Colleen Tote Bag Gemology Tour

Gemology Blog Tour with the Colleen Tote

Today is my day on the Gemology Blog Tour supporting my friend, Andrea Tsang Jackson and her new quilting book, Patchwork Lab – Gemology. I had the absolute pleasure of meeting Andrea earlier this year at QuiltCon – Nashville after following her on Instagram with her amazing quilt art for so long.  We met over coffee and had SUCH a great conversation about building businesses in the fiber arts world and also being immigrants in North America.  Our stories are very similar and one of the reasons why I was thrilled when she asked me to be a part of this tour!!!

Colleen Tote Bag Gemology Tour

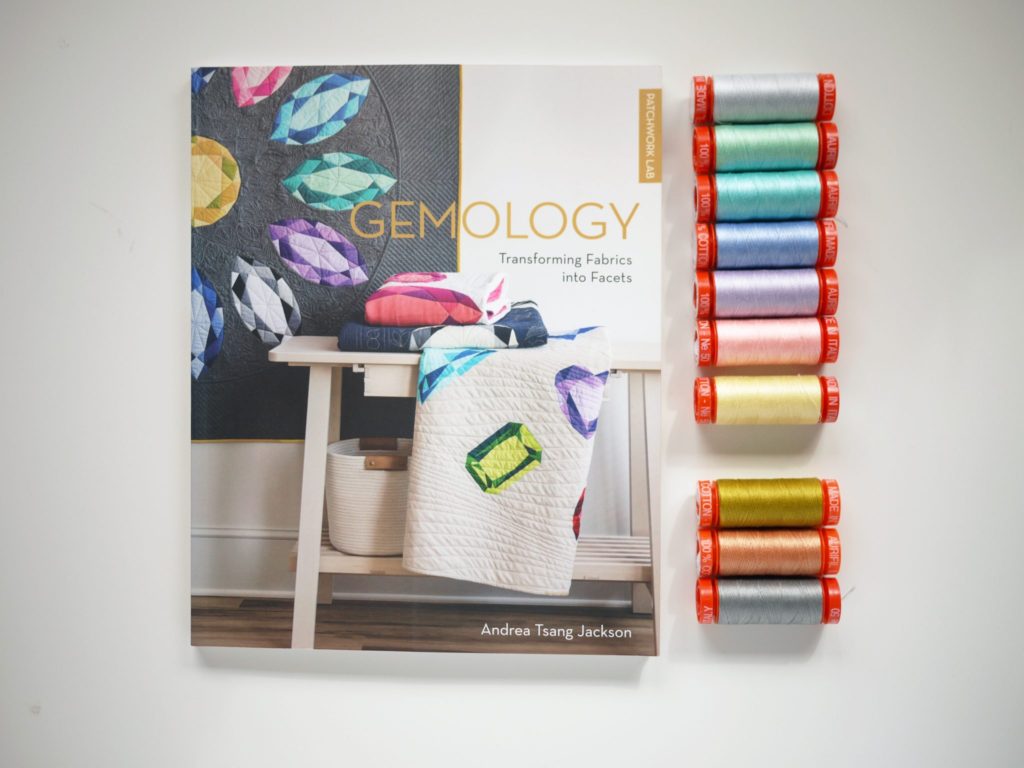
This new Patchwork Lab – Gemology book is absolutely beautiful and jam-packed with designs featuring nine different gem shapes which you can adjust into four different sizes ranging from a 6″ to a 24″ square block. There are additional instructions to make 5 quilts and a sweet little coin purse. The great thing about the book is that it is not just another quilting book. There is SO much additional information about how light hits the facets producing different colors and info about birthstones themselves.  It really gives you extra appreciation of the blocks as you construct them.

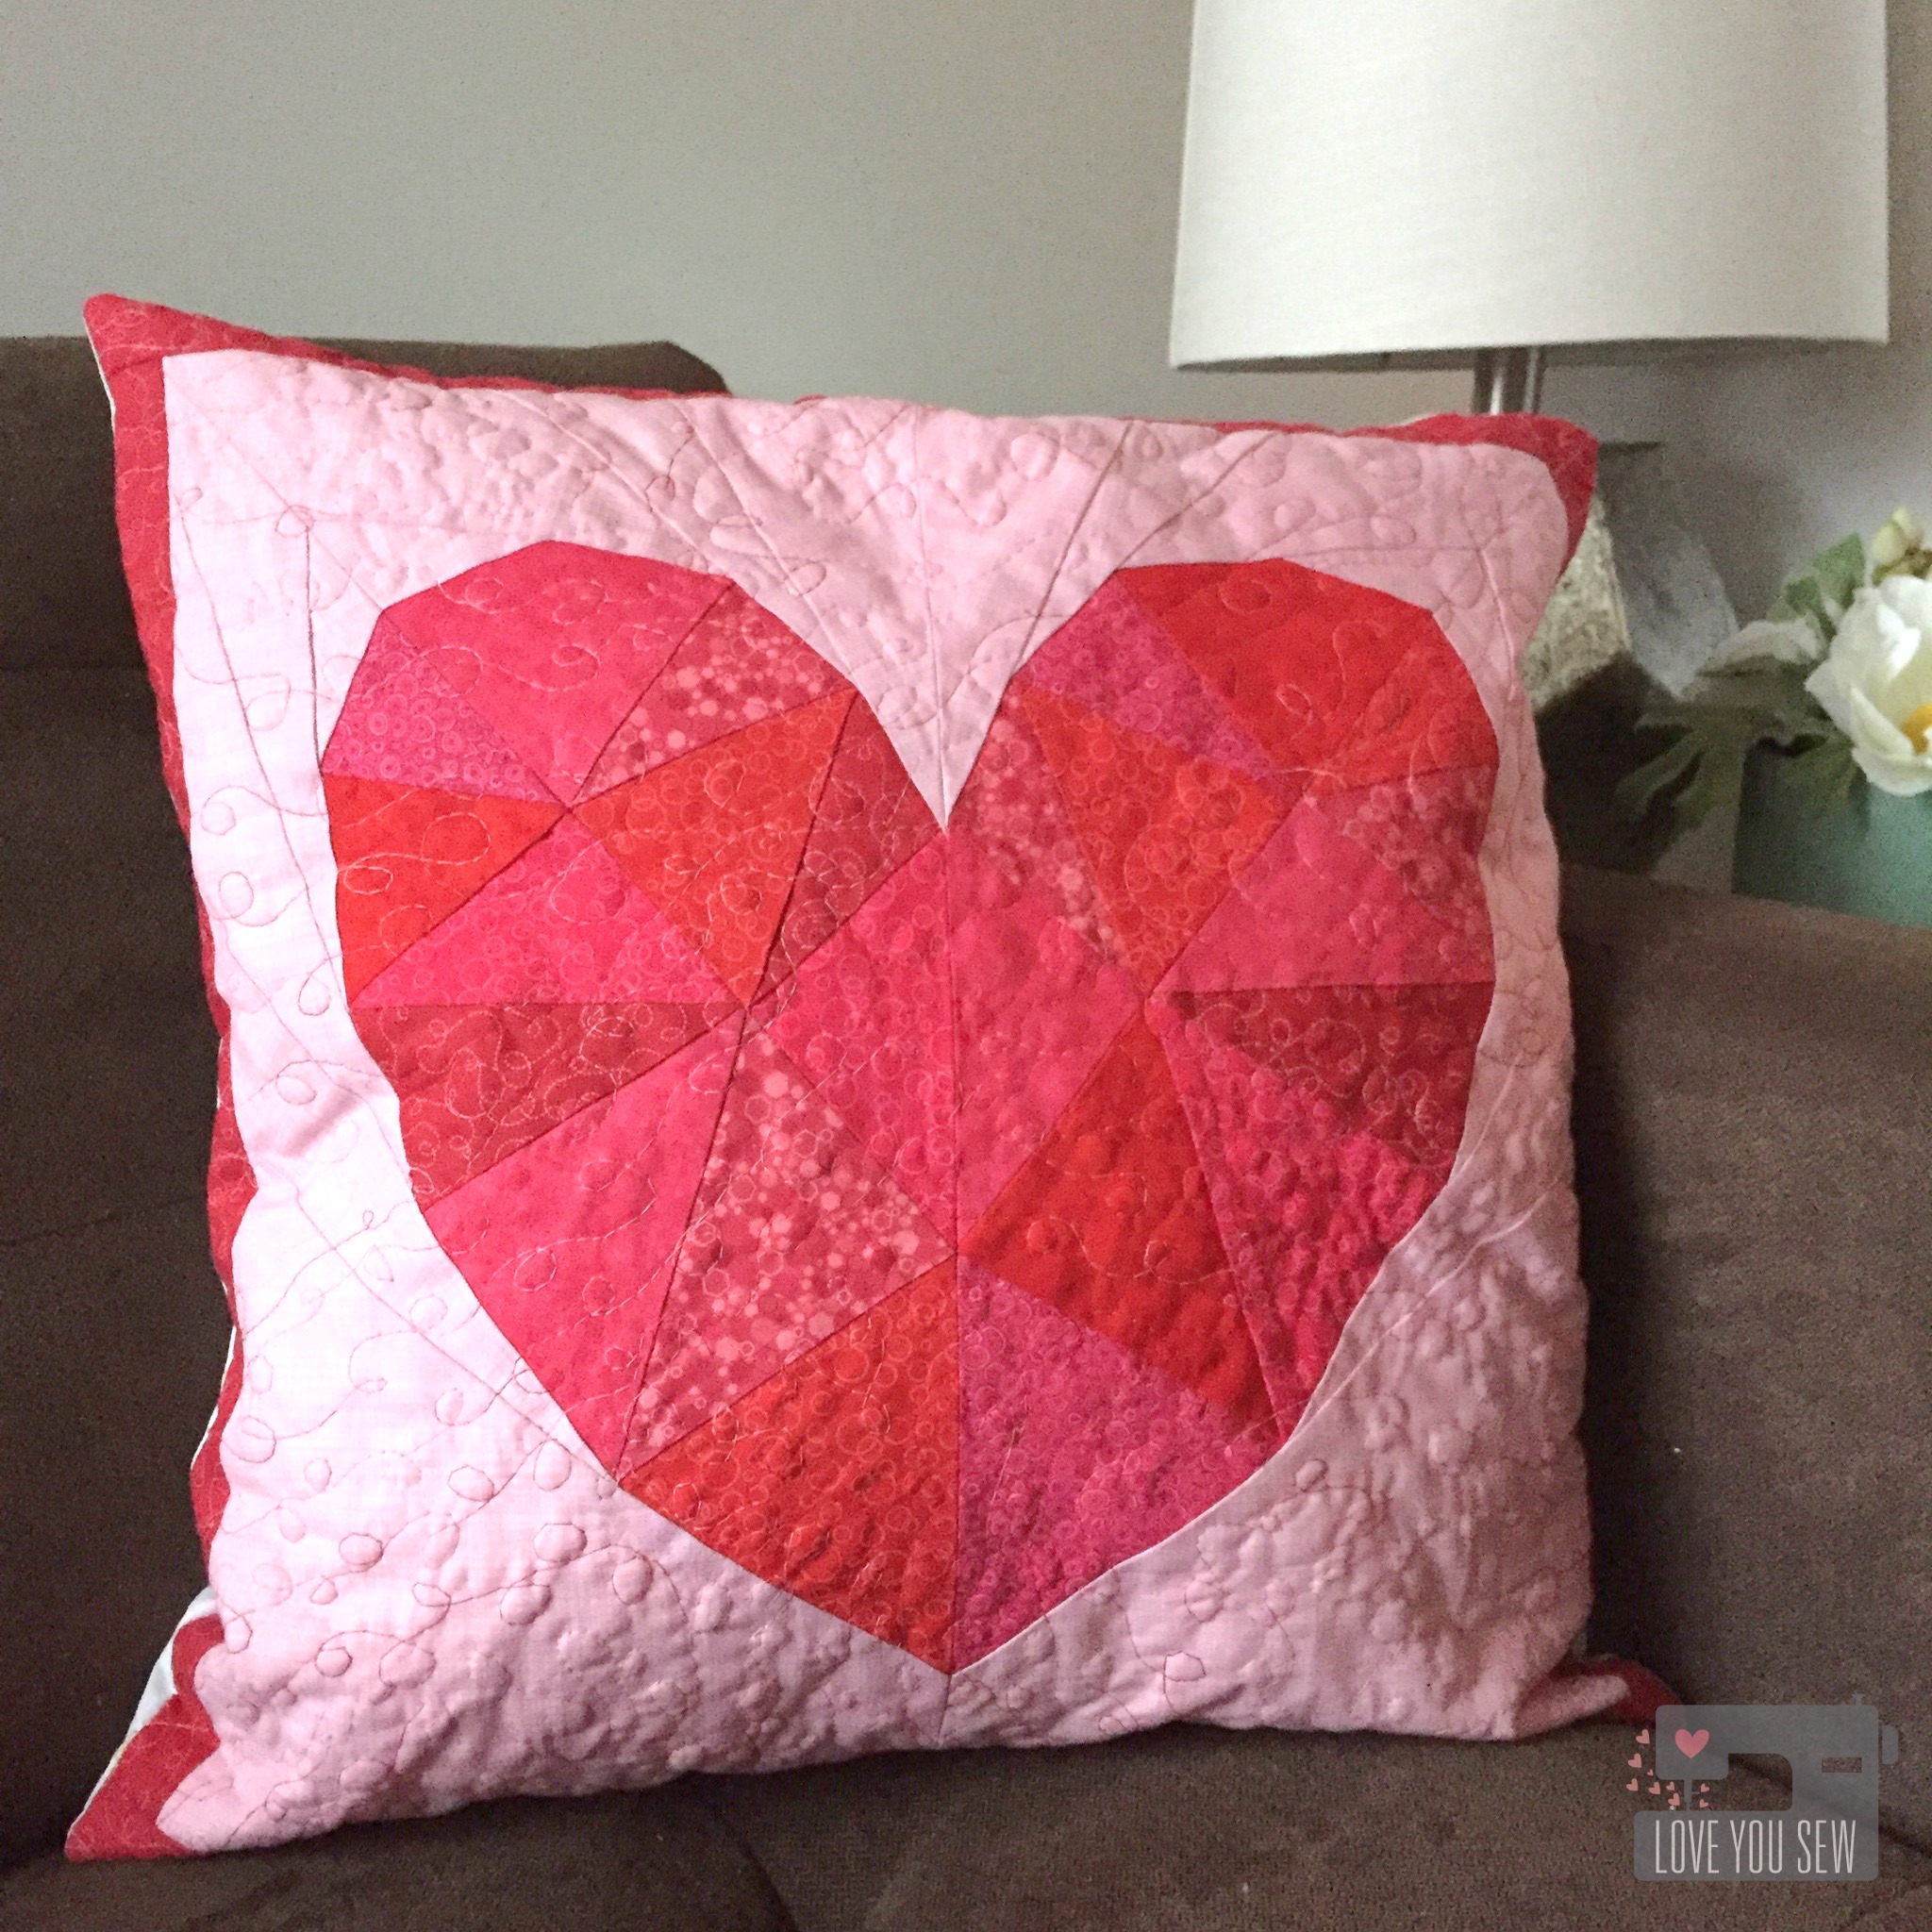
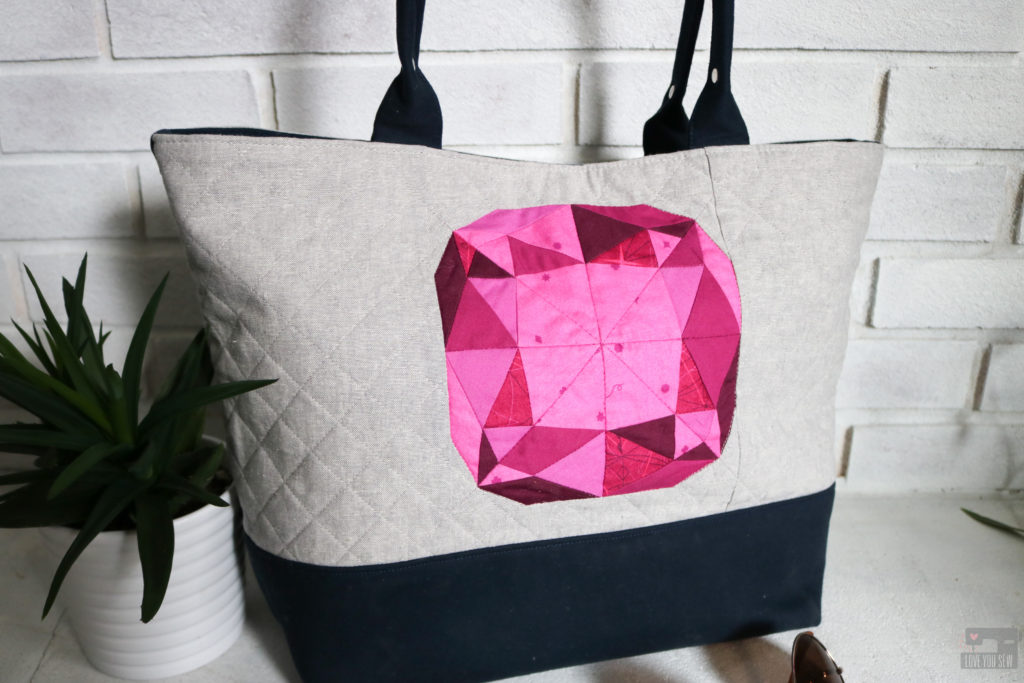
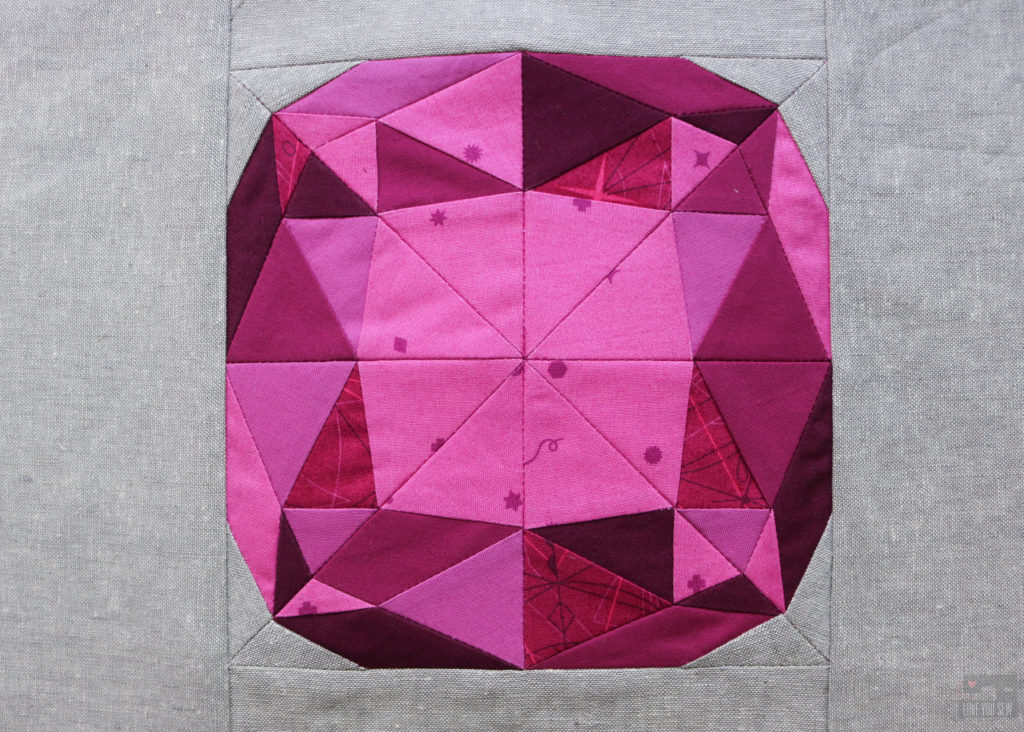
I knew after seeing the book, I would use the  6″ block for the exterior of my Colleen Tote Bag pattern.  When I first designed this bag, the quilter in me wanted enough open space on the exterior to eventually use quilt blocks to add some fun flair to the outside.  I’m so glad I finally got a chance to make this happen with the Cushion cut pattern.

Fabric

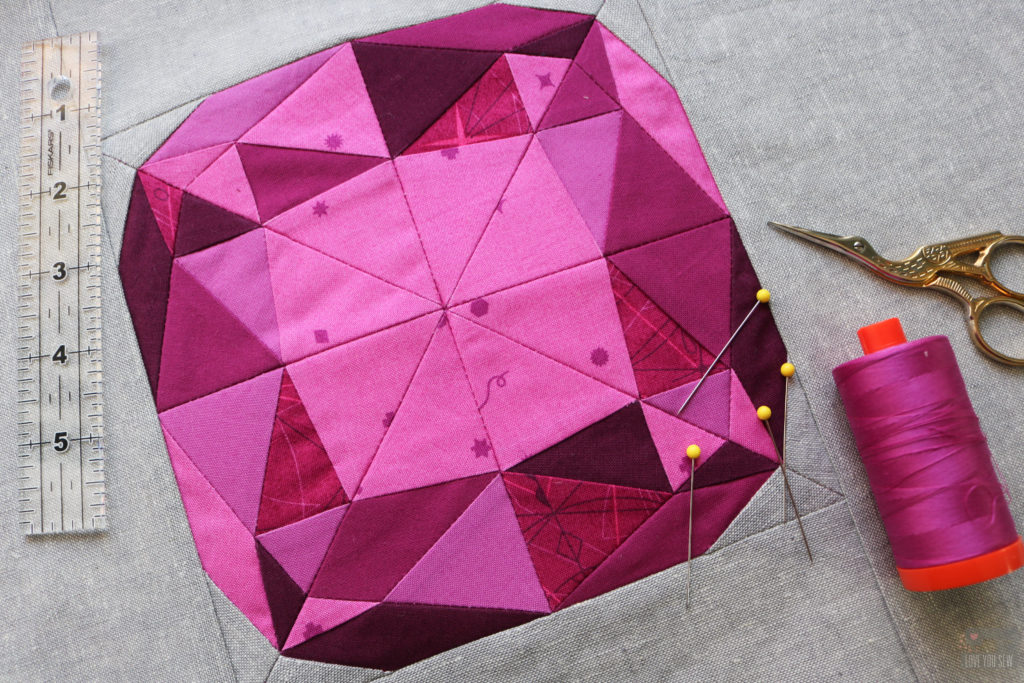
There are great fabric suggestions in the book for many of the birthstones, but I decided to use my own stash and make up my own gem. The Swatch Chart reference sheet is definitely a must IMO. It helped me sort out my fabrics and was a great visual reference as I was piecing the block together.

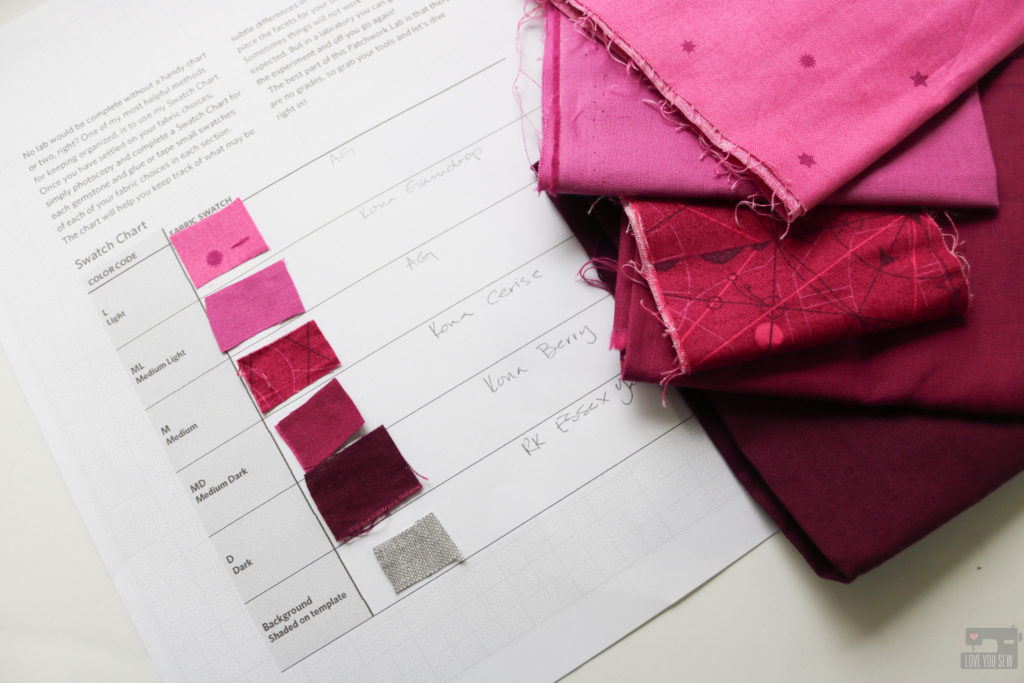
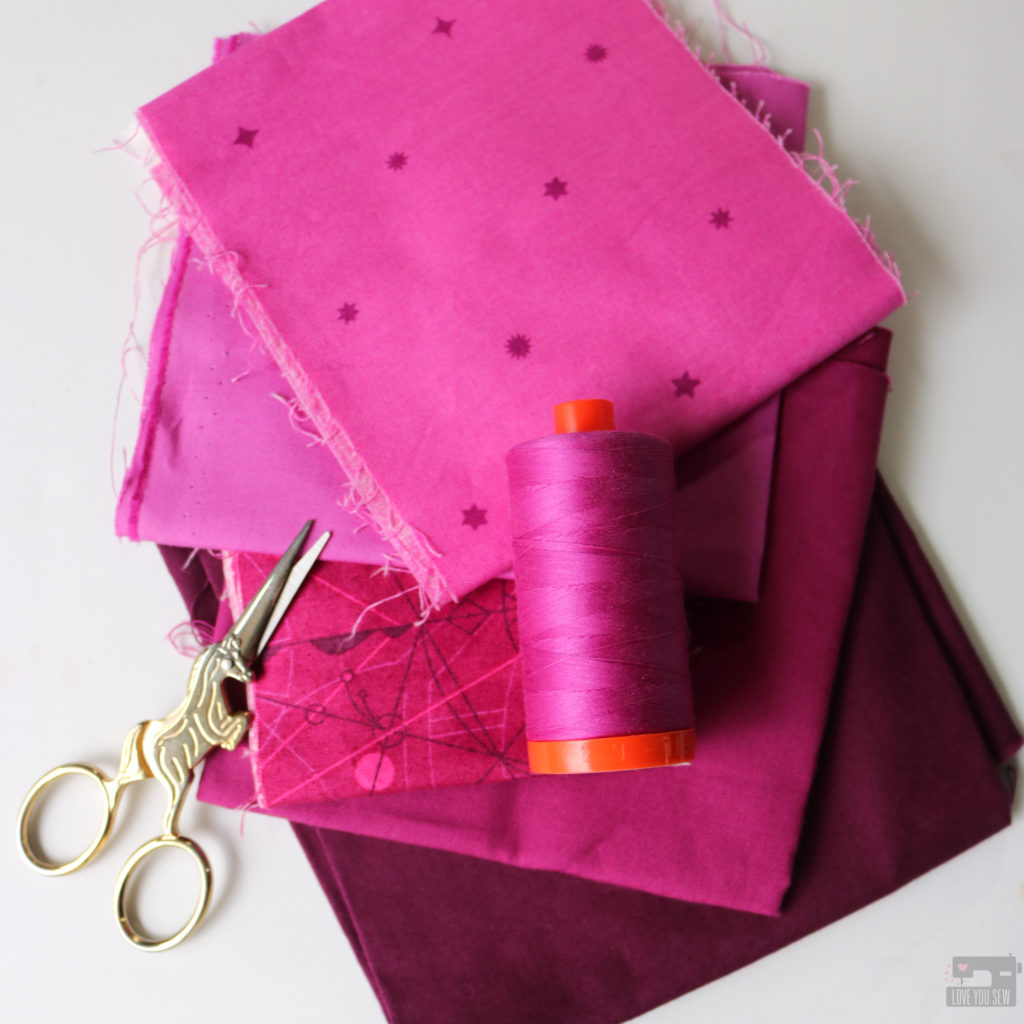
I really wanted the gem to pop on a bag so I used the following in the magenta family: (aff links)

For the rest of the bag, I used:

To Make the Side Panel with Gem Block

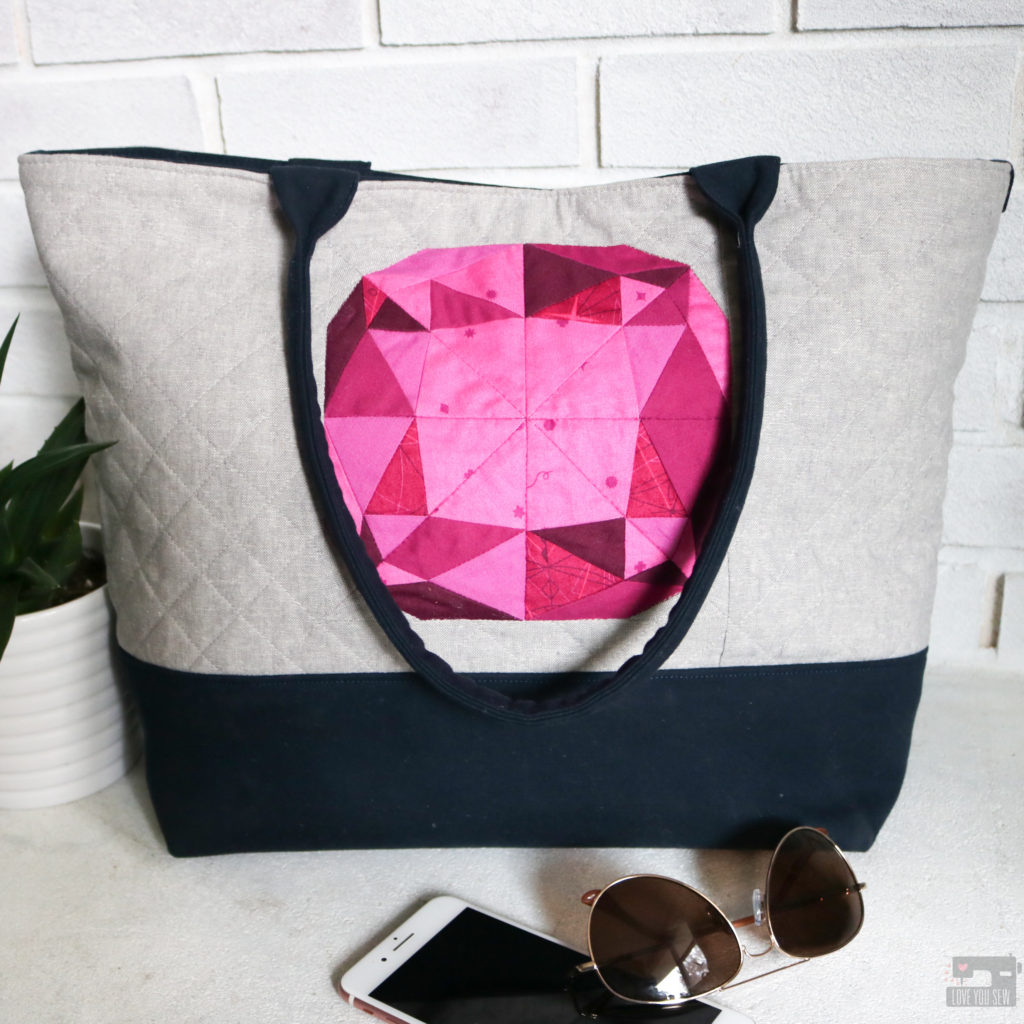
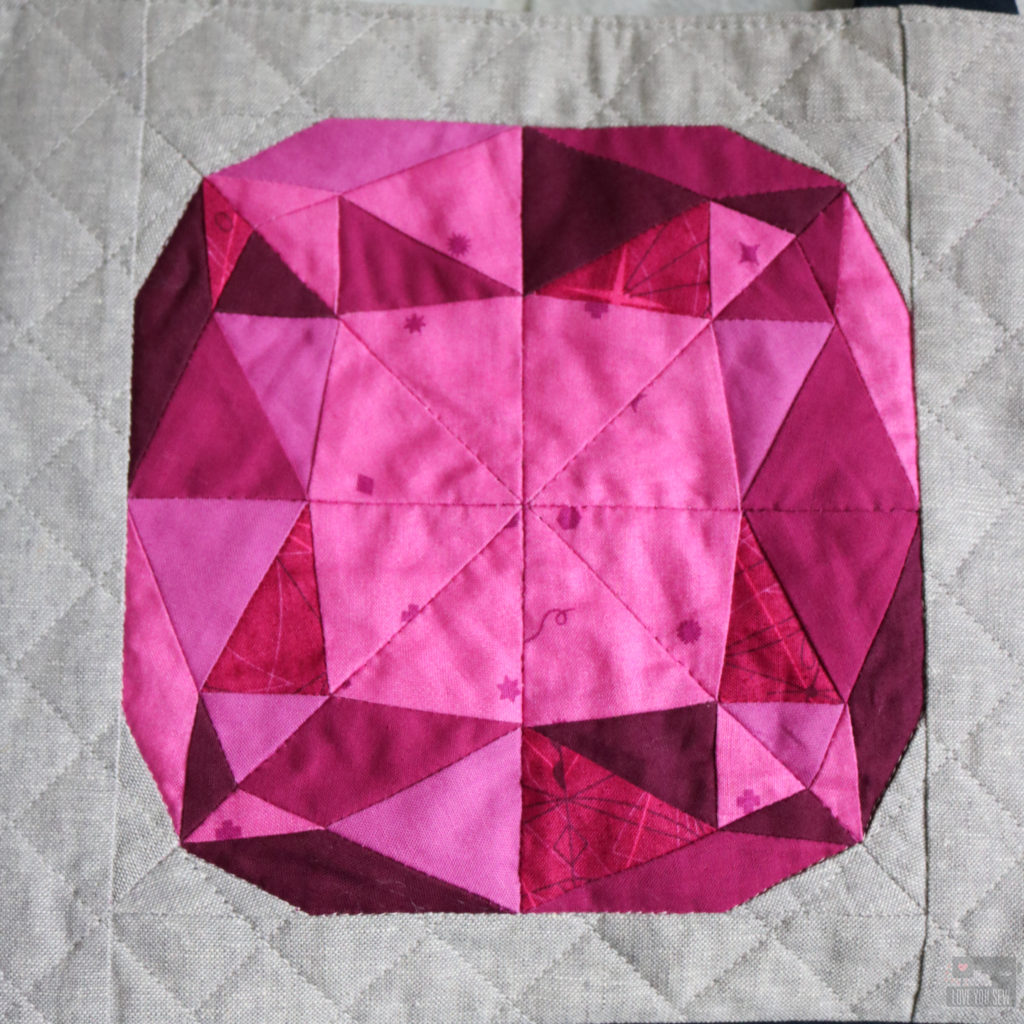
With this bag, I knew I wanted the exterior to be quilted for the texture and also to help secure the block to the interfacing. When doing this for a bag, it is always important to cut the fabric larger than what is needed, quilt it, THEN come back and cut it to size. Quilting will always shrink down a block and can become pretty significant difference if you are using more lofty batting or interfacing.

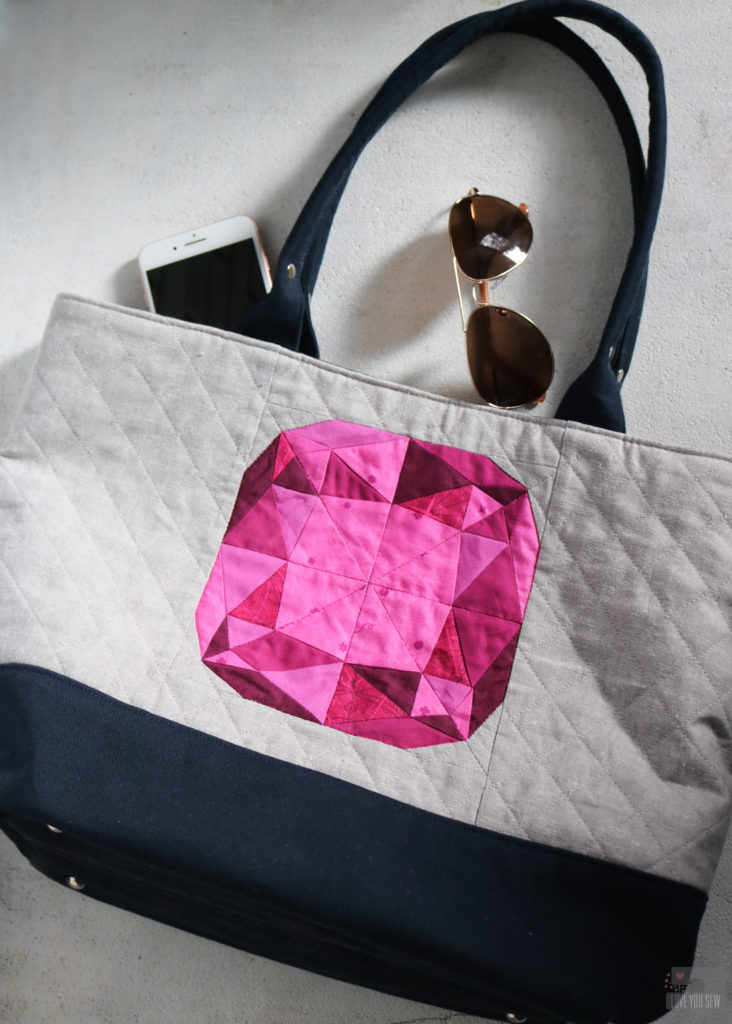
Since the finished panel would be 20 1/2″ x 10″, I added 3″ wide borders to the top and bottom (referred to as the “sides” in the book) and then 12 1/2″ x 7″ to the sides.  Instead of using fusible fleece as the interfacing, I swapped it out with Pellon 988 Sew-in Fleece.

I used matching Aurifil 2535 to stitch-in-the-ditch around the gem and then on all the intersecting seams that ran completely across the the pattern.  For the background, I used Aurifil 2615 to sew 1″ blocks at a 45* angle, stopping when I hit the gem. The nice part about quilting a bag panel is that you can leave the thread tails and just tie them off without having to bury any of them!

To cut the panel and create equal spacing above and below the block, you find the center horizontally and cut 4 3/4″ below the line and then 5 1/4″ above the line. The measurements are not equal to account for the different seam allowances as written in the Colleen Tote pattern.

Other Modifications

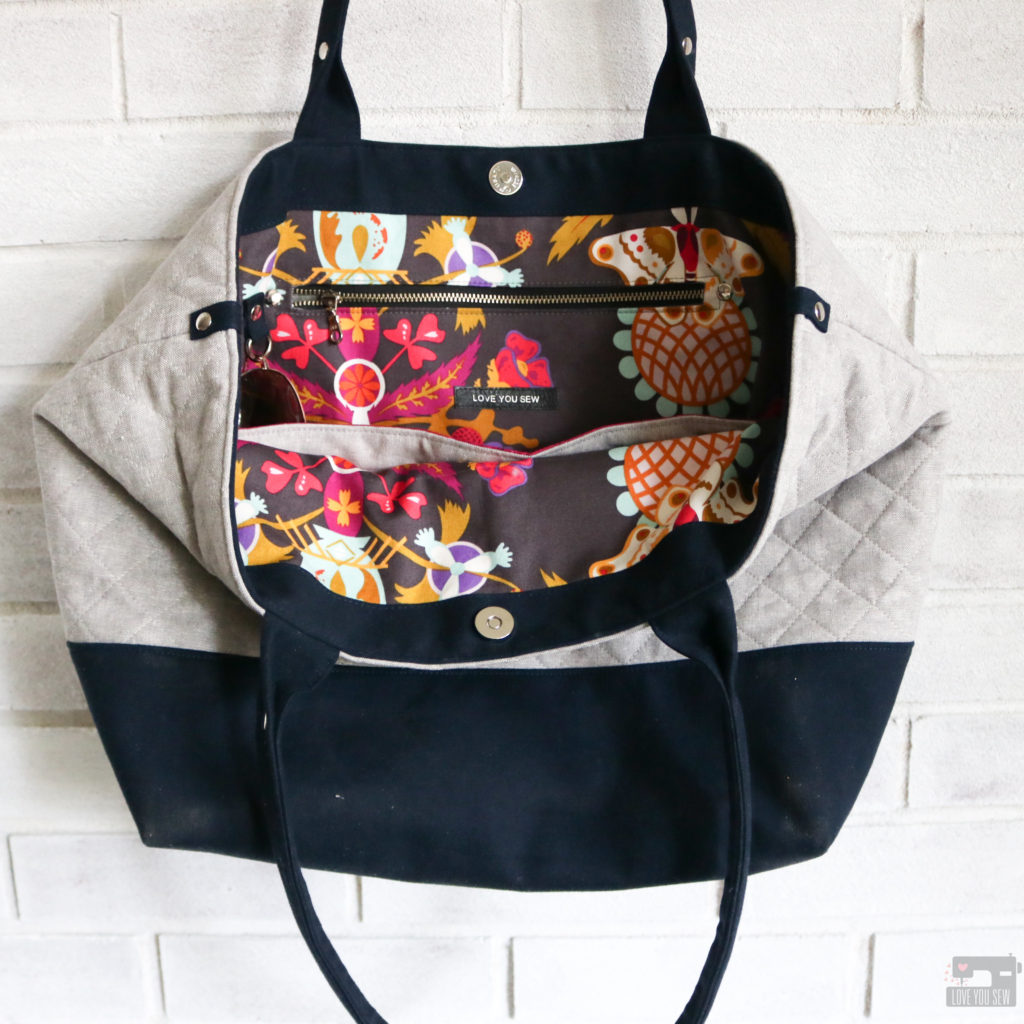
Every time I make a pattern (whether my own or someone else’s) I can’t help but add some different features so each one is unique.  I believe that every bag has it’s own personality and calls out for different features. I made the following changes to this Colleen:

  • Extended the key fob to 16″ in total length
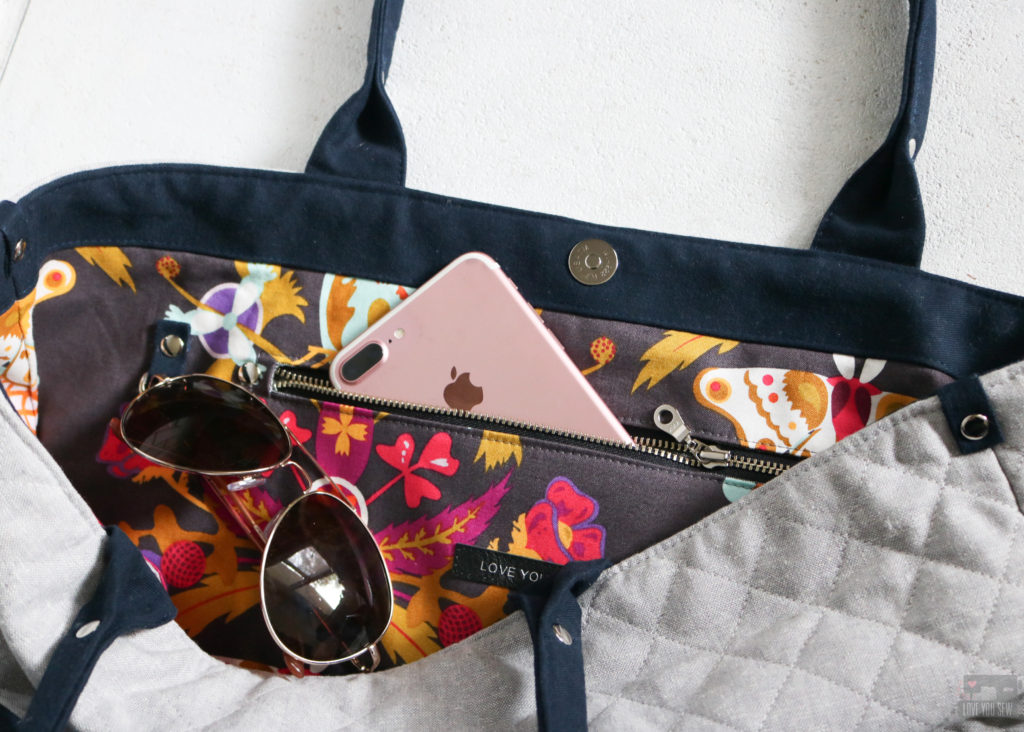
  • Added a interior D-ring
  • Added a magnetic snap to the interior band
  • Pieced the line with some of the Sangria Compass to bring some of the Gem colors to the interior
  • Added Purse Feet following the add-on instructions here.
  • Broke up the gray a little more on the exterior with some accent tabs and rivets.

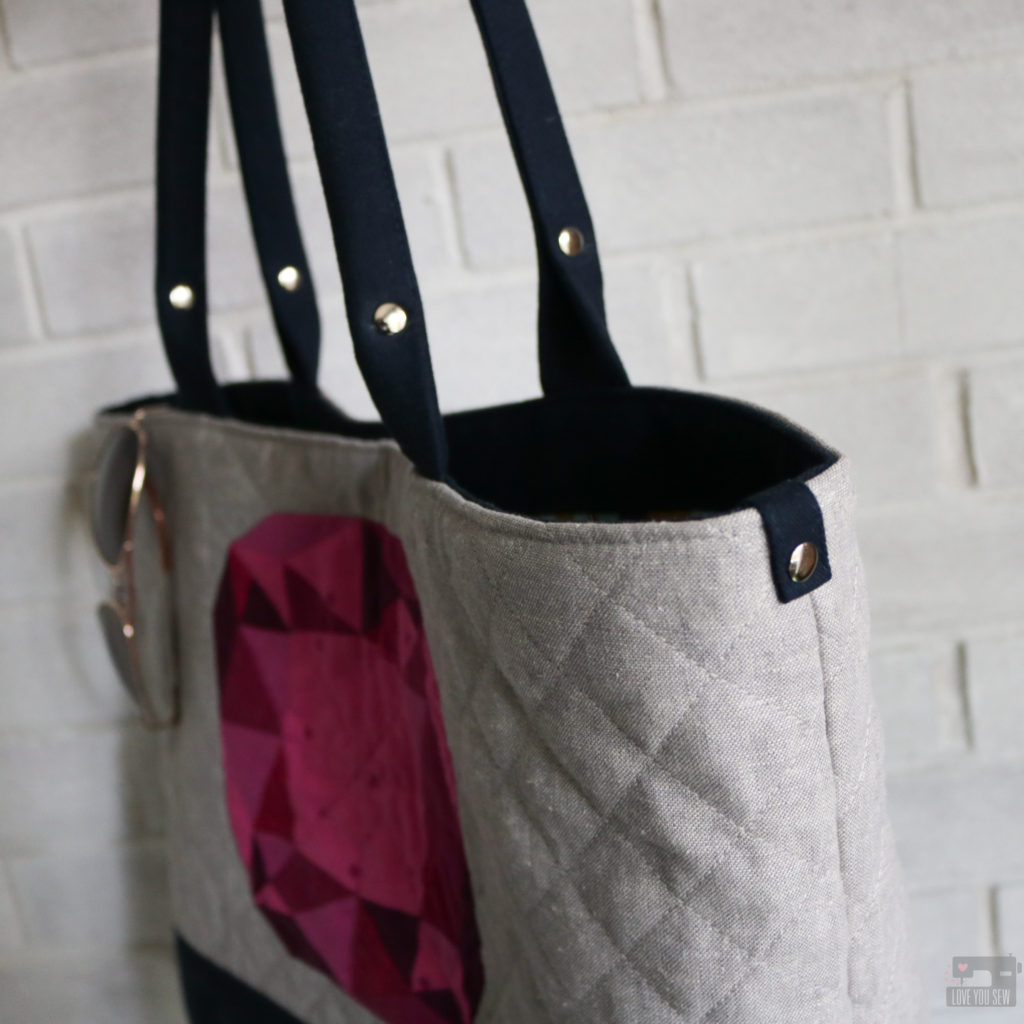
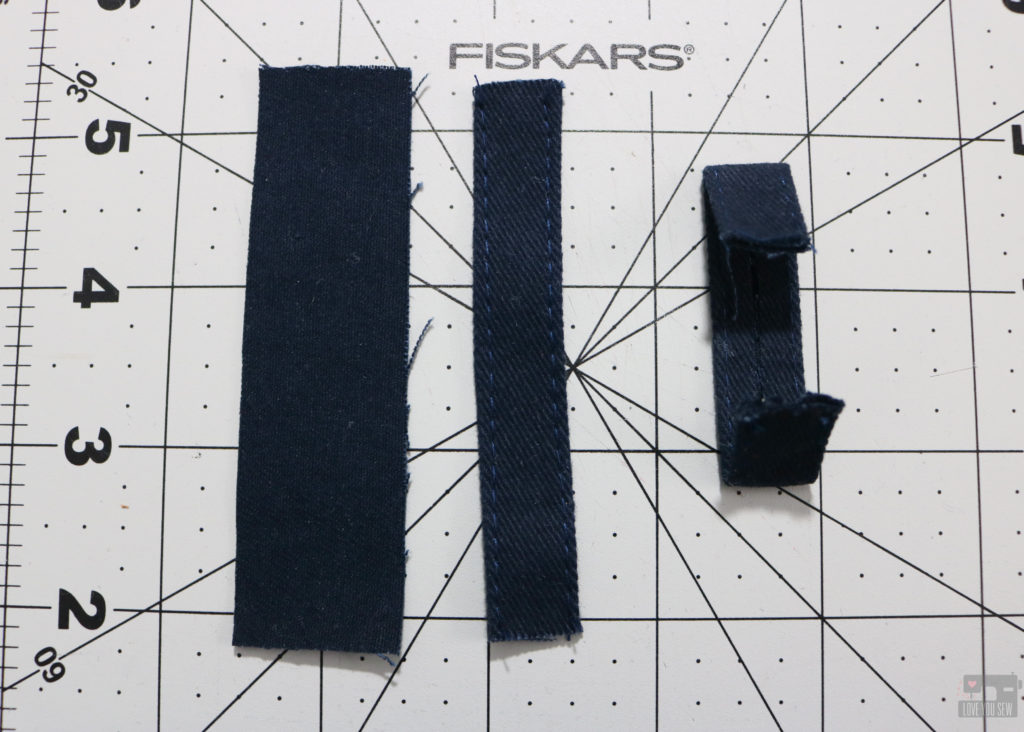
I did this by using the scraps I cut out of the bottom accent fabric.  You will need (2) 3 1/2 x 1″ strips.  Fold each long side to the center creating a single-fold tape and top-stitch 1/16″ along each side.  Fold down each short end by 3/4″ with wrong sides together.

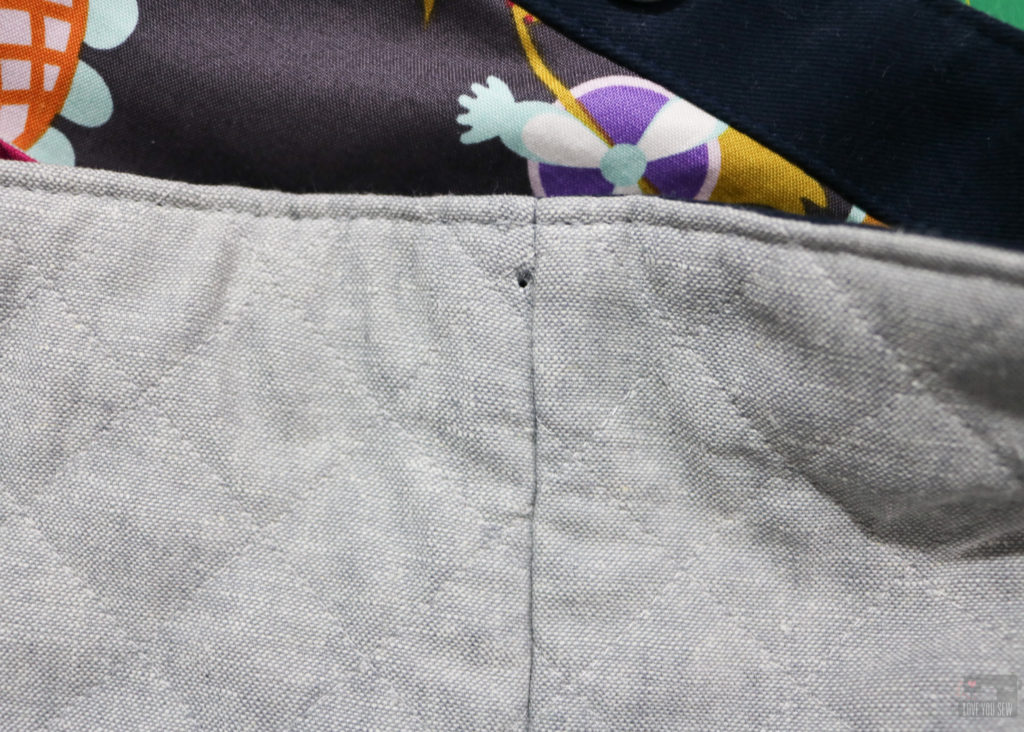
The trick to adding these tabs over the top of the bag is to fold the tab and cut those holes first.  Then place it over the edge of the bag and mark it just to the left of the side seam and cut the hole in the bag.  By moving the hole you won’t cut into the side seam but it will appear that the tab is centered from far away!  Add the rivet and now you have a cute tab that makes this look more high-end.

Please make sure you follow Andrea @3rdstoryworshop to keep up with the rest of the Gemology Blog Tour.  You can find her blog and shop her book here.

Tomorrow, Rebecca Makas is up with her Gemology Project.  Click to find her here.

I hope you enjoyed the new spin on the Colleen Tote Bag and all of the gemstone inspiration from Patchwork Lab – Gemology!


Hugs and Stitches,

Cristy


This post is in collaboration with Andrea Tsang Jackson for which I received a complimentary copy of her book.  //  This post may also contain affiliate links and you can read all the details in my Disclosures here.

FREE Woodland Mushroom Quilt Block :: Fabric.com Fall Block Party

It’s Week #2 of the 9-week Fabric.com Fall Block Party and I’m ready to take you into the deep woods…  I just love this season with the air getting crisp, the foliage changing colors, and the weather is cool enough for a good long hike.  It’s so much fun to explore the wilderness, especially with my young boys.  We find so many little critters, unique leaves, and lots of different plant-life.  Our own discoveries made me think of the quintessential Woodland Mushroom.

For this design, I wanted a fun scrappy mushroom to go along with all the different colors and textures we see out in nature.  The 12.5″ x 12.5″ (unfinished) block is based mainly on half-square triangles and you will love how just a little rearraging can give your block a new look.

For the Woodland Mushroom, I stuck to the Kona party theme found here, but prints are my key to scrappiness 🙂  These are the fabrics I selected (from top to bottom):

As I was making the block I was thinking of all the ways I could the mushroom as decor….because my house need some help!  I thought of all the fabric signs we see in big box stores with witty sayings all bound together with living picture frames (just a piece of wood at the top and bottom.)  Then it dawned on me to use pant hangers!  I know a lot of you already use them to display blocks, but I thought I would turn it up a notch and refinish a few.

I found these two pant hangers for a total of $0.60 at my local thrift shops.  Both were blonde wood with the same nickel finish on the wire.  With a little fine sandpaper, I took the shine off the entire hanger and used materials I had around the house to refinish it.  A watered down brown acrylic craft paint gave me the “stain” and I happened to have this gorgeous hammered bronze spray paint leftover from another forgotten DIY project.  A few layers of clear coat topped it off to protect the fabric against any paint which may rub off.

The hanger makeover really makes the piece more modern with an industrial rustic feel.  It works well with this fall palette and displays my Woodland Mushroom mini perfectly!  It will be easy to change out mini’s over time and through the different seasons.

Here is the mini displayed with some upcycled “ribbon” cut from a burlap coffee bag and leftover lace from my sister’s wedding.  It is displayed on a mantle with a wreath hanger and helps to bring the random decor I had around the house together.

And if mantle or table-scapes aren’t your thing, the pant hanger make it easy to display a mini quilt on your front door.  I think quilts should be the “new” wreaths, don’t you think?  We should get on that movement!

I hope you enjoyed our walk in the woods!  To make your own Woodland Mushroom block, visit Fabric.com’s blog here.


Don’t forget to keep sewing along and follow the rest of these amazing designers and their Fall #fabricdotcomblock party patterns!

Sept 12 – Fall Geese

Kristi Schroeder – Initial K Studio – @initialkstudio

Sept 19 – Woodland Mushroom

Cristy Stuhldreher – Love You Sew – @loveyousew_ (You are here!)

Sept 26 – Mod Tartan

Jenn Rossotti – Ginger Peach Studio – @jennrossotti

Oct 3 – Time Lapse

Christopher Thompson – The Tattooed Quilter – @thetattooedquilter

Oct 10 – Double Windmill

Haley Anderson – Happiness in the Making – @happinessinthemaking

Oct 17 – Antlers

Lisa Hofmann-Maurer – Sew What You Love – @sewwhatyoulove

Oct 24 – Gather

Elise Baek – Elise & Emelie – @eliseandemelie

Oct 31 – Forest Floor

Sarah Thomas – Sariditty -@sariditty

Nov 7 – Flutter By

Nicole Young – Lillyella – @lillyellasworld


Happy Foraging!

Cristy


***This post was sponsored by Fabric.com and there are affiliate links.  The block design, instructions and post are my own original work with my own opinions.

Observer Fabrics Preview

ObserverPreviewTitle

Have you ever seen something out in the wild, and wondered how pretty it would be to freeze that shot and frame it forever?  It’s that moment that is just SO good, you take in that extra long gaze and lose yourself a little…  Well when you’re April Rhodes, you take that extra step into permanence and create Observer fabrics.  It’s a collection of patterns seen out in the world…through the eyes of Miss April, herself.

IMG_4615

It is such an honor to sew with an unreleased collection.  The initial reveal is always exciting, but I love to hear about the inspiration.  That’s why it’s so wonderful to work with April…as we collaborate together, I get to hear the story behind every pattern and every color.  With all of that information, it then allows me to dig a bit deeper in my design wheel well.

IMG_4716

I was immediately inspired by the Homespun print.  It is based off of April’s love of weaving and fiber arts.  The 24″ x 24″ (finished) quilt is paper-pieced  to make every angle and line as sharp as can be. It utilizes mainly 1.5″ strips, making it very scrap friendly.

IMG_4656

With Observer, the prints are either monochromatic or duotone and this quilt was designed to really show off the contrast by using the colorways, exclusively, in each quadrant.

IMG_4655

As you get closer to the fabrics, you can see the little hints of metallic (yaaas!)  With this collection, April incorporated silver which looks amazing against the deep blues.  It’s always hard to photograph metallic, but you can see it in Triangle Tokens and on the Speck Stardust.

IMG_4930

The background is Art Gallery Fabric’s Premium Linen Blend in Soft Sand.  It is such a great texture and color to make the design and colors pop.

IMG_4898

With so much negative space in the piecing, a random application of matchstick quilting was in order using Aurifil 2310. The areas were split into quadrants, like the quilt design, itself.

IMG_4899

The backing was pulled from April’s Wanderer collection.  Wandering Lands Mineral was the perfect print which really complimented all the tones in Observer and it shows off the quilting beautifully.

Stay tuned…this quilt pattern will be available closer to Observer‘s release in August!!!


IMG_4715

April asked if I would help make some baby leggings as well and how could I not?!?  Ya’ll know babies are my business and LOVE the opportunity to make itty bitty gear.  These leggings are made with Overshot Gold in knit and they are so amazingly soft.  The pattern for the pants are from My Childhood Treasures.

IMG_4711

I drafted a pattern for the hat from an old one I have.  Make it Love it has a great tutorial and pattern which is similar.

IMG_4657

As an added detail, I used the selvage from a woven print on the back of the leggings.  It’s a great way to make a little tag so you know the direction of your hand-made garments.

Aren’t these clothes just perfect for the little bohemian in your life?


IMG_4940

Last, but surely not least, is my mini quilt hoop (measuring about 2.5″ lengthwise.)  Making these quilt hoops has become one of my favorite projects and I cannot help myself when I have such amazing fabric laying around.  I love tiny (who doesn’t?) and love being able to use up every little scrap.

IMG_4943

Of course, I used Dandelyne hoops and chose an oval to make a piece based of the main quilt I designed at the top of the post.  A little gold embroidery thread made this hoop extra special and I love how it turned out.


I hope you enjoyed my little preview of Observer which is due out in August.  Make sure to check out the full collection here.

Do you have any plans for these fabrics?  Please let me know!  I have a few already planned….maybe an envelope clutch, dresses for my nieces, shirts for my boys, and dresses for myself….I could go on and on!


Happy Stitching, Friends!

Cristy

Make an Easy and Simple Design Wall

Design Wall Title

I am fortunate enough to have my own sewing room.  However, I do have to share my space with a full size bed.  It is “suppose” to be for guests but has functioned as my design area for awhile.  The bed, unfortunately, is becoming more extra storage space with all the projects I juggle at the same time.  If I need to lay out a quilt, it ends up on the floor.  But you know that leads to an open invitation for my kids to run over my blocks…

That’s why I need a new design wall.  There are quite a number of options out there.  I definitely don’t have the space for the portable versions like this one (or the money.)  I didn’t want to hang rods for a design curtain.  The wall needs to be flat and flush as possible.  When guests have to actually have to use the bed, I also want something that wasn’t permanent.

Design Wall Cork Bar Hung

My solution?  A cork strip and some flannel fabric.  I bought this great 48″ long cork strip here.  You can probably find the same cork strip at an office supply store, but who can compete with Prime shipping, right!?!

Design Wall Attaching
Initially, I tried to use the mounting strips that came along in the package, but they couldn’t handle the weight when the flannel was added.  Instead, I used some large picture-hanging strips to hold up the cork.

Design Wall w Flannel Fabric

As luck may have it, Robert Kaufman has this great grid fabric in flannel….perfect for a design wall.  The flannel allows quilt cottons and other flannels to “stick” without the need of pins.  Initially, I used some cute thumbtacks to hold up the flannel, but the cork strip is actually not that thick.  But nothing a few quilting pins can’t fix 😉

Design Wall Finished

And here’s my fast and functional design wall.  It is quite simple and I love it.  The best part is I can quickly remove the flannel when needed.  What do you use for a design space?


Happy Sewing,

Cristy


Post contains affiliate links.  I receive modest compensation only if you purchase.

Love Story {Pattern Testing}

LoveStoryTitleI love Lilly Ella Stitchery‘s paper-pieced patterns ever since I tried her Butterfly Charm Blocks.  When Nicole sent out the request for testers of her new patterns, I seriously could not say no.  I didn’t even know what I was going to sew….all that I knew was that it was gonna be good!

PoetryCloseUpThen these beautiful hearts from Love Story appeared in my email….Oh my mercy!  How gorgeous, right?  The pack includes two patterns – Poetry (as shown above and below) and Prose (as shown in the title pic.)  Both square patterns come in 5″, 10″ and 16″ (finished) sizes.  You can find them over here.

NameTagLanyardMy first attempt was to make this 5″ version of the Poetry pattern.  The piecing in the heart was just screaming for a rainbow color palette.  The pattern and size were perfect for the Name Tag Lanyard Swap for my Central Ohio Modern Quilt Guild.  I used the Swapaholics tutorial and just raised the vinyl window up so the heart would not be obstructed.

ProseCloseUpNext, I tried out the 5″ Prose version.  Now this was a bit more difficult given the number and size of the paper-piecing.  There are more corners to match up and some bulk to contend with, but it’s all worth it!

LoveStoryPillowLastly, I used the 16″ Poetry pattern to make a special pillow for Valentine’s Day.  My house is lacking in the home decor department so I’ve been trying to add more handcrafted items in between all the ones I sell or giveaway.  I practiced my free-motion quilting by using some variegated red Aurifil 4668 in a simple loopy pattern.

LoveStoryPillowBackA border all around the pattern was added to fit the 18″ pillow form I had on-hand. For the back, I used Arrow Flight from Michael Miller to complement the V-day heart.  Having this in my stash paid off 😉  Since this is intended as seasonal decor, I made the pillow back in two pieces with a 2″ overlap and added KAM snaps to keep the pillow in place.  I’m set for Valentine’s Day now!

What would you make with these patterns?


Hugs and Stitches,

Cristy


Pattern was provided by Lillyella Stitchery for testing but you know projects, thoughts and opinions are my very own.