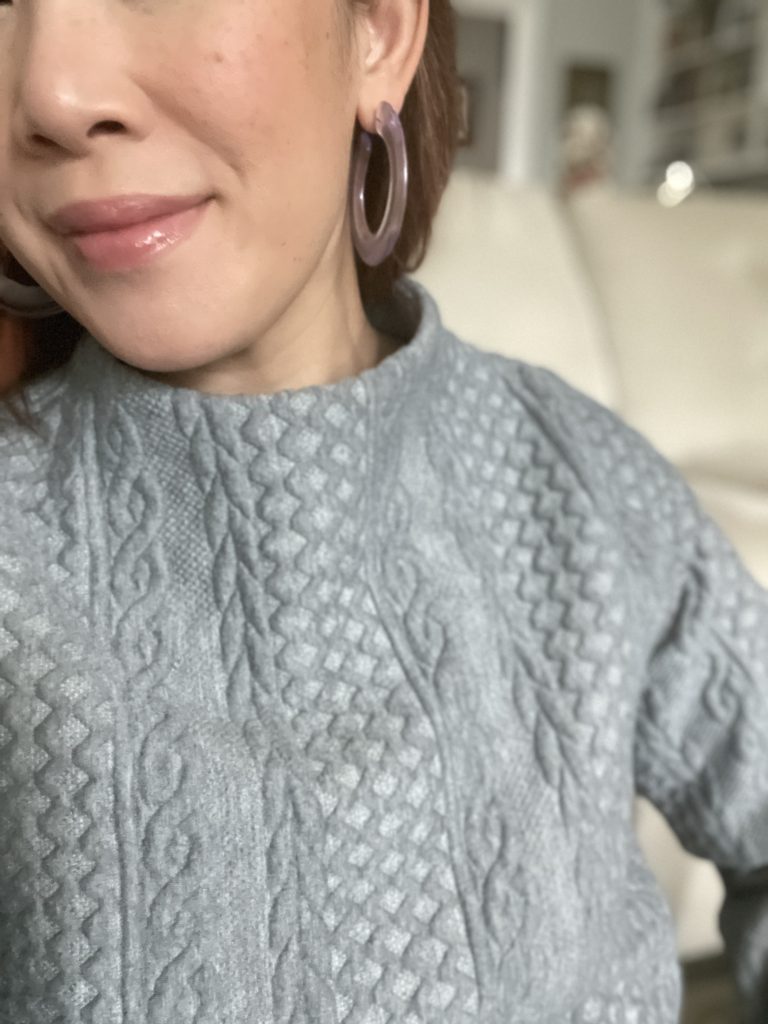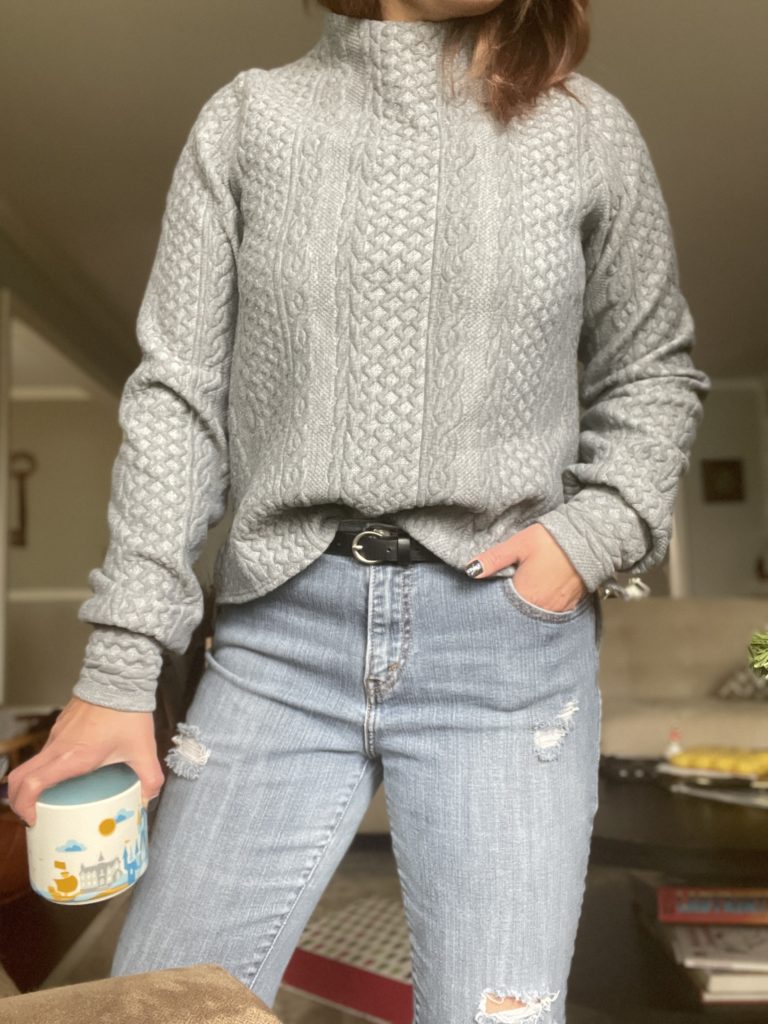
Split Hem Sheridan Sweater

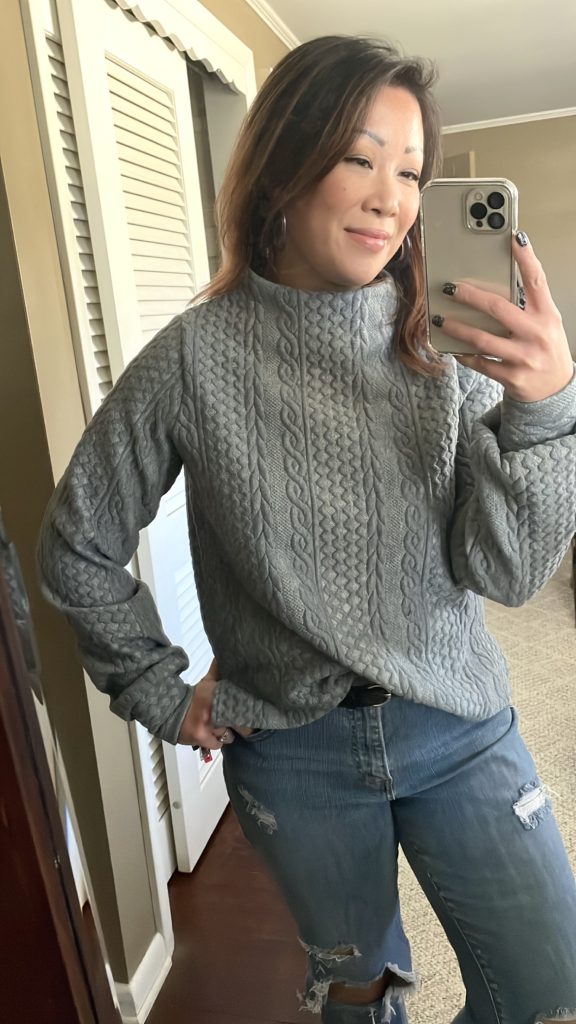
Winter finally hit here in the midwest.  And by winter, I mean the below-freezing temps with wind that just bites at your face!  Since I walk my dog everyday, I’m out in this cold whether I like it or not.  In the mornings, I usually just throw on a sweatshirt over a few layers, but for 2022, I feel like I need “nicer” cozy clothes.  Don’t get me wrong, the dog walks will probably always include a sweatshirt, but I would stay in them all-day long and that’s the cycle I want to break.  It’s been two years of sweatsuits and I’m ready to get out!  So, with this sweater knit I bought last year and  my TNT, Sheridan Sweater, I’m working to get out of this rut.

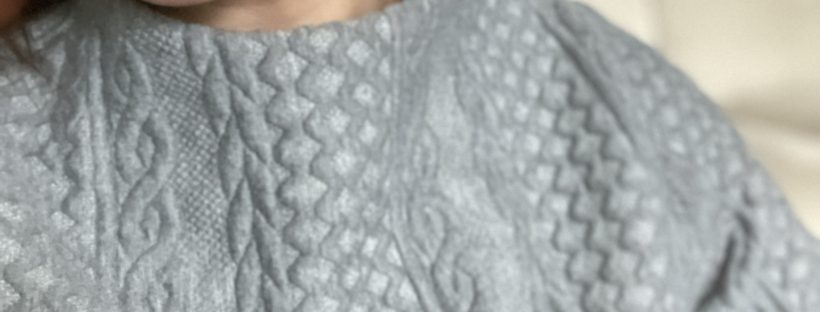
I know I need more texture in my tops (not just the knit sweatshirt/jersey look) and sweaters would bring it in.  But since I don’t knit or crochet, I have to bring it in through other ways.  For sure, I have to do some thrifting, but I also had this incredible cable knit-look fabric in my stash. I bought this from Fabric.com  after seeing so many other makers use it and it certainly delivers.  The fabric is a really nice thick knit that isn’t too heavy but has the feel of a real sweater.  While the inside “stuffing” frayed a bit depending where you cut the fabric, I was able to use my regular sewing machine, serger, and even cover-stitch to make this top.

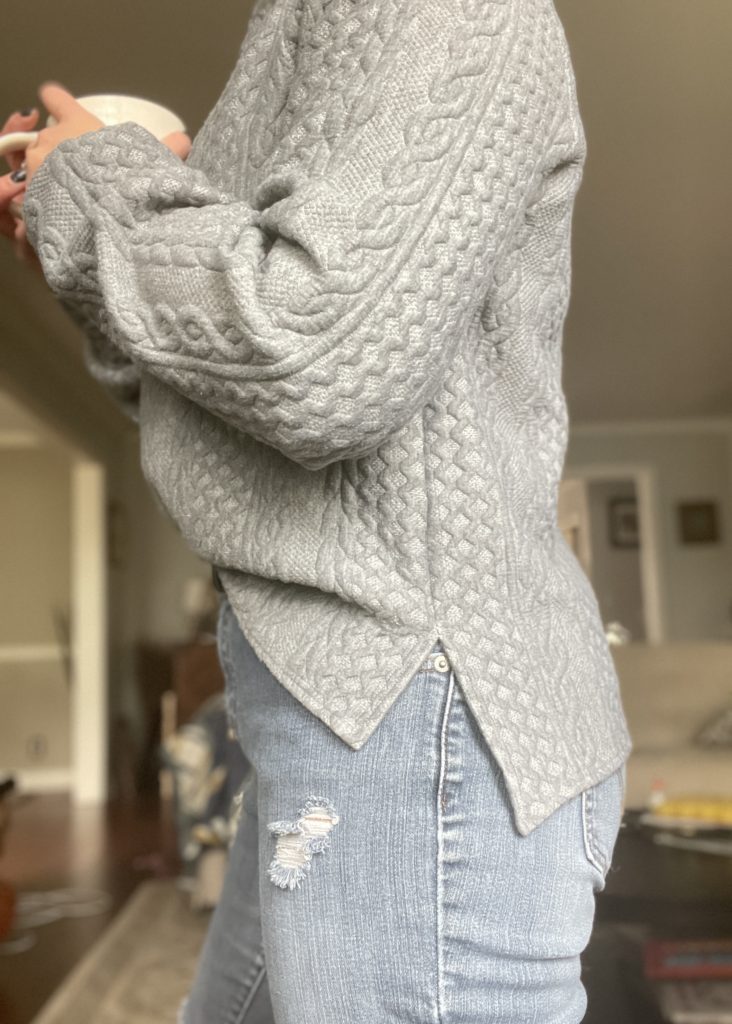
This is the fourth time I’ve made the Sheridan Sweater, a pattern by Hey June Handmade.  You can check out two I made on this post.  I’m a big fan of this pattern and really love the funnel neck view.  I’m always the “cold” one in the family and I like to have my neck covered, but I’m not a fan of turtlenecks.  My skin is pretty sensitive with fabric textures, so I always like some kind of loose covering like a cowl seen here in my Halifax Hoodie or this funnel neck.  Since I already have two Sheridans that are identical with the exception of color, I knew this one had to be different.  In addition to the fabric, I also hacked the pattern to make an uneven split hem, which is perfect for to half-tuck into my jeans.

These are all of the modifications on my size 10, view B Sheridan:

  • Increased the funnel neck by 1/2″
  • Omitted interfacing on the neck facing (fabric is thick enough)
  • Lengthened full front by 1″ and the back by 2 1/2″
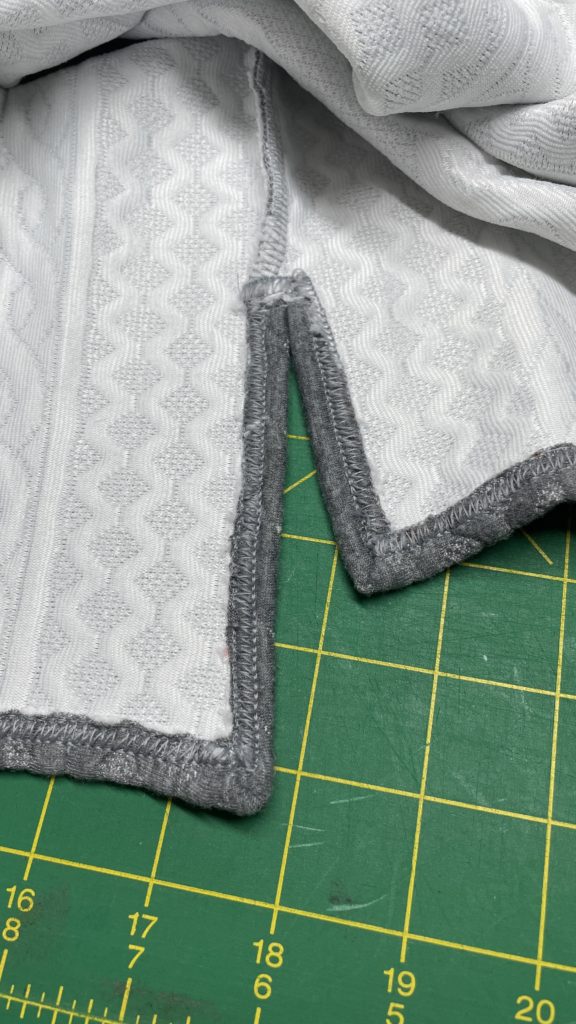
  • Marked 3 1/2″ from the bottom front for the split hem
  • Used 3/8″ single fold with cover-stitching for hem
  • Made a 1/2″ narrow shoulder adjustment (typical for me with HJ patterns)
  • Narrowed out the sleeve 2″ on each side (4″ total) for a less formal balloon sleeve

I was “winging” the split hem (which I kinda regret now) and wished I added more length to the hem and especially at the side seams for the split.  While this isn’t the prettiest cover-stitching, you can’t really tell from the outside (thank goodness!) it worked out in the end.  I used some Mettler Seraflex to help tack down the hem right at the split (on the side seams) and after using my cover-stitch, realized I should’ve just used it on the hem this whole time — Lesson Learned! It’s a great thread that has stretch which you use with a straight stitch.  Since the hem is loose and not getting much strain, the Seraflex would’ve been a good alternative to cover-stitching.  I also used it in the cuffs (for less bulk than my serger) and also for tacking down the funnel neck to the facing.

Despite the small regret with the hem, I’m really pleased with this Sheridan Sweater.  It has the comfy-cozy, cable knit look I needed and it’s VERY warm too!  This was a great wardrobe addition  while I brace this bitter cold!  Do you like this knit-look without being a real sweater?  I think I may have to invest in some more of this fabric!

Happy Sewing,

Cristy


This post may contain affiliate links.  You can read my disclosures, here.

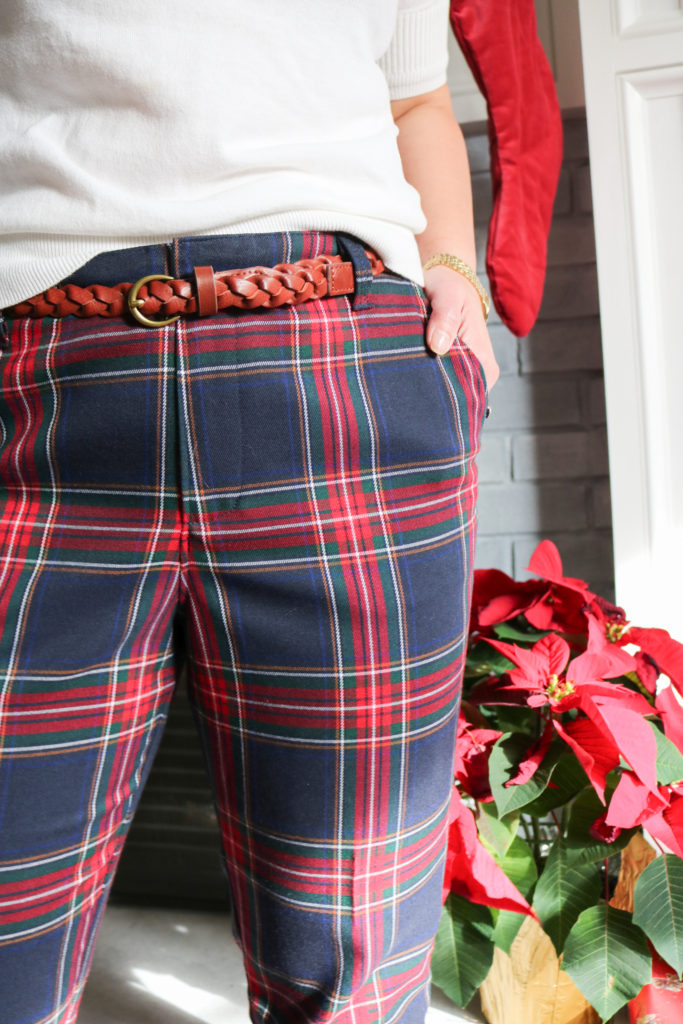
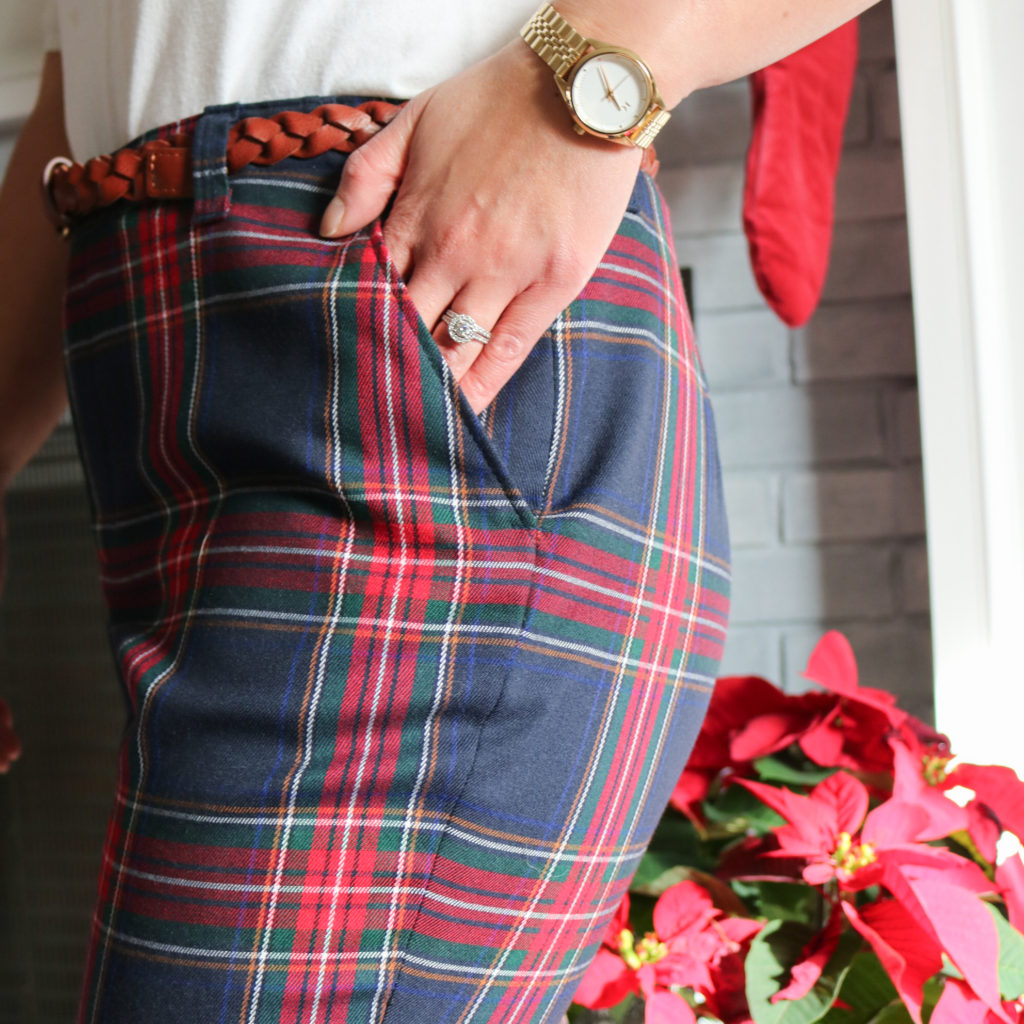
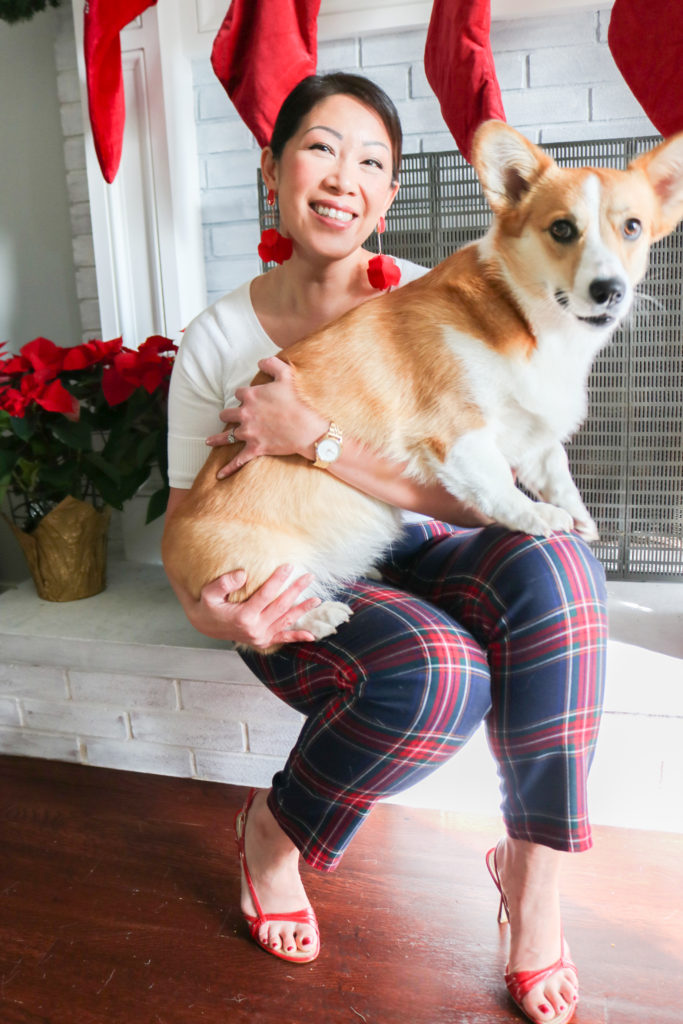
Holiday Tartan Pants with the Chi-Town Chinos

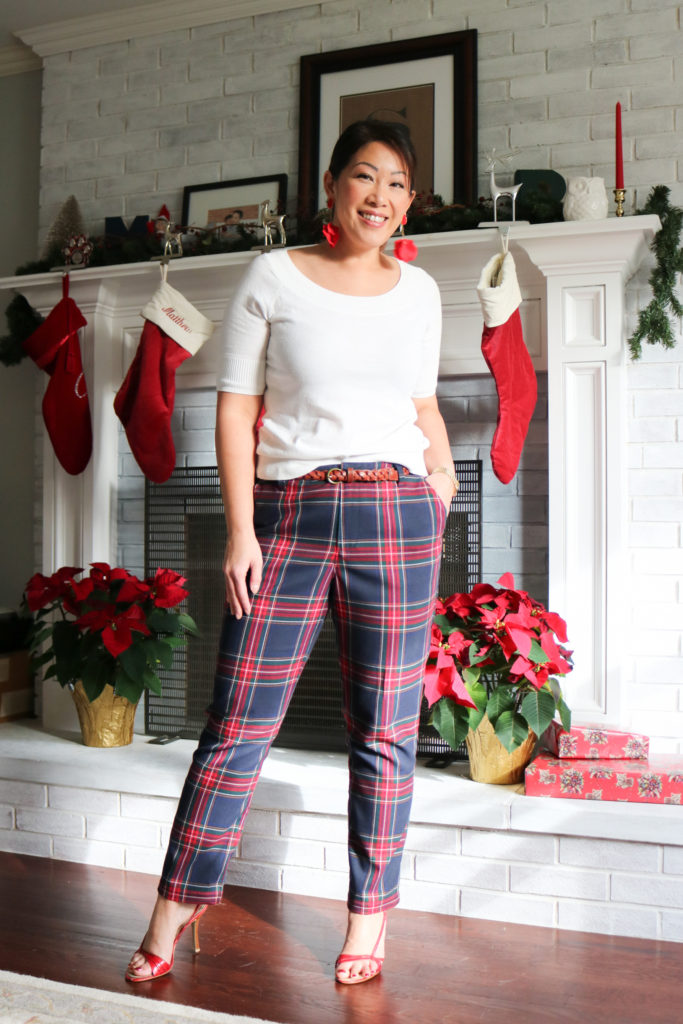
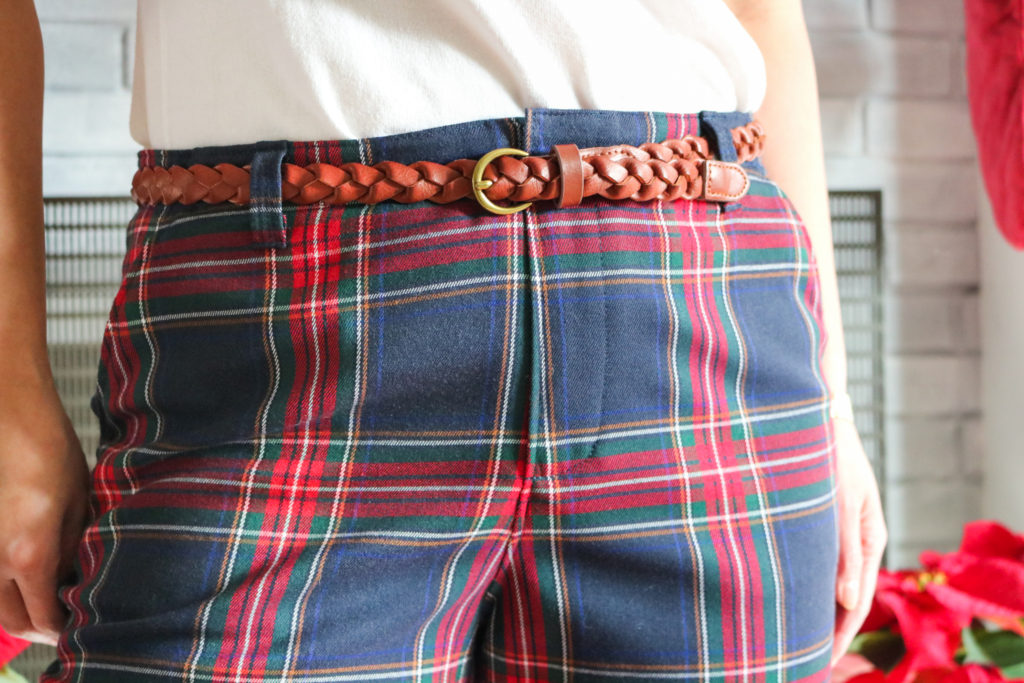
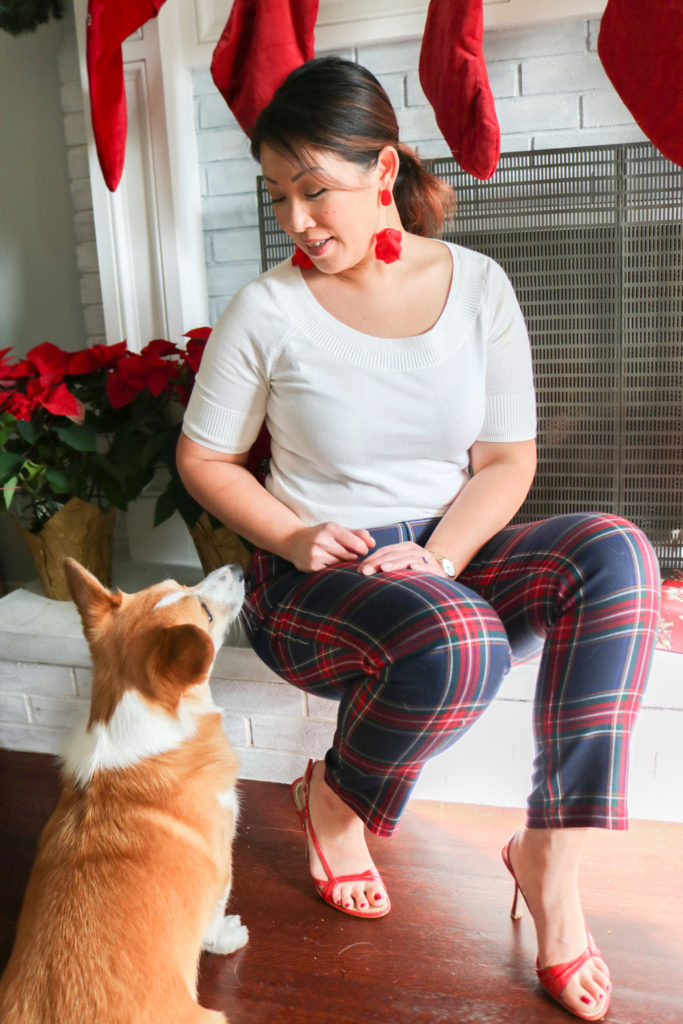
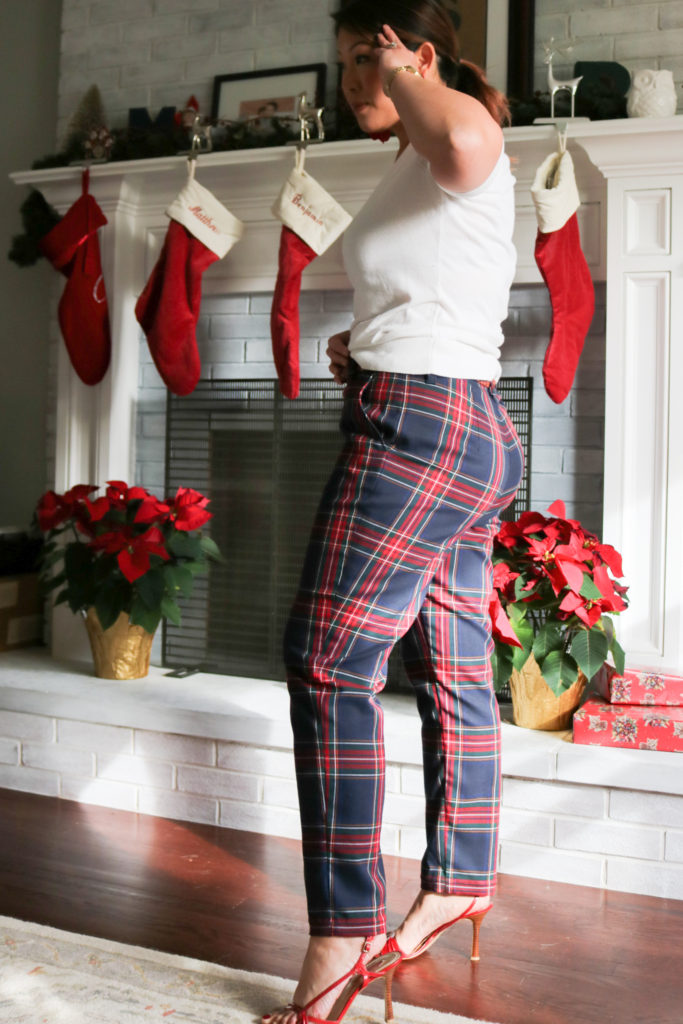
I have always loved the chic preppy look of tartan pants.  They are a bit out there, but still SO fun and a great way to liven up an outfit — especially around the holidays.  But unfortunately, I just was never confident enough to believe that I could rock the look.  Plaid placement is key and the right amount of ease is needed to not turn these overlapping stripes into curvy roadways that make my  body look wider than it really is.  Don’t get me wrong, I LOVE having curves, but don’t need the plaid to push my silhouette down.  By making my own pants that are custom to my frame, I’m happy (actually, surprised!) with how this print actually lengthens my 5’3″ body.

FABRIC

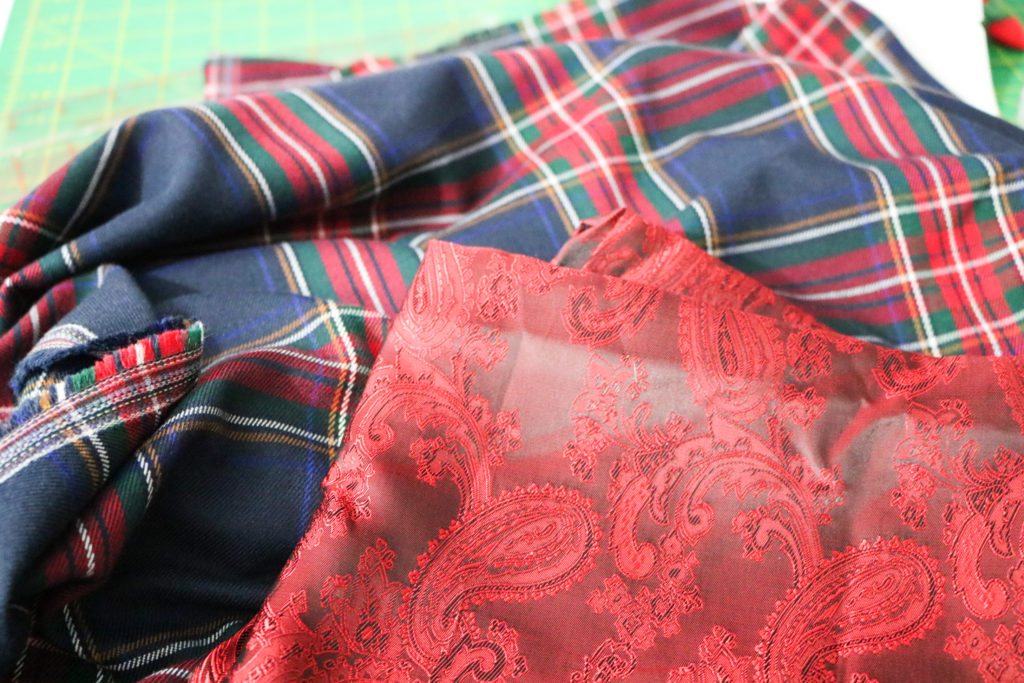
Ever since the end of summer, I’ve been on the hunt for some good plaid suiting…whether it be wool or another cool weather fiber.  Initially, it was just so I could have some gray trousers for dressed up occasions.  But I found myself falling in love with holiday colored plaids too.  I have always loved how J. Crew would always have their tartans out for the holidays and wanted a sophisticated blend of colors like their style.  Most of the fabrics I found were always a little “off,” until I found this Blue/Red  Nirvana Plaid from Melanated Fabrics.  It was exactly the style, scale and fabric blend I was searching for!  And the best part is I found it on sale during Black Friday — we were meant to be!

What I love about this fabric is that it has a medium hand and twill finish, but also includes spandex for a 2-way stretch.  When you’re curvy, some extra stretch is always welcome!  The fabric is also a generous 56/57″ width, actually giving me a lot of extra to make a top or even a possible jacket later on. (That’s something I can deal with in 2022!)

This fabric is great for pants since the polyester content makes it pretty wrinkle-free…and I’ve had these tossed all over the place in-between wear and I haven’t had to re-iron them yet.  The Nirvana plaid is also completely opaque and not scratchy…so no extra lining is required.  There is actually rayon in the fabric that makes it VERY comfortable to wear.

The only downside to this fabric is that it does fray pretty easily.  I would recommend finishing all the edges to keep the fabric from unraveling.  My pocket lining is leftover from a Minerva kit and that was unraveling quite a bit too….so I ended up always trimming down my pants every few steps.  If I end up using the rest of this plaid, I will definitely finish the edges to save myself the sewing room mess!

PATTERN

When I bought this fabric, I had a completely different pants pattern in mind.  During Black Friday, I also picked up the By Hand London Jackie Trousers.  But after making the toile, I thought all the pleats wouldn’t look right and be too busy with such a stand-out tartan pattern.  It’s also a VERY relaxed fit with lots of ease since it’s also a unisex pattern.  So instead, I’m going to save the Jackie Trousers for a gray wool suiting I have that isn’t as busy and won’t make me feel like a balloon!

I’m glad I went with my gut and turned to my TNT (tried and true) Chi-Town Chinos (with expansion pack 2) by Alina Design Co, instead.  You can check out the very first pair I made here.  Since I’ve made these pants, as well as, the shorts before, I knew the changes I would have to make to fit my body.  My waist measured an 8 and my hips measured at a 12.  I generally have a two size difference between waist and hip and have tested between so many different adjustments over the years.  After 4 pairs of Chi-Town Chinos, I think I have it.

Here were my mods:

  • Cut a 10 (knowing I would take in extra later) and blended the hips out to a 12
  • Added 1 1/4″ to the rise in order to be mid-level and right at my belly button.  (The original drafting is for a low-rise chino.)  I added the length to the top of both the from and back pants template in order to keep the dart in place and not accidentally raise it too high.
  • Took out an additional 1/2″ out of each dart (1/4″ on both sides)
  • Took out an additional 1/2″ out of the center back
  • Added 1/2″ to the back crotch length for my back-side
  • Removed 2″ of length at the leg’s shorten/lengthen line
  • After making the pants, cut off an additional 1 1/2″ off off the hem
  • Interfaced the size 8 waistband so it wouldn’t stretch out with wear
  • Omitted back pockets

PLAID MATCHING

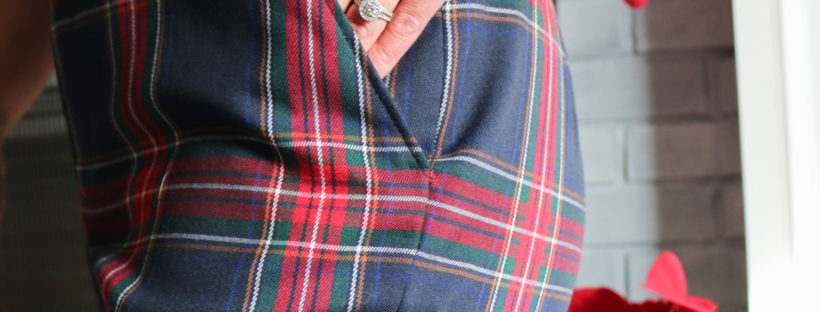
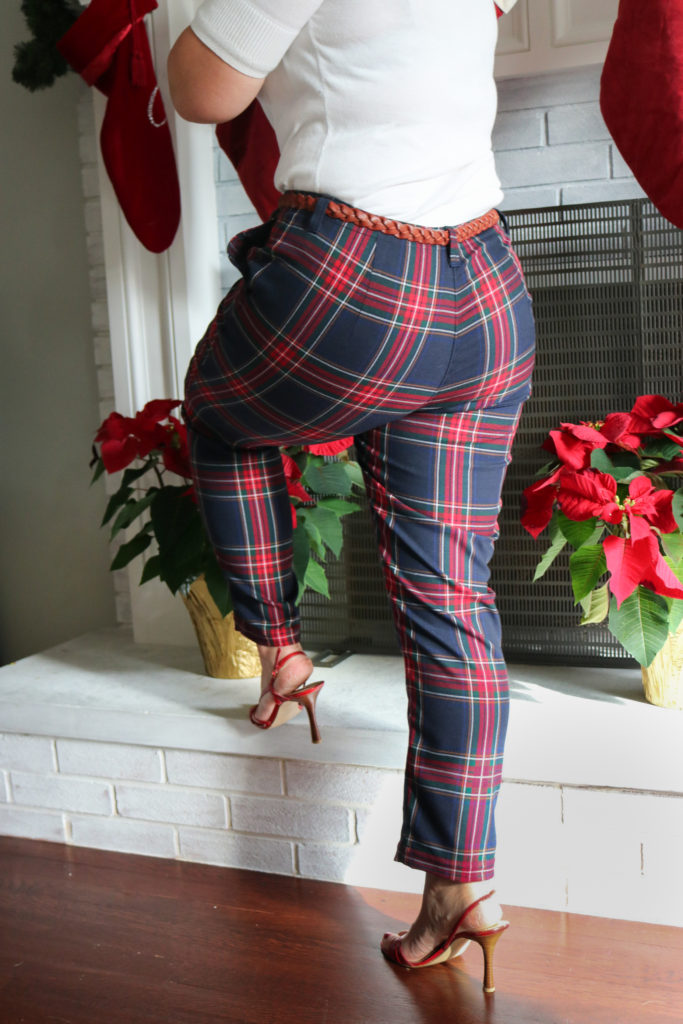
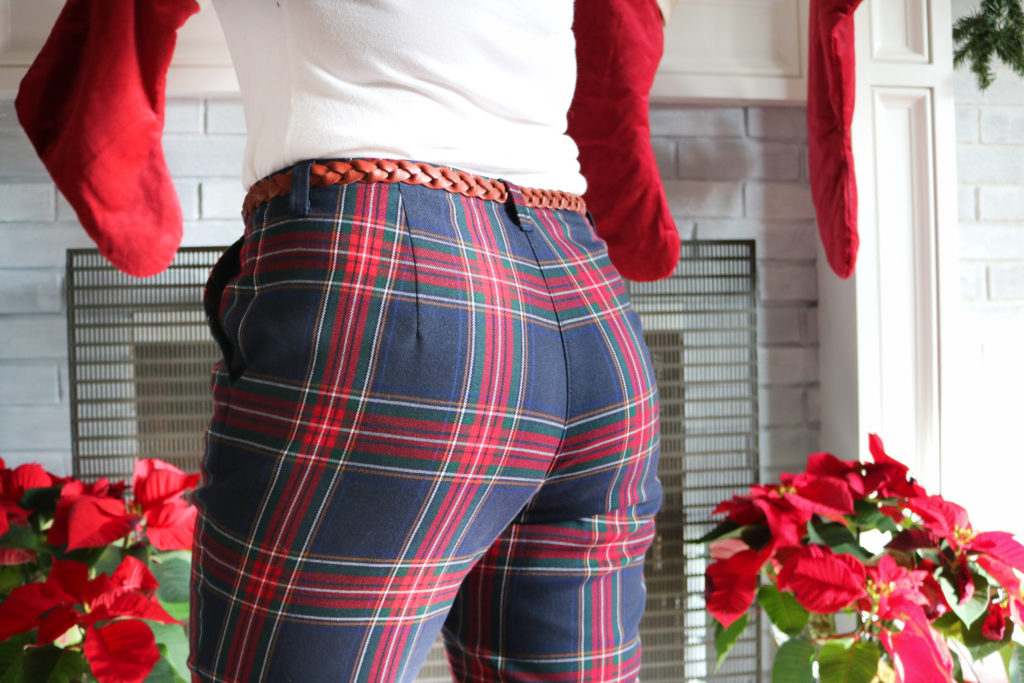
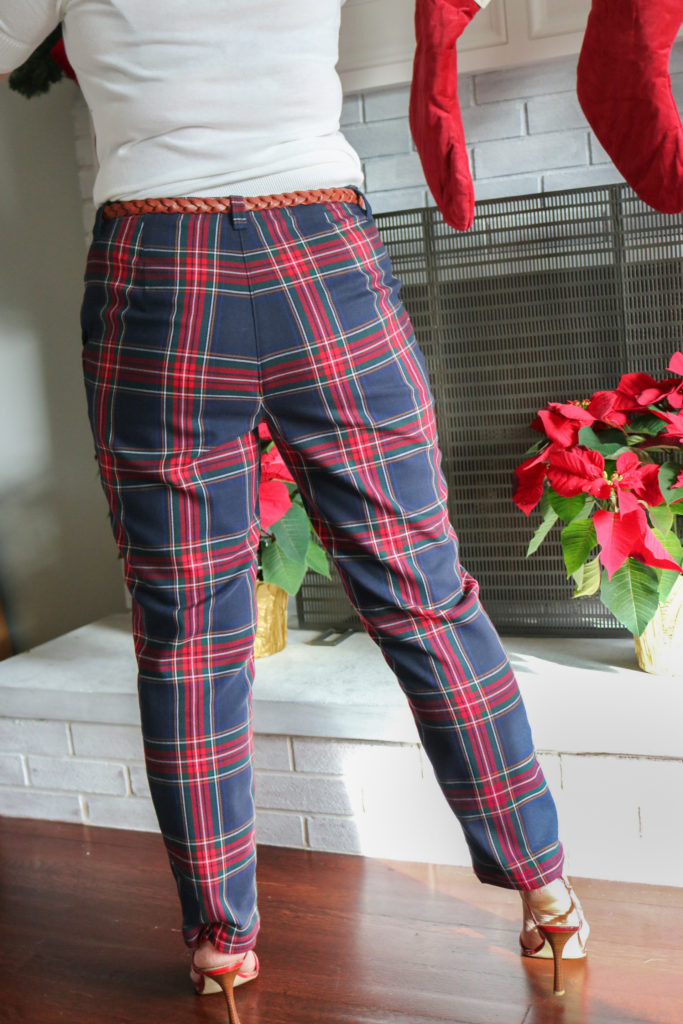
During my research of plaid pants, I unfortunately came across a bunch of poorly matched patterns….like, not even close to matching.  And I also saw some bad cutting, where one leg was cut on the bias and the other was on the grain…what?!?!  I couldn’t believe these pants were actually sold at one point!  But, there were a few pair that I definitely liked.  The ones I liked made sure to have the prominent stripe run vertically centered on the front and back legs.  This makes your eyes run up and down, with helps for a lengthening illusion.  You really have pay attention to the template’s grainline to get this right.  I also tried to make sure the big red stripes wouldn’t run horizontally across the apex of my back side and thus, widen me.  I wasn’t completely successful, but having the two red stripes on my backside, helps to even out the gaze…which is still winning!

When cutting the pant legs, I chose the widest part of the hip to be where I focused on matching. My main goal was to not have the horizontal stripe run directly into my crotch.  As you can see, it still runs across the pelvis and back, but not angled down into the crotch.  I cut every piece of the  chinos out separately to make sure all points were matched up.

To have nice side and inseams, I used A LOT of pins to hold the pants in place.  The Chi-Town Chinos have a generous 5/8″ seam allowance and it’s important to pin at the seam line and not just at the edge of the fabric.  If you pin just at the edge of the fabric, the pattern can shift very easily.  I know it’s a major “don’t,” but I will sew over my pins when I need to pattern match this much.  During the fit and basting process, I made sure to pattern match then.  If I was off a little bit, I could always go back and easily pick the stitching and re-pin for the final stitching.  Although this is takes patience and time, the pattern matching is well worth the effort!

One last tip I have is to use a walking foot when top-stitching…especially at the waistline.  Initially, I didn’t use one and with the twill weave along with the spandex fiber content, the plaid really shifted on me.  I picked all the stitching (ugh!) and then used a walking foot with extra pins to evenly guide the fabric while sewing so the plaid wouldn’t be lopsided.

I never thought I could wear patterned pants….mainly from RTW trauma years ago.  But I know NOW, with the right ease and fabric placement, I can do it.  This is really opening up my world and you better believe my pants will be much more fun going forward!  Isn’t sewing for yourself amazing?  Do you have any fun holiday makes in the works?


Merry Stitchmas Friends!

Cristy


Review Fibre Mood Agatha Dress with Rayon

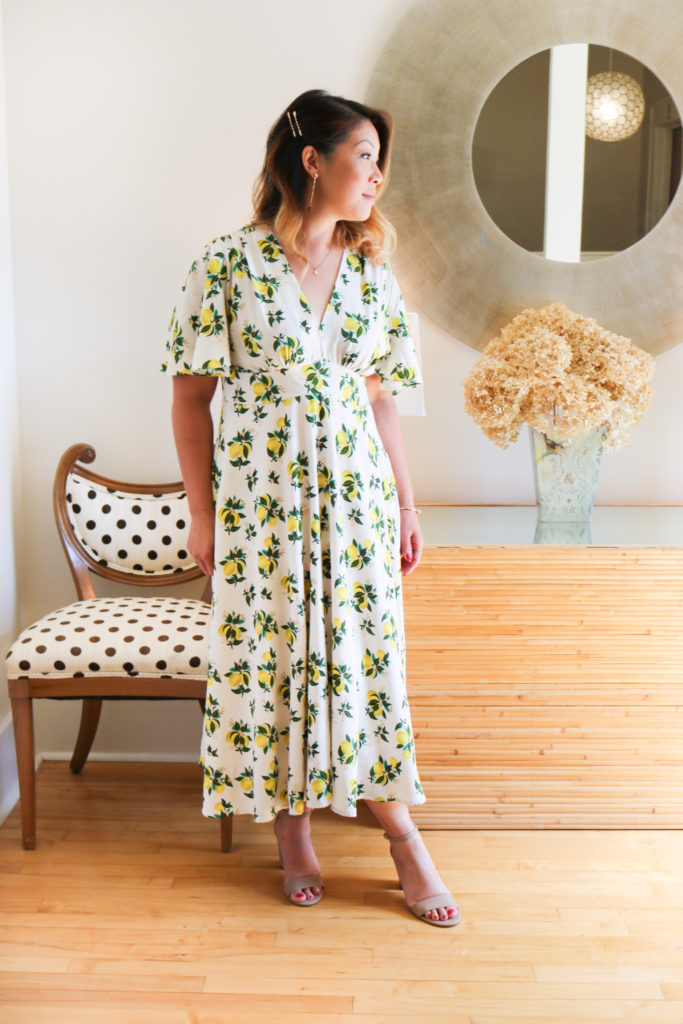
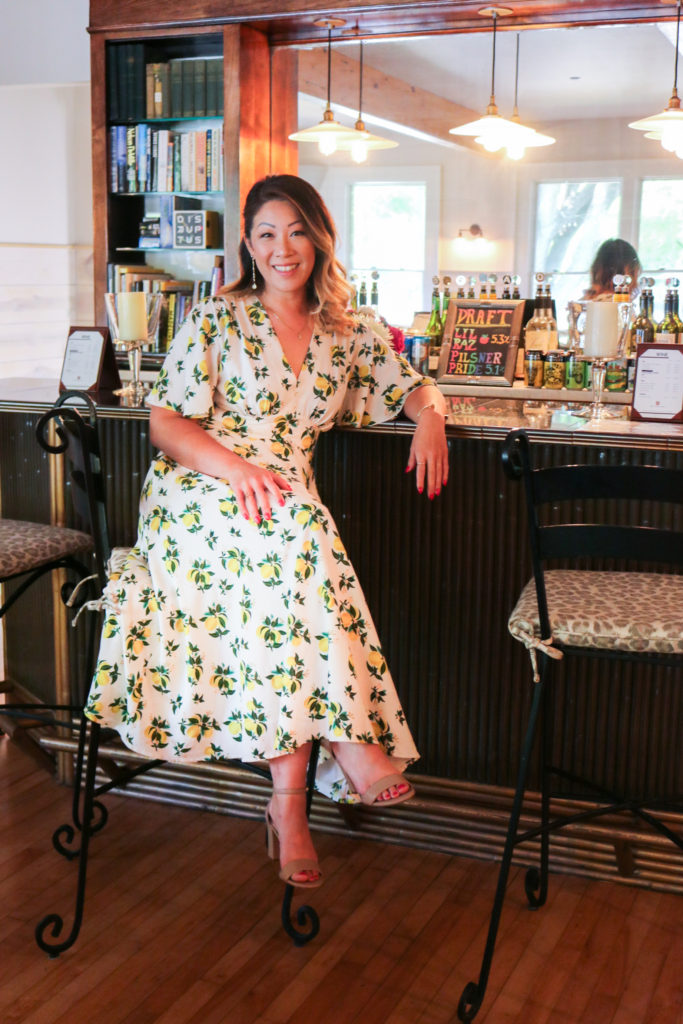
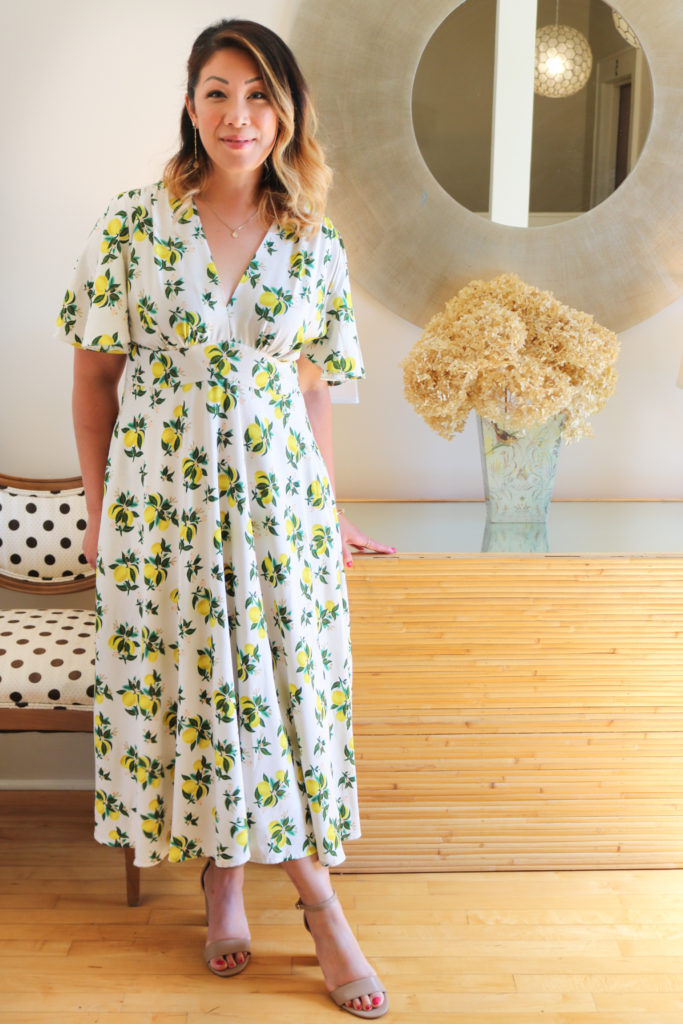
Over the summer, I was in a rush to make this Fibre Mood Agatha dress for the first wedding of 2021 and I completely forgot to write it up until now.  Let’s be honest though…most of my blogging was set aside while managing my family during the pandemic!  I was still sewing to save my mental state and am trying to catch up now while I have a little extra time 🙂

With the warmer weather approaching and vaccines coming out, I knew this was going to be one of the very first “big” social events for the family.  After a year of just sweatsuits and leggings, I really wanted to make something special and use up some fabric in my stash.  If there was any perspective gained from the pandemic, it was to use up all the “good” fabric and not let it sit on the shelves!

PATTERN

I’m not sure exactly where I saw this silhouette, but I wanted to make a flowy long dress with flutter sleeves for the midwest heat.  After a good bit of research at my typical spots – IG, Pinterest, and Google, I finally found the closest pattern to what I wanted.  And that pattern was the Fibre Mood Agatha…However, it was drafted for knit fabrics and of course, I wanted to use woven.  In the website description, FM says the pattern can be used for wovens, but I was pretty skeptical.  They mention that you “only” need a side zipper and I’m here to say I made a lot of extra adjustments to account for ZERO stretch.  Since I couldn’t find any other options, I still bought the pattern knowing I would have to muslin the bodice and be fully committed to a few days of fitting.

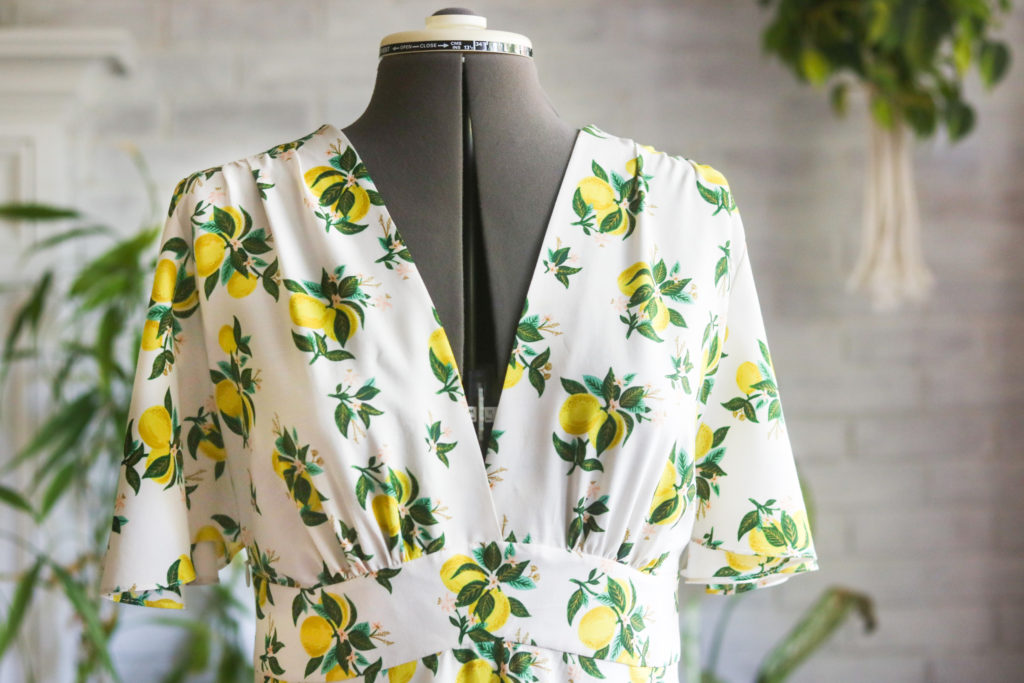
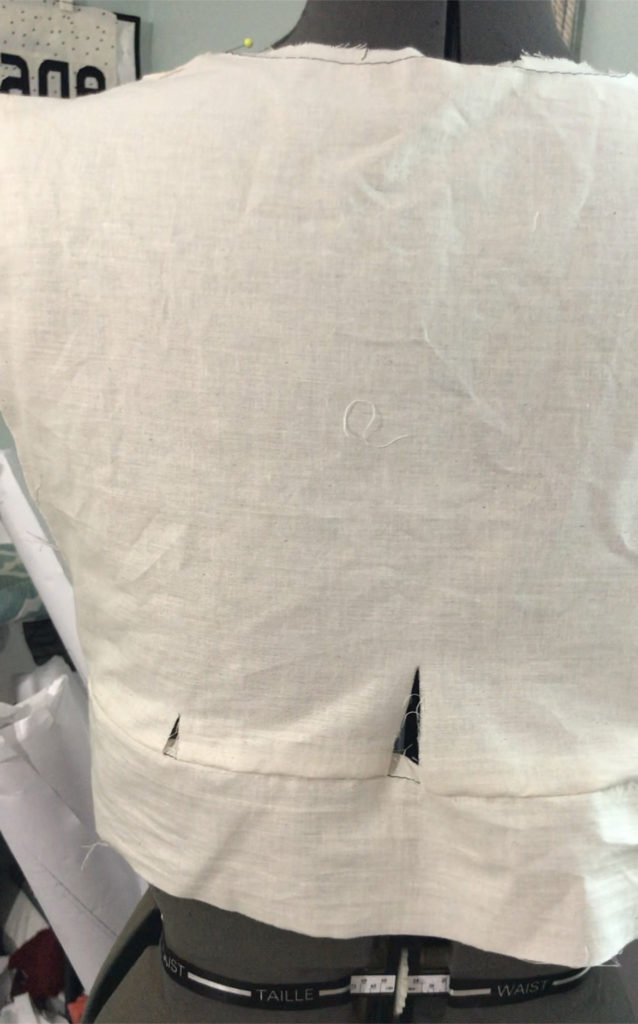
Although I measured a US 8, I cut a US 10 knowing that everything would have to be adjusted later on.  It gave me a base point to start without going too high and throwing off other fit (like the shoulders and sleeves.)  With the muslin, the armscyes are very generous, so I didn’t need to make the sleeves.  I just had to sew the bodice and waistbands together.  Even after cutting a larger size, I still needed 7/8″ added onto the front and back of the waistbands.  Then I slashed the back bodice in three spots (dividing the back evenly) to account for the new waistbands and created a new back bodice piece.

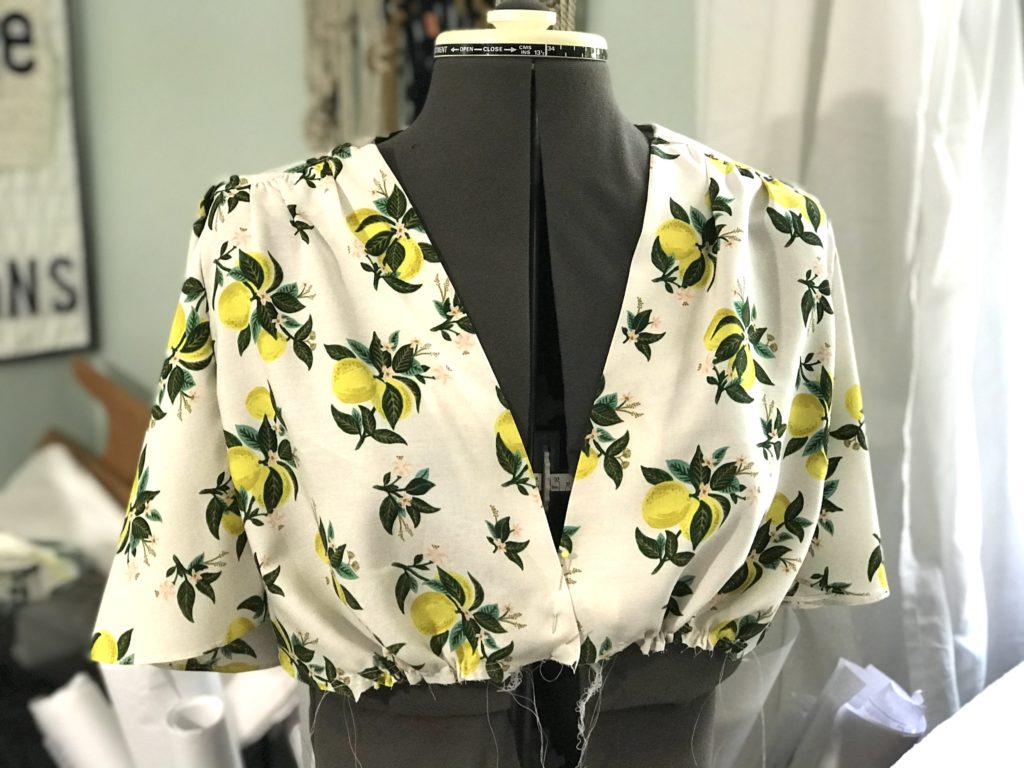
With the help of hashtags, I found Jessica R. (@mom.maker.model) who had made a few woven Agathas.  She had some good tips and mentioned she had to add about 2″ to the length of the bodice (towards the side of the bust) to make room for the ladies (I am a B-cup and you would have to add more for any size larger.)  Since the bust is gathered, I didn’t have to add more width…but just evenly spread the gathers along the new front waistband.  I had to play with the gathers and the added volume a little bit until I found the fit I liked.  The V-neck is pretty deep and I ended up overlapping the front bodice pieces by 3/4″ for a little extra modesty. With the added length of both the waistbands, I then widened the skirt opening to match.  *The pattern doesn’t mention stay-stitching the waist opening of the circle skirt, but I would HIGHLY recommend it so your skirt doesn’t stretch while making this dress.

For Jessica, she didn’t need to add a zipper, but I definitely had to in order to get the dress over my head! This was such a mental challenge for me because not only was I adding in an invisible zipper, but with the light colored fashion fabric I was using, I also had to account for a lining…and adding pockets!  I really set myself up for a challenge…eek!  I ended up sewing the invisible zipper to the fashion fabric and then hand-stitching the lining into place.

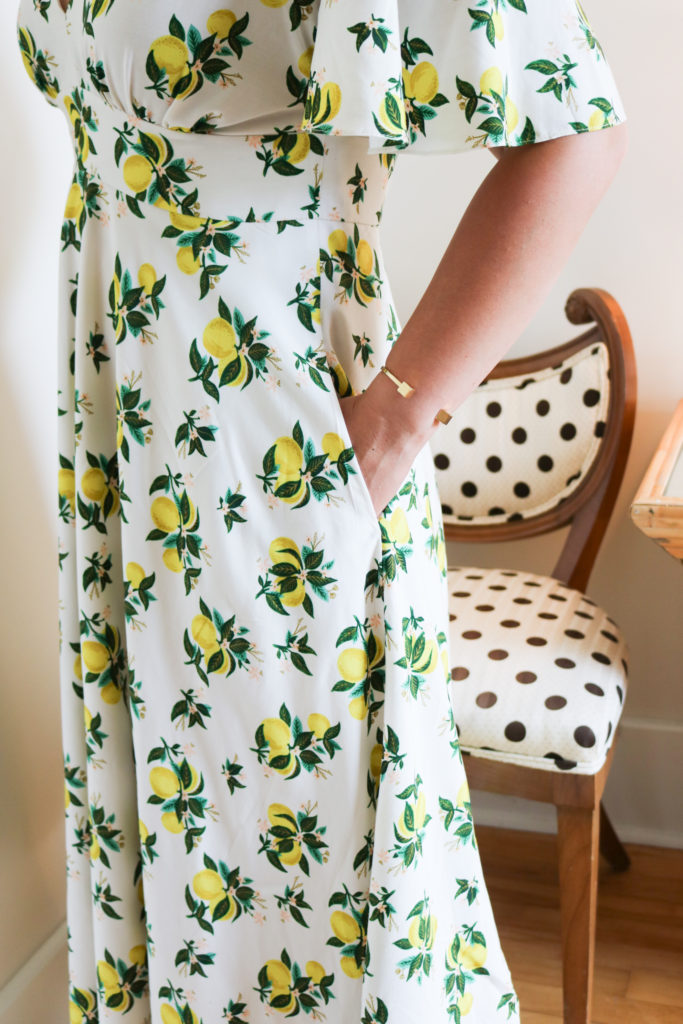
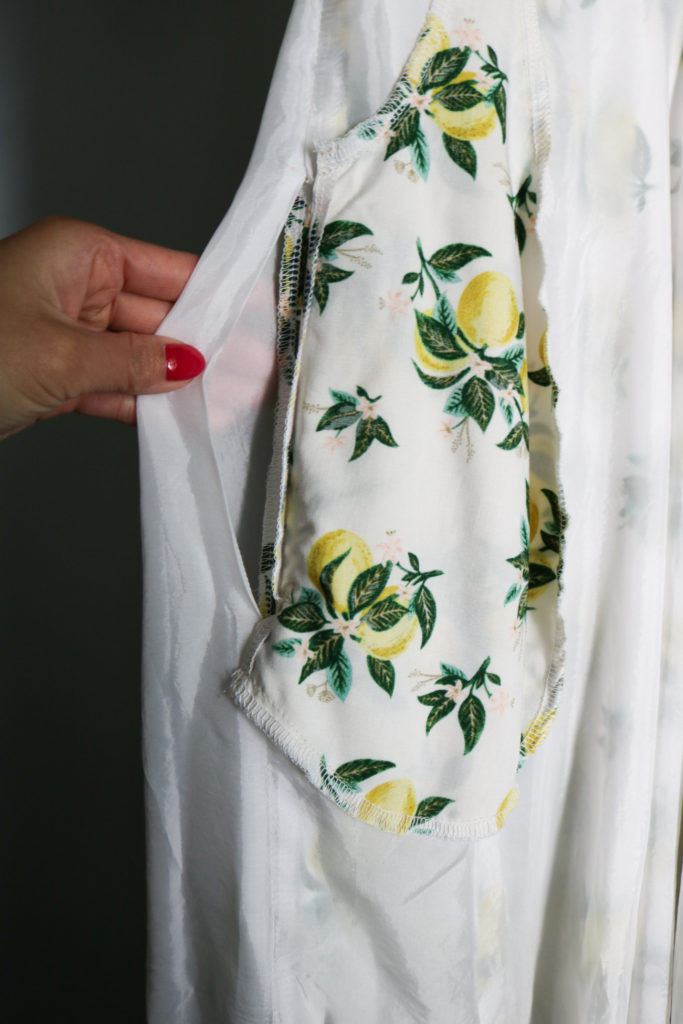
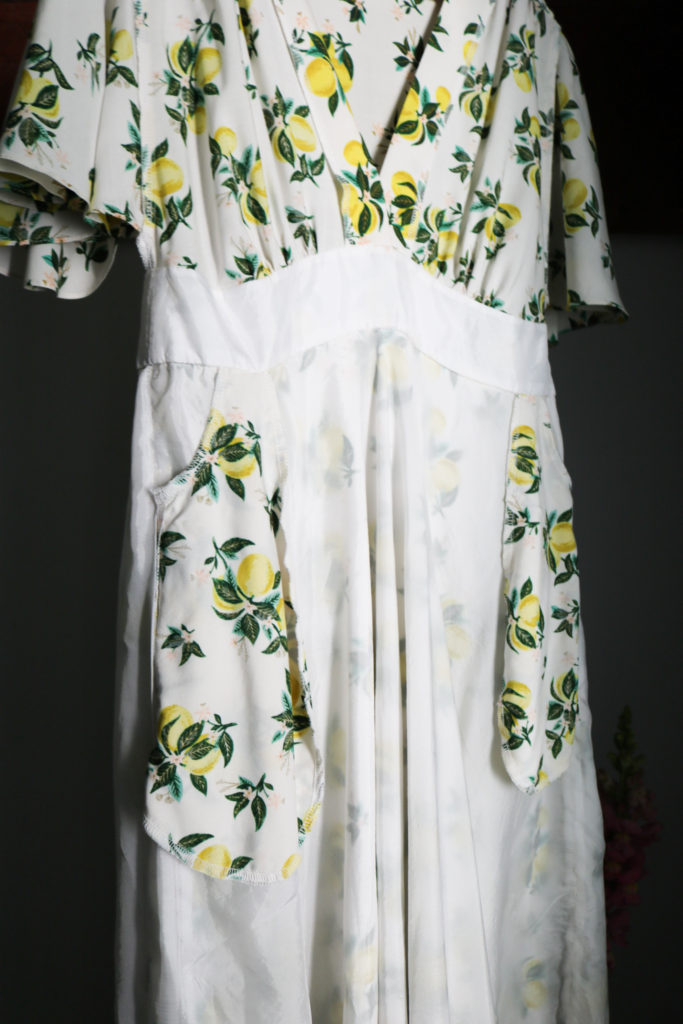
While adding in pockets is normally not a huge issue (but all designers should add them to all patterns anyways!) I, again, had to account for a slight sheerness of this fabric.  The pockets had to actually go behind the lining so they wouldn’t be seen through the front of the dress.  I know some of you are wondering why I didn’t use the lining as the pockets.  But with the slash style, I wanted to use the same fashion fabric to blend the pockets right into the dress whether my hands are using them or not.  To account for this interesting issue, I left openings in the side seams of my lining so the pockets could pop back.  I’ve never seen something like this in a pattern and was proud of my MacGyver sewing idea!

FABRIC

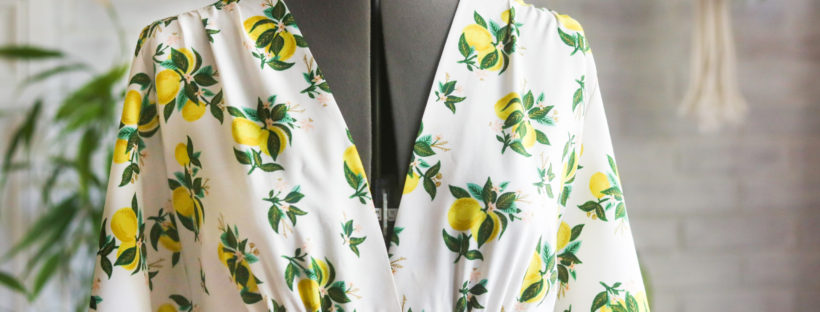
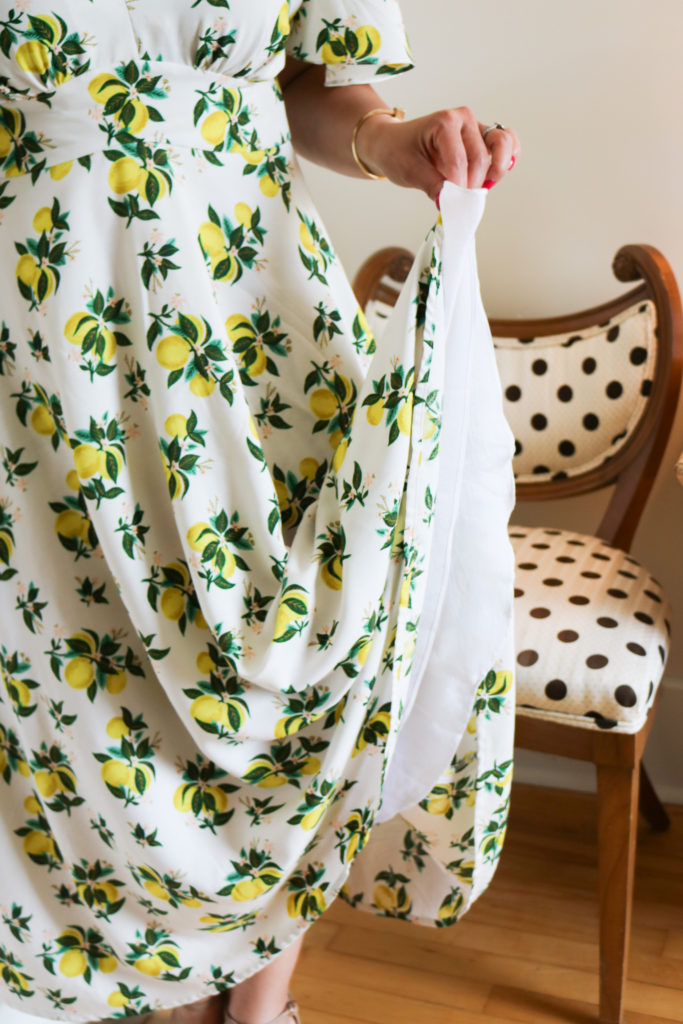
I had this Rifle Paper Co. Citrus Blossom rayon challis in my stash for a good year.  I’m normally not a yellow person, but these prints are always SO beautiful and I definitely needed the color in my wardrobe.  When this collection first came out, I bought enough fabric for a shirt or maybe a short dress….but then I came back to it just a month or so later and bought more.  I’m so glad I did because this circle skirt style uses a lot of fabric!

With rayon challis, it is a light and breathable fabric. I love it for the summer since it has a soft cool hand and drapes well. However, it can be slippery and pretty shifty when sewing.  So I use my fine pins and end up using twice as many as I would with a quilt cotton.  My machine is pretty hardworking, so I also have to switch down to a 70/10 needle when working with rayon.

As I mentioned earlier, I had to use a Bemberg rayon lining in the skirt to keep the dress from being see-through. I cut the lining the same shape as the skirt, but cut off an extra 2″ off the hem so it wouldn’t been seen as I wore the dress.  While I was at it, I also added a lining to the waistband (along with light-weight interfacing) to keep it more structured for a lean look.  Luckily, this was also in my stash and it’s definitely a good fabric to have around to line lighter fabrics.

Overall, this was probably one of my most laborious makes with the added steps of a muslin, adjusting for woven fabric, adding pockets and also adding a lining.  After the wedding and 6 additional months, I can still say that all of this work was WELL worth the effort and I have all of the adjustments ready for a future dress!  I’m so happy with the wearability of the FM Agatha.  While it’s light and flowy for warm weather, I love that my shoulders are covered for those shots of extreme air conditioning in the summer.  Keep a lookout for a new one in 2022!!!


Hugs and Stitches, friends!

Cristy


This post may contain affiliate links.  You can read about my Disclosures here.  While I am a Fibre Mood ambassador, this pattern and the fabric was purchased by me and not part of any promotion.

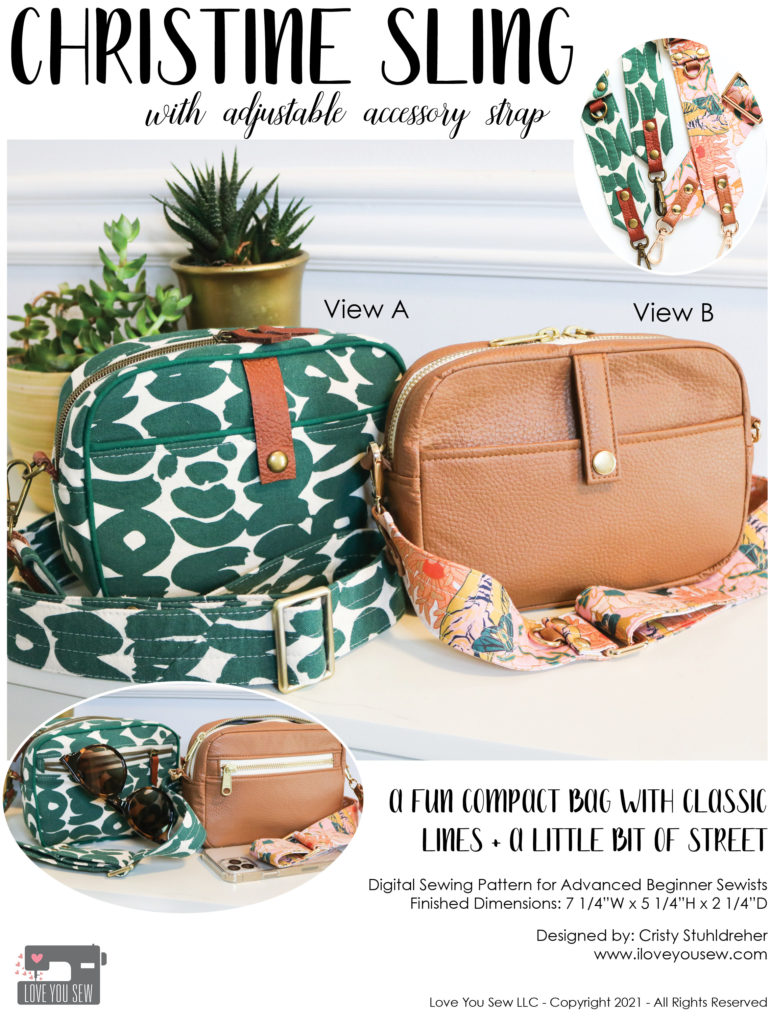
Introducing The Christine Sling Pattern

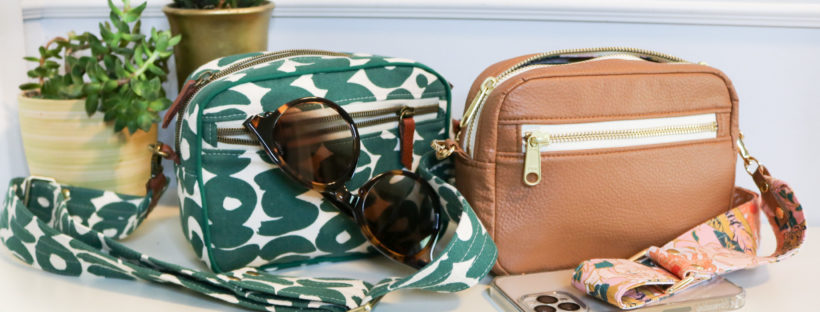
The Christine Sling is definitely the bag I’ve worked on for the longest time.  For many reasons, the development would keep getting pushed, but I always knew it would have some kind of compact cross-body silhouette.  This bag first started off as a very slim phone holder, but with the passing of time, phones kept getting bigger and styles kept changing.  But when bags were being worn more across the chest and mid-back, I knew the sling had to be re-tooled a bit.  I made her a little larger than just a phone holder but still small enough for life on the go.
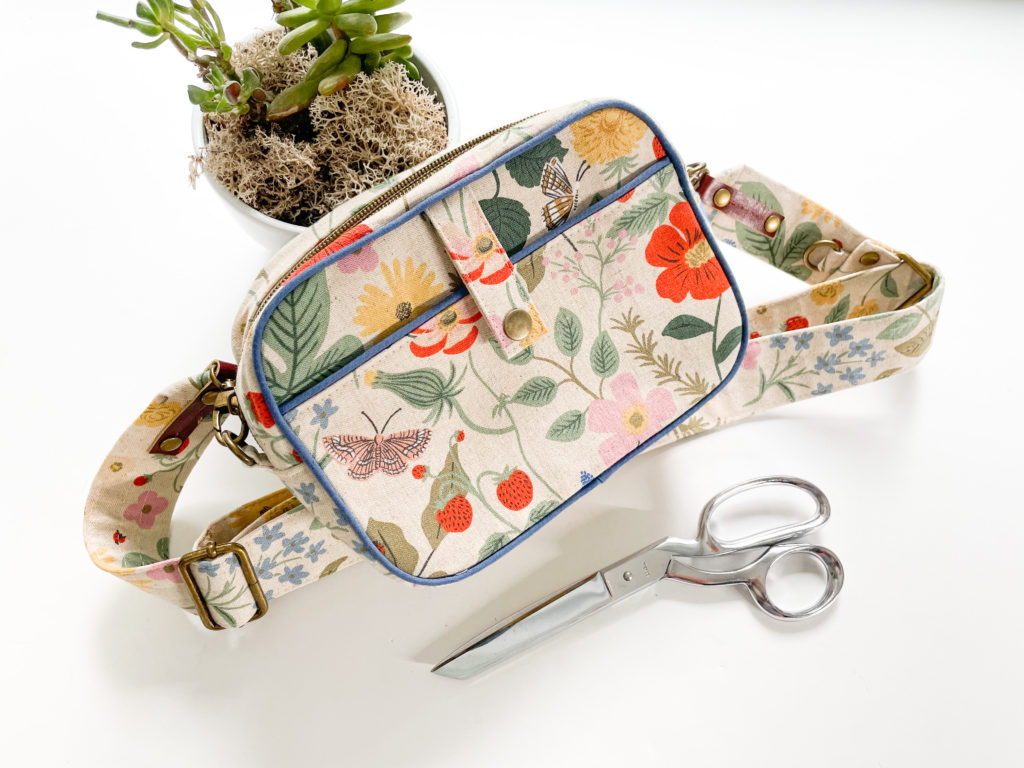
View B with added Piping

Inspiration
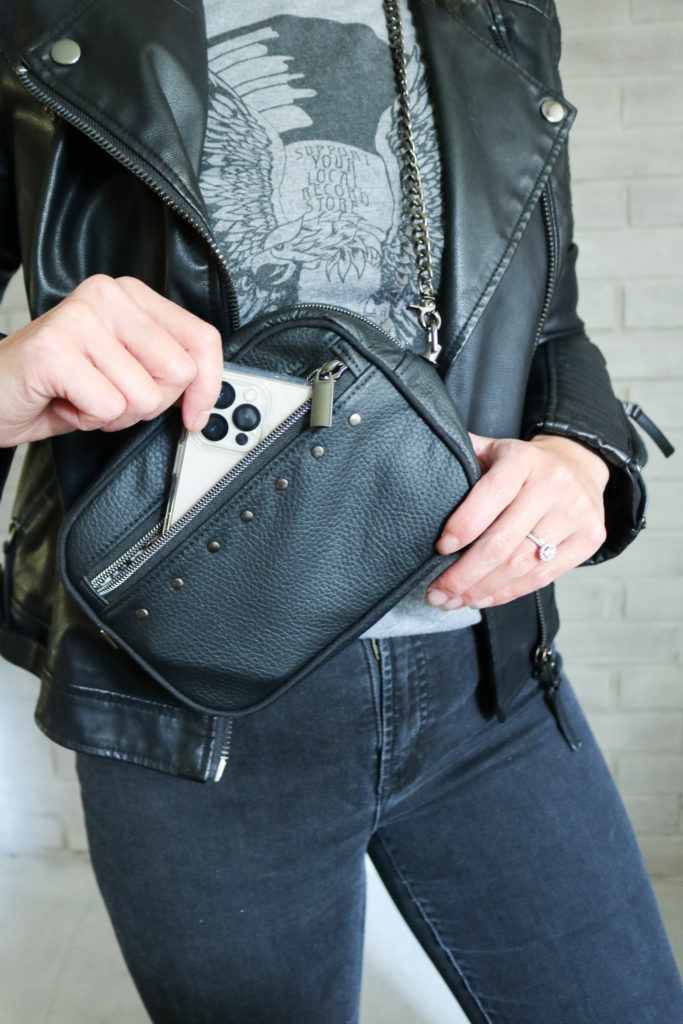
View A with rivet embellishments

With the slowly world opening back up with COVID-19, I knew I still wanted to have a small bag  to run in and out of stores quickly.  But now, our essentials of keys-wallet-cell phones have expanded to include masks and lots of sanitizer.  The depth of the bag had to expand with our needs.
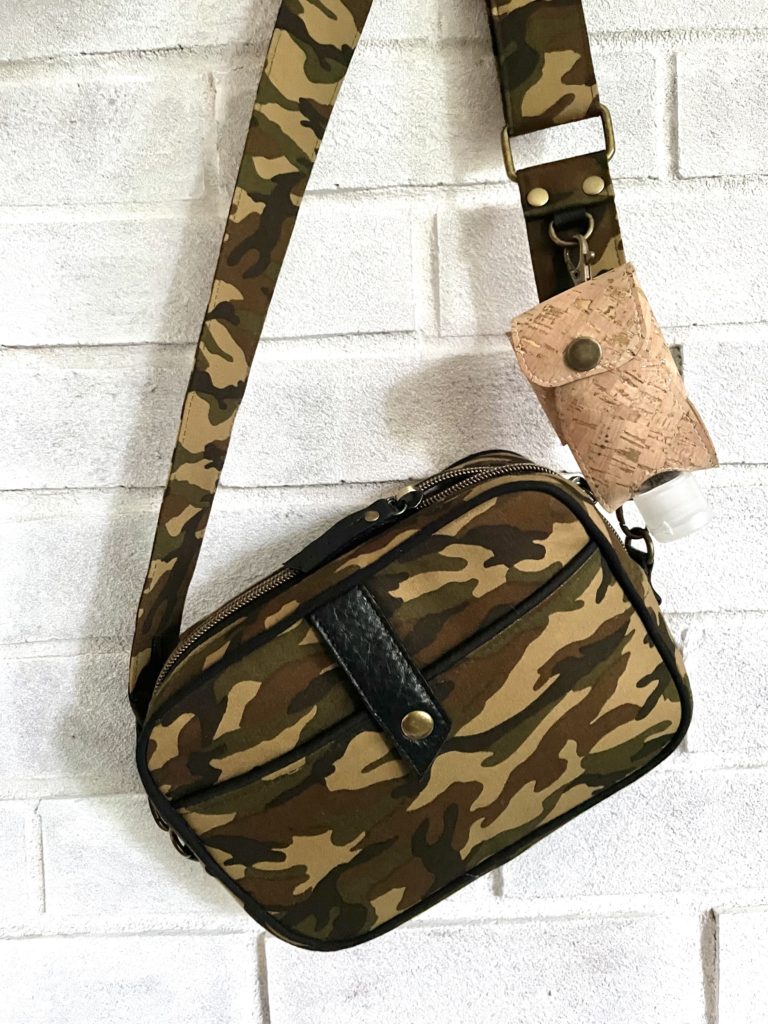
View A with angled tab

On top of this, belt bags are definitely sticking around and I just love the sling look — especially with the accessory strap.  All of my bag patterns teach a different way to make/use a strap and this pattern is no exception.  With everyone using their phones and earbuds, I wanted to keep a quick pocket to hold a phone and the accessory strap to hold a Tiny Sophia Bag with either earbuds or that sanitizer!

Namesake
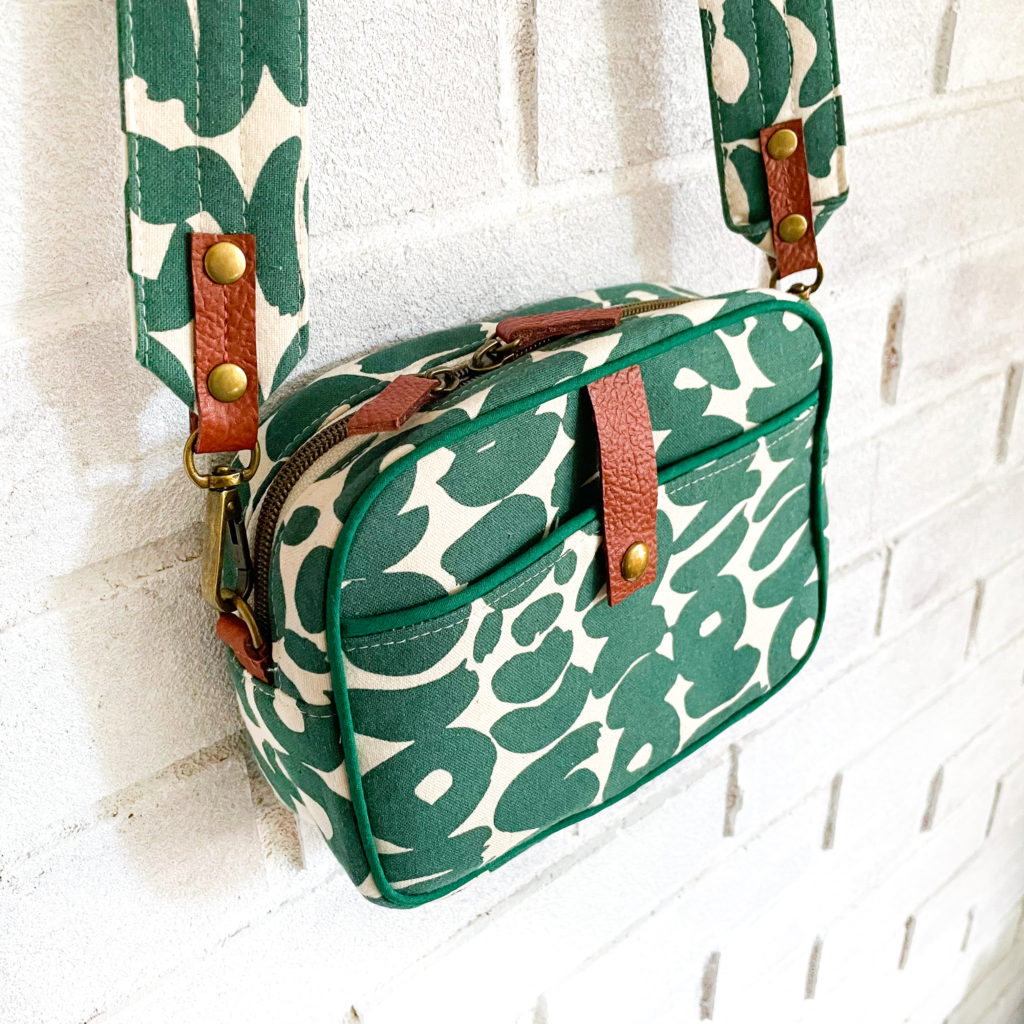
View A

As with all of my bags designs, they are named after my nieces.  Early on, I knew that Christine’s bag would always be a sling.  One – because it works with her name so well!  And two – when I started designing her bag, she was still in college.  I wanted to design a bag that could be a part of that care-free lifestyle while still being modern and on-trend.  That bag would also HAVE to  work with a busy lifestyle (Christine is also a nurse!) yet, would always be fun and cute like her <3  This bag is a perfect representation of my super funny and incredibly caring Christine.

Features
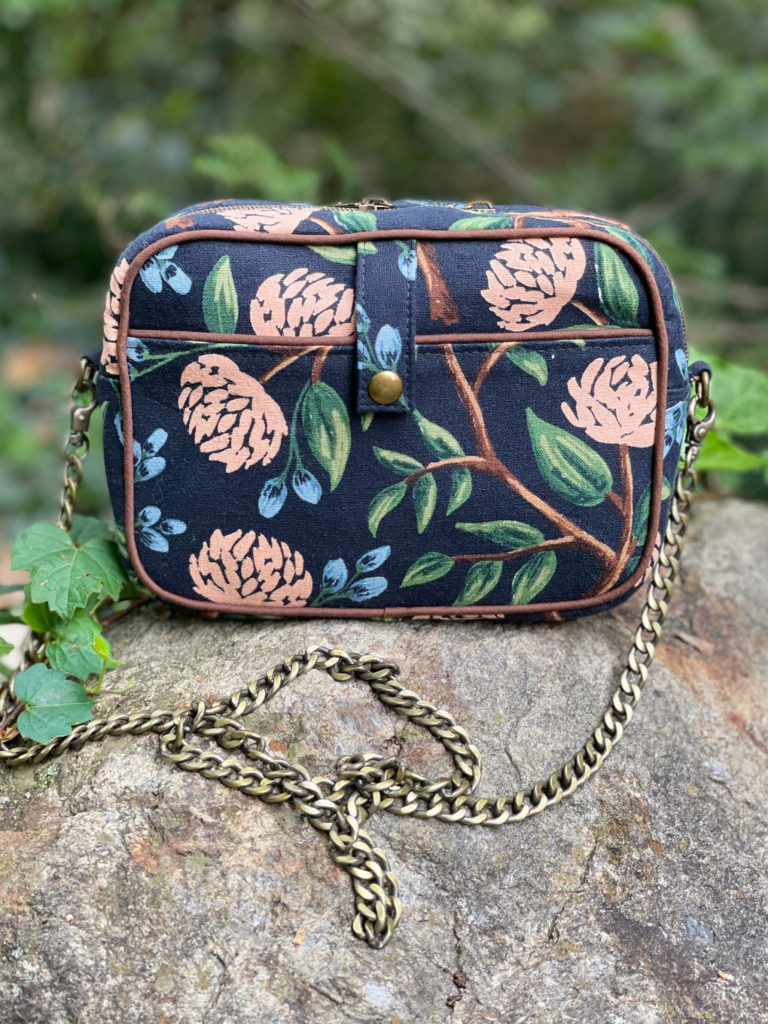
View A with chain strap

The Christine Sling is a small compact bag perfect for everyday.  It follows what I love in bag design — simple, clean lines with versatile styling and a modern twist.  As the “Sling” part of the name entails, this bag is meant to be worn across the chest or swung around the mid-back.  However, with a quick change of the accessory strap, the Christine can go to a full cross-body or even as a belt bag with adjusted length.  I am ALL about bag versatility!

  • Two Views – This bag includes instructions for two separate views.  View A includes piping and accent fabric for some fun raw-edge contrasting looks.  View B uses the same main fabric throughout for a sleeker look and comes together very quickly without the piping. 
  • Pockets – Both views have zipper and slip pockets which are the same for the exterior and the lining.  They are the perfect size to keep your phone or keys accessible. You can even omit the pockets altogether on the exterior for a classic look or double up the zipper pockets for extra security. 
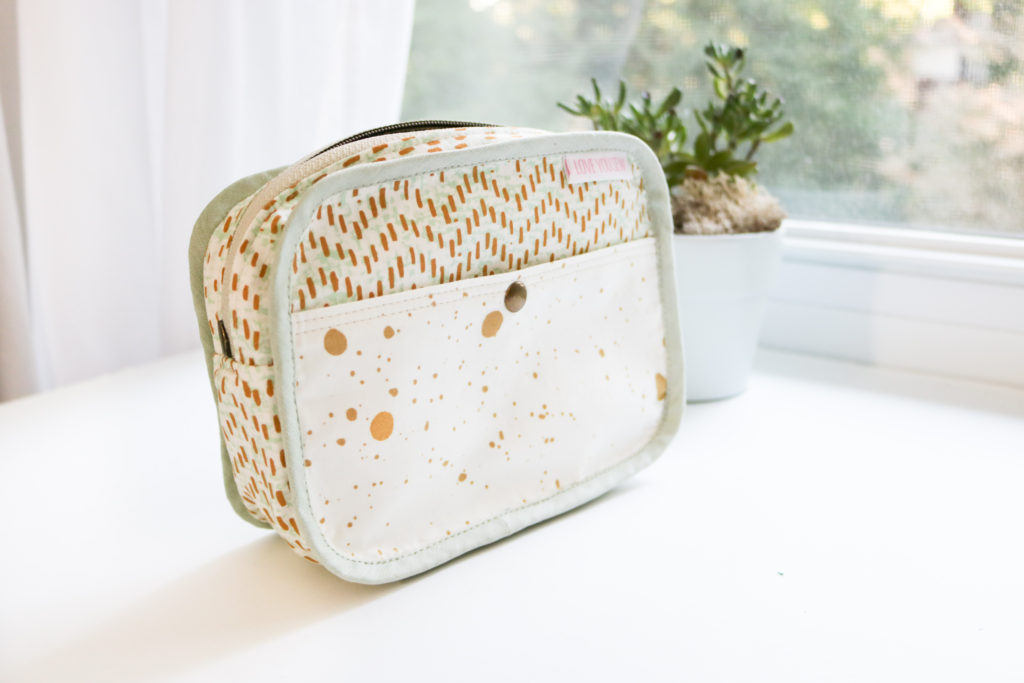
View A inside out

  • Lining –  The lining uses bias tape to keep seams clean while also providing extra structure.
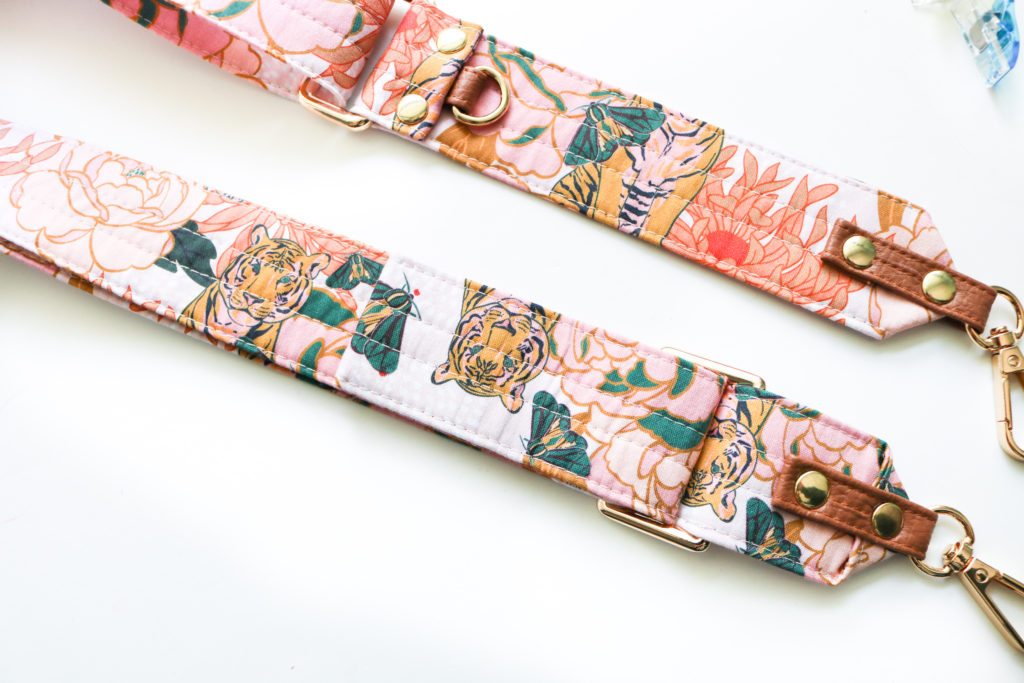
View B Strap

  • Strap -Both views also include a wide accessory strap for comfort and a D-ring to hold your ear pods or sunglasses. Use contrasting fabric or even some pre-made webbing for a fashionable statement strap!
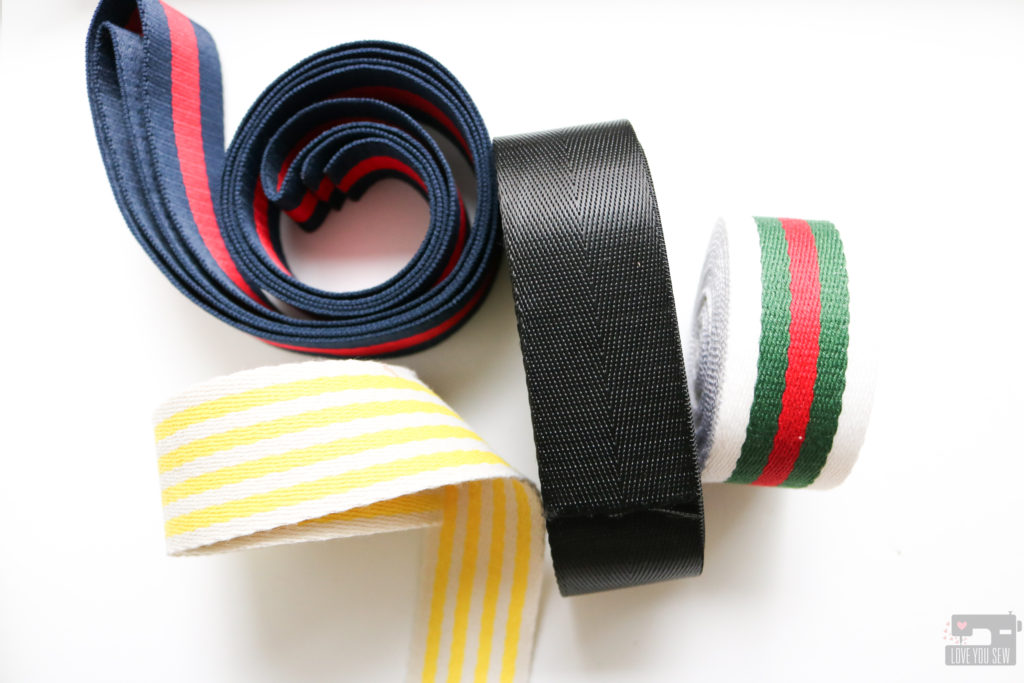
Assorted Webbings


Fabric
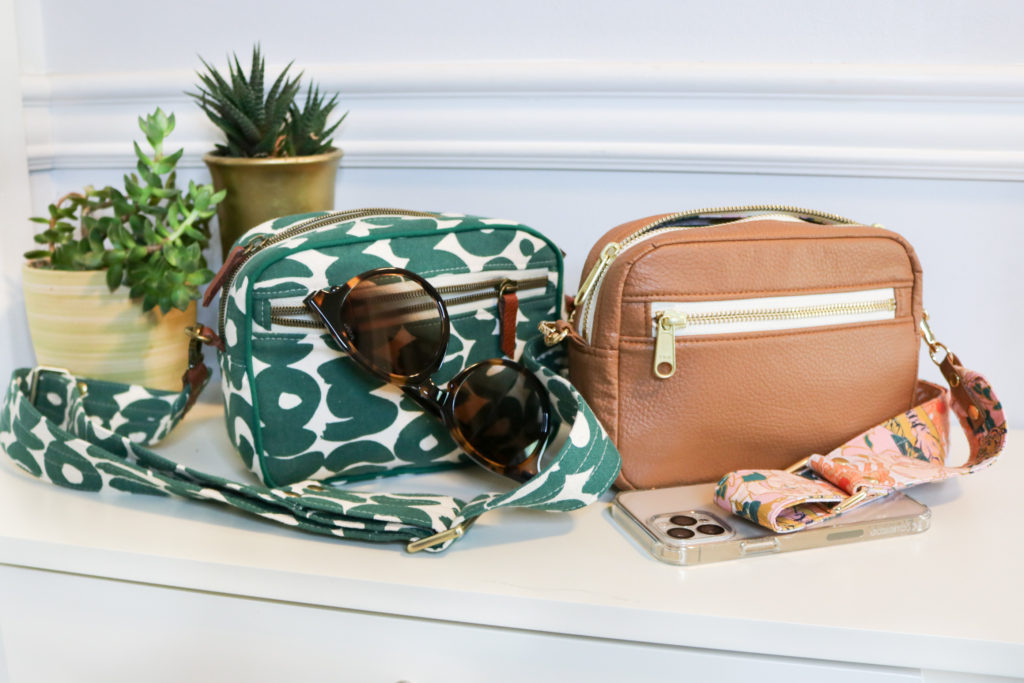
View A + View B

Fabric Requirements:

  • 3/4 yd Main Fabric
  • 1/2 yd  Lining Fabric 
  • Scrap Accent Fabric
  • 2 1/2 yd  Woven Interfacing (e.g. Pellon SF101)  
  • 1/2 yd  Firm Stabilizer (e.g. Vilene or Pellon Decovil light)

This pattern is written for home decor and/or bottom-weight fabrics such as canvas, duck cloth, and denim with weights of ~ 6 oz per square yard or more. The lining is based on quilt cotton and any other fabric with the same weight (~4 oz) can be used such as linen, chambray and twill.  The accent fabric in View A is intended to be left with a raw edge, allowing you to use leather, suede, vinyl, cork or another non-fraying substrate.  This allows you to add some high-end details to elevate your bag.

In my samples bags for the pattern, I used Kokka canvas and Art Gallery Fabrics quilt cottons as my lining and bias tape for View A.  For View B, I used faux leather from BigZ Fabrics.  I like the thickness of this for bag making with pliability and it’s the same product I used for the Megan Bucket Bag.  The interior lining for View B is from Teresa Chan and I’m a big fan of her designs. Be on the lookout for many future projects with her fabrics 😉
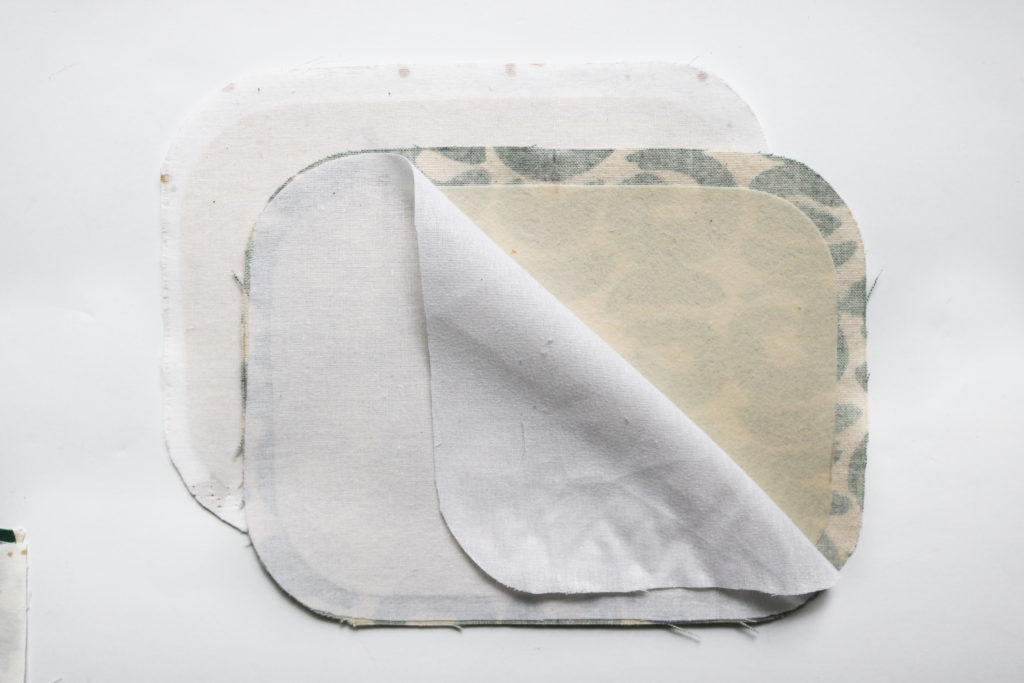
I feel a little behind on the times, but I finally got the chance to try out some interfacing I bought from a little while ago*.  Let me tell you, this stuff is A-MAZING.  I used Vilene Decovil light (which is similar to Pellon Decovil.)  Let me tell you, the quality and adhesion is really nice.  I’m definitely a fan from the jump-off and have already ordered more!  But if you can only get material from the big box stores, Pellon products are fine but they won’t have as much structure and strong fusing as these other interfacings.  I say all of this, but it’s all to your own preference.   Always make sure to test other interfacing mixes with fabric swatches to see what you like before cutting.

*You know I always love to share where I source products, but it has recently come to light (11/2021) that this interfacing business has some polarizing views which I do not support in any way.  I have deleted mention of them from this post.

Hardware
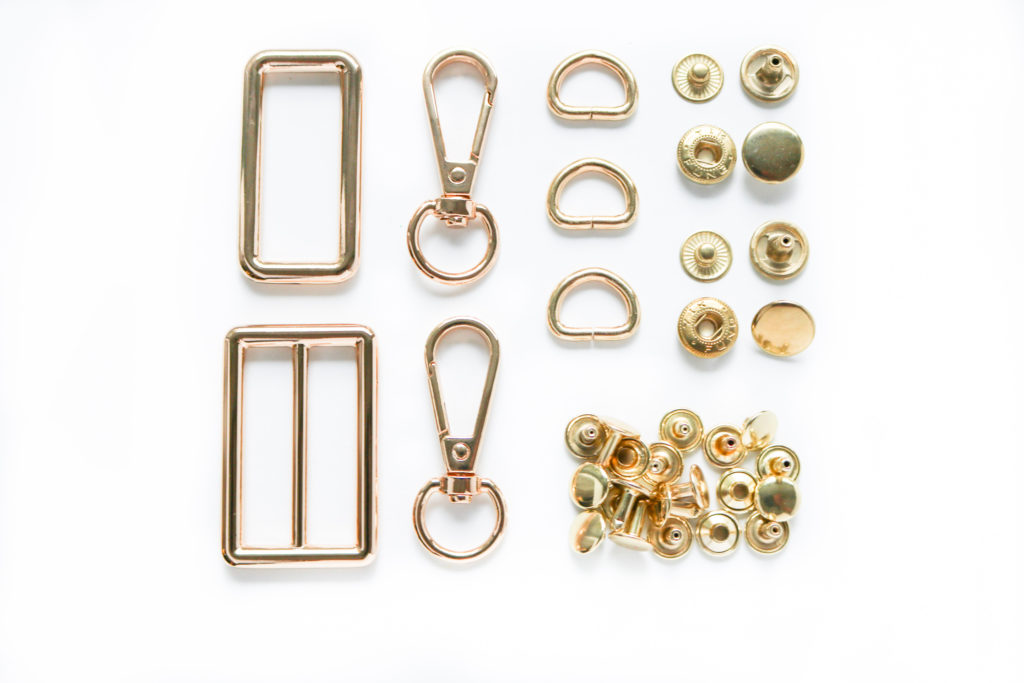
Requirements:

  • (2) 1/2” Swivel Clasp
  • (3) 1/2” D-Rings
  • (1) 1 1/2” Slider
  • (1) 1 1/2” Rectangle Ring
  • (10) Sets of Rivets (8 mm post length) + Setting Tools
  • (2) Sets of 12.5 mm Snaps + Setting Tools

The pattern requires the following hardware listed above.  You can grab full kits in my shop here.

If you need help setting rivets, check out my video here.

If you need help setting the snaps, you can head over here.
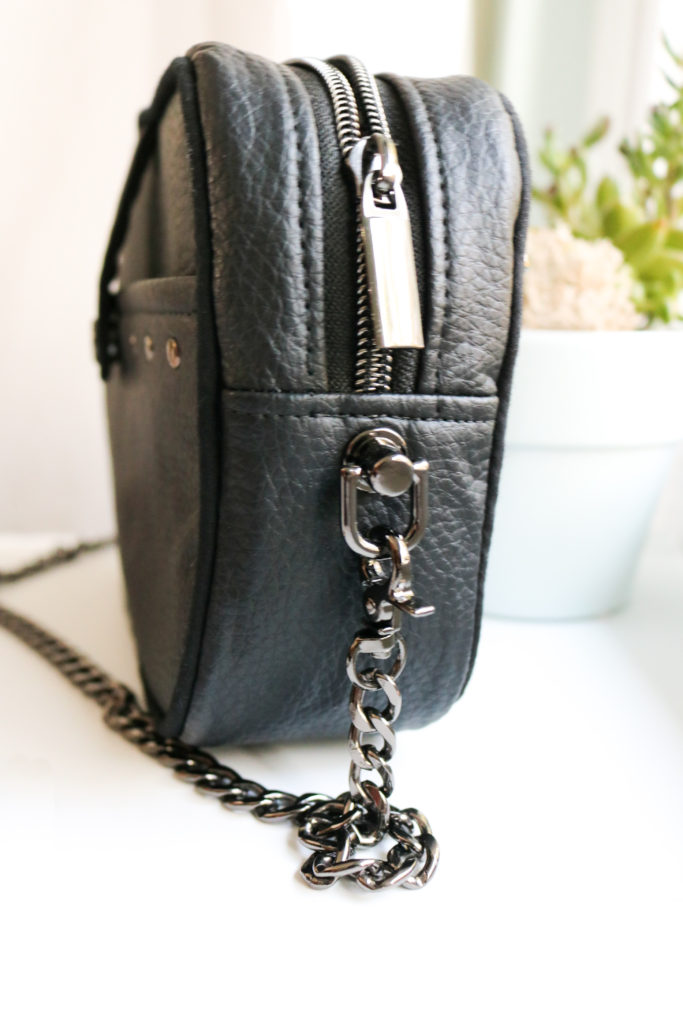
View A with strap connectors

As a BONUS add-on to my Christine hardware kits, I’m also offering these incredible screw-in strap connectors.  I found them when I was ordering hardware for myself and thought they would be a great thing to introduce to you!  A video to install will follow, but essentially you completely finish the bag minus the (2) D-ring tabs at the zipper.  Once you turn out the bag, you punch holes right below the side gusset stitching and screw on these connectors, adding a little glue to the bolt.  That’s it!  This is a great way to have a professional looking bag.
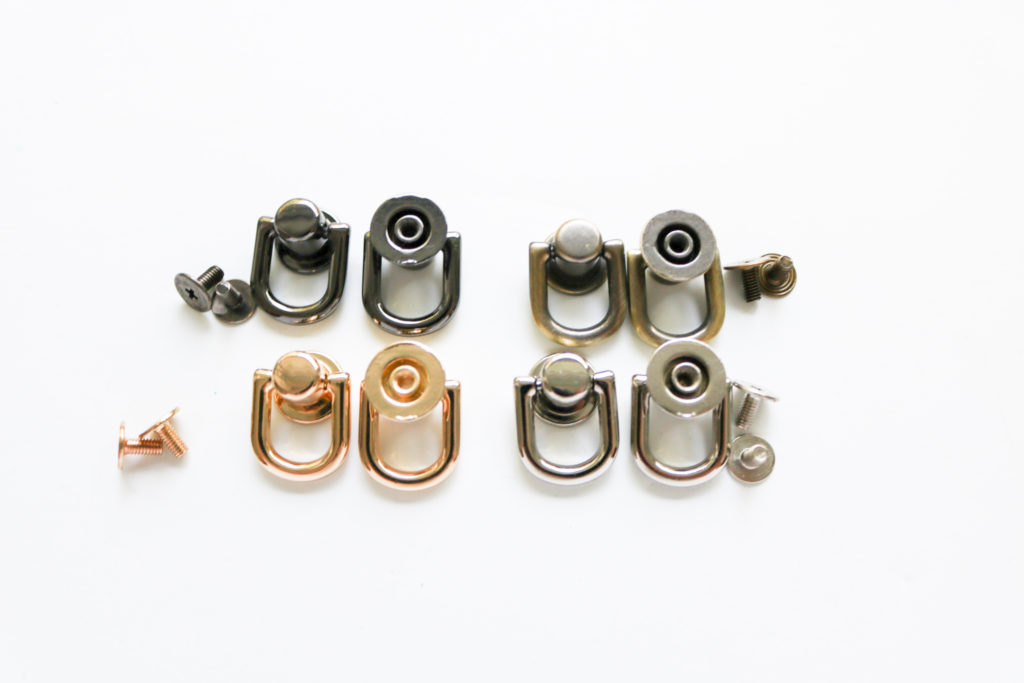
Notions
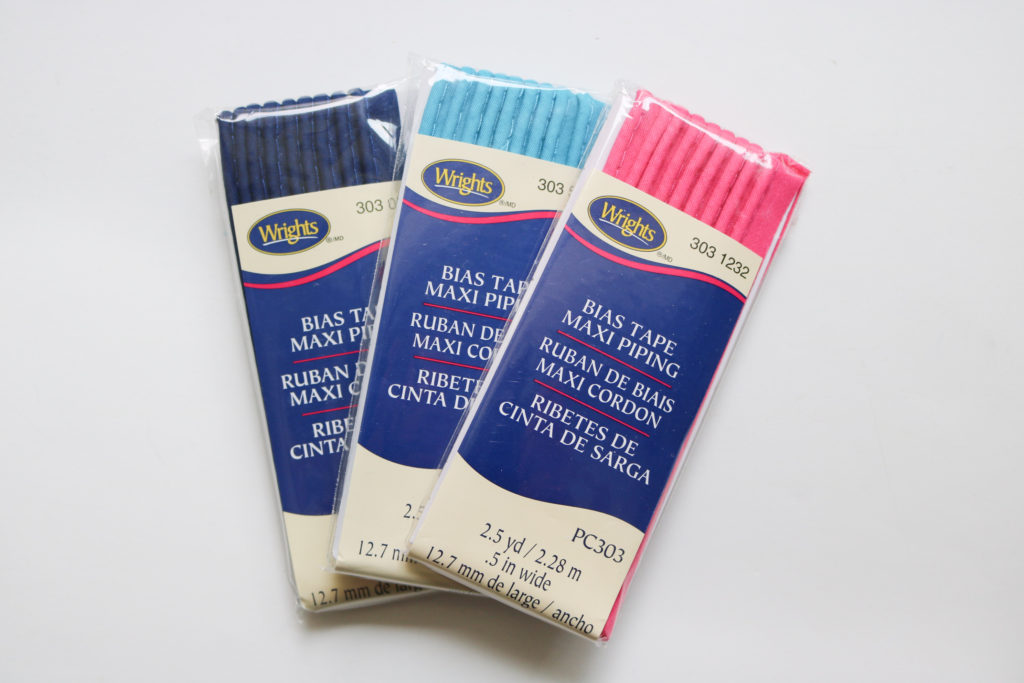
View A uses piping which I think really finishes a bag nicely and instantly takes a bag up a level.  Although it take a little more time and patience to sew it in, it’s worth the effort, especially if you can just purchase it.  These ready-made packs are great from your big box stores or from my favorite place for notions, Wawak.
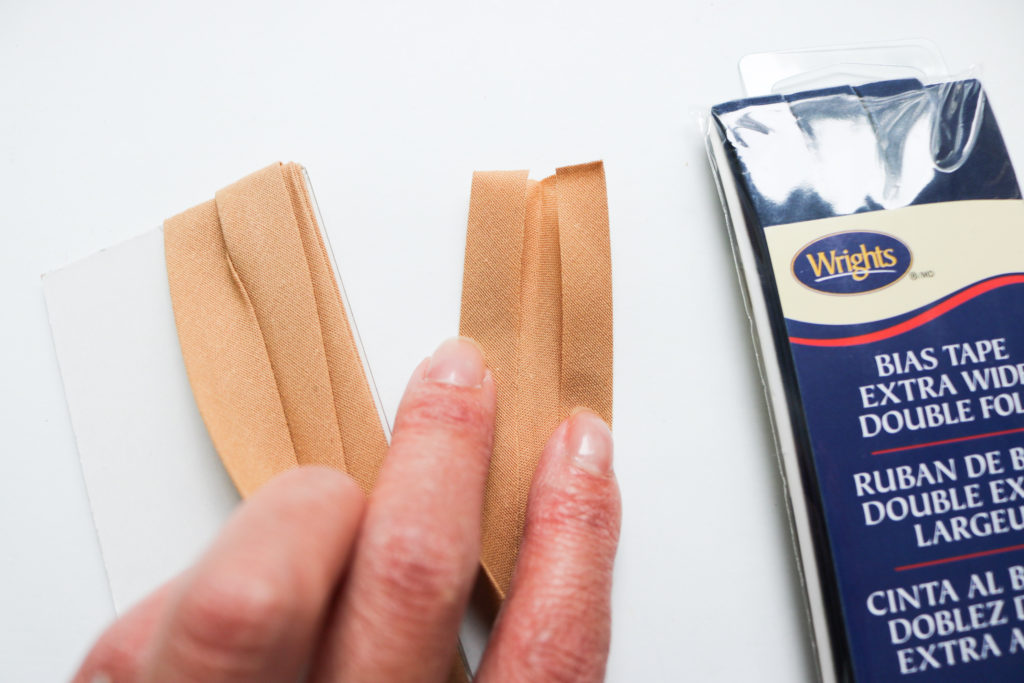
With the Christine, the lining is finished with bias binding which is a first for my bag patterns.  I went through several construction techniques and this is the best way IMO for this type of bag.  With the piping, you want to sew each side separately to feel where you are sewing.  A drop-in lining is possible (I tried it!) but it’s very difficult given how small the bag opening is.  I want you to have a good experience making this bag and I’ll save you the pain!  While sewing the binding takes longer, it is the easier method overall.  The pattern calls for 3/8″ bias tape and you definitely need to use this size because anything bigger will obstruct your zipper opening.  However, you can still purchase the ready-made 1/2″ double-fold packages seen above.  The beauty of this manufacturer is that not all parts of the folds are 1/2″,  so you can open up the tape and re-press so the long sides meet at the center crease.  This will give you 3/8″ double-fold bias tape!

Zippers
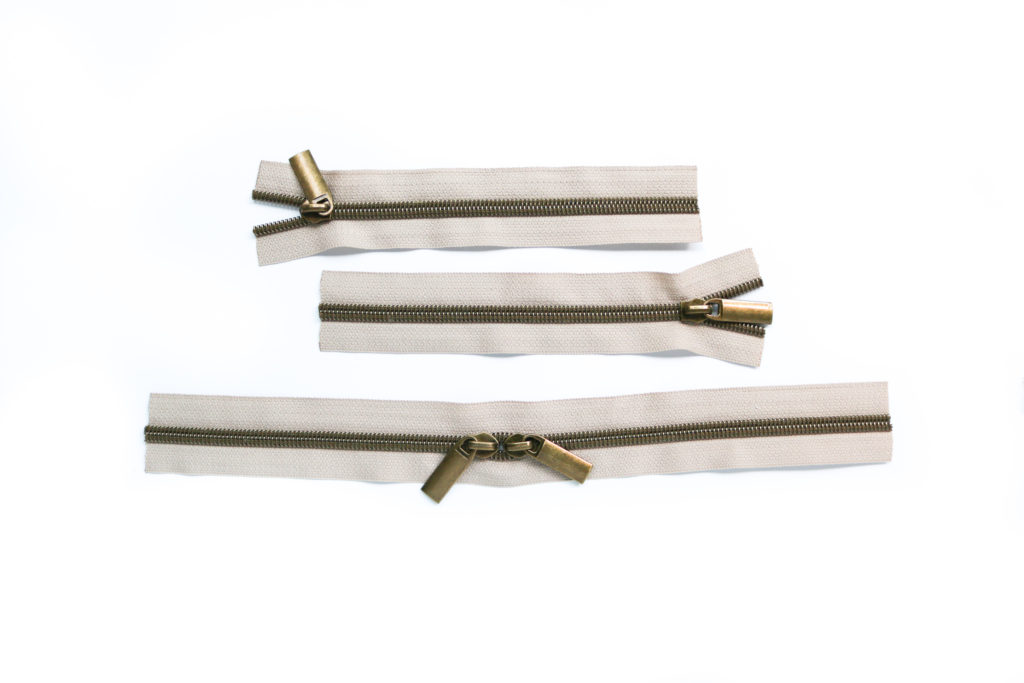
I am a HUGE fan of metal-look nylon zippers.  They have the high-end look fo metal teeth, but have all the ease of nylon –which means you can easily cut and sew right over the teeth!   My Handmade Space is one of my favorite spots for zipper kits and Wawak just started carrying them as well, but not with as many color and zipper pull options.
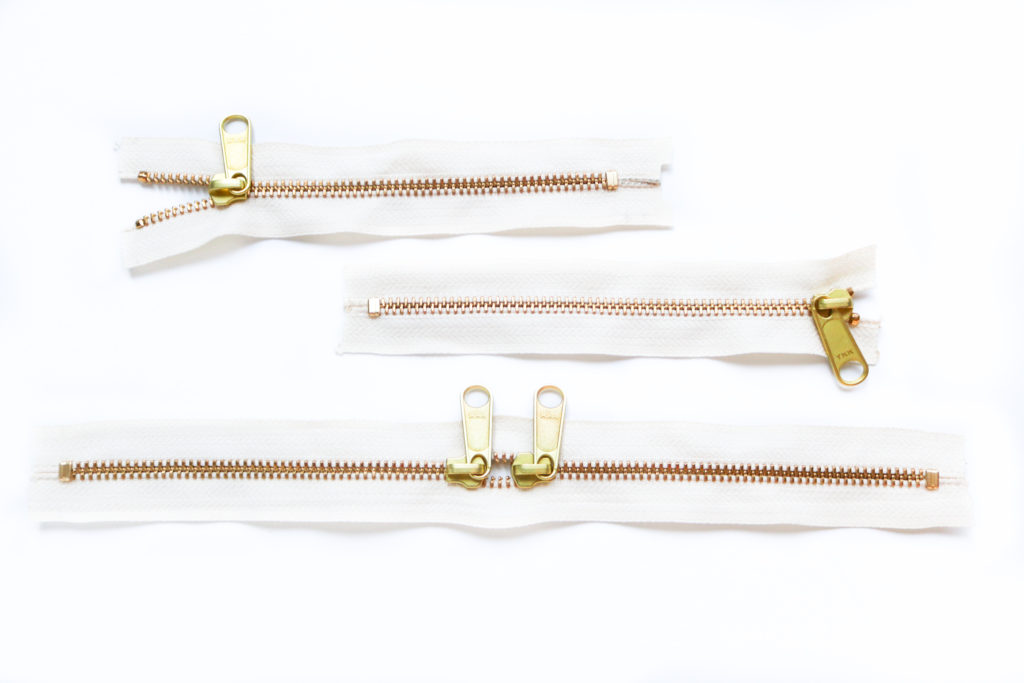
But the only finish I don’t like in nylon is brass.  (For some reason, it’s just way too bright yellow for me.)  I always go back to metal and like these long pull zipper from Wawak.  To make the double pull zipper,  you do need to buy a coverall zipper (that zips in both directions) and I replaced the pulls to match.
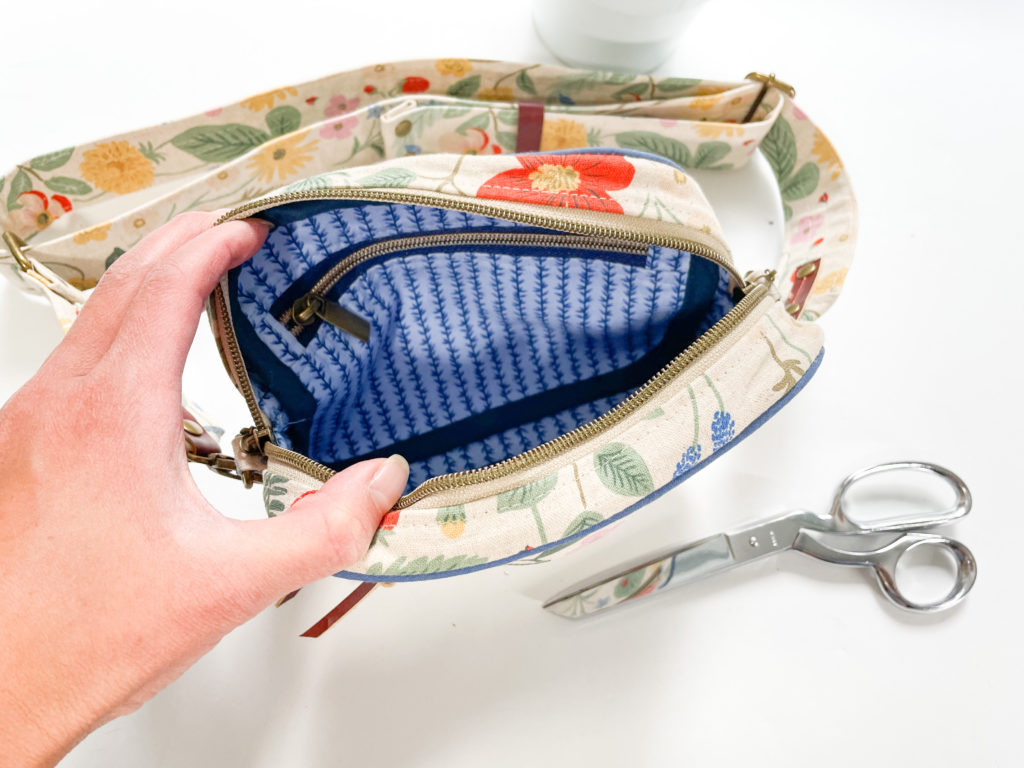
I hope you enjoy making and wearing the Christine Sling as much as I had designing it!  Please tag me on Instagram with your makes and post with #ChristineSling so we can enjoy all of these bags!


Happy Sewing!

Cristy
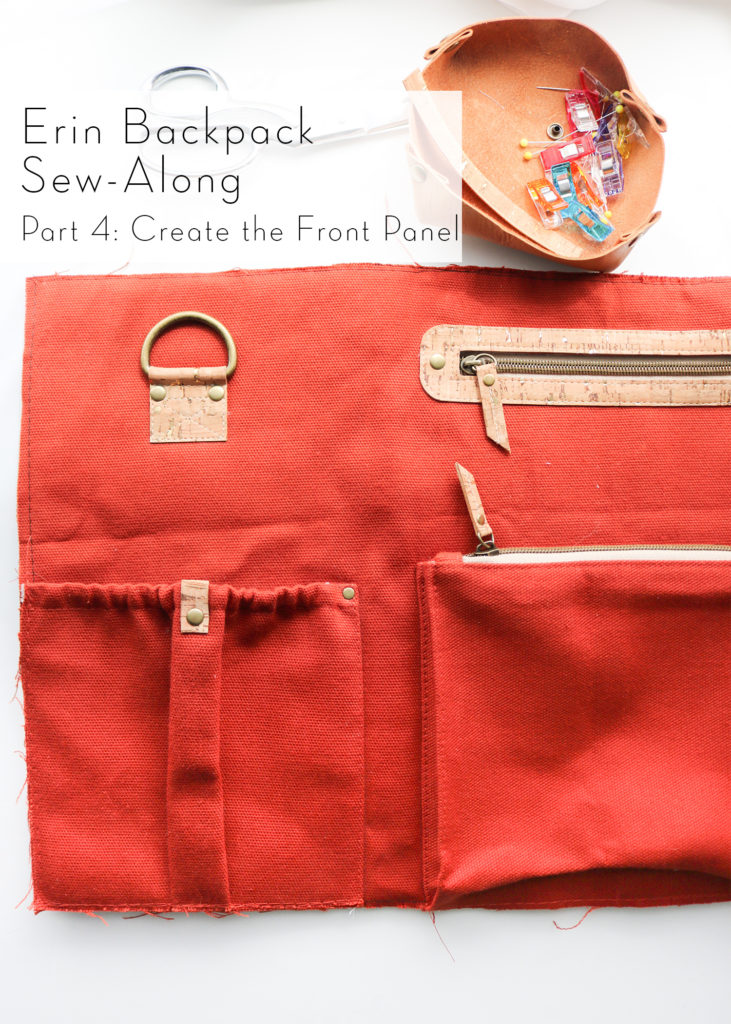
Erin Backpack Sew Along || Part 4: Create the Front Panel

Welcome Back to the Erin Backpack Sew Along!  We are now on Part 4: Create the Front Panel.  If you missed any of the prior blog posts, you can find them below:


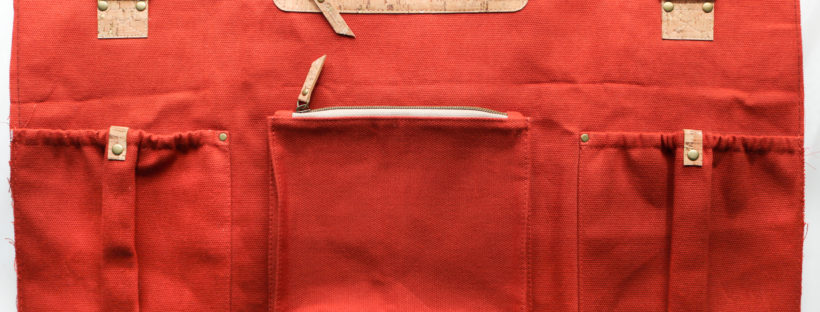
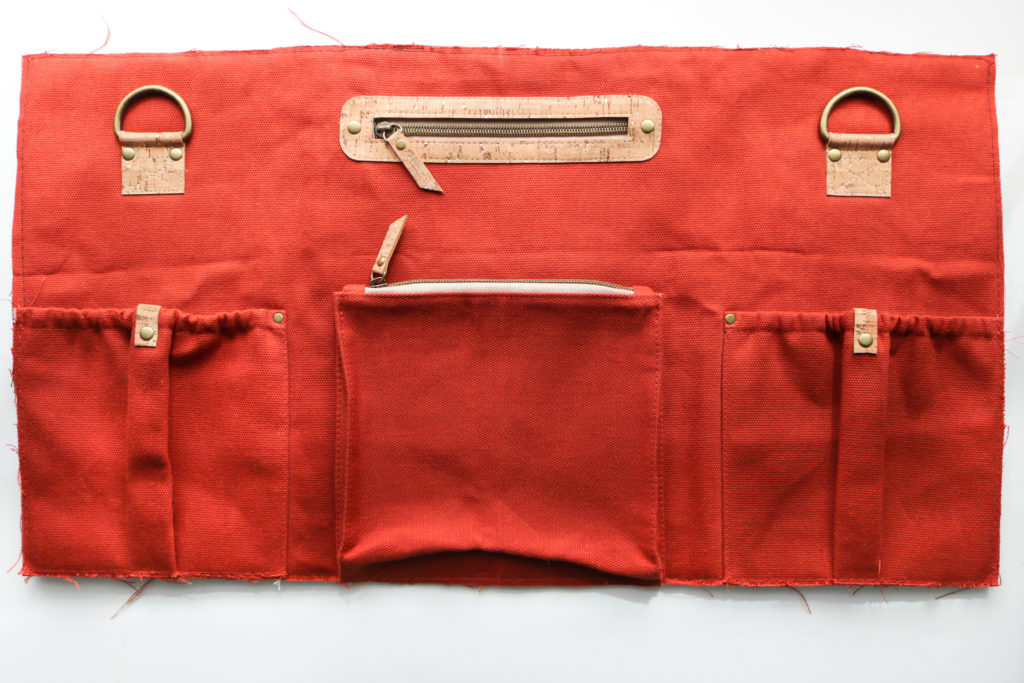
With this part,  we are tackling the entire Front Panel with four different pockets. It seems overwhelming, but I’ve broken down all the pockets into 4 different short videos so you can work at your own pace.


WELT Zipper POCKET

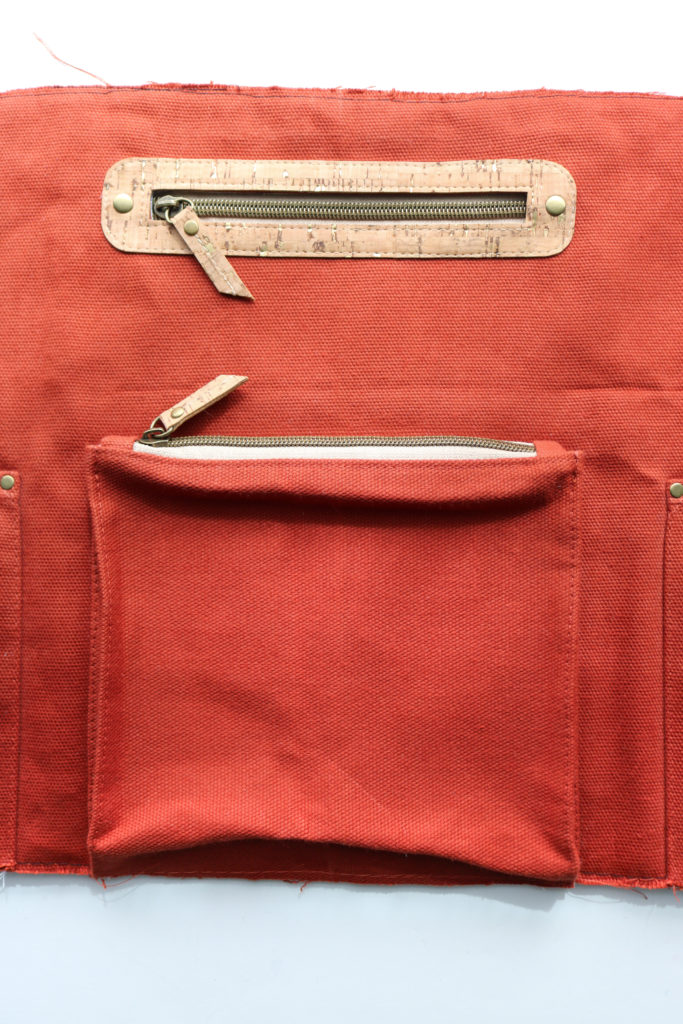
At this point, the Front Panel is the only pattern piece left that hasn’t been basted to foam. This is added later because creating the Front Welt Pocket through foam would produce so much bulk and be very difficult to work with.  I love all of you too much to put you through the extra wrestling and time spent trimming back foam! Ha!

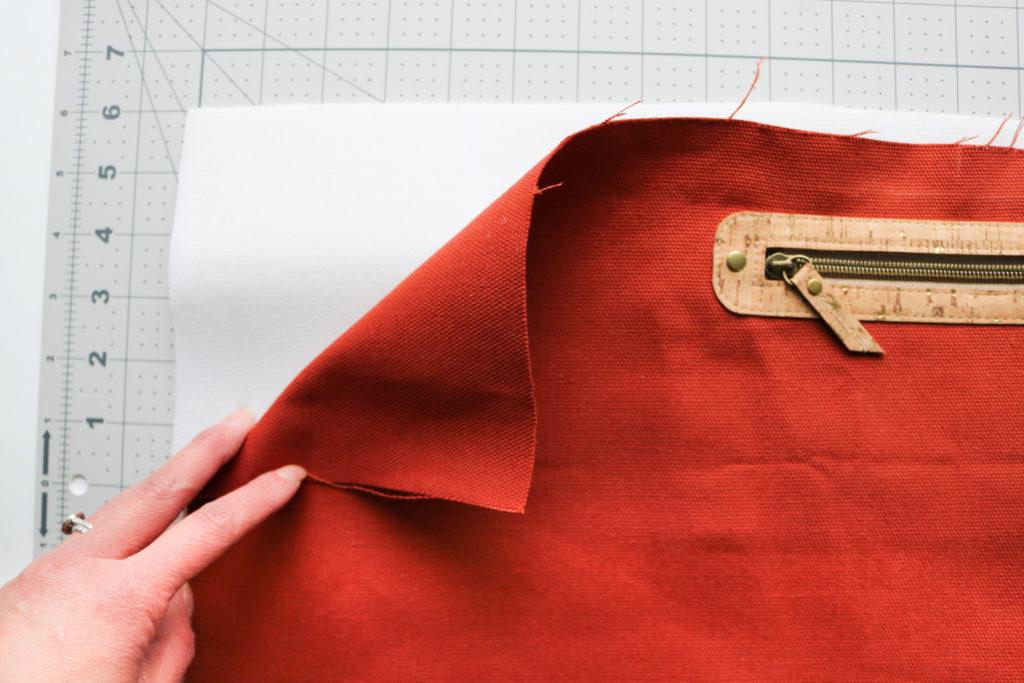
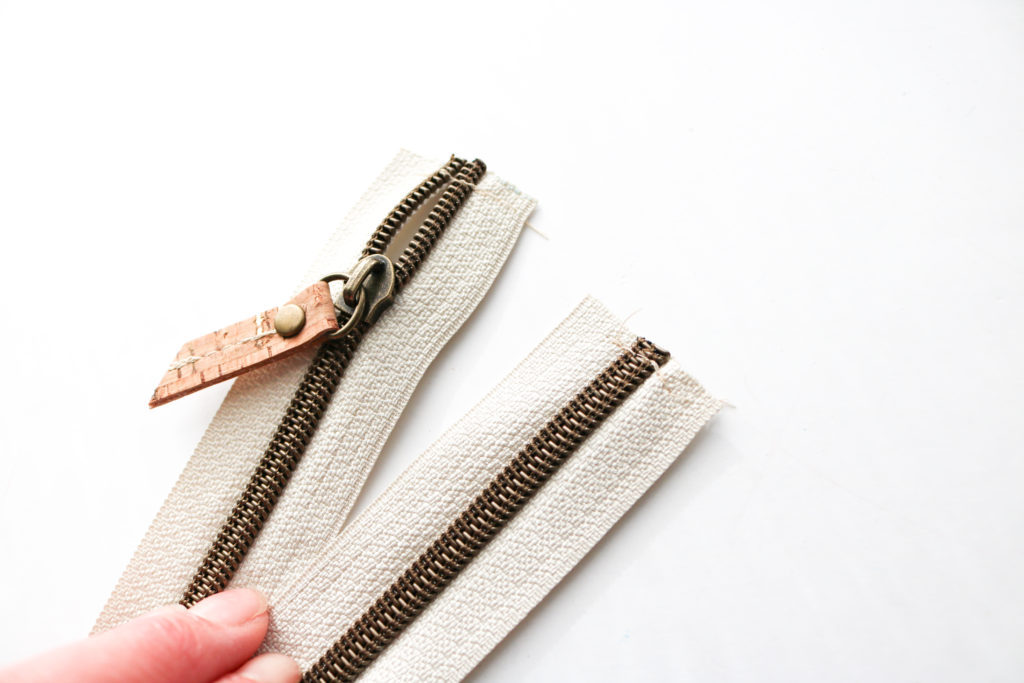
I know you will ask me about the zipper pulls used on my bag 😉 These zippers are from MyHandmadeSpace and yes, I made the tabs myself!  They are approximately 3/8″ x 4″ folded in half and secured with a seam straight up the center.  I added a rivet to balance out the look with the rest of my bag.  These are SUCH a great option to really personalize your bag.  I’m so glad I bought them as a stash option!

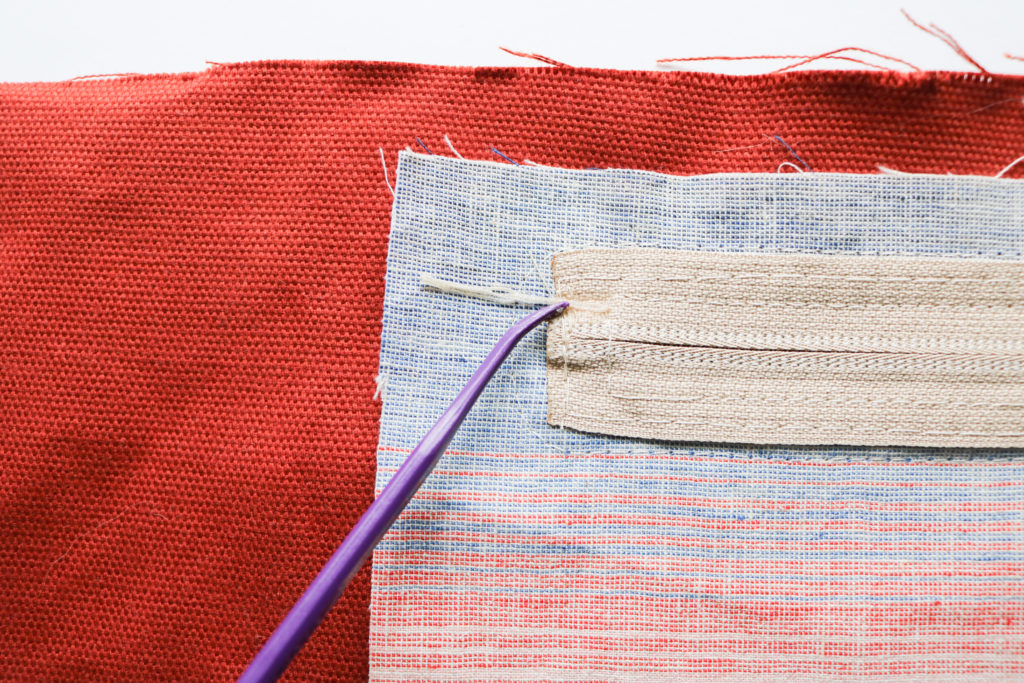
Now let’s get to work.  Click into the video about to watch how the Welt Zipper Pocket is created.  Please note the following from the video:

  • I am using “Craft” Tape as an alternative to Wonder Tape. This is only 1/8″ wide, but is permanent.  With the coating on the canvas, I wanted to use a tape that was a little stronger than Wonder Tape. So, to avoid human error, I like to add this directly to the zipper tape first, and not to the lining.
  • While adding on the Zipper Plate, I used glue instead of Wonder Tape.  Again, I was looking for something stronger I could sew through and unfortunately, Craft Tape cannot be sewn through. (Your needle would gum up.)
  • I’m adding the rivets earlier than the instructions.  I don’t know why….but I started going by memory without checking instructions and went out of order. (This is what I get for not checking!) There is not a huge difference if you add them before closing the pocket lining or waiting until after the foam is basted on.  Per the instruction, my intent to add them post foam, was to have extra anchor points against the foam to keep it from separating with the Front Panel.  But there are many other points anchoring the foam to the main fabric with the rest of the pockets and Front Strap Tabs.

TIP: When I sew through an accent fabric and want to minimize punctures, I like to pull the threads through for a clean continuous line of stitches.  However, from the back, I don’t want the threads just hanging inside.  So, I knot the threads and use a light dab of glue to seal them against the fabric.  I like to leave the tails long so that they will be sewn into the pocket later on.


SIDE ELASTIC POCKETS

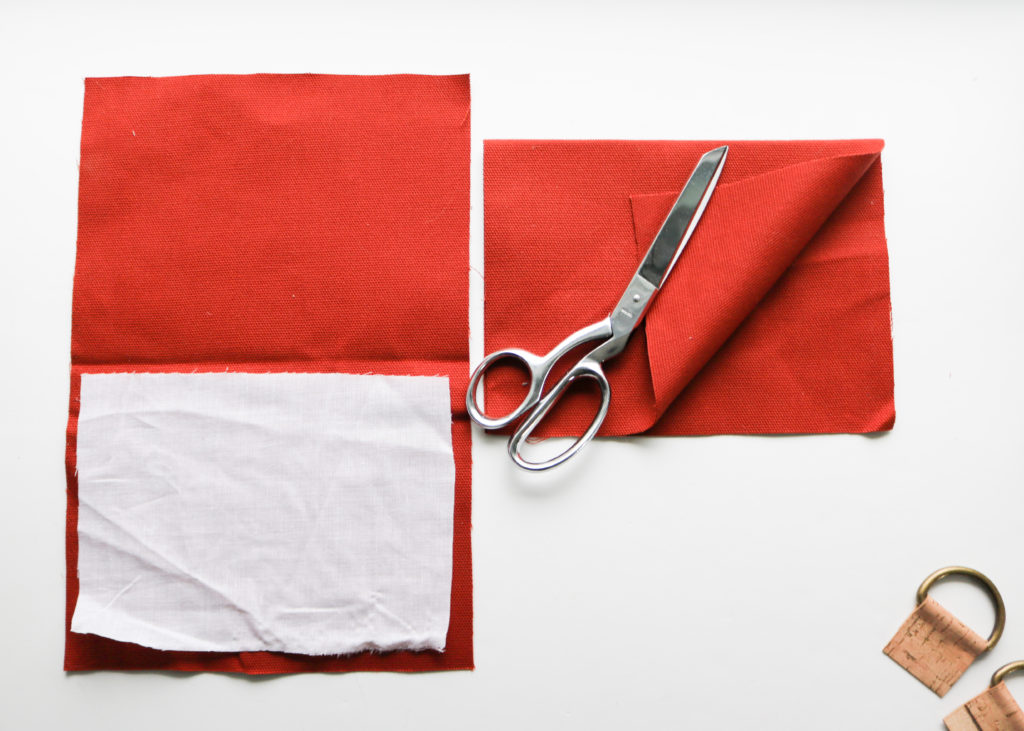
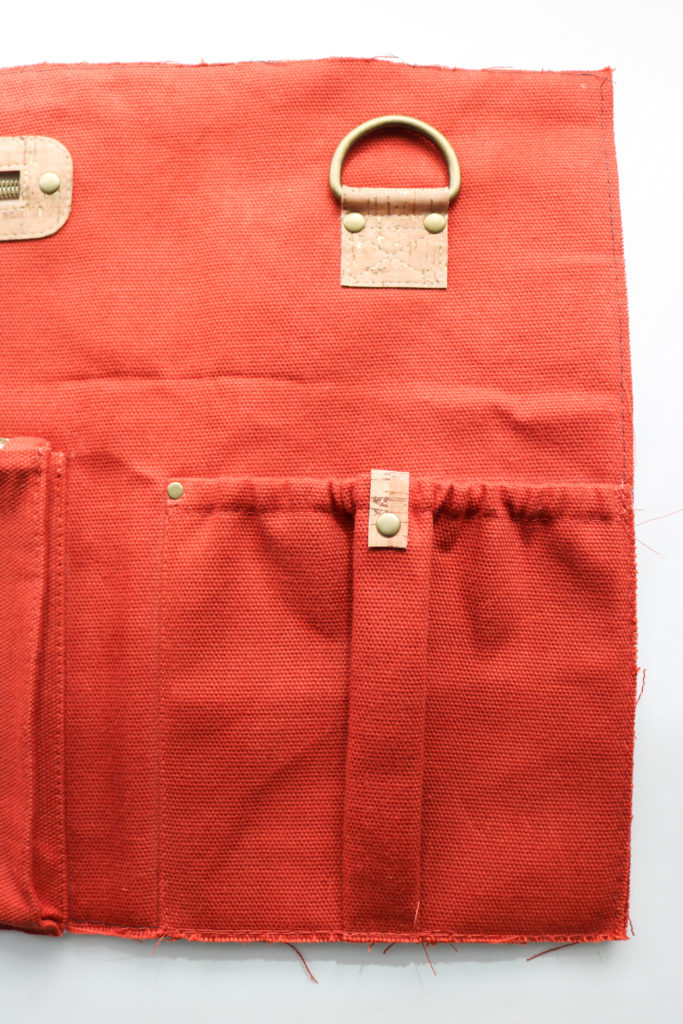
With untreated fabric, interfacing would’ve been fused to the part of the Elastic Side Pocket facing the bag, as seen above on the left.  But, since I’m using a heavy treated fabric, I cannot add heat and fuse to it.  So you will see there is no interfacing to indicate the wrong side of the fabric in the video below.

Click the video to watch how to make and attach the Elastic Side Pockets.  Please note the following:

  • For extra durability, I demonstrate how to sew the pocket with an extra triangle at the top of the seam. This helps reinforce that area since it will be pulled on heavily.
  • The size of the rivet used in the triangle has a 6mm cap and is not included in my hardware kit. I thought I would just make it a little different as to not compete with the added embellishment.  This is the same size I use on the zipper pulls as well
  • As an option, you can add in accent fabric with rivets as extra way to highlight pockets. It was an afterthought when making my waxed canvas sample seen here, but I wanted to show you the steps just in case you wanted to add them as well!


POP-OUT POCKET

If I am in a clothing store, I will always take a look at it’s bag section.  I like to see what’s popular and if there are any outstanding features.  Well, I saw a 3-D pocket similar to this one that I was determined to figure out on my own because I thought it was a unique way to create one.  With a home machine, my design had to be changed, but the essence is there.   Now, I get to share with all of you how figured out this pocket construction for my bag-makers!

Please click into the video above to view and note the following:

  • When finishing the edge of the Zipper (that’s sewn directly to the Front Panel,) can just zig-zag along the zipper tabs.  But since I primarily work on a straight stitch machine, it would require me to set up a machine.  With the content being so heavy this week, I went with the serger that sits right next to my regular machine.
  • When attaching the Zipper to the Front Panel, I switched feet on the second seam to get a little  closer to the teeth and clear the overlock stitching
  • During the filming, I lost a few segments when attaching the sides down to the Front Panel.  I had to re-film those parts, but the Front Panel was already completed. So you will see that there are no hanging bits of fabric as part if the instructions.  You might  even see some of the Front Strap Tabs.


FRONT STRAP TABS

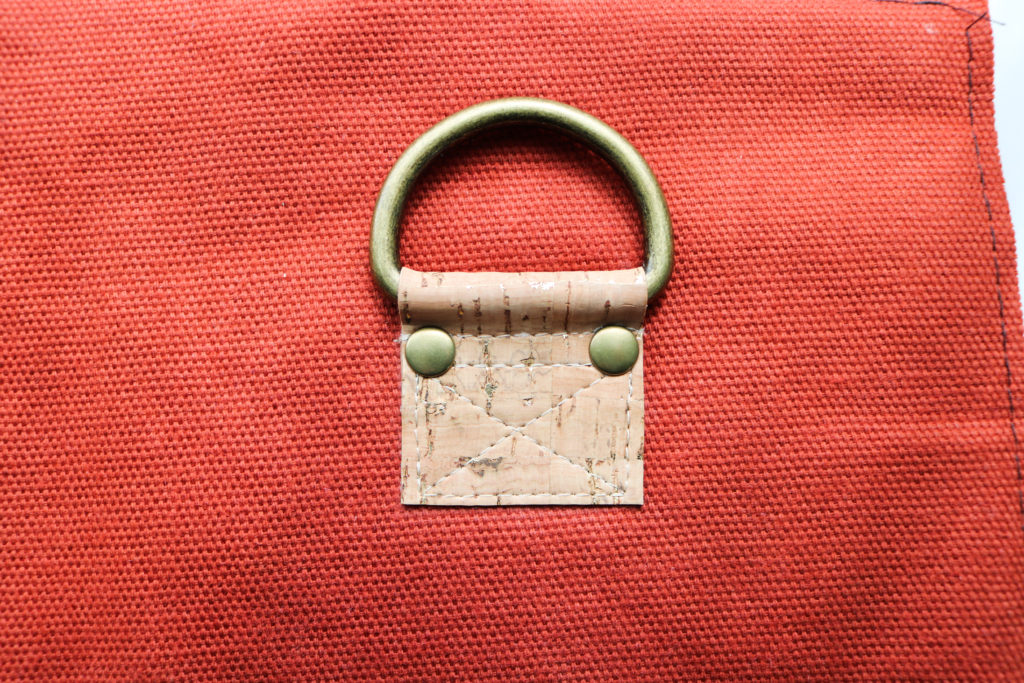
These Front Strap Tabs are for the cross-body and shoulder carrying options.  So all the weight of the bag will be on these spots.  That is why there is so much reinforcement stitching, as well as the added rivets.  You don’t want these ripping out later, so take your time on every stitch!

Click into the video above to watch hoe to attach the Front Strap Tabs and note the following:

  • I work with both my Teflon and Zipper Feet.  I don’t call out the changes, but you can see them in the video
  • For a clean finish, I always like to leave long thread tails and pull them to the back.  With several knots and a dab of glue, those seams will hold just as well as several back-stitches.

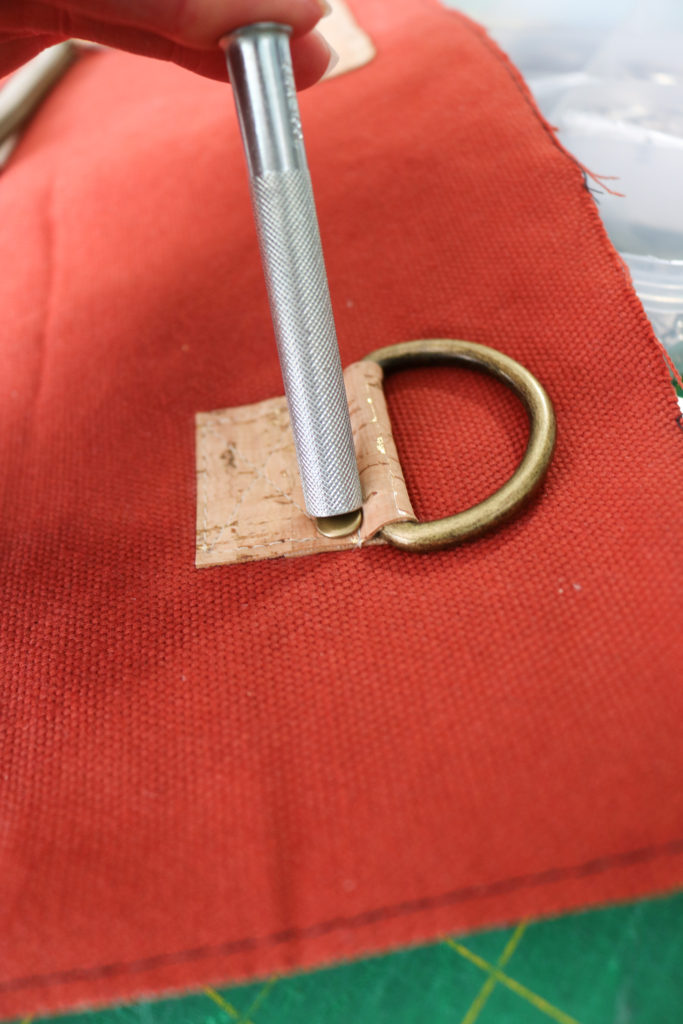
Although a hardware press is a great tool, this is one case when a manual setting tool is better than a press.  The dies require at least an 1/8″ clearance around the rivet caps whereas you hardly need any clearance with the tool seen above.  There are some projects where there isn’t enough throat space with a press to install as well.  So don’t ever get rid of those setting tools!

CONGRATULATIONS on finishing this Part 4 beast!  You are more than half-way done now and doing great!  Check back next week for Part 5: Making the Lining.


Happy Sewing!

Cristy


Please note, this post contains affiliate links.  Please refer to my Disclosures for additional information.