Mountain View Quilt

If you are the lucky holder of a 2017 Quilter’s Planner, you might know this is my block week with  “Mountain View.”   If you happened to miss out on the planner, you can still find the instructions to my block here to make your very own Mountain View Quilt and read about the block inspiration.

The Quilter’s planner really helped me organize all my plans with the Project Planner sections.  It’s nice to have a written outline instead of trying to cram everything in my head!  Space is limited there nowadays 🙂

I was lucky to play with some Art Gallery Smooth Denim when it was first released and thought it was perfect for my quilt.  I used the lightweight denim along with some other great assorted Art Gallery prints in peach and pink.


As a lap quilt, the secondary design really comes through and you can see how the profile view (of the single block) becomes an aerial view of the Mountains.  The light blue denim looks like water running through the range and I love how it turned out.

The backing had to be pieced together and I figured it should have some added interest as well.  The extra panel was improvved using scraps and follows the same geometric angles as the front. It’s a nice pop of color against the main backing print.

Look at that texture!  Quilting was done on my domestic machine using my walking foot and favorite Aurifil 2021.  I followed the shapes of the piecing and added more density in the darker blue denim.  This backing really shows all the lines.


The binding was also scrappy and pieced together.   As always, I machine attach my binding to the front and spend some couch time with my husband which hand-stitching it to the back.  The colors really complement the denim.

Project  Stats:

 Observer Fabric Tour >> Quilted Envelope Clutches

ObserverBlogTour_Title

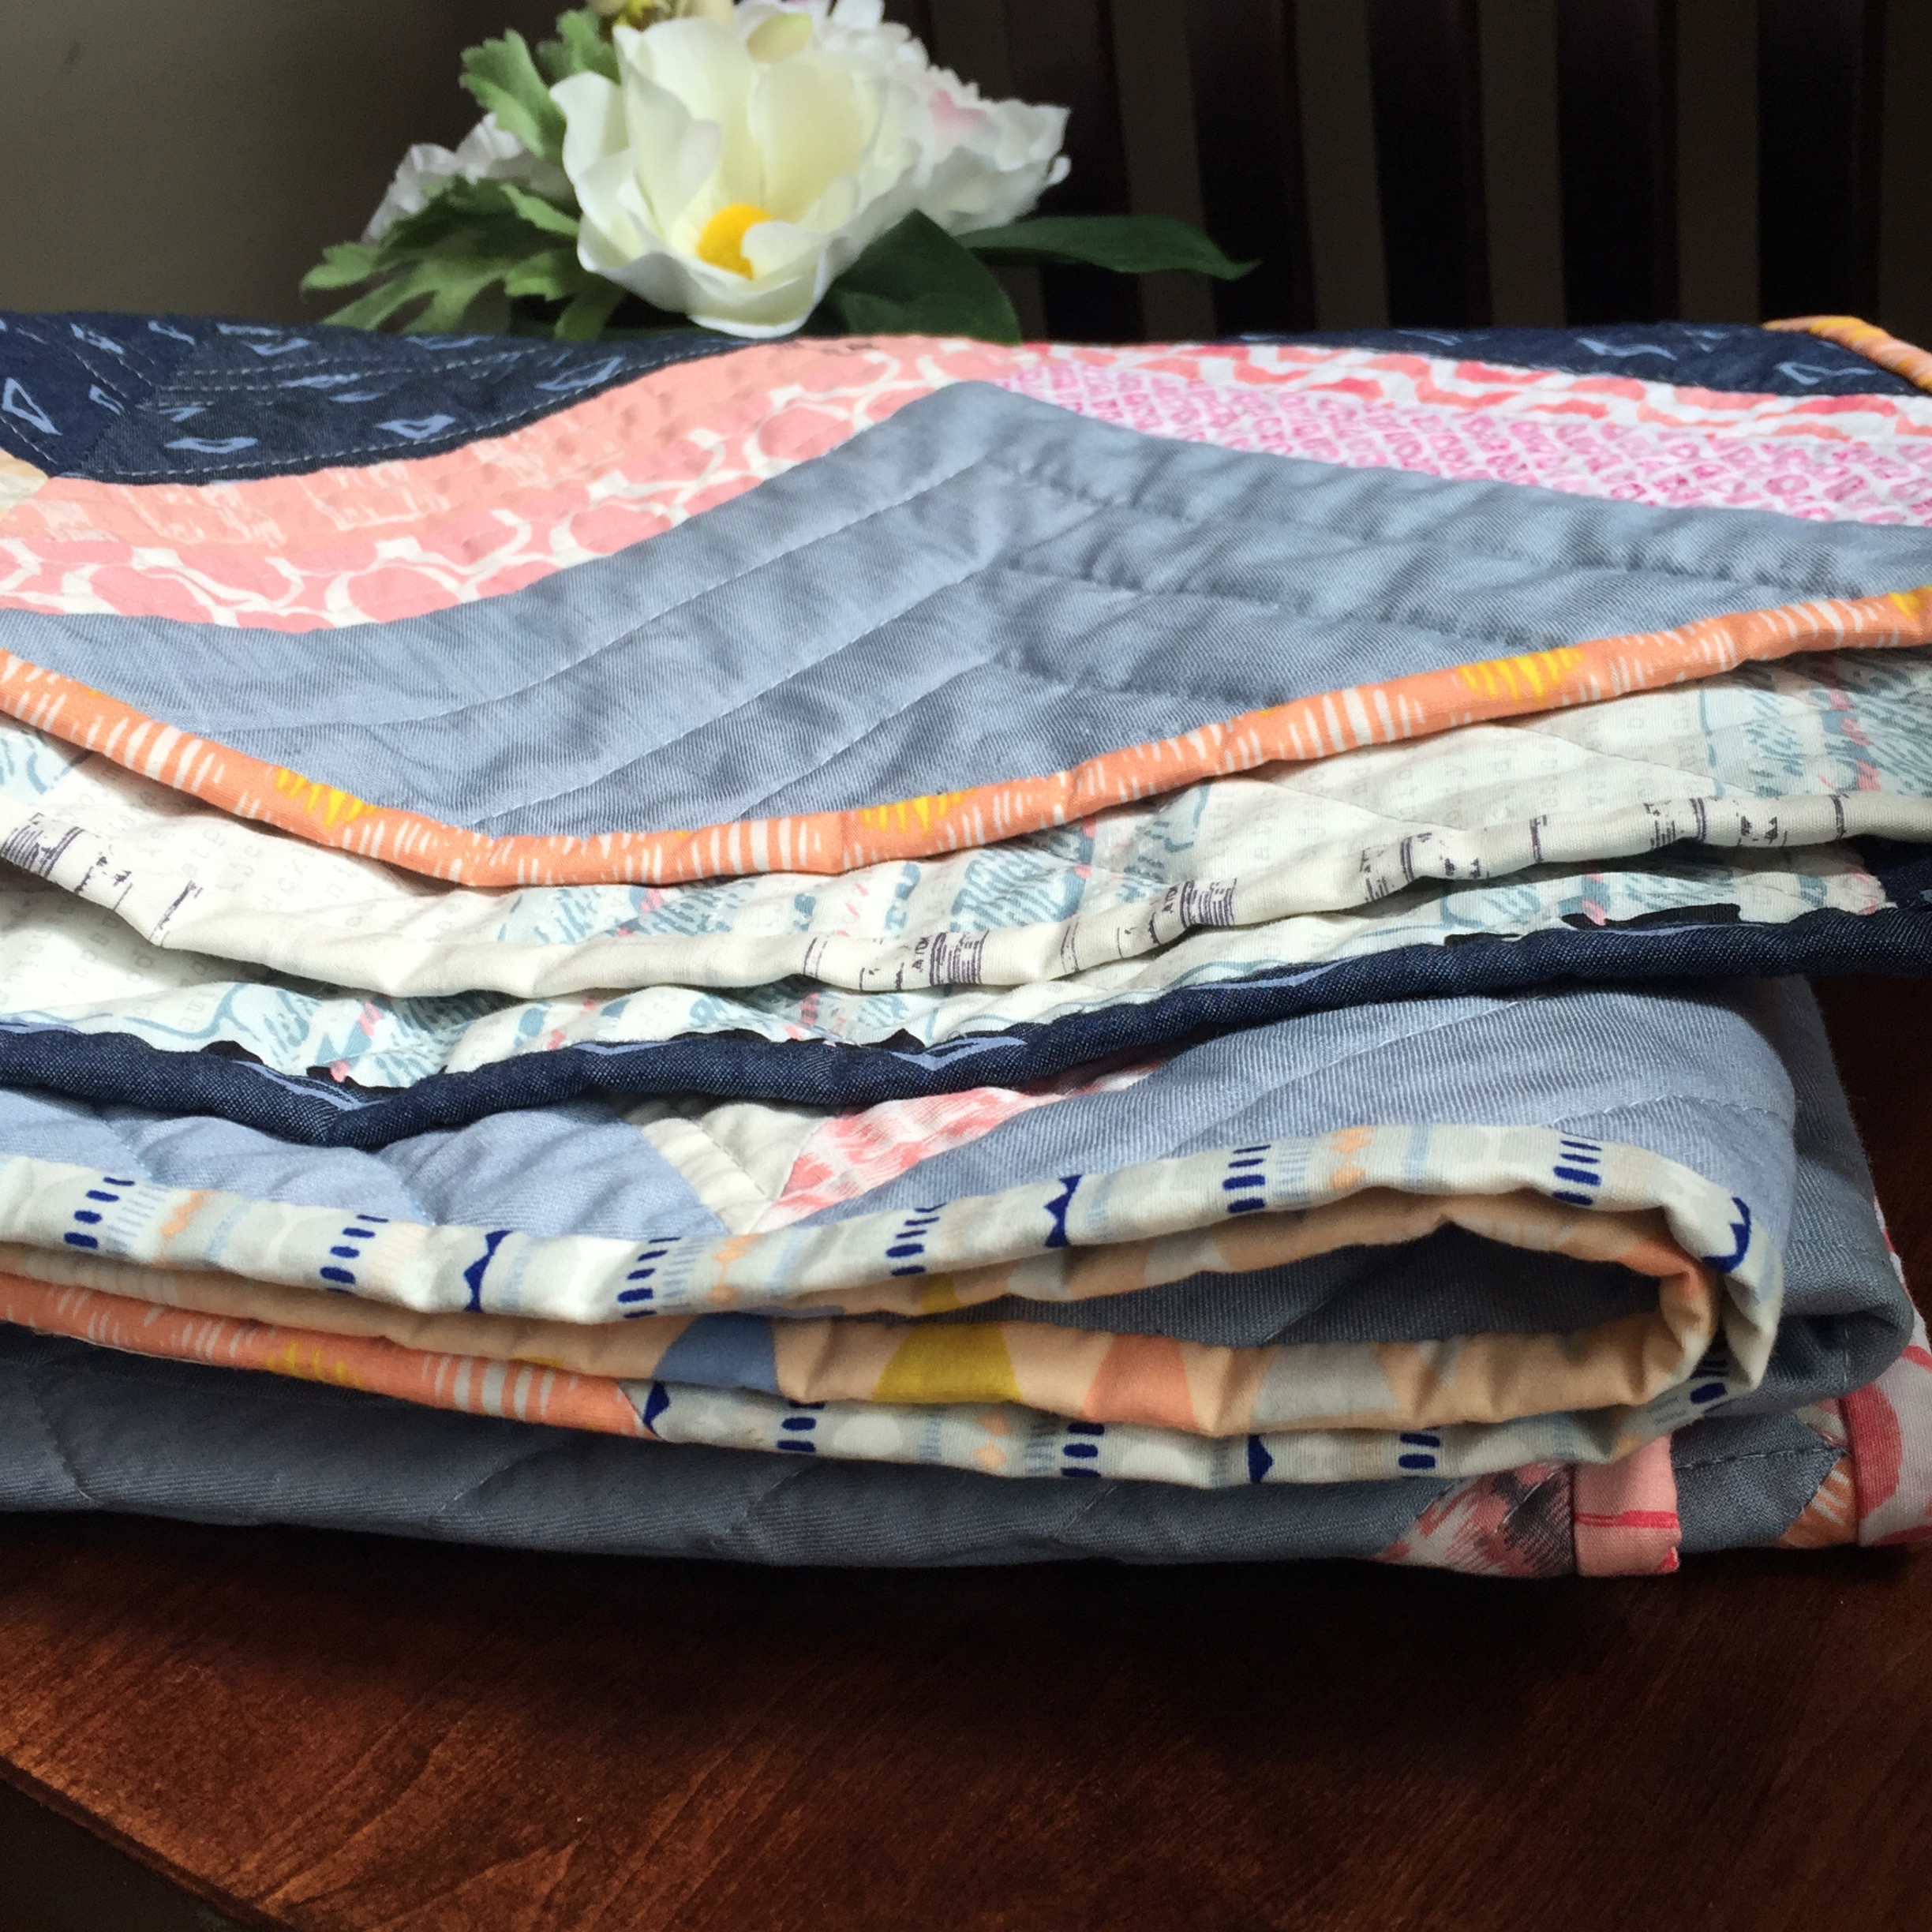
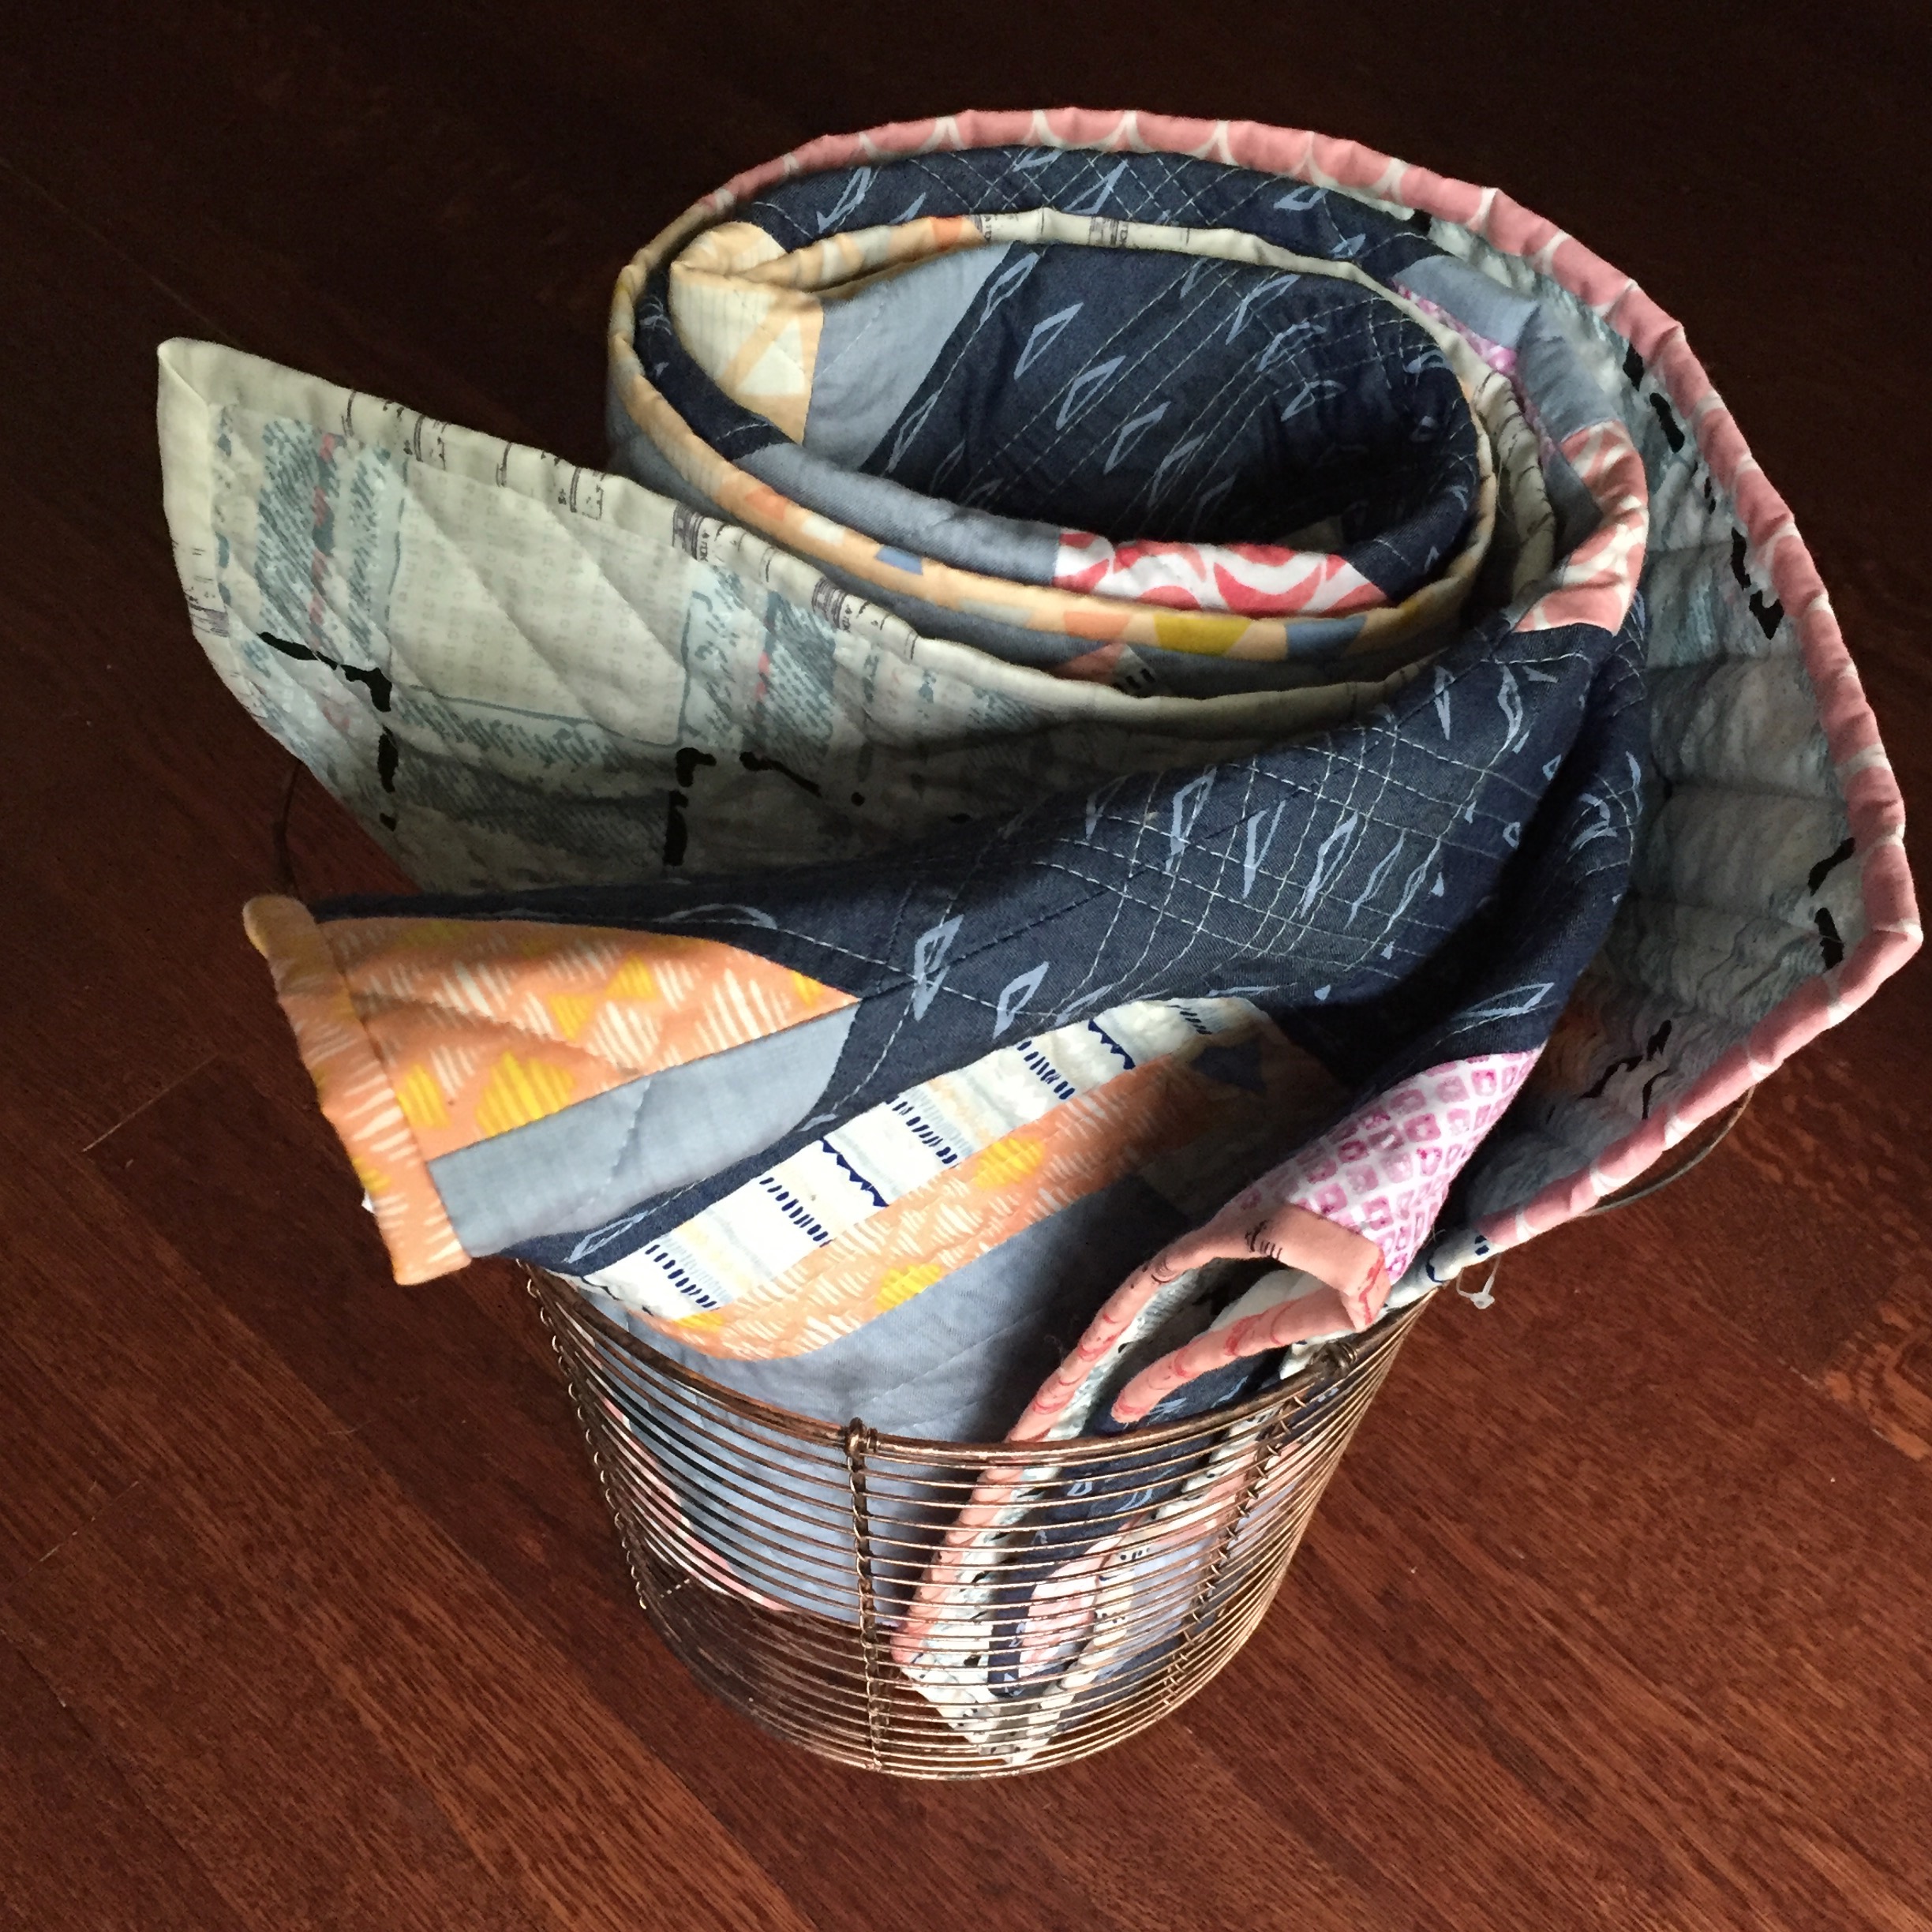
It’s here!  It’s here!  The Observer collection by April Rhodes for Art Gallery Fabrics has finally made it way to shops and I’m so happy to show you my projects on the #OBSERVERfabrictour.  In true fashion, April does not disappoint.  These designs come from her own eyes and what she has seen both physically and mentally.  My favorite print is Aerial View…mainly because it was inspired by Columbus, OH (where we both live) and just shows how little we are in such a big world…

Observer-Fabric-Tour

I was very fortunate to play with the early strike-offs for this line, and you can view my other projects in this previous post.

P1060647

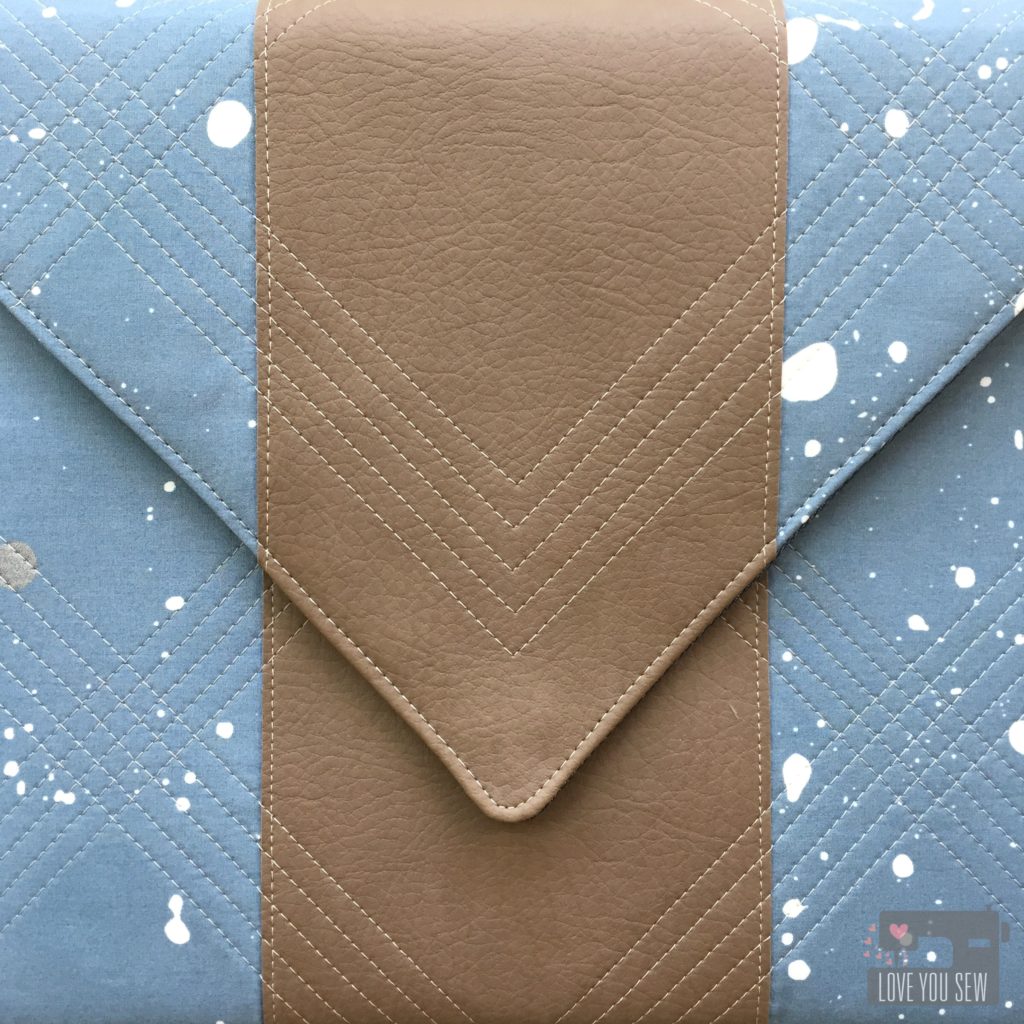
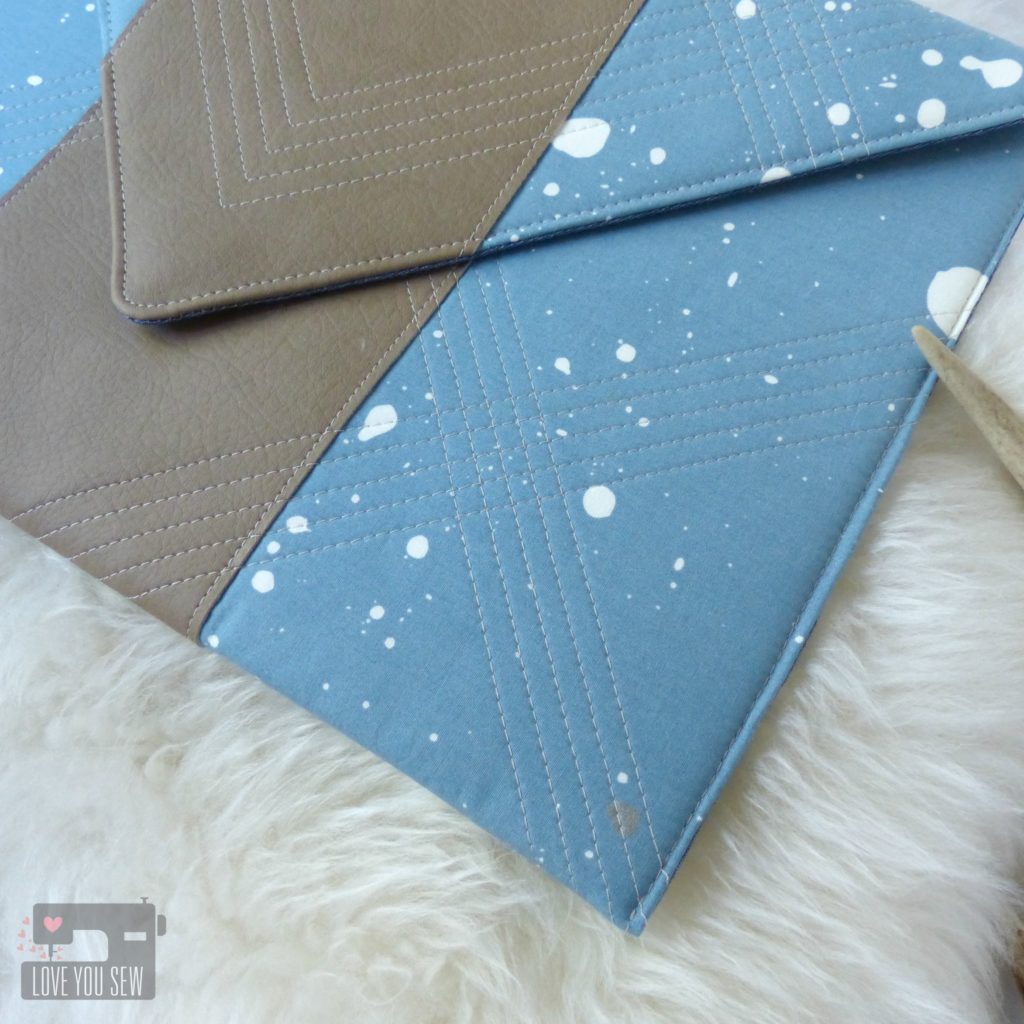
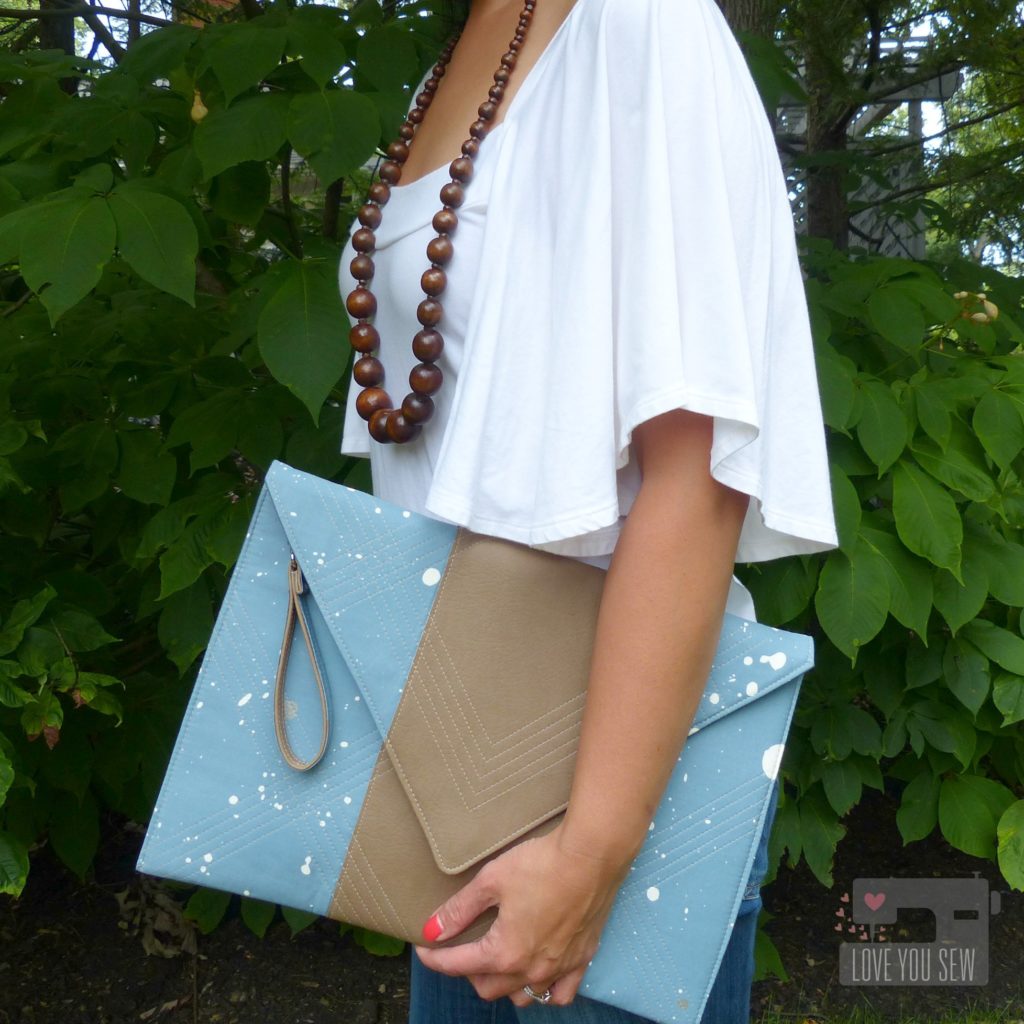
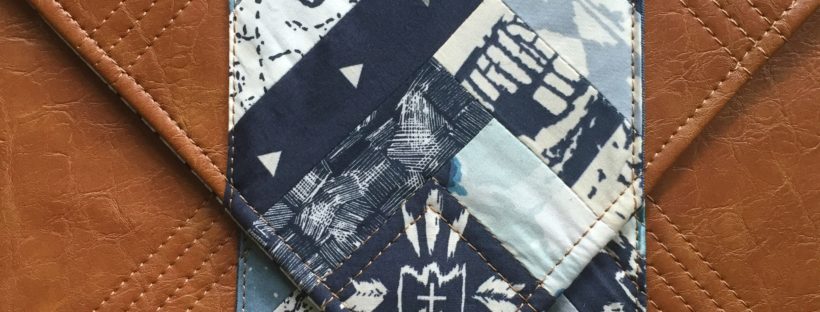
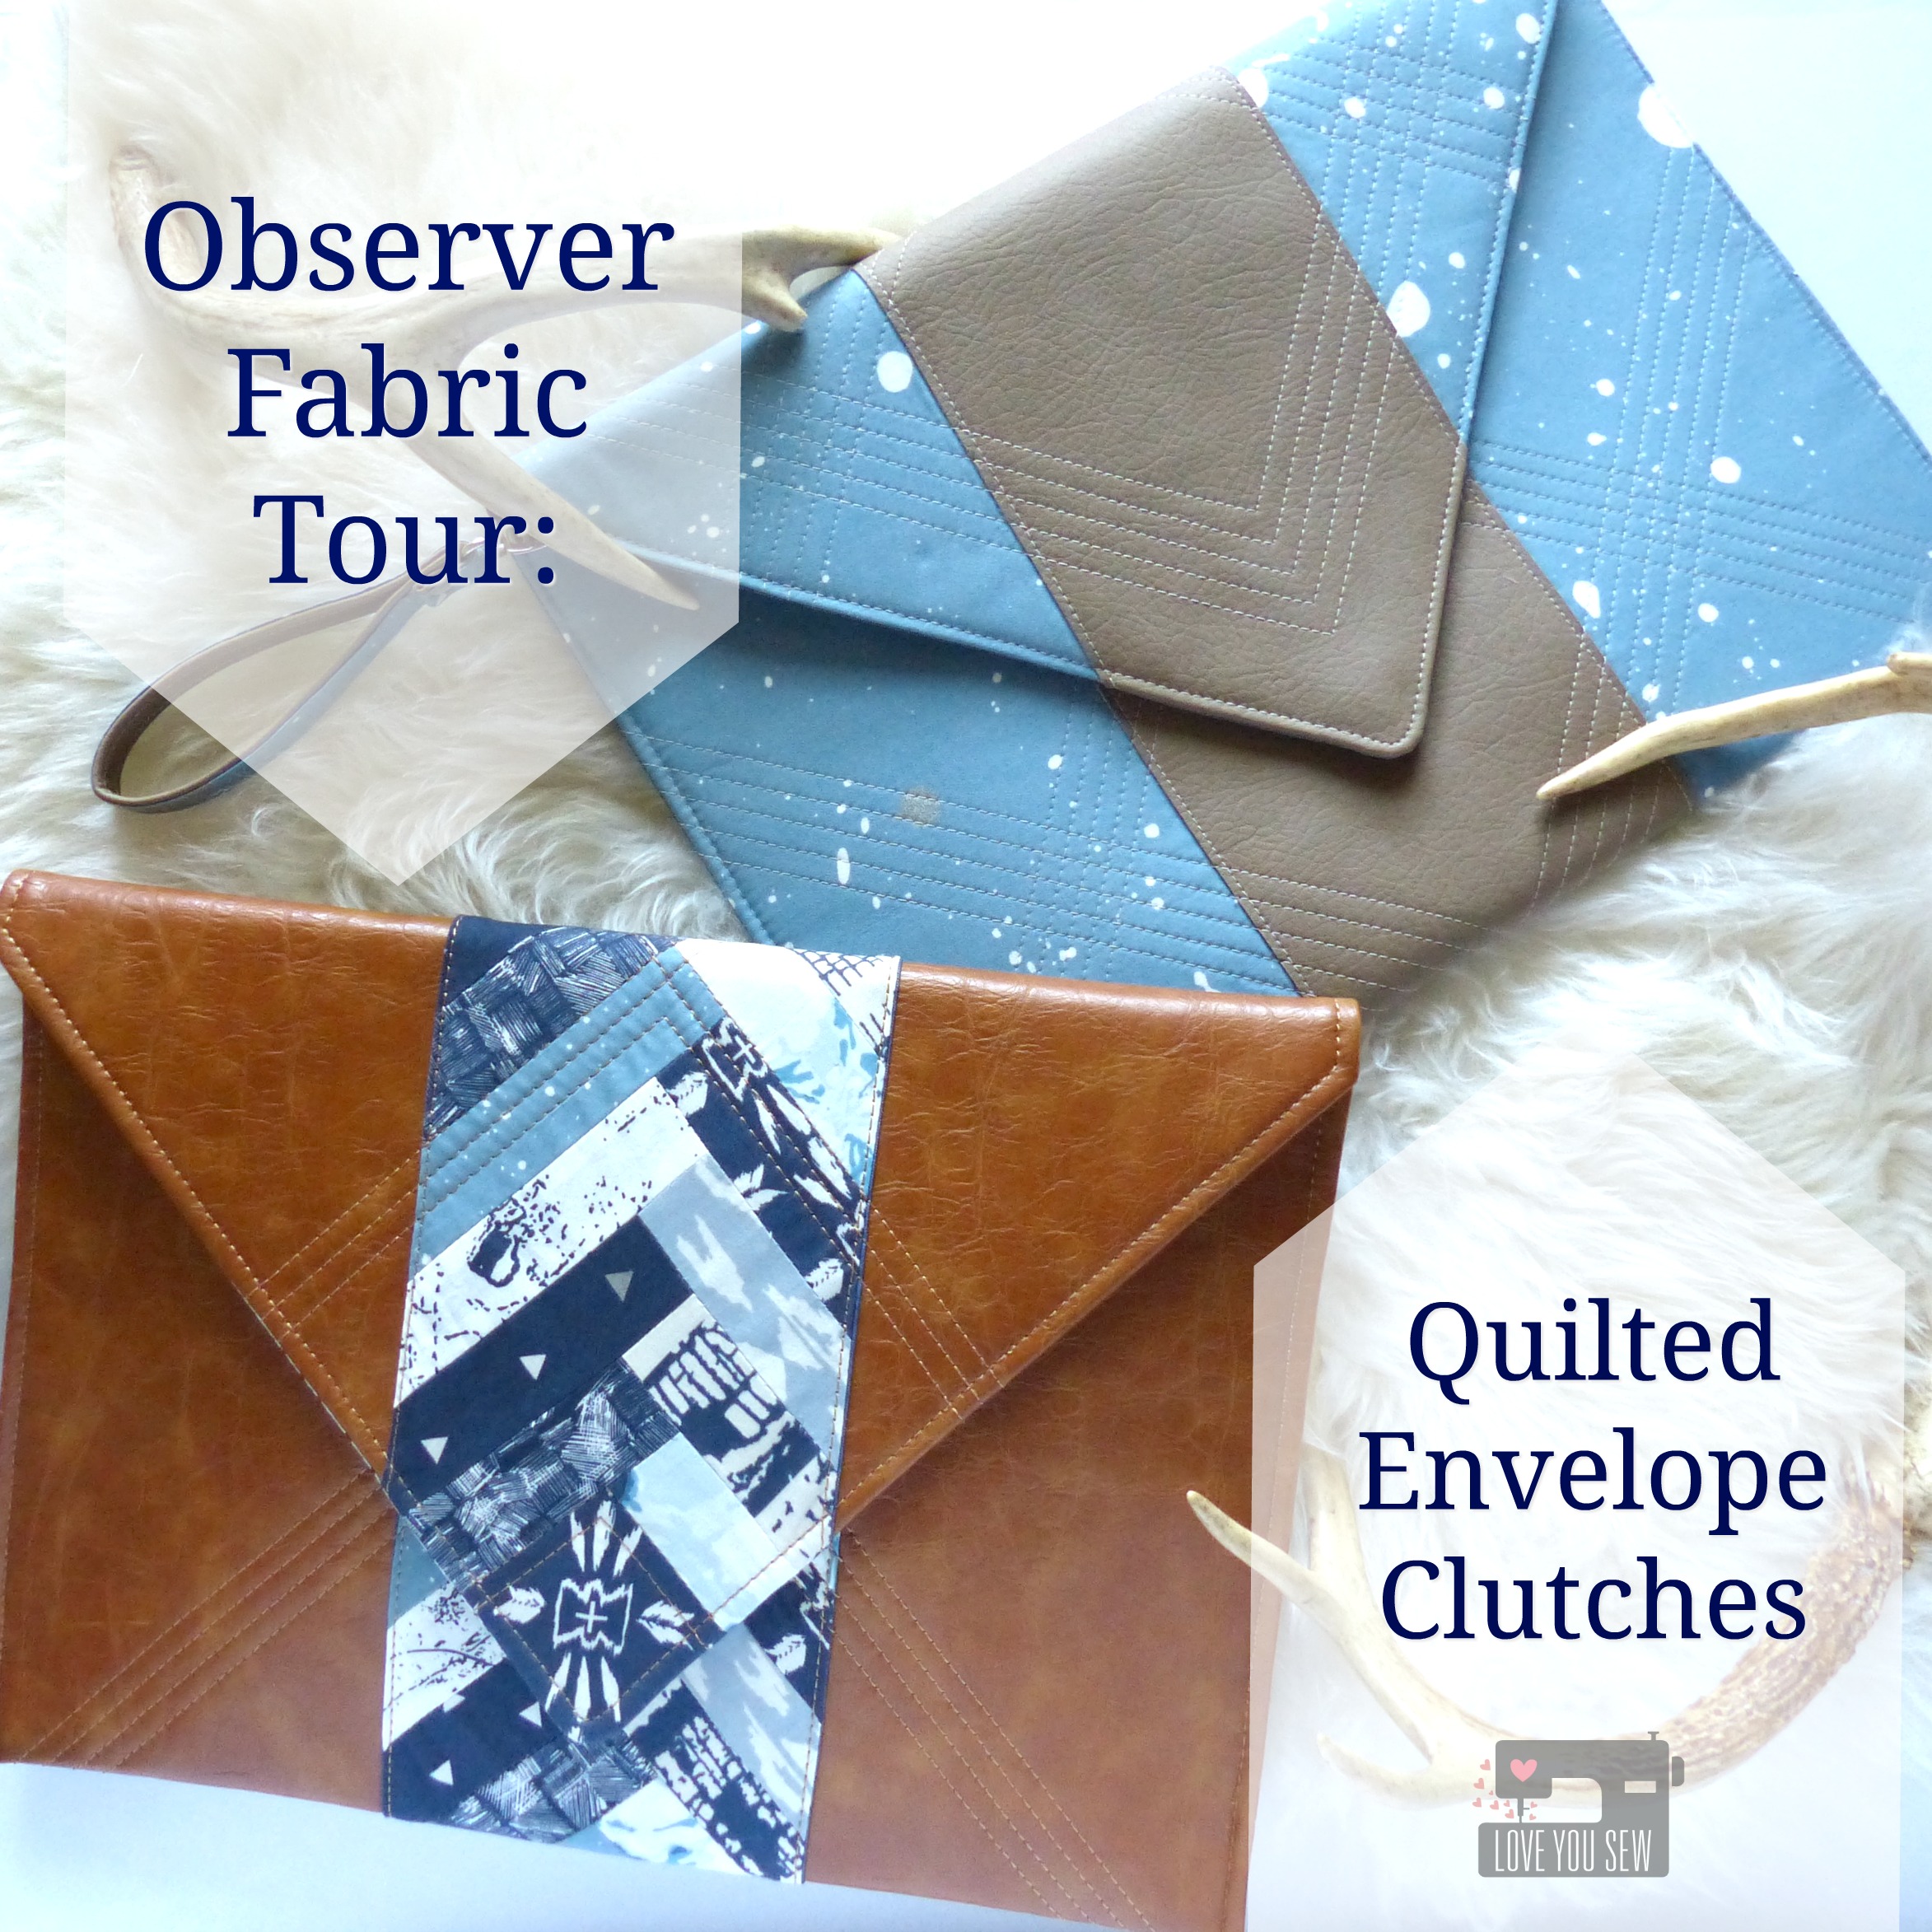
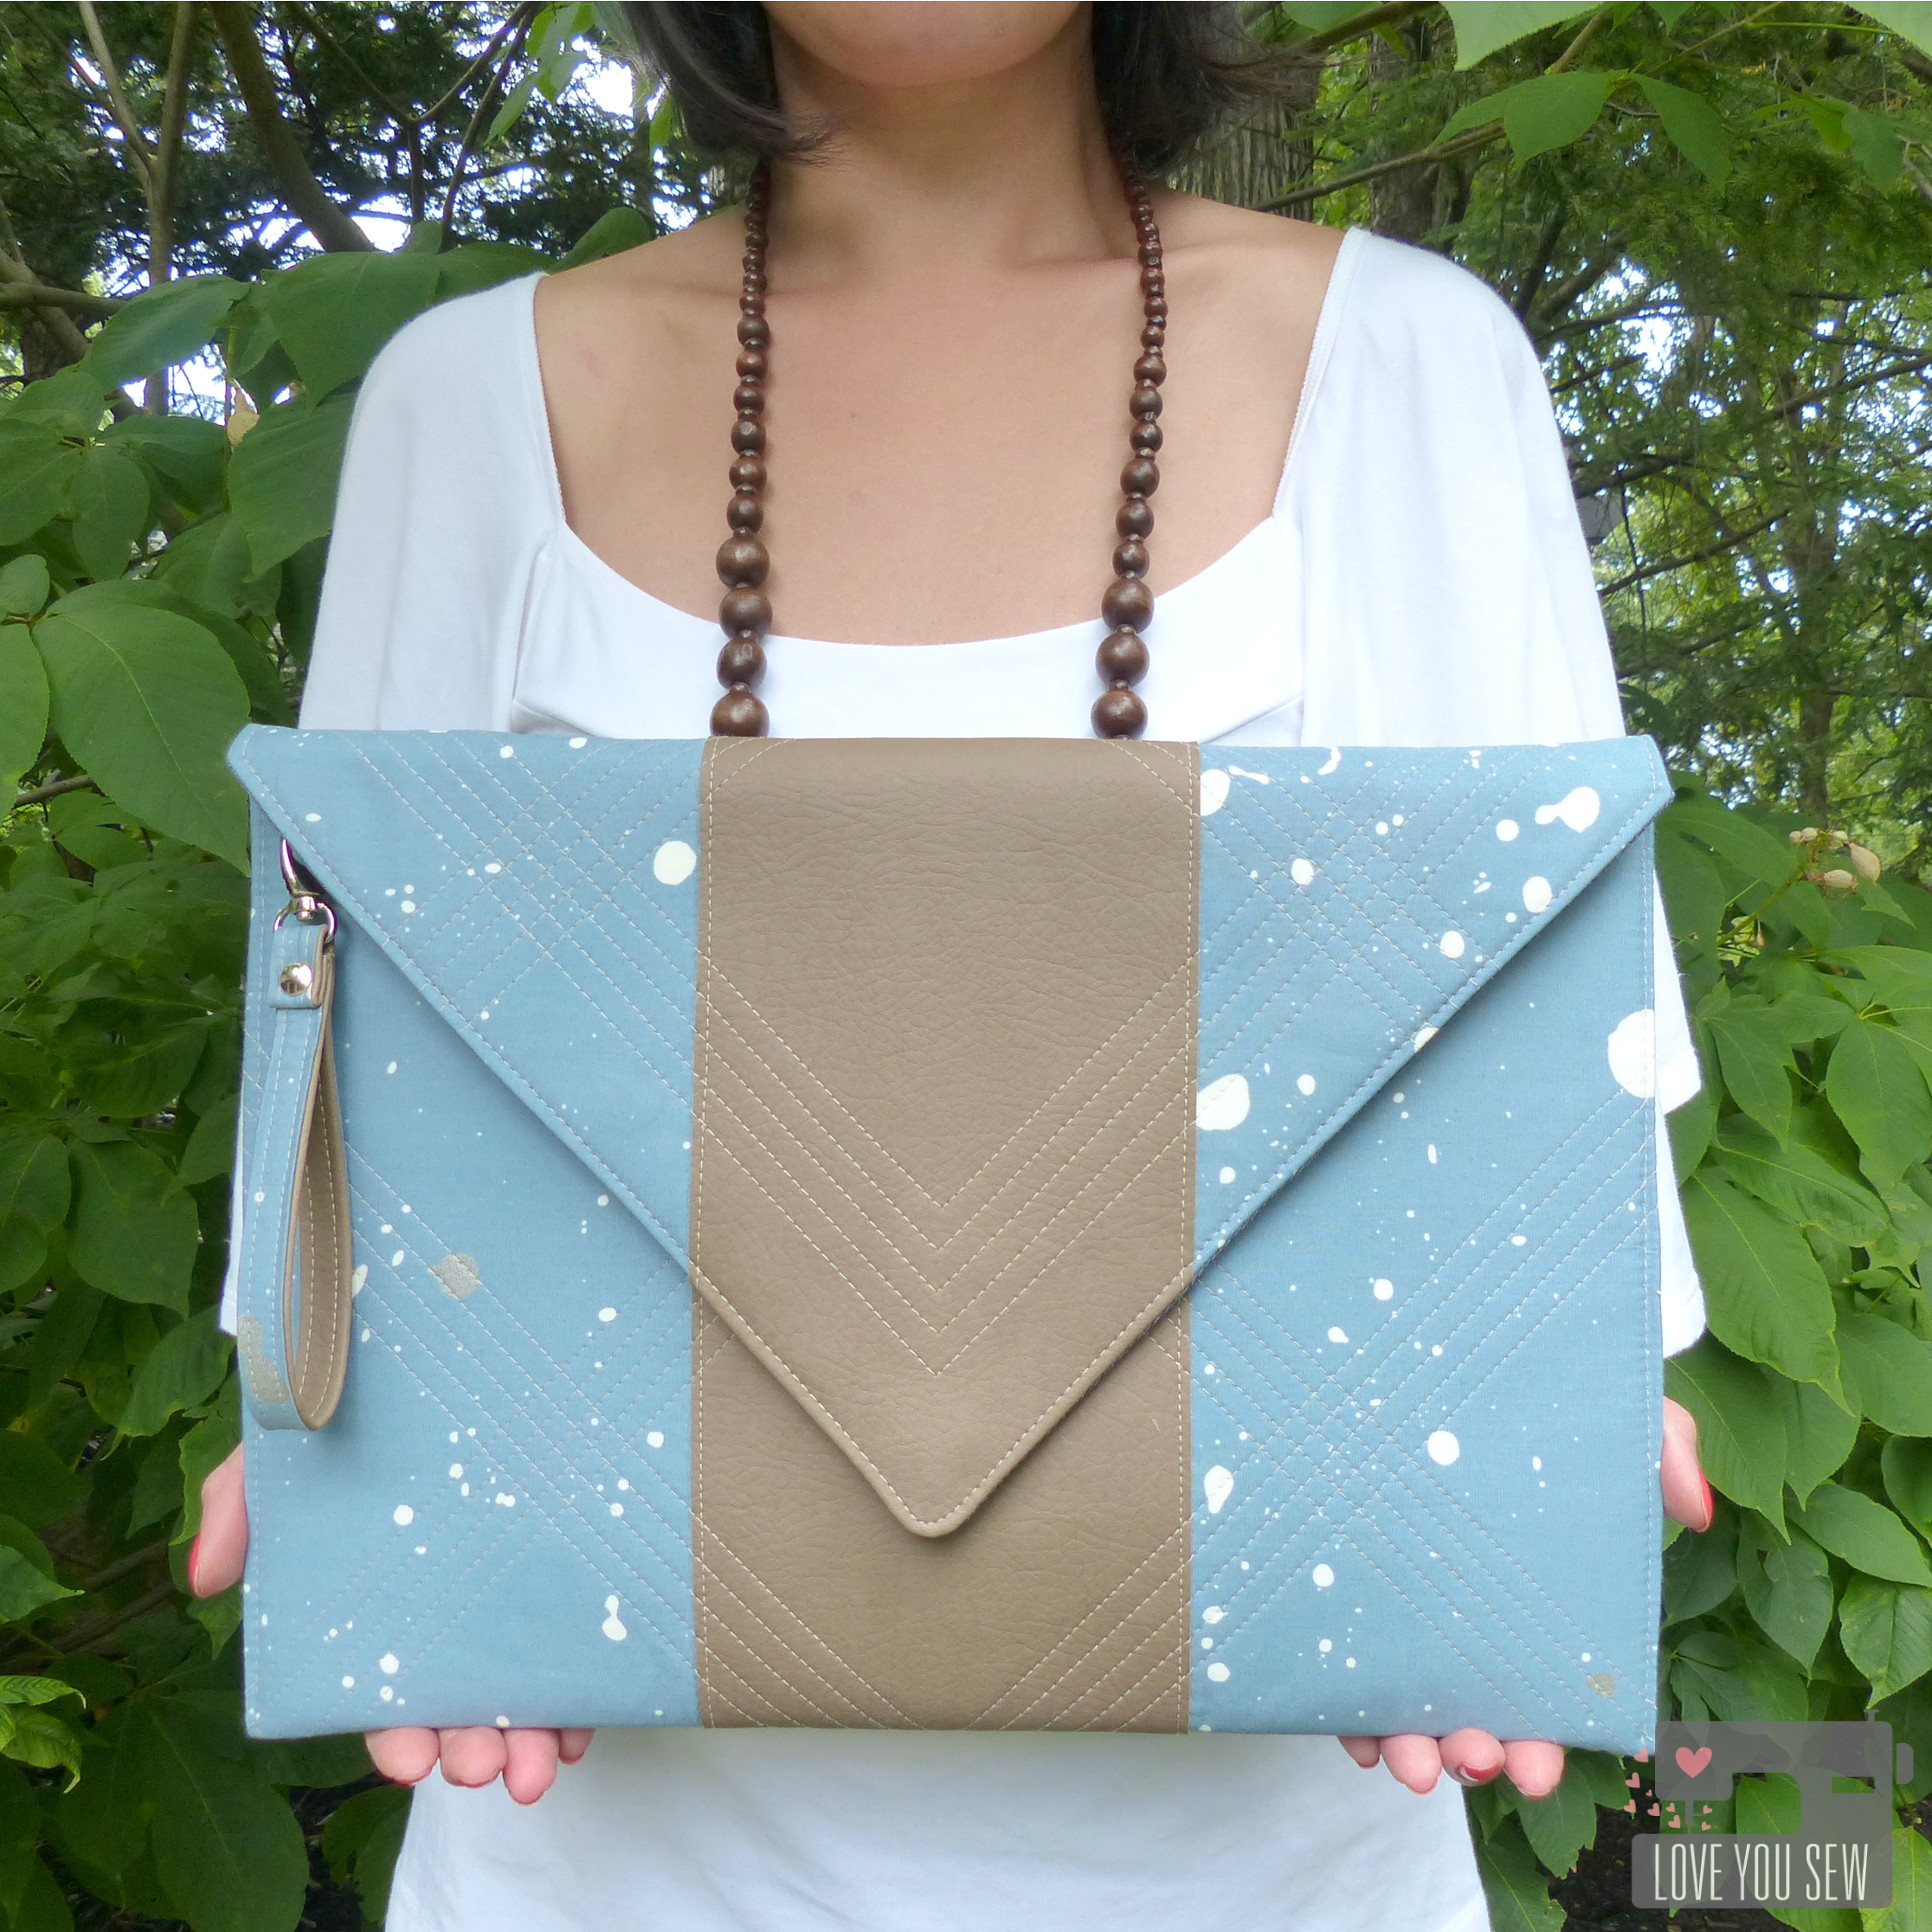
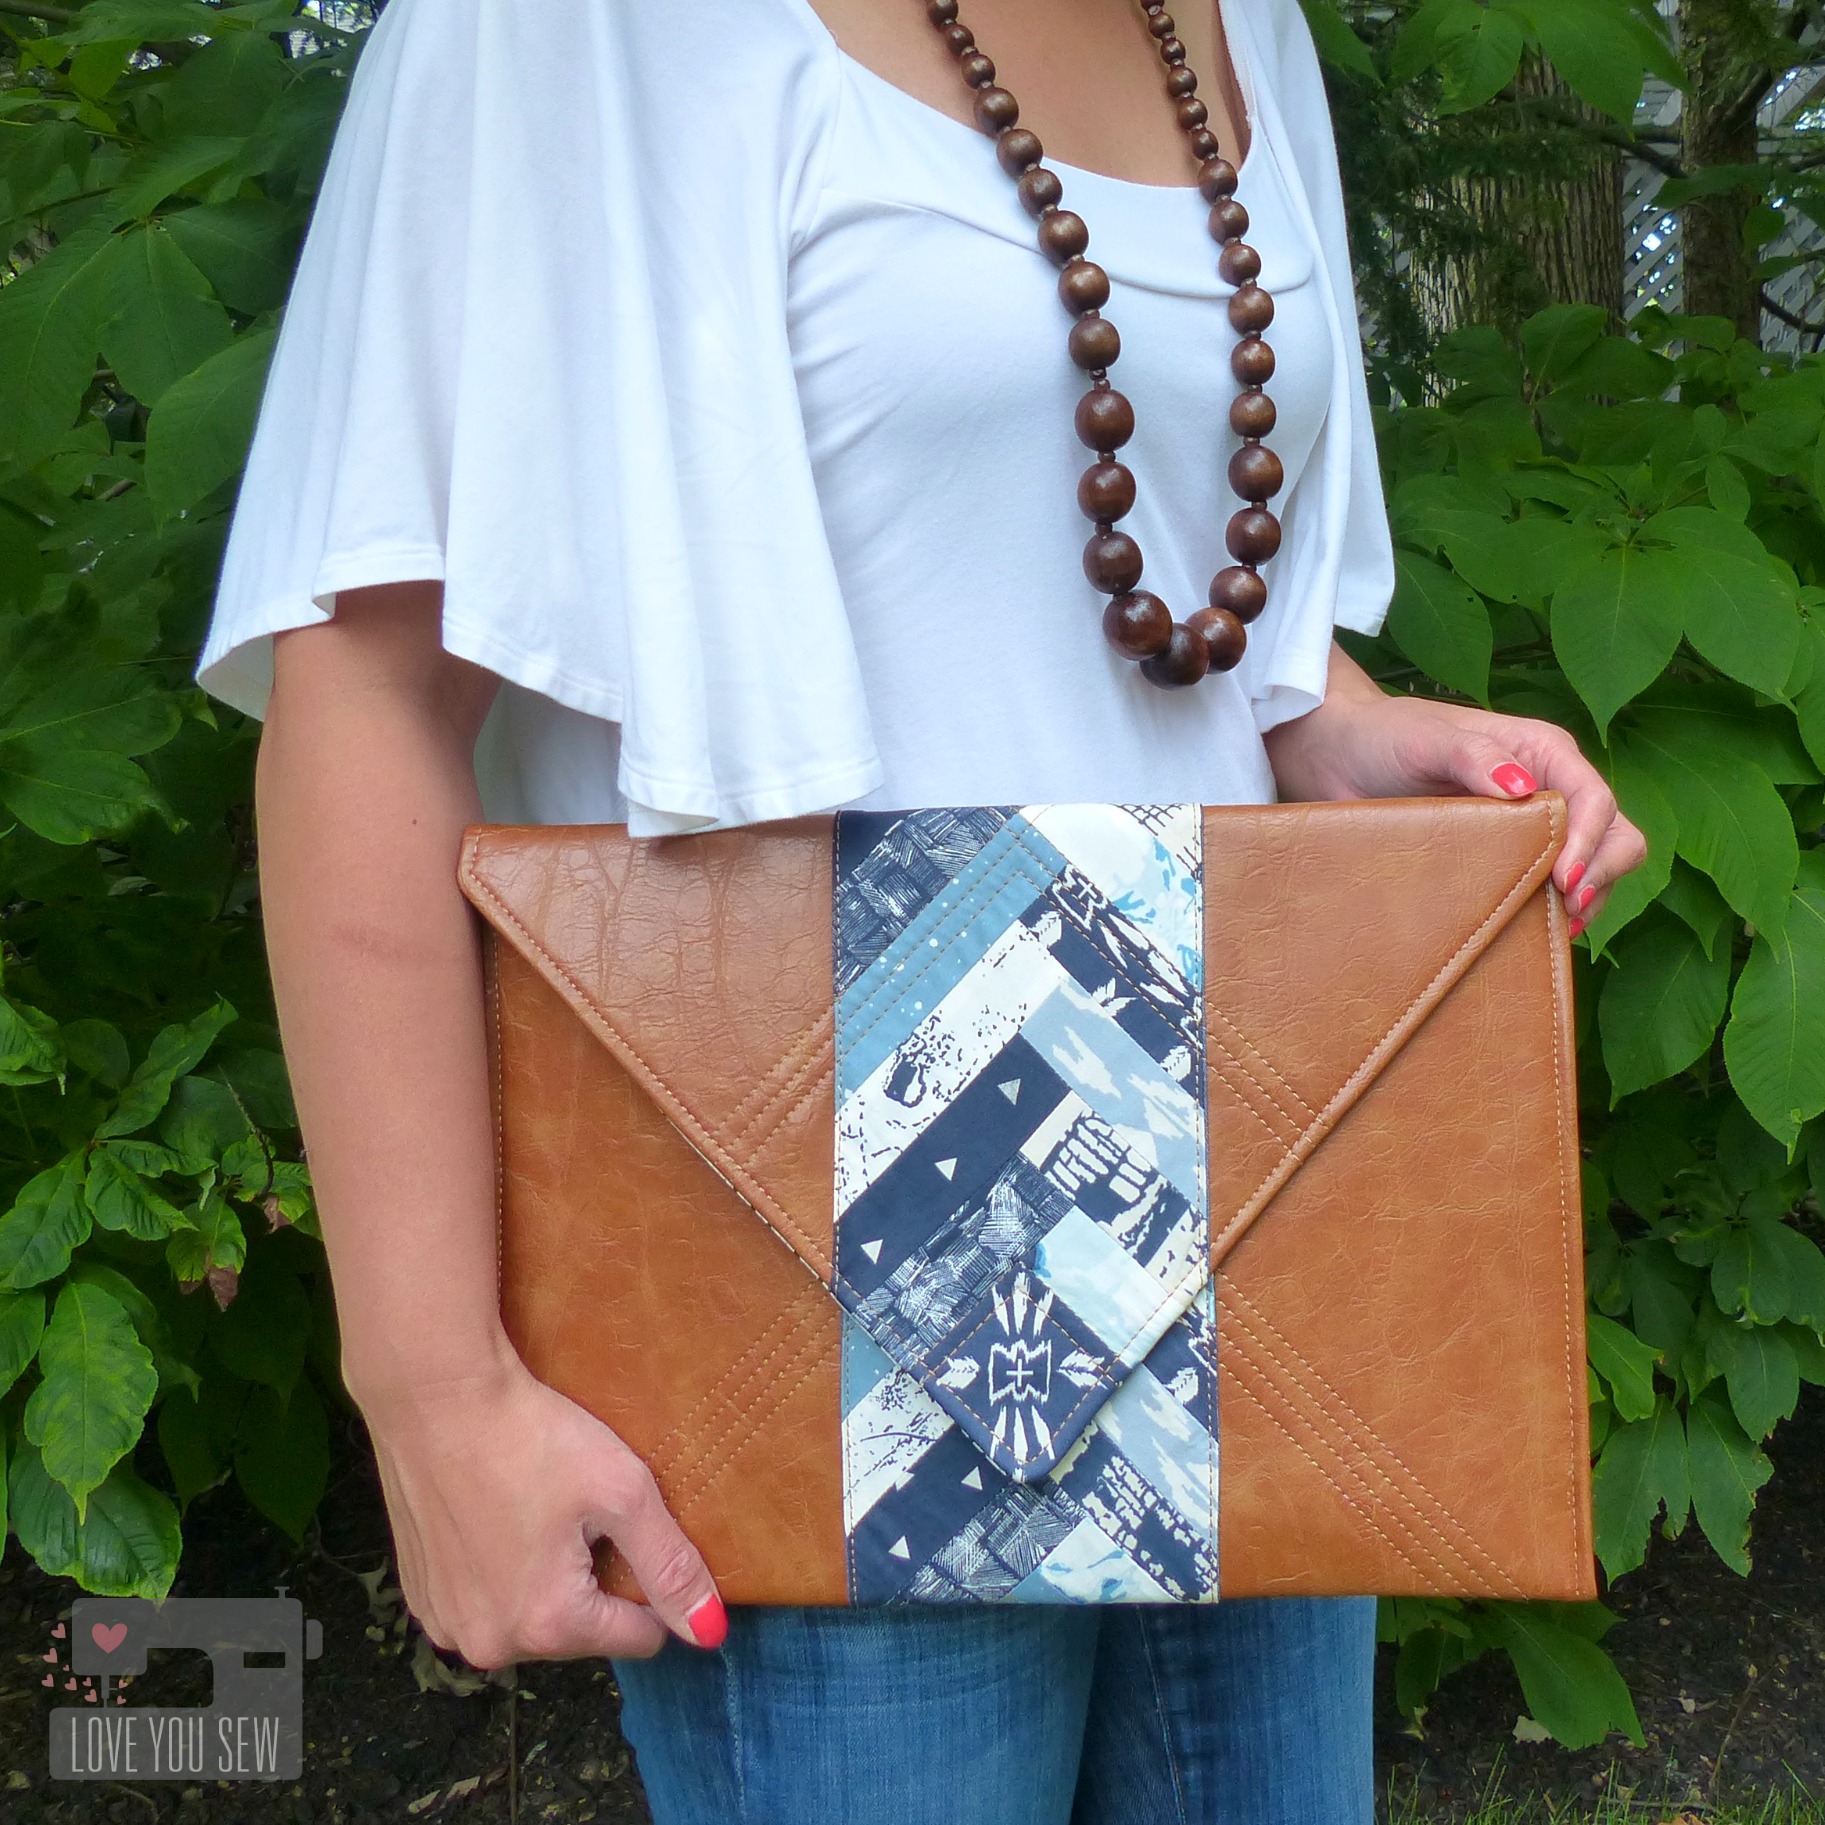
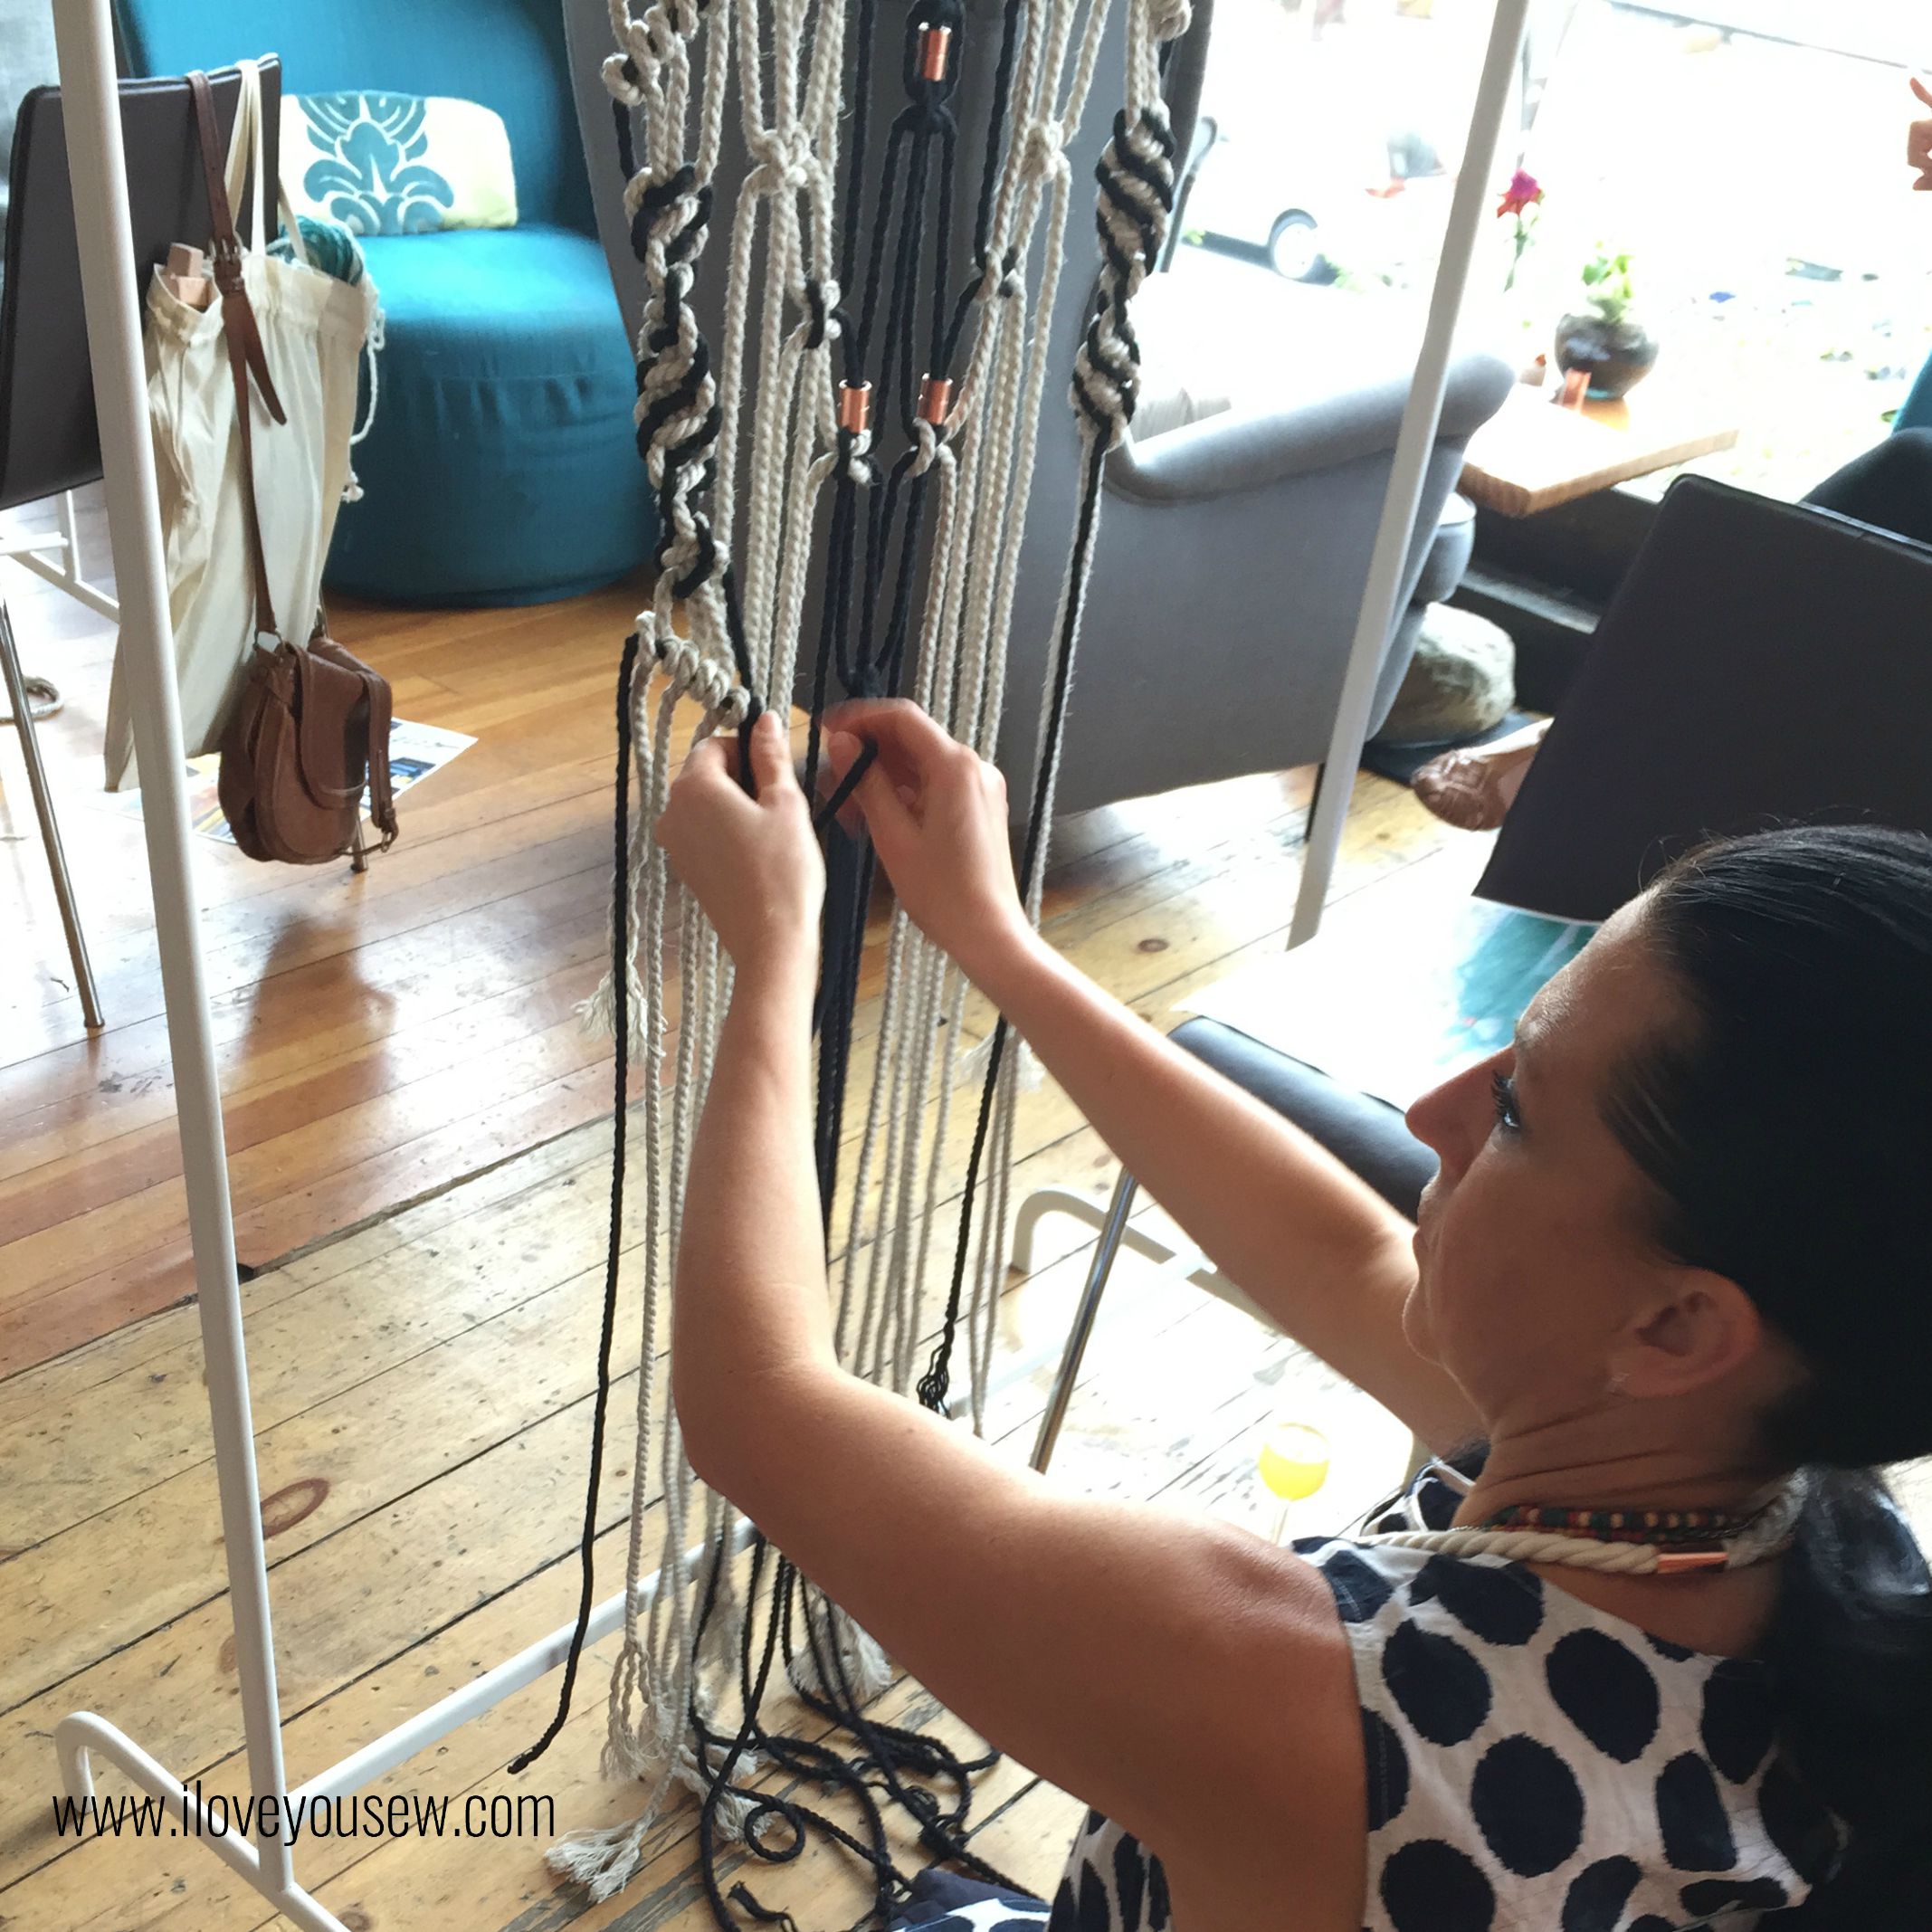
I’m kicking the tour off with these fabulous oversized Envelope Clutches.  Ever since I had swatches of these fabrics in my studio, I was trying to think of what I wanted to make as a personal project.  These curry and sulfur colors mixed with sand and copper play SO well with the indigos, grey-blues and navy.  I fell head-over-heels with this palette and have plans for a dress in Overshot Gold.  With that in mind, I thought a trendy Envelope Clutch would be perfect in the Shard colorway.

P1060617

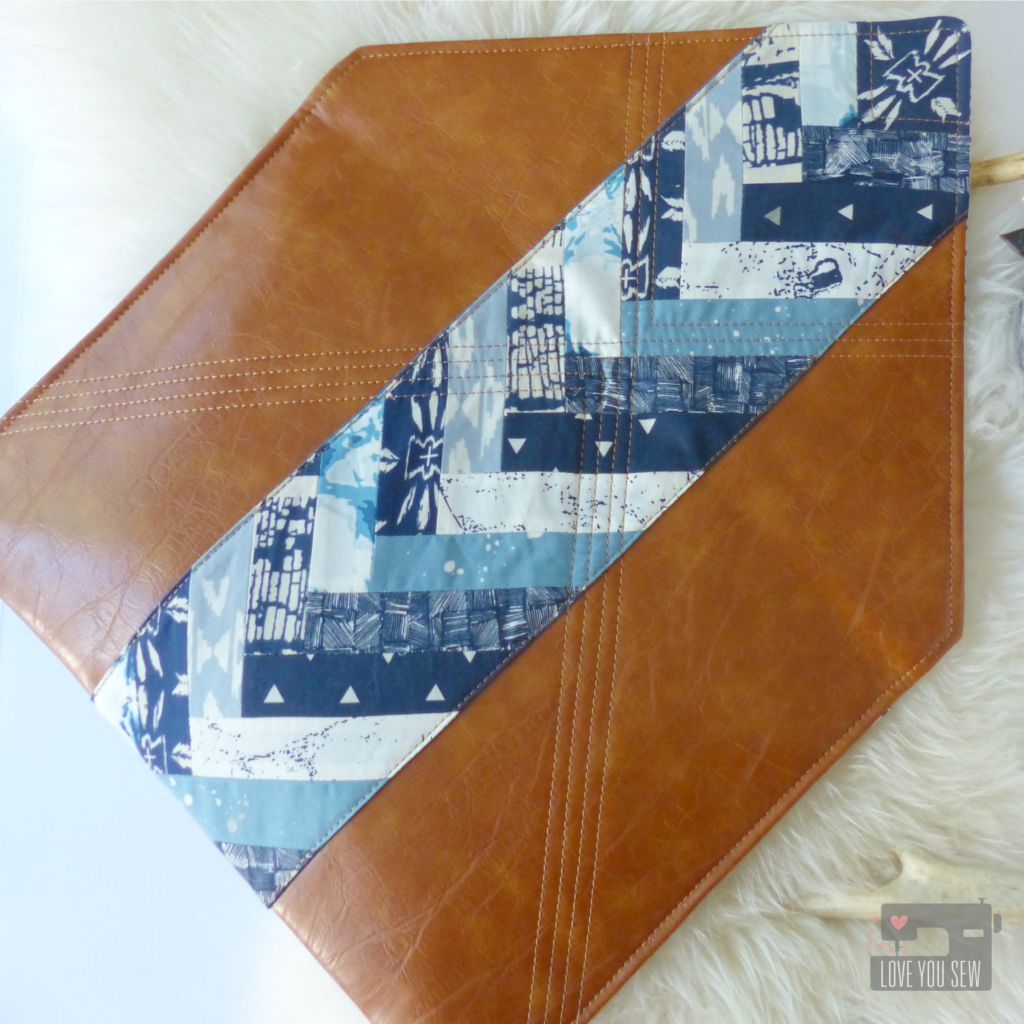
As a modern quilter, I continually try to show the rest of the world that patchwork and sewing are still “cool.”  Sound familiar, friends???  I thought combining the sophistication of (faux) leather with a simple block would be the perfect marriage of current Boho-Gypsy love and traditional quilting.

IMG_6780

This was initially going to be a one-off creation just for myself, but the sneak peeks on Instagram created such positive feedback, that I knew I HAD to write a pattern for all of you. EDIT:  Tutorial can now be found HERE. 

IMG_6770

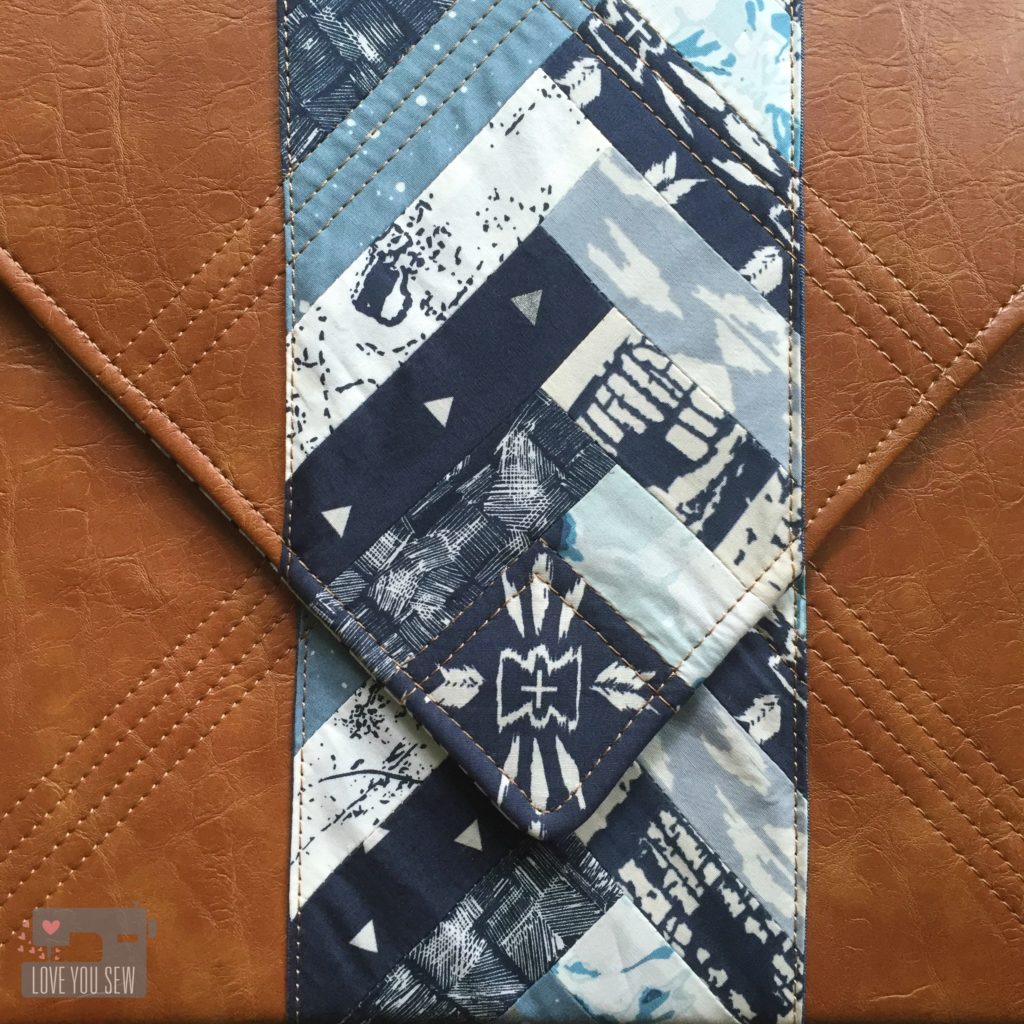
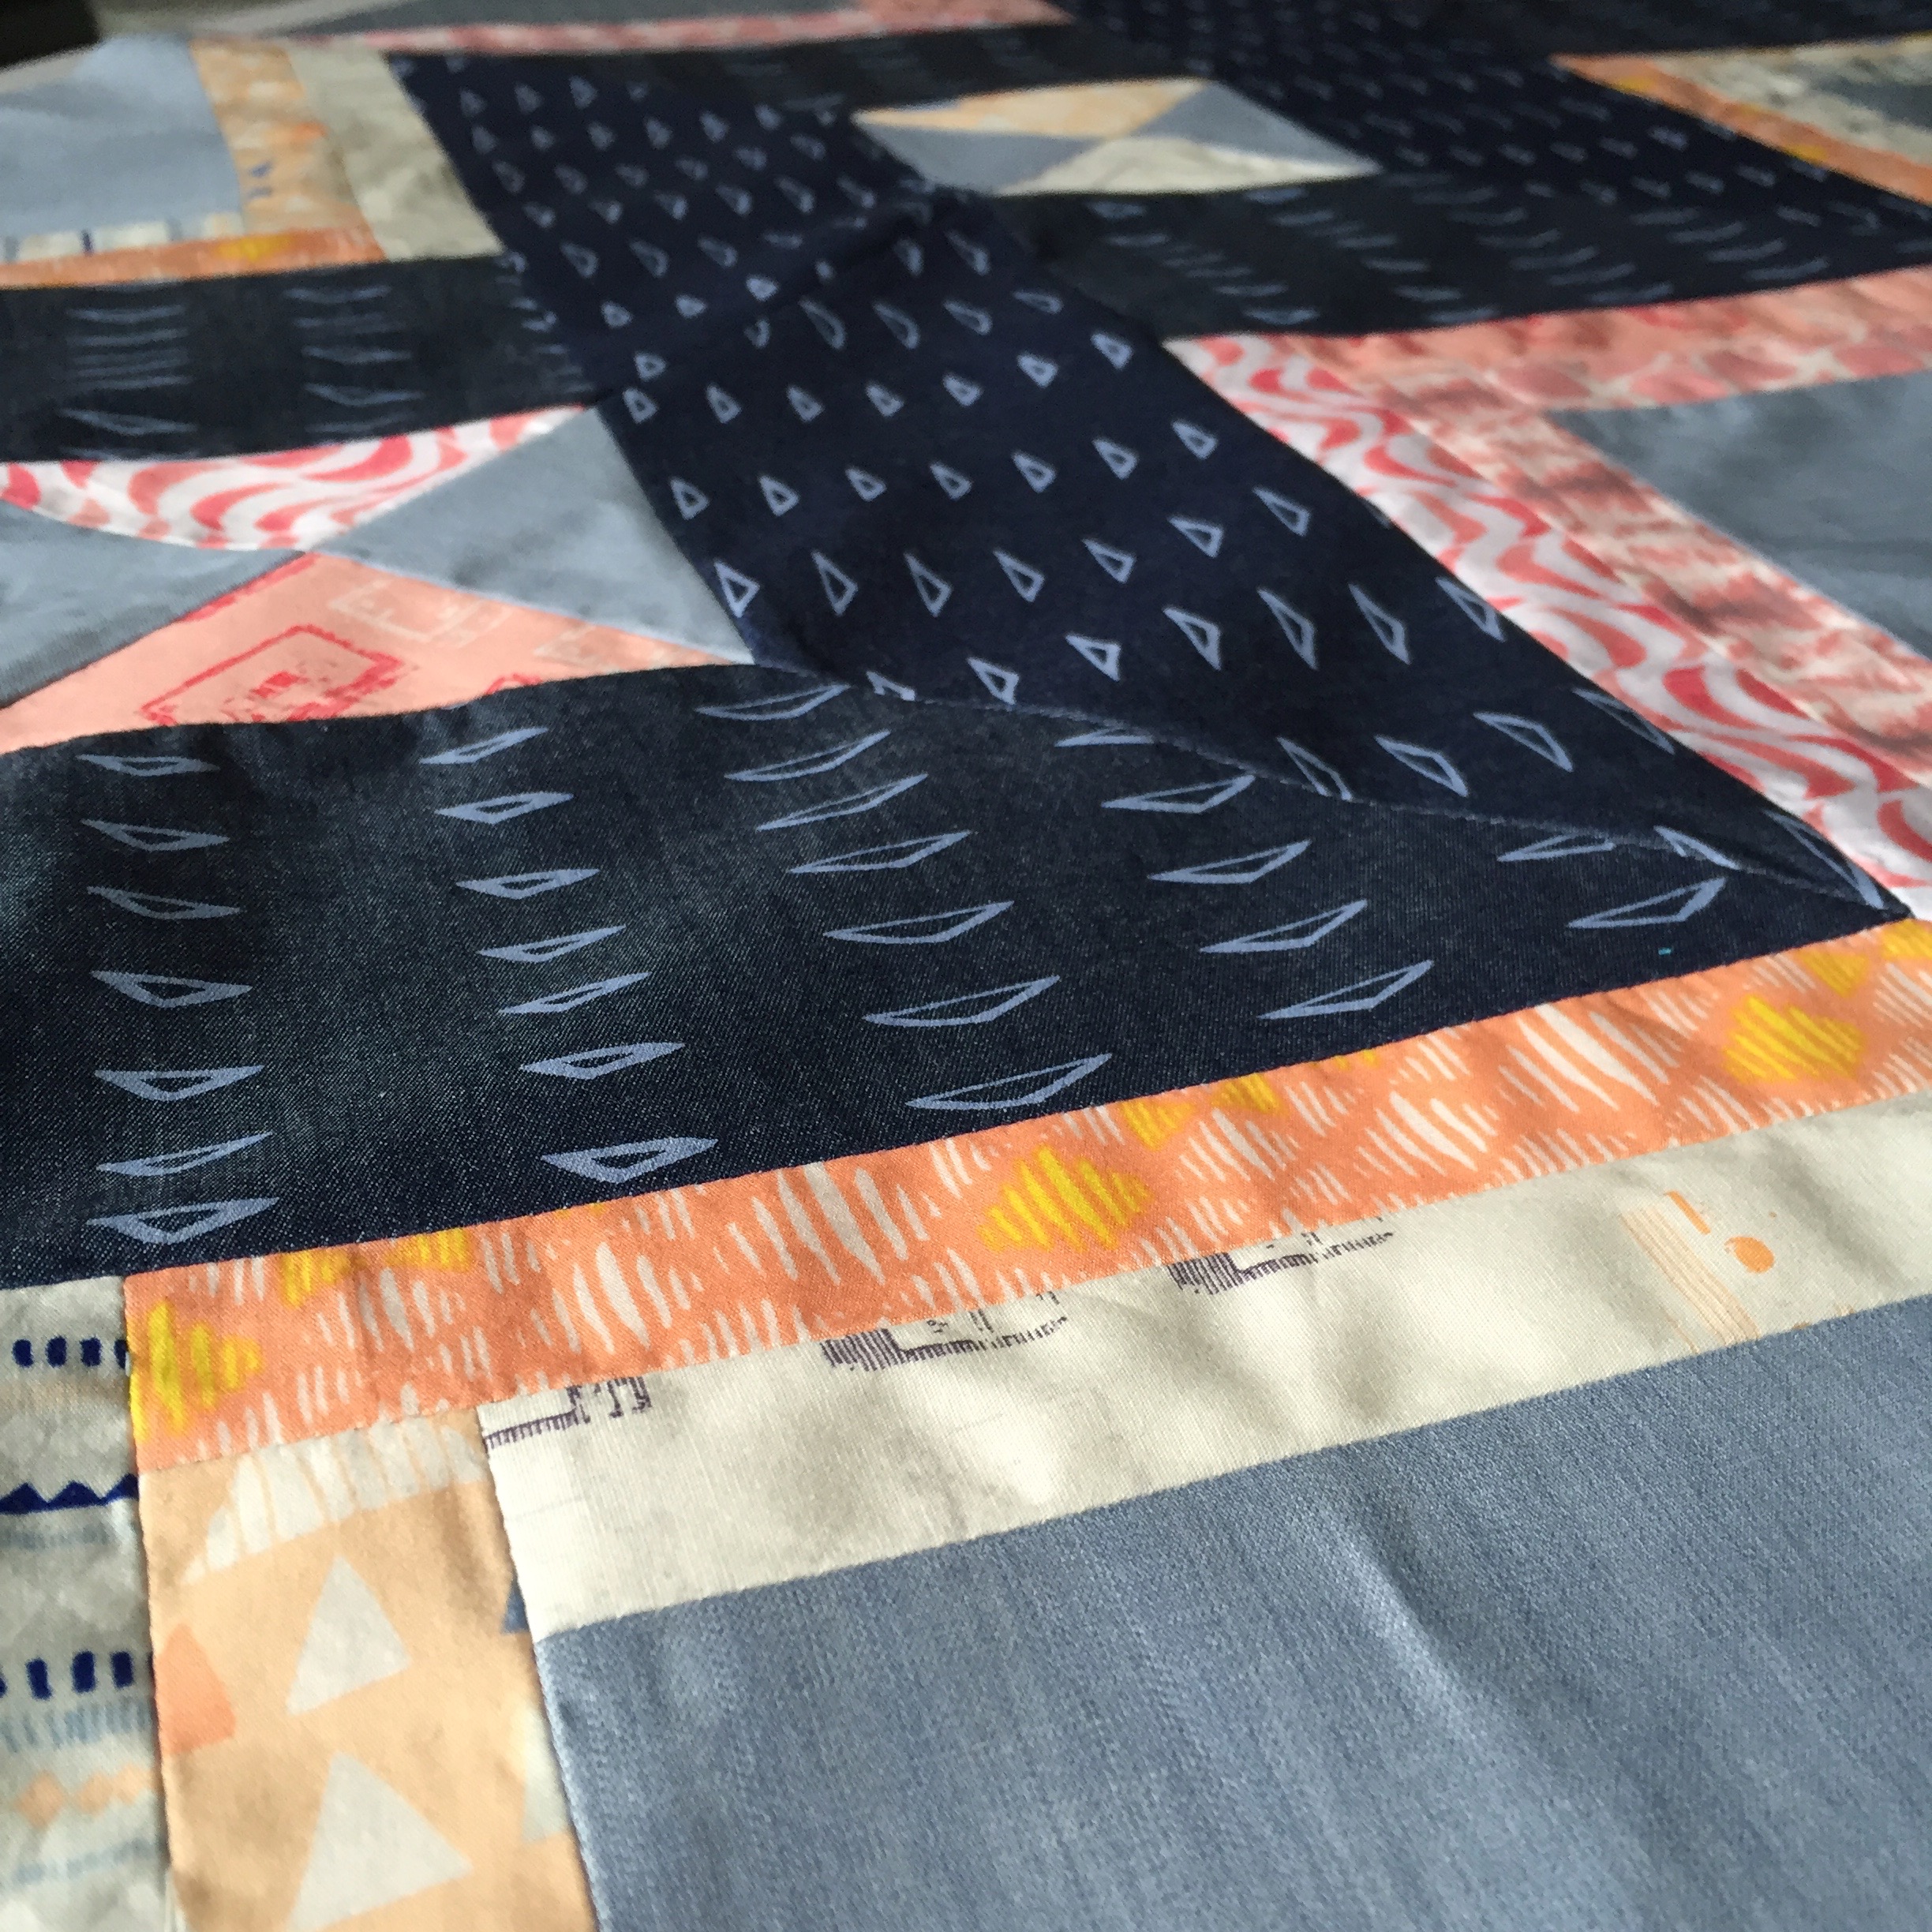
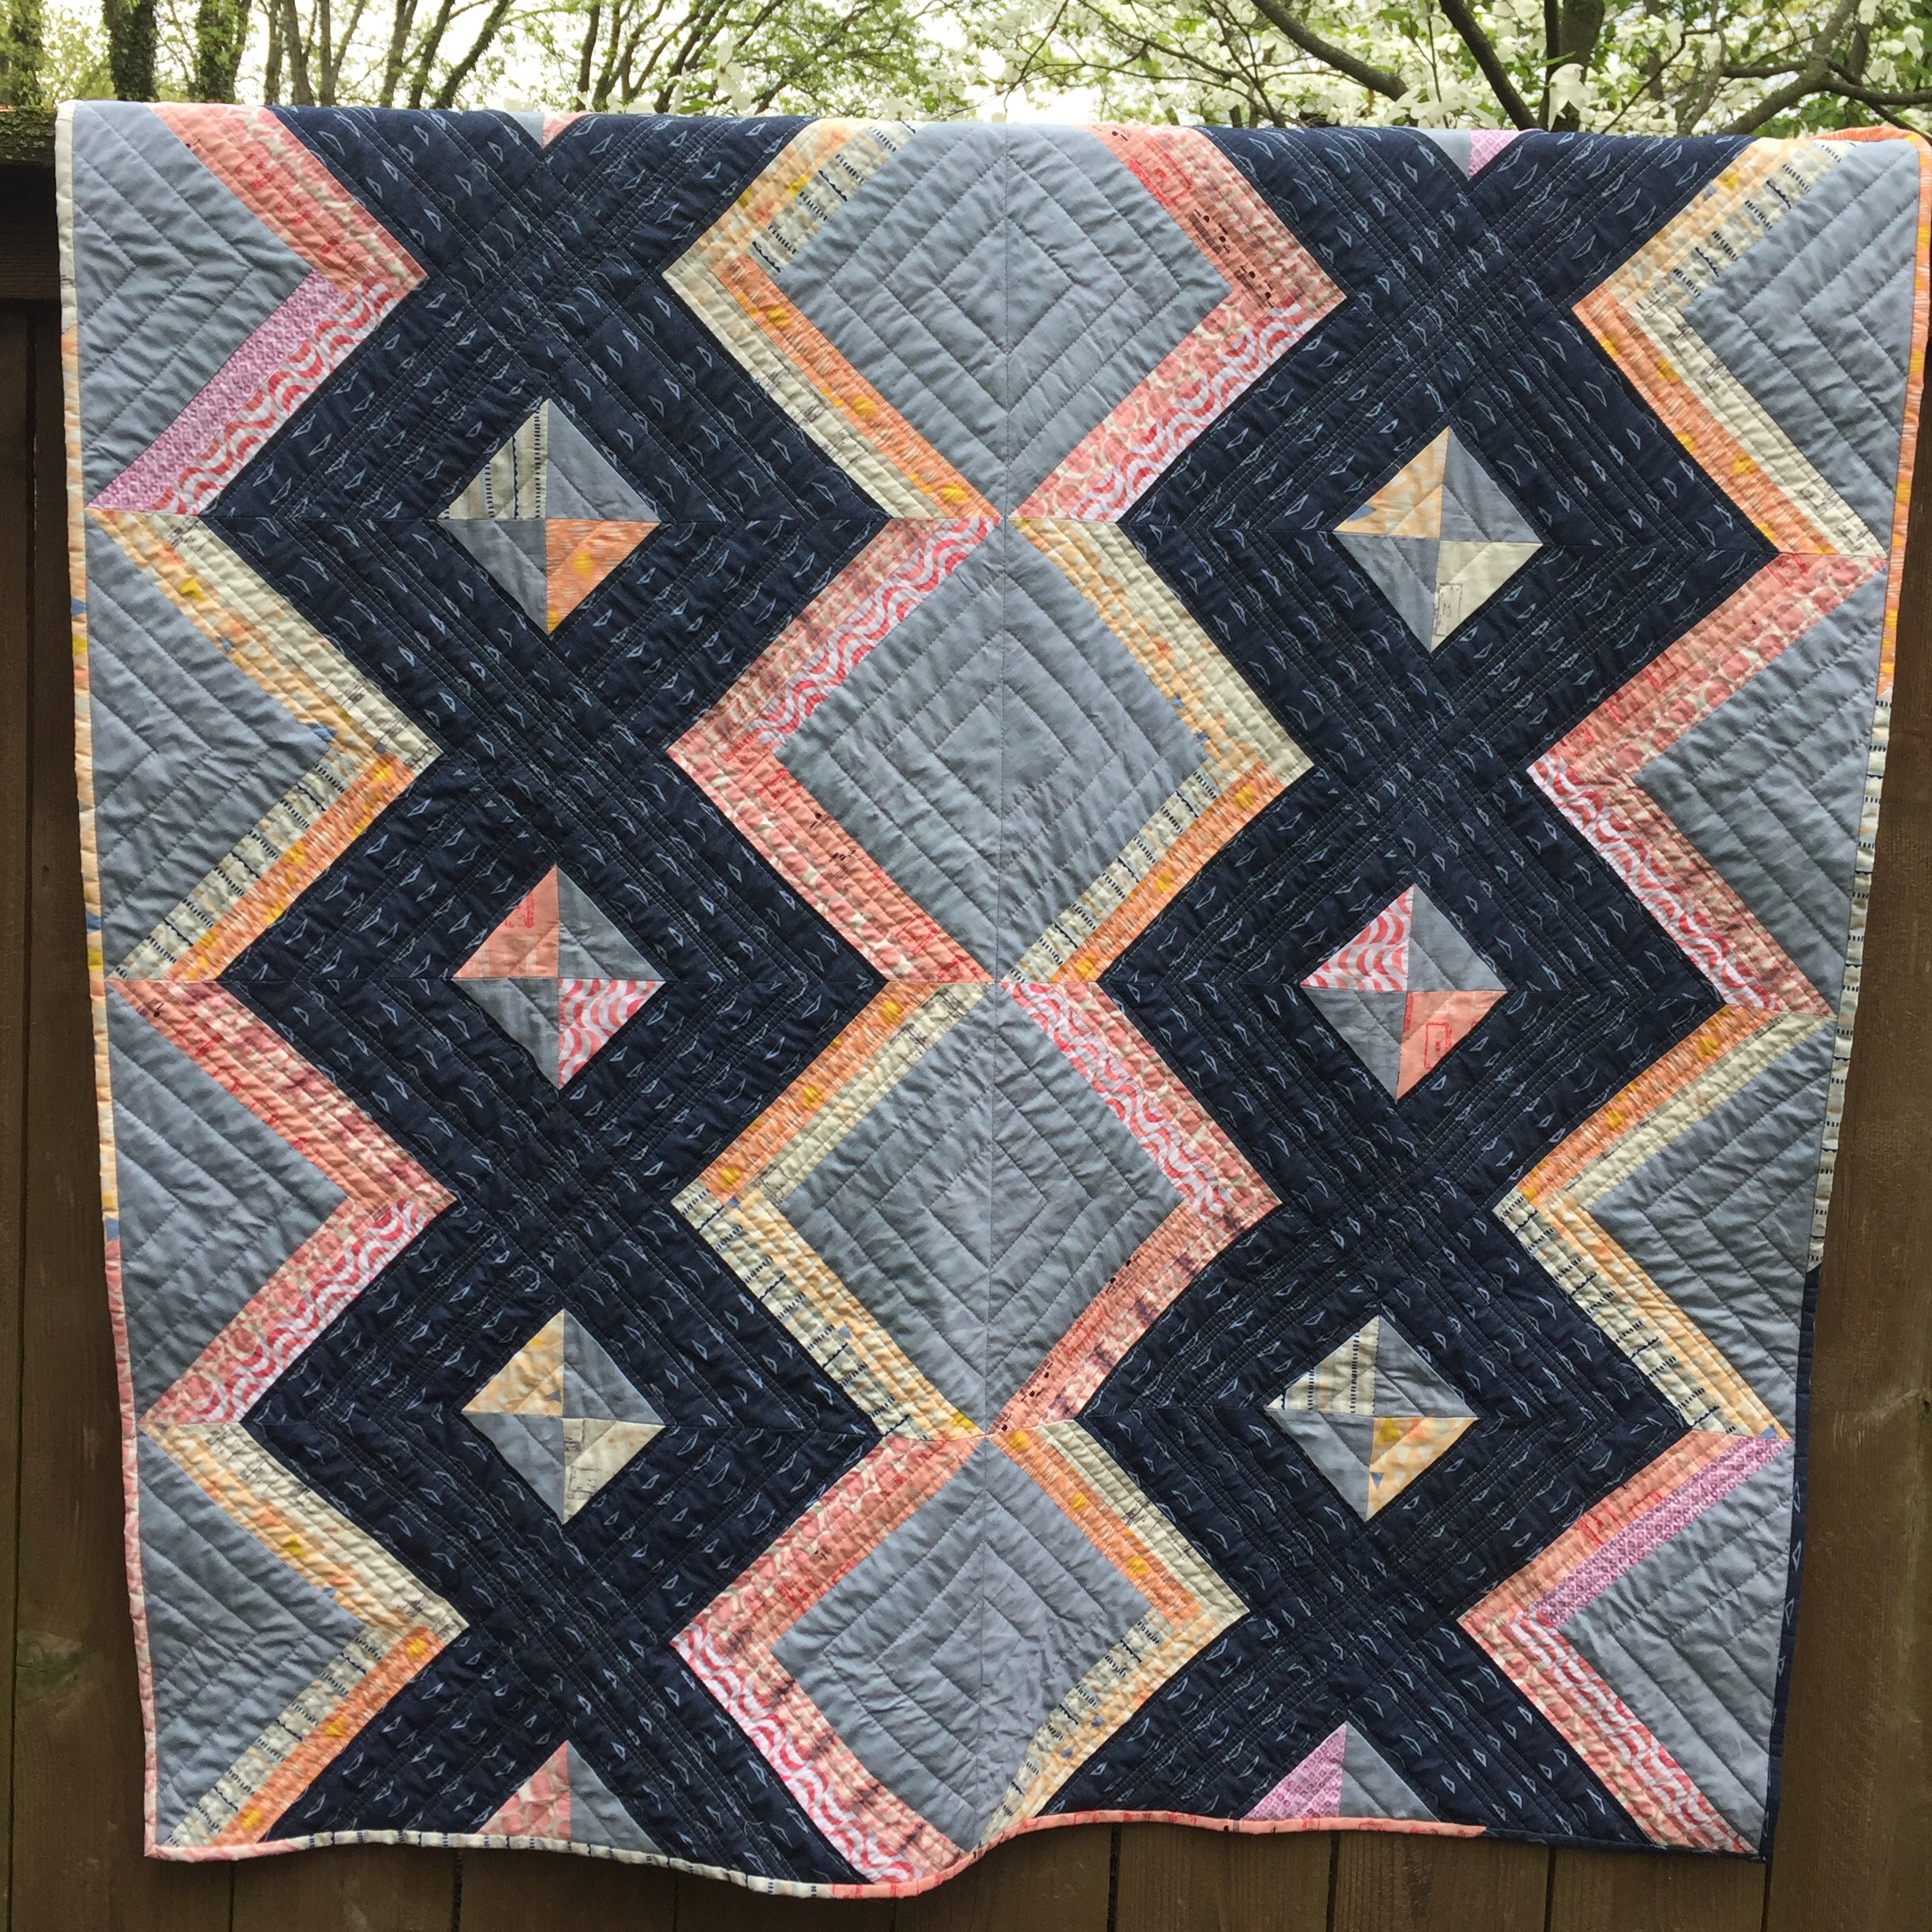
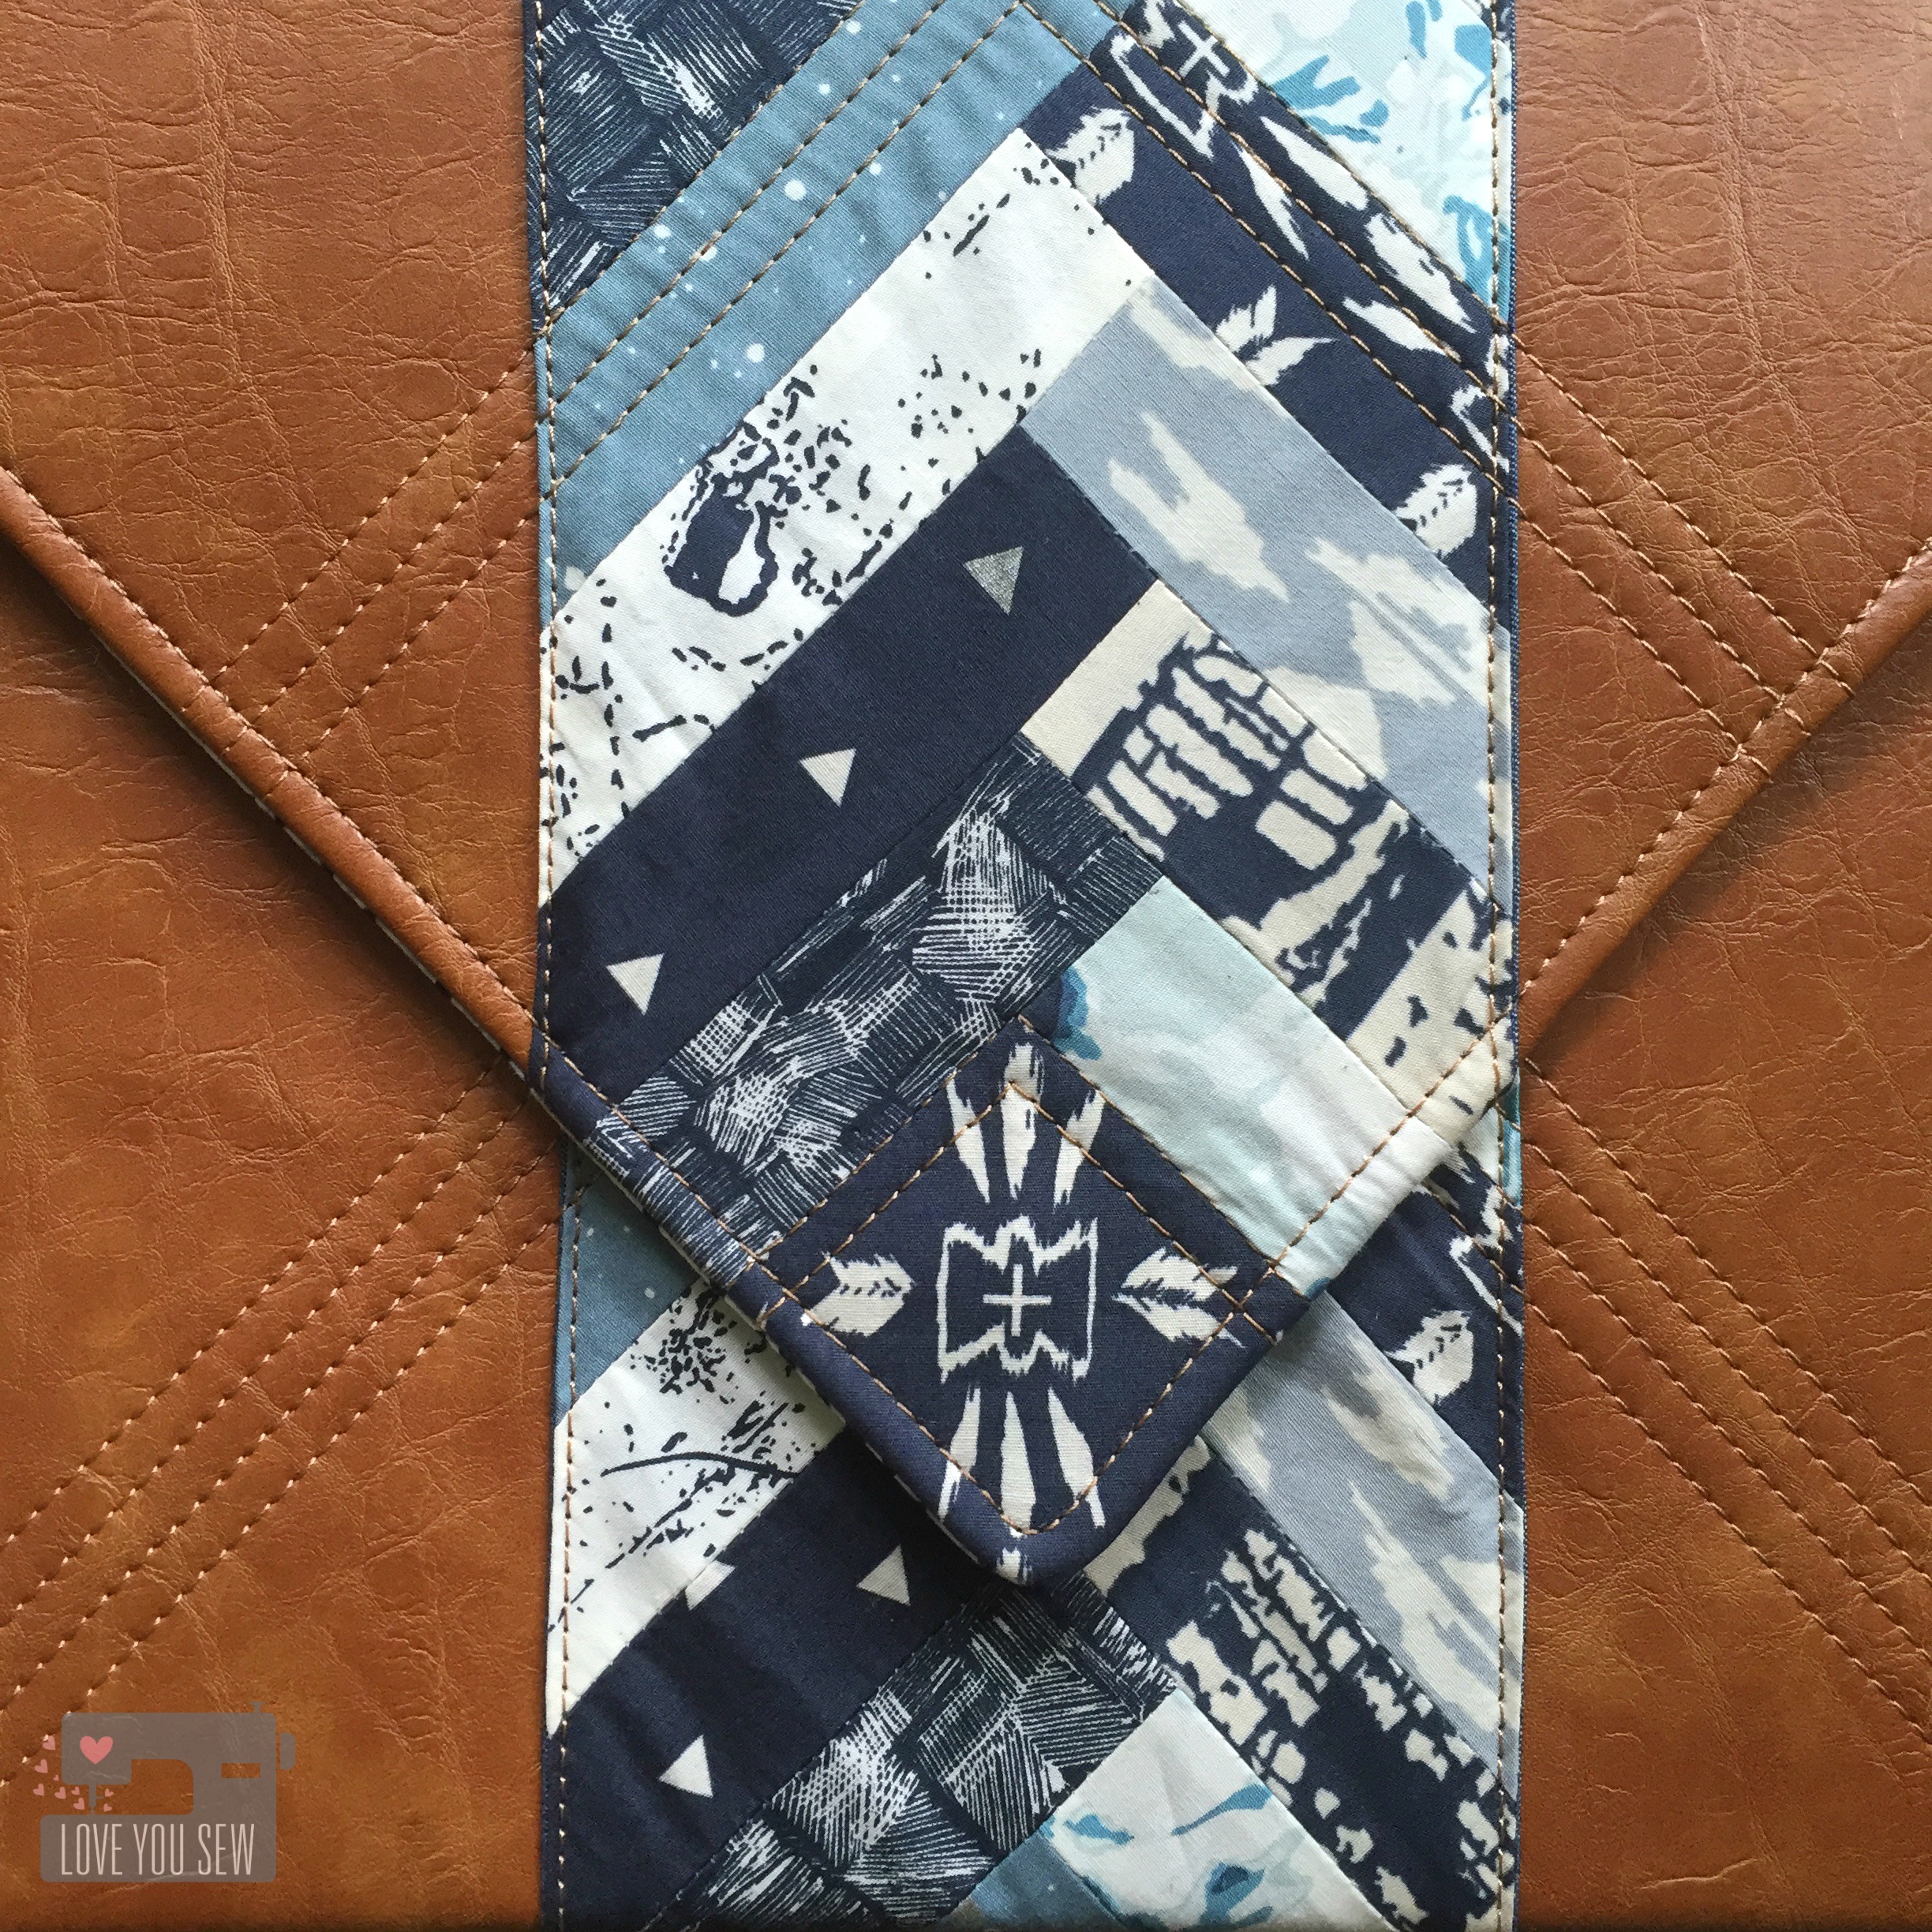
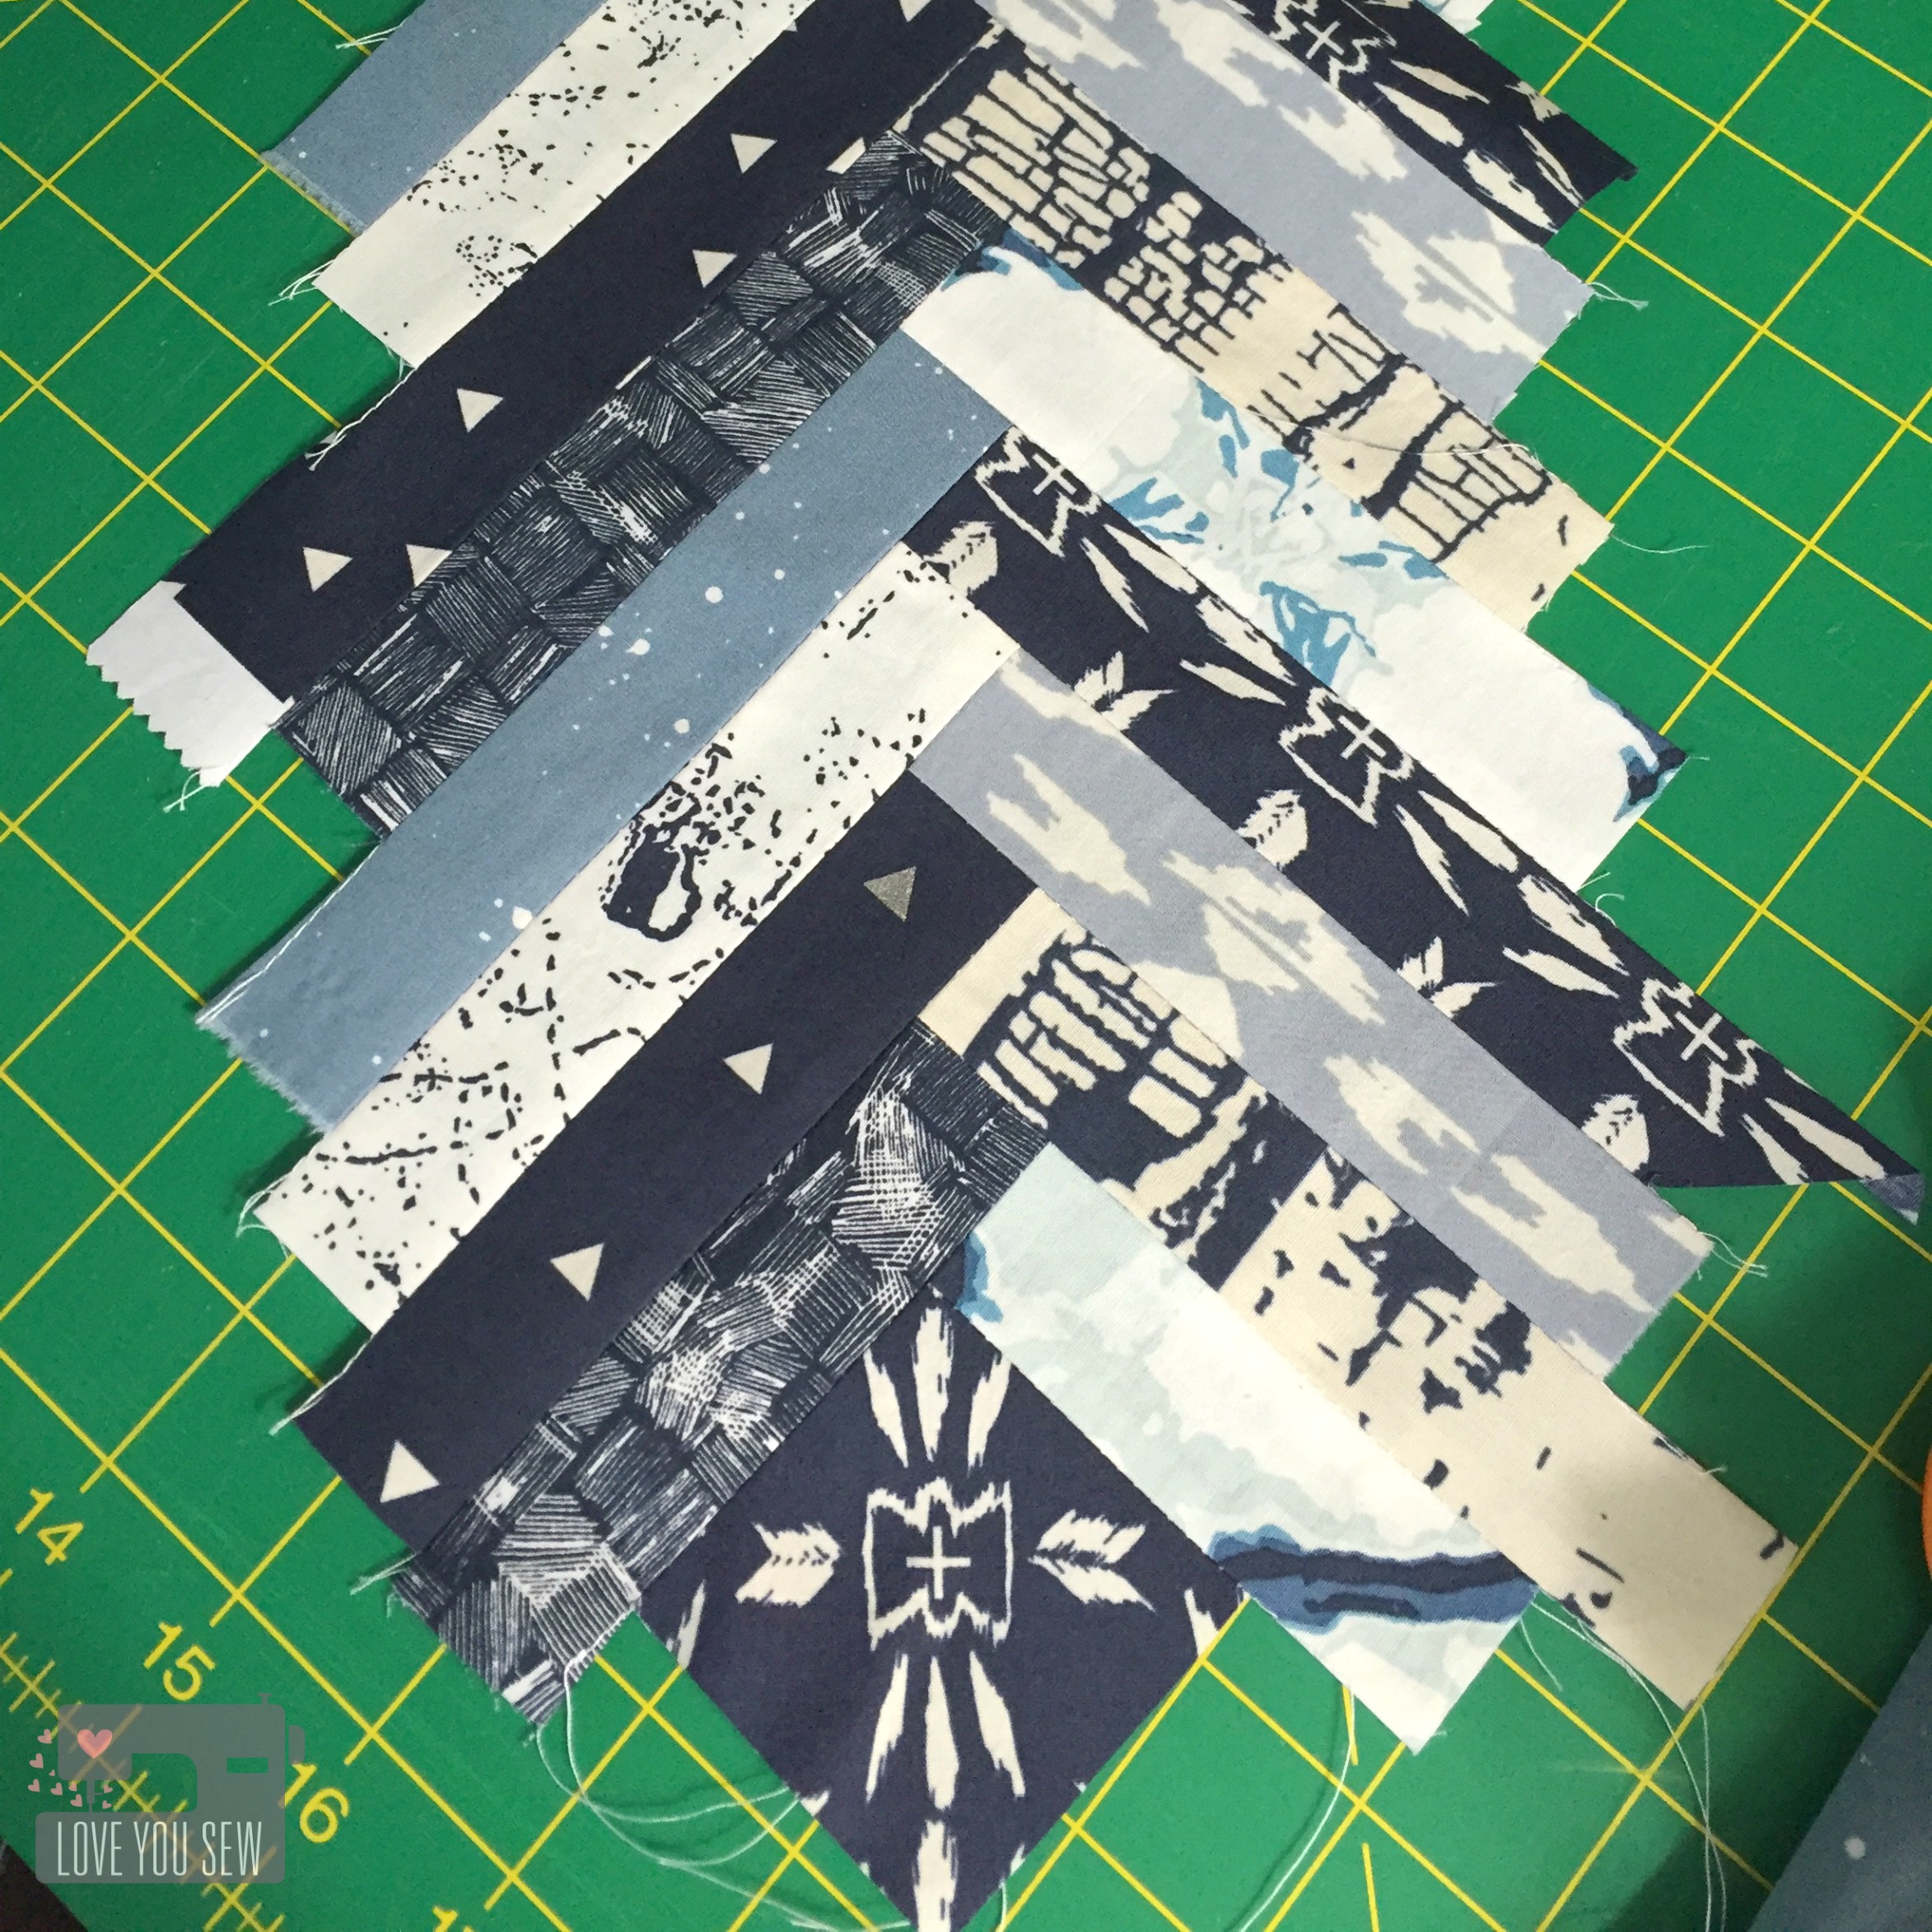
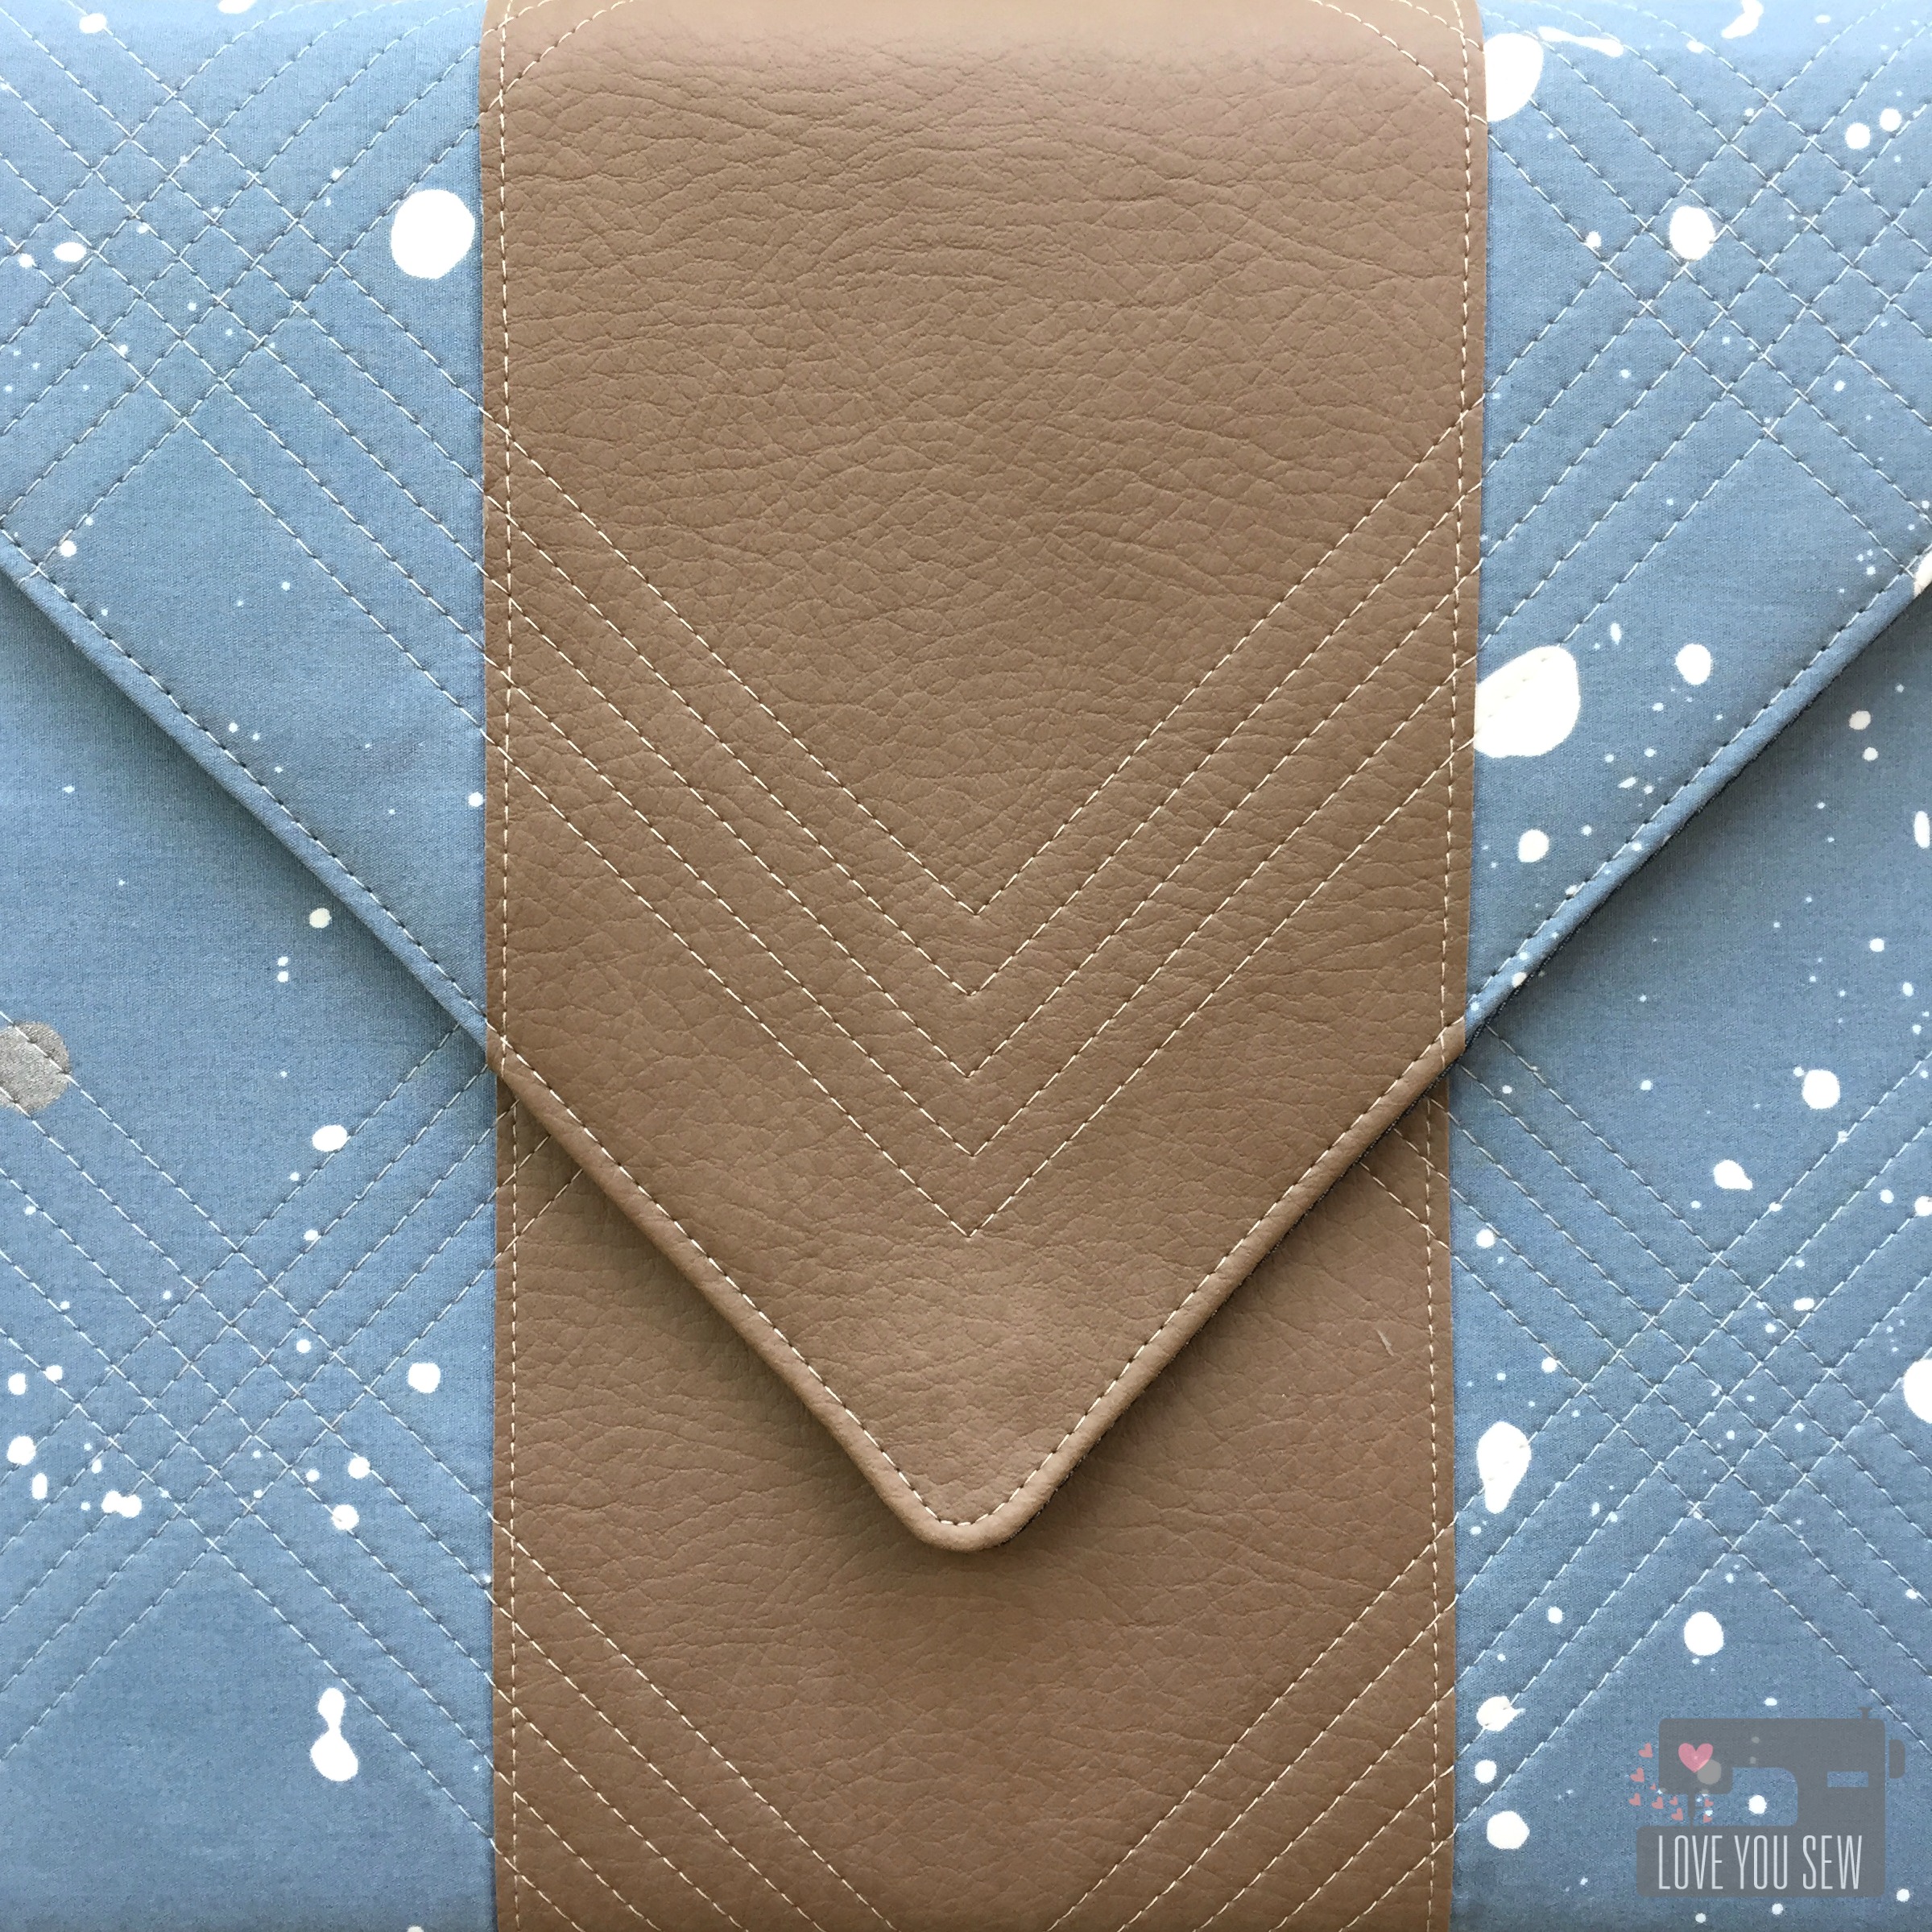
Working with the envelope design, I used a simple half log-cabin pattern to work with the flap’s 90 degree angle.  I used a 2.5″ fussy-cut square from the Homespun Praxis and used various 5″ (or longer) x 1.5″ strips to make a 28″ panel.  The panel was then trimmed to 5.5″ wide.

IMG_6772

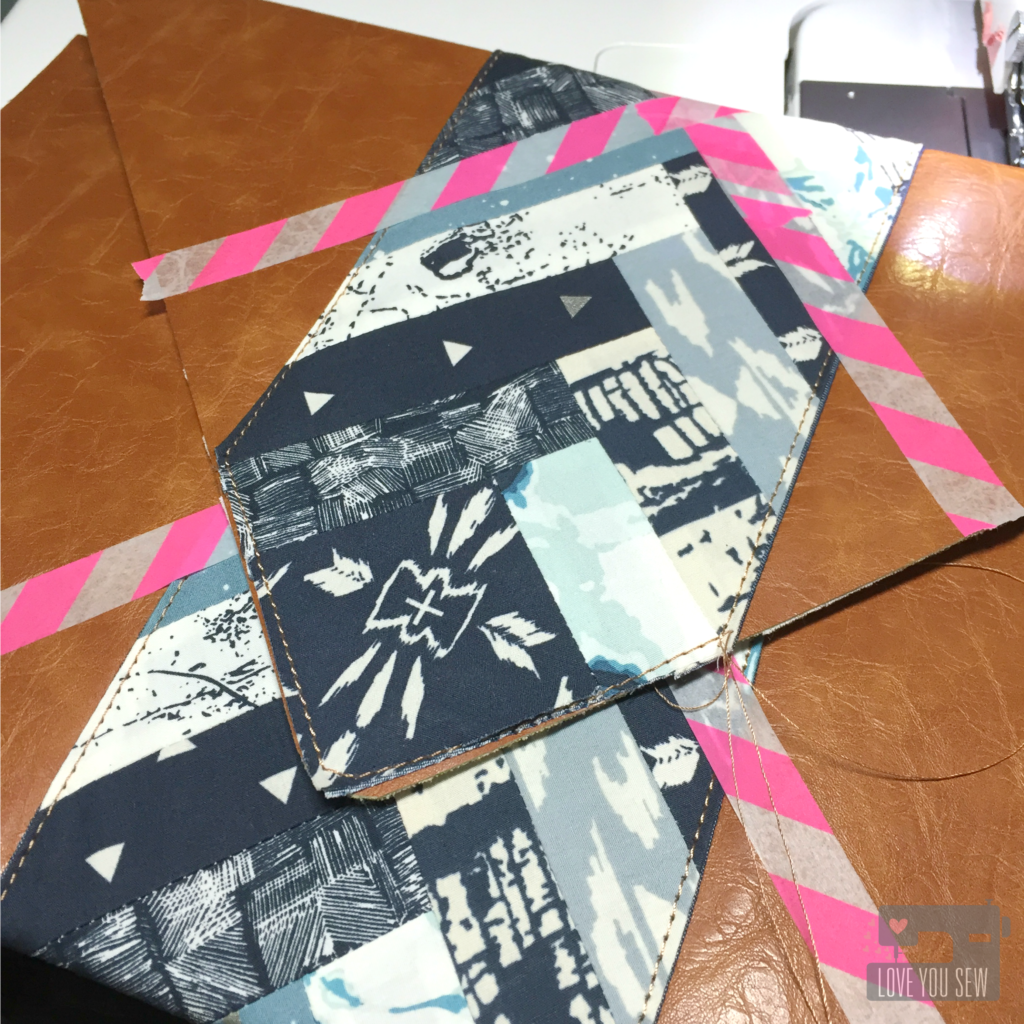
The pieced panel was then sewn onto a coordinating AGF Solid Smooth Denim with right sides together. They were turned out and pressed.  The results are clean even edges which are then top-stitched down onto the (faux) leather.  I used Gütermann upholstery thread which provides a nice raised look and slides well through the leather.  Washi tape was used as the quilting guidelines since pen and chalk can smear.  I followed the lines of the piecing  to create additional texture and add more design detail onto the clutch.

P1060621

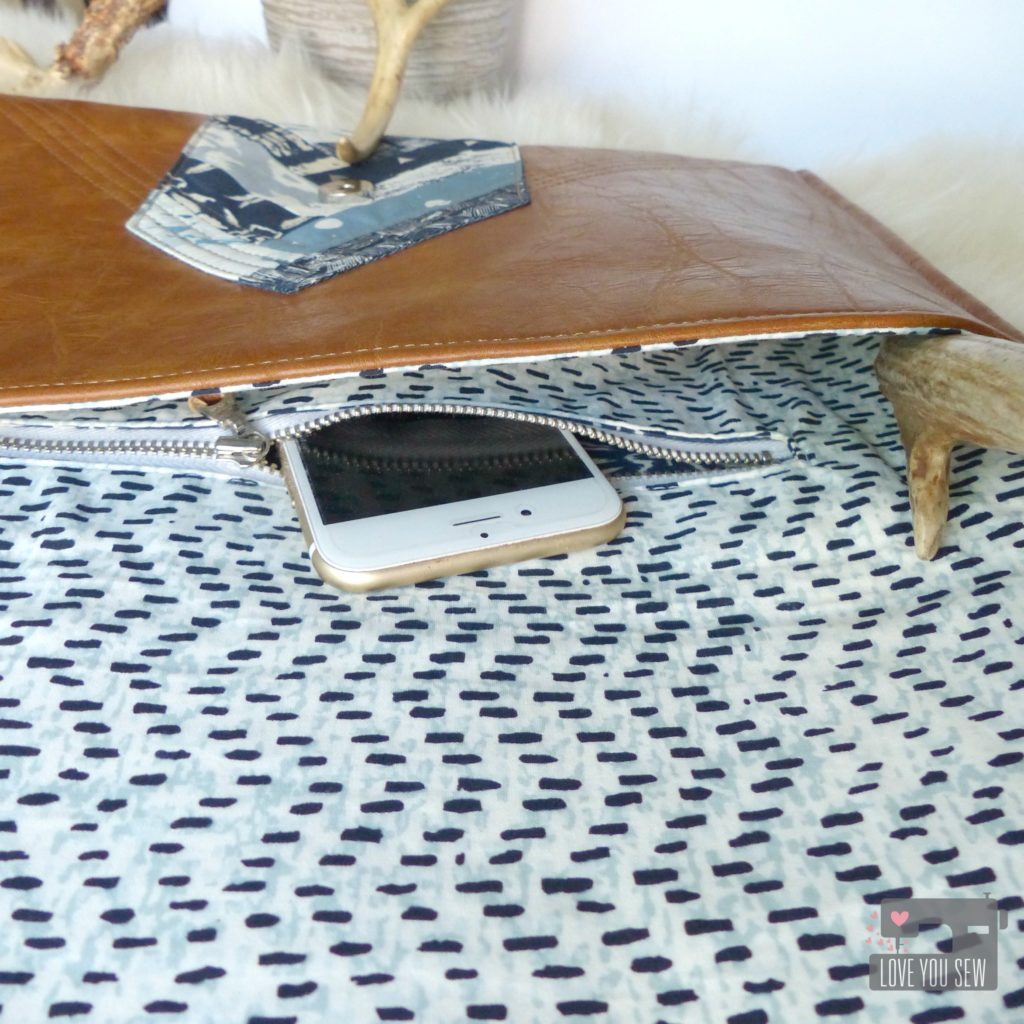
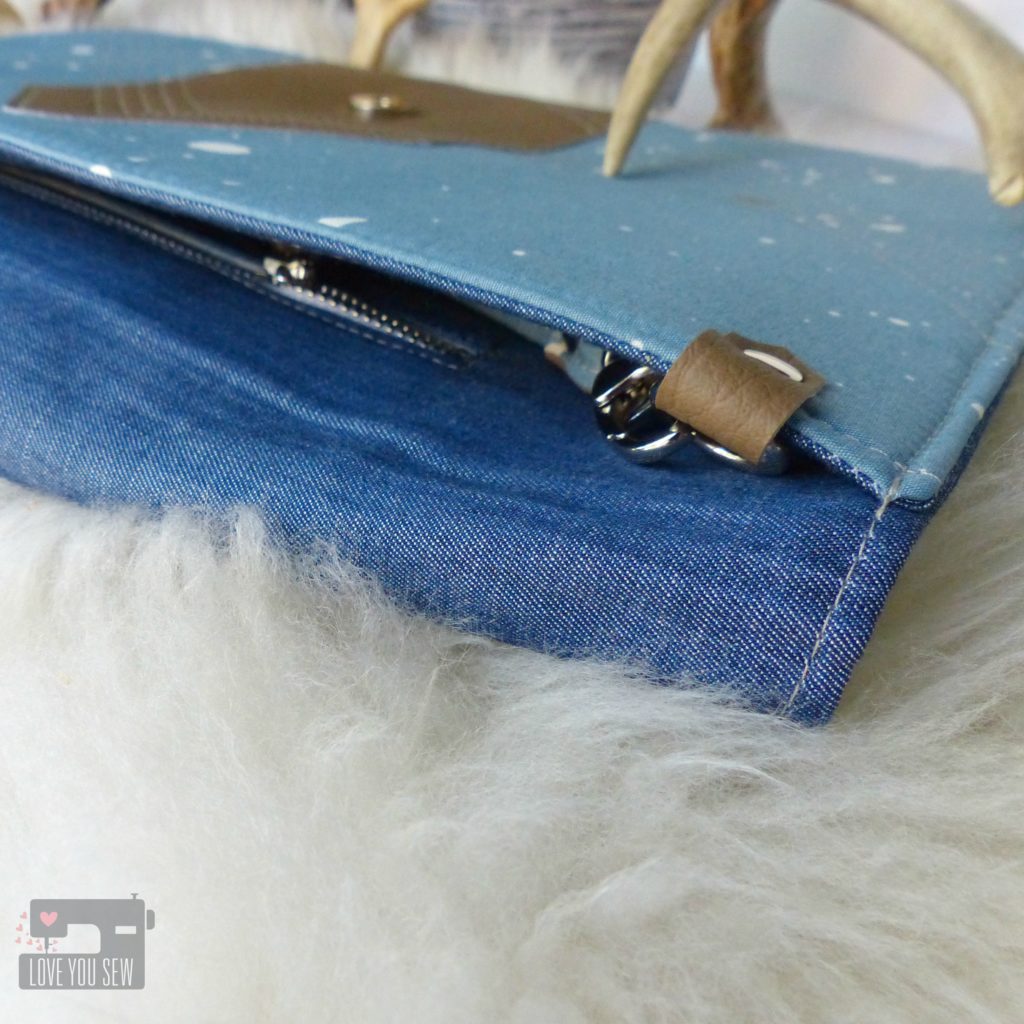
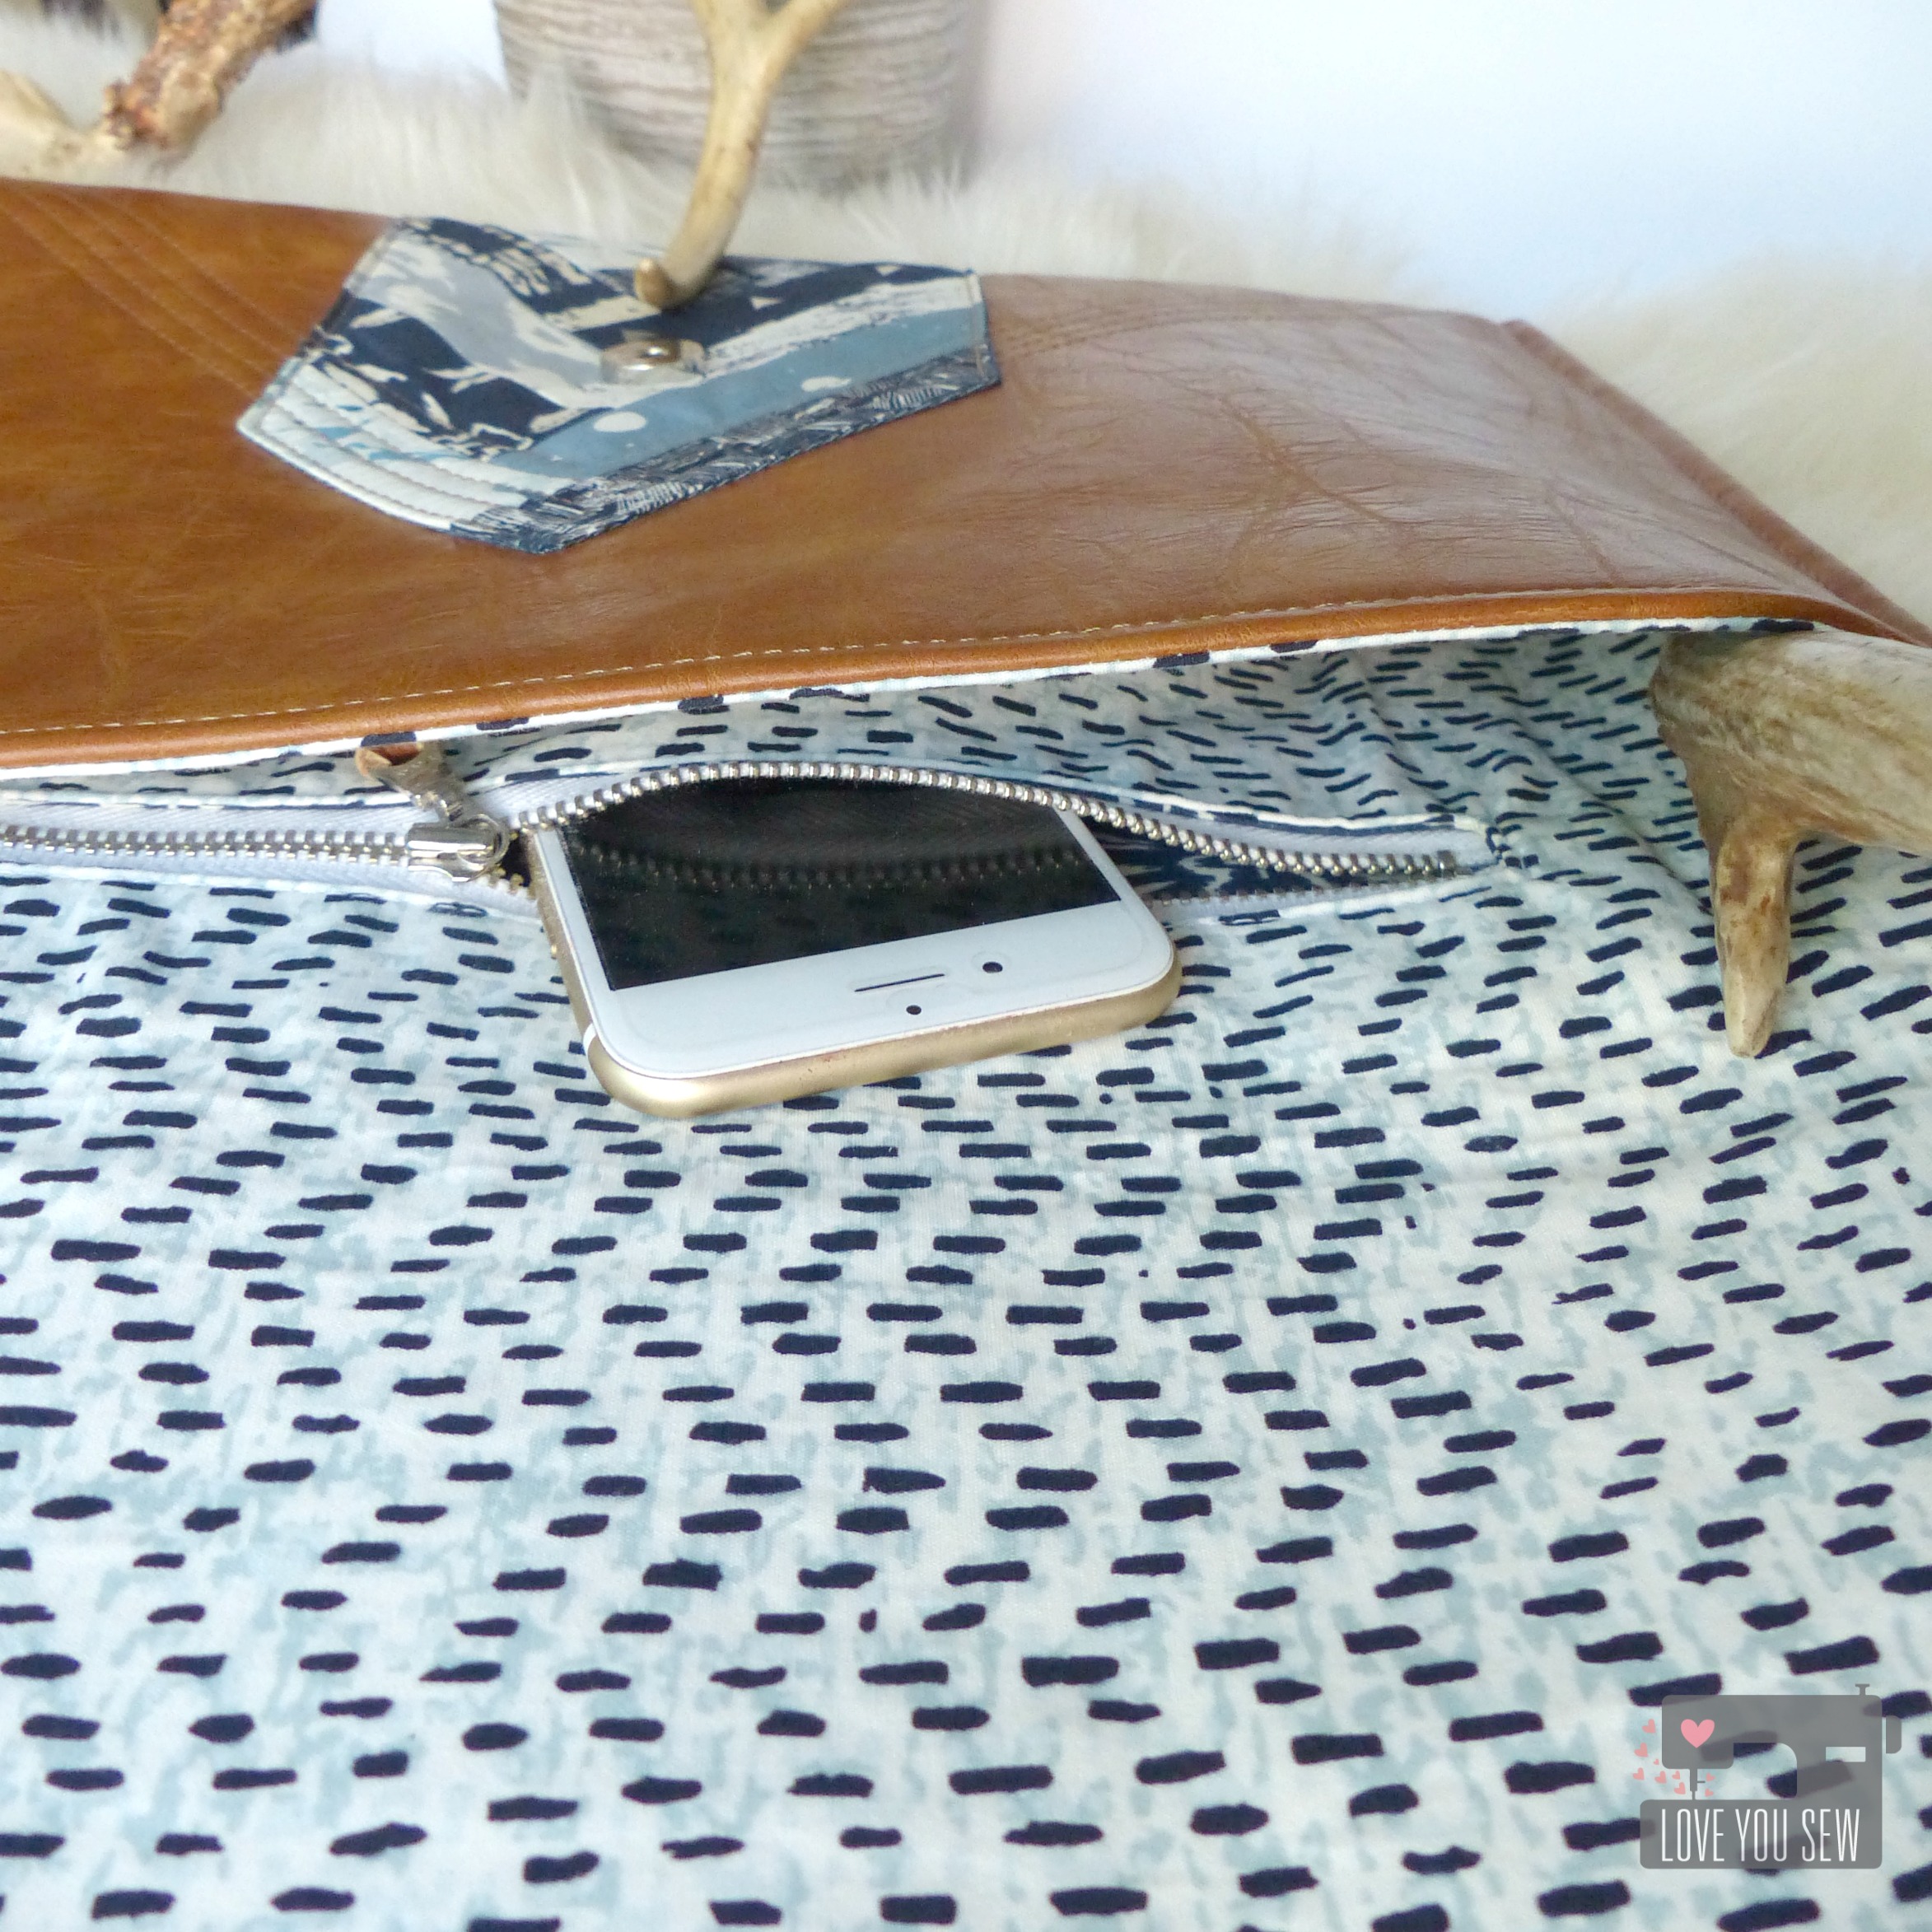
This Envelope Clutch, although oversized to carry a lot of stuff, still needs the basic features of any bag.  The lining is made out of Treadle Tradition with a generous sized pocket using a 9″ metal zipper from Zip It Zippers.  Metal zippers add that extra professional look I just love.

P1060620

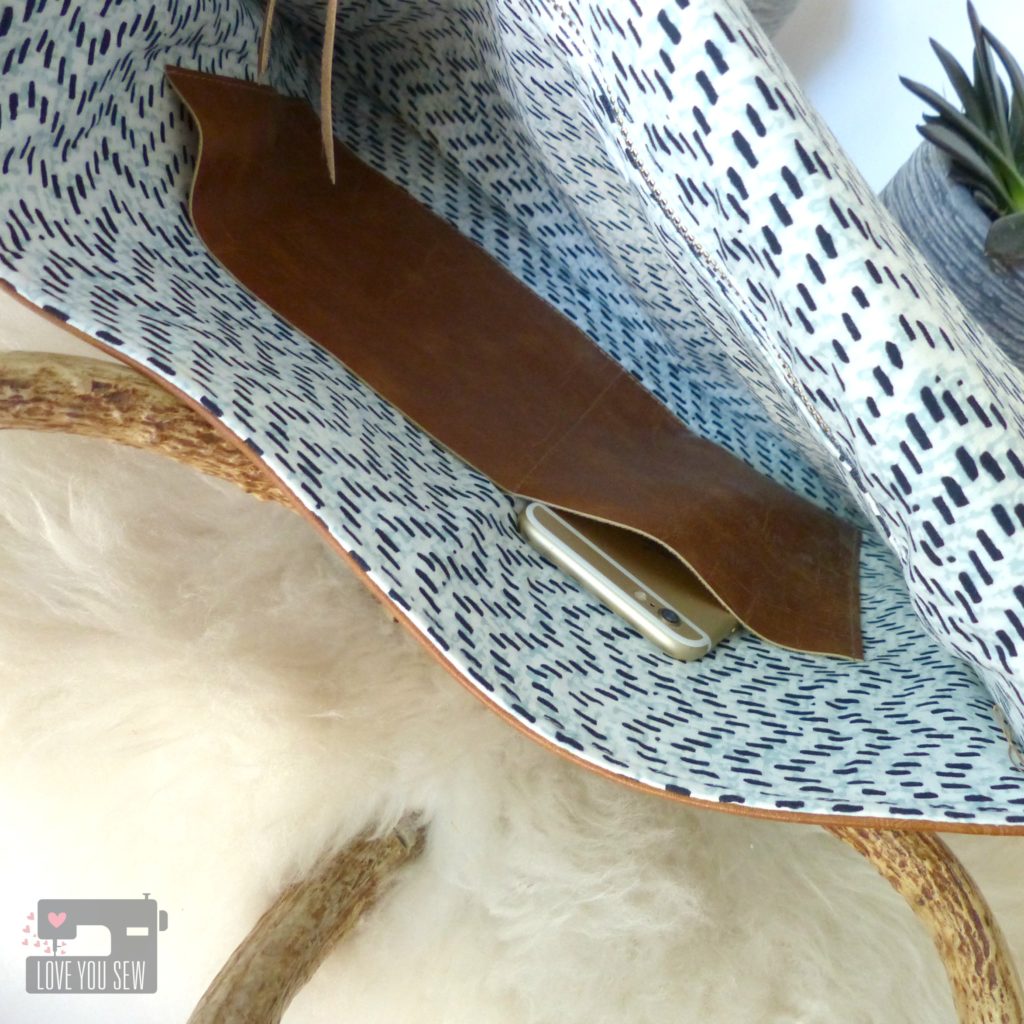
On the opposite side of the lining, I added simple slip pockets.  These are unlined, using leftover leather so there is no fraying.  They were sewn down with unfinished edges.  I just made sure one pocket was the proper size for my cell-phone…priorities, right? 😉

P1060649

Metal snaps were added and now I’m ready to hit the town with my chic boho clutch!

IMG_6880

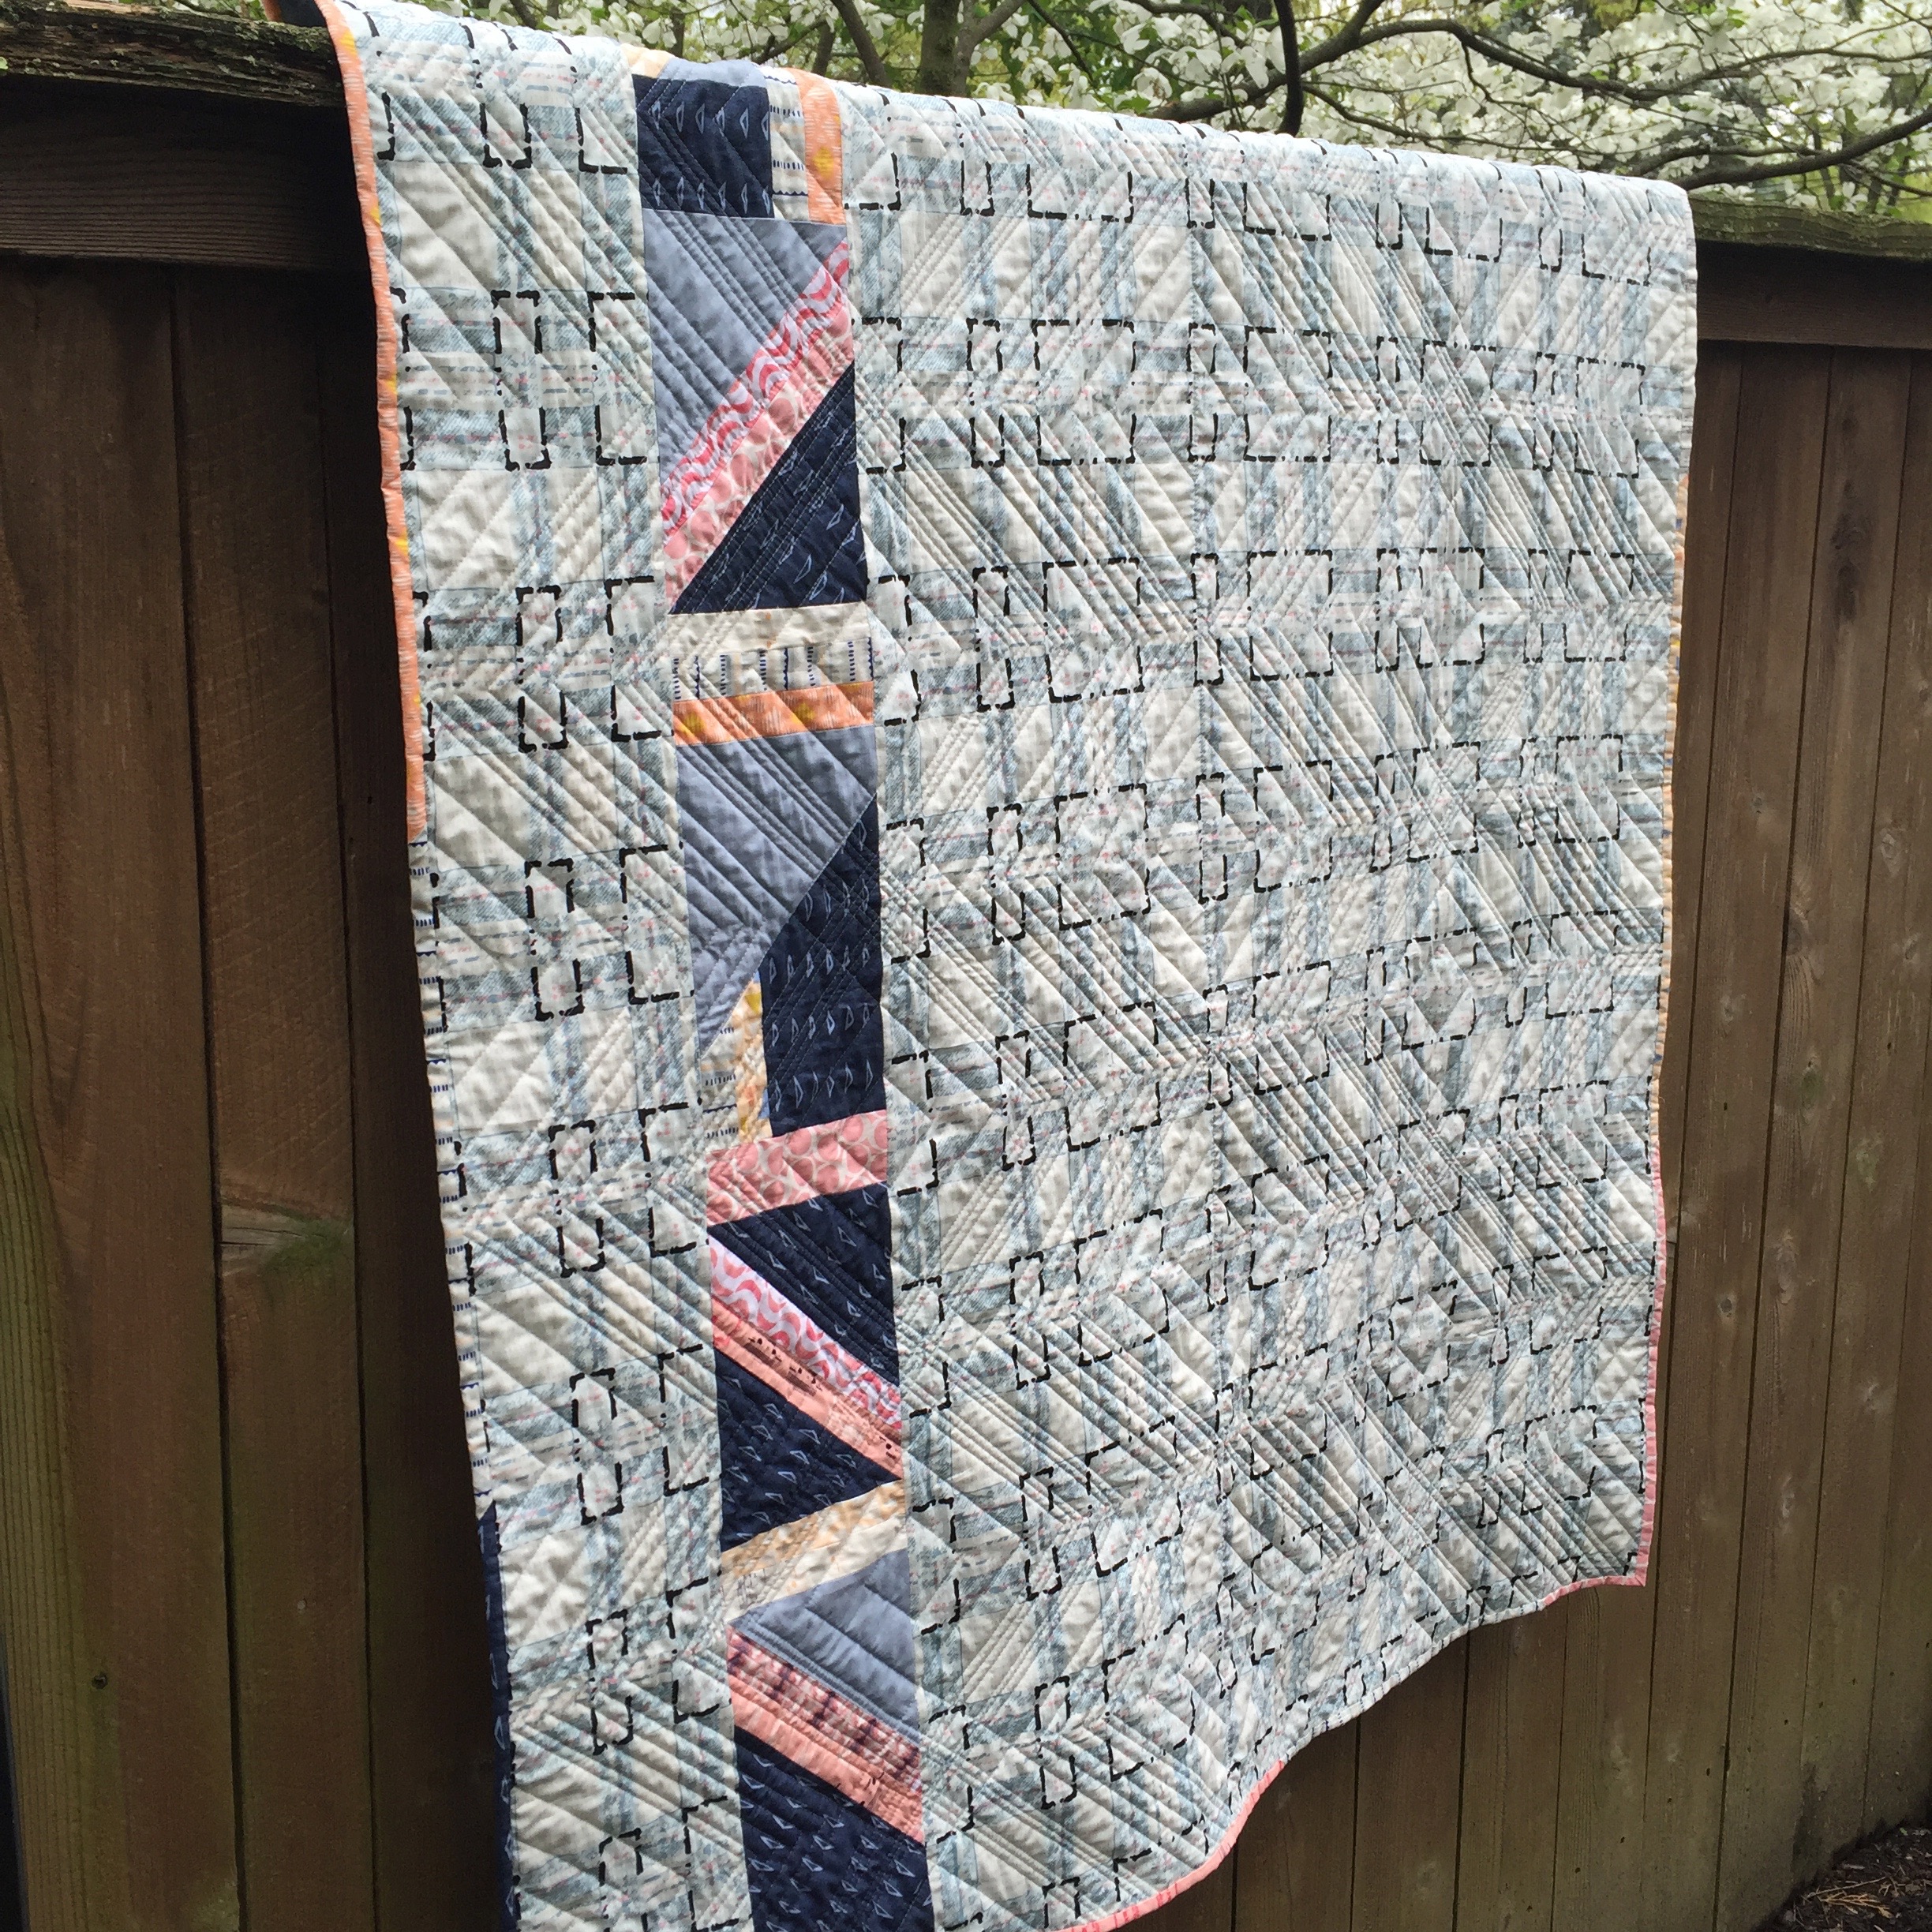
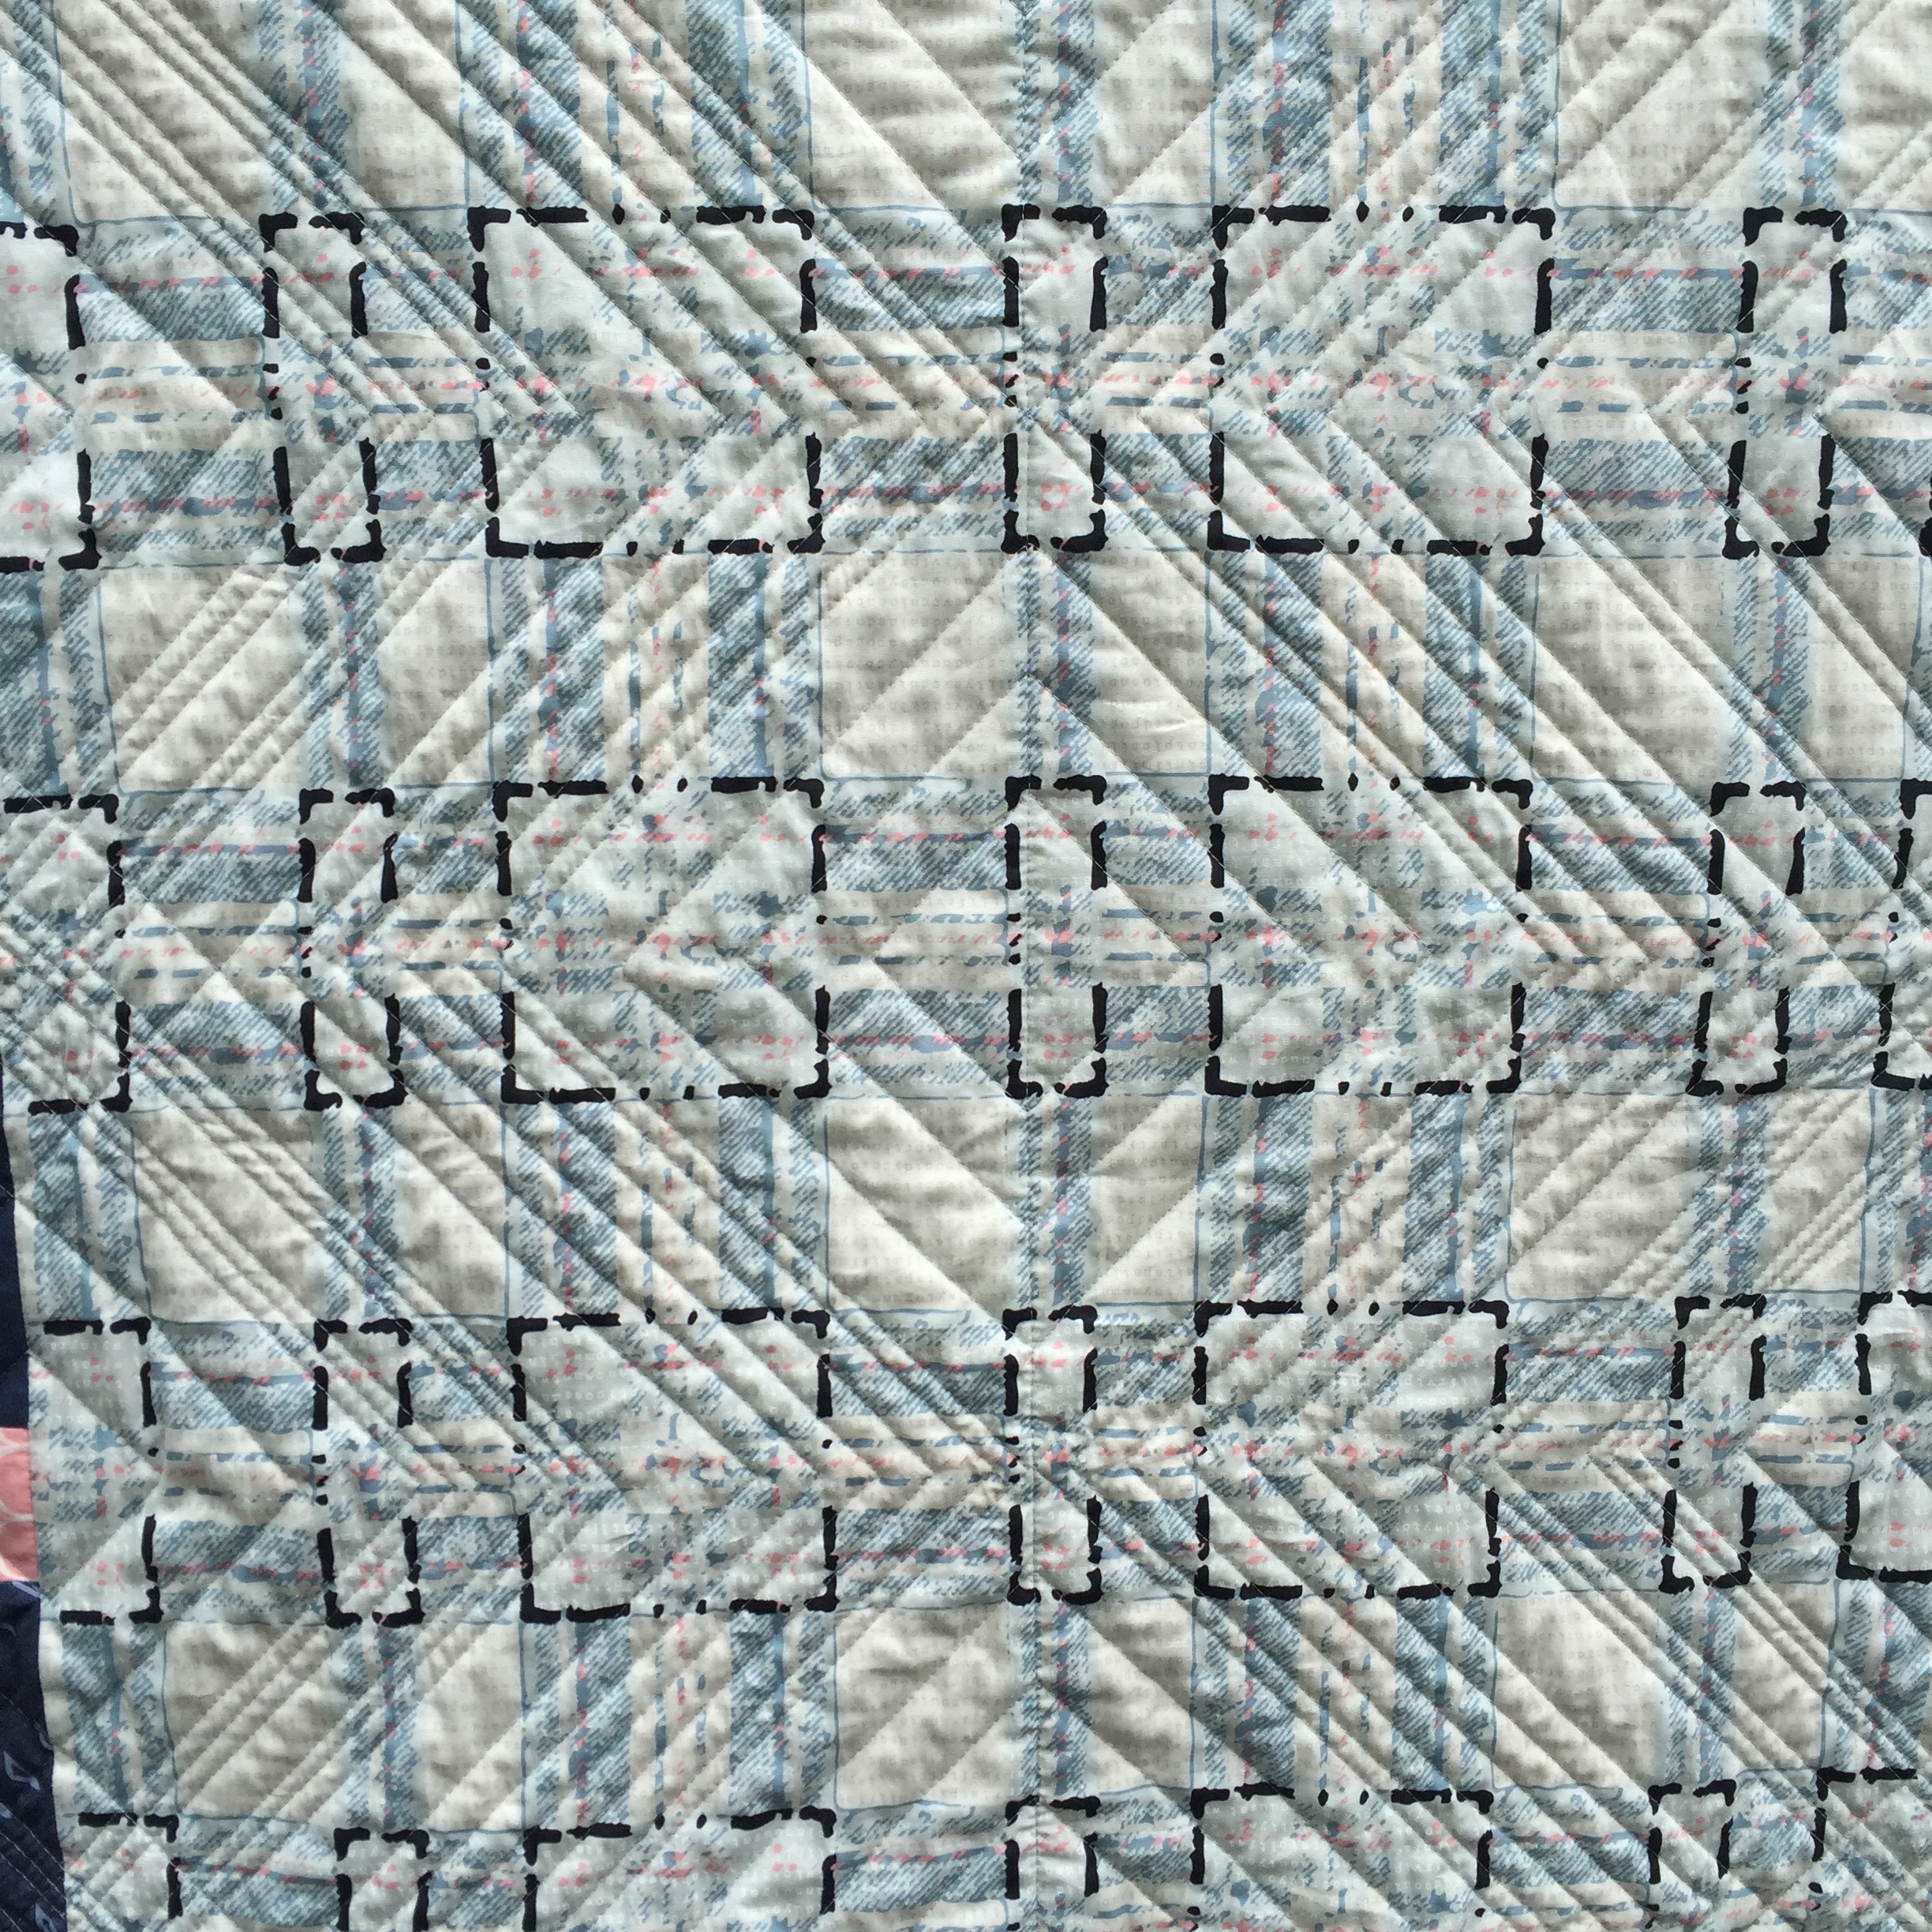
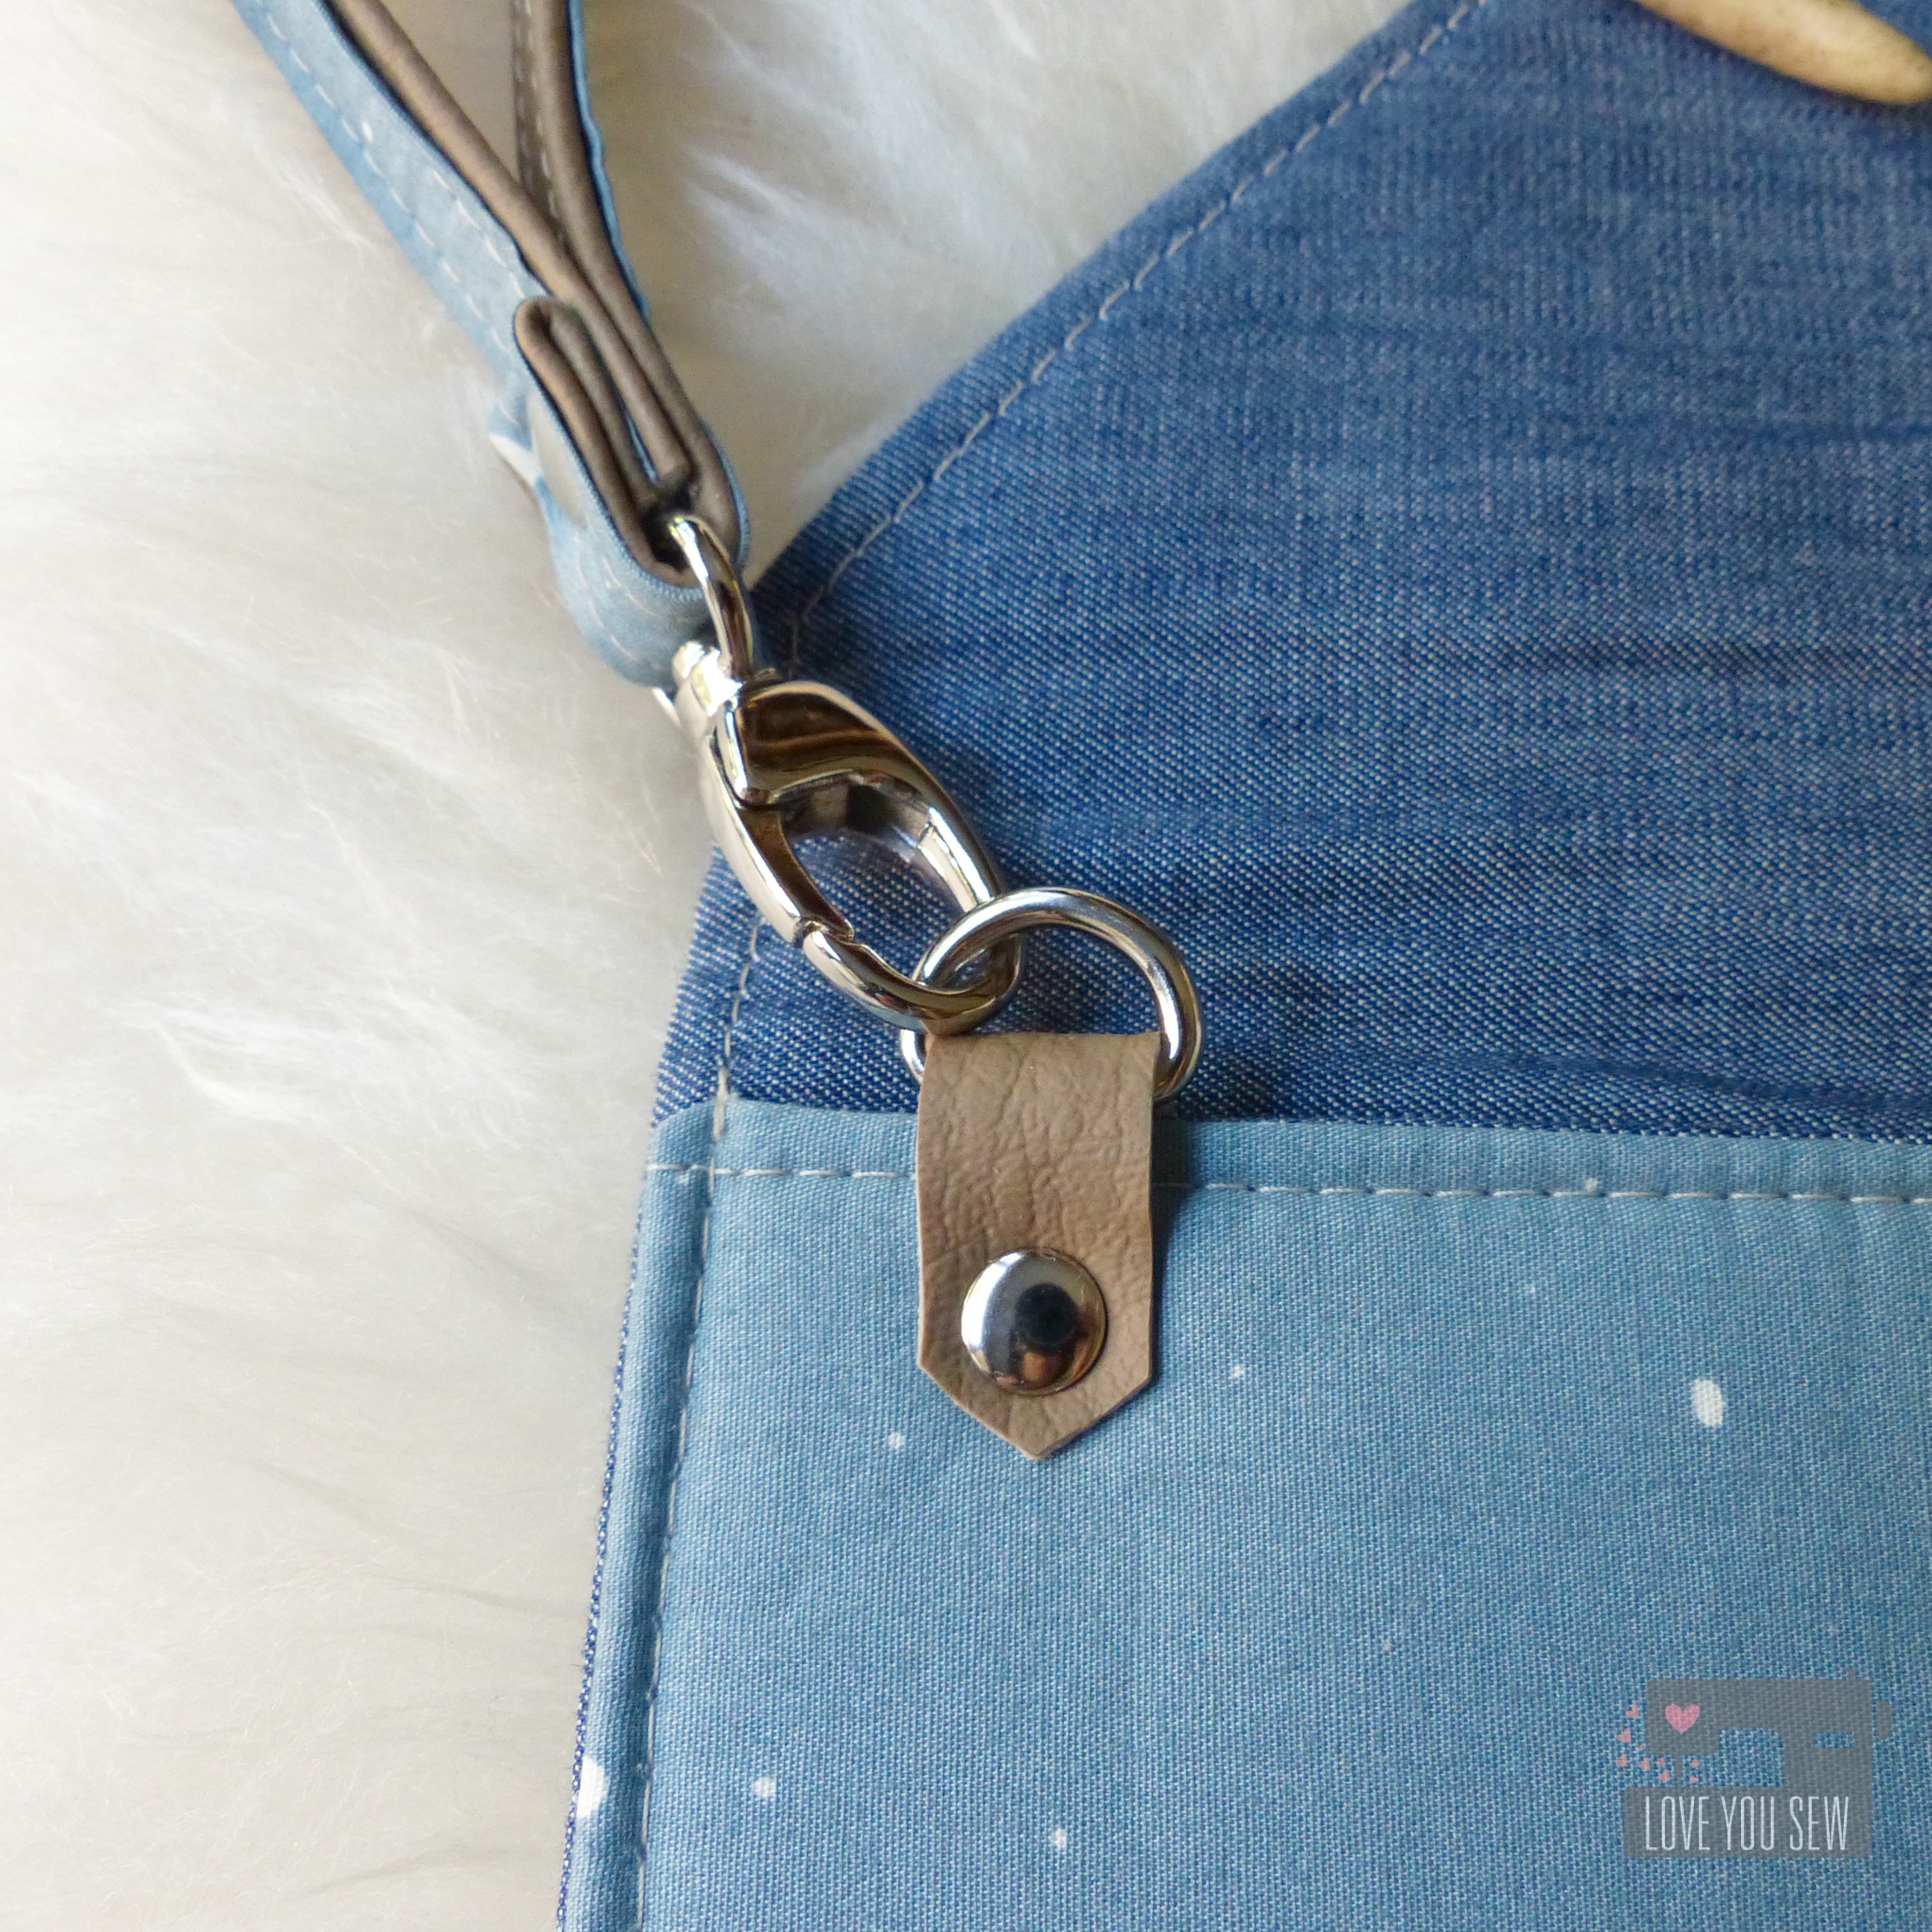
Sewing through faux leather can be a challenge on many domestic machines.  So I wanted to come up with a similar style Envelope Clutch which is MUCH easier to sew.  This design is shown in Speck Stardust and utilizes some fusible fleece with just a single panel of raw-edge faux leather.  I love how this print color reminds me of a perfectly worn pair of jeans and the leather match my favorite fall booties.

P1060626

I wasn’t able to find upholstery thread to match this vinyl, so I used Gütermann Sew-All polyester.  This slides through the faux leather really well and still provides a great look and quilting texture.  I changed up this quilting design to make some fun cross-hatching.  ‘Slow and steady with the walking foot kept the lines straight and even.

P1060628

With this version, I added a wrist strap using hardware from Emmaline Bags and scraps of both the (faux) leather and Speck Stardust.  Using half fabric and half leather is easier to work with rather than trying to sew through multiple layers of leather.

P1060629

The D-ring was added to the front of the clutch rather than sewn into the side.  This provides the option to be hidden.  It also doubles as a spot to hook your keys.  The lining was made from Indigo Shadow Solid Smooth denim and I created the same zipper pocket one side and two slip pockets on the other.

P1060638

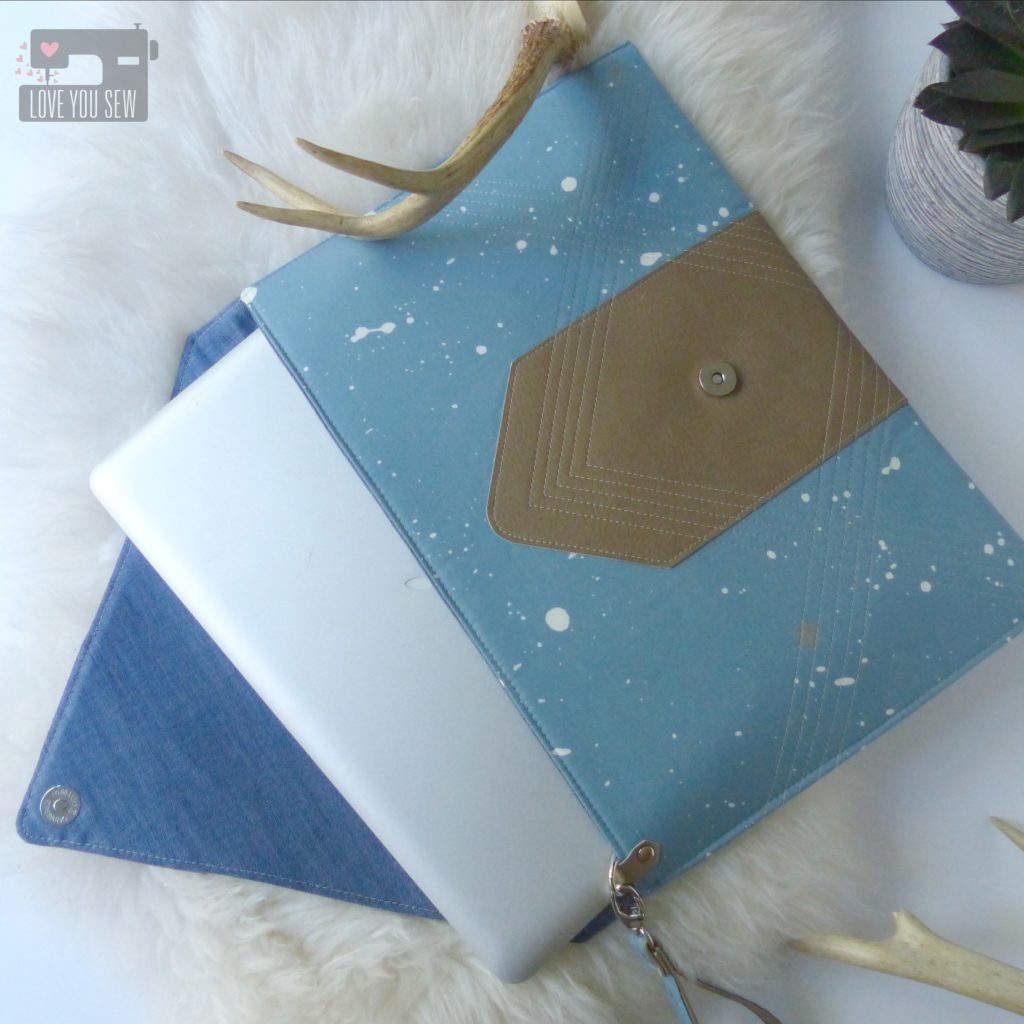
Ironically, this design also fits my laptop.  So with the fusible fleece, this Envelope Clutch can be used as a laptop cover.  The pockets are great for cords and small headphones.

P1060648

I know I’ll be rocking this clutch out on the town with the girls though….

What’s on your project list with Observer?


Make sure to stop by April’s blog to get the up-to-date schedule with 6 weeks full of dreamy inspiration.  The line-up of bloggers is quite impressive 😉  If you need even more ideas, head to Art Gallery Fabric’s Observer Lookbook….you might even recognize someone’s name in there 😉

#ObserverFabrics #ObserverFabricTour #ArtGalleryFabrics #WeAreFabrics


Sew On,

Cristy

Macrame School with Natalie Miller

Macrame School
This past weekend, I had the ultimate fiber arts experience with famed Aussie artist, Natalie Miller.  I took a 3-hour Macrame Wall-hanging workshop and it was all here in beautiful Columbus, OH.  Honestly, I still can’t believe I had the chance to take this class without having to leave home!

image5

Natalie resides in gorgeous Kangaloon, Australia and has the most visually delicious Instagram feed.  It is filled with colorful images of her home along with all of her amazing weavings and macrame.  You can even pick up all the supplies you need from her online shop…which includes her hand-dyed wools!!!

I initially discovered this class through my friend, April Rhodes.  She co-hosted with Sam Van Der Puy and Michelle Parson to organize  these workshops. April is a big fan of macrame and suggested I follow Natalie on IG….I’ve been drooling over her work ever since.

Unfortunately, two days of classes overlapped with my family’s trip up north to Lake Leelanau, MI.  I really wanted to try tapestry weaving…especially with the wool roving (swoon!) but they were both on Friday and Saturday.  Luckily, I also wanted to try macrame and decided on the wall-hanging course.  My house is still in need of serious decor even after 5 years of habitation….so this was perfect!

Bellini and Rope

The workshop started with (a bellini!) selecting the colors of 100% cotton rope shipped directly from Natalie’s supplier in Barcelona, Spain.  In addition to natural rope,  we were asked to select one more color…and boy, they were all calling my name.  It was hard to select one.  I ended up with a navy…a safe neutral that would stand the test of time.  After everyone had their turn, there was ample leftover rope so I was able to select an additional color. *SCORE* I selected a warm mustard to go with my vision and was not disappointed at all.

image7

We learned basically three knots and the different variations of them to create our own design.  I’m still trying to get over the fact that macrame is based on only a few knots!  Who knew?!? I stayed with a bunch of square and diagonal half hitch knots on mine.

image6

Natalie brought us some macrame “bling” to sauce up our hangings.  There were choice of wooden and copper pipe pieces.  I selected the smaller copper ones to add some bold contrast.  I thought after my pegboard, I was done with the hardware store…but now I have another reason to go!

Necklace

Many of us were able to finish with some time leftover.  While we were enjoying our bellini’s and snacks, Natalie broke out a bonus project for us….bib necklaces!  These all use the same knots as our hangings but we used different “fabric” rope instead. Some of my classmates chose an almost shoelace (but thinner) rope and I selected a thick recycled jersey knit for mine. Can you say, “scrap buster project?!?”  I’m in LOVE!

LYS and Natalie

Wow….what a day…I’m still reeling over the fact that I got a once in a lifetime opportunity to learn from such an amazing artist and person.  Most importantly, I learned macrame was WAY easier than expected!  I want to make more of these wall hanging and necklaces in the future.  Yes, I totally snagged a frame (IKEA clothing rack) from the workshop too 😉

image1


Still knotting on a Macrame Cloud,

Cristy xx