Add Puff Sleeve Drama with a Sheridan Sweater Hack

This post was originally published on the Hey June Handmade Blog in January, 2020.  Edits are in italics and additional pictures have been added (since I love this pattern SO much!)
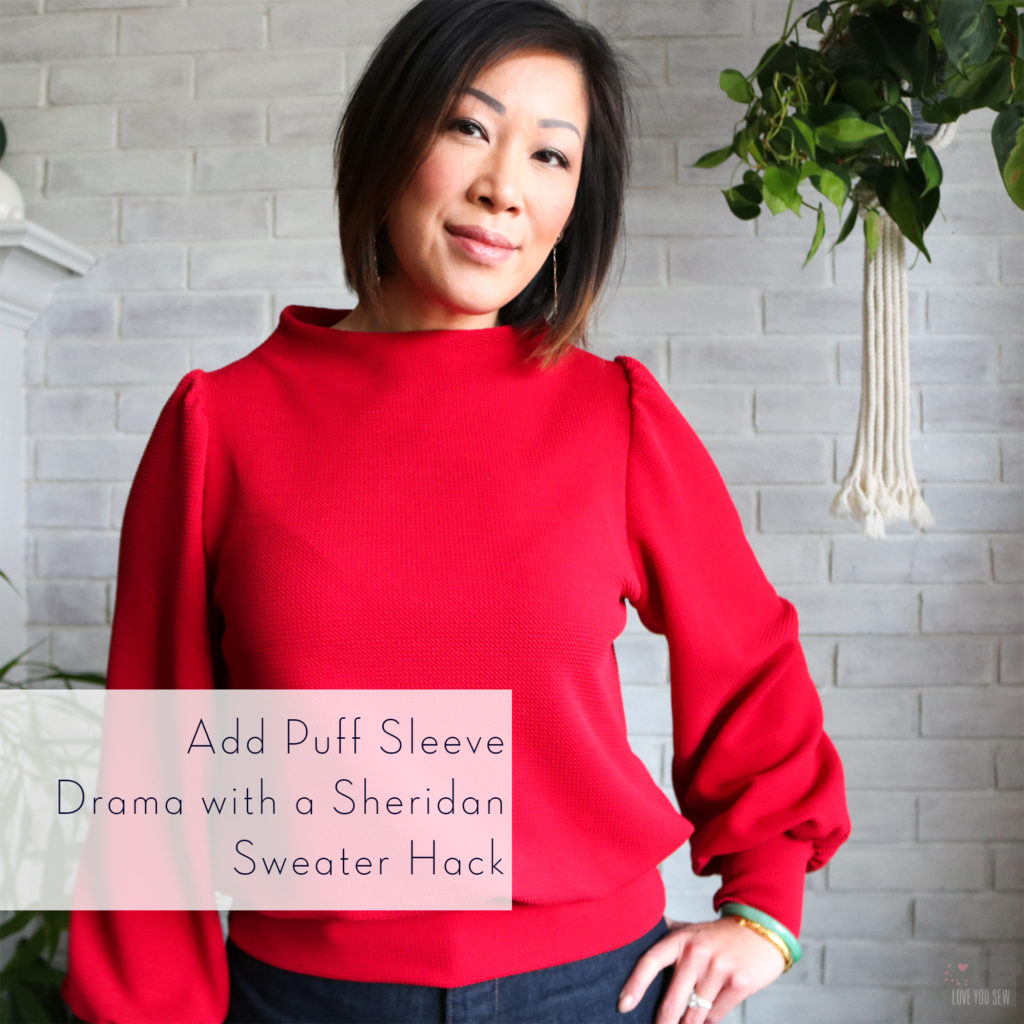
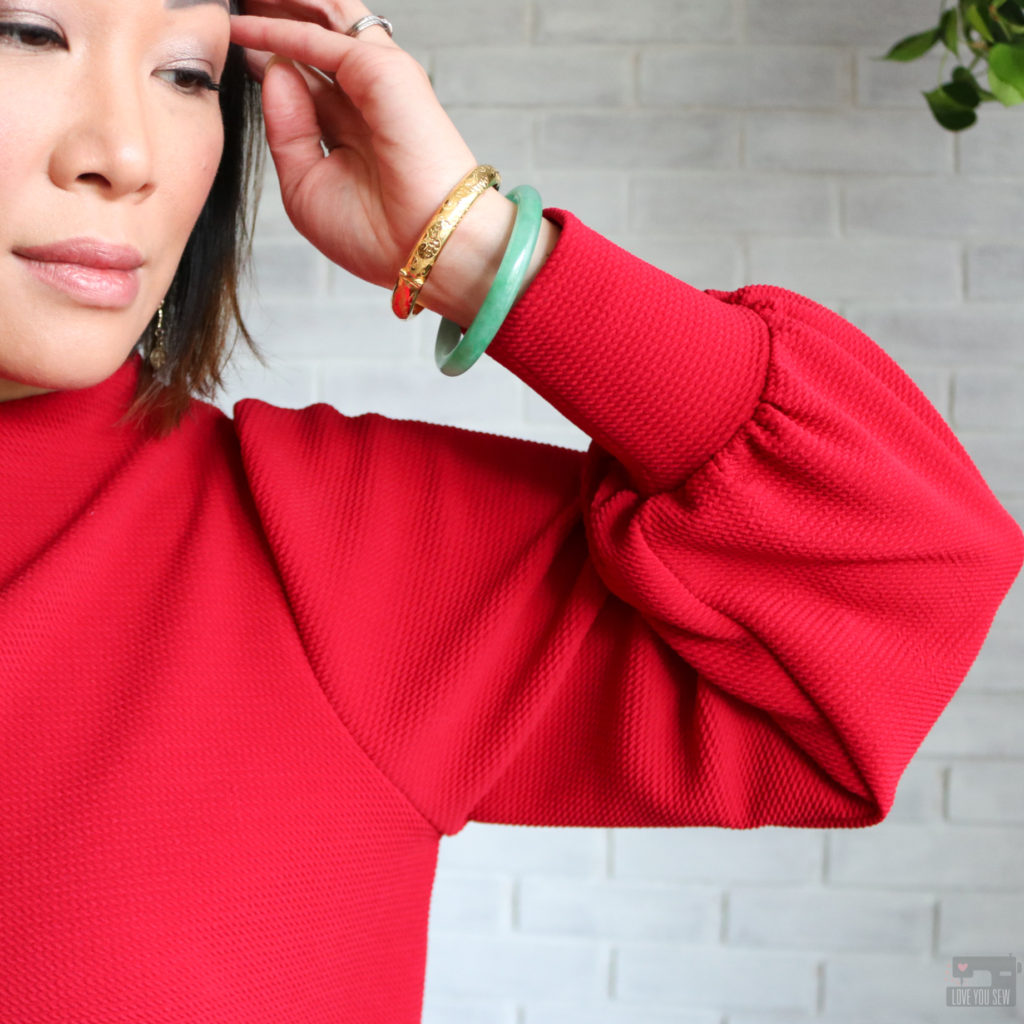
When I first hacked this Sheridan Sweater for the Hey June Handmade Blog, I had no idea it was going to become one of my MOST worn tops. Prior to March, life was pretty normal while we were just starting to hear about the pandemic. My social world was still moving along and was able to wear my Sheridan to Lunar New Year celebrations (as planned!), Galentine’s Day fun with my girls, and was my go-to for a night out.  I knew even back then that I wanted another Sheridan.
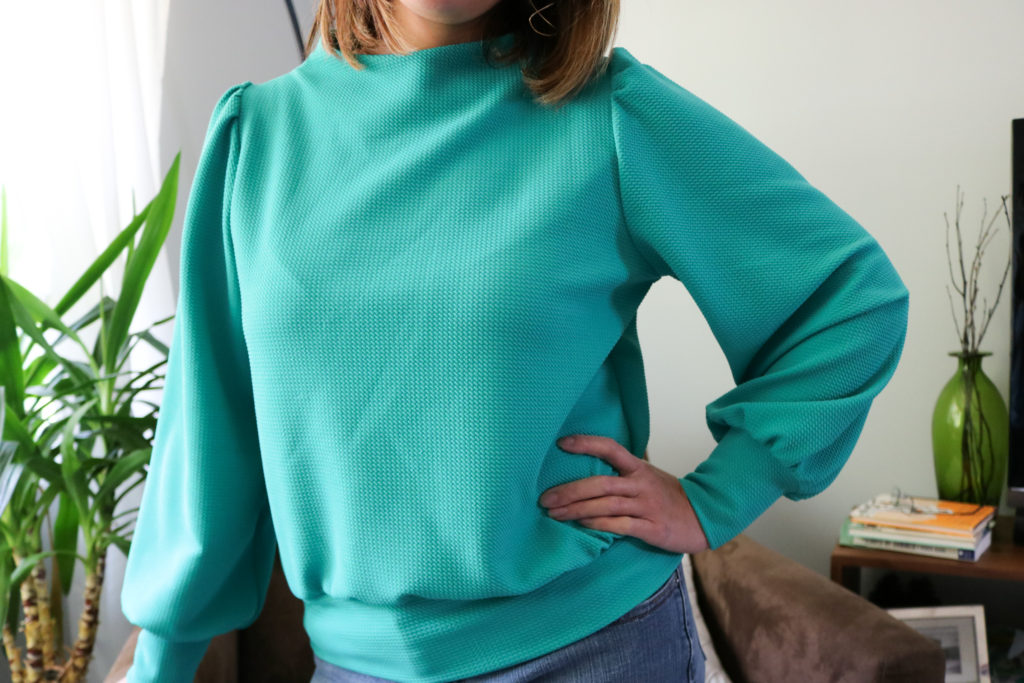
After a #sewingfail with the wrong fabric (it was a red and cream colored stripe that clashed and looked HORRIBLE with my skin tone and hair highlights,) I was ready to make another.  This time I wasn’t going to mess around.  I knew I would ADORE my new Sheridan because I used…the same hack…and the same fabric as my OG…just a different color!
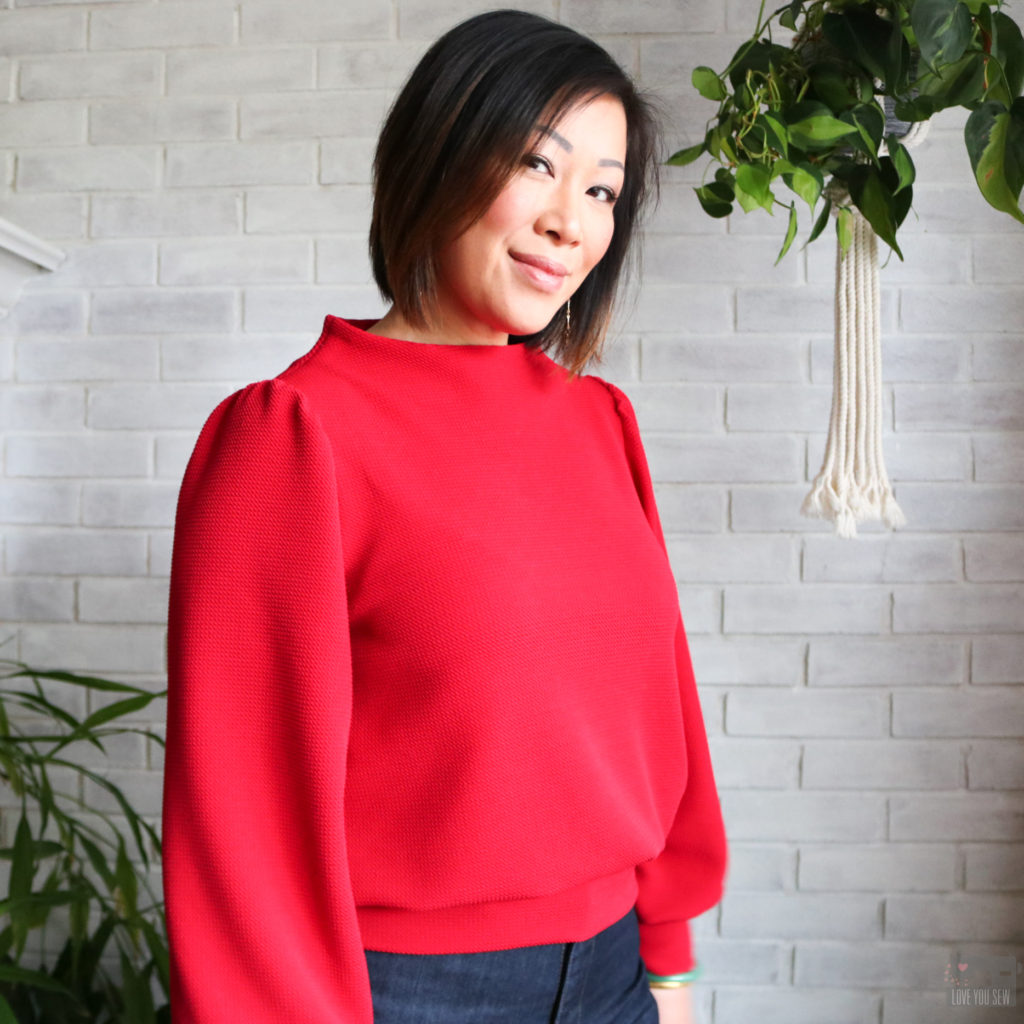


Back in early December, I knew I needed a new red top.  My one cardigan just wasn’t enough for all of the holiday school parties, concerts, church events and even family get-togethers.  I wore that one piece of red clothing OUT and knew I needed something else to add to my festive wardrobe.  But did I really need a new top???  Did I really want to make one??? Then the Sheridan Sweater was launched and my questions were answered.
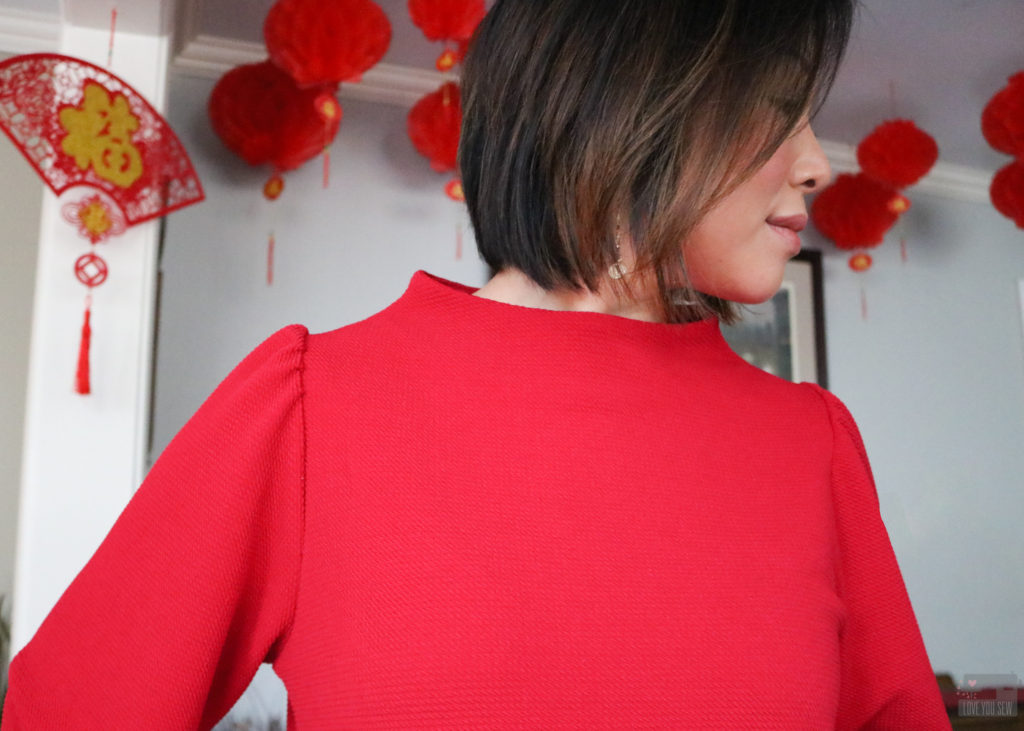
All of my internal fighting against wanting “another” knit top disappeared.  After seeing the Sheridan launch, my mind switched and I bought the pattern right away.  Of course, I need  a new red top!  It WILL work through the holiday season, AND into the Lunar New Year AND be useful for Valentine’s Day school parties!  Why wouldn’t I need the Sheridan Sweater in my life?!?
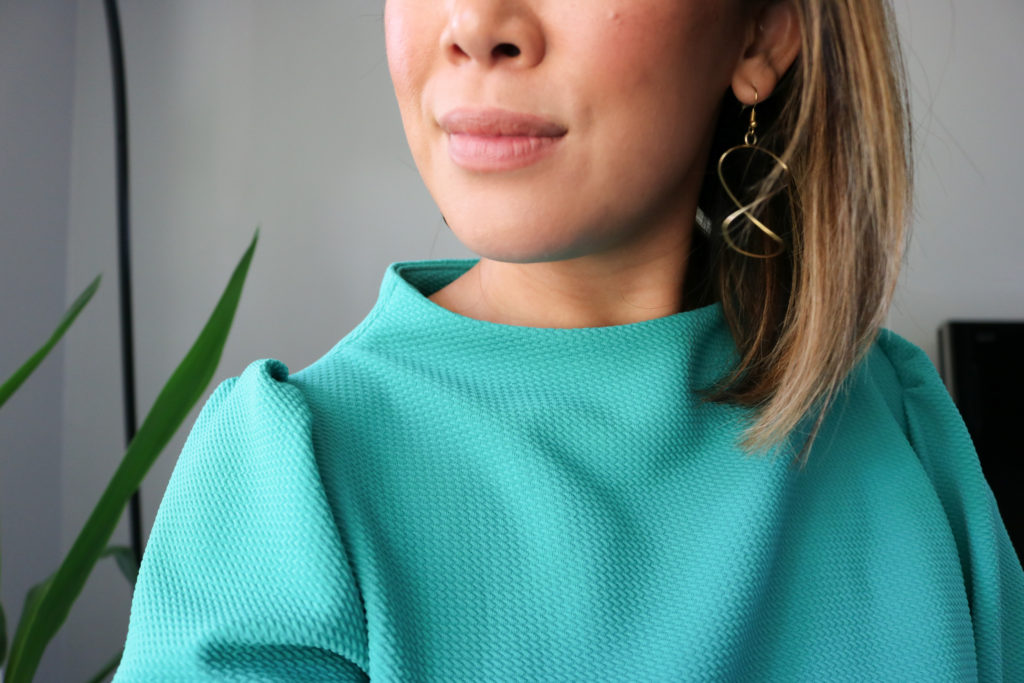
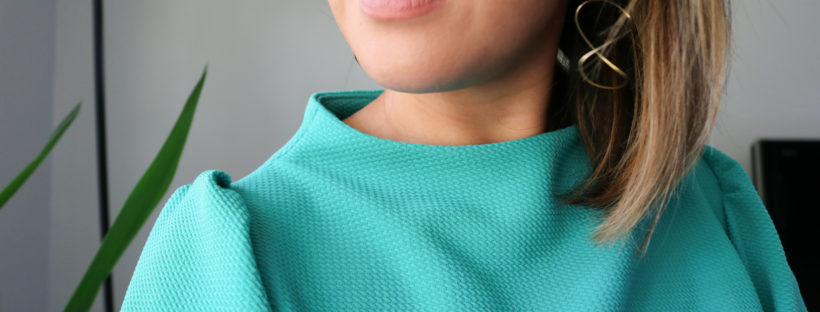
Adrianna did a fantastic job designing the different views and I’m obsessed with the seamless funnel neck, which I haven’t seen in any other DIY pattern.  The Sheridan Sweater also has the big statement sleeves which is on still on trend and I knew both of these features would really stand out in red.  But since this was going to be my all-winter holiday top, I wanted to bring it up juuuuust an extra notch.

FABRIC
I found this beautiful textured waffle knit from Telio fabrics.  One of the reasons this sweater has been on constant wardrobe repeat is the fabric.  As a poly/spandex blend, the color saturation is on point.  After all of the washing and drying I’ve done, the color still looks as intense as day one.  I was concerned that the texture might be lost over time with dryer heat, but it’s all still there!
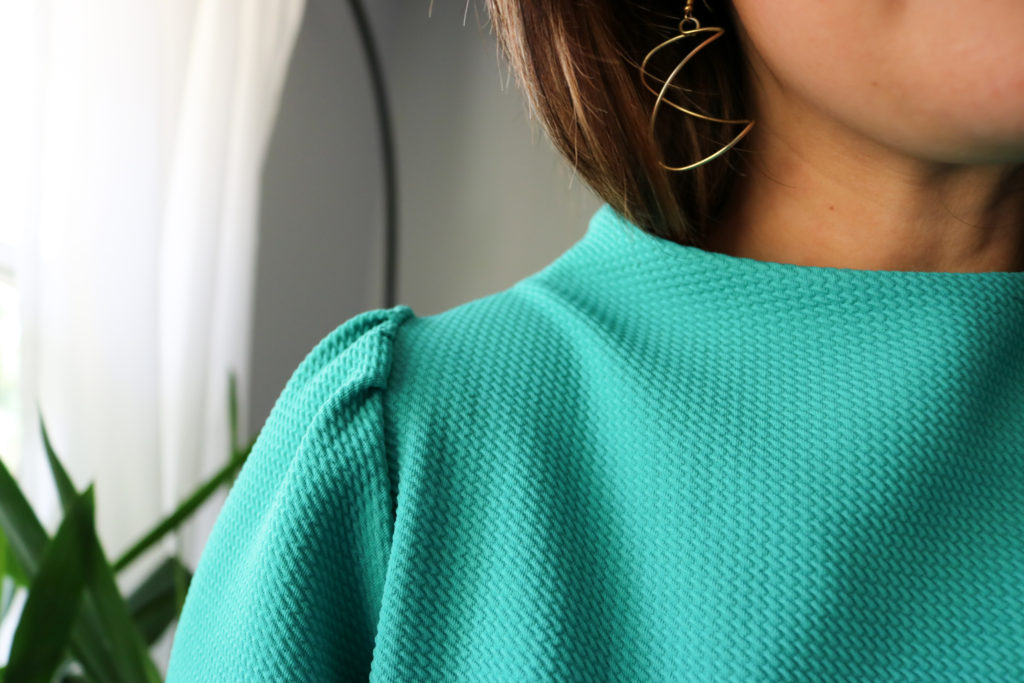
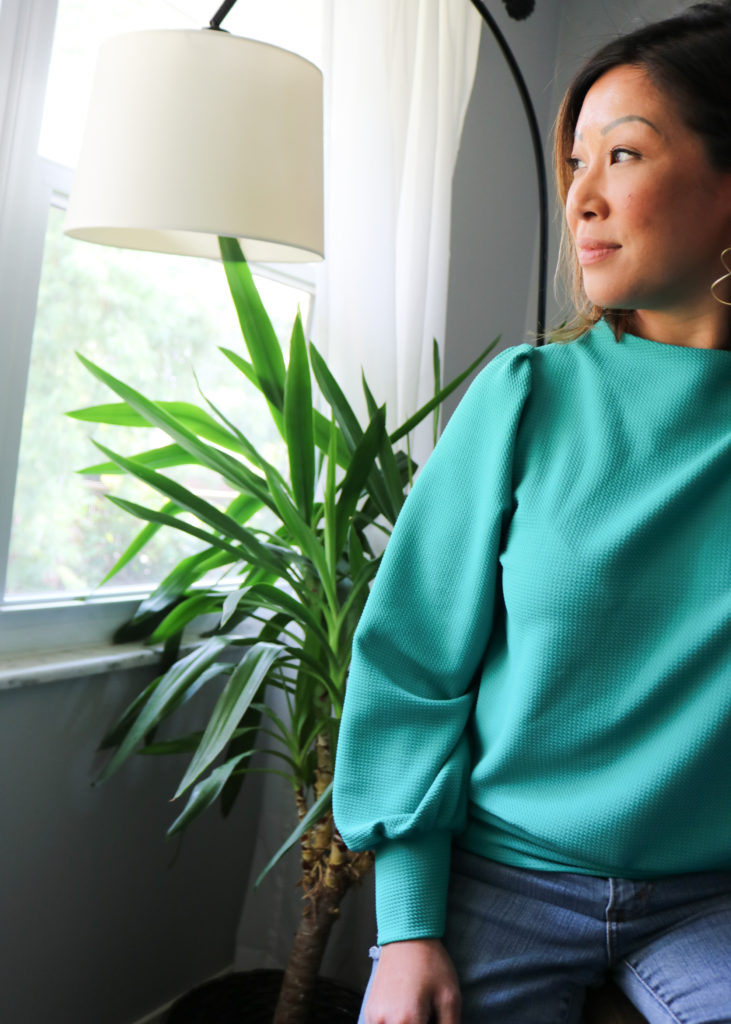
The Paola Pique Liverpool’s medium weight was a perfect complement to this pattern.  It has great body and really shows off the full sleeves.  The stretch and recovery is also very nice.  When I pull up on the sleeves and adjust the waistband, it  holds it’s size well and doesn’t stretch out over the course of the day.  This fabric comes in so many rich jewel tones that I had to have the Emerald.  The pictures come up more teal, but this color swings more to the green side in-person.

TUTORIAL

I figured if I was going red, I wanted to make the sleeves stand out even more. So….I hacked the sleeves to be more voluminous in the sleeve head for All. Of. The. Drama.  Below is my quick and definitely non-technical way to achieve that extra shoulder poof.
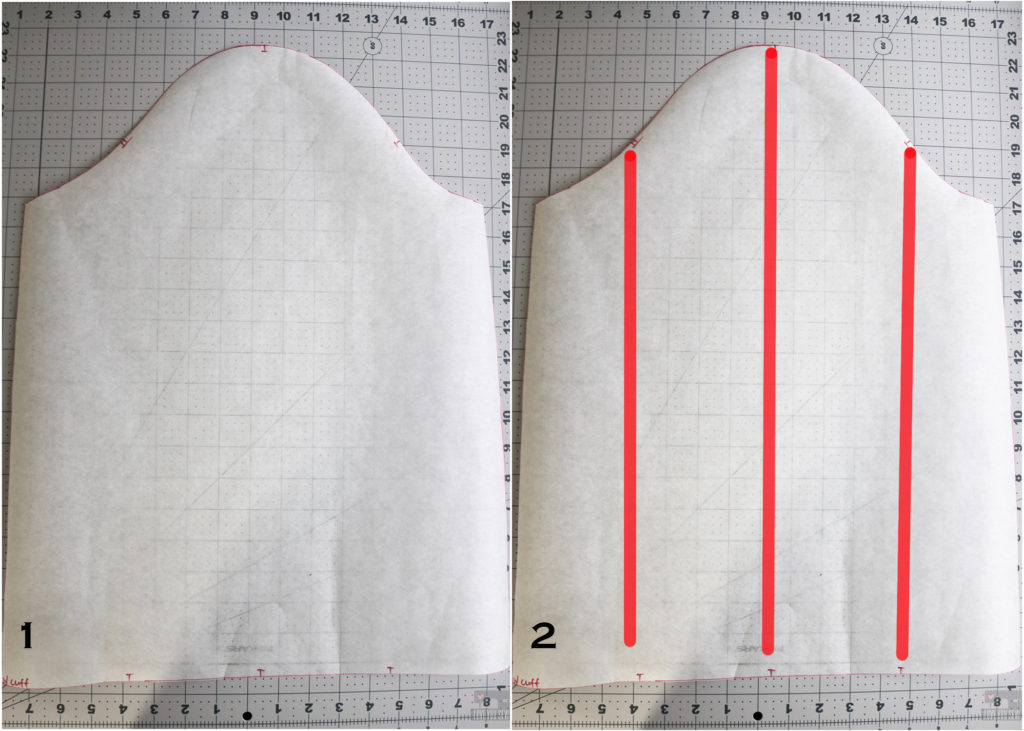
1. Take the sleeve pattern and make a copy.  (I traced the pattern onto some Swedish tracing paper I had on-hand.  I like using this since it’s more pliable than regular paper and can be pinned/sewn without being destroyed.)

2. Divide the sleeve into approximately 4 equal sections by width.  With the nice notch markings already drafted as part of the pattern, I used these as guide when splitting the sleeve.
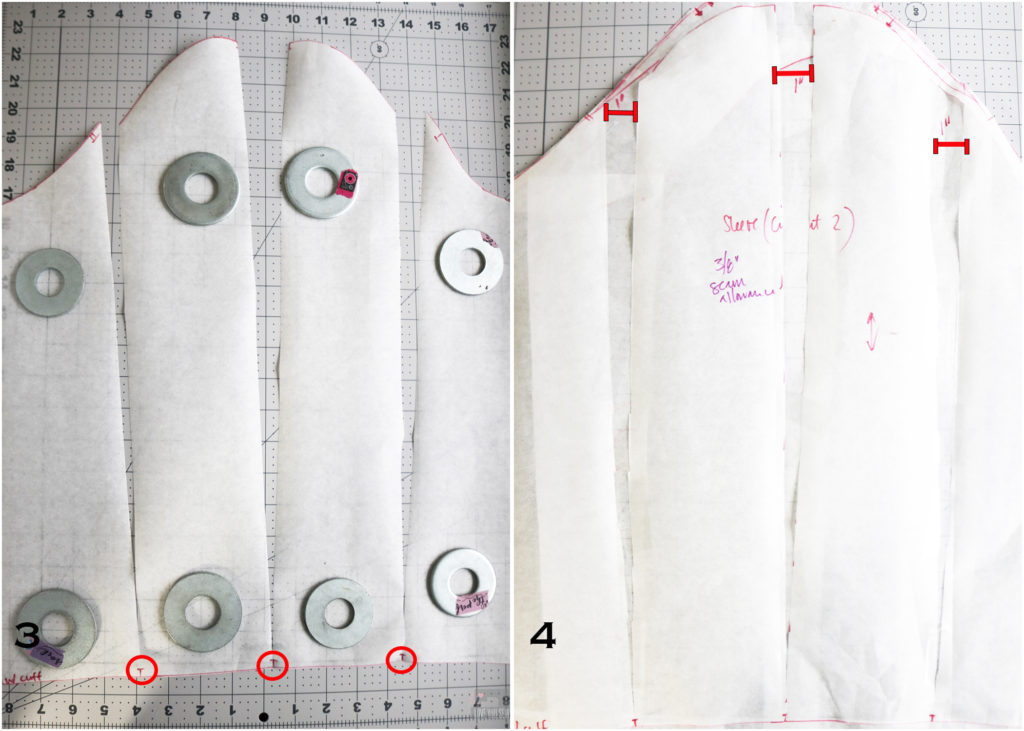
3. Cut the pattern to separate these sections from the sleeve head all the way down to the cuff, but NOT cutting through.  All of the sections should be hinges and able to move.

4. To start, I added 1” in between each section.  I placed scrap paper underneath the pattern, and hinged each section out by 1” at the sleeve cap.  Then I taped the pattern onto the scrap.  Repeat 2 more times between the sections.  If you would like more volume, you can increase the hinge widths.
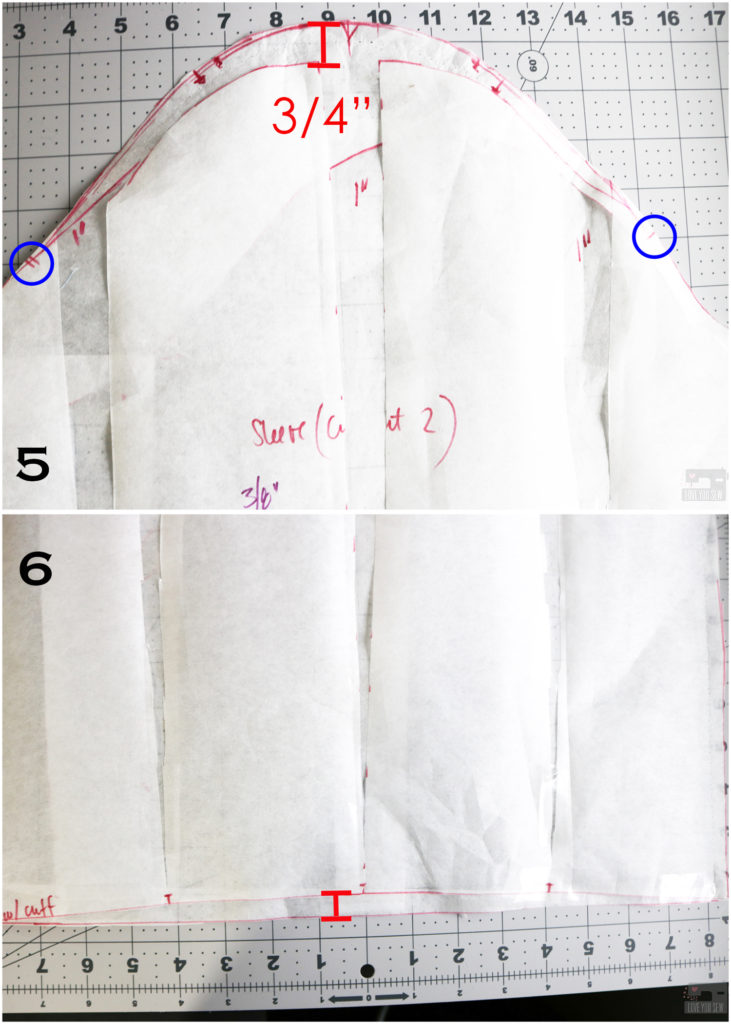
5. To get the extra volume at the top of the cap, I added 3/4” to the top and blended the line back to the notched parts of the cap, all while following its shaping.  Again, if you want a little more puff in the sleeve cap, feel free to add a little more to length to the top.

6. At the cuff line, true up the pattern so it is straight again.
At this point, I cut out the pattern and did make a muslin, but only had quilt cotton on hand.  It gave me an idea of the extra volume and shape added to the sleeve.  I did have to consider the extra weight and stretch with the knit fabric.  But it was still good enough for me and I went ahead to cut into the main fabric.
To insert the sleeve, I made gathers between the sleeve notches not exactly knowing how it would all look.  But I ended up marking 3” on either side of the shoulder seam and pushed all the gathers in between those markings.  I basted the sleeve into place and was very happy with the result!  With that, I finished sewing the sweater and have never been more pleased!
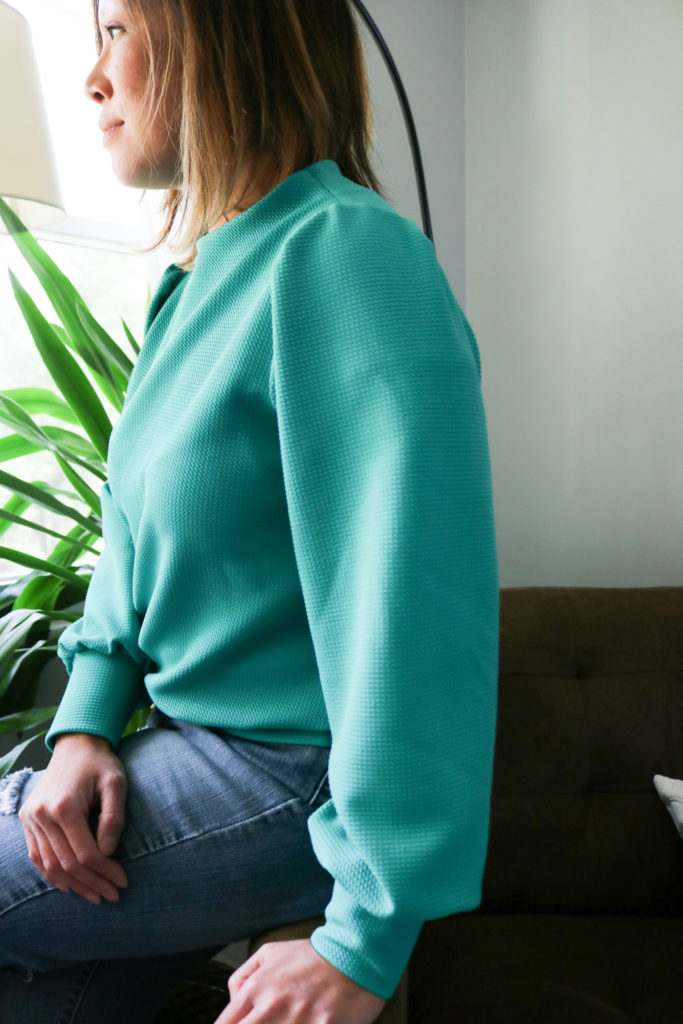
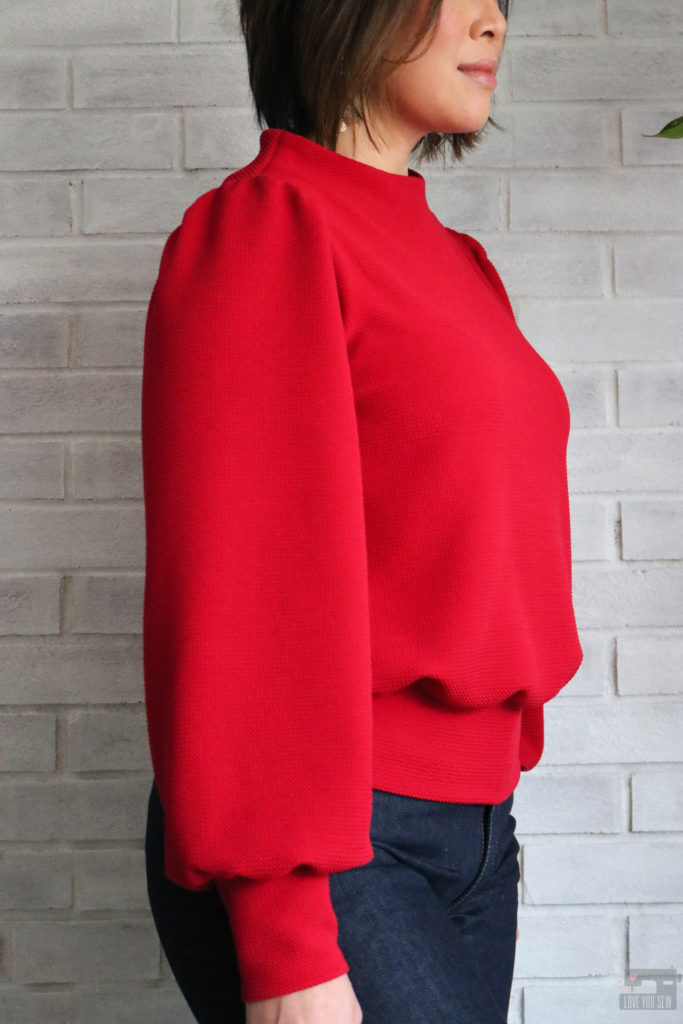
This hack turned out exactly like what I wanted and just love how “extra” the sleeves are.  The additional gathers and volume in the sleeve cap really balance out the overall ease in the sleeve and I love the extra long cuff to show it all off.  This top is pretty fancy and ready for every occasion now.  It’s still comfy in a stretch knit, but also so incredibly unique and special!
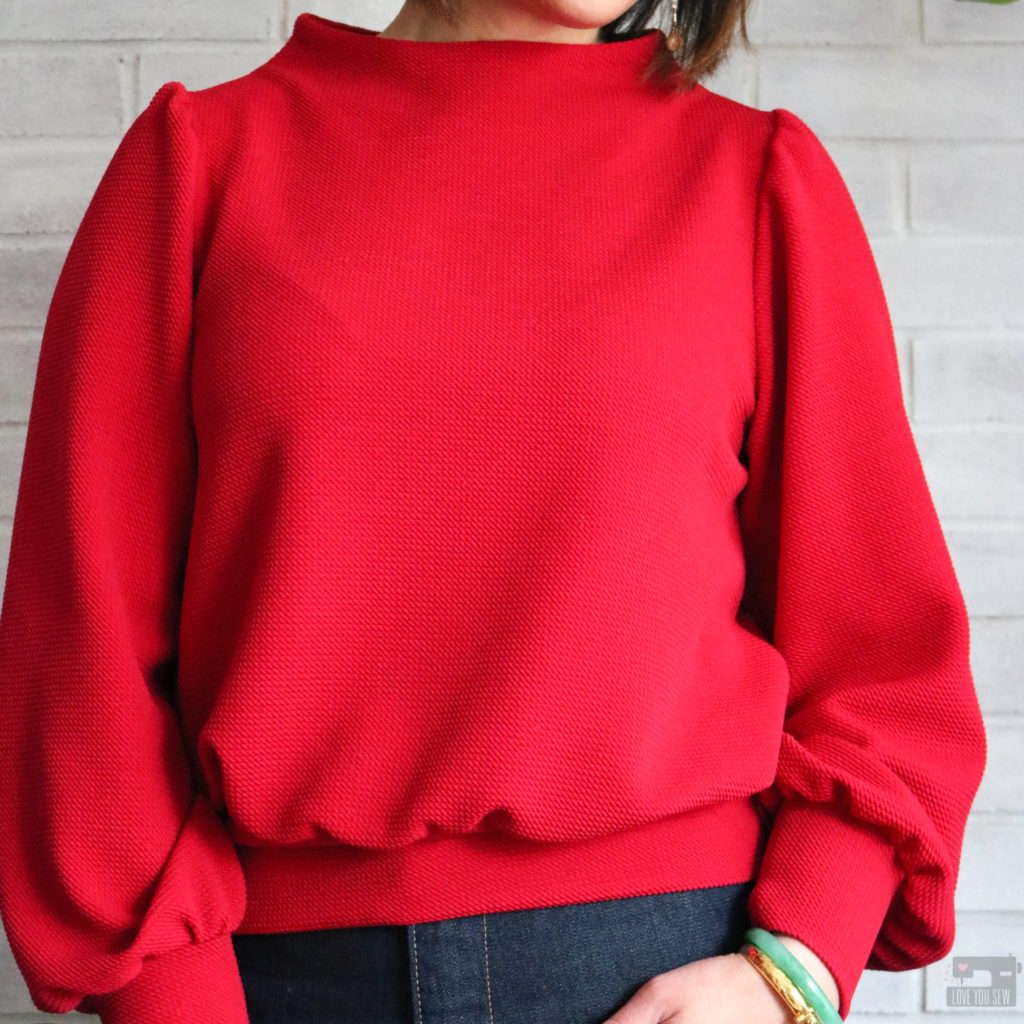
Project Summary

  • Pattern: Sheridan Sweater by Hey June Handmade; View: B; Size 10
  • Mods: Narrowed shoulders by 1/2″ each, increased the cropped length by 1″, used Puff shoulder hack above
  • Fabric: Telio Pique Liverpool Knit from Fabric.com in Hermes Red and Emerald
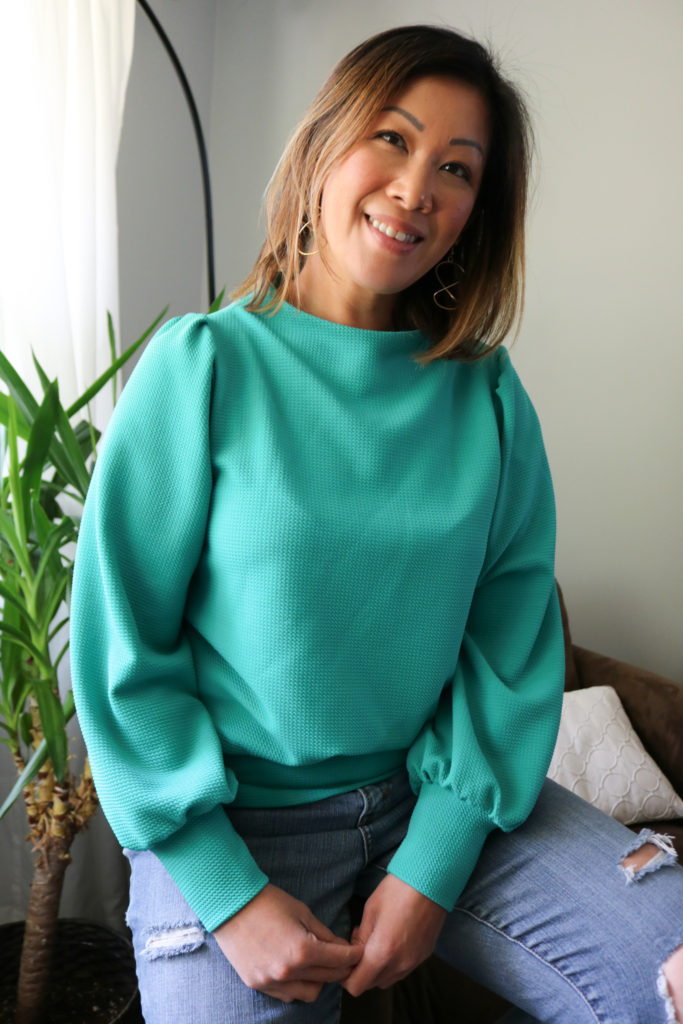
This hack can be used on just about any pattern with a set-in sleeve.  I may have to try it on a woven pattern this fall/winter.  Please let me know in the comments if you use this hack!  I would love to hear what you think!


Hugs and Stitches,

Cristy


This post may contain affiliate links.  You can read my full Disclosure here.
 

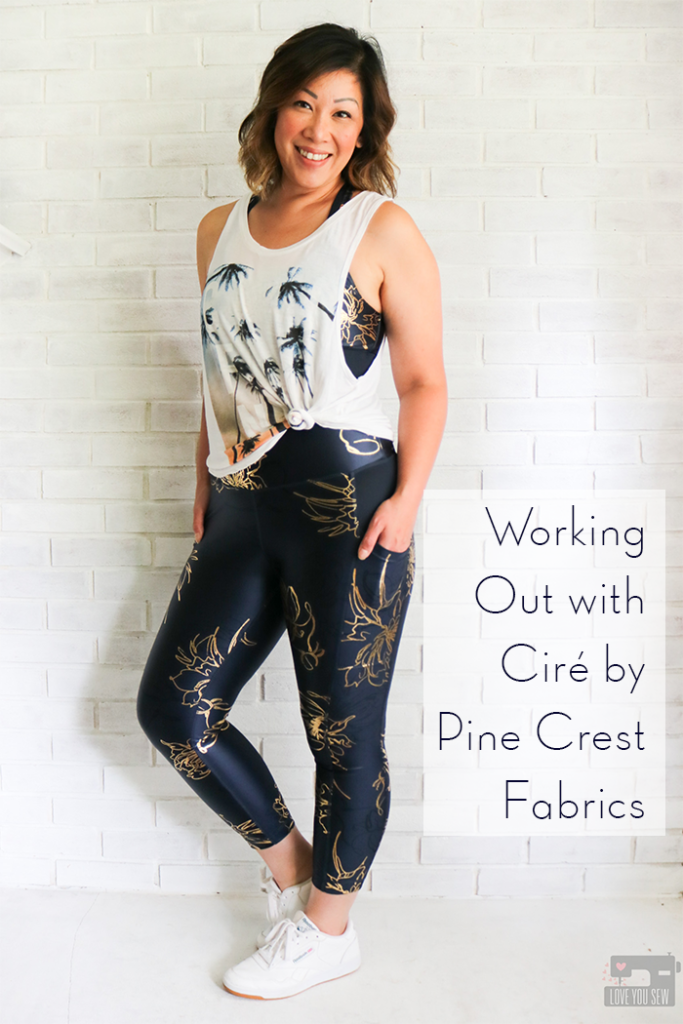
Working Out with Ciré by Pine Crest Fabrics

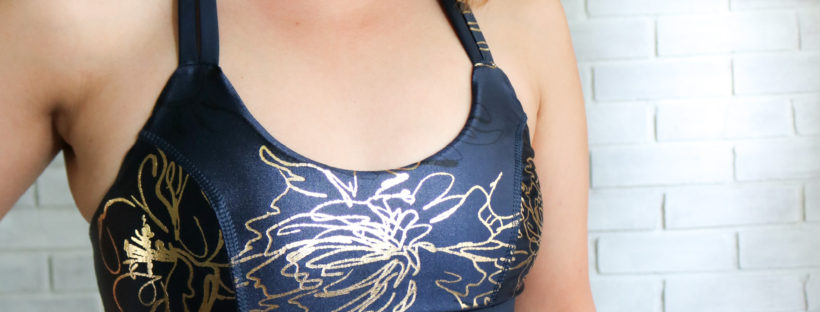
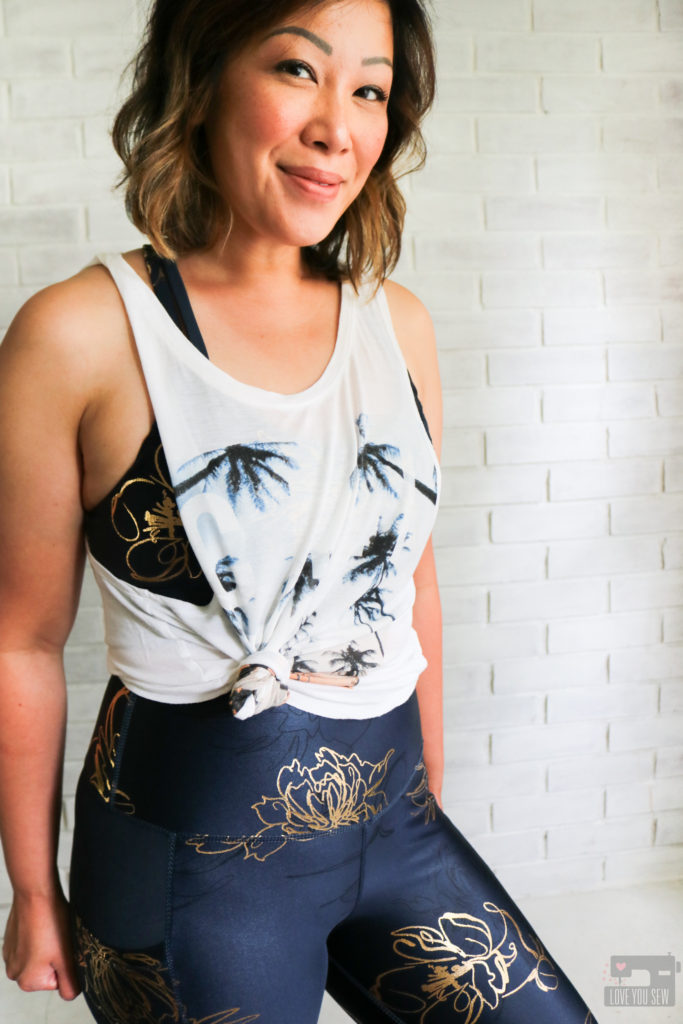
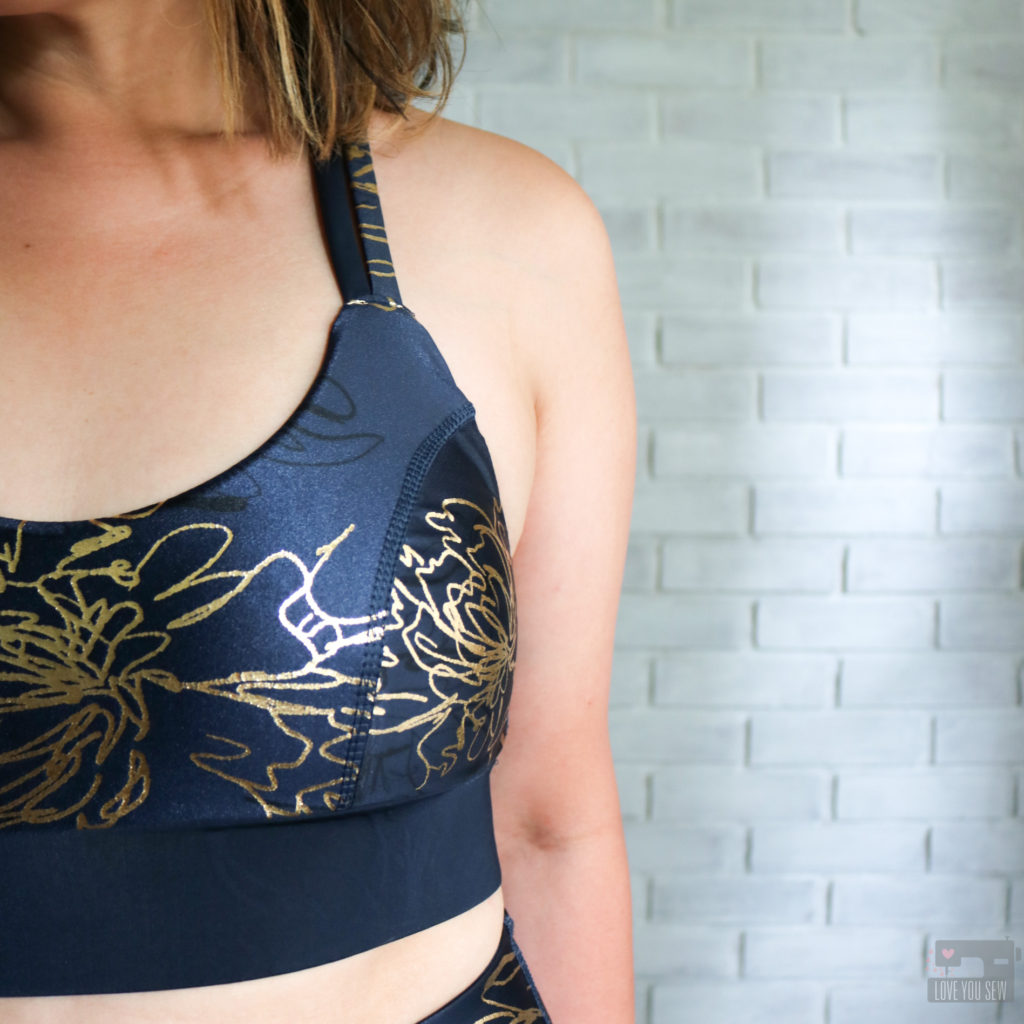
With a short, petite frame and hips two sizes larger than my waist, I’ve struggled to find athletic wear that won’t roll or shift down while I move.  Even with poor luck with the big name athleisure companies, I started making my own work out clothes a few years ago and haven’t turned back since.  The fabric and compression fit are important factors to me and why I am SUCH a big fan of Pine Crest athletic fabrics.  I was pretty stoked when they asked me to work with their gorgeous Blazer Floral Printed Ciré fabric since I was curious to see how it felt and moved with it’s liquid-like look.

You can understand my love for this company by checking out my other makes using Pine Crest fabrics like my Full-Zip Rashguard, Textured Web Athleisure Capsule, and Holiday dress with their Stretch Velvet.


FABRIC

When I was first asked to work with the Blazer Floral Printed Ciré, I honestly admit, I was a little hesitant about how it would look and feel.  Would it be TOO shiny?  I mean, I do like some flash…but I don’t consider my style to be flash-yyy…  Would it have a “plastic” coating to it?  Would I end up sticking to it when I work out?  There were so. many. questions.

Well, I’m so glad I took the plunge because this fabric is A-MAZING!  While there is remarkable shine and sheen to the top of the fabric, the Ciré is not “sticky” at all.  It is smooth to the touch and is completely matte on the reverse, making it SO comfortable and soft.  The fabric is 80% Nylon, 20% Spandex, 195GSM, and has a generous 56/58″ WOF.  There is ~40% four-way stretch with GREAT compression — making this fabric ideal for working out, dancing and even swimwear.  You can check out more the full line of Ciré fabrics including more colors and prints here.
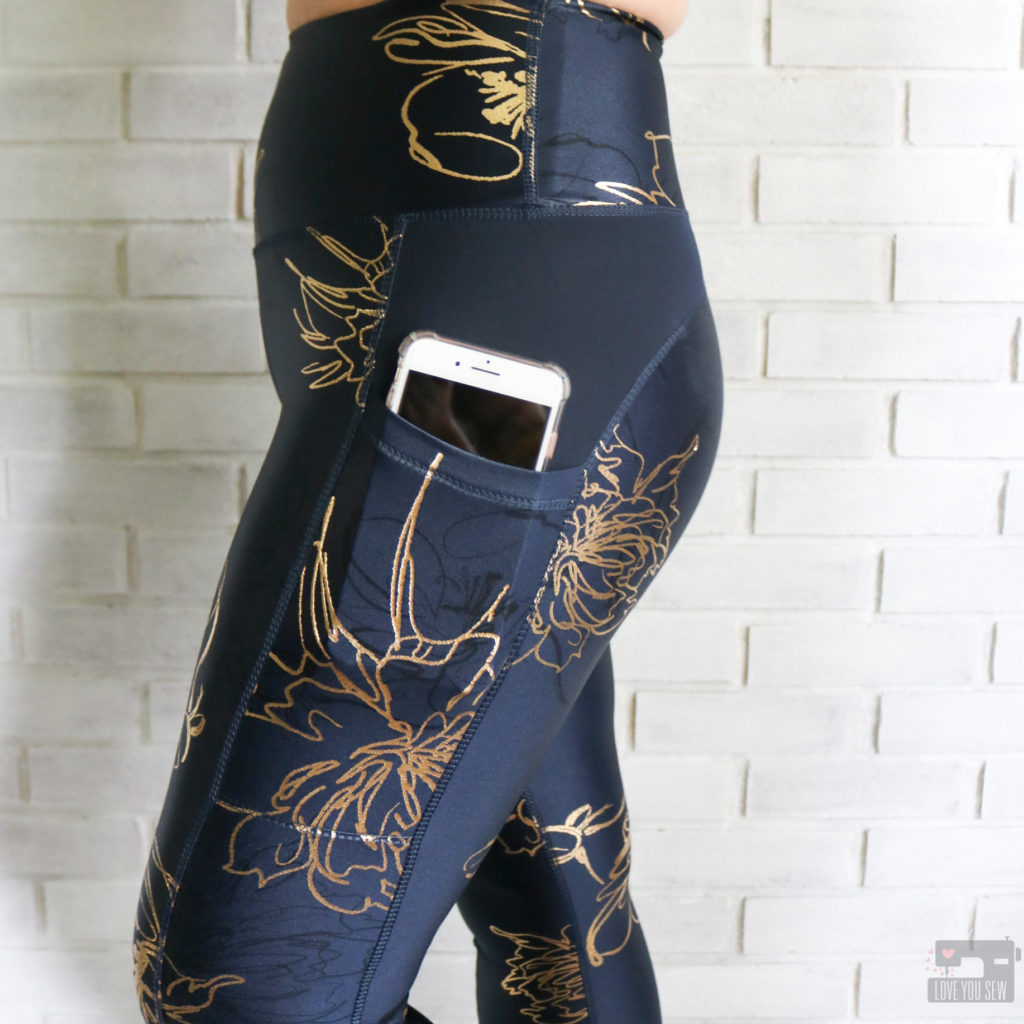
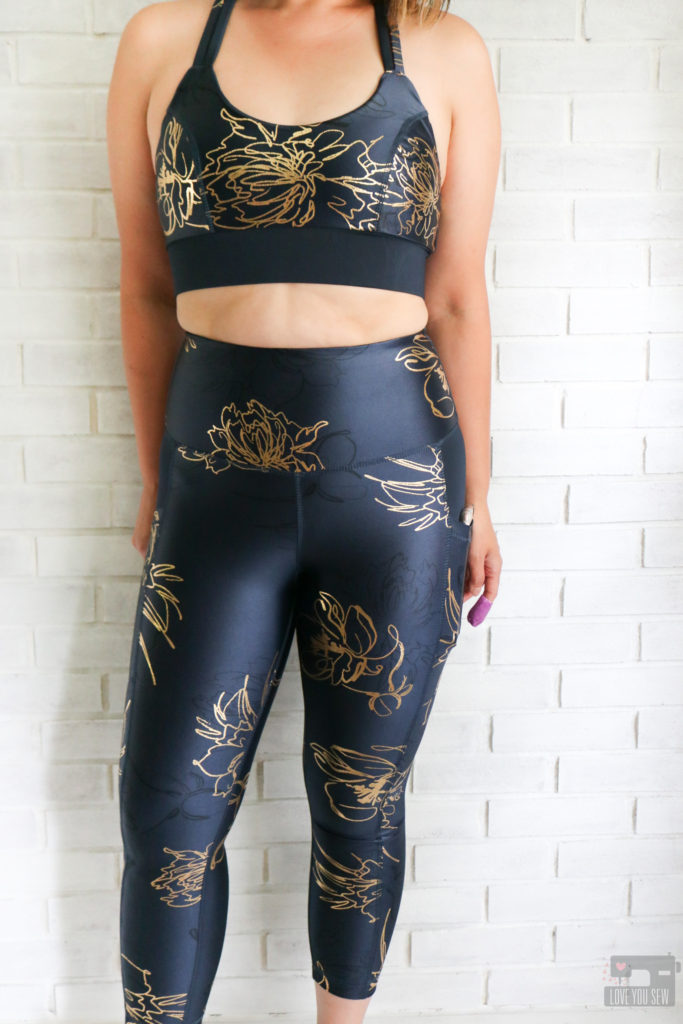
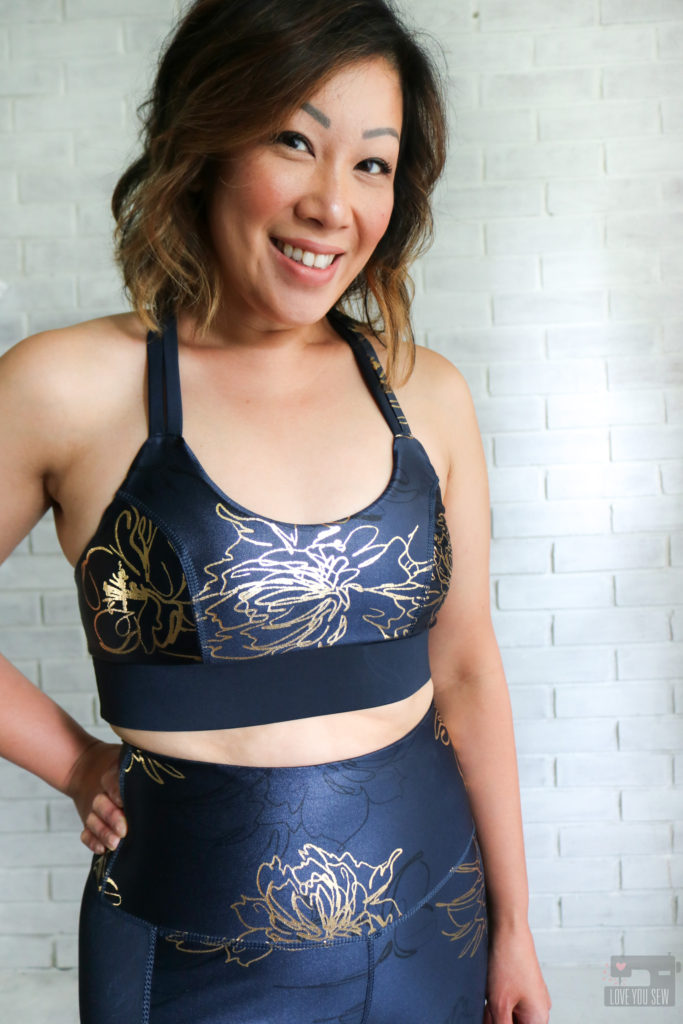
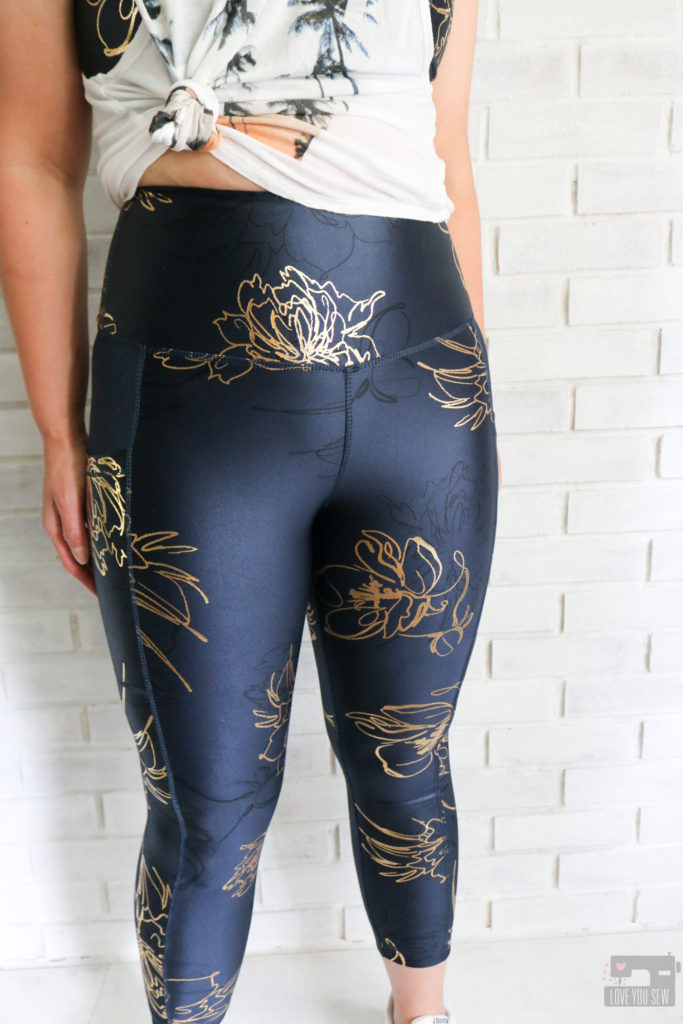
In addition to the amazing base cloth, the Blazer Floral Printed Ciré  has these stunning gold foil flowers that stretch and move beautifully with the fabric.  There are also subtle black printed shadows of the same flowers that give the fabric even more depth and texture.  I’ve washed this fabric twice and even tried to pick at the foil a little bit, and it is not coming off!  The fabric has remained vibrant with that signature sheen and even with all the stretching, the gold foil recovers back to a smooth finish — winner!

PATTERN

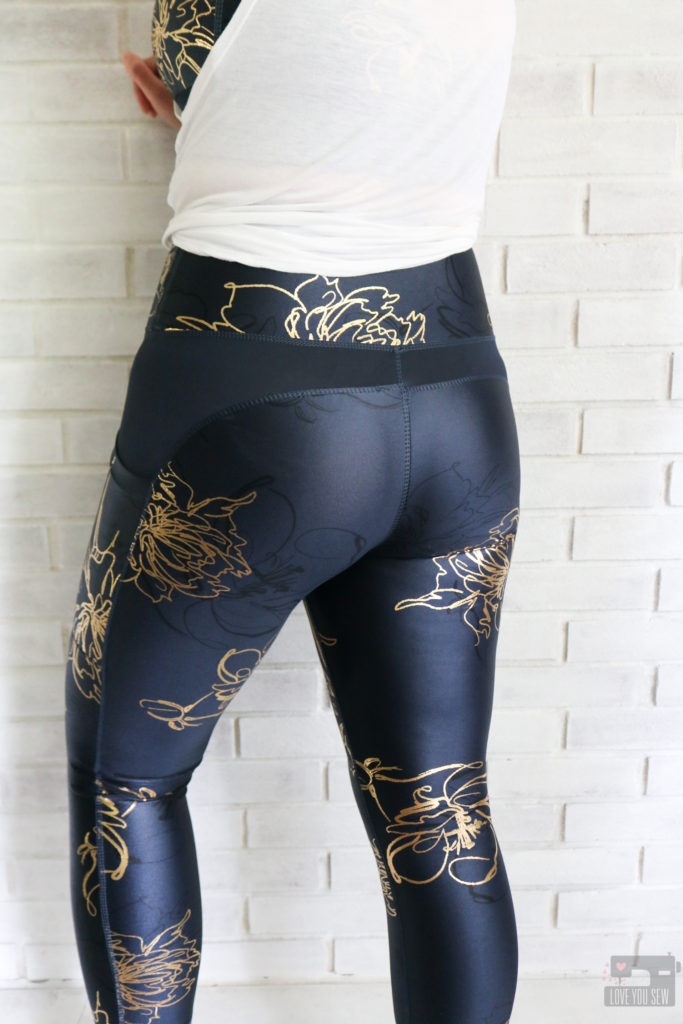
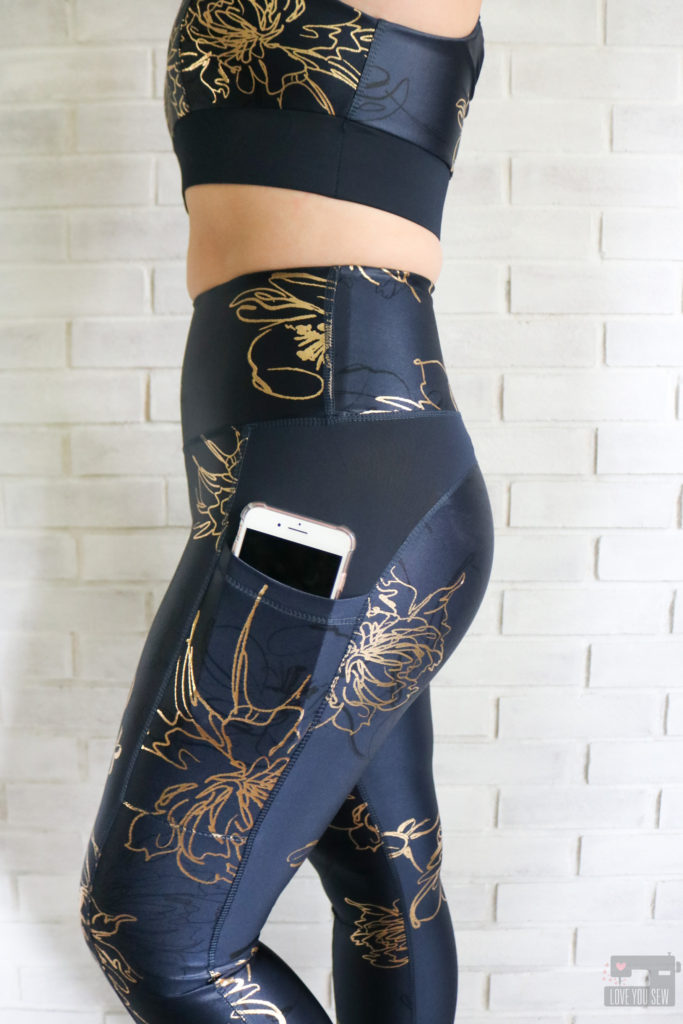
The true test of the Ciré is how it sews up and wears on the body.  So, I chose the Greenstyle Creations Power Sports Bra and Stride Athletic Tights (because…pockets!)  With the floral print, I made sure to take extra care with pattern placement with nothing odd coming out off the crotch and rear areas.  (We’ve all made those mistakes before!)  I LOVE the scale and how the foil flowers look on the body.  There is a nice balance between the gold and the navy base.  Too bad my Zumba studio is still closed, else, I’d be showing this off!

I used both my Juki MO-2000QVP Serger and Juki MCS-1700QVP Coverstitch to make both of these pieces.  It’s been awhile since I last used my Coverstitch machine and I was riding high on my “great” sewing skills on the first pass of the leggings…..until I went to try them on….and heard a series of pops.  Ugh!  I had to remove all of the thread and coverstitch again…only to go back and repeat.  SMH.  Even though I eventually got it right,  the Blazer Floral Printed Ciré took a pounding at the seams with so many additional punctures that were certainly not necessary.  With other stretch fabrics, the area would have been worn down and fuzzed up. But to my surprise, there didn’t seem to be any additional wear! This was kinda shocking since I really beat up the fabric.

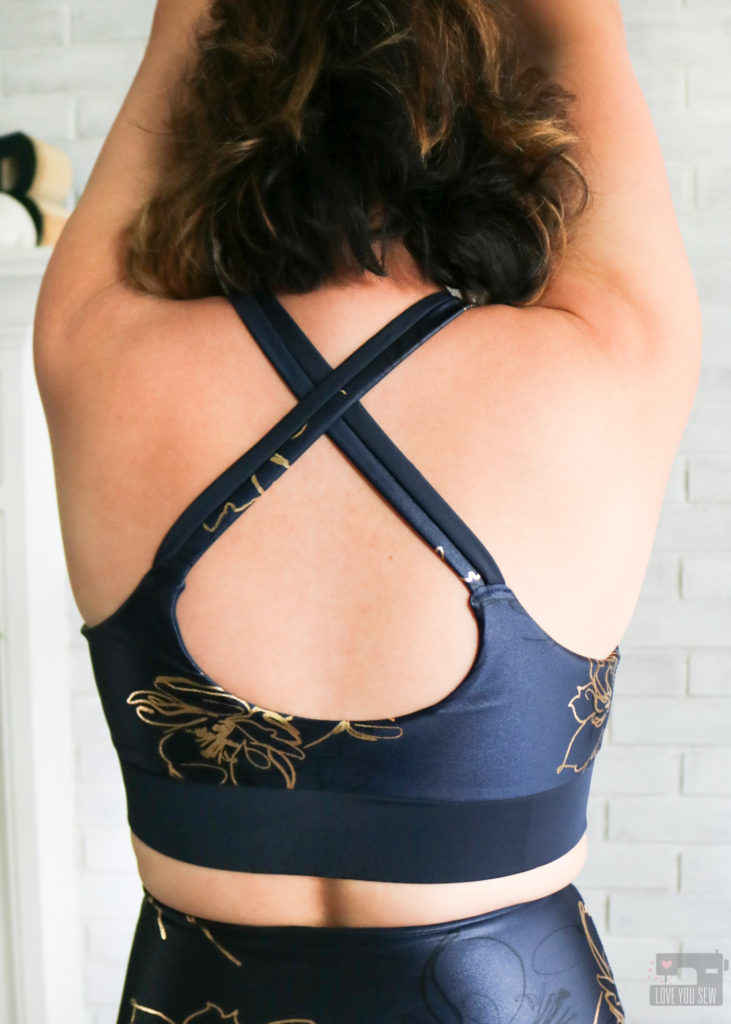
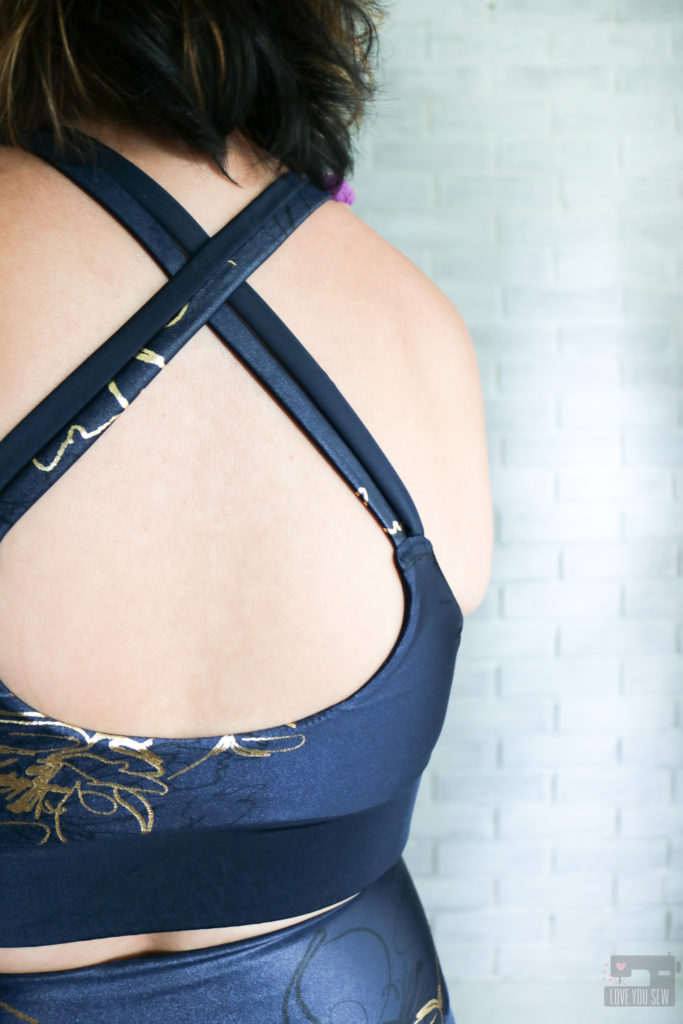
With the reverse of the fabric being matte, I couldn’t help flip it over for a subtle accent.  You can see I used the matte side on the back of the tights and in the band and straps of the Power Sports Bra.  I love the extra use out of the same Blazer Floral Printed Ciré!

Other Pattern Notes:

  • Power Sports Bra
    • Made the  34C U-back with extra wide band
    • Stitched down the sides of band to keep from shifting
    • Used reverse side of fabric for the lining
  • Stride Athletic Tights
    • Made the Medium from hips down
    • Graded to Small in waist using curved add-on waistband
    • Add Power net to waistband along with elastic
    • Shortened pattern by 1.5″
    • Cut the cropped length
    • Added optional gusset for full range movement

PROJECT SUMMARY

I hope you are inspired to try out some new fabric that might not necessarily be your style…you maybe surprised with the results!


Happy Sewing!

Cristy


Fabric for this post was provided by Pine Crest Fabric.  Project conception and all opinions are my own.  

There maybe (noted) affiliate links in this post.  For my full disclosures, click here.
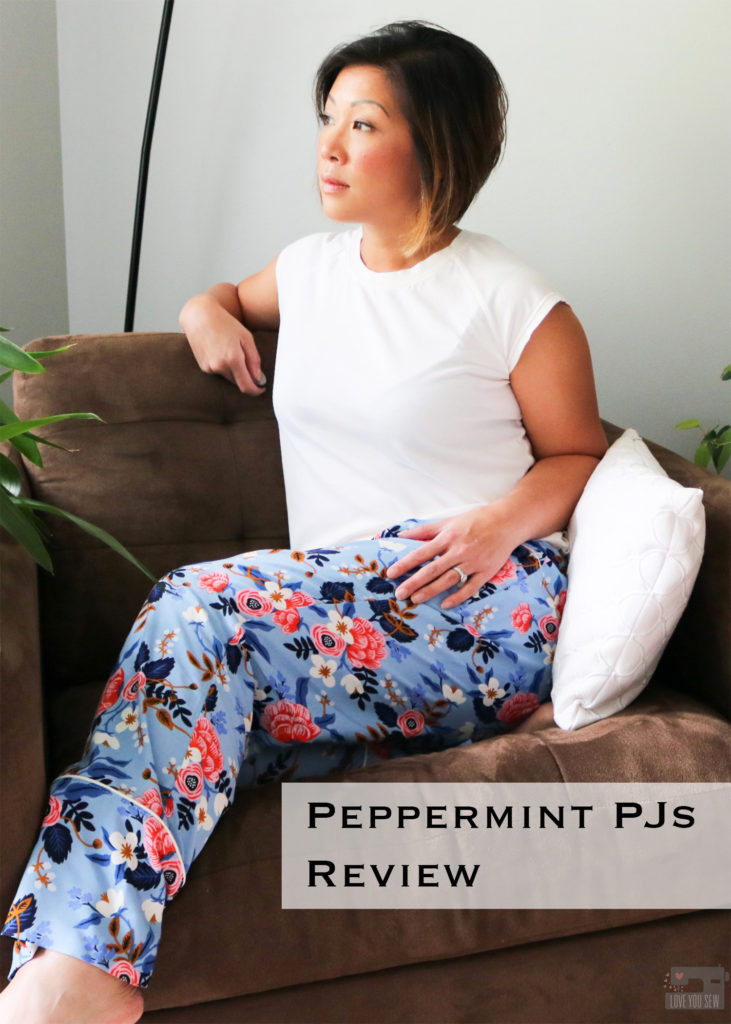
Peppermint PJs Review

What great timing on the launch of these Peppermint Pajamas by Blank Slate Patterns. We’re heading into holiday season and I’ve always sewn family PJs for Christmas Eve. I’ve also always drafted my own (making different tweeks every year) and have yet to add pockets. Well, now I actually have a pattern (that fits!) and won’t have to spend as much time making my holiday pajamas!

Pattern

The Peppermint Pajamas comes with patterns for BOTH the woven pants and the knit top. This is like a 2-for-1 pattern with sizes ranging from XXS-3X (bust 30″ – 53″ and hips 33″ – 55″.)

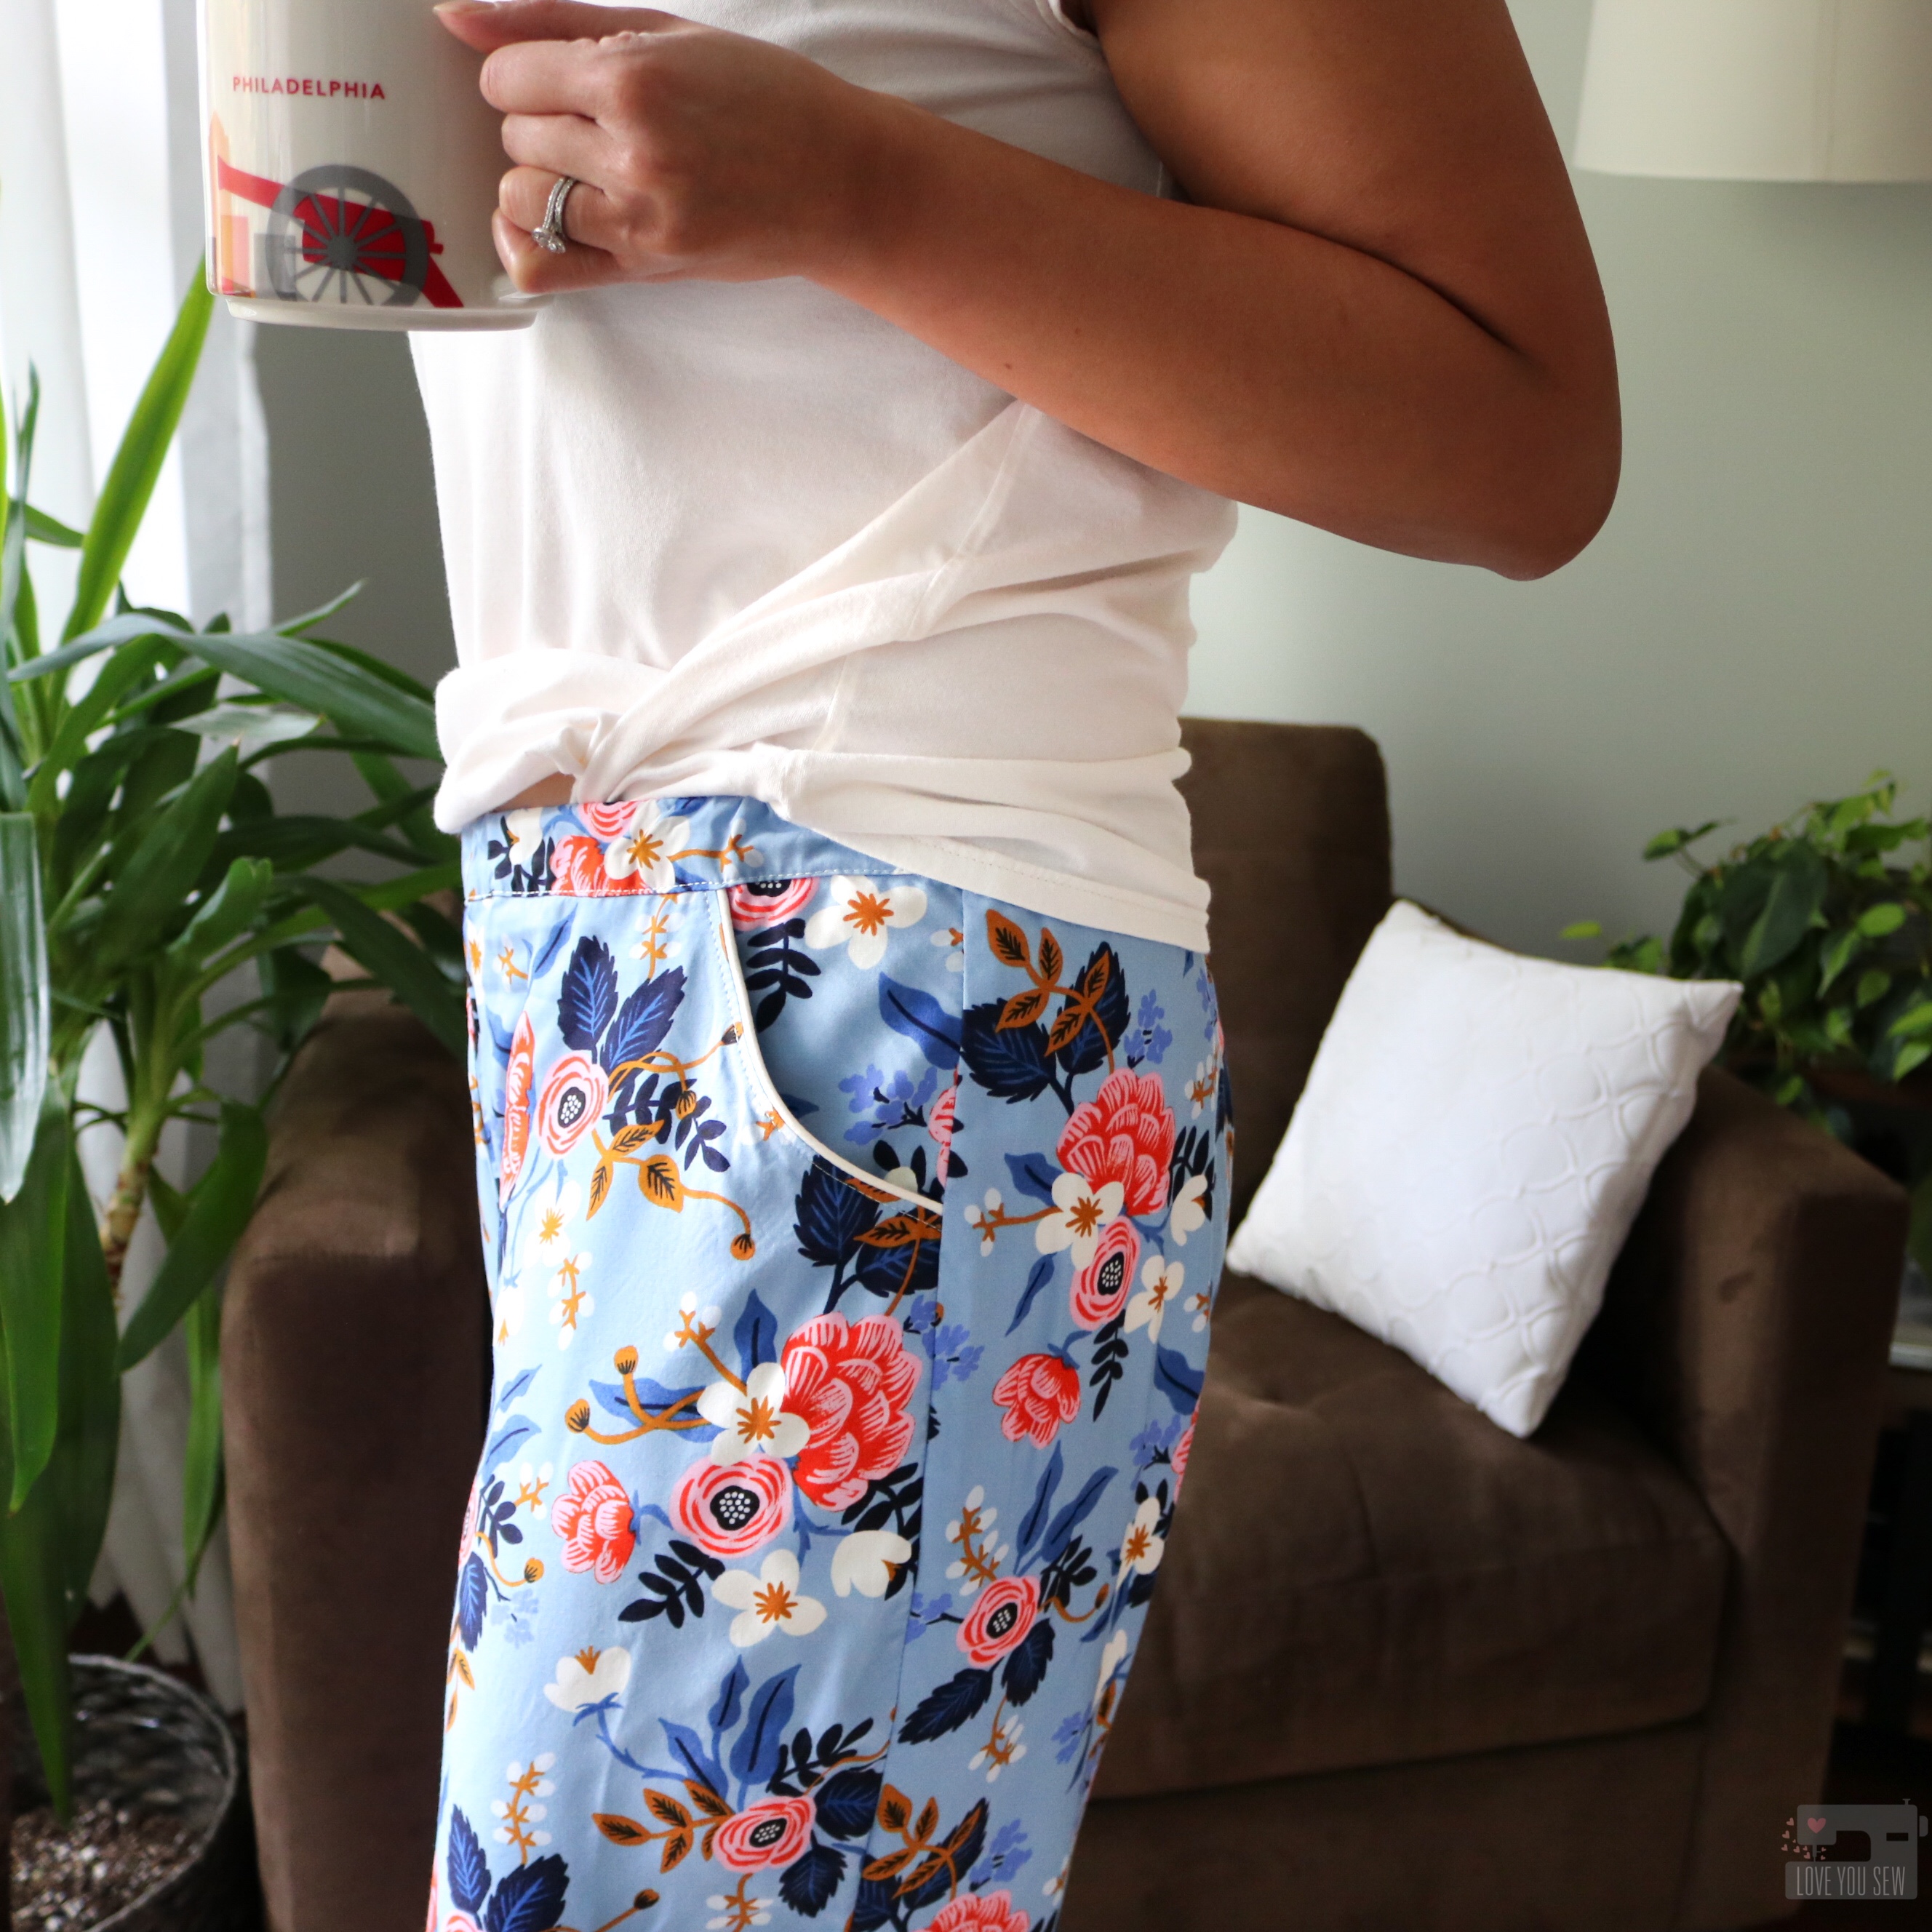
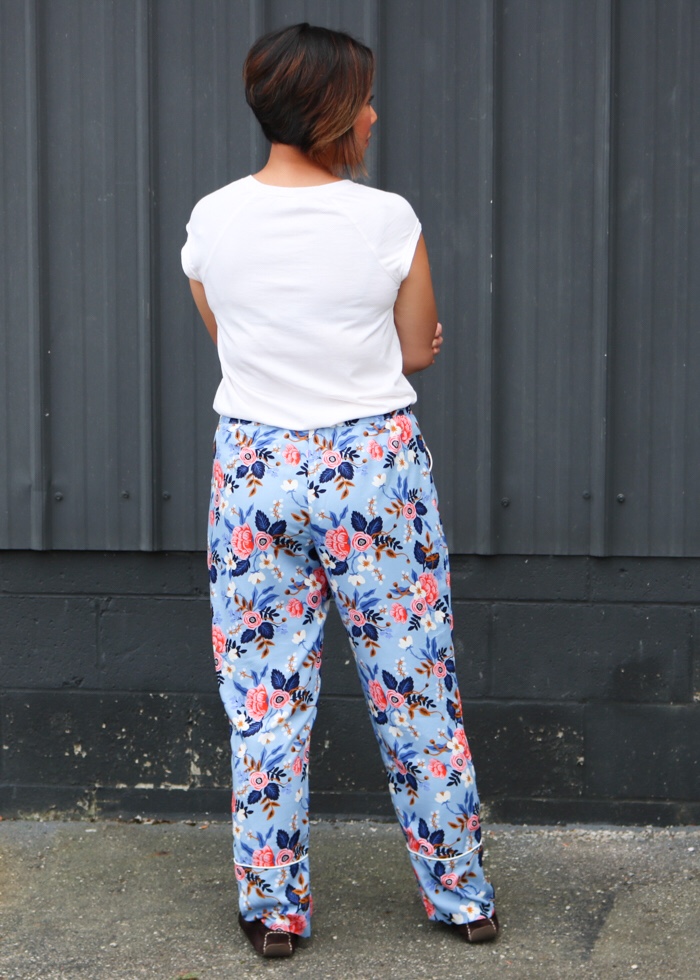
The pants feature an elastic waist, roomy slash pockets, and a separate cuff. The bottoms can be made into shorts, capris (by leaving off the cuffs) and full-length pants.

For the knit top, it features a crew-neck with raglan sleeves. You can make cap sleeves like I did, or use the long sleeve option. It has a nice relaxed slim fit for shaping, but not body-con tight.

Fabric

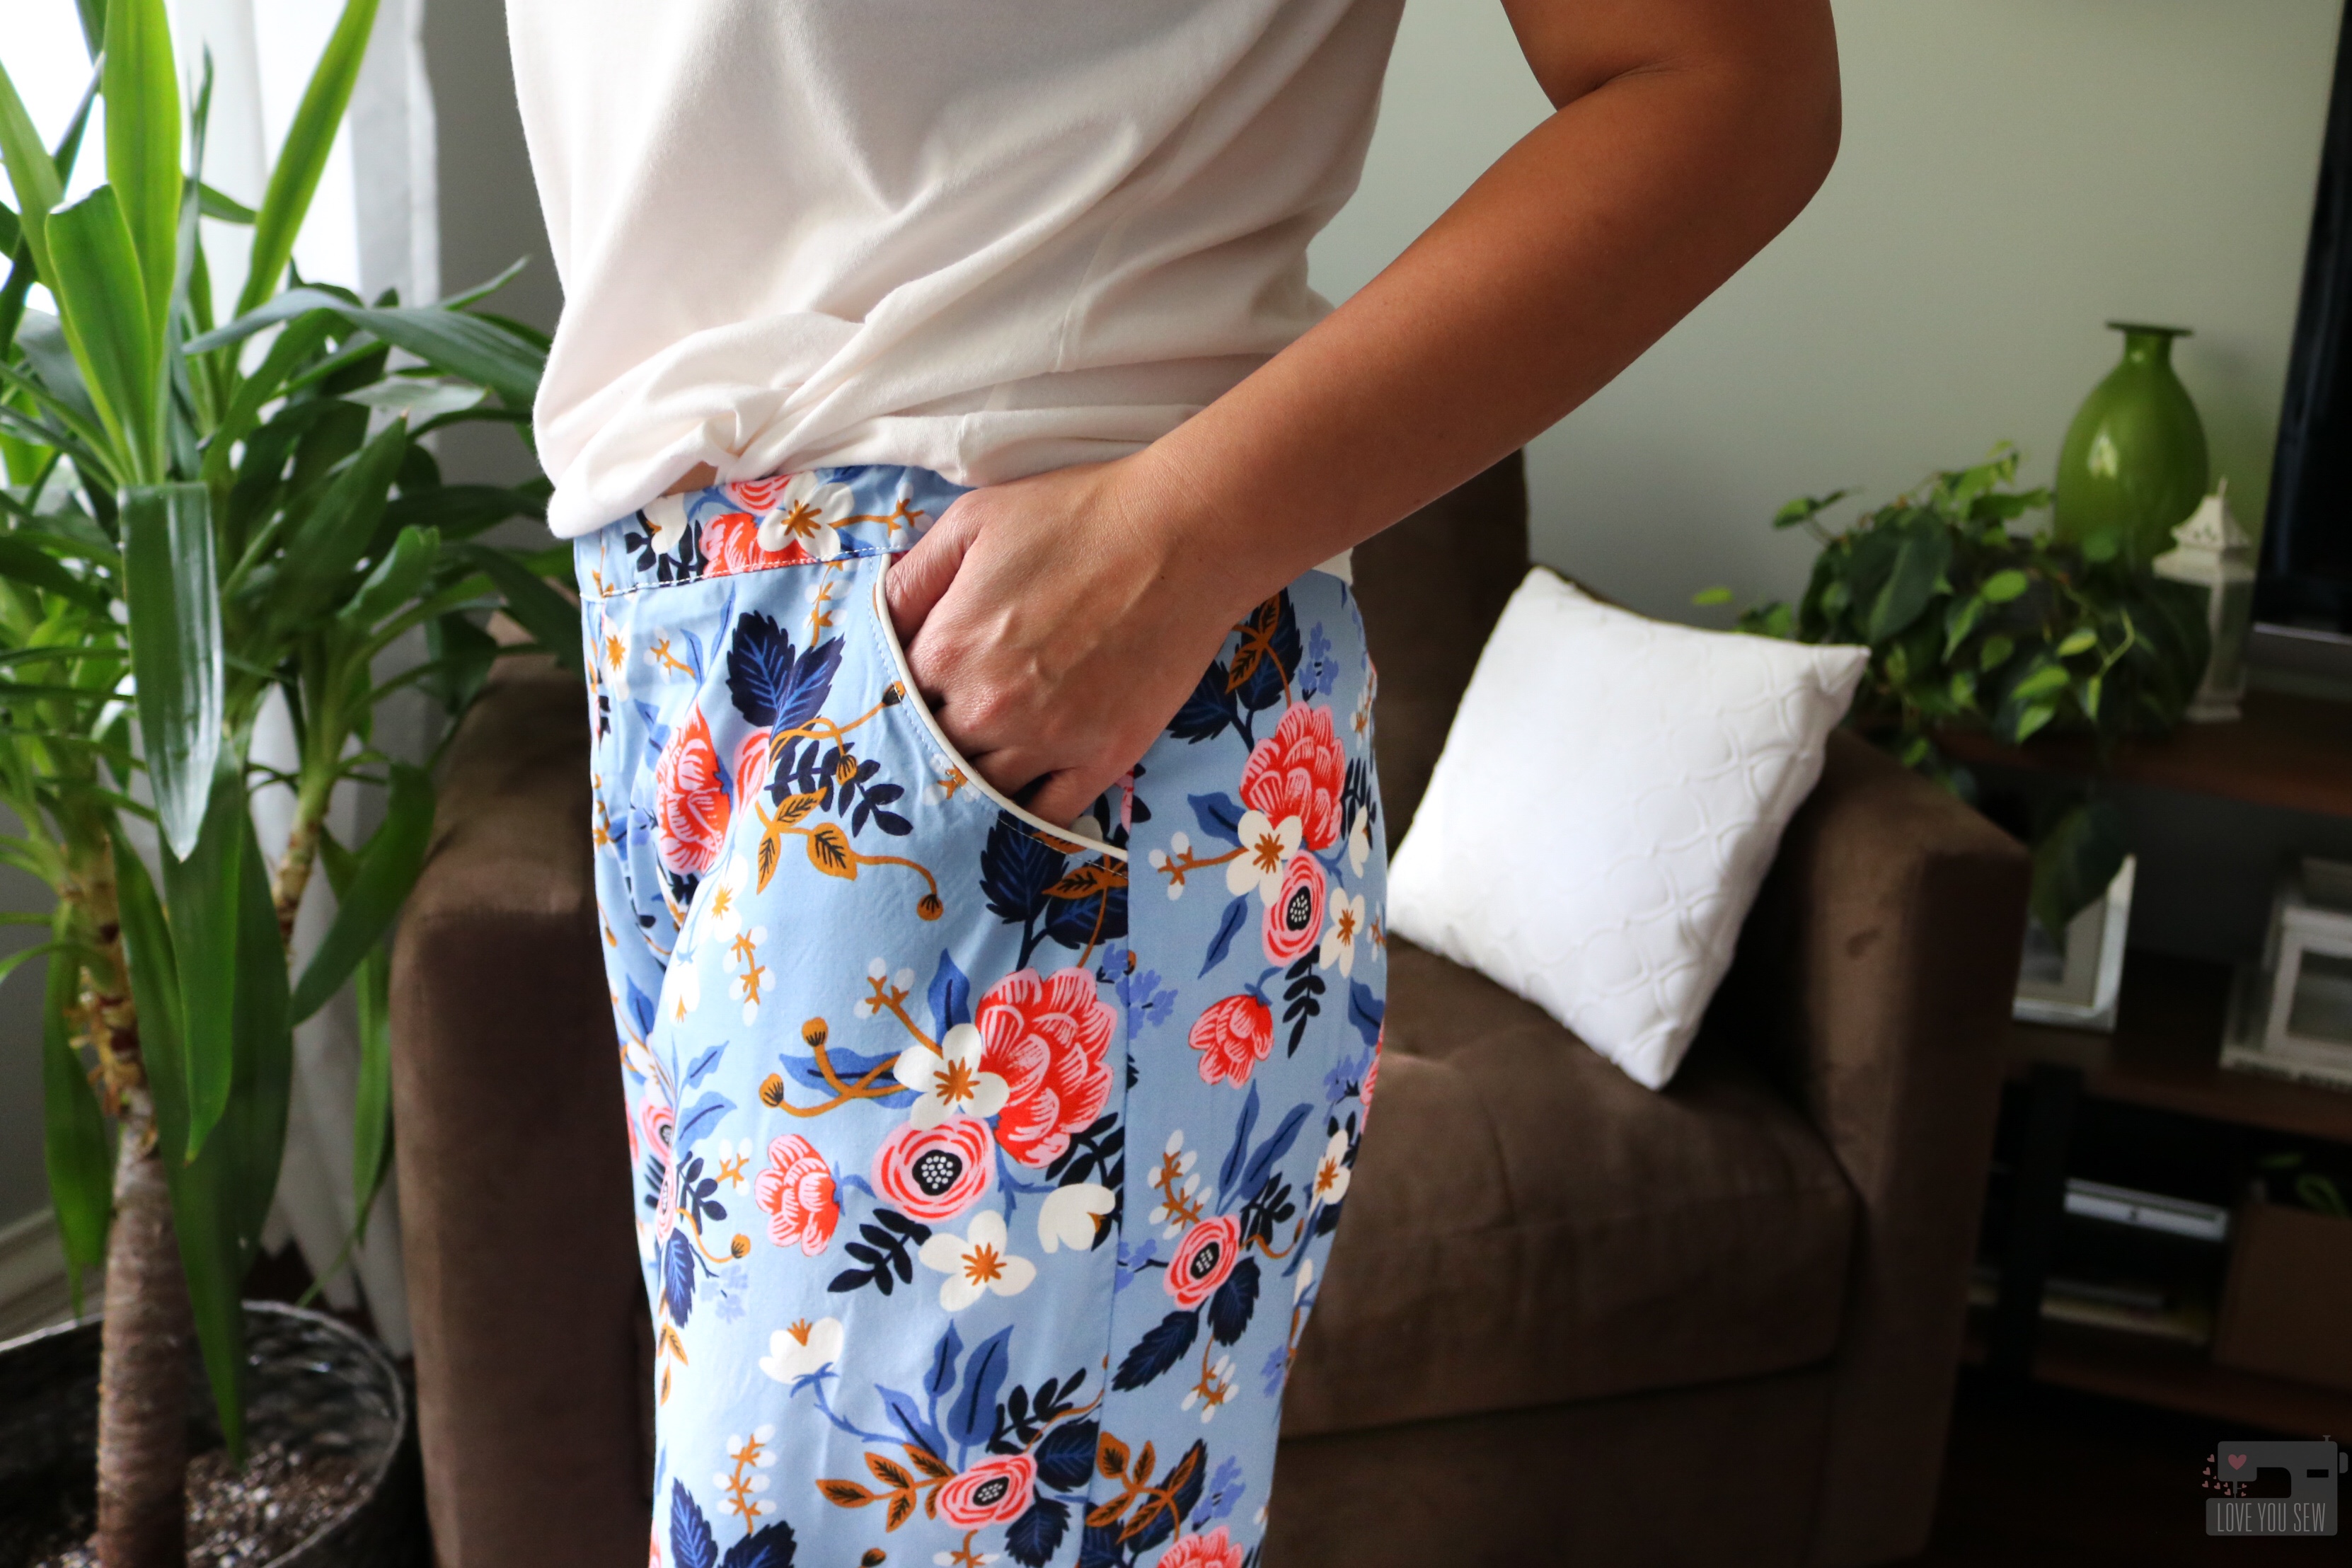
I knew I wanted something luxurious for my first pair of Peppermint pants. I am usually a boxers gal and wear all of my old flannel Xmas ones in colder months. I’ve been very conscious lately of my fabric consumption and was happy to find this Rifle Paper Co floral already in my stash. It is a Rayon Challis and feels incredible!. It has a soft hand, wonderful drape and feels silky to the touch. However, with these features, it can be very slippery to handle. With Rayon, I always use twice as many pins I usually do and I try not to pick a design which requires fabric matching – it is already hard enough to sew a new pattern!

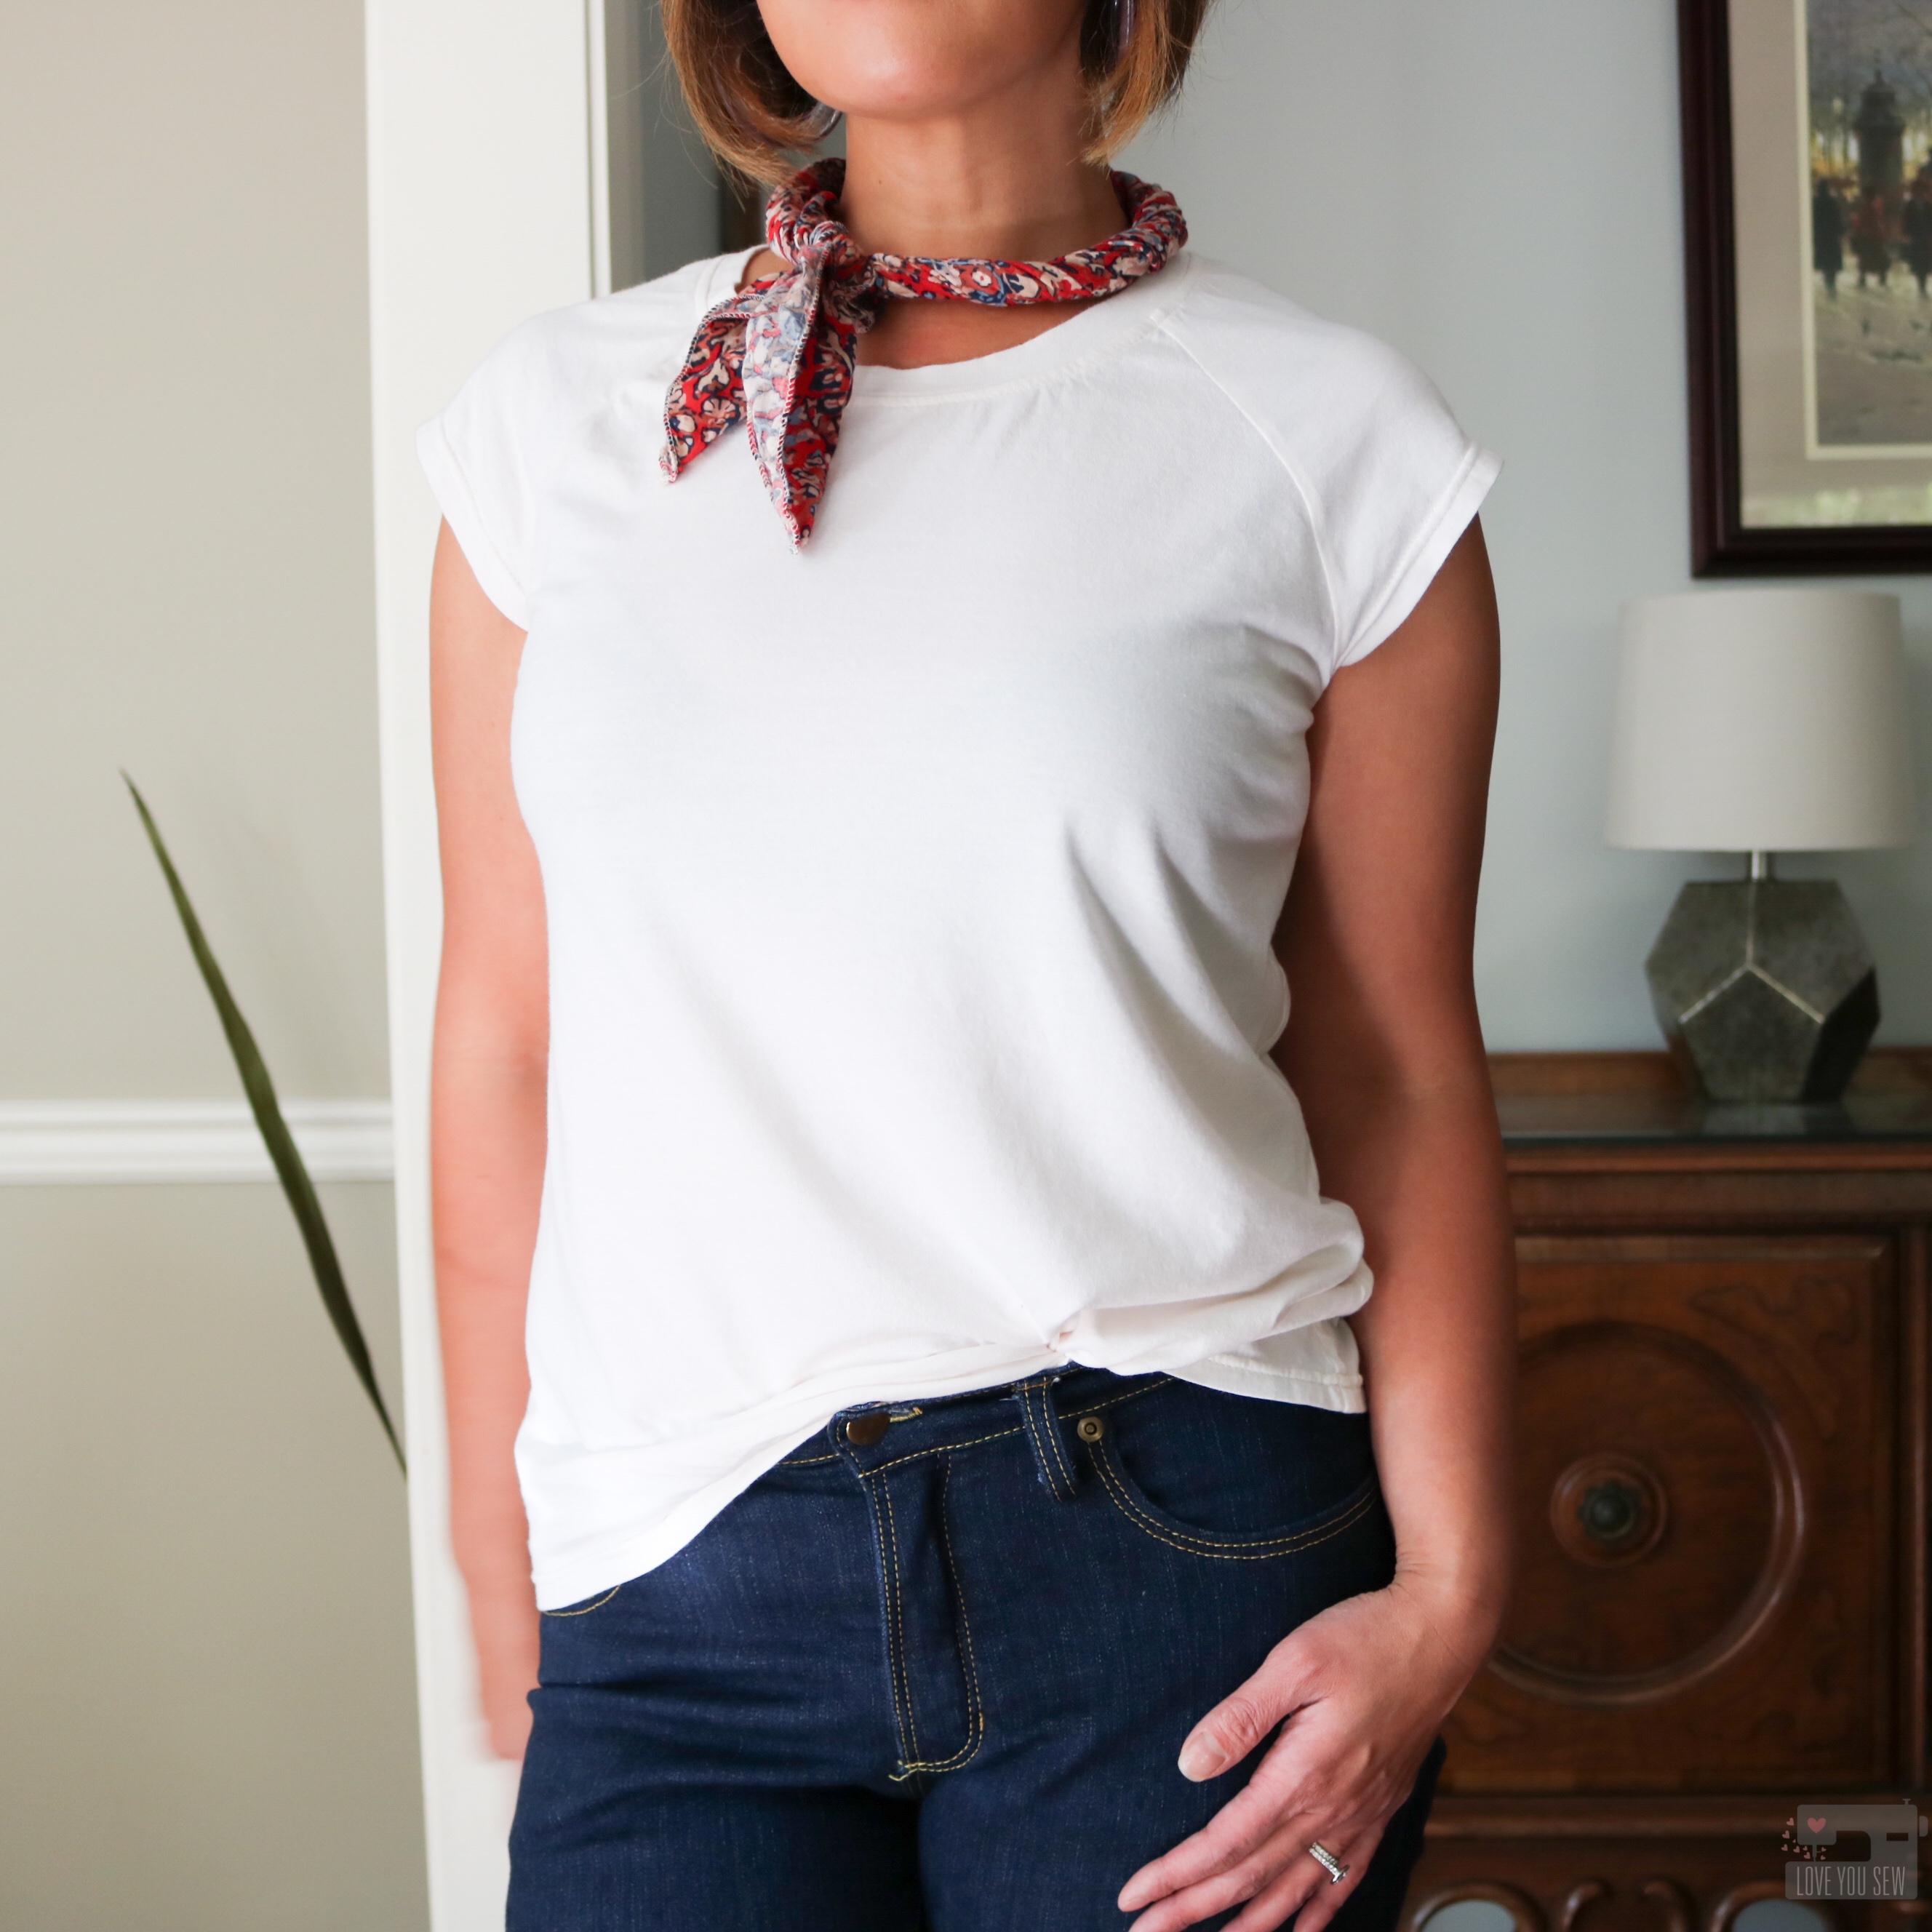
For the top, I dug into my stash again and found just enough of this Robert Kaufman Dana modal knit to make the cap-sleeve version. It’s a nice off-white cream color and so soft. The knit is a bit lighter and slightly sheer, but is perfect if you are looking for a tissue tee or for some great drape. I purchased this from Imagine Gnats, but this is a staple from RK and you can find it also at Fabric.com, here.
Modifications

With pants, I always measure all across the board. I’m a small in the waist and am in-between a medium and large in the hips. But since the Peppermint PJs are meant for lounging, I sized up to the large and then graded the waist to a medium since the elastic would pull the sides in more. I love the extra room – perfect for laying on the couch for family movie night! I also made my regular pants adjustments of extending the crotch by 1/2″ and deepening the seat by 3/8″.
Since I was working within my stash, I did not have a contrasting rayon that would work with my floral print. So I added piping where the cuffs attached to help keep the look cohesive. I also added piping at the pockets to balance out the look.
As you know, I’m also a shortie at 5’3″. I used the shorten/lengthen line to reduce the front and back legs by 2″. On the cuff, I took another 2″ off the total length because I didn’t want this delicate fabric to drag on the floor at all. So overall, I took 4″ off each leg.

With the top, I made a straight medium with the cap sleeve and didn’t make any additional adjustments. The length is great for a PJ tee and I think this is great pattern for any basic tee. It’s a great neutral to wear with jeans and a light jacket for fall!

Final thoughts

The Peppermint PJs were great basics to sew and I love the video on Melly Sews YouTube channel on making the waistband. It’s always great to get that double-check while sewing to ensure the correct construction! I think this is beginner-friendly and a great value with two patterns for the price of one! I hope you enjoy making this set as much as I did!!!

Hugs and Stitches,

Cristy


The pattern was gifted to me by Blank Slate Patterns, but I was not required to write a blog post. All thoughts and opinions are my own. Also, this post may contain affiliate links. You can read about all of my disclosures, here.

Derby Dress by Love You Sew

Derby Dress: Maxi Hack

Derby Dress Maxi Hack by Love You Sew

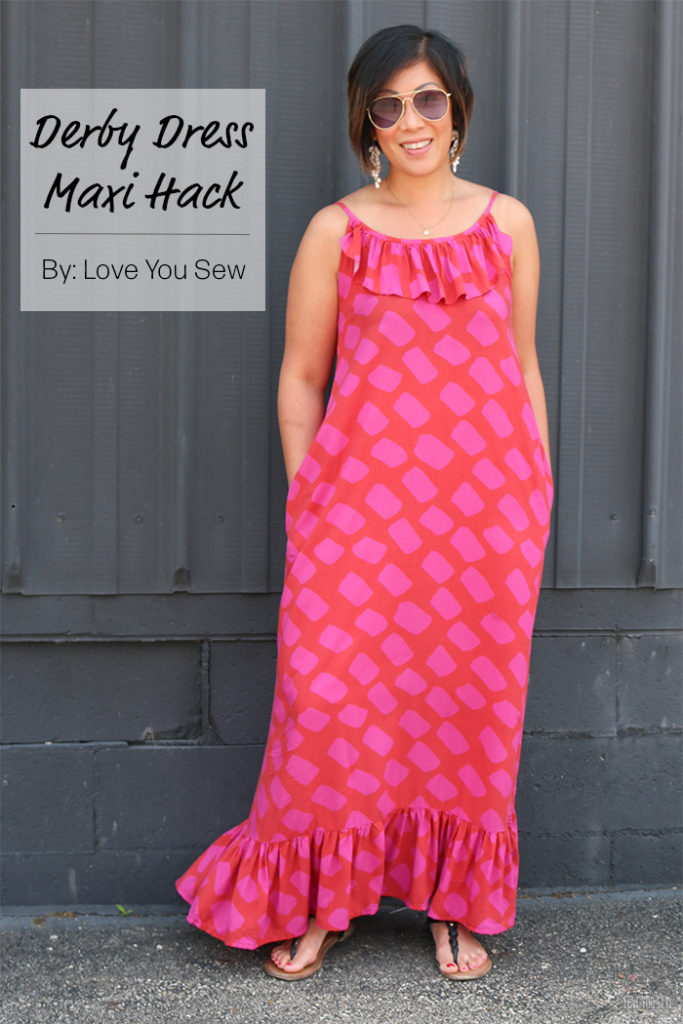
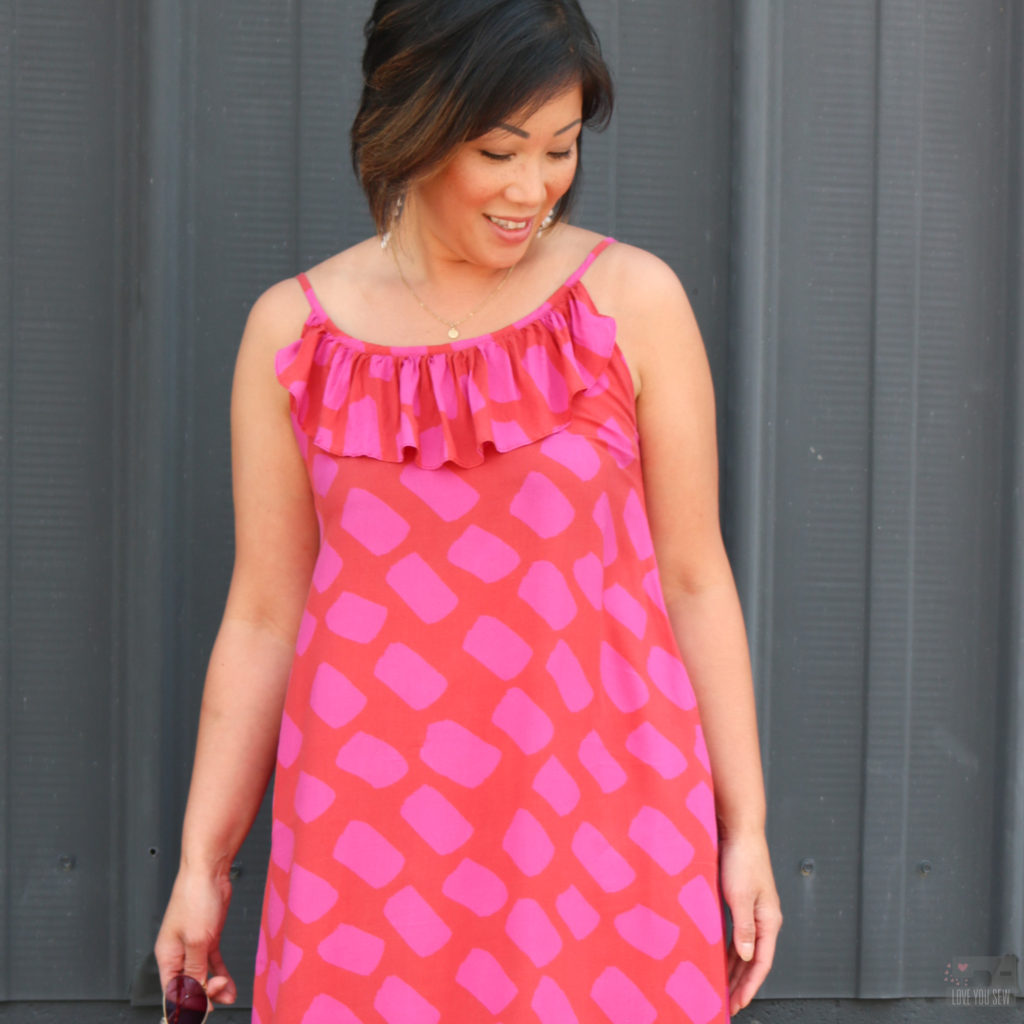
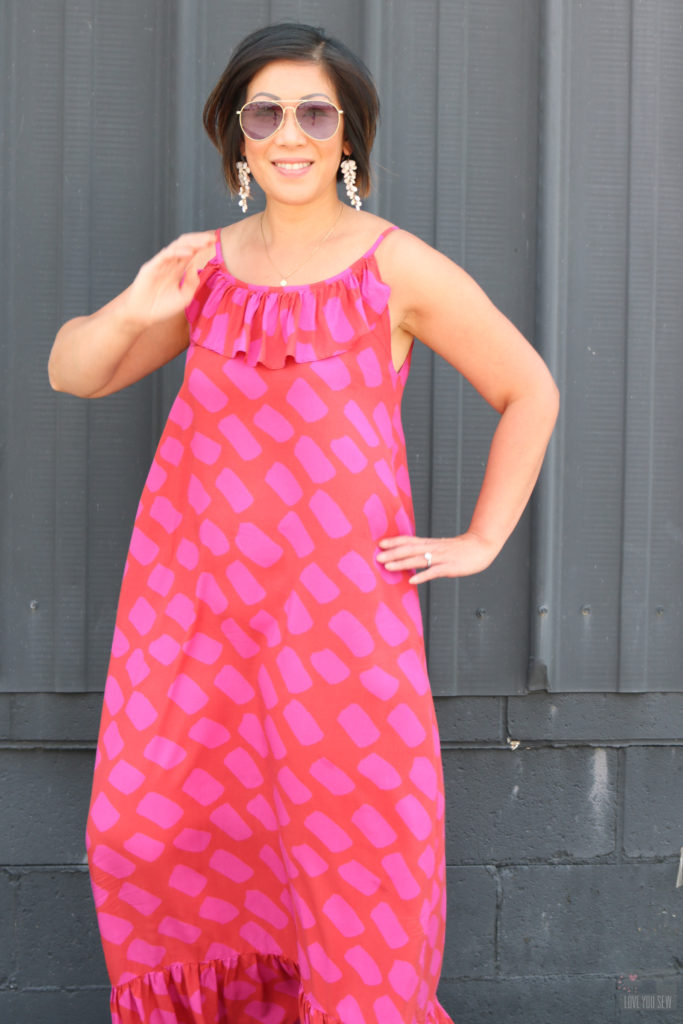
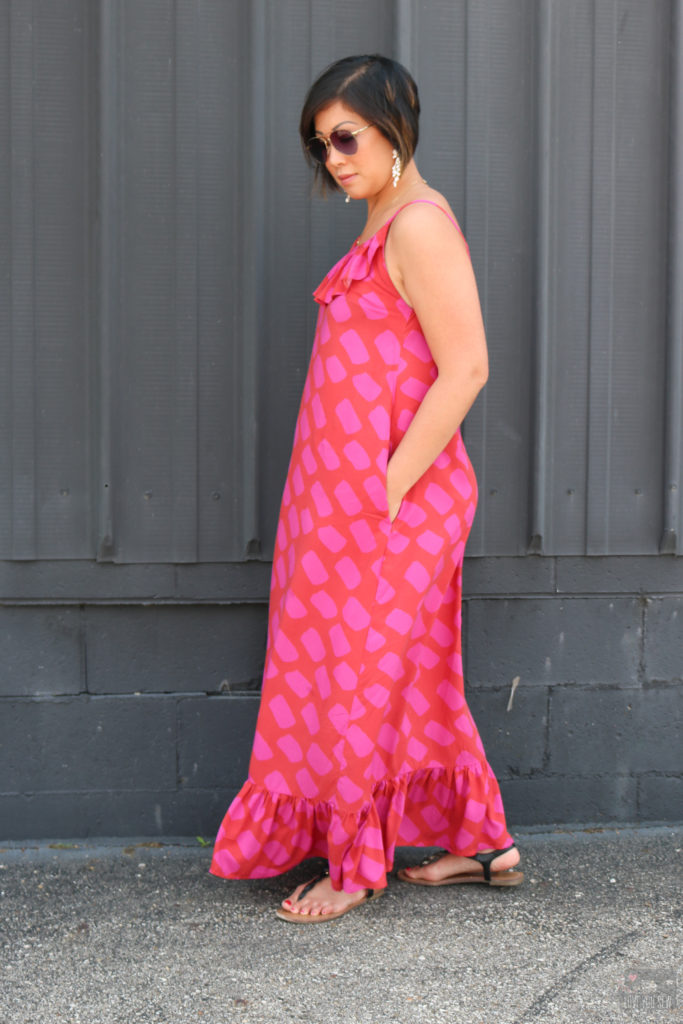
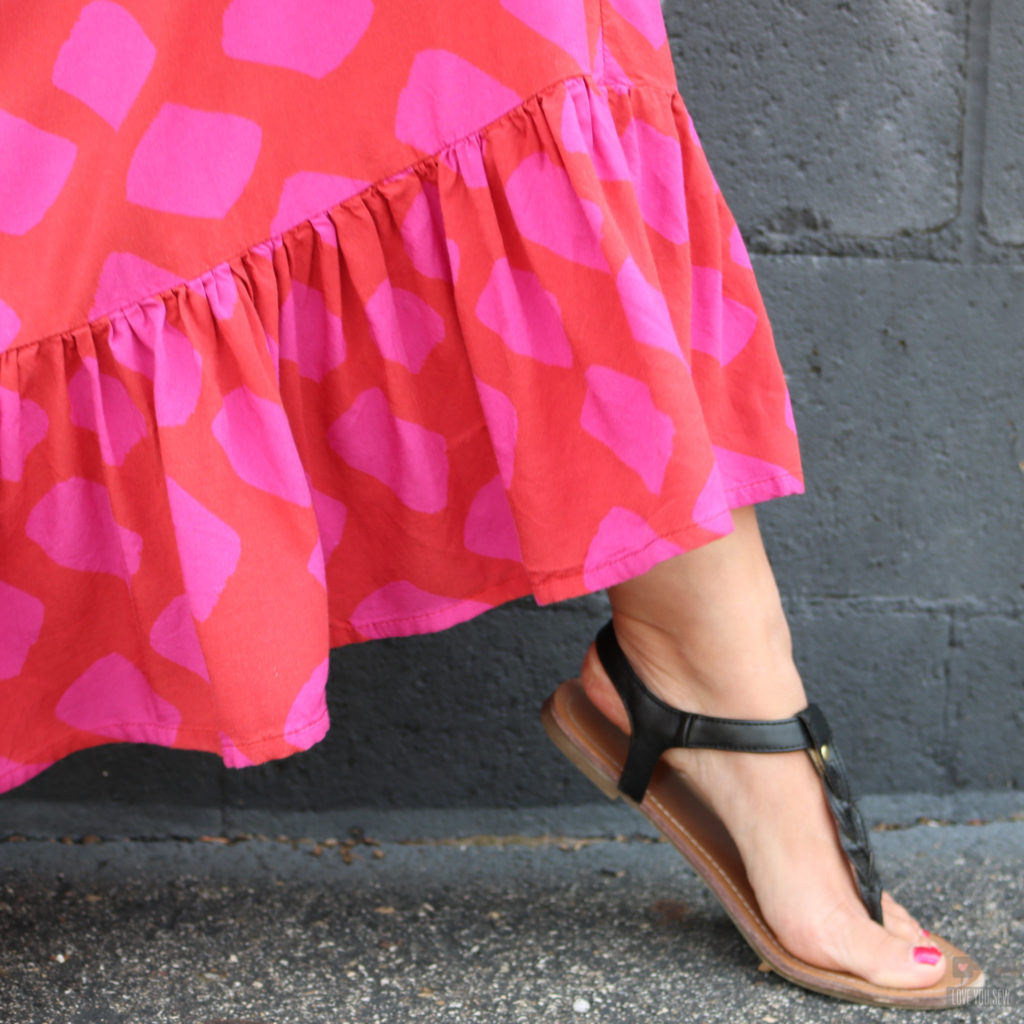
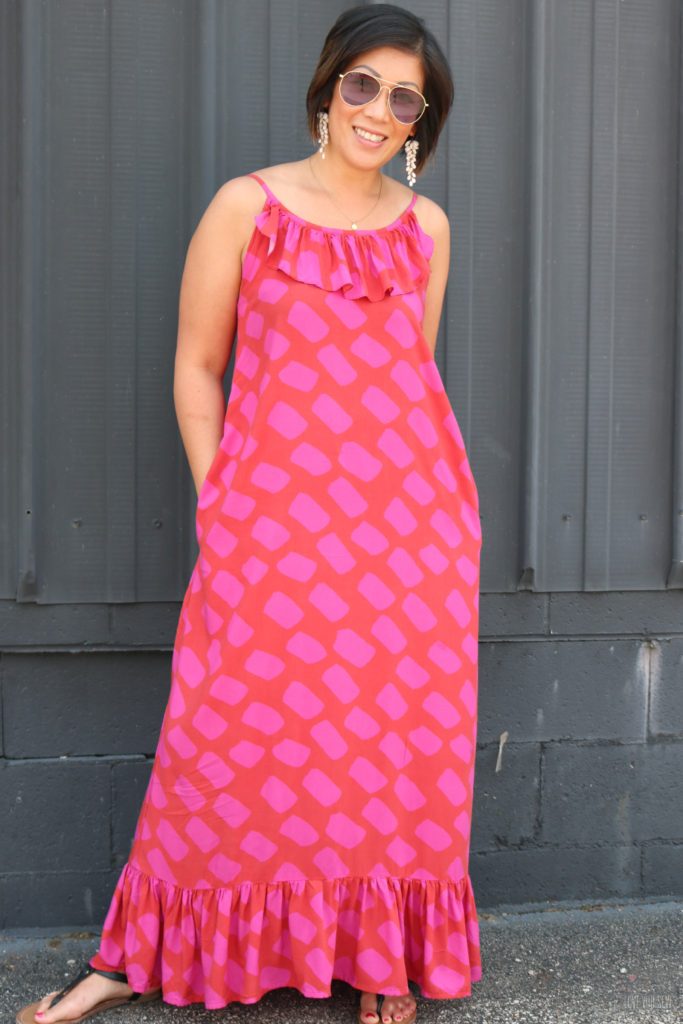
I was so excited when D&H Fabrics approached me to collaborate with their exclusive fabric collection with Katie Kortman.  I was asked to make something using one of the three available prints and I knew I would have to make a statement maxi dress using the Dash fabric with the Derby Dress pattern by Christine Haynes.  Katie’s designs are always so colorful and dramatic.  I wanted to make a garment that’s also fun, bold, yet approachable – like the designer, herself!

The Derby Dress (aff link) pattern has been in my library for awhile now.  I’m a sucker for the classic feminine styles which Christine has in her patterns.  I made the knee-length version a few years ago with a rayon challis and it’s still on rotation in my closet.  So I knew a full maxi version would get the same wear…if not more!

Fabric

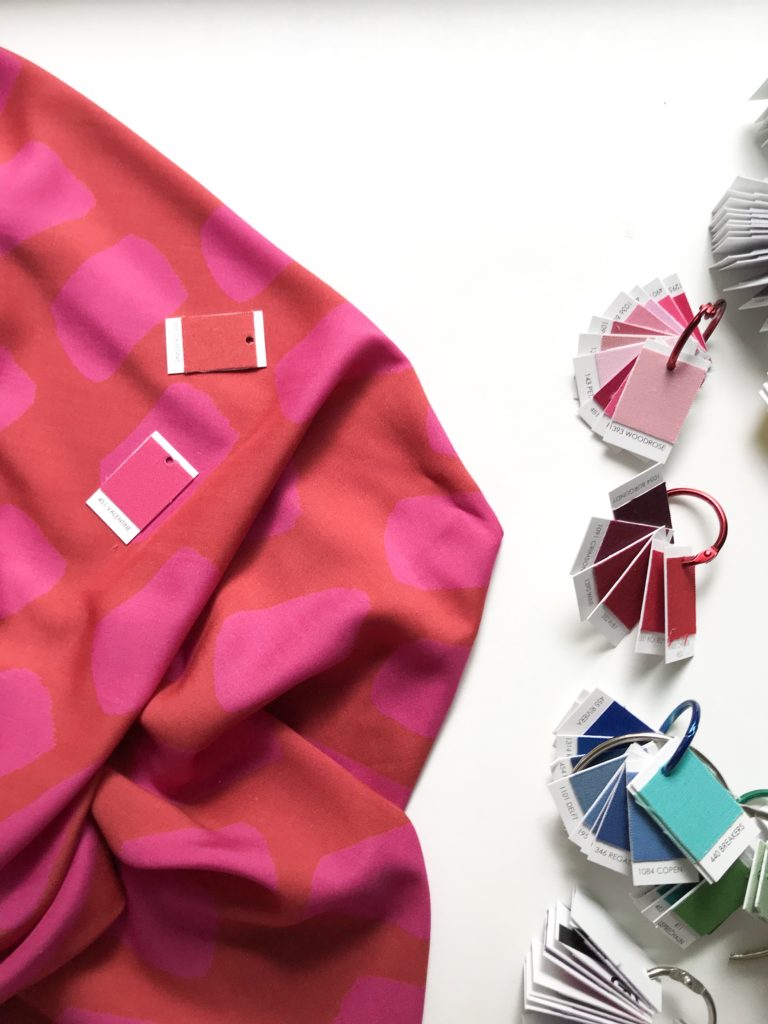
After checking out the available prints at D&H Fabrics, I fell in love with the vibrant pink and red Dash.  There was just something about these analogous colors that pulled me in.  I admit my garment fabric game is a bit neutral (aka boring) so it felt good to step out of my comfort zone a bit…especially for summer!  If you follow Katie on IG, you know she has her own personal movement to get more of us sewists to use fun color combos.  I SO appreciate the extra fun inspiration and color push 😉

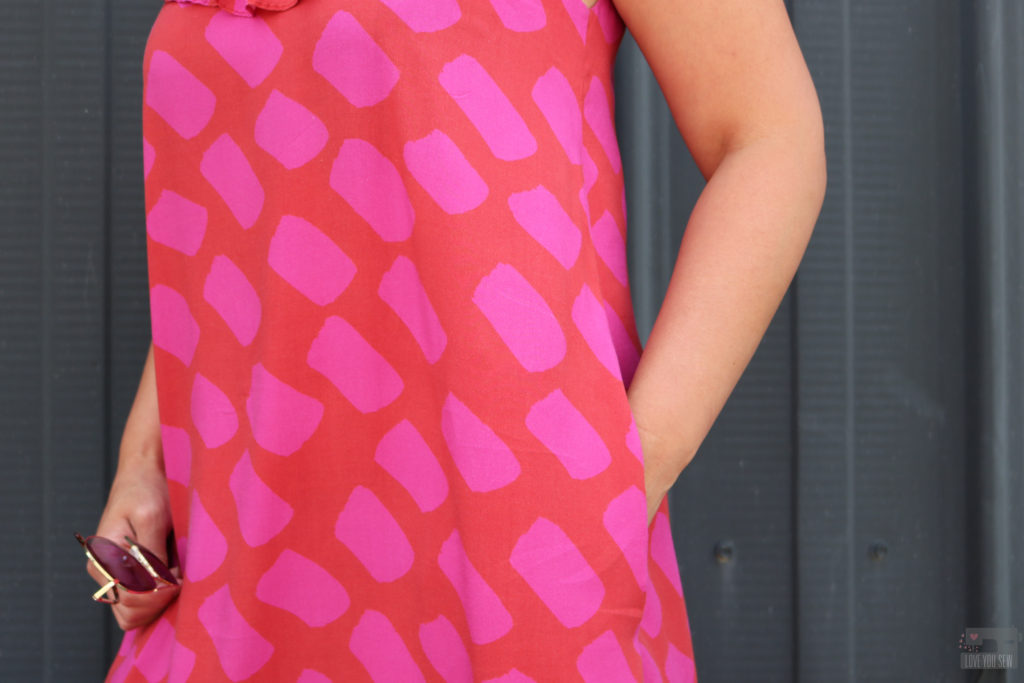
This gorgeous print is made of a 56″ wide lightweight rayon poplin which is incredibly soft with a soft hand and beautiful drape. The tight poplin weave makes the fabric easier to handle than a rayon challis which is much more slippery. With this more delicate fabric, I like to use a smaller universal needle sized 75/11 or 70/10.

The fabric design is printed directly on a white basecloth and washes very well. Most of these pictures were taken after three washes and yes, even with delicate tumble-dry.  (I wash my handmade garments along with my RTW.)  The colors remain saturated and I even sweat through this for hours in 90* heat.

Pattern & Modifications

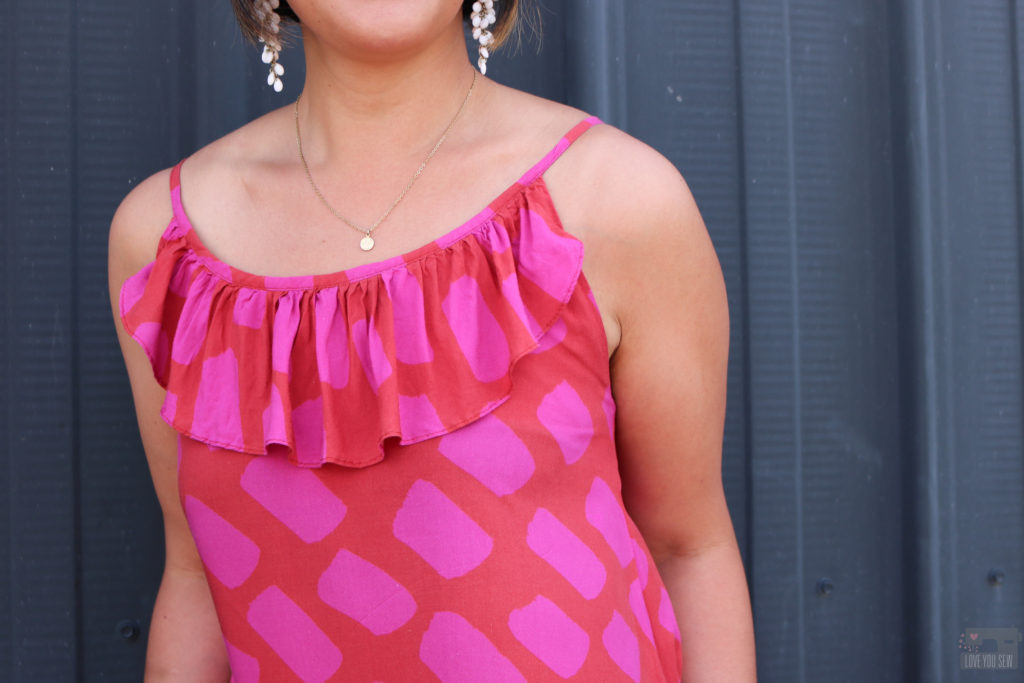
As I mentioned above, I’ve made this Derby Dress by Christine Haynes before and love the flirty ruffle feature — plus it has pockets!  I actually use this pocket pattern as my go-to for any dresses which need an in-seam pocket.  It’s just a nice shape and perfect size for my hands.  I’ve used these pockets on my Sylvie seen here, and my Alix dress found here.

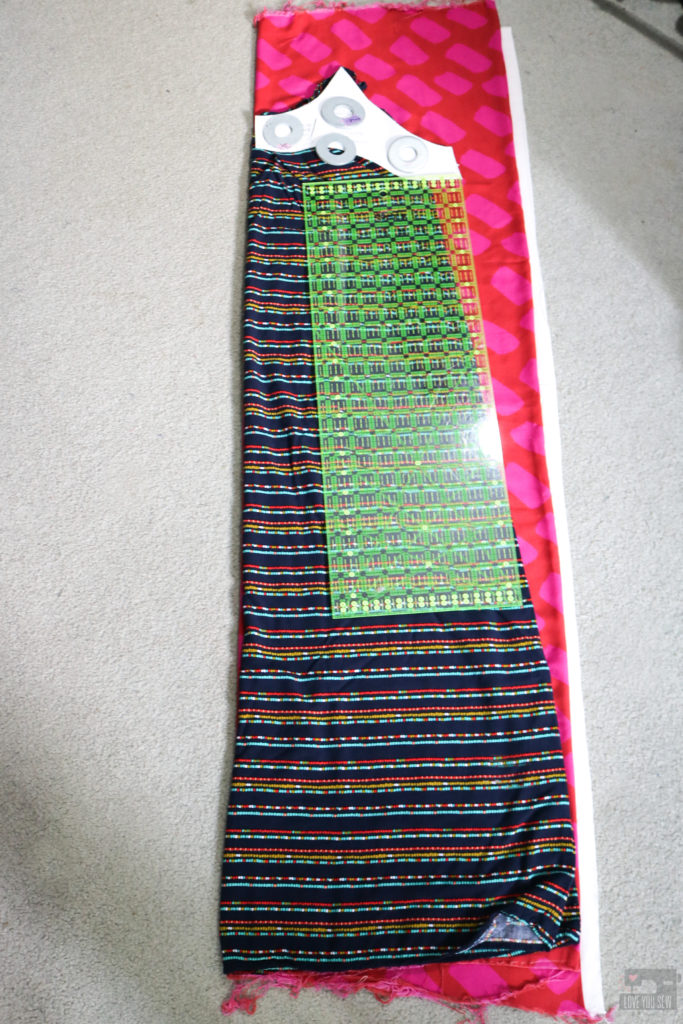
The front of the Derby is drafted with 3 separate panels for princess seams and the back has 4 panels for additional shaping.  This is great for a solid fabric or a busy print, but I didn’t want to disrupt the dashes in this fabric design.  I definitely did not have enough fabric for all of the pattern matching either…nor the time! So, I used a RTW maxi dress from Target (aff link) I have to work out the width and length of the dress.

I laid the RTW dress over the fabric on the fold and used the facing of the Derby to cut the top of the dress (of course, adding in seam allowances.)  The Derby uses two different facings for the front and back, but I took the easy route and made my front and back pieces identical since all of the panel seams we eliminated.   I then cut out two of the front facings on their own to match the front and back of the Derby.  The straps were later shortened to account for these changes to the neckline.

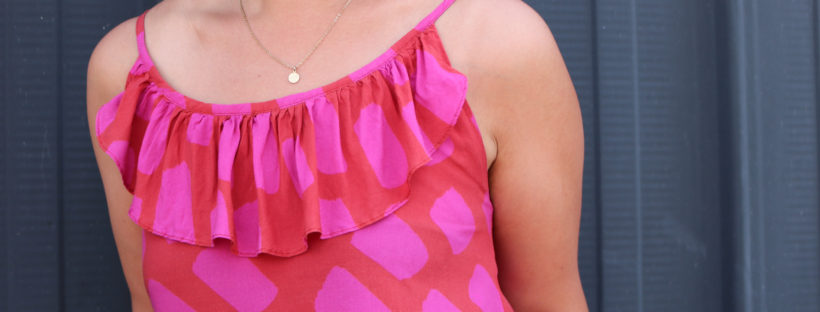
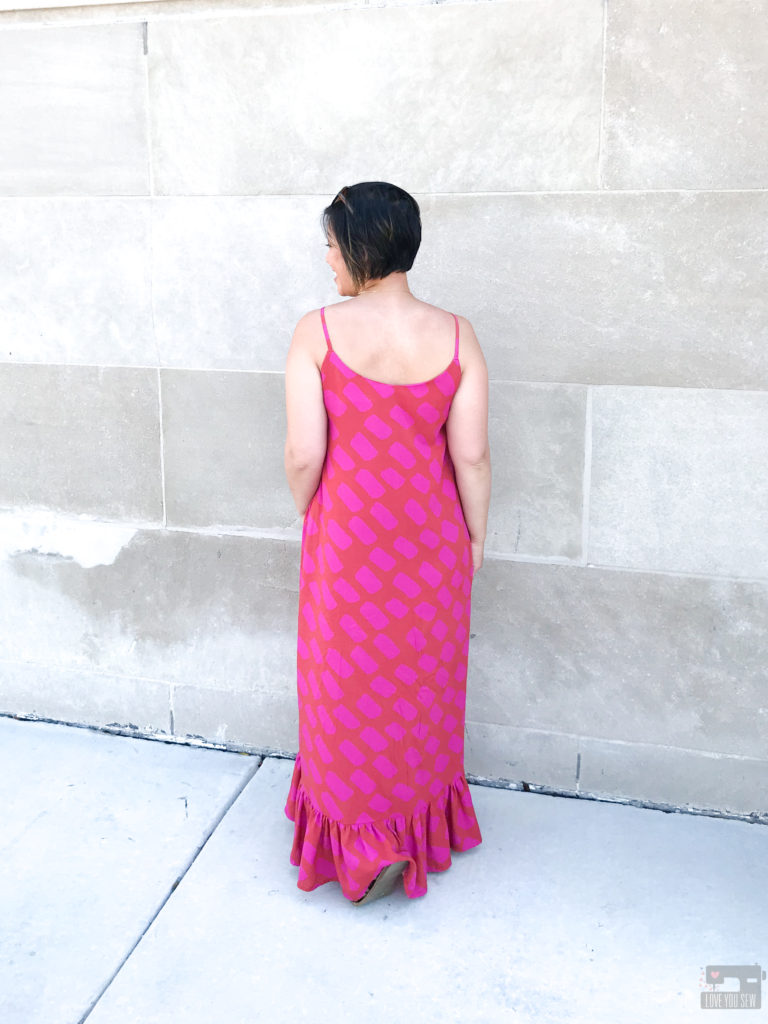
With the dress lengthened out to a maxi, I also extended the length of the neckline ruffle by 1″ to balance the proportion.  I though the ruffle would be cute on the back as well, but it ended up being  a bit “too much.”  Sometimes you have to know when to edit, and the back looks much better with a clean line.  To play with the neck ruffle, I also added a 7 1/4″ (finished) x WOF ruffle to the bottom of the Derby to make it as close to the ground without touching as possible.  It adds to the flirty feel of the dress and adds some extra swing.

I LOVE how this maxi version of the Derby came out.  The print needed to become a statement dress and I can definitely tell you it turned a lot of heads at the airports!  The lightweight rayon poplin was just perfect with the dress pattern for all the great movement.  It’s the perfect summer dress for travel and pairs beautifully with my vintage denim jacket….so that means I can also extend the season on this make! Yay!!!

Derby Dress by Love You Sew

Project Summary


Are you a bold and colorful person or usually a bit more reserved and neutral like myself?    I have to admit that stepping out of my usual color scheme was a lot of fun and I’m reaching for this dress a lot more than I thought I would!  Try it out if you haven’t already!!!


Hugs and Stitches,

Cristy


The fabric for my dress was provided by D&H fabrics for advertising but I was not contracted to write a blog post.   As always, I like to share my makes and good fabric finds 🙂  There are affiliate links in this post and you can read up about my disclosures here.


Holly Jumpsuit by Love You Sew

Holly Jumpsuit Review

Holly Jumpsuit by Love You Sew

When I sew my own clothes, I like to know they will last for awhile.  So when the jumpsuit and romper trend came out, I was very hesitant to make one.  I wasn’t sure the one-piece look would be right on me.  Oh, and there IS that issue of completely undressing when using the restroom! But alas, after a couple of years seeing so many different versions of a romper, I finally took the plunge with the By Hand London Holly Jumpsuit.

Holly Jumpsuit by Love You Sew

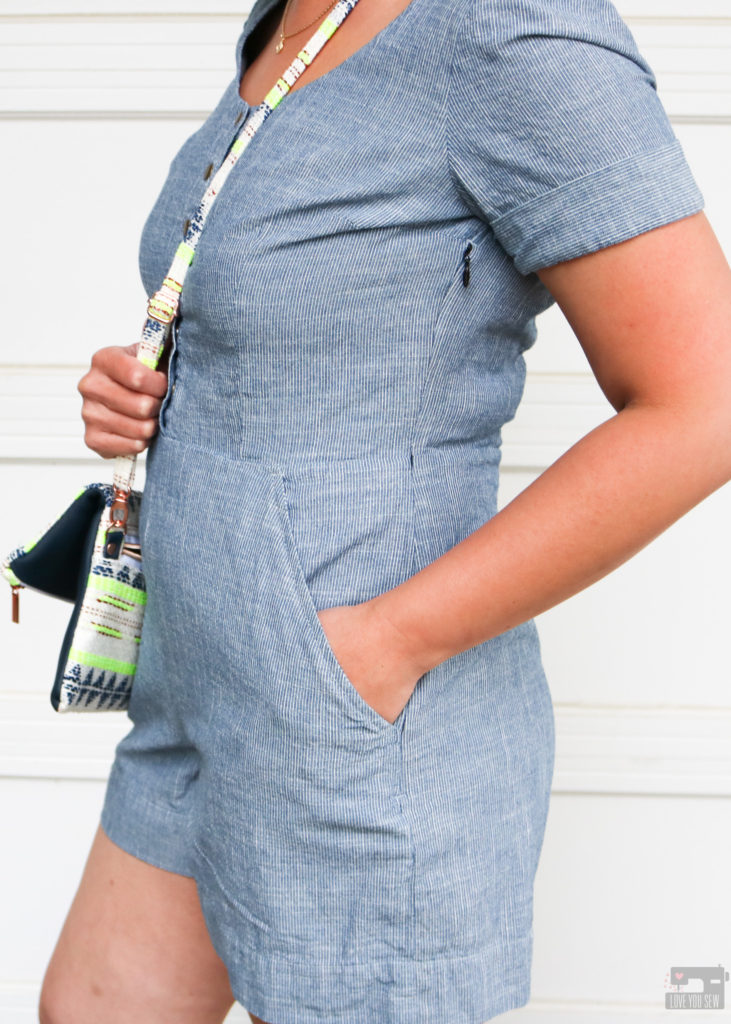
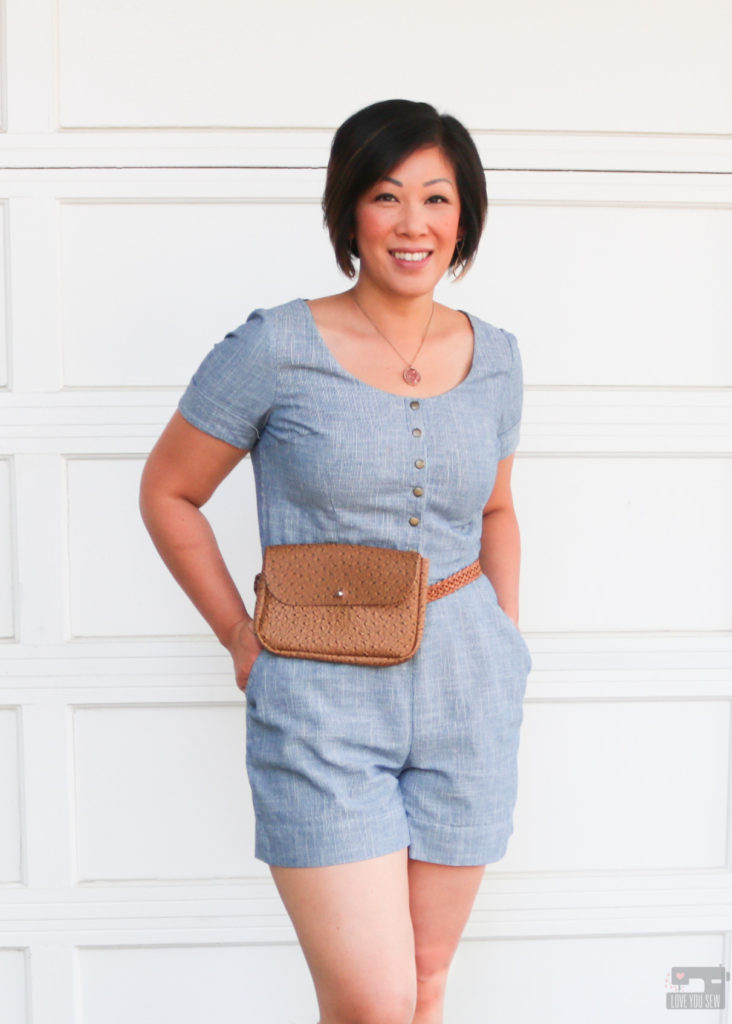
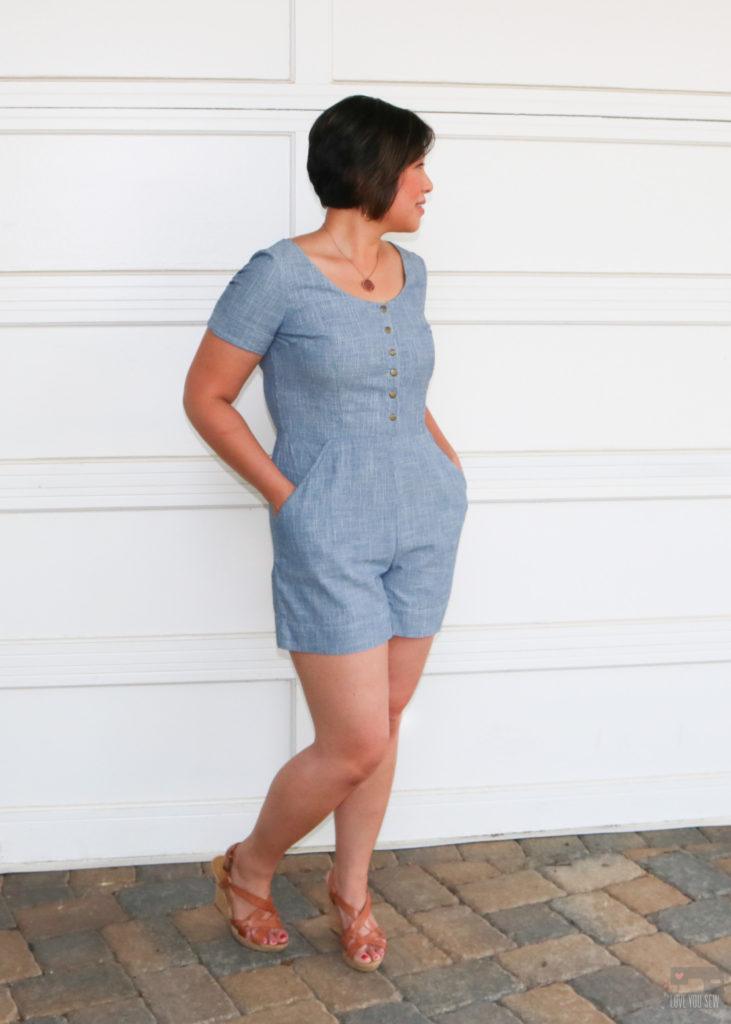
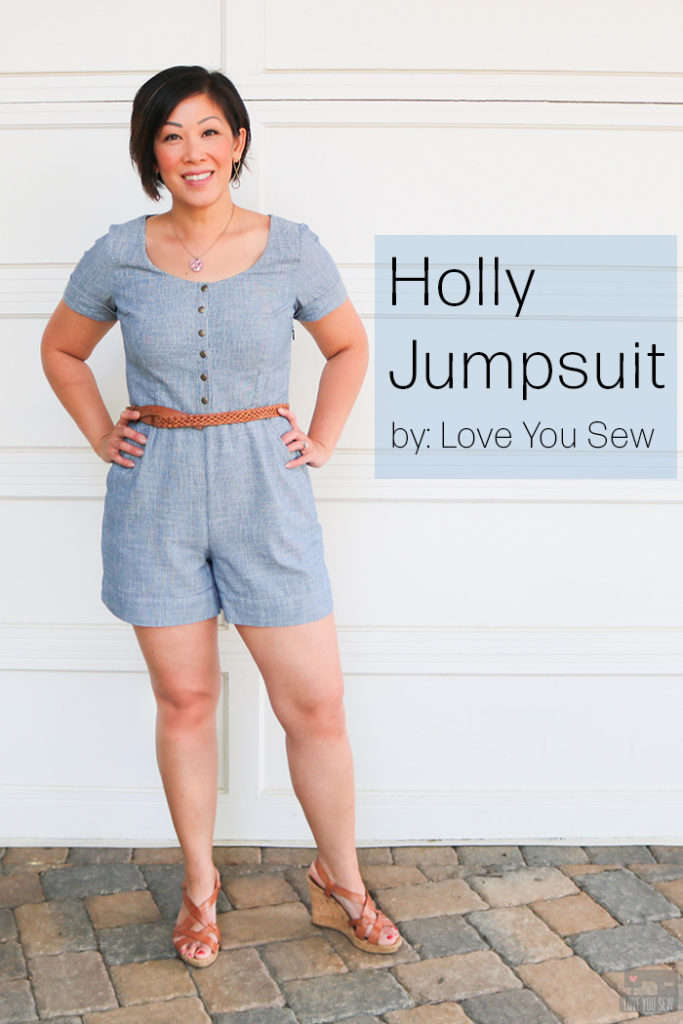
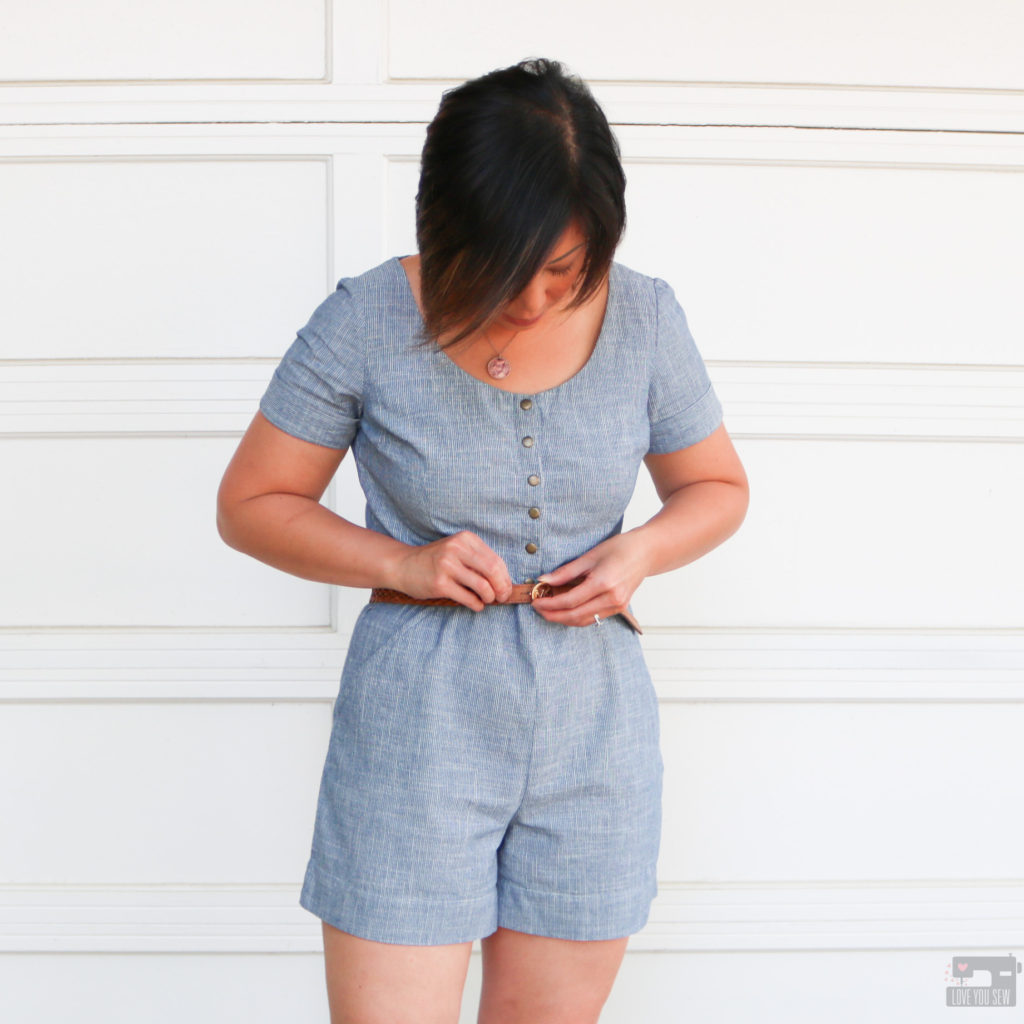
With many of the RTW rompers I’ve seen, they either have a very loose low v-neck wrap (probably for easier bathroom breaks) or the bottoms are way too short for my age bracket.  I fell for the Holly Jumpsuit with the nice open scoop neck (while still being modest,) the tailored waist and the 4″ inseam which is long enough for me, but could be a little too short for all of you  over 5’3″.

Holly Jumpsuit by Love You Sew

I initially bought the Holly Jumpsuit for the trouser view to help make a traditional Vietnamese Áo Dài.  I loved the wide leg, high rise, and the clean waistband which was perfect. However, it’s now been a few years and the Áo Dà has yet to be sewn…I know, I know…it will eventually happen!  However, I have made a pair of culottes using some rayon twill seen above.  These are such a great summer make.

Holly Jumpsuit by Love You Sew

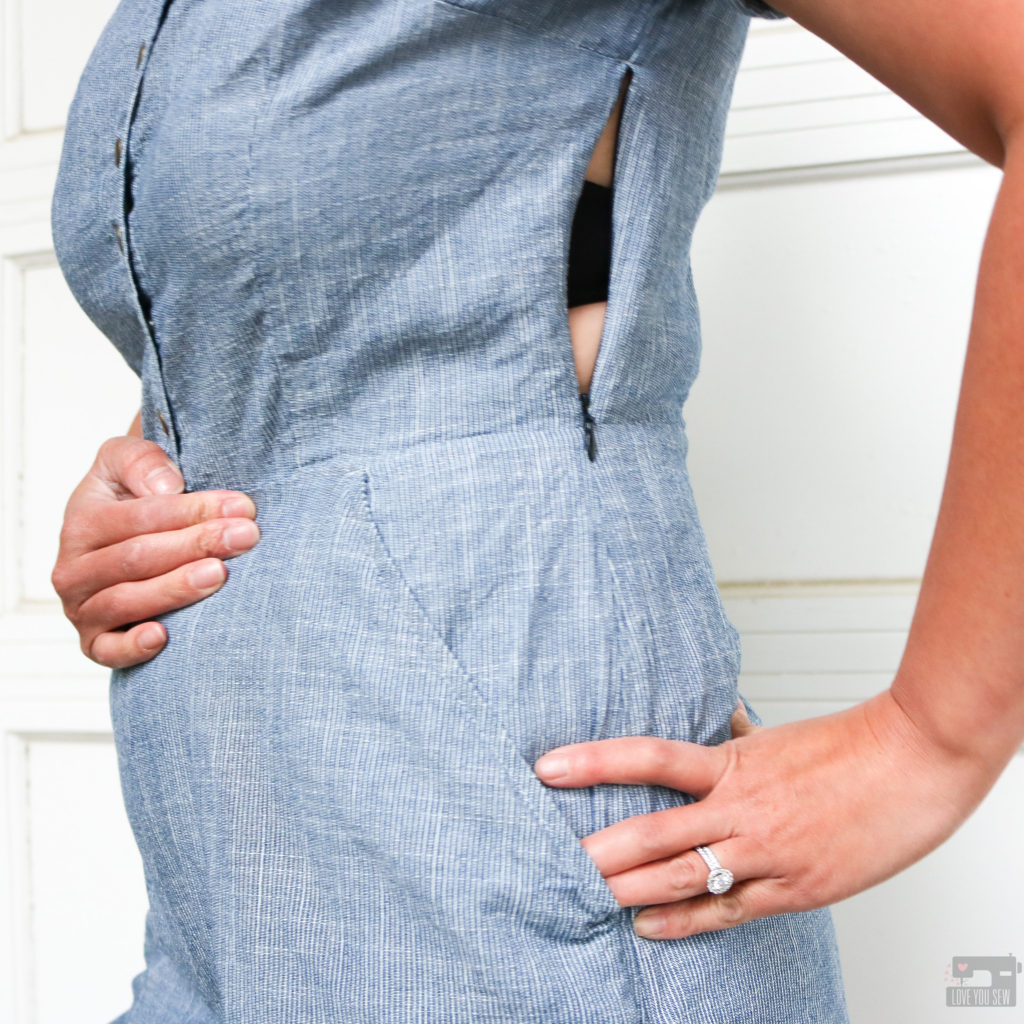
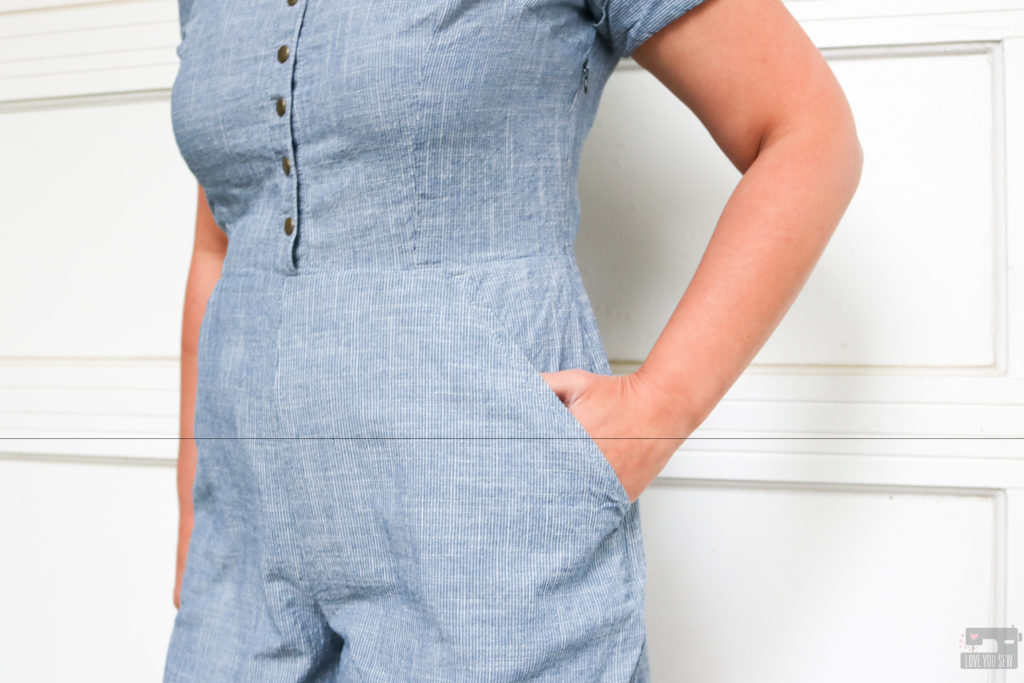
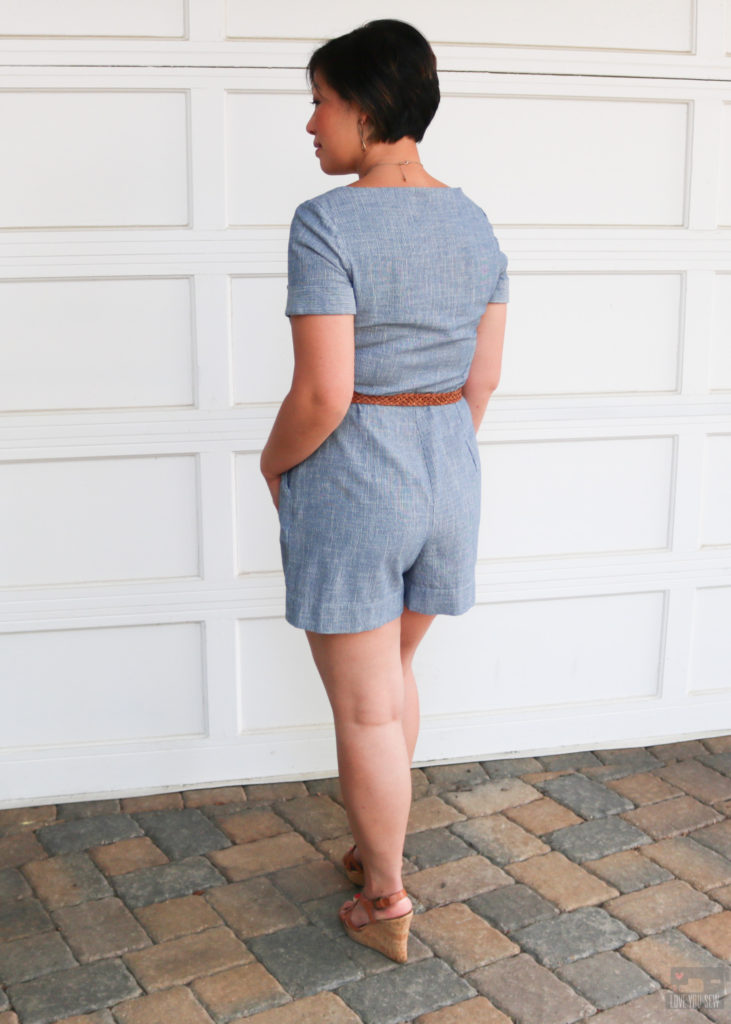
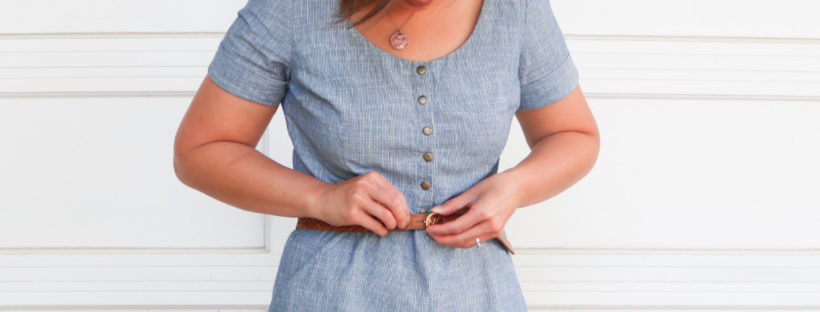
I know what you’re thinking….The big question with all rompers and jumpsuits is always, “How do you pee?”  There is a nice long invisible zipper which extends from the side dart down to the hip.  This allows you to slip the romper on and off in combination with unbuttoning the placket.  I wish I had a blue zipper to match my Holly when I was making this in time for a party, but I went with the only invisible zipper I had on-hand — black.  With the smart placement of the zipper, you can only see the pull when I have my arm up…and it’s still very discreet.

Holly Jumpsuit by Love You Sew

Fabric

When I was looking for fabric, I wanted something light enough to wear during warm weather, but structured enough to hold it’s shape and not wrinkle easily. Since this was my first romper, I also was looking for a simple print that could help camouflage any imperfections.

Holly Jumpsuit by Love You Sew

I was happy to find this great Vintage Chambray Stripes at Imagine Gnats. It’s a classic micro stripe with that railroad-esque feel.  I love the blue and how neutral it is for any occasion.  I can just switch up accessories to give it a different feel.  At 4.5 oz this is still light enough with a soft hand and the 100% cotton content makes it breathable for the summer.

Pattern

Holly Jumpsuit by Love You Sew

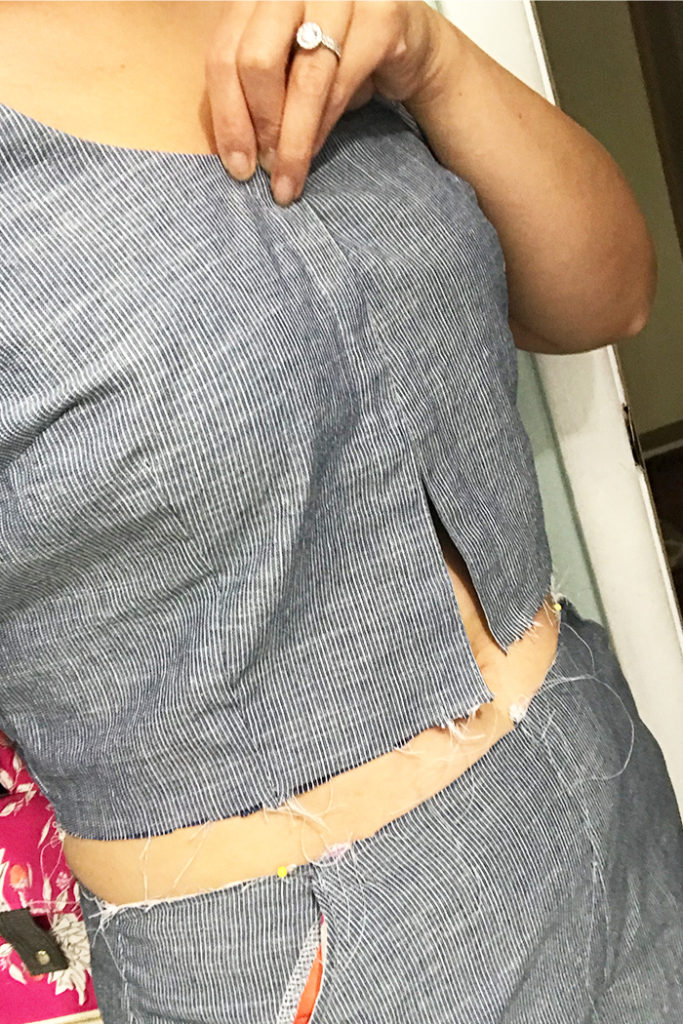
For the romper, I used view A and made a size UK10/US12 for both the bodice and bottoms based on my measurements. Since I already made the culottes, I knew I wouldn’t need any adjustments on the bottoms, but I did forget to take into account that I shortened the rise on them previously.  So, my romper ended up being too short! *Cue head-slap* Fortunately, I had enough fabric (thanks to the extra wide WOF) left to remake the bottoms.  Since there is no fly, it wasn’t too much of a set-back.  I’ll turn the first set with the lower rise into shorts by adding on the waistband found in View C.  Phew!

Holly Jumpsuit by Love You Sew

These are the additional modifications I made to the Holly:

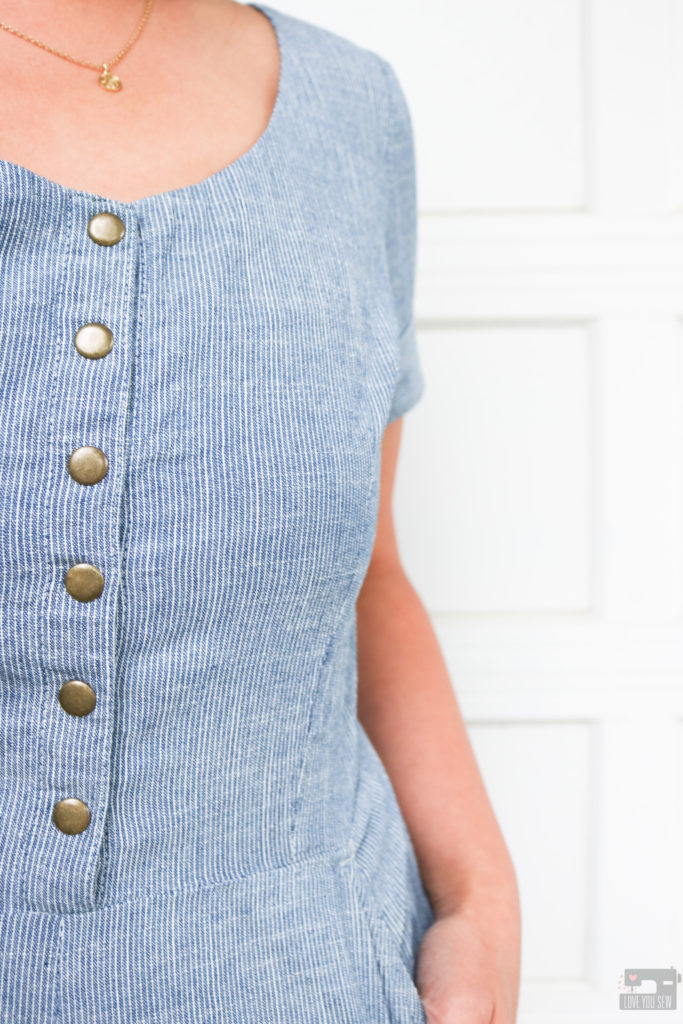
  • Added lightweight woven interfacing in the placket to hold the snaps, but I would add it even if I used buttons for more stability
  • Used metal snaps instead of buttons for faster bathroom breaks 😉
  • Added slash pockets by drafting a pocket and the facing  (the one thing missing with the pattern)
  • Decreased the seam allowance for the sleeve and increased the armscye to match
  • Reduced seam allowance to 3/8″ between the bodice and shorts for more crotch room

Holly Jumpsuit by Love You Sew

When I make this again, I would consider the following modifications:

  • Slight broadback adjustment – There is a little bit of tightness across my shoulder blades.
  • Bicep adjustment for even more ease – After wearing this to an event (with lots of sweating!) I think adding in more arm ease would allow more air flow and an easier time getting the romper off and on.
  • Increase the bodice length by 1/2″ – I’m only 5’3″ but if I raise my arms all the way up, I get some cameltoe, which is surprising. Most patterns are drafted for 5’5″-5’8″ that I’ve seen, and usually I have to shorten the bodice on a pattern.
  • Lower the side darts by ~1/2″ – Everything looked good when I was finished, but after an additional washing, the darts look a little too high.

Holly Jumpsuit by Love You Sew

Final Thoughts:

For my first romper, I am SO pleased with this make. I love the slim fit around the waist and the ample ease around the buttocks and thighs.  This is a great pattern for my fellow pear shapes! But it is certainly still great for other body shapes as well with just simple changes to the darts. This fabric was great for the pattern but I may use a woven with just a little stretch next time and probably won’t need those broadback and bicep adjustments.

Holly Jumpsuit by Love You Sew

Project Summary:

Now that I’m done with my very first romper, I think I’m ready for another.  Do you have any good romper/jumpsuit patterns to recommend?  Let me know in the comments.  I would love to hear your thoughts!


Happy Sewing,

Cristy


This post may contain affiliate links for which I may receive compensation.  This helps keep ads off the blog and helps me to keep this website afloat.  Thank you for your support.