Announcing the Erin Backpack Sew-Along!

Welcome to the Erin Backpack Sew Along! 

Since all of my bag and accessory patterns are all digital, I have the luxury of unlimited pages and love the fact I can add more details into my instructions…but I know one photograph is not nearly enough for some of the more complicated steps.  I was asked by YOU to provide a sew along and HAD to oblige!  So if you already have some questions or comments, please post them below so I can address them during the month!

DETAILS

This sew along will be broken down into 6 parts as listed below and will be posted every Monday and Thursday throughout March, starting March 8th. 

  1. Prepare the Fabric + Hardware tabs (including cutting, interfacing and basting)
  2. Make the Convertible Strap and Key Fob + a hack for Permanent Backpack Straps
  3. Create the Back Panel
  4. Create the Front Panel
  5. Make the Lining
  6. Final Bag Assembly 

For some added fun, I have prizes for participating in this sew along on Instagram.  Post any picture of your progress whether it be a fabric pull or the finished product and use the hashtags #loveyousewpatterns, #erinbackpack and #erinbackpacksewalong to be added into the pool of entries.  I’ll randomly select a winner for $25 shop credit, a copy of all of my digital bag patterns, and a package of my favorite bag notions at the end of the month.  It’s that simple!  Don’t forget to tag me @loveyousew_ so I can see your makes along the way!

>> To get you going, you can grab the Erin Backpack pattern for 20% off  and Hardware Kits for 15% off in my shop,  here, all month long.

If you are ready for a little pre-work, you can checkout the introductory post of the Erin Backpack here and find lots of inspiration in the tester versions here.

Now let’s talk a little more in depth about fabric and supplies you need before we officially start next week!

FABRIC

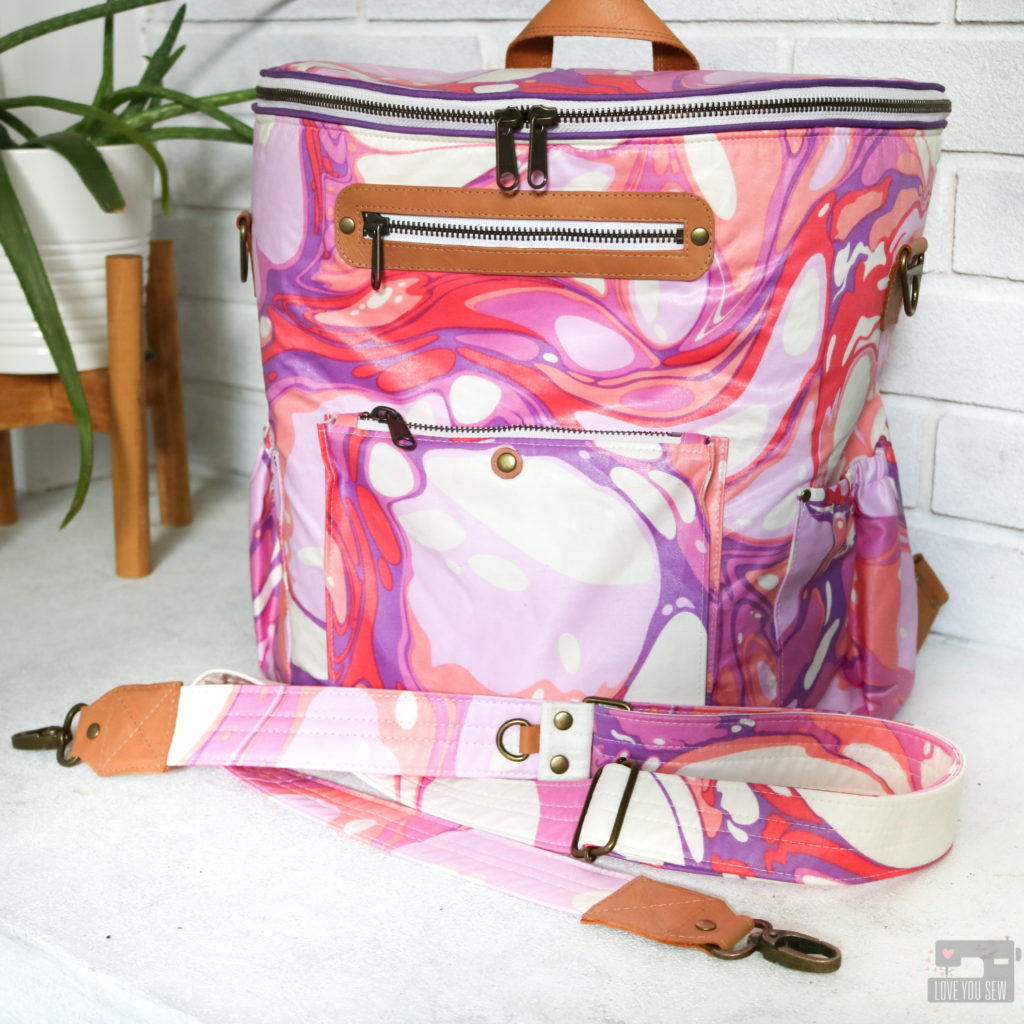
As you know, the selection of fabric is KEY with any bag.  You have to look a little into the future to see how you really want to use your Erin Backpack.  Will it be used outdoors, for home, or maybe for the family?  The answers will help you decide what fabrics you want to use. Below are the fabric notes (as written in the instructions of the pattern – in blue italics) along with some extra guidance.

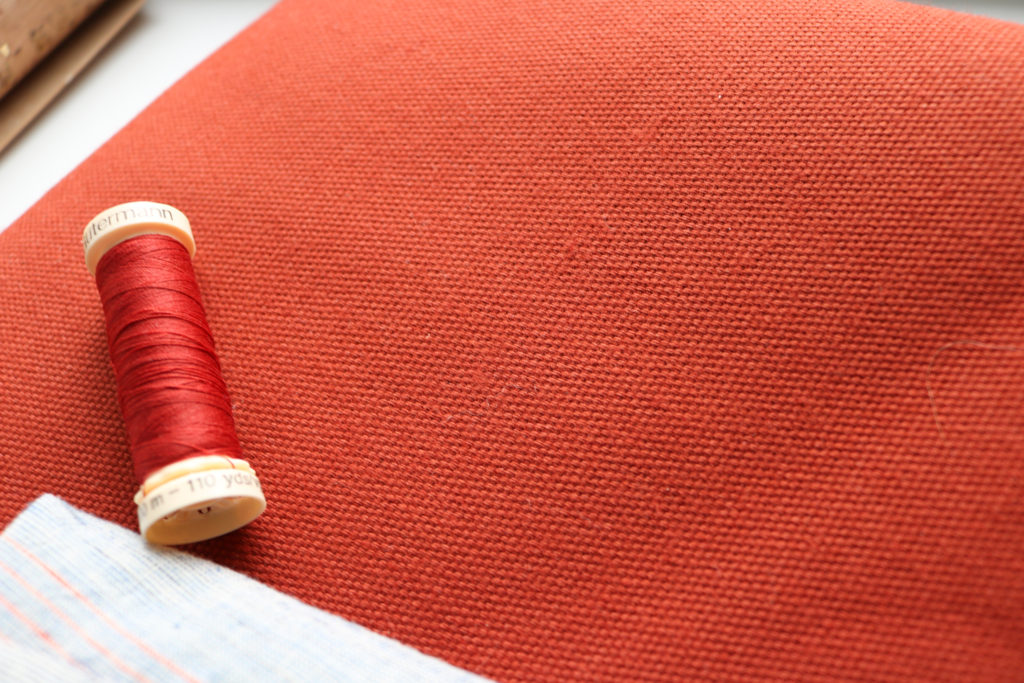
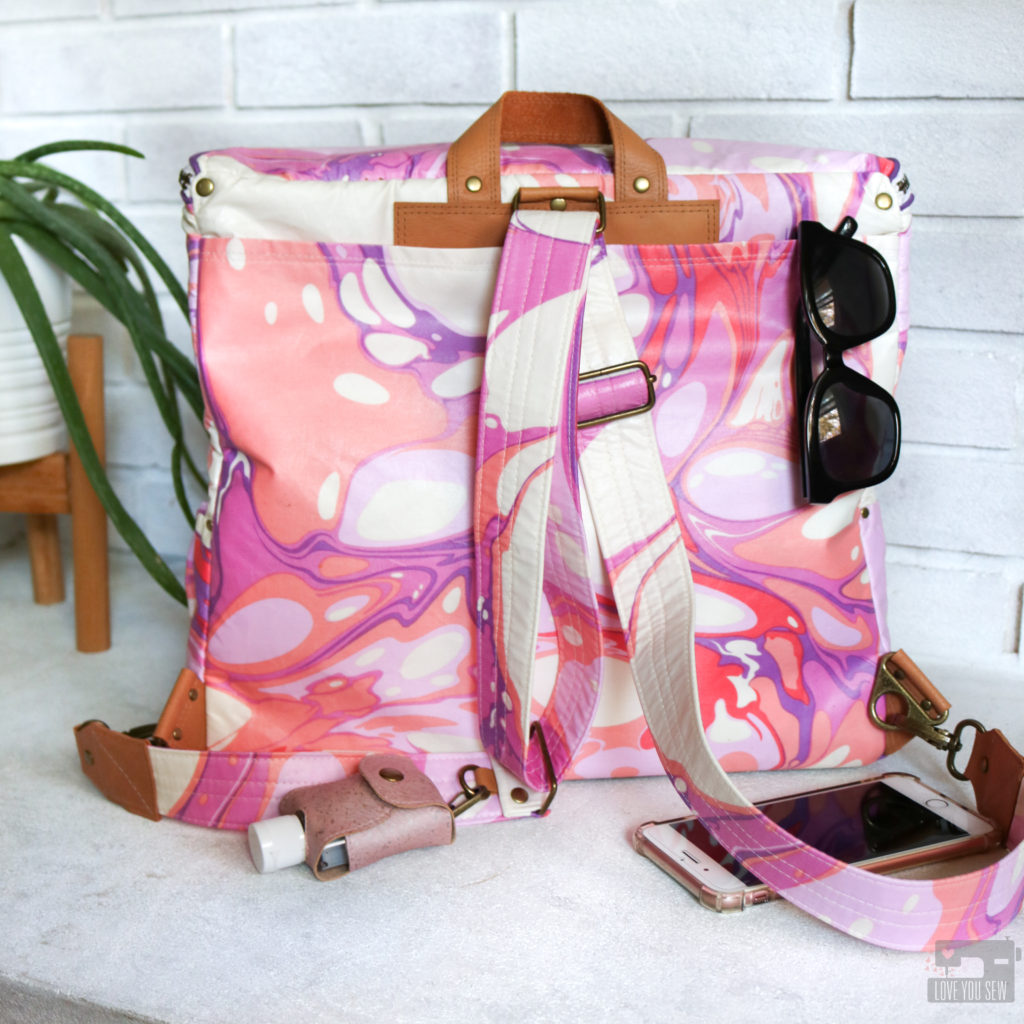
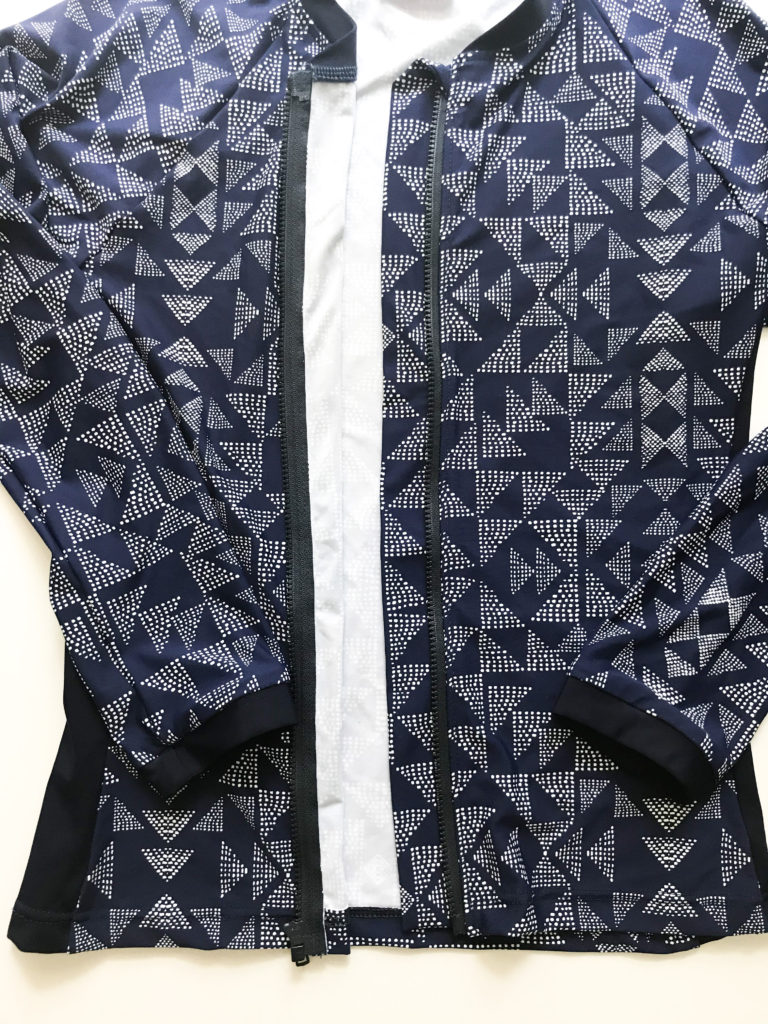
This pattern is written for bottom-weight fabrics such as canvas, duck cloth, and denim with weights of ~ 6 oz per square yard or more.For large bags like the Erin Backpack, you want a heavier and more durable main fabric that can withstand some beating.  The last thing you want to do is make a bag with fabric that ends up wearing away before you want to stop using it.  For the sew along, I will be using a heavy and durable 9 oz Expedition dry oilskin canvas by Merchant and Mills.  I chose this fabric for the weight and color, but also for its water resistant properties which is PERFECT for an everyday backpack.  On the flip side of heavy duty fabrics, you also want to be cautious with selecting a fabric that maybe TOO thick for your personal home machine.  (I sew with a semi-industrial Juki and am confident it can handle this fabric.) There are points in the construction where you will be dealing with several layers of fabric, interfacing and accent fabric all combined.  Always test the layers BEFORE sewing the actual bag.

*As a side note, since I’m using a treated fabric, the manufacturer states I cannot use heat or iron this fabric and will be adjusting interfacing in the first part of the sew-along (which is fine given the weight of the fabric.)  So if you are using something like a waxed canvas or a vinyl, you will have to make sure the weight balances out the fact that you will have to omit some interfacing.

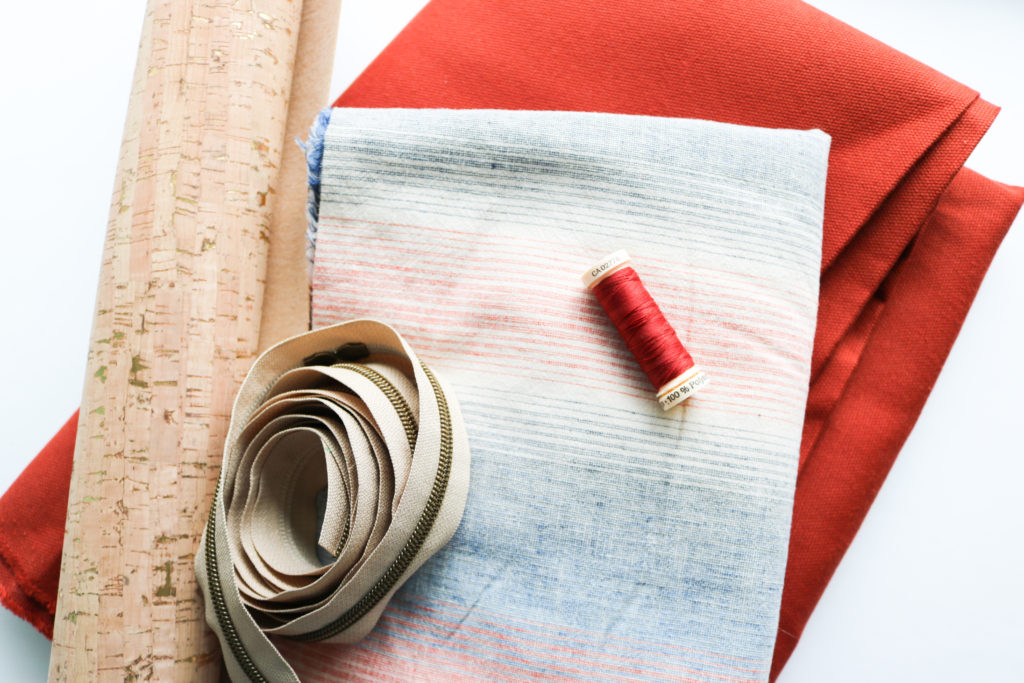
The lining is based on quilt cotton and any other fabric with the same weight (~4 oz) can be used such as linen, chambray and twill. — Since the lining does not get nearly as much wear as the main fabric, you can have more fun with a tight woven quilt cotton.  This would also be a great place to use a light laminate like these from Cloud 9.  If you want the inside to be wipeable, this is a nice laminate that is easy to sew through.  I have such a deep stash of fabrics from old projects that I will be using leftovers from a linen blend fabric I used on a dress years ago….But doesn’t it look great with the canvas?!?

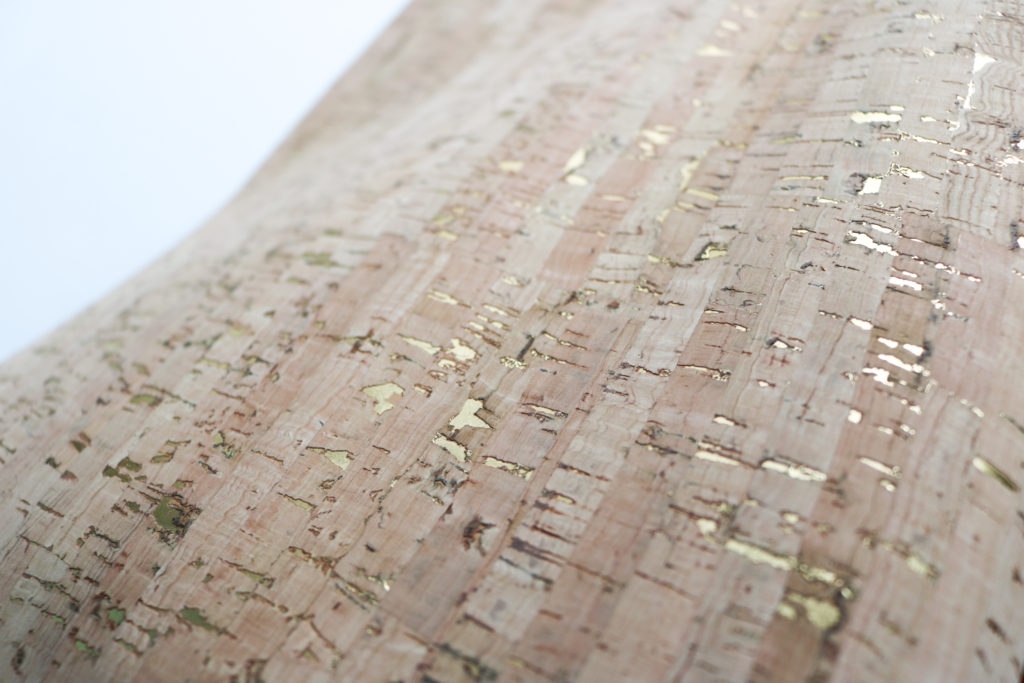
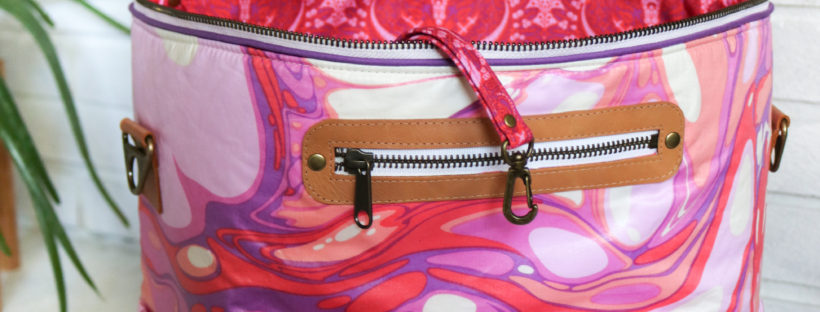
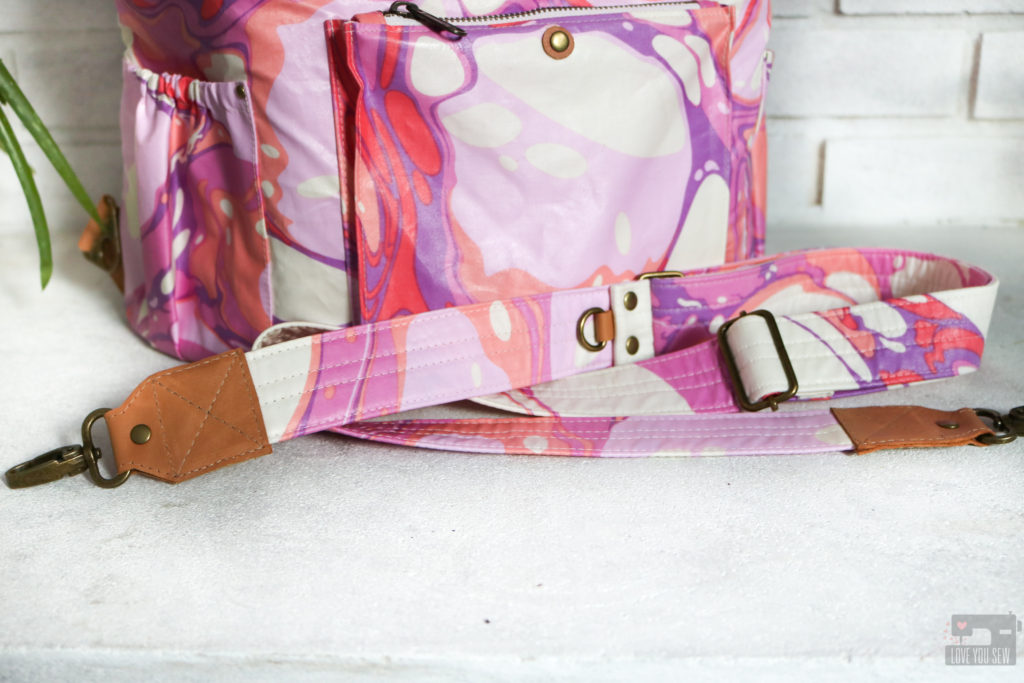
The accent fabric is intended to be left with a raw edge, allowing you to use leather, suede, vinyl, cork or another non-fraying substrate. This allows you to add some high-end details to elevate your bag. The Erin Backpack assumes the use of thicker 2-3 mm accent fabric. *If you use a thinner accent substrate like some corks or a lambskin leather, you may want to cut two handles for a sturdier finish. For this bag, I’ll be using some gold flecked cork fabric from Sew Sweetness and will show you how to finish this substrate, as well as how to reinforce some areas.

If you are looking for other sources of faux leather/vinyl Big Z Fabric’s has a nice selection and I’ve used the Terracotta DuroLast vinyl in a Megan Bucket Bag, here.  This brand is great for a beginners with a more basic home machine because it’s thinner and MUCH easier to sew through. The pebbled finish makes it look like real leather too!  Sew Sweetness also carries thinner faux leather as well…including the black I used for the pattern photography.


INTERFACING

The interfacing mix is based on these suggested fabrics and the foam is crucial to holding the structure, while still being pliable.  

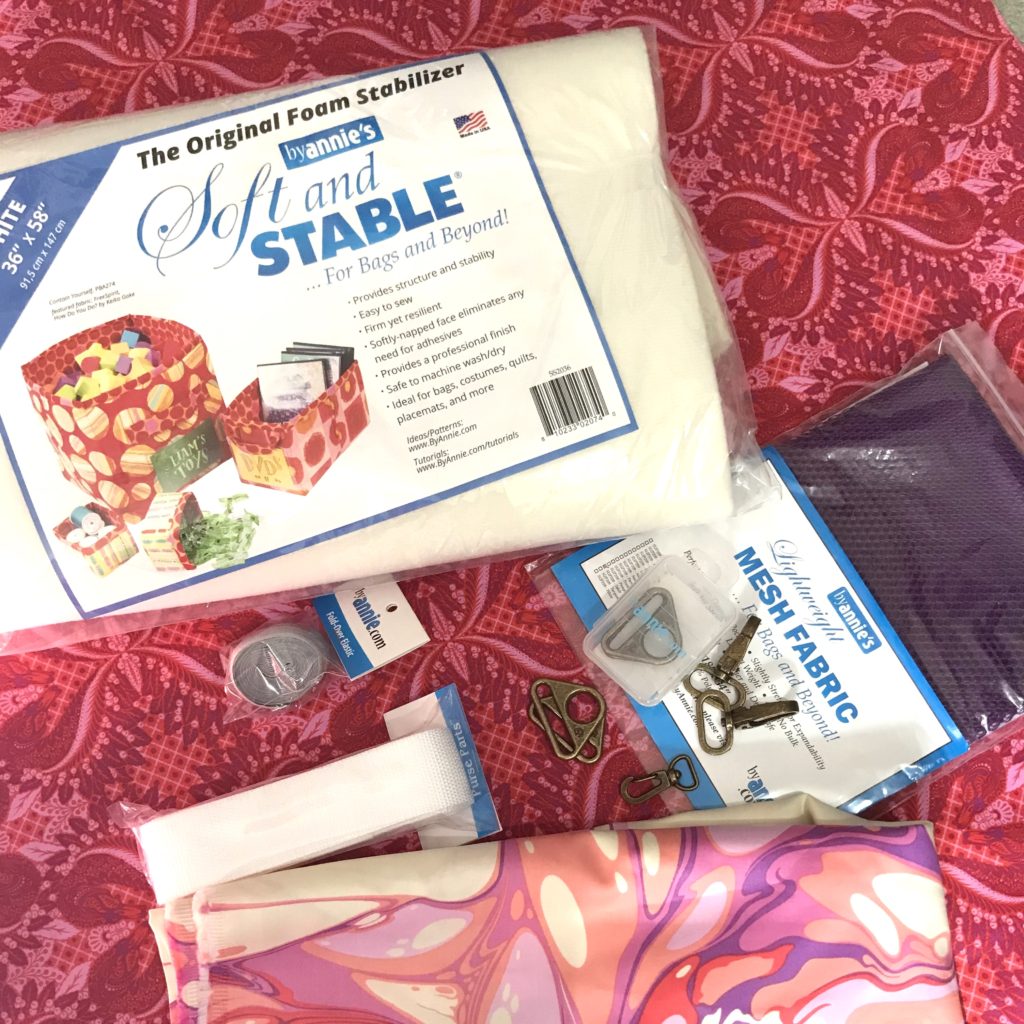
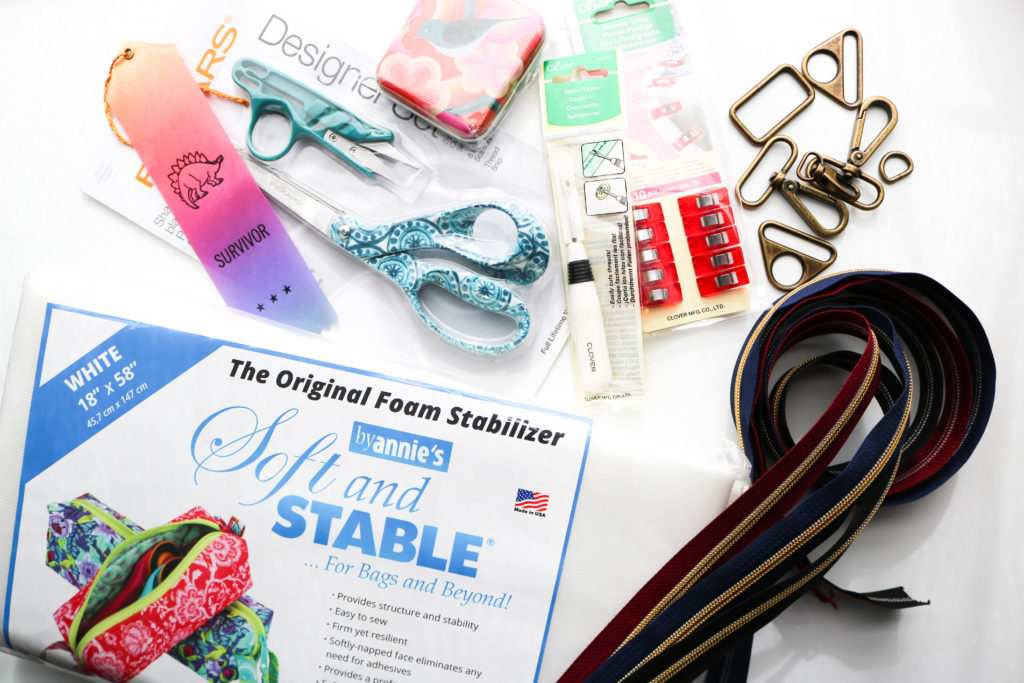
  • Please make sure you are using a non-fusible foam to avoid wrinkles on the main fabric as the bag wears.  By Annie’s Soft and Stable is my preferred foam which is denser and thus, provides more structure than Pellon foam.  You can grab it in my shop here.  But if you can only get Pellon, it works well too.  
  • For woven interfacing, I generally use 60” wide Pellon Shapeflex SF101, but I just tried out Barb’s Bags Interfacing (which is great too…just have to see how it wears before a full endorsement) to block fuse (when you fuse the interfacing to the fabric first and then cut out the pattern pieces…but we’ll get into more of this next week!)  It’s allows me to use the entire width of fabric, but you generally can only find 20″ WOF in stores….which IMO is more wasteful.
  • For the firm stabilizer, Pellon Peltex sew-in interfacing is a great choice.  It provides a stronger base for both the lid and bottom of the backpack.

If you would like to use other types of fabrics, please test interfacing with fabric swatches to see what you like before cutting.

HARDWARE

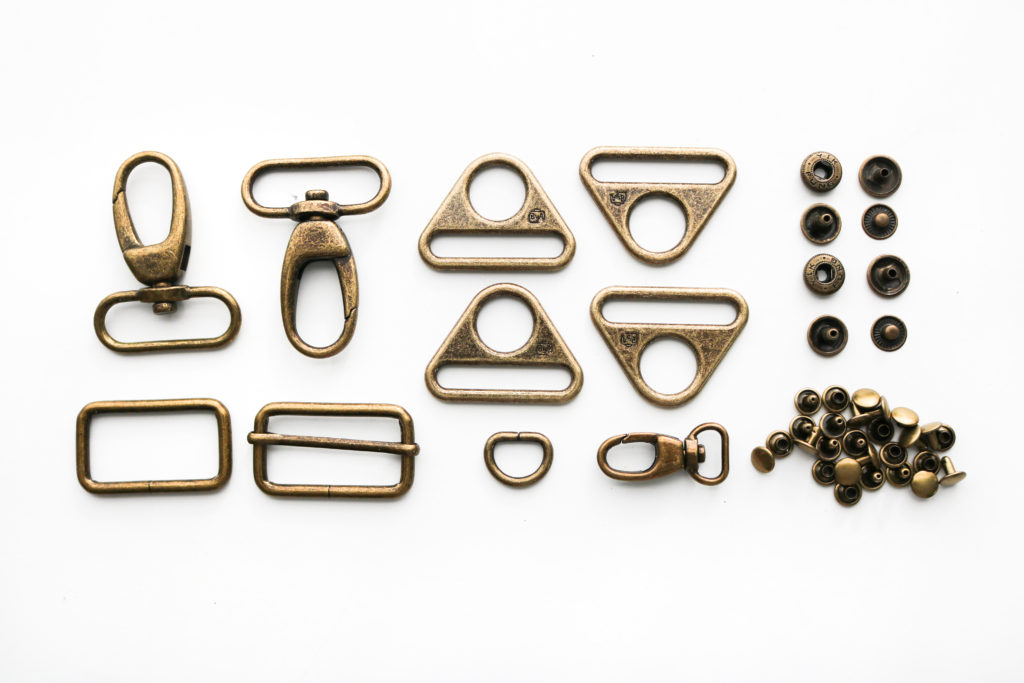
With a full-size backpack of this nature, there is a good bit of hardware involved.  This helps the bag look more polished and gives the ability to be be a convertible bag.  I’ve sourced some amazing hardware from Emmaline Bags and By Annie’s as part of a full kit you can find here in my shop.

The kit includes:
(4) 1 1/2″ Triangle Rings
(2) 1 1/2″ Swivel Clasps
(1) 1 1/2″ Rectangle Ring
(1) 1 1/2″ Strap Slider
(1) 1/2″ Swivel Clasp
(1) 1/2″ D-Ring
(3) Sets of 12.5 mm Double-Cap Spring Snaps
(5) Sets of Medium Double-Cap Rivets (9mm cap x 8mm post)
(20) Sets of Small Double-Cap Rivets (8mm cap x 6mm post)

Will we be going through some hardware installation?  Yes!  I know this is a tricky part for many folks and you can refer back to the Intro post for some links to videos I already have.
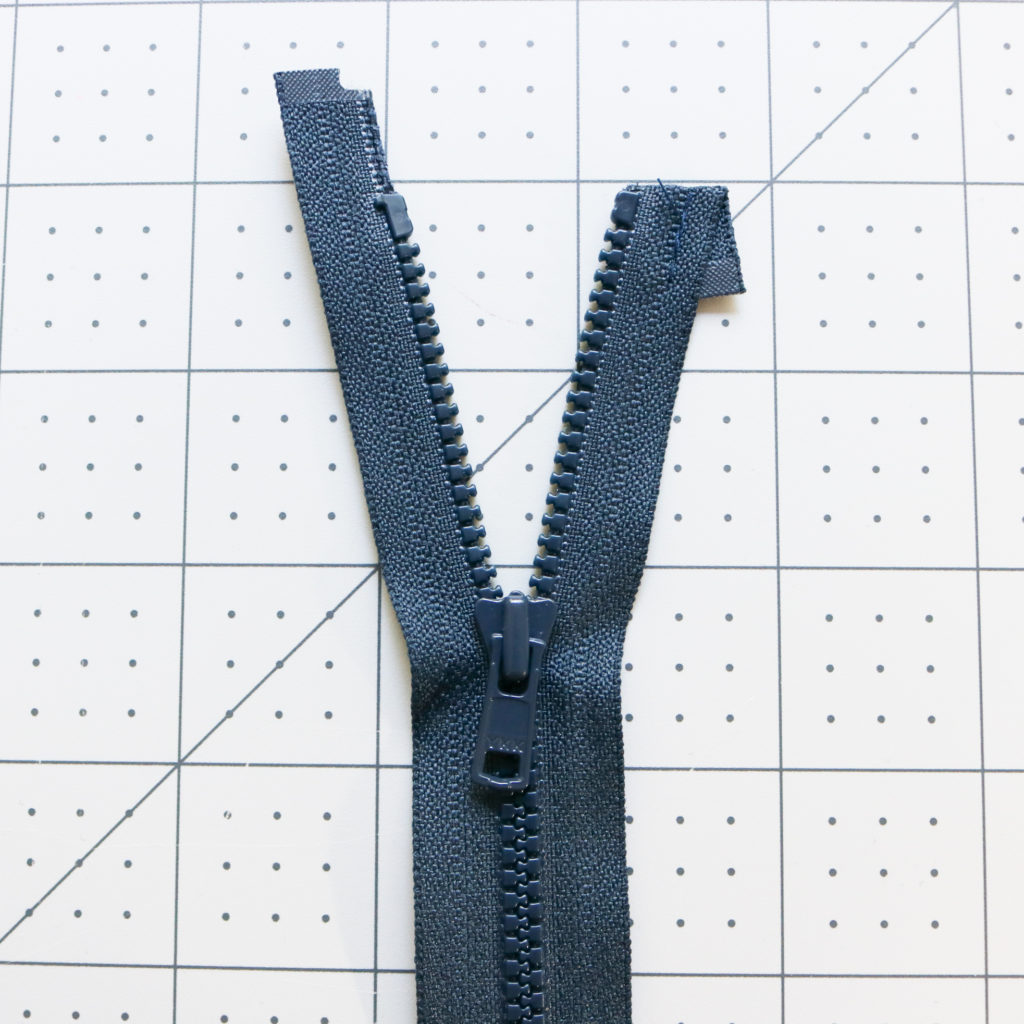
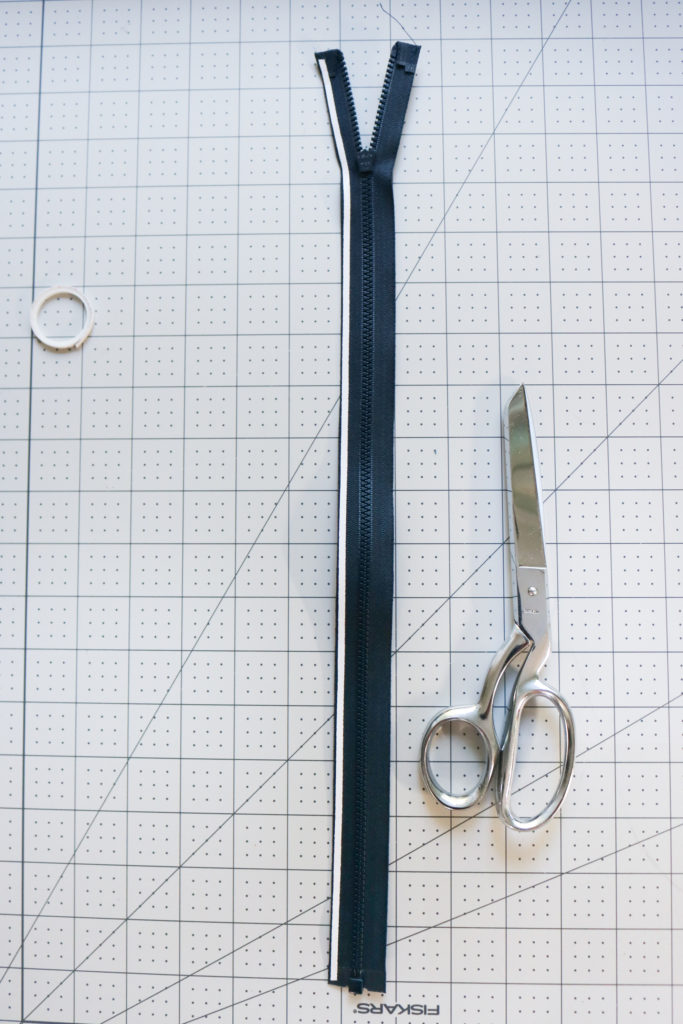
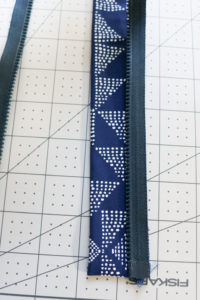
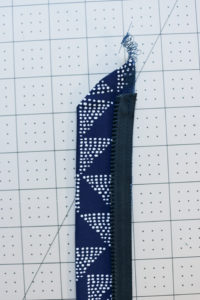
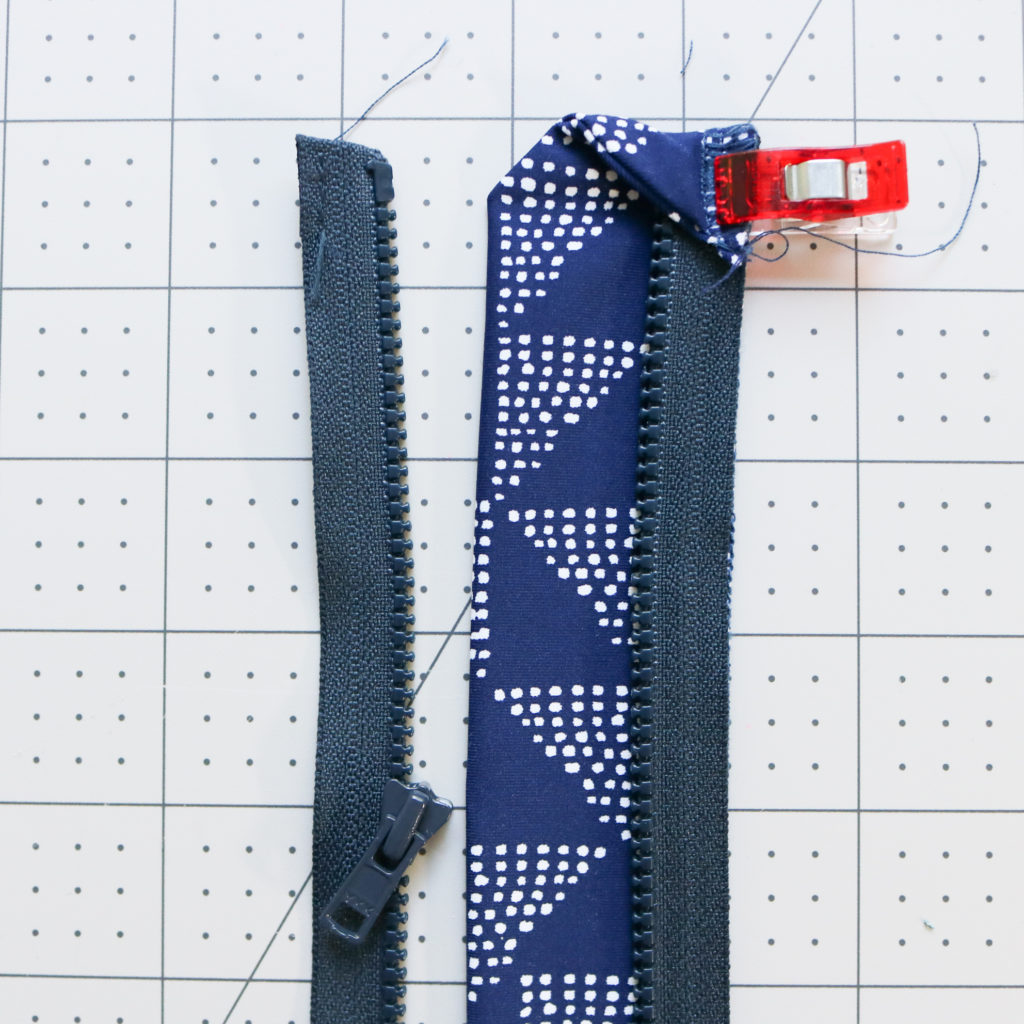
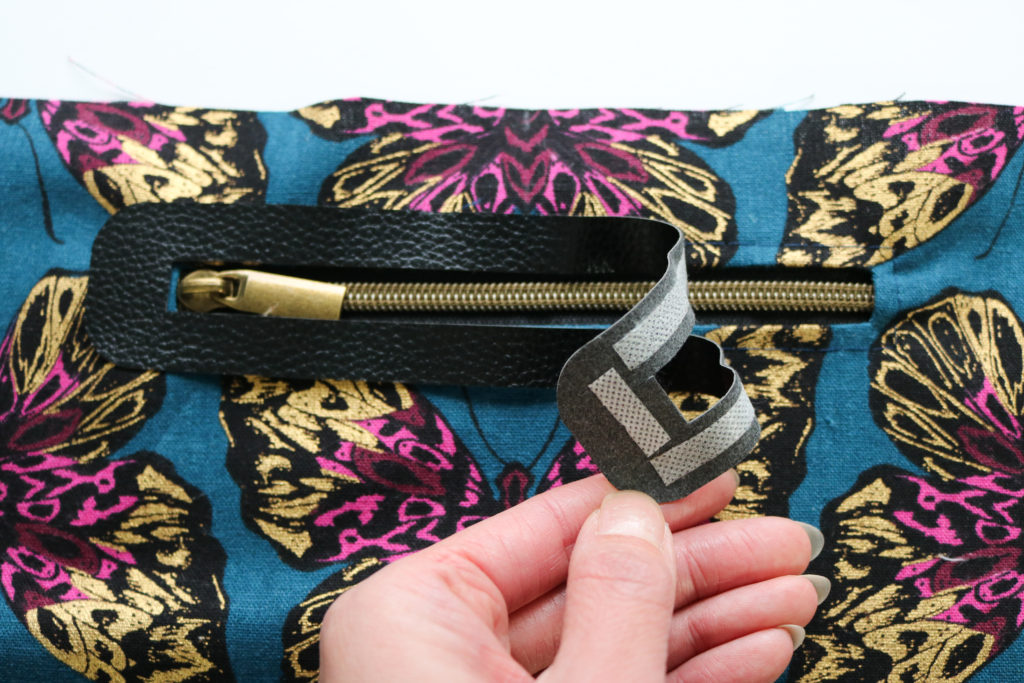
ZIPPERS

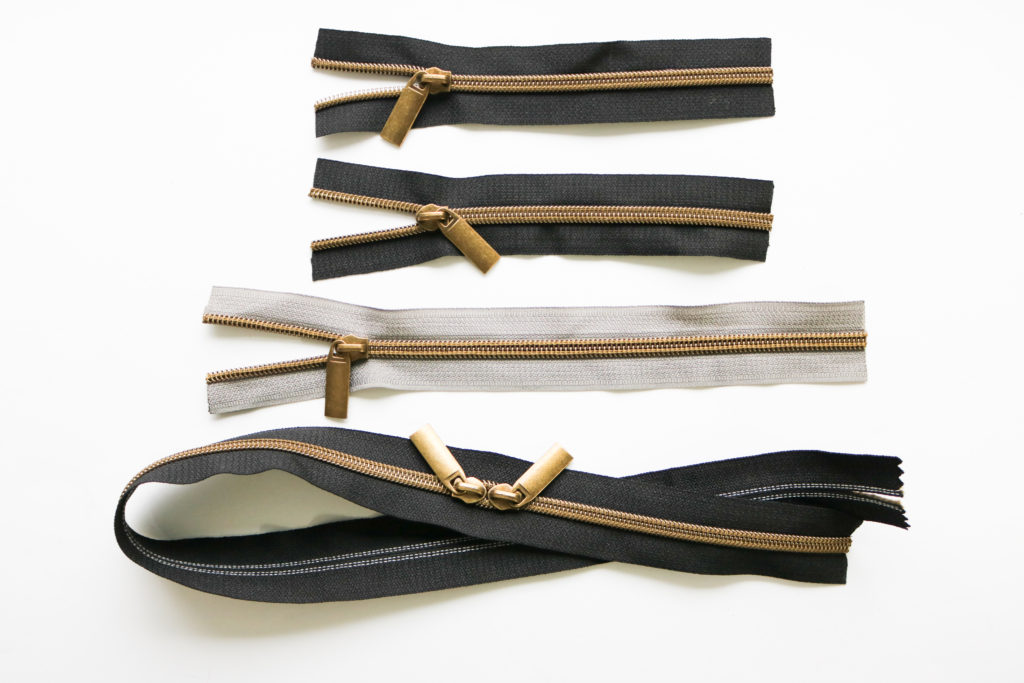
With four zippers in the Erin Backpack pattern using three different sizes, it’s a great idea to use zipper tape to cut exactly what you will need.  I used metal zippers for a long time for their polished style, but have fallen in love with these nylon ones that look like metal!  You can cut through them with craft scissors (don’t use your special fabric ones!) and sew right through them as well.  There is no laborious effects to cut away teeth with these zippers!  I love the ones from Emmaline Bags (if you are looking for basic colored tapes) and My Handmade Space for more variety in both tape color and teeth finishes.

Other Supplies

There are plenty of other supplies and notions I reference in the Erin Backpack pattern.  For your ease, I’ve added them all onto an “Idea List” below through Amazon.  It’s included my favorite glue, fabric punch, hardware setting tools, and also the interfacings mentioned above.  I continue to add to all of my list as part of my Storefront all the time as I test out new products in my projects….so don’t forget to “like” it!

>> Making the Erin Backpack list on Amazon


I hope this is enough information to get you started on the Erin Backpack.  Again, please post any questions and/or comments below.  I’ll be sewing along with you so that I can address any concerns along the way!


Happy Sewing!

Cristy


Please note, this post contains affiliate links.  Please refer to my Disclosures for additional information.

#SewPink Blog Hop with the Erin Backpack

October is Breast Cancer Awareness Month, and with 3.5 million women in the US with a history of current and/or past treatment, we all have someone close to us who has been affected.  Unfortunately, I’ve seen my aunt suffer and pass away from this disease and also continue to see more and more friends go through their own personal battles.  It’s so difficult to see anyone suffer and knowing that I am personally at higher risk – as an aging woman. That is why I’m SO proud to be part of the By Annie #SewPink Initiative to bring more awareness to this cause.

The #SewPINK Blog Hop has been taking place all this month to raise awareness for breast cancer and breast cancer prevention. You can follow the hashtag on social media to follow along!   By Annie’s is even running a photo contest here and released a great FREE pattern which you can find here.  These are great ways to get involved and the pattern is a nice and easy sew with your friends and/or guild.  On top of all of these activities, By Annie’s has graciously offered to provide a $30 shop credit to one of you!!!!  (Details are below.)

Earlier this very year, my OB/GYN told me I’ve hit the age where I need to start getting mammograms.  (‘Nothing like getting older, right?)  85% of new cases happen to those who have NO prior family history (due to genetic mutations) so early detection is key!  (Source: www.breastcancer.org )  But just like everything else that has also happened this year, my appointment was put on hold. Getting the call to be part of the #SewPink Blog Hop really gave me the push to get a screening back on my schedule and I am so very grateful! I hope you do the same and check out available screenings below:

Project

For my Blog Hop project, I made the (soon to be released) Erin Backpack. This is a design I’ve been working on and off again for over a year — OK, it’s been more off, then on but it will be released by end of year!  This is a spacious backpack with a half moon design that also converts to an over-the-shoulder or crossbody bag.  It is large enough to be used as a diaper bag or just for some day-tripping.

I wanted, of course, to make my backpack PINK!  This is not a color I use often in my sewing and definitely not as a focused hue.  So, I chose this great Tula Pink quilt cotton for it’s beautiful marbling of pinks and purples balanced on a natural background. The lining is also from the same collection and I just love that deeper shade of magenta with the swans.  Who wouldn’t love some swans?!?

The structure of the Erin Backpack is based on By Annie’s amazing Soft and Stable product.   I’ve been such big fan of this stabilizer for awhile and appreciate the firm shape it creates beyond other interfacing — especially when using a lighter substrate like quilting cotton as seen in this kid’s bag here and should bag seen here. Soft and Stable is also wonderful in how it provides great stability but is also soft and pliable.  Most domestic machines can sew through this quite easily!  The last thing I’ll gush about is how I love the loft of this product and how it could also provide so much great texture.  I used it on my favorite duffle bag (EVER!) you can find here.

By Annie’s also has so many other great purse accessories. I knew I had to try out some of the hardware!  The swivel clasps and triangle rings in the antique brass finish were perfect for my project. They went well with the leather details and balanced with the metal zippers.  The hardware is nice and sturdy and definitely feels like it will hold up well over time.

For the strap, I use my Guitar Strap tutorial and FREE pattern templates you can find here.  (You’ll notice I made a change for this strap to be adjustable…which is the addition of an extra rectangle ring.)  Inside the strap, I also added By Annie’s 1.5″ wide Strapping to add more strength and heft when wearing this backpack.  This is a nice large bag and I wanted to make sure the weight when filled up doesn’t make the straps dig into my shoulders.

Inside Erin, there is room for a large zippered welt pocket and 5 separate slip pockets. Since this bag can be used for virtually anything, I wanted the lining to serve as more organizational than just storage.  This way,  you can hold larger snacks water bottles, books and even craft projects inside!

But in a large backpack, it can be hard to see all the contents which is why the By Annie’s Lightweight Mesh is so wonderful.  You can check out everything in your pockets at a glance and I love that there is a little stretch for anything you may want to carry. The top edge is finished with Foldover Elastic and was a breeze to sew with my coverstitch, but any zig-zag stitch would work as well.

I hope you enjoyed my PINK Erin Backpack for the blog hop.  Its pairs perfectly with my rose gold phone and hacked Tiny Sophia Bag, don’t you think?

Contest

For your chance to win $30 shop credit to By Annie’s, please comment below.  I’d love to hear your connection with breast cancer.  If your own story is too personal, let me know how you like my project or share your own bag-making journey.

Giveaway will be open until 10/31/2020 and open internationally.  

2020 Blog Hop info:

Schedule

Message from By Annie’s:  “The #SewPink Initiative was created by ByAnnie.com LLC to raise awareness for breast cancer throughout the year. Our efforts culminate in an annual blog hop during October’s Breast Cancer Awareness Month to promote self-care, awareness, early detection and support for those affected by breast cancer.” 

To learn more and see the calendar of events visit: https://www.ByAnnie.com/SewPINK


Bag making products, as mentioned, were provided for this post By Annie’s as part of the Blog Hop.  The Erin Backpack is my own design.  All reviews and opinions are my own. For my full disclosures, you can read about them here.

Review: Sirocco Jumpsuit in Luxe Green Scuba

This post was originally written for the Minerva Crafts blog in November, 2019. Additional edits have been made after real-life wear of the garment.

Intro 

Hi, this is Cristy Stuhldreher from Love You Sew with my very first #MinervaMake as a blog contributor!!!  I was SO excited to be invited to be part of such an extensive team of bloggers here and equally excited to play with so much beautiful fabric.  My first find was this gorgeous Lady McElroy Luxury Plain Scuba Jersey Knit Fabric in Bottle Green.  With autumn (my favorite season!) quickly coming to the States, I knew I would need to get ahead and make some transitional garments with the switch of temperatures that are bound to come.  So, after I saw this scuba fabric I immediately thought of the Deer and Doe Sirocco Jumpsuit (like many other contributors already have!)

Fabric

This Lady McElroy Luxury Plain Scuba Jersey Knit Fabric was such a great find!  I’m a big fan of Ponte de Roma fabrics and knew I would love Scuba just the same since they are both heavy double-knits.  They feel and act very similarly, but are made of different fibers.  Scuba is generally poly and elastane whereas Ponte is generally viscose and elastane.  This soft and smooth Scuba Jersey did not disappoint with its great stretch and nice body which is perfect for a jumpsuit when you don’t want every bodily imperfection to show through.  It is also works SO well for a knit jumpsuit with amazing stretch and recovery.  The last thing I would want after all of this hard work would be a saggy stretched out butt!
It’s always hard to tell how color will come out in person versus on a computer, so I was a bit nervous to see how the Bottle Green would be.  It looked slightly more muted, like a deeper sage green on my screen.  But I was actually delighted  to see that the fabric was more of a deep rich gem tone – a solid “Hunter” green, in my opinion.  With my olive skin and dark hair, I love a gem tone- especially for the colder months ahead!  After a few washes, the color has stayed true to the first day it arrived on my doorstep – love that!
With this fabric being a double-knit, I would recommend using a ball-point needle and your stretchiest stitch found on your machine (zig-zag, triple-zig-zag, lightning bolt, etc.)  I used a combination of my overlocker and coverstitch to allow my jumpsuit the greatest amount of stretch to fit larger hips.

Pattern

Jumpsuits still look to be on trend a little while longer, so I thought it was safe to make the Sirocco Jumpsuit for the fall.  With the short-sleeves and full pant legs (on View A) I figured this was a great garment to wear on the cooler nights downtown with or without needing a jacket.
The Sirocco is a unique pattern in that there are no ties or other fasteners used to get in and out of the garment.  You slip in and out of it all through the faux wrap V-neckline.  This might not pose a huge deal for most, but I have hips which are two sizes larger than my waist –which means I REALLY will need to stretch out the waist to maneuver around.  This is the main reason I chose the heavy Scuba fabric to handle the severe stretching over my hips.  As I was fitting the garment, I honestly thought I would have to put in a side zipper for my hips, but the Lady McElroy Luxury Plain Scuba Jersey Knit Fabric proved to have such amazing stretch and recovery that I didn’t need it!  Honestly, I feel like I could wear this all day long…even after multiple bathroom breaks!
I made a few modifications for my SHORT 5’3″ frame with those aforementioned HIPS:
  • Made a 40 bodice and graded to a 42 in the hips and back to a 40 for the rest of the leg
  • Shortened bodice by 1/2″ and used a chainstitch (from my coverstitch) to secure the seam allowance down since the fabric is so lofty – This allows the lapped bodice to stay secure over your chest.
  • Shortened pant legs by 4″ initially (by just tissue fitting) and then took an additional 3 3/4″ when it was time to hem so that it would hit right above the ankle bone – Next time, I will shorten at the thigh and also from the ankle to get a better fit around the knee.
  • Extended the crotch length 3/4″ on both the front and back pant
  • Deepened the seat on the back pant by 3/8″
  • I wish I took out an 1″ out of the rise before cutting, but was able to take 1/2″ out of the overall inseam to narrow the legs and decrease the rise.
  • Took an additional 1″ out of the ankle and blended up to the knee for a slimmer leg

After these changes, I can’t tell you how incredibly pleased I am with my Sirocco JumpsuitThe Lady McElroy Luxury Plain Scuba Jersey Knit Fabricis so chic and the deep green really does make the Sirocco Jumpsuit so “EXTRA!”  Love it!!!
You can find my other makes on the Love You Sew Blog (here!) and more daily inspiration on Instagram @loveyousew_ .


Happy Sewing!

Cristy


Affiliate links are in this post. Check out my Disclosures here. Fabric was provided for review as part of the Minerva Maker Blog Team.  All thoughts and opinions are my own.  


Full Zip Hack with the Grace Rashie Pattern

When I first hacked the Grace Rashie by Swim Style Patterns two years ago, I never documented the process…Big mistake, I know!  It was one of my late night experimentations which you can find here.  I honestly didn’t know if it would work or not and got so wrapped up in the process that I didn’t write down measurements or take photos of my complete step outs.  But luckily, I knew I needed at least a second rashguard for myself and made sure to document it this time!

Supplies Needed

Tutorial

Step 1:  Cut all pattern templates according to instructions.  Pull out the “Front Section” and add 1/4″ to the center-front as shown.  You will cut at the dashed line for just the “Top.”

Note: I made a size M and all measurements for center front, zipper guard, and zipper are ALL for this size.  You will have to adjust as needed for your sizing.

Step 2:  Cut all fabric according to instructions EXCEPT for the “Front Section.”  Instead of cutting the “Front Section” on the fold, you will cut TWO separate mirrored pieces using that 1/4″ you added in.

Step 3: Cut (2) 19 1/4″(length of the center front)  x 1/2″ strips of interfacing and fuse to each wrong side of the  center “Front Sections.”  Set aside.

left side of image is the Bottom and the right side is the Top

Step 4:  Cut (1) 19 1/4″ (same as length of center front) x 3″ strip of Main Fabric for the Zipper Guard.  Fold the fabric lengthwise with right sides together and press with low-heat iron, if needed. Mark seam with 1/4″ at the bottom.  For the top, measure 1/4″ down at the raw edge and then 1″ down on the folded side.  Connect the two points with a curved line as shown.  It doesn’t need to be precise!

Step 5: Sew on the markings you made. (They don’t need to be serged, but I went ahead and serger the seams while my machine was set up.)

Step 6:  Flip the Zipper Guard right side out, pushing out the bottom corner and the top curve.  Press with a low-heat iron.  Match the raw edges and finish with serger or zig-zag stitch.  Set aside.

Step 7:  Prepare Zipper by folding down the excess tape above the top stoppers.  Tack the fold into place approx. 1/8″ away from the edge.  Trim the overhanging tape.  (If you are making size L, you might be able to skip this step and use the full length of the zipper.)

***Follow instructions to complete the Grace Rashie (skipping all zipper steps.)  When you get to the hem, double check that the length of the finished center front matches the length of the zipper.

Step 8: With the wrong side of the Zipper facing up, add Wonder Tape to each long side of the tape.

Bottom

Top

Step 9:  Separate the Zipper and lay one zipper side down on the stitched side of the Zipper Guard.  Pictured is the LEFT side of the zipper (without the head,) but my previous version had the head with the guard.  I honestly don’t know which side of the zipper should sit with the guard, is technically correct.  I was playing to see if there was any real difference in how it wore on the body and I didn’t feel anything different…

Step 10:  Fold the Top of the Zipper Guard over Zipper and tack into place with 1/8″ seam allowance.

Step 11:  Working on the LEFT side of the garment, match the center front of the Rashie with the Zipper Guard, right sides together.  Use a zipper foot and sew itogether with a 1/4″ seam allowance.  Open the Zipper Guard and press seam allowance to the back.  Top-stitch 1/8″ from the edge of the Zipper, going through the Main Fabric, Zipper, and seam allowance.  Repeat with the RIGHT zipper.

Congratulations!  You now have a custom swim rashguard to protect your skin against the sun and elements.  I love having these for the cool winds of the lake.  The best part is when the rashguard gets wet, I can easily zip it off!

Please let me know how this tutorial worked for you!


Happy Sewing,

Cristy


This post may contain affiliate links.  Please read about my Disclosures, here.

Make the Most Comfortable Fabric Mask

It’s hard to imagine months later, we are still here…  But now with mask mandates across so many US cities and numbers of COVID-19 cases back on the rise.  Everyday, more and more businesses are requiring masks when in their stores and even schools are requiring them as well.  We ALL need to do our part and wear a mask to prevent the spread of this coronavirus.  This is not a practice that will be going away soon, so I figured I would make the most comfortable fabric masks for my family and friends.

This post details what I’m using for my fabric masks (which are non-medical) and where to find supplies.  I am not a medical professional and/or a PPE engineer or expert.  I made these masks in lieu of purchasing medical grade supplies to keep them available for healthcare and other frontline personnel.  I encourage you to read the CDC fabric mask guidelines for additional info and how you can help prevent the spread of COVID-19.

Background

At the doctor’s with jewelry cording elastic and a paper clip nose bridge

Back in May, I took my oldest son (9 years old) to his annual check-up and it was required that both of us had to wear masks.  No problem.  From the time B put on his mask until we were seen and back in the car, one whole hour passed.  But during that time, he was batting at his ears the ENTIRE appointment.  Granted, the only elastic I could get my hands on at that time was jewelry cording.  While the cording fit behind the ears and didn’t push them forward, after awhile they felt like they were cutting into the ears a bit….making them so uncomfortable.  I knew we needed something different for comfort and just knowing masks are here to stay for awhile.

Pattern

With so many sewists in mask making mode since the beginning of the pandemic, it was not hard to find patterns.  I even have a Pleated Mask (with Ties) Tutorial you can find here.  If you are looking to upcycle or do a project with kids with no sewing, I also have a No Sew T-Shirt Mask Tutorial using hair elastics you can find here.  But for comfort, I was looking for a pattern that I could either tie in the back or use elastic to hold around the head instead of pressure by the ears.  I decided to use the Craft Passion version because (1) It was already drafted for a nice contoured fit around the face and used less fabric which I thought could be cooler? (2) It came in multiple sizes (3) Had instructions for a filter pocket and (4) Came with pattern length adjustments for elastic/tie widths.  You can find the very detailed blog post with videos and even more options here.

I decided to make the original mask with filter pockets, but used the extended length for wider elastic/ties even though the widest width elastic I would use is 1/4″.  The extra length allows room for the mask to scrunch and fit around the face better.  If it’s more narrow and closer to the stitching and folds (aka bulk) of the fabric, it doesn’t contour as well.

Elastic

Mask with DIY knit jersey “elastic”

With my kids as my target audience, I knew the elastic definitely needed to be changed.  When I was first testing out this pattern, I used knit ties made from cutting 1″ 4-way jersey knit fabric and pulling on each strip until they coiled around.  But I wanted a little bit of a faster (and easier) make since I was sewing for family and friends too.  Luckily, elastic supplies are back in stock and I was SO pleased to find rounded knit elastic that is MUCH softer  than traditional braided elastic and came in various widths.  To the touch, these elastics feel so much softer and do not have that rubber texture.  They are are incredibly more comfortable than the cording I was previously using.

I’ve been purchasing the majority of my elastics off of Amazon and like the flat 4mm width the most, but have had to order from different sellers based on available stock. From left to right (top image) and going top-left clockwise (in bottom image):

  • White Flat 4mm – Feels like a heavier stocking and has great stretch and recovery.  I got this particular one from Amazon, but have purchased similar product from Salt and Summit Supply.  If you are planning to make a lot of masks to sell or for friends and family, I got a great deal ($15.99) on a large 145 yd spool here.
  • White Rounded 4mm – This one feels more like the inside of a sock and also has good stretch and recovery.  It’s not quite flat, and not completely round, but definitely thicker than the above flat elastic. You can find it here.
  • Black Flat 6mm (1/4″) – The touch of this elastic is like a traditional pair of sheer stockings or like many baby headbands.  It stretches the most out of these three and had good recovery as well.  You can find it here.

The other great part about having a mask with elastic around the head is that you can pull it down (with washed hands and socially distanced from others) to eat or to grab a breath. The way the mask hangs, the inside doesn’t come in contact with your neck or clothing too!  I imagine that these masks will turn into the new “lost glove,” especially with kids.  So, I love that this style of mask can stay with the person and not be sitting on random surfaces, fall to the floor or stuffed in a pocket. Having the tie or knot on the top of the head is CLUTCH! You just have to grab the knot and pull down. This helps to reduce contact with the actual mask itself.

For each sized mask, I used the following lengths:

  • Men – 36″
  • Women/Teen – 30″
  • Older Kids – 24″
  • Little Kids – 20″

Note:  As with all items that hand around the neck, these can become a chocking hazard. Please make sure kids are monitored by an adult at ALL times while wearing a mask.

Cord Locks

To pull down the mask, the elastic would have to be adjusted and I just couldn’t imagine my kids having to tie their masks….they barely can tie their own shoes well!  So, I thought adding a plastic cord lock made the most sense.  This allows a nice firm fit around the head which keeps the sides of the masks close to the cheeks and it won’t shift if you have to talk while wearing the mask.

Sphere vs Slim Cord Locks

When I first was looking at locks, I (of course) went to Amazon to find a deal on just a handful of them to try out.  I bought the spherical ones here and while they are strong and give you ample surface area to pinch down on the lock, they were just too bulky for my tastes.  Nothing goes to waste, so I used them on just the men’s masks I was making.  I then found these slimmer locks from Paracord Planet for the best pricing at the time ($21.99/50) with more color choices too.  But just the other week I found the same locks only in black for WAY less ($8.49/50) here!  These are the same quality..if not a little better than the ones from PP.

Nose Bridge

There is some debate among sewists to which side the nose bridge should go…and I choose the inside – call me a rebel!  For my method, I complete the entire mask and sew on a 4″ x 1/2″ piece of acrylic felt, leaving  a 1/2″ opening to add and remove the metal when washing or for replacement purposes.  I back-stitch on both sides of the opening and at the short ends of the felt rectangle for extra security.

You can use any material to make the nose bridge chamber (ribbon, twill tape, folded fabric, etc.)  Personally, I like the felt for the extra loft and softness on my nose.  I wear glasses just about every single day and definitely have been blinded by fog coming out of the refrigerated produce room in Costco!  The extra loft seems to help catch more of the moisture and I love how you can leave it with a raw-edge…double-win!

Domesticity vs Amazon

Early on in the pandemic, I was using pipe cleaners and paper clips for nose bridges and they were okay, but I was never truly fog-free.  Then metal strips were slowly coming onto the scene and they are wonderful!  The strength and extra surface area that helps wrap your nose is truly key in making a good seal.  I first bought (50) 3 1/2″ x 1/8″ aluminum strips from Domesticity back in May and they are great!  I tried to bend one bridge back and forth 50+ times and it still hasn’t snapped.  But I’m always on the hunt for a great deal and found 200 of these strips with an adhesive backing for just about the same price.  While these strips are also Aluminum and slightly larger at 3.54″ x 1/5″, they are also slightly thinner and broke after about 38 repeated bends.  Even though I have plenty of extras for back-up, I would definitely switch back to the ones at Domesticity for their strength.

Filters

As I mentioned above, I used the Craft Passion mask pattern since it was drafted with a filter pocket feature.  You can purchase mask filters like these, but I caution that they do come from overseas and do not come in sterile single packaging.  I have yet to find a domestic supplier, so if you know of one, please comment below!  You can certainly use paper towels, another layer of fabric or coffee filters for extra protection.  Shown above, you can see how a filter fits inside this mask.

Fabric

Fortunately, my stash has always included lots of designer quilt cottons from my quilt making days.  I was able to use my stash through the beginning of the pandemic and I’m getting around to supporting small quilt shops as I receive personal requests for masks from friends and family.  Of course, I love Sew to Speak which is local to me and I can pay online for contactless pick-up.  While picking up the nose bridges, I’ve also purchased fabric from Domesticity.  I love Circa Fabric Studio for great clearance prices on designer cottons and recently bought from Hart’s Fabric which has a nice selection.

Final Thoughts

I think this is a great pattern for a mask and fits such a wide variety of faces.  The feedback I’ve received is a combination of the softness of the fabric (designer cotton, baby!) and how nice it is to have pressure relieved from the ears.  The cord-lock is MUCH appreciated by parents and it only took a few learning sessions for my 7 and 9 year olds to put them on and take them off on their own.  Please let me know how any of these supplies worked out for you!

DON’T FORGET TO WEAR A MASK!


Hugs and Stitches!

Cristy


While there are many affiliate links in this post (please read full Disclosures here,) I purchased all of these supplies on my own for my own fabric masks.  I’m sharing the supplies based off of feedback when I shared many of these links on my Instagram account.