It’s hard to imagine months later, we are still here… But now with mask mandates across so many US cities and numbers of COVID-19 cases back on the rise. Everyday, more and more businesses are requiring masks when in their stores and even schools are requiring them as well. We ALL need to do our part and wear a mask to prevent the spread of this coronavirus. This is not a practice that will be going away soon, so I figured I would make the most comfortable fabric masks for my family and friends.

This post details what I’m using for my fabric masks (which are non-medical) and where to find supplies. I am not a medical professional and/or a PPE engineer or expert. I made these masks in lieu of purchasing medical grade supplies to keep them available for healthcare and other frontline personnel. I encourage you to read the CDC fabric mask guidelines for additional info and how you can help prevent the spread of COVID-19.
Background
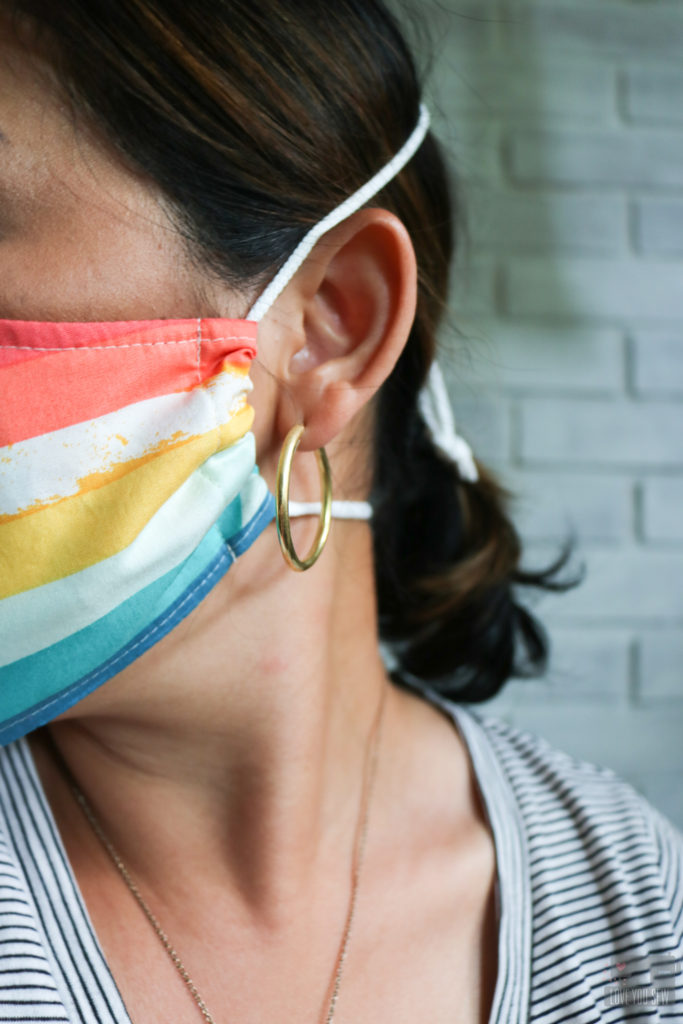
At the doctor’s with jewelry cording elastic and a paper clip nose bridge
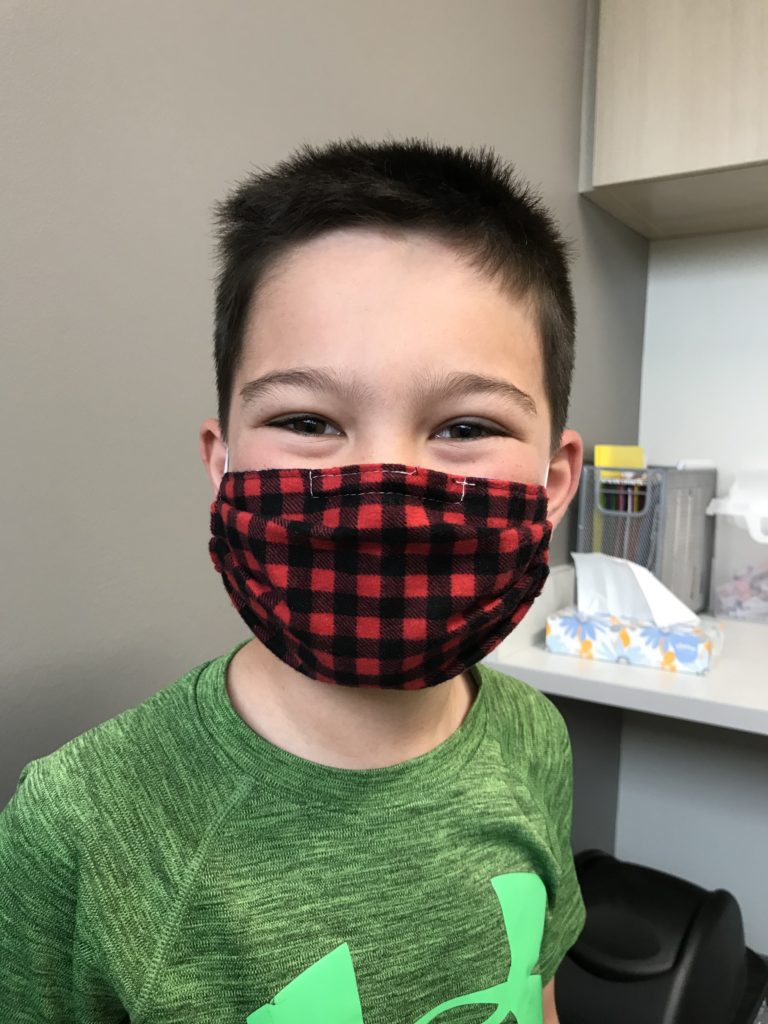
Back in May, I took my oldest son (9 years old) to his annual check-up and it was required that both of us had to wear masks. No problem. From the time B put on his mask until we were seen and back in the car, one whole hour passed. But during that time, he was batting at his ears the ENTIRE appointment. Granted, the only elastic I could get my hands on at that time was jewelry cording. While the cording fit behind the ears and didn’t push them forward, after awhile they felt like they were cutting into the ears a bit….making them so uncomfortable. I knew we needed something different for comfort and just knowing masks are here to stay for awhile.
Pattern
With so many sewists in mask making mode since the beginning of the pandemic, it was not hard to find patterns. I even have a Pleated Mask (with Ties) Tutorial you can find here. If you are looking to upcycle or do a project with kids with no sewing, I also have a No Sew T-Shirt Mask Tutorial using hair elastics you can find here. But for comfort, I was looking for a pattern that I could either tie in the back or use elastic to hold around the head instead of pressure by the ears. I decided to use the Craft Passion version because (1) It was already drafted for a nice contoured fit around the face and used less fabric which I thought could be cooler? (2) It came in multiple sizes (3) Had instructions for a filter pocket and (4) Came with pattern length adjustments for elastic/tie widths. You can find the very detailed blog post with videos and even more options here.
I decided to make the original mask with filter pockets, but used the extended length for wider elastic/ties even though the widest width elastic I would use is 1/4″. The extra length allows room for the mask to scrunch and fit around the face better. If it’s more narrow and closer to the stitching and folds (aka bulk) of the fabric, it doesn’t contour as well.
Elastic
Mask with DIY knit jersey “elastic”
With my kids as my target audience, I knew the elastic definitely needed to be changed. When I was first testing out this pattern, I used knit ties made from cutting 1″ 4-way jersey knit fabric and pulling on each strip until they coiled around. But I wanted a little bit of a faster (and easier) make since I was sewing for family and friends too. Luckily, elastic supplies are back in stock and I was SO pleased to find rounded knit elastic that is MUCH softer than traditional braided elastic and came in various widths. To the touch, these elastics feel so much softer and do not have that rubber texture. They are are incredibly more comfortable than the cording I was previously using.
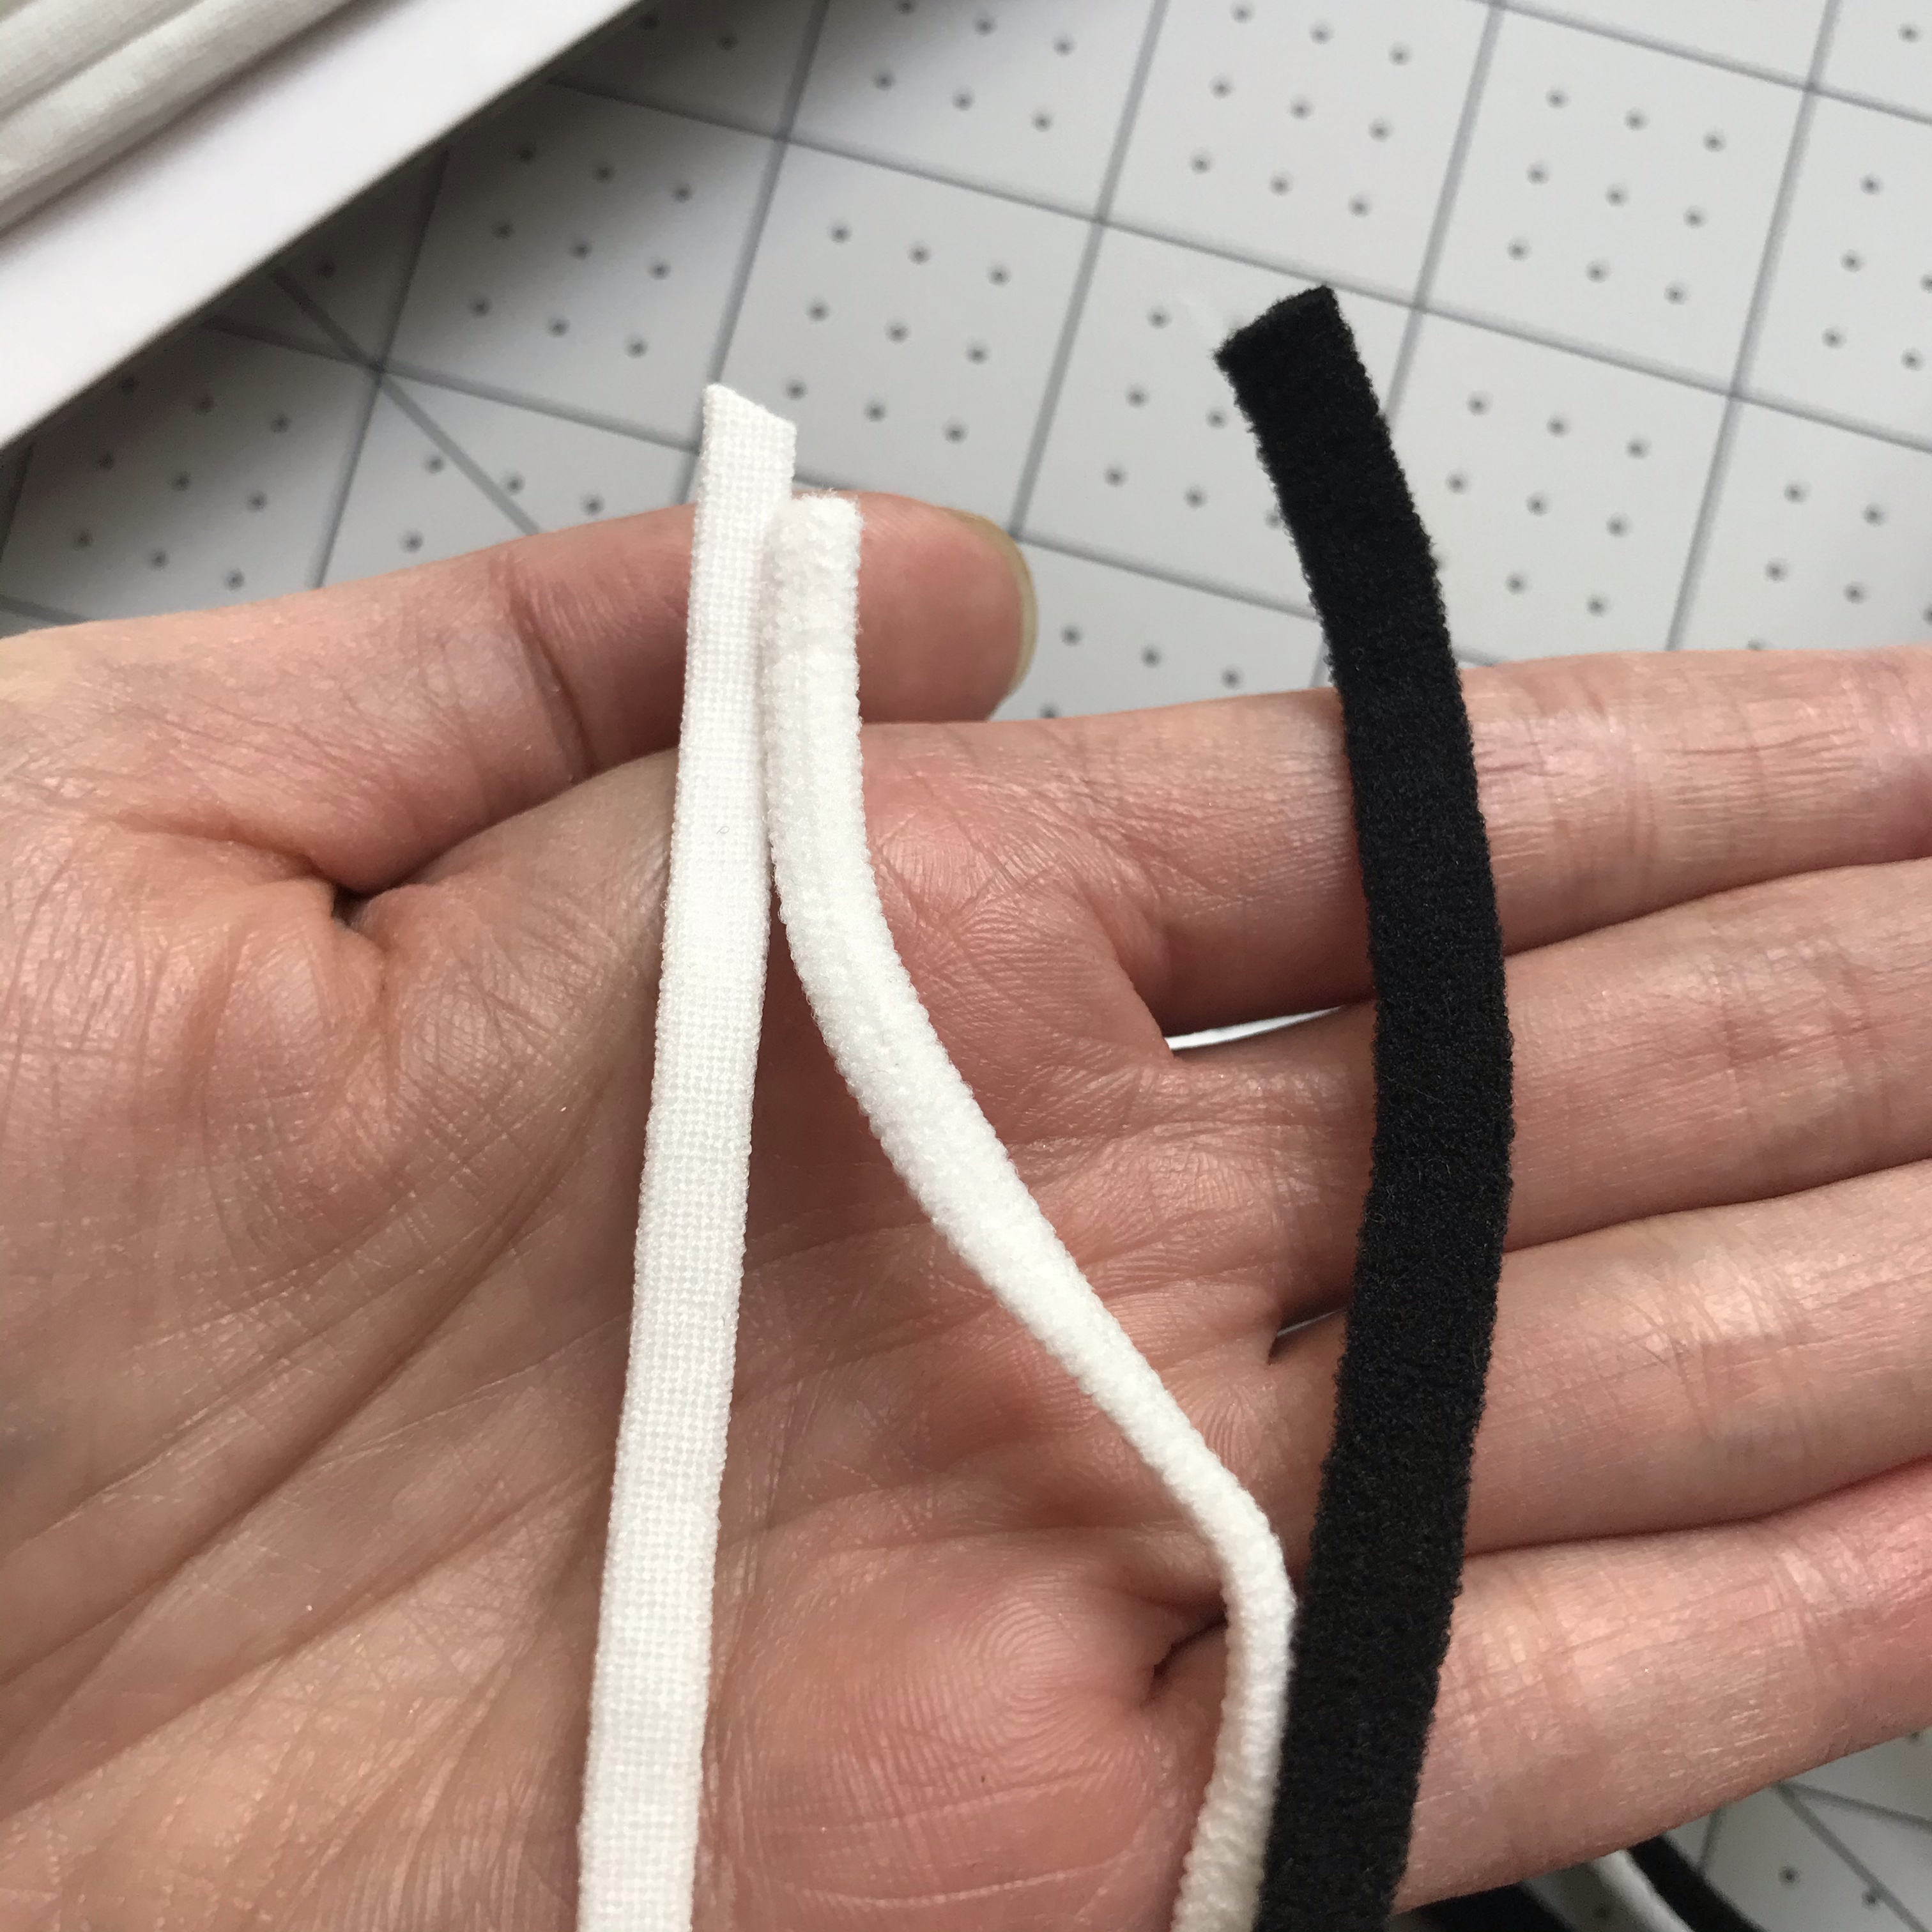
I’ve been purchasing the majority of my elastics off of Amazon and like the flat 4mm width the most, but have had to order from different sellers based on available stock. From left to right (top image) and going top-left clockwise (in bottom image):
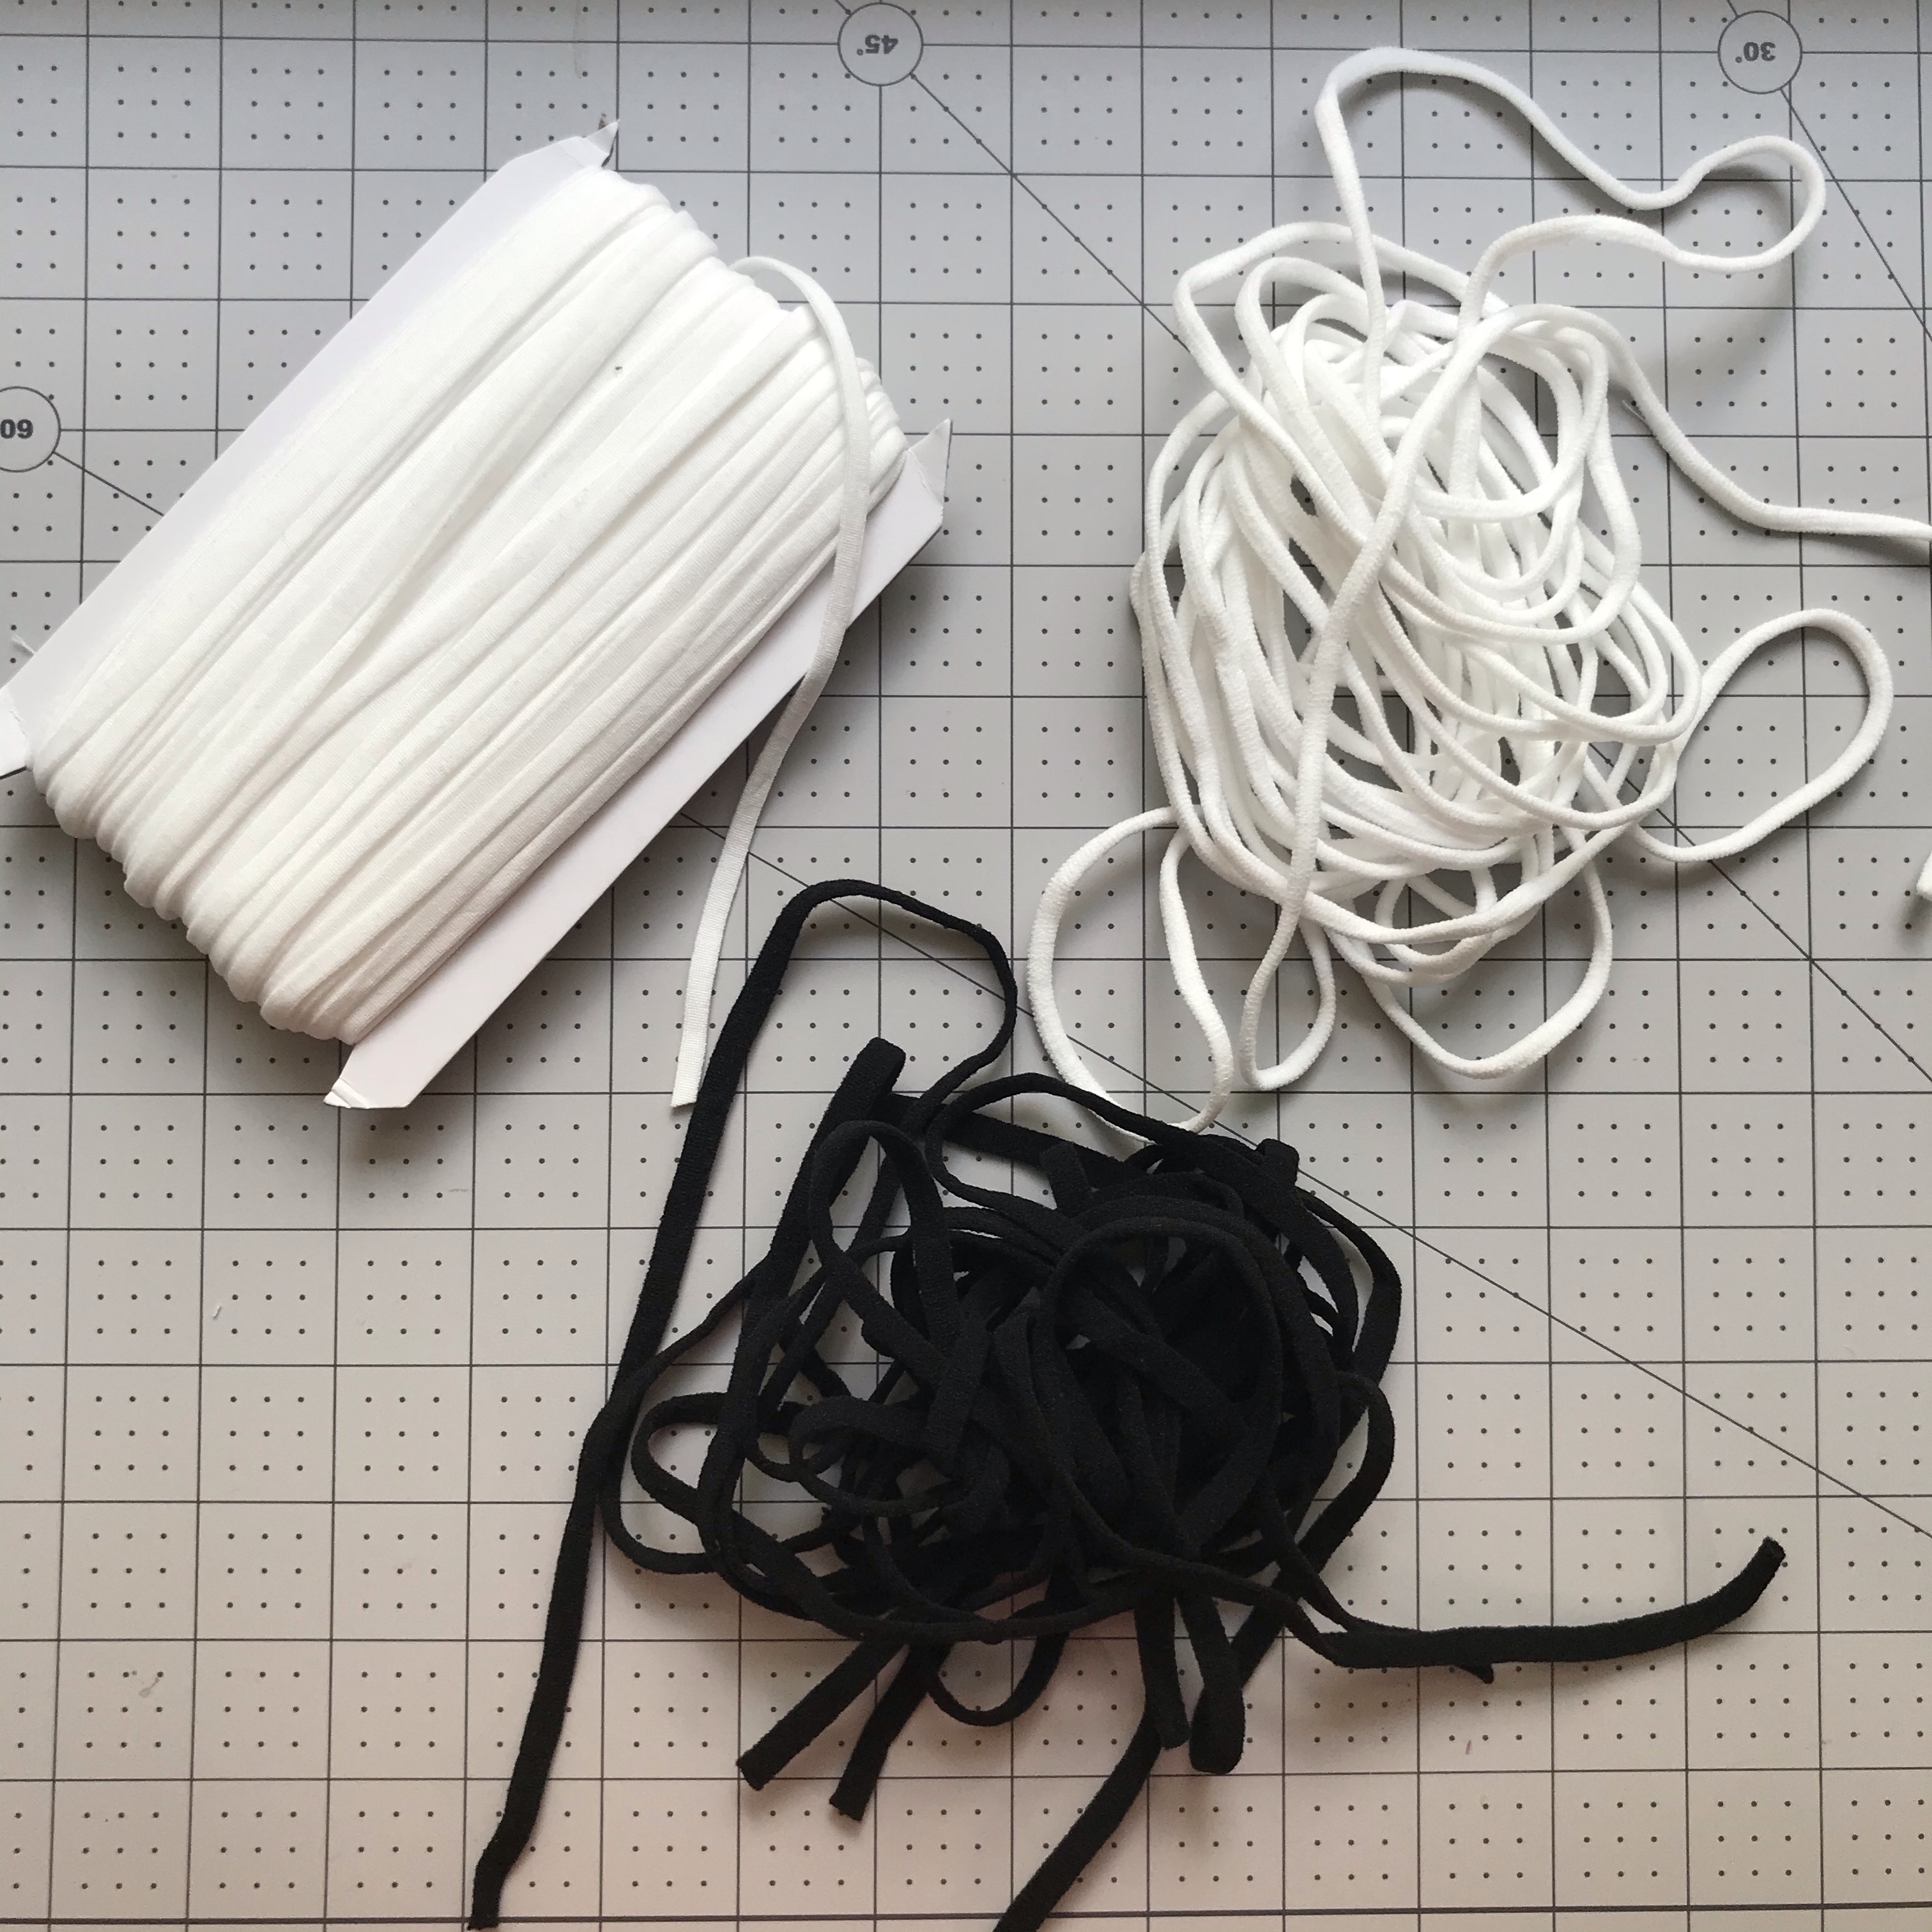
- White Flat 4mm – Feels like a heavier stocking and has great stretch and recovery. I got this particular one from Amazon, but have purchased similar product from Salt and Summit Supply. If you are planning to make a lot of masks to sell or for friends and family, I got a great deal ($15.99) on a large 145 yd spool here.
- White Rounded 4mm – This one feels more like the inside of a sock and also has good stretch and recovery. It’s not quite flat, and not completely round, but definitely thicker than the above flat elastic. You can find it here.
- Black Flat 6mm (1/4″) – The touch of this elastic is like a traditional pair of sheer stockings or like many baby headbands. It stretches the most out of these three and had good recovery as well. You can find it here.
![]()
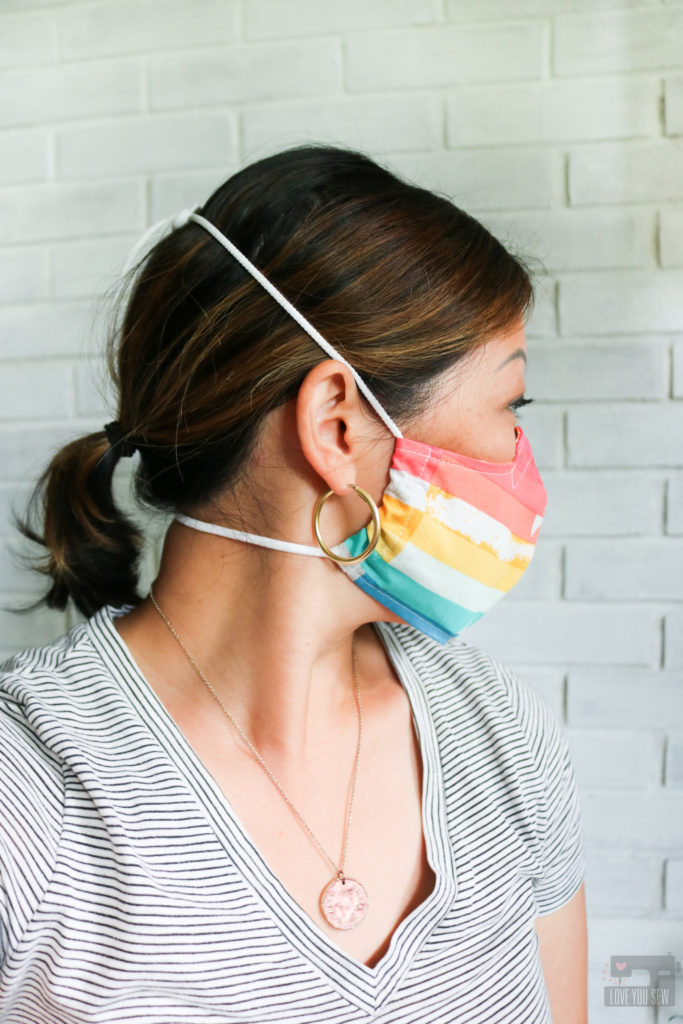
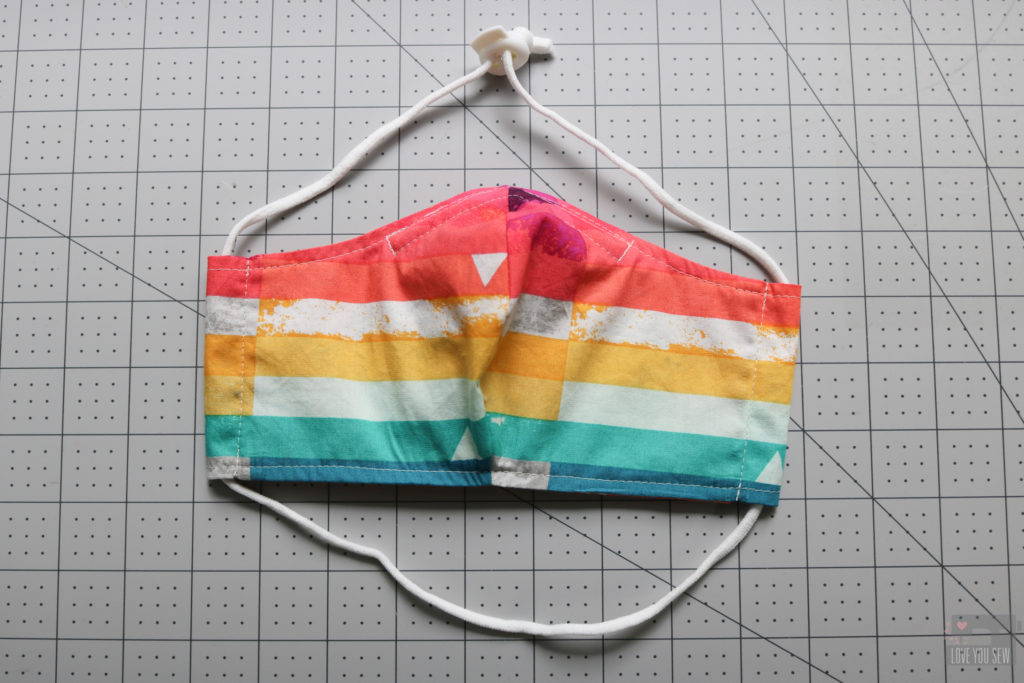
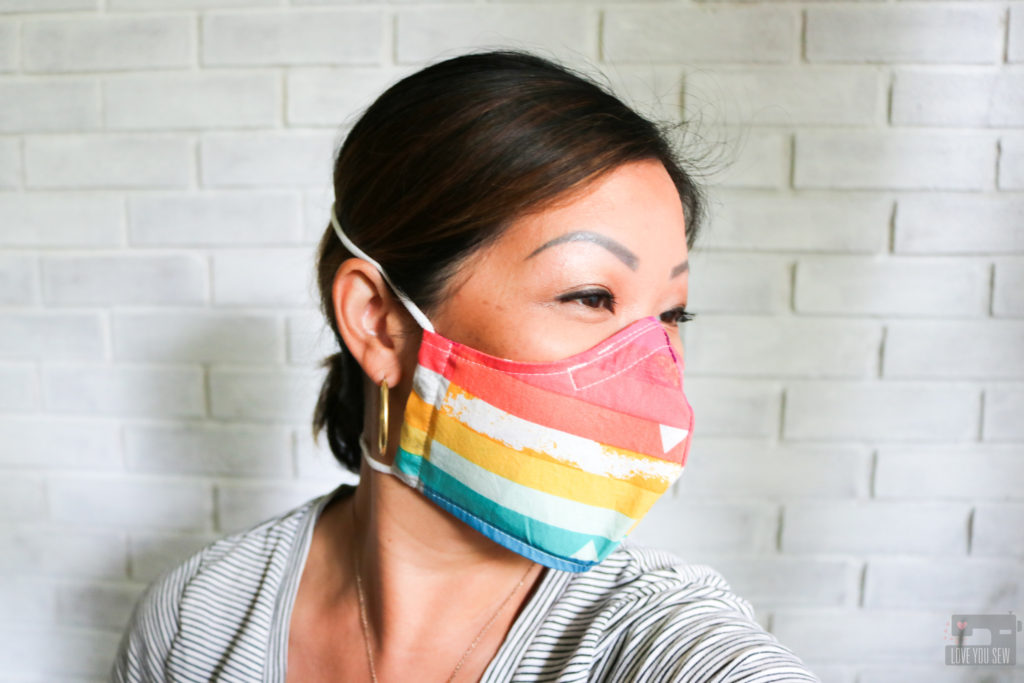
The other great part about having a mask with elastic around the head is that you can pull it down (with washed hands and socially distanced from others) to eat or to grab a breath. The way the mask hangs, the inside doesn’t come in contact with your neck or clothing too! I imagine that these masks will turn into the new “lost glove,” especially with kids. So, I love that this style of mask can stay with the person and not be sitting on random surfaces, fall to the floor or stuffed in a pocket. Having the tie or knot on the top of the head is CLUTCH! You just have to grab the knot and pull down. This helps to reduce contact with the actual mask itself.
For each sized mask, I used the following lengths:
- Men – 36″
- Women/Teen – 30″
- Older Kids – 24″
- Little Kids – 20″
Note: As with all items that hand around the neck, these can become a chocking hazard. Please make sure kids are monitored by an adult at ALL times while wearing a mask.
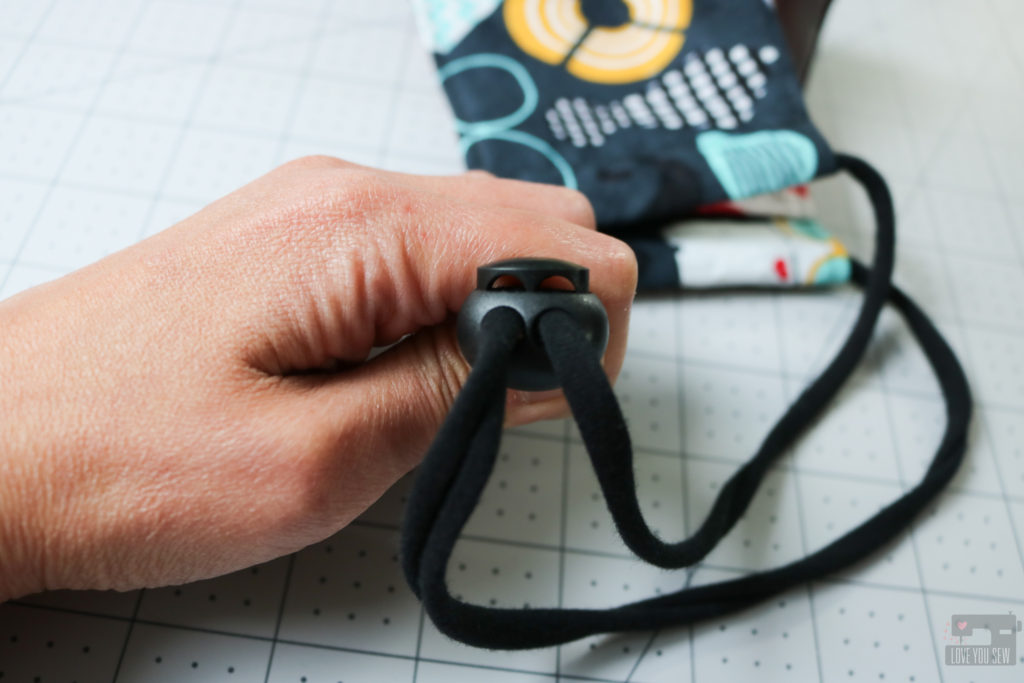
Cord Locks

To pull down the mask, the elastic would have to be adjusted and I just couldn’t imagine my kids having to tie their masks….they barely can tie their own shoes well! So, I thought adding a plastic cord lock made the most sense. This allows a nice firm fit around the head which keeps the sides of the masks close to the cheeks and it won’t shift if you have to talk while wearing the mask.
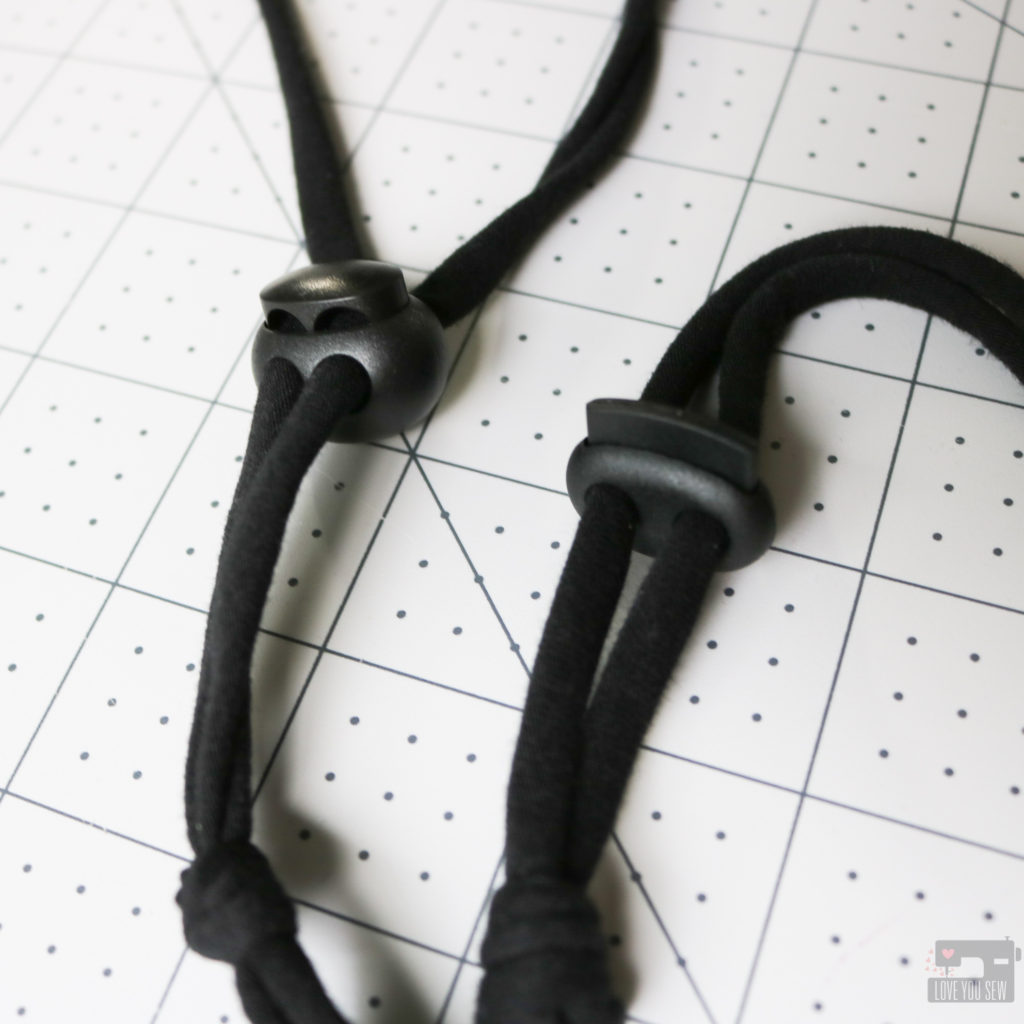
Sphere vs Slim Cord Locks
When I first was looking at locks, I (of course) went to Amazon to find a deal on just a handful of them to try out. I bought the spherical ones here and while they are strong and give you ample surface area to pinch down on the lock, they were just too bulky for my tastes. Nothing goes to waste, so I used them on just the men’s masks I was making. I then found these slimmer locks from Paracord Planet for the best pricing at the time ($21.99/50) with more color choices too. But just the other week I found the same locks only in black for WAY less ($8.49/50) here! These are the same quality..if not a little better than the ones from PP.
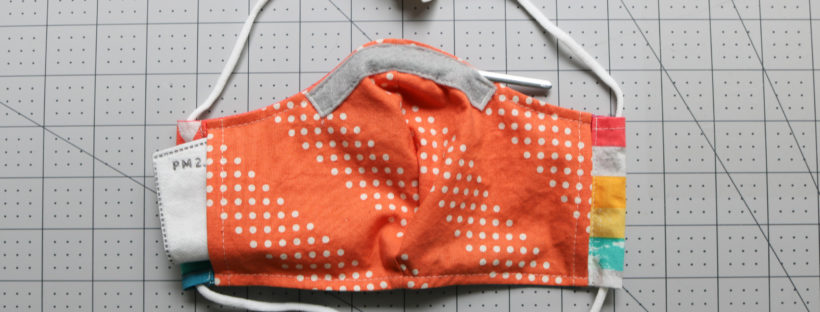
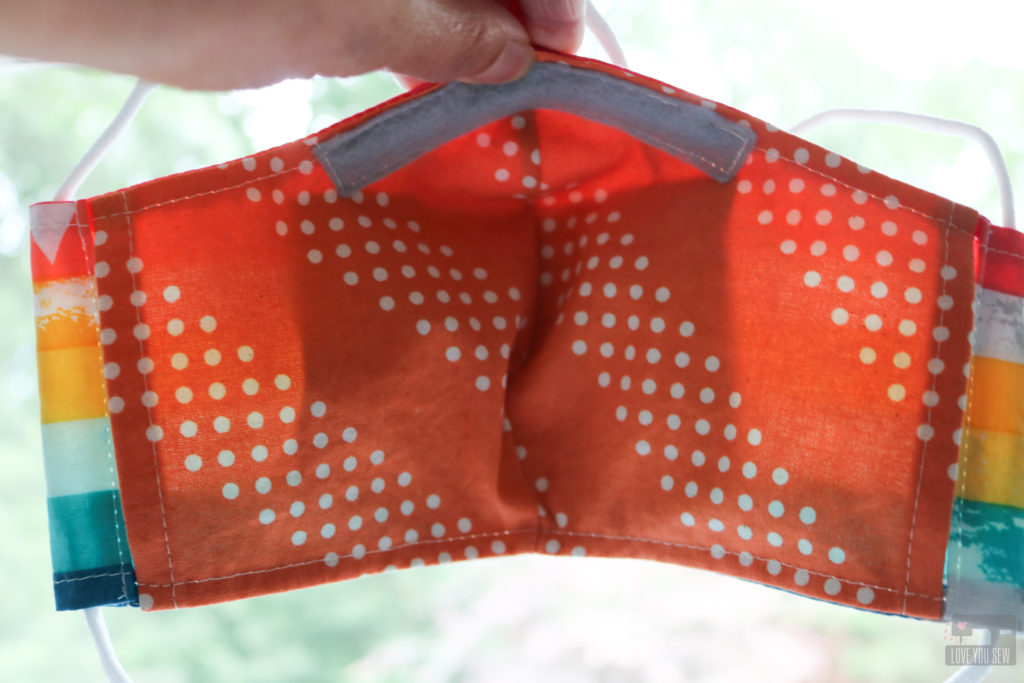
Nose Bridge
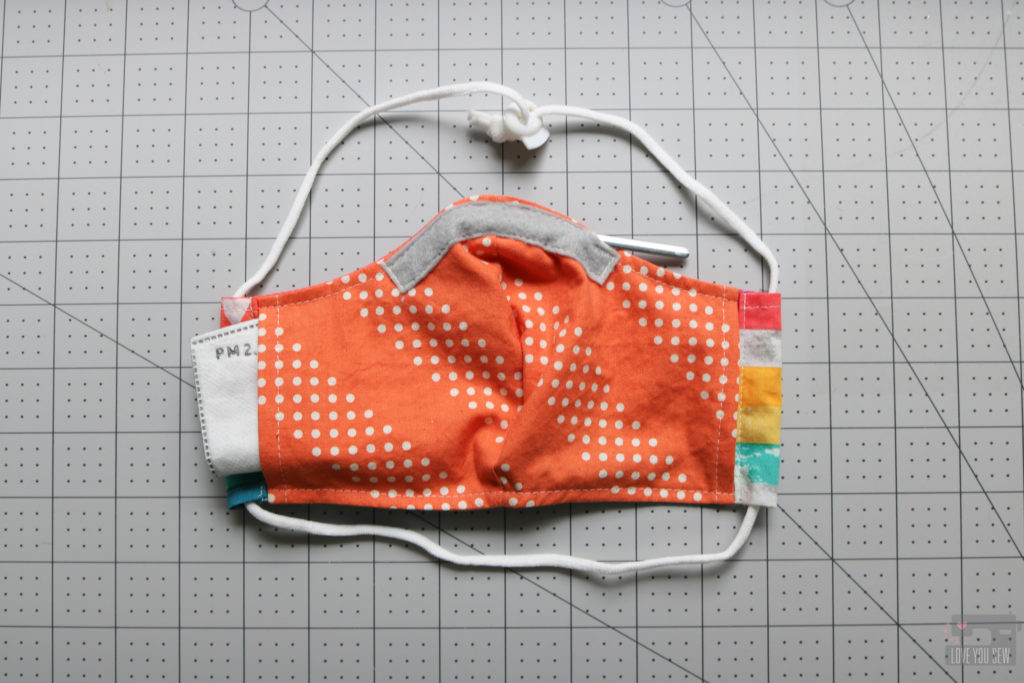
There is some debate among sewists to which side the nose bridge should go…and I choose the inside – call me a rebel! For my method, I complete the entire mask and sew on a 4″ x 1/2″ piece of acrylic felt, leaving a 1/2″ opening to add and remove the metal when washing or for replacement purposes. I back-stitch on both sides of the opening and at the short ends of the felt rectangle for extra security.
You can use any material to make the nose bridge chamber (ribbon, twill tape, folded fabric, etc.) Personally, I like the felt for the extra loft and softness on my nose. I wear glasses just about every single day and definitely have been blinded by fog coming out of the refrigerated produce room in Costco! The extra loft seems to help catch more of the moisture and I love how you can leave it with a raw-edge…double-win!
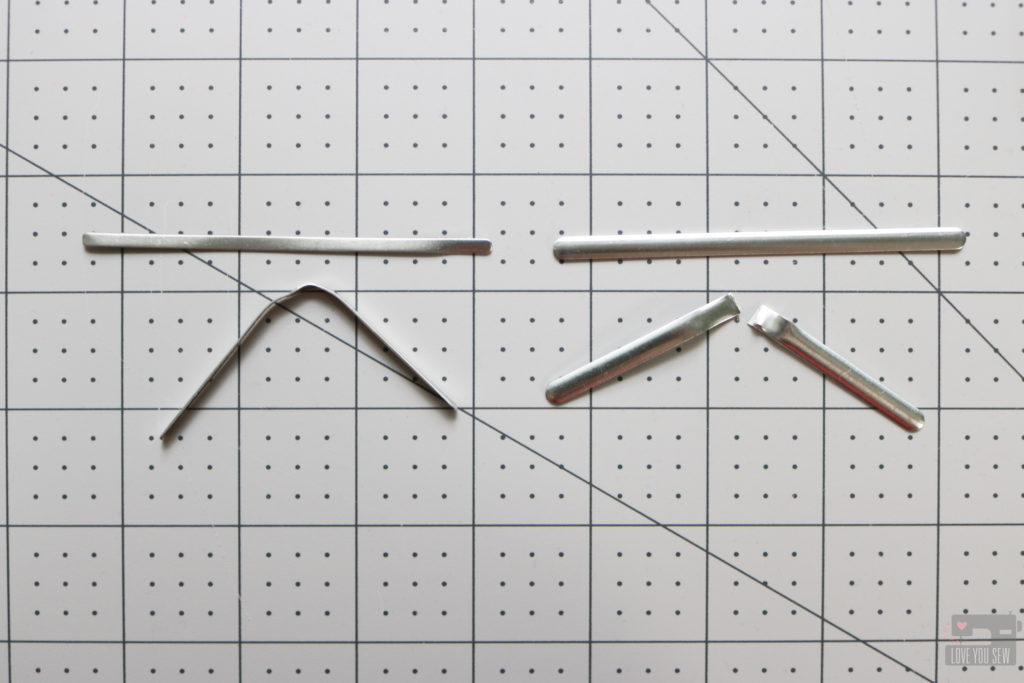
Domesticity vs Amazon
Early on in the pandemic, I was using pipe cleaners and paper clips for nose bridges and they were okay, but I was never truly fog-free. Then metal strips were slowly coming onto the scene and they are wonderful! The strength and extra surface area that helps wrap your nose is truly key in making a good seal. I first bought (50) 3 1/2″ x 1/8″ aluminum strips from Domesticity back in May and they are great! I tried to bend one bridge back and forth 50+ times and it still hasn’t snapped. But I’m always on the hunt for a great deal and found 200 of these strips with an adhesive backing for just about the same price. While these strips are also Aluminum and slightly larger at 3.54″ x 1/5″, they are also slightly thinner and broke after about 38 repeated bends. Even though I have plenty of extras for back-up, I would definitely switch back to the ones at Domesticity for their strength.
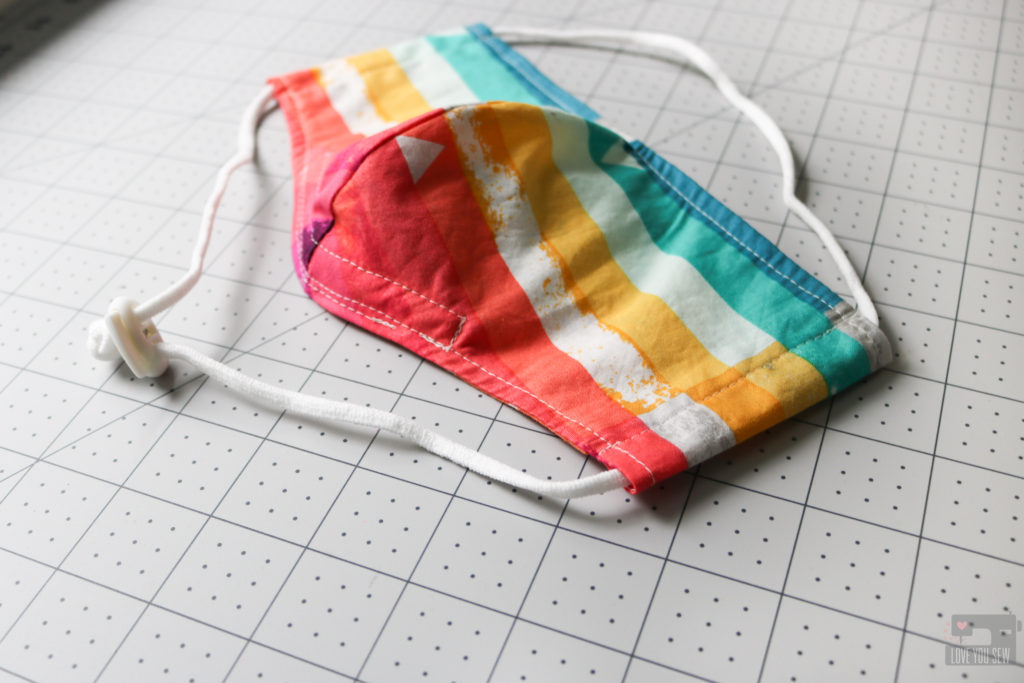
Filters
As I mentioned above, I used the Craft Passion mask pattern since it was drafted with a filter pocket feature. You can purchase mask filters like these, but I caution that they do come from overseas and do not come in sterile single packaging. I have yet to find a domestic supplier, so if you know of one, please comment below! You can certainly use paper towels, another layer of fabric or coffee filters for extra protection. Shown above, you can see how a filter fits inside this mask.
Fabric
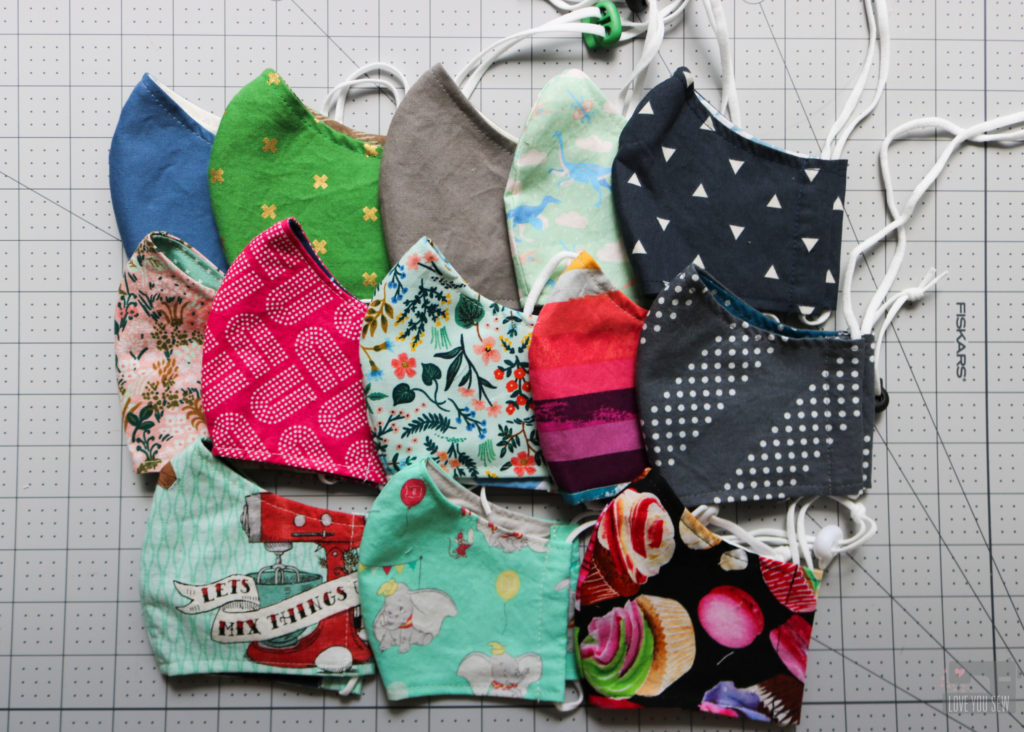
Fortunately, my stash has always included lots of designer quilt cottons from my quilt making days. I was able to use my stash through the beginning of the pandemic and I’m getting around to supporting small quilt shops as I receive personal requests for masks from friends and family. Of course, I love Sew to Speak which is local to me and I can pay online for contactless pick-up. While picking up the nose bridges, I’ve also purchased fabric from Domesticity. I love Circa Fabric Studio for great clearance prices on designer cottons and recently bought from Hart’s Fabric which has a nice selection.
Final Thoughts
I think this is a great pattern for a mask and fits such a wide variety of faces. The feedback I’ve received is a combination of the softness of the fabric (designer cotton, baby!) and how nice it is to have pressure relieved from the ears. The cord-lock is MUCH appreciated by parents and it only took a few learning sessions for my 7 and 9 year olds to put them on and take them off on their own. Please let me know how any of these supplies worked out for you!
DON’T FORGET TO WEAR A MASK!
Hugs and Stitches!
Cristy
While there are many affiliate links in this post (please read full Disclosures here,) I purchased all of these supplies on my own for my own fabric masks. I’m sharing the supplies based off of feedback when I shared many of these links on my Instagram account.


What size pattern did you use in Craft Passion- Men’s or Women’s?
Also, since you used the extra length on the outer fabric for the mask, did you extend the lining earpiece area?
Thanks!
mlga730
I am wearing the Women’s/Teen size and used Craft Passion’s template for filter pockets and the extra length for thicker cord. It’s the extra 1/2″ as labeled on the pattern template.
Thank you so much for this review, I ordered some elastic and adjusters from your post. I am excited to try them. I personally love the Filti filters, easy to breathe through and made in the USA. (I have a discount on my site too but I am sure there are lots out there😉)
Thank you so much for the filter info! I’ll definitely check it out on your website.
Those cord adjusters are really smart! Even a grown-up like me doesn’t like re-tying knots more than I have to! I will say, one blessing of the hot/humid/awful NE weather we’ve had recently – the air is too warm for my breath to fog my glasses.
As the family shopper, I was sick of tying knots too!
Thank you so much for the great DETAILS about the elastic and cord locks. I know this post must have taken a long time to put together!
You welcome! I knew I was having a hard time sourcing supplies from home and figured all of you were too. I’m so glad it’s been helpful!
This is a GAME CHANGER!! Brilliant idea. My locks and elastic have already arrived and I am sewing up a storm. I am loving this system and getting the elastic off my poor ears.
I’m SO happy to hear this helped you! I’m ALL about the cord locks!
You are awesome to post this! Thanks so much!
After so many months making masks like all of you, I had to share my experience. Thanks for reading!