Christine Sling Tester Inspiration

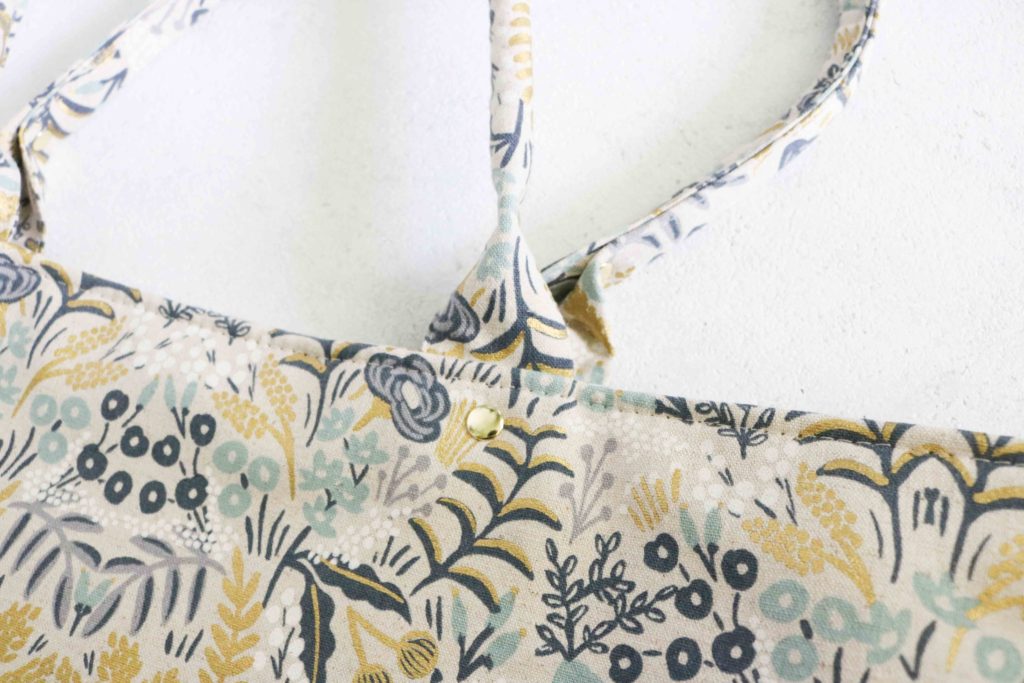
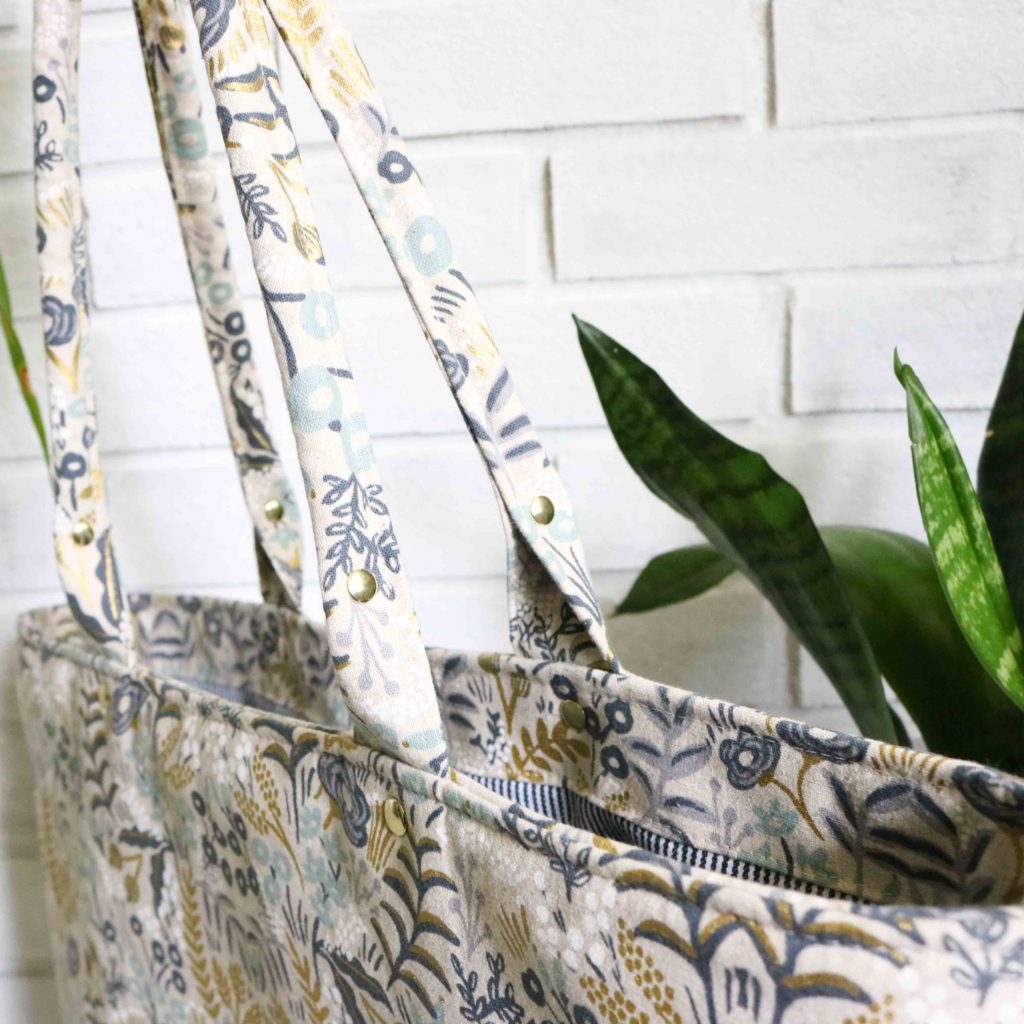
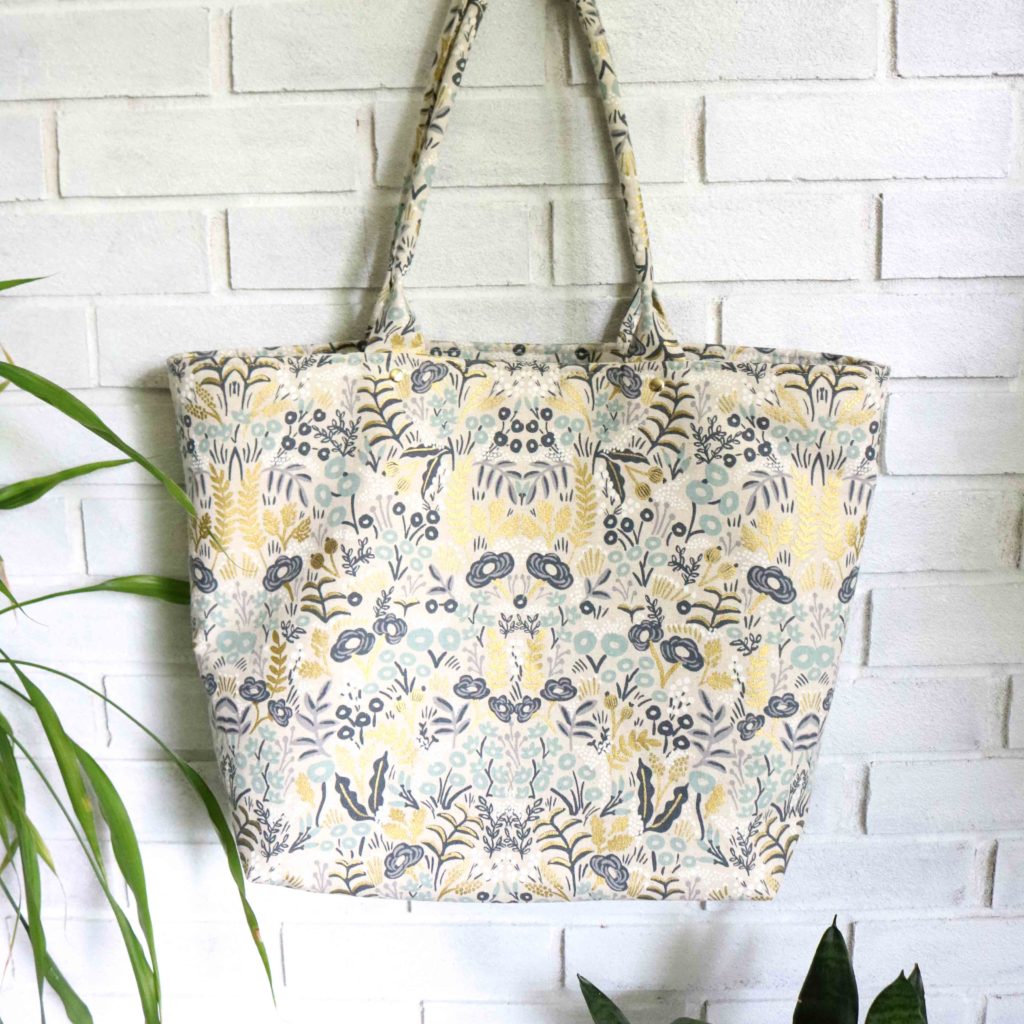
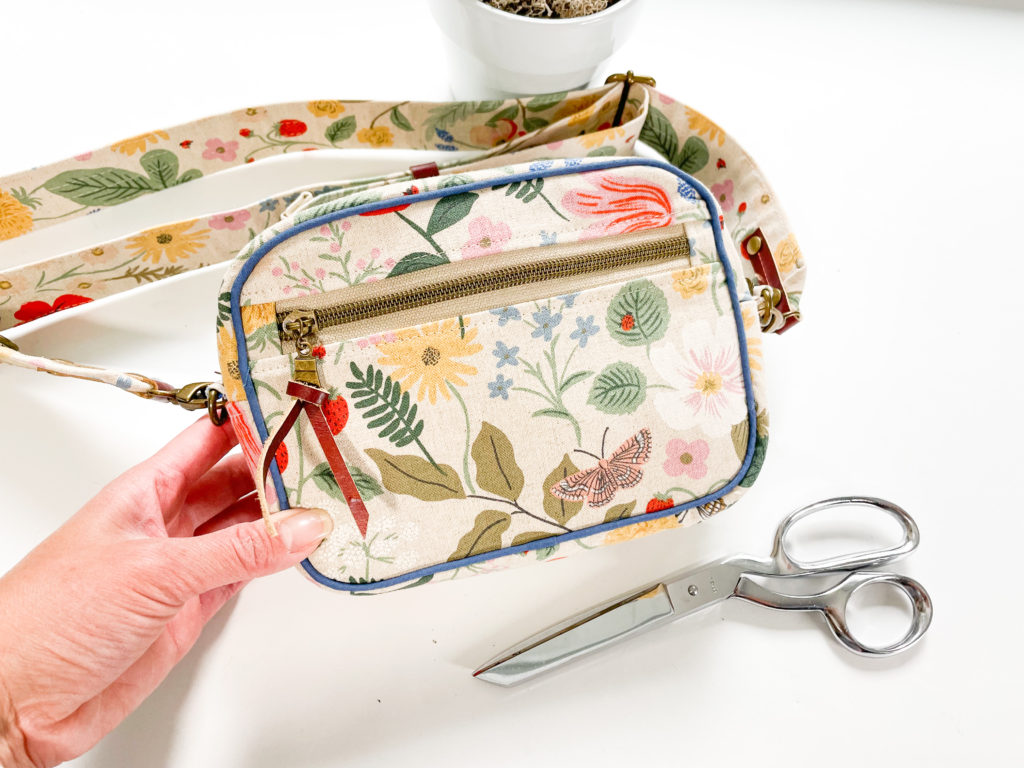
The Christine Sling pattern pulls together a classic camera bag silhouette with a modern wide statement strap. The possibilities of fabric combinations are truly endless.  For a full rundown of pattern specifics, including features and where to source materials, check out the Christine Sling Intro here.

TESTER BAGS

As I develop a pattern, there are so many considerations that have to take place.  My first priority is to always make a bag approachable for beginning sewists who have basic domestic machines.  That’s why I like to always like to have full fabric versions of a pattern, but I also like to show more complex versions with other substrates for more advanced bag-makers.  My testing group runs the gambit of experience and I am so appreciative of their knowledge and different skillsets.

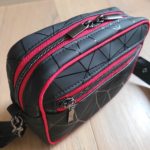
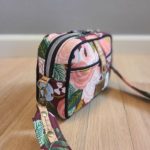
Carrie (@carriedwithyou) made not one, but TWO tester versions of the Christine Sling.  Her first make was this sweet floral version with natural cork accents and metal-look nylon zippers.  Then…Carrie went to the other side of the spectrum for a dark and sleek version of the bag using some webbed matte vinyl and incredible red accents. She used seatbelt webbing for the strap giving the whole look some chic vibes!  You can find out her patterns and finished bags for sale at www.carriedwithyou.com.

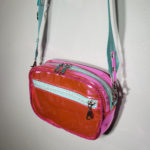
Maggie (@ms.maggiemakes) is an incredible bag-maker and I love her use of different fabric patterns and color.  Her version of the Christine Sling did not disappoint my expectations at all!  She used this great pink mirror-effect vinyl along with a mix of donut quilt cotton for her bag.  I love the way she using upholstery trim for the piping instead of the “plain” stuff I used.  It makes her bag SO much fun!  Follow her instagram to see her makes…many are for sale too 😉

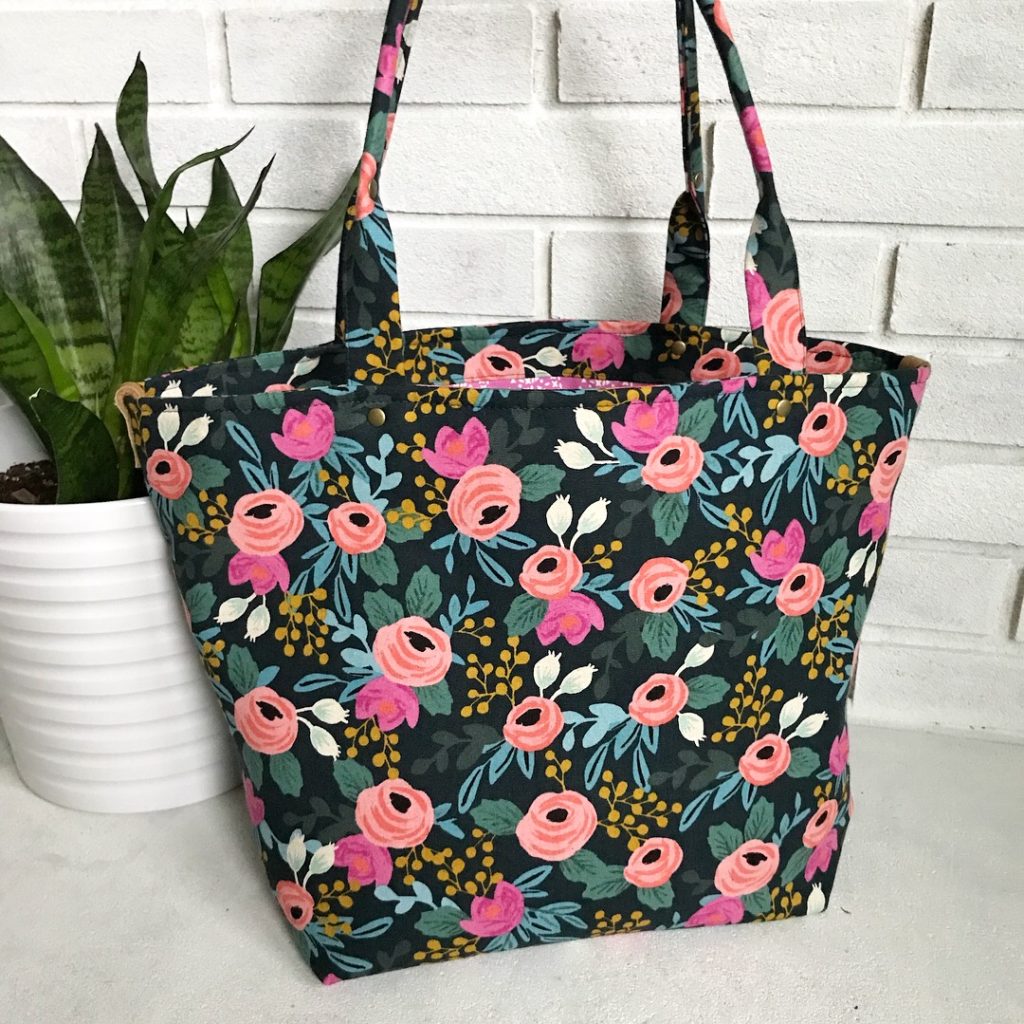
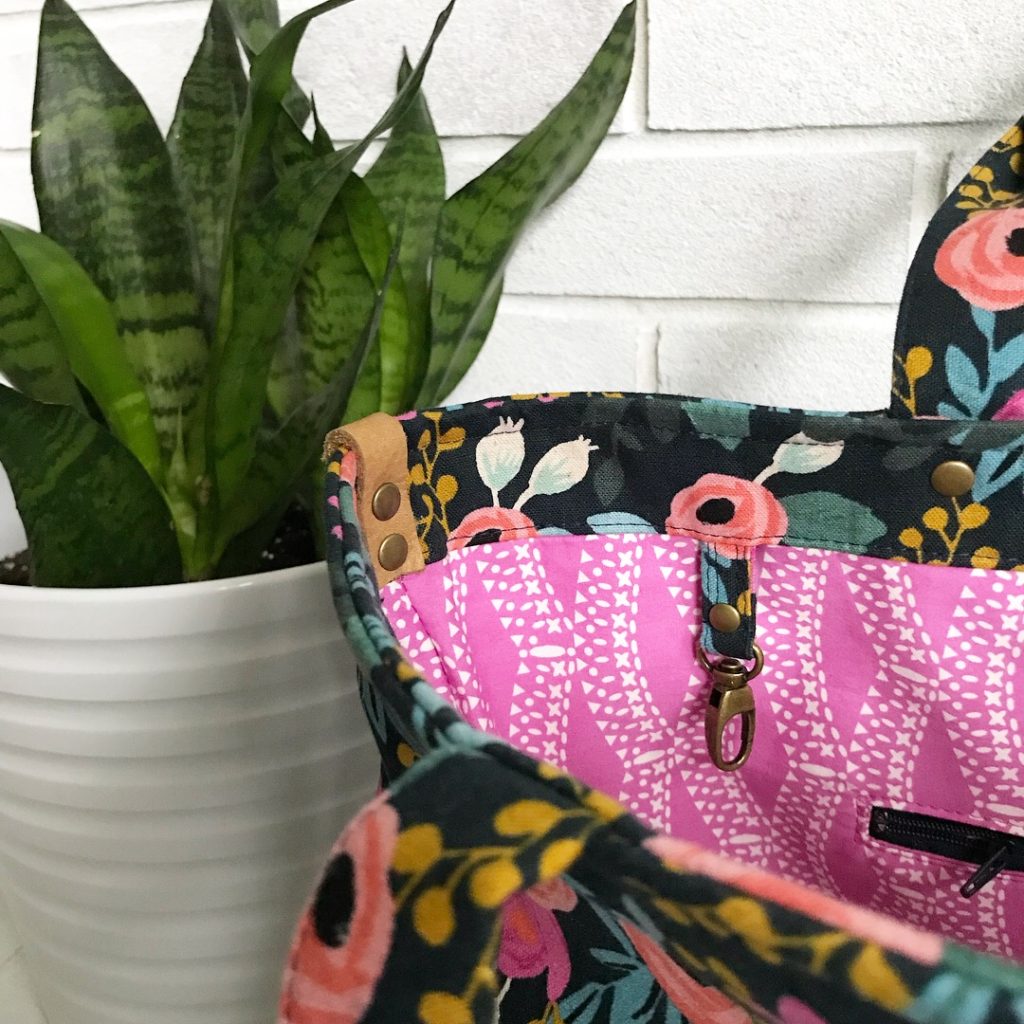
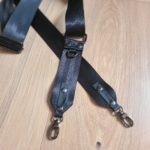
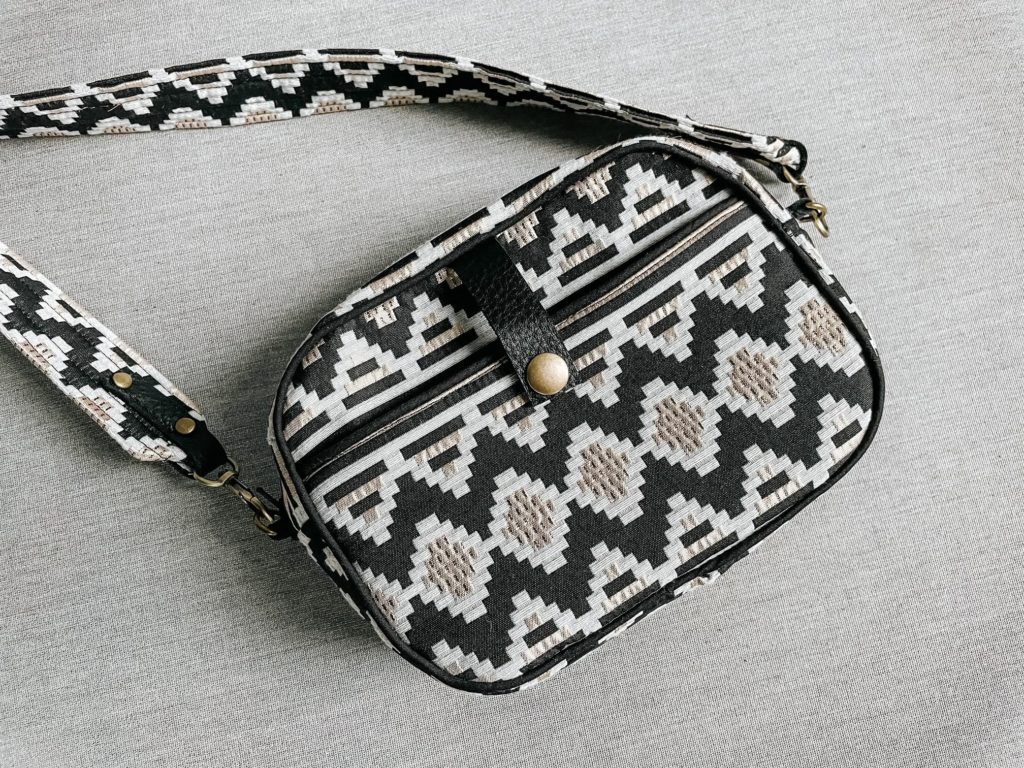
Mallory (@malloryhillmakes) is a local friend and also my copy-editor.  She makes incredible bags and clothes, which makes her invaluable with technical knowledge.  Her boho version of the Christine is just perfect for everyday!  The leather accents and piping, help to give more depth and framing to the bag.  It will make a statement with any outfit!  You can follow her blog at www.malloryhill.com.

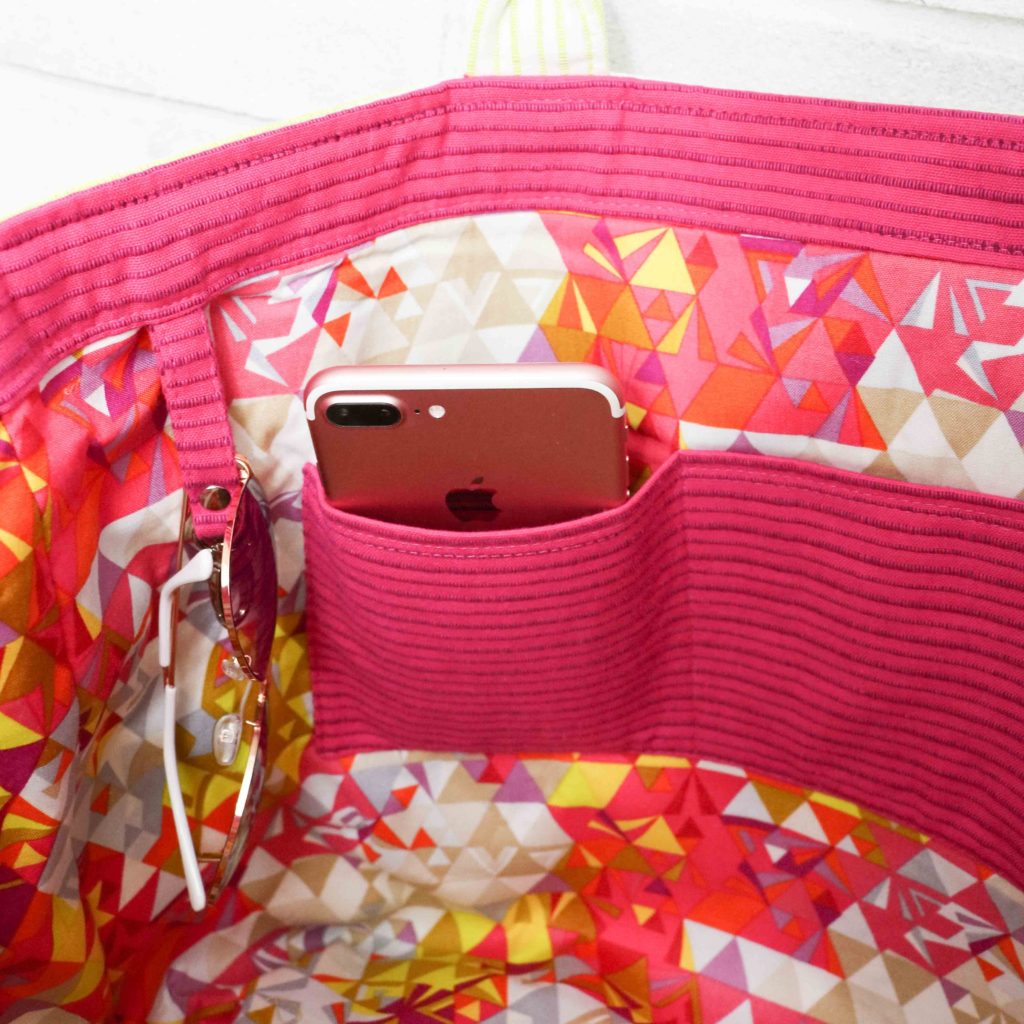
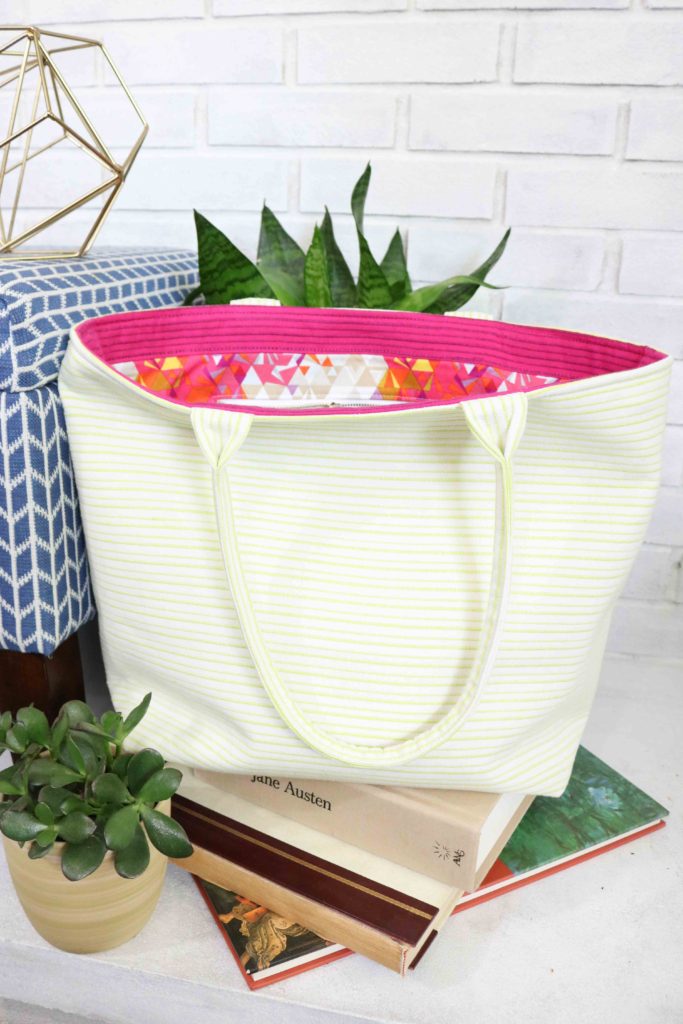
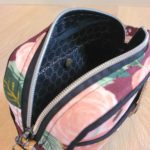
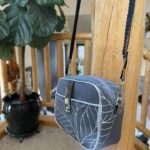
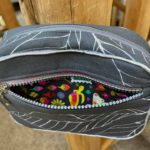
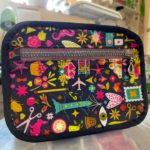
Robbin (@sewfarmquilter) is the newest team member of the testing group.  I have been following her since my quilting days and was so happy to know she wanted to test the Christine! Her version of the bag is very classy and demure on the outside, but pure party on the inside.  I’m a sucker for a wild bag lining (since RTW ones are always boring!) and this one is perfect.  If you can see, Robbin scalloped the edges of her leather accents to add more texture and appeal.  It is such a great look!  Check out all of Robbin’s makes on her instagram.


I’ve said it before and I’ll say it again, but NOTHING is more heart-warming than it is to see my patterns sewn up by all of YOU!  For a full-range of different takes on the Christine Sling, check out the hashtag, #christinesling, on Instagram.  You know I follow it 😉 and LOVE being tagged in all of your makes.

These pictures are so inspirational and I hope you are able to get some ideas when you make your Christine Sling.  Pattern available here.


Happy Sewing,

Cristy

Colleen Tote :: Pattern Release


It’s been quite a journey, but I have finally written my Colleen Tote bag pattern! If you’ve been following me on Instagram, you know I’ve been making this bag for well over a year now, but always tweaked the design every time I made it.  As a newbie designer, I just wasn’t comfortable enough to bring it out to the sewing market.  There were people were asking me about the pattern every time I posted a new iteration and I kept pushing it off until…I finally told myself to get out of my own head and just write it!

The Colleen Tote was designed to be the classic open tote bag to carry a large number of things. The clean design makes it versatile enough for any occasion…and allows you the creative freedom for customization.  I’m thinking a quilted block maybe in the works 😉   You can use the tote for the beach, as a work bag (large enough for a laptop,) a diaper bag or just a throw-all-your-junk-in bag.  There are so many possibilities.


With a roomy open compartment, I made sure to add in a zipper pocket to keep personal items secure and an easy-access slip pocket for a phone and chapstick.  You can also see the fun, yet functional interior band.  This adds deign interest while giving extra support for the weight of the rolled handles.

The next feature added was a trusty key fob.  I have a car with the keyless ignition, so I find myself actually losing my keys or leaving them in my car more than I’d like to admit….so I made sure to add in this feature to quickly allow me to click my keys onto the tote.  The other thing I find myself doing is fishing around for my sunglasses.  I tend to just throw them in my bag, so I made the key fob double duty.  You can hang your glasses through the loop to more easily find and locate your sunnies!

Original Tote Pattern

When I first made what would turn into the Colleen, I was testing out waxed canvas and learning to make my own.  I figured a tote would be a great use for this fabric treatment.  I drafted a VERY simple tote with very light interfacing and didn’t even even really create a sturdy bottom.  I cut leather straps and attached them with rivets as shown above.  But this was just the jump off…

Customer Order

Later on,  one of my very best and loyal customers asked me to make a “plain” tote bag as she called it with just one fabric for the exterior without any contrasting bottom or the leather handles.  It’s a joke between us now…because she knows I do not make “plain.”

Beautiful Leather and Rivet Enhancements

That’s when I suggested some rolled handles to make the tote a bit more interesting instead of just flat sewn-in ones.  And of course, I jazzed it up with some rivets and leather accents.  With this special request came the second view of the Colleen along with the rolled handles.

As I worked on the design, I played with different interfacing combinations and thought a combo of woven plus fusible fleece works for me.  If you would like something more rigid, yet soft, some foam would be perfect.  However, the weight of the bag does get heavy….especially when you start to add your own stuff inside.  Peltex lines the base to make the Colleen sturdy and you can swap it out with needlepoint plastic if that’s more to your liking.

The handles are secured down with two rows of top-stitching, but you can opt to use rivets in place of the second row of stitching.  The extra bit of hardware makes this pattern look so chic and professional.

Additionally, rivets can be added to the handles for strength and for a little more jazz.  These are all fun ideas to help bring your Colleen Tote up a notch!

As part of the release this week, you can purchase the Colleen Tote digital PDF pattern for 20% off in my Etsy shop. Additionally, you can also get my Claire Foldover Crossbody bag on sale as well! (Sale good through July 2, 2018.)


Happy Sewing Friends!

Cristy

Simple Zipper Bag Sew-Along

Zipper Pouch Sew Along

Who loves a great stash-busting project?  Well, Kimberly Jolly of Fat Quarter Shop, along with Sherri McConnell of A Quilting Life, have a great new tutorial of a super simple patchwork zipper pouch.  This project is also mini-charm friendly which makes it even easier.  Check out their easy to follow video below.

I went the mini-charm route and used Bright Sun, also by Sherri, for Moda Fabrics.  With the unofficial start of summer this week, I thought these fun and cheery fabrics were perfect for the pouch.

Charmpack

This charm pack had 42 prints which is more than enough for two large pouches.  (I have plans to make a second one as a future gift!)  After a little playtime, I settled on this arrangement and had the Dusk on Bisque print already in my stash.  So I used that for my backing, linings, and zipper top.

Layout

For this pouch, I thought I would have a little fun and add a metal brass zipper for some flare.  I used a 10″ metal one.  This length is a little short for the pouch, so I needed to add tabs on both ends to account for it.   I cut a mini-charm square in half to make each tab.

Zipper Tabs

With each half charm, I folded down both short-ends of the tabs by 3/8″ and then in half to sandwich around the zipper.

Zipper End

I sewed on the tabs with a zipper foot, making sure to get both the top and bottom of the tab sandwich.

Zipper Tabs Complete

For the quilting, I used trusty Aurifil 2021 to sew straight diagonal lines on the front patchwork and on the backing.  The simple straight lines keep with the fun modern fabrics.  With such a small piece of quilting, I used some basting spray to keep all the layers from shifting.  It makes for faster work than pinning 😉

Back Profile

As I machine bound the pouch with Alison Glass‘s Corsage fabric, I added one of my labels in the front which can double as a key ring fob for more versatility.

Label Close Up

On the zipper, I omitted the fabric pull and instead, used some faux suede cording I had on-hand.  I thought the additional punch of yellow worked with the pouch better than more of the same background and interior fabric.

Interior

I love the structure and feel of the quilted Soft and Stable which make for a nice durable pouch.  It is perfect for personal electronics and/or for books you want to carefully protect.

Front Profile

The simplicity of this project and use of scraps makes it a MUST sew for any traveler this summer!  Do you have any fun vacation destination(s) coming up?

Don’t forget to visit all of the Simple Zipper Pouch Sew-Along bloggers below for more ideas:

Tina from Emily Ann’s Kloset
Jessee from An Art School Dropout’s Life
Erin from Why Not Sew?
Kitty from Night Quilter
Leanne from She Can Quilt
Vanessa from Lella Boutique
Amanda from Jedi Craft Girl
Sherri from A Quilting Life
Cristy from Love You Sew (you are here)
Leslie from Seasoned Homemaker
Tiffany from Tiny Seamstress


Happy Sew Along,

Cristy


This post was sponsored by Fat Quarter Shop and I was compensated for time and materials.

Indigo Sky Quilt

Indigo Sky Quilt Title

It seems like all of my friends are all having babies right now.  I try to hand-make at least one gift for each of them…but of course, time is usually too short.  (Sound familiar, anyone?)  My girlfriend, whom I’ve known since kindergarten (!!!) is pregnant and is expecting this week!  Her baby shower has already passed, but at least I was able to squeeze this quilt in before he’s born 😉

Handcrafted Indigo

This stack of Handcrafted Indigo by Alison Glass for Andover Fabrics is like “whoa,” right?!?  I love love blues and all of these different variations are just killer!  These beauties were picked up at my little quilt shop when was first released about 5 months ago and they’ve just been sitting in my stash.  When I found out my friend was having a boy, I immediately went to these fabrics.  I was going to use solid white to have these blues “pop” but quickly reconsidered since this was for a baby.  Wise decision.  Instead, I went to Essex yarn-dyed Linen in nautical as one of my go-to blenders.  It’s such a nice alternative to a solid and gives a great layer of texture.

Indigo Sky Quilt Full Profile

Although I didn’t have an exact quilt pattern in mind, I knew I wanted to make some Flying Geese and keep the quilt asymmetrical.  So I figured I’d kinda improv the design.  I used Connecting Threads tutorial to make two no waste geese blocks per fabric.  Each block is 6.5″ x 3.5″.  After lots of playing around, I settled on my random design of stacked geese with lots of negative space.

Indigo Sky Quilt Binding

With so much Essex Linen, the binding on this quilt had to be scrappy in order to highlight the Indigo and add some fun.  It’s a bit of work to attach all the different binding fabrics, but well worth the effort.

Indigo Sky Quilting close up

The quilting was straight-line 1/4″ apart using Gutermann’s blue variegated thread.  This was my first time quilting with the 100% cotton thread and it won’t be my last.  The changes in the thread color are very subtle against the Essex and of course, the blues.

Indigo Sky Quilt Back

For the backing, I was lucky to have this Doe fabric from Carolyn Friedlander for on hand.  (1) It’s a nice contrast to the front design. (2) It really complements the quilting and (3) I’ve been on a fabric diet…

This quilt was so fun to make.  I loved every moment and hope baby boy enjoys it just as much!


Keep Stitchin’

Cristy


Padded Laptop Tutorial by Love You Sew

Padded Laptop Case Tutorial

LaptopCaseTitle

Today, I’m going to share my own pattern for a padded laptop case.  Every time I’ve had to travel, I’ve thought of how much I needed a cover for my MacBook.  But with our recent trip to the lake, I actually made one…the night before we left…in true procrastinator style.  How many times have you done something like that???

*Please read through all steps before starting.  Cutting dimensions are based on a 13″ Apple Macbook Pro (approx. 12.75″L x 9″W x  0.75″H)

Supplies:

  • 1/2 yd of Exterior Fabric
  • 1/2 yd of Lining Fabric
  • 1/2 yd of Pellon Flex-Foam or Annie’s Soft & Stable
  • 1/4 yd of Mid to Heavyweight Interfacing
  • 1 set of Magnetic Snaps
  • 3 sets of KAM Snaps
  • Coordinating Thread
  • Rotary Cutter and Cutting Board
  • Fabric Scissors

01LaptopFabricPull

If you follow me on IG, I made my personal one with Alison Glass‘s Geometry in Sunset (as shown) but with Mercury in blue as the pocket and the Historical Fiction in Gold print for the lining.  Luckily, my niece saw what I made and wanted one for her very own.  How did she know I also wanted to write a tutorial? She selected Geometry and I had a bunch of Historical Fiction in Strawberry in my stash to match. I love this vibrant combination.


Cutting Requirements:

02LaptopPatternCut*Please note all measurements are for a 13″ Apple Macbook Pro.

  • Cut from Exterior Fabric (L x W):
    • Front – 15.75″ x 10.75″
    • Back – 15.75″ x 16.25″
    • Pocket – 17.75″ x 18.75″
  • Lining – 15.75″ x 26.5″
  • Interfacing  – 17.25″ x 9″
  • Flex-Foam 15.25″ x 26″ (not pictured)

Instructions:

03InterfacingonPocket

Lay Pocket right-side facing down (17.75″ at the top) and fuse the interfacing to the bottom half according to the manufacturer’s instructions.  There should be a 1/4″ seam allowance all around the interfacing.


04PocketCloseup

Fold the pocket in half, wrong sides together, so the interfacing is sandwiched in between the Pocket fabric.  Press with iron and sew a 1/2″ seam along the fold to keep all pieces in place. Set aside.


05NotchFlap1

Take the Exterior Back fabric and hold it with the 15.75″ side along the top.  Measure 3″ in from both of the top corners and mark.


07NotchFlap3

Connect the two marks and cut off each corner.


09NotchFlap5

Repeat for the lining and Flex-Foam.


13Basting

Center the Lining (wrong side) on top of Flex-Foam and baste the two layers together.  Set aside.  TIP: Baste from the center out toward the edges. This helps pull the lining taut.


16PocketBasting

Center the pocket on the right-side of the Exterior Back.  Take the over-hang fabric and make a pleat approximately 1″ in (so it doesn’t get sewn into the lining later on.) [Edited to add: Repeat on other side.] Baste the pocket onto the Exterior Back with a 1/4″ seam allowance.


17AddFront
Sew the Exterior Front to the Exterior Back/Pocket right sides together on the short side creating the entire exterior cover.


18ExteriorComplete

Open and press seam open.  Exterior should look like picture above.


Mark Snap

From the top of the Lining, fold the sides together to find the center.  Mark down 1.25″ and attach the magnetic snap according to the manufacturer’s instructions.


19AttachLining


On the bottom of the Completed Exterior, find the center.  Mark down 2.5″ from that point to attach the other half of the snap set.  TIP: Fuse a piece of scrap interfacing on the wrong side of the fabric where you will attach the snap.  This helps provide a layer of durability.

With right sides together, sew the Exterior to the Lining with 3/8″ seam allowance leaving approximately 5″ opening to turn.  Notch the corners. Remove basting threads.

Turn the Laptop cover out and push out the corners.  Press well.


24Complete

Sew a square around the magnetic snaps with about 1/4″ clearance all around.  This helps secure the snap into place.

Sew a 1/4″ seam along the bottom edge of the laptop case.

Fold the front of the cover up along the sewn seam and clip into place.  Starting from one bottom corner, sew all around the case with 1/8″ seam allowance to create the main compartment for the laptop.

20 SideSnap

Follow the pleat on the pocket and finger press the fabric to mark where you will attach the KAM snaps.  The female and male ends will be right next to each other.


21SideSnapTogether

This will secure the pleat but gives the pocket more room to hold your cords and other goodies.  Repeat on the other pleat.

23BackwSnaps


Find the center of the pocket and add one more snap about 1/2″ down from the opening.  Find where the snap meets the body of the case, mark and add the other snap.  The pocket opening should lie completely flat when all snaps are fastened.

22CompletewLaptop

And there you have it – a beautiful cushioned case for your baby to travel!

Please let me know if you have any questions (I’m new to pattern writing) and please tag me on Instagram if you make one. #loveyousewlaptopcase  #loveyousewpatterns


Happy Sewing!

Cristy


This post may contain affiliate links for which I do receive a small compensation…It helps me keep this site running 🙂