Abbey Convertible Backpack DIY Sewing Pattern

I’ve been on a long pattern writing break and look at me….I have two out in less than a month!  It might be all the inspiration I’m feeling or maybe it’s the fact that I’ve learned quite a bit more about designing now 🙂  It really is a combination of all the above along with clearing my plate of other sewing commitments so I can focus!  You can check out the FREE Kelly Waist Bag pattern  just released a few weeks ago here and keep on reading for the long awaited Abbey Convertible Backpack

Abbey Backpack by Love You Sew

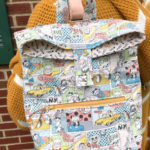
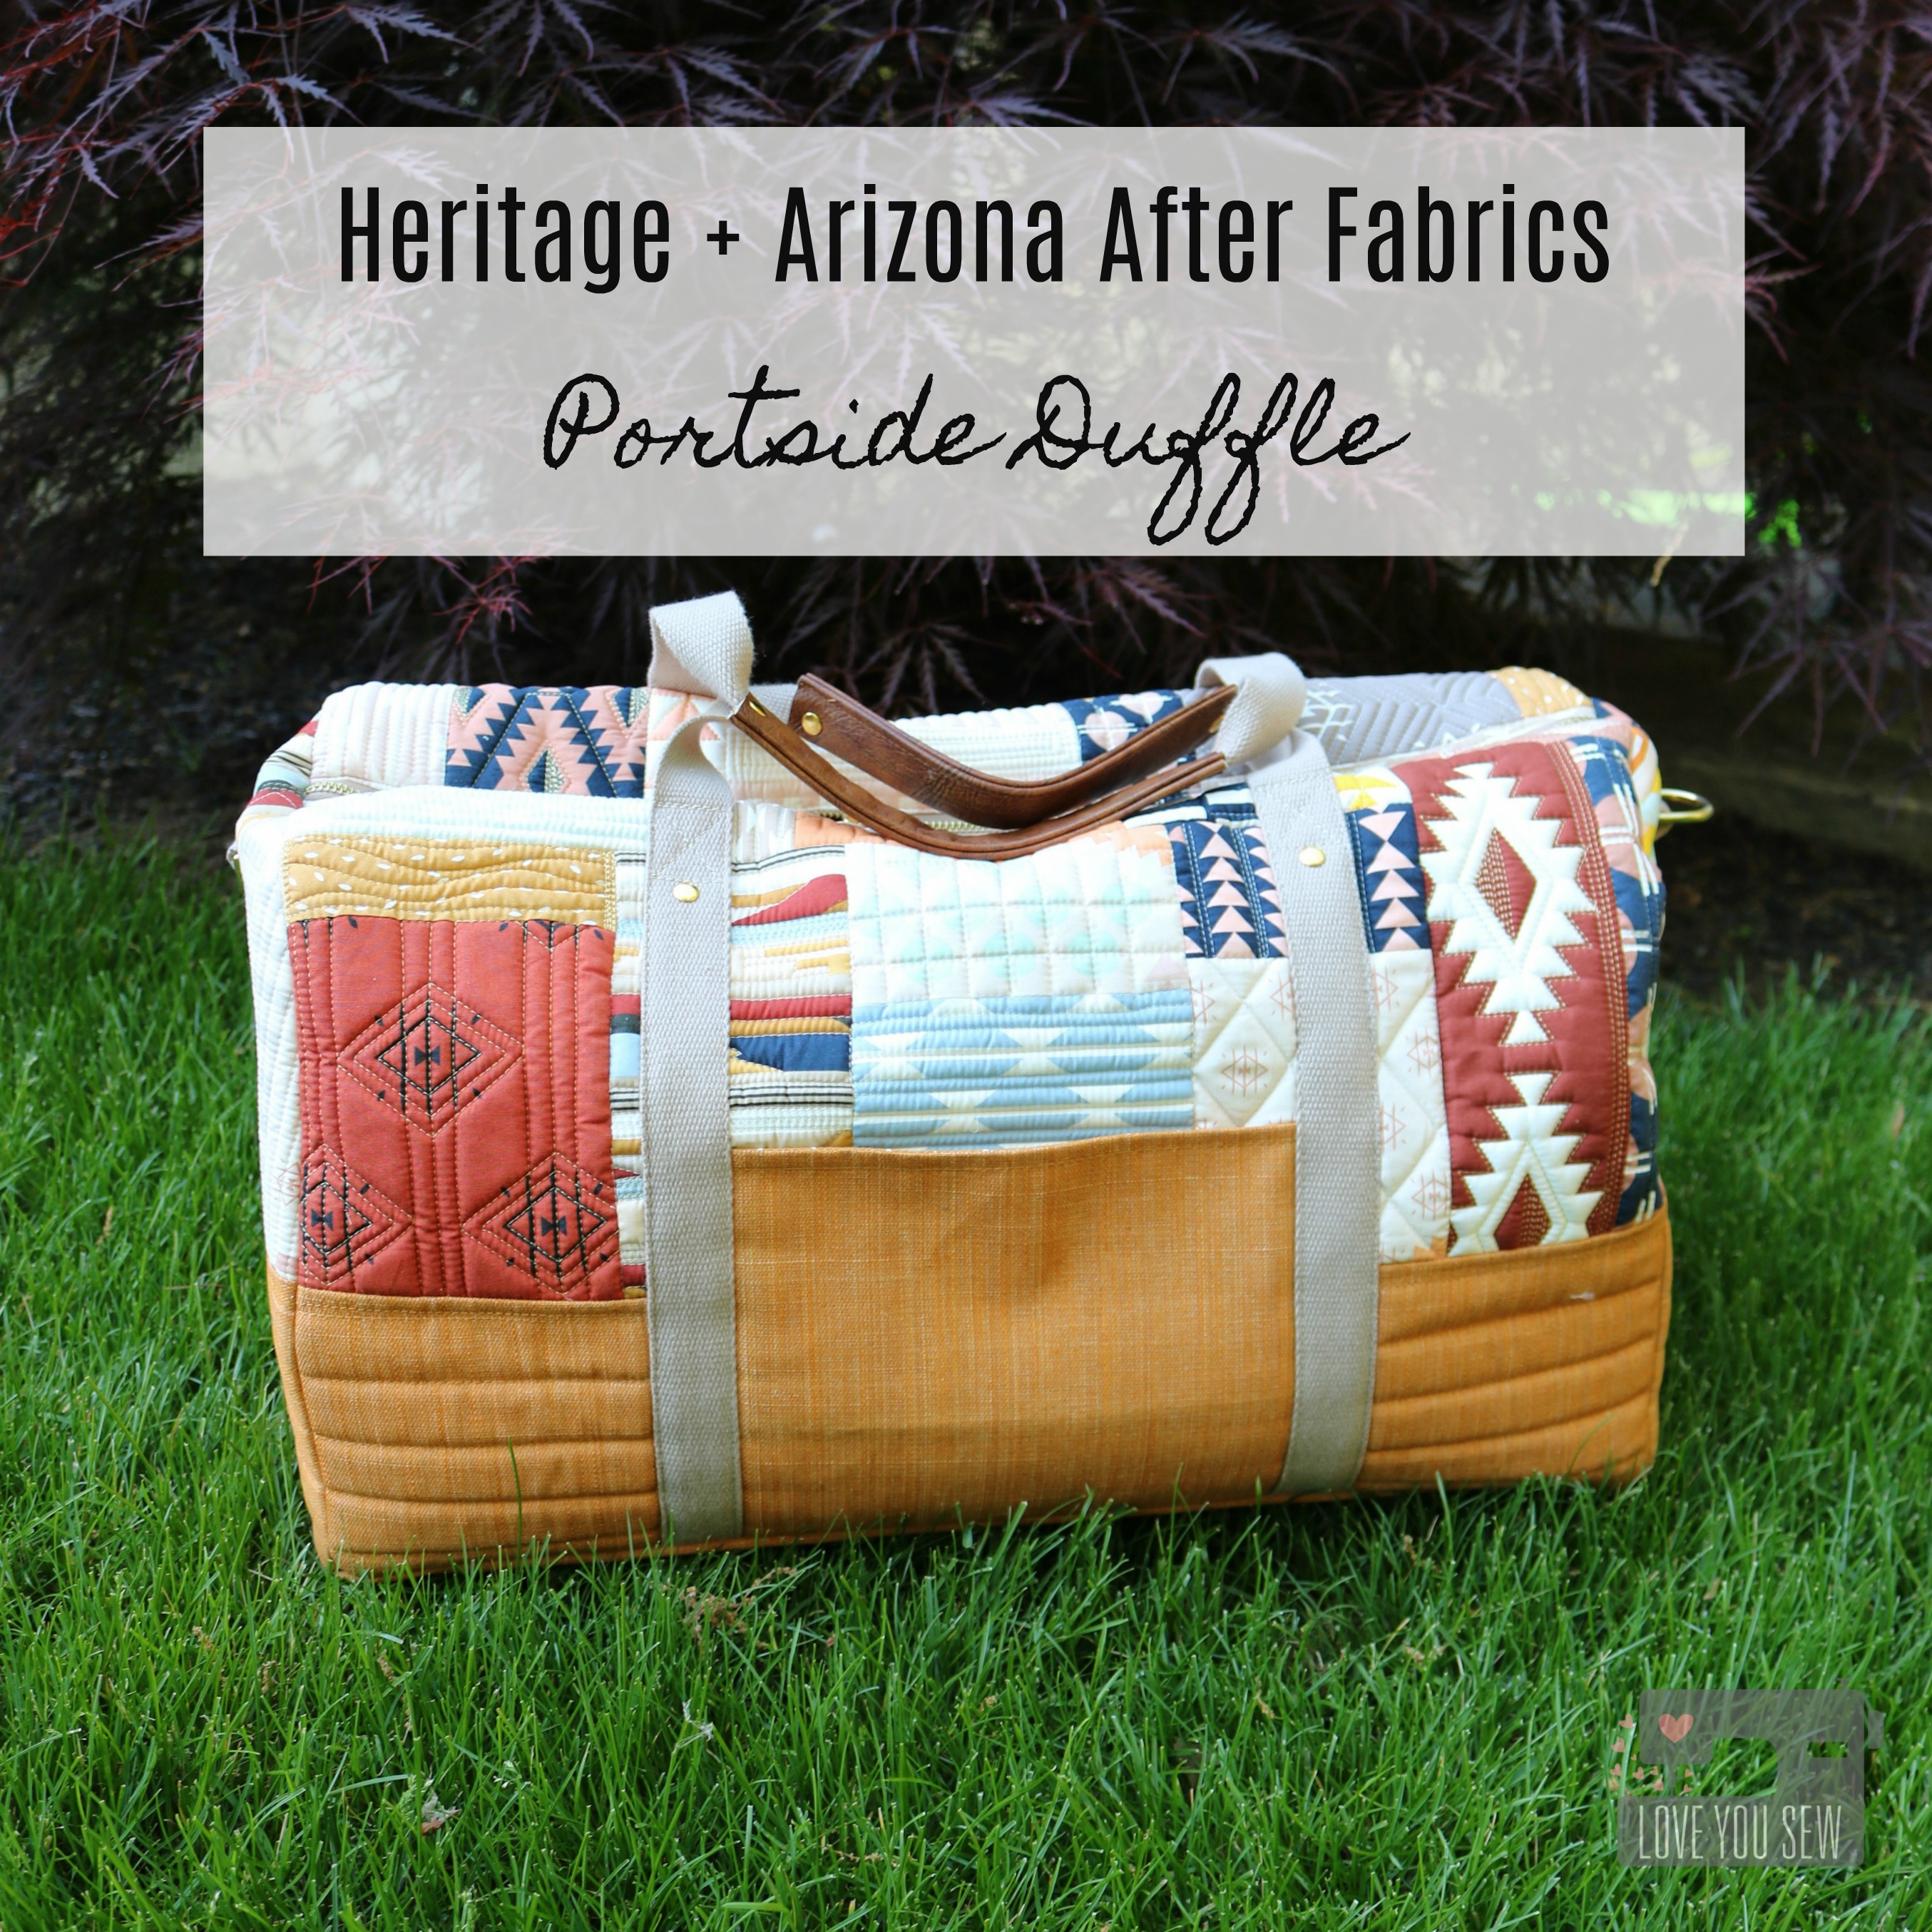
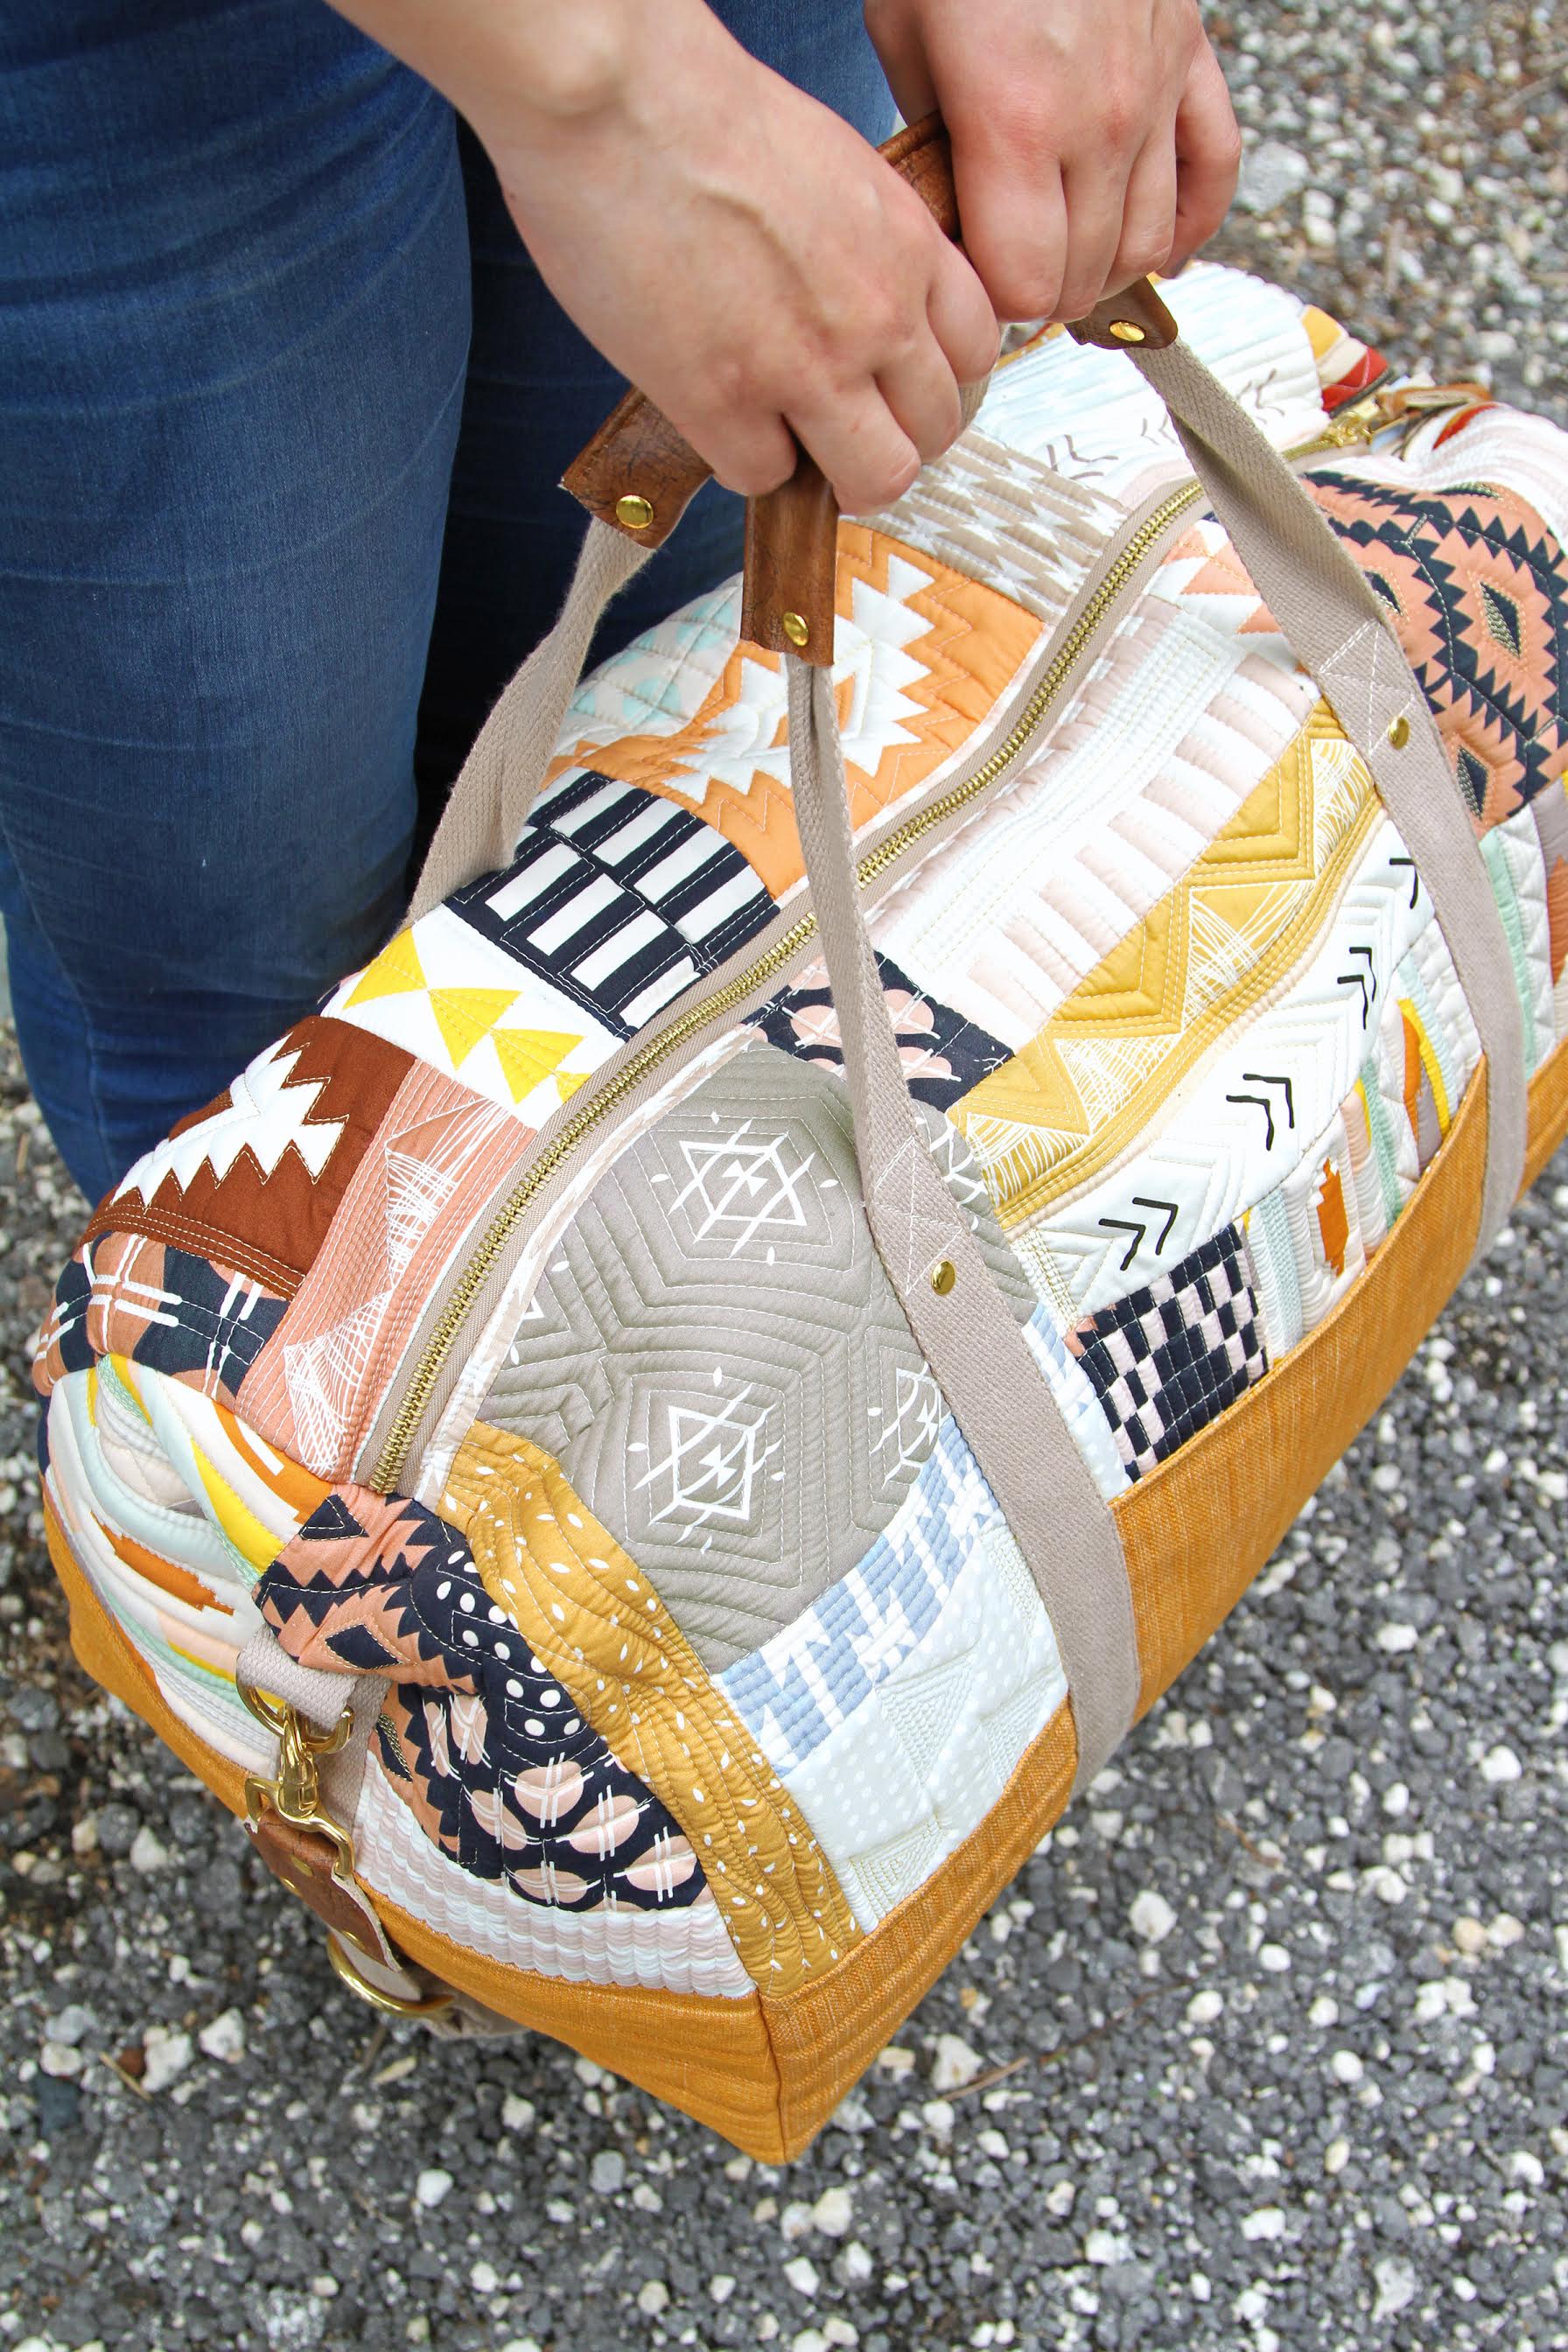
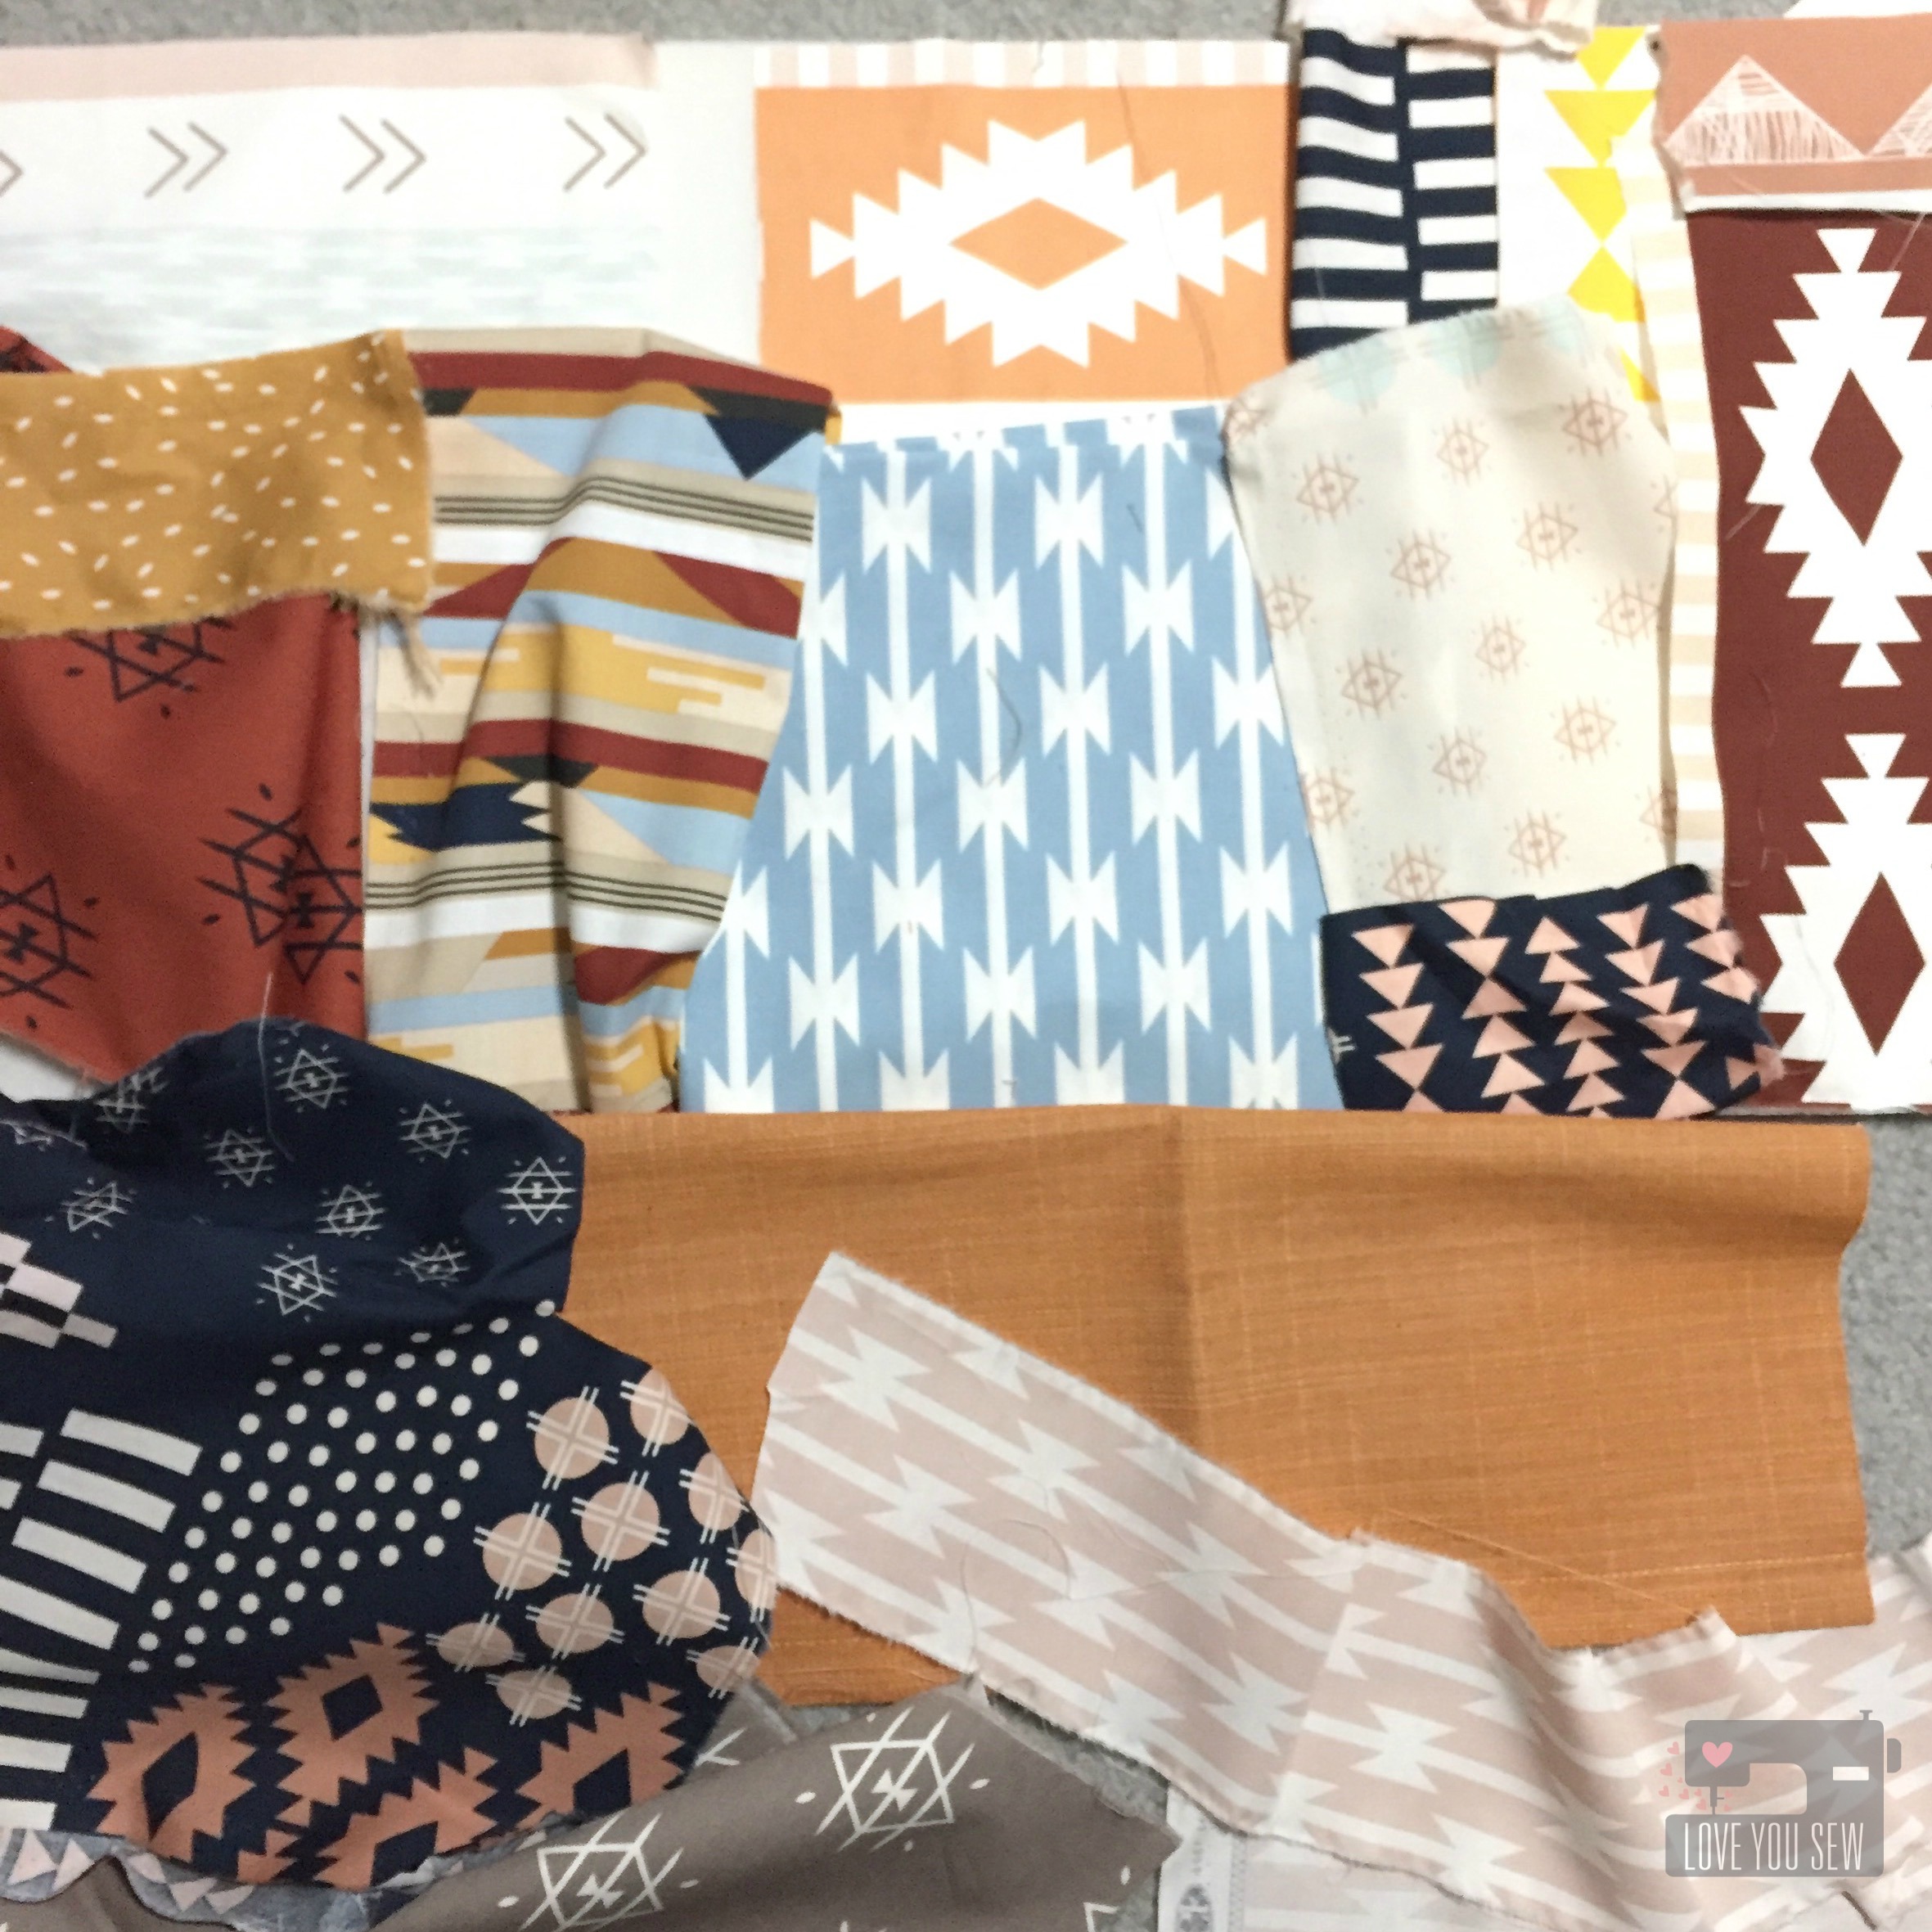
At the end of 2017,  I was looking for a fun bag idea for my toddler niece.  But since she’s a little fashionista, I wanted to make her a “non-kid bag” and more of an “adult-bag”….just in a miniature size. With boho style hot at that minute, I remember seeing so many hiker style backpacks around with southwestern prints.  I had this great canvas fabric in my stash from April Rhodes and knew it would be perfect for my niece.

I made this little backpack just thinking it would be a one-off project — that was until I posted it on my Instagram.  That’s when all the comments and inquiries flooded in.  I had at least half a dozen people wanting to buy it.  But no, it was only for my niece. <3  Although I didn’t want to sell the actual bag, I knew I had a great design…especially as a kid-size bag that’s modern and something an adult might like….

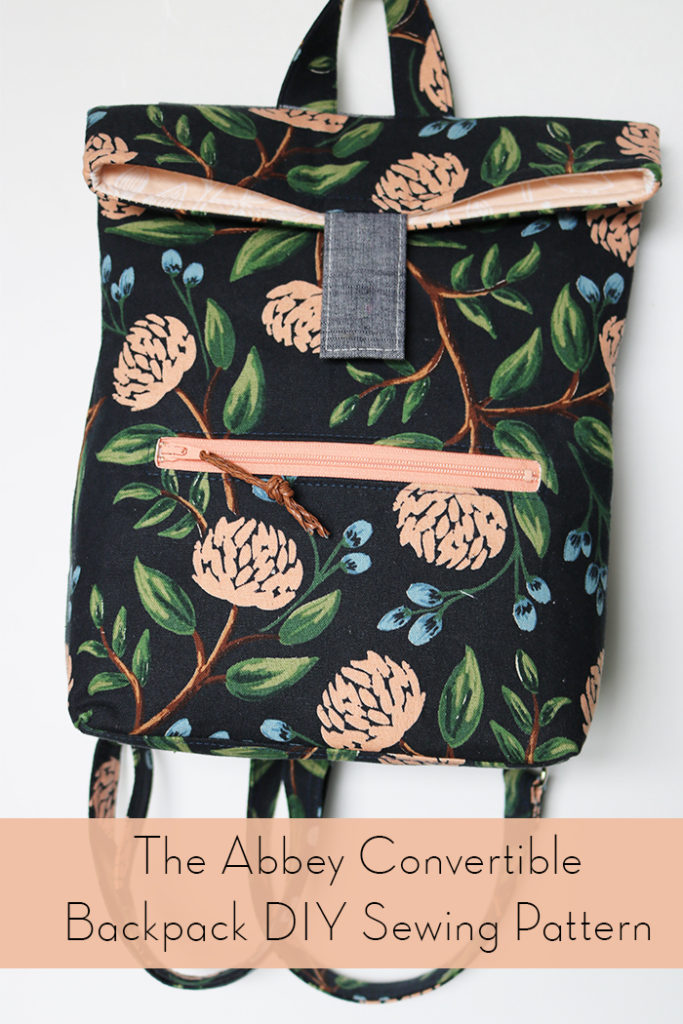
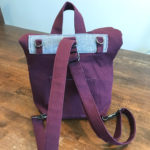
Fast forward a year after learning to use some proper drafting software and I was set to tackle the longest and most involved bag I’ve written to date.  From the first design, much has changed.  The body is slightly larger and more pockets have been added inside and on the back. The most significant change is the additional hardware to make the Abbey a completely convertible adult bag too!

Abbey Crossbody by Love You Sew

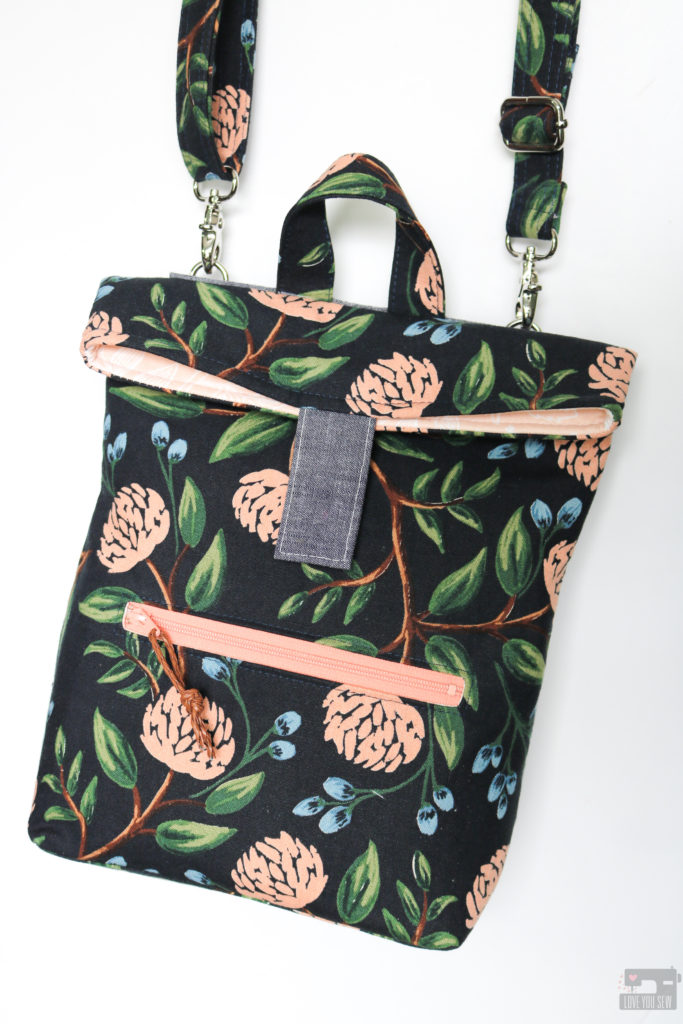
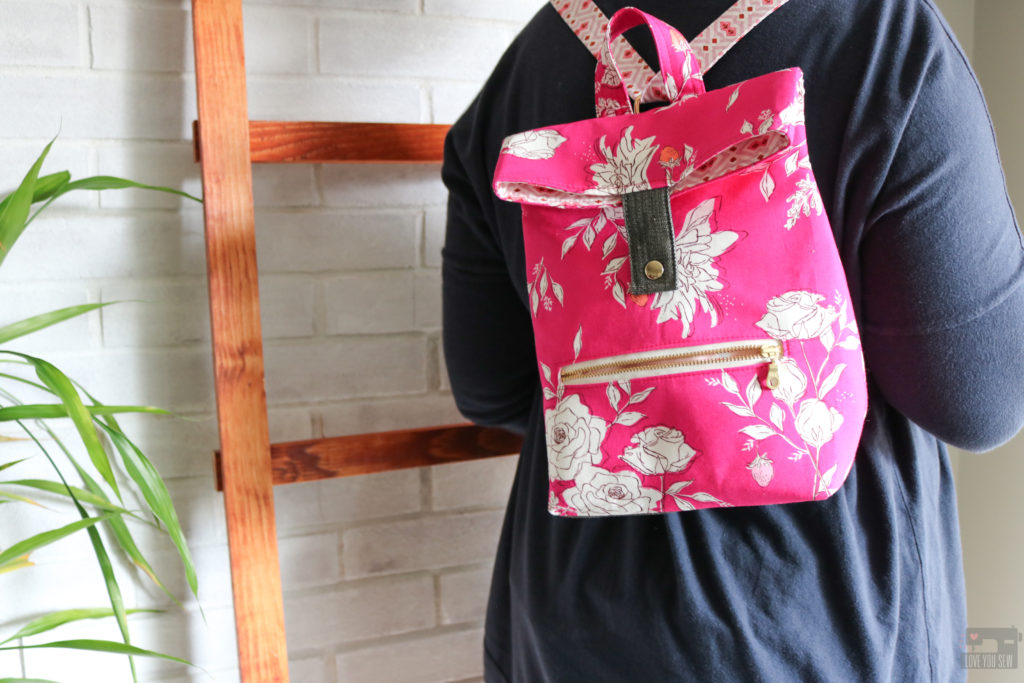
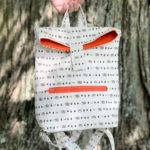
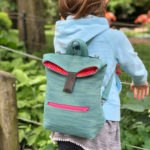
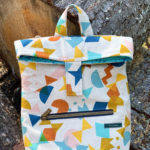
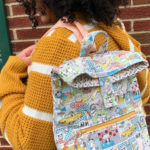
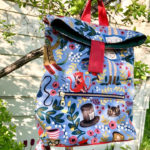
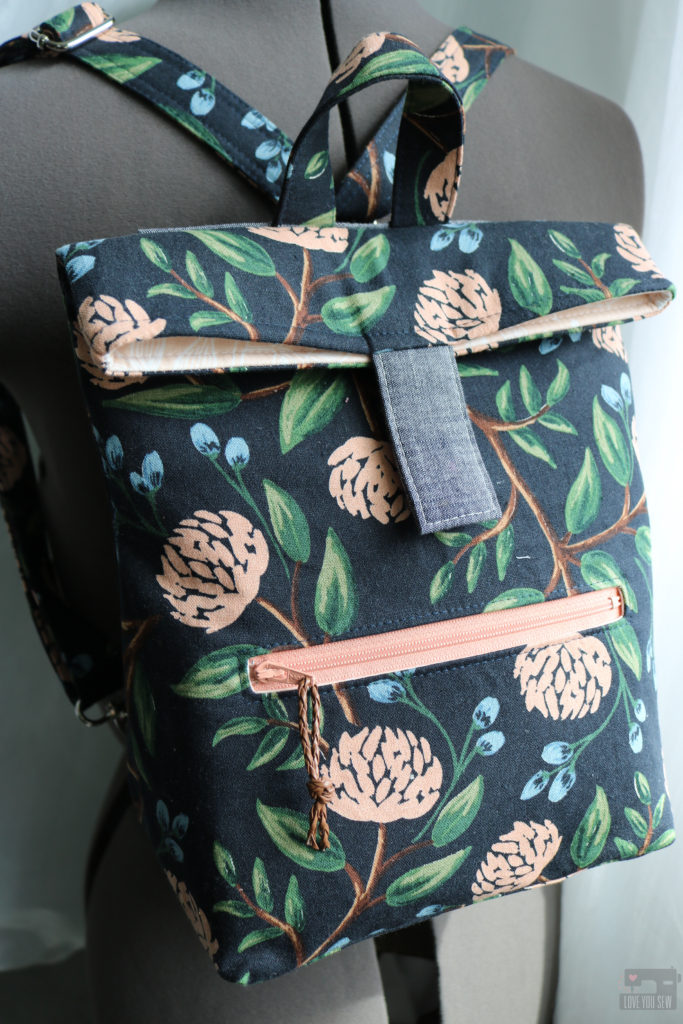
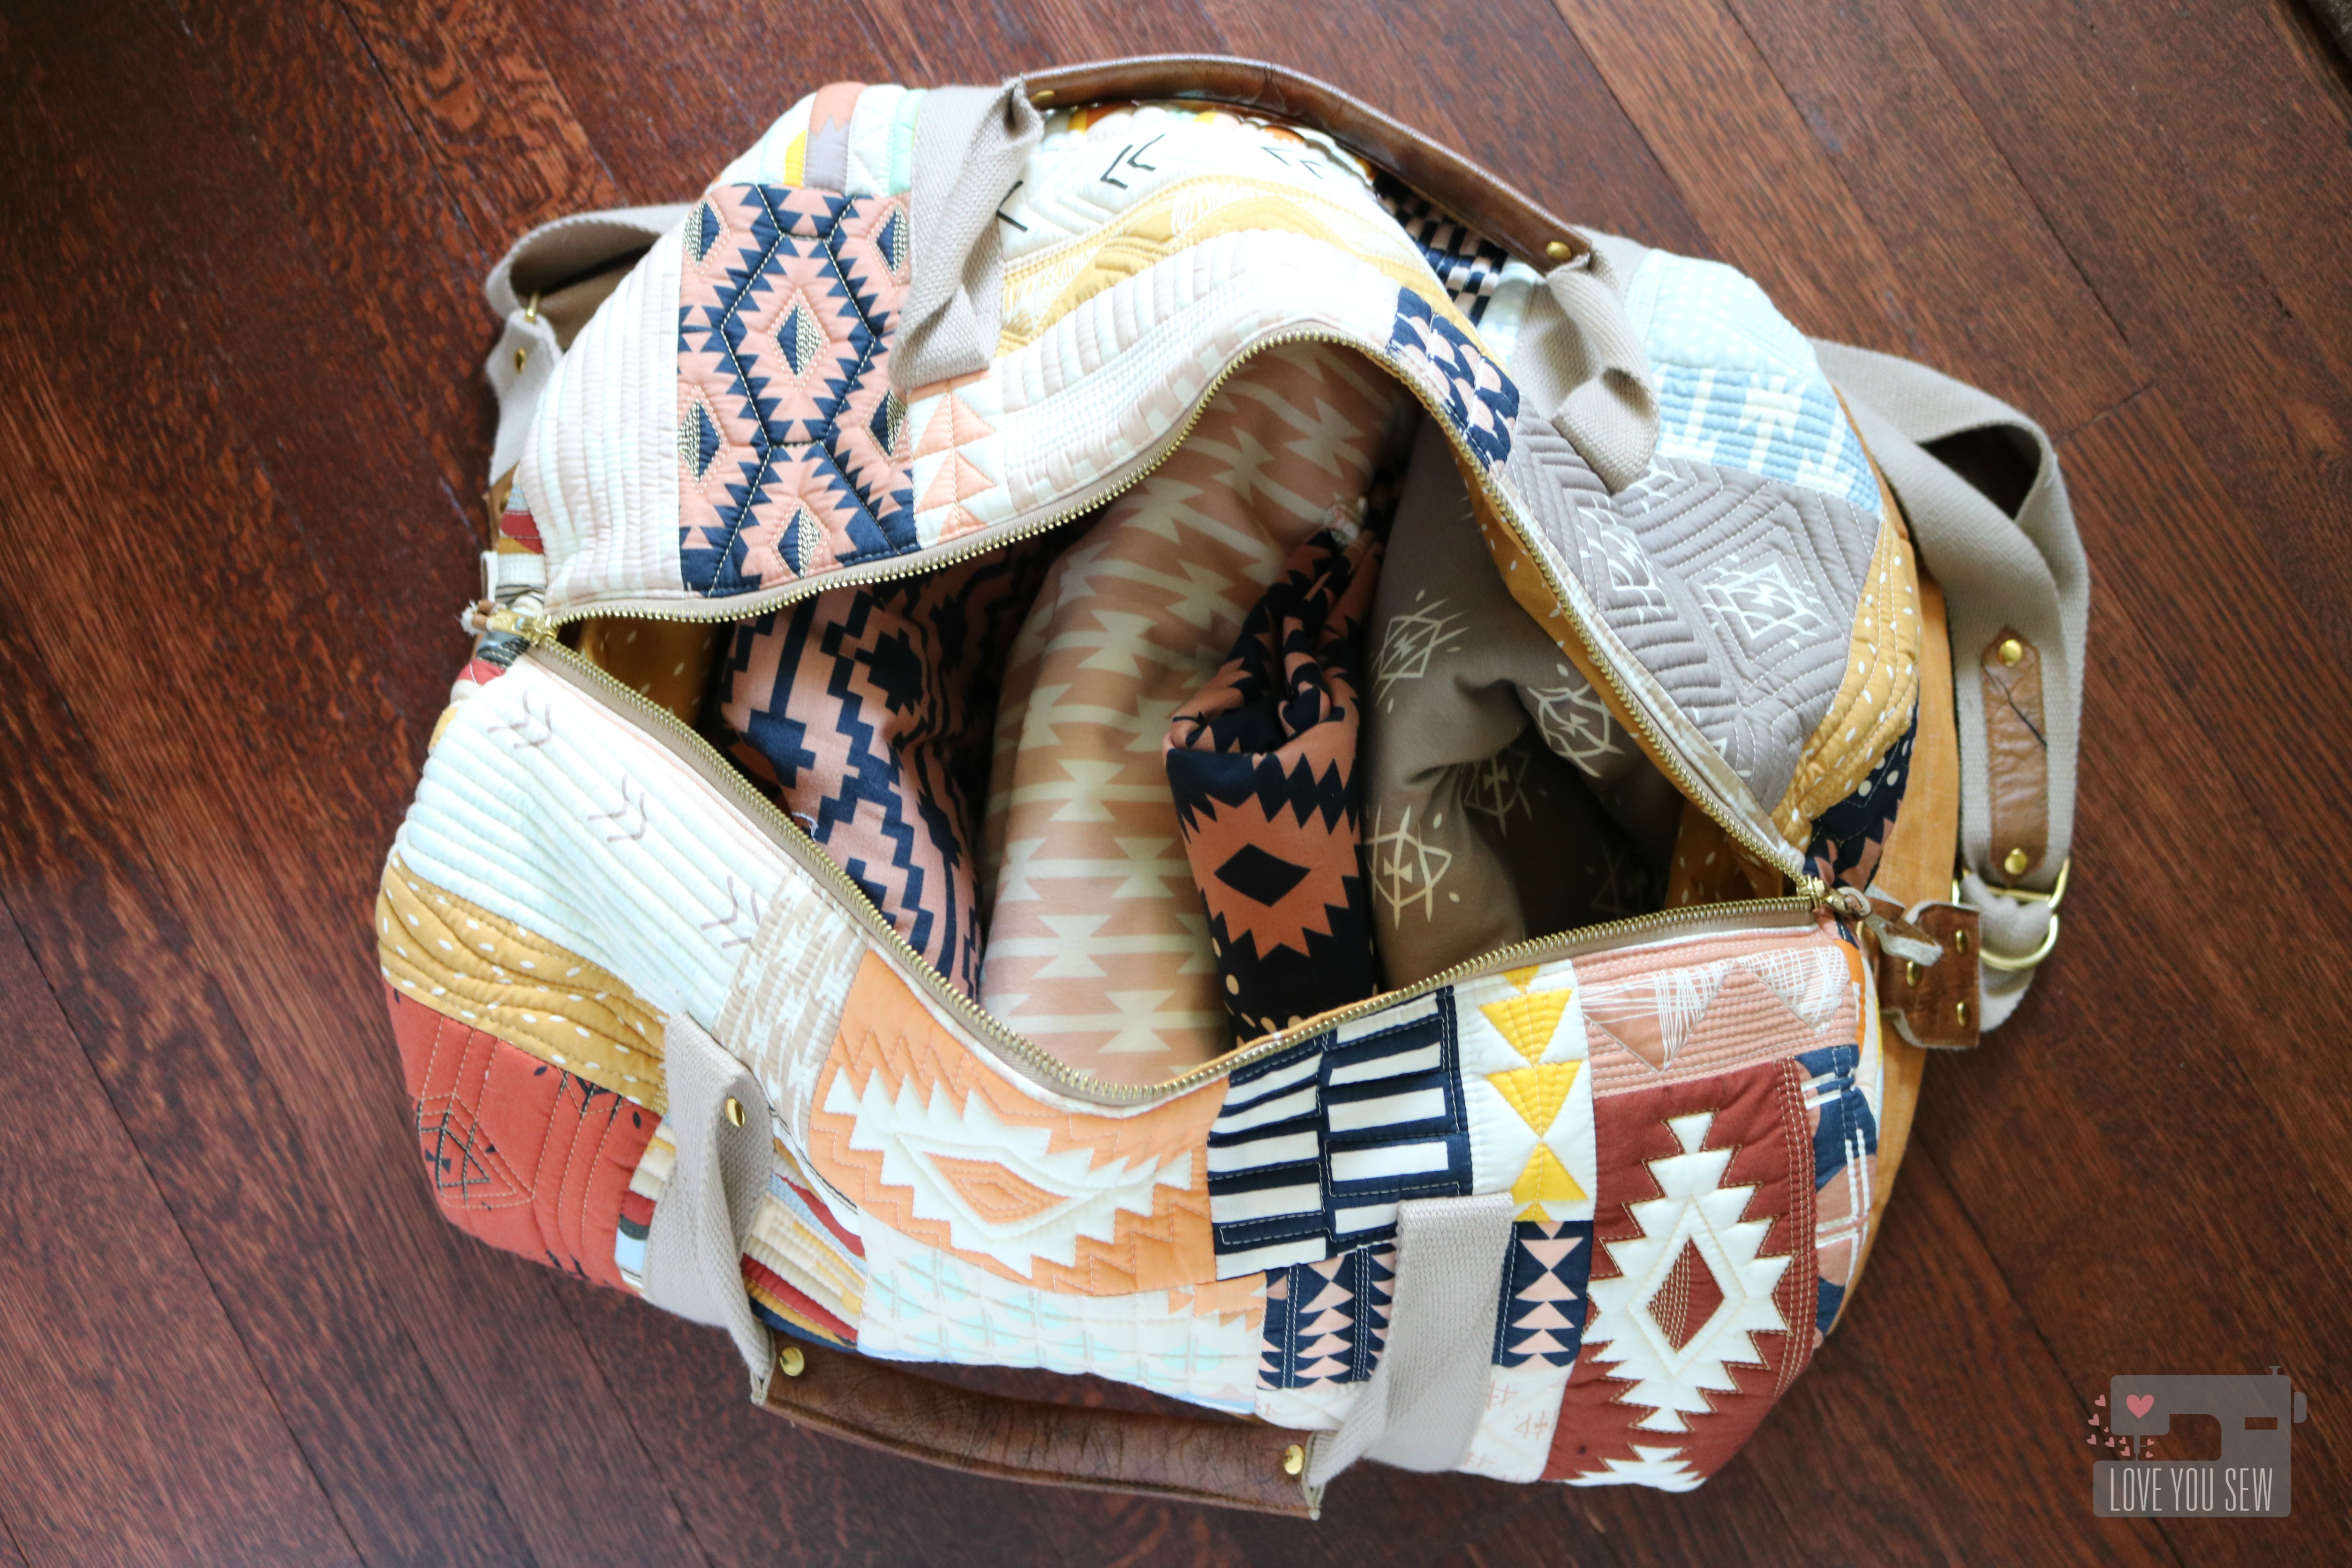
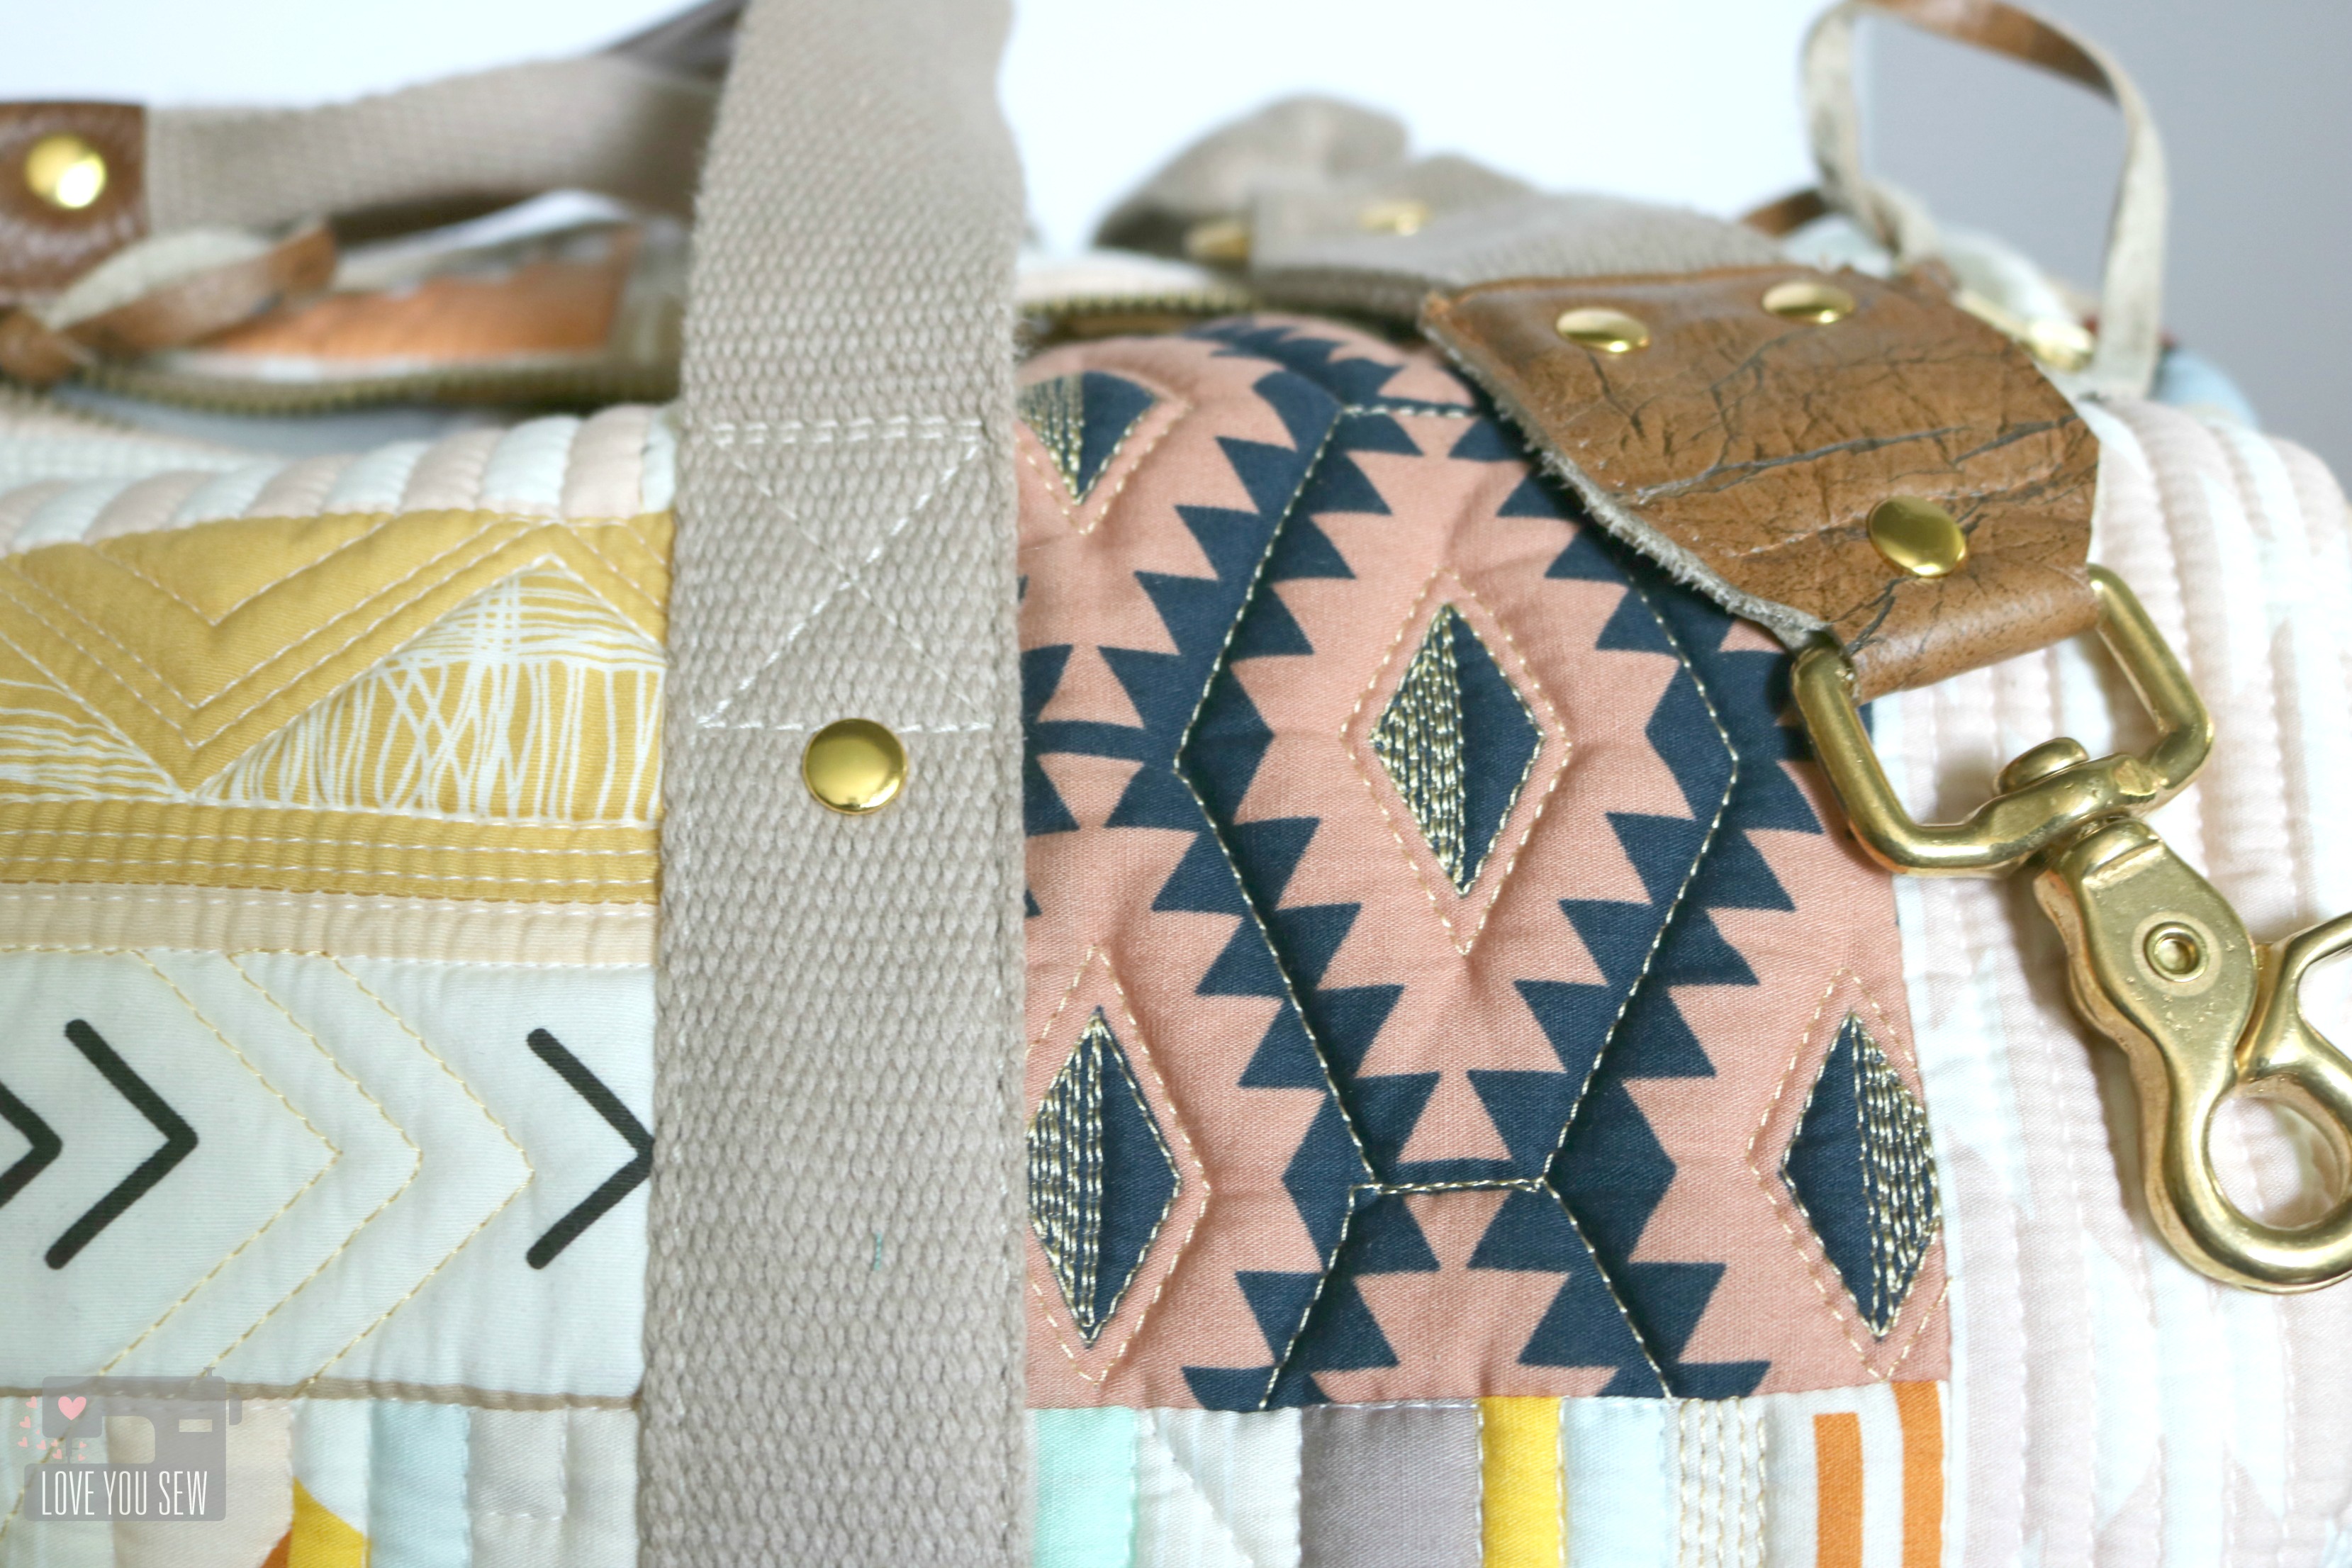
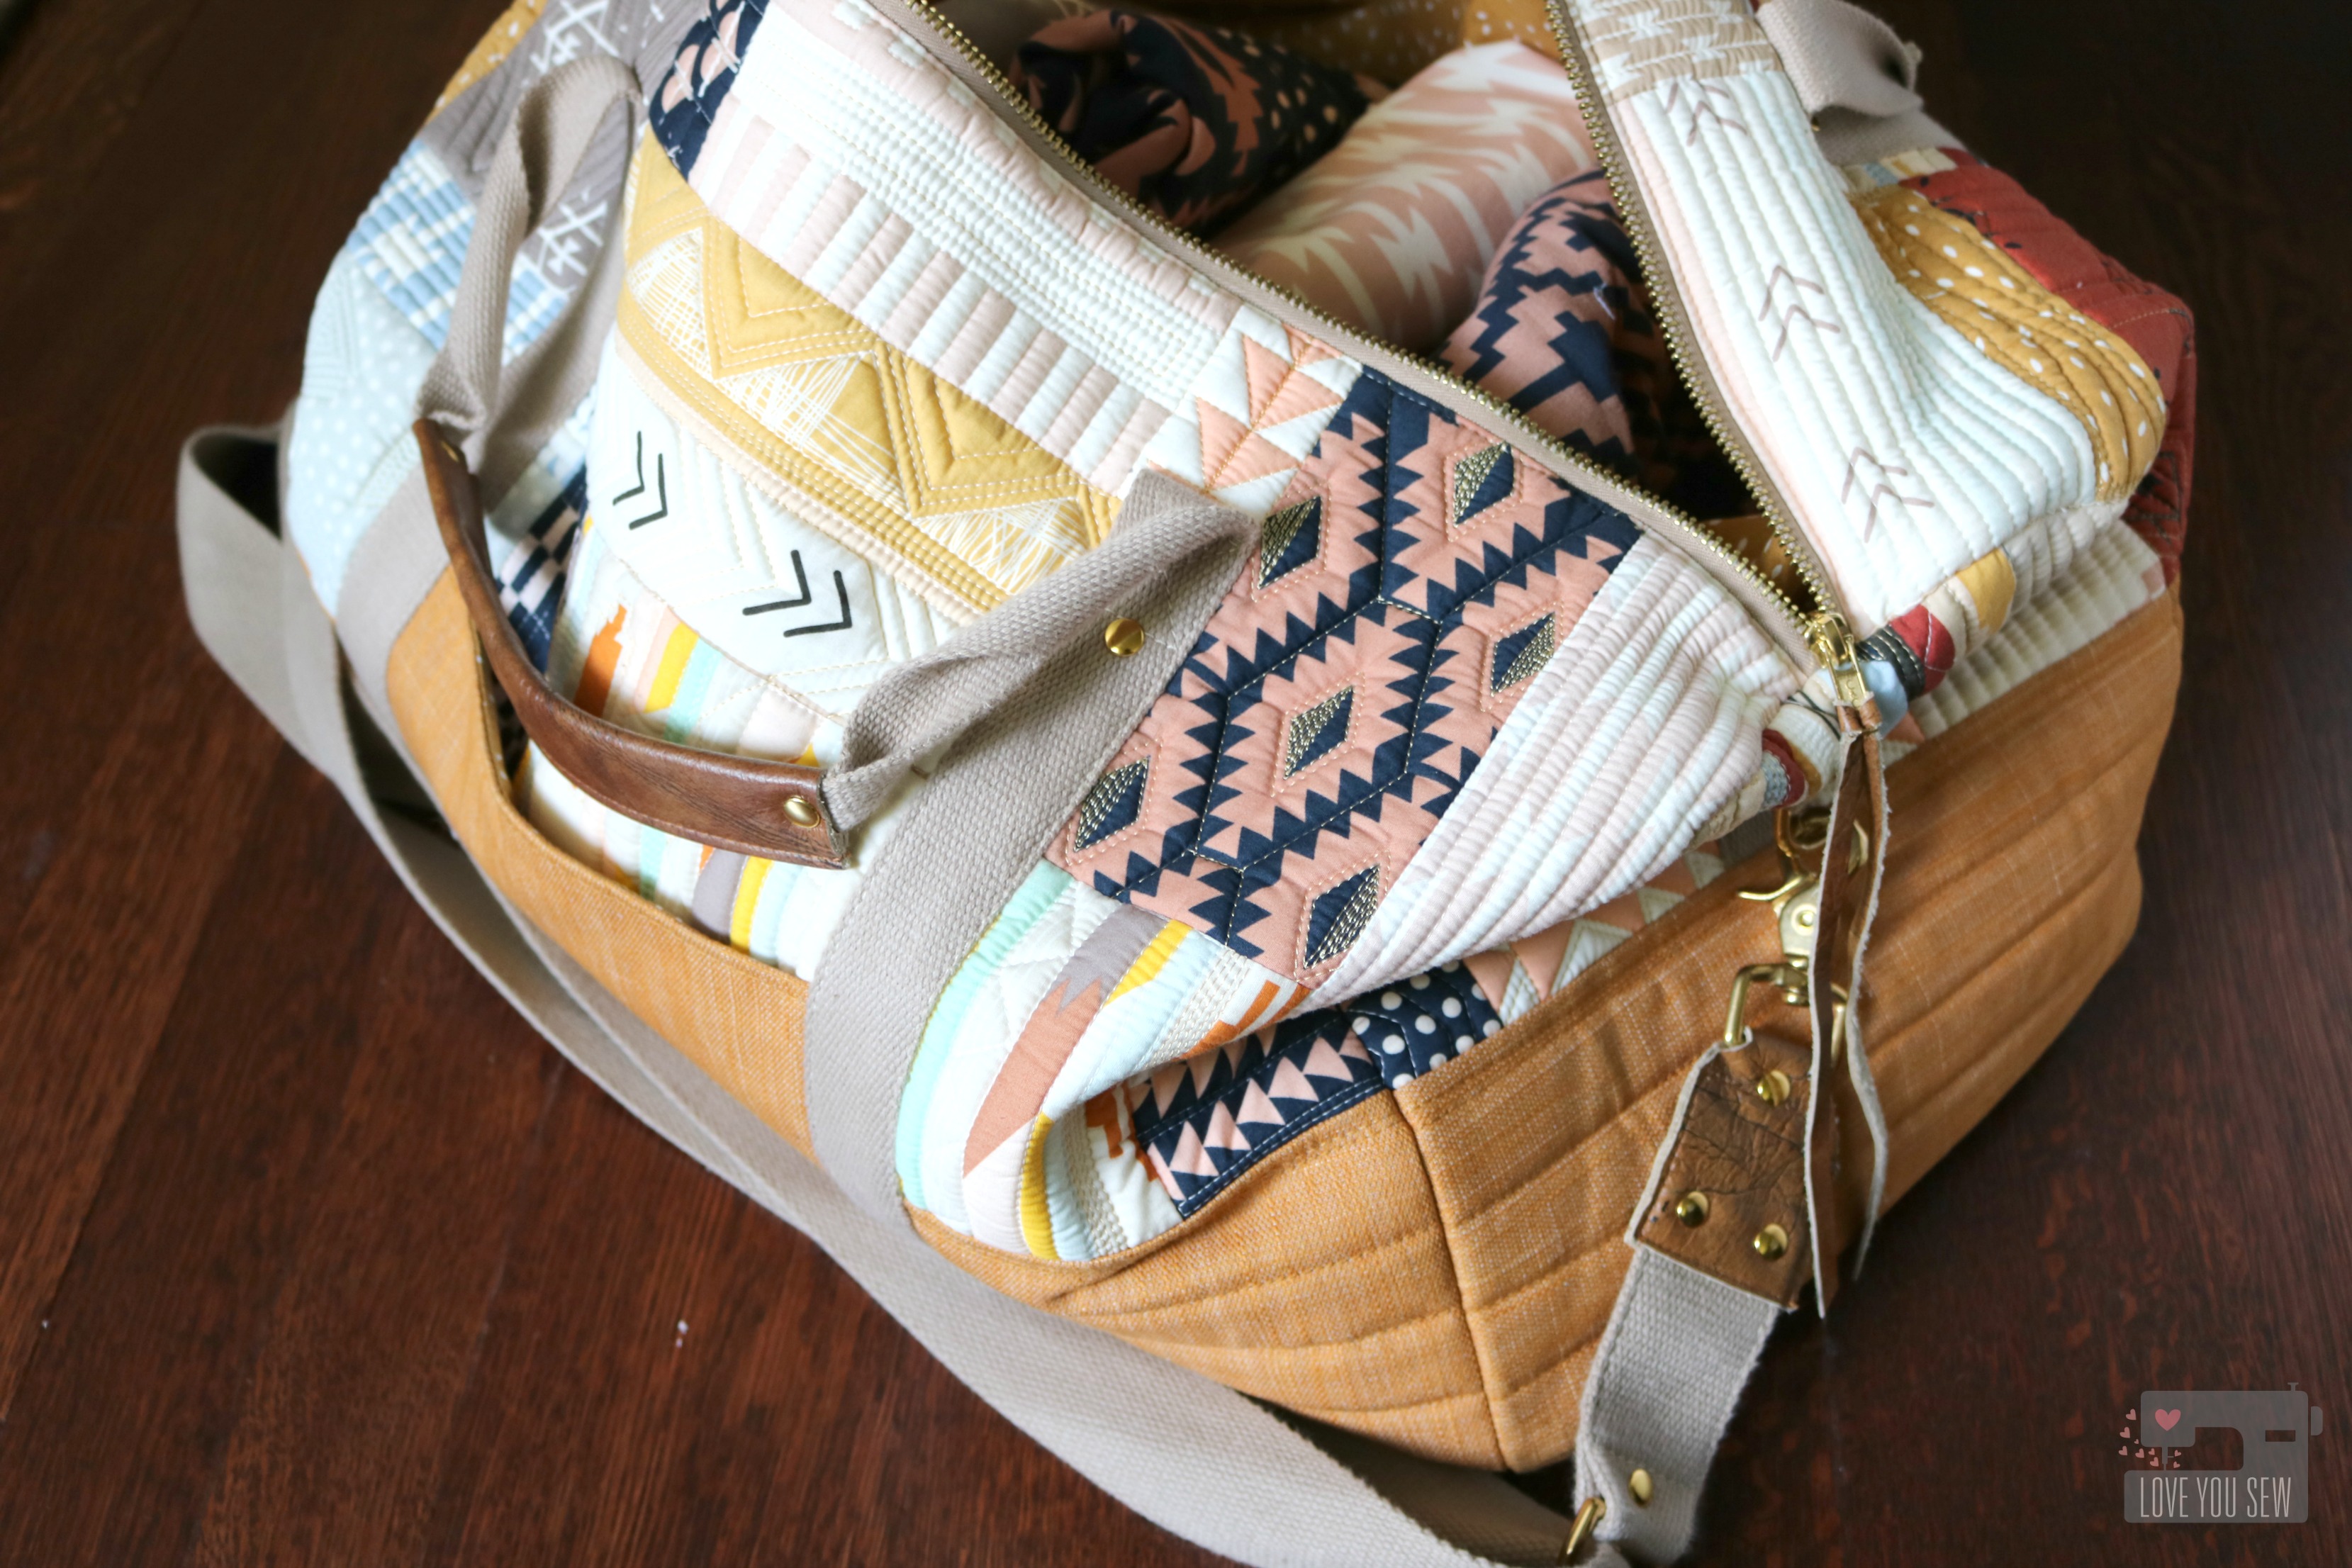
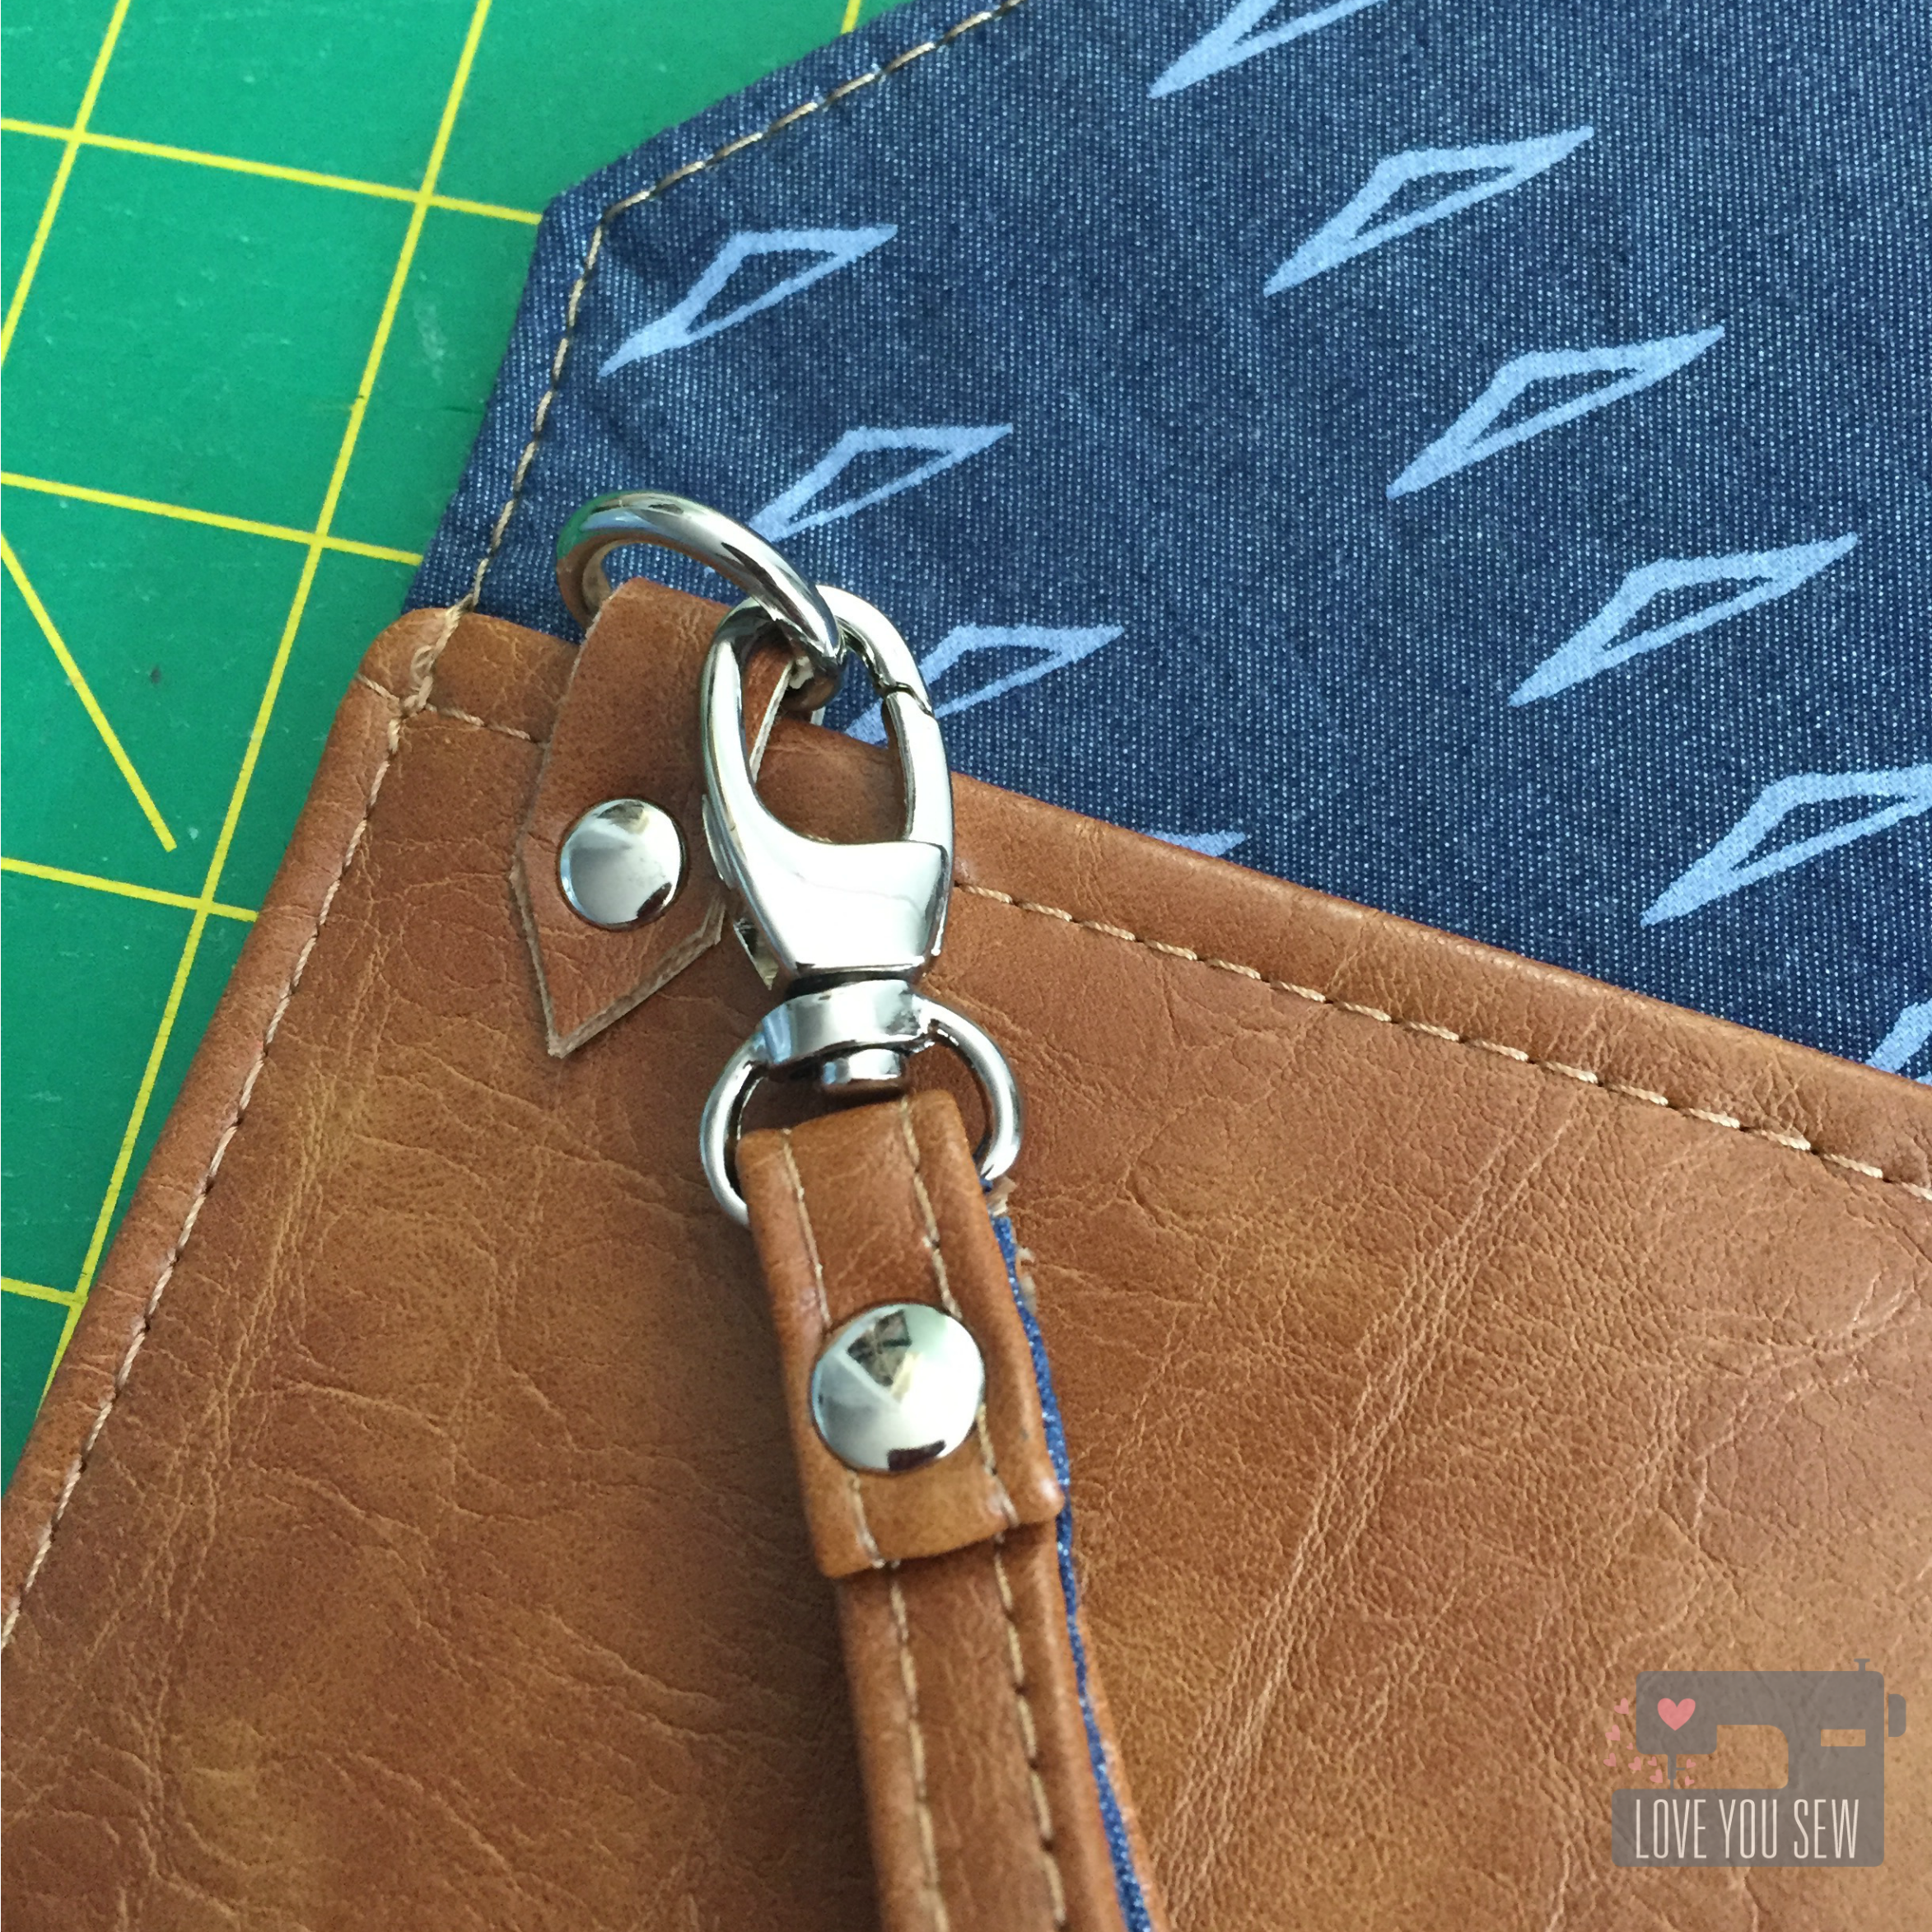
With a quick switch of the swivel clasps from the lower connectors up to the top ones, the backpack changes to a cross-body!  This allows the Abbey to be such a versatile bag and can change with you depending on the situation.  ‘Sometimes you just want your bag out of the way and sometimes you need all the access to it — I get it!  Additionally, the Abbey also has these features:

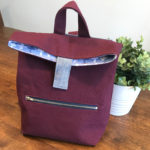
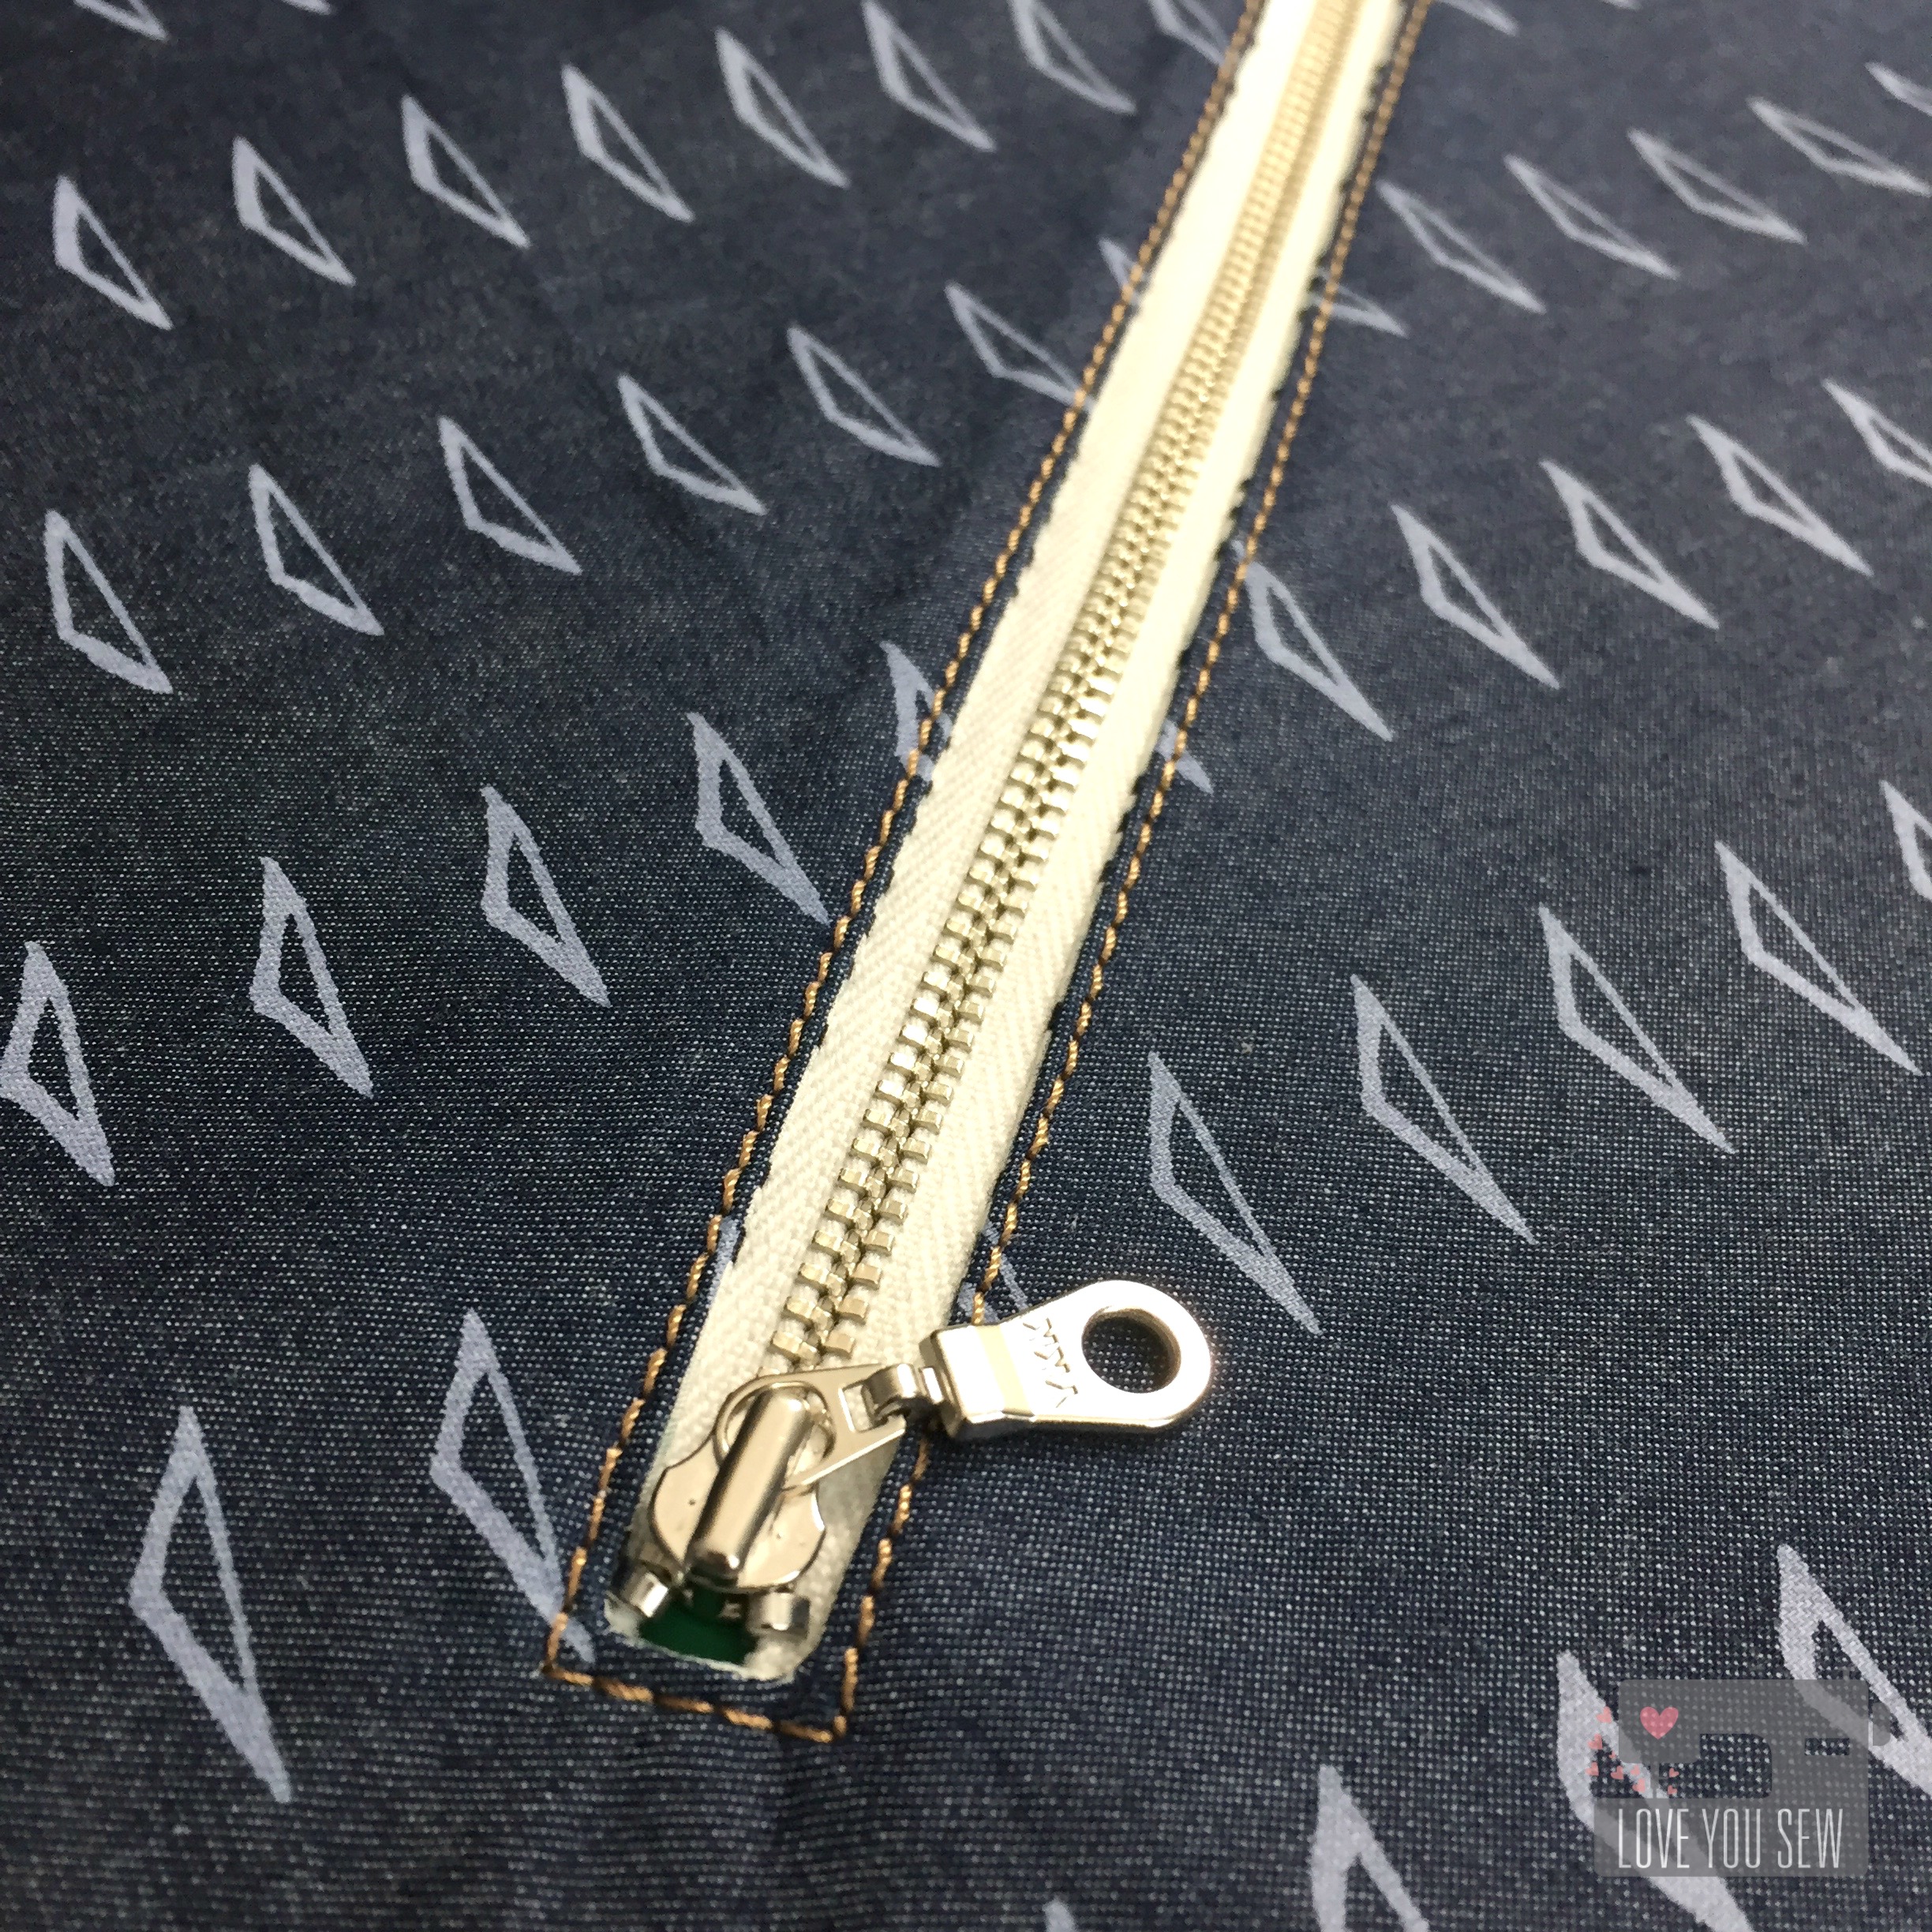
  • Convenient front zipper pocket for keys, chapstick or change
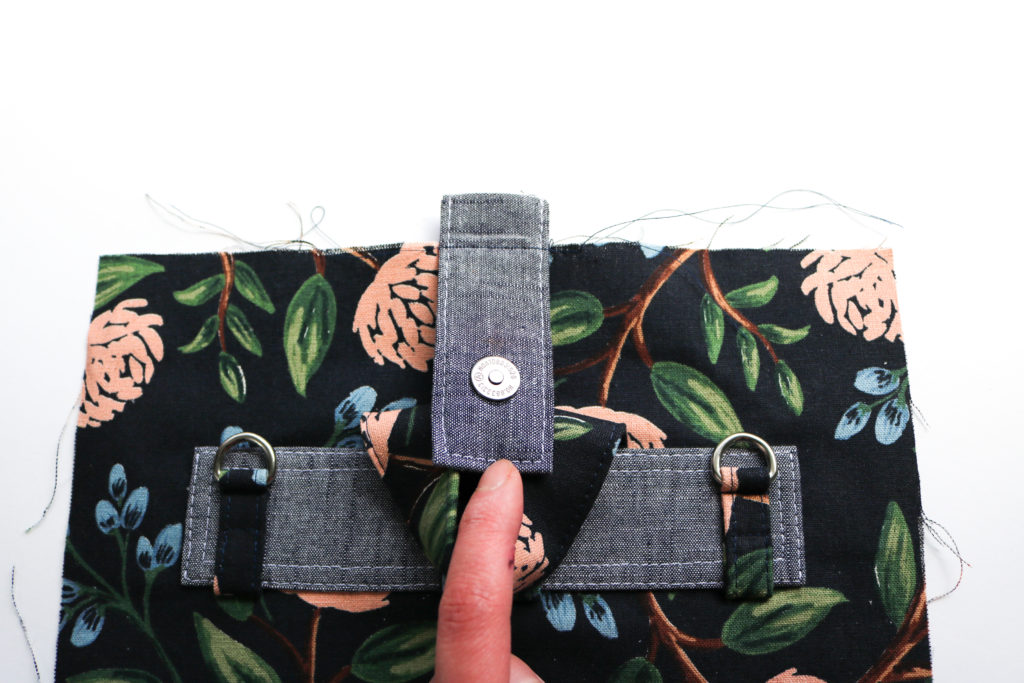
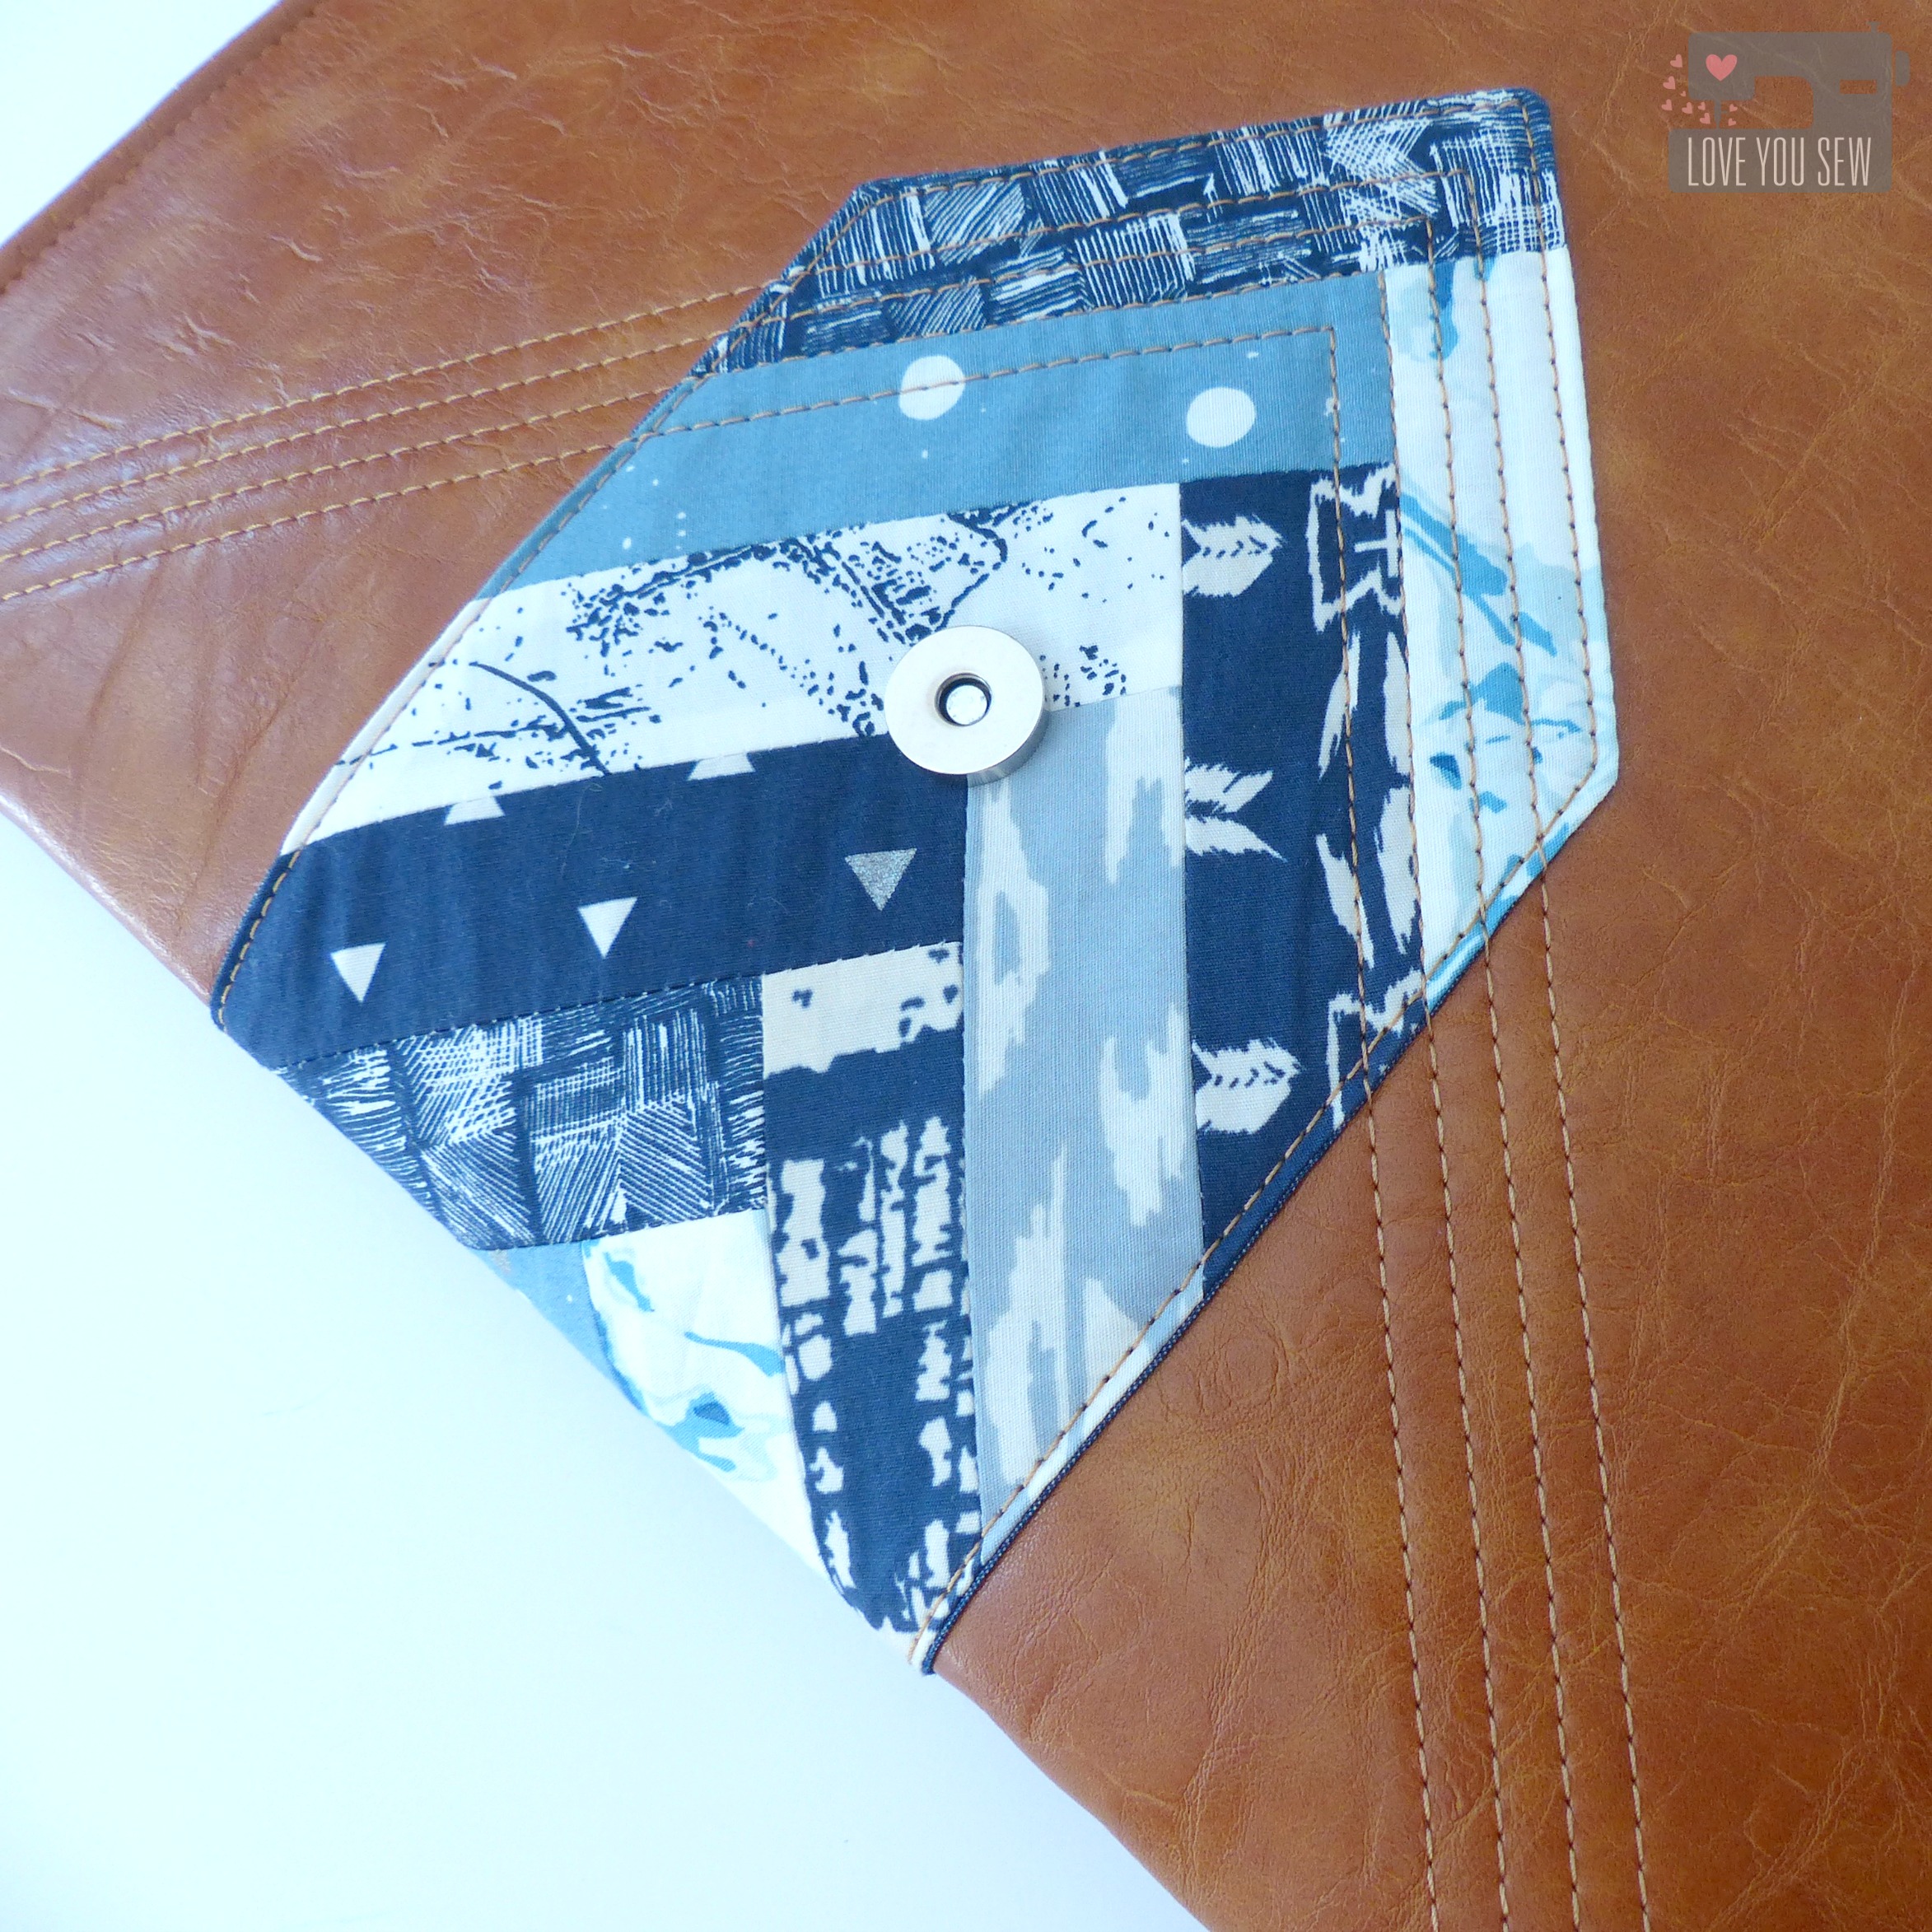
  • Magnetic snap tab closure for easy access to the main compartment
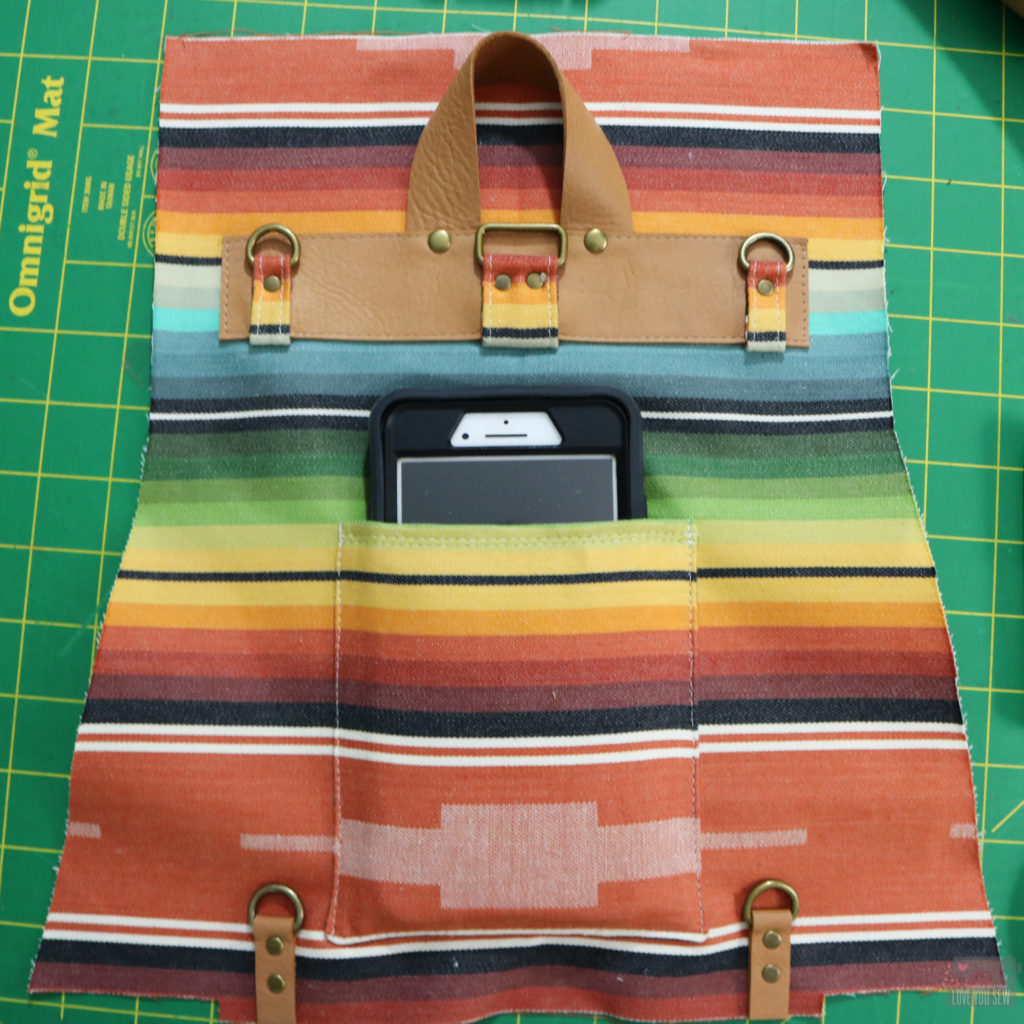
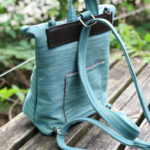
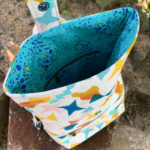
  • Back slip pocket – perfect for your phone, boarding passes or concert tickets
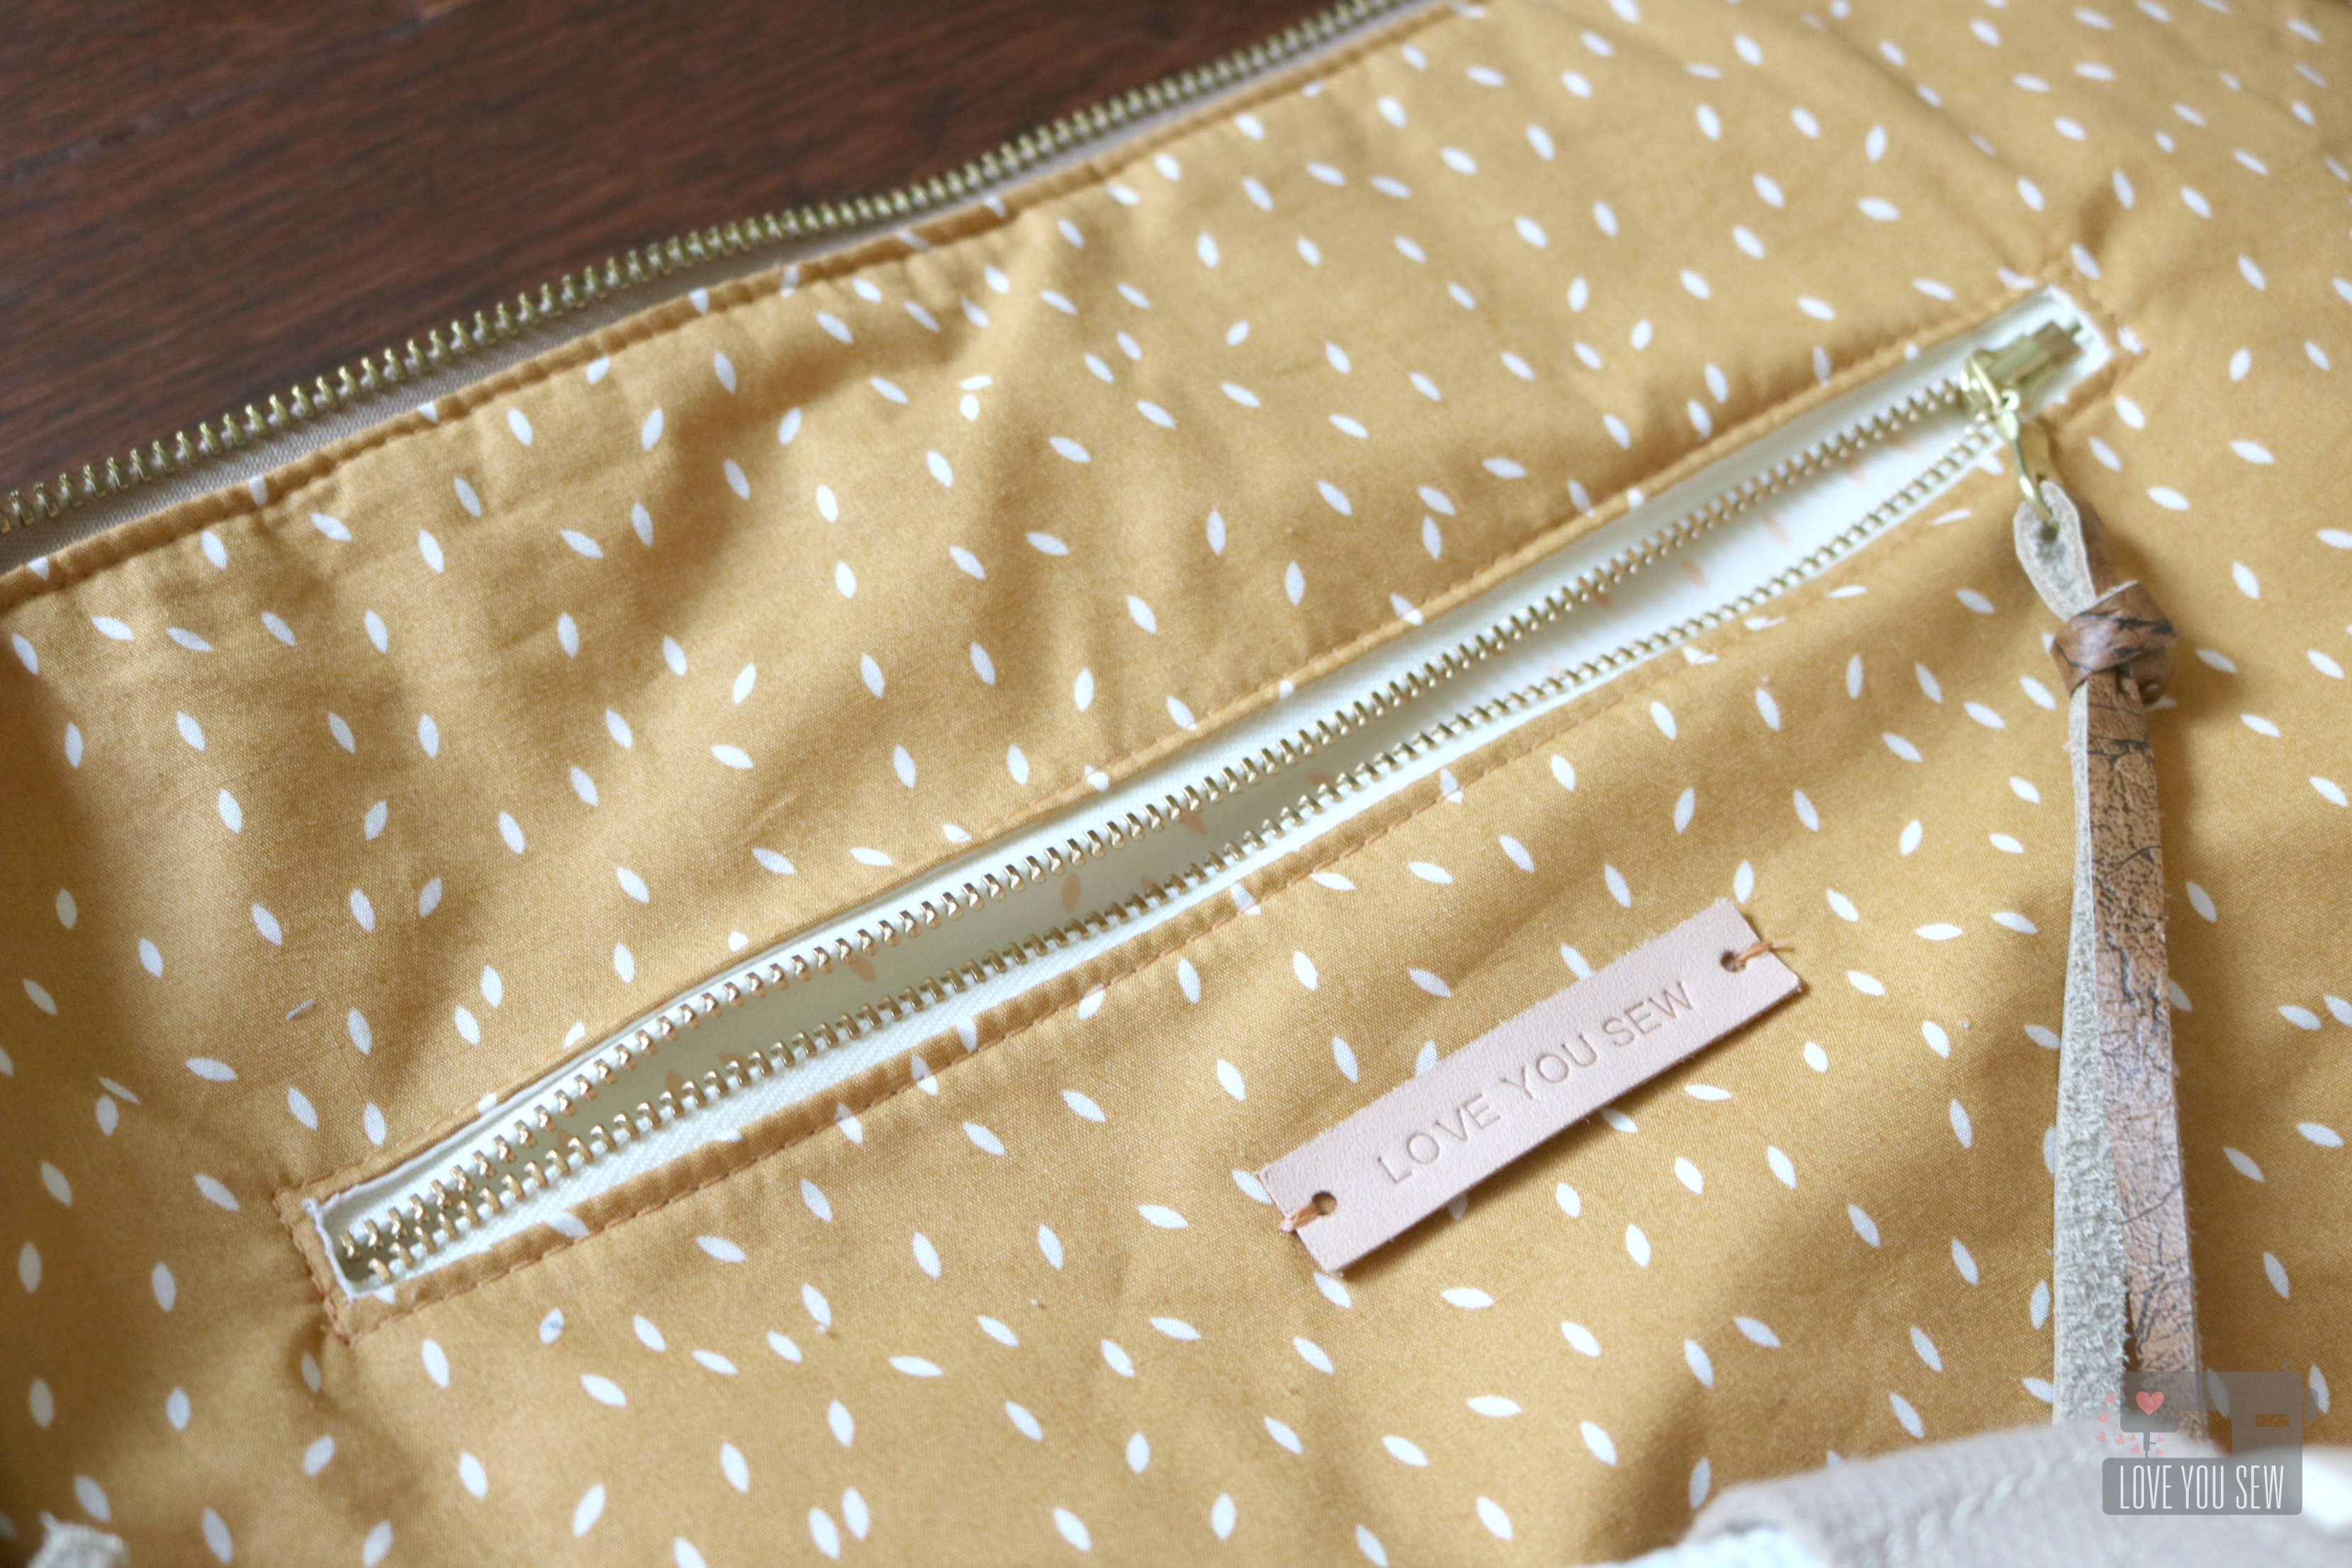
  • Interior zipper pocket to keep valuables safe
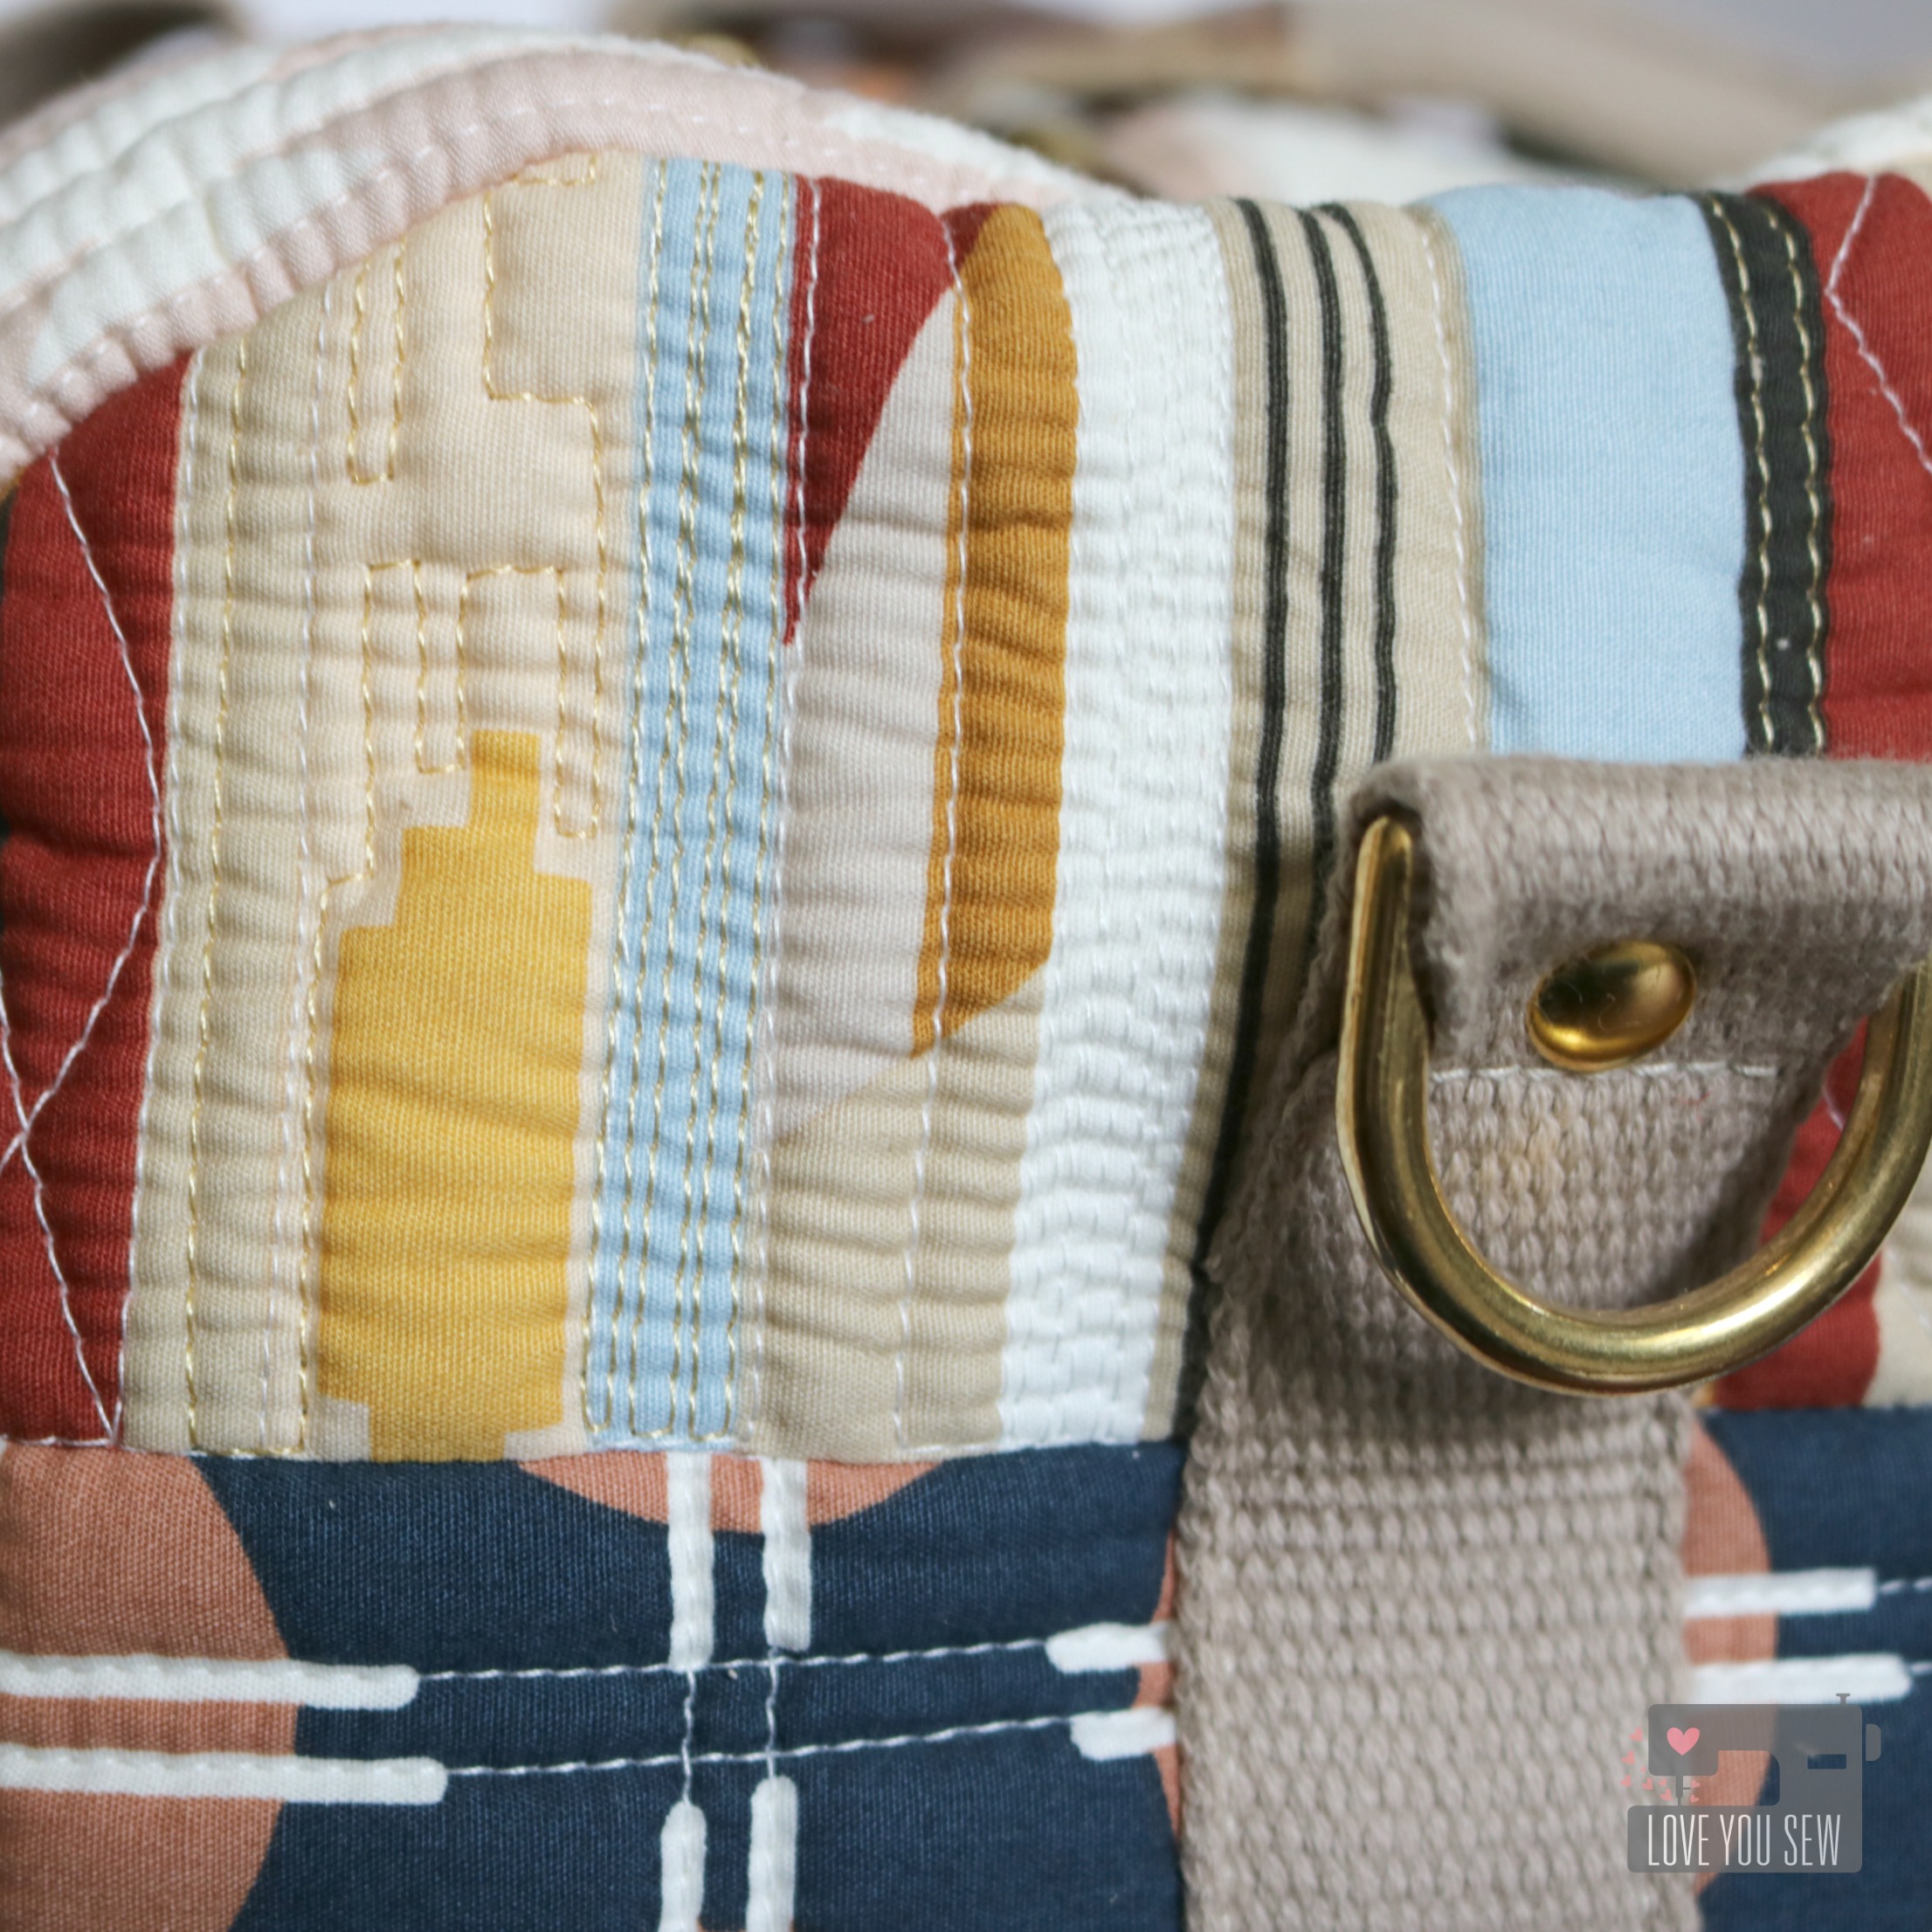
  • A generously sized adjustable strap which can be used for the backpack or crossbody

As a bag-maker, you will love having this unique design which you can (of course) keep, but also gift to friends and family, both young and mature.  I’m thinking some mommy and me versions would be so cute!  You will also learn some great techniques such as:

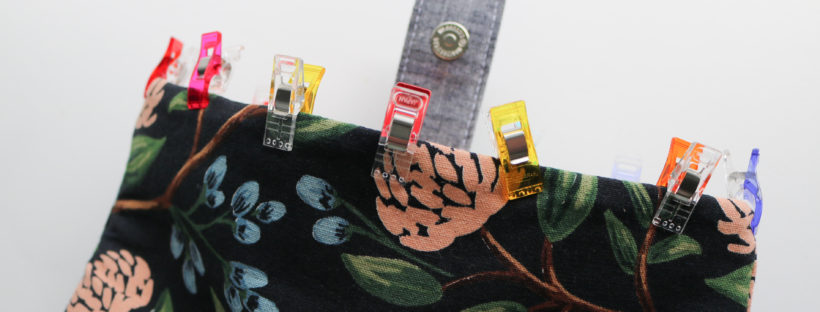
  • Installing magnetic snaps (with my tips to prevent the prongs from wearing through your fabric!)
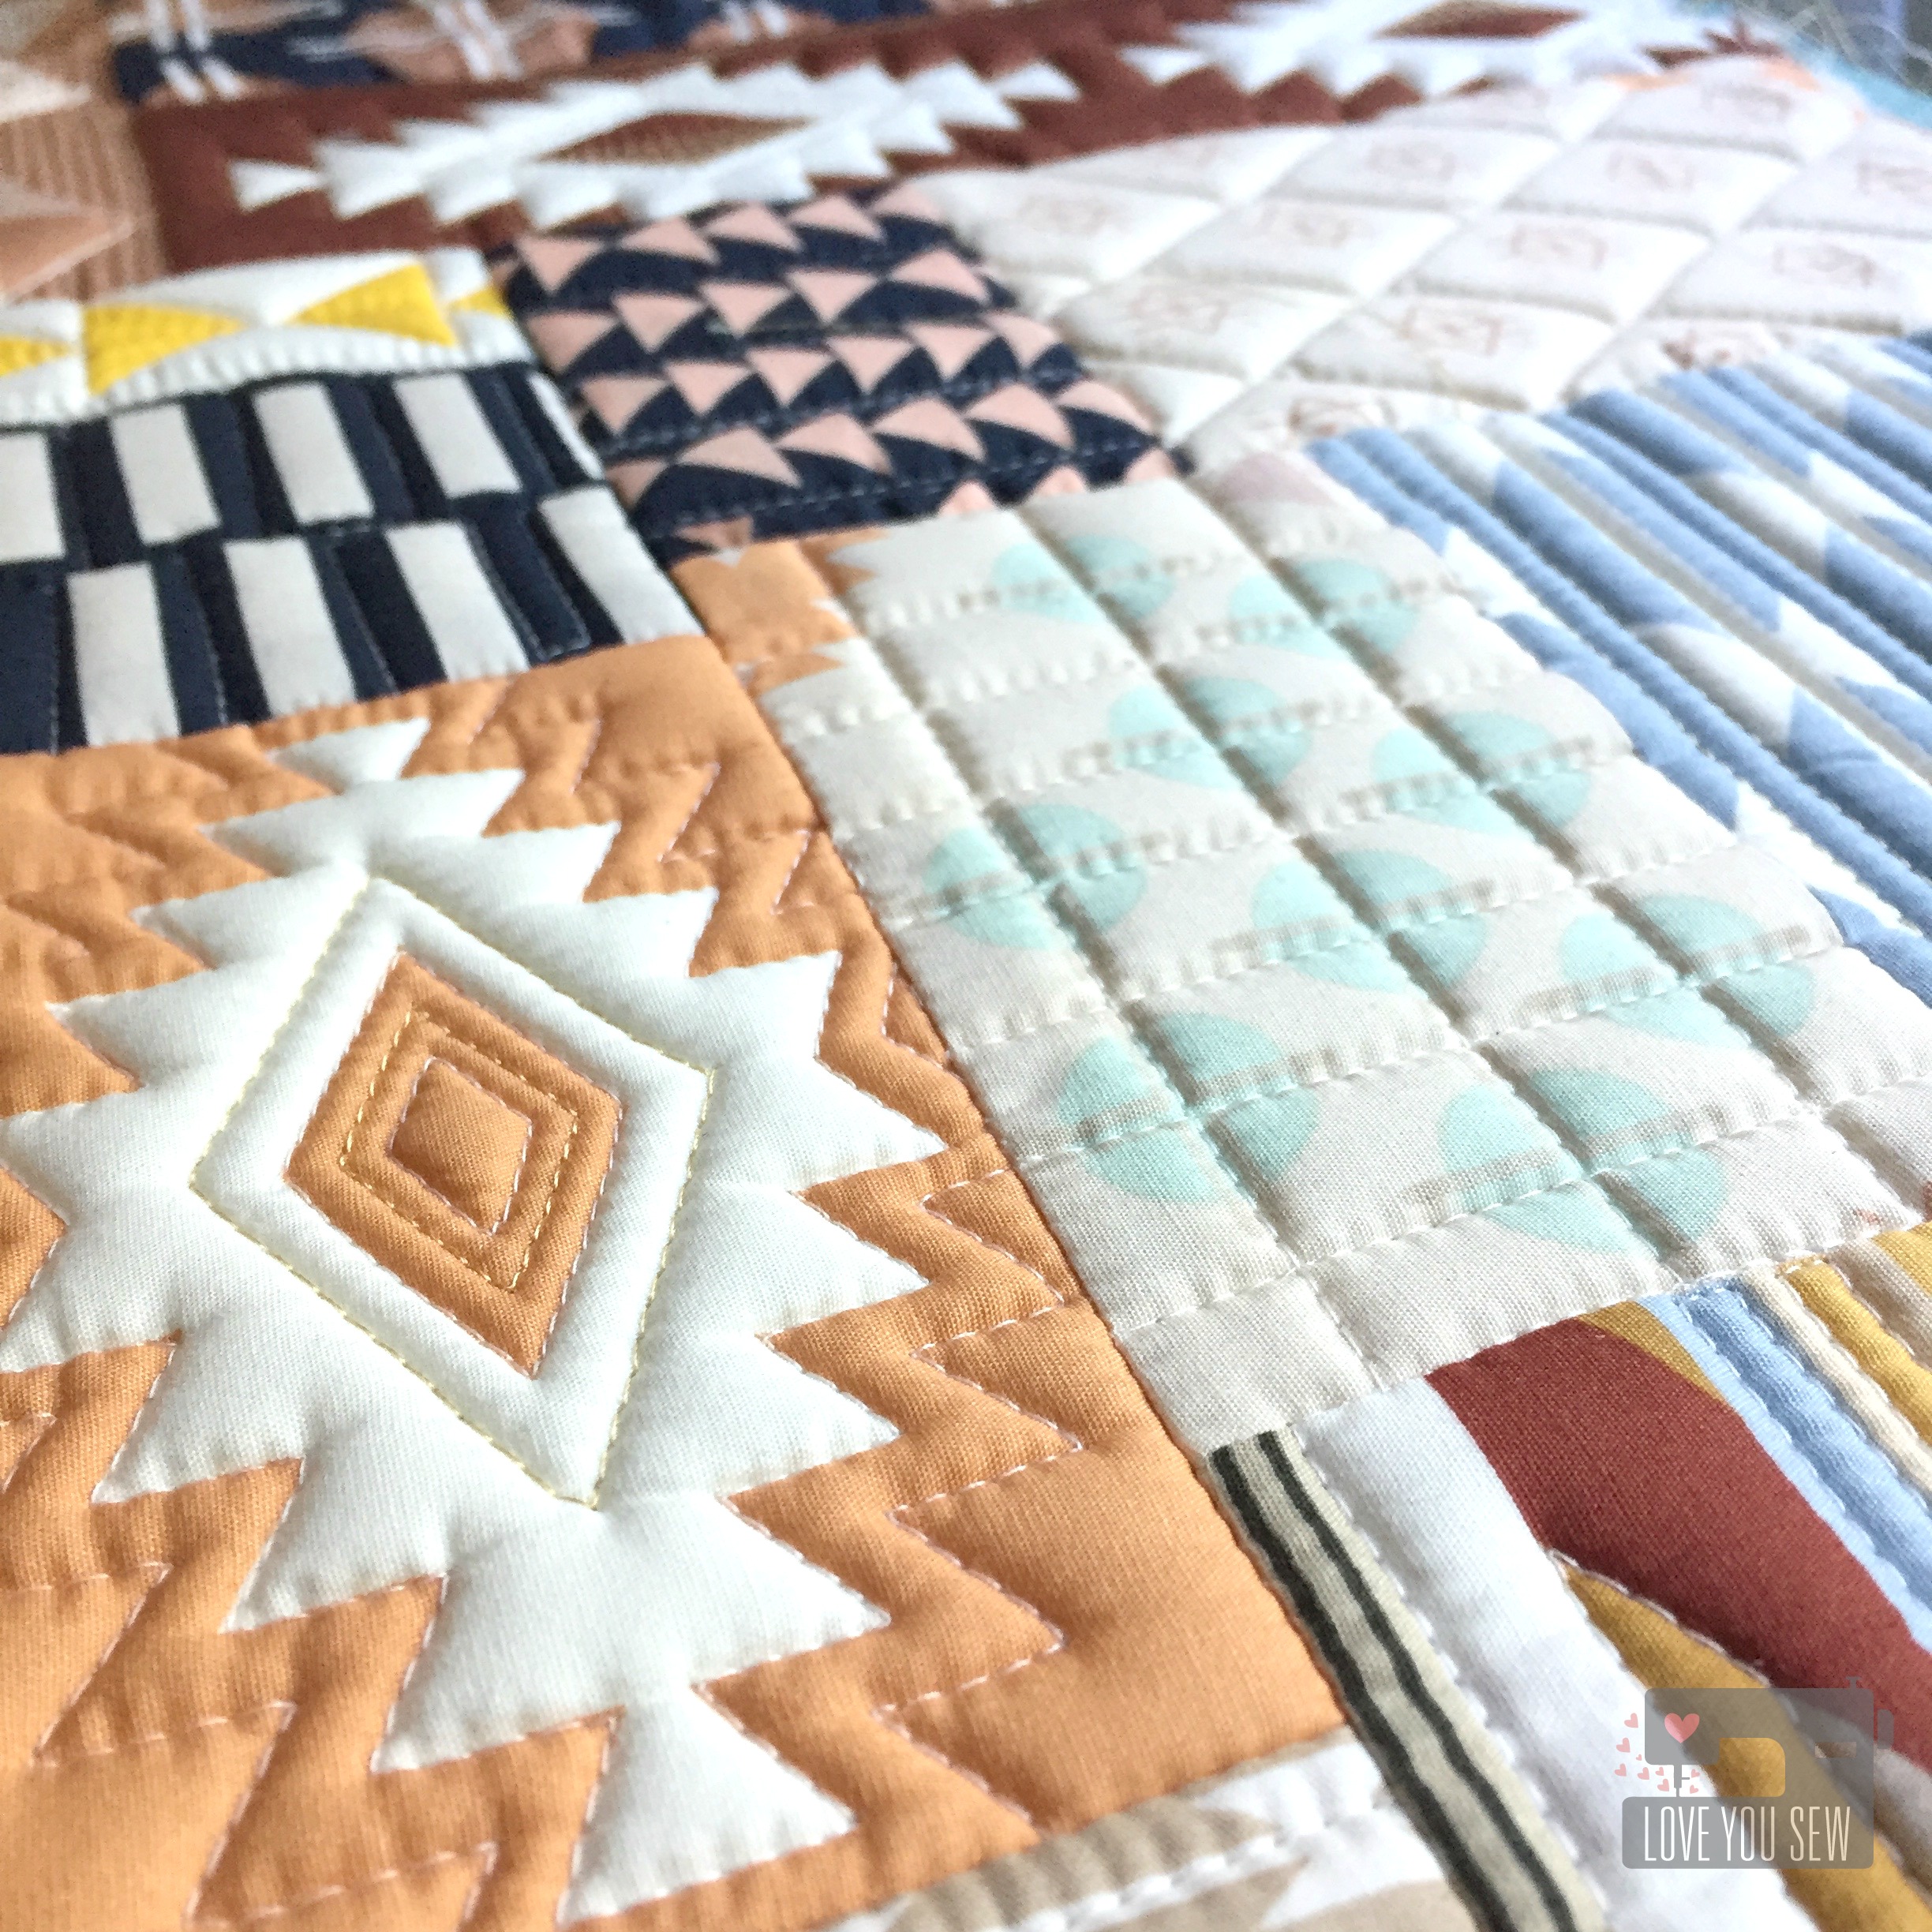
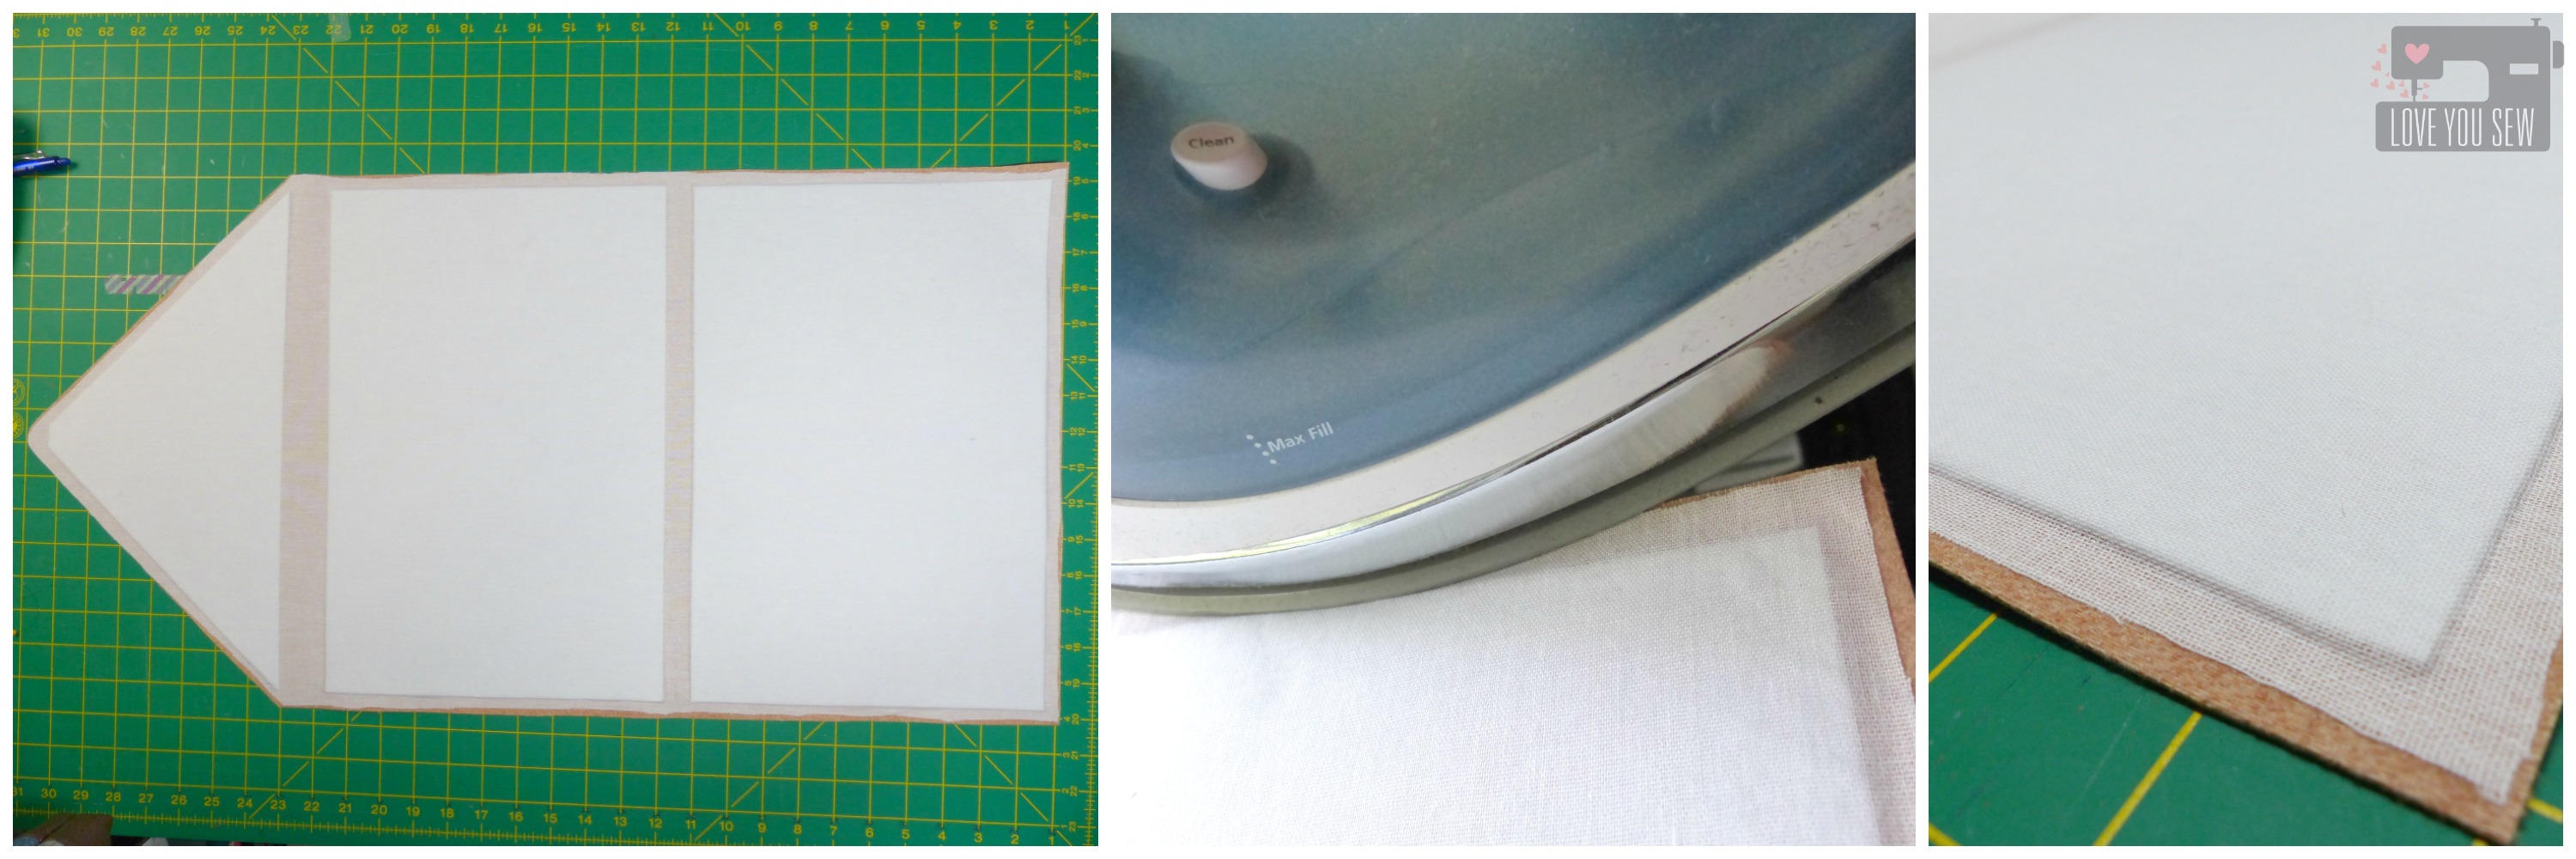
  • Using three different types of interfacing for a structured, yet pliable bag
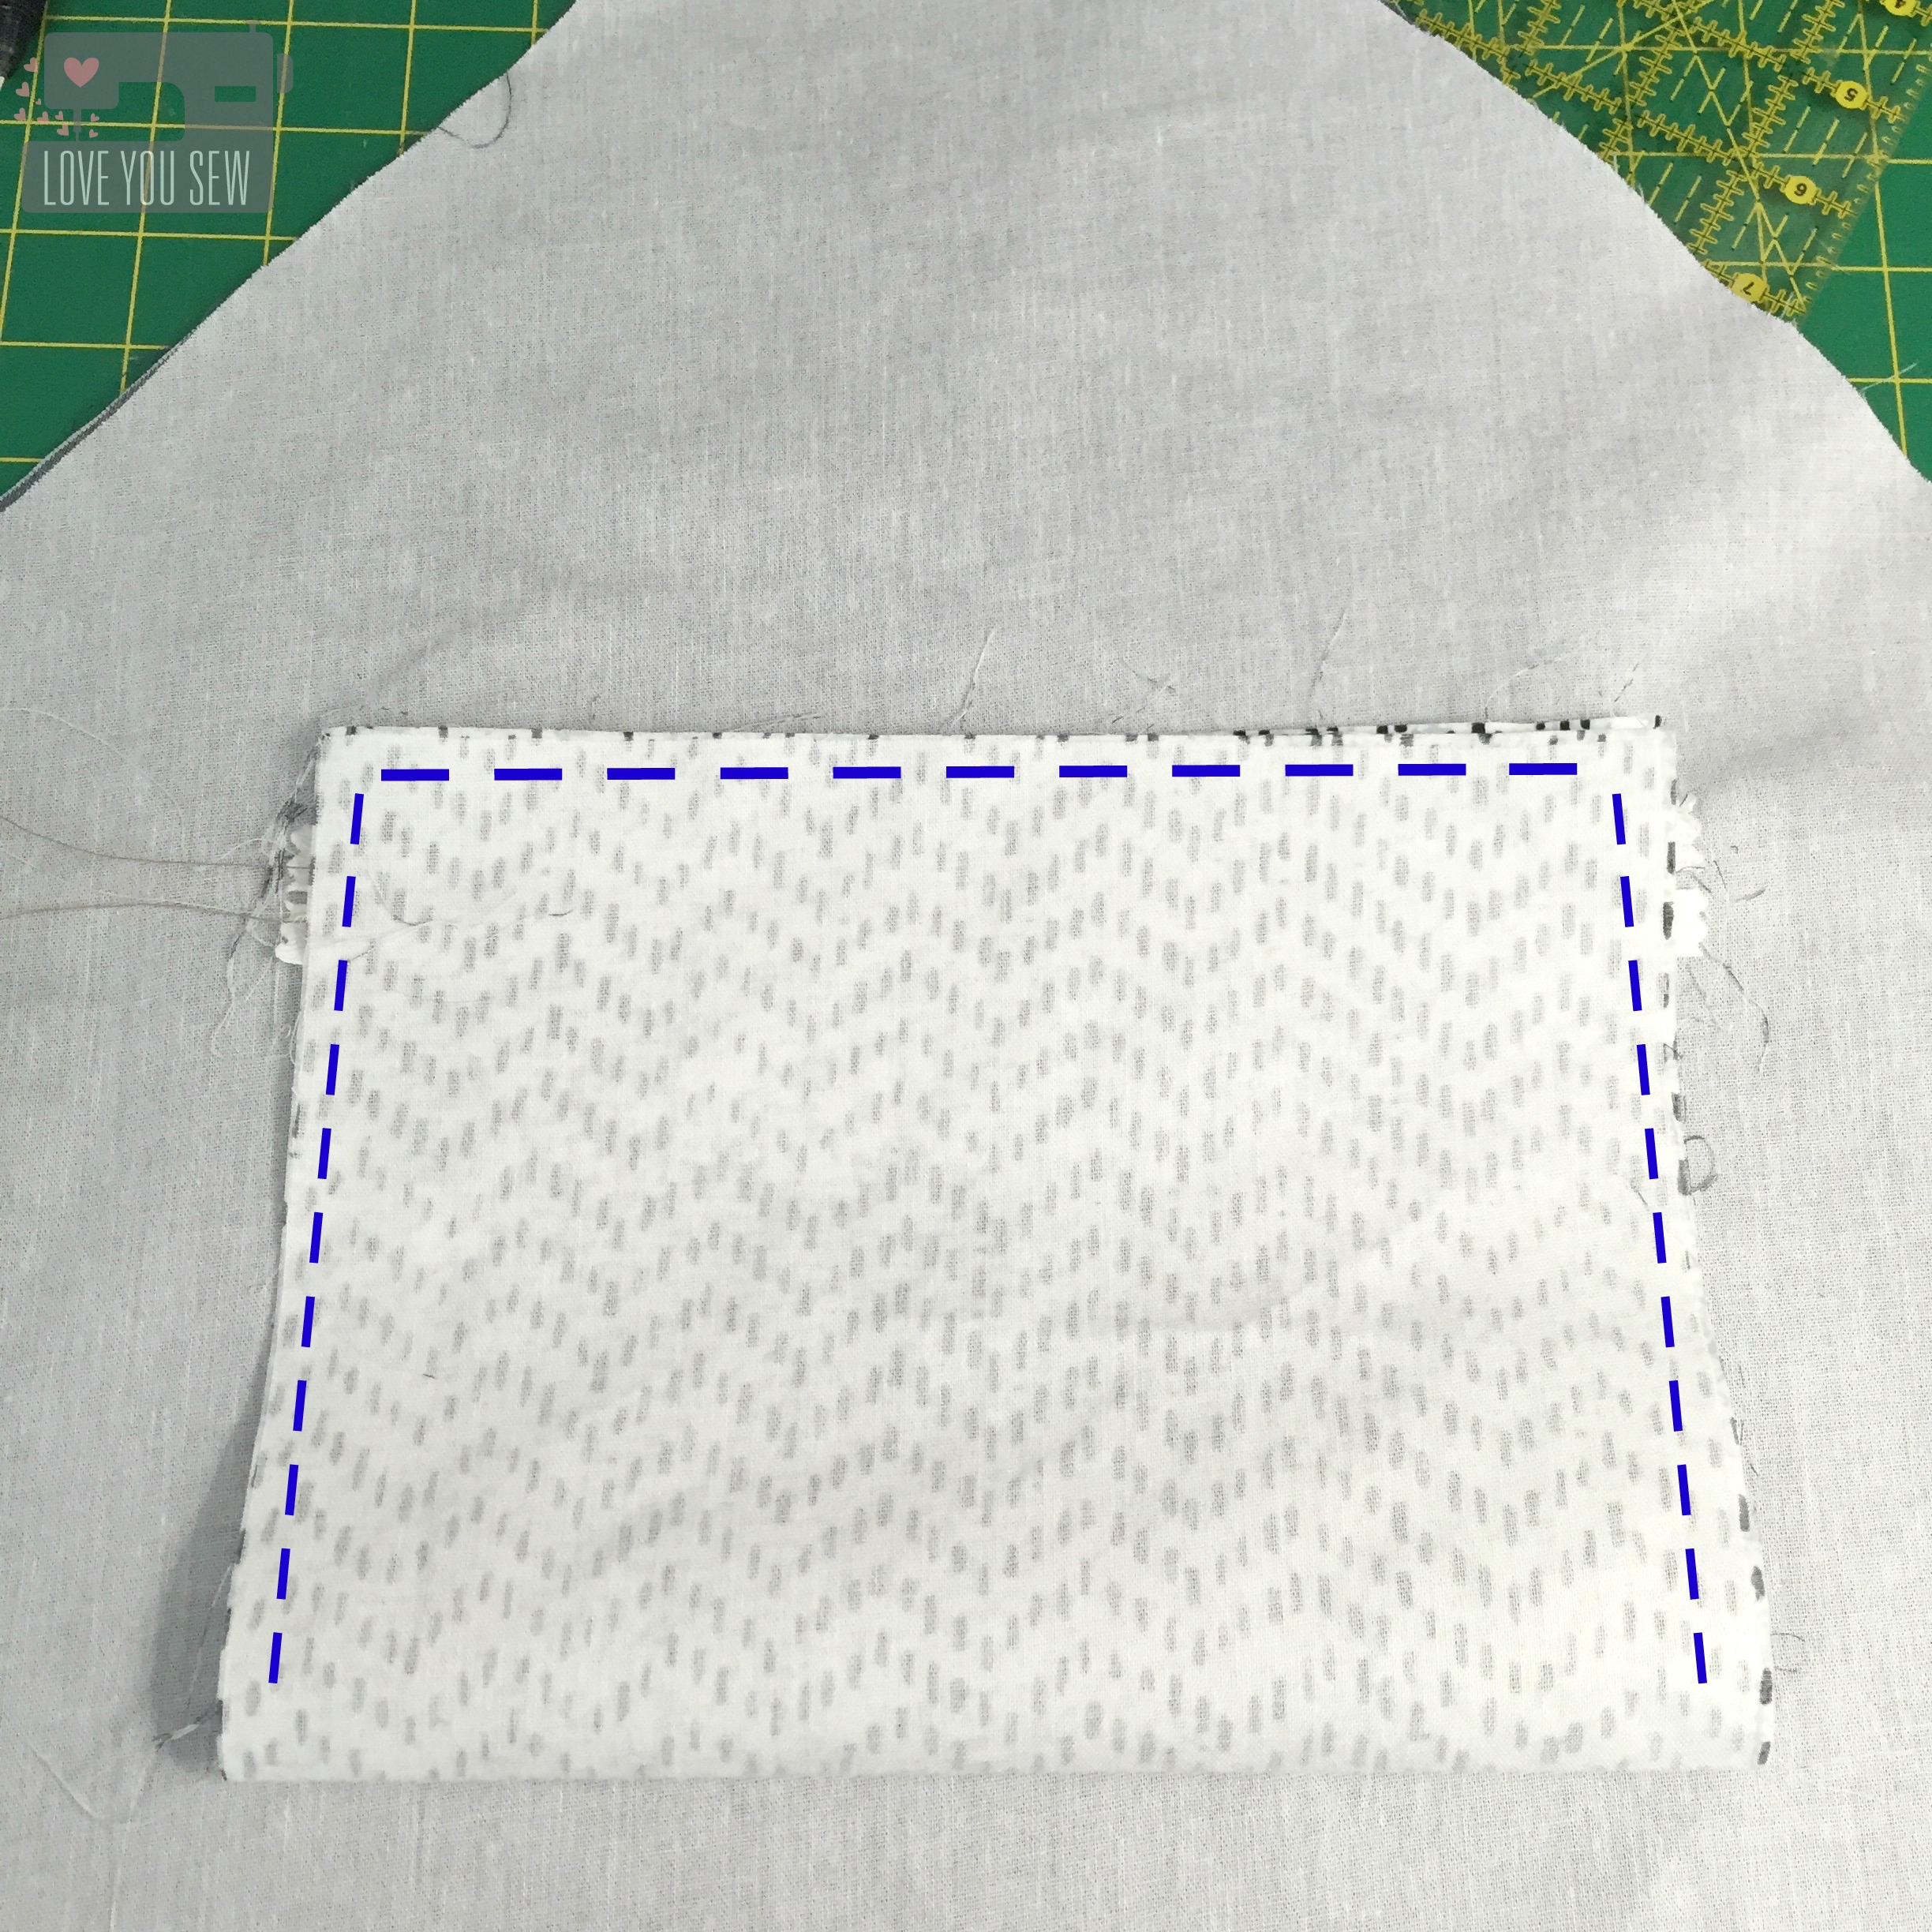
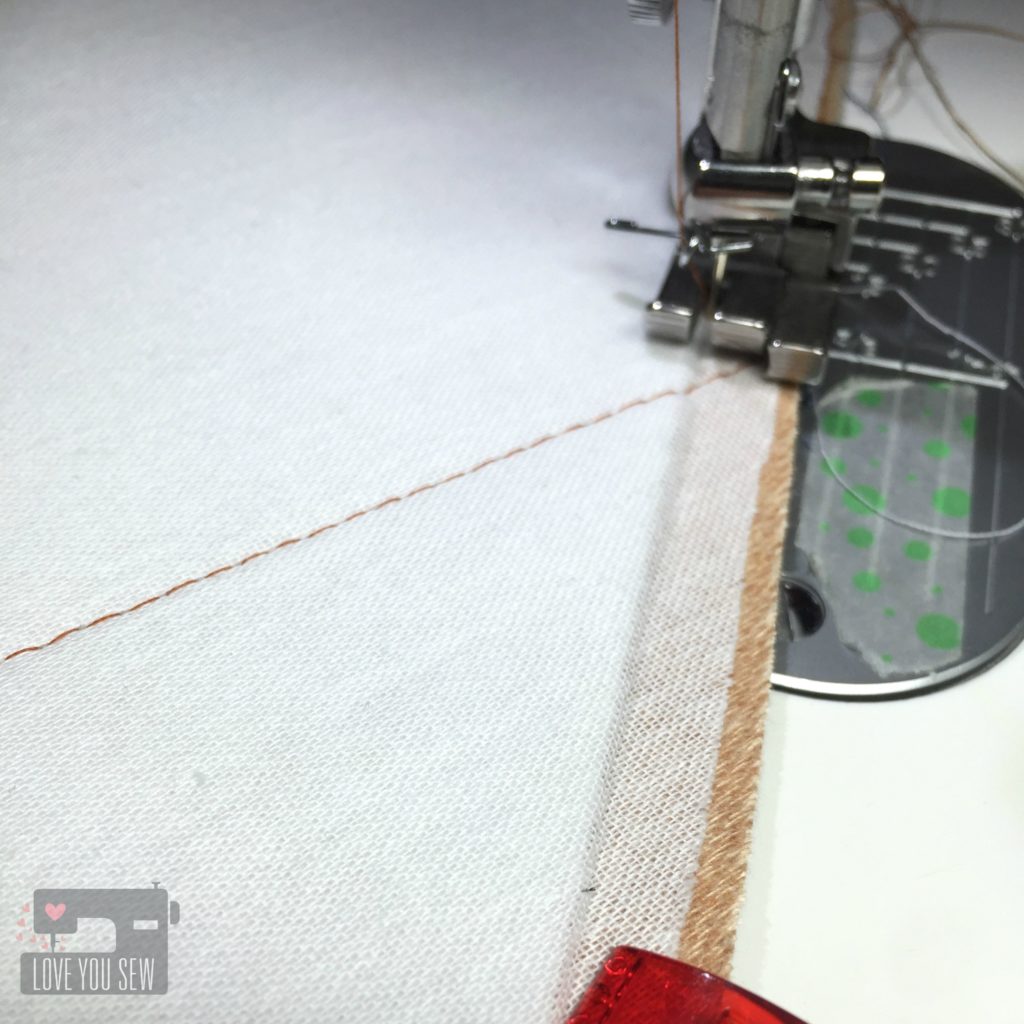
  • Creating zipper welt pockets
  • Making an adjustable strap
  • Construction style which leaves a clean and seamless base.
  • And I’m already working on some hacks to leave you with more options and ways to customize each bag you make 😉

Sonata Abbey Backpack

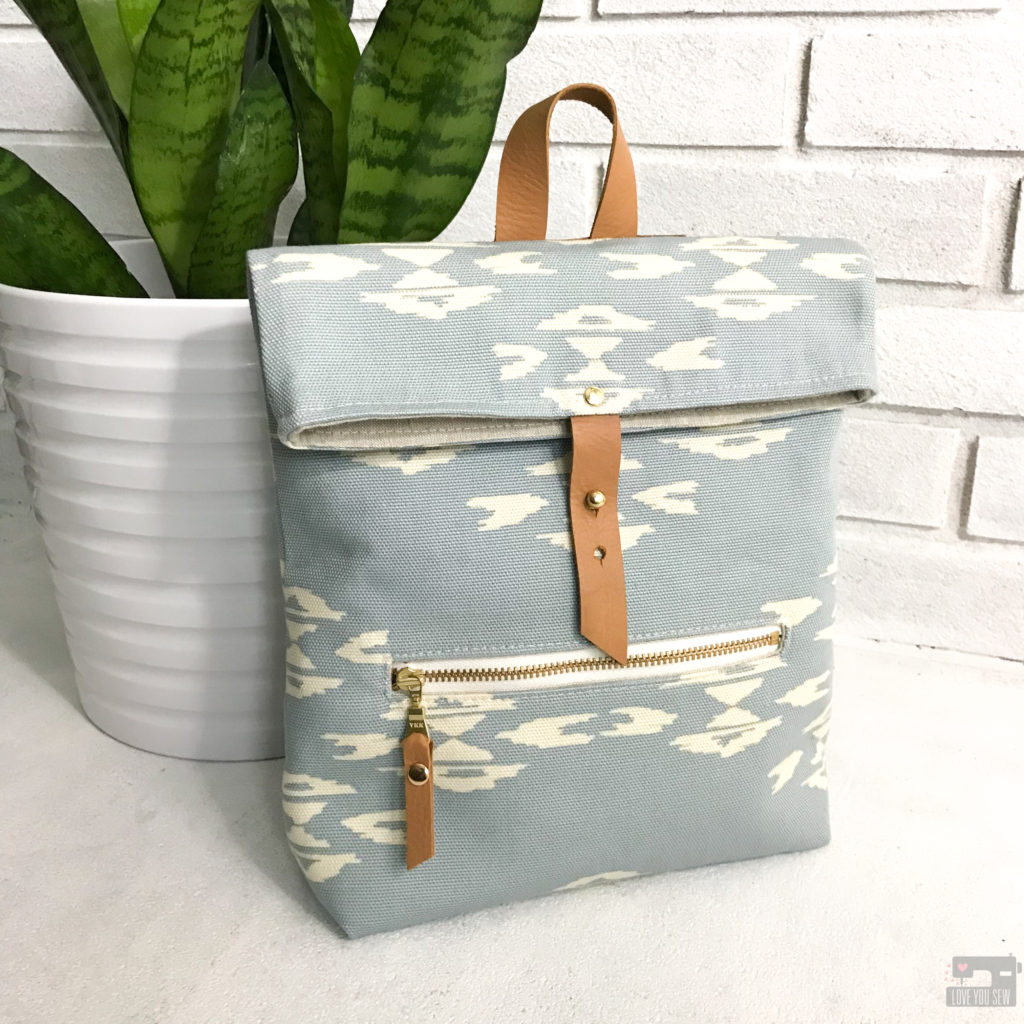
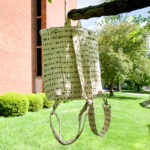
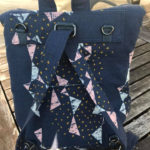
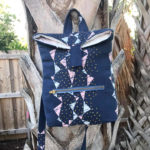
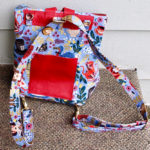
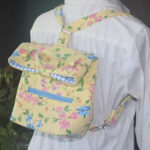
For some inspiration, you can check out my Sonata Fabric Showcase Tour here.  These were both prototypes as I was testing out interfacing combinations and still checking out which features to keep in the pattern.

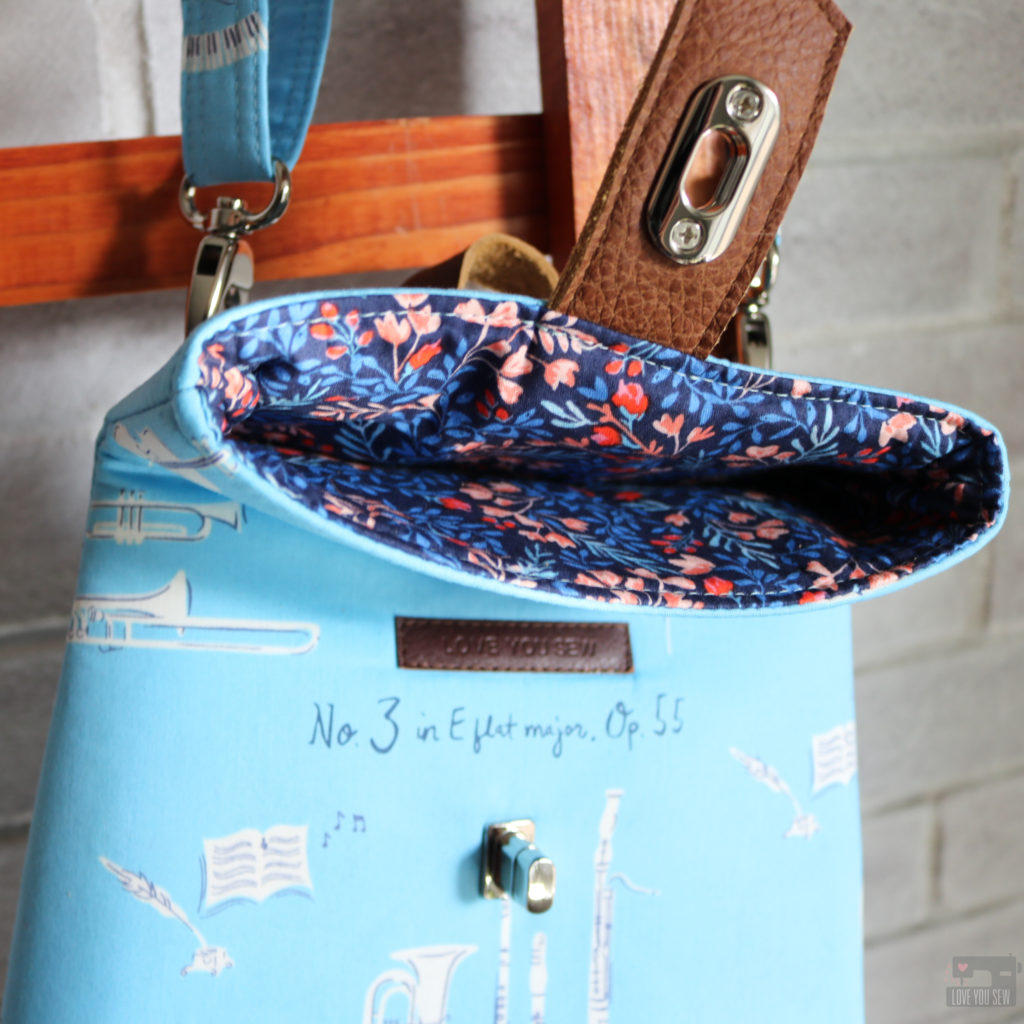
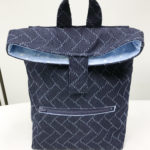
  • The blue bag used foam interfacing which I thought was just too much.  The bag was not able to fold very well.  However, it uses leather accents which I do include in the cutting table.  (I will write a blog post for the zipper frame soon!)
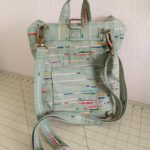
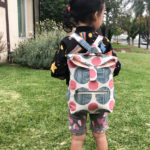
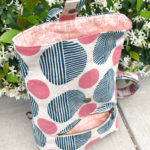
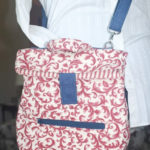
  • For the pink bag, this was a test to see how quilt cotton would hold versus the recommended canvas.  It still had great shape and pliability, but some structure is lost.  Once the bag is filled up, it’s not that noticeable though.  This version is the lightest weight and great for using all of those cute quilt cotton prints for little ones.

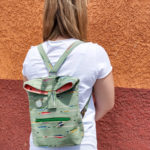
If you need even more inspiration, you have to check out all of these amazing creations from my tester group.  These ladies are absolutely amazing and I could not make this pattern without all of their help!  You can click through each image below to direct you to the maker.

Pattern Summary:

I hope you enjoy this pattern as much I do!  Happy Sewing!


Cristy


Summer Day Top Review

I can’t believe the “unofficial” end of summer is near!  My kids are starting school in less than a month and all of a sudden I’m thinking about all things fall.  But I’m trying to hold onto the warm temps, lazy mornings with my boys, and days at the pool for as long as possible.  The Summer Day Top by Dana Willard is helping me do that.  I can wear “Summer” all year now!

First off, I want to mention how well written and thorough the instructions are in this pattern.  If you are a beginning sewist and new to garments, Dana walks you through the whole sewing process – from printing the pattern to selecting the right fabric to explaining all the technical terms.  I was very impressed!  The graphics are clean and simple to understand, but there is also a good bit of further explanation into adjustments and why the construction is the way it is.

The Summer Day Top was drafted for both woven and knit fabrics (bonus!)  I decided to use this Observer quilt cotton by April Rhodes for Art Gallery Fabrics for my make.  I’ve been sitting on this fabric for such a long time and knew it could be a striking garment.  But, I had to find the right pattern with it being a stiffer substrate.  Plus, I didn’t want a pattern with gathers that would distort the shibori’s composition.  I really wanted the fabric’s design to really shine through.

Quilt cotton is a wonderful substrate for a beginner.  The non-stretch nature makes it easy to sew and iron.  However, it holds more body which I love around the torso, but didn’t want in the sleeves.  Granted, I could have selected a fabric with more drape like a rayon or gauze, but I was pretty keen on sewing what I had. (Cheers for sewing my stash!)

You can see (on the right) how the sleeve holds shape with the quilt cotton.  My arms make me a bit self-conscious so I don’t like them highlighted (unless it’s to cover them up!)  So I tried to change the shape of the sleeve as if it were a more drapey fabric, as seen on the left.

What did I do?  I just added a few 1/4″ pleats centered at the shoulder seam. I played around with the number and width of the pleats until I was pleased with the shape, but still allowed the same movement around my arm as before.  I’m so pleased with the look of drapey sleeves, the body around my torso (more forgiveness after dessert!) and the ease of sewing quilt cotton.  You can’t beat that!

The Summer Day Top is a quick sew as well.  The neckline is finished with bias tape, which I made out of the same fabric, but you could buy pre-made tape from your local quilt shop to save even more time.  I chose the short-sleeve version, so everything else was finished with a hem.

Are you ready to make your Summer Day Top?  I’m already getting lots of use out of this top and love how I look put together…even in my ripped up jeans!


Project Details:


Happy Sewing Friends!

Cristy


The pattern was gifted but blog post was not required. I thought this pattern deserved a review though 🙂 All opinions, modifications and fabric are my own.  Please also note, there maybe affiliate links in this post, which helps to keep this website going.

Rumi Tank Review

I’m a huge fan of racerback tops. I don’t know if I just have weird sloping shoulders or maybe the wrong bras, but any kind of spaghetti strap I wear, always falls down.  Over the years, its become pretty annoying having to constantly pull the straps back up.  I started to wear mainly racerback bras to combat my issue and then had to find new tank tops that would cover the new strap configuration.

So when Christine Haynes came out with the Rumi Tank pattern, I knew instantly, it was for me.  It’s designed for knits, has a classic versatile shape and is stash friendly. I can get a tank out of less than a yard and have made two tanks that out of pure scraps.  This pattern is a PDF with printing options for a personal printer and copy shop.  I decided to send this pattern to my local big box office supply store (because I had a coupon) for the first time.  Let me say, if given the option, I will always choose copy shop printing.  Taping PDF patterns is just not what I want to spend my time doing.

My first project was just the tank version and I used the Limestone Feel knit by Leah Duncan . I’m between a 6 and an 8 and also a B cup. From the waist up, I cut a 6 and then graded out to the 8 around the hip (to account for my larger rear) and used a 10 in length.

With a serger, the construction of the Rumi Tank was very quick.  However, I made sure to take the time to evenly distribute and pin the neck and armbands for a nice smooth finish. Although not necessary, I do top-stitch (with a ball-point needle!) around the neck and armholes for a professional look and to keep the seam allowance in place.

TIP: I like my garments to even be pretty on a hanger. So, I start and stop all my serging at inconspicuous spots…usually off to one side.

For my second Rumi project, I made the dress version. My family had spring break plans down on Florida and I could use a casual dress to throw over a bathing suit, if needed. April Rhodes’ Observer knit was perfect! I wore it to the beach and back.

Bonus – This dress can be worn with a jacket and layered over leggings.

I’ve made two more Rumi tanks to fill in my summer wardrobe. One with a navy and cream skinny stripe I got from a destash and then another in the same Observer knit because I love the print and color so much 🙂 The ease and comfortability with these makes are awesome. I’ve been wearing them with jeans and skirts all summer long.

As we near the autumn and winter months, I plan on sewing a few more tanks and dresses. These will make nice layering pieces under my cocoon cardigans and with some fun tights.  All in all, I think this is a great beginner knit pattern. It’s also perfect if you are working on a handmade capsule. The silhouette is classic and you don’t have to deal with pesky falling straps!


Happy Sewing!

Cristy


This post may contain affiliate links.

Heritage and Arizona After Fabrics :: Portside Duffle

April Rhodes has done it again.  She has just dropped not one, but TWO new fabric collections with Art Gallery Fabrics.  Arizona After is a gorgeous extension of April’s inaugural Arizona line with some new prints and some recolored with soft dusty pink and blues along with some deep rust and mustard.  The color combos she puts together are always so striking.  Heritage fabrics consists of garment focused substrates…including the new RAYON.  With April’s clothing patterns, she has always been a designer who knows scale for the quilters and the garment sewist alike.  It’s the perfect collection for the me-made makers!

Beyond the fabrics, April’s inspiration for the collections is just so touching.  The way she talks about her family and memories of her father and grandmother is just pure love.  Truly awesome. I love how a lot of the designs were just a part of April’s everyday life and over time, have been permanently imprinted in her head.  To bring these images to life brings so much light to her eyes and it’s been amazing to witness it all. These fabrics are just gorgeous and I’m happy she’s shared them with all of us….because whoa, right?!?

When I was asked to make a bag for April’s Spring Quilt Market Booth, I (of course) agreed.  She has become a dear friend and I will always help her, as she has helped me in so many ways.  April asked me to make a larger duffle and suggested a quilt-as-you-go method for easy patchwork because with Market…comes some tight deadlines.  I got to immediate work, but quickly realized I had to Turn. It. Up.

All 14 quilt cottons in the Arizona After collection was used to make the Portside Duffle Bag by Grainline Studios.  It’s the perfect bag to showcase these fabrics with all that surface area.  I loved playing with all the color combos while mixing and even deconstructing, some of the prints.

Once I started to quilt with my walking-foot on the Soft and Stable, that texture just got me.  I knew I had to add more and more quilting…and change up the designs with each print. Then it dawned on me….ooooh, metallic thread would be A-mazing with this palette.  The gold really brings out the colors and I’m so happy with how it turned out. TIP: Cut a larger piece of soft and stable than the pattern requires. Quilt and then cut to size. Don’t forget to baste those edges!

Art Gallery’s textured denim in Canyon Sunset was the perfect complement to Arizona After and is a nice durable fabric for the bottom accent of the duffle bag.  On the inside, I used the Scattered Wood print and added an additional zip pocket…because we can always use some extra pockets.  I love the look of brass zippers and with the gold thread, this combo obviously had to happen.

For more texture and to turn this bag up another notch, I used hardware from ARmercantile combined with some leather from my sacred stash.  Guitar-inspired bag straps are popping up all-over the place and I just had to add that look to this duffle.  The added rivets bring out more of the brass and help round out the look.  Who says a quilted bag can’t be modern and on-trend?  I love being able to combine my love of quilting with my love of bag-making….and the gorgeous fabric definitely helps.  Thank you Arizona After for the inspo!

Make sure to check back on April’s blog and Instagram all throughout July for the up-to-date info on the Blog Tour.  Next up will be an Instagram loop on July 5th and I heard there maybe prizes involved 😉

Last, but not least, don’t forget to tag #heritagefabrics and #arizonaafterfabrics with all of your makes.  I can’t wait to see all of them!

Project Summary:


Fabric and pattern for the Arizona After + Heritage Blog Tour was provided.  There are affiliate links in the Project Summary.


Quilted Envelope Clutch :: Free Tutorial

quilted-envelope-clutch_title

Envelope Clutches are everywhere right now and I was inspired by it simple and timeless shape.  This Quilted Envelope Clutch design is over-sized to give you ample room for all of your essentials, but still is nice  enough to go from day to night.  It’s a sleek bag when paired with the right faux (or real) leather.  Coincidentally, this clutch design also fits a MacBook Pro perfectly, so its versatile and you can change up the fabrics to make it as laptop holders.

As I wrote in last week’s post from the Observer blog tour here, I like to show how hip and modern quilting can be.  I love how the piecing of a half log-cabin accentuates the envelope shape and the monotone palette keeps it chic.  Simple quilting adds enough texture and detail without being over-the-top…or over-worked.

This tutorial is for the faux leather version and finishes at approximately 14 3/4″ x 10 1/2″.  As with all patterns, don’t jump the gun…please ready through the instructions in their entirety.  Shoot me an email and/or leave me a comment if you have any questions.  Enjoy!

Materials Required:

  • Faux leather/ Vegan leather / Vinyl (1/2 yd)
  • Lining & Pocket Fabric (1 yd)
  • Pieced Panel scraps (1/4 yd)
  • Pieced Panel Lining Fabric (1/4 yd)
  • Woven Fusible Interfacing [Pellon SF101] (2 1/2 yds)
  • Ultra-firm Sew-In Interfacing [Pellon 70 Peltex] (1 yd)
  • 9″ Zipper
  • Magnetic Snap
  • Coordinating Thread(s)
  • Poster Board (optional for cutting pattern templates)
  • Spray Baste or Fabric Glue Pen (optional)
  • Clover Clips

 Cutting Instructions: 

  1. Create the body and center panel cutting templates following the black numbers.  Make markings for the numbers and lines in purple.
    • Cut the angles by finding the mid-point of the short-sides of each template.  cutting-template
    • Round out each of the “envelope points” using a large spool of threadimg_7001
  2. Use your larger template to cut:
    • (1) Body with faux leather
    • (1) Lining
    • (2) Woven Fusible Interfacingsp1060660
  3. With the Firm Sew-In Interfacing, cut:
    • (2) 14 3/4″ x 9 3/4″ rectangles
    • (1) Triangle per the following photo:img_7014a
  4. For pieced Center Panel (as a half log-cabin), cut:
    • (1) 2 1/2″ x 2 1/2″ square
    • (34) 5″ x 1 1/2″ strips
    • Use smaller template to cut (1) Center Panel liningp1060674
  5. For Lining Pockets, cut:
    • (1) 16″ x 11″ rectangle with the lining fabric
    • (1) 16″ x 11″ rectangle with fusible woven interfacing
    • (1) 9″ x 4 1/2″ rectangle with faux leather

Construction:

(1/4″ seam allowance unless otherwise noted)

  1. Interface the body.  *Please check and test the heat settings beforehand.  Not all vinyl/faux leather is created equal.

    • Place the Peltex pieces per the following photo.  Leave 3/8″ allowance all around the edge of the vinyl.  Keep 3/4″ in between the (2) 14 3/4″ x 9 3/4″ pieces.  Make sure you align the Peltex triangle long edge with the top corners of the vinyl.  You can can secure them in place with a little spray baste or with Sewline glue pen.  *It’s important to have the Peltex split into 3 pieces to give the ease and flexibility where the clutch will fold.  It will also alleviate some of the “cracking” appearance that can happen with interfacings that are forced to moved a lot.p1060663
    • Use one of the fusible woven interfacing pieces and fuse on top of the firm sew-in interfacing.  You may need to work the edges of the SF101 around the Peltex with your iron. Set aside.interface-vinyl
  2. Fuse the 2nd piece of fusible woven interfacing to your lining.  Set aside
  3. Fuse the pocket fusible woven interfacing to the pocket lining fabric.  Set aside
  4. Prepare Center Panelp1060670
    • Piece as desired.  I used a traditional half log-cabin design, but you can use anything that you like as long as it can be trimmed to the Center Panel template you created earlier.
      • Line up the short-end of the first strip (gray-blue speck) with the edge of the square (eagle) and sew with 1/4″ seam allowance.  Press open
      • Line up the short end of another strip (navy dashes) with the opposite edge of the square (eagle) and sew.  Alternate sides until you have used all 34 strips.
      • Use Center Panel template and trim to fit.
    • Assemble the Center Panel by placing the right-sides of the center piecing with the center panel lining.p1060675
    • Sew all around leaving an opening at the TOP to turn.p1060676
    • Notch out the BOTTOM and all cornersp1060678
    • Pull right-side out and press
  5. Line up the center panel on top of the right-side of the faux leather.  Make sure it’s even on both sides of the panel.  You can secure it into place using pins since you don’t see the faux leather.p1060680
  6. Topstitch into place.  It may seem easier to have sewn this panel onto the vinyl before all of the interfacing, but this is how you will secure all of the Peltex into place and prevent any shifting with use.p1060683TIPS:
    • Use upholstery thread or any other nylon/polyester thread.  I like the upholstery for the heavier weight, the sheen, and it glides well through all of the layers.
    • Increase your stitch-length to at least 3.0 for a nice look
    • Use a walking foot for even stitches
    • You may need to increase your needle size if the thread is not pulling through and/or you are getting skipped stitches
    • Keep matching all-purpose polyester thread in the bobbin.  It helps with skipped stitches.
  7. At this point, you can quilt the vinyl, if desired.  Set the body aside.IMG_6780 IMG_6880
    • TIP:  Use washi tape for your guidelines. Chalk and pen will easily smear off the faux leather.IMG_6772
  8. Attach pockets onto lining
    • With the flat edge of the lining on top and right side facing you, measure 3″ down from the straight edge and 3 1/4″ in on either side.  Pin (where you will sew) the faux leather into place 1/8″ from the edges (marked in yellow.)  You can leave this as a large slip pocket or you can divide it for your cell phone.  I marked mine 3 1/2″ in from the edge to hold an iPhone 6. Sew the three edges into place and then the dividing seam (marked by yellow.)img_7026
  9. Turn the lining 180 degrees.  With the right-side facing you, mark 10 1/2″ down from the top of the lining and pin the short-side of the  pocket lining fabric there.  Mark a rectangle 1″ down from the top and sides of the pocket that is 9″ x 3/8″ (blue pen.)  p1060690
  10. Sew all-around the 9″ x 3/8″ rectangle on the marks you made.  Cut through the rectangle as shown, stopping about 1/4″ from the end (red pen lines.) [Image a]. Make small cuts from the middle out to each corner, getting close to the stitches, but not cutting directly through.  Push pocket through the hole [images b & c] and press [image d].lining-pocket-collage
  11. With the right side of the lining facing you, line up the zipper in the opening just created.  Either pin in place or use Sewline glue pen.  Sew 1/8″ all around the opening.img_7024
  12. With the wrong-side of the lining facing you, fold up the pocket so the short-sides match.  Press on the fold.  Pin all around the pocket, but not including the lining. Sew pocket shut (following blue dashed lines in pictures.)  Make sure you move the lining out-of-the-way as you sew.img_7025

Assembly:

  1. Now match the right-sides of the lining and body together.  Clip in place and sew all around the edge (marked in blue) with a 3/8″ seam allowance.  Back-stitch when you start and end leaving a 5″ opening to turn. Notch out corners and the top of the clutch.  Be very careful not to cut through any stitches.img_7032
    • TIP:  Use a compensating foot or a zipper foot since the Peltex give you can uneven surface. img_7034
  2. With wrong sides together, make markings for your magnetic snap and install per manufacturer’s instructions.  With the point being so narrow at the top of the clutch, you may need to move your snap up or down to make sure there is enough clearance for all parts of the clasp.  For the male part, I marked mine 1 1/4″ down from the top edge of the lining and marked the female where it hit the body (approx. 7″ from straight short side.)
    • TIP: Before you install, reinforce where you will cut with a scrap piece of interfacing.p1060602
  3. Turn the body right-side out and press with the lining facing up.  Be careful not to press the faux leather directly with your iron.
    • TIP:  Use Clover Clips on the edges to help them stay flat and/or hammer them as well.  Hammering helps to flatten the edges so top-stitching will be easier in the next step.  Test the hammer method on scrap to make sure the hammer doesn’t leave marks.
  4. img_7036Time to {finally} make the envelope!
    • Top-stitch along the straight short-end of the body (red dashed line)
    • Fold the front of the clutch up 10″ to create the main pocket and secure the sides into place with Clover Clips
    • Top-stitch all along the clutch (following the yellow dashed line)
      • TIPS:
        • Use a large 16 or 18 needle to get through all the layers
        • Increase stitch-length to 3.5-4.0 and use your walking foot to achieve even stitches
        • GO SLOW so that you do not skip stitches
        • Hammer the edges again, if needed
        • Leave long thread tails so you can pull them through the lining and hide for a cleaner finish
    • Hide thread tails by pulling them toward the lining, knot, then bury.
    • Press the lining

img_7063

If you want to get extra fancy, you can add some additional finishes.  Some examples are:

  • Sew a wristlet handle with hardware (as shown)
  • Just add the D-ring so you can attach some fun tassels.
  • Include a key fob on the inside
  • Attach rivets and grommets

img_7042


CONGRATS!!!  You have made a #LYSquiltedenvelopeclutch!  Please, please share your creations.  I would love to see them all!

As long as you credit Love You Sew with the pattern (because it took me a long time to write this all up,) you are free to sell the finished clutch.

Product Details (Sources in Links):