Kelly Waist Bag and Clutch

Introducing the FREE Kelly Waist Bag Pattern

It’s such an incredible feeling when inspiration hits at the right time and the creative juices are just flowing.  That’s what happened when I paired this beautiful leather from Measure Fabric with  my idea for a simple and sleek waist bag.  I was able to quickly design, prototype, tweak and write a full pattern within 48 hrs (muuuuch different from my usual practice of taking months to write a pattern!)


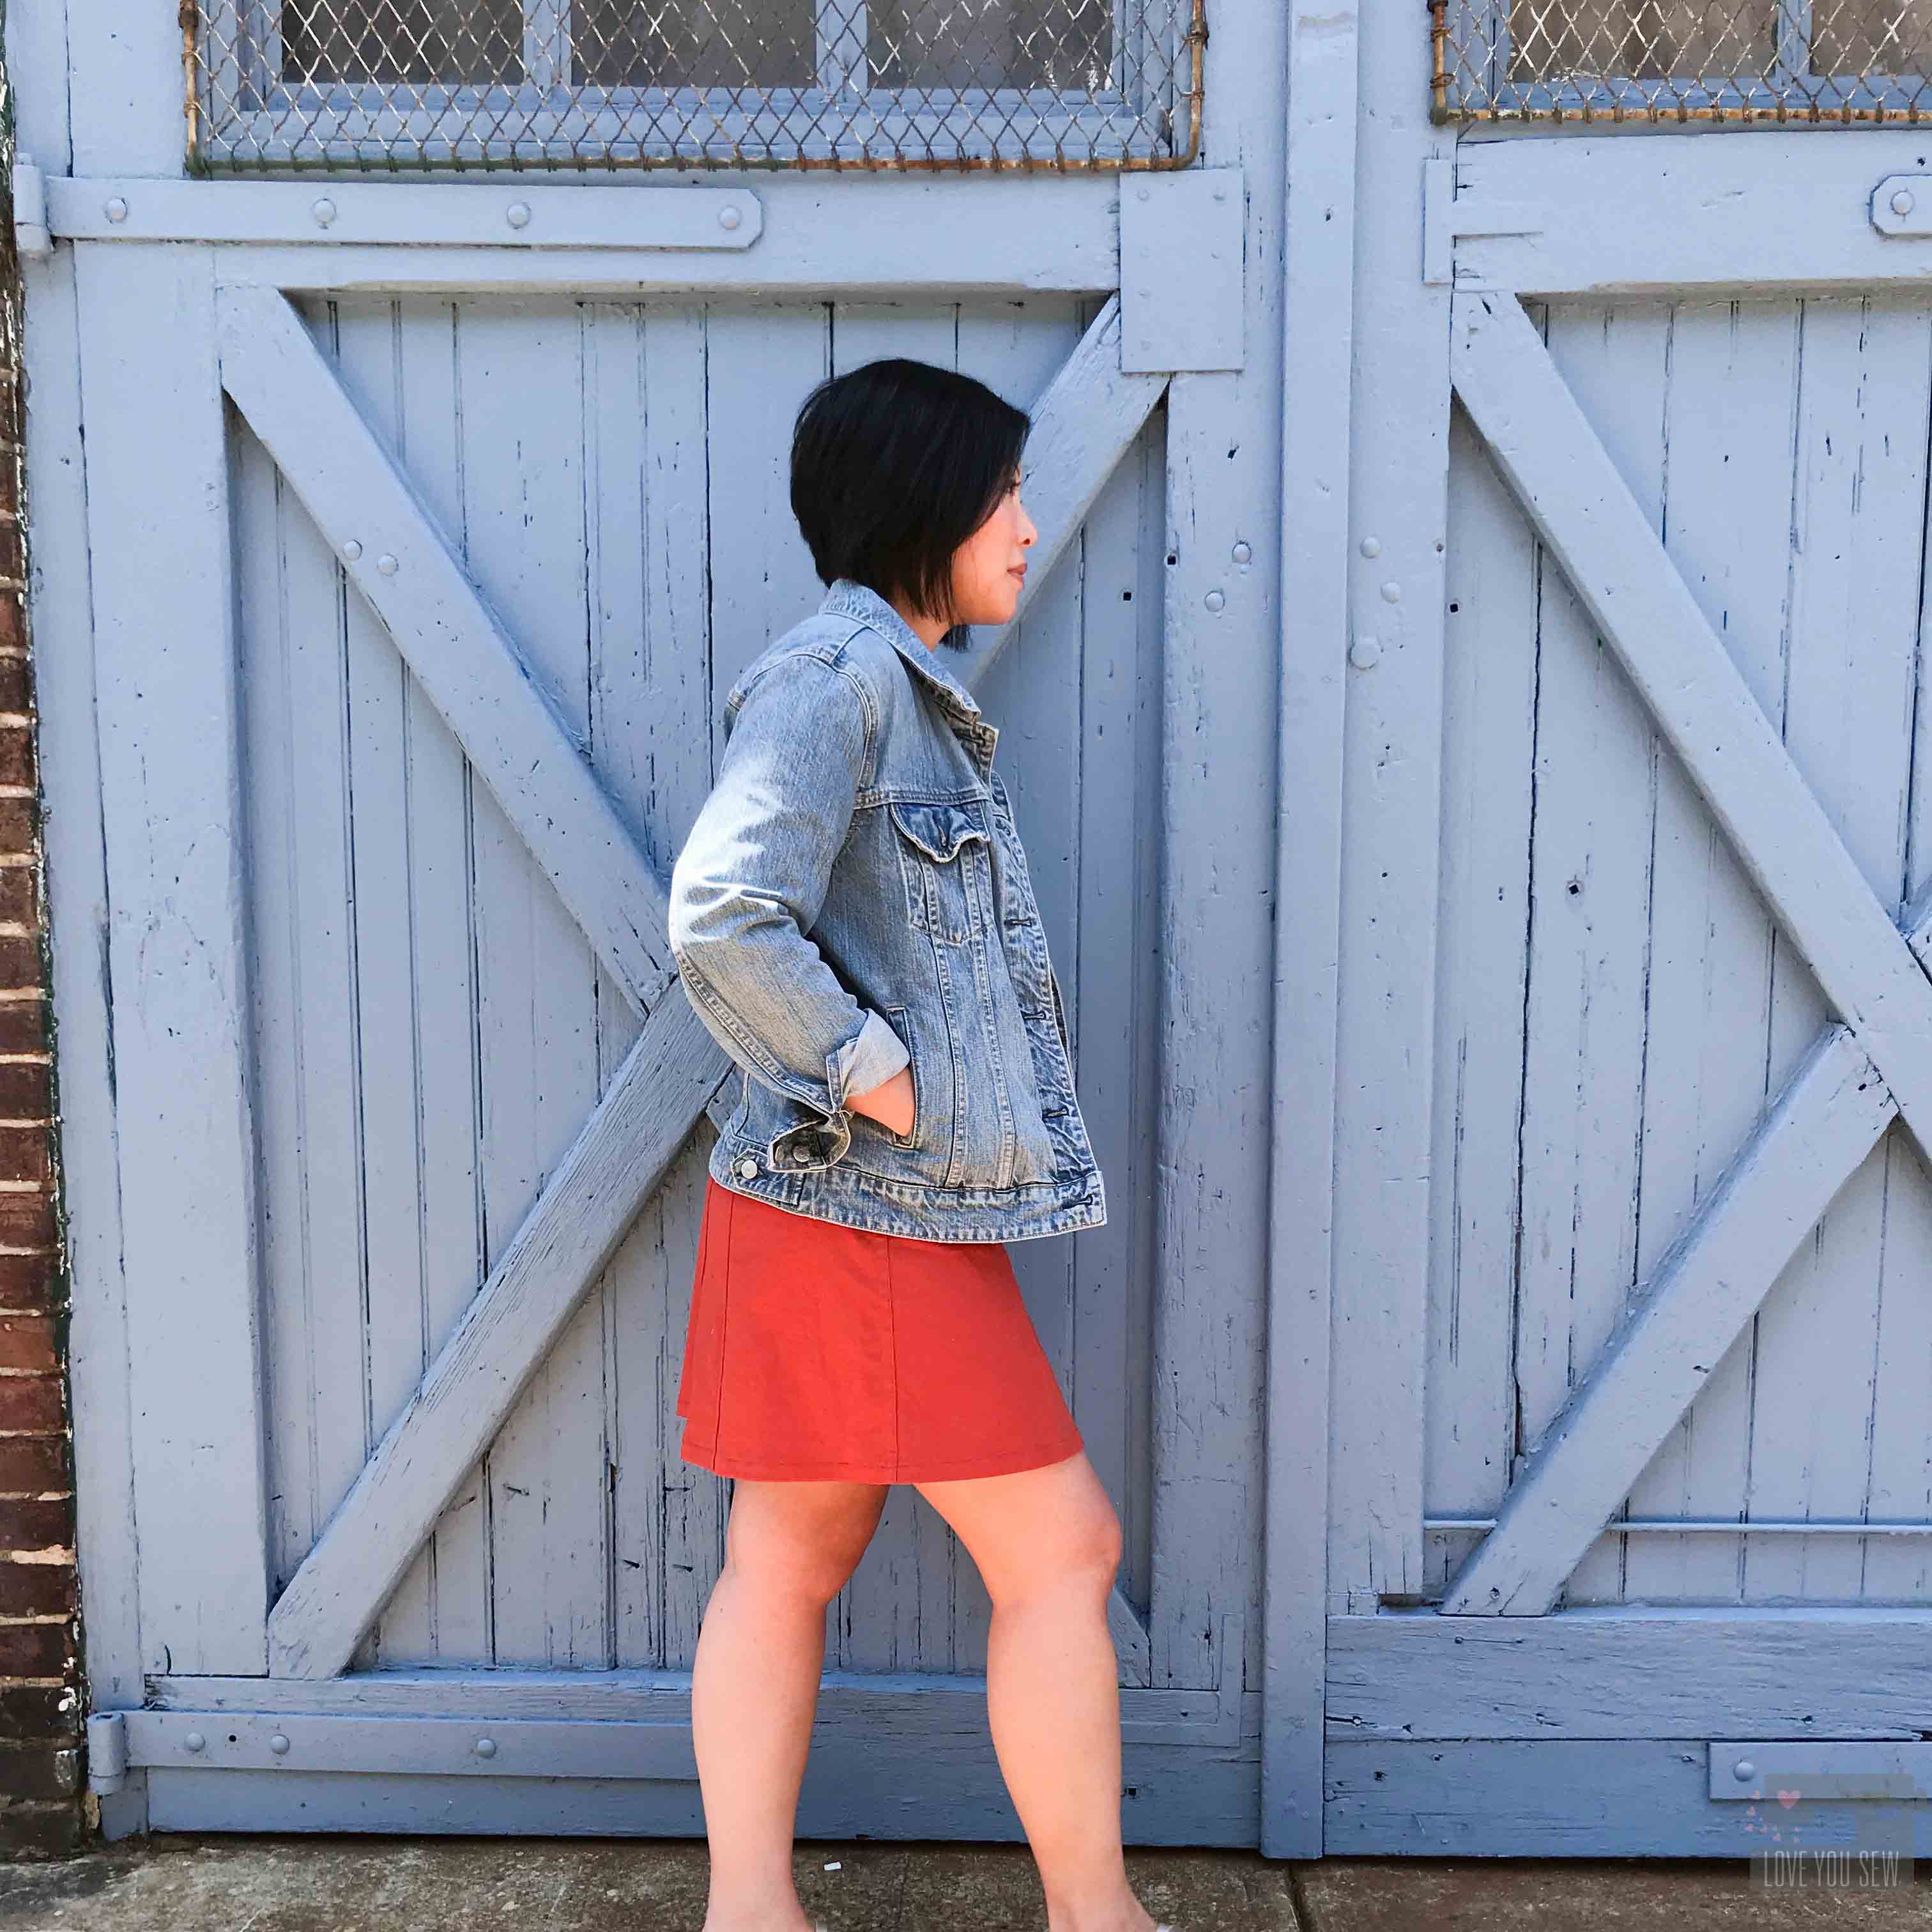
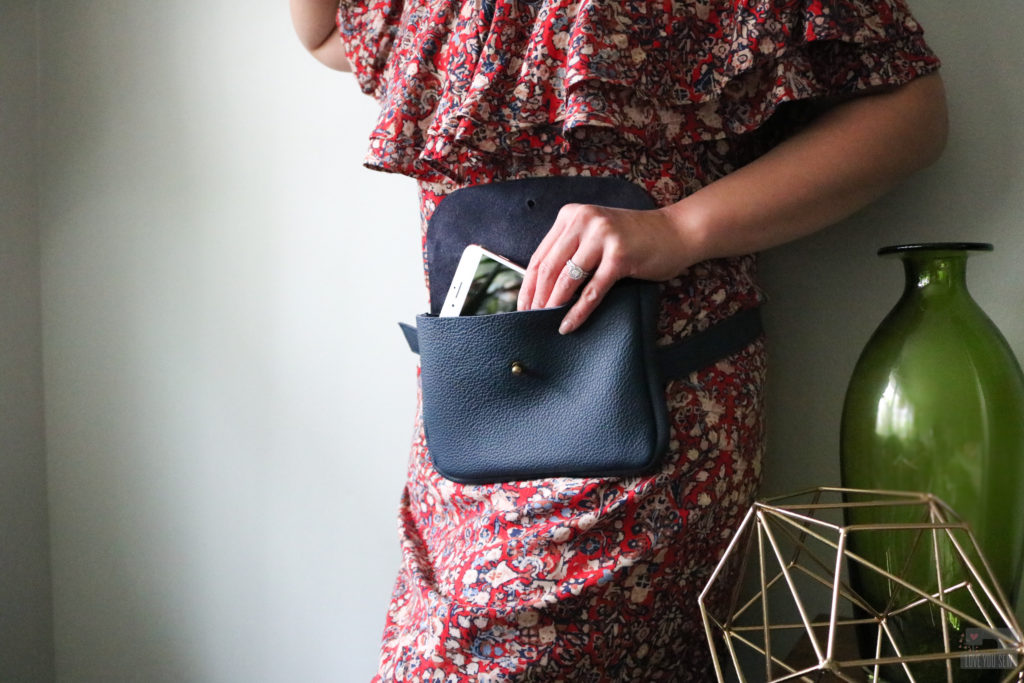
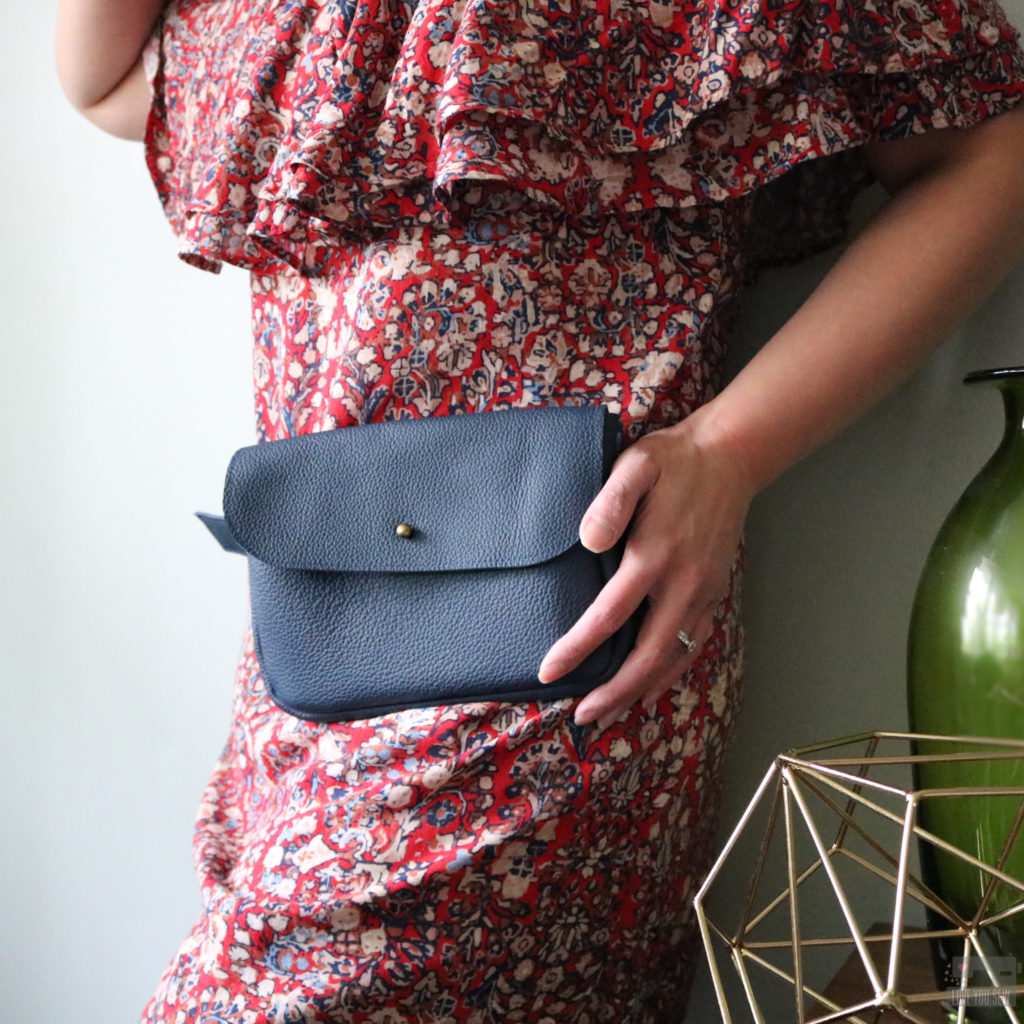
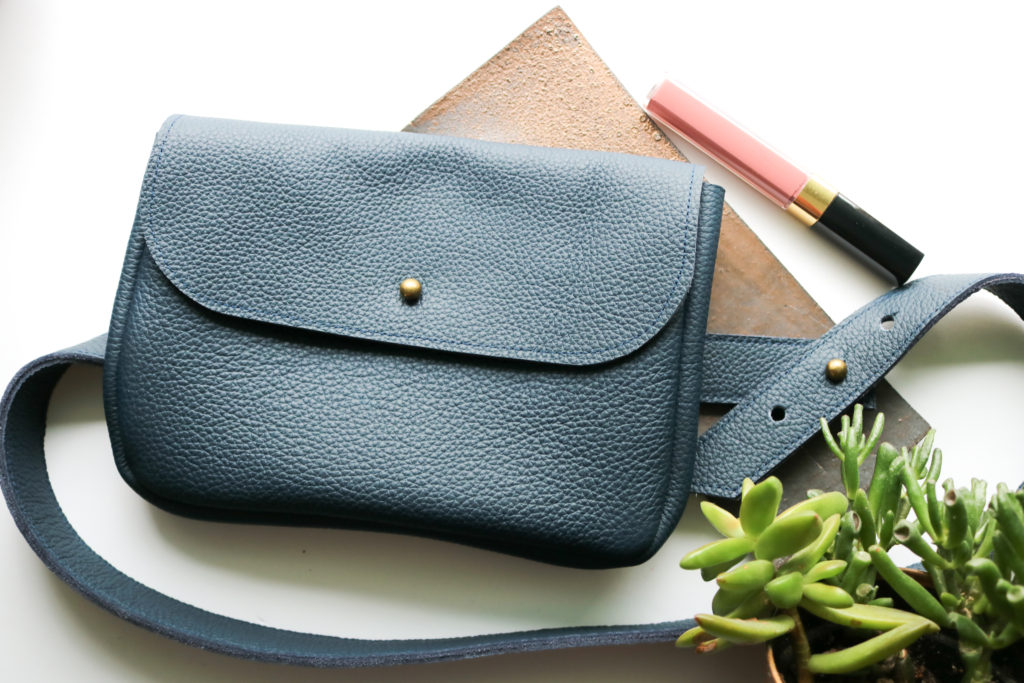
Whatever you call them – waist bag, fanny pack, belt bag, hip bag….wearing a bag around your torso is the hottest bag trend right now.  Although the classic 80’s throwback style is probably the most popular, I wanted to have something with cleaner lines to match my fashion tastes.   I also wanted to make sure if I’m making a bag (especially in leather,) it can last beyond the current trend.  So I designed a minimalist raw edge leather bag which can convert to a clutch, simply by removing the belt.

Leather

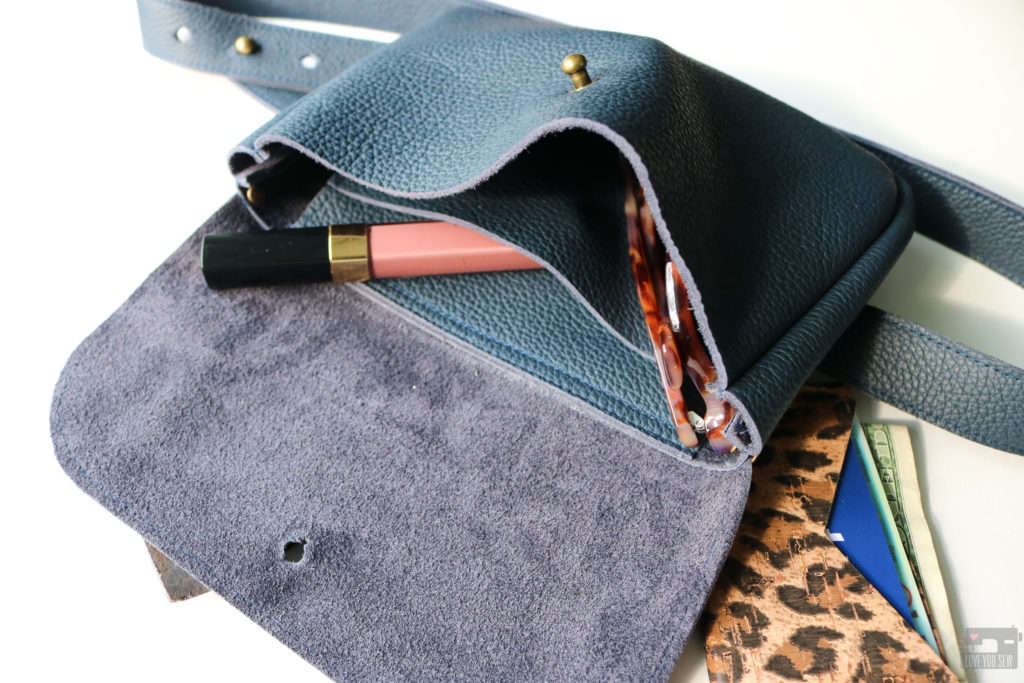
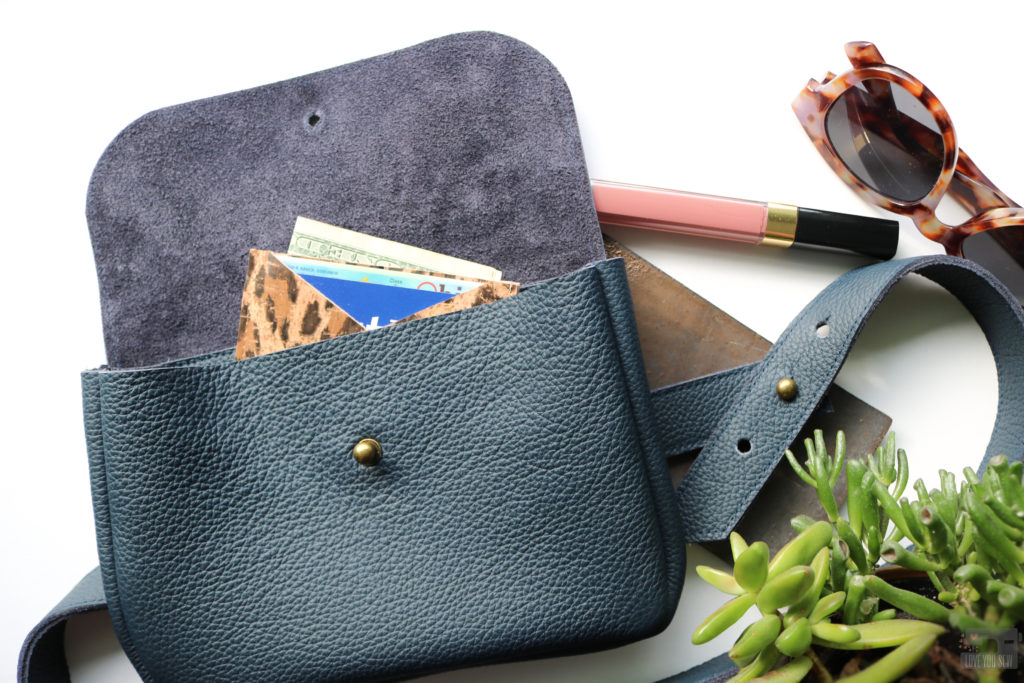
Initially, I thought I would make an envelope style clutch when I first saw this leather on Measure Fabric’s website.  I thought the leather might be a little too difficult to sew on my machine.  I figured I could use a bunch of rivets to origami it altogether since I already fell in love with the top-grain texture and beautiful neutral navy color.

Thanks to the miracle of videos on Instagram, the shop ladies were able to show me the leather’s softer hand.  The hide is approximately 2mm thick, but is still pliable enough to shape and can hold some weight.  You can check out their entire selection here. Get ready to drool over all the beautiful hides!

Bag Features

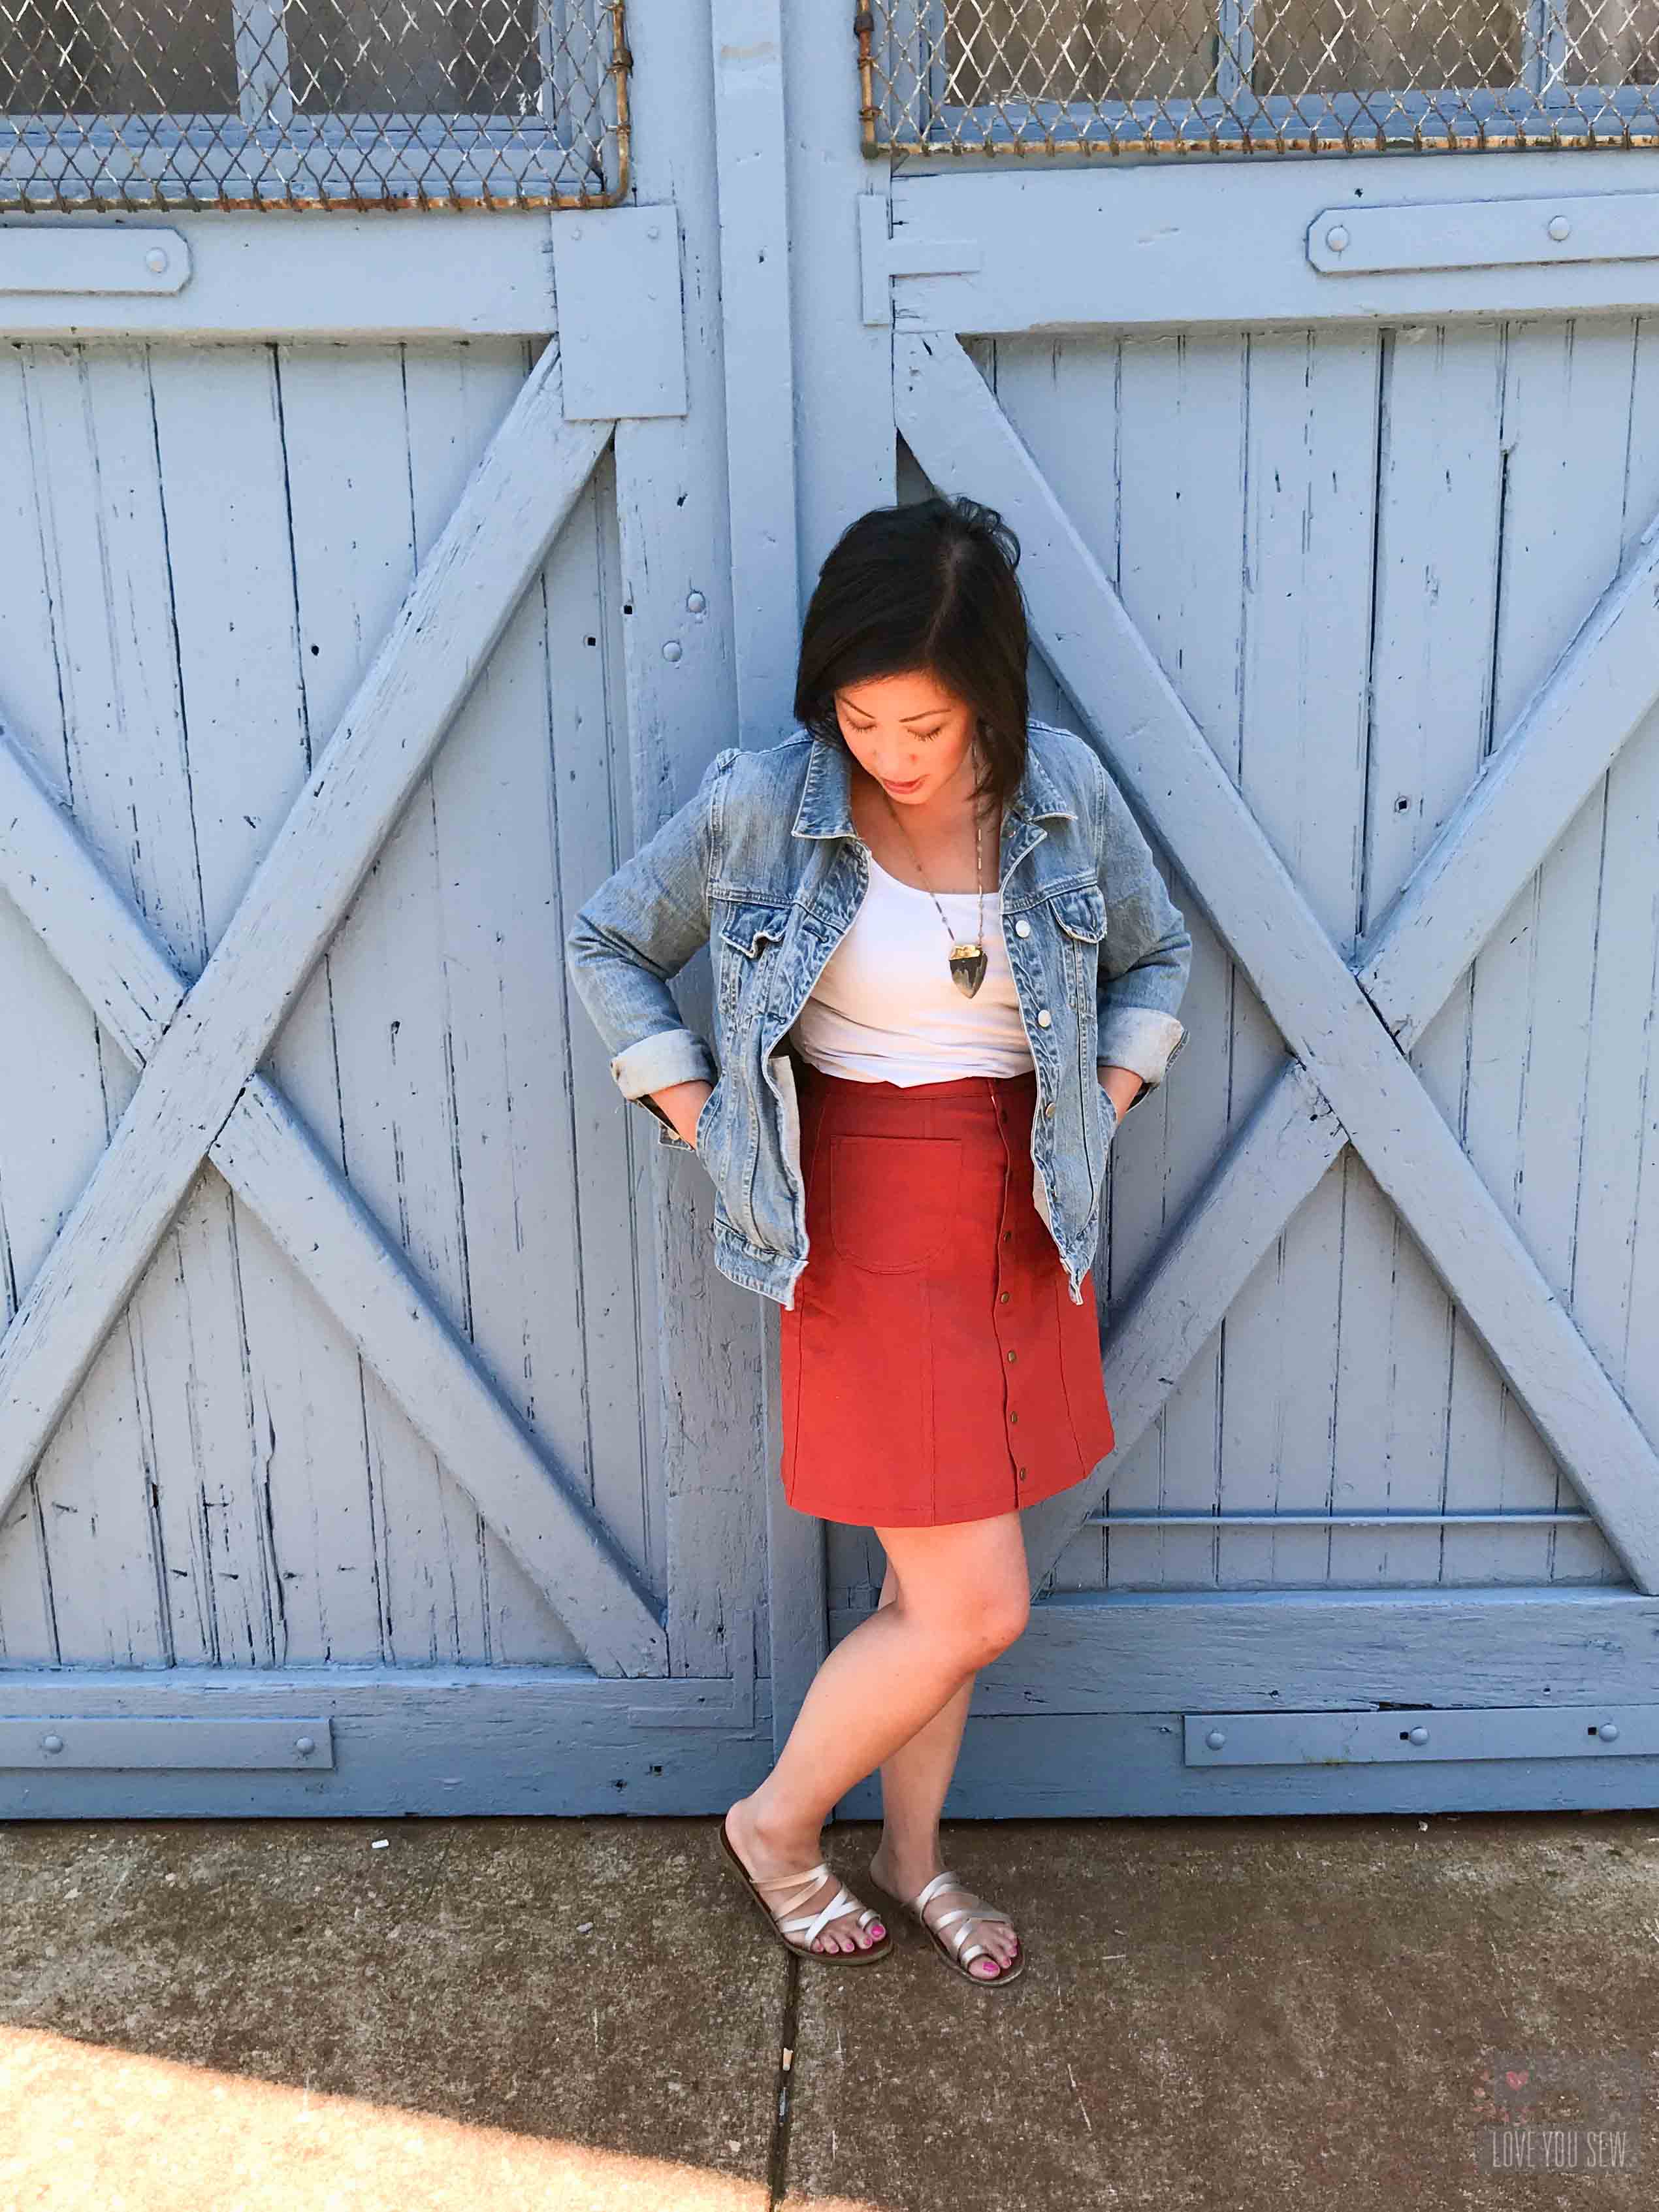
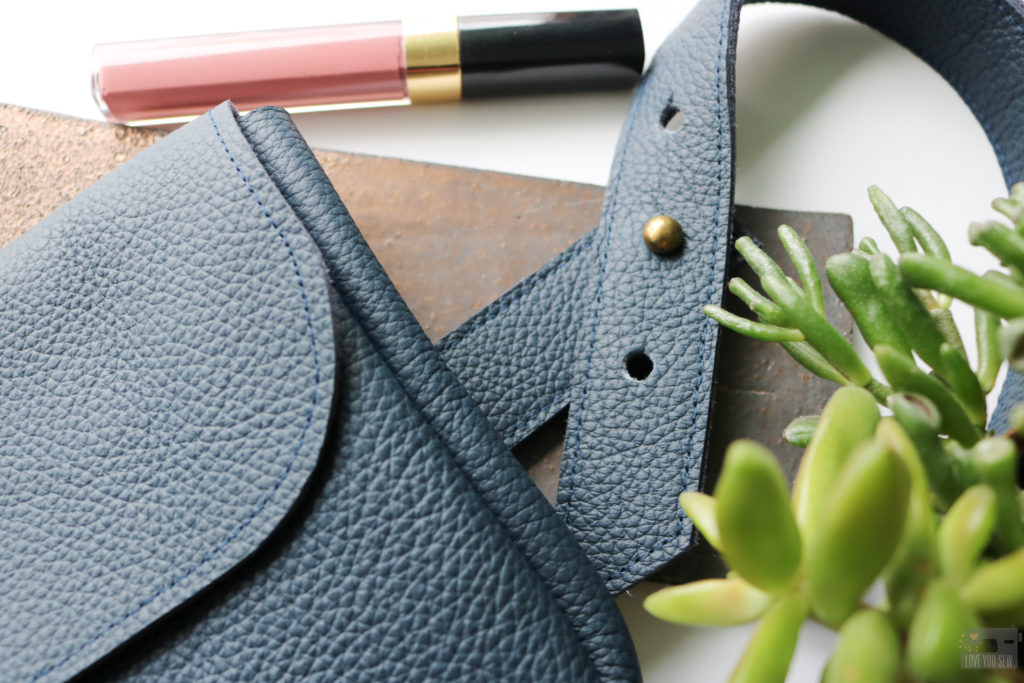
Named after one of my awesome nieces, this waist bag is all about having some freedom.  Whether you want hands-free options to wrangle the kids like me, or to attend the latest festival concert like Kelly (oh to be in my twenties again,) this is your bag!  It’s small but mighty with plenty of great features:

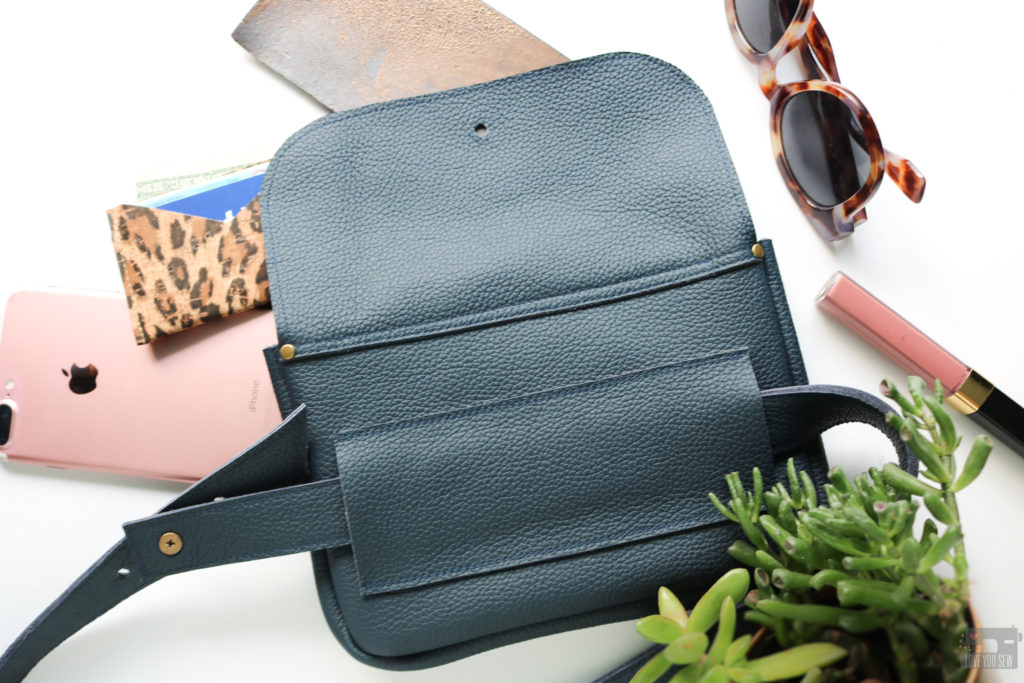
  • Slip pocket – Perfect to stowe away cash, ID and/or a Shuffle Cardholder
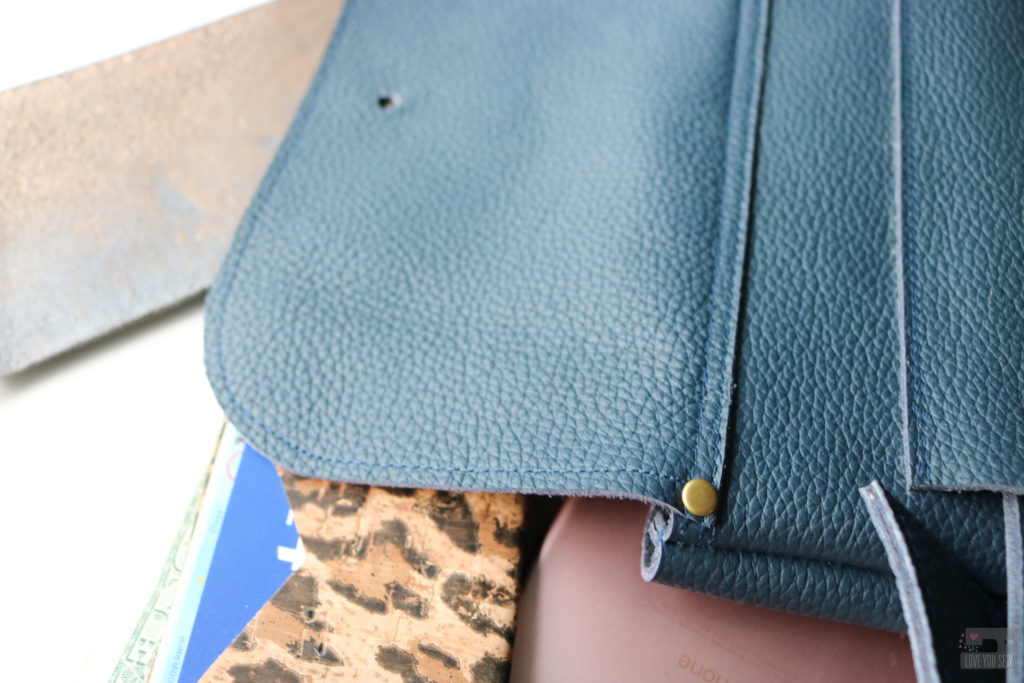
  • Simple screw on button stud – There is no need for fancy hardware or tools.  But feel free to make this your own!  You can find them on Amazon here or here and on Etsy here. (aff links)
  • Adjustable belt design – Whether you wear this with just a tee or over a bulky sweater, the belt can change with you.
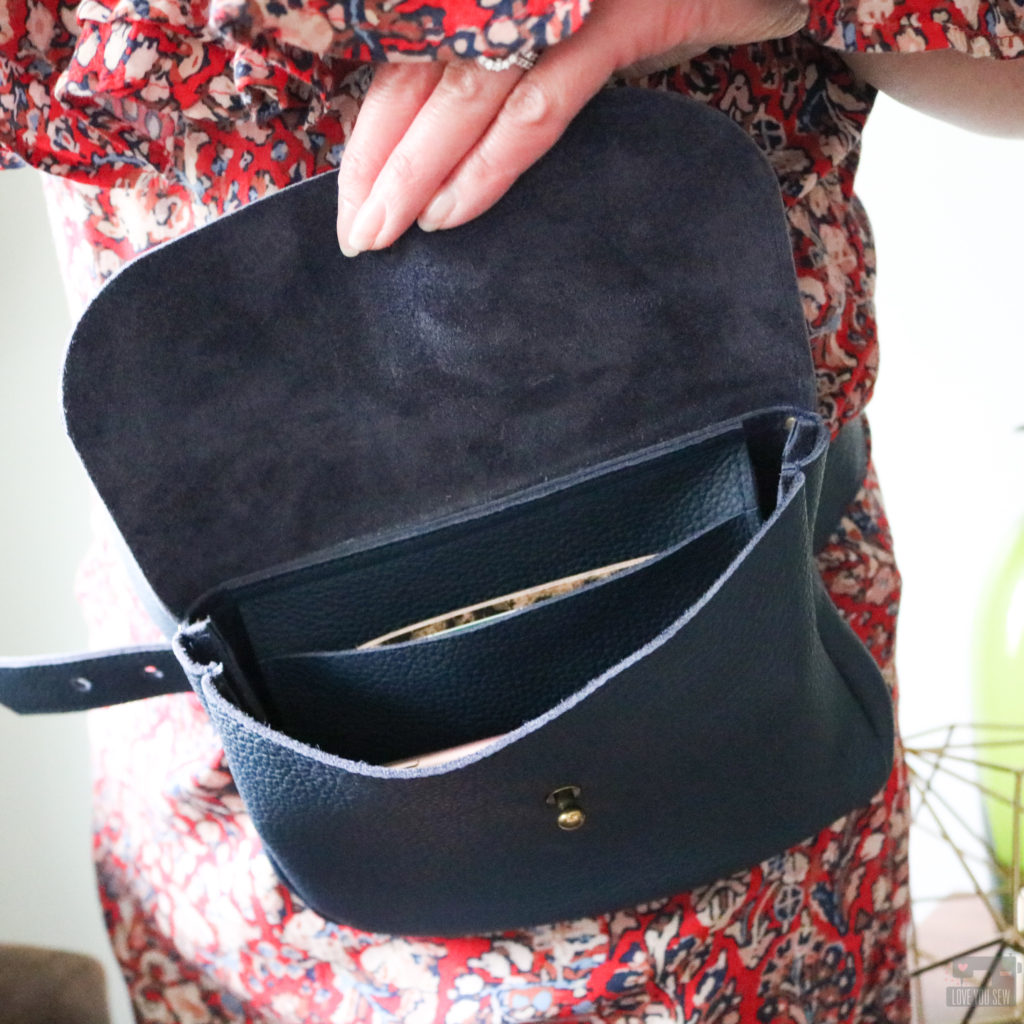
  • Convertible to clutch – Simply remove the belt and you have a perfect leather clutch for a night out or use it as a pouch in a larger tote.
  • Able to use any belt – The belt guide is generously sized to accommodate most belt widths.  You can use your own belts to mix and match, creating different looks.
  • Fits many arena and public venue bag guidelines – With finished dimensions of 8″ x 5″ x 1″, the Kelly conforms to many stadium and concert bag regulations.  It’s the right size for your phone, ID, cash, with room to spare for keys.

Sewing Tips:

  • Leather and some vinyl are not self-healing.  Needle holes will be permanent, so work slowly and use clips instead of pins.
  • Use a leather needle with leather or a heavy duty (16 or 18) needle with cork or vinyl to handle the extra thickness.  Machines vary, so don’t forget to TEST before making the bag!
  • With thicker substrates, leave long thread tails to manually tie off with double and even triple knots.  Don’t try to back-stitch because your machine may not like the bulk.
  • A walking foot is great to get even stitches without sticking and a Teflon foot prevents sticking as well
  • Use a stiletto tool like this or carefully notch into the gusset 1/8″ to help maneuver around the curves. (aff link)
  • For punching the holes, I love this tool with a softer plastic bed vs a metal bed.  You get a cleaner cut through the leather. (aff link)

|| Click Here for the Kelly Waist Bag + Clutch Pattern by Love You Sew ||

#kellywaistbag #loveyousewpatterns 

Print at 100% or Actual size

Please share your projects on social media with the #kellywaistbag and #loveyousewpatterns tags.  I would LOVE to see what you do with the pattern.  Don’t forget to give me a follow and tag me @loveyousew_ so I don’t miss it!

Enjoy!!!


Leather for this project was provided by Measure Fabric.  All thoughts and opinions are always my own.  There are also affiliate links in the post for which I would receive a small commission only if you decide to make a purchase.

Tillery Skirt Review

When I went to Texas a month ago, I was hoping to make this Tillery Skirt for the hot weather ahead.  Unfortunately, I ran out of time and did not make it then.  But, I was able to finish this skirt now that central Ohio feels like Texas…at 93*F!  I’m so glad I was able to get this made for our first of many heat waves this summer.

Sometimes shorts just don’t cut it.  My wardrobe was in need of more casual skirts to get me from swim lessons with the kids to date night with the hubs.  So when I saw this digital pattern by Blank Slate Patterns, I knew I had to make it.  The Tillery is a great high waisted skirt with a 70’s vibe making my Boho fashion heart flutter.  Who doesn’t love the look of the flat felled seams?!?

I recently had the opportunity to visit the Imagine Gnats shop and instantly gravitated to this J.Crew overstock stretch twill in Brick.  This rust color is definitely my summer color to go with all the denim <3  It is so rich and complements my coloring.  I can always use the extra comfort of Lycra, so the extra give in the twill makes it perfect for a skirt or pants.

As mentioned earlier, these flat felled seams give the skirt so much design character.  It maybe a little intimidating sewing eight panels to make the Tillery, but it is all worth it.  I never made these kind of seams before, but after watching Melly Sews’ video, the instructions all made sense. TIP:  Baste all panels together to check fit. I ended up grading in a size around the waist.

With the seams visible and lots of top-stitching ahead, I used my rolled hem foot to give me an even edge to sew along.  Many machine have an edge or top-stitching foot.  My Juki only came with a few feet and this foot works great to get even spacing.

Look at those beautiful skirt guts!  Or maybe lack thereof…  The flat felled seams gives the skirt such a clean inside, so it’s soft and smooth all around.  I used some Wanderer fabric by April Rhodes left in my stash for this extra pop around the waistband.  The little hints of black and mint really bring out the brick color of the fabric.

As you can imagine, the hem of the skirt can get pretty thick when doubled over against these flat-felled seams.  My regular foot didn’t even want to go over all of this bulk, so that’s when I broke out my hammer to help flatten them out for stitching.  TIP:  Make sure to test your fabric and hammer to the inside of the hem so you don’t create any “shine” on the front of your skirt.

Another beautiful feature of the Tillery are the use of metal snaps.  There are instructions within the pattern with a link to video to help you, if needed.  Fortunately, I already had the snaps and the correct dies for my hardware setter (as the bag-maker you know I am.)  I was able to add these snaps quickly making the skirt look so professional.

The next time I make this skirt, I think I will grade back in from the hip down.  The waist and hip fit perfectly, but with the A-line cut of this pattern, I feel like I have a little bit too much flare going outwards.  It’s hard to tell in this photo, but the skirt A-lines at every angle (not just the front and back) thanks to some extra booty…

I ended up skipping the belt loops and even contemplated the pockets.  But the pockets really make the skirt and break up the high-waisted silhouette…AKA looking like old school mom/dad jeans!  Who was I really kidding?  Always add pockets.


I’m in love with this skirt and love how it all came together.  The solid fabric really brings out the seams and this brick color is a definite wardrobe staple.  My Tillery will be on repeat all summer long with it’s casual style and it will go with tanks and tees.  This piece will definitely be worn into the fall!

Project Details:

  • Pattern:  Tillery Skirt by Blank Slate Patterns
  • Sizing:  6 in the waist graded out to an 8 in the hip
  • Length: Mini
  • Fabric:  J.Crew Overstock stretch Twill from Imagine Gnats
  • Machine:  Juki TL-2010Q
  • Hardware:  Gold Star Tool Hardware Setter with in-house snaps. Unfortunately, I cannot recommend their snaps.  They bend a little when opening, but not enough to make me remove them all.  Going forward, I’ll only use Tandy Leather Snaps.)


Happy Sewing Friends!

Cristy


This post does include afflilate links for which I would be compensated only if you make a purchase.  All of it goes to keeping this blog as ad-free as possible!

Sora Sweater :: Review

As a member of the Blank Slate Patterns Sewing Team, I get to see and test out patterns before you do.  (Yeah, it’s a pretty amazing gig…)  This last release with this Sora Sweater (aff link) certainly did not disappoint.  It’s a beautiful pullover and cardigan pattern for knits with a great relaxed and casual design available from XXS to 3X sizing.

For my first sew (and yes, there are other versions floating in my head,) I decided to make the pullover view with the shawl neck.  It took me a minute to wrap my head around the construction, but I made it through pretty well for my first run.  I like to live on the edge (ha!) and not muslin with companies I’ve sewn with before.  Luckily for all of you, Melly created a video to get you through this step and you can find it here.

The other great feature of this top is the side gusset.  I’ve never sewn one into a top before, but absolutely love it.  It adds fabulous shape around the hips without adding volume all-over the garment.  The front of the Sora still sits nice and straight.  You can find the tutorial in the same video above.

I used a lightweight  Eco-knit made from 50% recycled fiber and 50% organic cotton.  This dark peppered gray is a nice neutral and will go with so much in my wardrobe….especially my blue and black denim jeans!  This fabric was a great find from the Instagram of TrashN2Tees .  I don’t know if Jenelle will offer the buy again, but you should check out her website.  She is an inspiration for the upcycle and textile re-use world.

I opted for the long sleeves with my make, but you can make a short sleeve version for some layering or to just wear alone.  The sleeves are drafted to be a bit longer….which I really appreciate given the style of the Sora.  With comfy cozy types of tops, I tend to pull down the sleeves to warm up my hands a bit and are perfect for just that.  If you aren’t sure what you like, you can always sew them as the pattern says and take off an inch or two if they are too long before adding the cuff.

To add to the casual factor, I modeled my Sora after some menswear versions with the toggle.  I sewed in corded elastic which I looped so it could wrap over the toggle.  If you see other versions of the Sora pullover, you’ll notice that the shawl neck overlaps with the left side over the right.  But, I already sewed in the elastic and had to have the right side over the left as you see here.  So if you want to add an embellishment, remember my mistake and plan for the correct side!  TIP:  Use a small piece of fusible interfacing behind the toggle or button to keep the knit from pulling open.


The shirt-tail hem is folded up with a nice clean finish.  I serged the raw edge and then used my twin-needle with wooly (aka bulky or smooth) nylon in the bobbin.  You can see I have grey in my stash but was too lazy to wind another bobbin when I already had the cream color ready to go.  (Hey, you can’t stop me when I want to get a shirt finished!)  I love using wooly nylon in the bobbin of my domestic machine and also in the upper loopers of my serger for extra stretch and stress forgiveness.

You can find other versions of this pattern using #SoraSweater on social media and you can find it for purchase here (aff link.)

I hope you are enjoying my continual quest for a handmade wardrobe and this top definitely fits into the basics I need and will wear for years to come.


Happy Sewing!

Cristy


*This pattern was provided to me as part of the Blank Slate Patterns Sewing Team, but I was not asked to blog about it.  Any affiliate links are noted.  As always, all opinions and words are my own.

Blank Slate Patterns: Fairelith Top Review

As I sew more clothing for myself, I try to create pieces which will last and fit with my existing wardrobe staples.  However, I also find myself looking into fashion trends again.  The 80’s and 90’s have come back again with a mixture of looks.  I didn’t think I would be into high waisted jeans, but I just bought my first pair (after these photos were taken) and LOVE them!  With young kids, you never have to worry about running around with them and accidentally showing off your plumber skills (Eek!)

With mid and high-waisted pants taking over, I see so many tops being tucked in.  Overalls are back in a big way, so slender layers are needed.  While taking these all into mind, I thought I could really use a Fairelith Top (aff link) by Blank Slate Patterns in my closet.  This body skimming version was what I was looking for and I knew it would also be perfect tucked in with my Moss Skirts which you can see here and here.

I wanted a little more color in my closet while staying pretty classic, so I chose this fantastic mustard stripe Blake cotton knit jersey (aff link) by Carolyn Friedlander.  It is a great tone with my olive skin and pairs SO well with denim, black and other blues (the predominant colors I wear!)

When I first measured myself for this top, it was before the holidays and I cut all my pieces.  But of course the holidays got the best of me and it ended up a wee bit more snug than I would have liked.  :/  Luckily, I was able to get my body back on track so I could share this make with you (a few months later…)  Although, next time, I will definitely make a larger arm.  As I’ve mentioned before, my arms are heavy for RTW based on my waist and bust measurements….so I  should’ve known the arms would be slightly too tight!  You can see all the extra folds around my armpit area.  But it’s my fault for being too anxious and not making a muslin. (Rookie mistake…)   Melly Sews does include instructions to narrow out the neck…so maybe I’ll move up a whole size and then use that adjustment.  (I’ll keep you update and let you know what I do and how the process goes.)

This neckline is just gorgeous, right?  The ballet neckline hits at just the right spots on the shoulders so it’s not falling off.   I love how it shows the collar bone and is perfect for a statement necklace.  Bandana scarves are pretty hot right now and would pair well with this kind of opening.

The open neckline continues to the back. With my short hair, this ballet opening highlights my neck well.  I like this different style, which I haven’t seen much in other indie designers.

With a  raglan sleeve, this make comes together quickly.  The hem and sleeves are all pressed under and finished with a twin needle.  I like to use wooly nylon (aff link) in the bobbin for a little extra stretch and comfort with this method.  When sewing, it’s good to leave long thread tails and stretch out the hems afterwards.  This is just in case you have some tension issues and the bobbin thread was pulled too tight.


Even with the puckering around the armpit, I still love the design features of the Fairelith Top (aff link) and can’t wait to make another (with the right adjustments!) The extra folds do not matter to me on a day-to-day basis.  But if you run across the same issue, a jacket or vest like this one above can help you hide it.  Lol.

Happy Sewing Friends!

Cristy