
Boho style is all over the place right now and I thought I’d try to catch up with this Sew It Yourself Kimono. The wrap is part of the Bohemian Chic trend which is all about being unconventional, artsy and spirited. To me, it’s a very relaxed and airy style but the “chic” part keeps it classy.
I’ve been in a fashion rut ever since having my little guys. I’m much happier (and more comfortable) in my yoga pants and a t-shirt any day. But whenever I have a “girls trip” with my hip city friends, I feel like the frumpy charity case…so I decided to do something about it!
I’ve been eying up Kimonos for awhile, but when Sew Caroline had a post referencing her FREE pattern on IG one day, I knew I had to suck it up and make my own. The pattern is one size fits most and being a whopping 5’3″, it was good for me 😉
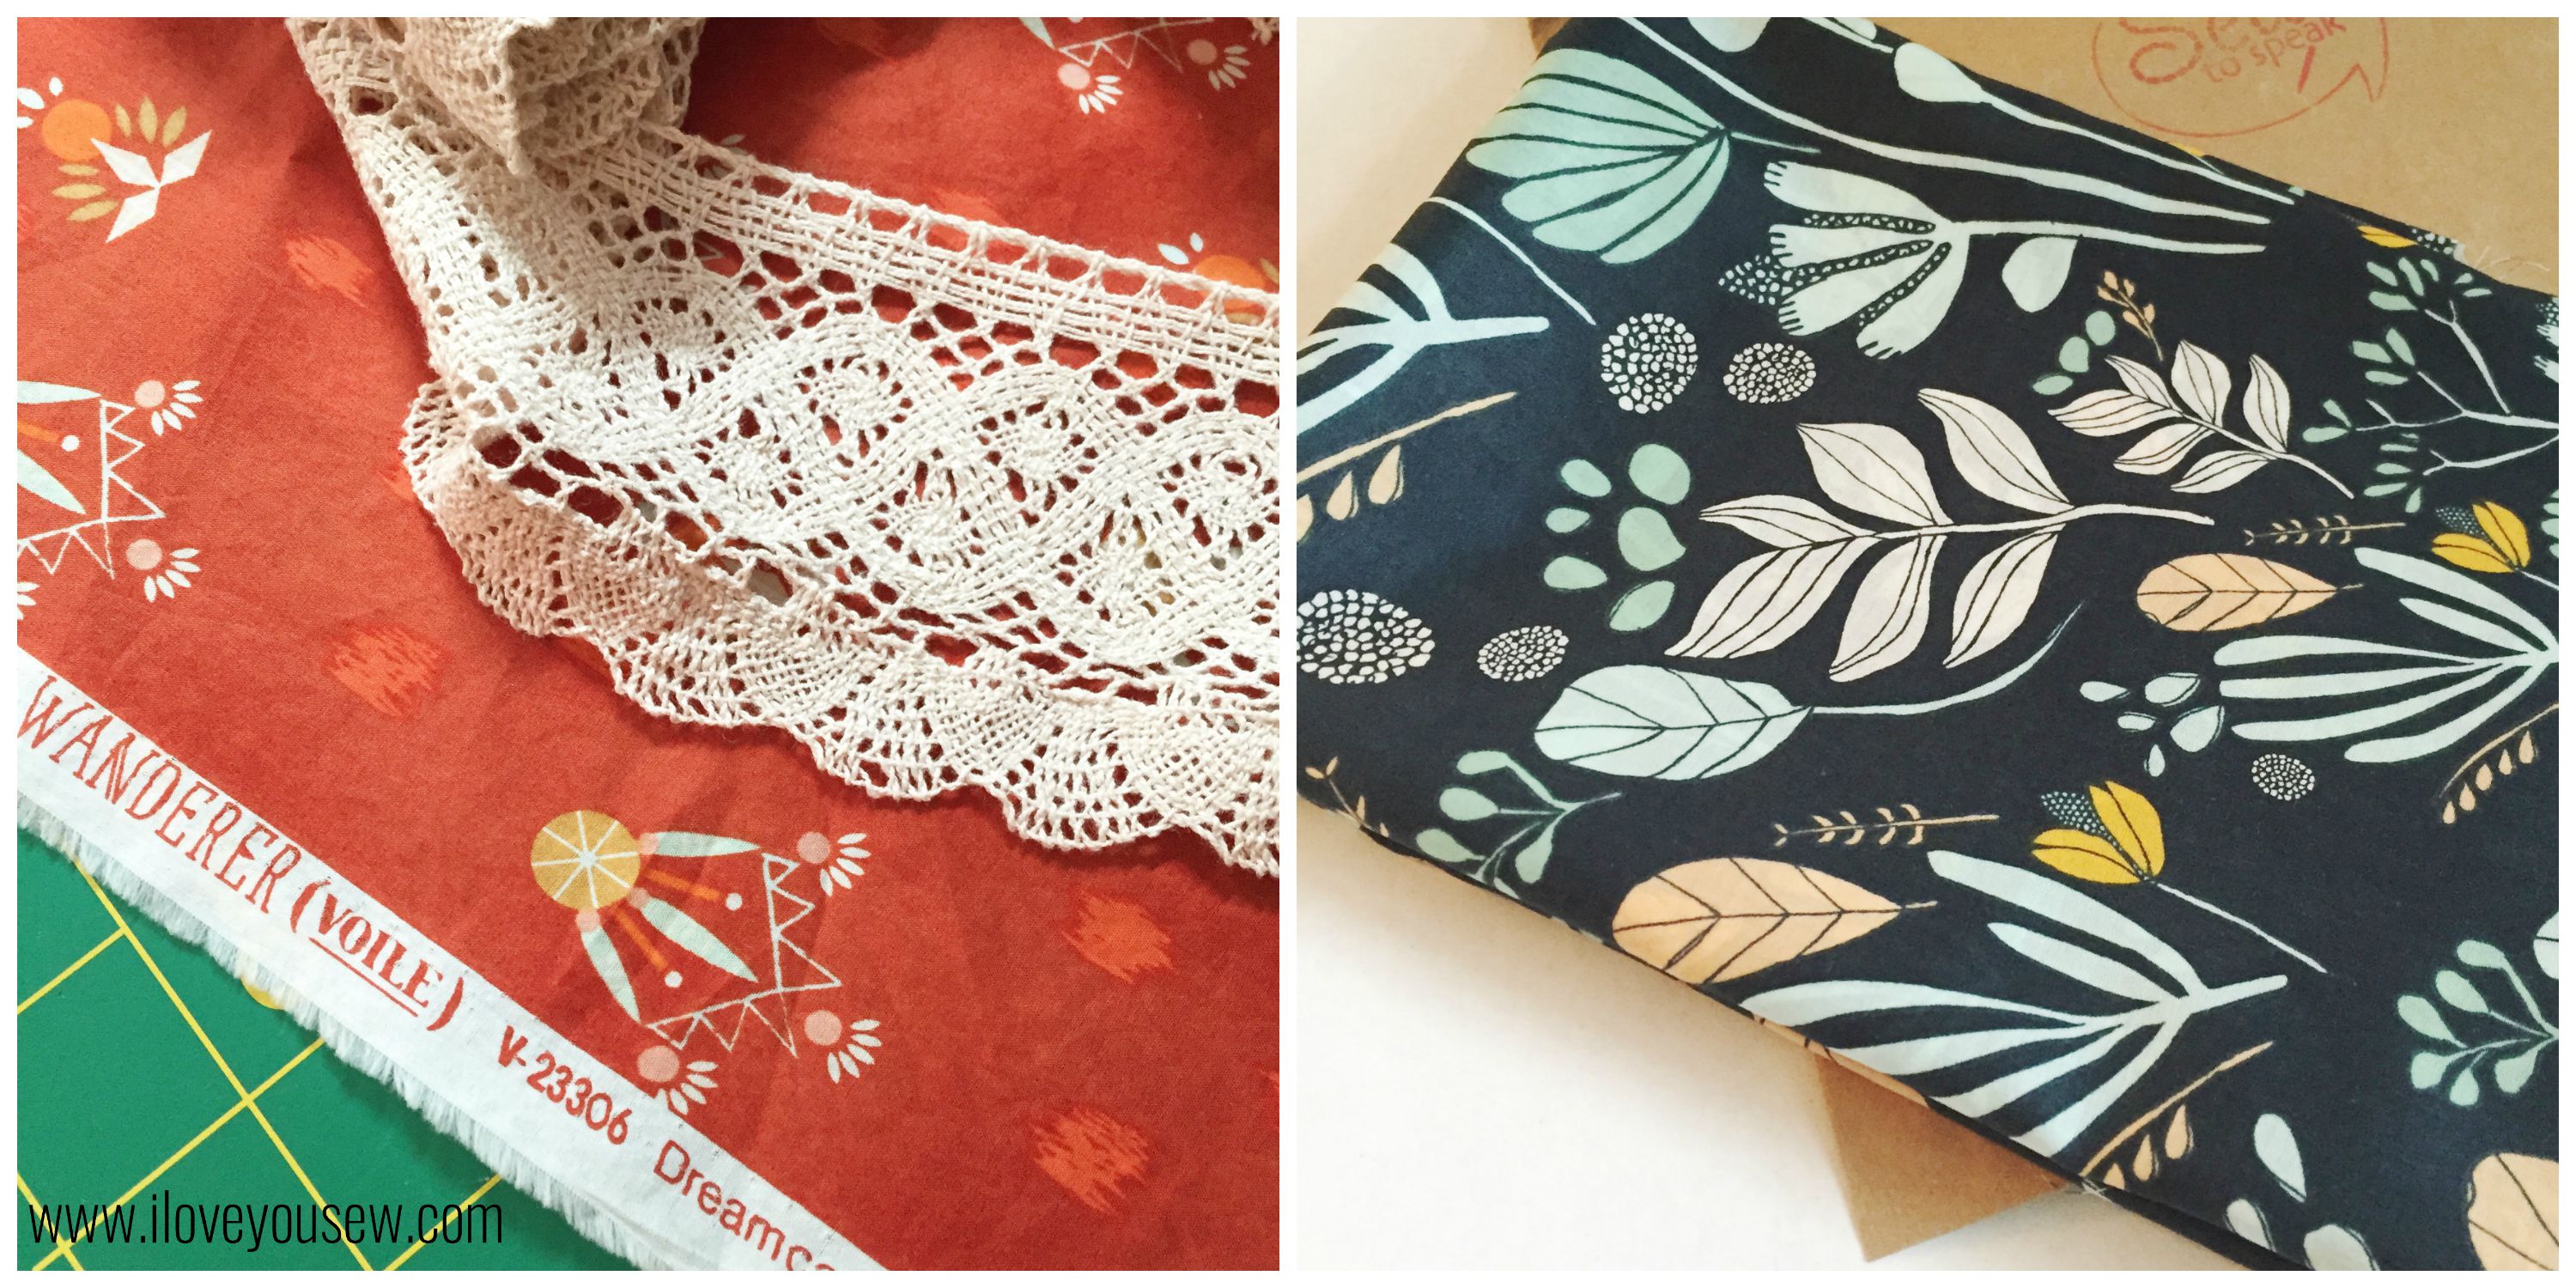
When selecting fabric for a Kimono, you need some good drape. I knew anything from April Rhodes, was gonna be perfect. Luckily, one of my favorite prints came in voile, so I snagged up Dreamcatching Flare from the Wanderer collection right away. For trim, I wanted some earthly lace. I tried to get a friend to crochet some for me (hehehe,) but ended up at my local JoAnn’s! Who knew they had such a selection?!? As I was gathering supplies, I thought I should make two styles….so I picked up Leah Duncan’s Bare Nopal Gloom from Morning Walk in voile at my Local Quilt Shop (LQS). For the trim on this one, I used some delicate vanilla lace from my stash to complement the steely blue.
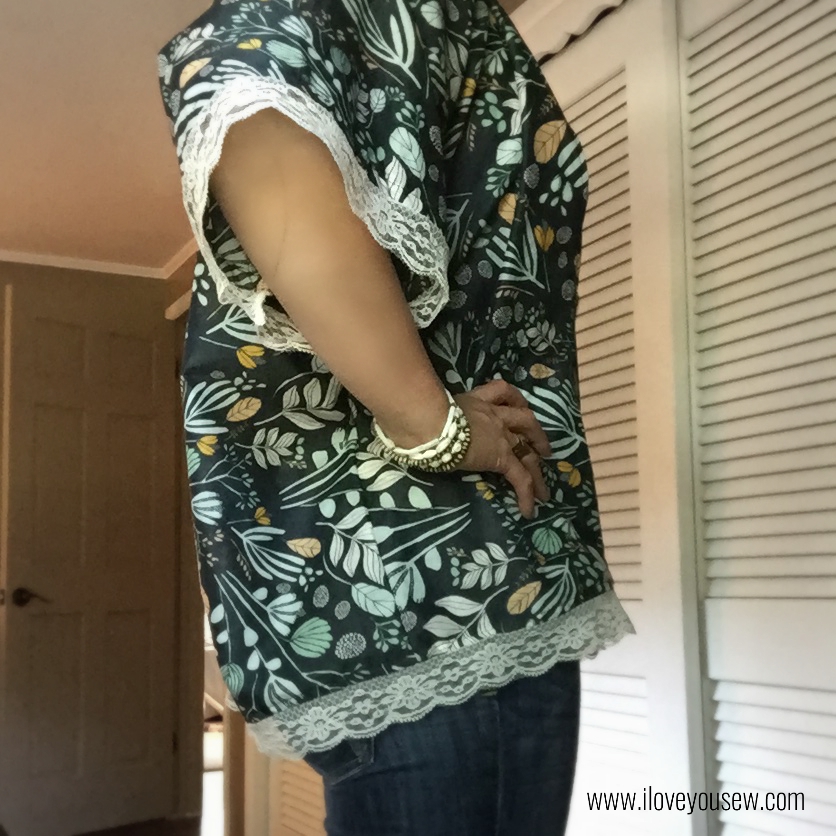
Version A- Morning Walk:
Sew Caroline‘s pattern and instructions are pretty straight-forward and simple. However, I did get hung up on how she attached the trim to the sleeves. I tried to find some pattern reviews online to show me how, but couldn’t find any (at least without having to pay subscription fee.) The following are the steps as I interpreted them so there would be some pictures out in cyber world 😉
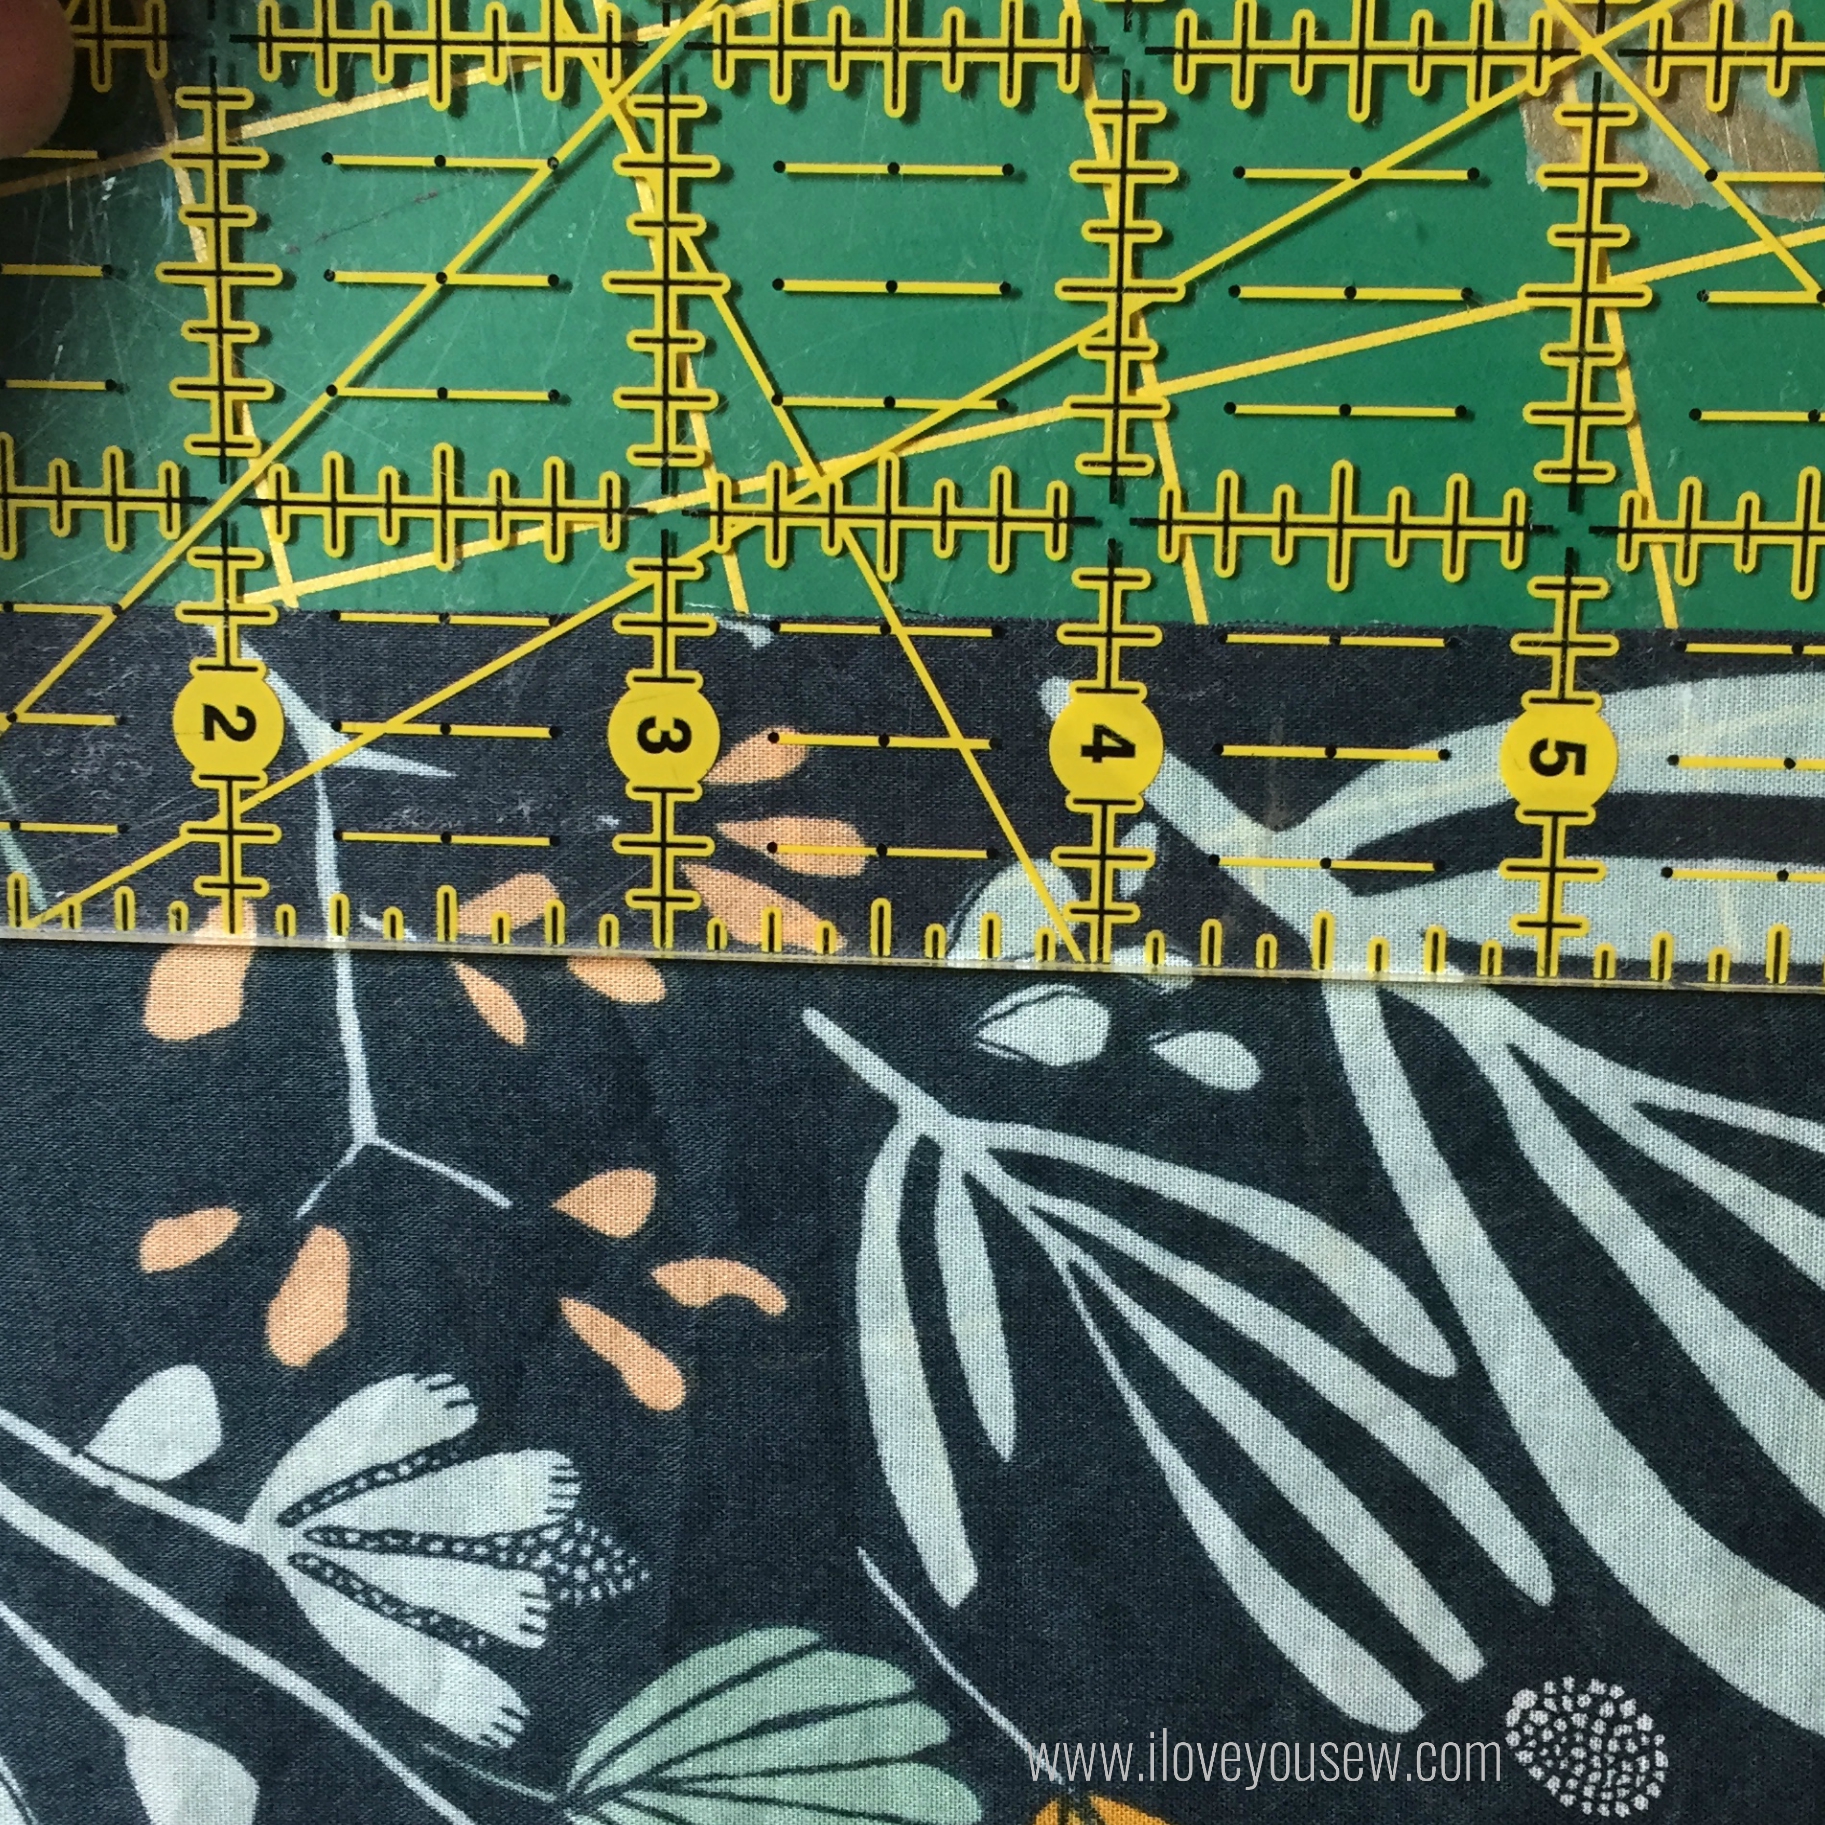
With the right-side facing up, measure 3/4″ down from the end of the sleeve and mark.
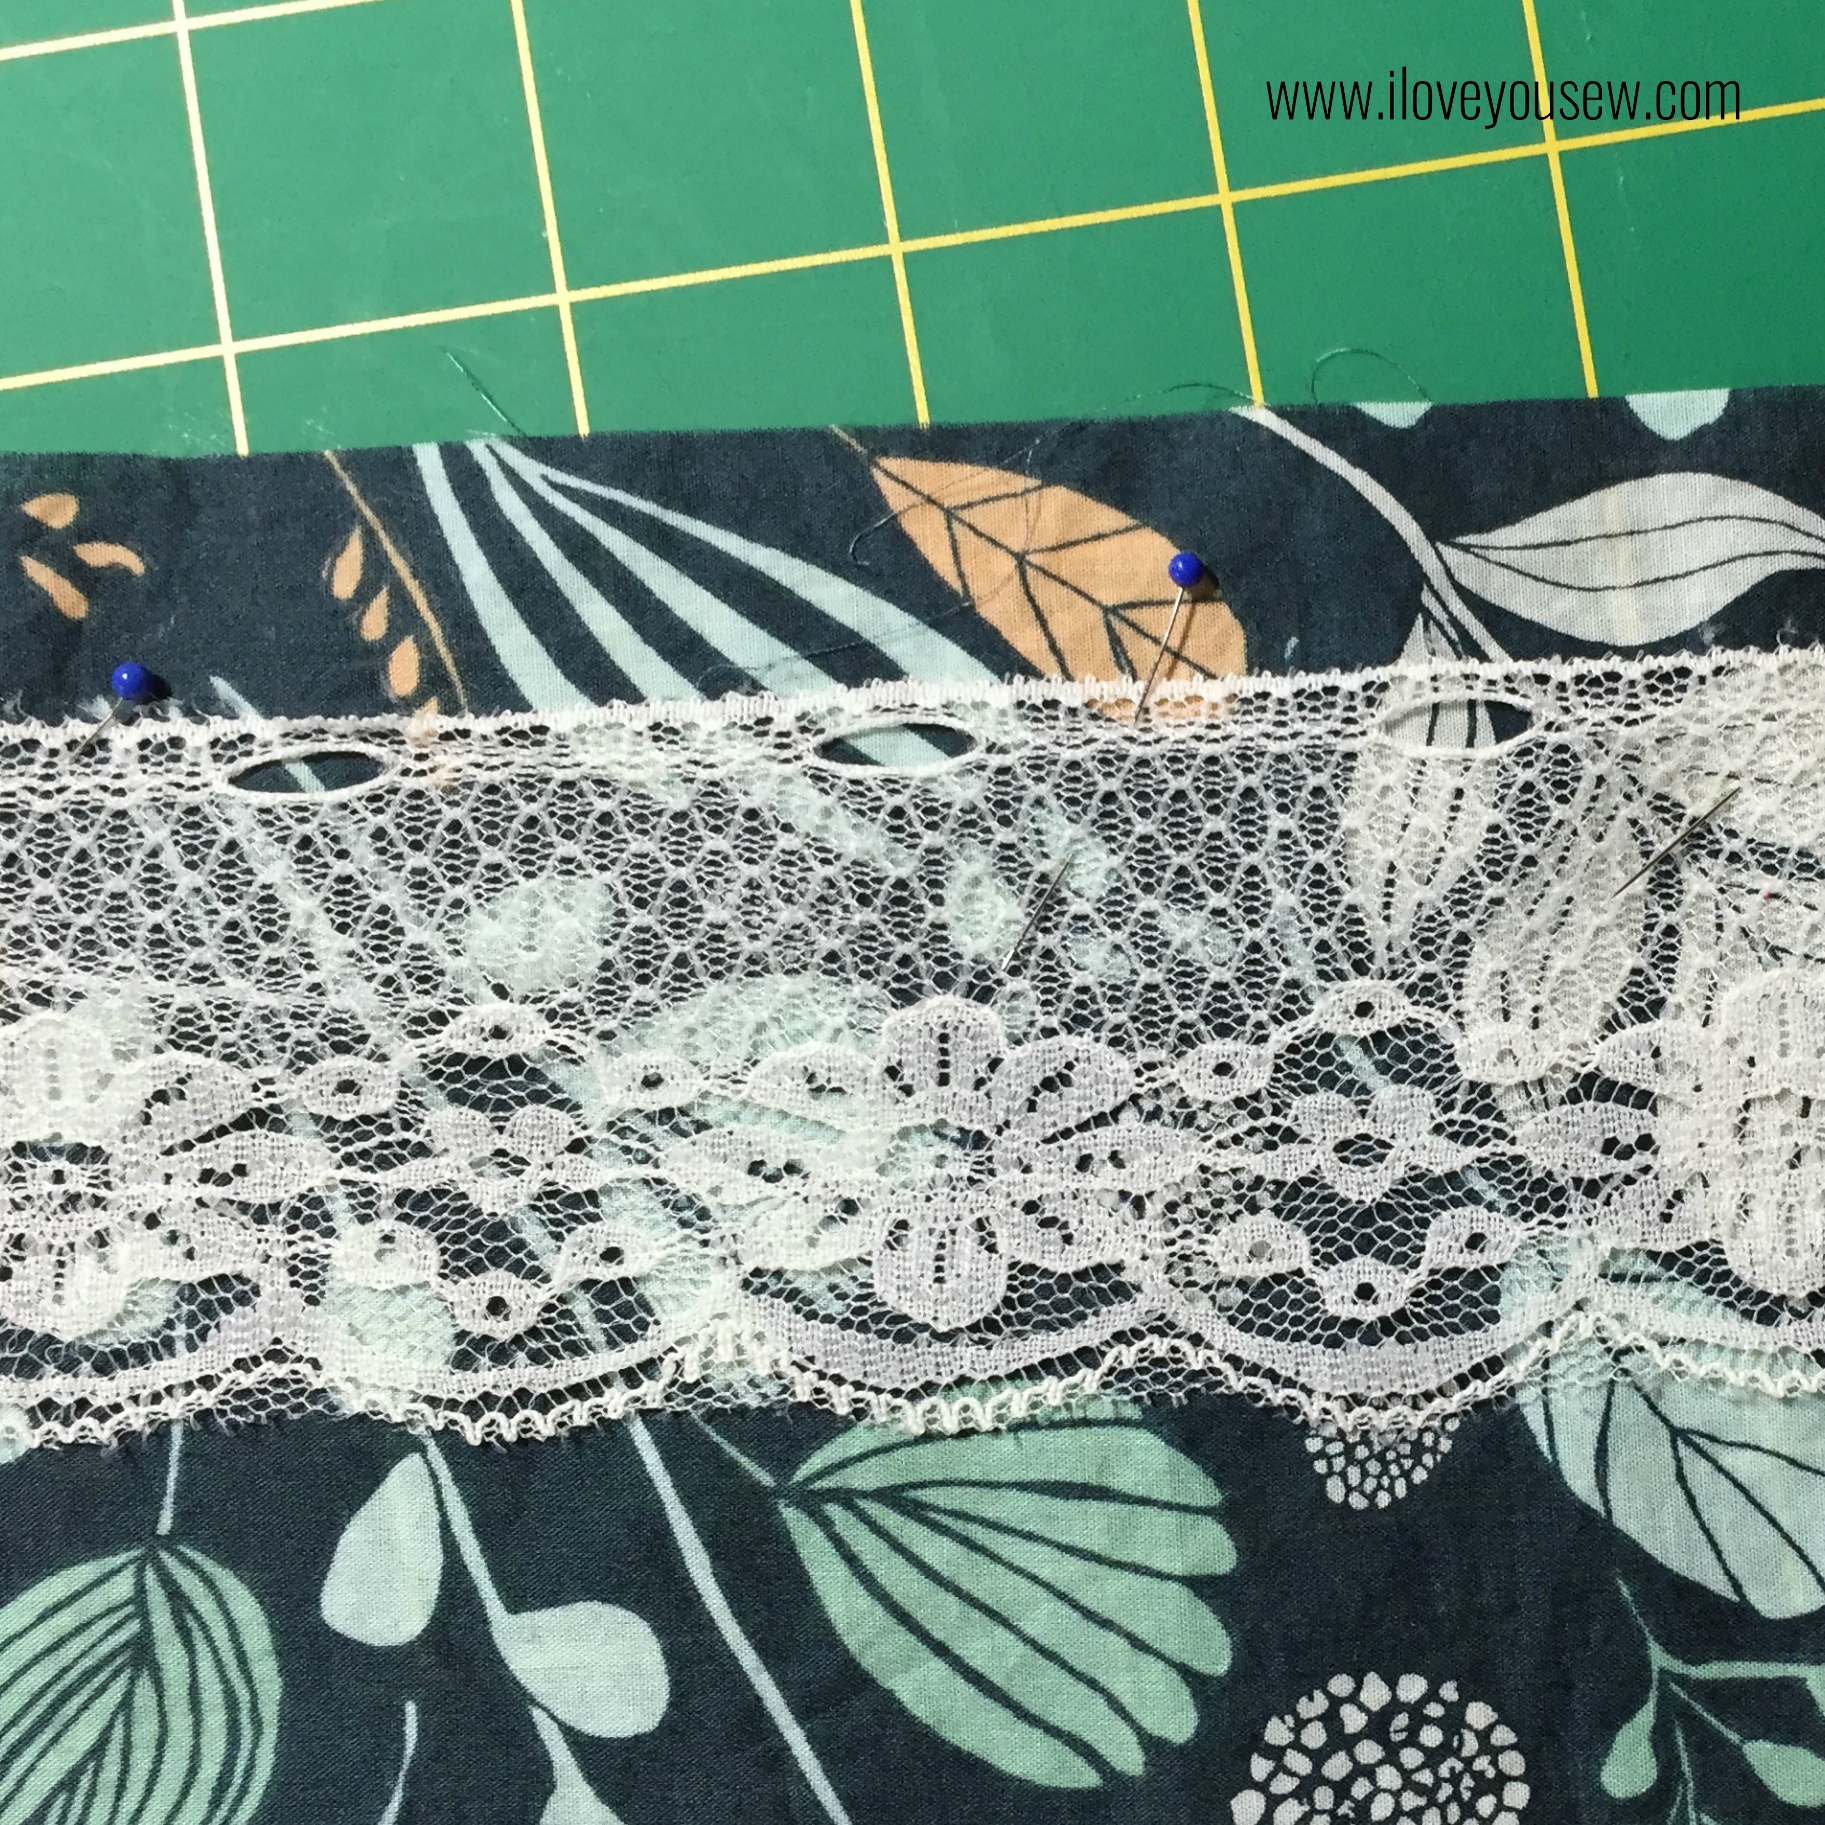
Pin the trim right-side facing the sleeve fabric on the line marked.
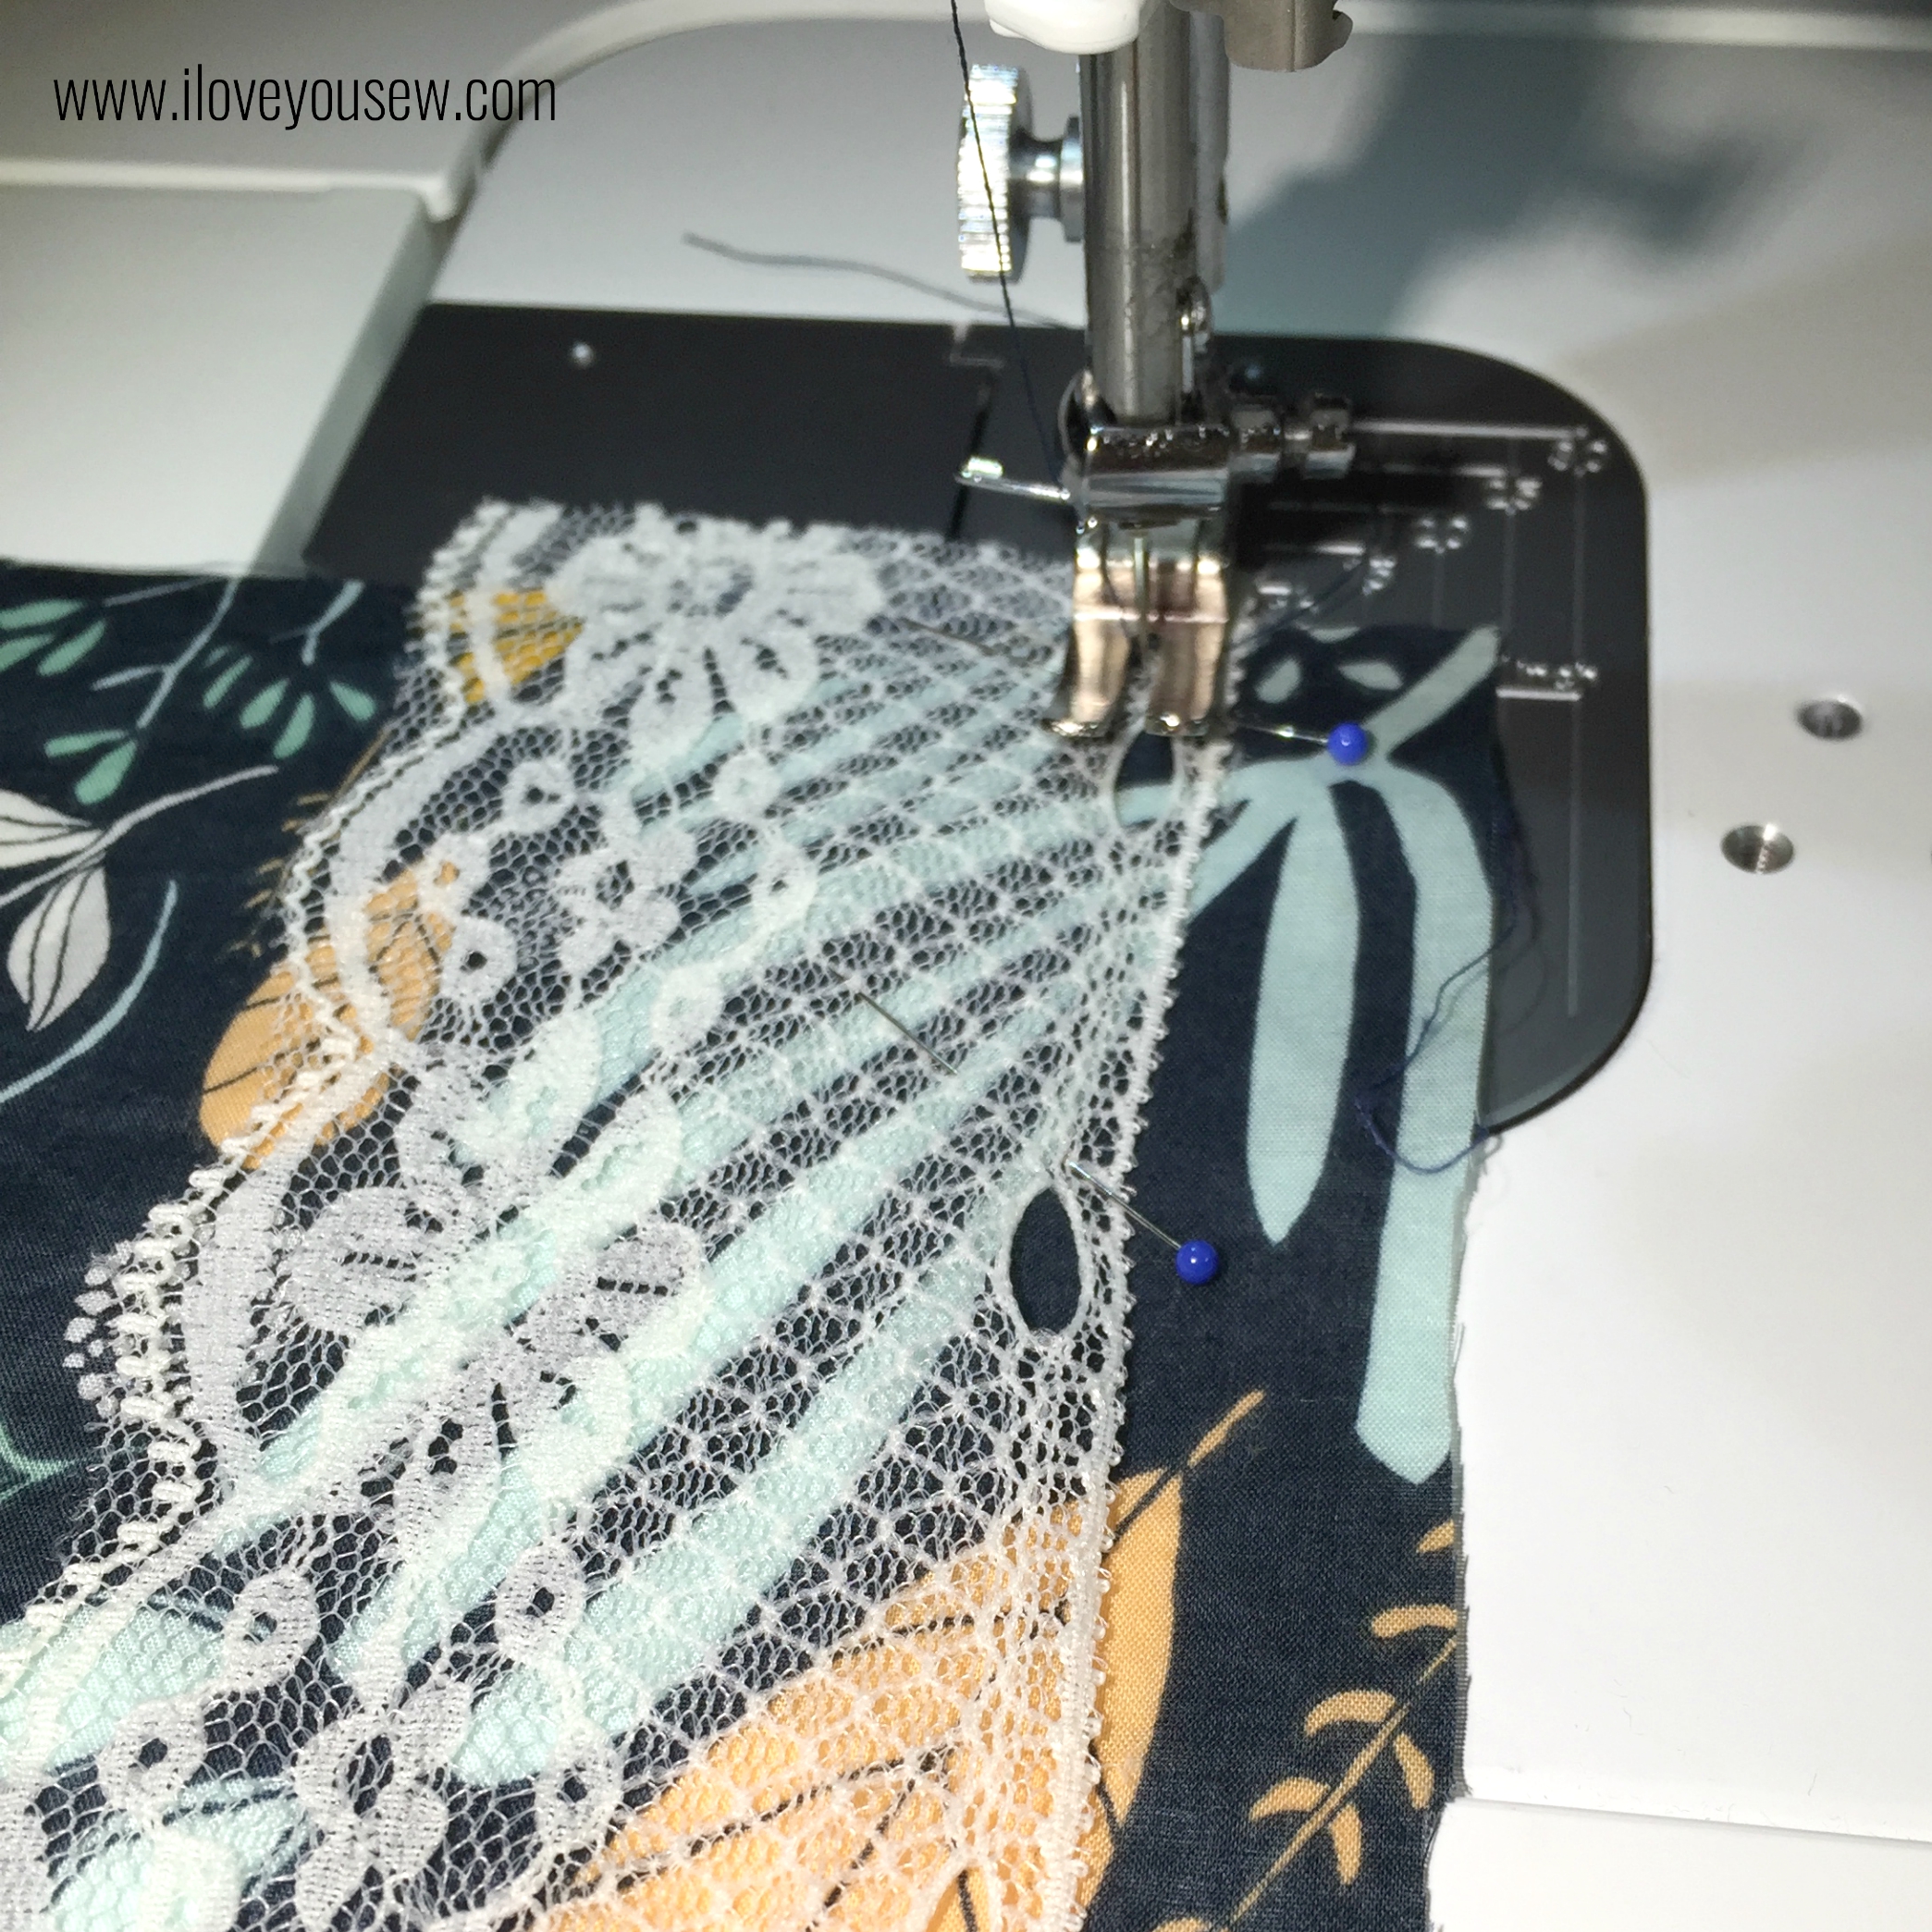
Sew the trim onto the sleeve with a 1/4″ seam allowance.
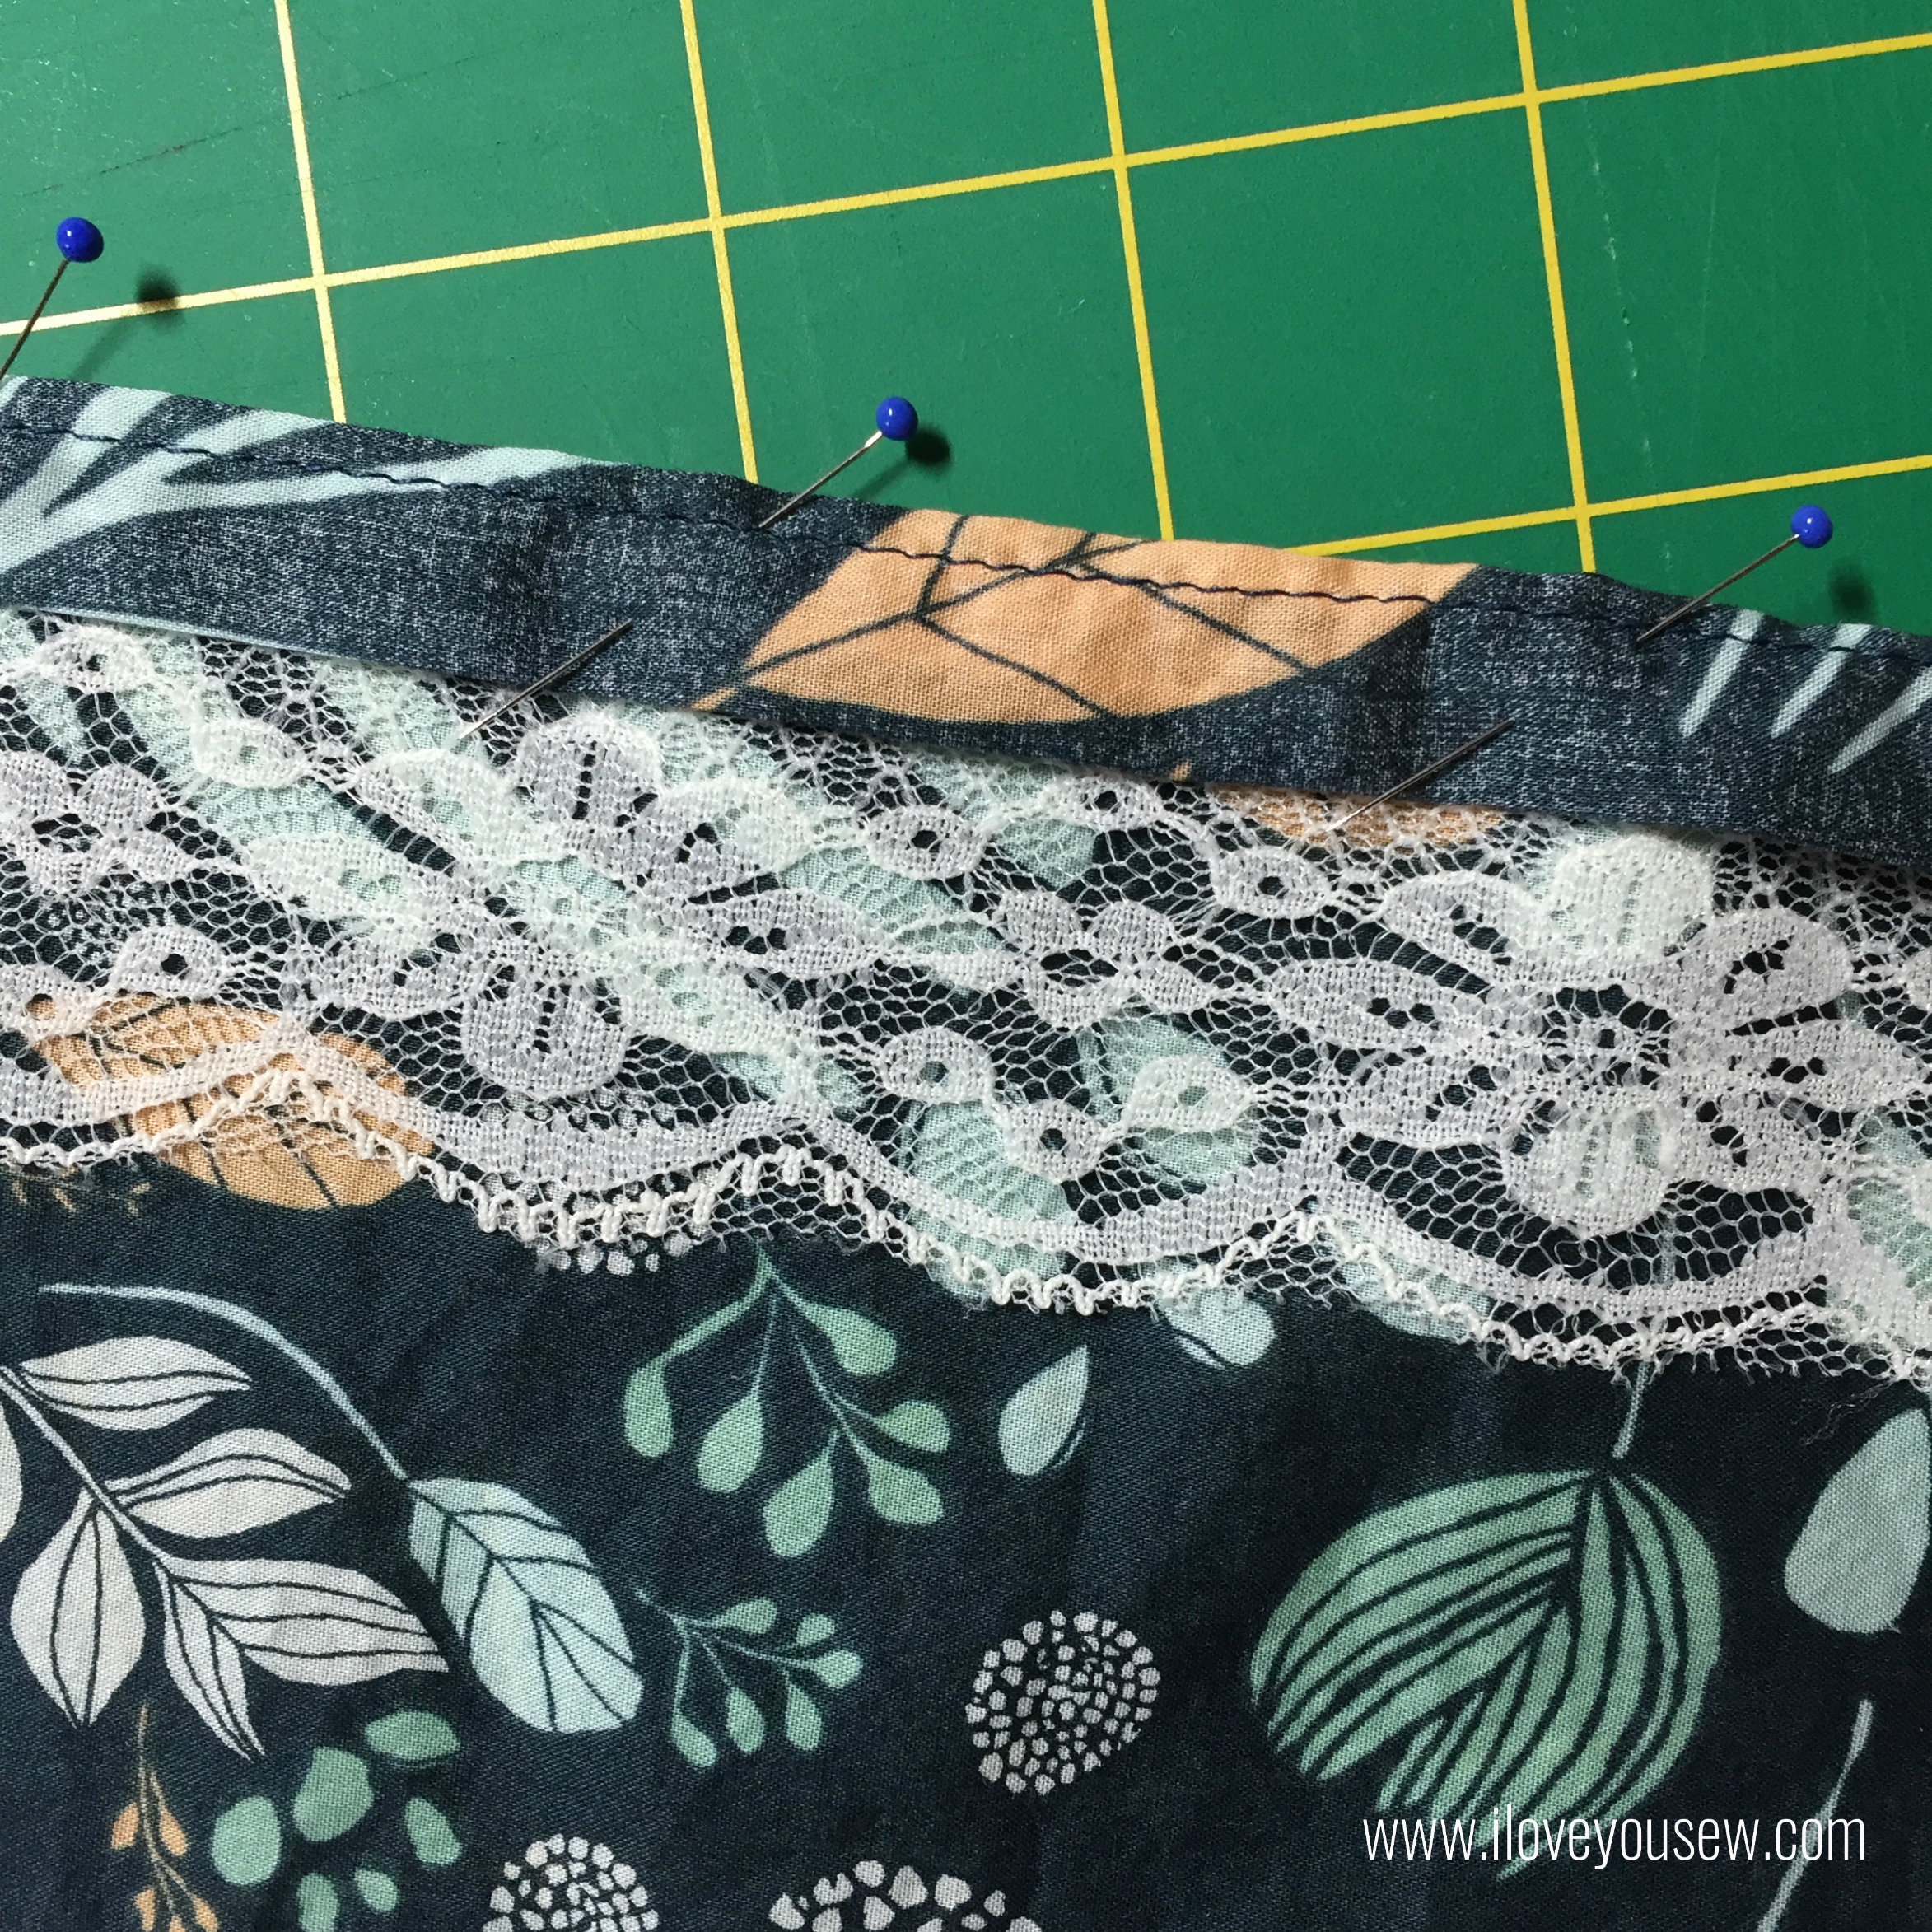
Fold the end of sleeve up 1/2″ and press (not pictured.) Fold up another 1/2″ press and pin in place. Sew 1/8″ from edge fold next to lace.
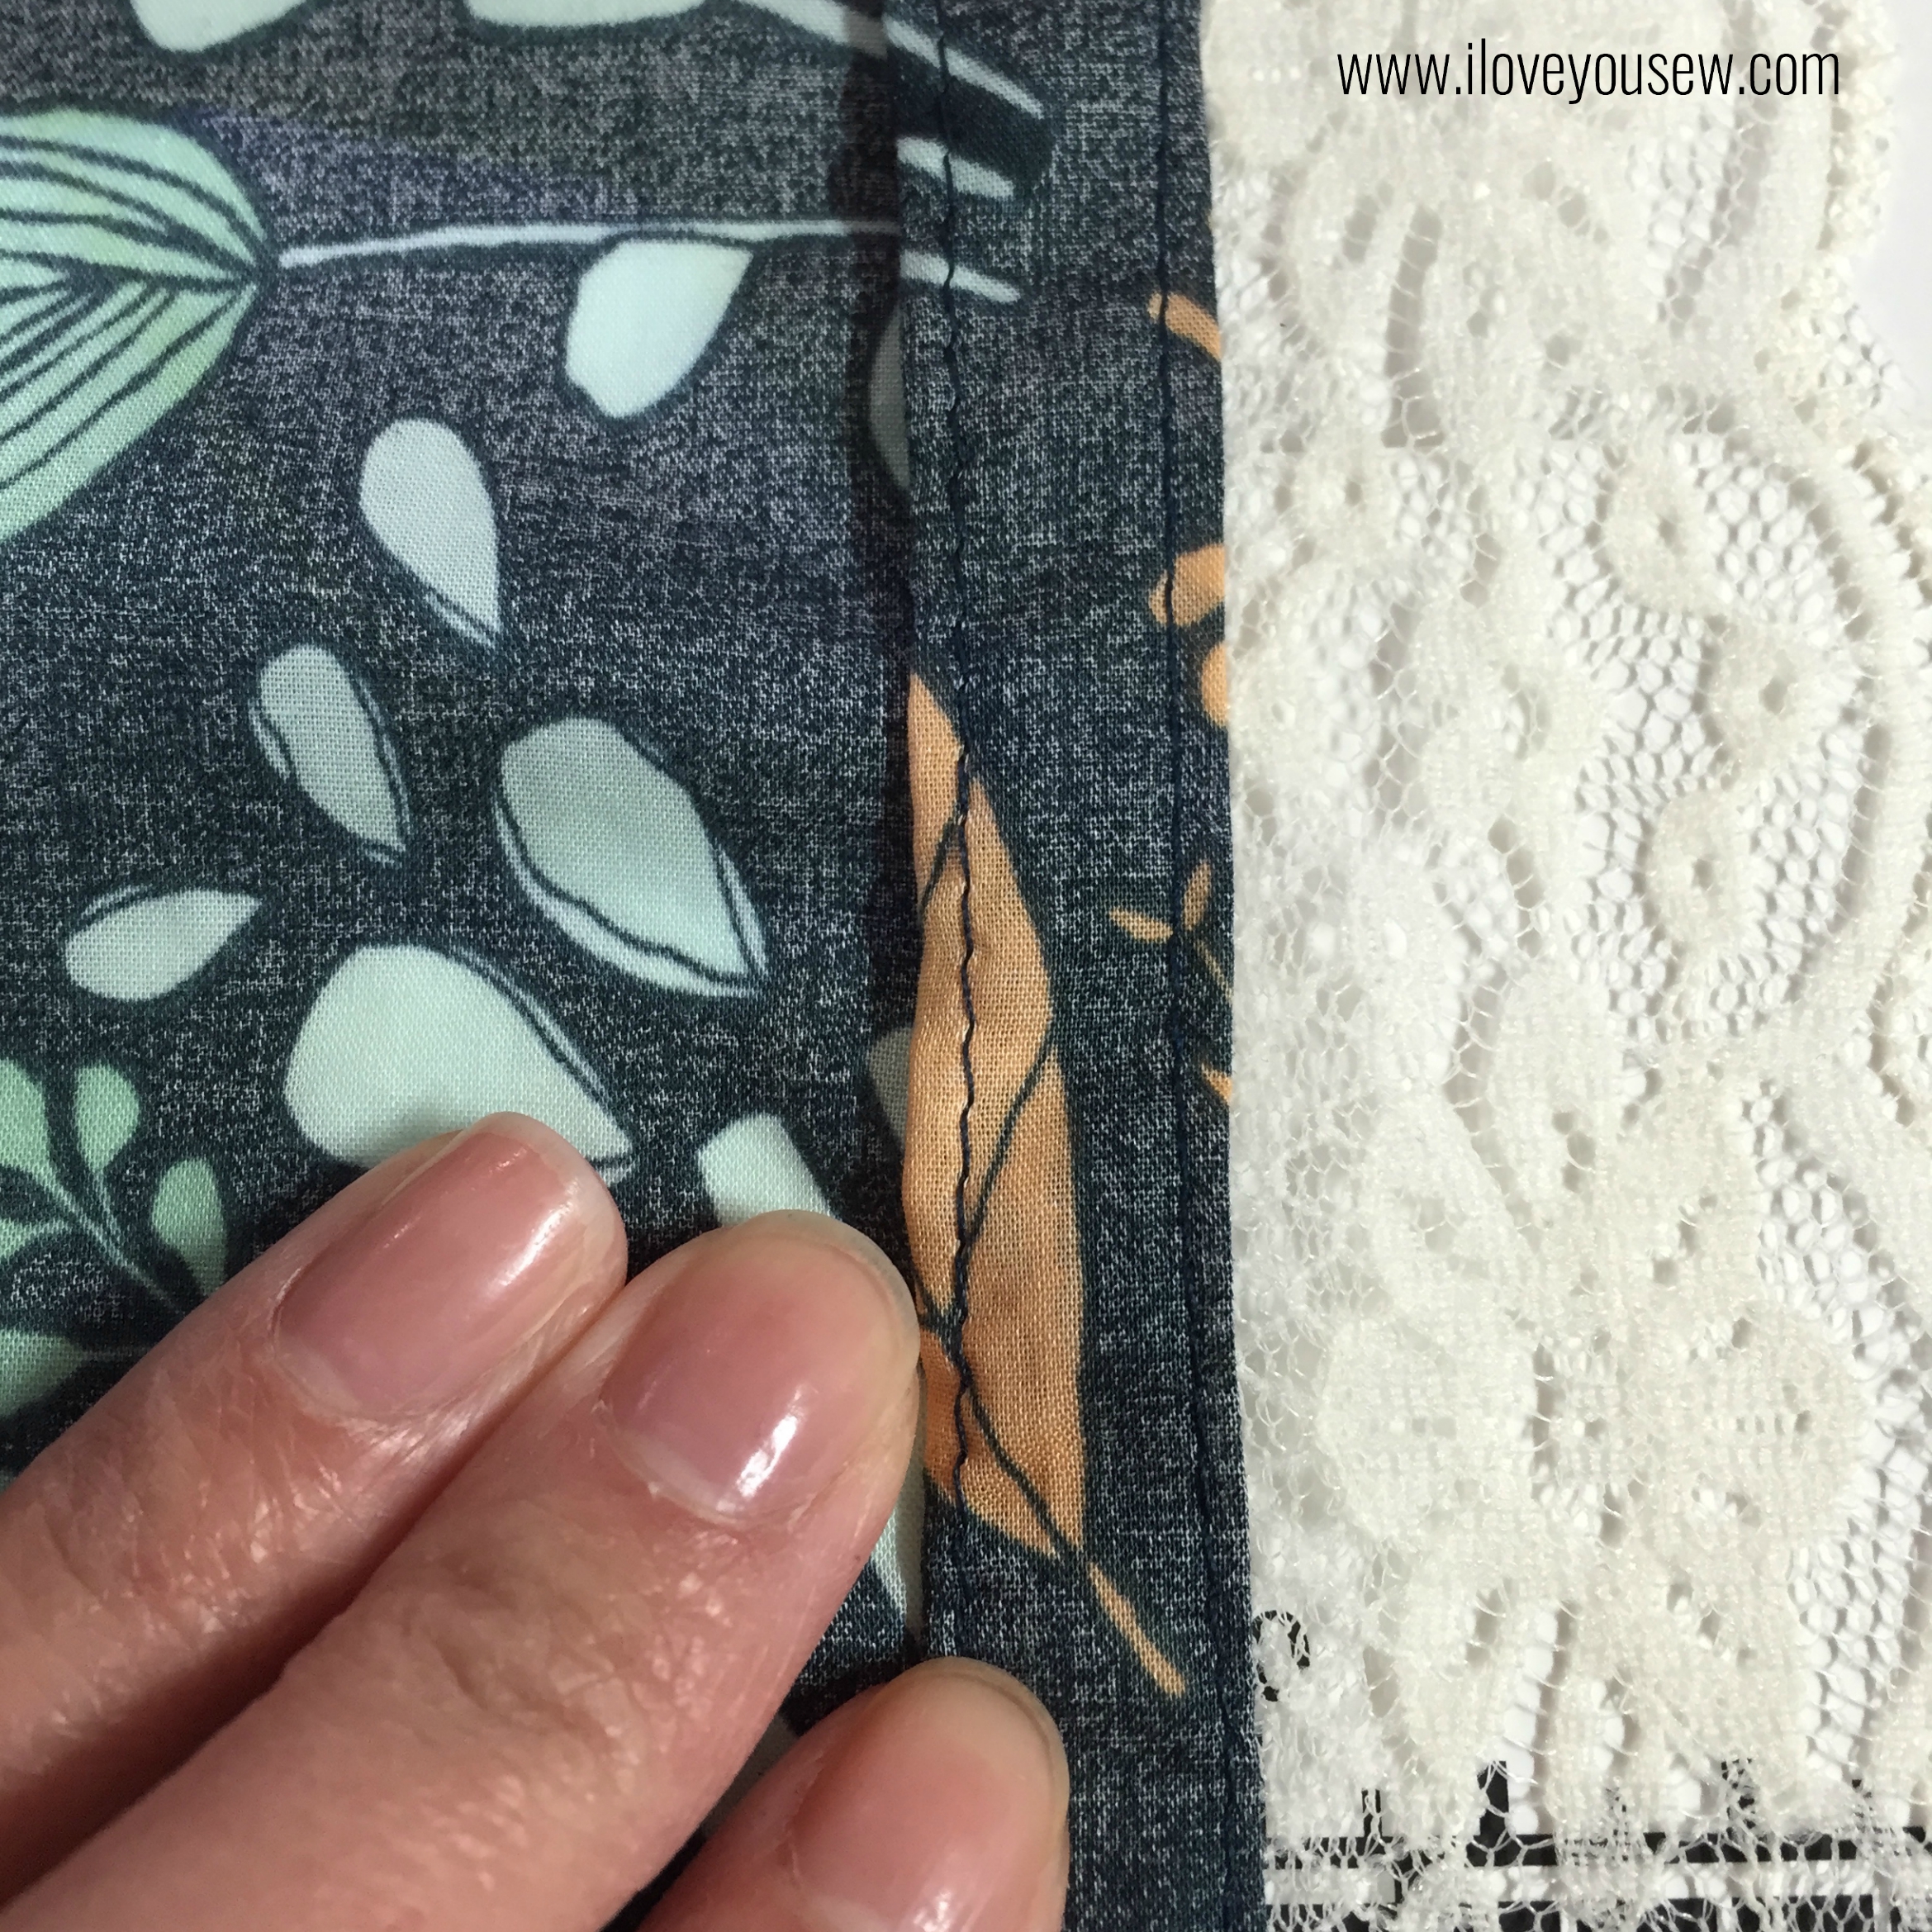
Fold the entire casing to the inside of the sleeve and press. Sew on top of the inside seam (under my index finger) to secure .
After I added the lace on each sleeve, I tried on the Kimono and wasn’t 100% happy with this technique. The sleeves “belled” out on their own and didn’t lay down as nicely. The extra folding and all the seams made the sleeves stiffen out a bit. However, I left the sleeves be and hoped that some washing will soften them out.
With the lace on the bottom of the Kimono, I decided to test out a French Seam technique that would drape more and allow for more of the lace to show.
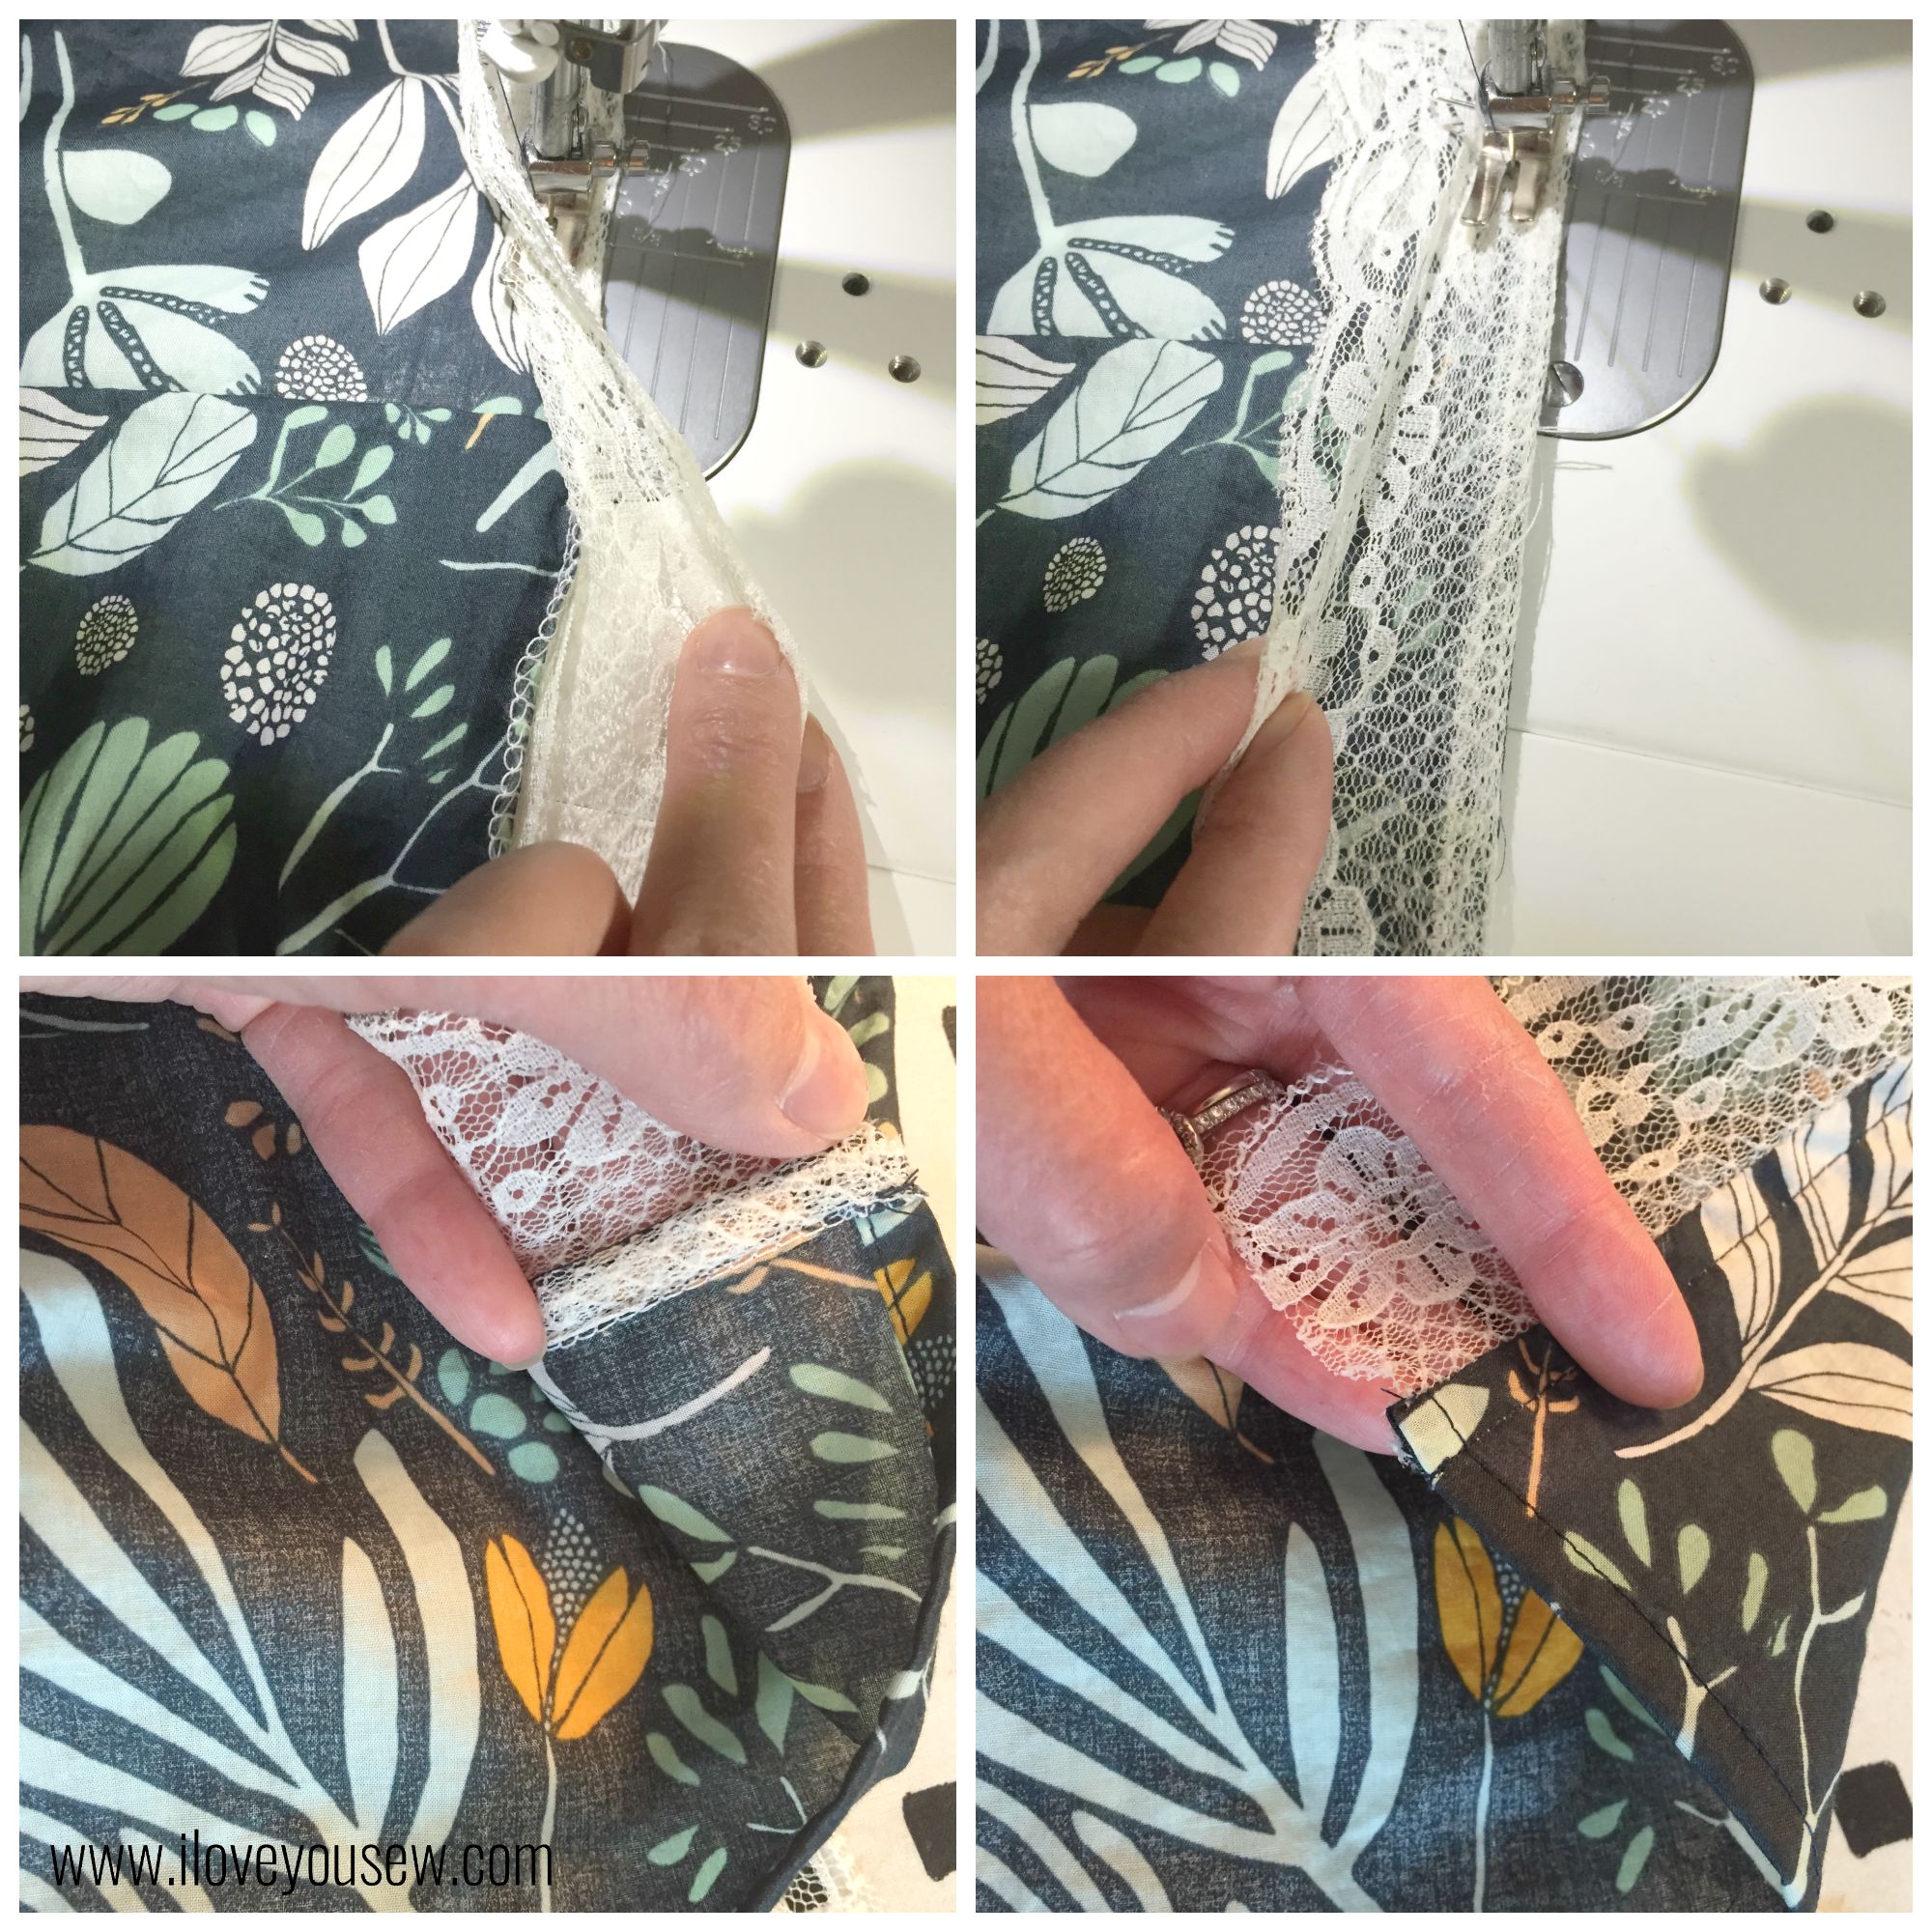
Clockwise from top-left:
- Serge or straight-stitch with wrong side of fabric and lace together.
- Fold the seam over with fabric and lace are right-facing. Press and sew 1/4″ seam
- Fold lace out and press. Sew seam in place.
- Outside of Kimono finished.
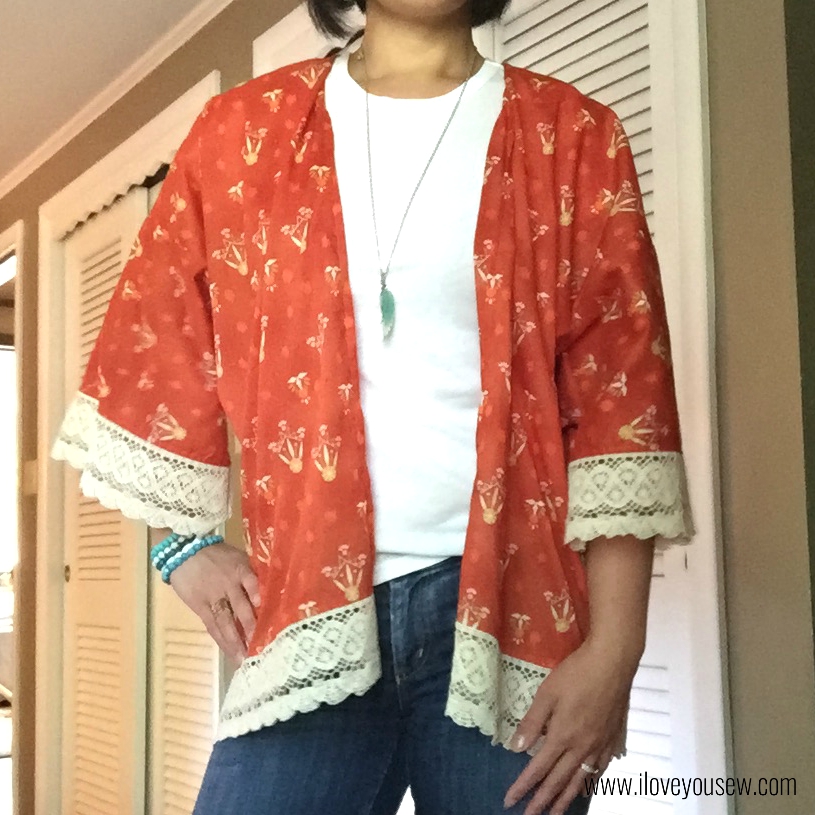
Version B- wanderer:
After making the Morning Walk Kimono, I made a few adjustments with this Wanderer one. The first adjustment was to make the back a little longer with the colder autumn season quickly approaching. I’ll wear this with denim jeans and leggings to go along with the amazing burnt orange color.
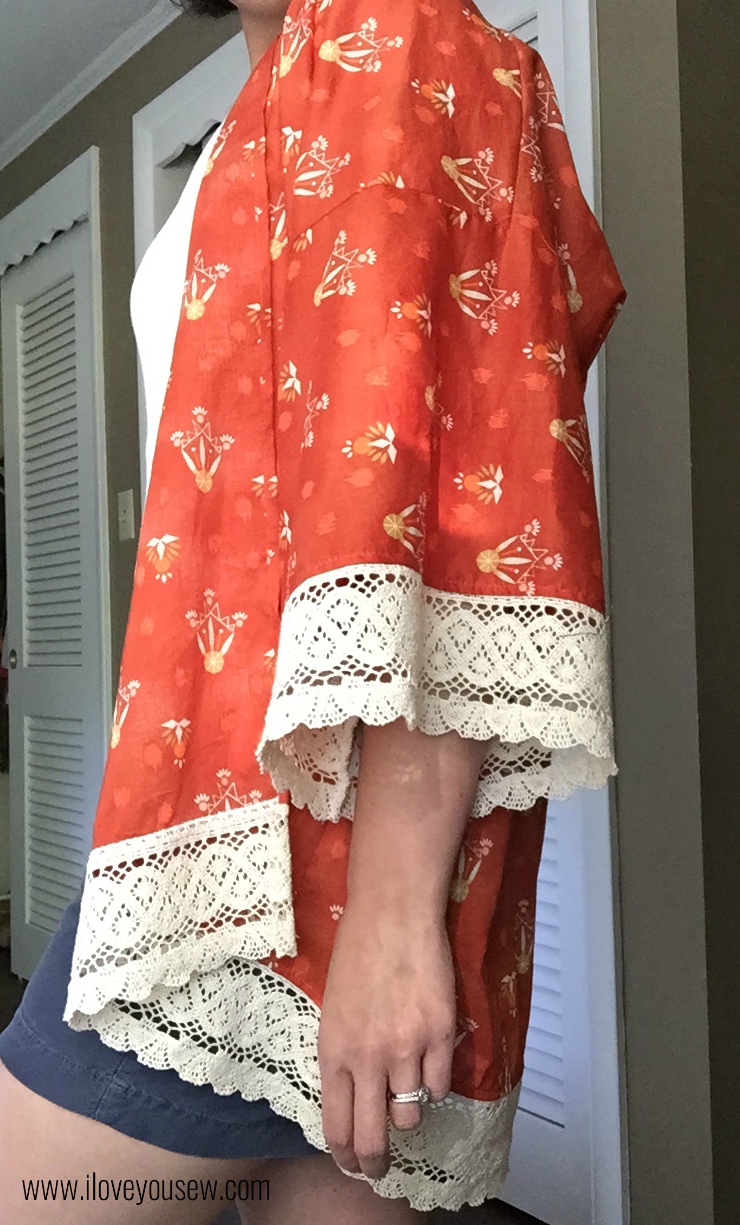
I cut the back piece 2″ longer than the pattern piece. After attaching the front pieces to the back, I folded the entire Kimono in half and made a cut connecting the original length of the front pieces to the longer back. This made for the nice drop to hide my bum 😉
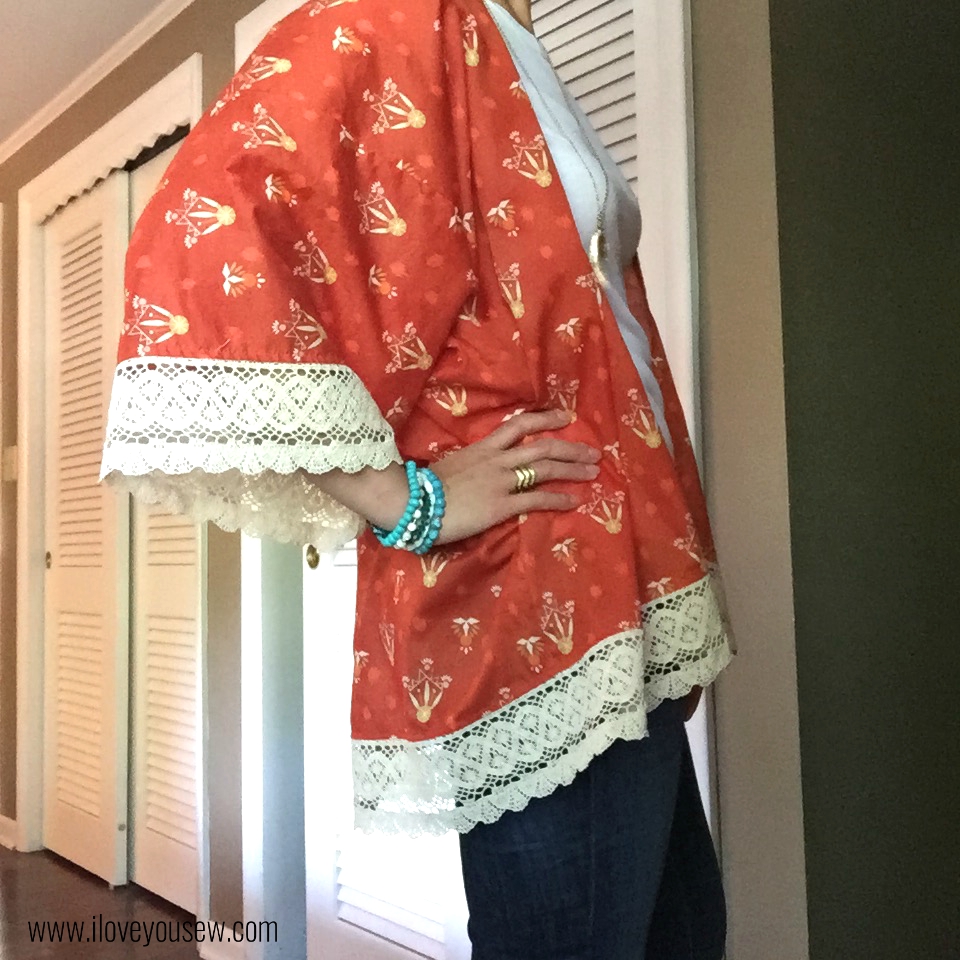
The second change I made was how I attached the lace. I wanted to have as much of the lace showing because it’s just gorgeous and I didn’t want to stiffen up the sleeves like with Morning Walk. The lace was attached with my serger (blade disengaged) and then I top-stitched it into place.
The interior isn’t as pretty as the original pattern instructions, but I don’t mind one bit. I got all the extra length and flow I expect from a Kimono. The width and the weight of the lace will most likely keep the inside seams hidden away…
I absolutely love both versions of Sew Caroline’s Kimono pattern and definitely recommend this as a beginner garment. I can’t wait to strut around with some more Boho Chic style this season 😉 What are you making this fall? I need some suggestions for some future wardrobe fillers!
Happy stitching,
Cristy