Blank Slate Patterns: Fairelith Top Review

As I sew more clothing for myself, I try to create pieces which will last and fit with my existing wardrobe staples.  However, I also find myself looking into fashion trends again.  The 80’s and 90’s have come back again with a mixture of looks.  I didn’t think I would be into high waisted jeans, but I just bought my first pair (after these photos were taken) and LOVE them!  With young kids, you never have to worry about running around with them and accidentally showing off your plumber skills (Eek!)

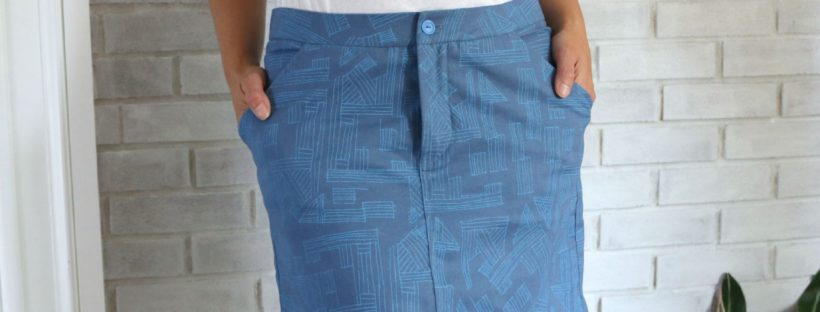
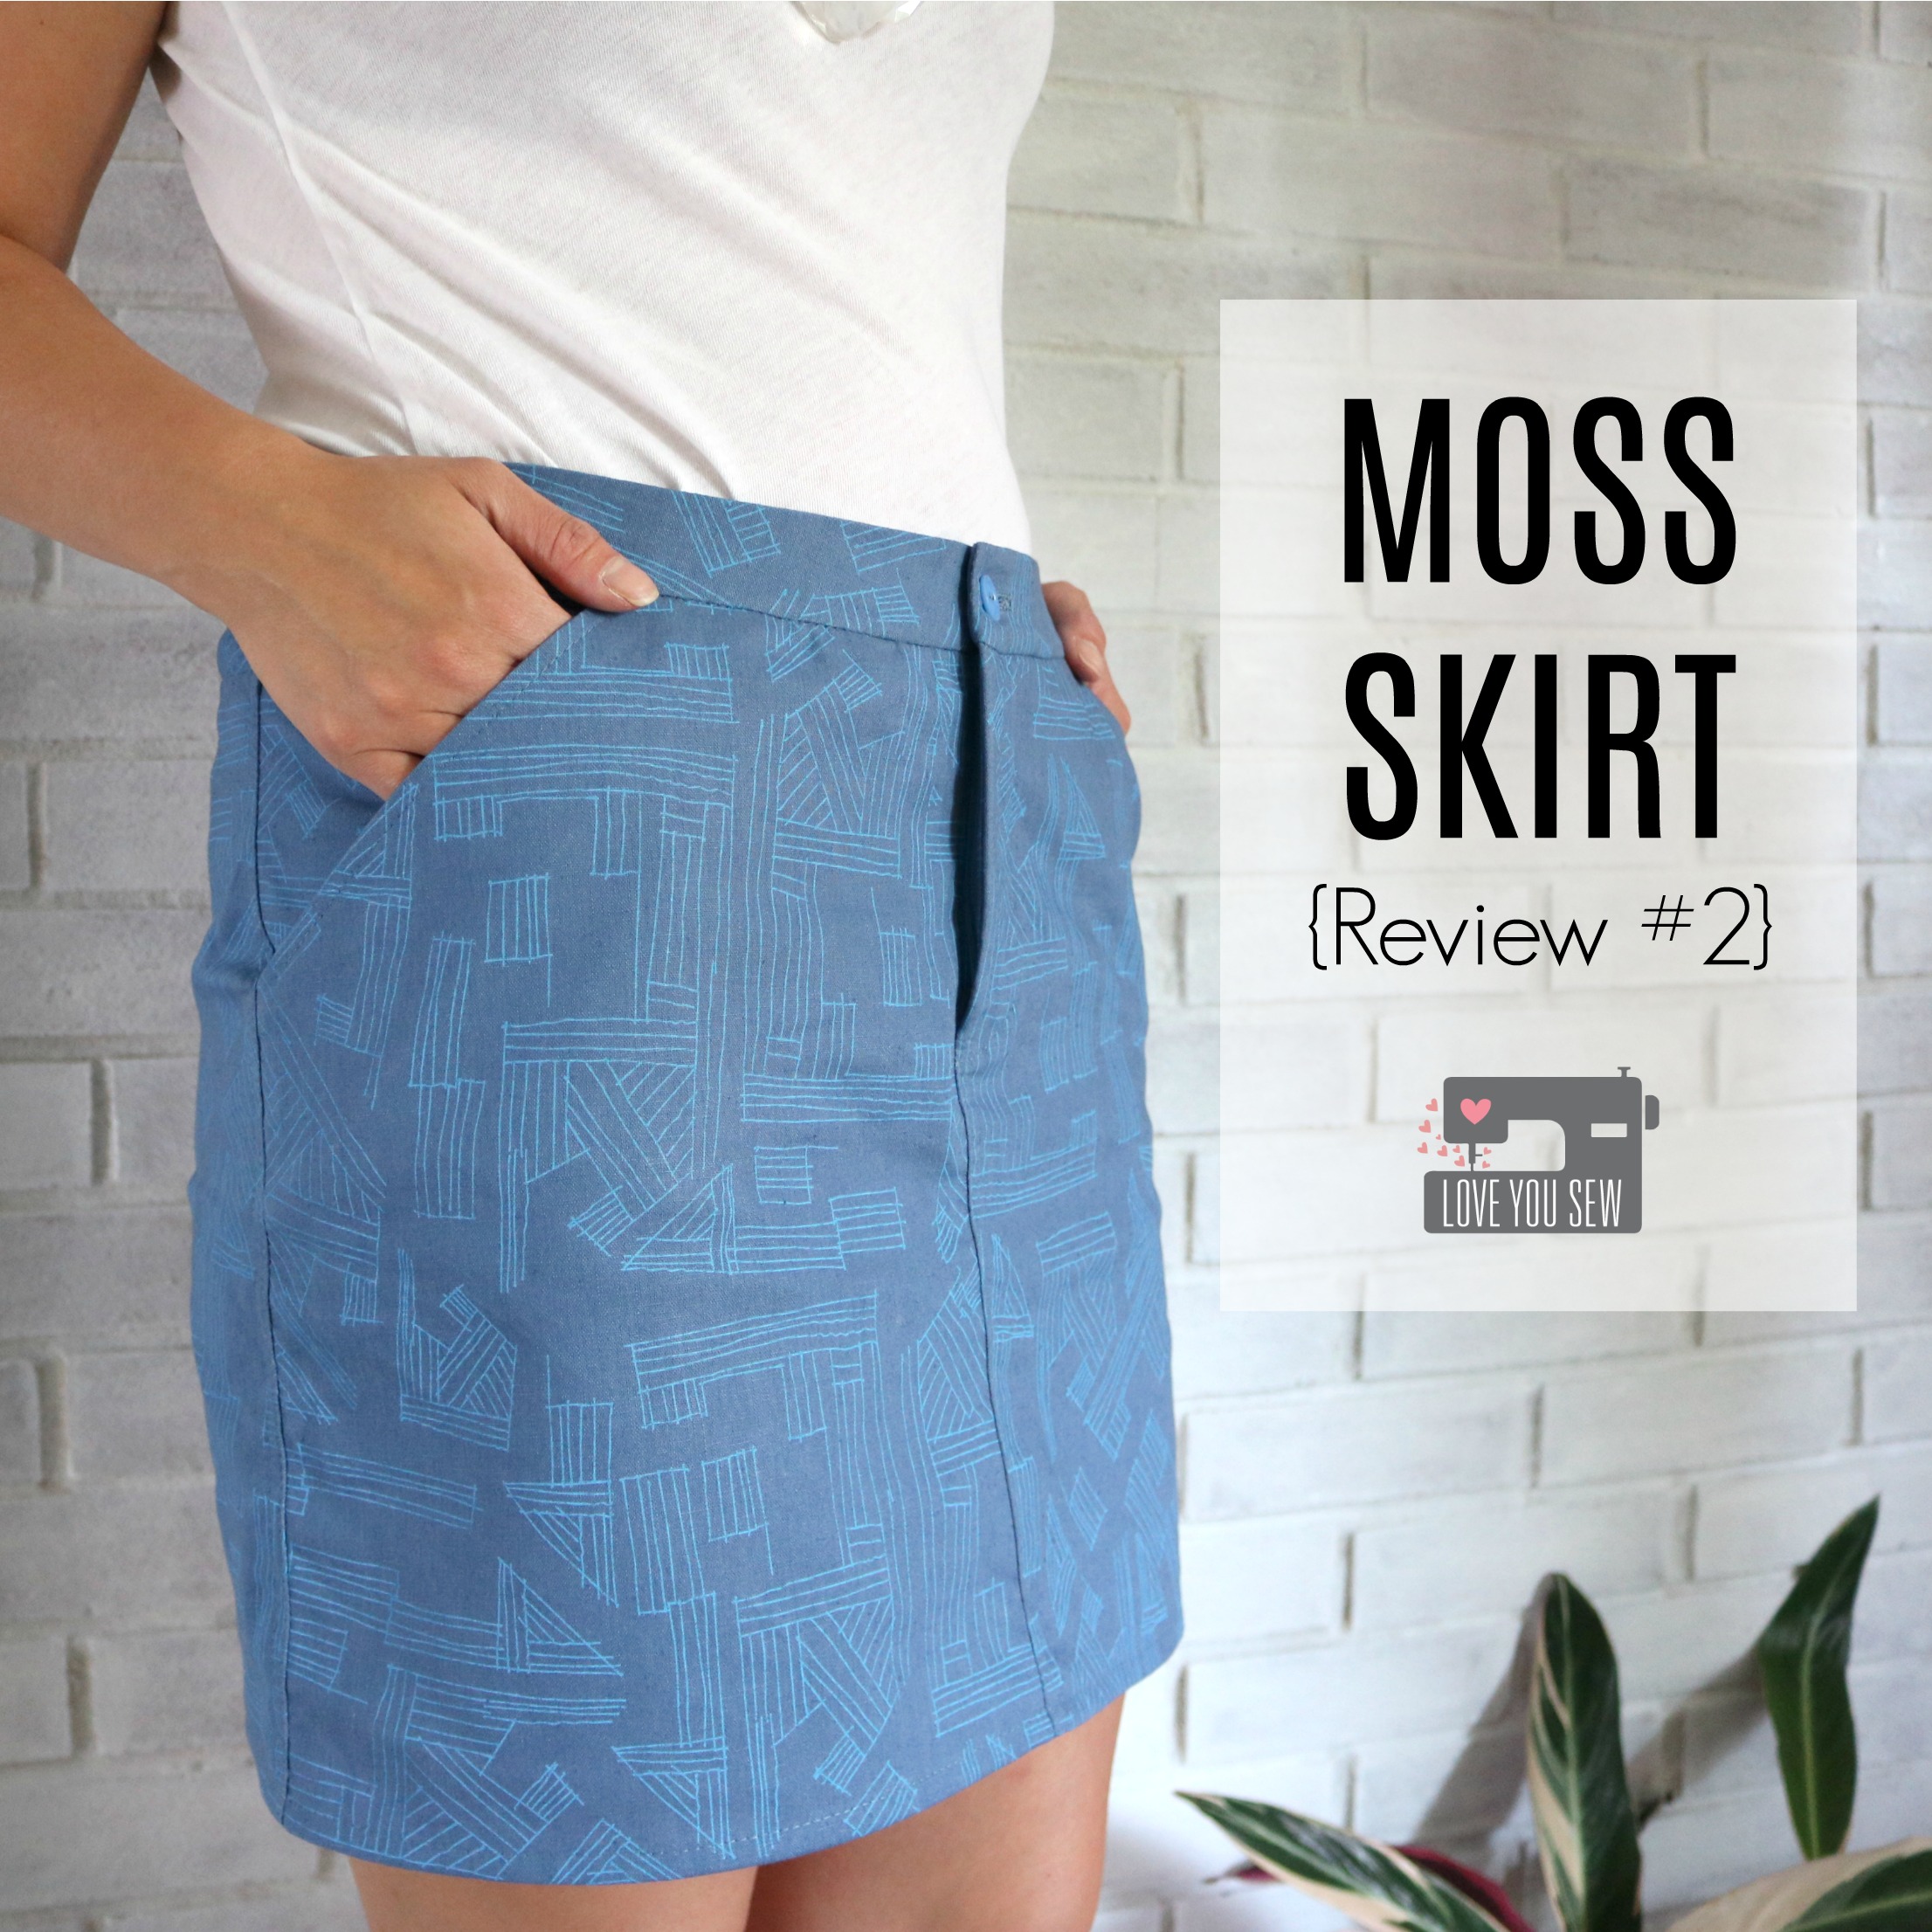
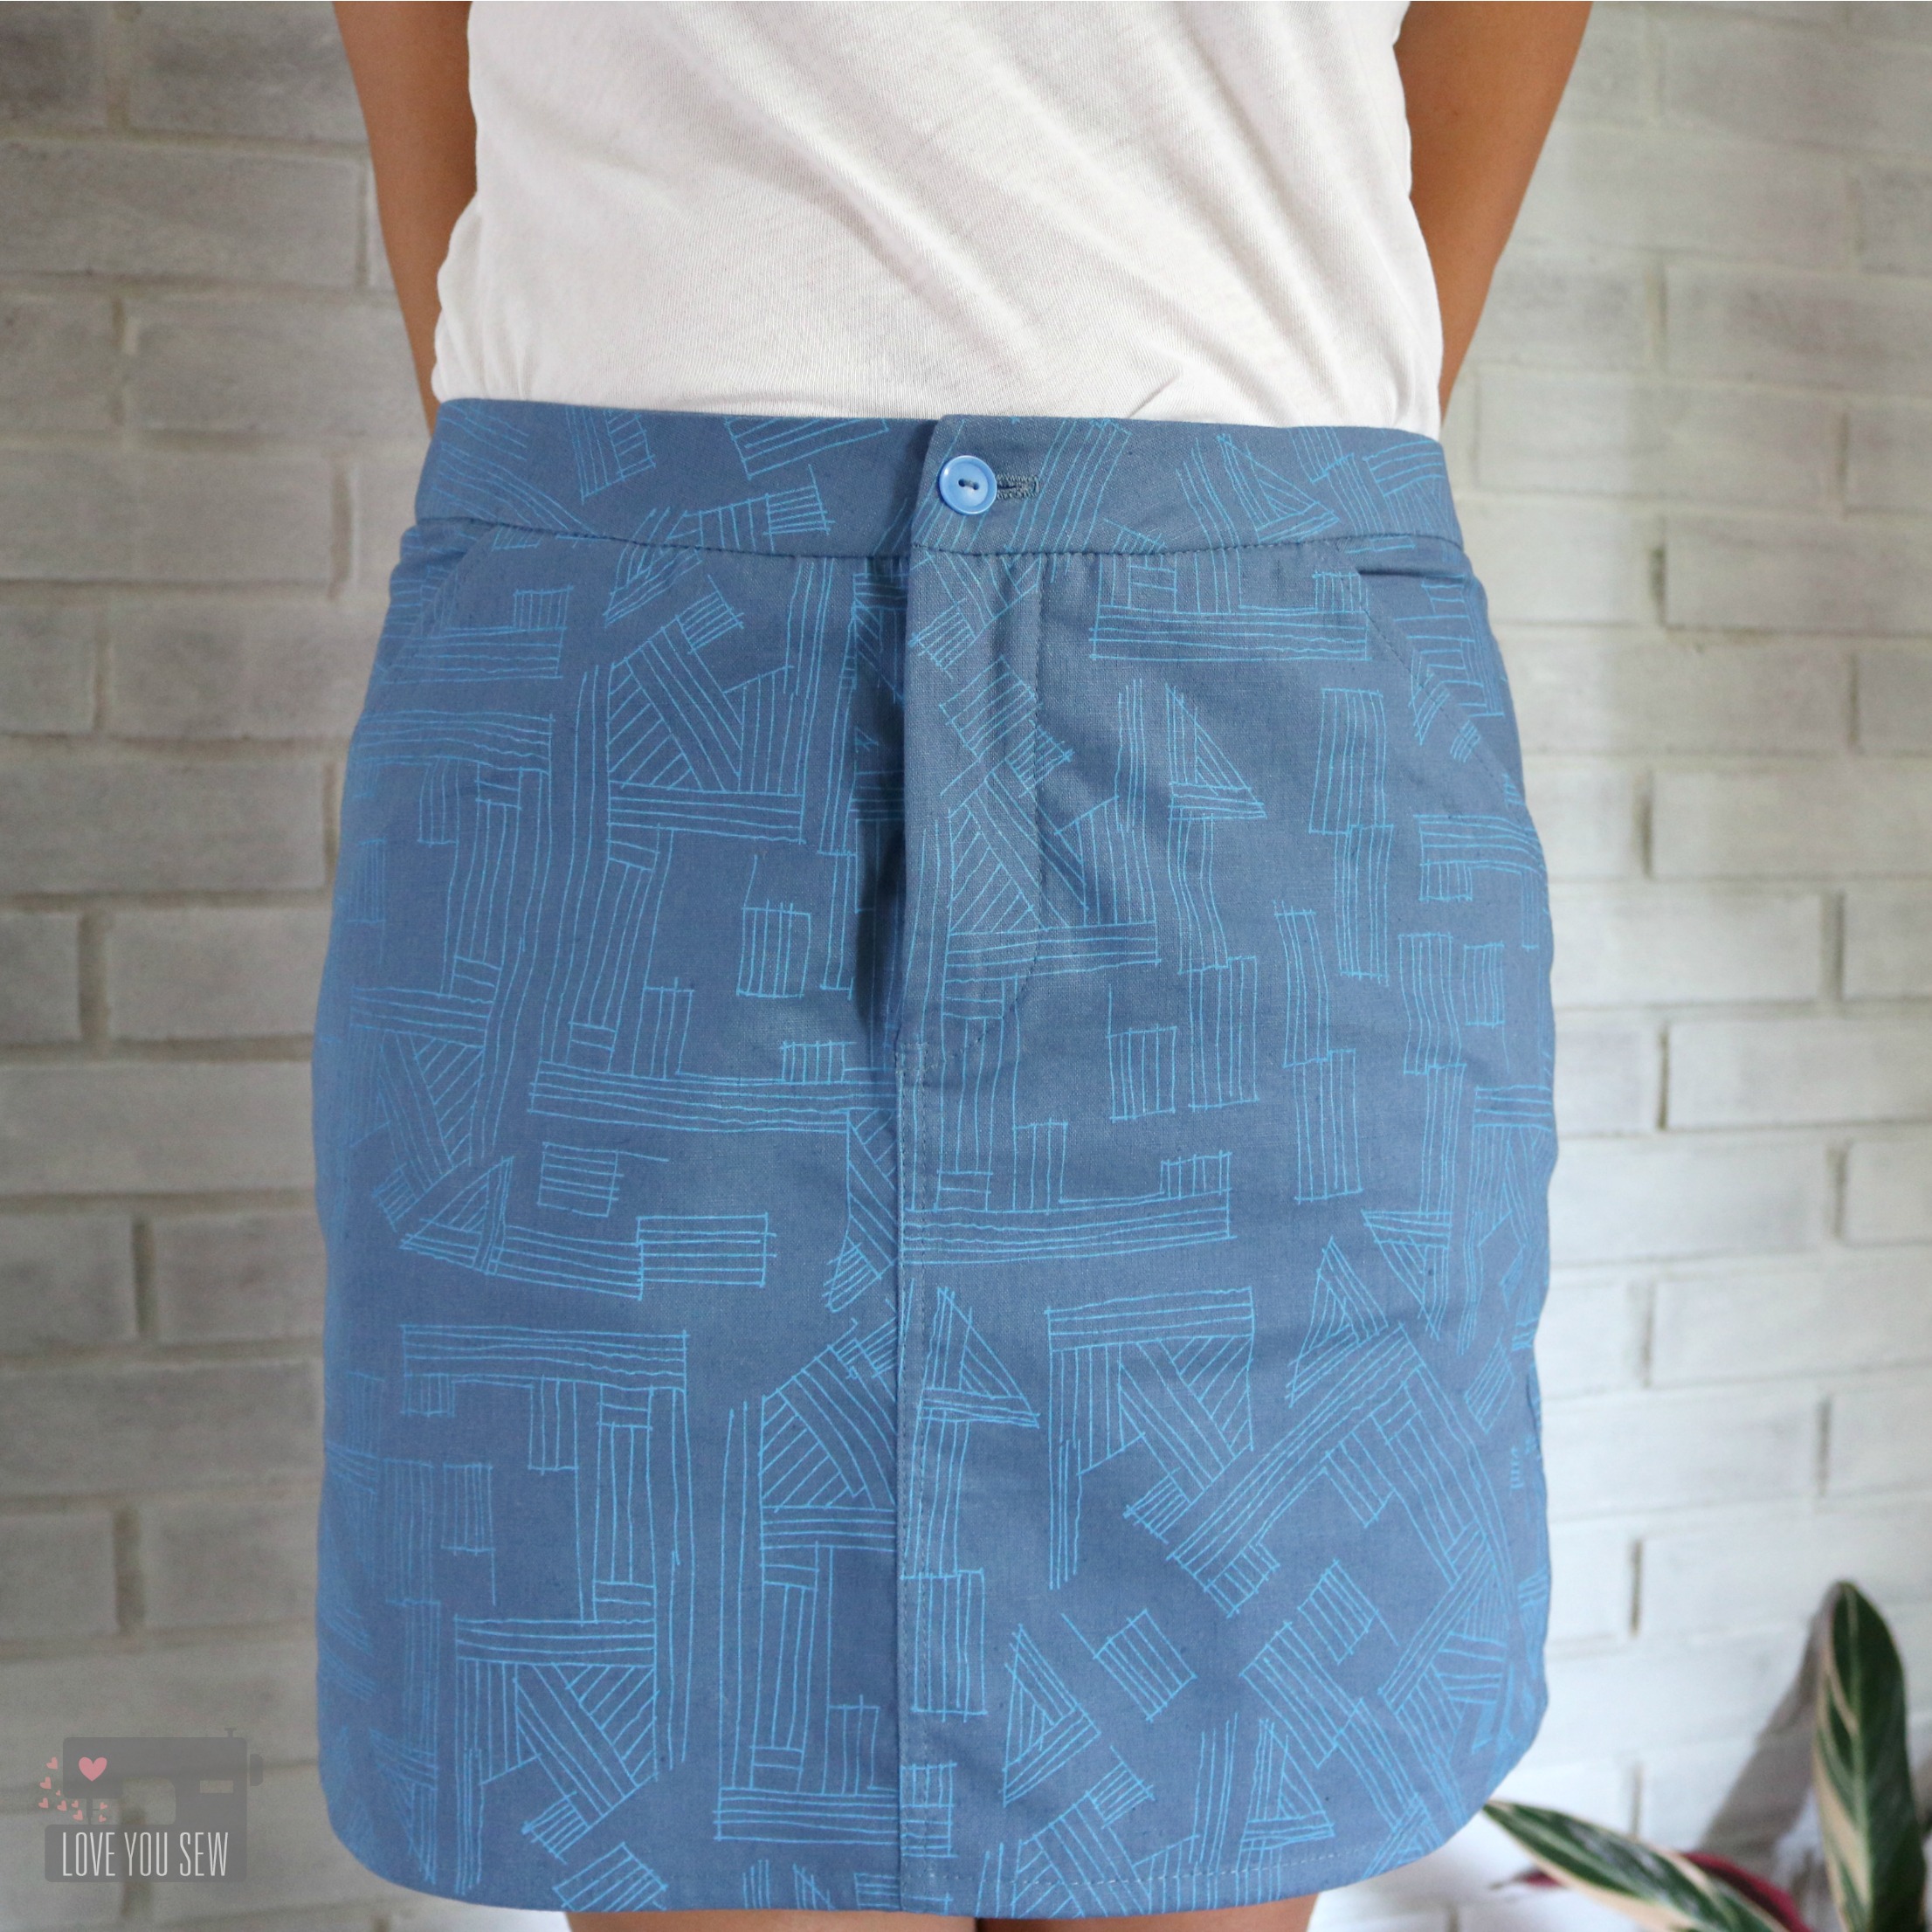
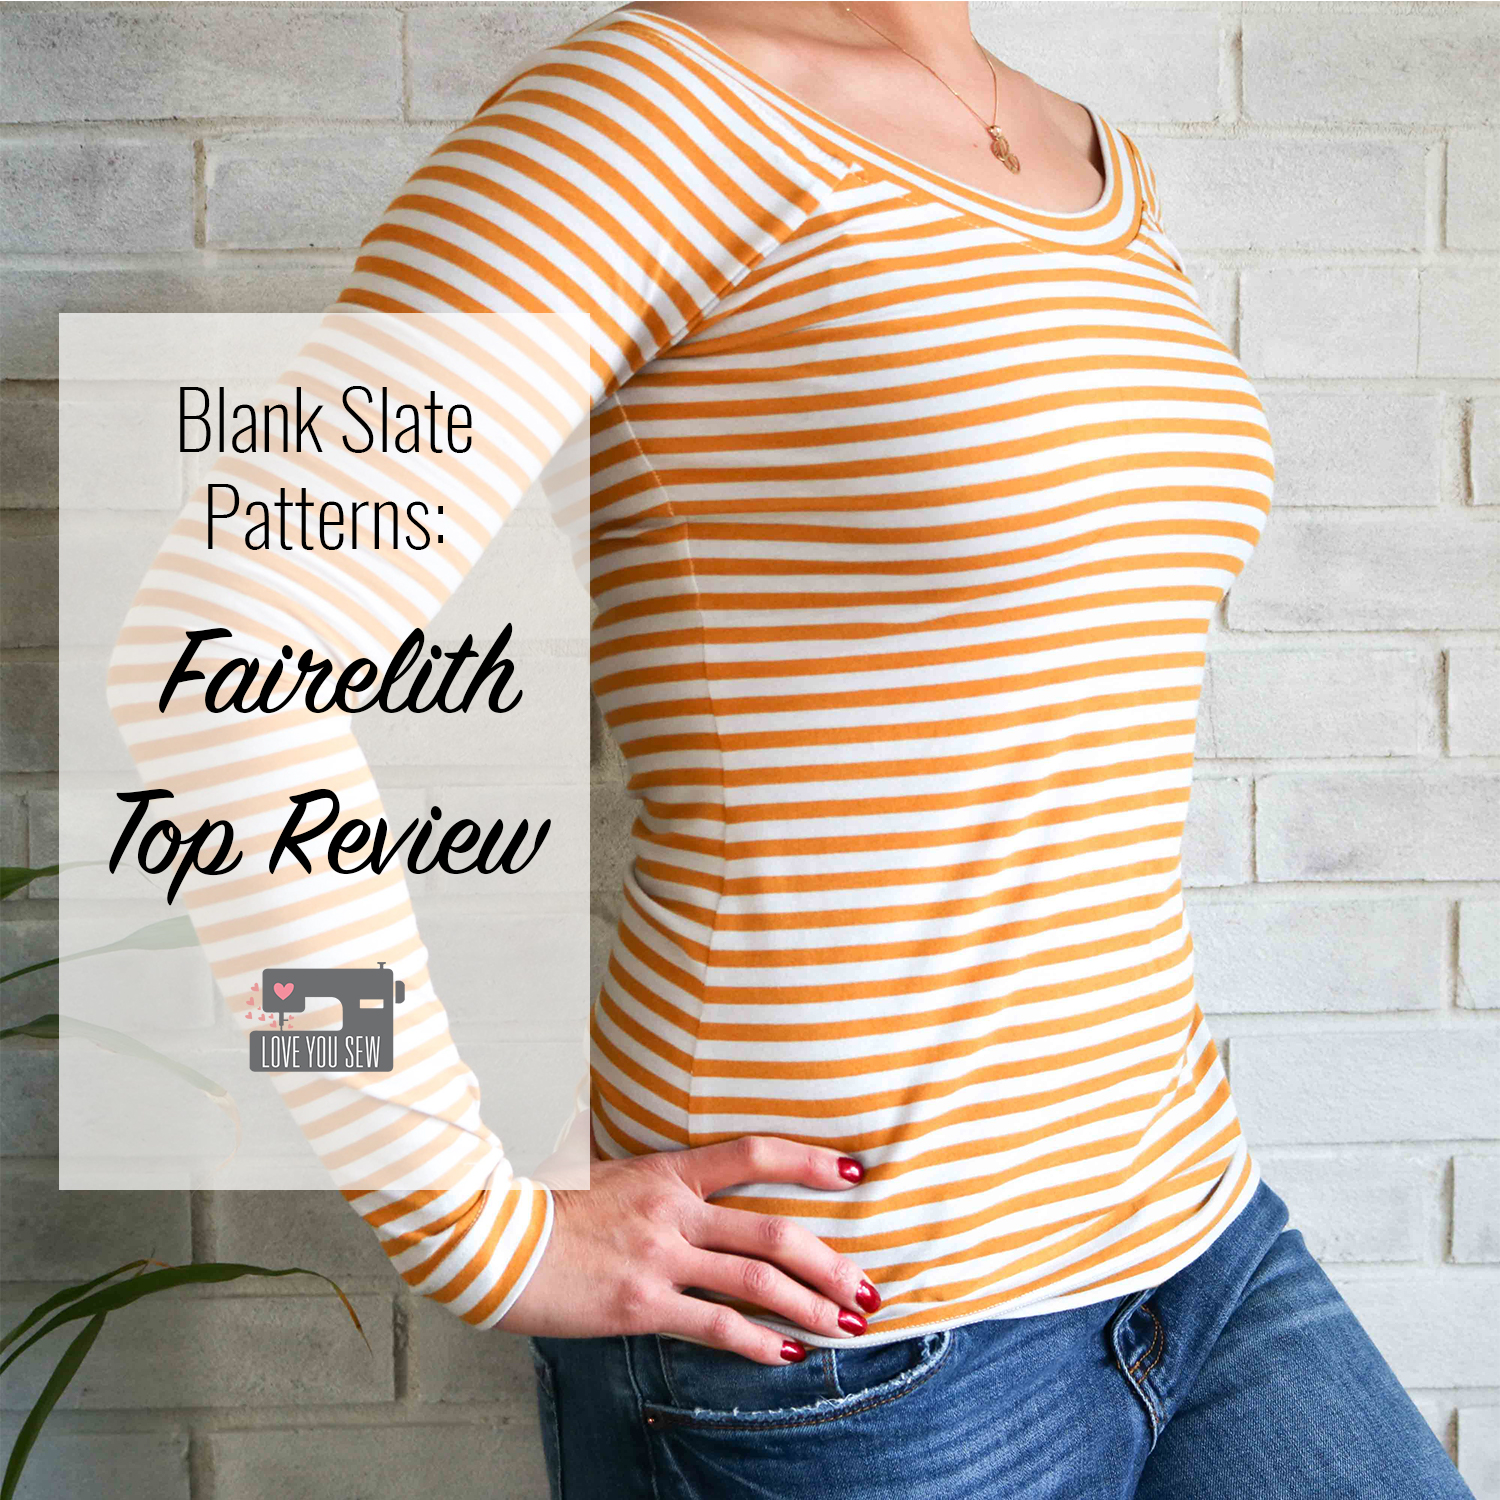
With mid and high-waisted pants taking over, I see so many tops being tucked in.  Overalls are back in a big way, so slender layers are needed.  While taking these all into mind, I thought I could really use a Fairelith Top (aff link) by Blank Slate Patterns in my closet.  This body skimming version was what I was looking for and I knew it would also be perfect tucked in with my Moss Skirts which you can see here and here.

I wanted a little more color in my closet while staying pretty classic, so I chose this fantastic mustard stripe Blake cotton knit jersey (aff link) by Carolyn Friedlander.  It is a great tone with my olive skin and pairs SO well with denim, black and other blues (the predominant colors I wear!)

When I first measured myself for this top, it was before the holidays and I cut all my pieces.  But of course the holidays got the best of me and it ended up a wee bit more snug than I would have liked.  :/  Luckily, I was able to get my body back on track so I could share this make with you (a few months later…)  Although, next time, I will definitely make a larger arm.  As I’ve mentioned before, my arms are heavy for RTW based on my waist and bust measurements….so I  should’ve known the arms would be slightly too tight!  You can see all the extra folds around my armpit area.  But it’s my fault for being too anxious and not making a muslin. (Rookie mistake…)   Melly Sews does include instructions to narrow out the neck…so maybe I’ll move up a whole size and then use that adjustment.  (I’ll keep you update and let you know what I do and how the process goes.)

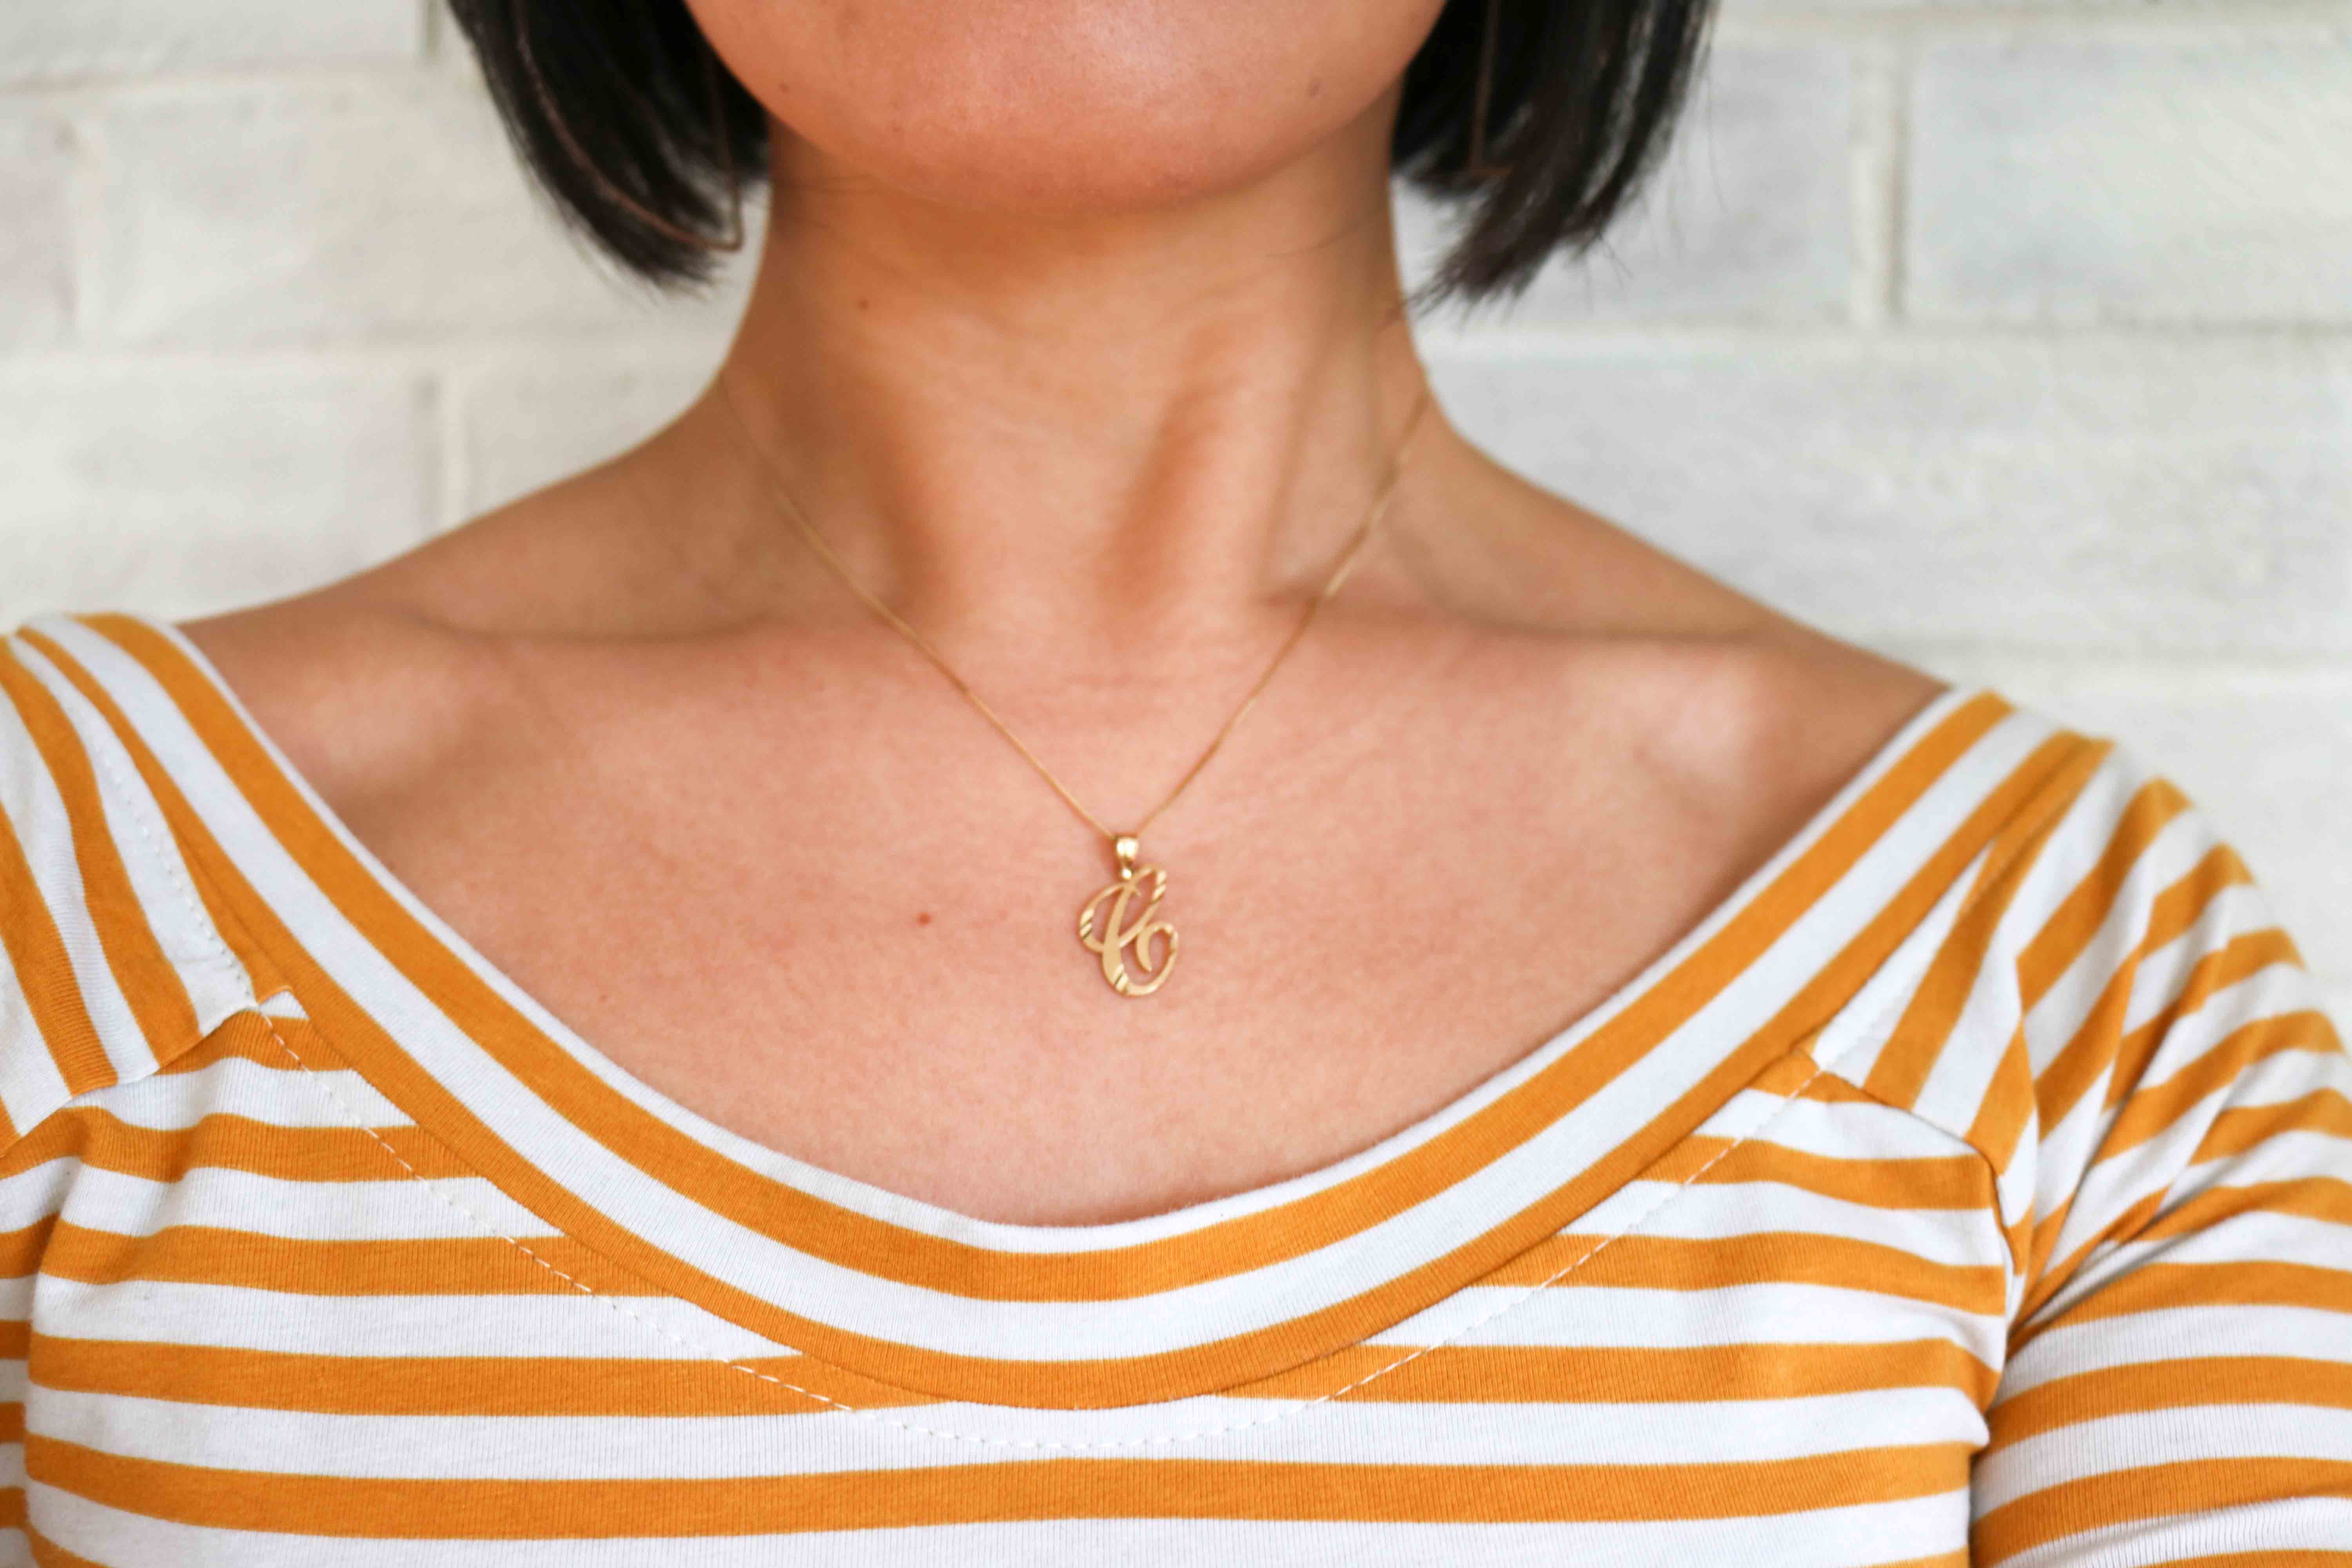
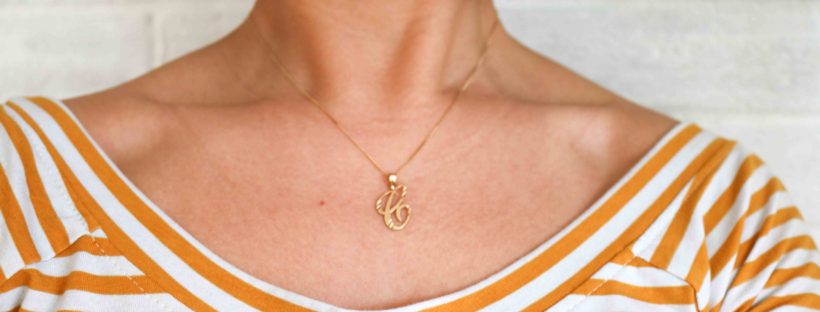
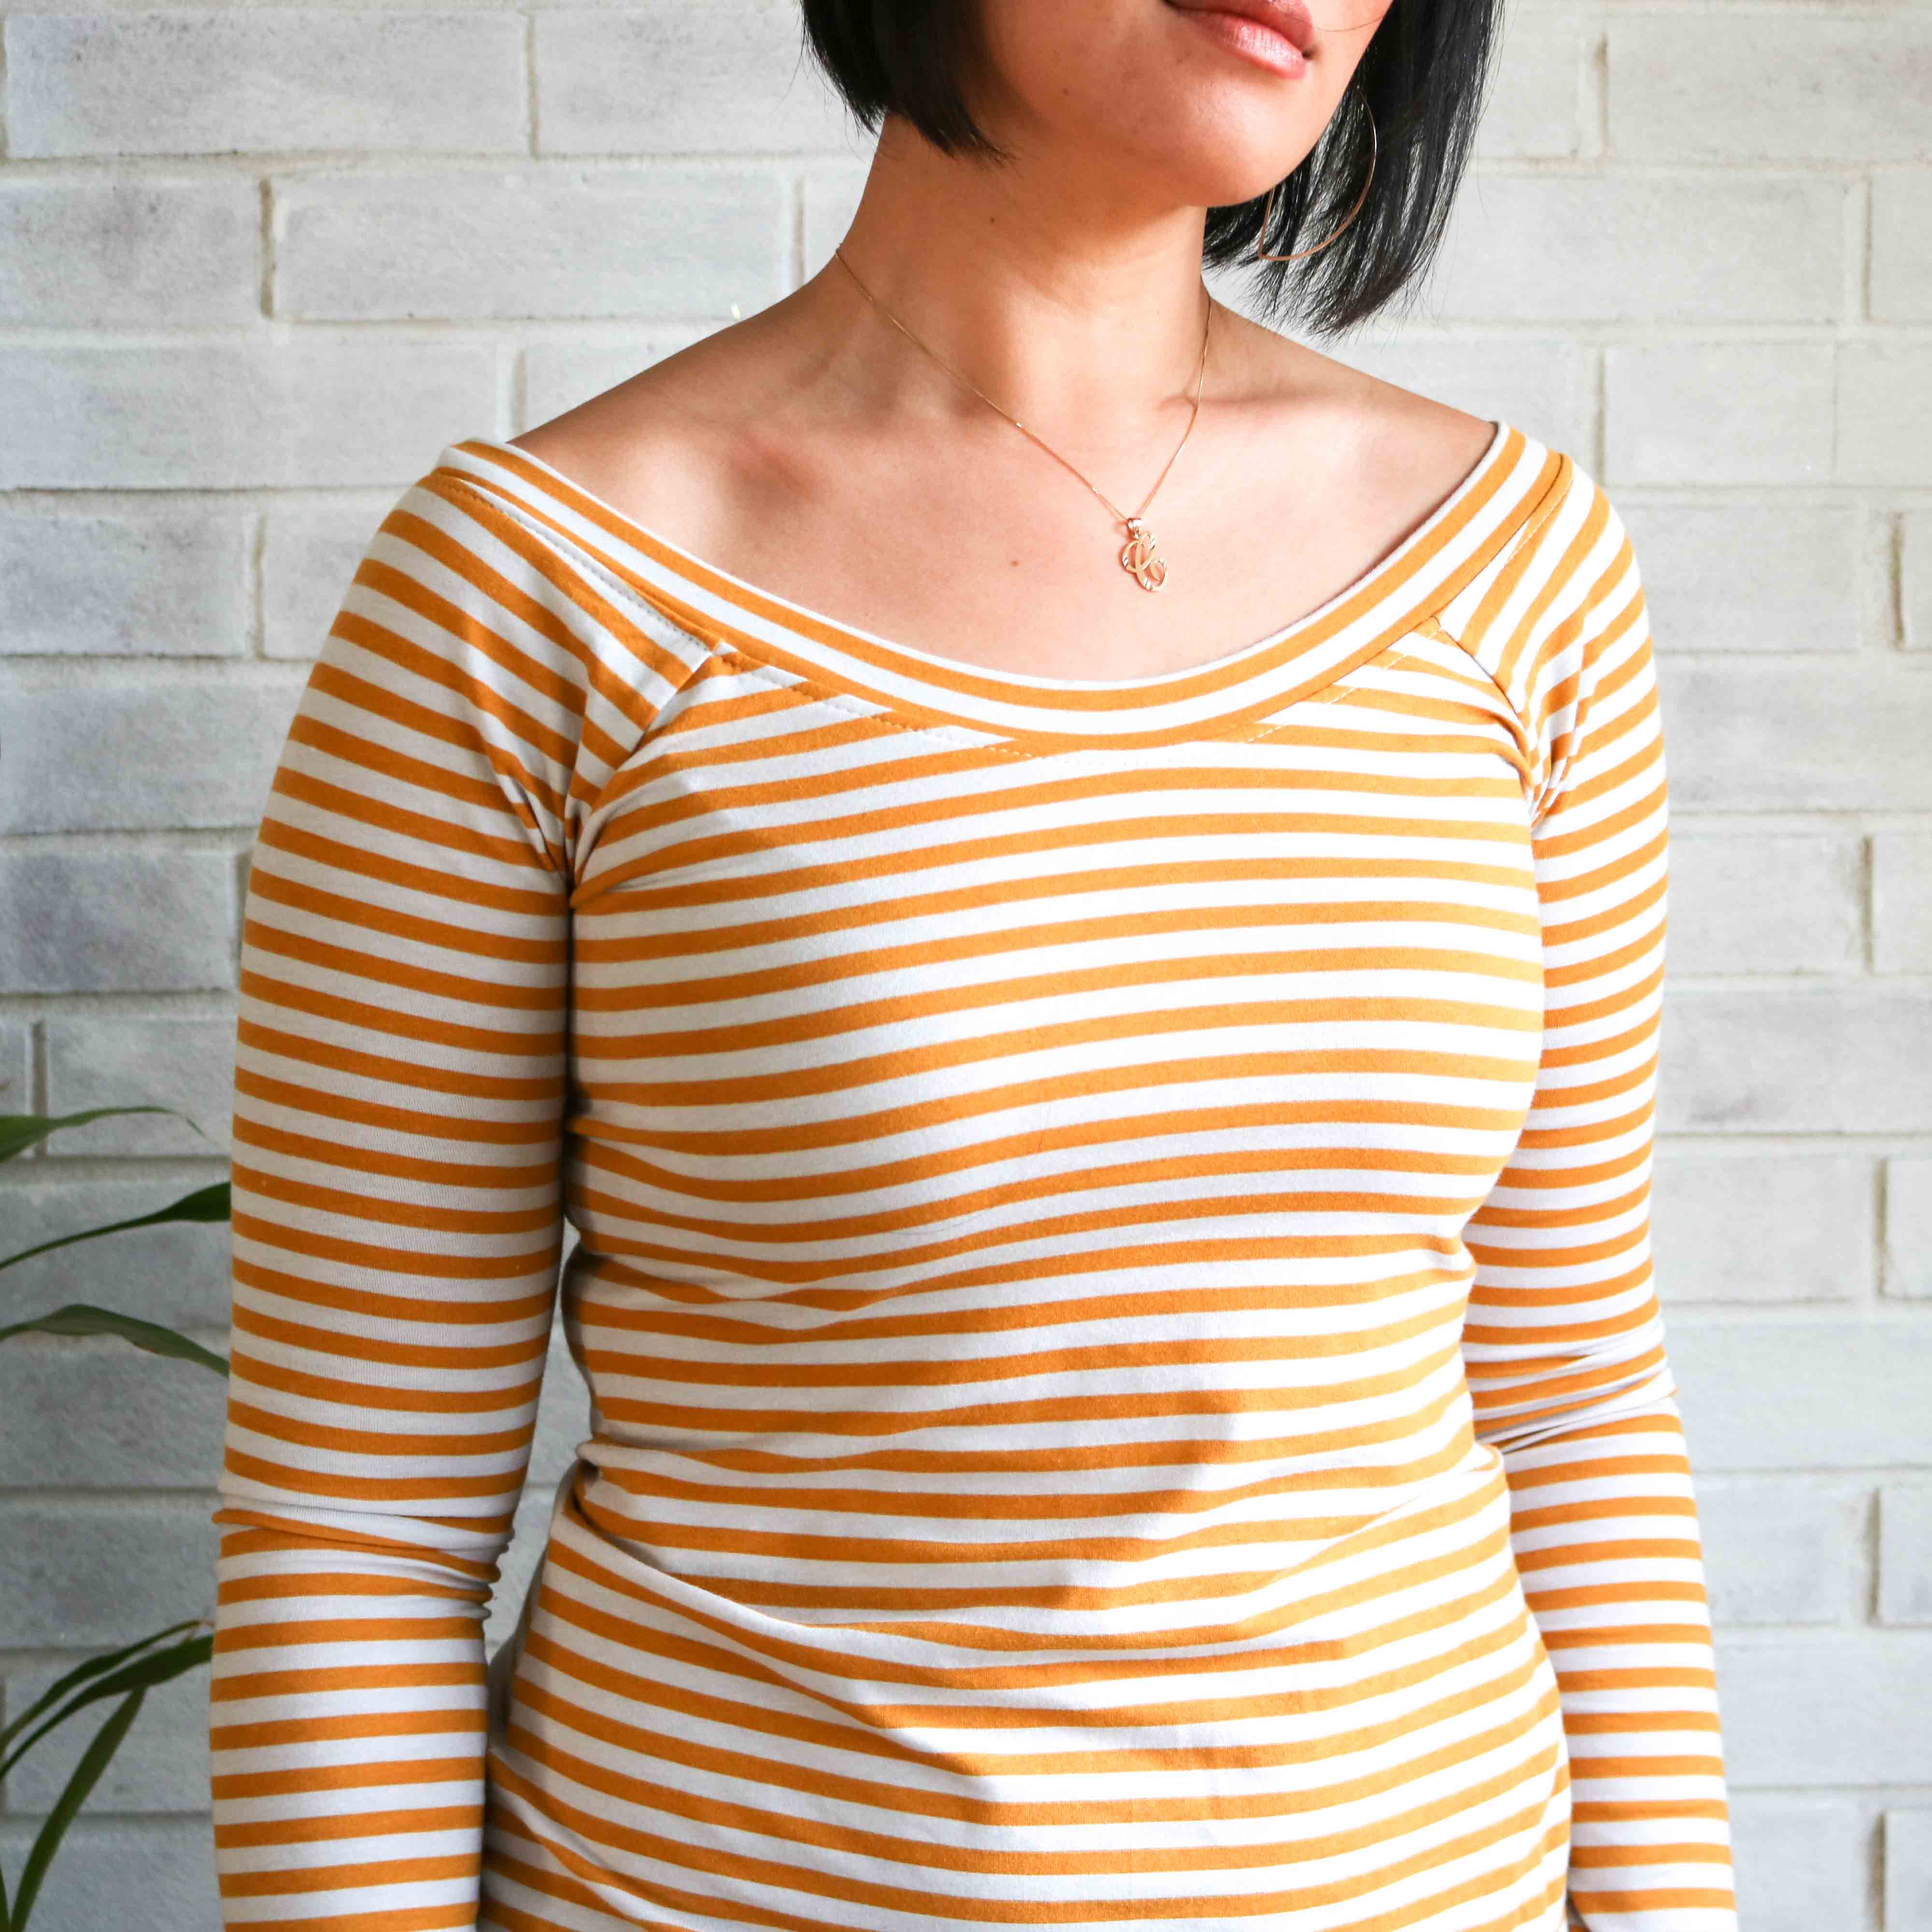
This neckline is just gorgeous, right?  The ballet neckline hits at just the right spots on the shoulders so it’s not falling off.   I love how it shows the collar bone and is perfect for a statement necklace.  Bandana scarves are pretty hot right now and would pair well with this kind of opening.

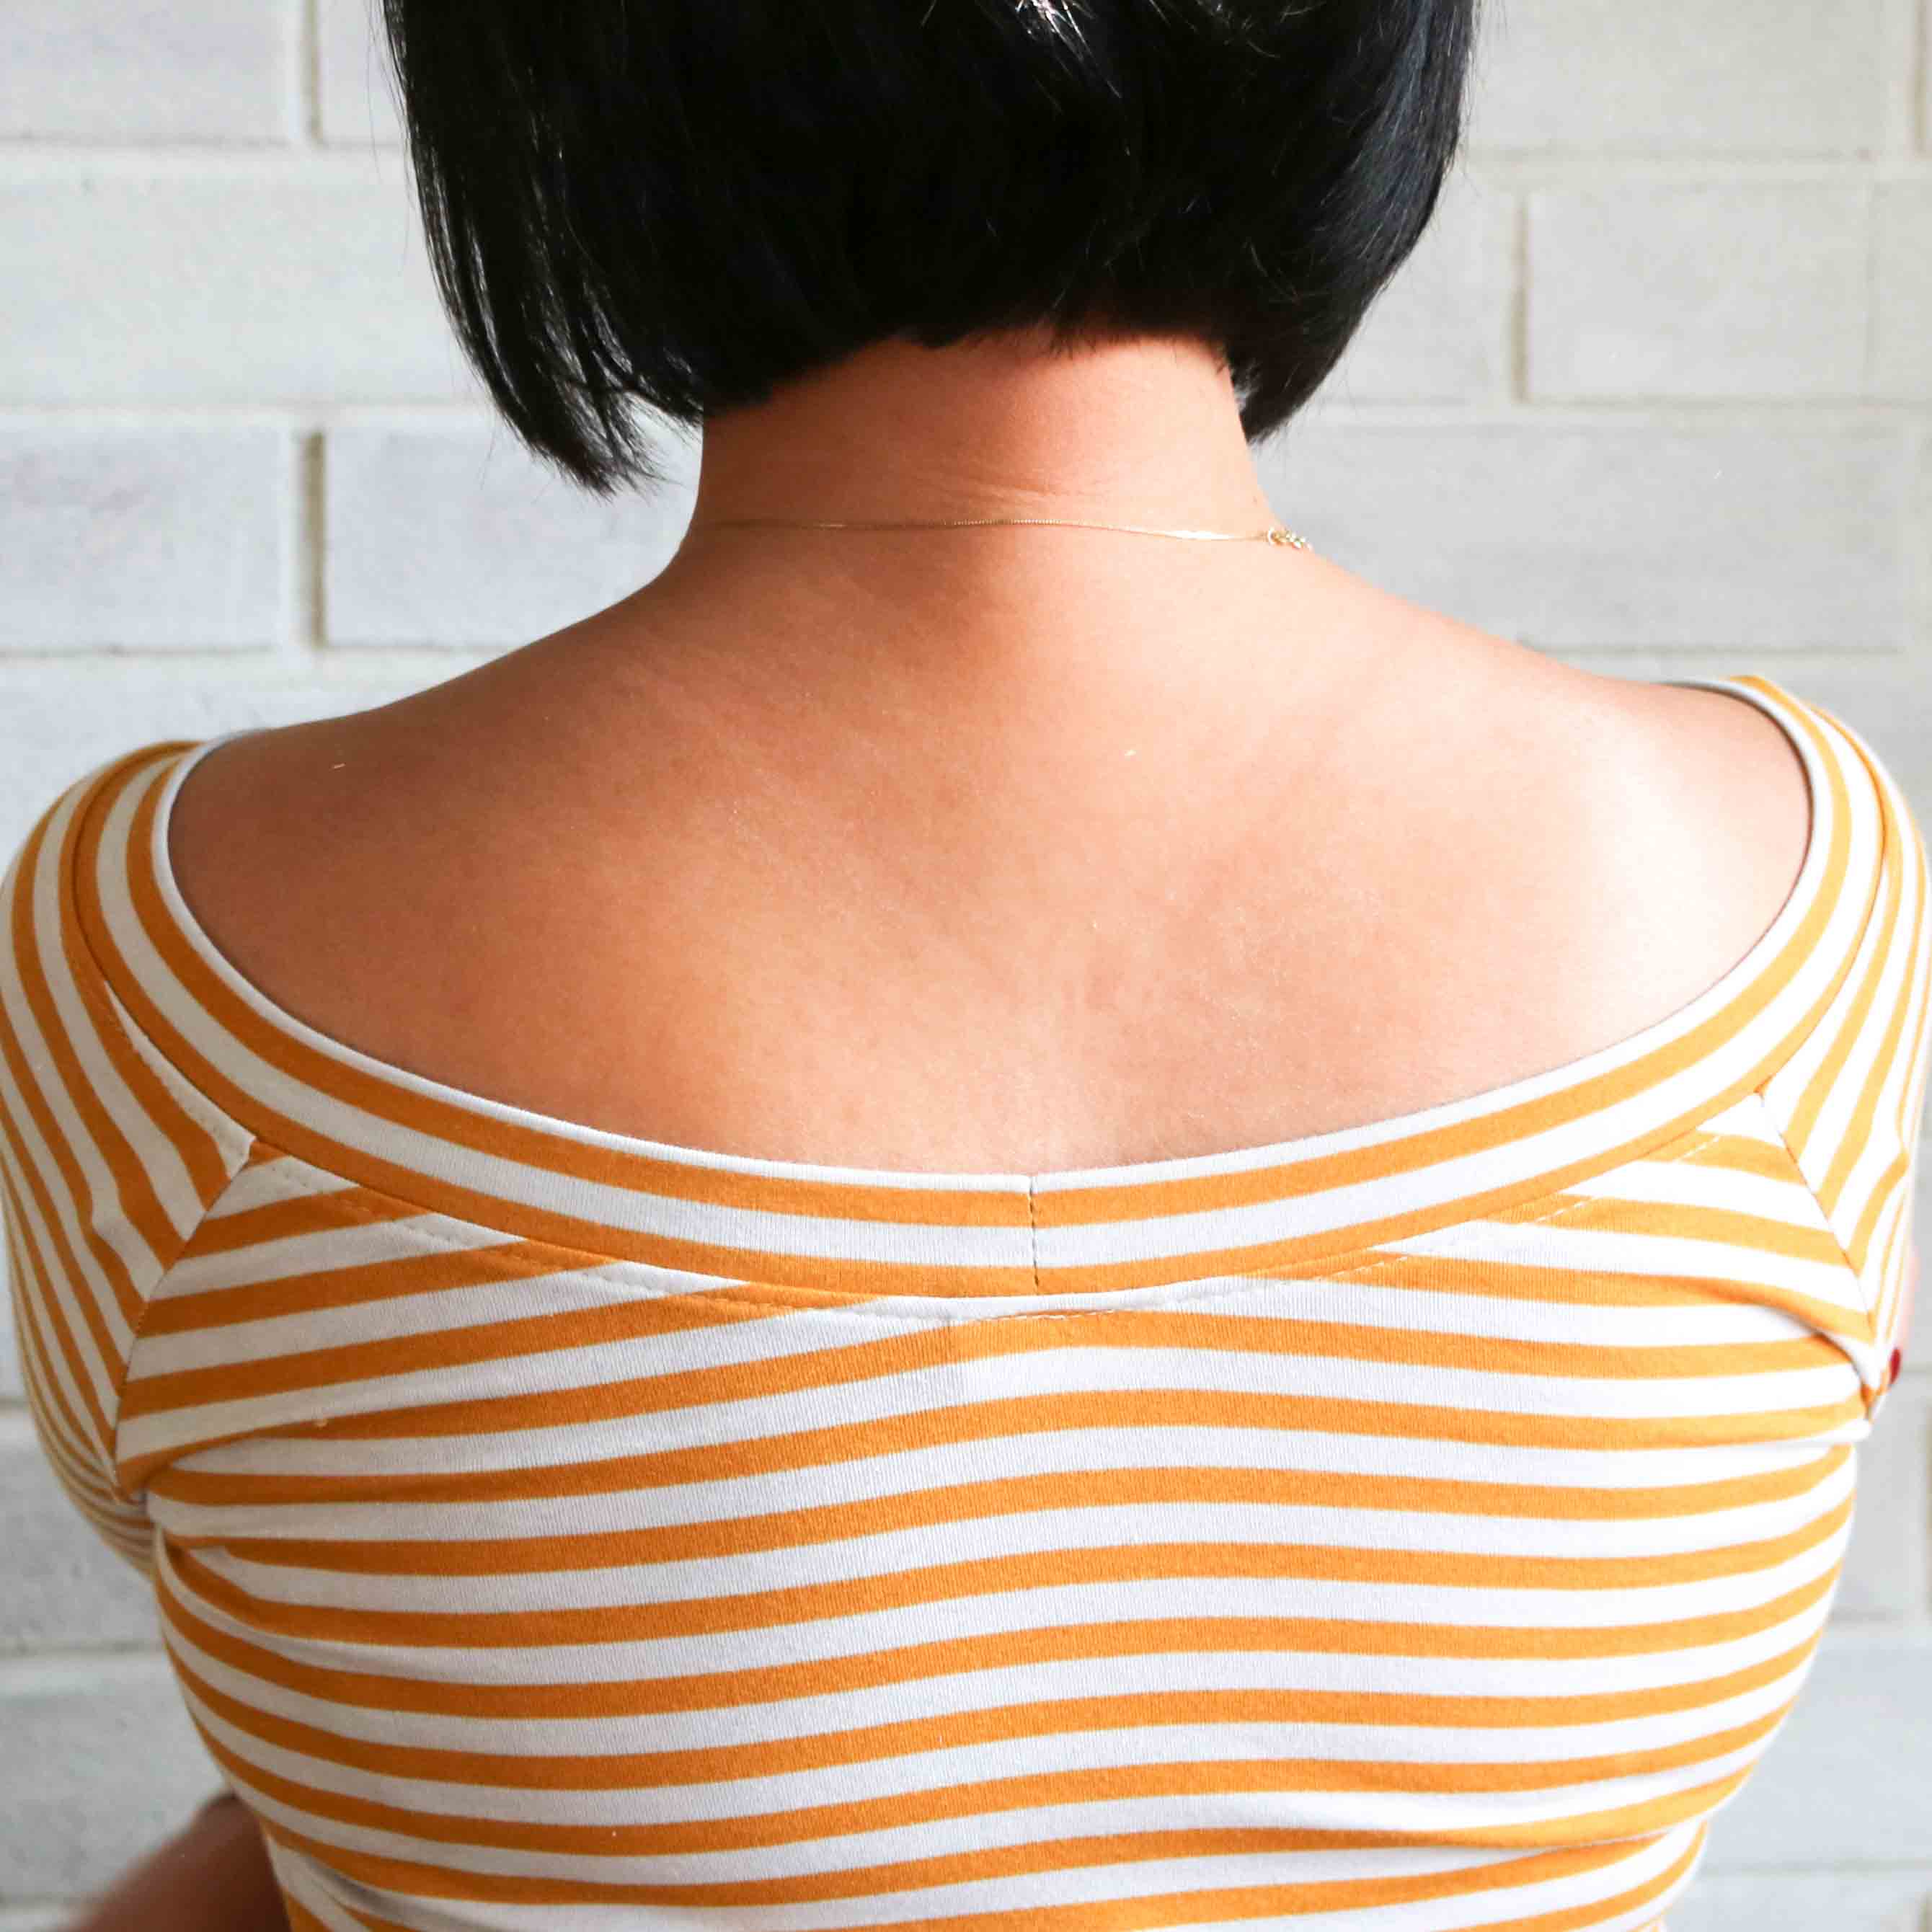
The open neckline continues to the back. With my short hair, this ballet opening highlights my neck well.  I like this different style, which I haven’t seen much in other indie designers.

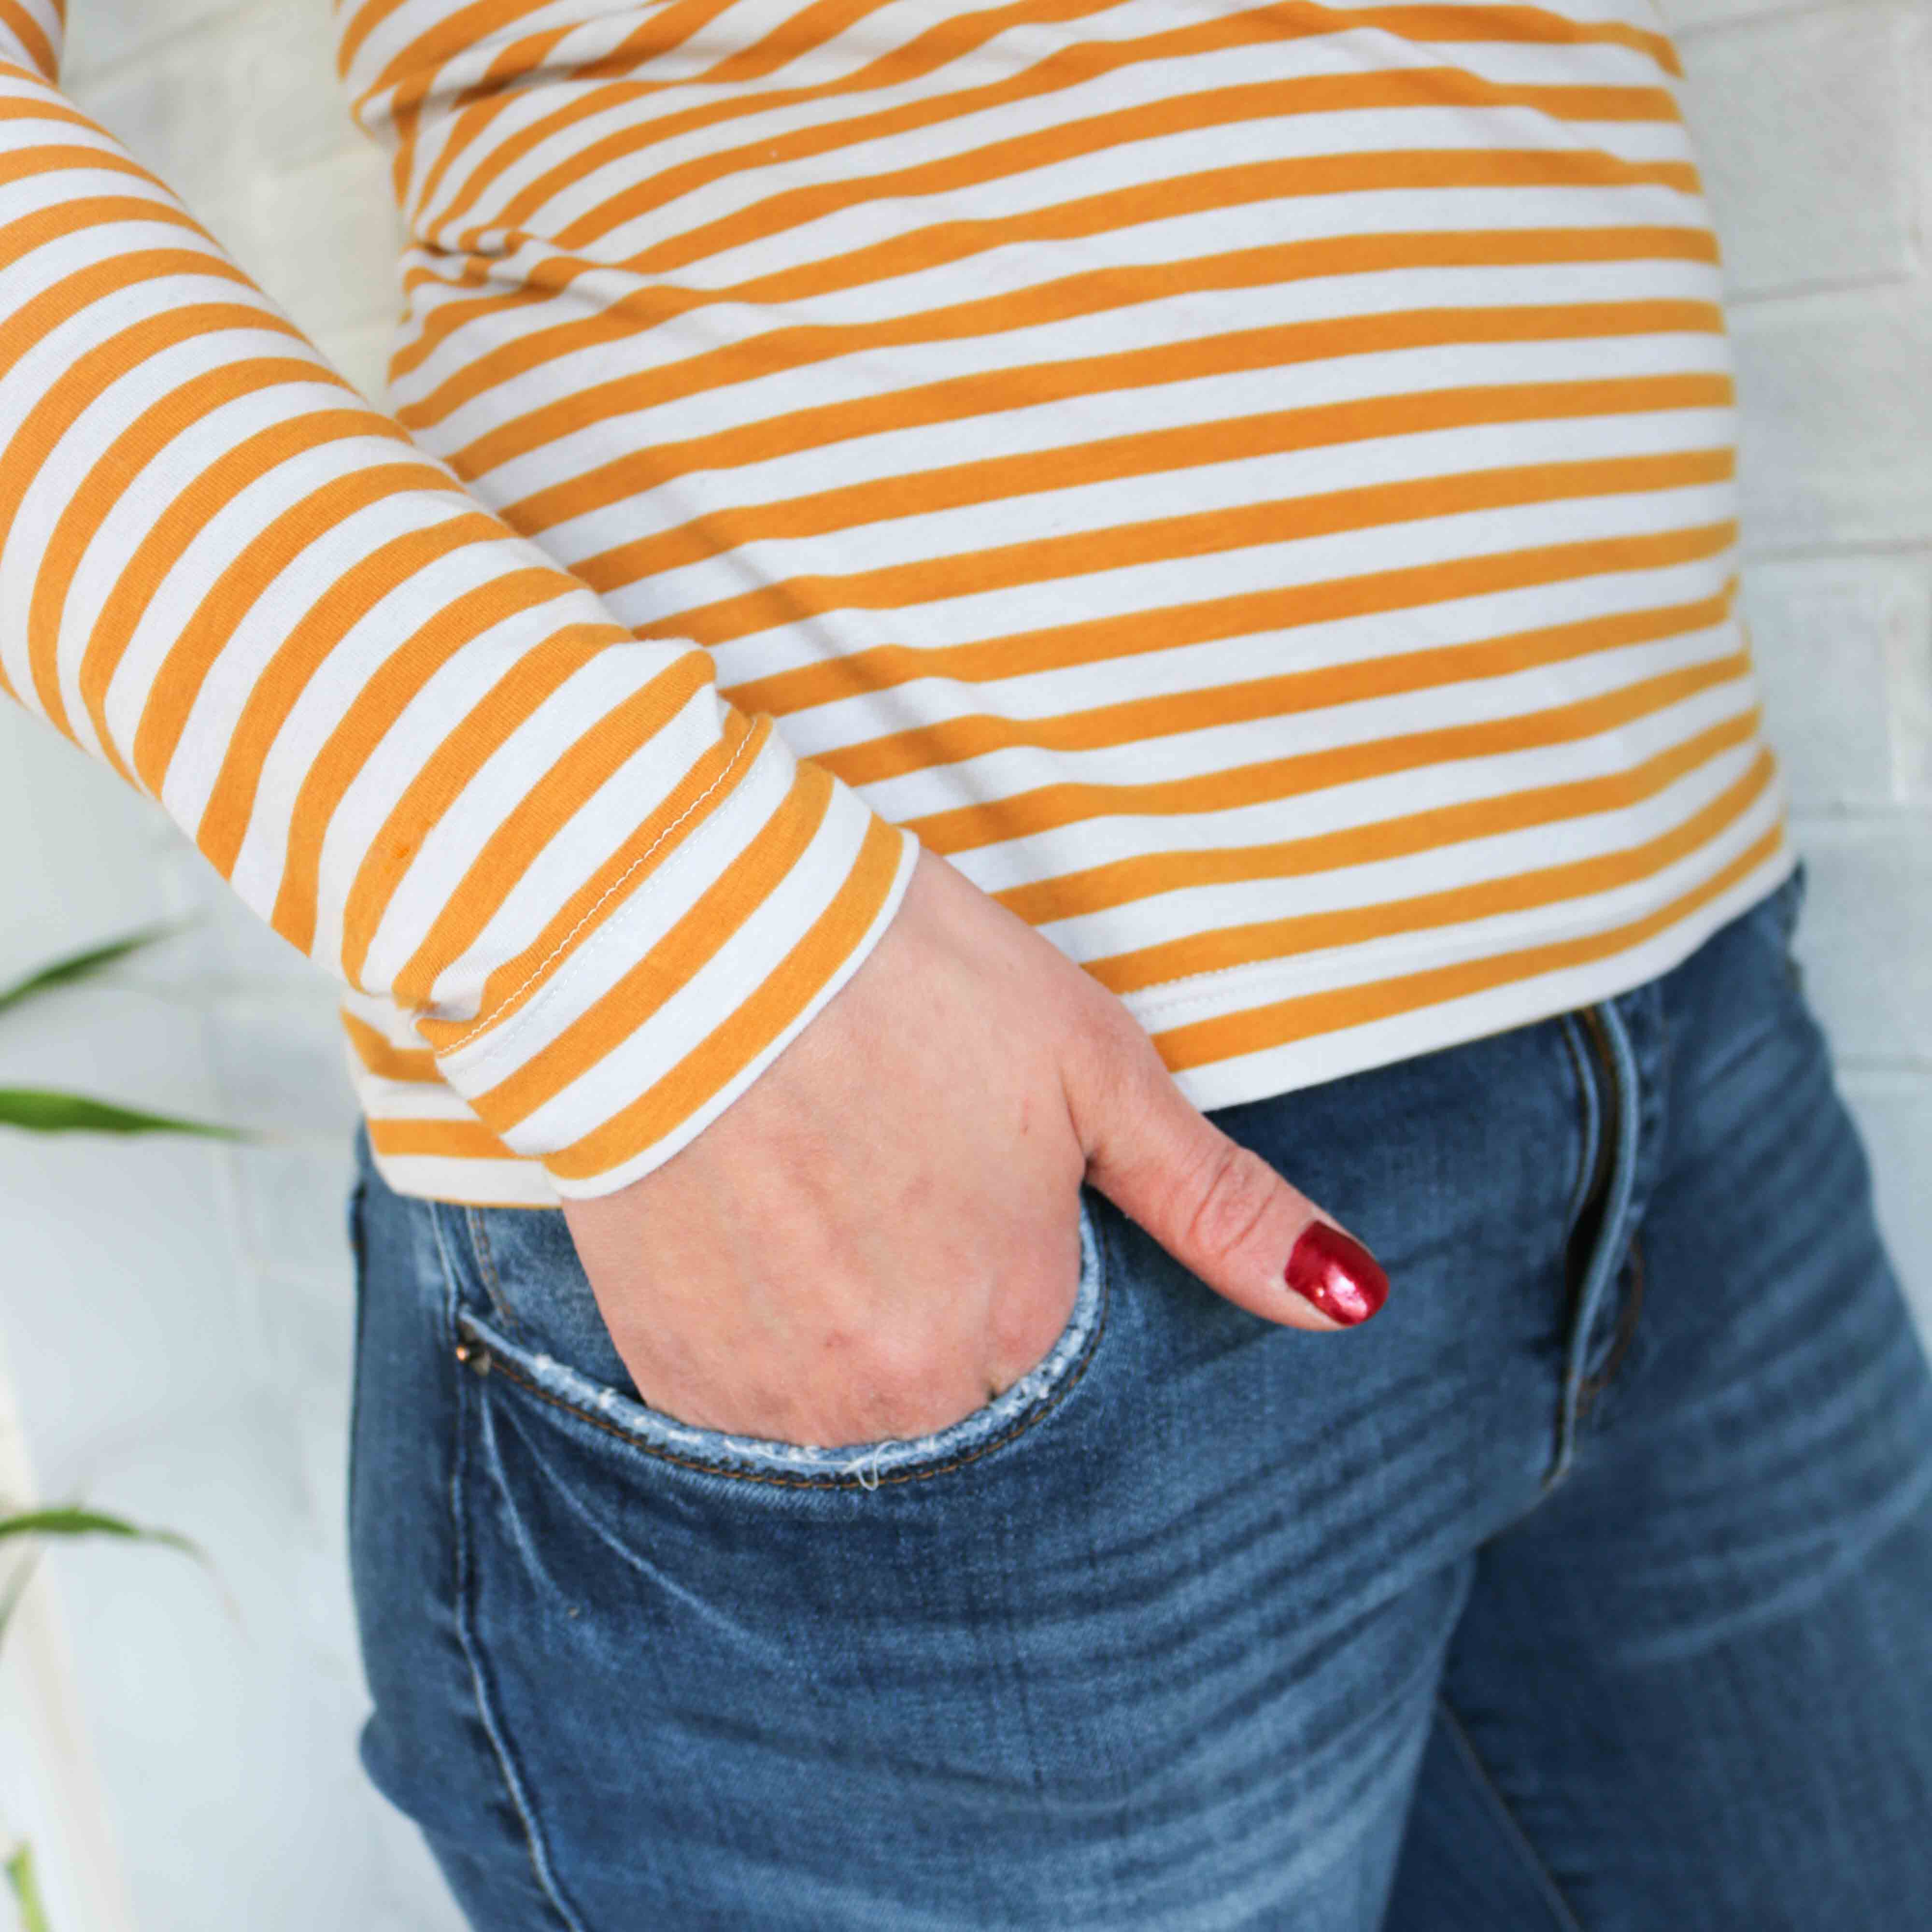
With a  raglan sleeve, this make comes together quickly.  The hem and sleeves are all pressed under and finished with a twin needle.  I like to use wooly nylon (aff link) in the bobbin for a little extra stretch and comfort with this method.  When sewing, it’s good to leave long thread tails and stretch out the hems afterwards.  This is just in case you have some tension issues and the bobbin thread was pulled too tight.


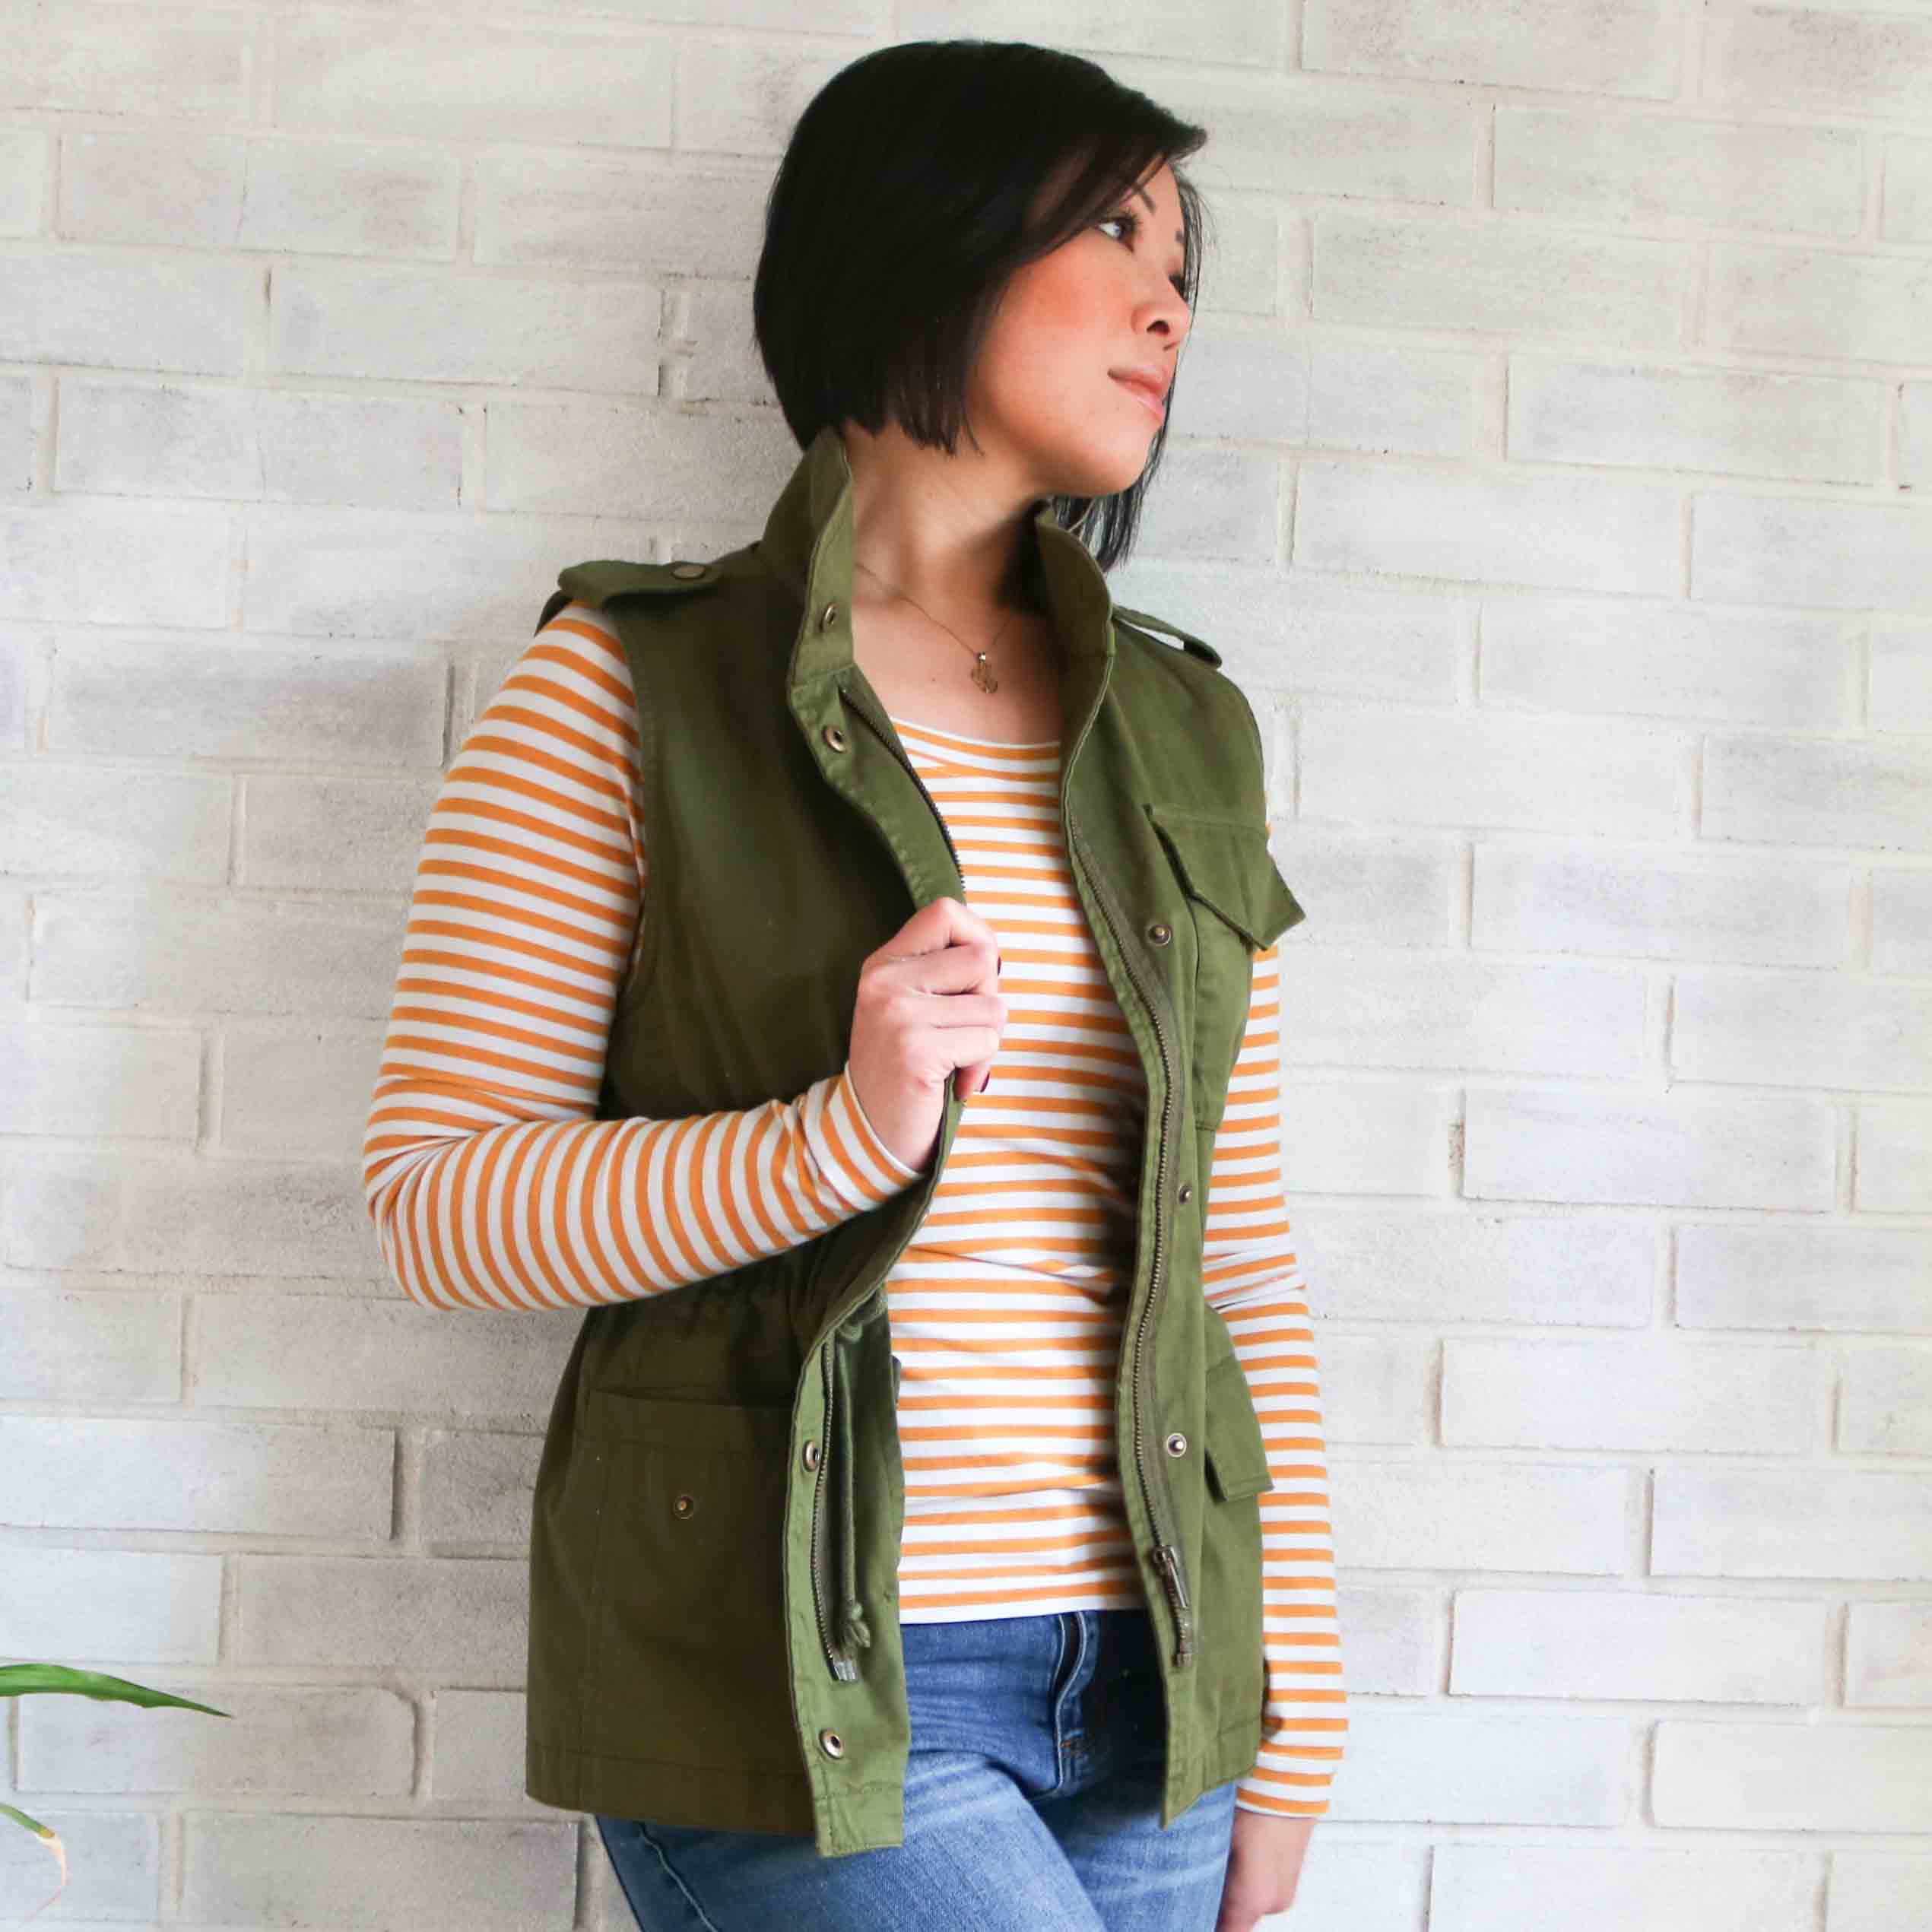
Even with the puckering around the armpit, I still love the design features of the Fairelith Top (aff link) and can’t wait to make another (with the right adjustments!) The extra folds do not matter to me on a day-to-day basis.  But if you run across the same issue, a jacket or vest like this one above can help you hide it.  Lol.

Happy Sewing Friends!

Cristy


Moss Skirt {Review #2}

I had my fabric selected for my Moss Skirt by Grainline Studios months ago…hoping to be able to wear it all summer long.  But as you know, life just happens and selfish sewing gets put on the back burner.  This is the second one I’ve made and love it even more than before.  For the first one I made over a year ago, you can read about it here.

For this version, I used Euclid fabric in Cadet which is a printed linen/cotton blend.  This is slightly heavier than quilting cotton, and makes for the perfect summer weight skirt. With the blend, you get the texture of the linen, but not all the wrinkles. I’m all about less ironing!  By making View A this time, I was able to make this skirt out of one yard of fabric (minus the pockets.)


After learning from my first Moss, I knew I had to adjust the back yoke to get rid of the gap. You can see (on the dotted line above) how I cut into the yoke pattern piece on an angle to leave the room for my rear but move the waistline closer to my back.

The other other learning was to keep my vertical seams unfinished until I was ready to add the waistband and hem. This allowed me to make just slight tweaks to curve my seams, if needed. Once I was satisfied with fit, I serged my seams.


For some fun and to keep the silhouette smooth, I used Architextures Gridlines for my pockets. This allowed me to use some scrap fabric and reduce the bulk if I would’ve kept to the same cotton/linen blend.

As I moved through the pattern pieces, I mimicked the same top-stitching as seen on a pair of ready-to-wear jeans. I love how it turned out! Be sure to increase the stitch length and go slowly to ensure nice straight line.

The great thing about making your clothes, not only for the custom fit, is being able to add so many special touches.  Like the pockets, I added a contrasting zipper and button for fun.  The button came from my MIL’s long hoarded collection and it reminds me of her as I wear this new garment.

For the waistband, I decided to machine stitch the inside down verses slip-stitching it as the pattern calls.  I’m a busy mom and I try to machine wash and dry as much as I can.  For me,  a machine stitch would just hold up better with my lifestyle.  This lady does not have time for all that hand-washing!  I pressed the interior band down just wide enough to just cover the seam and stitches.  (If you have any branding or sizing tags, this is the perfect time to pin them in.)  I used a Sewline glue pen to keep the interior waistband in place while I stitched-in-the-ditch along the exterior.  This allows me to just catch the interior band.


With View A, I hemmed as directed.  This length was perfect on my 5’3″ frame.  It hits a few inches  above the knee, but is perfect for the summer.  If I was any taller, this might be a tad too short for my “mom” lifestyle which requires a lot of bending up and down…and sometimes a bit of unexpected climbing.  🙂

As I’ve been building my handmade wardrobe, I’ve been selective in choosing some slimmer silhouettes for my petite frame.  I am heavier in the arms and legs, thus like to emphasize my waistline.  This is the perfect skirt pattern for just that.  The clean lines and waistband keep everything smooth to draw the eye up and down.  The printing on the fabric is just the right scale to keep everything in place and not over emphasize one part or the other. 😉

I love how I can pair this skirt with just a white tee and the outfit still looks polished.  I’m hoping to extend this skirt’s life with some heavy tights and cute clogs with a slim long-sleeve tee in the fall. Check out my IG feed to see how it pairs with a yellow and white striped tank and the other outfit pairings!


Project Details:

  • Pattern: Moss Skirt by Grainline Patterns
  • Exterior Fabric: Euclid in Cadet by Carolyn Friedlander for Robert Kaufman Fabrics from Fabric.com
  • Pocket Fabric: Architextures Gridlines in  by Carolyn Friedlander for Robert Kaufman Fabrics
  • Piecing and Top-Stitching Thread: Gutermann 236 polyester
  • Zipper: YKK from ZipIt Zippers
  • Button: Vintage (manufacturer unknown)


Happy Sewing!

Cristy


Please note there are affiliate links.

Kimberly Sac Sew-Along

Kimberly Sac Title

Fat Quarter Shop has another great pattern….and it’s for a bag!  When I was asked to join this sew-along, I could not say “no.”  I love making bags just as much as I do quilting.  With the Kimberly Sac by Fig Tree Studios, you get both!  It is a great cross-body design with some simple patchwork.  I’m so excited to show you my version along with all of Fat Quarter Shops versions found here.

Kimberly Sac Fully Open

I like having different looks and feels to all of my bags.  After making my Indigo Sky Quilt, I fell in love with the Essex Yarn-Dyed Linen in nautical, so I wanted to incorporate it into the Kimberly Sac.  It really helps complement Carolyn Friedlander’s fabrics.  There is a mix of Carkai and Architextures Crosshatch in more earthly tones.

Kimberly Sac Quilting Close Up

The bag came together very quickly, especially without having to deal with a zipper.  I did use 1/4″ straight-line quilting, but you can opt for a more simple design.  If you decide on more heavier quilting like I did, I would suggest cutting the batting about 1″ larger all around and then trim it back.

Kimberly Sac Vinyl Strap

One of the most noticeable changes I made was to use vinyl for the straps and bottom of the Kimberly Sac.  The brown vinyl gives any bag an extra level of sophistication and structure.  Make sure to test the vinyl with your machine before committing though!

Button Stud Close Up

When I have to break out a hammer on a project, it’s a good day 🙂  I love playing with hardware and saw the opportunity to use this button stud when the pattern called for a traditional sew-on button.  The loop was replaced by a strip of vinyl I hand-punched.  This closure adds a fun edgy detail to the bag.

Kimberly Sac Side Close Up

A tip to keep these tags straight and in place, is to use some Sewline Glue. It allows you to place the pieces on the bag before top-stitching.  With so many layers, pins were distorting the tabs shape, so the glue helps them lay nice and flat for straight stitches.

Kimberly Sac Fully Profile

The Kimberly Sac was a nice easy sew and the lack of zippers makes it very beginner friendly!  I love the relaxed slouchy design and who doesn’t love the ease of a cross-body strap?  The Carkai and vinyl make this a great everyday bag for running errands and is large enough to handle everyday life.  What is the strangest thing you have to carry in your purse or bag?

  • Need the Full Kit with hardware and Strawberry Fields Revisited fabric?  You can find it here.
  • If you would like just the pattern, you can find that here.
  • Let’s make all of this even easier by watching full video tutorial with Fat Quarter Shop and Fig Tree Studio.


For more inspiration, visit all my Kimberly Sac Sew-Along  bag-mates below:

Fat Quarter Shop

Emily Ann’s Kloset
Seasoned Homemaker
Jedi Craft Girl
Sharon Holland Designs
Why Not Sew
She Can Quilt
Love You Sew (you are here)
Sweet Little Pretties


Have fun stitchin’!

Cristy


As part of the Fat Quartershop Kimberly Sac Sew-Along, I have been compensated for my time and materials.  However, all opinions are all my very own. 


Indigo Sky Quilt

Indigo Sky Quilt Title

It seems like all of my friends are all having babies right now.  I try to hand-make at least one gift for each of them…but of course, time is usually too short.  (Sound familiar, anyone?)  My girlfriend, whom I’ve known since kindergarten (!!!) is pregnant and is expecting this week!  Her baby shower has already passed, but at least I was able to squeeze this quilt in before he’s born 😉

Handcrafted Indigo

This stack of Handcrafted Indigo by Alison Glass for Andover Fabrics is like “whoa,” right?!?  I love love blues and all of these different variations are just killer!  These beauties were picked up at my little quilt shop when was first released about 5 months ago and they’ve just been sitting in my stash.  When I found out my friend was having a boy, I immediately went to these fabrics.  I was going to use solid white to have these blues “pop” but quickly reconsidered since this was for a baby.  Wise decision.  Instead, I went to Essex yarn-dyed Linen in nautical as one of my go-to blenders.  It’s such a nice alternative to a solid and gives a great layer of texture.

Indigo Sky Quilt Full Profile

Although I didn’t have an exact quilt pattern in mind, I knew I wanted to make some Flying Geese and keep the quilt asymmetrical.  So I figured I’d kinda improv the design.  I used Connecting Threads tutorial to make two no waste geese blocks per fabric.  Each block is 6.5″ x 3.5″.  After lots of playing around, I settled on my random design of stacked geese with lots of negative space.

Indigo Sky Quilt Binding

With so much Essex Linen, the binding on this quilt had to be scrappy in order to highlight the Indigo and add some fun.  It’s a bit of work to attach all the different binding fabrics, but well worth the effort.

Indigo Sky Quilting close up

The quilting was straight-line 1/4″ apart using Gutermann’s blue variegated thread.  This was my first time quilting with the 100% cotton thread and it won’t be my last.  The changes in the thread color are very subtle against the Essex and of course, the blues.

Indigo Sky Quilt Back

For the backing, I was lucky to have this Doe fabric from Carolyn Friedlander for on hand.  (1) It’s a nice contrast to the front design. (2) It really complements the quilting and (3) I’ve been on a fabric diet…

This quilt was so fun to make.  I loved every moment and hope baby boy enjoys it just as much!


Keep Stitchin’

Cristy