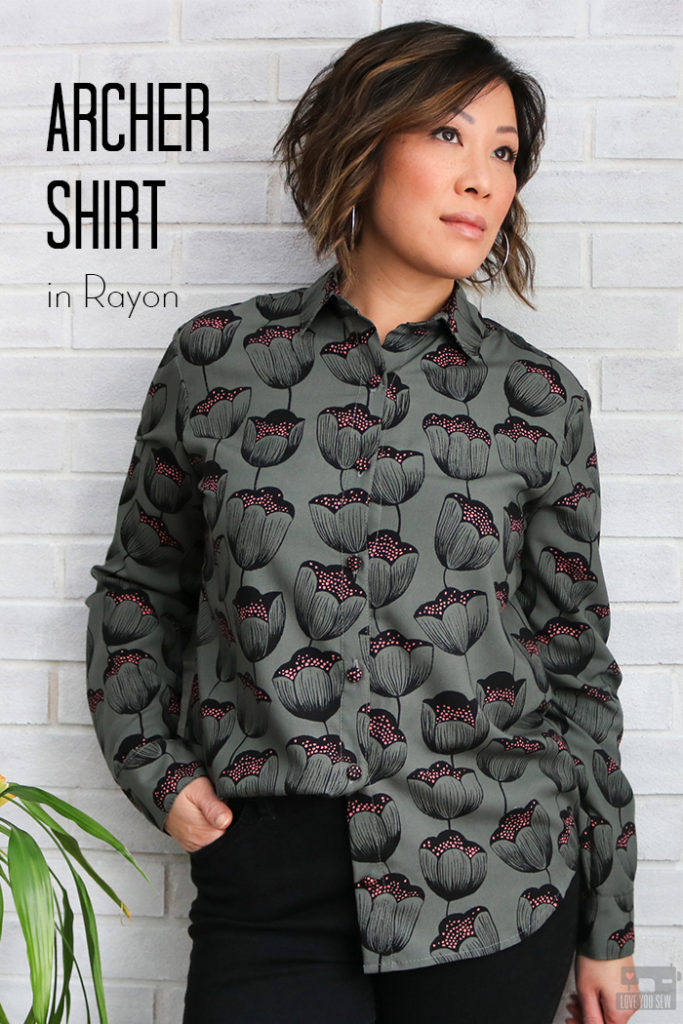
Everyone knows the versatility of a button-up shirt. It’s an absolute classic silhouette with ease all around the torso but a crisp collar keeps the style elevated. The button-up shirt works well in so many different fabrics. After making my first flannel Archer Shirt with it’s casual feel here, I knew I wanted to flip the script and sew a “fancier” one for going out.
Because of other blogger commitments I have with other companies, it’s sometimes hard to find time to sew projects with my own fabrics without any constraints. So when I saw Indiesew was hosting #ShirtMonth again, I knew this would be the time to sew my button-up….This is exactly the motivation I needed! This month is dedicated to highlighting fabrics, patterns and techniques for all shirts with a placket. You can read more about the month here. I’ve really enjoyed joining in on so many of these sewing challenges on Instagram and hope you do too!
Fabric
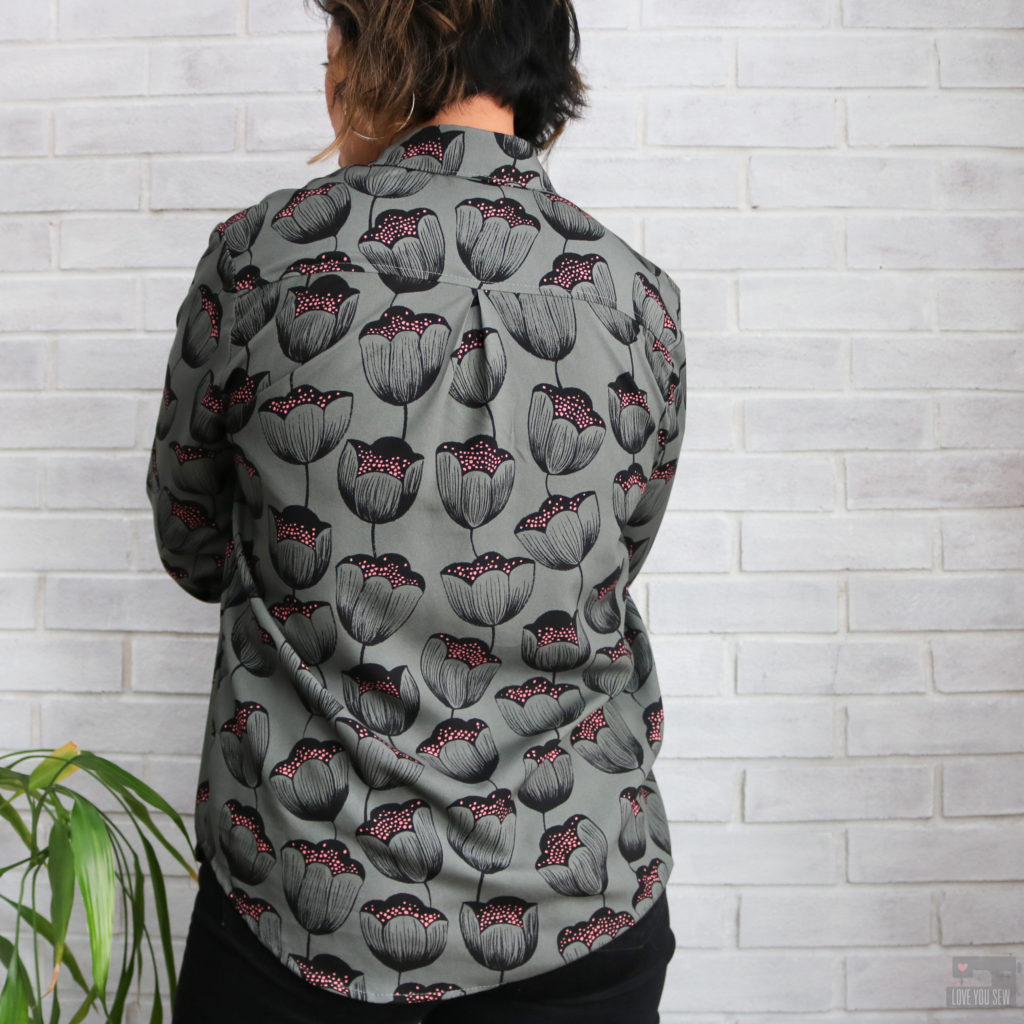
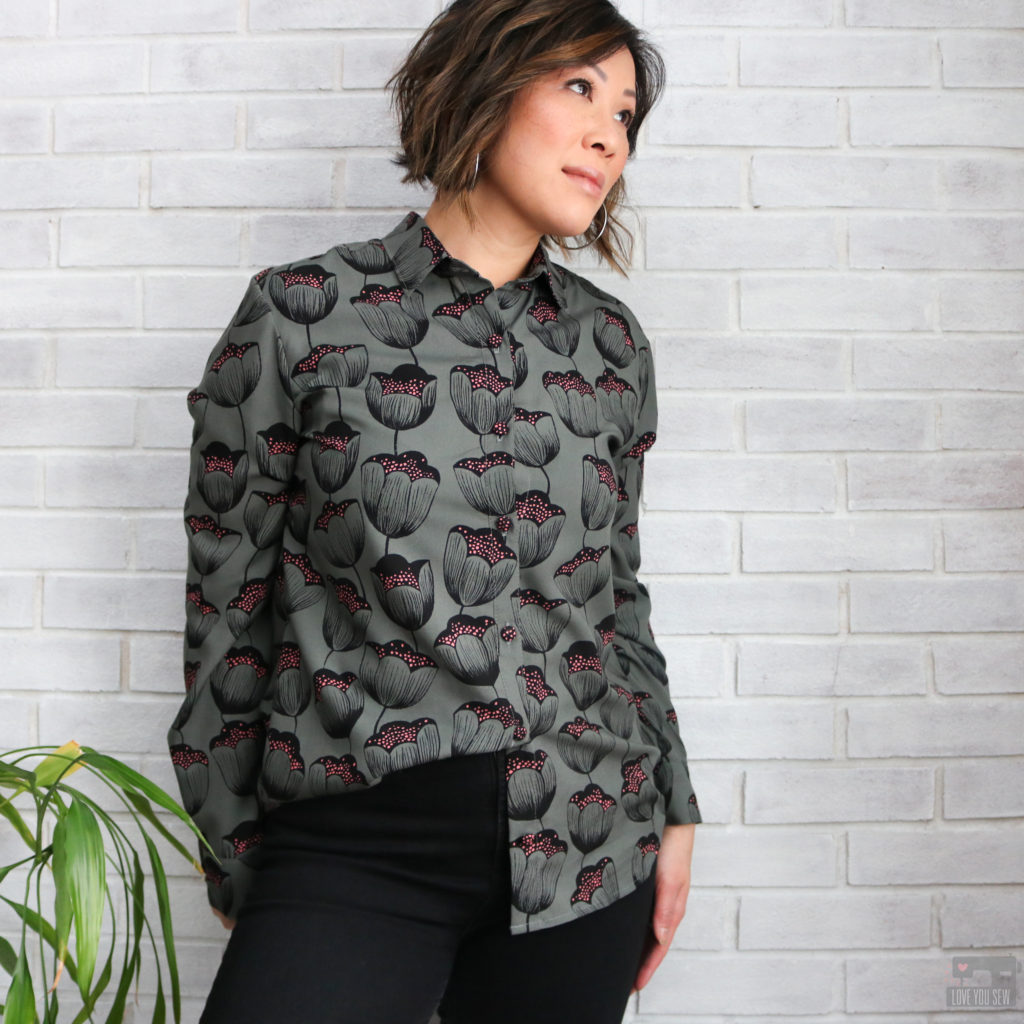
This Cotton + Steel rayon designed by Sarah Watts caught my eye the first time I saw it. I’m very fond of my dark neutrals and love the extra pops of pink over this moody floral print. And if you’ve ever felt C+S rayon challis, you know it’s incredibly soft and silky. The drape is fantastic and makes for beautiful dresses and tops. I’m a big fan and have quite a bit of their rayon in various prints in my wardrobe. When this print went on sale at Fabric.com awhile ago (it’s since sold out,) I knew I had to grab 2 1/2 yards of it. It been sitting in my stash for well over a year and I knew this would make a sharp looking Archer Shirt.
Tips:
- Use a fine needle – I like a 75/11 or 70/10
- The fabric can be pretty slippery, so pin more often than you normally would for a quilt cotton
- Use finer needles like these which leave small holes in your delicate fabrics.
Pattern
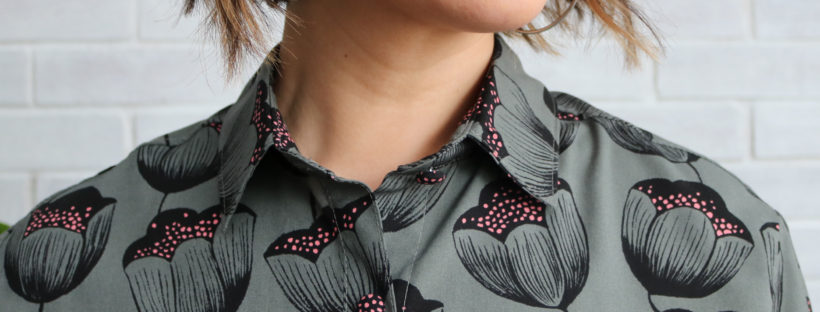
I first made the Archer Shirt (pattern by Grainline Studio) in a soft cotton flannel which you can read about here on the Imagine Gnats blog. It was such a great casual relaxed shirt that I could wear with jeans or leggings. I wanted the same ease of getting dressed, but knew a rayon Archer would just be so much more sophisticated for the days I need to be dressed up.
Although the thought of making a button-up can seem pretty daunting, there is so much help out there! Grainline has a full sew-along that has been broken up into very digestible chunks. since this is also an older pattern, you can find plenty of inspiration on social media with a quick call to our bestie, Google 😉
FIT
I made a size 8 according to my measurements and graded out a size in the hip like a usually have to do with a woven top (my hips measure two sizes larger than my waist.) There were no other adjustments made. Although, I would shorten the sleeves on a dressier version by 1/2″ to have it look more polished. (I like the longer sleeve on my flannel version since it helps keep my hards warm in these colder months.)
Interfacing
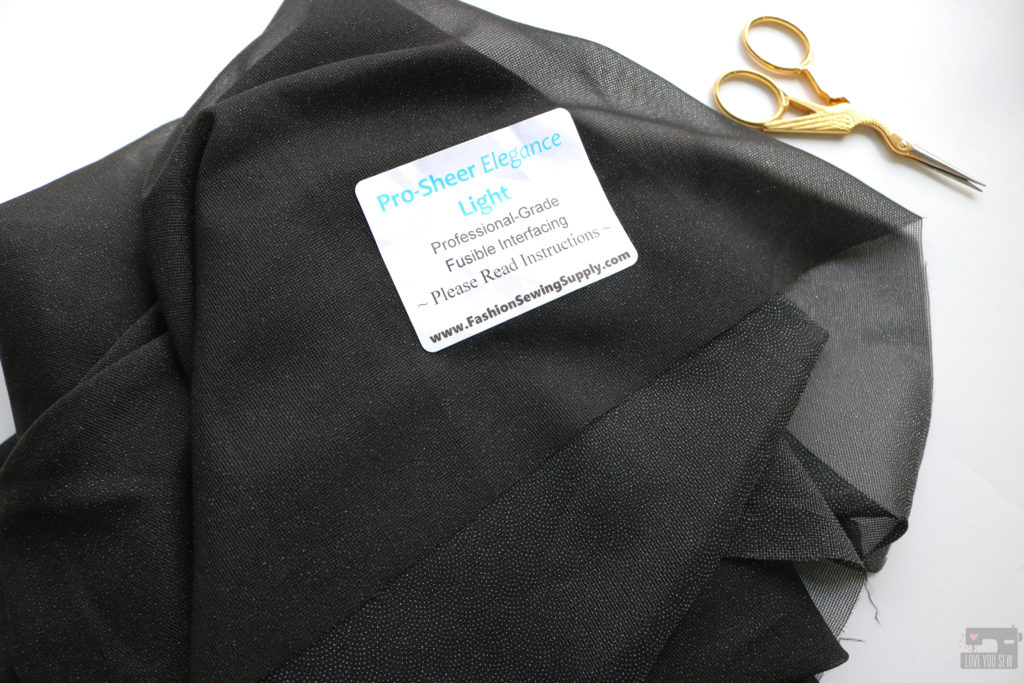
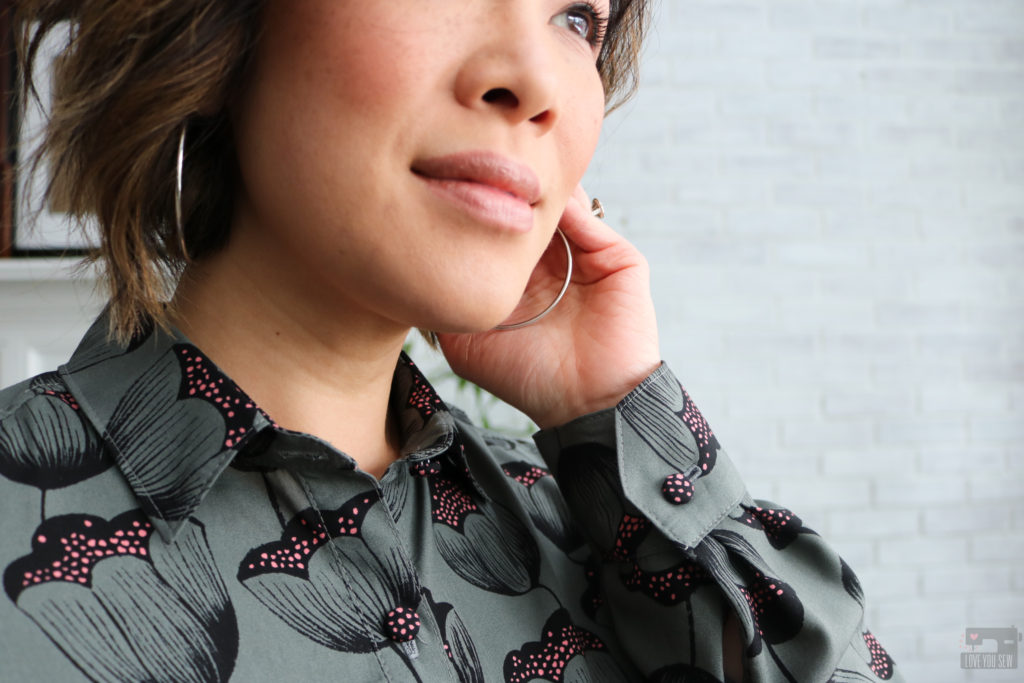
What’s very different for me with this rayon project is the interfacing. Awhile back, I used Pellon Lightweight Apparel interfacing with this rayon jacket and it has bubbled with use (ugh!) I have to pretty much re-iron the jacket every time I want to wear it since the bubbling all over the front and back yokes. What a drag, right??? Thanks to all of you smarties on Instagram, I learned about FashionSewlingSupply.com and purchased a few different garment interfacing like this ProSheer Elegance in black. Not only did it fuse well, it still allows for some drape. I was able to sew the entire shirt while flipping the collar and cuffs inside out…and there was NO bubbling! I’m completely sold on this stuff and won’t buy my apparel interfacing from the big box stores anymore. These interfacings definitely costs more, but it’s well worth it to save all of my sewing time!
Based on how lightweight this interfacing is, I used it on both sides of the collar stand. The patterns calls for it only on the inside, but I wanted to make sure the collar stands up nicely and doesn’t just flop over. I’m happy with how it turned out and would recommend this if you are using other lightweight fabrics like lawn, voile, crepe de chine, silk and gauze.
Buttons
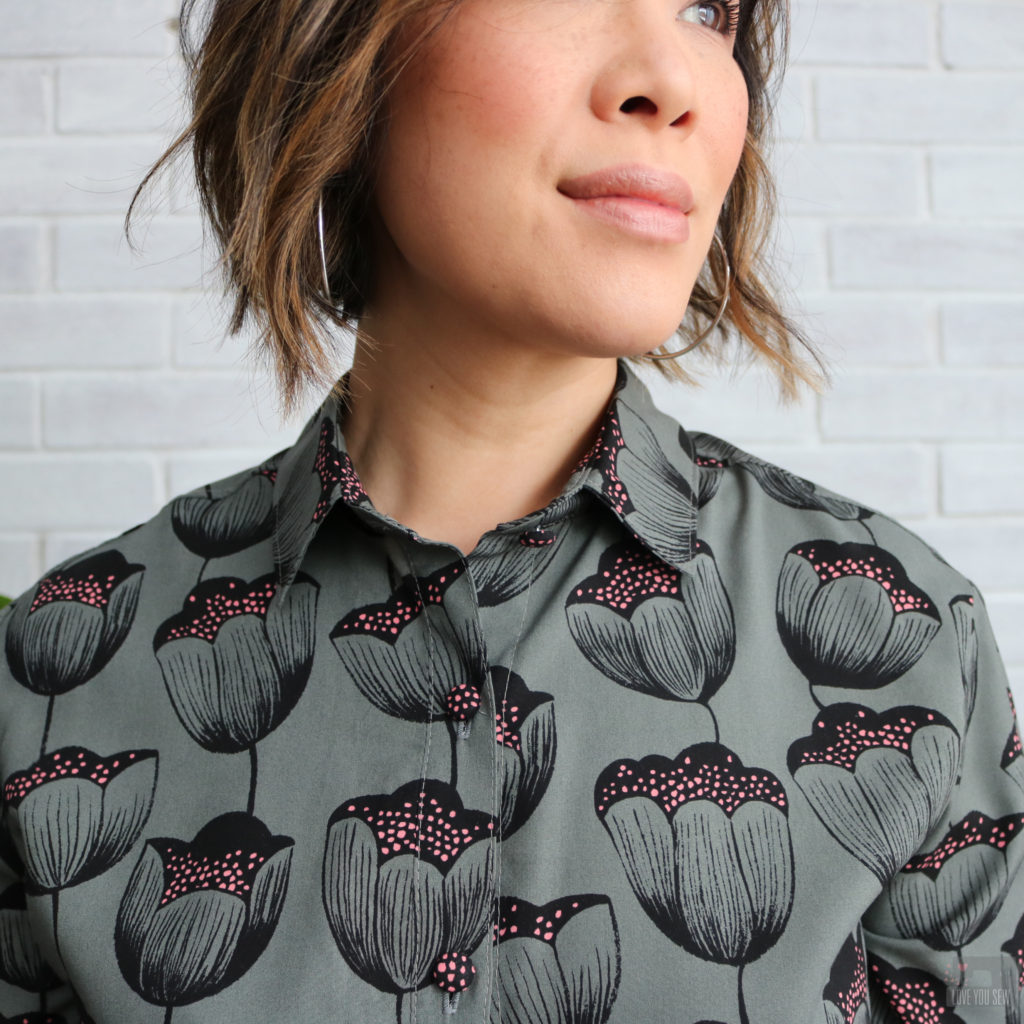
I love being able to use up my MIL’s button stash as much as I can, but I couldn’t find enough plain black buttons for this shirt. Fortunately, I bought these 1/2″ buttons years ago, which can be covered in just about any fabric. I was able to use all the scraps to make these buttons. It’s such a fun and easy way to add special details to a garments which are uniquely my own. You can see how I used them on this Felix Dress and how I used them on my Alix Dress to cover up some negative space on the yoke.
How I wear it
After investing all this time making the Archer and in the effort to be more sustainable, I want to make sure I can wear all my makes over-and-over again. I like following other fashion influencers and RTW companies for inspiration. Below are three ways to wear a button-up for me.

1. With high-waisted pants on trend, I like being able to tie a button up. It still can camouflage my mid-section but looks so stylish and playful as well. Plus, you can conceal a lost button in case that ever happens 😉 I think a flannel button-up tied up over shorts is such a classic summer look too.
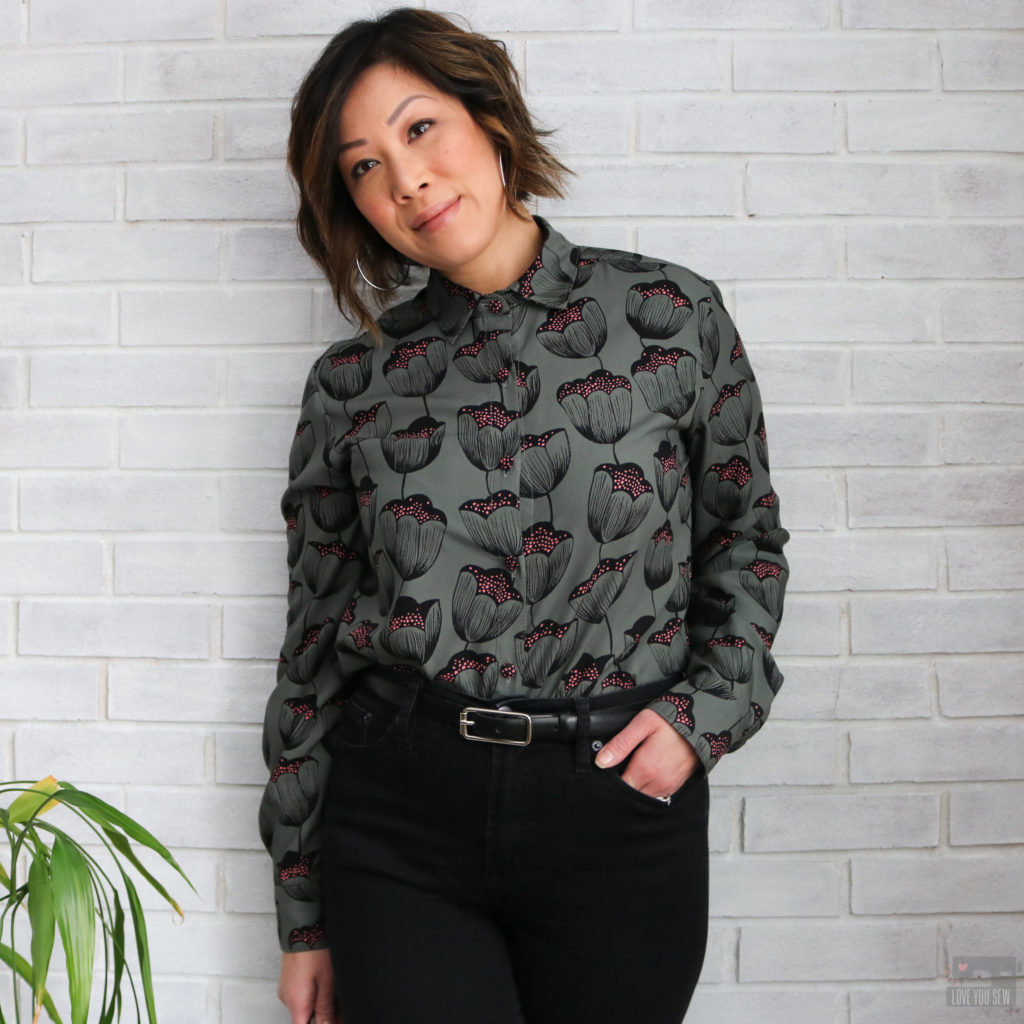
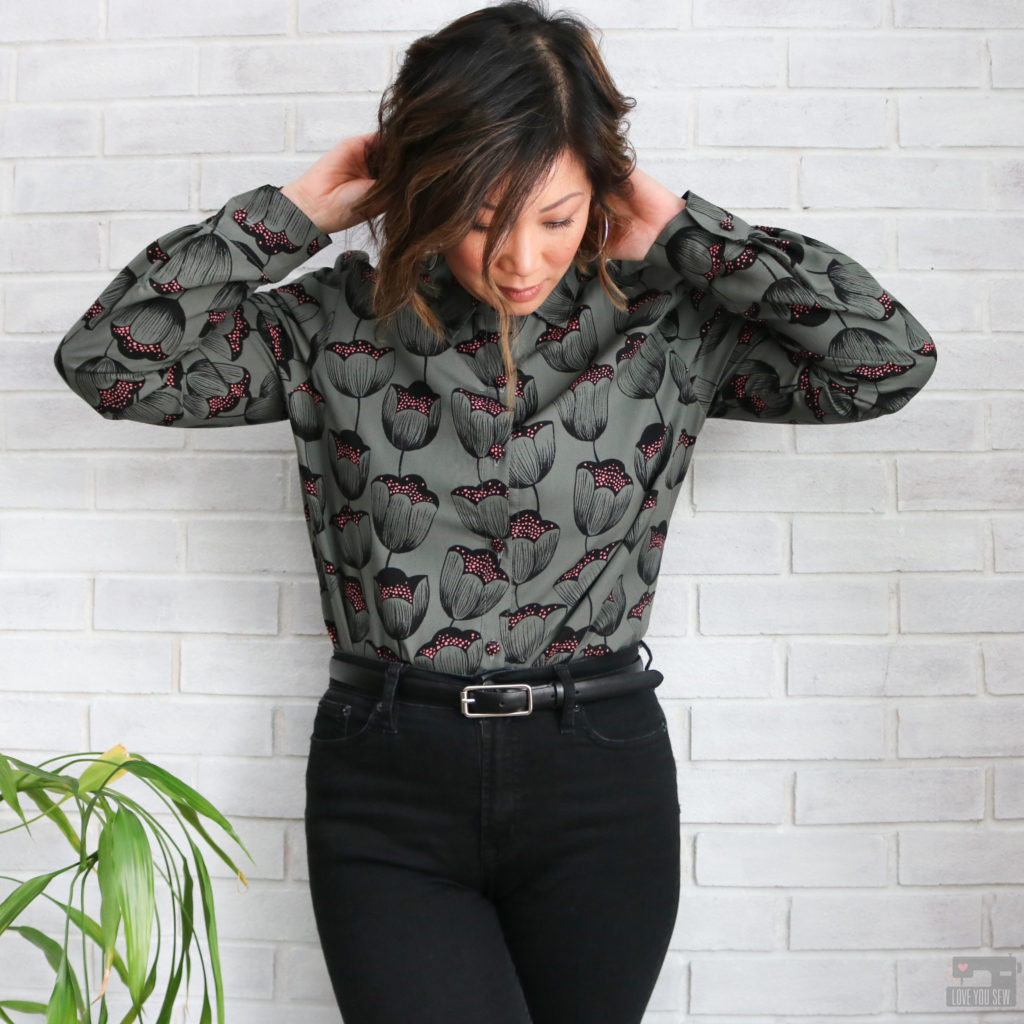
2. For the hipster look, I like to fasten all the buttons up through the collar. This along with tucking in the shirt with high waisted jeans (as shown) keeps the outfit polished. Pair it with a sleek belt and I’m ready for drinks with the ladies downtown!
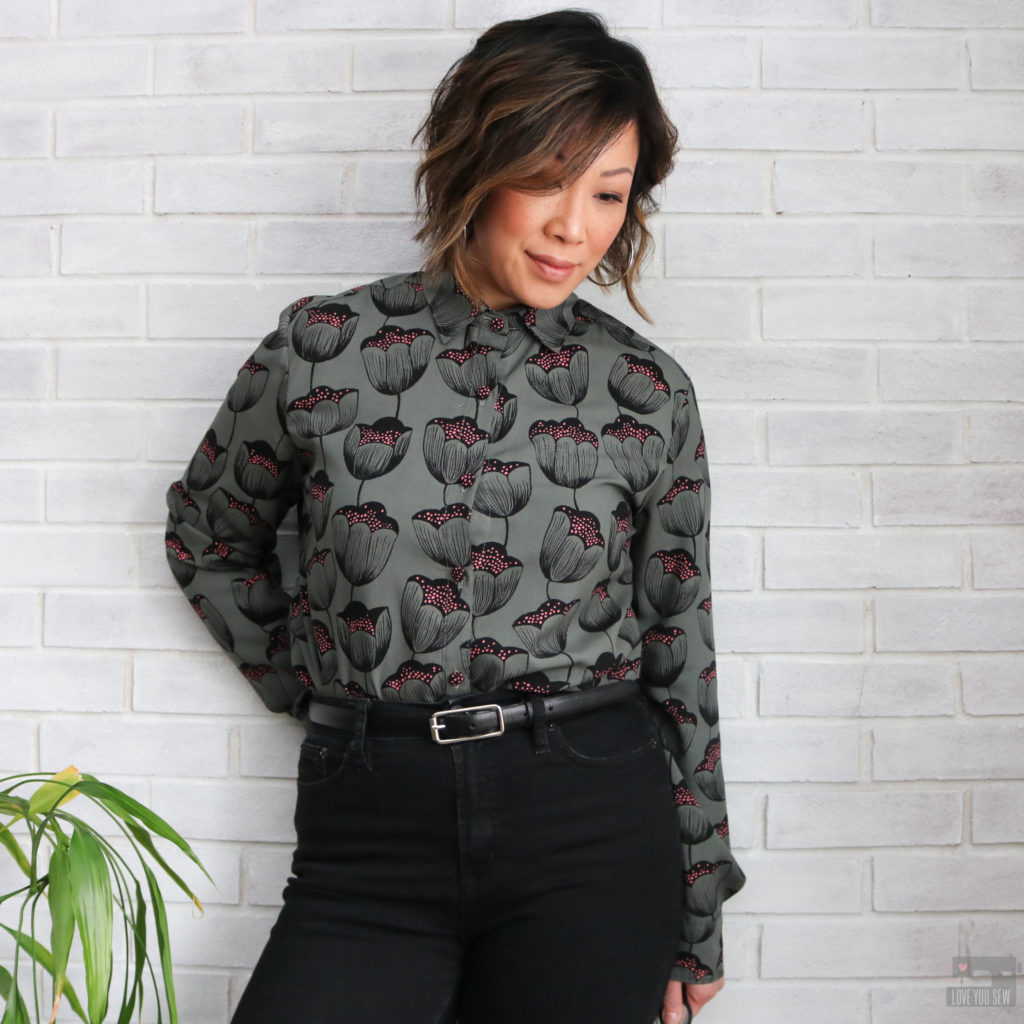
3. Finally, I have the half-tuck (also known as the French tuck.) This is definitely another on-trend way to wear any top…whether it be a tee or even a heavy sweater. I like how it’s more casual and breaks up the hem line for more visual interest.
Which way would you wear your #MeMade button-up shirt? I hope you enjoyed this post and join in on #ShirtMonth whether it be this year or next!
Happy Sewing!
Cristy
This post may contain affiliate links for which I may receive a small commission only if you make a purchase. Thanks for support, friends!