Sewing the Persephone Shorts

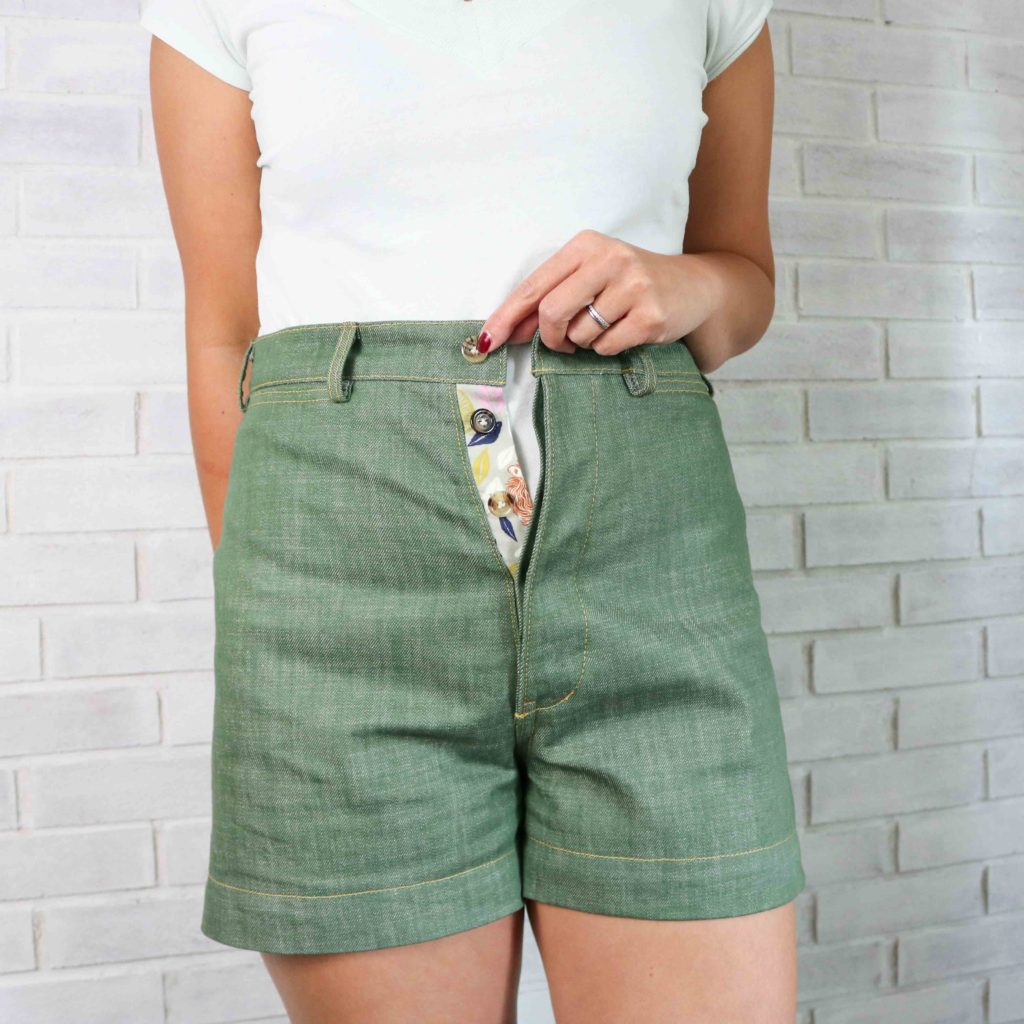
Like everyone and their mama, I scooped up the Persephone Pants pattern by Anna Allen Clothing last summer. I made these shorts last summer as well…and even took the pictures…but this post was left on the back burner while I had other blog deadlines to fulfill. While pulling clothes for our spring break trip, I was reminded inspired to finally finish this review — especially for all of you who are heading into shorts season as well!

The inspiration behind this pattern were the wide-legged, high-waisted sailor pants from the 20-40s. The Persephone drafting is unique in that there are no side seams which made fitting a little different, but still doable with a muslin. These shorts are my wearable muslin since I could work on the fit around the waist and hips, but save all the fabric from the legs.

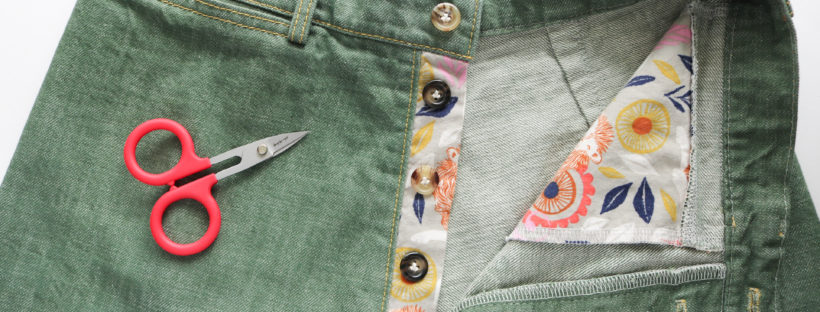
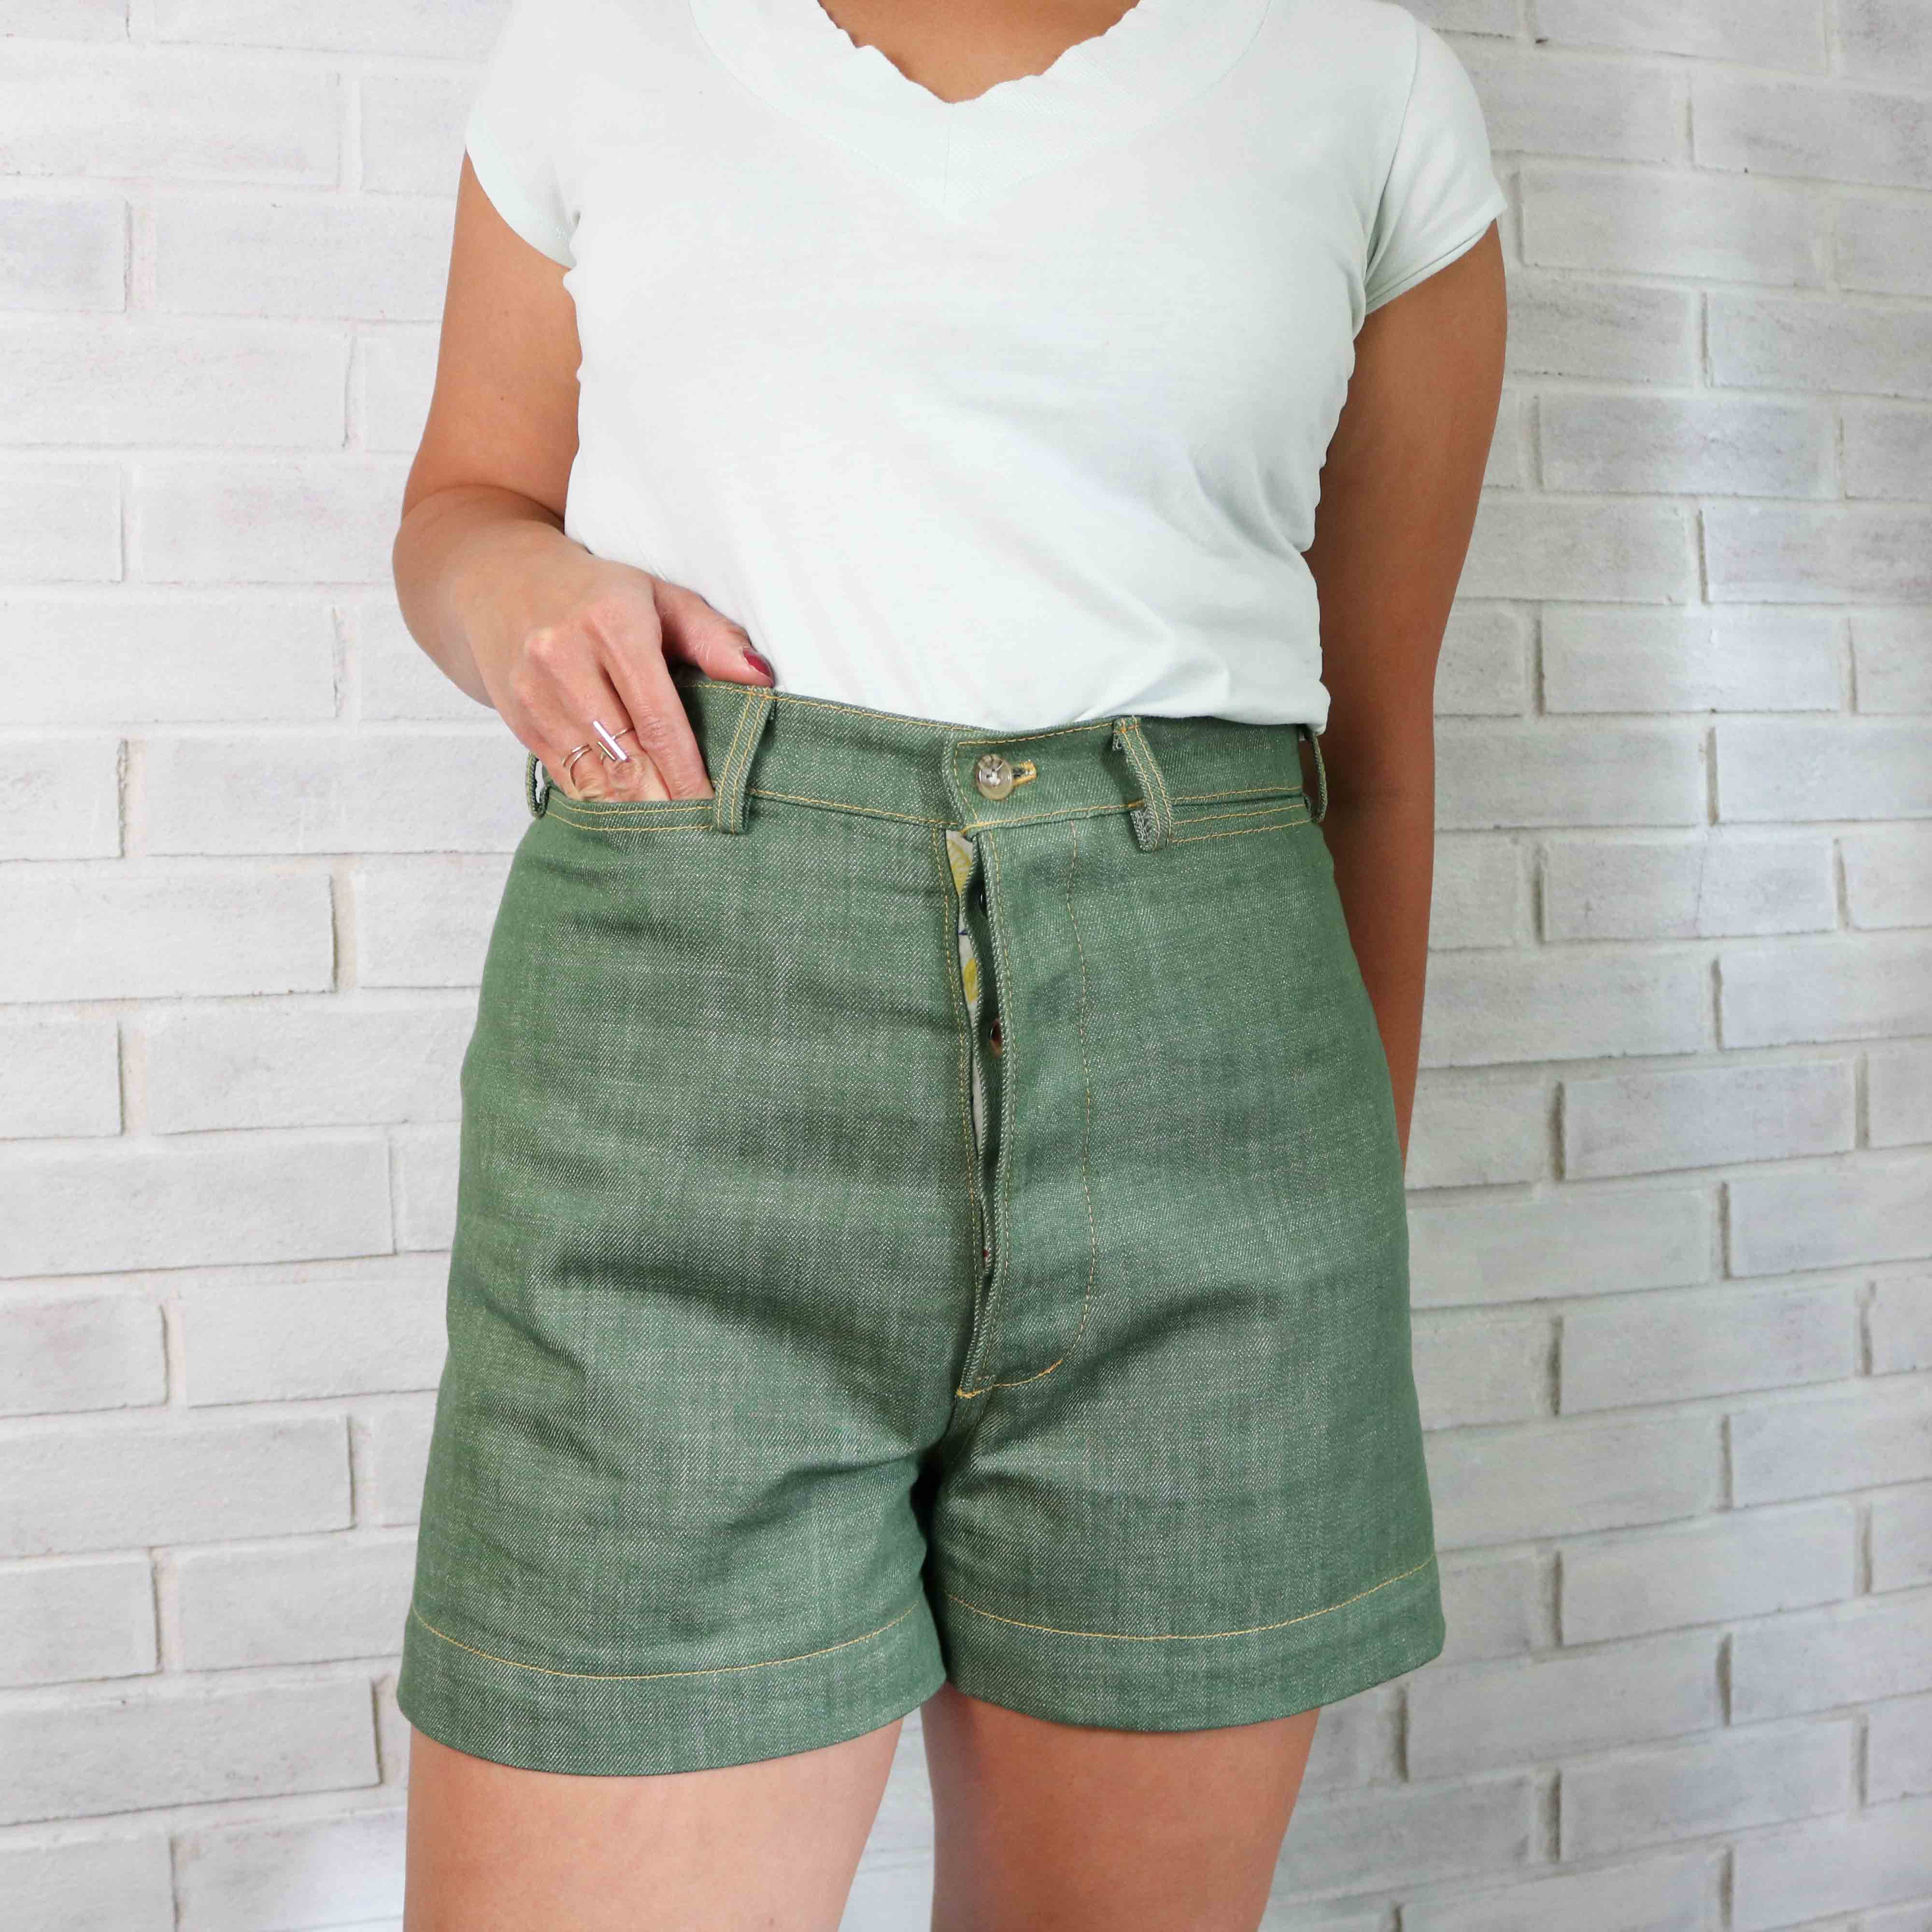
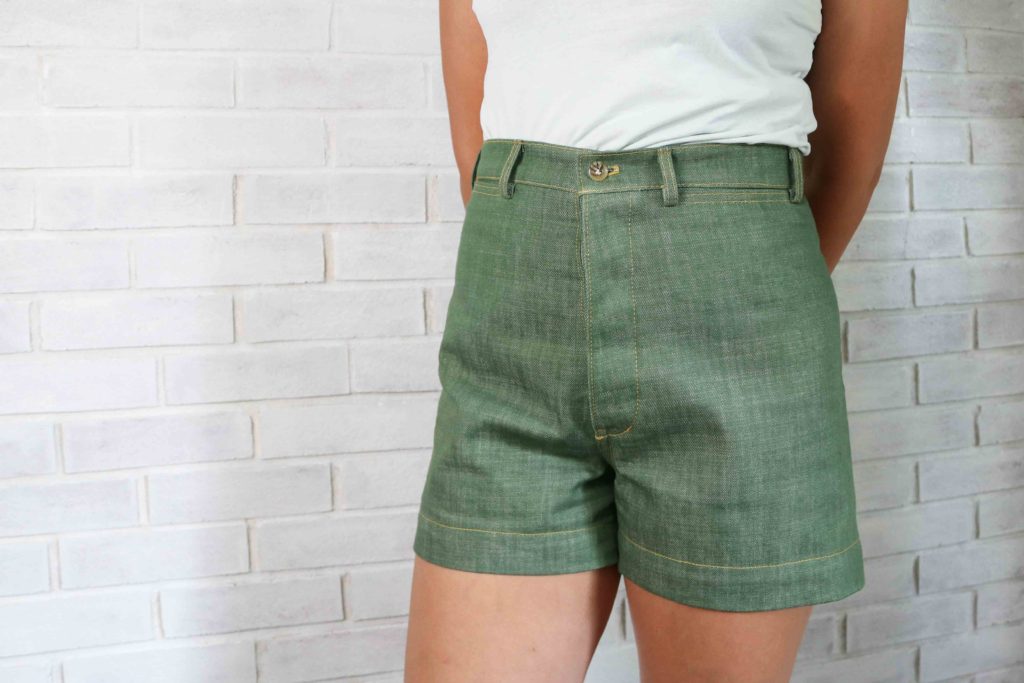
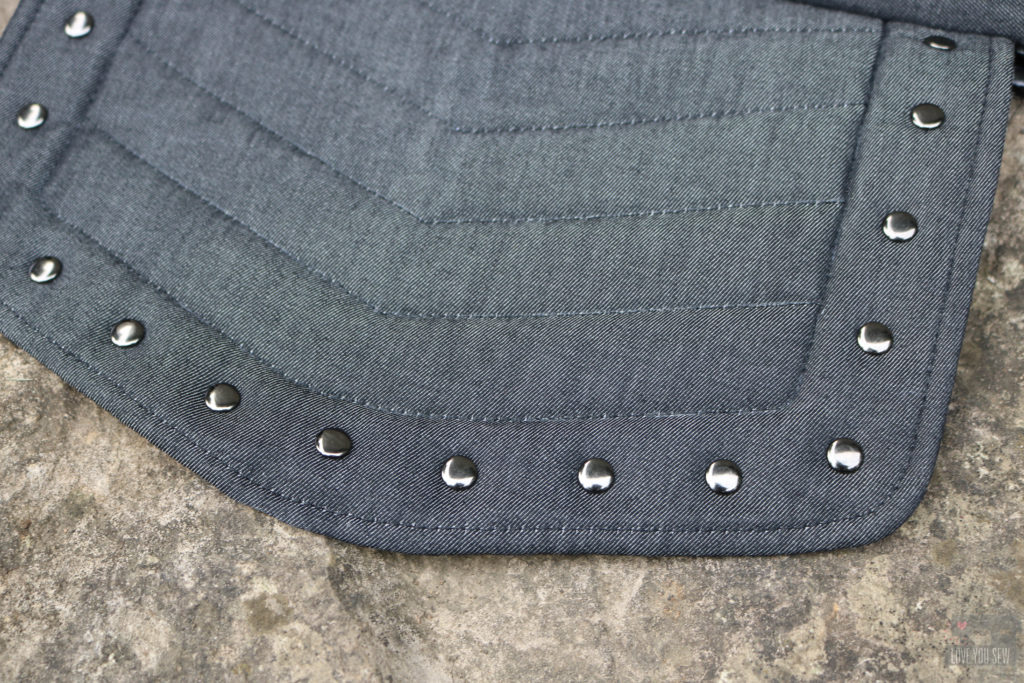
These pants feature a hidden button fly, but Anna released the zip fly expansion pack after I made these. When I make the full pants, I would like to use a zipper to make getting them off and on more easily. Also, I’ve been getting creasing at every space between the buttons, so I think a zipper will help smooth that out.

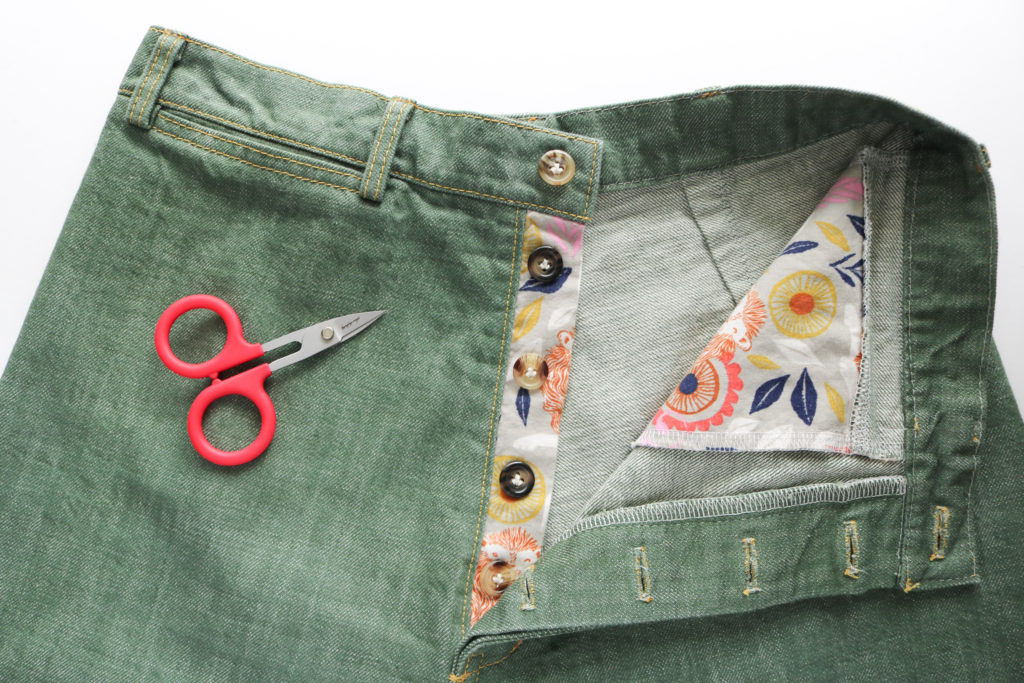
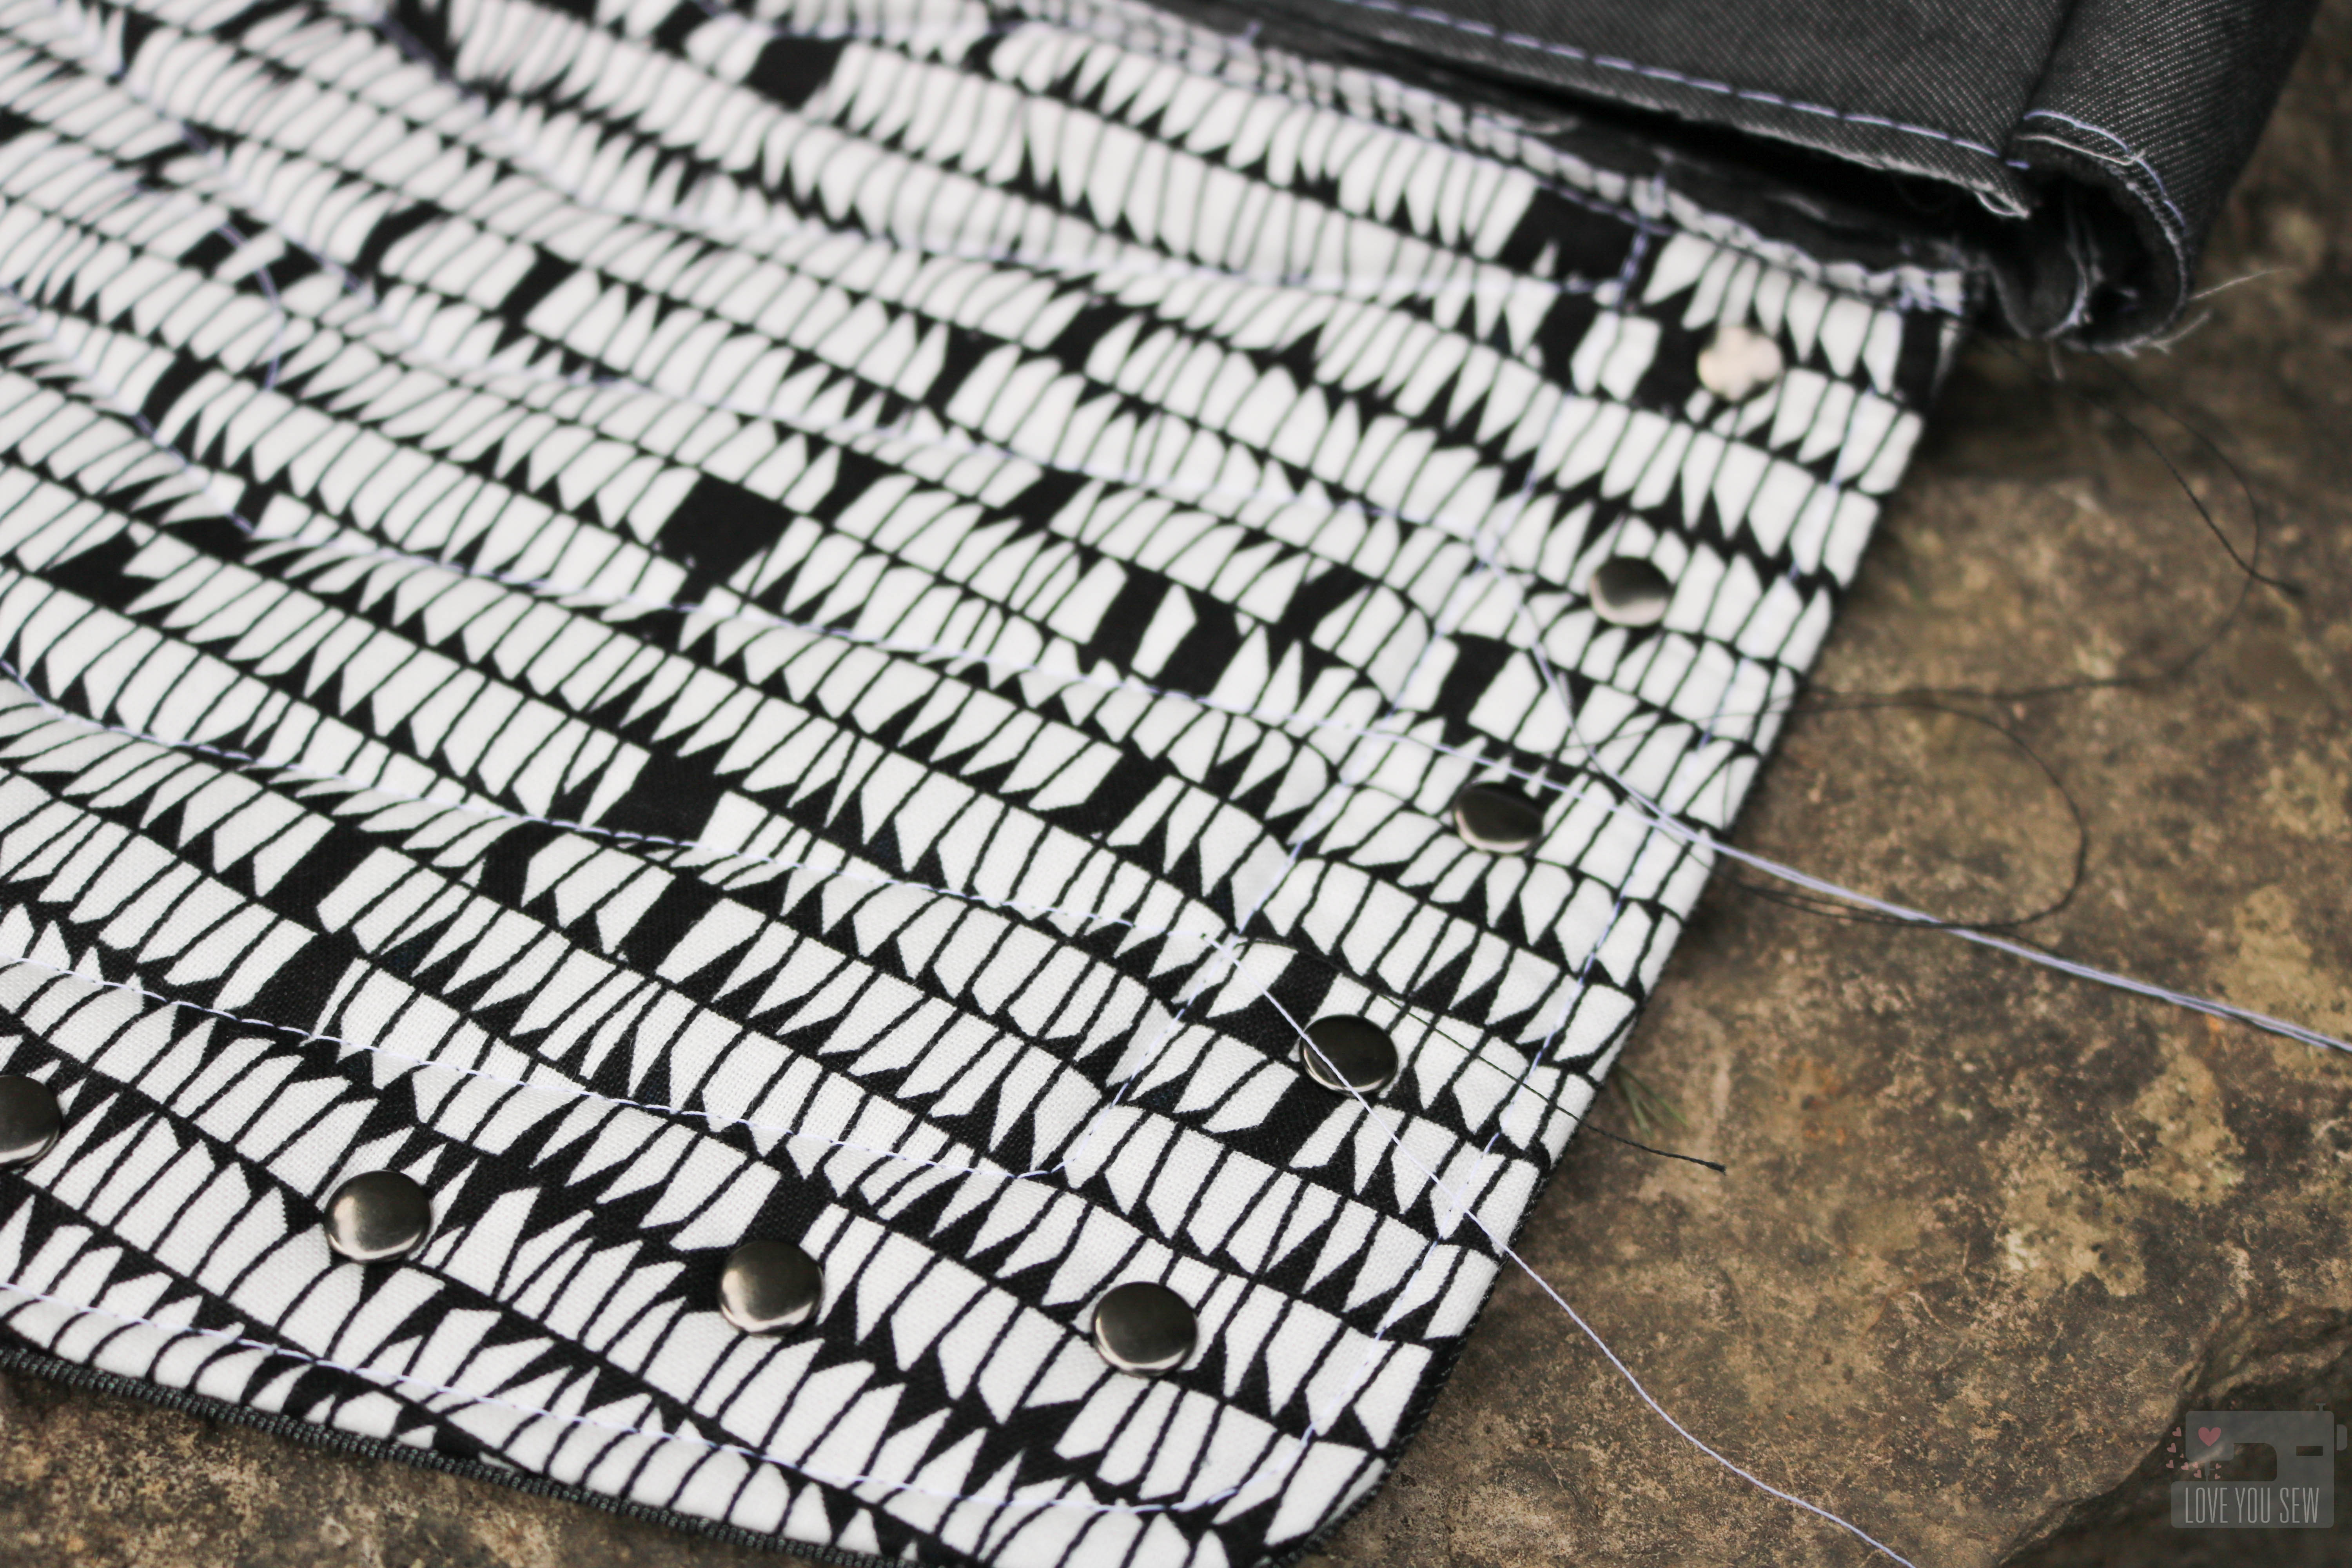
With the hidden button fly, I figured I could also get a bit crazy with the buttons. I’m still working through my MIL’s old stash and couldn’t find five matching colors in the same size. But I did find five with the same size and just alternated the colors.

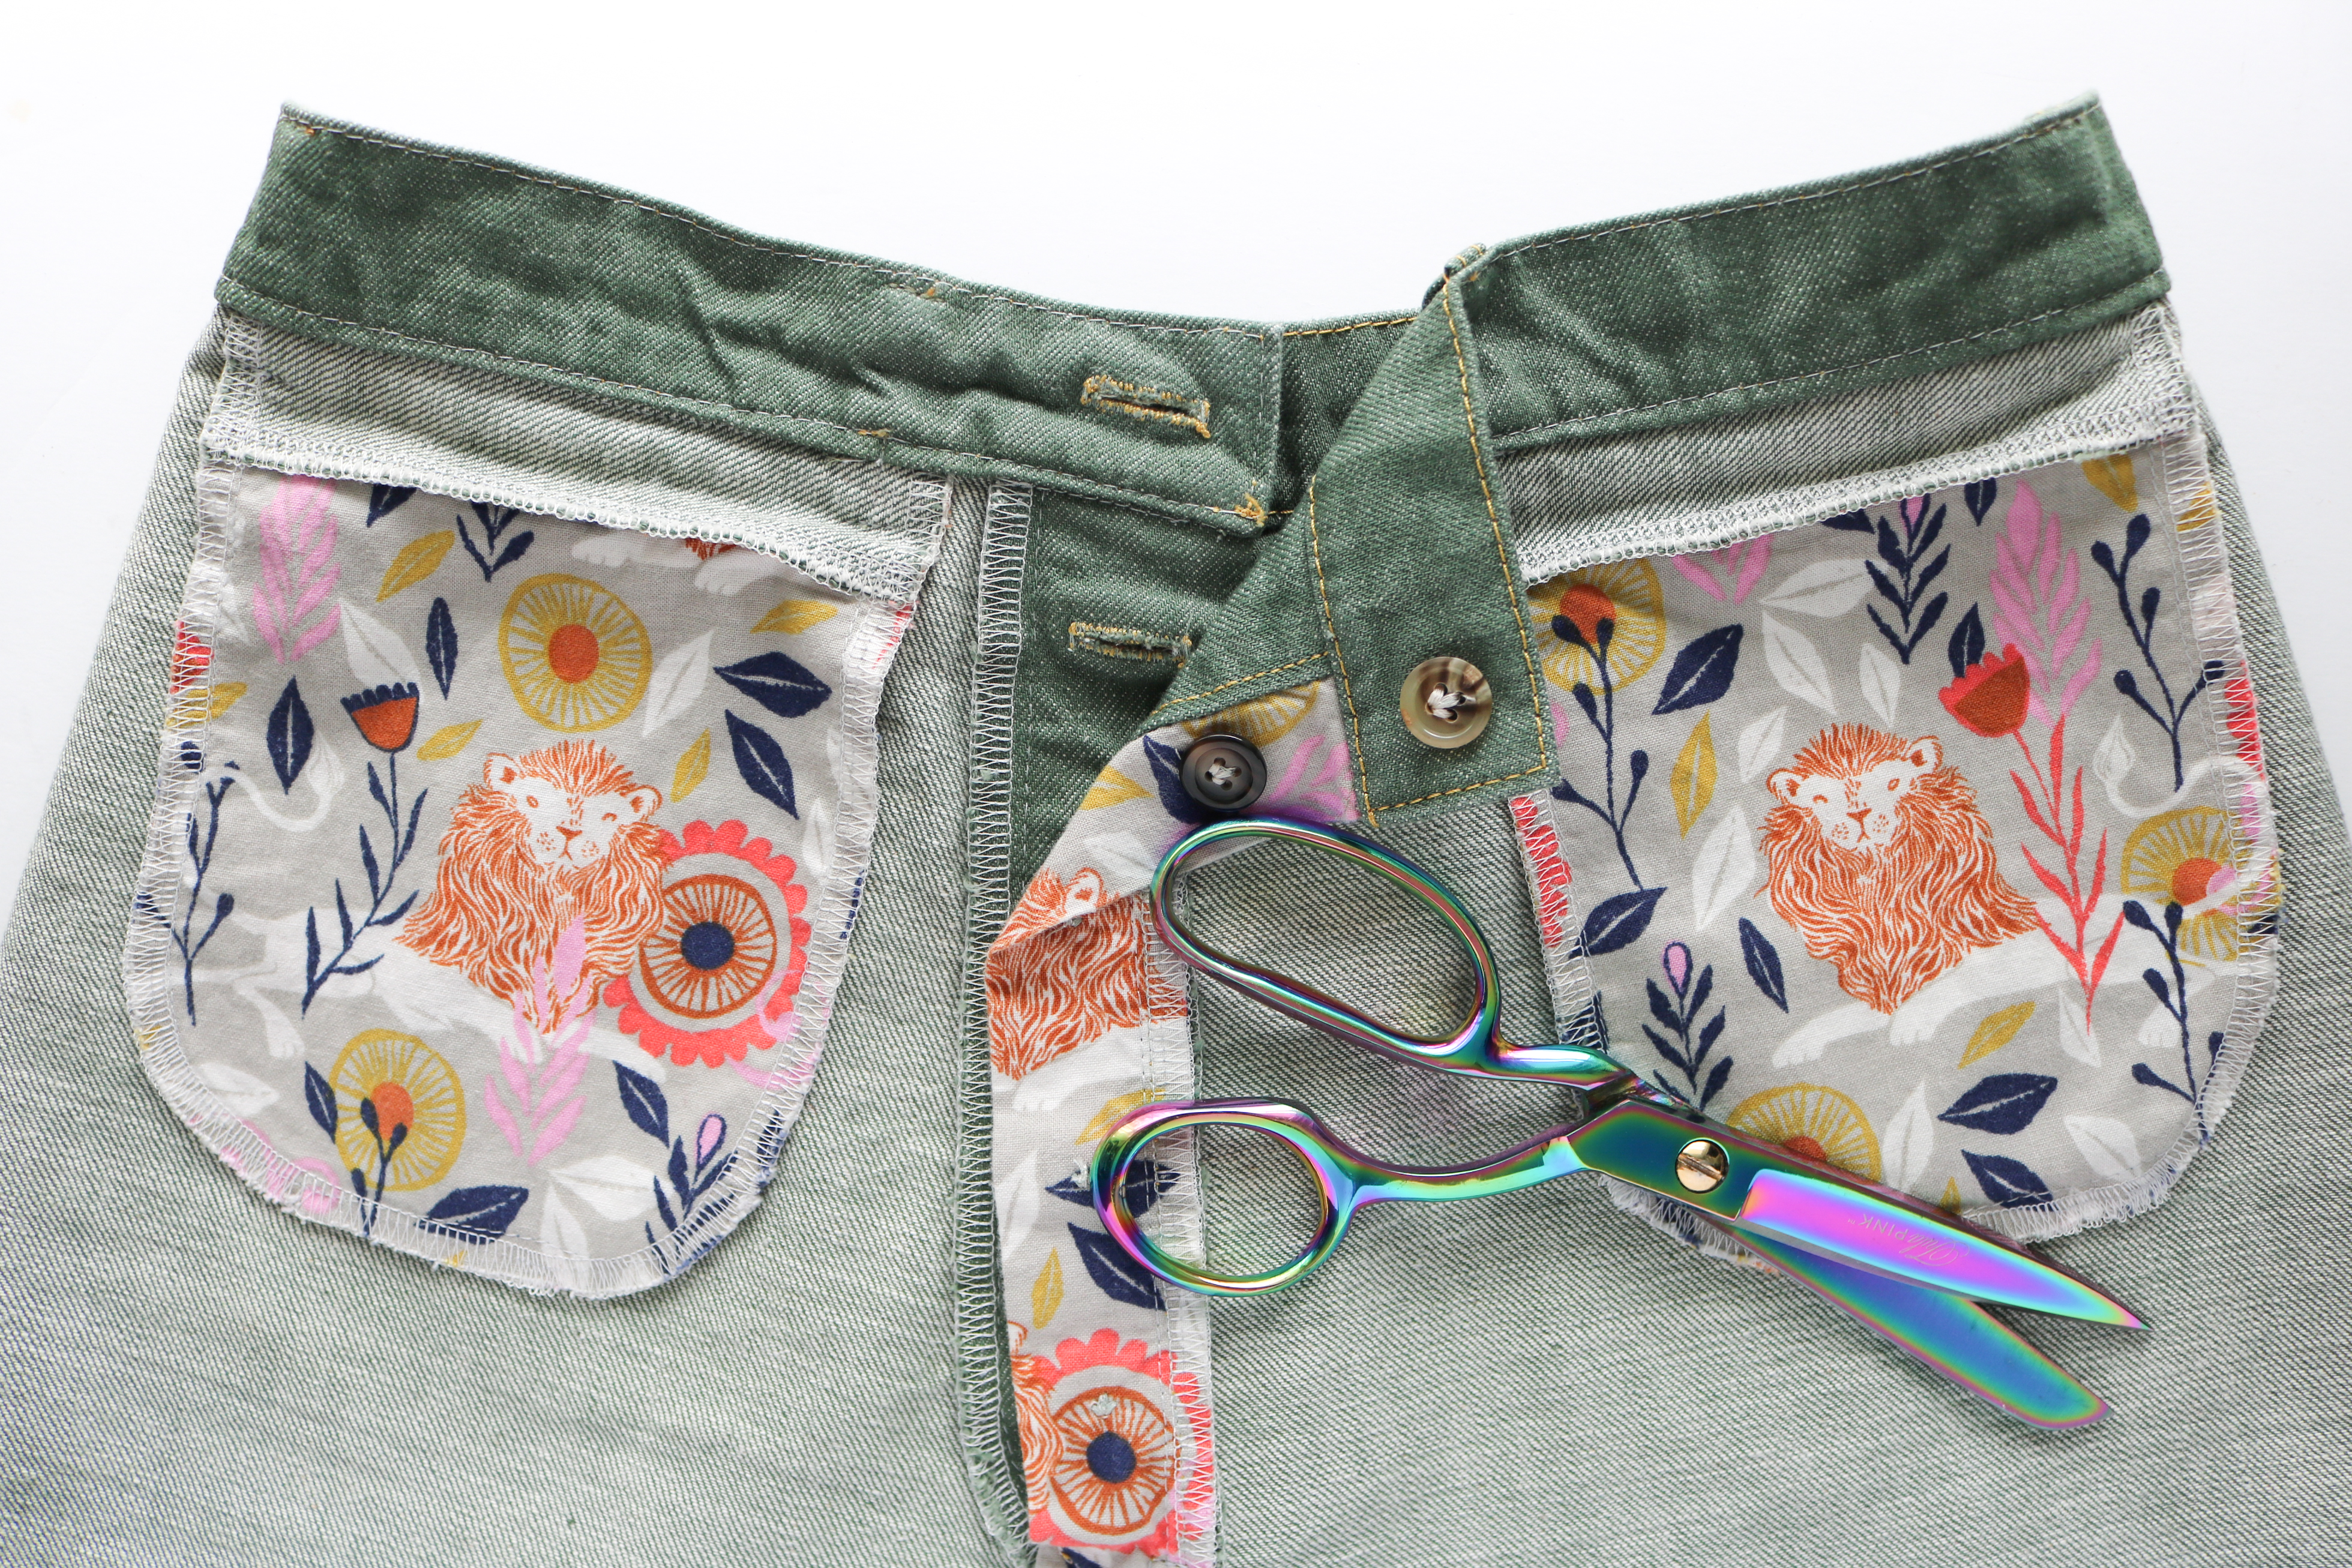
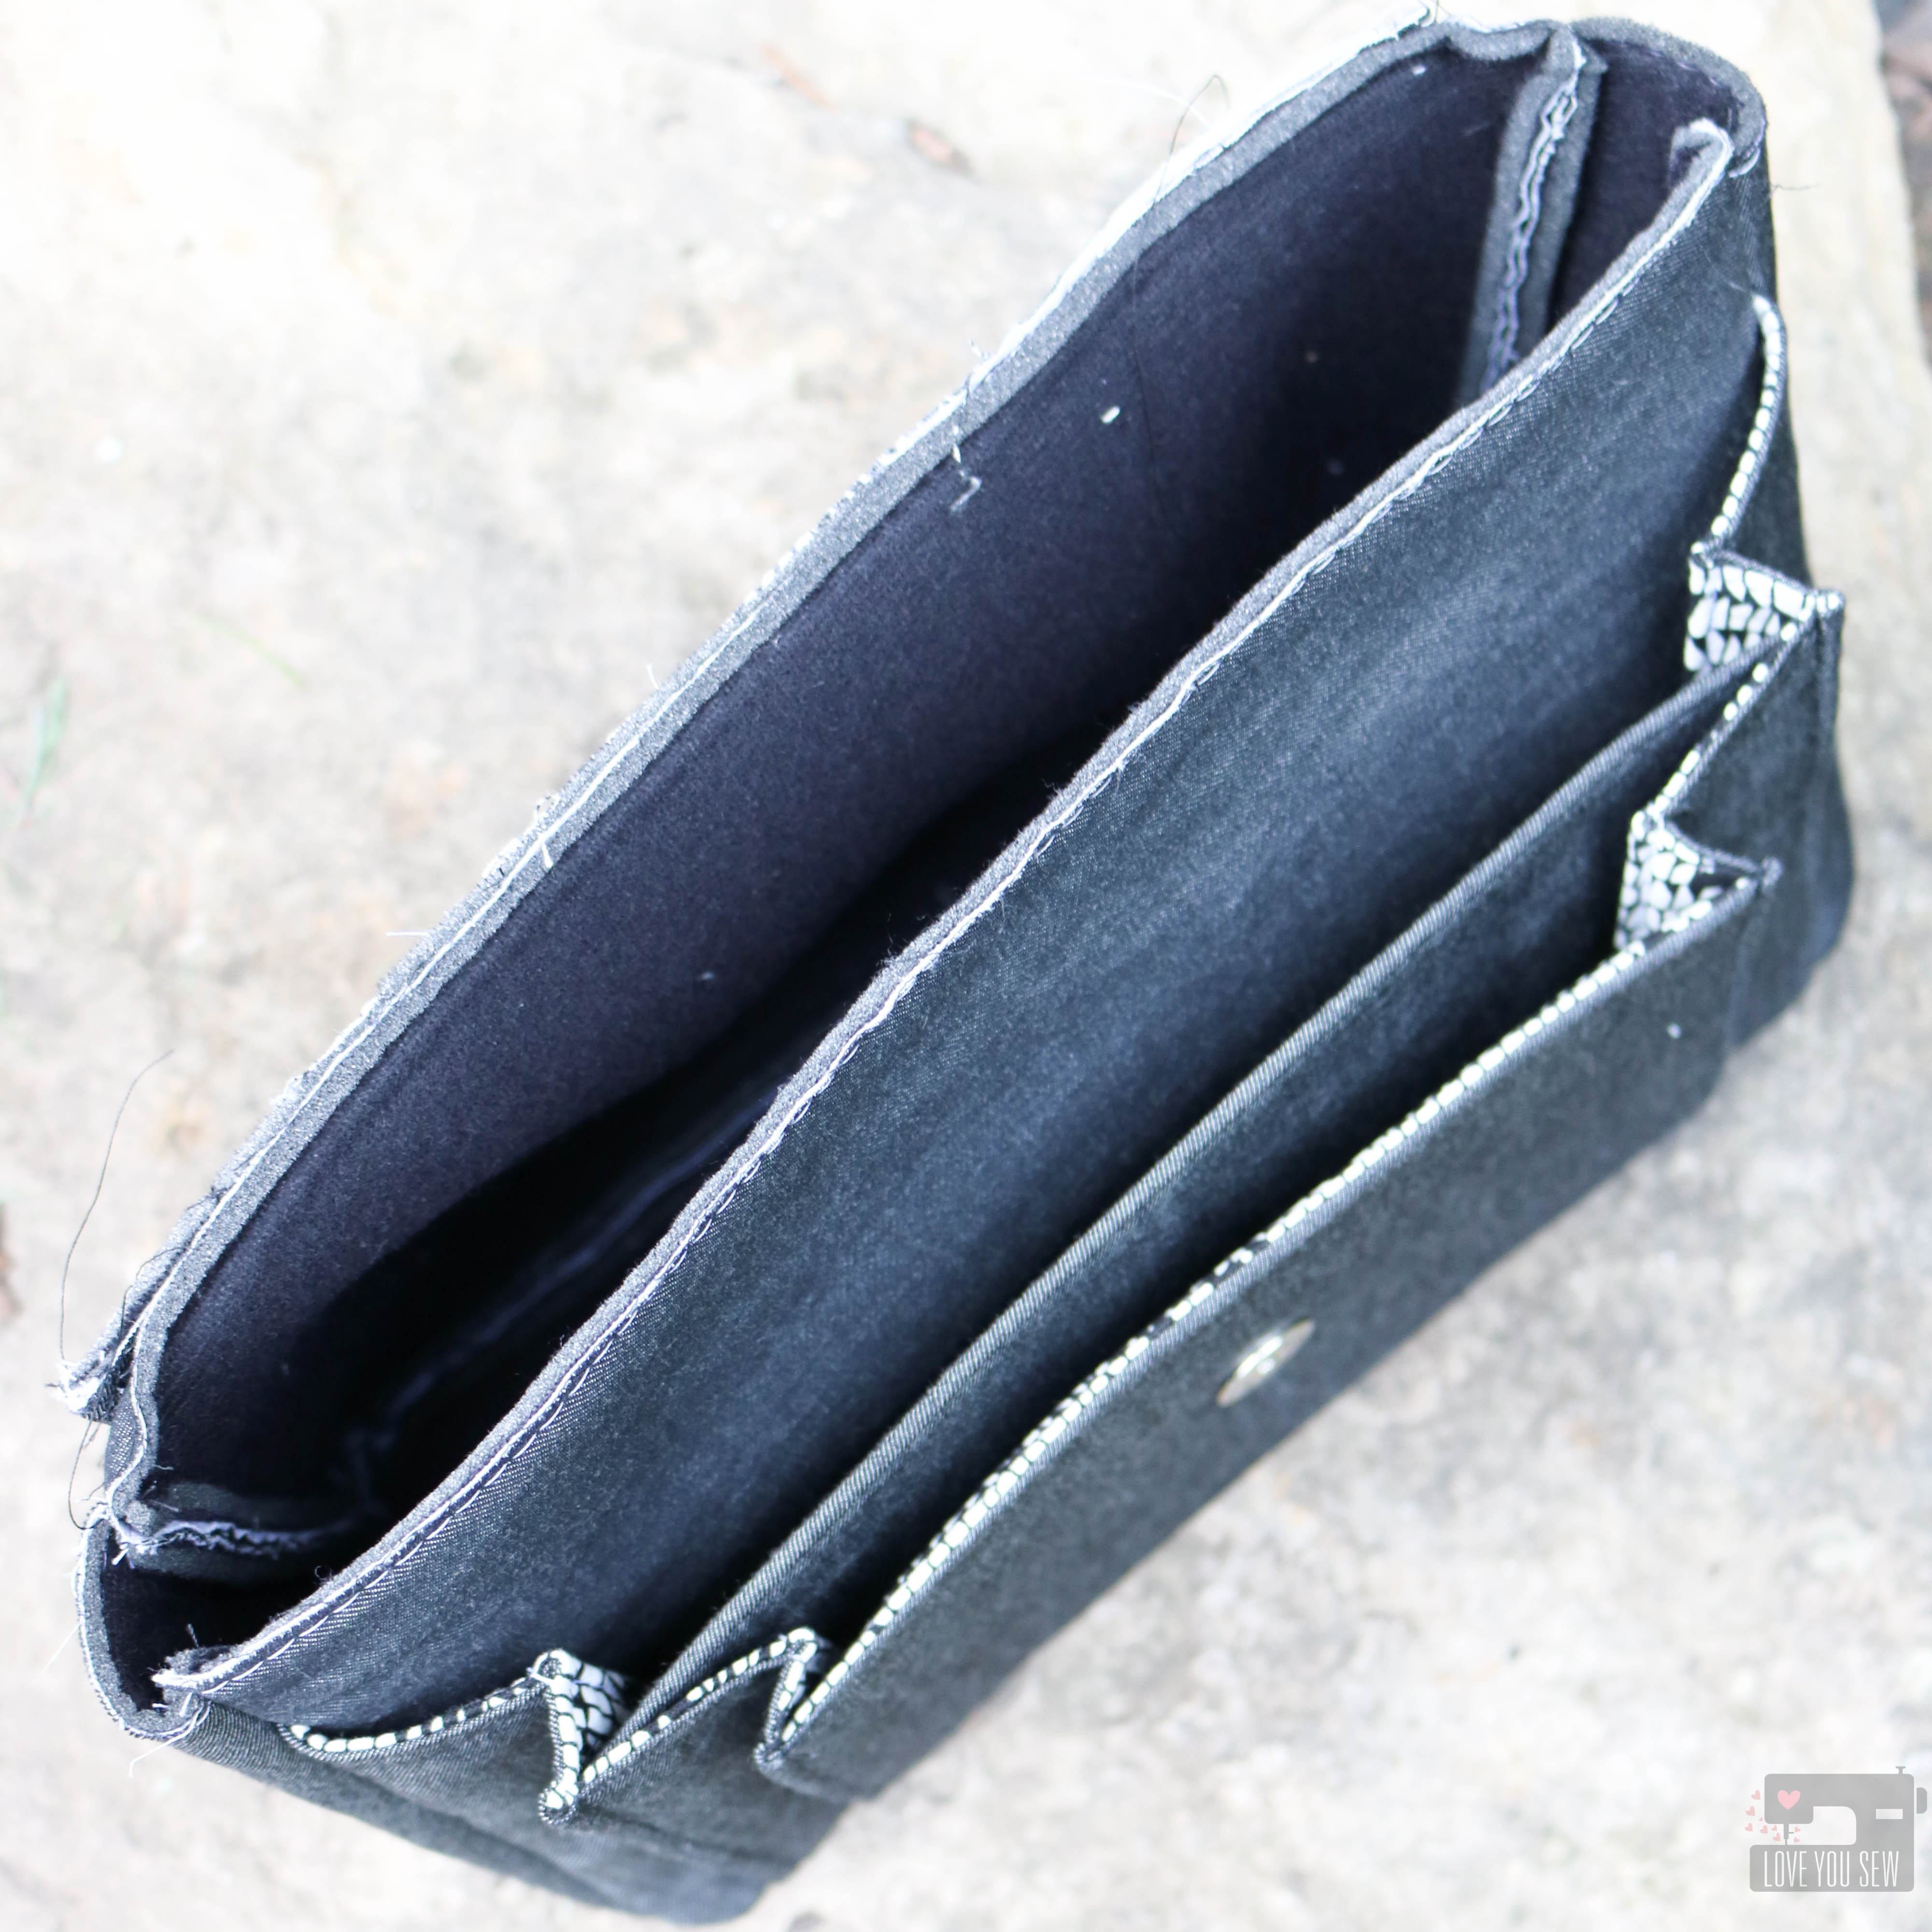
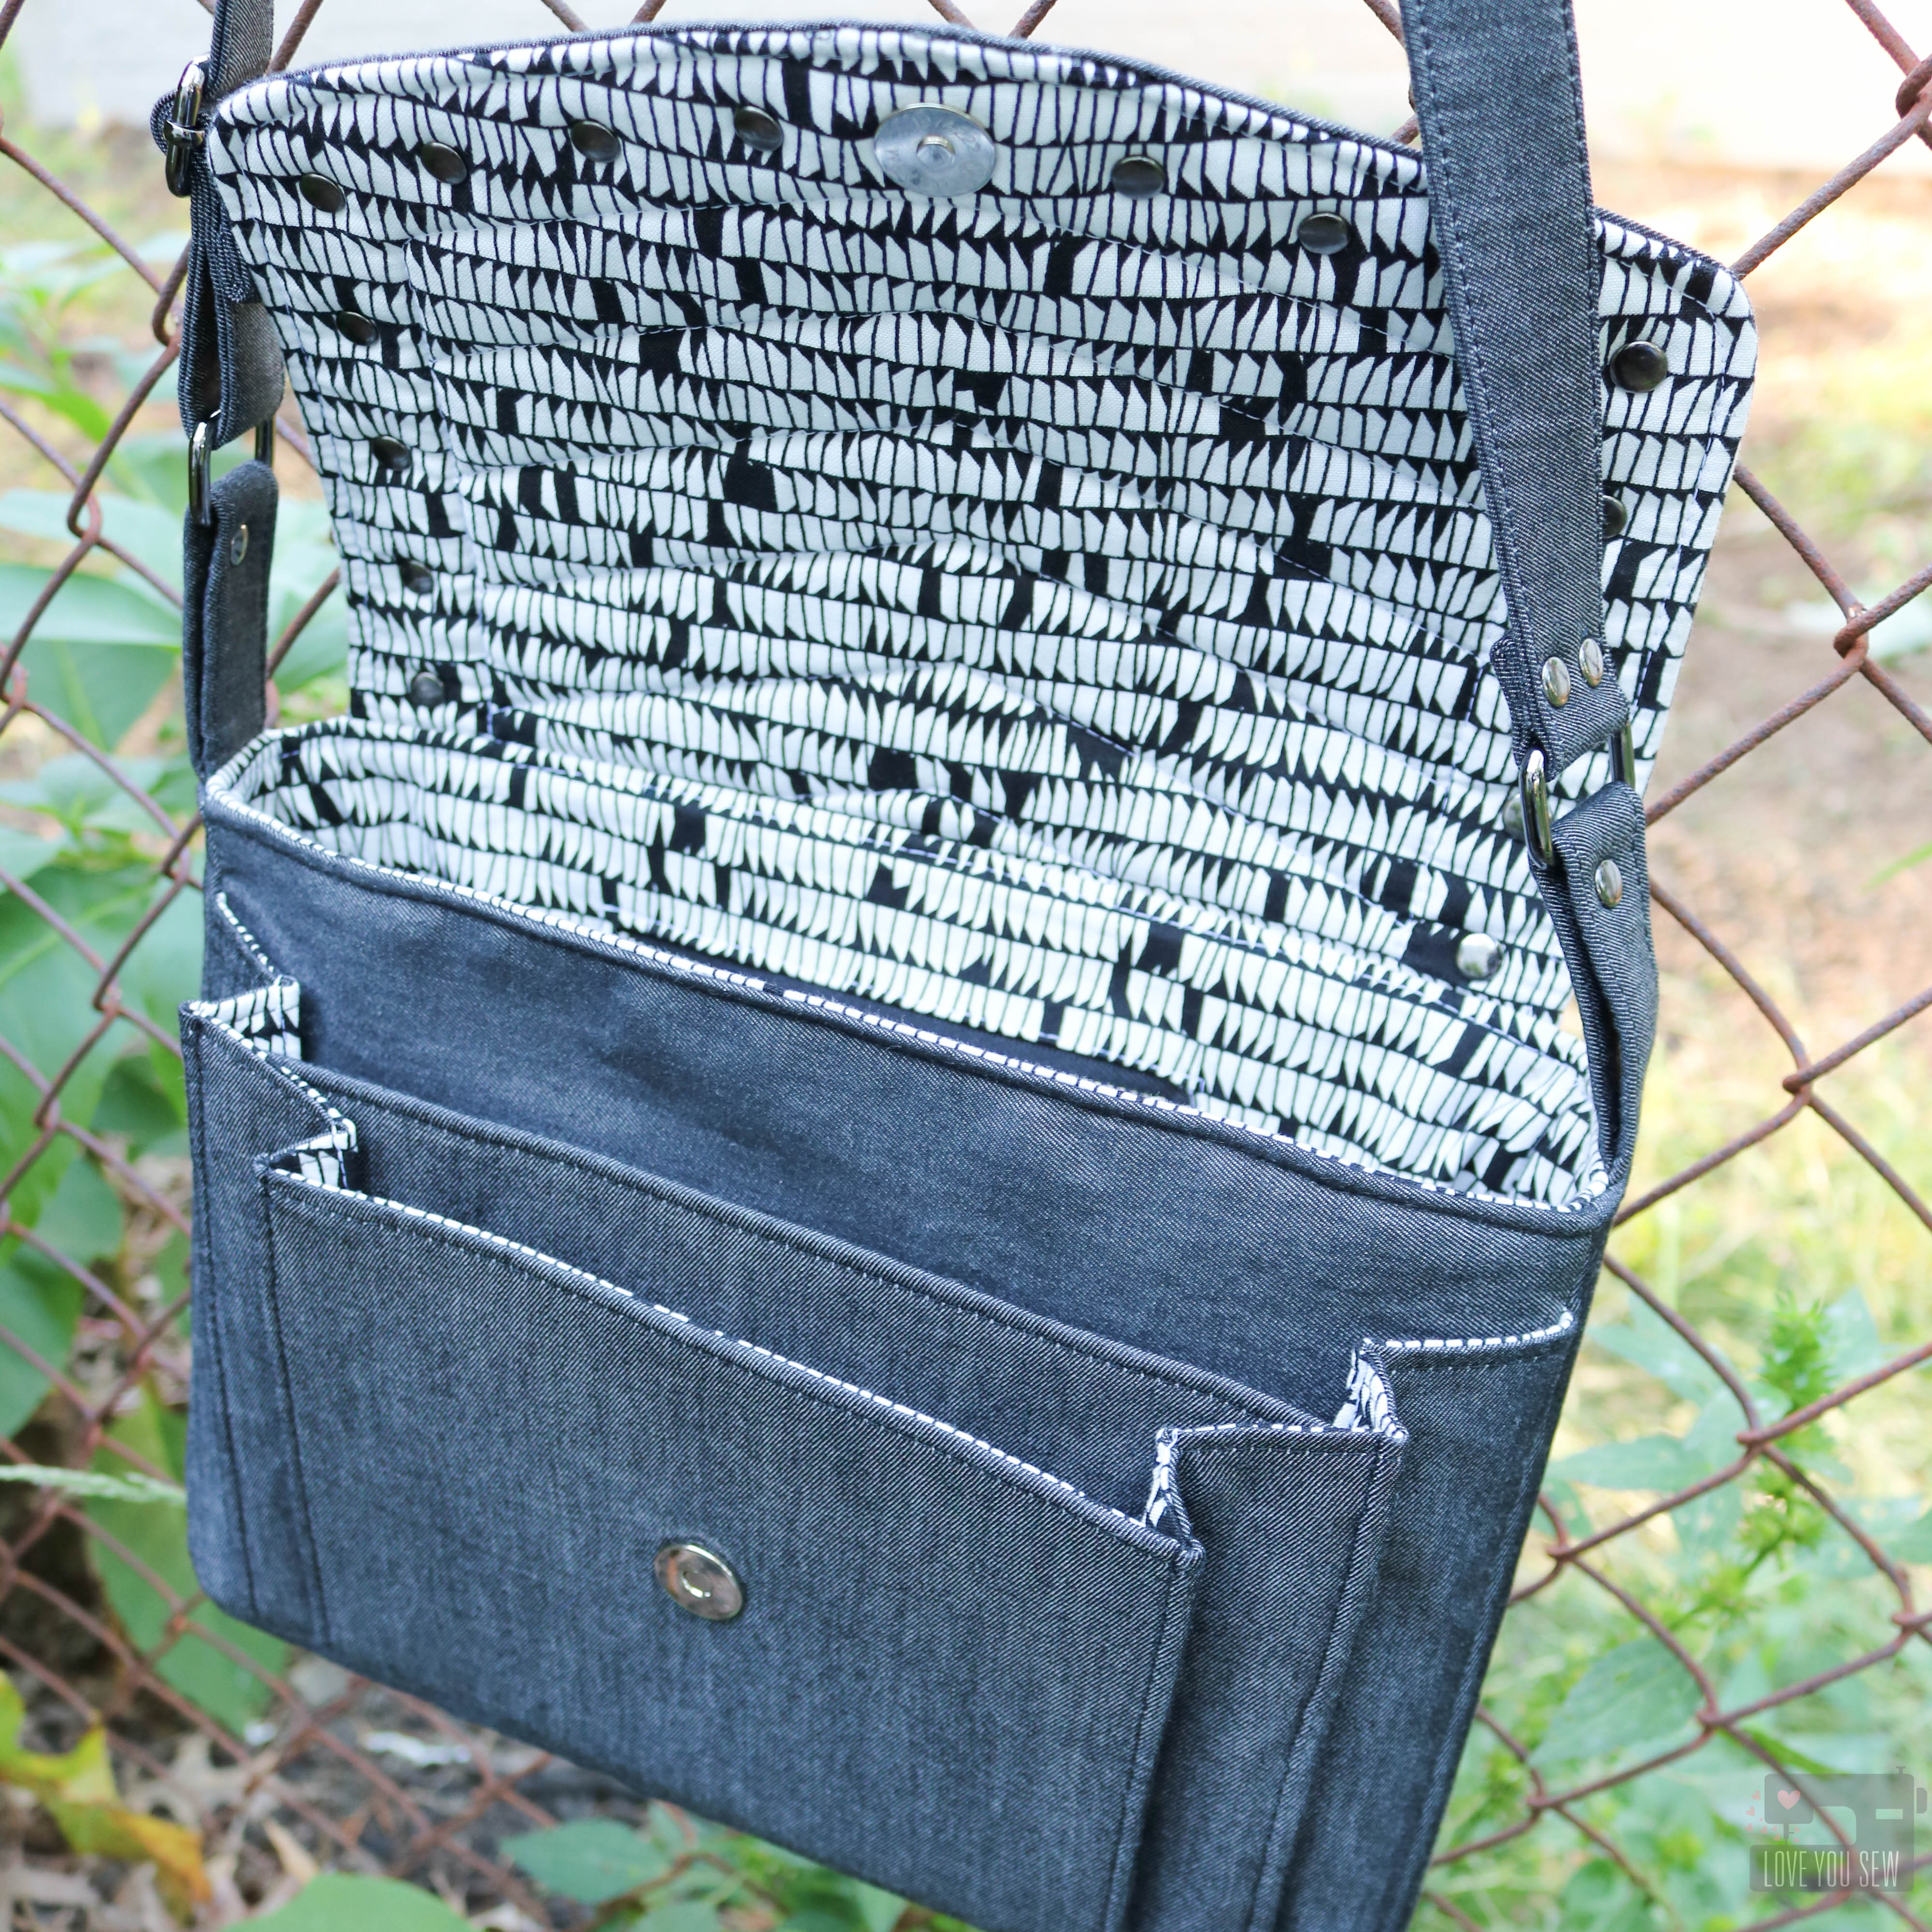
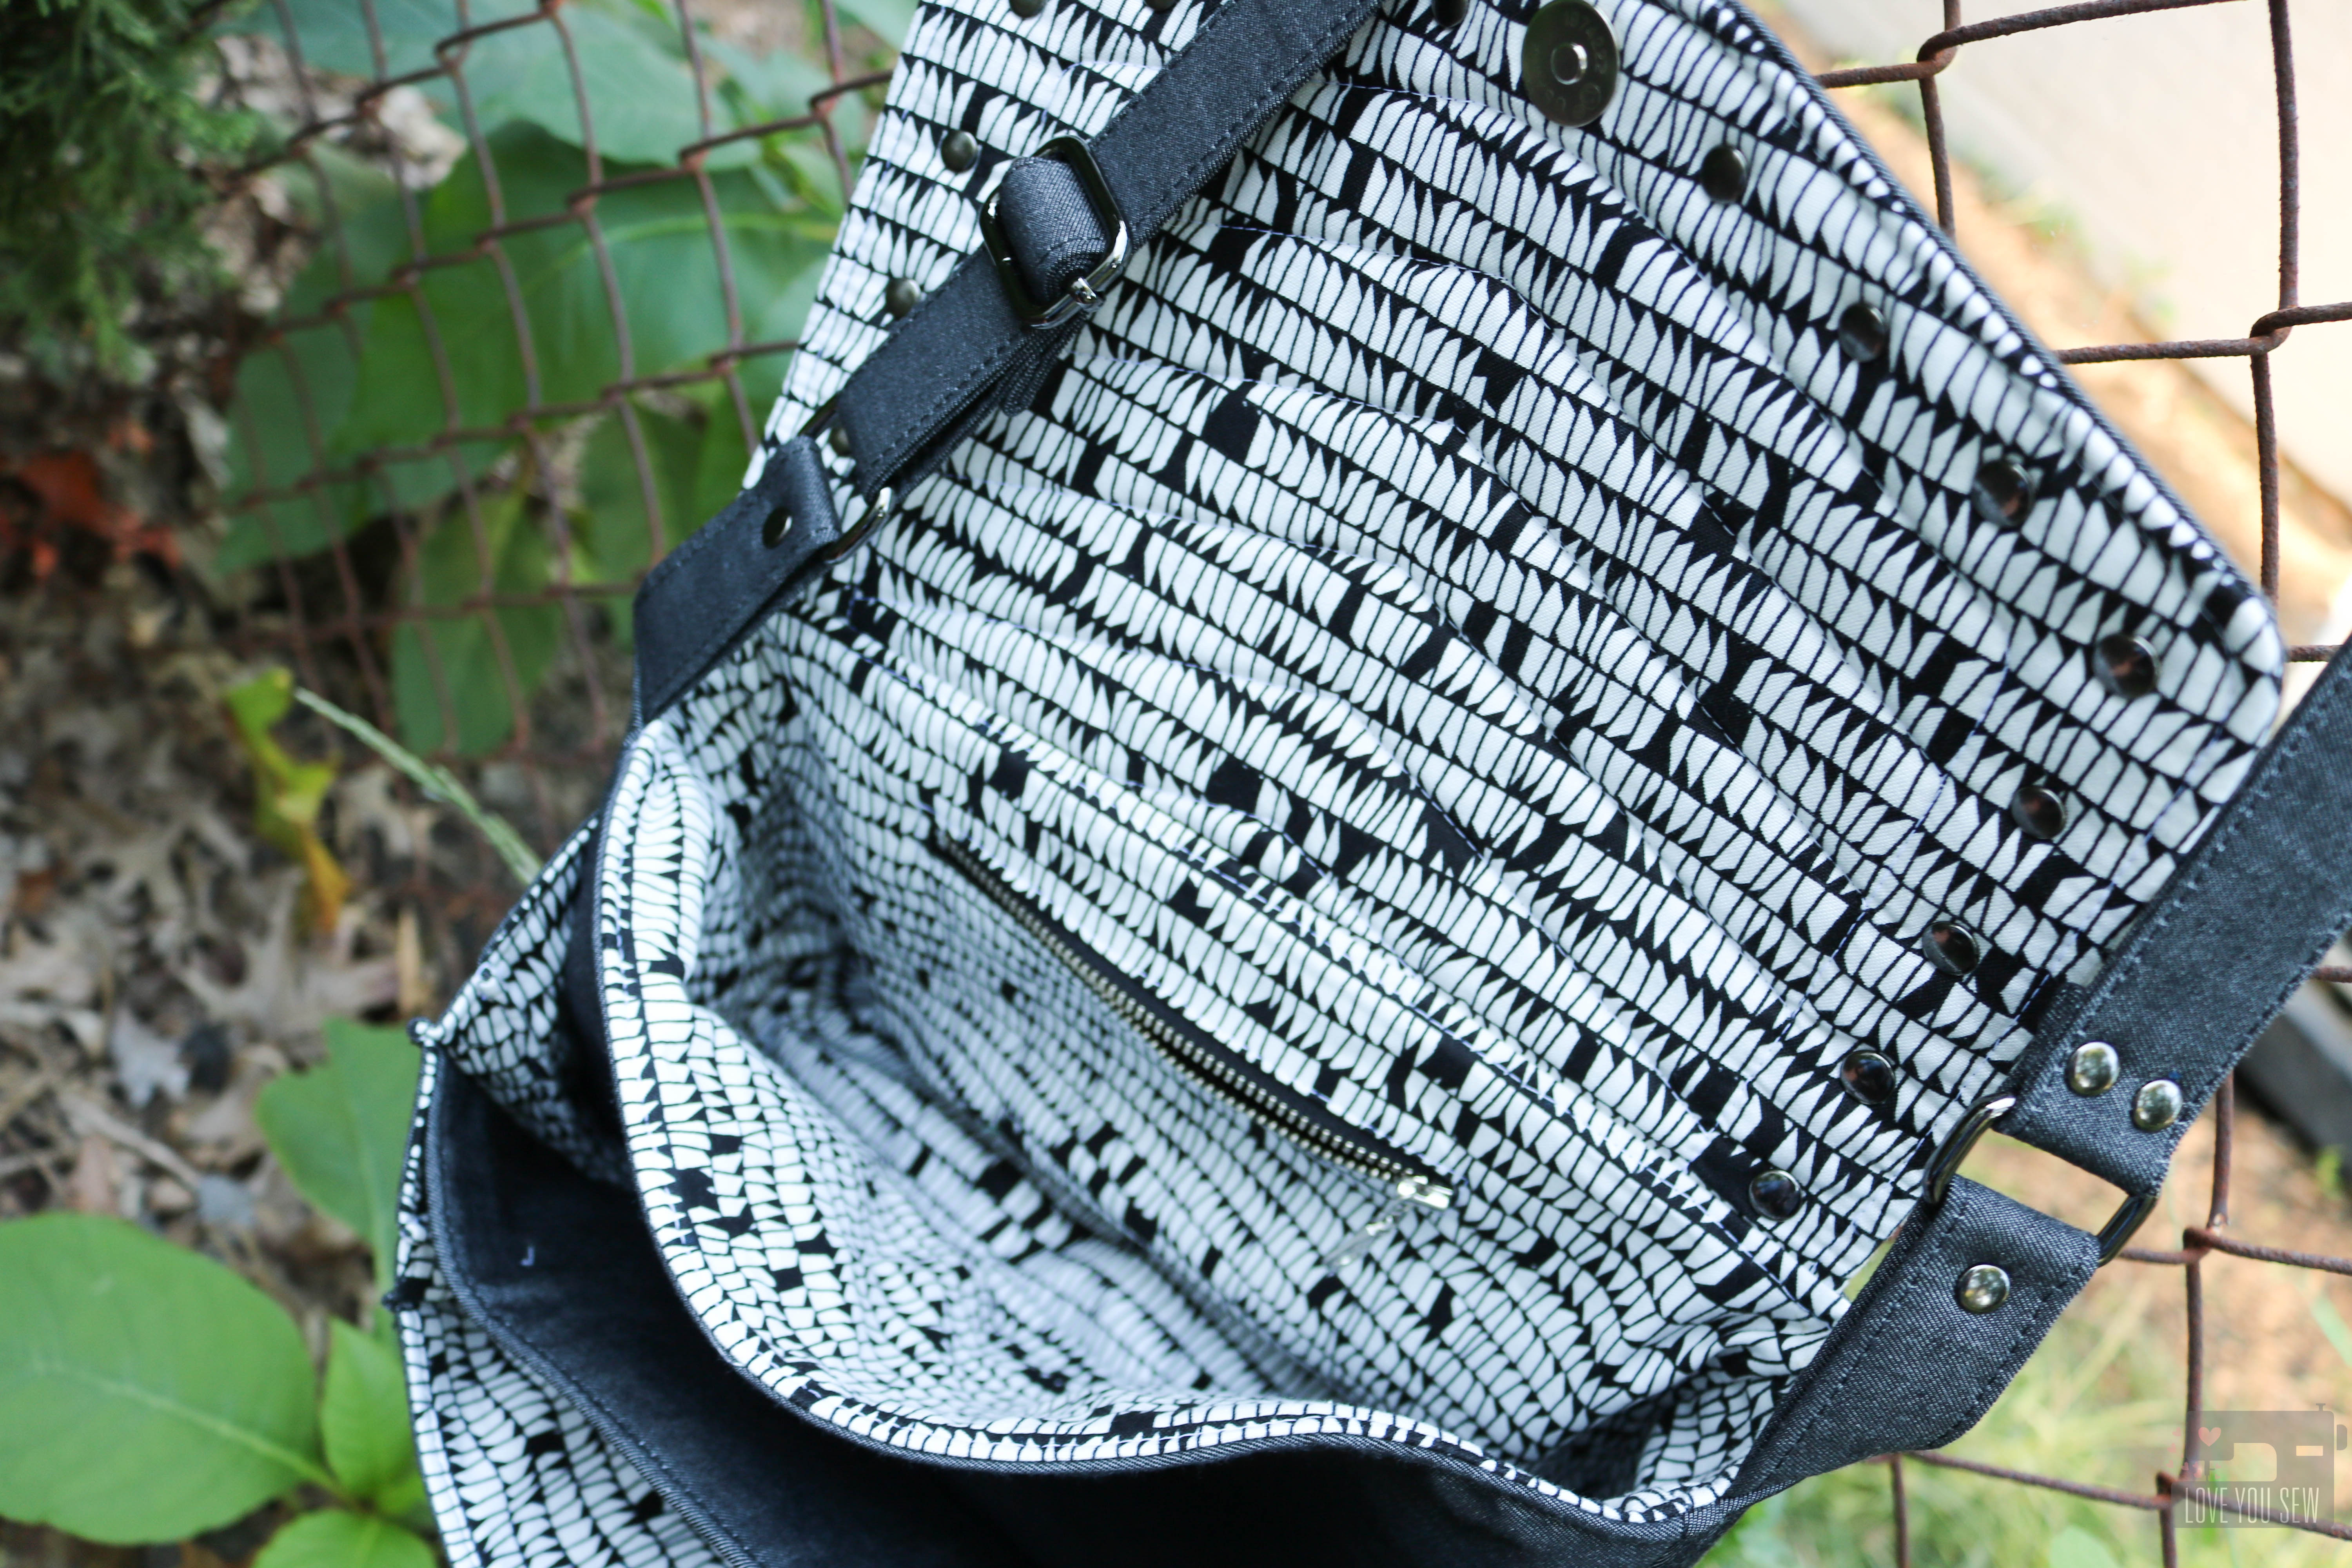
Even though these Persephones were a muslin, I still wanted them to be fun…and you know I love surprise garment guts! With this great Olive Cone Mills denim, I reached into my quilt cotton stash and found this print by Sarah Watts. The colors go so well with the denim and who doesn’t love some lions?

I used the quilt cotton on the fly facing as well as with both in seam pockets. You can see I fussy cut the pockets and love how they turned out. However, these are pretty small pockets and can only hold a small set of keys or some chapstick. I’ll still keep them in my next pair, but will add some back pockets for more storage.

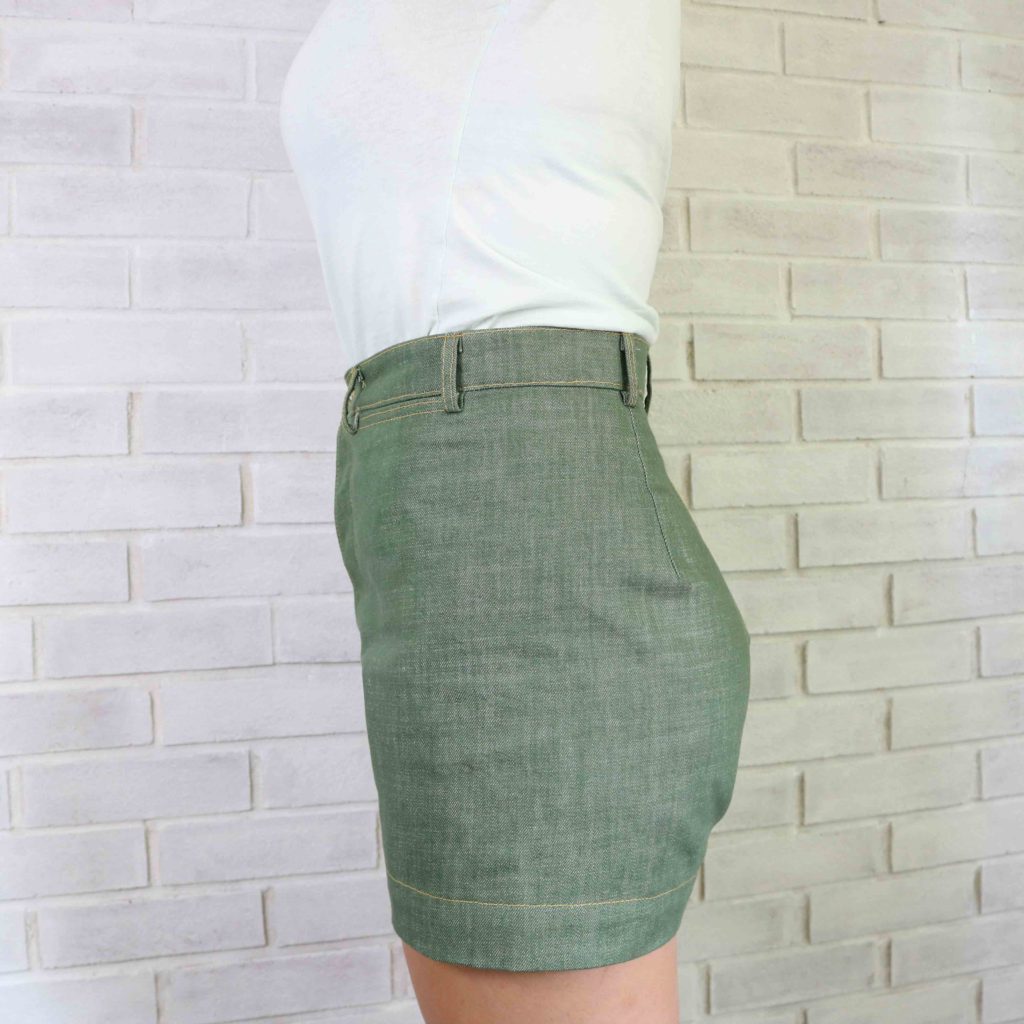
With almost all pants, I know my measurements run between two, if not three sizes. I cut a size 8 in these Persephone shorts and graded the hips out to a 10. I left the rise as it was drafted, but at 5’3″, the top of the waistband sits about 1 1/2″ above my belly button. Although, I love the super high-rise look, the pants push a bit too high when I sit. Next time, I will reduce the rise by ~1″.

My fit issues are always around my booty. There was lots of back and forth with baste fitting going on, but I was able to work out the following:

  • Increased each dart on the fold by 1/4″ (1/2″ total) which was 1″ taken out of the waist overall.
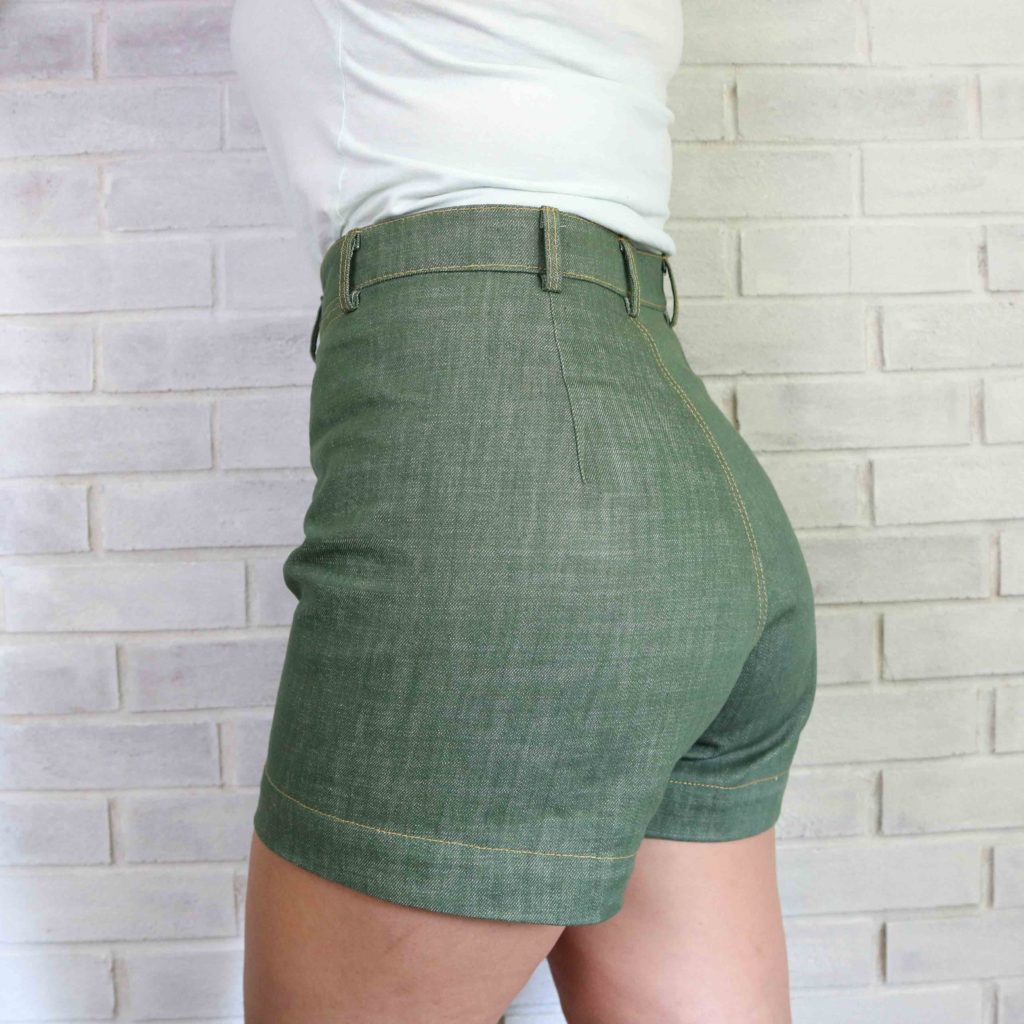
  • Low buttocks adjustment – Extended each dart by 1 3/8″ to where the curve is extended out the most. I had to do this after seeing the dart poke out rather than sit smoothly on my backside.
  • Took an additional 1/4″ out of the center back (1/2″ overall)
  • Scooped out the seat by 1/4″ to reduce wrinkling around the back thighs. But since I already cut the fabric, I couldn’t compensate and add 1/2″ to the crotch length. You can see there is a slight “wedgie” effect since I didn’t lengthen the seat. But after a year’s worth of wear, this non-stretch denim has really molded to my shape. The fabric has actually relaxed more in the seat and I’m not seeing (or feeling) that wedgie anymore! Not all fabric is as forgiving, so I’ll definitely make sure I add in the extra fabric with my next make.

Overall, I LOVE the fit of these Persephone shorts. I have always had a hard time finding RTW shorts with room for my thicker thighs…especially when seated. The wide cut gives me so much ease around my thighs while the high-waist provides such beautiful shaping.

I have a whole winter’s worth of bottom weight scraps and can’t wait to make a few more pairs of these shorts for the summer ahead! Are these in your summer sewing queue?

Happy Sewing!

Cristy


Project Summary:

  • Pattern: Persephone Pants by Anna Allen Clothing; Shorts View
  • Fabric: Olive Cone Mills Denim from Imagine Gnats
  • Lining: From the August fabric collection by Sarah Watts for Cotton + Steel
  • Thread: Gutermann Denim for Top-stitching and Gutermann all-purpose poly for piecing and tacking the carriers.
  • Machines: Juki TL-2010Q, Singer Quantum Stylist (for buttonholes), and Juki MO-2000QVP

This post may contain affiliate links for which I may receive a very compensation. These payments help to keep the website up and running. Thank you for your support!

Highlands Wrap Dress

Yay!!!  I knocked off one of my 2018 “Make Nine” goals with this Highlands Wrap Dress by Allie Olson.  I haven’t blogged about all my completed projects, but I’ve sewn 6 out of the 9 patterns I selected the beginning of the year.  With just under five months left, I think I’ll be able to make everything on my list!  You can read all about my 2018 garment goals here.

I made the Highlands dress earlier in the spring, but just haven’t had a chance to blog about it until now (blame it on my kids and other sewing commitments!)  This dress has been worn on so many occasions already and has lived up to my expectations for sure.  The slim column silhouette makes my 5’3″ frame look so tall and the length adds to the sophistication.  I love how the Highlands dress covers the body, but still has a bit of sass with the high slit skirt and deep v-neck.

For the fabric, I chose this Telio stretch chambray with a crazy cute pineapple (!!!) print from Fabric.com.  You can see this dress, plus read up about this substrate on the original Fabric.com blog post I wrote for them here.  After a few months of wear, I can say the fabric still feels great and still has nice stretch and recovery.  However, I did have to wash it twice to get all of the extra dye out of it.

My wardrobe doesn’t have many short-sleeved dresses.  They are mainly long or sleeveless altogether.  So, I wanted to make the sleeved version so I don’t necessarily have to bring a cardigan with me everywhere!

I’m heavy in the calve area and I don’t like dress hems to hit me at one of the widest parts of my legs, so I’m not a “midi” length lady.  That’s why I also chose the maxi length.  After following a few people on IG who made this dress, it was safe to say I would need to shorten it by 5″.  But beware – There are two shorten/lengthen points on the skirt (one for the rise and one for the leg length.)  Make sure to shorten at the lower of the two lines or you end up raising the slit like I did. (Doh!)  That was one mistake I made which I didn’t realize until I had a slit high up my thigh!  Since I already sewed on the facings, I had to hand-stitch the slits together a few inches.  That was a hard lesson learned!

What I love about this wrap dress pattern are the two button tabs (one inside and one right under the ties) to keep the bodice secured.  If you have ever worn a RTW dress that just uses ties, you know that they will end up untying at the most inconvenient…er..most embarrassing times…even when you double-tie.  I know I’m not alone here, right?  With the two tabs AND the tie, this wrap dress feels VERY secure.

Project Details:

  • Pattern:  Highlands Wrap Dress by Allie Olson
  • Fabric:  Telio stretch chambray
  • Sizing: I measured 6 in the bust and 8 in the waist/hip, but made a straight 6 so there wouldn’t be as much bunching around the back elastic.  I also used a 10% stretch fabric.
  • Alterations:  Shortened skirt by 5″
  • Thread: Gutermann Polyester
  • Machine: Juki TL-2010Q


Happy Sewing!

Cristy


This post may contain affiliate links.  If you make a purchase, I could receive a small commission which helps to keep this website going.

Mountain View Quilt

If you are the lucky holder of a 2017 Quilter’s Planner, you might know this is my block week with  “Mountain View.”   If you happened to miss out on the planner, you can still find the instructions to my block here to make your very own Mountain View Quilt and read about the block inspiration.

The Quilter’s planner really helped me organize all my plans with the Project Planner sections.  It’s nice to have a written outline instead of trying to cram everything in my head!  Space is limited there nowadays 🙂

I was lucky to play with some Art Gallery Smooth Denim when it was first released and thought it was perfect for my quilt.  I used the lightweight denim along with some other great assorted Art Gallery prints in peach and pink.


As a lap quilt, the secondary design really comes through and you can see how the profile view (of the single block) becomes an aerial view of the Mountains.  The light blue denim looks like water running through the range and I love how it turned out.

The backing had to be pieced together and I figured it should have some added interest as well.  The extra panel was improvved using scraps and follows the same geometric angles as the front. It’s a nice pop of color against the main backing print.

Look at that texture!  Quilting was done on my domestic machine using my walking foot and favorite Aurifil 2021.  I followed the shapes of the piecing and added more density in the darker blue denim.  This backing really shows all the lines.


The binding was also scrappy and pieced together.   As always, I machine attach my binding to the front and spend some couch time with my husband which hand-stitching it to the back.  The colors really complement the denim.

Project  Stats:

Appaloosa Bag – Pattern Review

A few months ago, I had the amazing opportunity of taking one of Sara Lawson’s bag-making classes…at my local quilt shop!  I’ve been trying to attend one of her retreats for awhile and was so glad she came to Columbus. Sara designs some pretty fantastic bags and accessories through her business, Sew Sweetness.  The Aeroplane bag was one of my first names and you can read about it here.

We have worked together in the past and I have a few guest posts on her blog.  There is one from Purse-Palooza which you can read about here.  I also wrote a review on a Craftsy Tailoring class which you can read about here. Sara is such a sweet and humble person but she’s such a rockstar to us bagineers!

I have to admit, the Appaloosa bag (aff link) would not have been my choice for a class with Sara.  But I completely understand the bag we make has to be done in the time allotted, which was about 6 hrs.  However, I found it as my own personal challenge to try to make this pattern, more “me.”

I used a light weight black denim by Robert Kaufman as my main fabric with Carolyn Friedlander’s Euclid as the lining.  This would keep the bag modern and pretty versatile with any wardrobe.  And since I was using the black denim, I made sure to use black Soft and Stable in the construction of the bag.  Otherwise, you run the risk of the natural colored foam peeking though the needle holes.

With the black denim being pretty plain, I just had to do a little bag quilting. (You know me!) I took some inspiration from current Rebecca Minkoff bags to try to pull off something very modern and on-trend.  With the pattern calling for all of the Soft and Stable, I knew the texture would be perfect on this bag.  I made a simple herringbone design using my favorite Chalk-pencil.  You can still see the marks on the picture above.  The lines just erase right off when you are finished.

Like most other quilting, I made sure to use my walking foot and created long thread tails to hide later on.  I used all Gutermann polyester thread.

I used rivets all around the border of the flap to add the extra “edge” on this bag.  Initially, I was going to use nickel hardware (because that’s what I had on-hand,) but Sara helped me decide on the gunmetal and just wait to finish my bag later.  Yeah…that was a pretty good decision.

The slider and rectangle rings were quickly ordered and boy…do they make the bag.  🙂  The gunmetal really works with the feel I was going for with this bag.

So….of course, I added a few extra rivets around to balance out the front flap.  Also, I made two strap extenders instead of just one.  After having the bag sit around waiting for the hardware, I thought I would use this more as a cross-body than an under-the-arm bag.  It just works more with my lifestyle with active young kids.

Having Sara around to instruct and so many nice bagineers to assist, the Appaloosa came together so quickly.  We definitely didn’t need the full 6 hours at all.  The most challenging part was just sewing through all the layers of the front accordion pockets to the sides of the bag.  I would definitely recommend some large needles and to hand-crank it if needed.

I love the multiple pockets in the front of the bag…and there is still another zip pocket in the main compartment.  Since I used a metal zipper, I did run into the issue of having to shorten and adjust the one had even though it was a 9″ as called for in the pattern.

The back of the Appaloosa is nice and smooth.  With all the pockets on the front, you really don’t need anything on the back.  Although….once I get my new black leather labels, this bag will definitely get one toward the top-center of the back.

Verdict – I love this design!  Initially, it wasn’t for me, but I made it my own.  It made me think out of the box a little bit and now I want to go through all the patterns I own and take a look at each one differently and how I can own each one.  It’s amazing what the fabric and some hardware can do to completely change up a bag.

For the Appaloosa bag, you can purchase the pattern and/or the instructional video here.


Please note there are affiliate links in this post.  I will only ever link to products I have used myself  and as always give you the real deal in my opinions and experiences.

Heritage and Arizona After Fabrics :: Portside Duffle

April Rhodes has done it again.  She has just dropped not one, but TWO new fabric collections with Art Gallery Fabrics.  Arizona After is a gorgeous extension of April’s inaugural Arizona line with some new prints and some recolored with soft dusty pink and blues along with some deep rust and mustard.  The color combos she puts together are always so striking.  Heritage fabrics consists of garment focused substrates…including the new RAYON.  With April’s clothing patterns, she has always been a designer who knows scale for the quilters and the garment sewist alike.  It’s the perfect collection for the me-made makers!

Beyond the fabrics, April’s inspiration for the collections is just so touching.  The way she talks about her family and memories of her father and grandmother is just pure love.  Truly awesome. I love how a lot of the designs were just a part of April’s everyday life and over time, have been permanently imprinted in her head.  To bring these images to life brings so much light to her eyes and it’s been amazing to witness it all. These fabrics are just gorgeous and I’m happy she’s shared them with all of us….because whoa, right?!?

When I was asked to make a bag for April’s Spring Quilt Market Booth, I (of course) agreed.  She has become a dear friend and I will always help her, as she has helped me in so many ways.  April asked me to make a larger duffle and suggested a quilt-as-you-go method for easy patchwork because with Market…comes some tight deadlines.  I got to immediate work, but quickly realized I had to Turn. It. Up.

All 14 quilt cottons in the Arizona After collection was used to make the Portside Duffle Bag by Grainline Studios.  It’s the perfect bag to showcase these fabrics with all that surface area.  I loved playing with all the color combos while mixing and even deconstructing, some of the prints.

Once I started to quilt with my walking-foot on the Soft and Stable, that texture just got me.  I knew I had to add more and more quilting…and change up the designs with each print. Then it dawned on me….ooooh, metallic thread would be A-mazing with this palette.  The gold really brings out the colors and I’m so happy with how it turned out. TIP: Cut a larger piece of soft and stable than the pattern requires. Quilt and then cut to size. Don’t forget to baste those edges!

Art Gallery’s textured denim in Canyon Sunset was the perfect complement to Arizona After and is a nice durable fabric for the bottom accent of the duffle bag.  On the inside, I used the Scattered Wood print and added an additional zip pocket…because we can always use some extra pockets.  I love the look of brass zippers and with the gold thread, this combo obviously had to happen.

For more texture and to turn this bag up another notch, I used hardware from ARmercantile combined with some leather from my sacred stash.  Guitar-inspired bag straps are popping up all-over the place and I just had to add that look to this duffle.  The added rivets bring out more of the brass and help round out the look.  Who says a quilted bag can’t be modern and on-trend?  I love being able to combine my love of quilting with my love of bag-making….and the gorgeous fabric definitely helps.  Thank you Arizona After for the inspo!

Make sure to check back on April’s blog and Instagram all throughout July for the up-to-date info on the Blog Tour.  Next up will be an Instagram loop on July 5th and I heard there maybe prizes involved 😉

Last, but not least, don’t forget to tag #heritagefabrics and #arizonaafterfabrics with all of your makes.  I can’t wait to see all of them!

Project Summary:


Fabric and pattern for the Arizona After + Heritage Blog Tour was provided.  There are affiliate links in the Project Summary.