Feliz Pattern Blog Tour

I love Straightgrain patterns.  That’s it…’just gonna put it out there.  You know I can’t stop making girls’ dresses and An’s designs are always at the top of my list.  She creates children’s garment patterns with beautiful clean lines and they are just so chic!  You can read about my previous Nova dress here

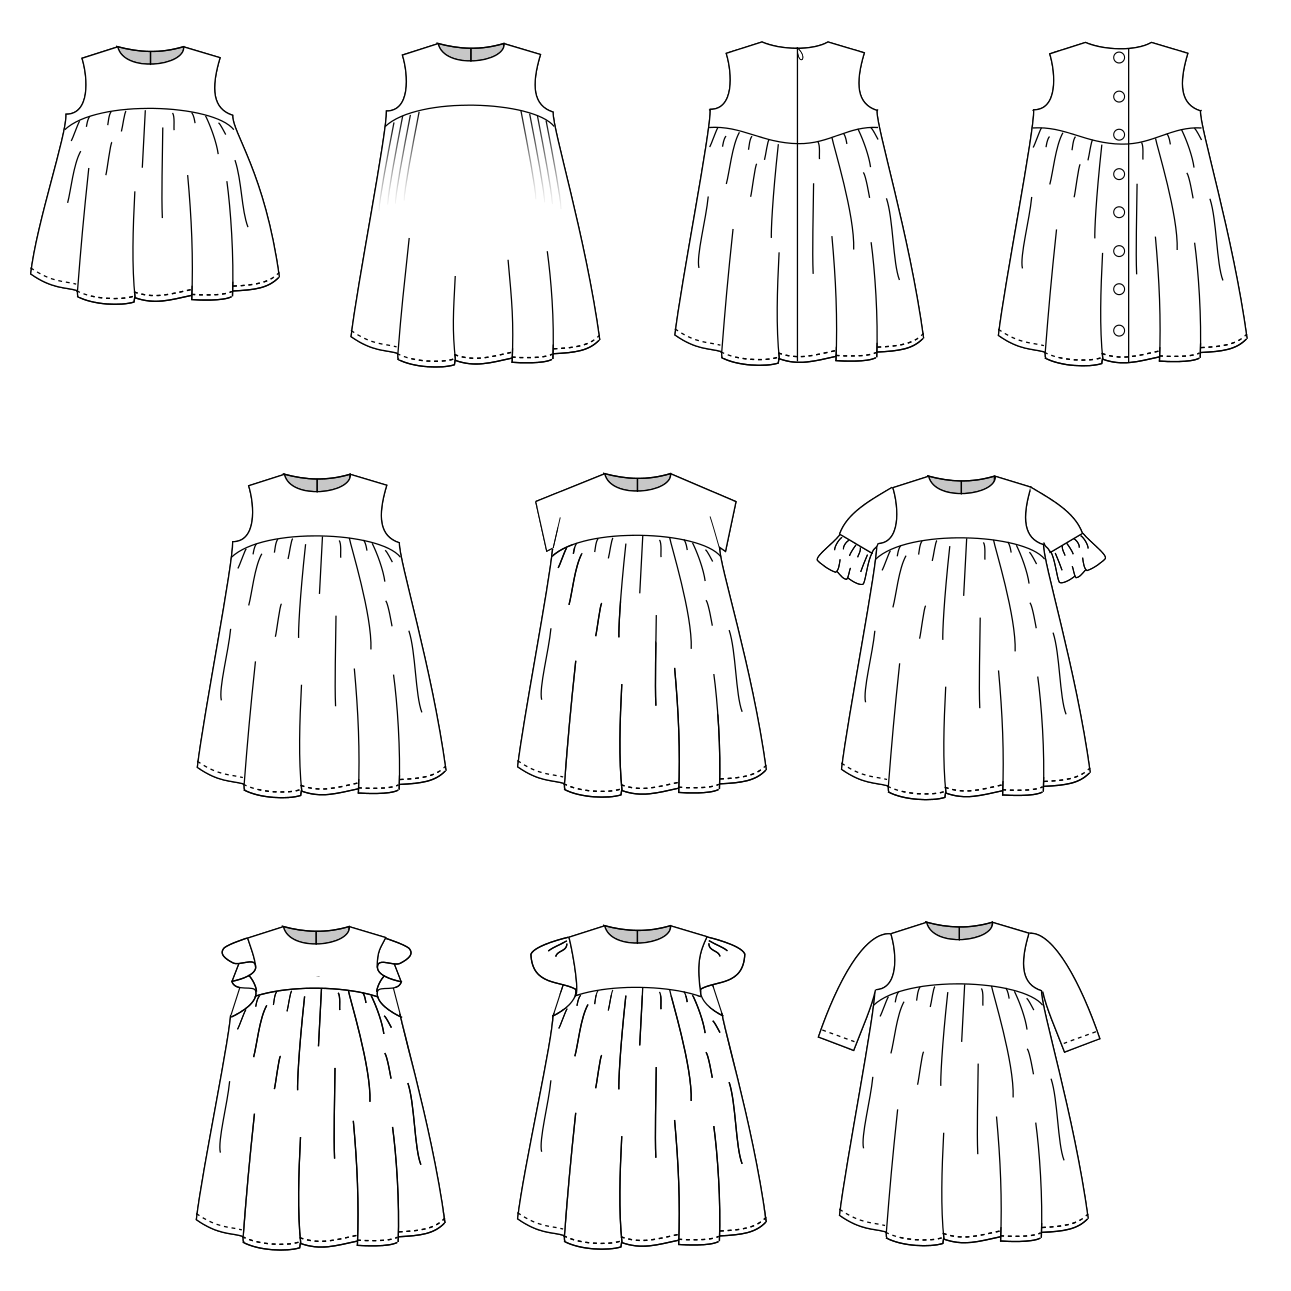
Straightgrain patterns always includes several variations to give you a number of different styles and the Feliz is not different. You can choose from a PDF or paper pattern from her online store here.  With the pattern, you can make a tunic or dress with 6 different sleeve options, two different back closures, and two different skirts.  It’s great to get so much versatility out of one pattern and I think An’s are a great value for all which she provides.

Of course, I picked the dress version. I make all my dresses as gifts (since I’m a boy mom) and dresses count as a full outfit 🙂 It makes me happy to work on a tiny garments (purely because of the cute factor) and my nieces are happy to get some custom clothes.

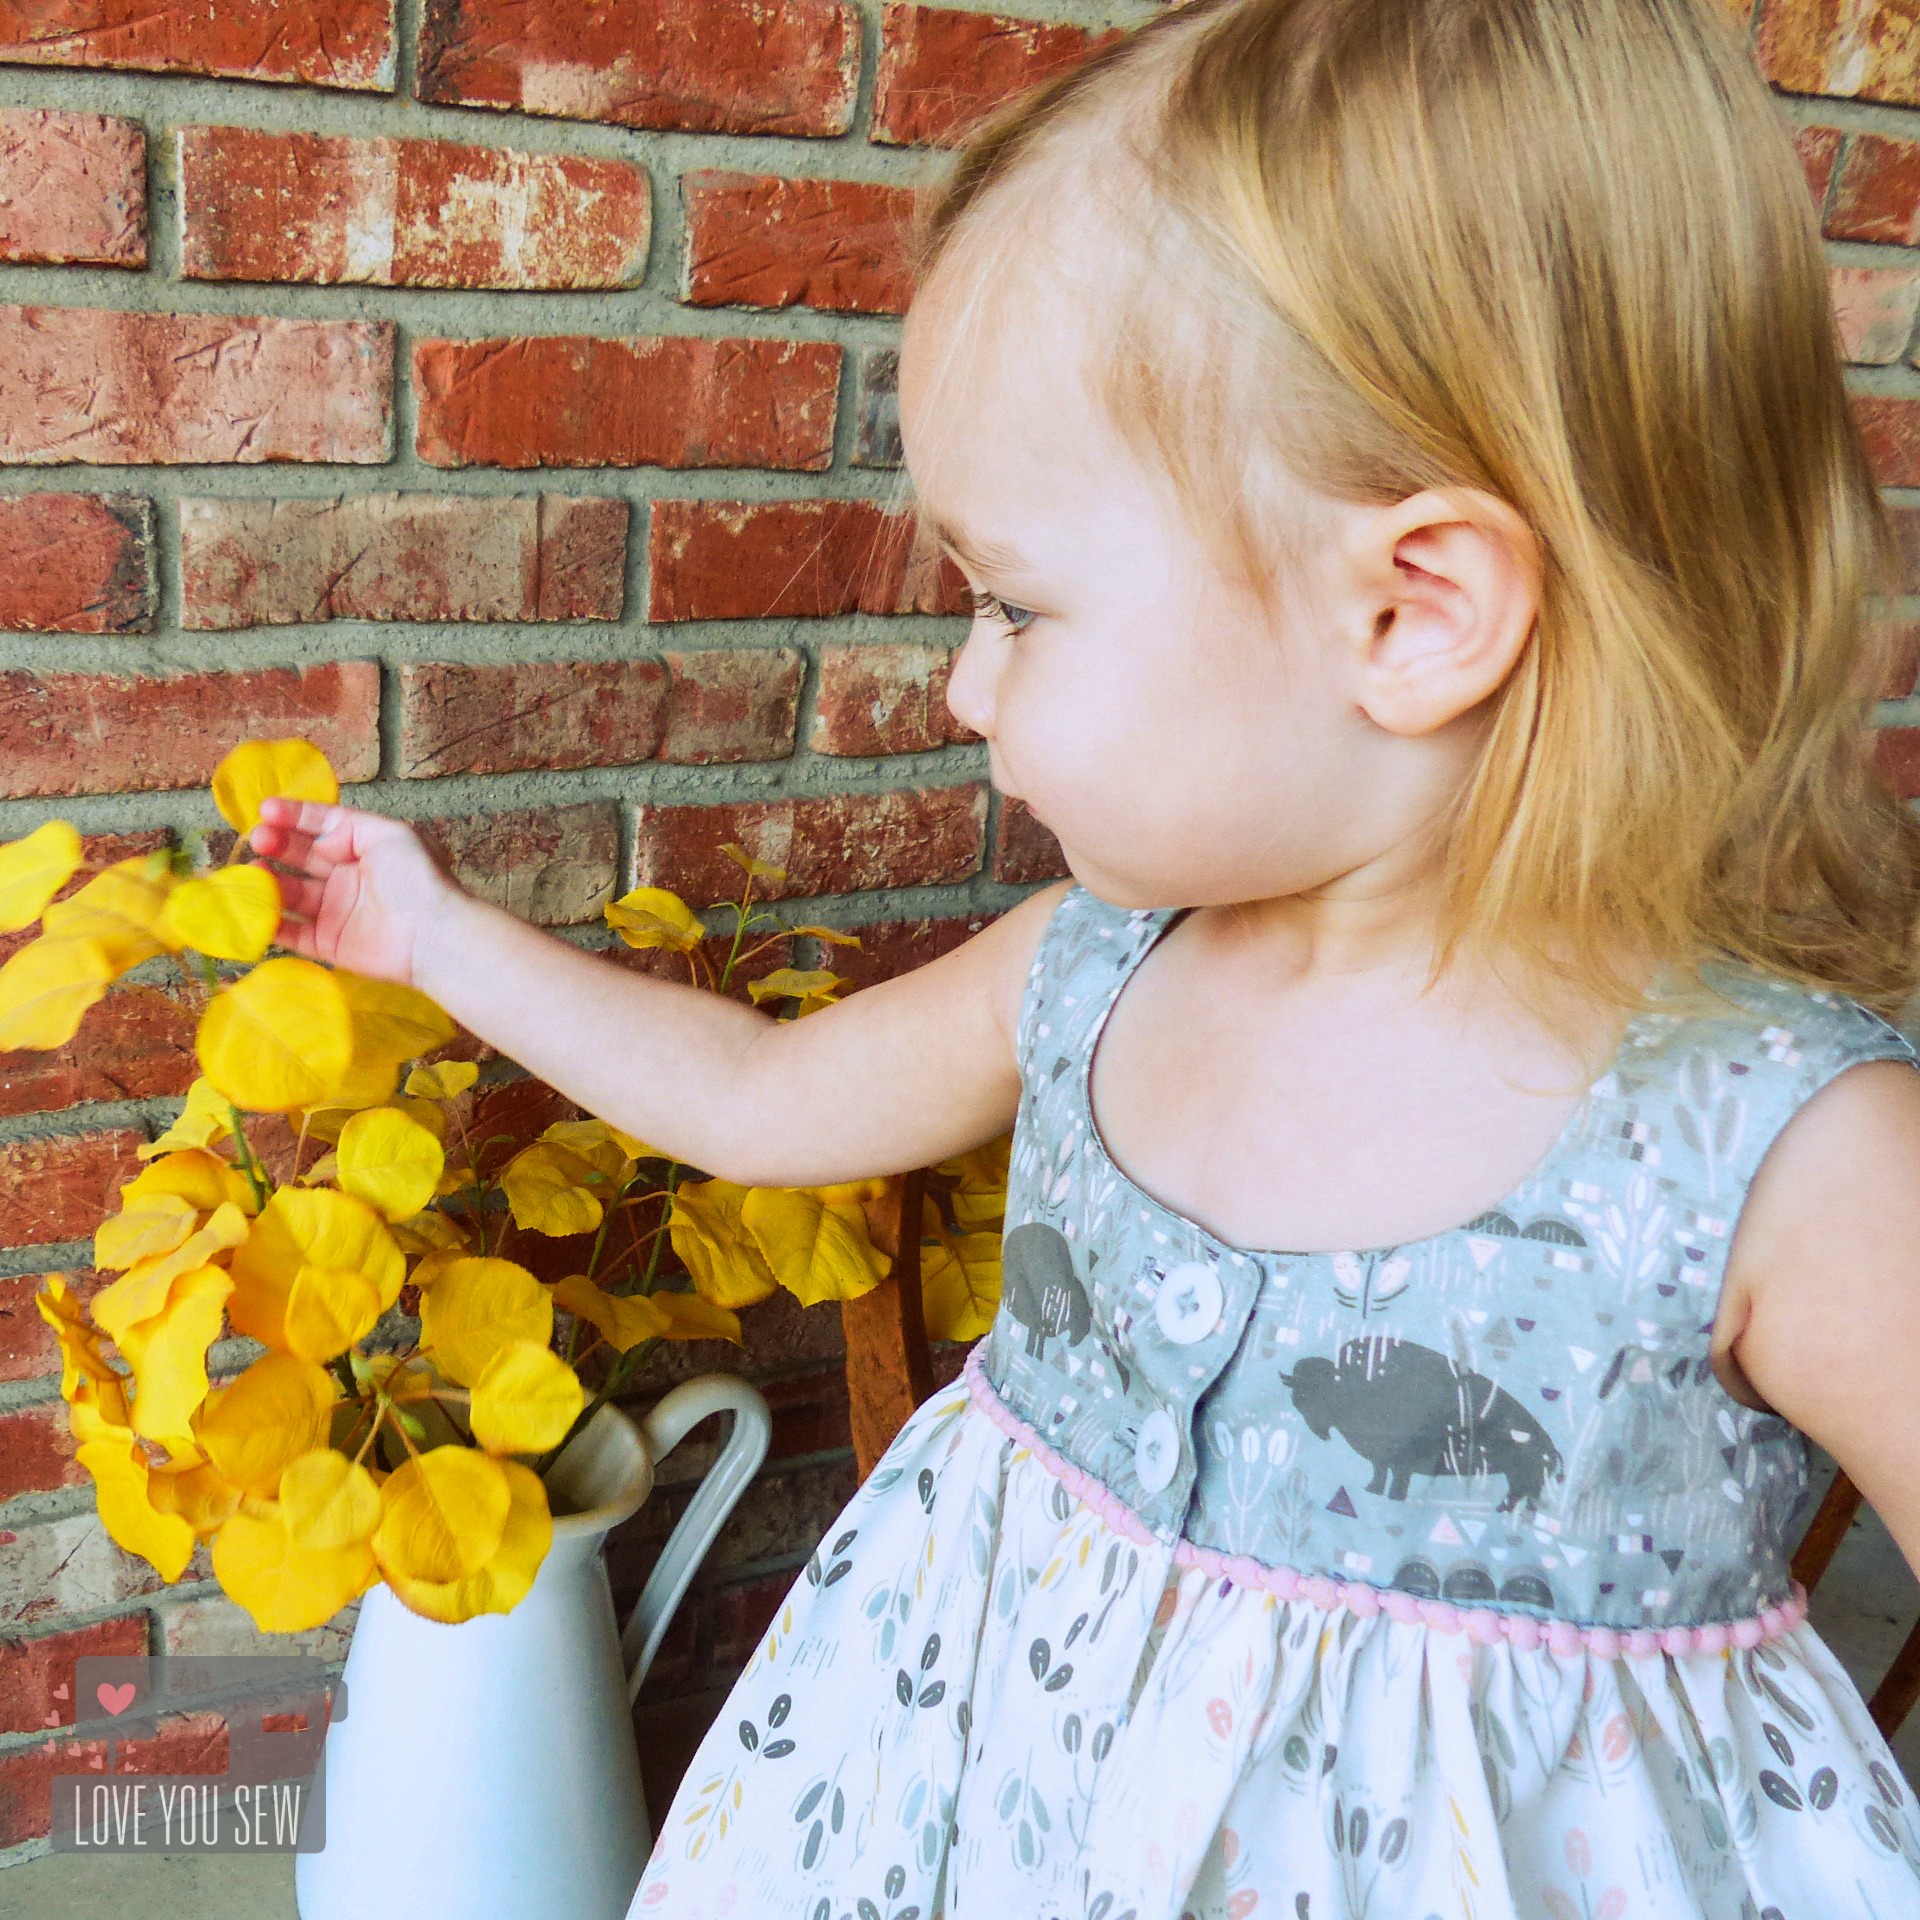
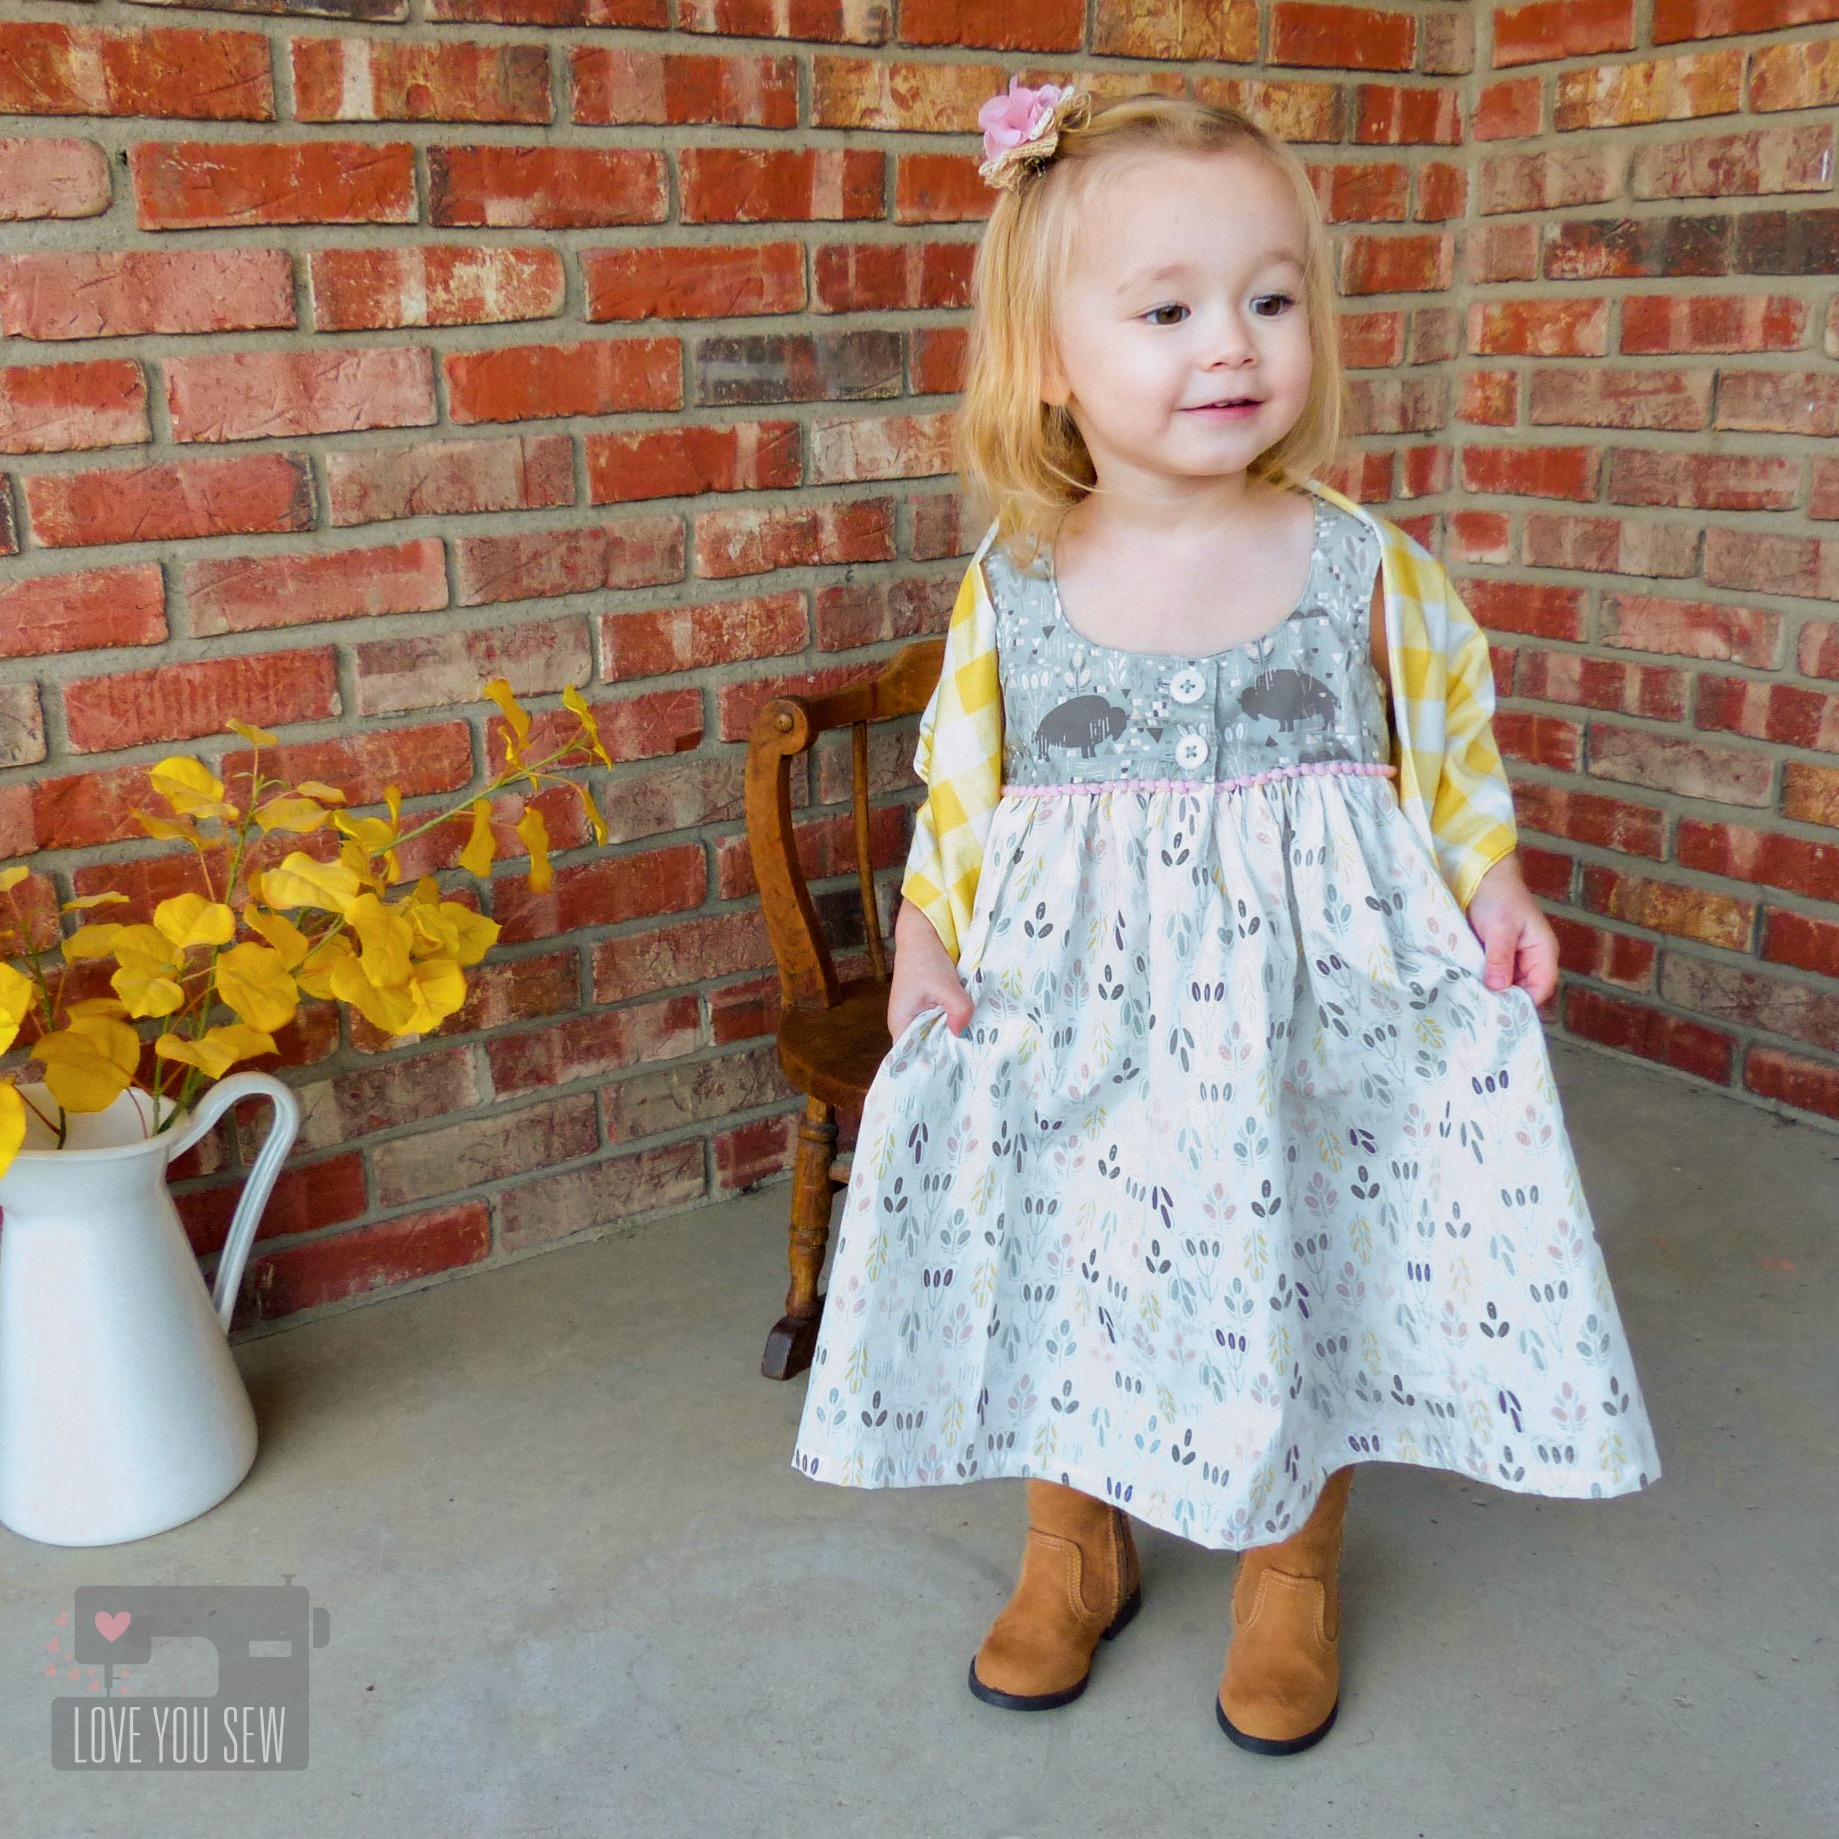
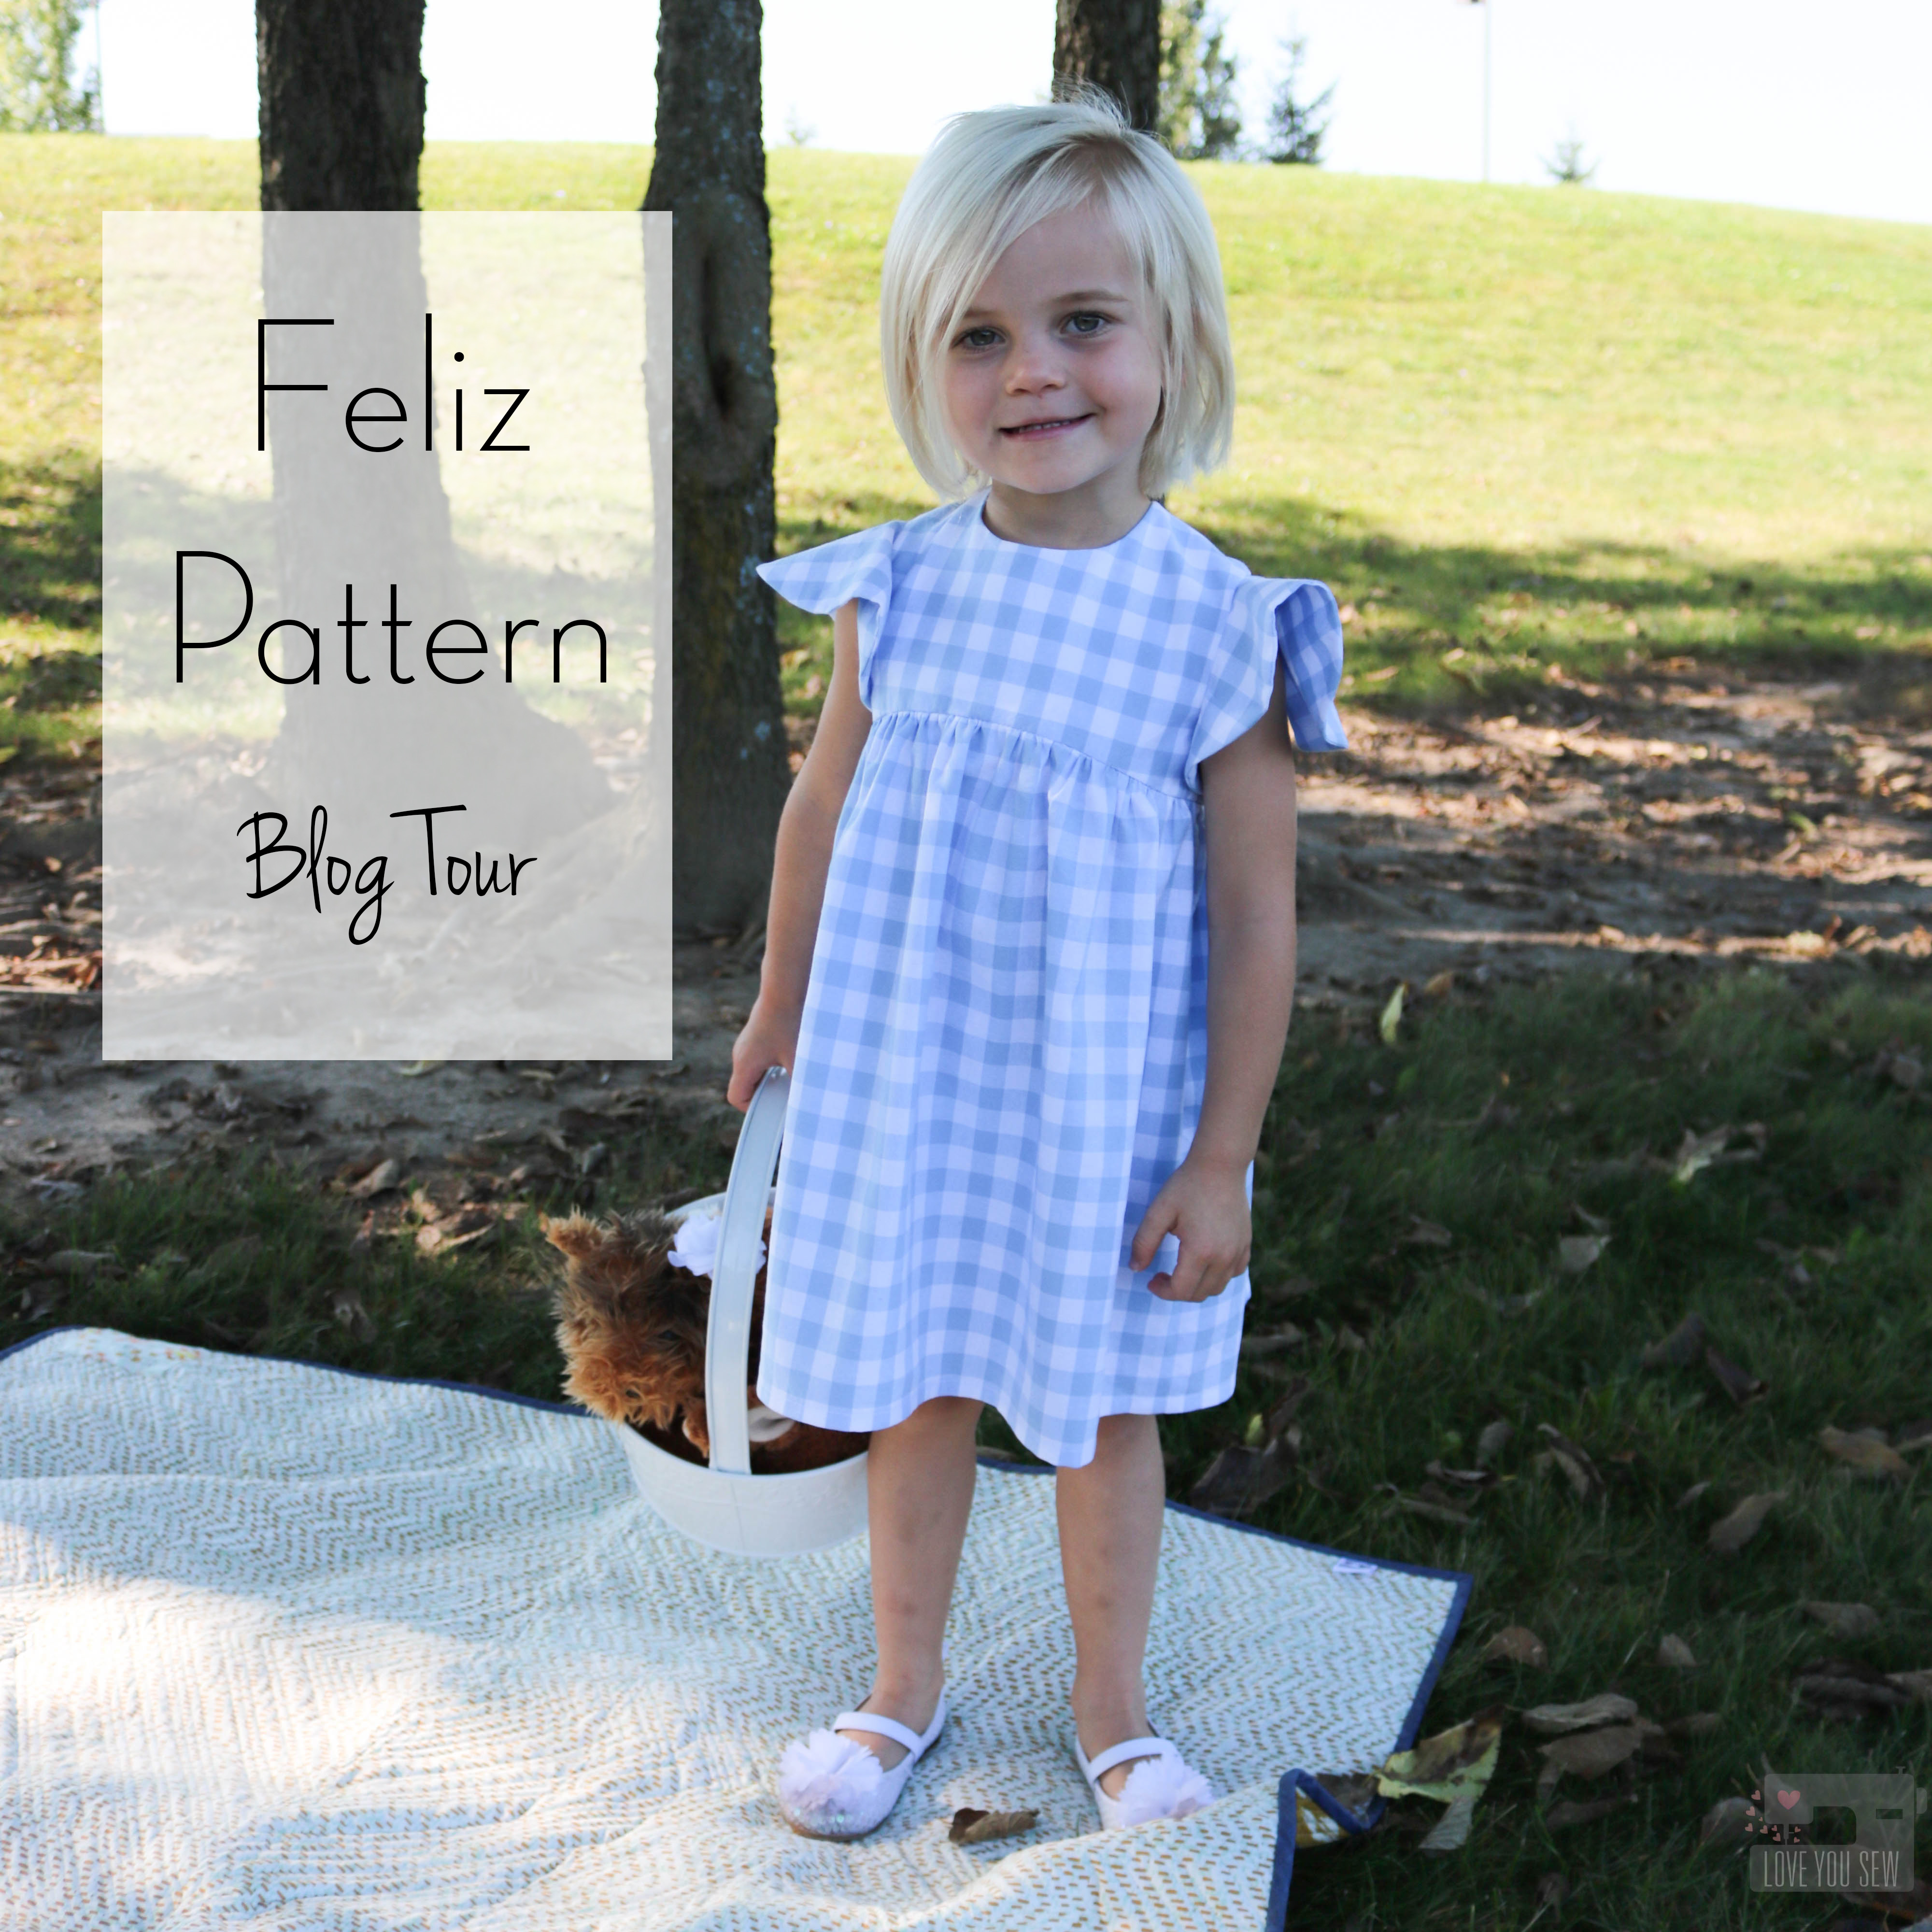
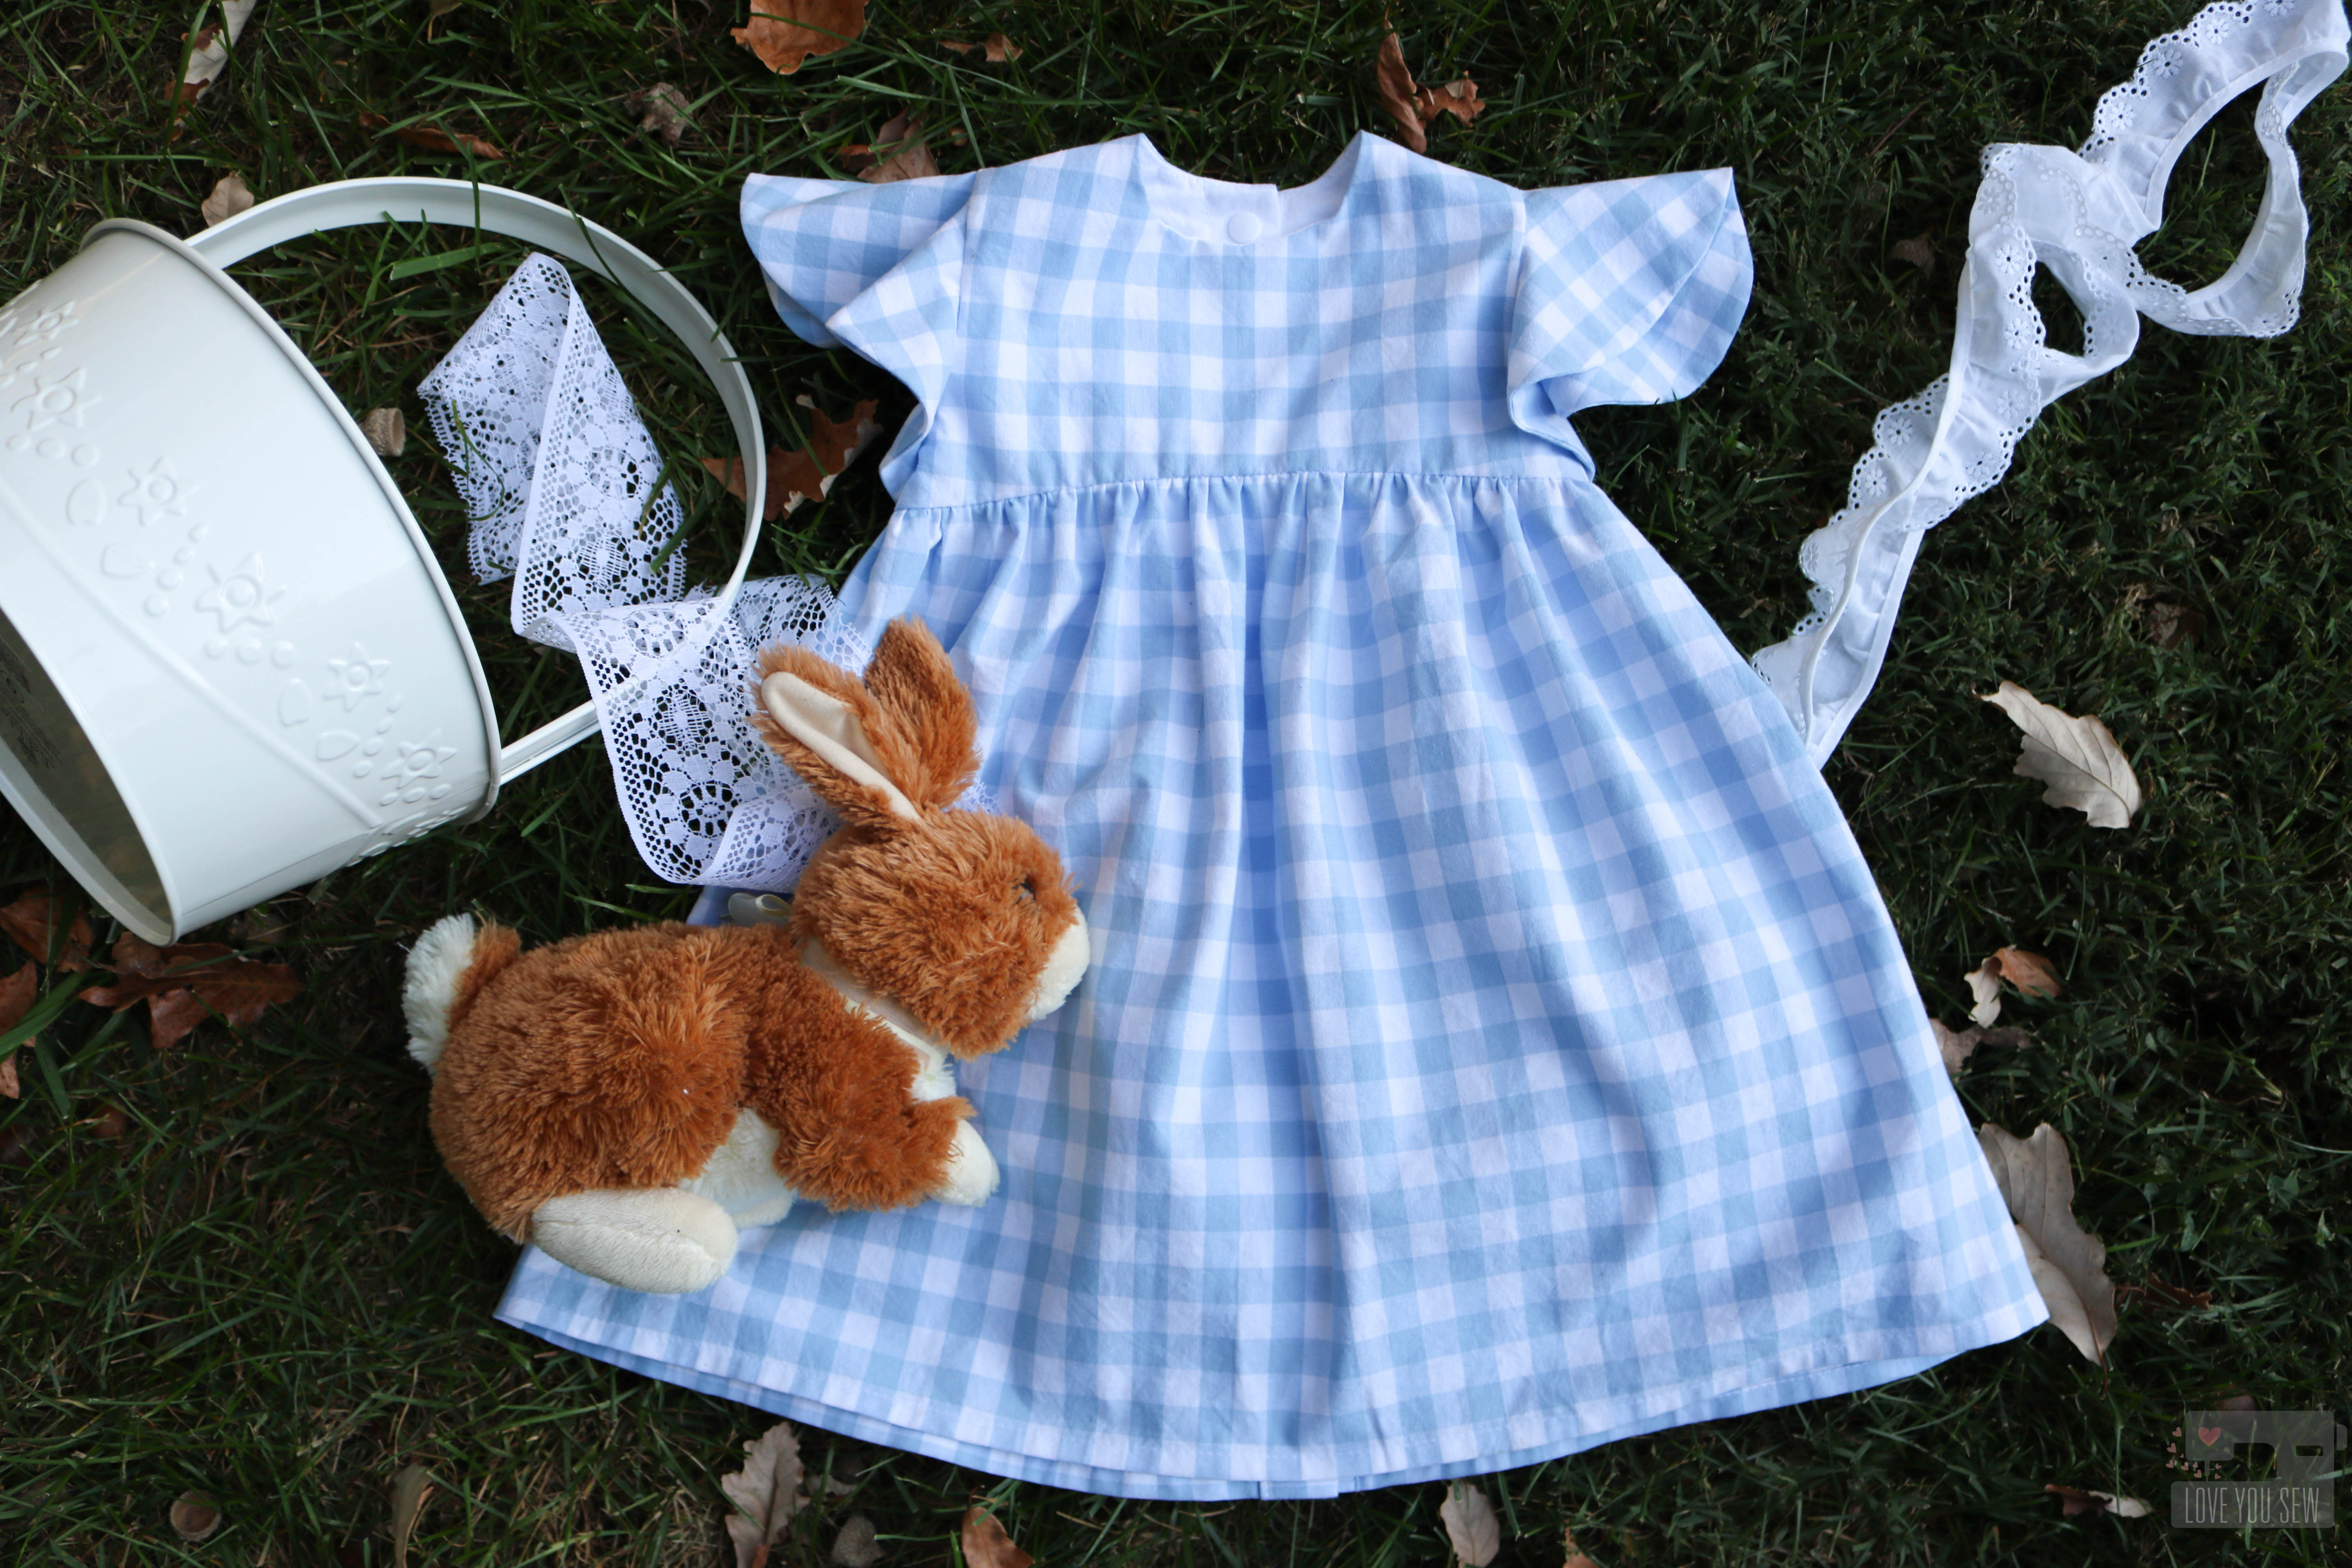
Did you see the flutter sleeve options?  SO cute!!! The soft waves are so feminine and really soften out this silhouette. It was hard for me to choose between the narrow and wide options. But I settled on the wider for just a little more arm coverage.

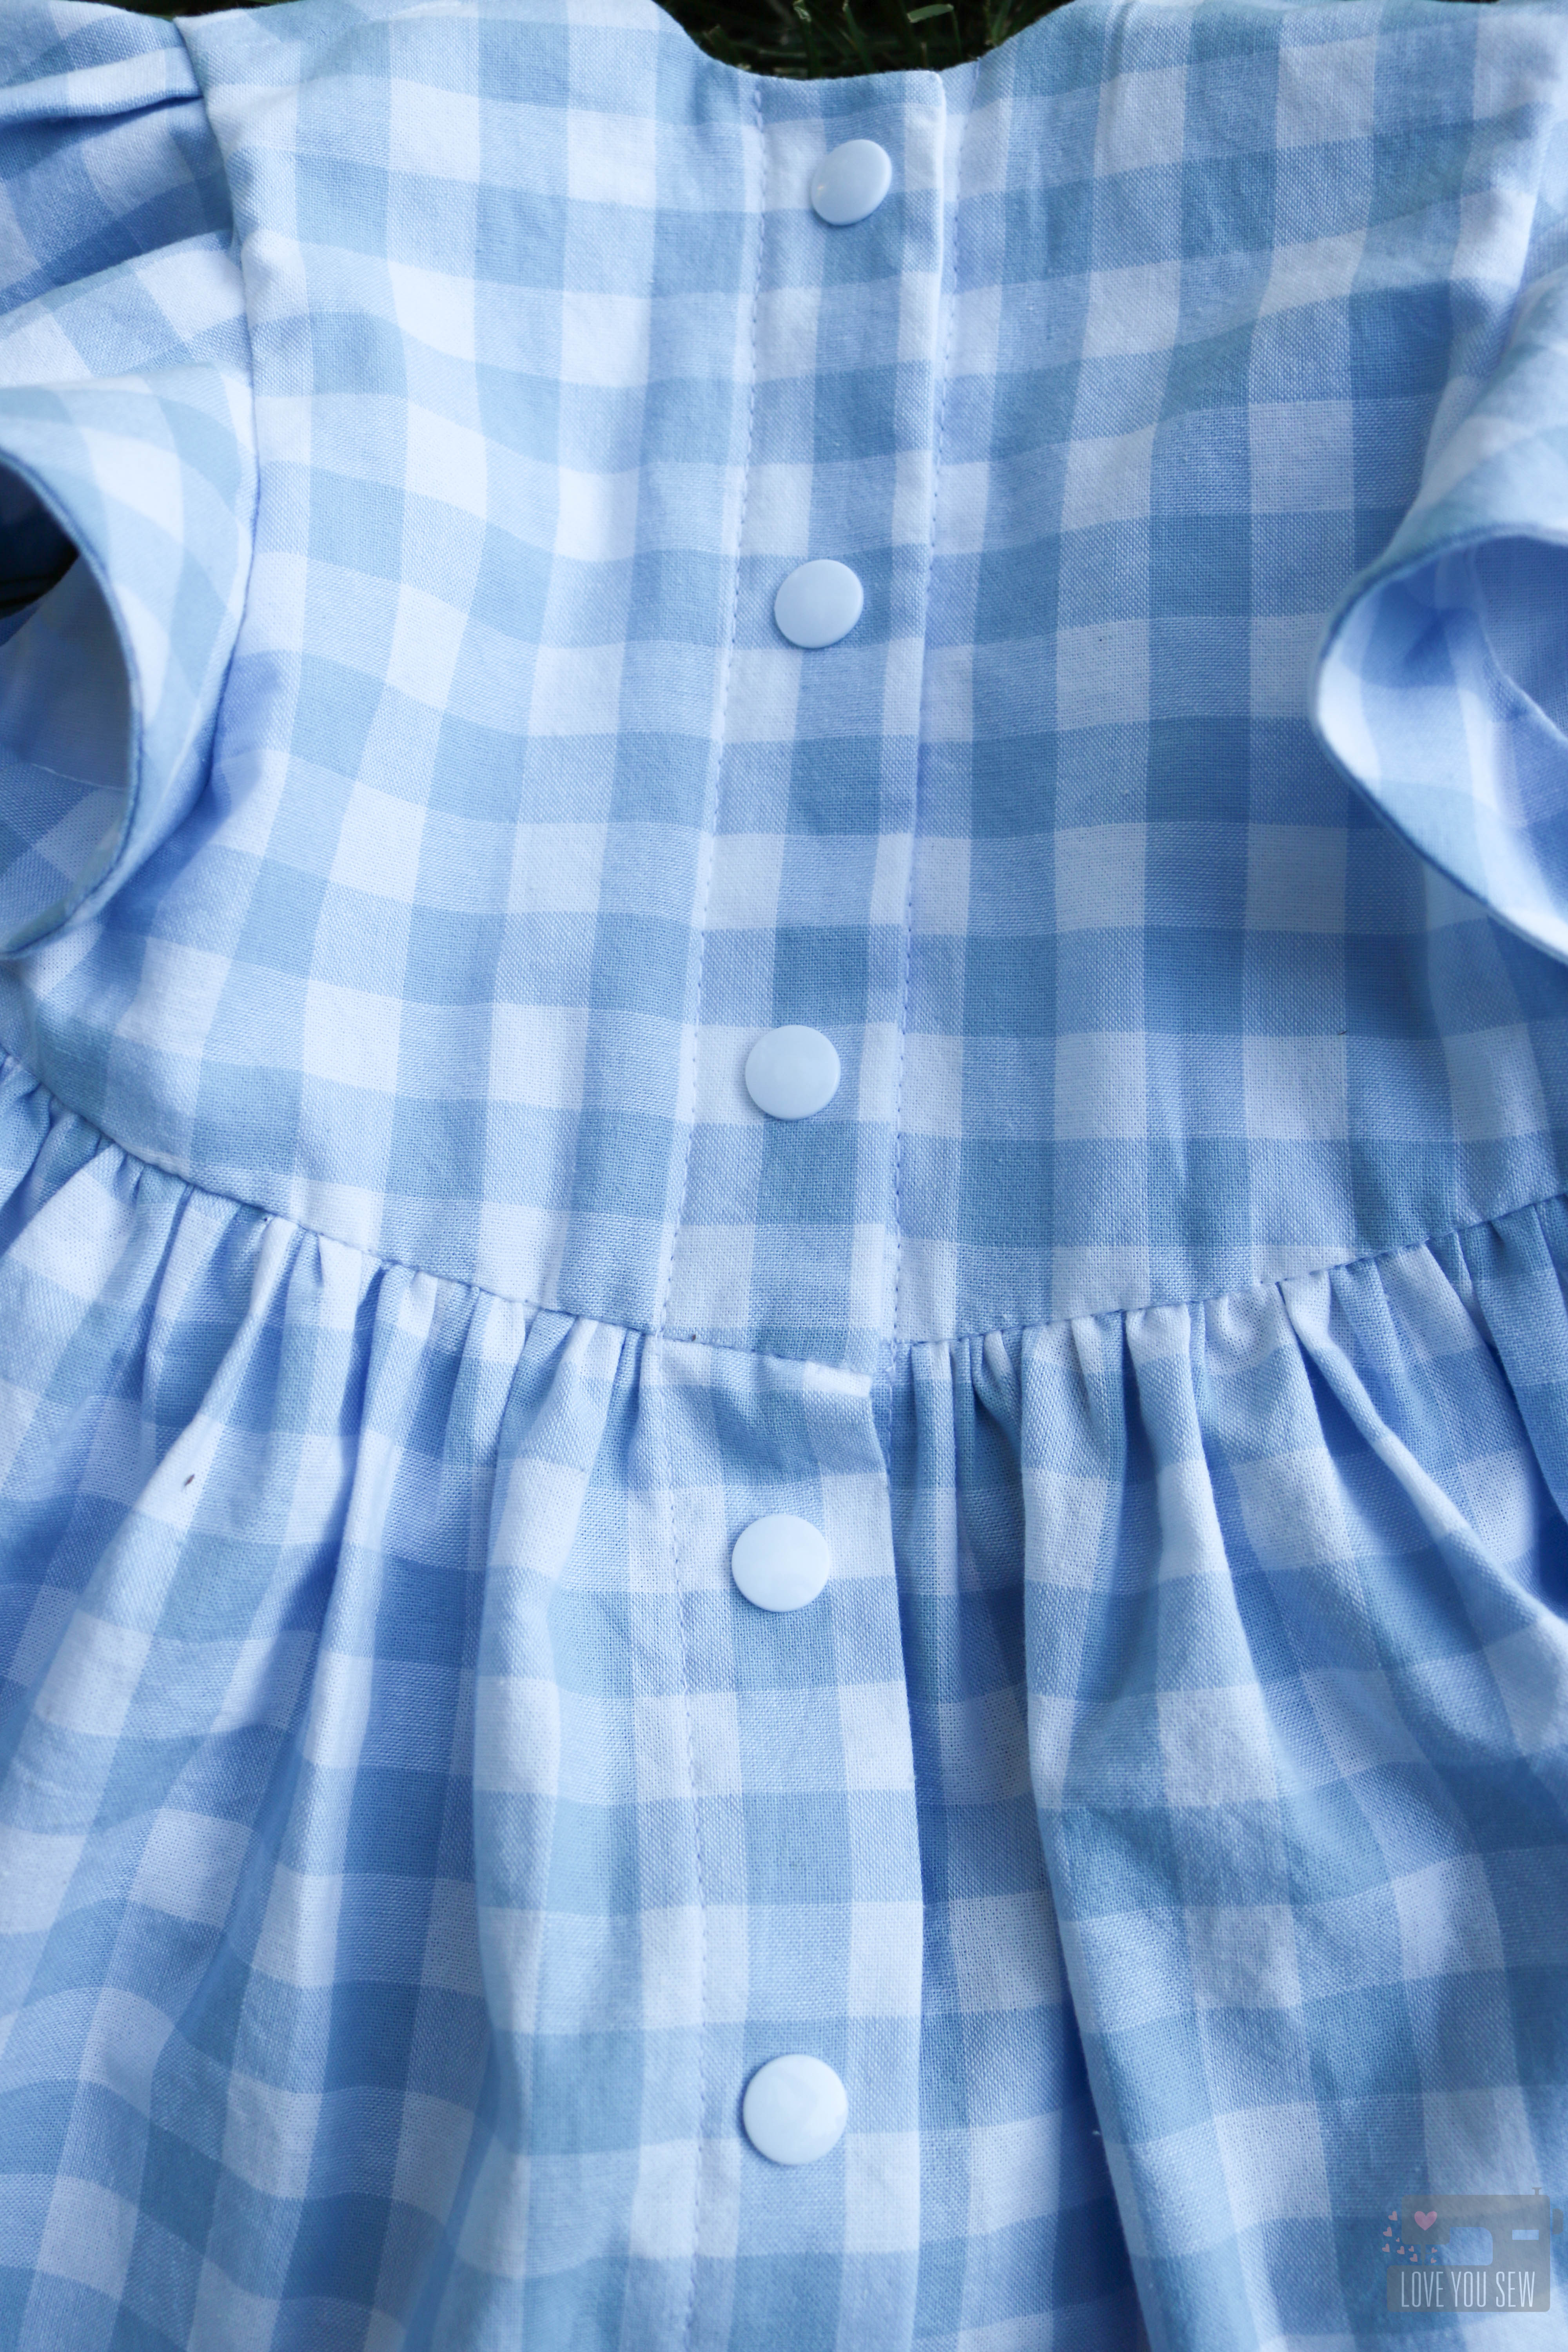
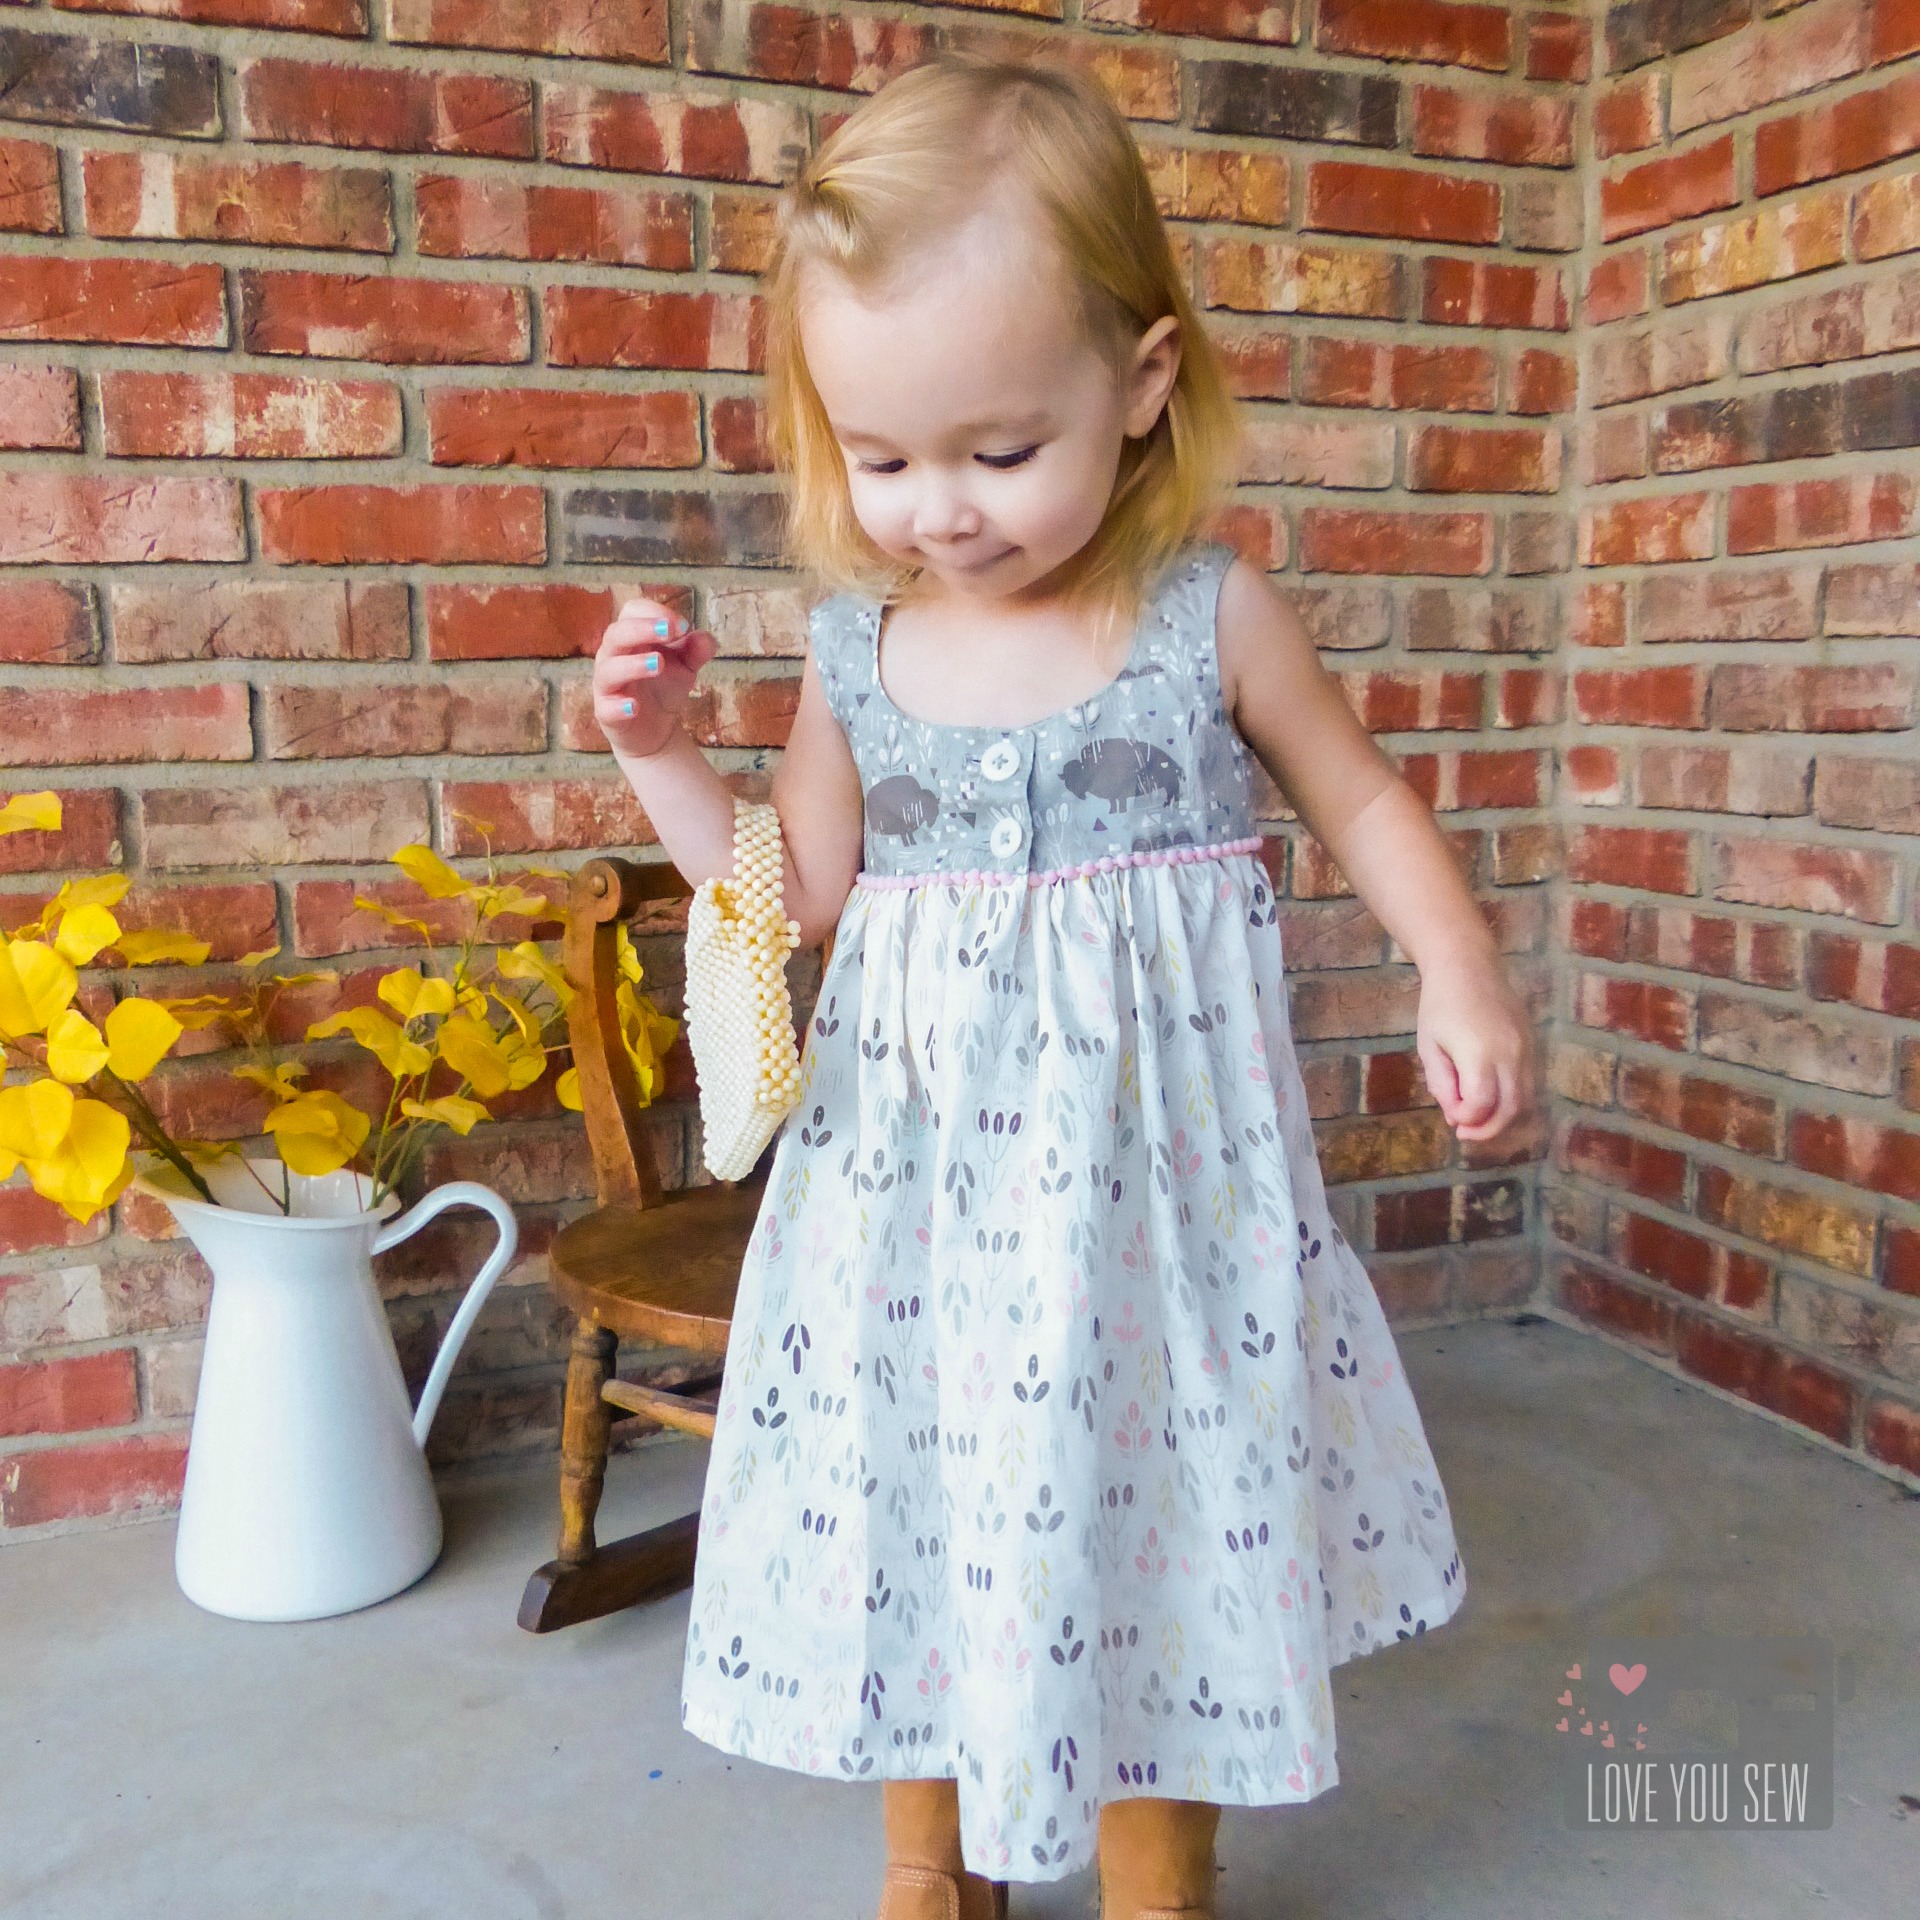
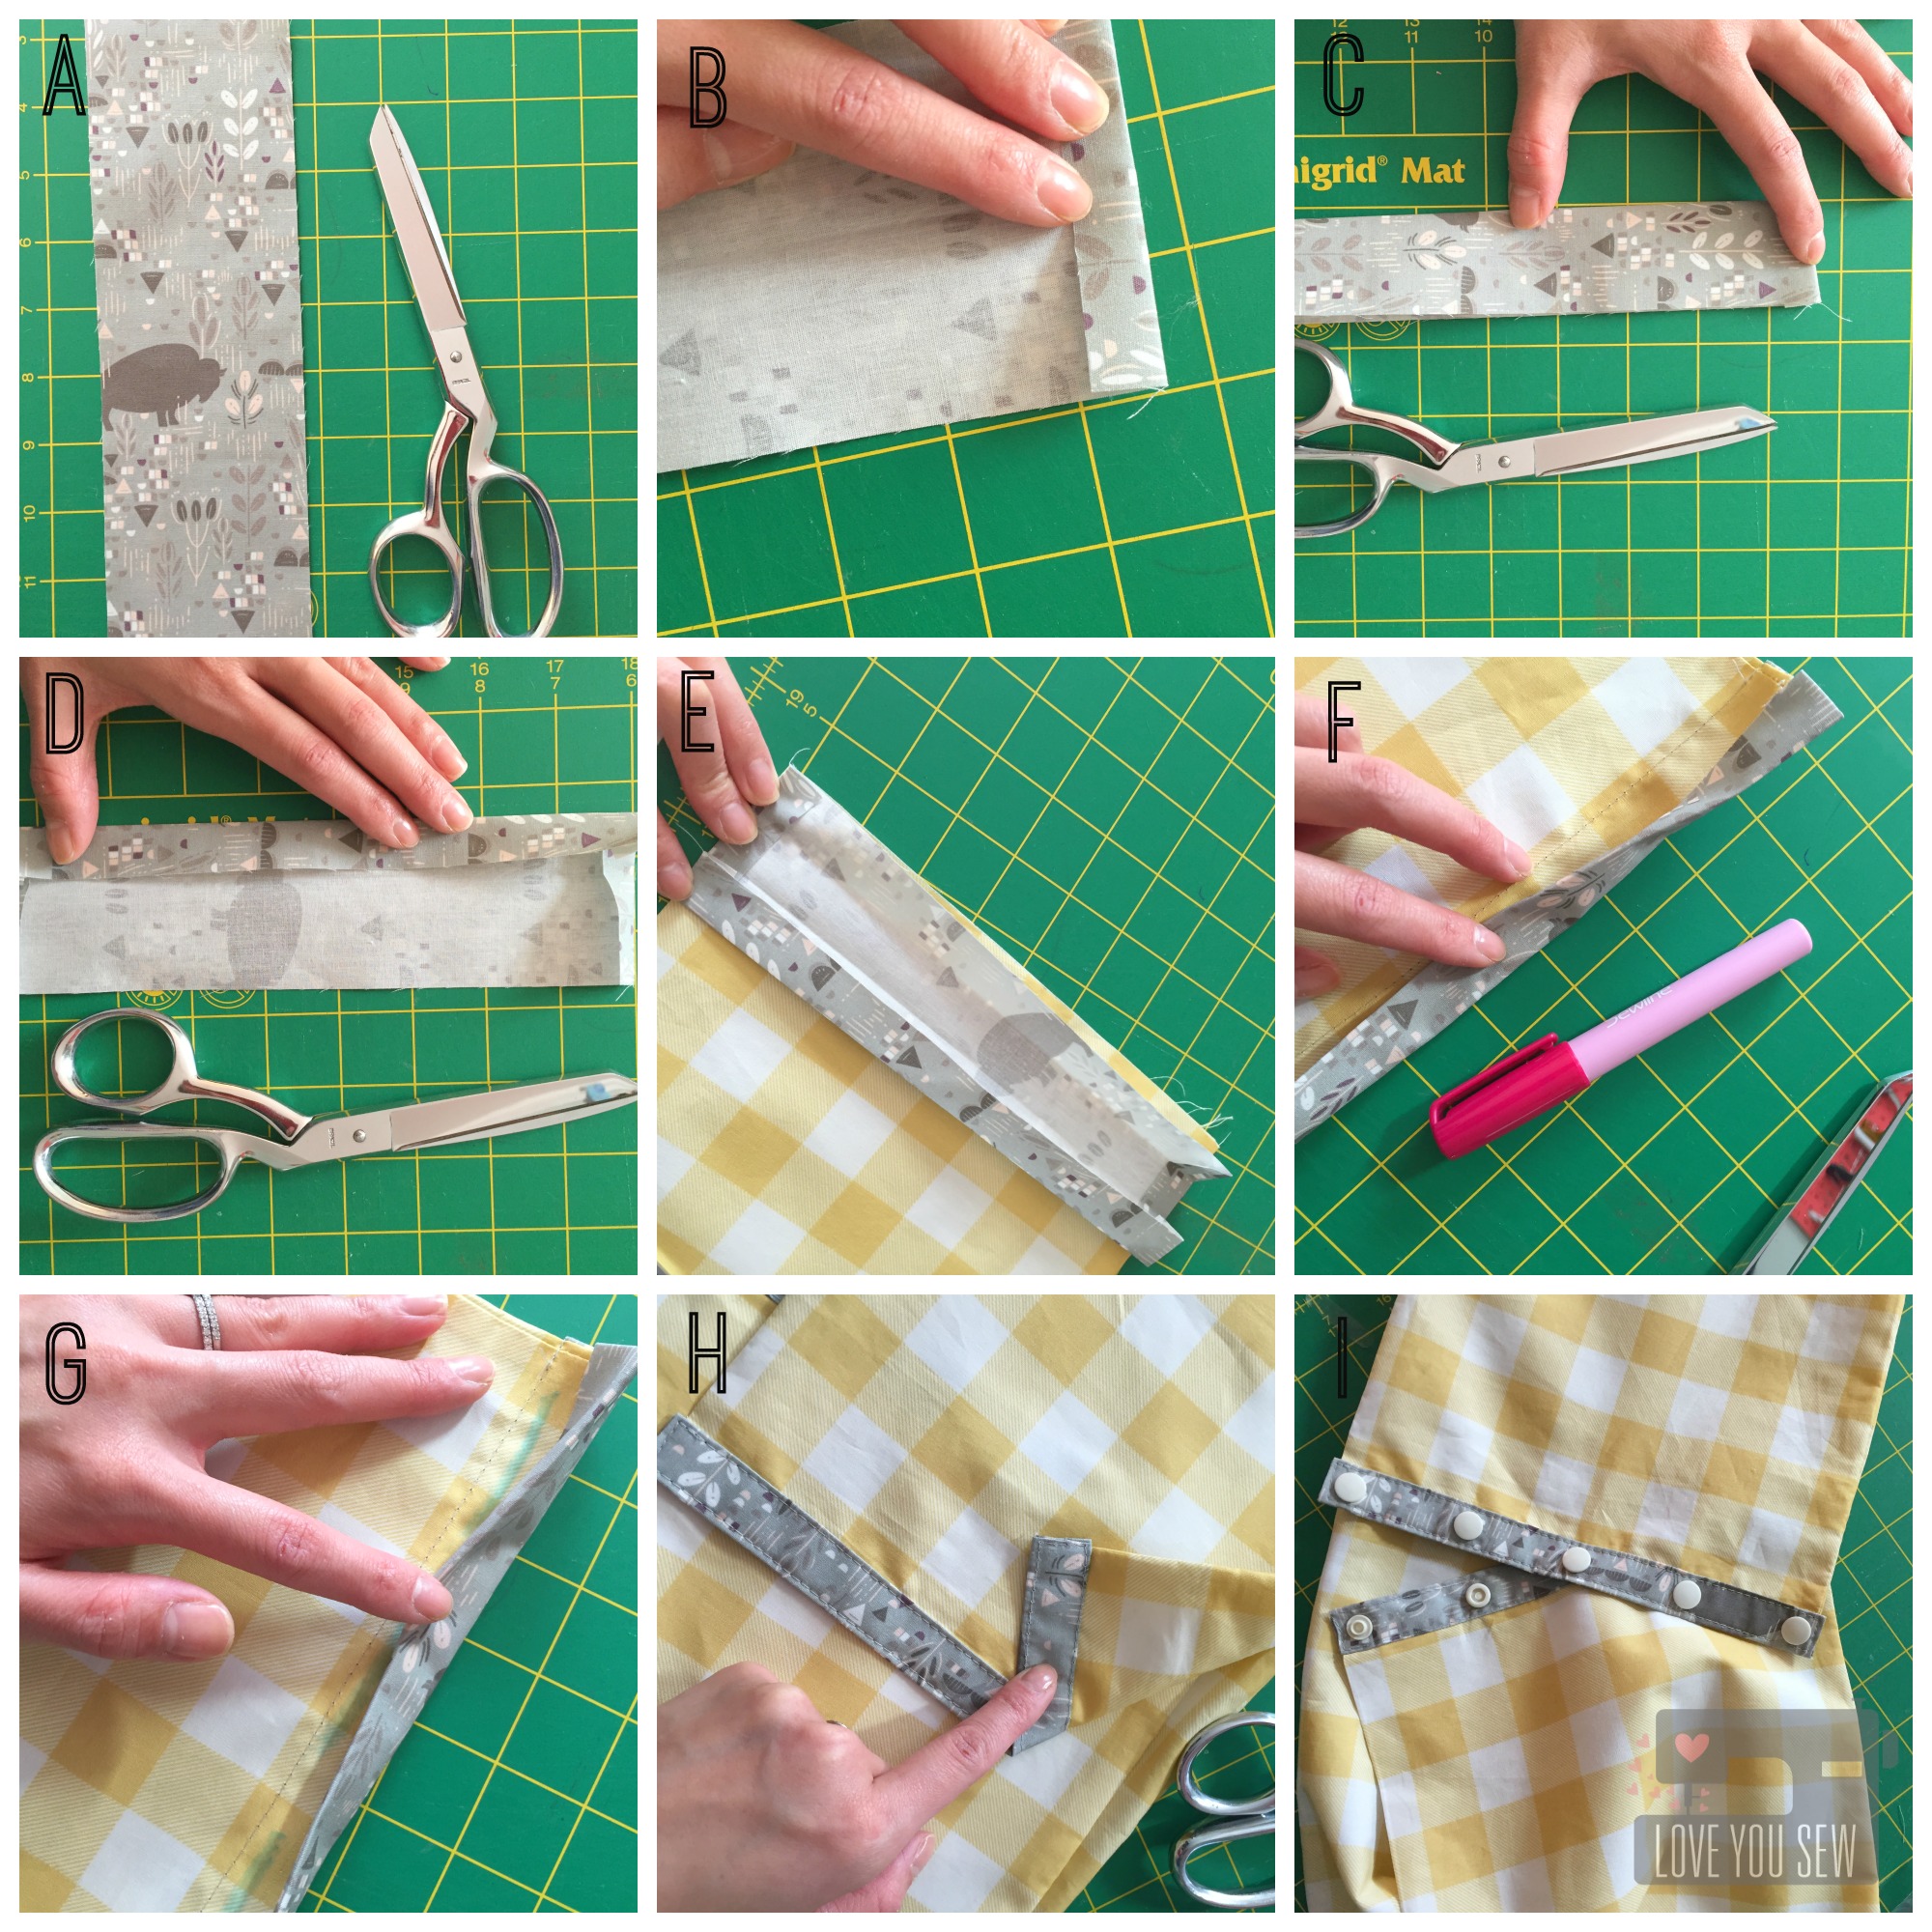
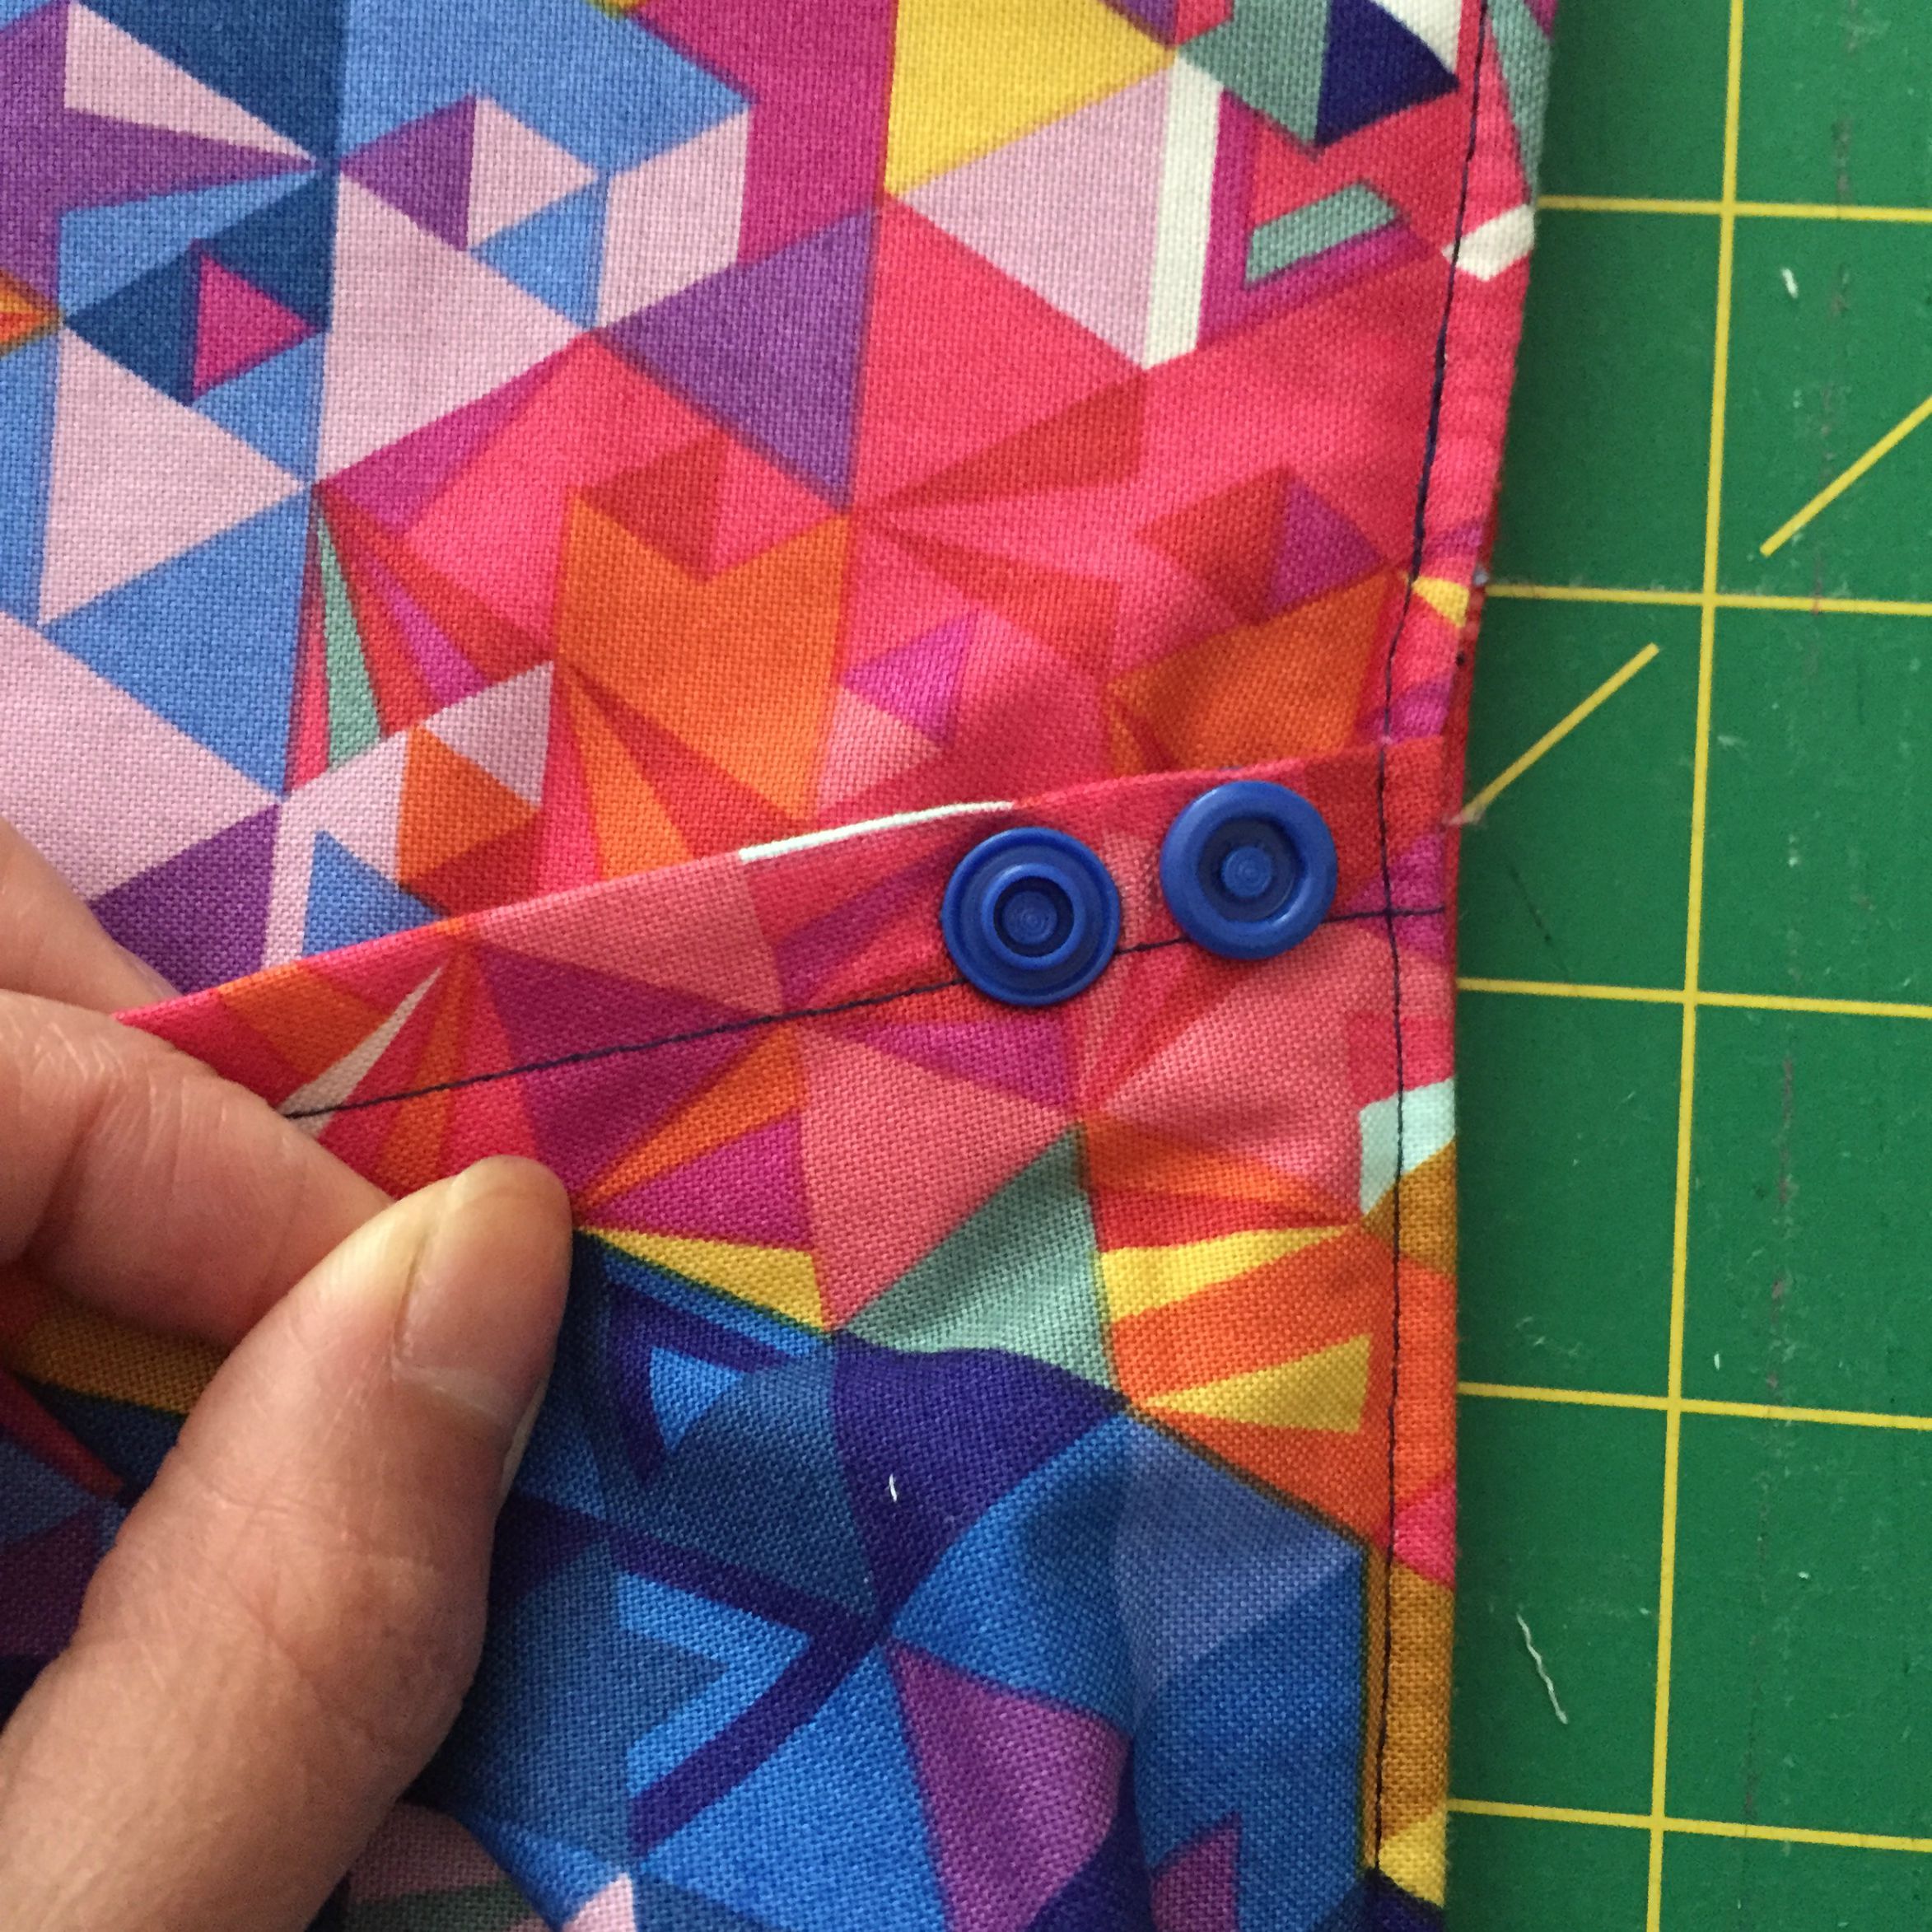
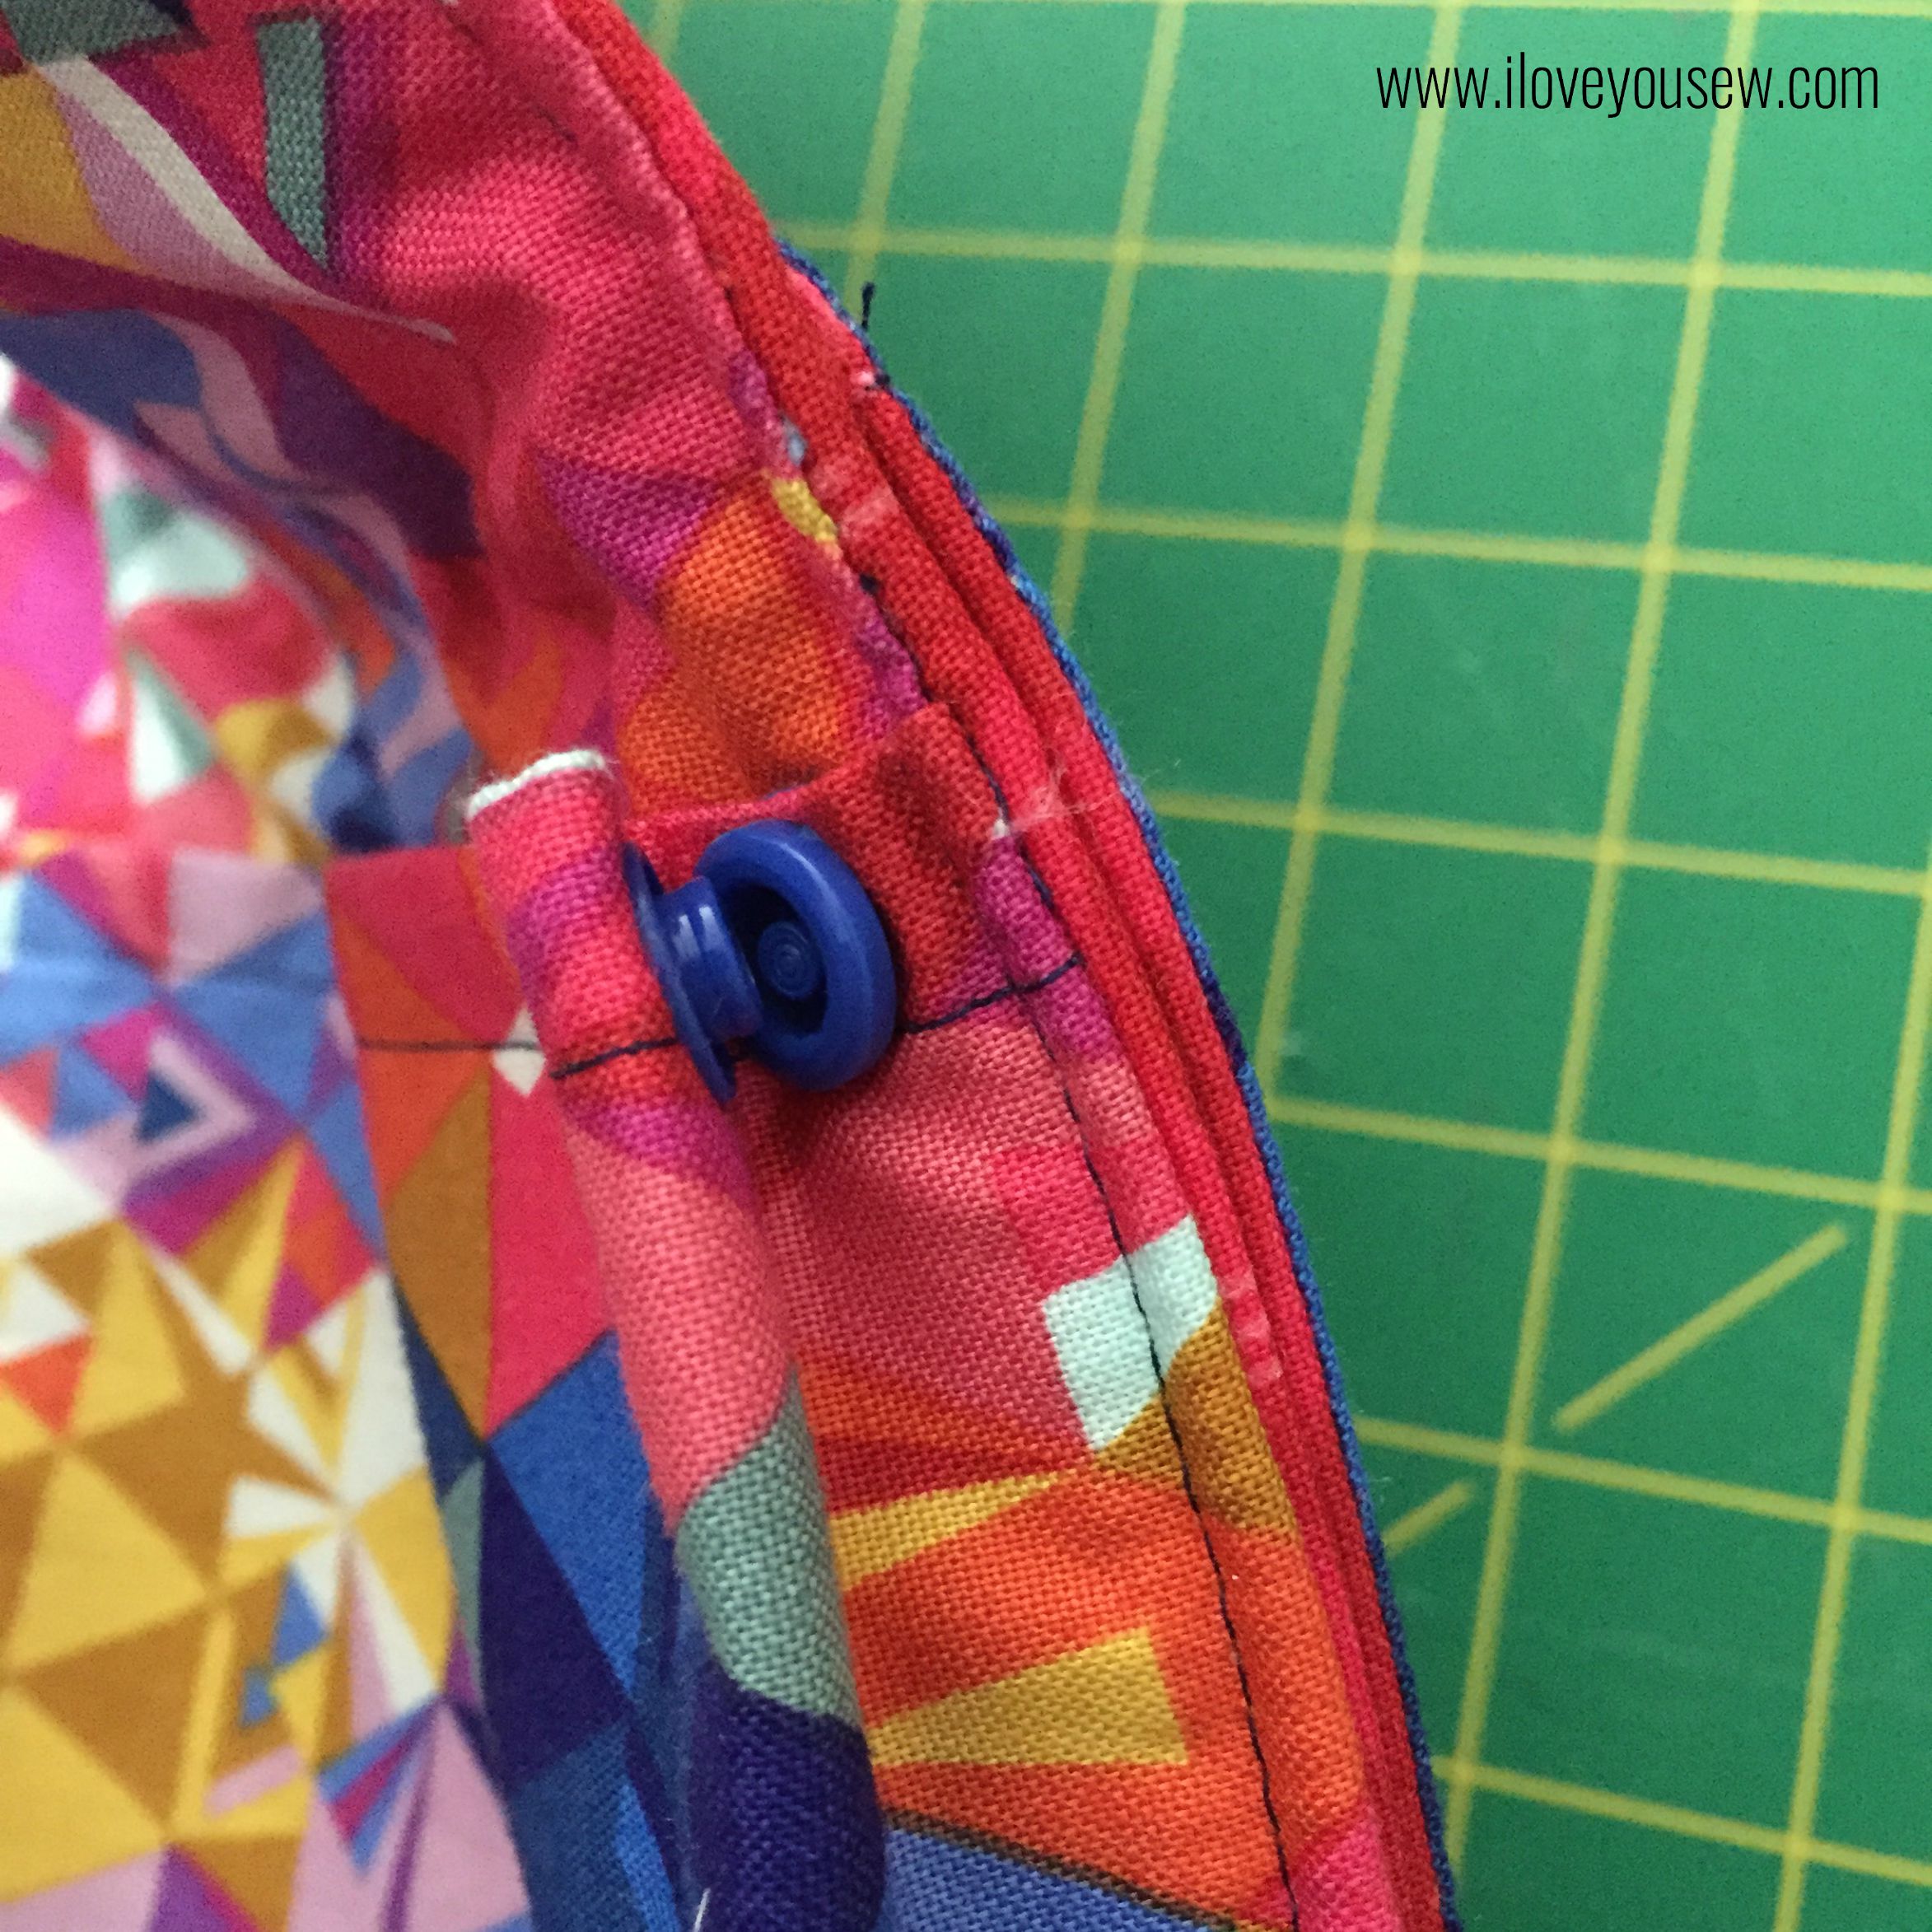
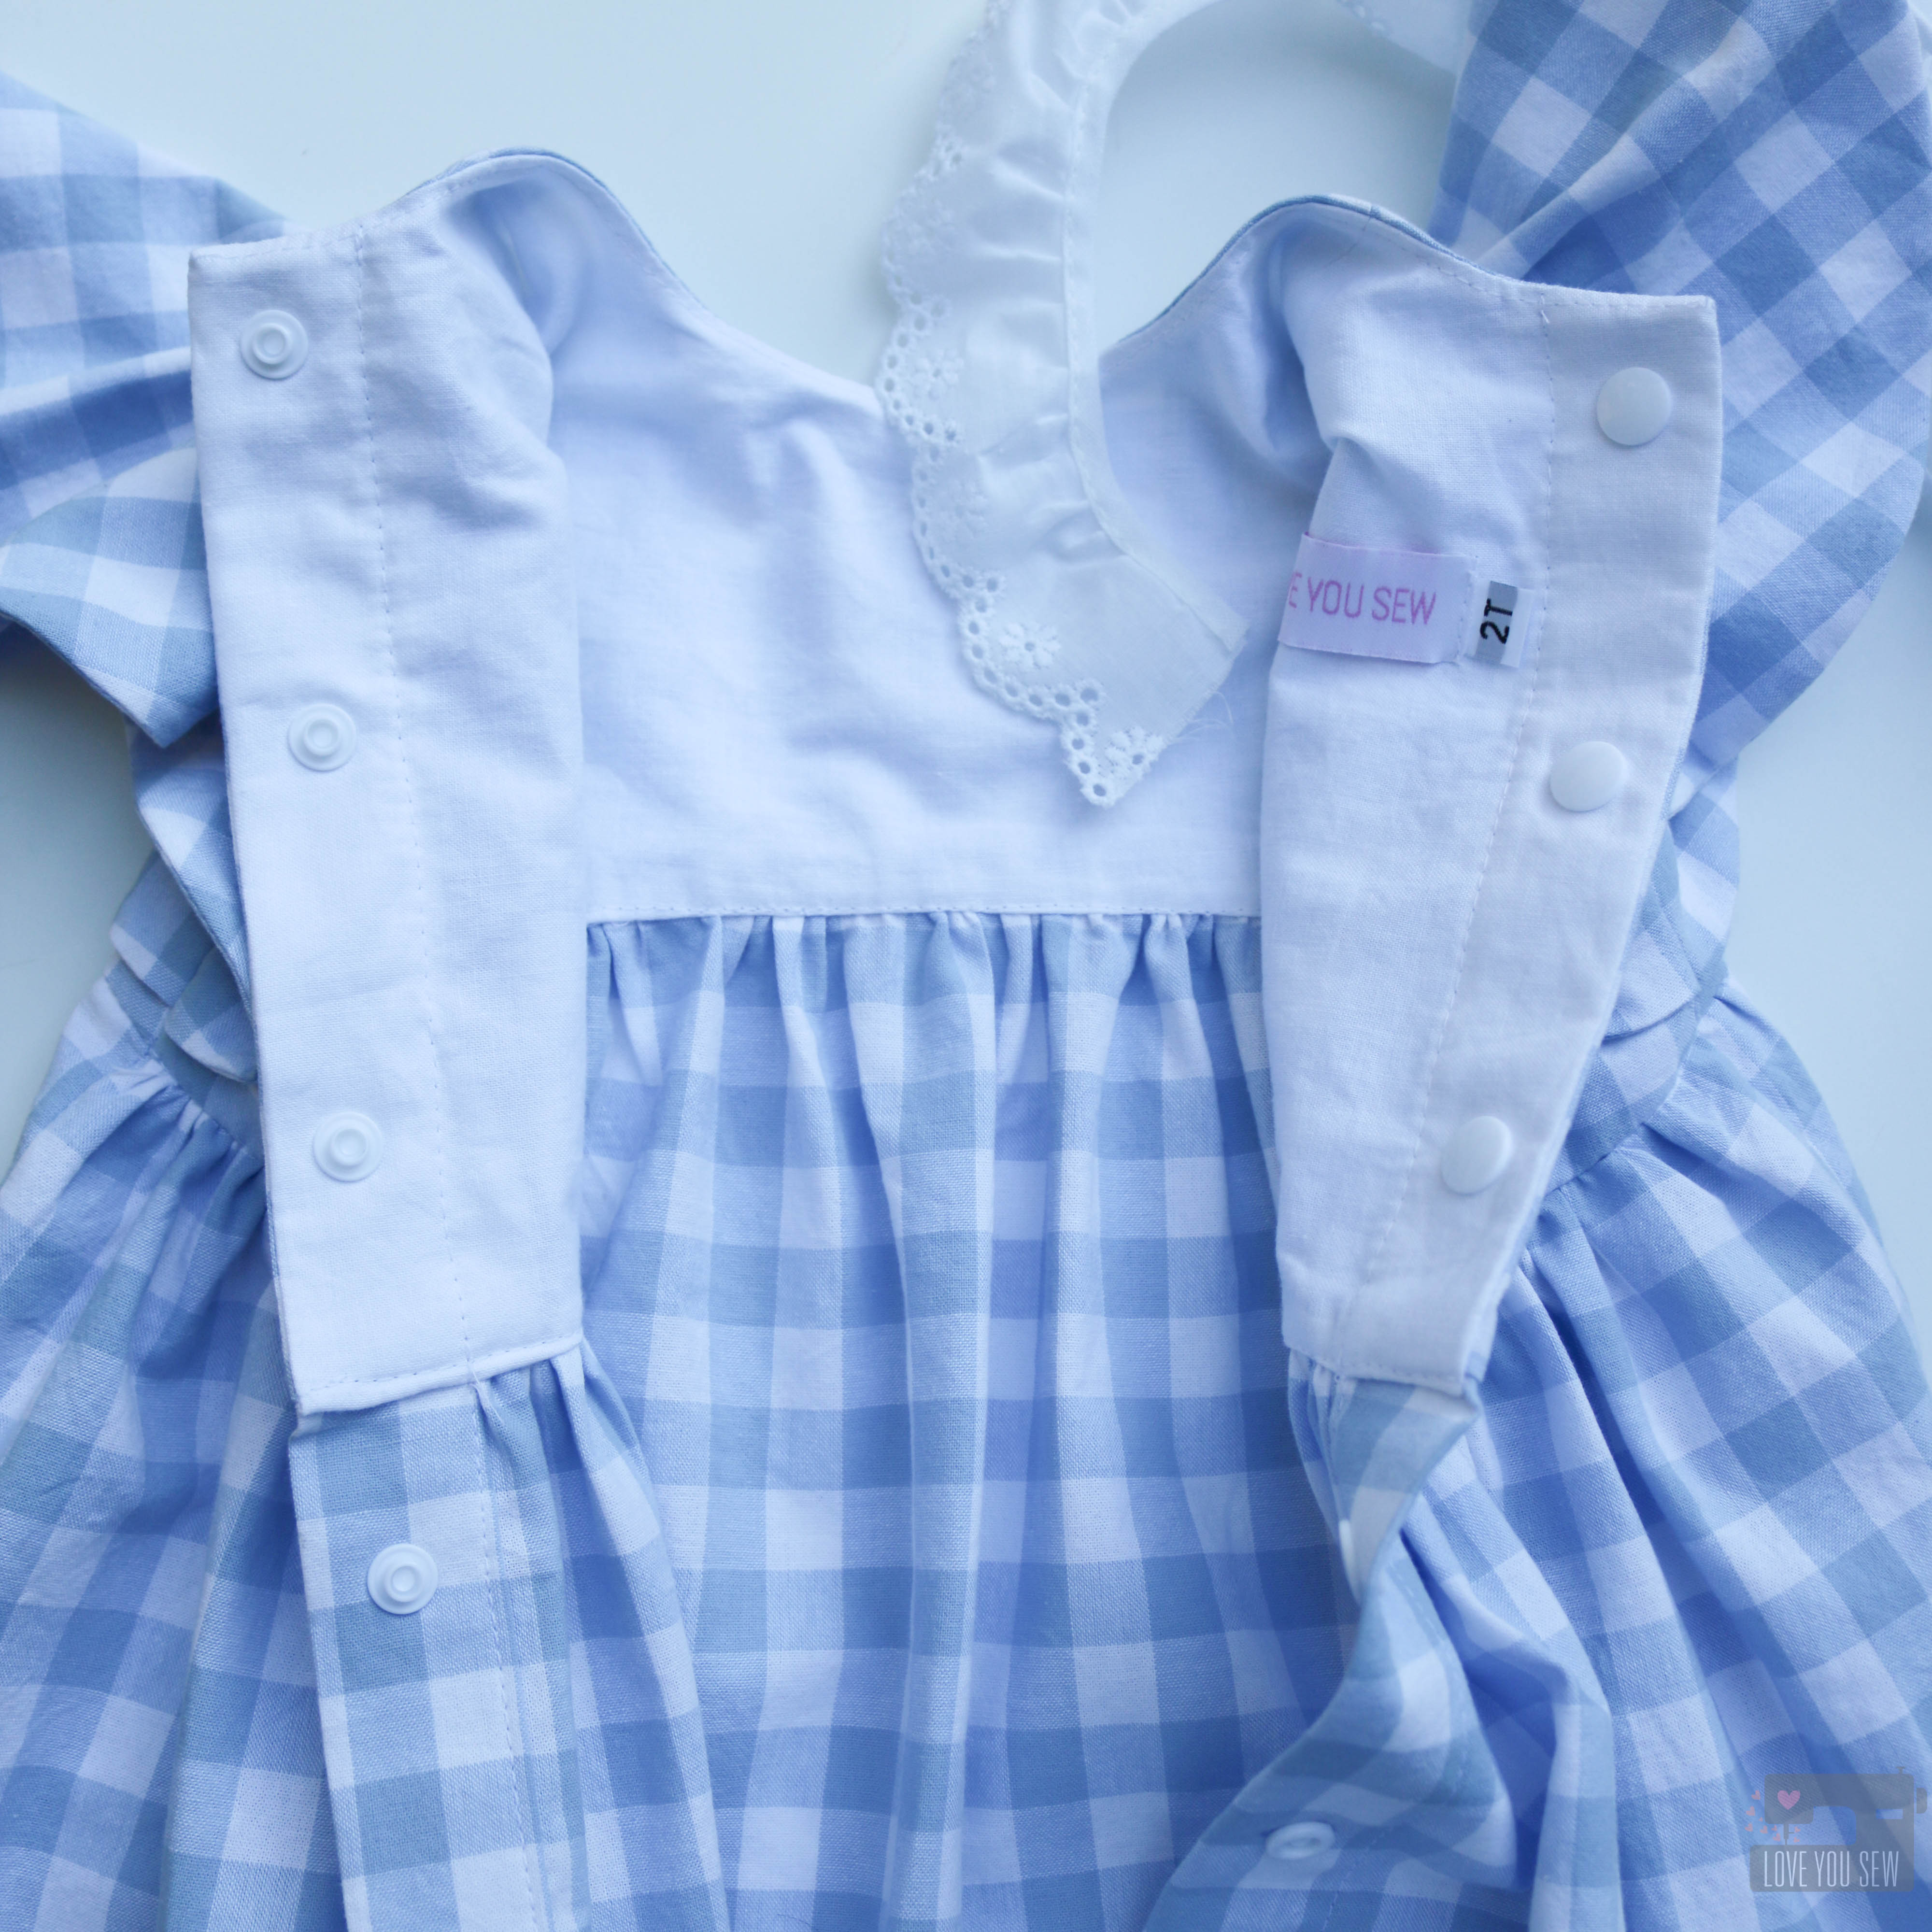
With the back of the Feliz dress, I knew I wanted to make a button closure. But instead of buttons, I used KAM snaps. I have quite a collection in my stash and they make for very quick dressing and undressing.


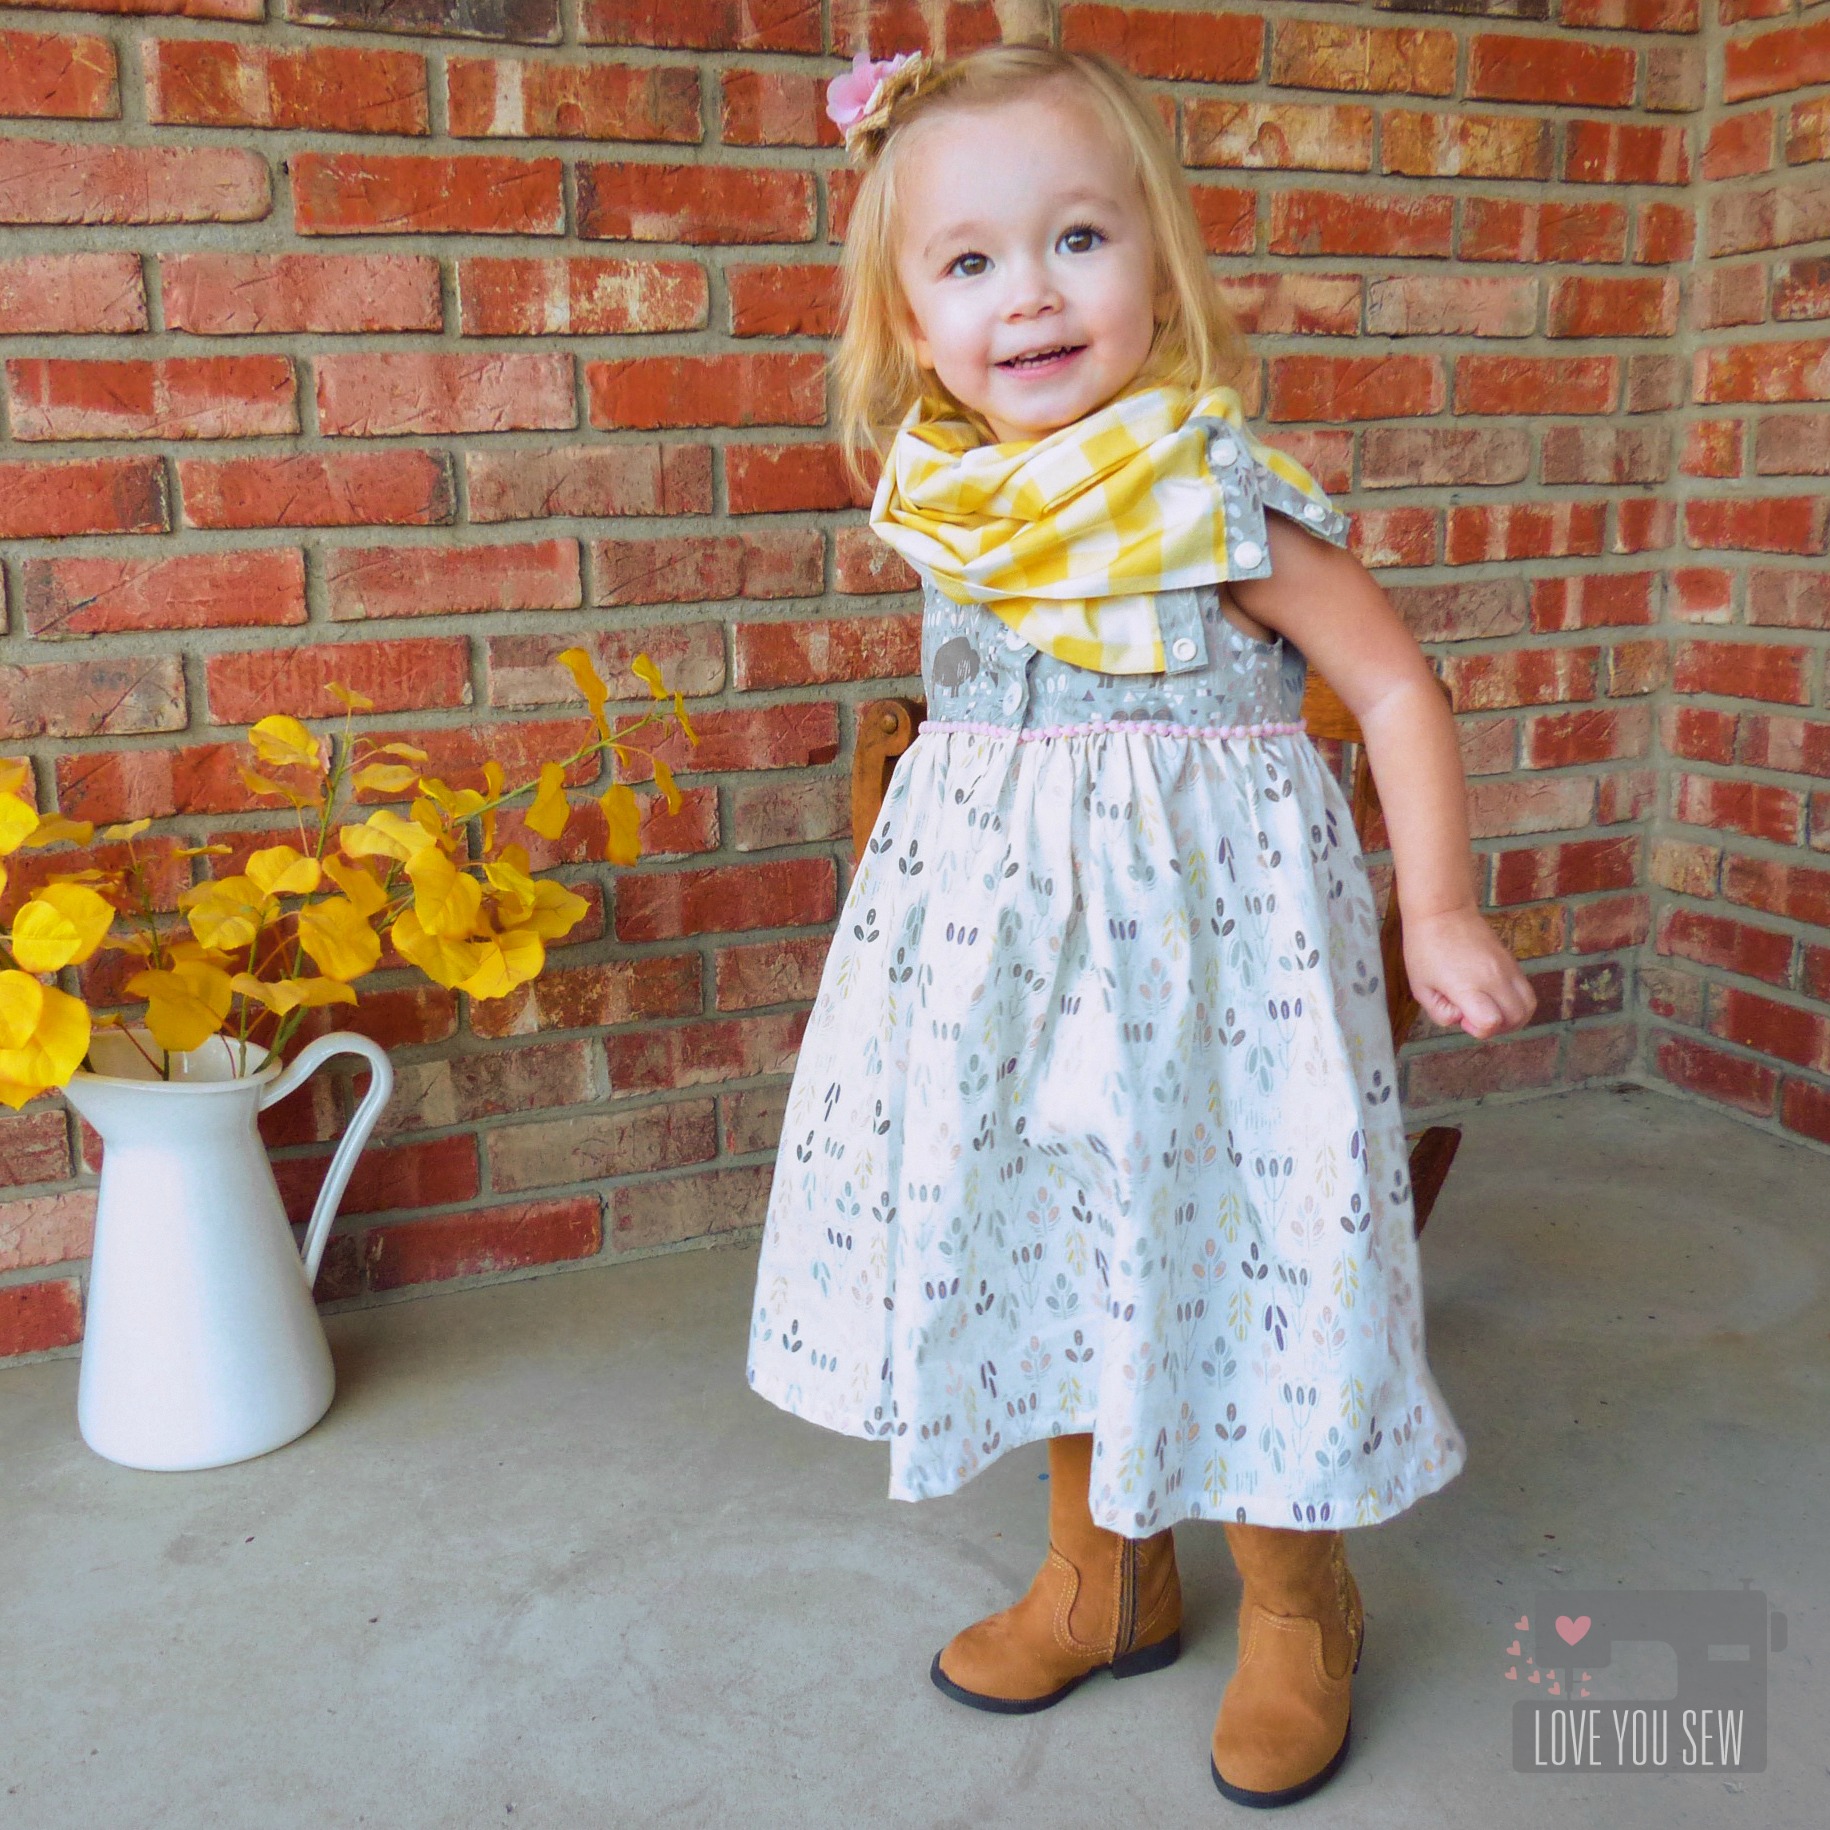
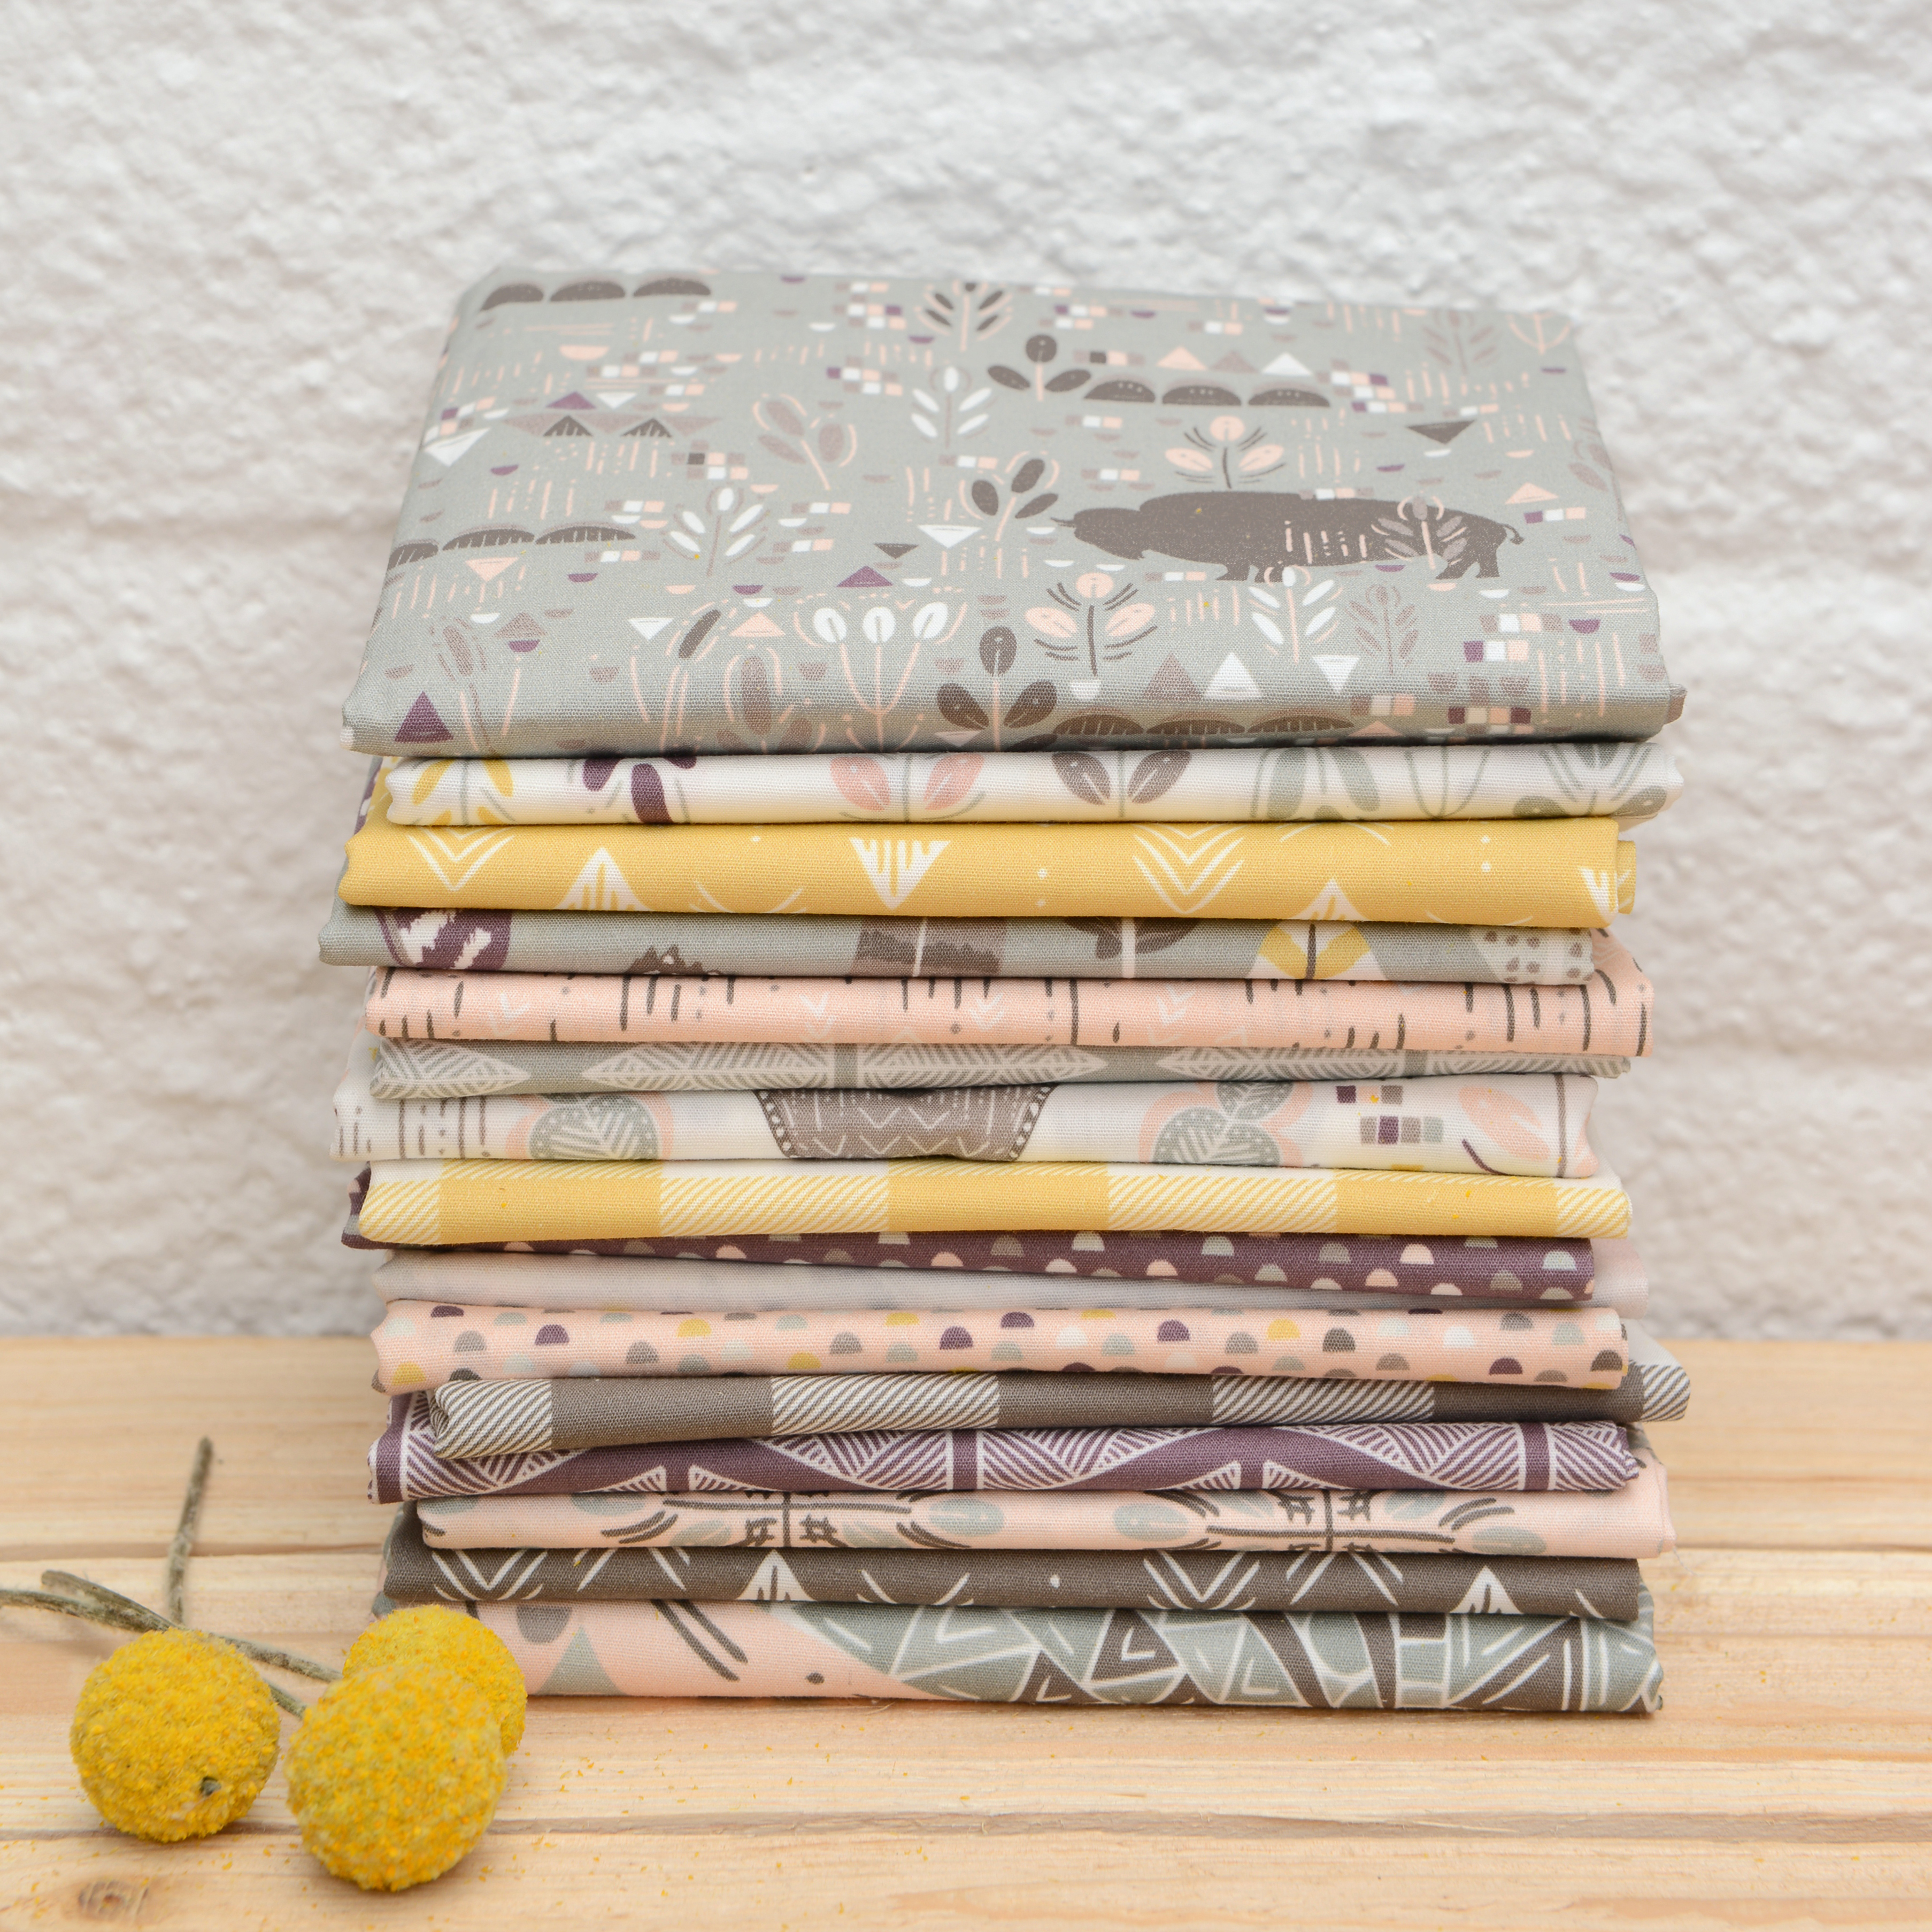
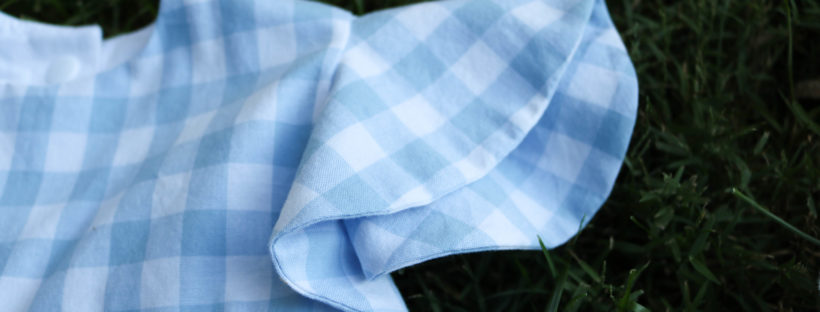
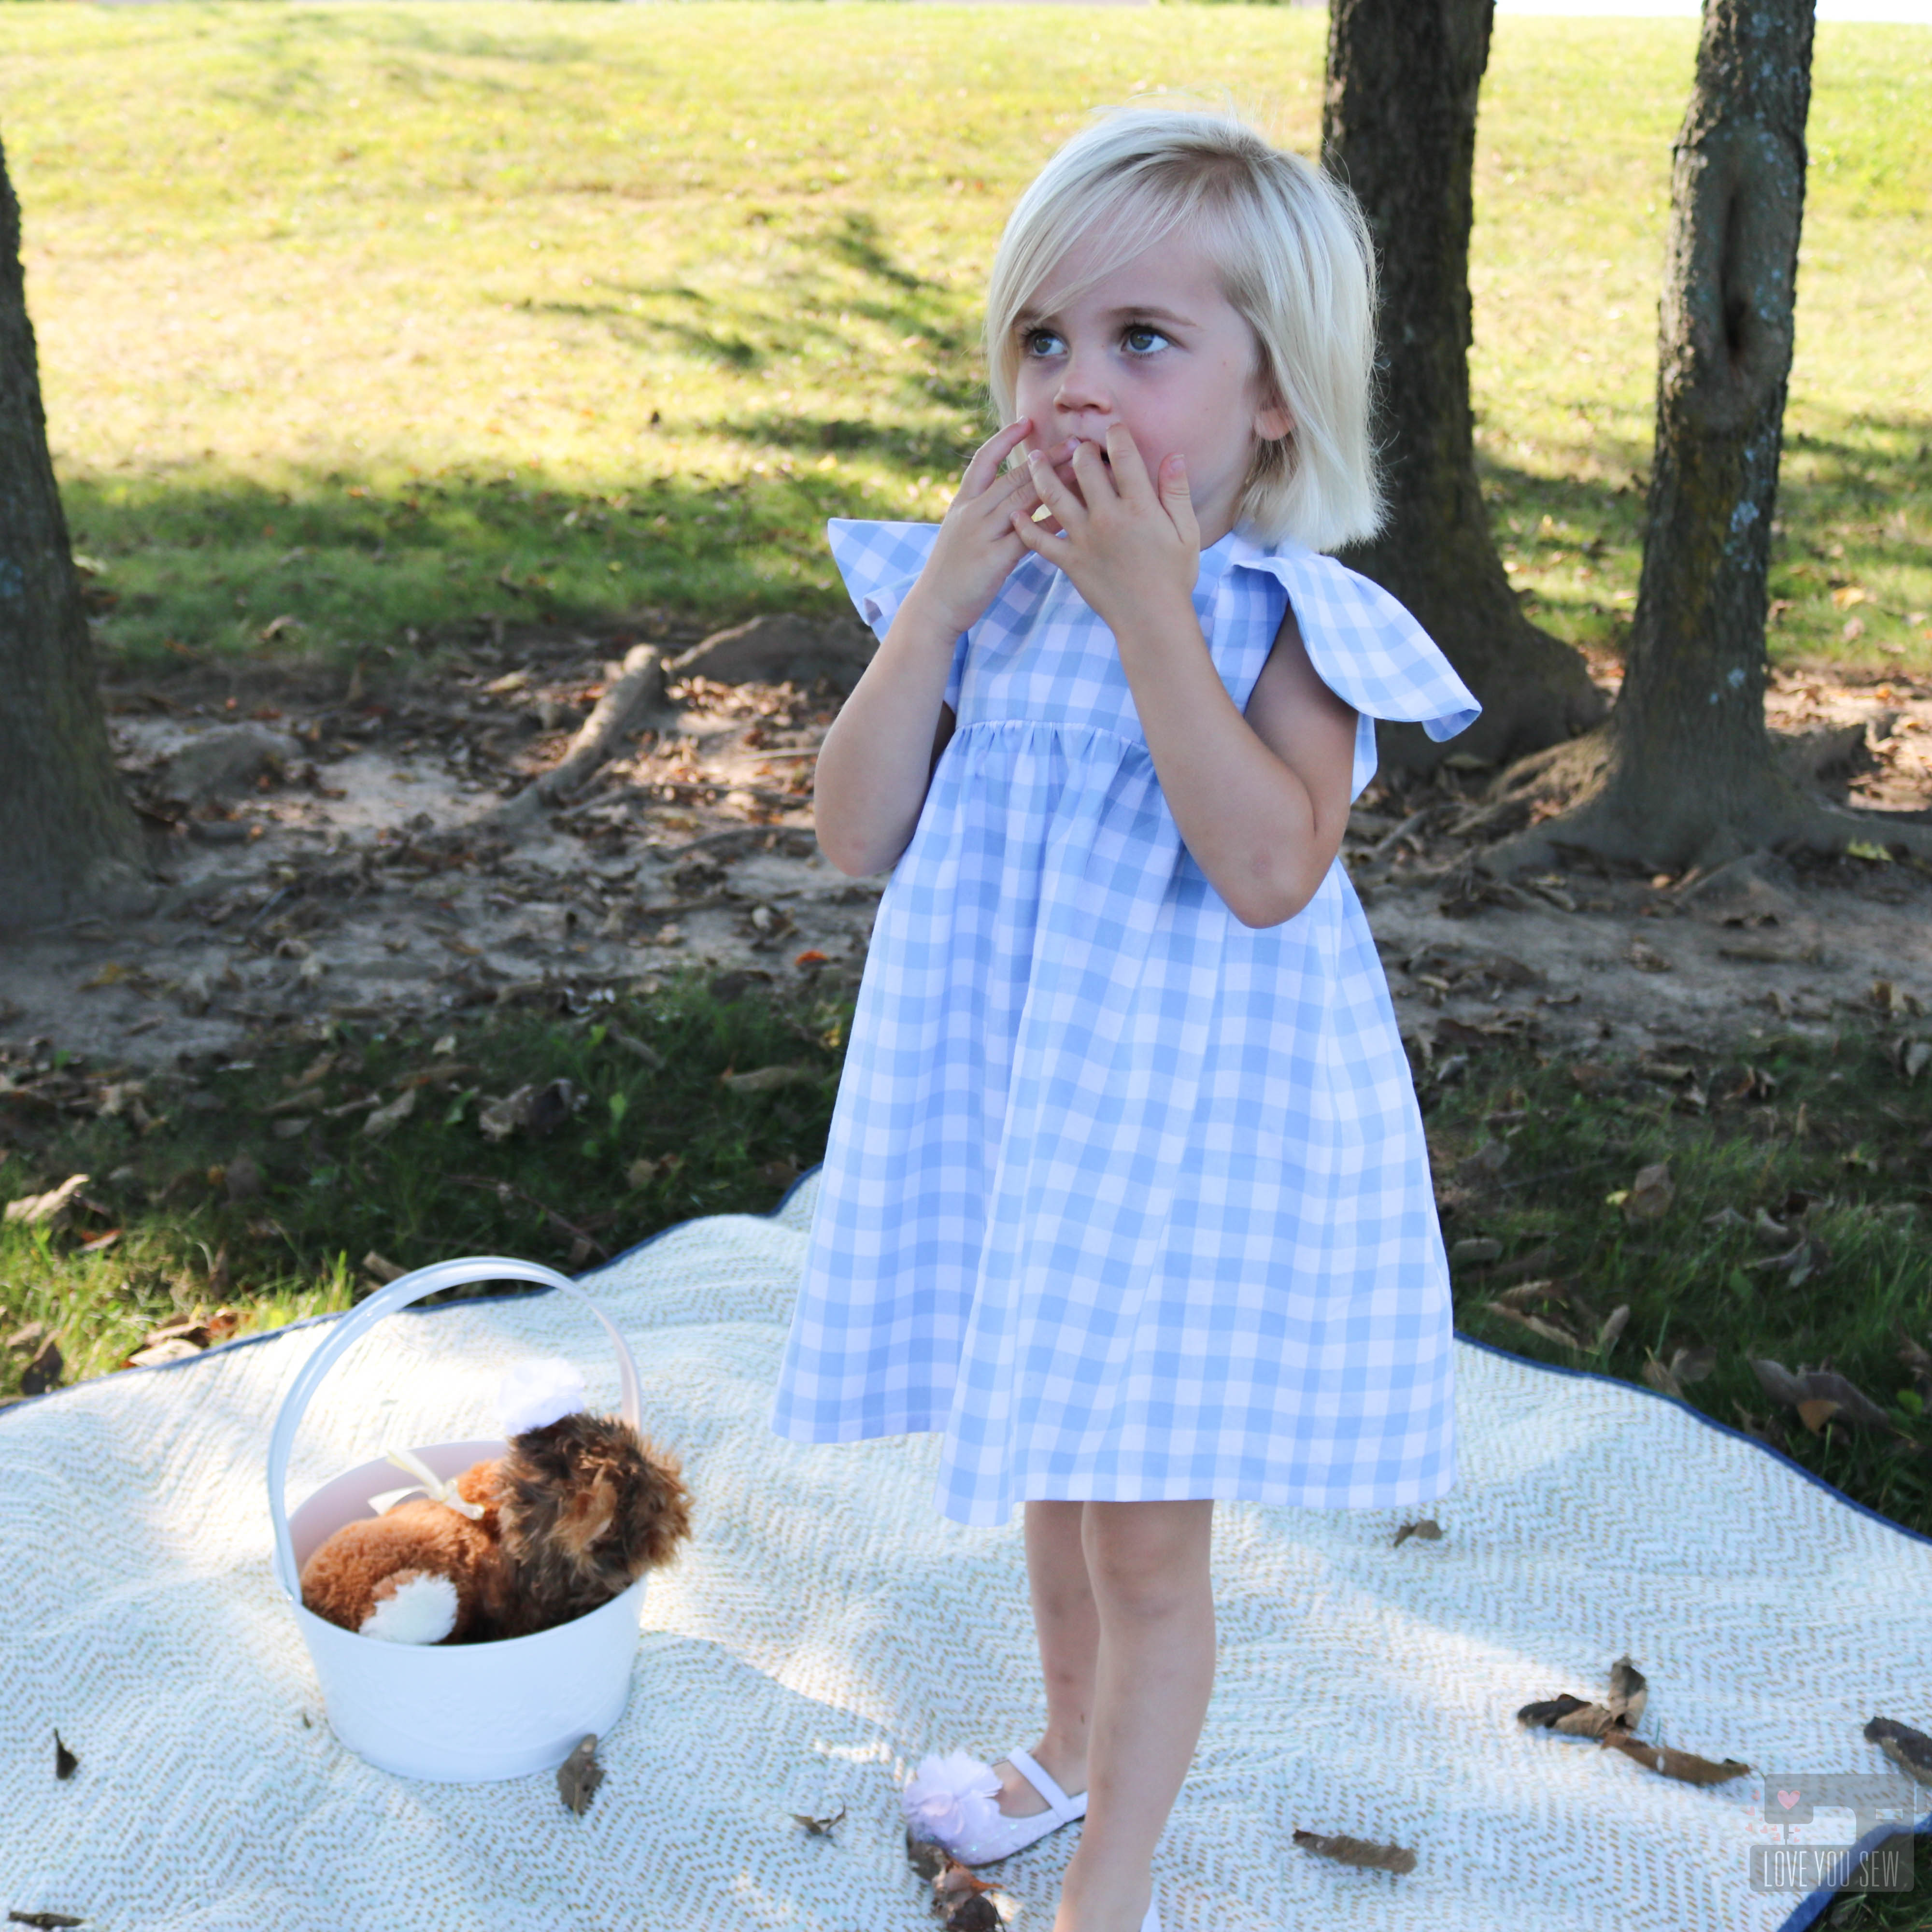
I happened to have Cotton and Steel’s yarn dyed gingham in Sky and was able to make this dress with just one yard of it!  There wasn’t enough left for lining, but Kona Snow worked in perfectly.  I’m so glad I saved the fabric from becoming a scarf (like I initially planned) because the Feliz is just the such a darling pattern and pairs well with this sweet fabric.

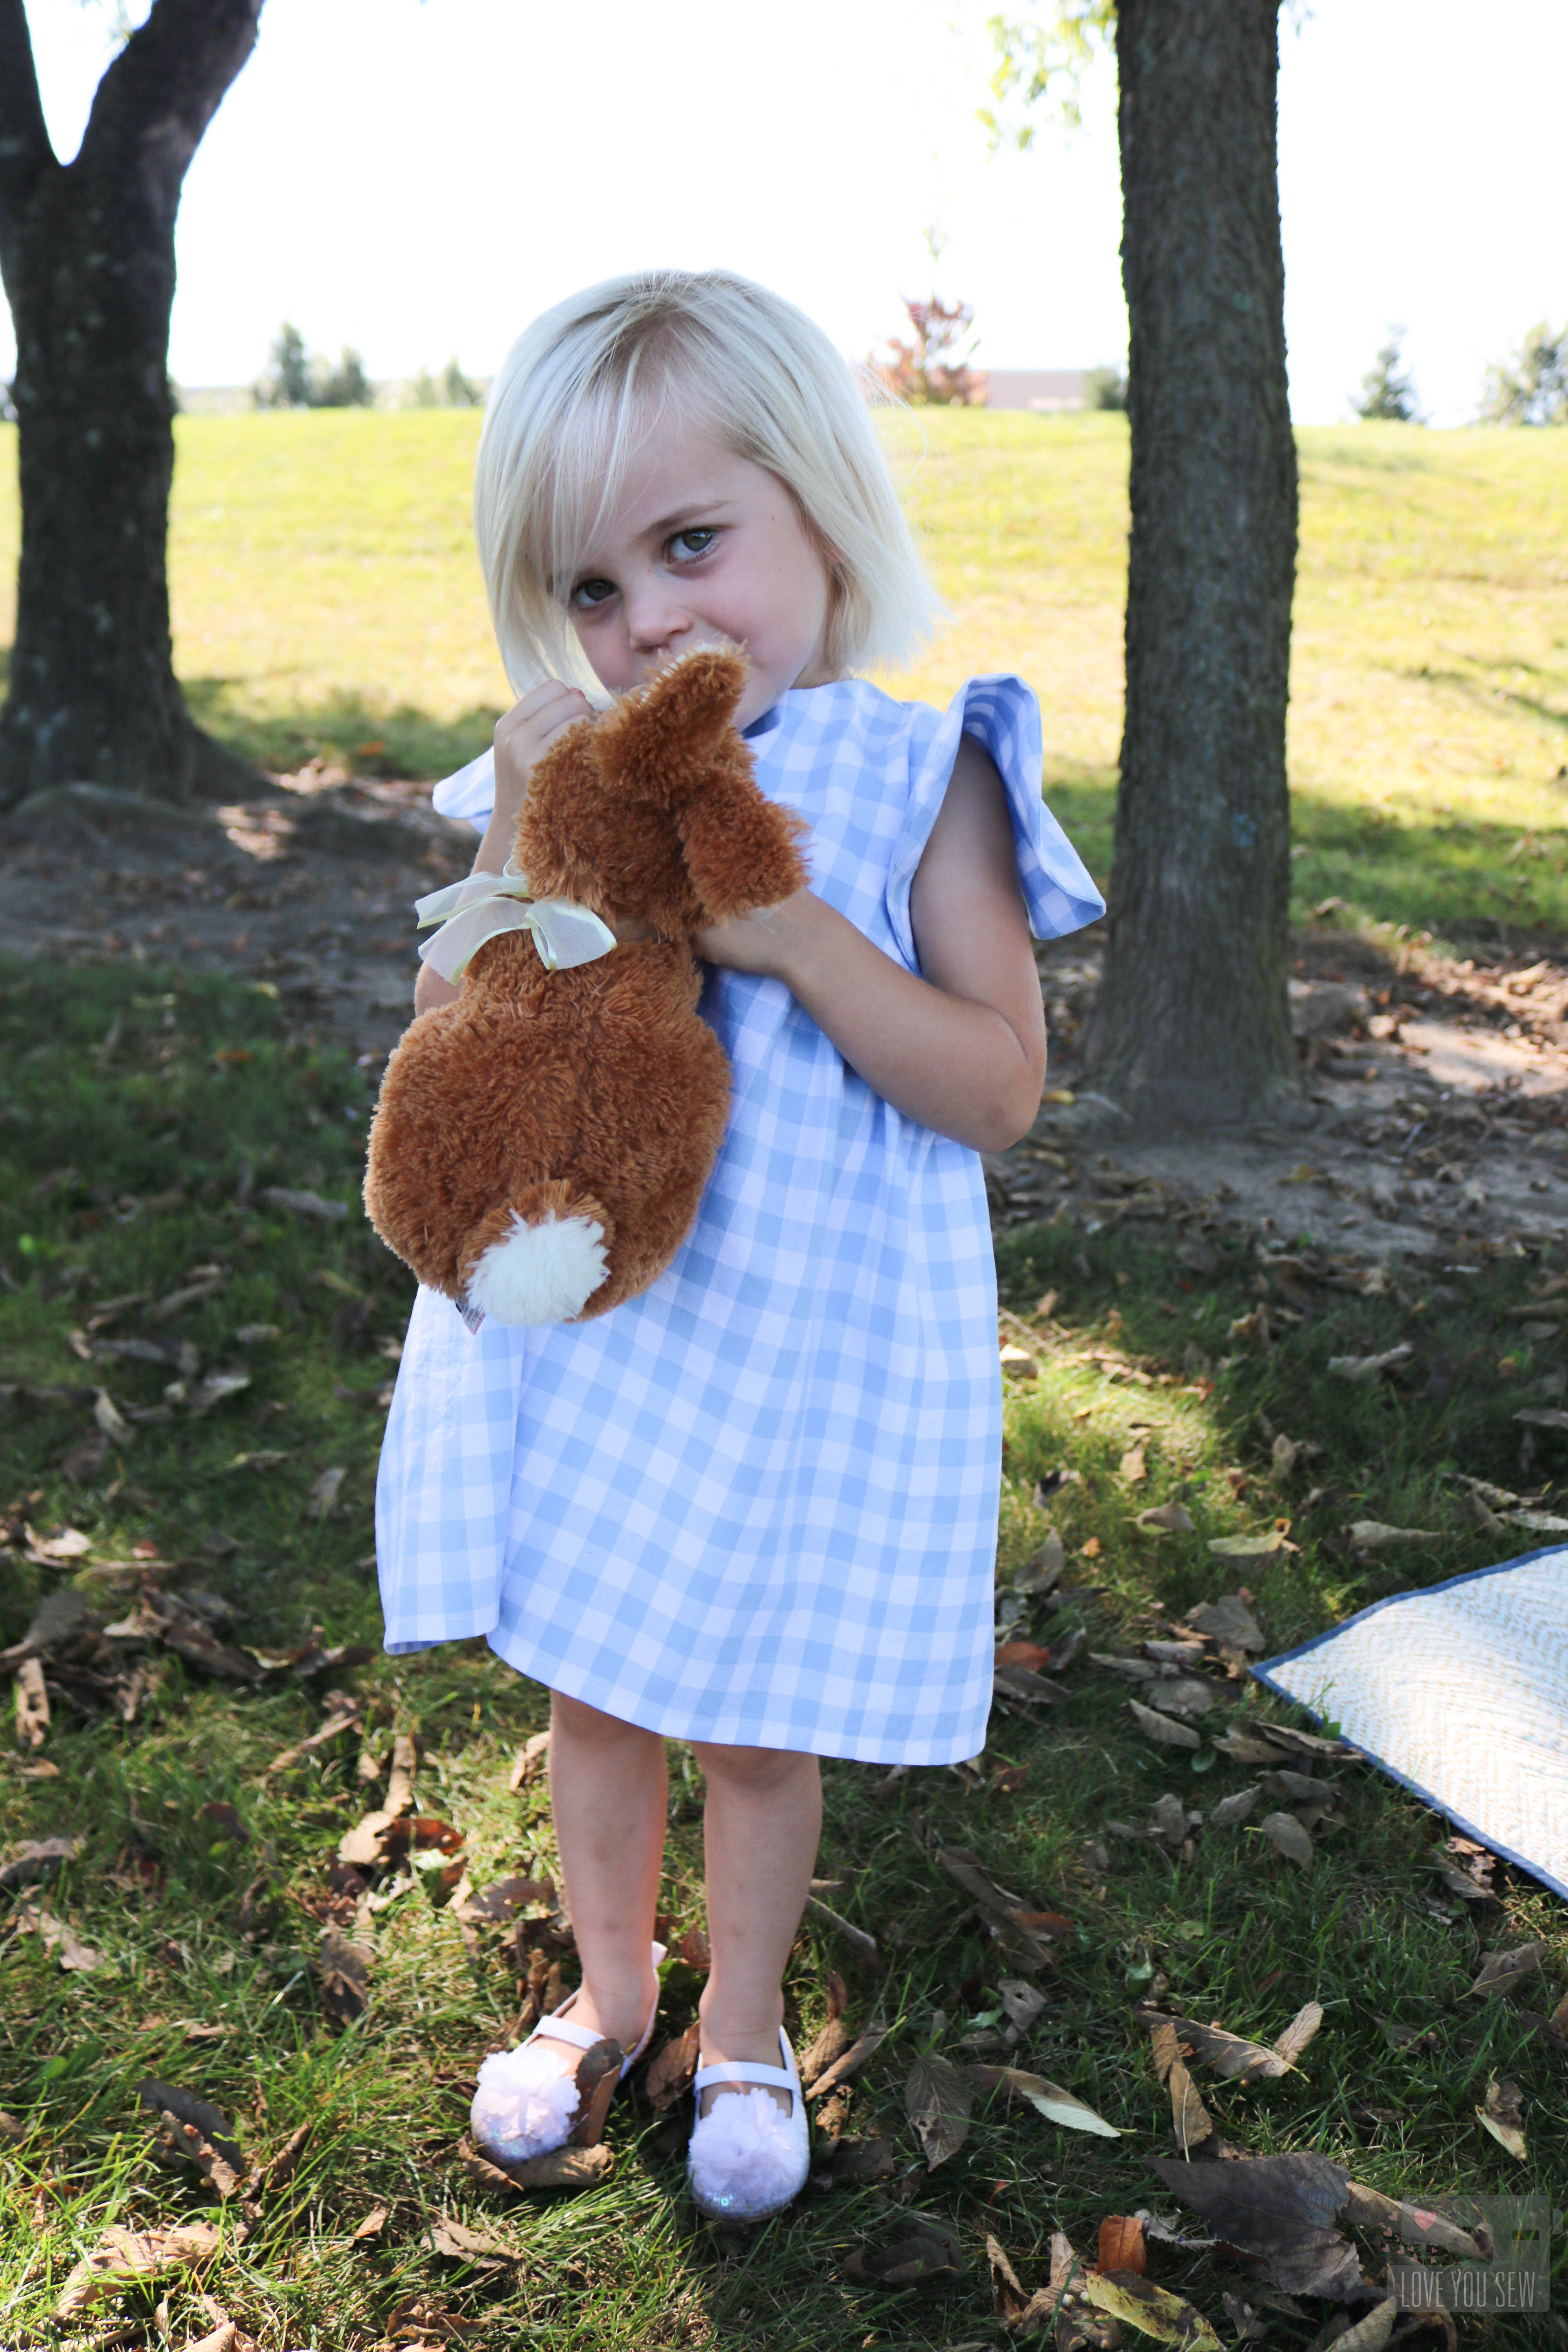
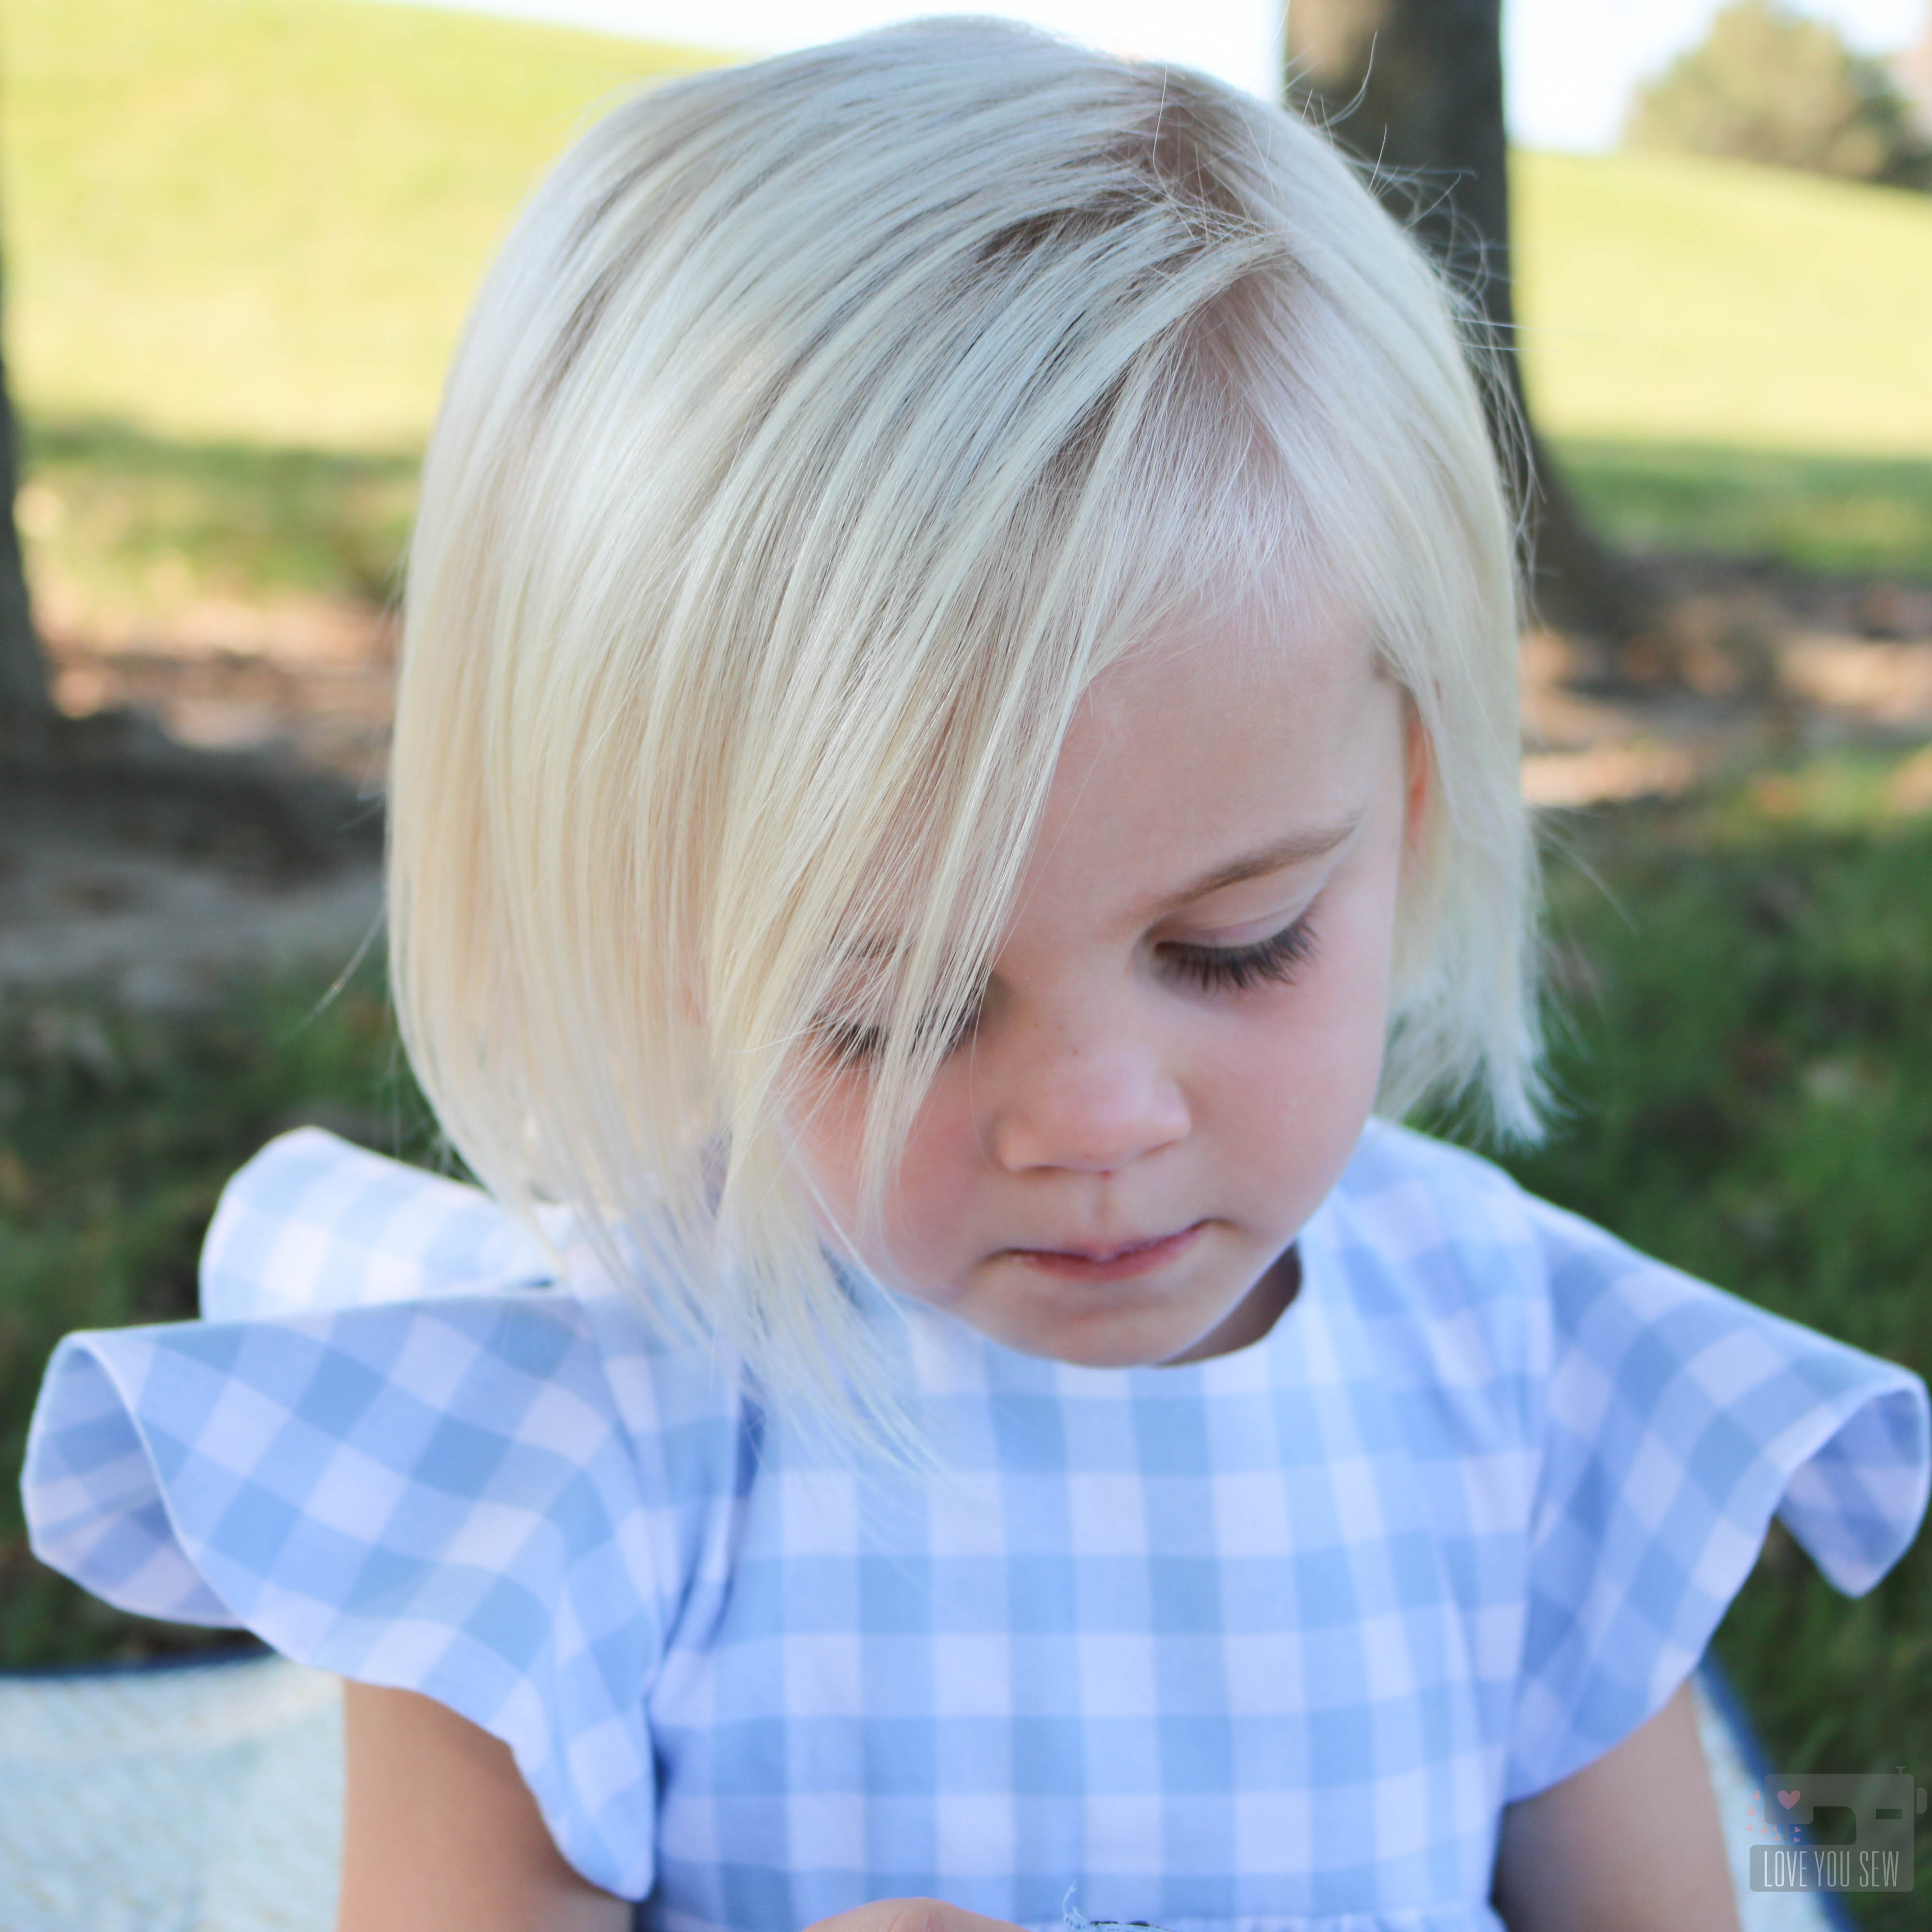
I think my model agrees! She would not take off this dress after our photo shoot.  Can you blame her at all?  I’m thinking I need some gingham love in my wardrobe soon…

The sizing is spot on with this pattern.  My model is a 3T for length, but is still pretty slim, so the 2T fit her well…and of course, I pre-washed all the fabric so there is no surprise shrinkage.  The dress hits her at just the right spot on the knees and is the perfect for some playtime!


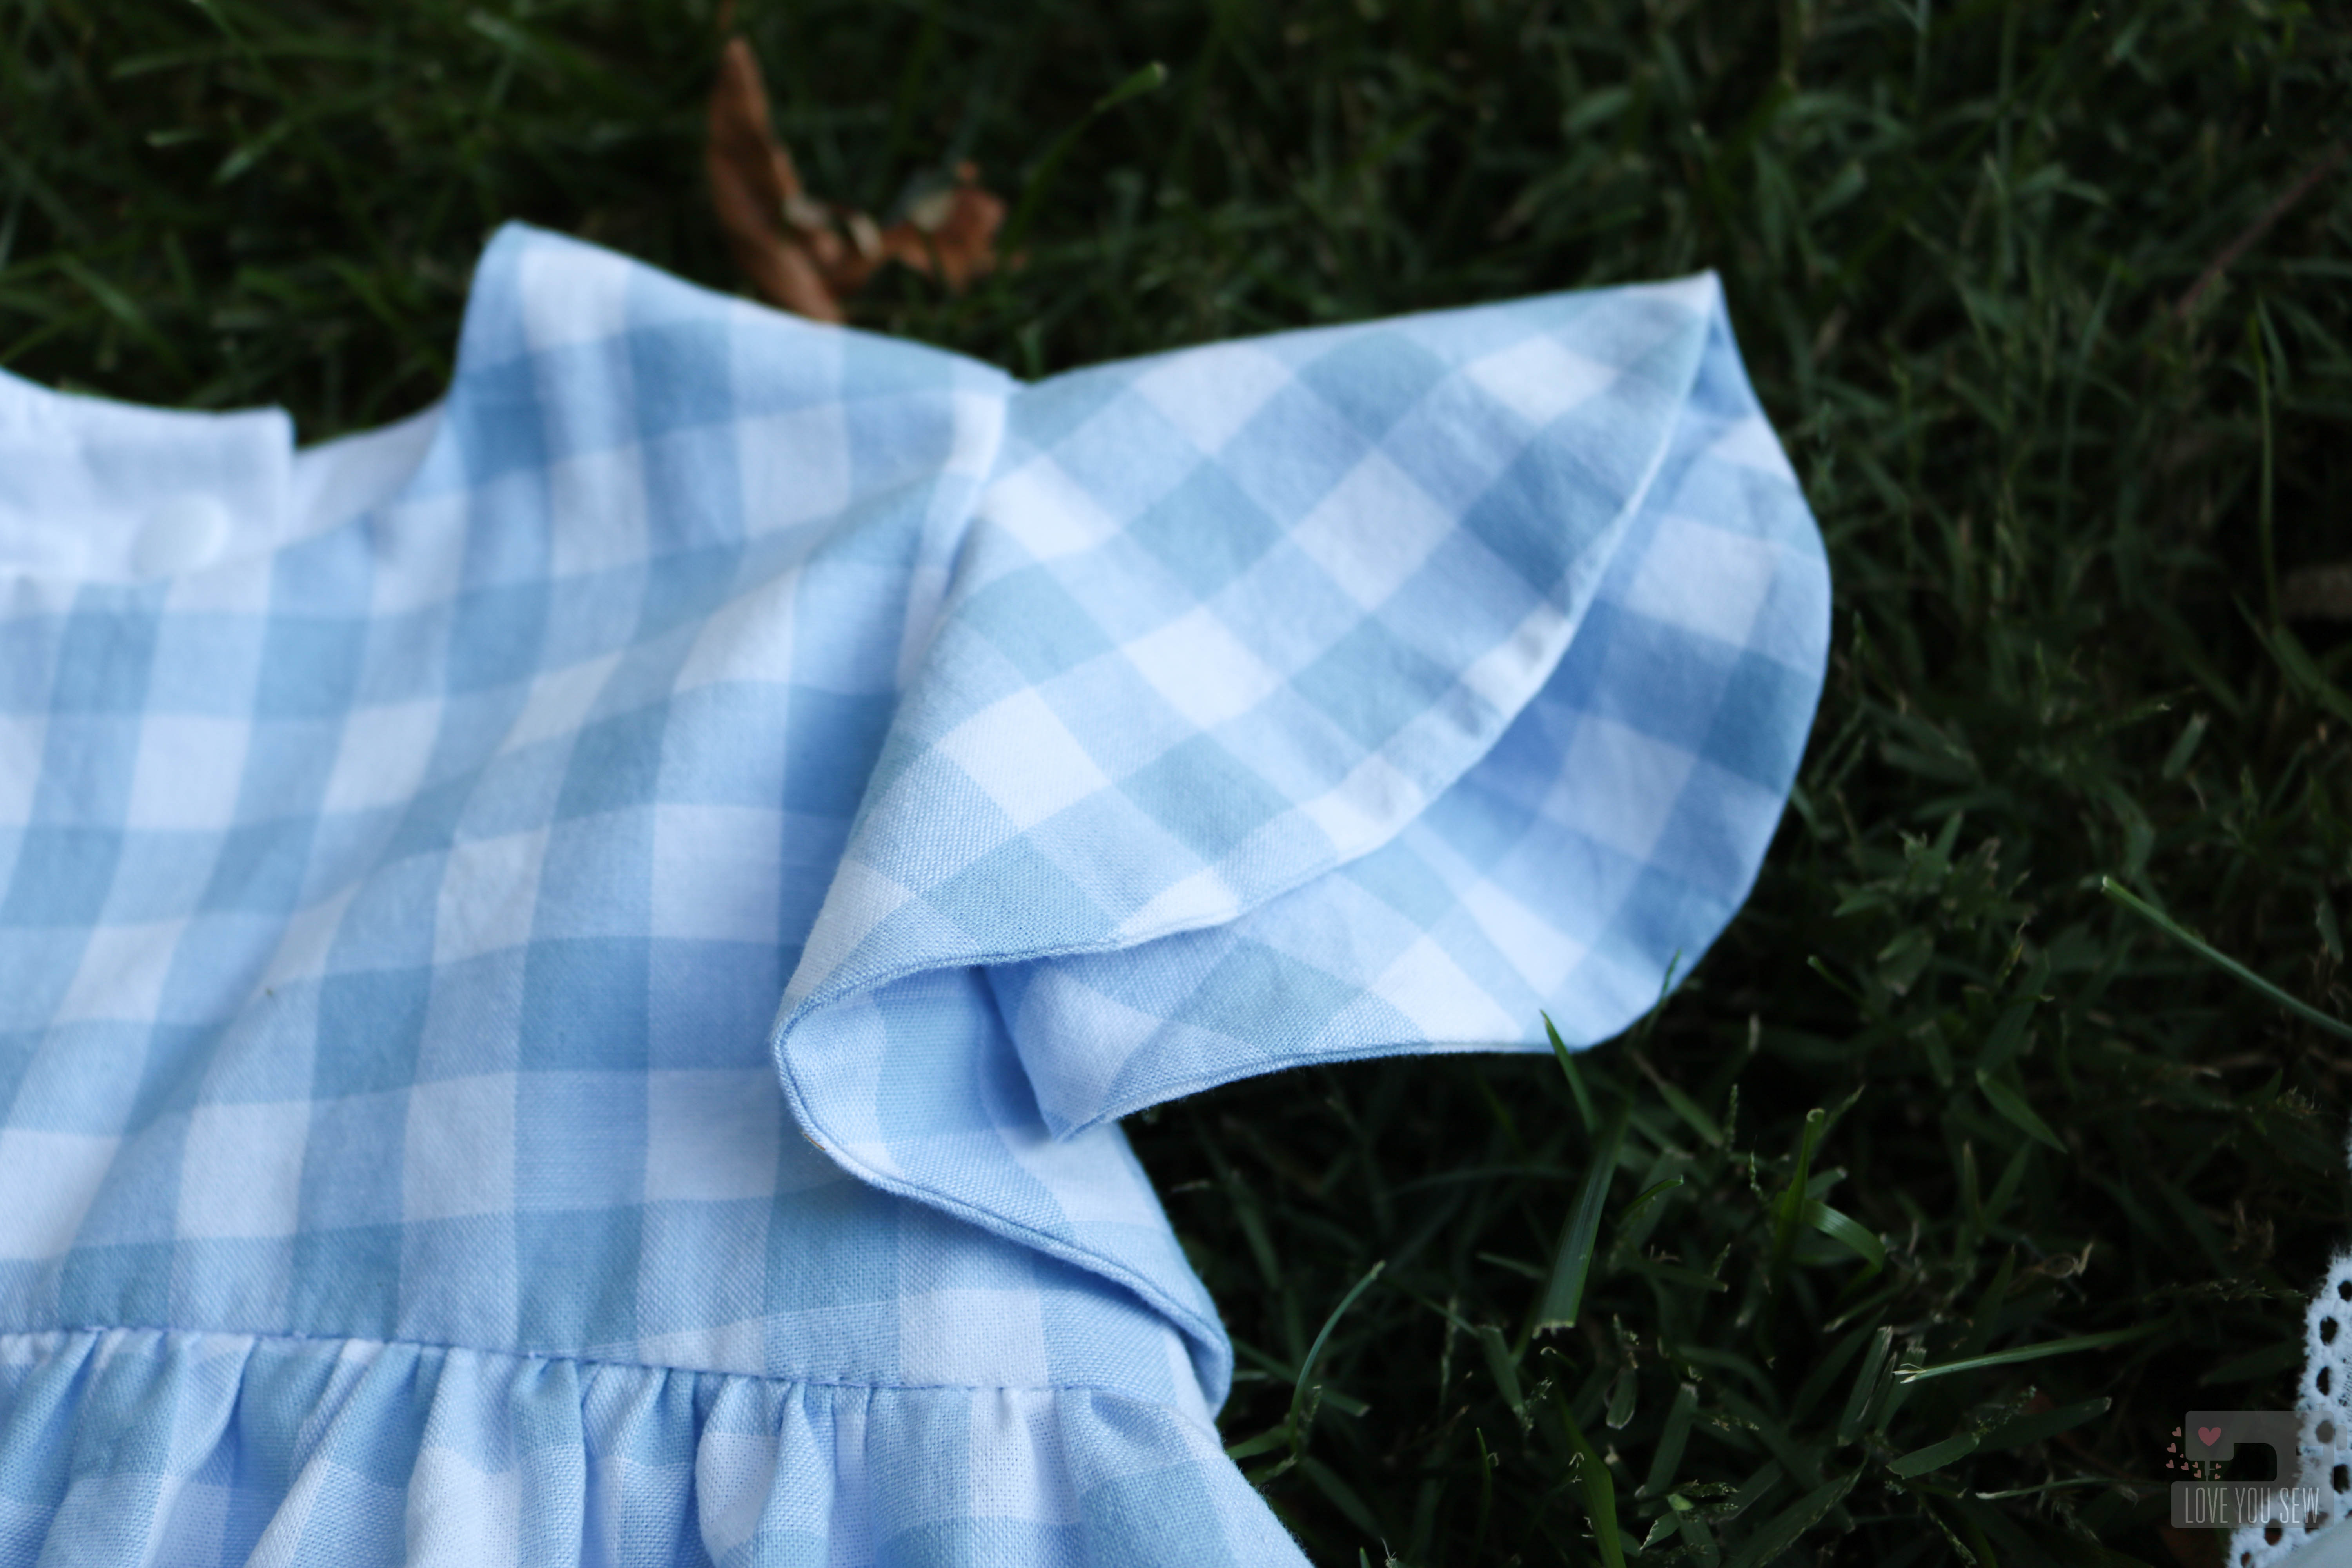
I like the lift on the sleeves with a woven fabric.  It adds a little more drama 🙂  But if you used something lighter, like a double-gauze, it would be more draped.

I really love the versatility of this pattern and can’t wait to make a few more!  What combo would you make?

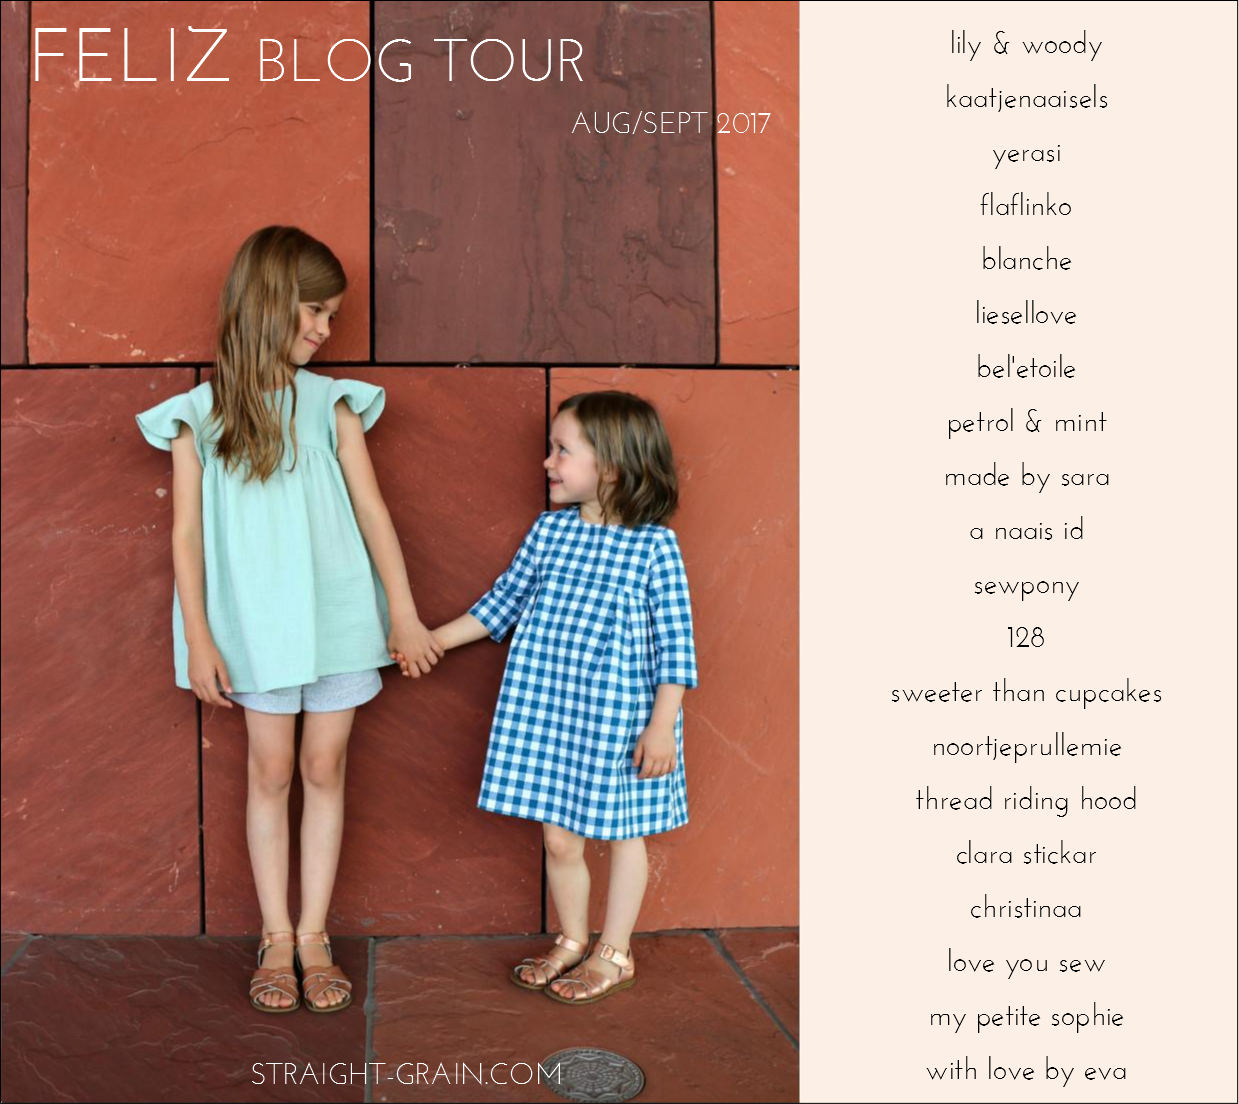
If you need even more Feliz eye-candy, please check out #felizpattern on social media and visit all the bloggers part of the blog tour:

Happy Sewing Friends!
Cristy

Hawthorne Threads Roam Fabric Blog Hop

blog hopWhen Hawthorne Threads asked me to participate in this blog hop for Roam, I just about jumped out of my seat!  I had the pleasure of working with some of their digitally printed fabric for my niece’s nursery bedding so I already knew just how lovely this fabric would be.

Roam is a soft, dreamy rustic collection in both a Dawn and Dusk palette.  I tend to lean toward blues when I select fabric, but for some reason I couldn’t resist playing with the Dusk fabrics.  There is something about the earthly yellows, purples and pinks that is just so incredibly soothing…

I Love You Sew-4

I selected The Plains in Sage and Prairie Flowers in Dusk to make the Desert Rose Dress by Caila Made.  This is such a cute dress pattern for toddlers and the Roam fabric was just a perfect playful fit for the design.

I Love You Sew-1

With the contrasting top and skirt, I couldn’t help but add a little extra pink pom-pom action….because…who can resist, right?!?  If you have not worked with pom-pom trim before, I suggest basting it in before you attached the top to the skirt.  It makes it MUCH easier to attach and stay even as you sew!

I Love You Sew-2Along with the dress, I made a Side-Snap Infinity Scarf.  The Buffalo Plaid in Honey is such a gorgeous coordinate.  I love how it picks up the yellow from the skirt and adds a hip stylish look for a little one.  The best part is the side snap placket which allows you to wrap the scarf without having to slip it over those big heads 😉

I Love You Sew-3You can also play with how you attach the scarf to change the look.  Snap it right in the middle and fold it over allows the scarf to work as a caplet.  If you use all the snaps, the scarf can stand up better to ensure full neck coverage on chilly days.  If you leave the snaps undone, you get a cute little shawl as shown.  Now who doesn’t love a multi-tasking accessory?!?

SideSnapScarfTutorial

To make the Side-Snap Infinity Scarf:

  • Use 1/3 – 1/2 yards of 42-44″ wide main fabric (depending on how much volume you would like.)
  • Fold the fabric with right sides together and sew down the length creating a long tube.
  • Pull the fabric so right sides are facing out and press
  • For the placket – {A} Take the accent fabric, cut (2) 3″ x 10″ strips (if using 1/2 yd for main fabric) OR cut (2) 3″ x 7″ strips (if using 1/3 yd for main fabric)
  • {B} On the short sides of the accent strips, fold a 1/2″ hem and press on both sides
  • {C} Fold in half length-wise and press.  {D} Open and fold lengthwise again but match the sides to the center line.  Press and make sure you keep a nice rectangle shape with sharp corners.
  • {E} Attach the placket by sewing in the the first crease of the placket closest to the end of the scarf tube.
  • {F} Flip the scarf over and sandwich the open end of the main fabric tube in-between the opening of the placket.  Top-stitch all around with a 1/8″ seam allowance {H.}  Repeat for the other side of the scarf. TIP: Use some washable fabric glue to keep the placket in place as you top-stitch
  • {I} Add plastic snaps such as these KAM ones by marking 5 sets approximately 2 1/4″ apart (for 1/2 yd scarf.) *Yes, I know that one left snap was incorrectly attached, but I didn’t realize it until all the pictures were already taken. It’s been fixed since 😉

Dusk Giveaway Bundle Image

***Giveaway is closed***  Now who’s ready for the giveaway??? Comment with how you would like to use this Dusk color-way for a chance to win the entire fat quarter bundle!  This is open internationally and a winner will be announced once the blog hop is complete.  Make sure to visit everyone on the hop for beautiful ideas and additional chances to win this gorgeous fabric!!!

The complete Hawthorne Threads Roam Blog Hop Schedule:
Tuesday, December 1st – Fabric Mutt
Wednesday, December 2nd – Coffee + Thread
Thursday, December 3rd – Love You Sew
Friday, December 4th – Olivia Jane Handcrafted
Saturday, December 5th – Hawthorne Threads


12/15/2015 Update – Randomly Selected Winner is  Veronique Oudard!  Congratulations!!!


Hugs & Stitches,

Cristy


***The blog hop was sponsored and fabric was provided by Hawthorne Threads.  All opinions  are my own and have not been influenced by outside parties.

Padded Laptop Tutorial by Love You Sew

Padded Laptop Case Tutorial

LaptopCaseTitle

Today, I’m going to share my own pattern for a padded laptop case.  Every time I’ve had to travel, I’ve thought of how much I needed a cover for my MacBook.  But with our recent trip to the lake, I actually made one…the night before we left…in true procrastinator style.  How many times have you done something like that???

*Please read through all steps before starting.  Cutting dimensions are based on a 13″ Apple Macbook Pro (approx. 12.75″L x 9″W x  0.75″H)

Supplies:

  • 1/2 yd of Exterior Fabric
  • 1/2 yd of Lining Fabric
  • 1/2 yd of Pellon Flex-Foam or Annie’s Soft & Stable
  • 1/4 yd of Mid to Heavyweight Interfacing
  • 1 set of Magnetic Snaps
  • 3 sets of KAM Snaps
  • Coordinating Thread
  • Rotary Cutter and Cutting Board
  • Fabric Scissors

01LaptopFabricPull

If you follow me on IG, I made my personal one with Alison Glass‘s Geometry in Sunset (as shown) but with Mercury in blue as the pocket and the Historical Fiction in Gold print for the lining.  Luckily, my niece saw what I made and wanted one for her very own.  How did she know I also wanted to write a tutorial? She selected Geometry and I had a bunch of Historical Fiction in Strawberry in my stash to match. I love this vibrant combination.


Cutting Requirements:

02LaptopPatternCut*Please note all measurements are for a 13″ Apple Macbook Pro.

  • Cut from Exterior Fabric (L x W):
    • Front – 15.75″ x 10.75″
    • Back – 15.75″ x 16.25″
    • Pocket – 17.75″ x 18.75″
  • Lining – 15.75″ x 26.5″
  • Interfacing  – 17.25″ x 9″
  • Flex-Foam 15.25″ x 26″ (not pictured)

Instructions:

03InterfacingonPocket

Lay Pocket right-side facing down (17.75″ at the top) and fuse the interfacing to the bottom half according to the manufacturer’s instructions.  There should be a 1/4″ seam allowance all around the interfacing.


04PocketCloseup

Fold the pocket in half, wrong sides together, so the interfacing is sandwiched in between the Pocket fabric.  Press with iron and sew a 1/2″ seam along the fold to keep all pieces in place. Set aside.


05NotchFlap1

Take the Exterior Back fabric and hold it with the 15.75″ side along the top.  Measure 3″ in from both of the top corners and mark.


07NotchFlap3

Connect the two marks and cut off each corner.


09NotchFlap5

Repeat for the lining and Flex-Foam.


13Basting

Center the Lining (wrong side) on top of Flex-Foam and baste the two layers together.  Set aside.  TIP: Baste from the center out toward the edges. This helps pull the lining taut.


16PocketBasting

Center the pocket on the right-side of the Exterior Back.  Take the over-hang fabric and make a pleat approximately 1″ in (so it doesn’t get sewn into the lining later on.) [Edited to add: Repeat on other side.] Baste the pocket onto the Exterior Back with a 1/4″ seam allowance.


17AddFront
Sew the Exterior Front to the Exterior Back/Pocket right sides together on the short side creating the entire exterior cover.


18ExteriorComplete

Open and press seam open.  Exterior should look like picture above.


Mark Snap

From the top of the Lining, fold the sides together to find the center.  Mark down 1.25″ and attach the magnetic snap according to the manufacturer’s instructions.


19AttachLining


On the bottom of the Completed Exterior, find the center.  Mark down 2.5″ from that point to attach the other half of the snap set.  TIP: Fuse a piece of scrap interfacing on the wrong side of the fabric where you will attach the snap.  This helps provide a layer of durability.

With right sides together, sew the Exterior to the Lining with 3/8″ seam allowance leaving approximately 5″ opening to turn.  Notch the corners. Remove basting threads.

Turn the Laptop cover out and push out the corners.  Press well.


24Complete

Sew a square around the magnetic snaps with about 1/4″ clearance all around.  This helps secure the snap into place.

Sew a 1/4″ seam along the bottom edge of the laptop case.

Fold the front of the cover up along the sewn seam and clip into place.  Starting from one bottom corner, sew all around the case with 1/8″ seam allowance to create the main compartment for the laptop.

20 SideSnap

Follow the pleat on the pocket and finger press the fabric to mark where you will attach the KAM snaps.  The female and male ends will be right next to each other.


21SideSnapTogether

This will secure the pleat but gives the pocket more room to hold your cords and other goodies.  Repeat on the other pleat.

23BackwSnaps


Find the center of the pocket and add one more snap about 1/2″ down from the opening.  Find where the snap meets the body of the case, mark and add the other snap.  The pocket opening should lie completely flat when all snaps are fastened.

22CompletewLaptop

And there you have it – a beautiful cushioned case for your baby to travel!

Please let me know if you have any questions (I’m new to pattern writing) and please tag me on Instagram if you make one. #loveyousewlaptopcase  #loveyousewpatterns


Happy Sewing!

Cristy


This post may contain affiliate links for which I do receive a small compensation…It helps me keep this site running 🙂

FREE Walking Geese Needlebook Tutorial

Love You Sew Needlebook Tutorial

I’m new to the world of Swaps.  I’ve seen and followed quite a few through Instagram and finally signed up for a few.  The #IGneedlebookSwap was my second sign-up, but my first which has been sent and received.  After looking at a few online, I wanted to design my own and share it for FREE with you!!!  If you are unfamiliar, these swaps have a theme (in this case, a needle book) and you have to post progress shots on your IG account.  They are usually secret and you have great fun finding out…aka “stalking” your partner’s tastes and preferences.    I like it because you get work on something new and it’s challenging to have some parameters set….including a deadline!

My partner asked for a Needlebook with a pocket to hold a small set of scissors, so I went about designing one myself!  How can I screw up the math on something that finishes at 4.5″ x 7″ (open) and 4.5″ x 3.5″ (closed), right???  My partner also specified using navy, coral and aqua…so I incorporated a design to showcase all of those colors.

Needlebook Sketch

Needlebook Sketch

==========

Material Requirements:

  • Exterior Fabric (shown in Robert Kaufman IndigoChambray)
    • 1.5″ x 5″ rectangles [cut 2]
    • 2″ x 5″ rectangle [cut 1]
    • 1.25 x 2″ rectangle [cut 4]
    • Goosing Borders [sew 2]
  • Interior Fabric (shown in Cotton + SteelHatbox – Navy Desert Flower)
    • 4″ x 5″ [cut 2]
    • 4″ x 7″ [cut 1 for pocket A]
    • 4″ x 4″ [cut 1 for pocket B]
    • 2″ x 3.75″ [cut 1 for snap closure tab]
  • Accent Fabric 1 (shown in Cotton + Steel Dottie in Bluebird)
    • 2.5″ x 4″ [cut 1 for pocket A]
  • Accent Fabric 2 (shown in Cotton + SteelXOXO in Coral)
    • 2.5″ x 4″ [cut 1 for pocket B]
    • 2.75″ x 2.75″ [cut 1 for needle-landing]
  • Felt for needle-landing
    • 3″ x 3″ [cut 1]
  • Batting
    • 5″ x 8″ [cut 1]
  • KAM Snaps [2 sets]
  • 2″ Grosgrain Ribbon
  • 3/4″ Magnet

Use 1/4″ seam allowance unless noted.

==========

FPP Geese Close-up

FPP Geese Close-up

For the outside of the book, I used Jeli Quilts’s (surprise!) Goosing Borders and shrank the design down to 50%.  The geese are Cotton + Steel basics in Bluebird and Coral.  For the background and borders of the exterior, I used Robert Kaufman’s Chambray in Indigo. I love chambray for a clean sophisticated look and the added texture.  It’s definitely one of my go-to fabrics and always keep some in my stash.

For a nice video on Foundation Paper Piecing (FPP) click here.  I watched this to help me wrap my head around the fabric being sewn as a mirror image.  This technique takes some practice but you will quickly become addicted, like me 🙂 The finished Geese blocks should measure 2″ x 3.5″.  Attach the 1.25″ x 2″ rectangles to the short-sides of each Geese Block.  Then attach the 1.5″ x 5″ blocks to one side of each block.  Use the 2.5″ x 5′ rectangle to attach the Geese blocks together.  Quilt the exterior to the batting and trim 5″ x 7.5″.

Interior left with Pockets

Interior left with Pockets

On the inside, I chose another Cotton + Steel fabric.  This time, a navy from Hatbox by Alexia Abegg.  I decided to make two pockets – a larger one for scissors and/or a spool of thread or pen.  The smaller pocket could be used to hold floss, clips, or a spare packet of needles.  The binding helps to grip the pockets and adds some visual appeal.

Iron both pockets in half length-wise so [A] is 3.5″ x 4″ and [B} is 2″ x 2″.  Take each piece of binding and machine-bind down just like you would a quilt.  Lay Pocket [B] on top of Pocket [A] on top of 4″ x 5″ interior fabric, matching up corners at the bottom. Pin all in place.

Right above the Pocket [A], I cut a 2″ piece of grosgrain ribbon, sealed the ends, and made a loop to hold the scissor handles in place.  I am a big fan of KAM Snaps and used them with the ribbon as well as with the closure of the entire Needle-book.

Preparing Needle-landing with built-in Needle-minder

Preparing Needle-landing with built-in Needle-minder

On the right side, there needed to be a needle landing (because it wouldn’t be a needle book, otherwise, right?!?) I just used craft felt and my Gingher serrated scissors to cut out the rectangle.  But I wanted some more color, so I added the same Coral fabric on top as a nice accent.  I sewed 3-sides up with a 1/8″ seam along the Coral and slipped in a small 3/4″ magnet for a built-in needle-minder!  Then I sewed up the last side making sure the magnet was fully enclosed. With right-sides together, sew the two interior panels together to create a center seam.

Needlebook Exterior

Needlebook Exterior

To create a tab, press the fabric lengthwise in half then open.  Press each long-side to match the center fold then fold in half, matching up the short-ends.  Top stitch all around to secure.  Attach KAM Snap at this point. Pin the tab half-way on the right interior panel facing in.

On the exterior panel, mark where the tab will meet and attach your other KAM Snap.  With right sides together, sew the Interior and Exterior  panels to each other leaving a 3” opening to turn. Snip corners, turn the Needlebook right-side out and press.  Top-stitch 1/8″ all around the book to close up the opening.  “Stitch in the ditch” along the center inside seam to allow the book to easily fold.

Completed Interior

Completed Interior

And….that’s it 🙂  This was a nice easy sew that you could use as a “Swap Extra”  or a stocking stuffer for a good sewing friend.  If you are not a snap person or do not have any on-hand, you can alternatively use a button and elastic cord closure or long pieces of ribbon to tie it all together.  If you looked closely at my sketch, I was initially going to add some elastic loops under the landing, but decided to omit them to keep this simple…but it’s a great idea if you want to add an additional feature.

Since I’m not a seasoned tutorial author (yet!), please let me know if you have any questions. Don’t forget to share pictures of any completed projects as well!

I’m linked up to Late Night Quilters Tips and Tutorials Tuesday.  Please visit the page to see some more great sewing and blog related pointers!

#WalkingGeeseNeedlebook #IGNeedlebookSwap #LoveYouSew


Hug and Stitches,

Cristy

Love You Sew