Review: Sirocco Jumpsuit in Luxe Green Scuba

This post was originally written for the Minerva Crafts blog in November, 2019. Additional edits have been made after real-life wear of the garment.

Intro 

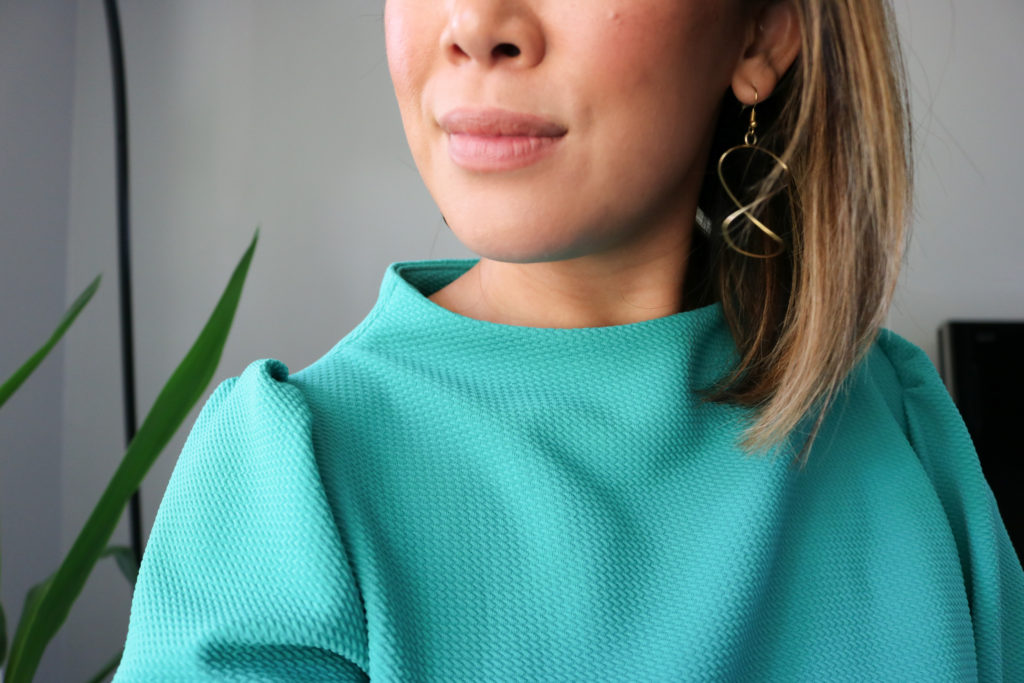
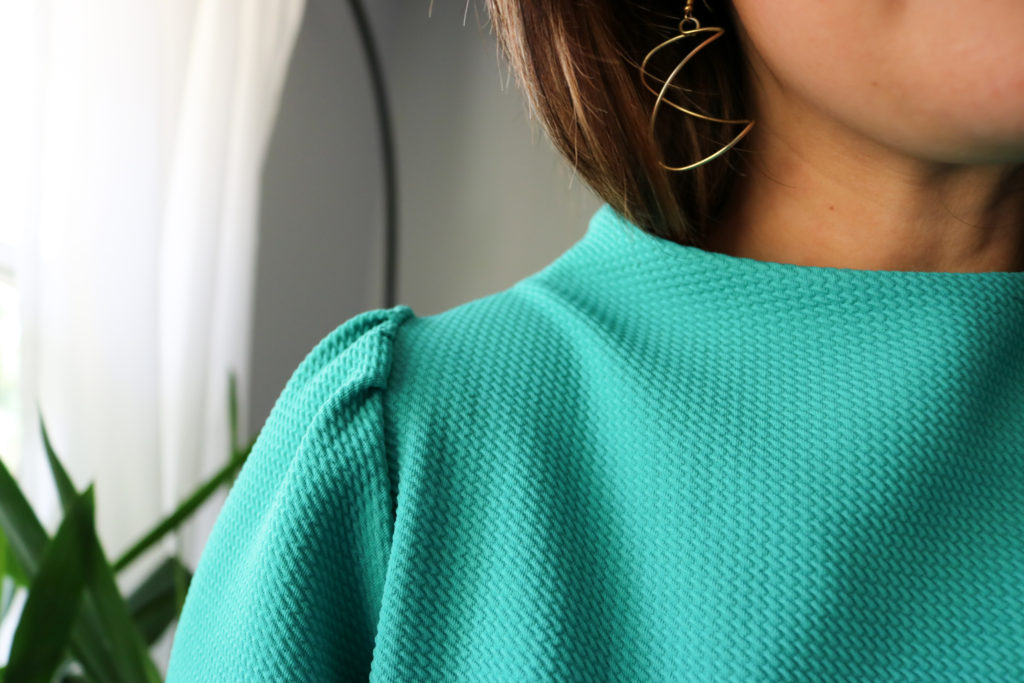
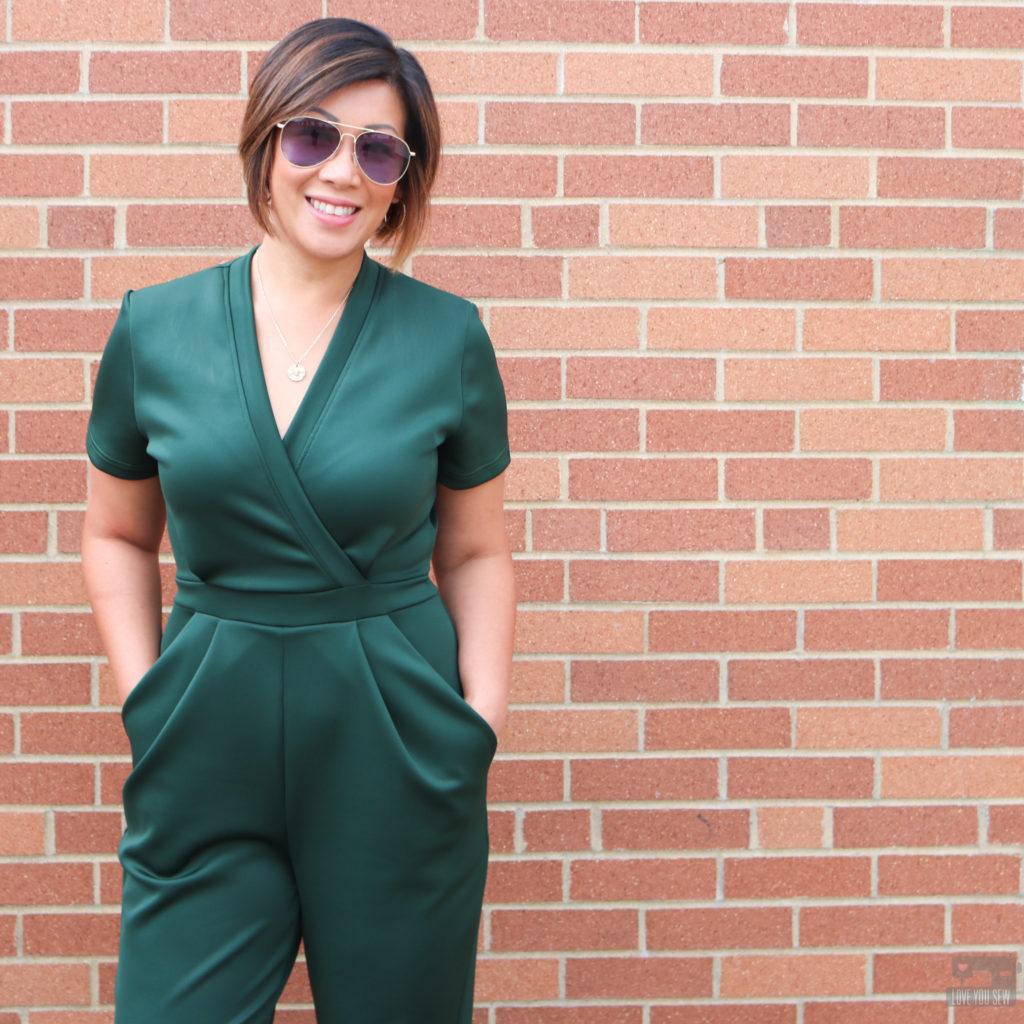
Hi, this is Cristy Stuhldreher from Love You Sew with my very first #MinervaMake as a blog contributor!!!  I was SO excited to be invited to be part of such an extensive team of bloggers here and equally excited to play with so much beautiful fabric.  My first find was this gorgeous Lady McElroy Luxury Plain Scuba Jersey Knit Fabric in Bottle Green.  With autumn (my favorite season!) quickly coming to the States, I knew I would need to get ahead and make some transitional garments with the switch of temperatures that are bound to come.  So, after I saw this scuba fabric I immediately thought of the Deer and Doe Sirocco Jumpsuit (like many other contributors already have!)

Fabric

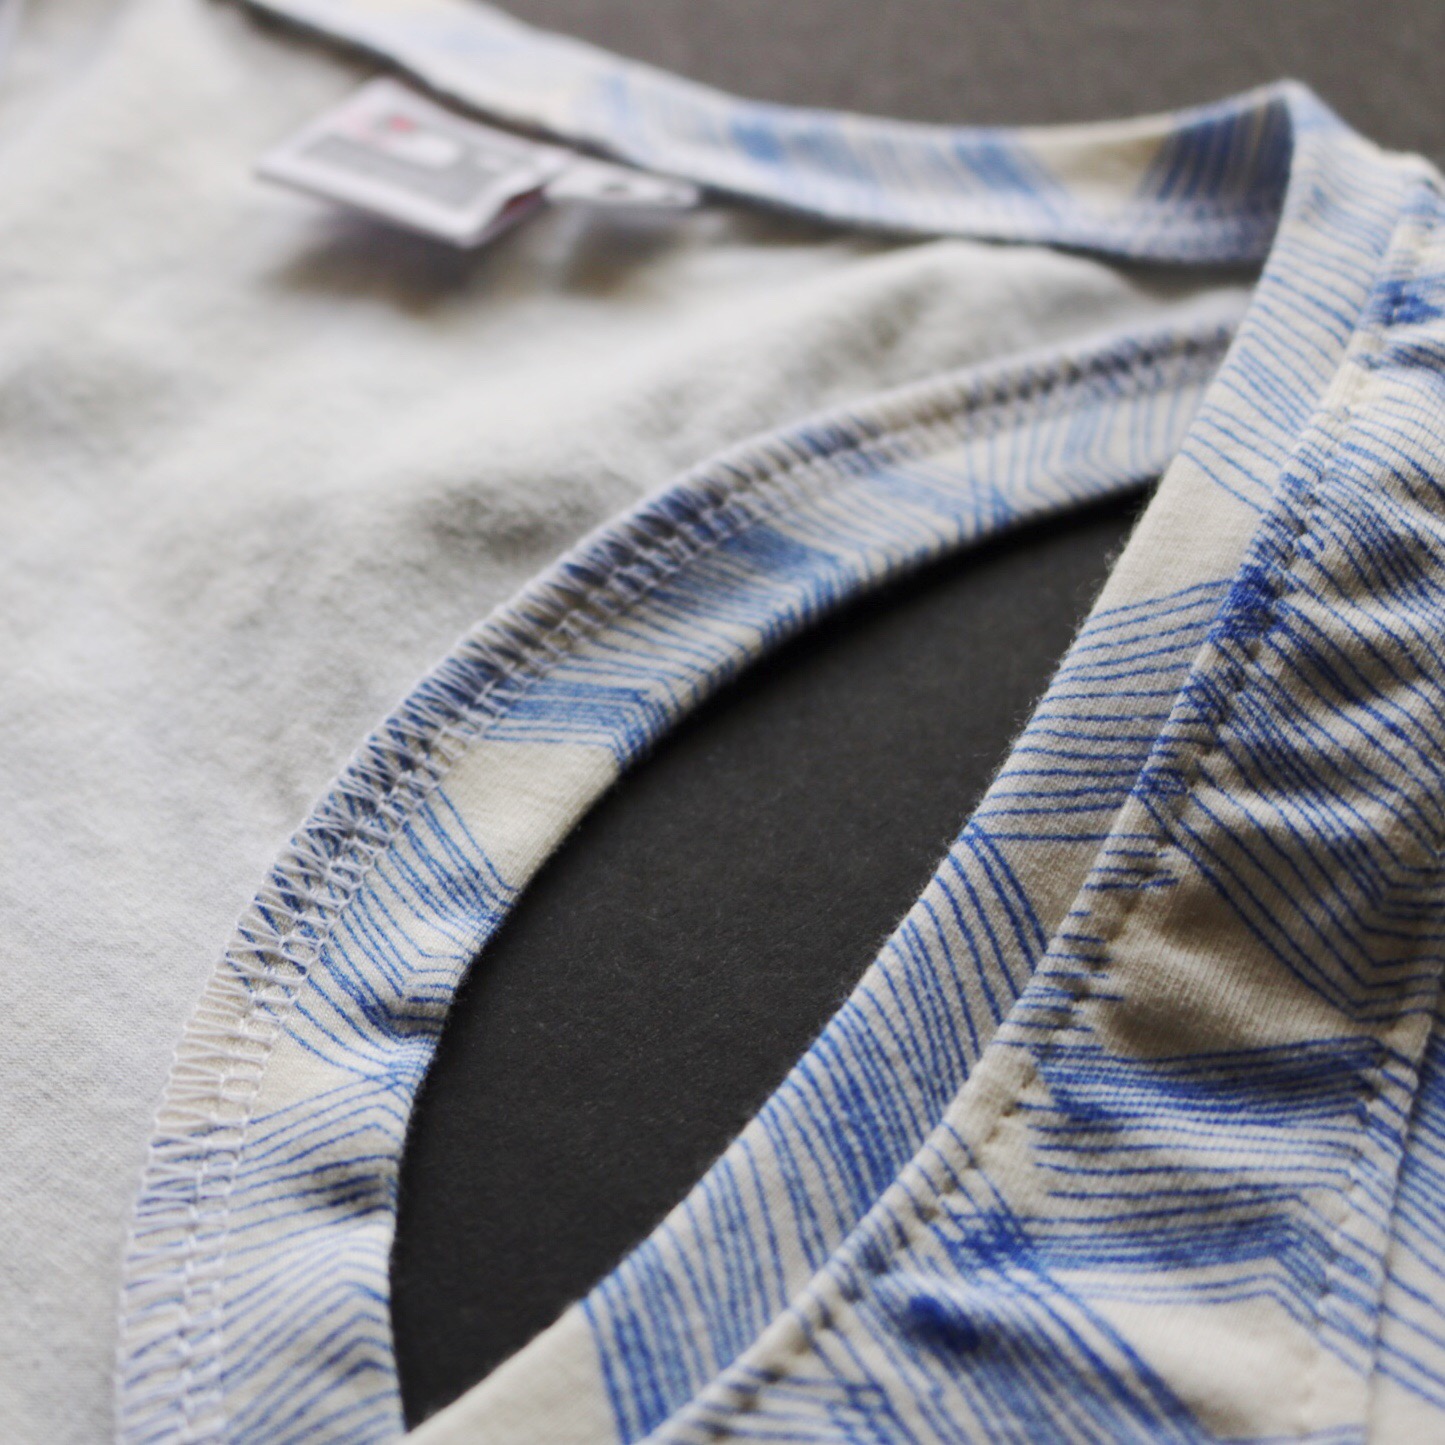
This Lady McElroy Luxury Plain Scuba Jersey Knit Fabric was such a great find!  I’m a big fan of Ponte de Roma fabrics and knew I would love Scuba just the same since they are both heavy double-knits.  They feel and act very similarly, but are made of different fibers.  Scuba is generally poly and elastane whereas Ponte is generally viscose and elastane.  This soft and smooth Scuba Jersey did not disappoint with its great stretch and nice body which is perfect for a jumpsuit when you don’t want every bodily imperfection to show through.  It is also works SO well for a knit jumpsuit with amazing stretch and recovery.  The last thing I would want after all of this hard work would be a saggy stretched out butt!
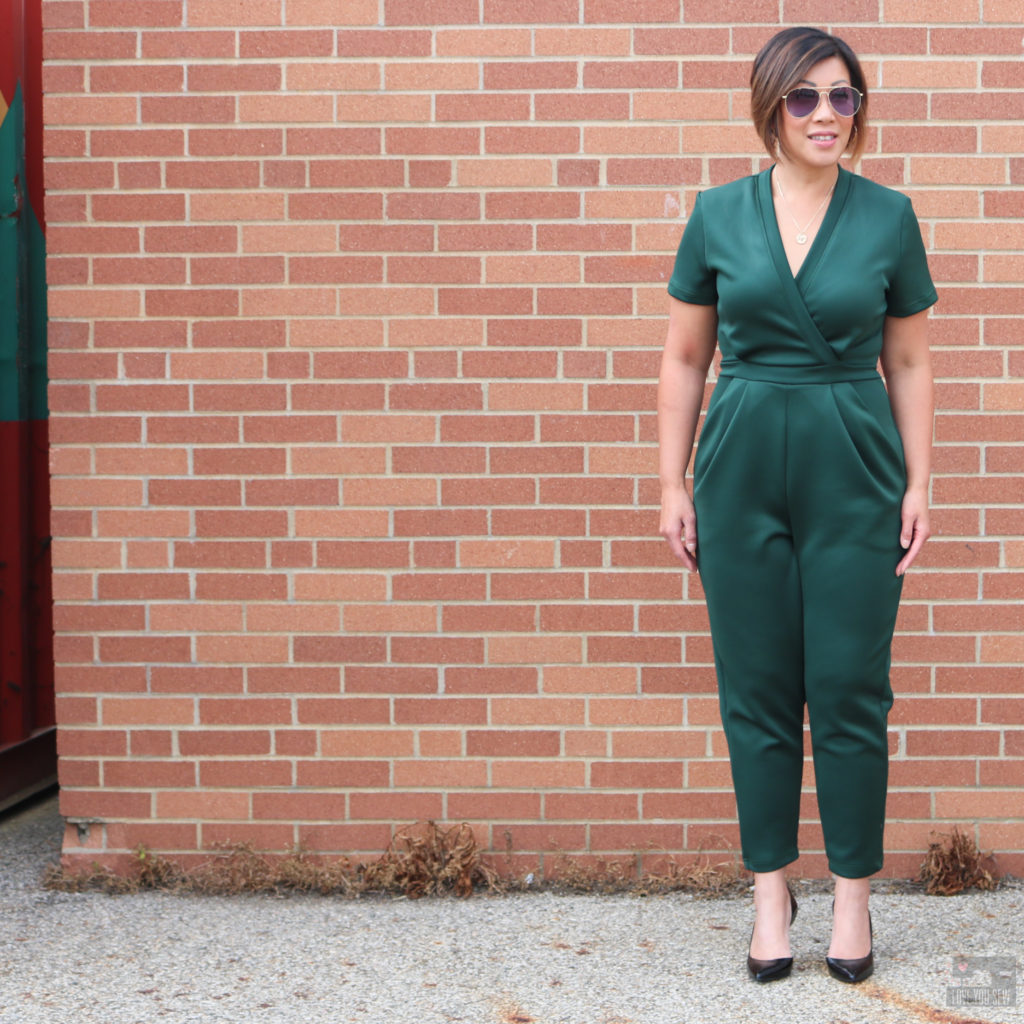
It’s always hard to tell how color will come out in person versus on a computer, so I was a bit nervous to see how the Bottle Green would be.  It looked slightly more muted, like a deeper sage green on my screen.  But I was actually delighted  to see that the fabric was more of a deep rich gem tone – a solid “Hunter” green, in my opinion.  With my olive skin and dark hair, I love a gem tone- especially for the colder months ahead!  After a few washes, the color has stayed true to the first day it arrived on my doorstep – love that!
With this fabric being a double-knit, I would recommend using a ball-point needle and your stretchiest stitch found on your machine (zig-zag, triple-zig-zag, lightning bolt, etc.)  I used a combination of my overlocker and coverstitch to allow my jumpsuit the greatest amount of stretch to fit larger hips.

Pattern

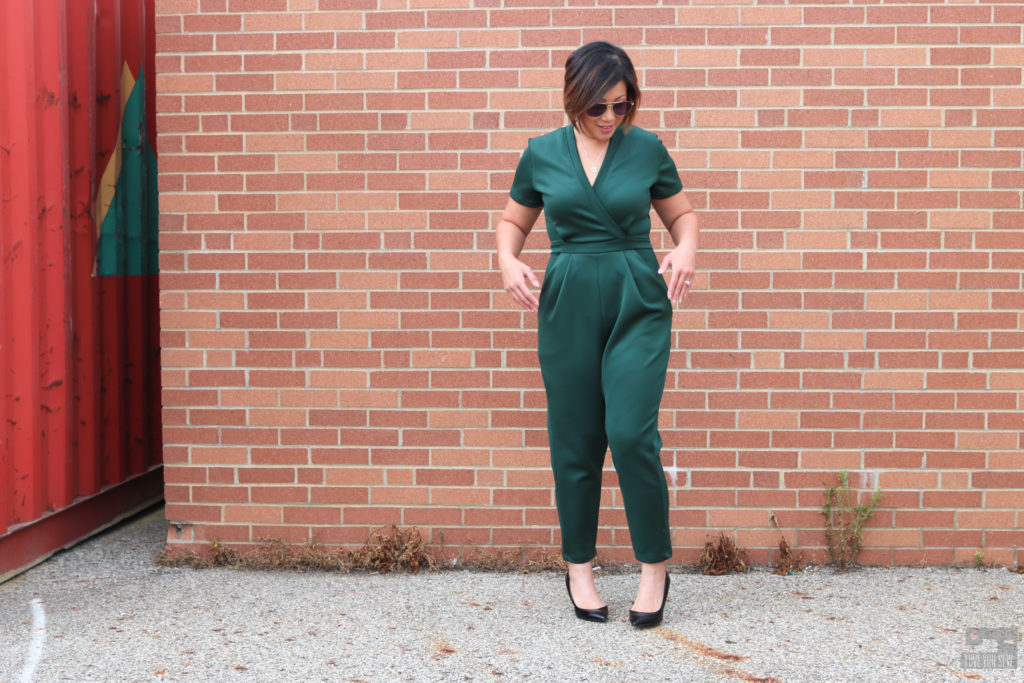
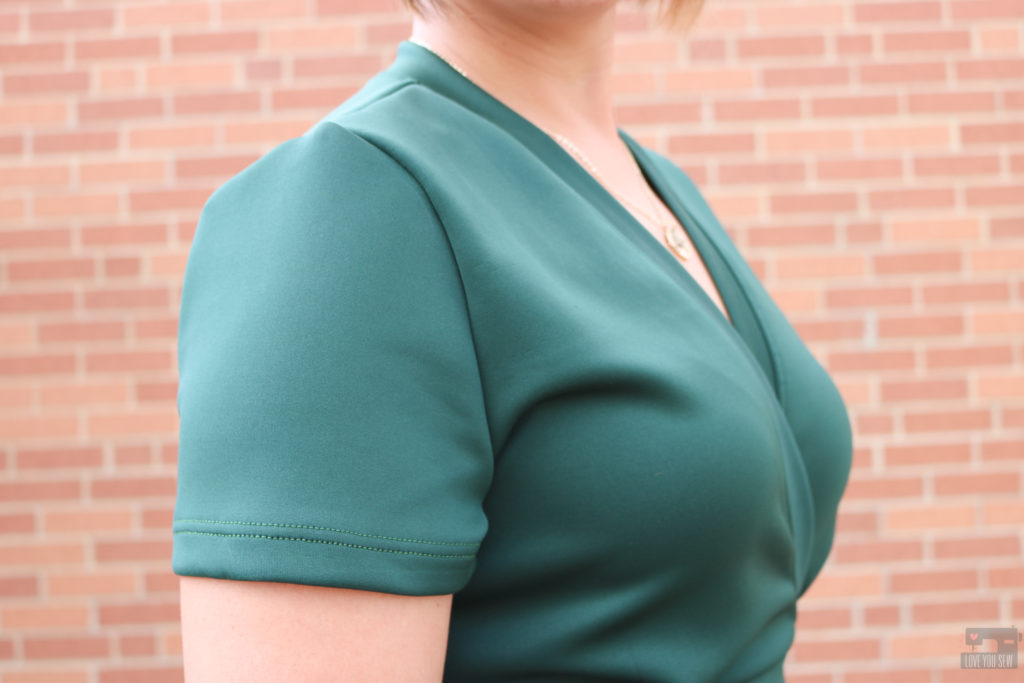
Jumpsuits still look to be on trend a little while longer, so I thought it was safe to make the Sirocco Jumpsuit for the fall.  With the short-sleeves and full pant legs (on View A) I figured this was a great garment to wear on the cooler nights downtown with or without needing a jacket.
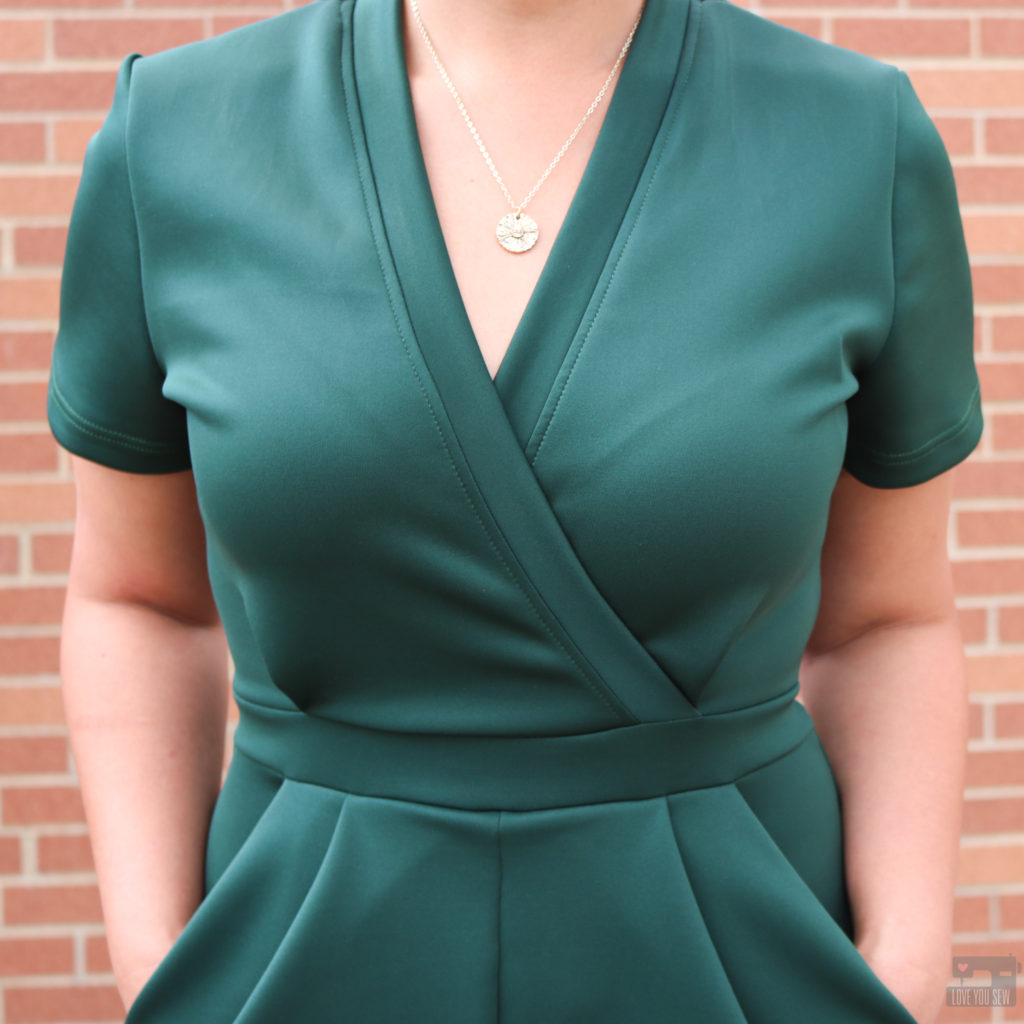
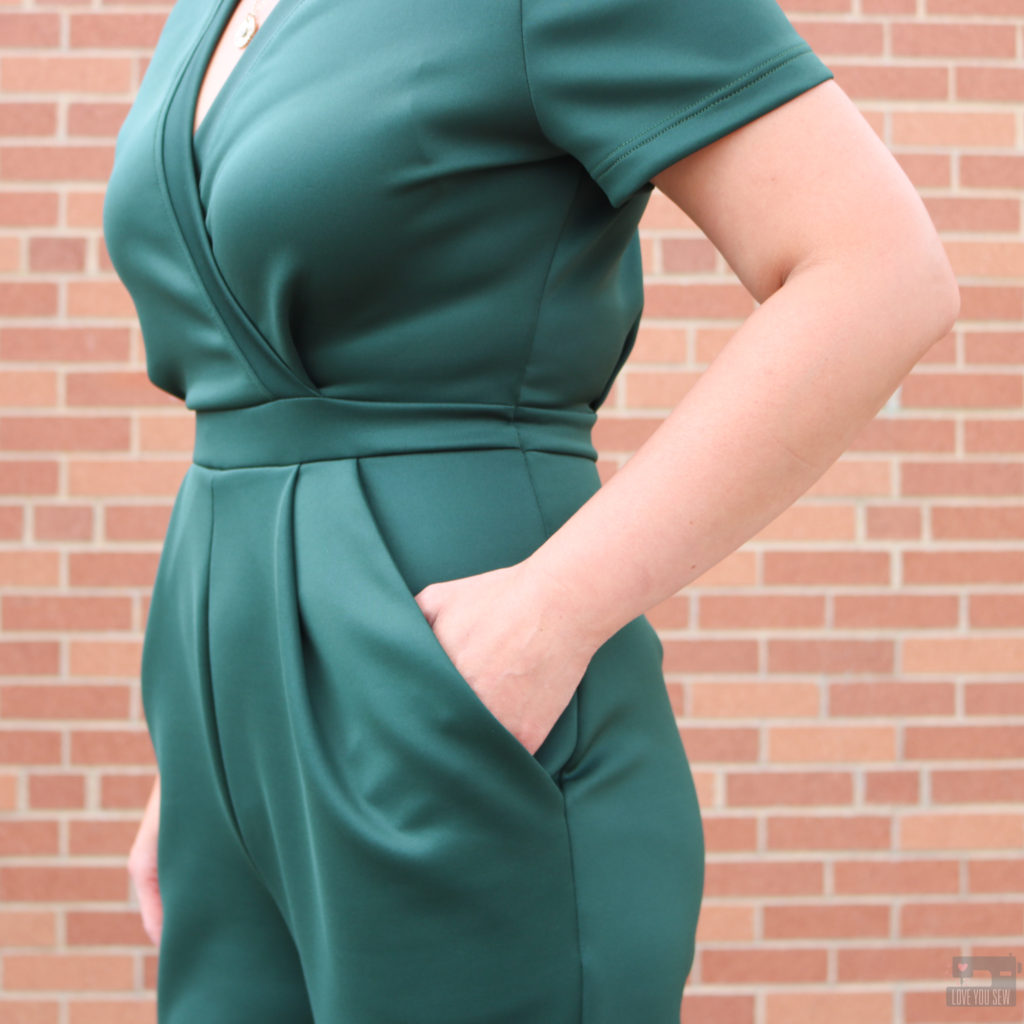
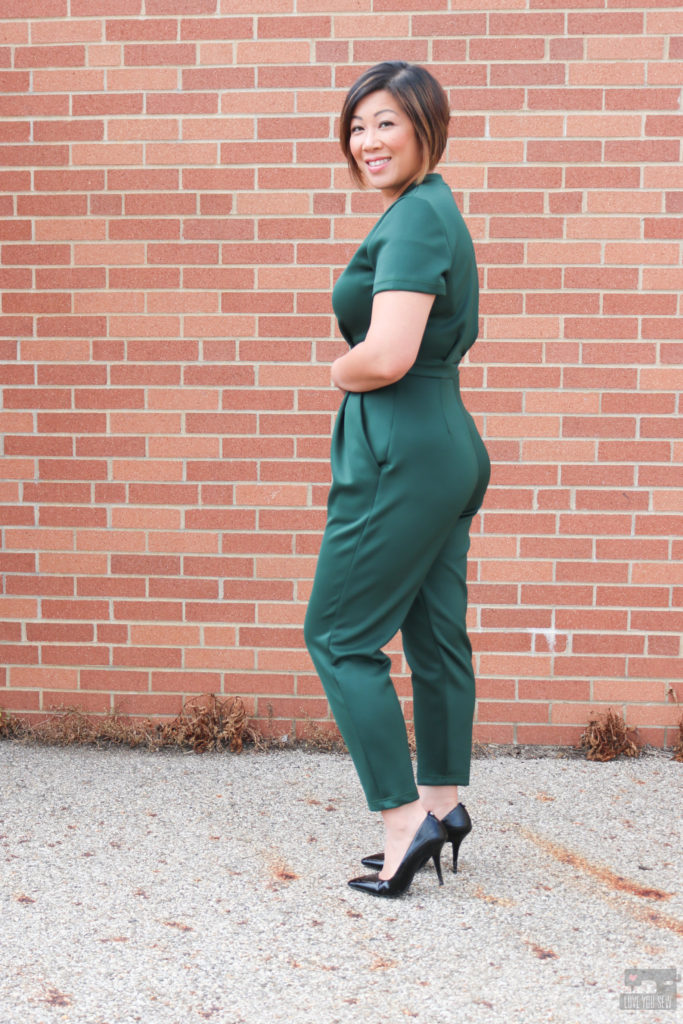
The Sirocco is a unique pattern in that there are no ties or other fasteners used to get in and out of the garment.  You slip in and out of it all through the faux wrap V-neckline.  This might not pose a huge deal for most, but I have hips which are two sizes larger than my waist –which means I REALLY will need to stretch out the waist to maneuver around.  This is the main reason I chose the heavy Scuba fabric to handle the severe stretching over my hips.  As I was fitting the garment, I honestly thought I would have to put in a side zipper for my hips, but the Lady McElroy Luxury Plain Scuba Jersey Knit Fabric proved to have such amazing stretch and recovery that I didn’t need it!  Honestly, I feel like I could wear this all day long…even after multiple bathroom breaks!
I made a few modifications for my SHORT 5’3″ frame with those aforementioned HIPS:
  • Made a 40 bodice and graded to a 42 in the hips and back to a 40 for the rest of the leg
  • Shortened bodice by 1/2″ and used a chainstitch (from my coverstitch) to secure the seam allowance down since the fabric is so lofty – This allows the lapped bodice to stay secure over your chest.
  • Shortened pant legs by 4″ initially (by just tissue fitting) and then took an additional 3 3/4″ when it was time to hem so that it would hit right above the ankle bone – Next time, I will shorten at the thigh and also from the ankle to get a better fit around the knee.
  • Extended the crotch length 3/4″ on both the front and back pant
  • Deepened the seat on the back pant by 3/8″
  • I wish I took out an 1″ out of the rise before cutting, but was able to take 1/2″ out of the overall inseam to narrow the legs and decrease the rise.
  • Took an additional 1″ out of the ankle and blended up to the knee for a slimmer leg

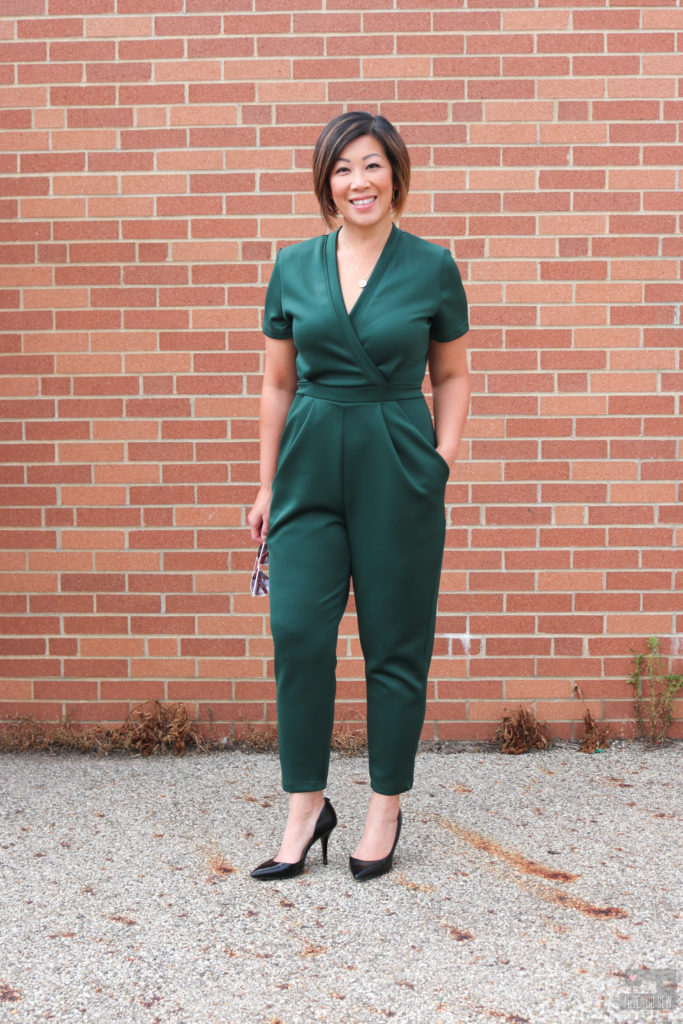
After these changes, I can’t tell you how incredibly pleased I am with my Sirocco JumpsuitThe Lady McElroy Luxury Plain Scuba Jersey Knit Fabricis so chic and the deep green really does make the Sirocco Jumpsuit so “EXTRA!”  Love it!!!
You can find my other makes on the Love You Sew Blog (here!) and more daily inspiration on Instagram @loveyousew_ .


Happy Sewing!

Cristy


Affiliate links are in this post. Check out my Disclosures here. Fabric was provided for review as part of the Minerva Maker Blog Team.  All thoughts and opinions are my own.  


Add Puff Sleeve Drama with a Sheridan Sweater Hack

This post was originally published on the Hey June Handmade Blog in January, 2020.  Edits are in italics and additional pictures have been added (since I love this pattern SO much!)

When I first hacked this Sheridan Sweater for the Hey June Handmade Blog, I had no idea it was going to become one of my MOST worn tops. Prior to March, life was pretty normal while we were just starting to hear about the pandemic. My social world was still moving along and was able to wear my Sheridan to Lunar New Year celebrations (as planned!), Galentine’s Day fun with my girls, and was my go-to for a night out.  I knew even back then that I wanted another Sheridan.

After a #sewingfail with the wrong fabric (it was a red and cream colored stripe that clashed and looked HORRIBLE with my skin tone and hair highlights,) I was ready to make another.  This time I wasn’t going to mess around.  I knew I would ADORE my new Sheridan because I used…the same hack…and the same fabric as my OG…just a different color!


Back in early December, I knew I needed a new red top.  My one cardigan just wasn’t enough for all of the holiday school parties, concerts, church events and even family get-togethers.  I wore that one piece of red clothing OUT and knew I needed something else to add to my festive wardrobe.  But did I really need a new top???  Did I really want to make one??? Then the Sheridan Sweater was launched and my questions were answered.

All of my internal fighting against wanting “another” knit top disappeared.  After seeing the Sheridan launch, my mind switched and I bought the pattern right away.  Of course, I need  a new red top!  It WILL work through the holiday season, AND into the Lunar New Year AND be useful for Valentine’s Day school parties!  Why wouldn’t I need the Sheridan Sweater in my life?!?

Adrianna did a fantastic job designing the different views and I’m obsessed with the seamless funnel neck, which I haven’t seen in any other DIY pattern.  The Sheridan Sweater also has the big statement sleeves which is on still on trend and I knew both of these features would really stand out in red.  But since this was going to be my all-winter holiday top, I wanted to bring it up juuuuust an extra notch.

FABRIC

I found this beautiful textured waffle knit from Telio fabrics.  One of the reasons this sweater has been on constant wardrobe repeat is the fabric.  As a poly/spandex blend, the color saturation is on point.  After all of the washing and drying I’ve done, the color still looks as intense as day one.  I was concerned that the texture might be lost over time with dryer heat, but it’s all still there!

The Paola Pique Liverpool’s medium weight was a perfect complement to this pattern.  It has great body and really shows off the full sleeves.  The stretch and recovery is also very nice.  When I pull up on the sleeves and adjust the waistband, it  holds it’s size well and doesn’t stretch out over the course of the day.  This fabric comes in so many rich jewel tones that I had to have the Emerald.  The pictures come up more teal, but this color swings more to the green side in-person.

TUTORIAL

I figured if I was going red, I wanted to make the sleeves stand out even more. So….I hacked the sleeves to be more voluminous in the sleeve head for All. Of. The. Drama.  Below is my quick and definitely non-technical way to achieve that extra shoulder poof.

1. Take the sleeve pattern and make a copy.  (I traced the pattern onto some Swedish tracing paper I had on-hand.  I like using this since it’s more pliable than regular paper and can be pinned/sewn without being destroyed.)

2. Divide the sleeve into approximately 4 equal sections by width.  With the nice notch markings already drafted as part of the pattern, I used these as guide when splitting the sleeve.

3. Cut the pattern to separate these sections from the sleeve head all the way down to the cuff, but NOT cutting through.  All of the sections should be hinges and able to move.

4. To start, I added 1” in between each section.  I placed scrap paper underneath the pattern, and hinged each section out by 1” at the sleeve cap.  Then I taped the pattern onto the scrap.  Repeat 2 more times between the sections.  If you would like more volume, you can increase the hinge widths.

5. To get the extra volume at the top of the cap, I added 3/4” to the top and blended the line back to the notched parts of the cap, all while following its shaping.  Again, if you want a little more puff in the sleeve cap, feel free to add a little more to length to the top.

6. At the cuff line, true up the pattern so it is straight again.

At this point, I cut out the pattern and did make a muslin, but only had quilt cotton on hand.  It gave me an idea of the extra volume and shape added to the sleeve.  I did have to consider the extra weight and stretch with the knit fabric.  But it was still good enough for me and I went ahead to cut into the main fabric.

To insert the sleeve, I made gathers between the sleeve notches not exactly knowing how it would all look.  But I ended up marking 3” on either side of the shoulder seam and pushed all the gathers in between those markings.  I basted the sleeve into place and was very happy with the result!  With that, I finished sewing the sweater and have never been more pleased!

This hack turned out exactly like what I wanted and just love how “extra” the sleeves are.  The additional gathers and volume in the sleeve cap really balance out the overall ease in the sleeve and I love the extra long cuff to show it all off.  This top is pretty fancy and ready for every occasion now.  It’s still comfy in a stretch knit, but also so incredibly unique and special!

Project Summary

  • Pattern: Sheridan Sweater by Hey June Handmade; View: B; Size 10
  • Mods: Narrowed shoulders by 1/2″ each, increased the cropped length by 1″, used Puff shoulder hack above
  • Fabric: Telio Pique Liverpool Knit from Fabric.com in Hermes Red and Emerald

This hack can be used on just about any pattern with a set-in sleeve.  I may have to try it on a woven pattern this fall/winter.  Please let me know in the comments if you use this hack!  I would love to hear what you think!


Hugs and Stitches,

Cristy


This post may contain affiliate links.  You can read my full Disclosure here.


Sora Sweater :: Review

As a member of the Blank Slate Patterns Sewing Team, I get to see and test out patterns before you do.  (Yeah, it’s a pretty amazing gig…)  This last release with this Sora Sweater (aff link) certainly did not disappoint.  It’s a beautiful pullover and cardigan pattern for knits with a great relaxed and casual design available from XXS to 3X sizing.

For my first sew (and yes, there are other versions floating in my head,) I decided to make the pullover view with the shawl neck.  It took me a minute to wrap my head around the construction, but I made it through pretty well for my first run.  I like to live on the edge (ha!) and not muslin with companies I’ve sewn with before.  Luckily for all of you, Melly created a video to get you through this step and you can find it here.

The other great feature of this top is the side gusset.  I’ve never sewn one into a top before, but absolutely love it.  It adds fabulous shape around the hips without adding volume all-over the garment.  The front of the Sora still sits nice and straight.  You can find the tutorial in the same video above.

I used a lightweight  Eco-knit made from 50% recycled fiber and 50% organic cotton.  This dark peppered gray is a nice neutral and will go with so much in my wardrobe….especially my blue and black denim jeans!  This fabric was a great find from the Instagram of TrashN2Tees .  I don’t know if Jenelle will offer the buy again, but you should check out her website.  She is an inspiration for the upcycle and textile re-use world.

I opted for the long sleeves with my make, but you can make a short sleeve version for some layering or to just wear alone.  The sleeves are drafted to be a bit longer….which I really appreciate given the style of the Sora.  With comfy cozy types of tops, I tend to pull down the sleeves to warm up my hands a bit and are perfect for just that.  If you aren’t sure what you like, you can always sew them as the pattern says and take off an inch or two if they are too long before adding the cuff.

To add to the casual factor, I modeled my Sora after some menswear versions with the toggle.  I sewed in corded elastic which I looped so it could wrap over the toggle.  If you see other versions of the Sora pullover, you’ll notice that the shawl neck overlaps with the left side over the right.  But, I already sewed in the elastic and had to have the right side over the left as you see here.  So if you want to add an embellishment, remember my mistake and plan for the correct side!  TIP:  Use a small piece of fusible interfacing behind the toggle or button to keep the knit from pulling open.


The shirt-tail hem is folded up with a nice clean finish.  I serged the raw edge and then used my twin-needle with wooly (aka bulky or smooth) nylon in the bobbin.  You can see I have grey in my stash but was too lazy to wind another bobbin when I already had the cream color ready to go.  (Hey, you can’t stop me when I want to get a shirt finished!)  I love using wooly nylon in the bobbin of my domestic machine and also in the upper loopers of my serger for extra stretch and stress forgiveness.

You can find other versions of this pattern using #SoraSweater on social media and you can find it for purchase here (aff link.)

I hope you are enjoying my continual quest for a handmade wardrobe and this top definitely fits into the basics I need and will wear for years to come.


Happy Sewing!

Cristy


*This pattern was provided to me as part of the Blank Slate Patterns Sewing Team, but I was not asked to blog about it.  Any affiliate links are noted.  As always, all opinions and words are my own.

Rumi Tank Review

I’m a huge fan of racerback tops. I don’t know if I just have weird sloping shoulders or maybe the wrong bras, but any kind of spaghetti strap I wear, always falls down.  Over the years, its become pretty annoying having to constantly pull the straps back up.  I started to wear mainly racerback bras to combat my issue and then had to find new tank tops that would cover the new strap configuration.

So when Christine Haynes came out with the Rumi Tank pattern, I knew instantly, it was for me.  It’s designed for knits, has a classic versatile shape and is stash friendly. I can get a tank out of less than a yard and have made two tanks that out of pure scraps.  This pattern is a PDF with printing options for a personal printer and copy shop.  I decided to send this pattern to my local big box office supply store (because I had a coupon) for the first time.  Let me say, if given the option, I will always choose copy shop printing.  Taping PDF patterns is just not what I want to spend my time doing.

My first project was just the tank version and I used the Limestone Feel knit by Leah Duncan . I’m between a 6 and an 8 and also a B cup. From the waist up, I cut a 6 and then graded out to the 8 around the hip (to account for my larger rear) and used a 10 in length.

With a serger, the construction of the Rumi Tank was very quick.  However, I made sure to take the time to evenly distribute and pin the neck and armbands for a nice smooth finish. Although not necessary, I do top-stitch (with a ball-point needle!) around the neck and armholes for a professional look and to keep the seam allowance in place.

TIP: I like my garments to even be pretty on a hanger. So, I start and stop all my serging at inconspicuous spots…usually off to one side.

For my second Rumi project, I made the dress version. My family had spring break plans down on Florida and I could use a casual dress to throw over a bathing suit, if needed. April Rhodes’ Observer knit was perfect! I wore it to the beach and back.

Bonus – This dress can be worn with a jacket and layered over leggings.

I’ve made two more Rumi tanks to fill in my summer wardrobe. One with a navy and cream skinny stripe I got from a destash and then another in the same Observer knit because I love the print and color so much 🙂 The ease and comfortability with these makes are awesome. I’ve been wearing them with jeans and skirts all summer long.

As we near the autumn and winter months, I plan on sewing a few more tanks and dresses. These will make nice layering pieces under my cocoon cardigans and with some fun tights.  All in all, I think this is a great beginner knit pattern. It’s also perfect if you are working on a handmade capsule. The silhouette is classic and you don’t have to deal with pesky falling straps!


Happy Sewing!

Cristy


This post may contain affiliate links.