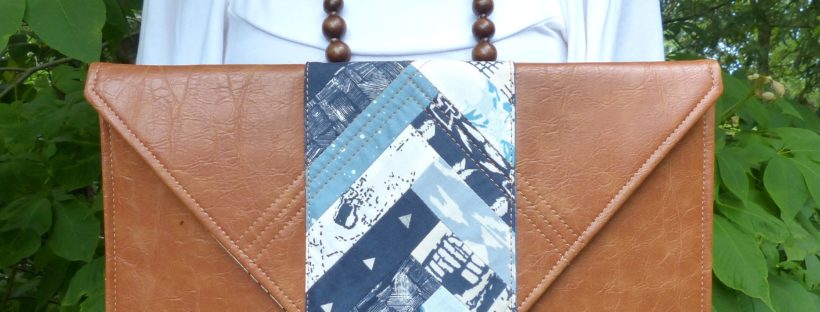
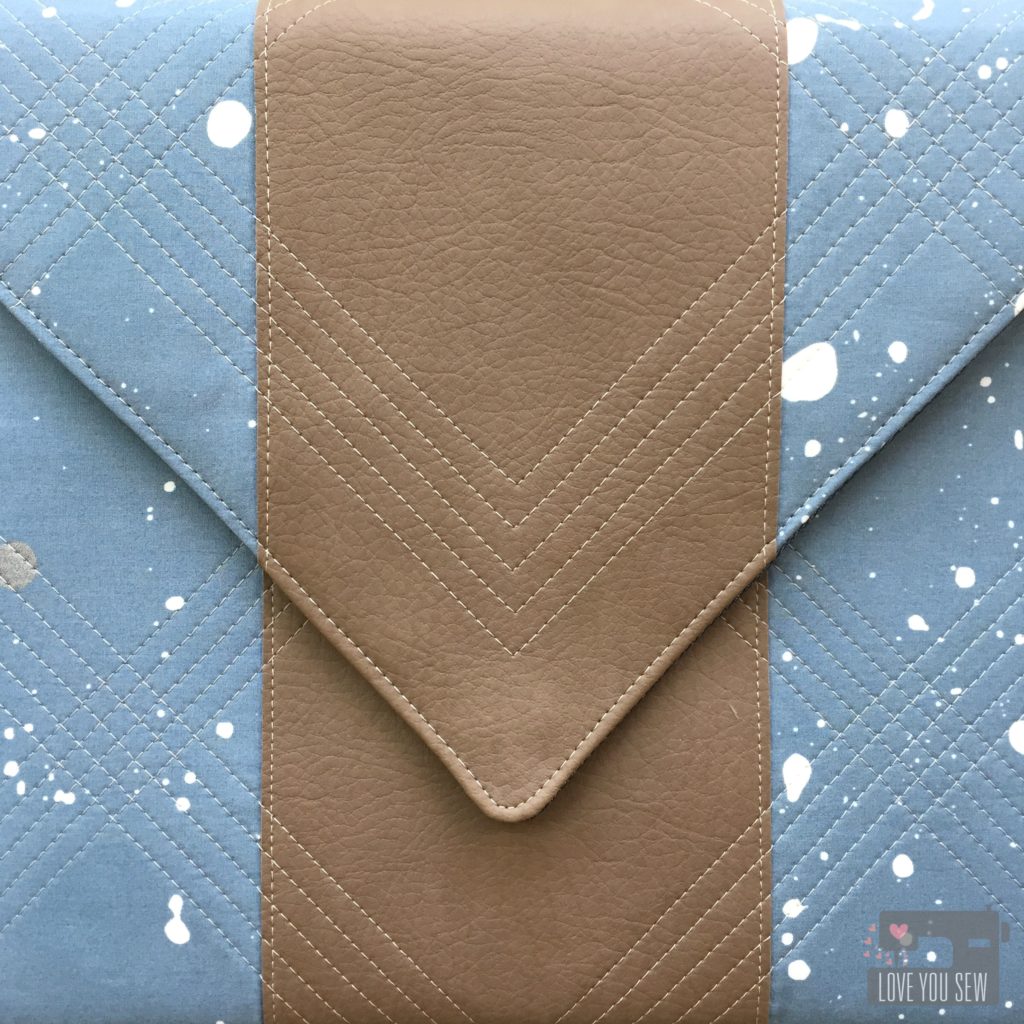
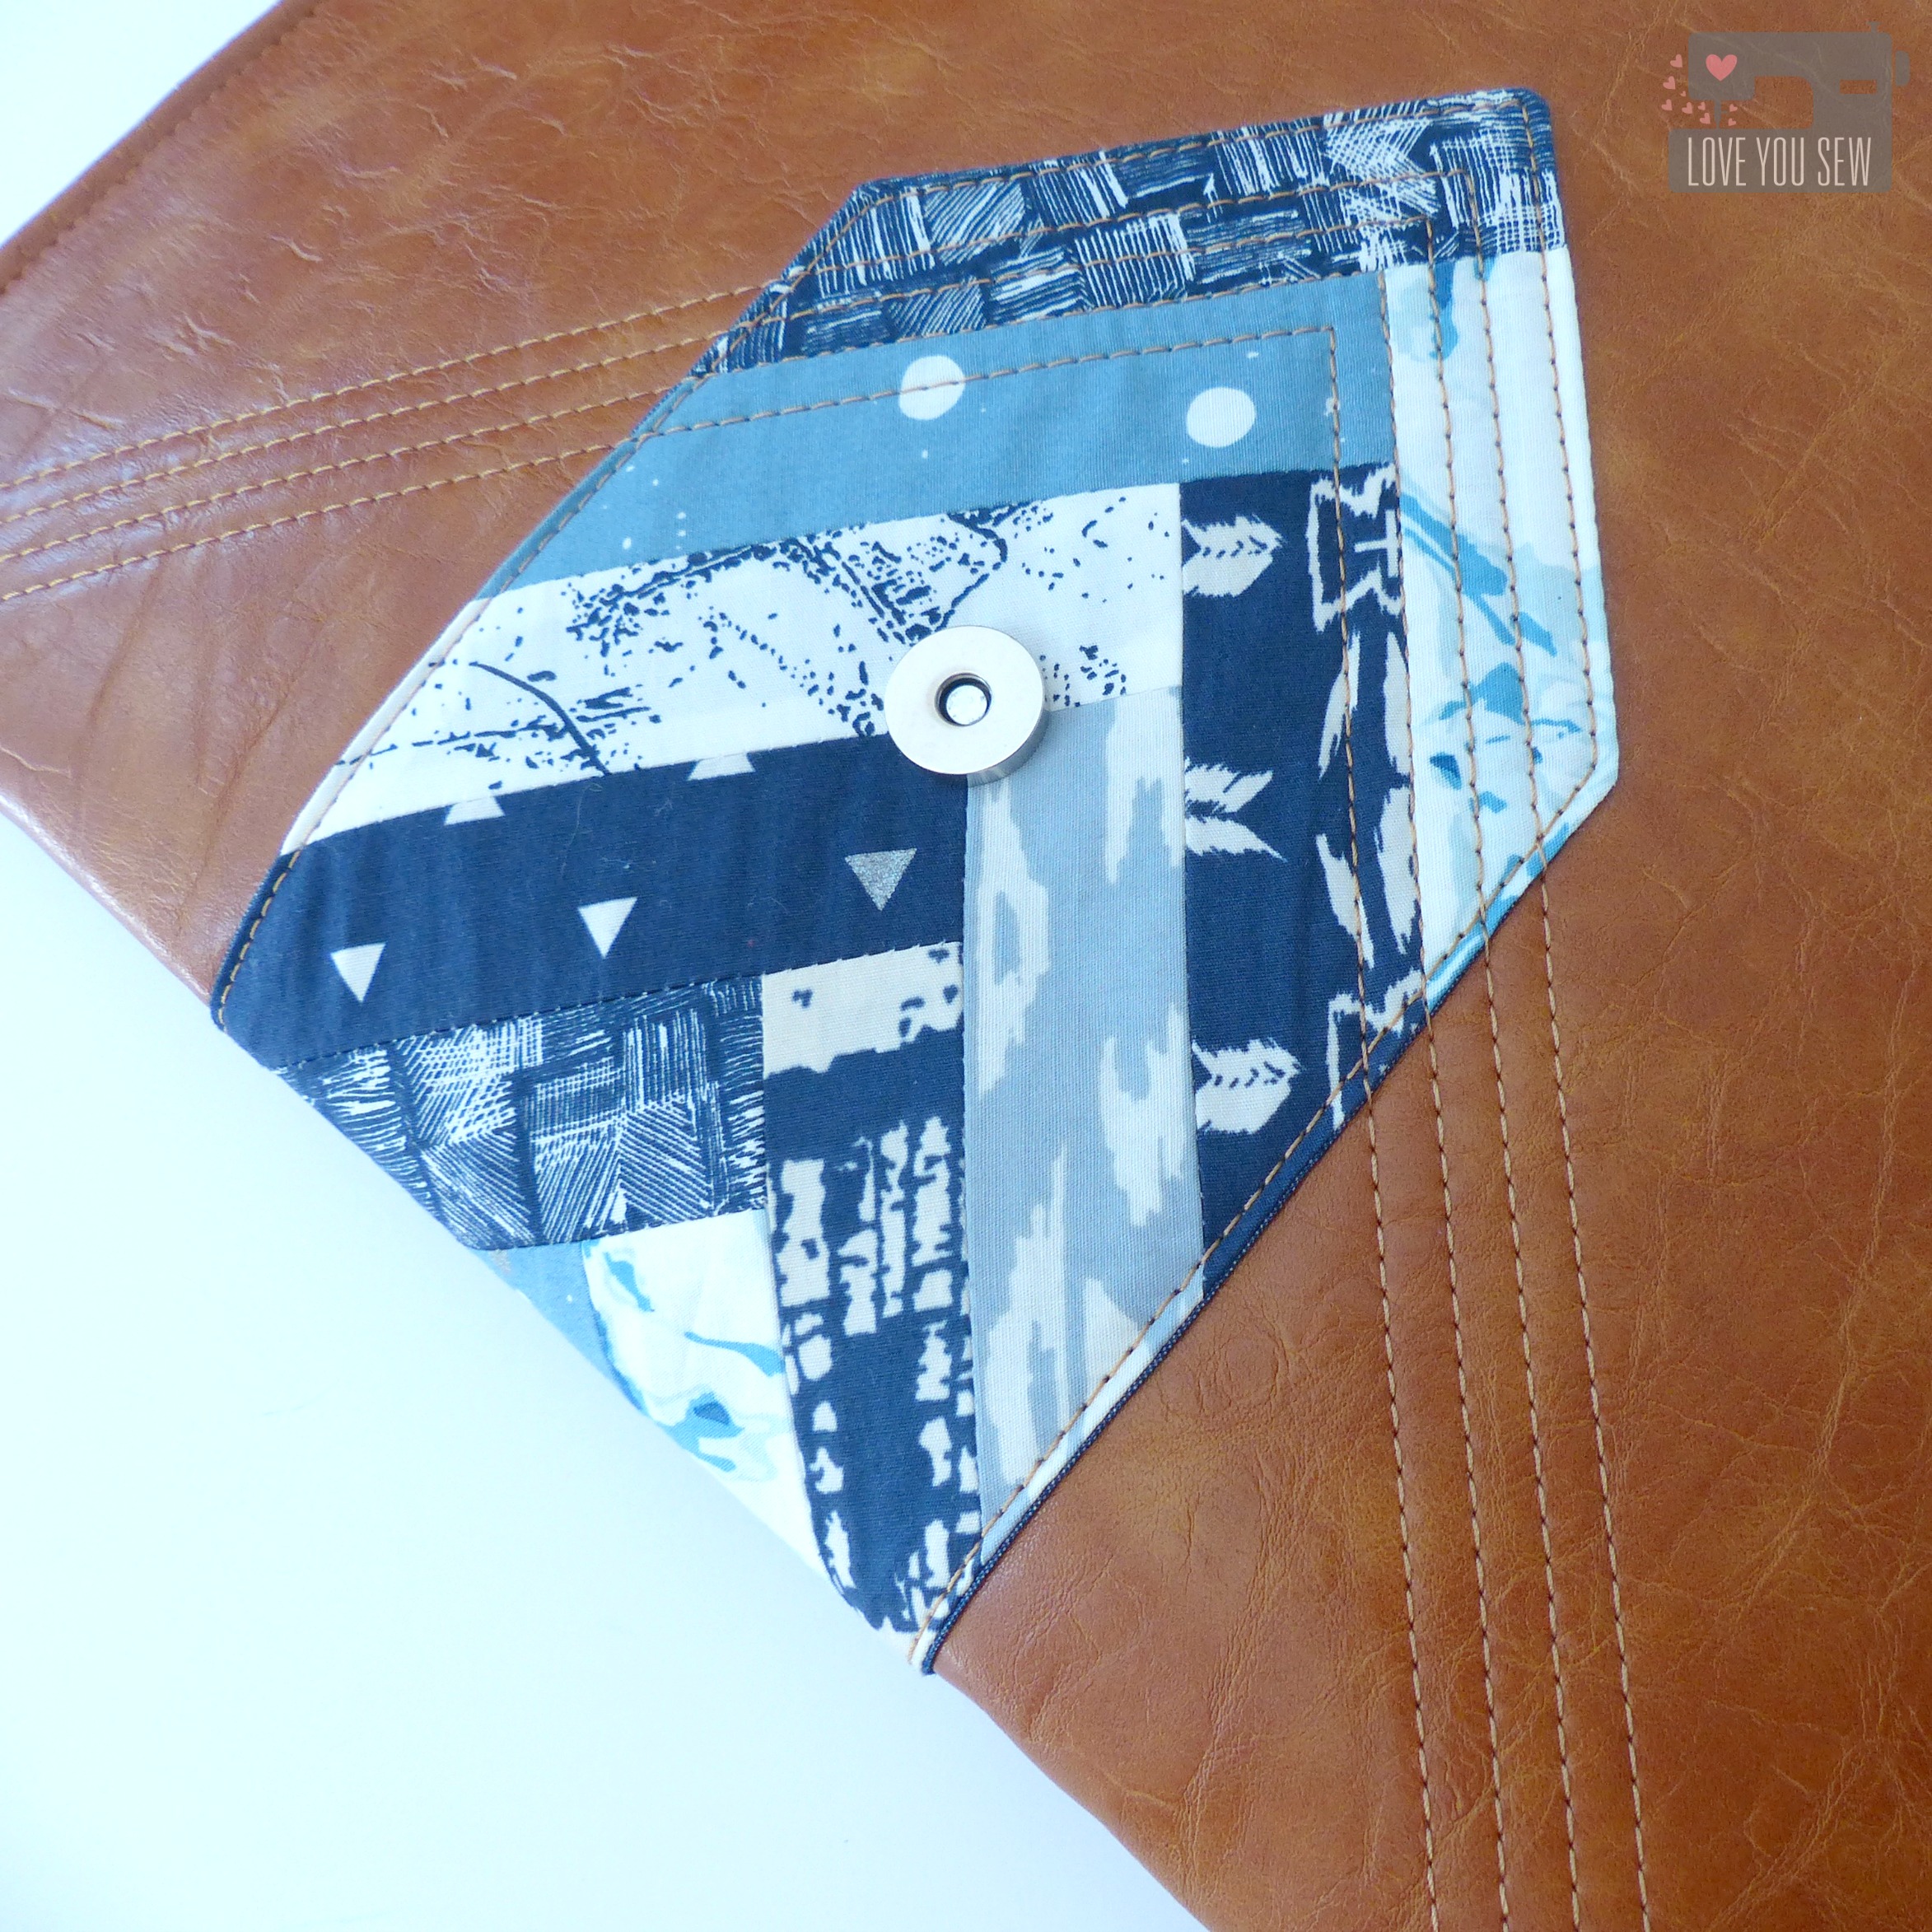
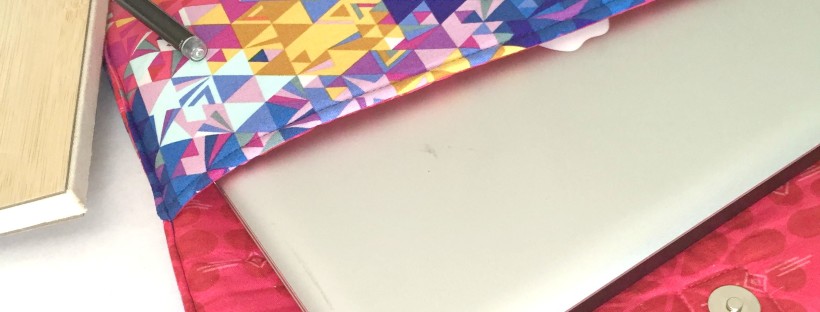
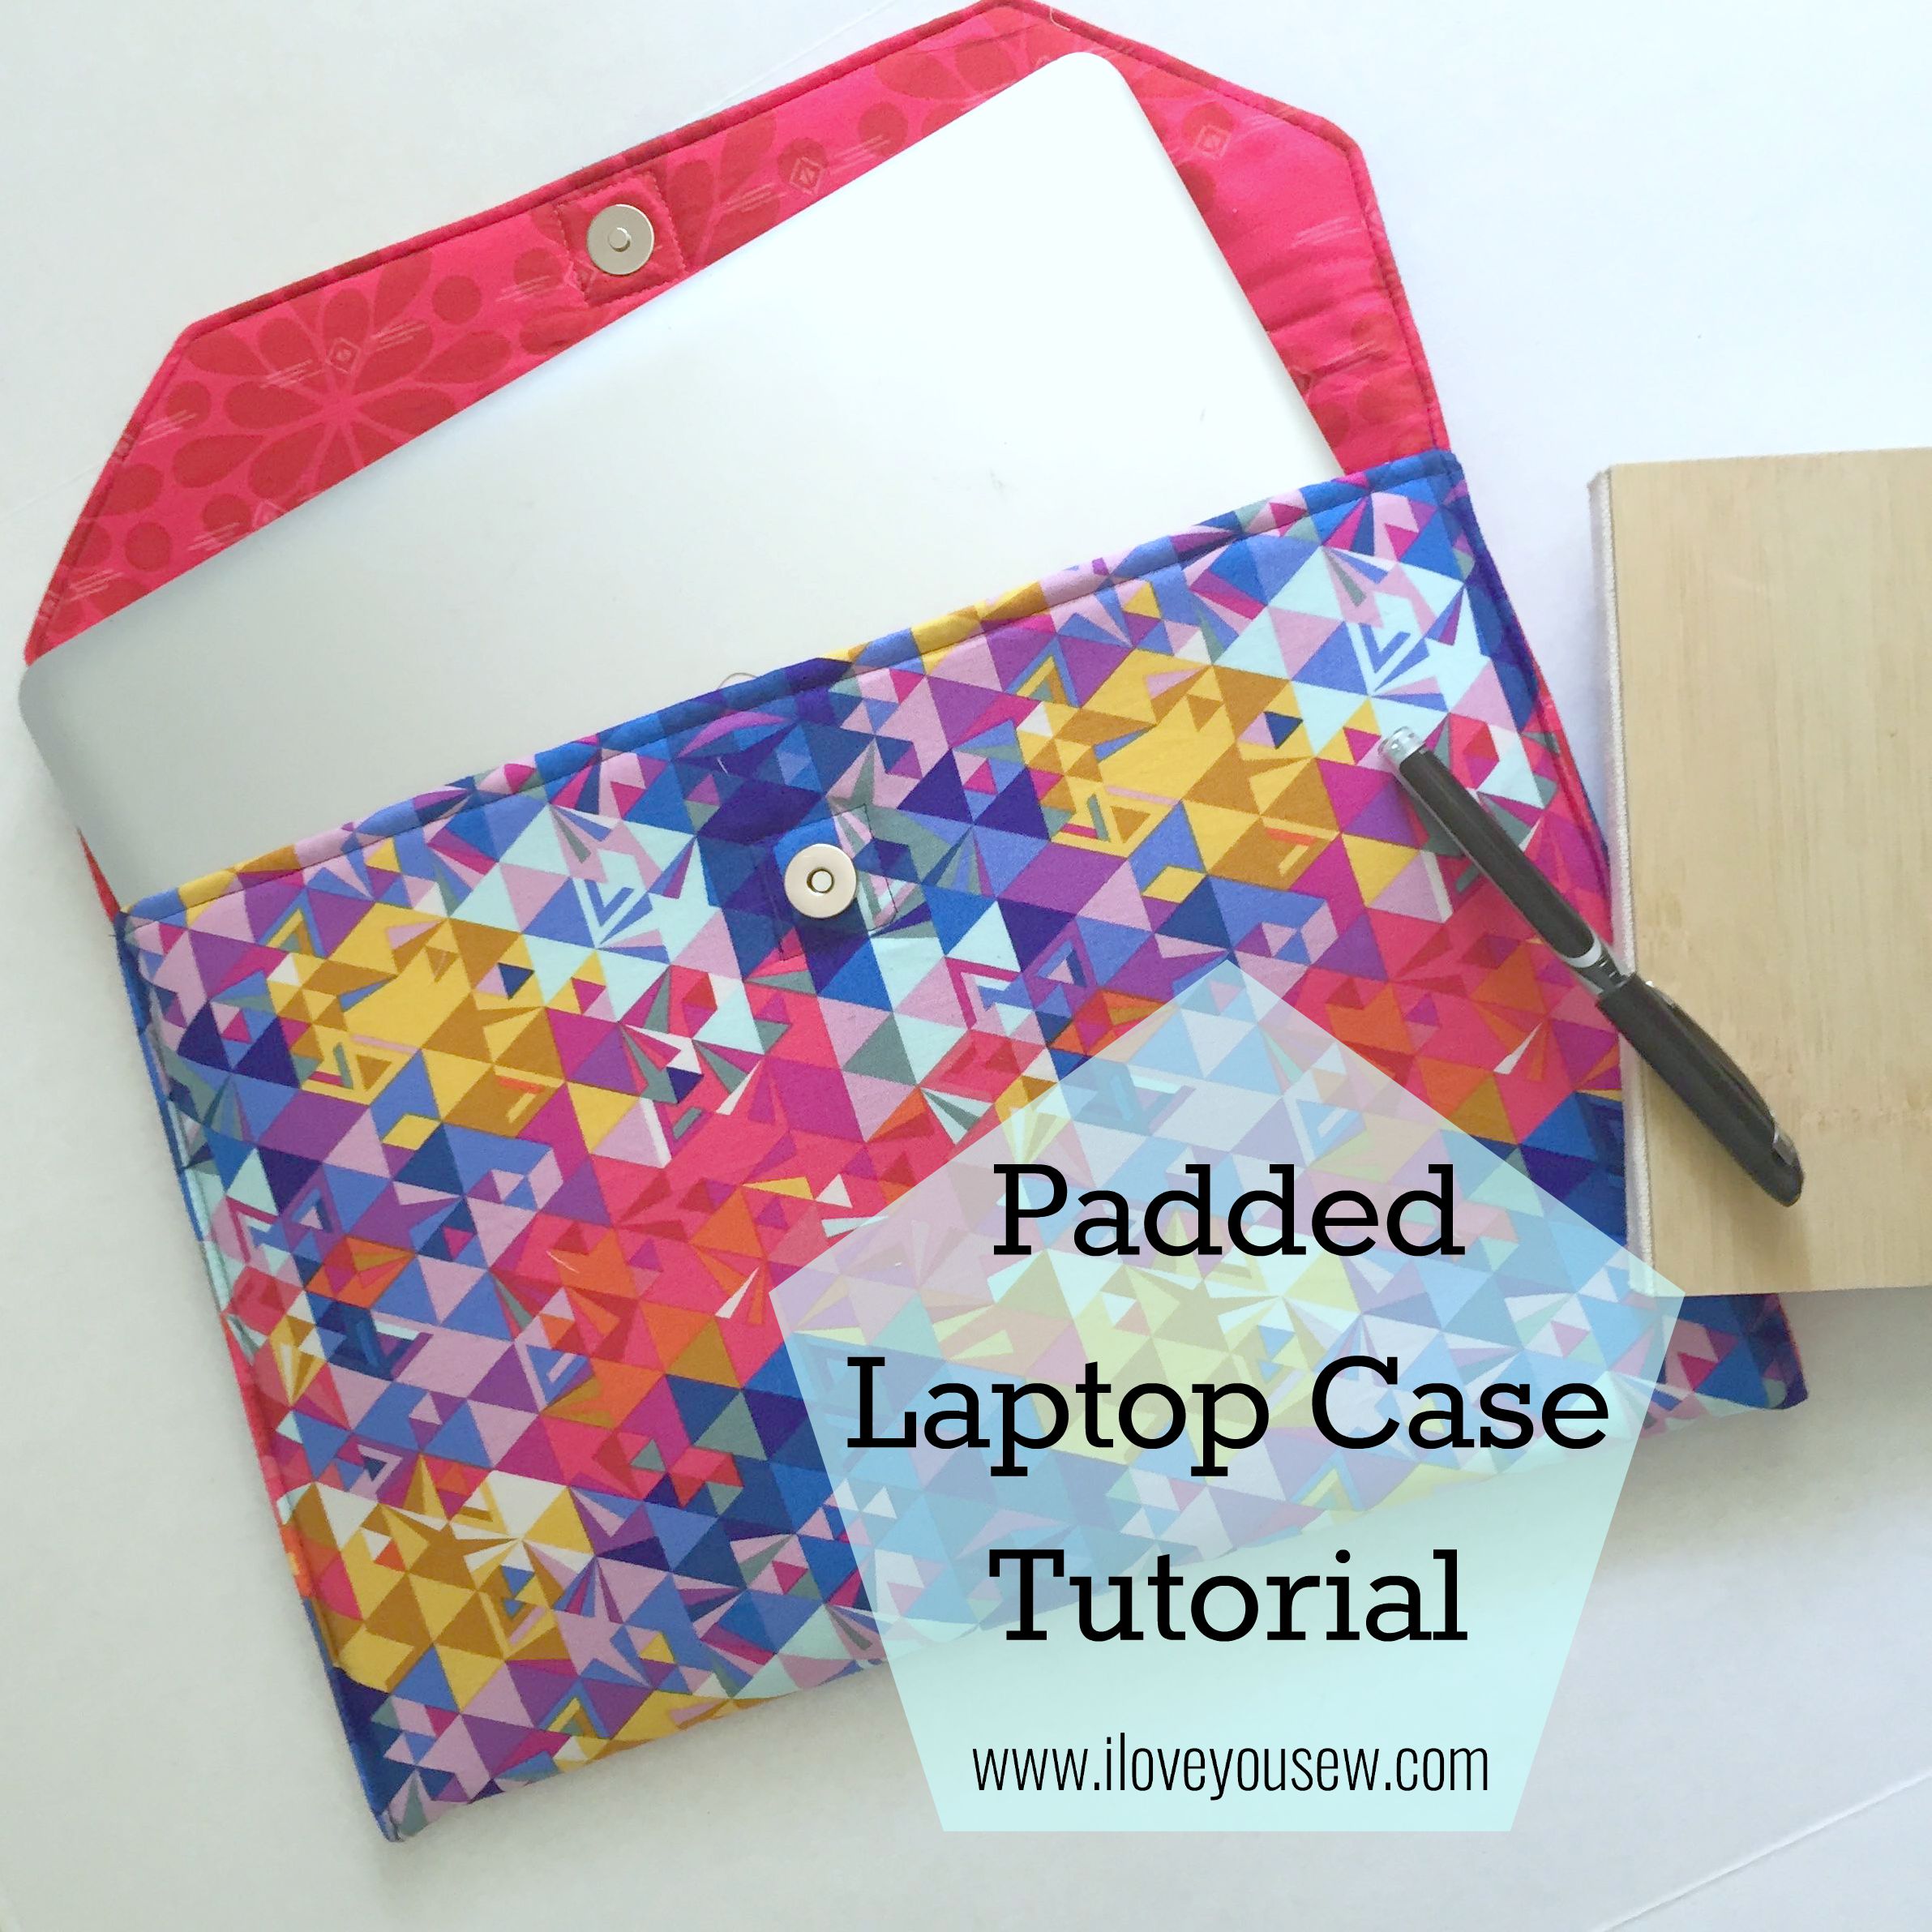
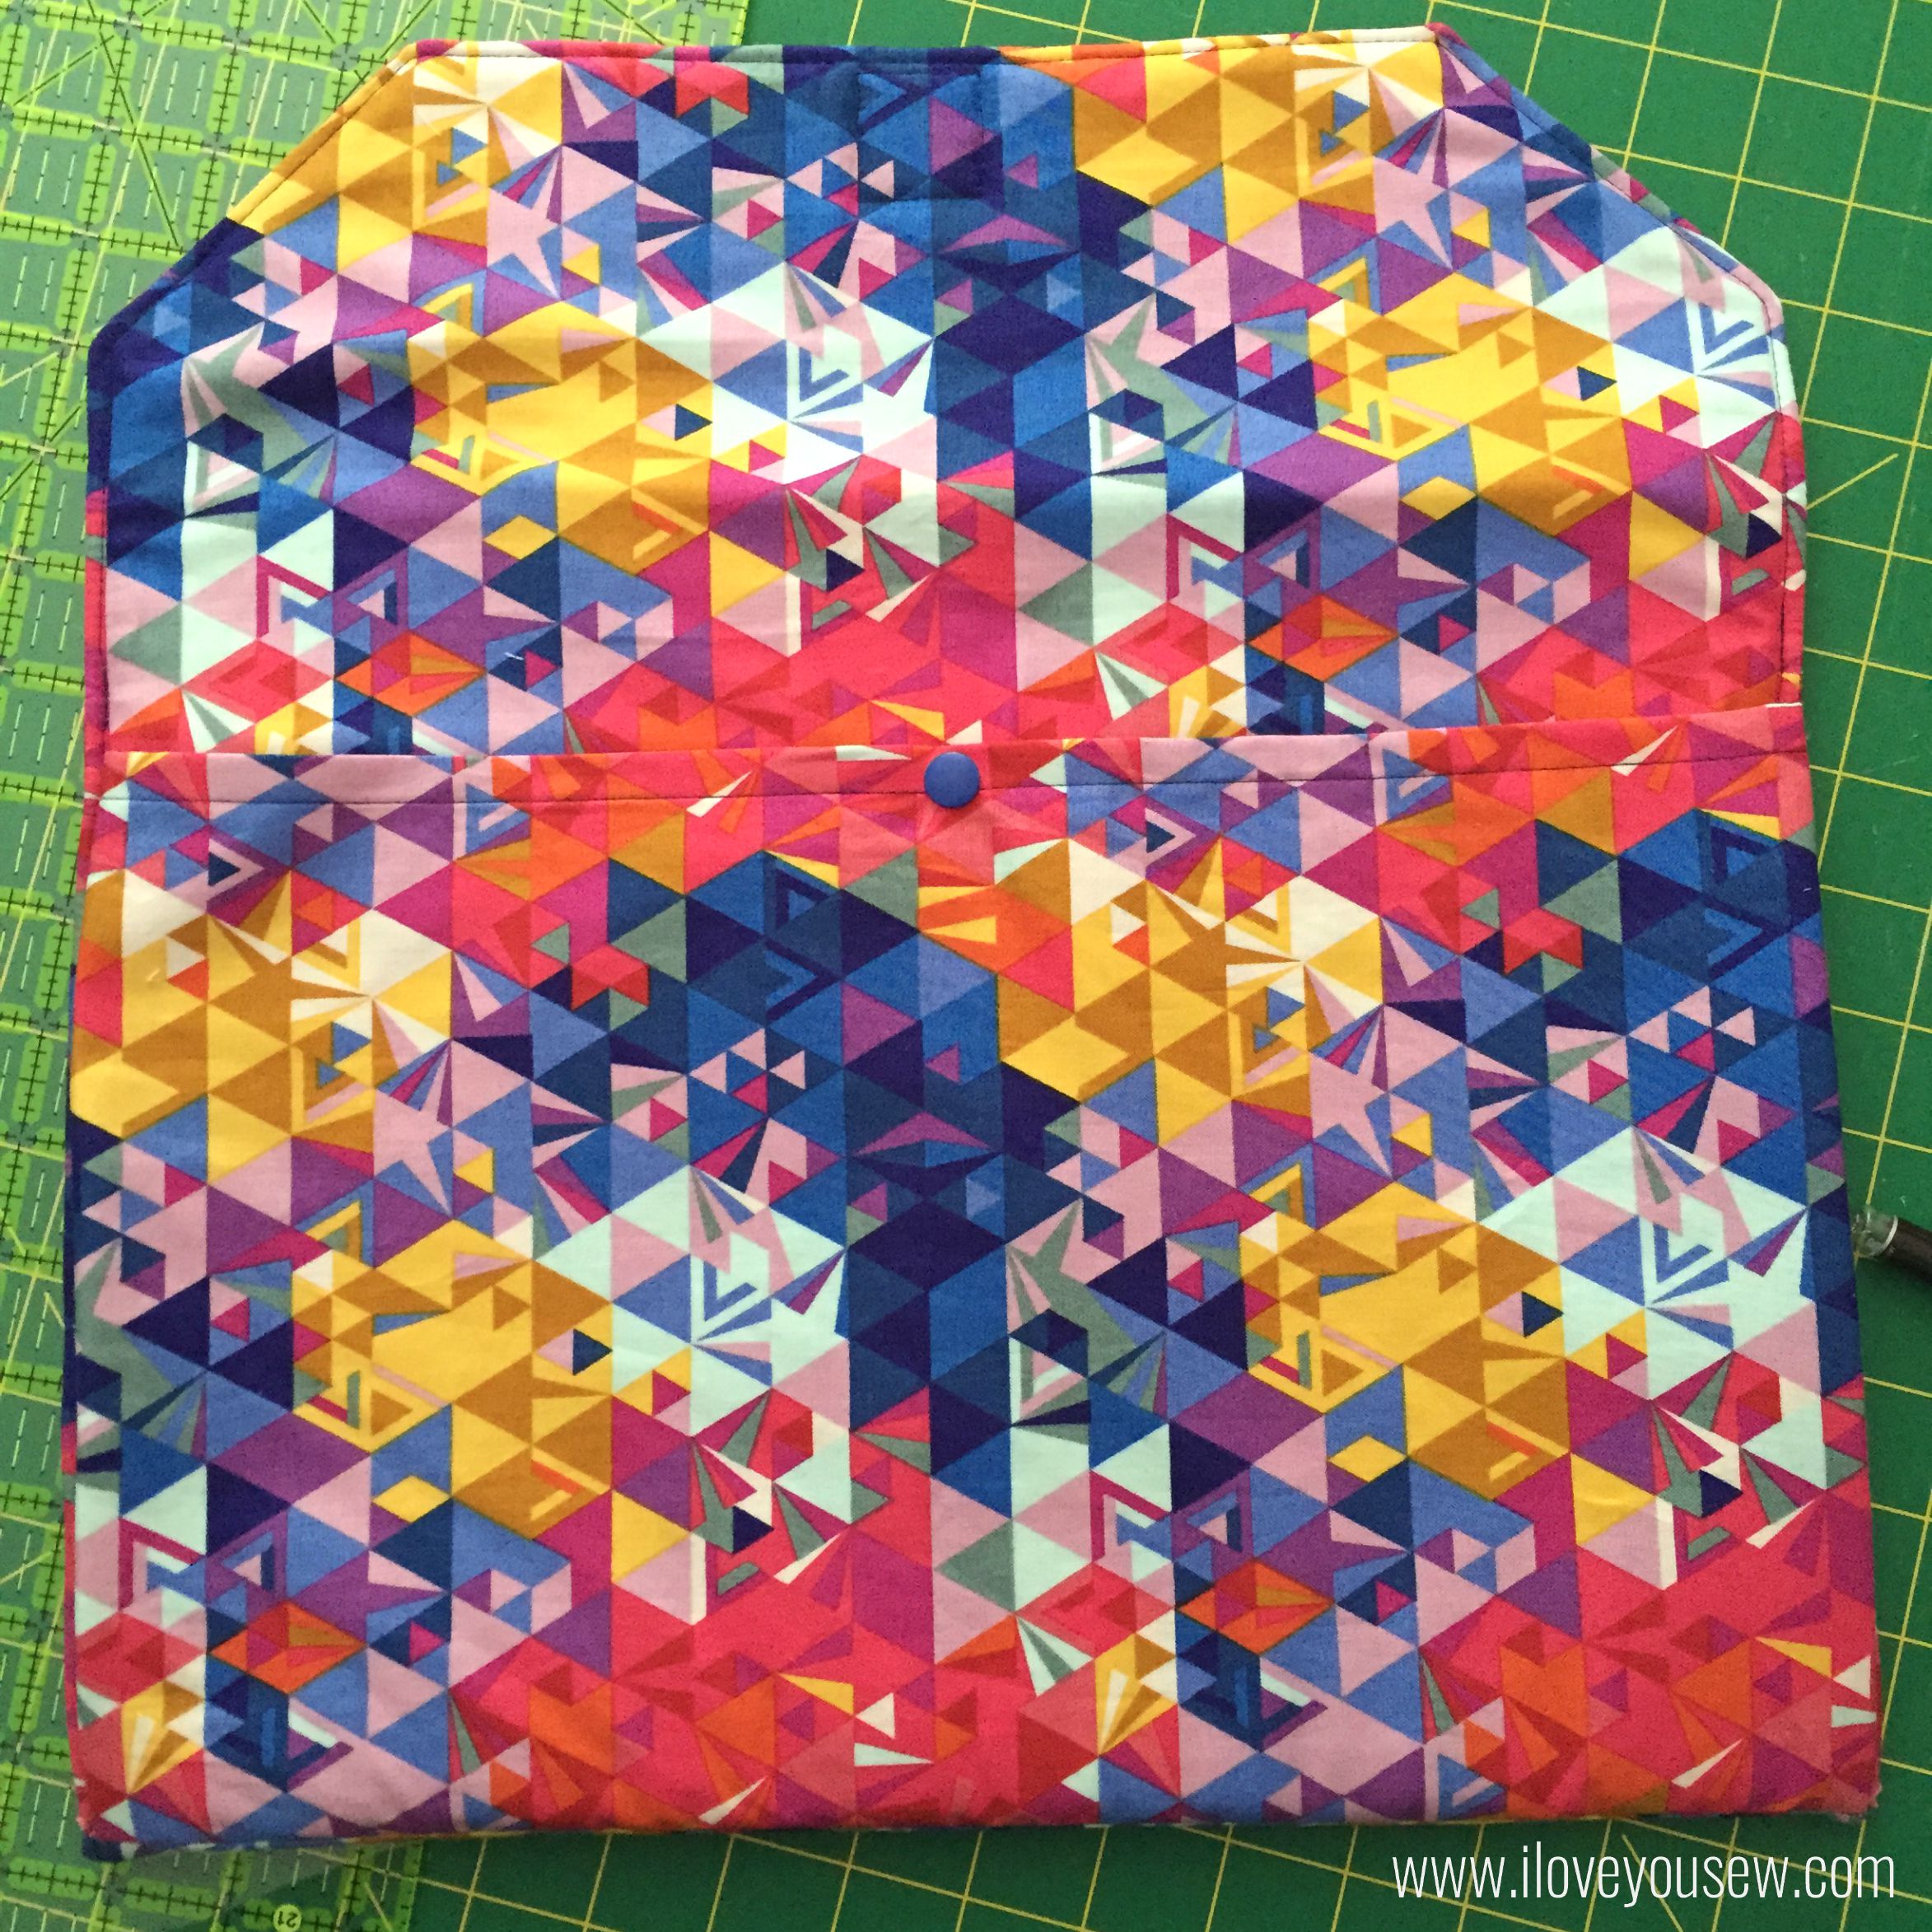
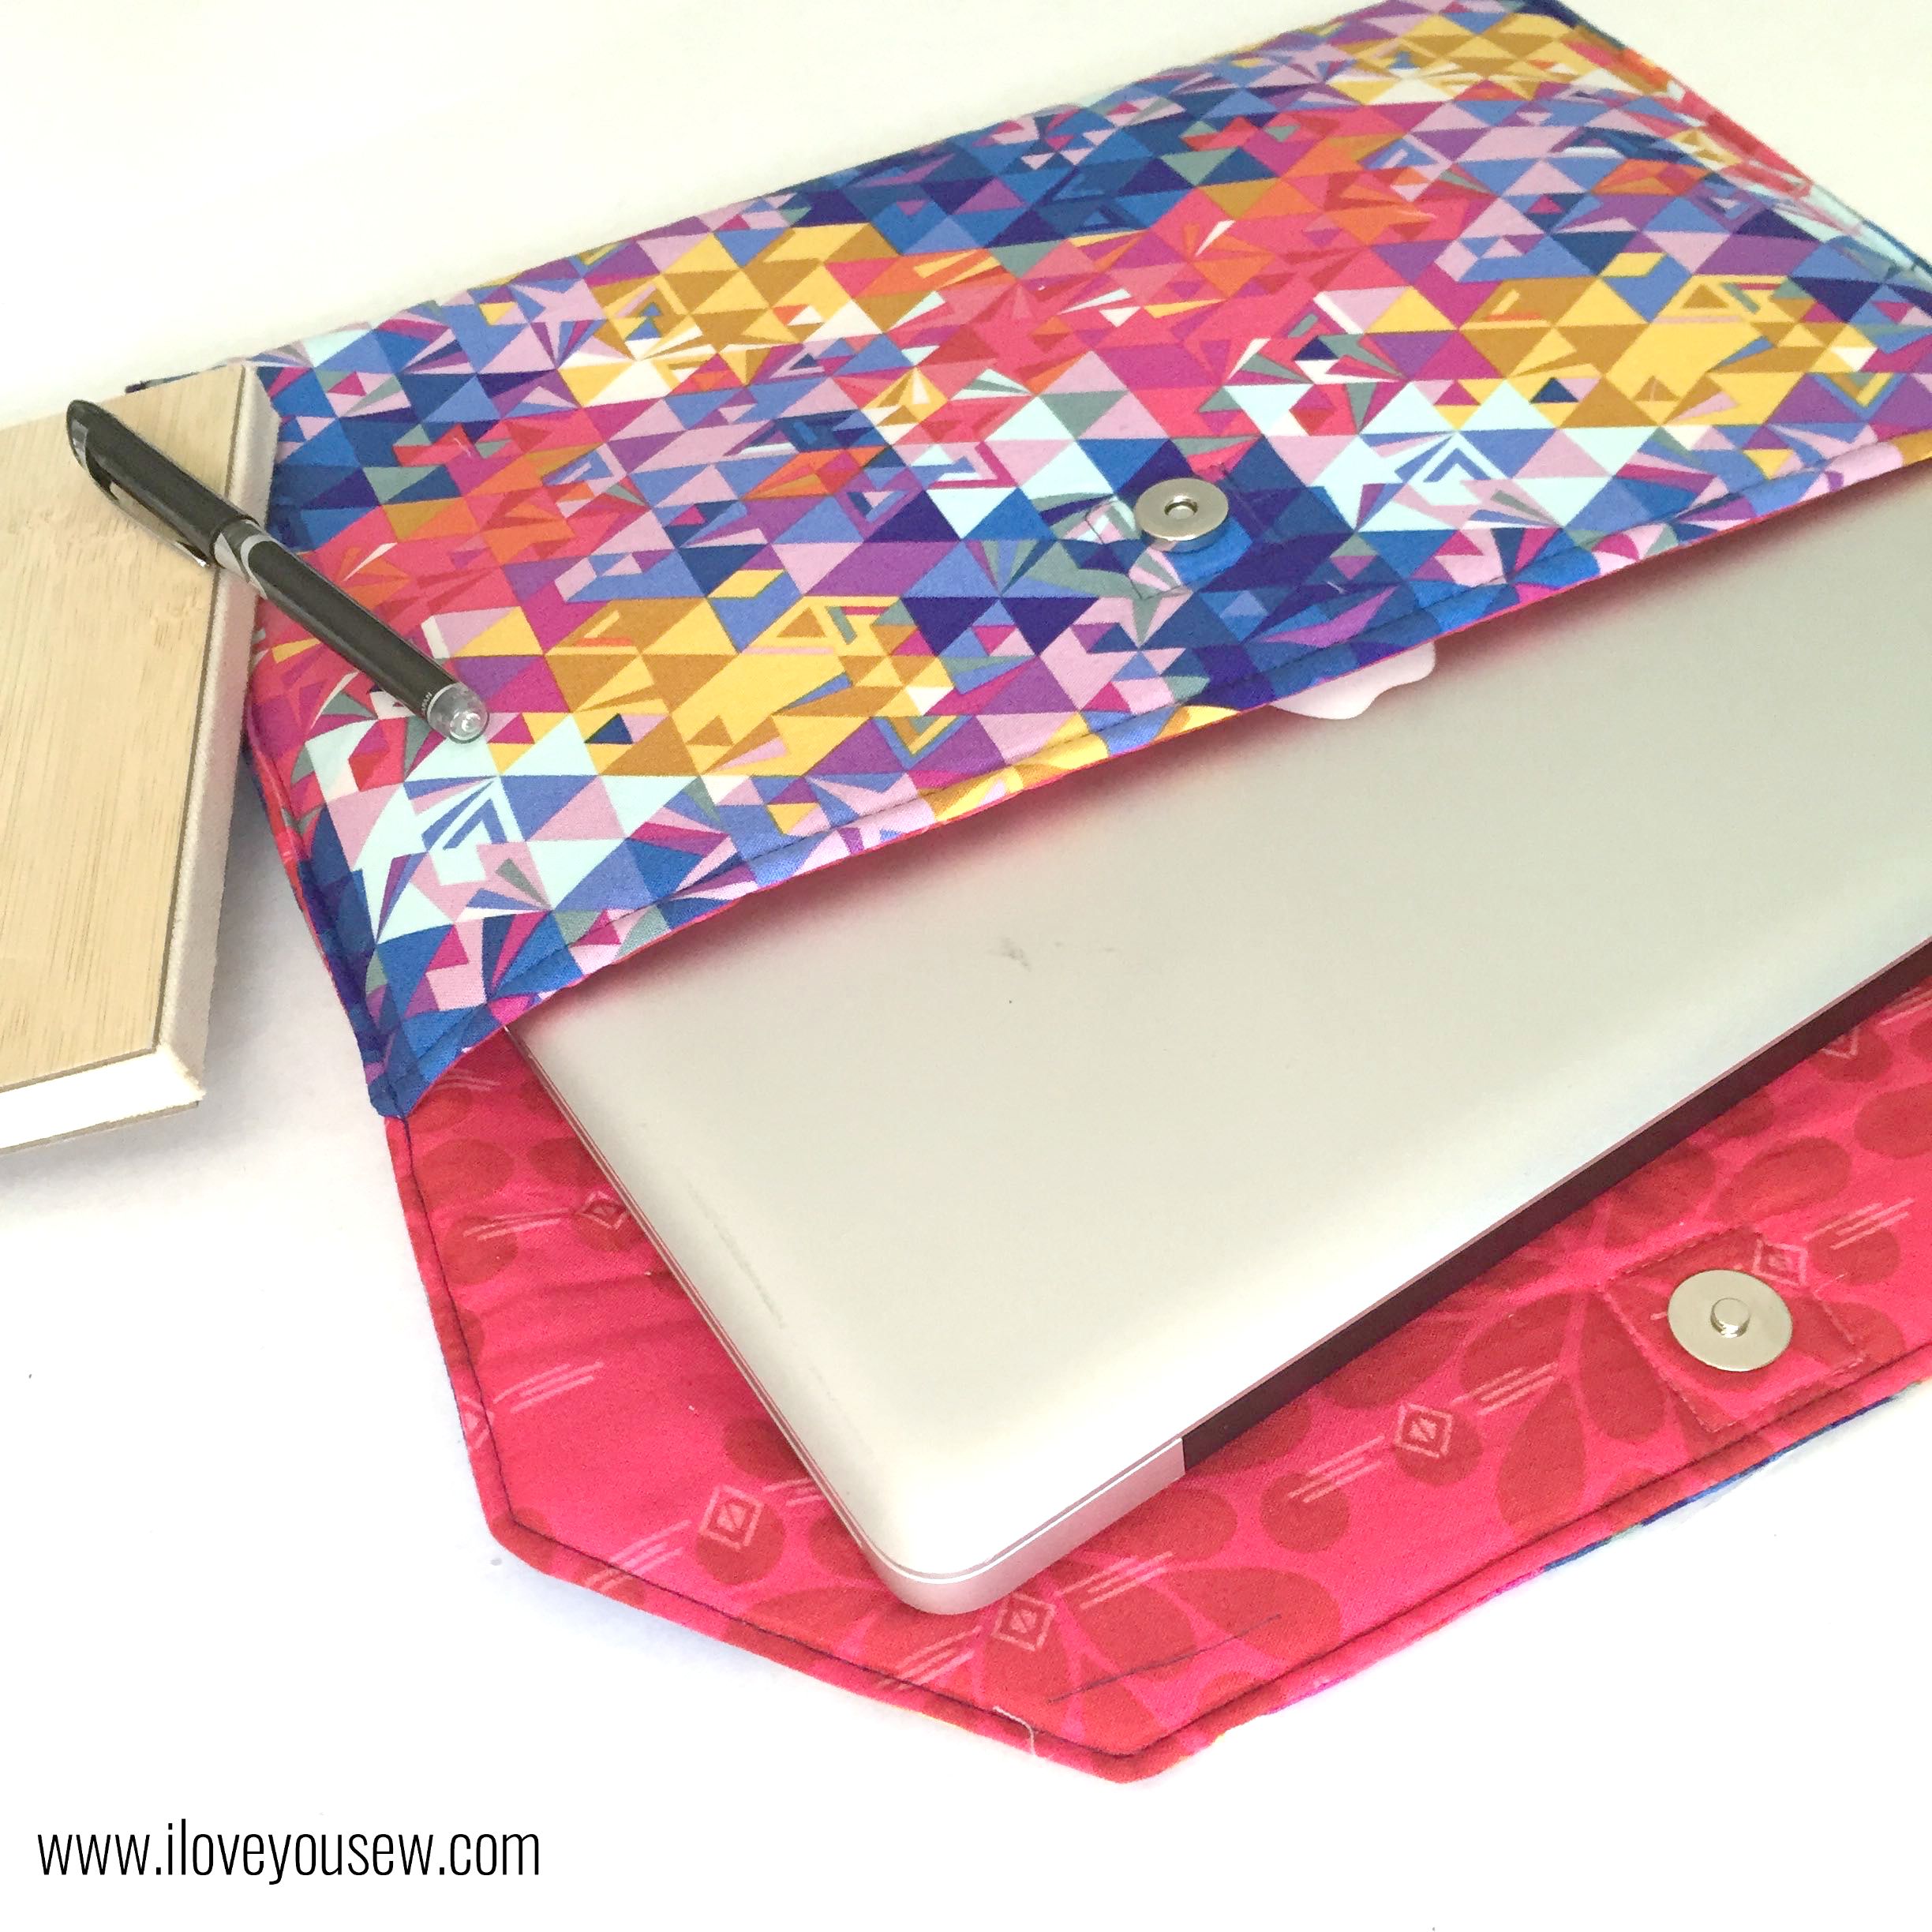
Envelope Clutches are everywhere right now and I was inspired by it simple and timeless shape. This Quilted Envelope Clutch design is over-sized to give you ample room for all of your essentials, but still is nice enough to go from day to night. It’s a sleek bag when paired with the right faux (or real) leather. Coincidentally, this clutch design also fits a MacBook Pro perfectly, so its versatile and you can change up the fabrics to make it as laptop holders.
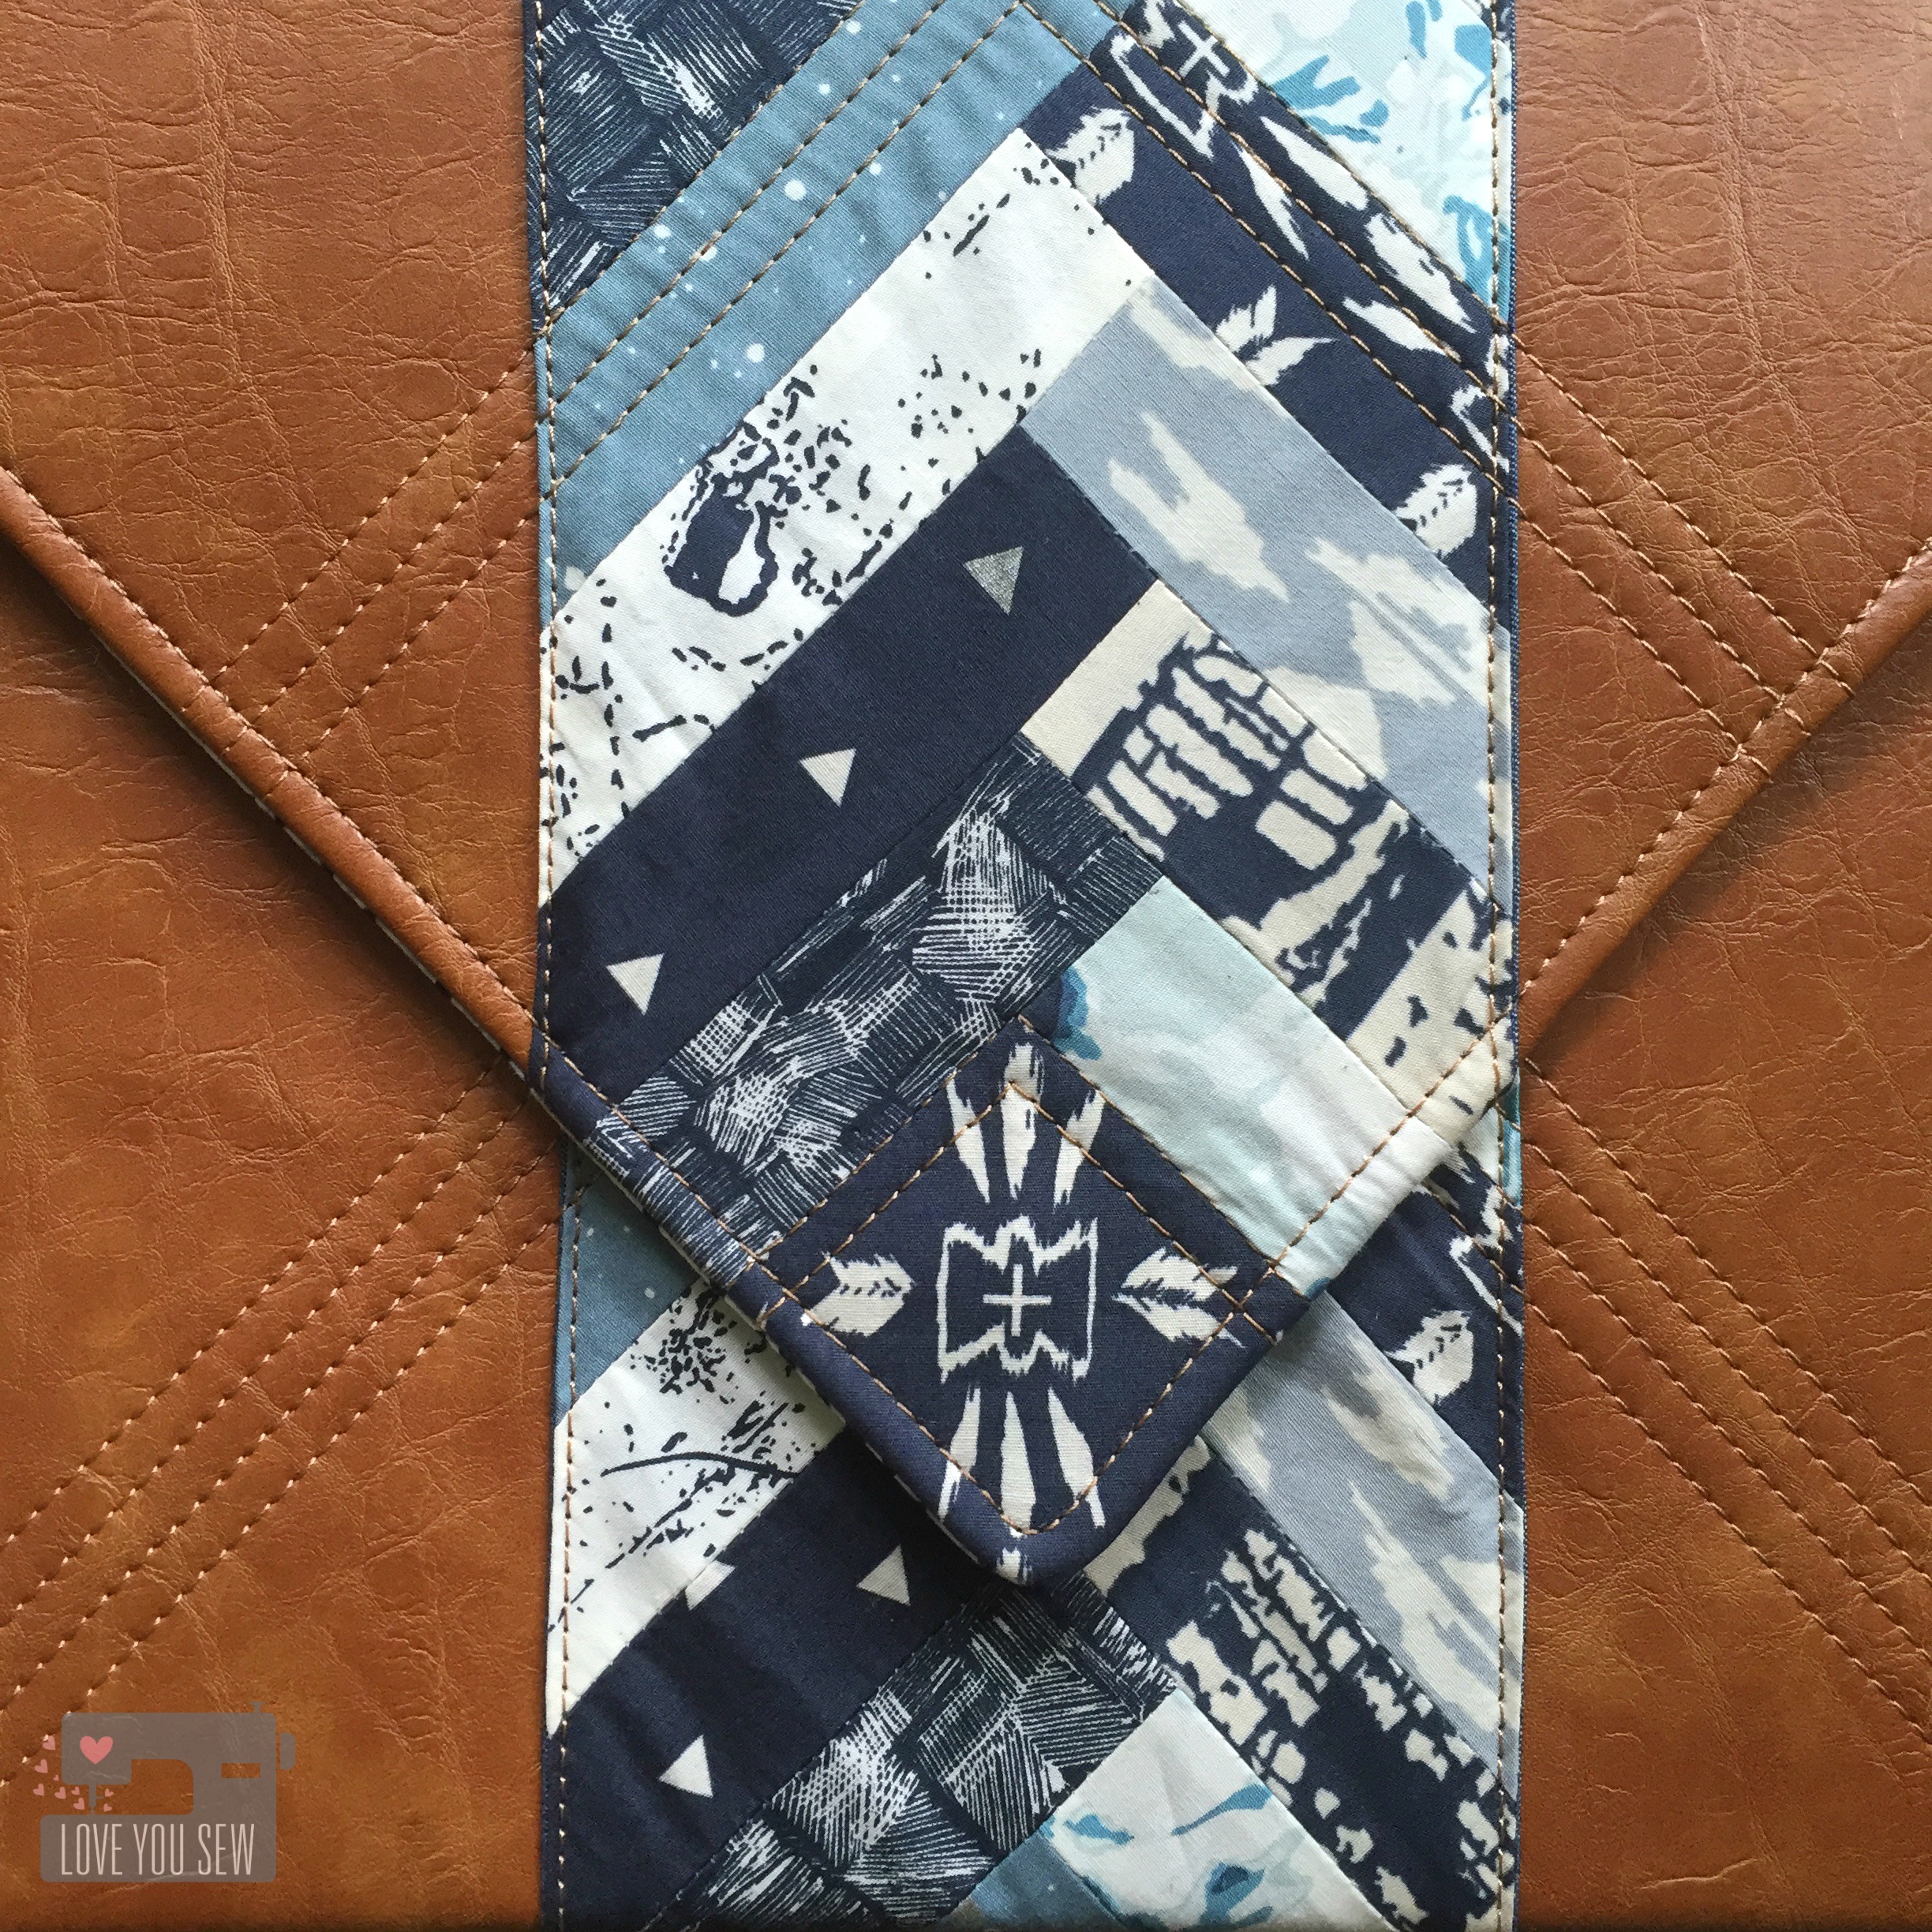
As I wrote in last week’s post from the Observer blog tour here, I like to show how hip and modern quilting can be. I love how the piecing of a half log-cabin accentuates the envelope shape and the monotone palette keeps it chic. Simple quilting adds enough texture and detail without being over-the-top…or over-worked.
This tutorial is for the faux leather version and finishes at approximately 14 3/4″ x 10 1/2″. As with all patterns, don’t jump the gun…please ready through the instructions in their entirety. Shoot me an email and/or leave me a comment if you have any questions. Enjoy!
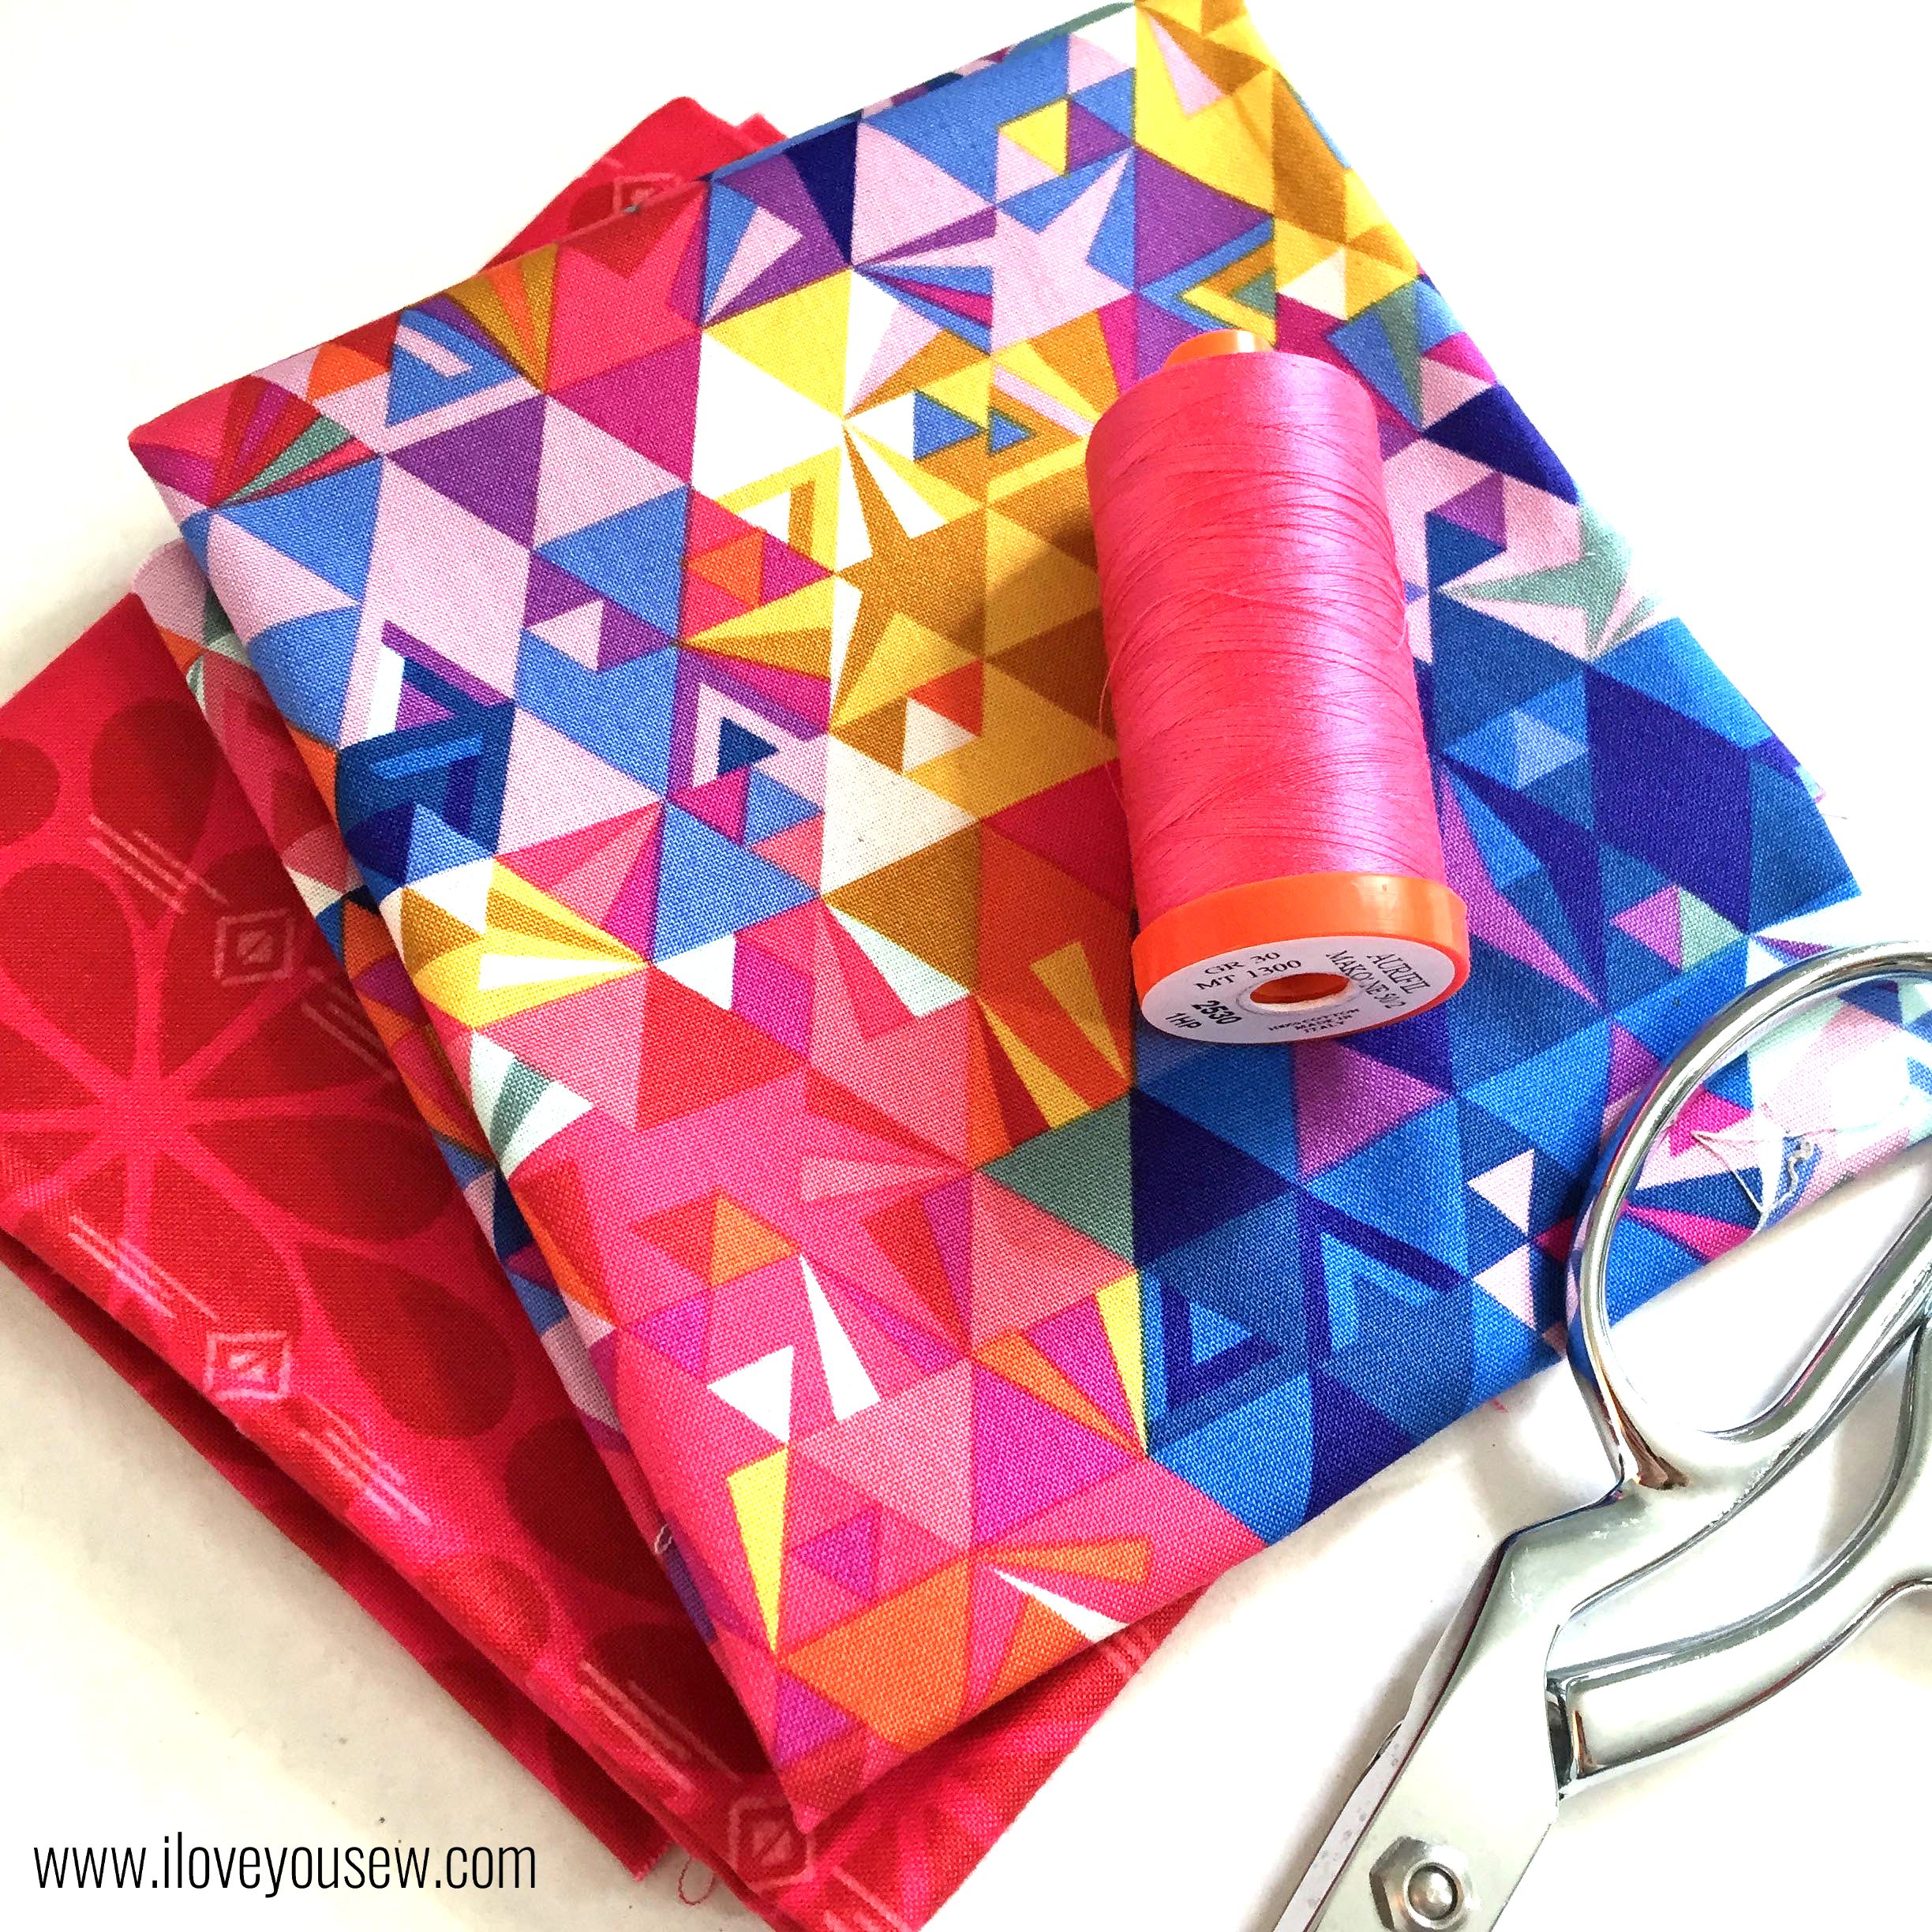
Materials Required:
- Faux leather/ Vegan leather / Vinyl (1/2 yd)
- Lining & Pocket Fabric (1 yd)
- Pieced Panel scraps (1/4 yd)
- Pieced Panel Lining Fabric (1/4 yd)
- Woven Fusible Interfacing [Pellon SF101] (2 1/2 yds)
- Ultra-firm Sew-In Interfacing [Pellon 70 Peltex] (1 yd)
- 9″ Zipper
- Magnetic Snap
- Coordinating Thread(s)
- Poster Board (optional for cutting pattern templates)
- Spray Baste or Fabric Glue Pen (optional)
- Clover Clips
Cutting Instructions:
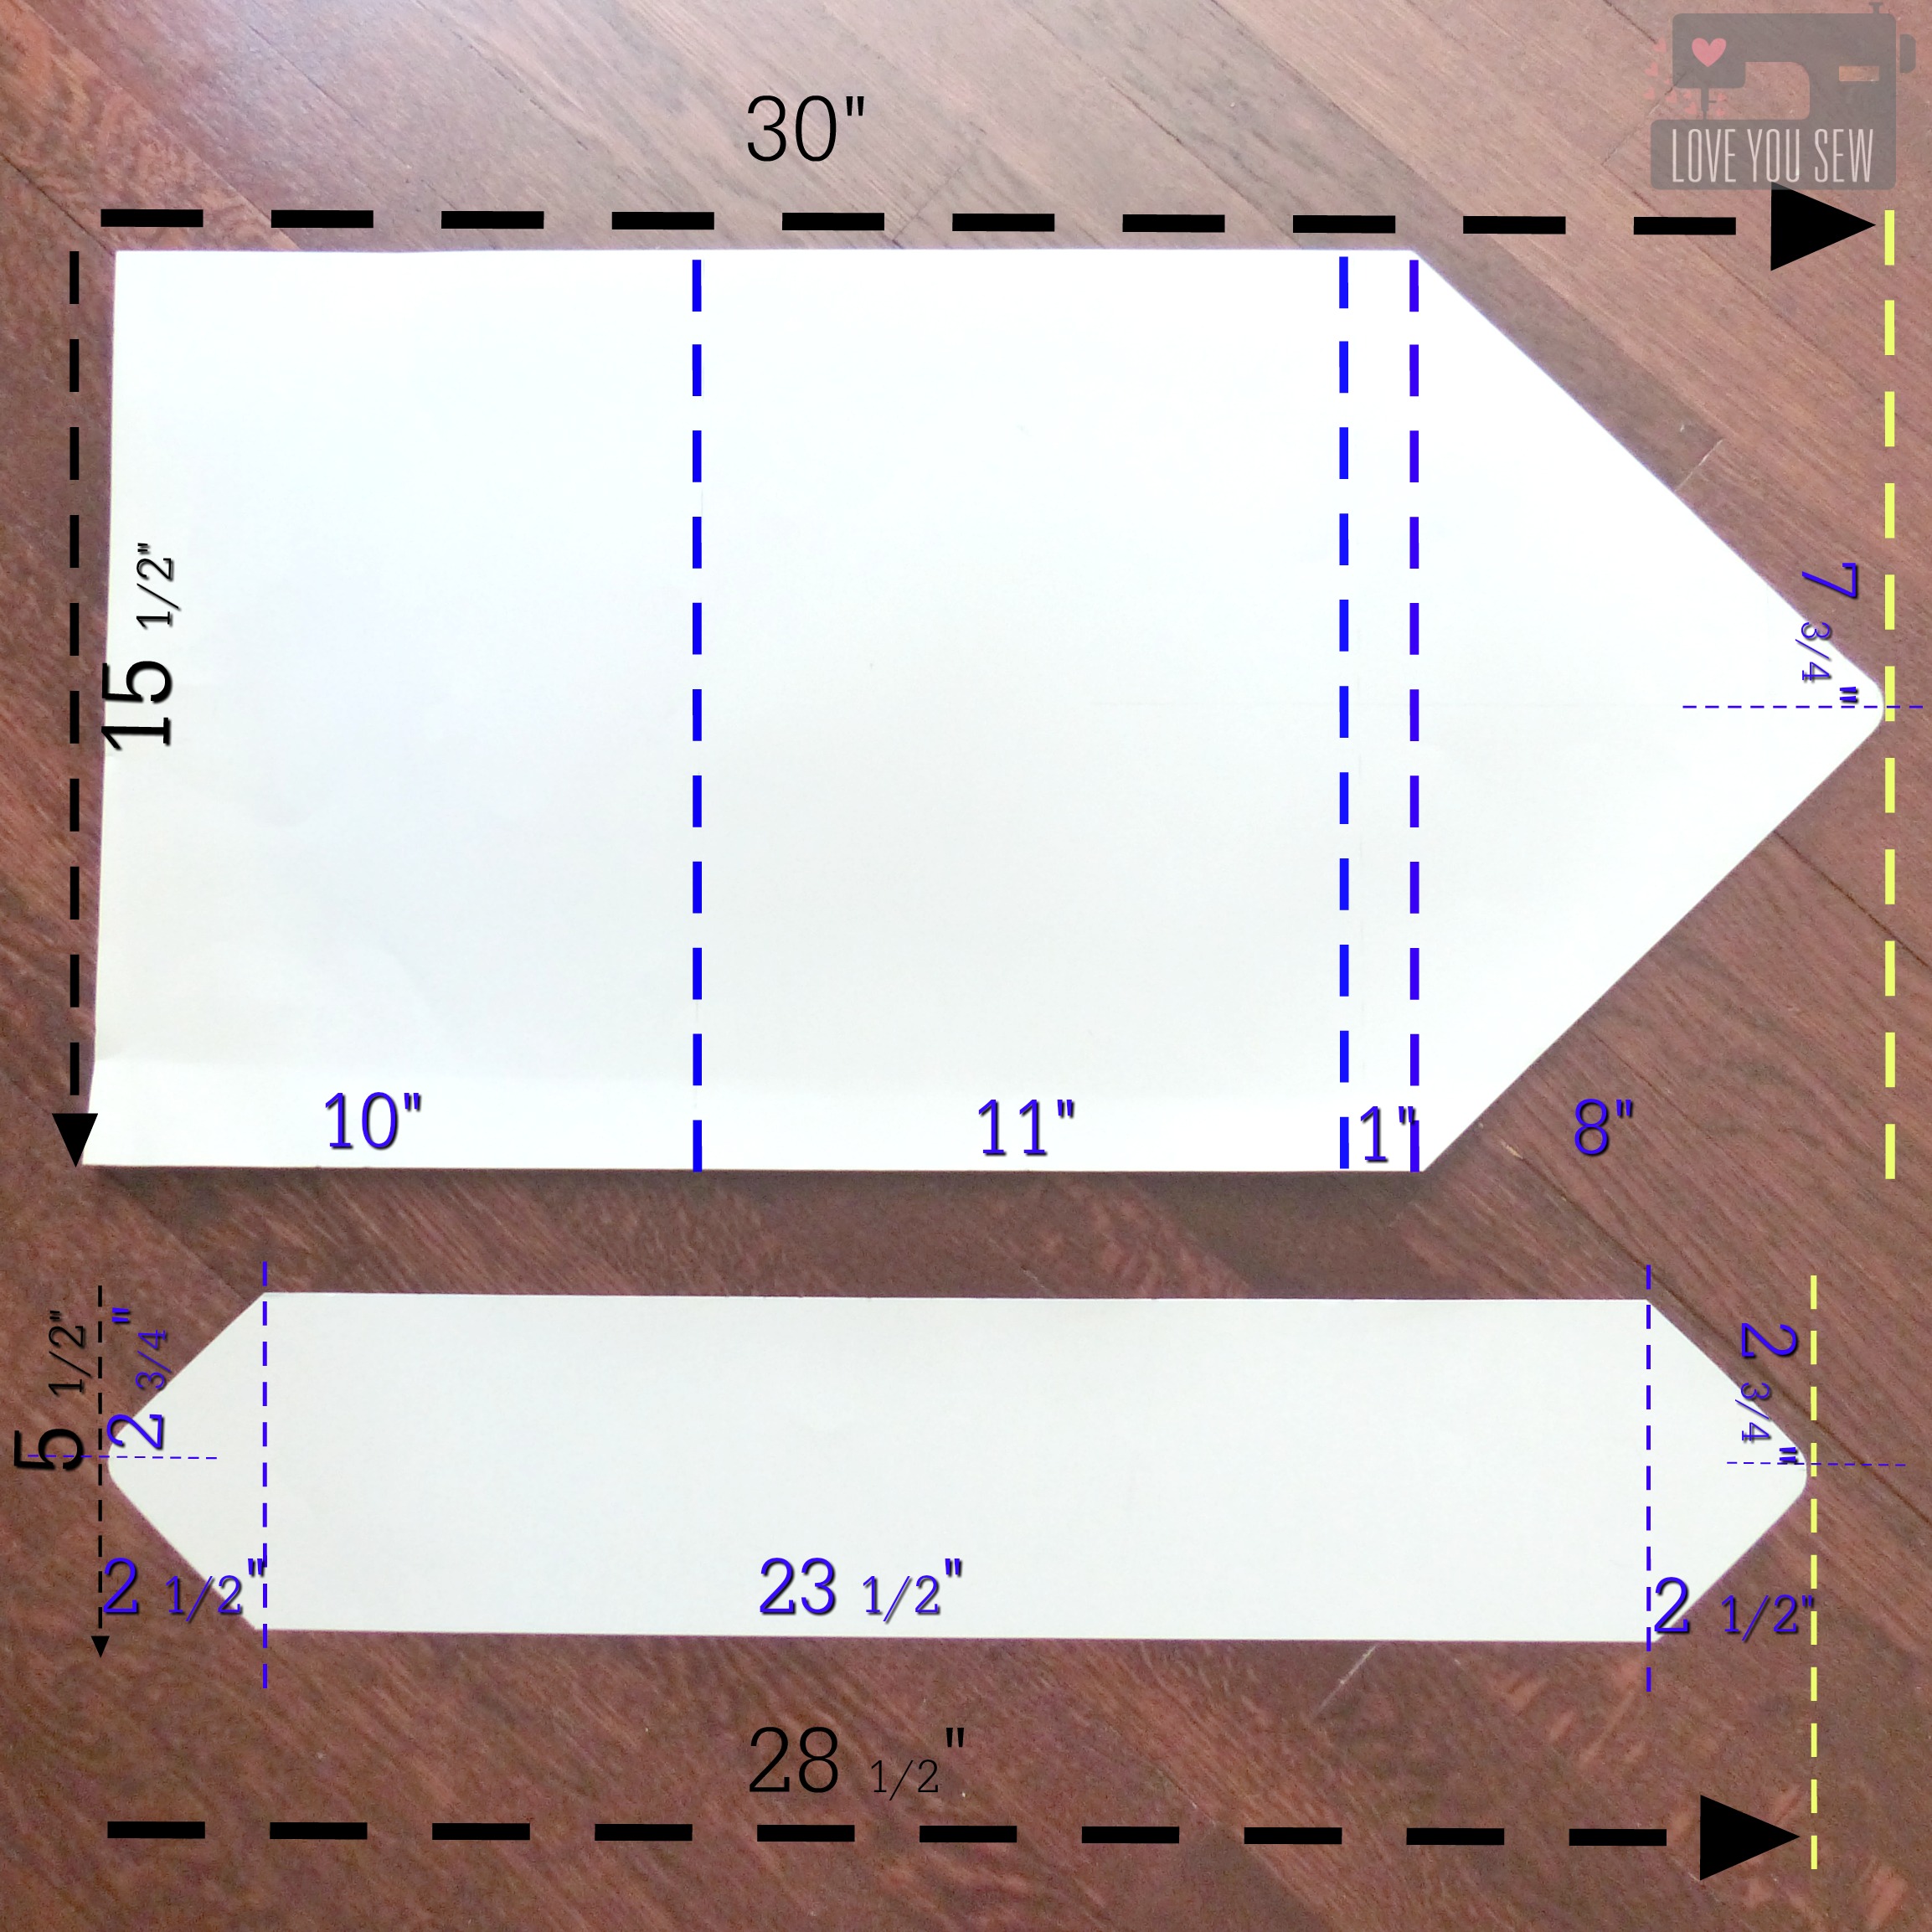
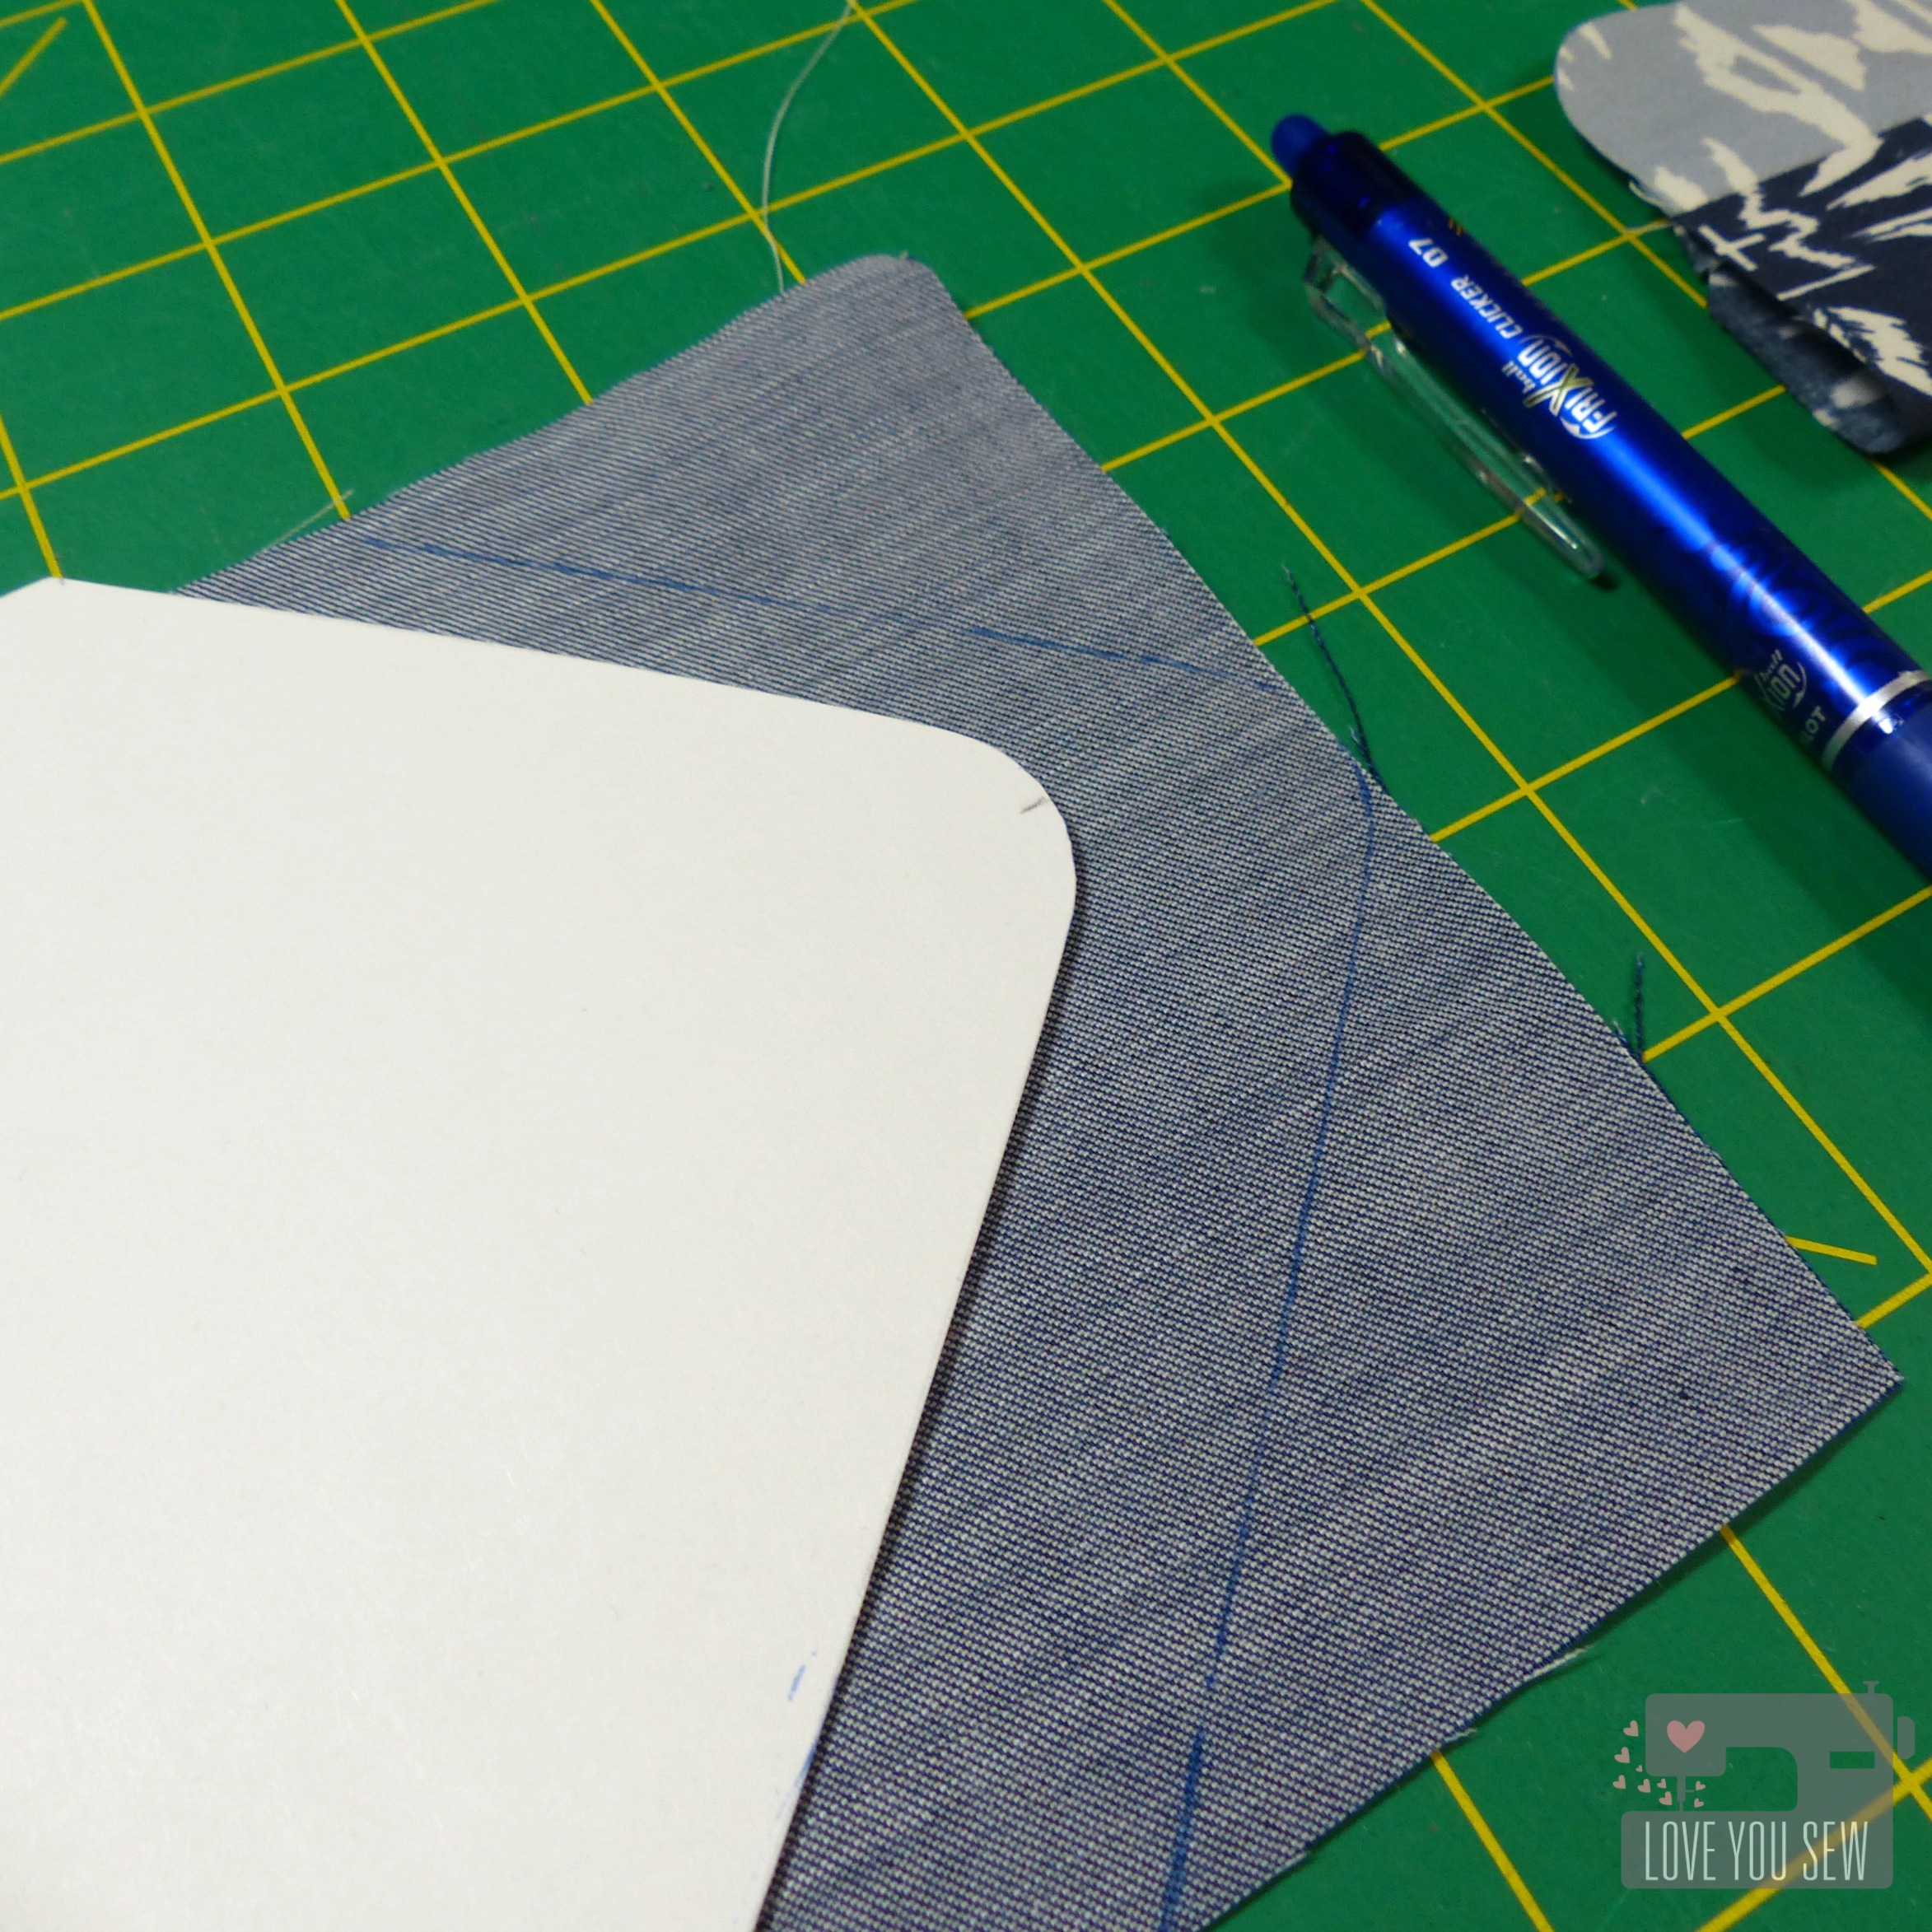
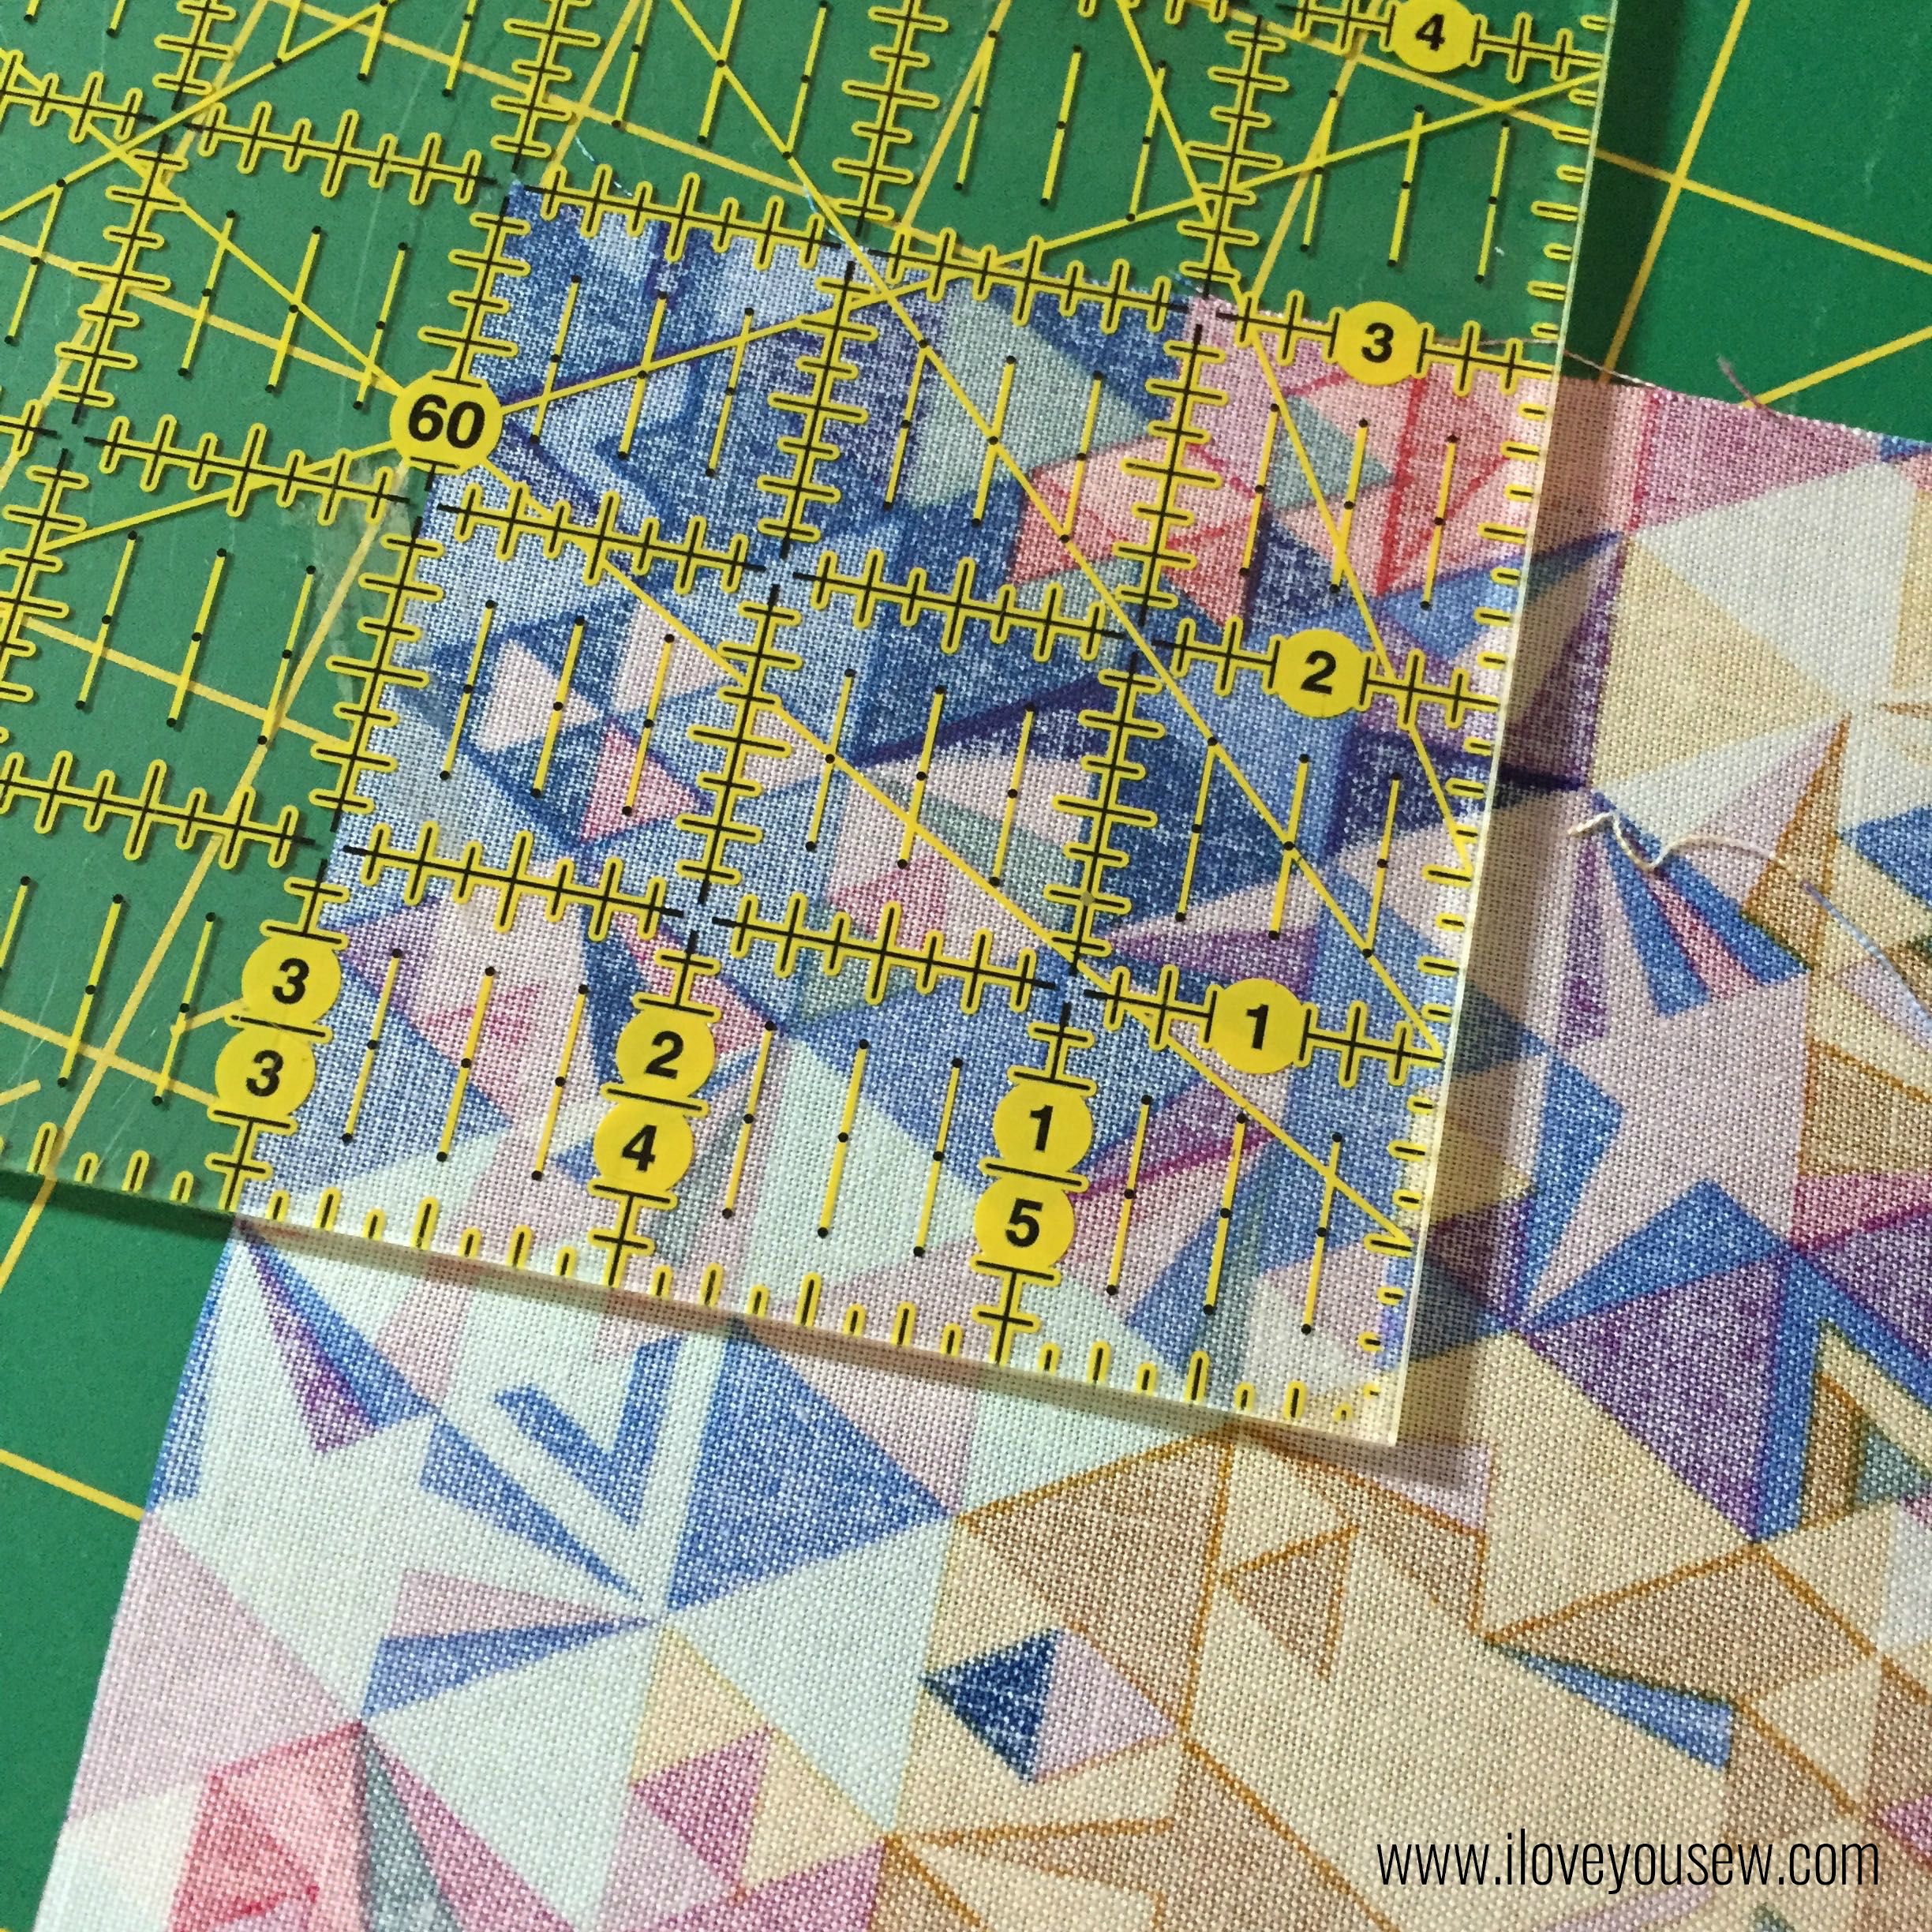
- Create the body and center panel cutting templates following the black numbers. Make markings for the numbers and lines in purple.
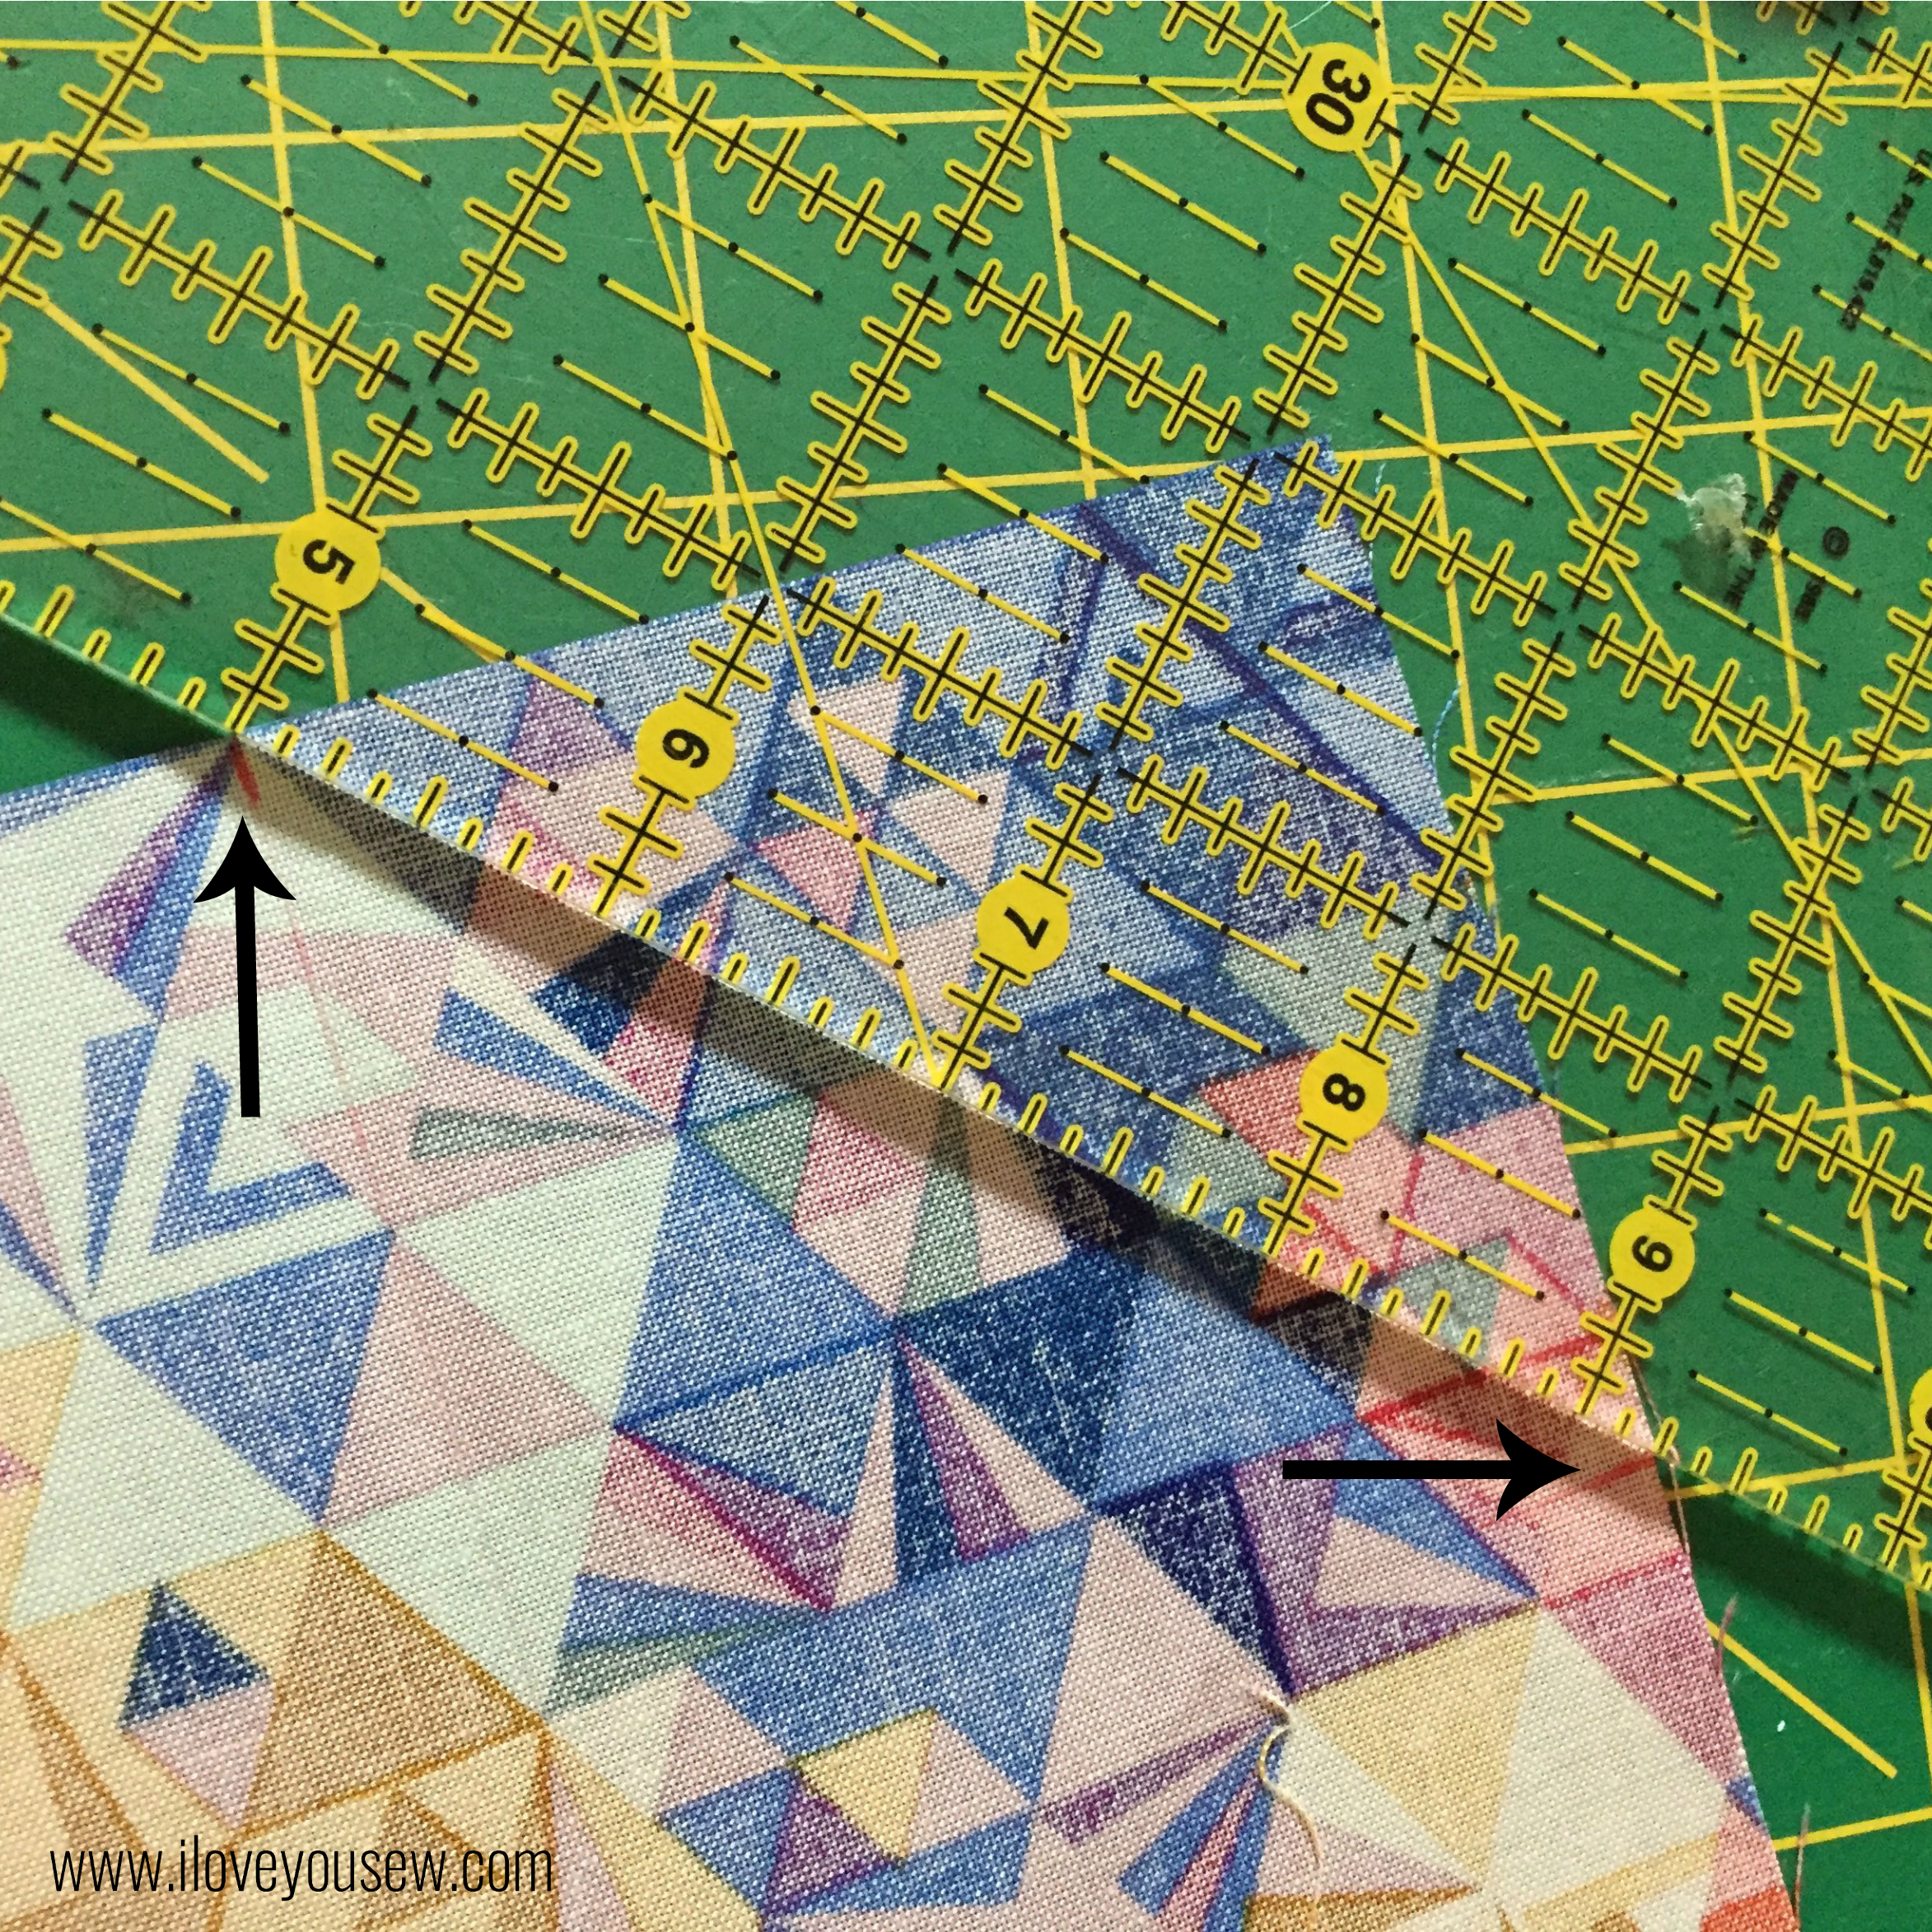
- Cut the angles by finding the mid-point of the short-sides of each template.

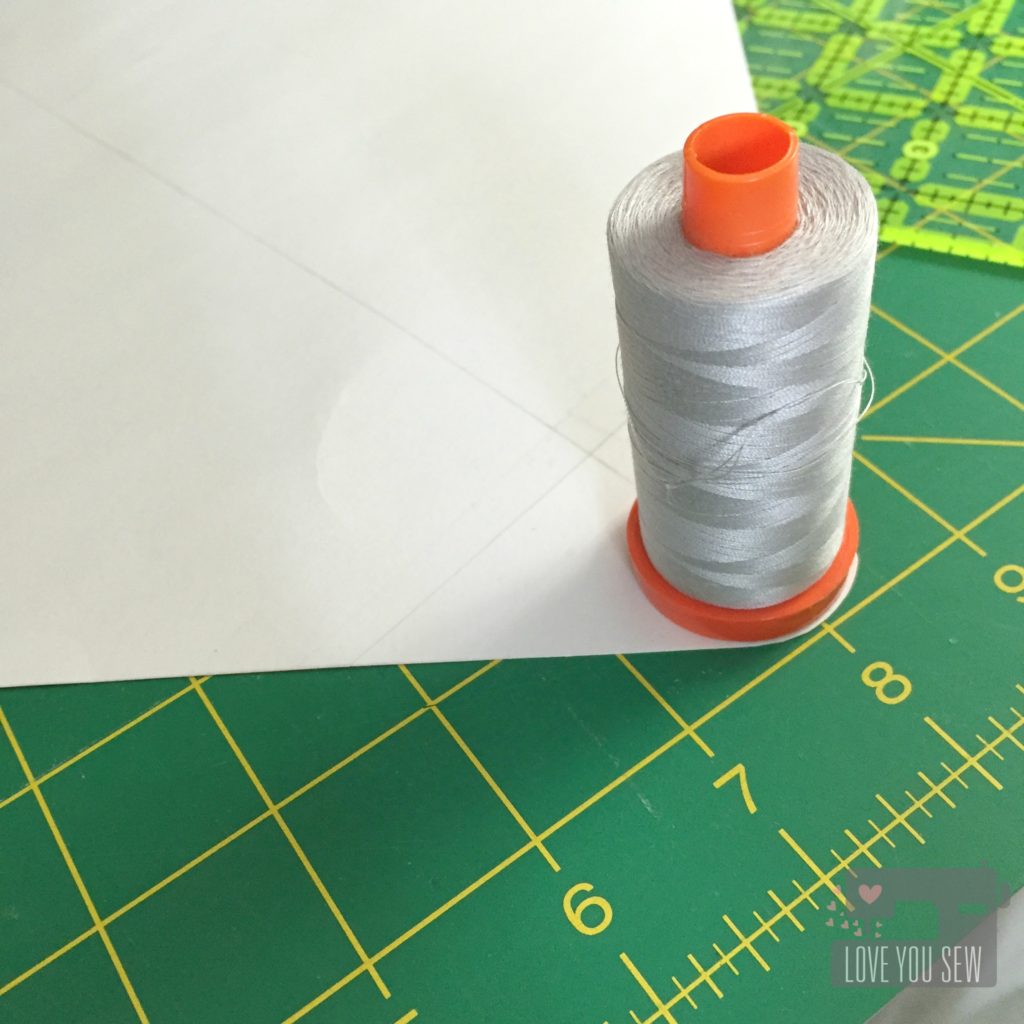
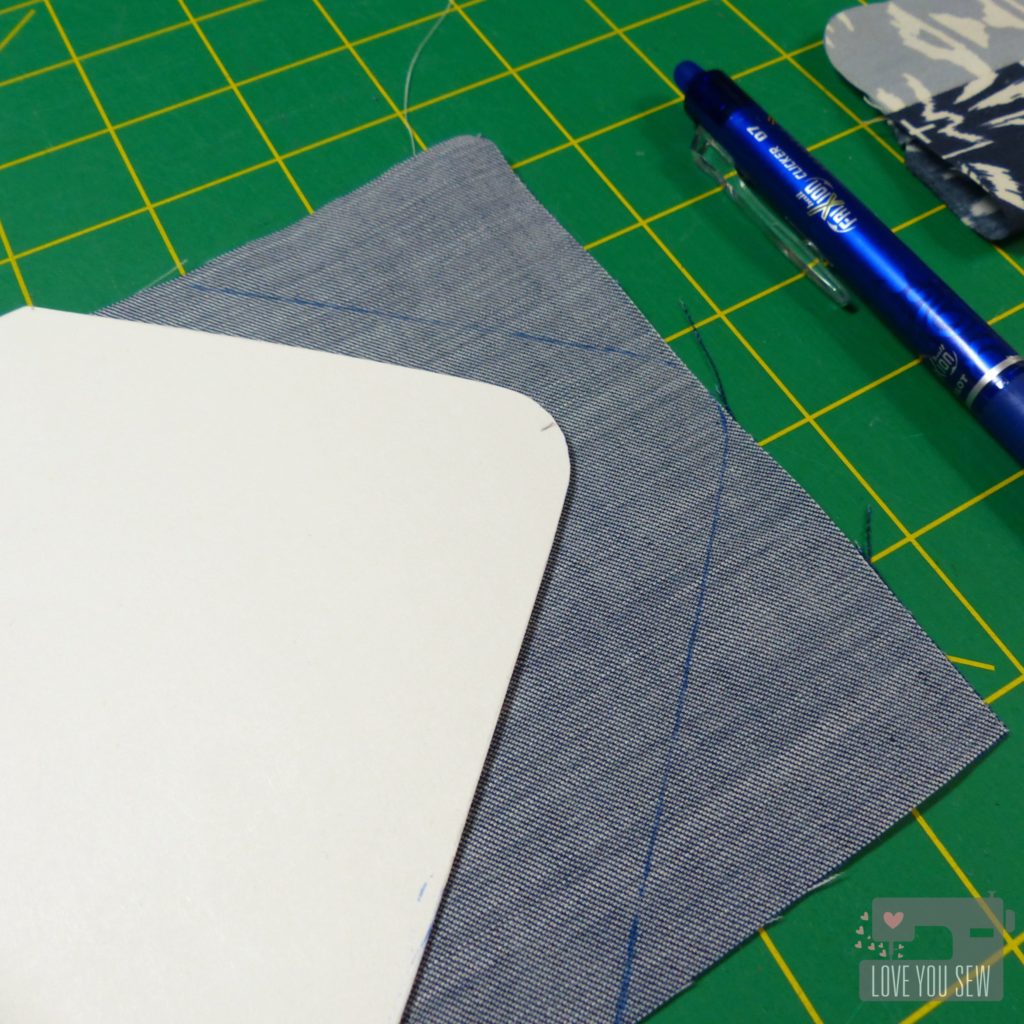
- Round out each of the “envelope points” using a large spool of thread
- Cut the angles by finding the mid-point of the short-sides of each template.
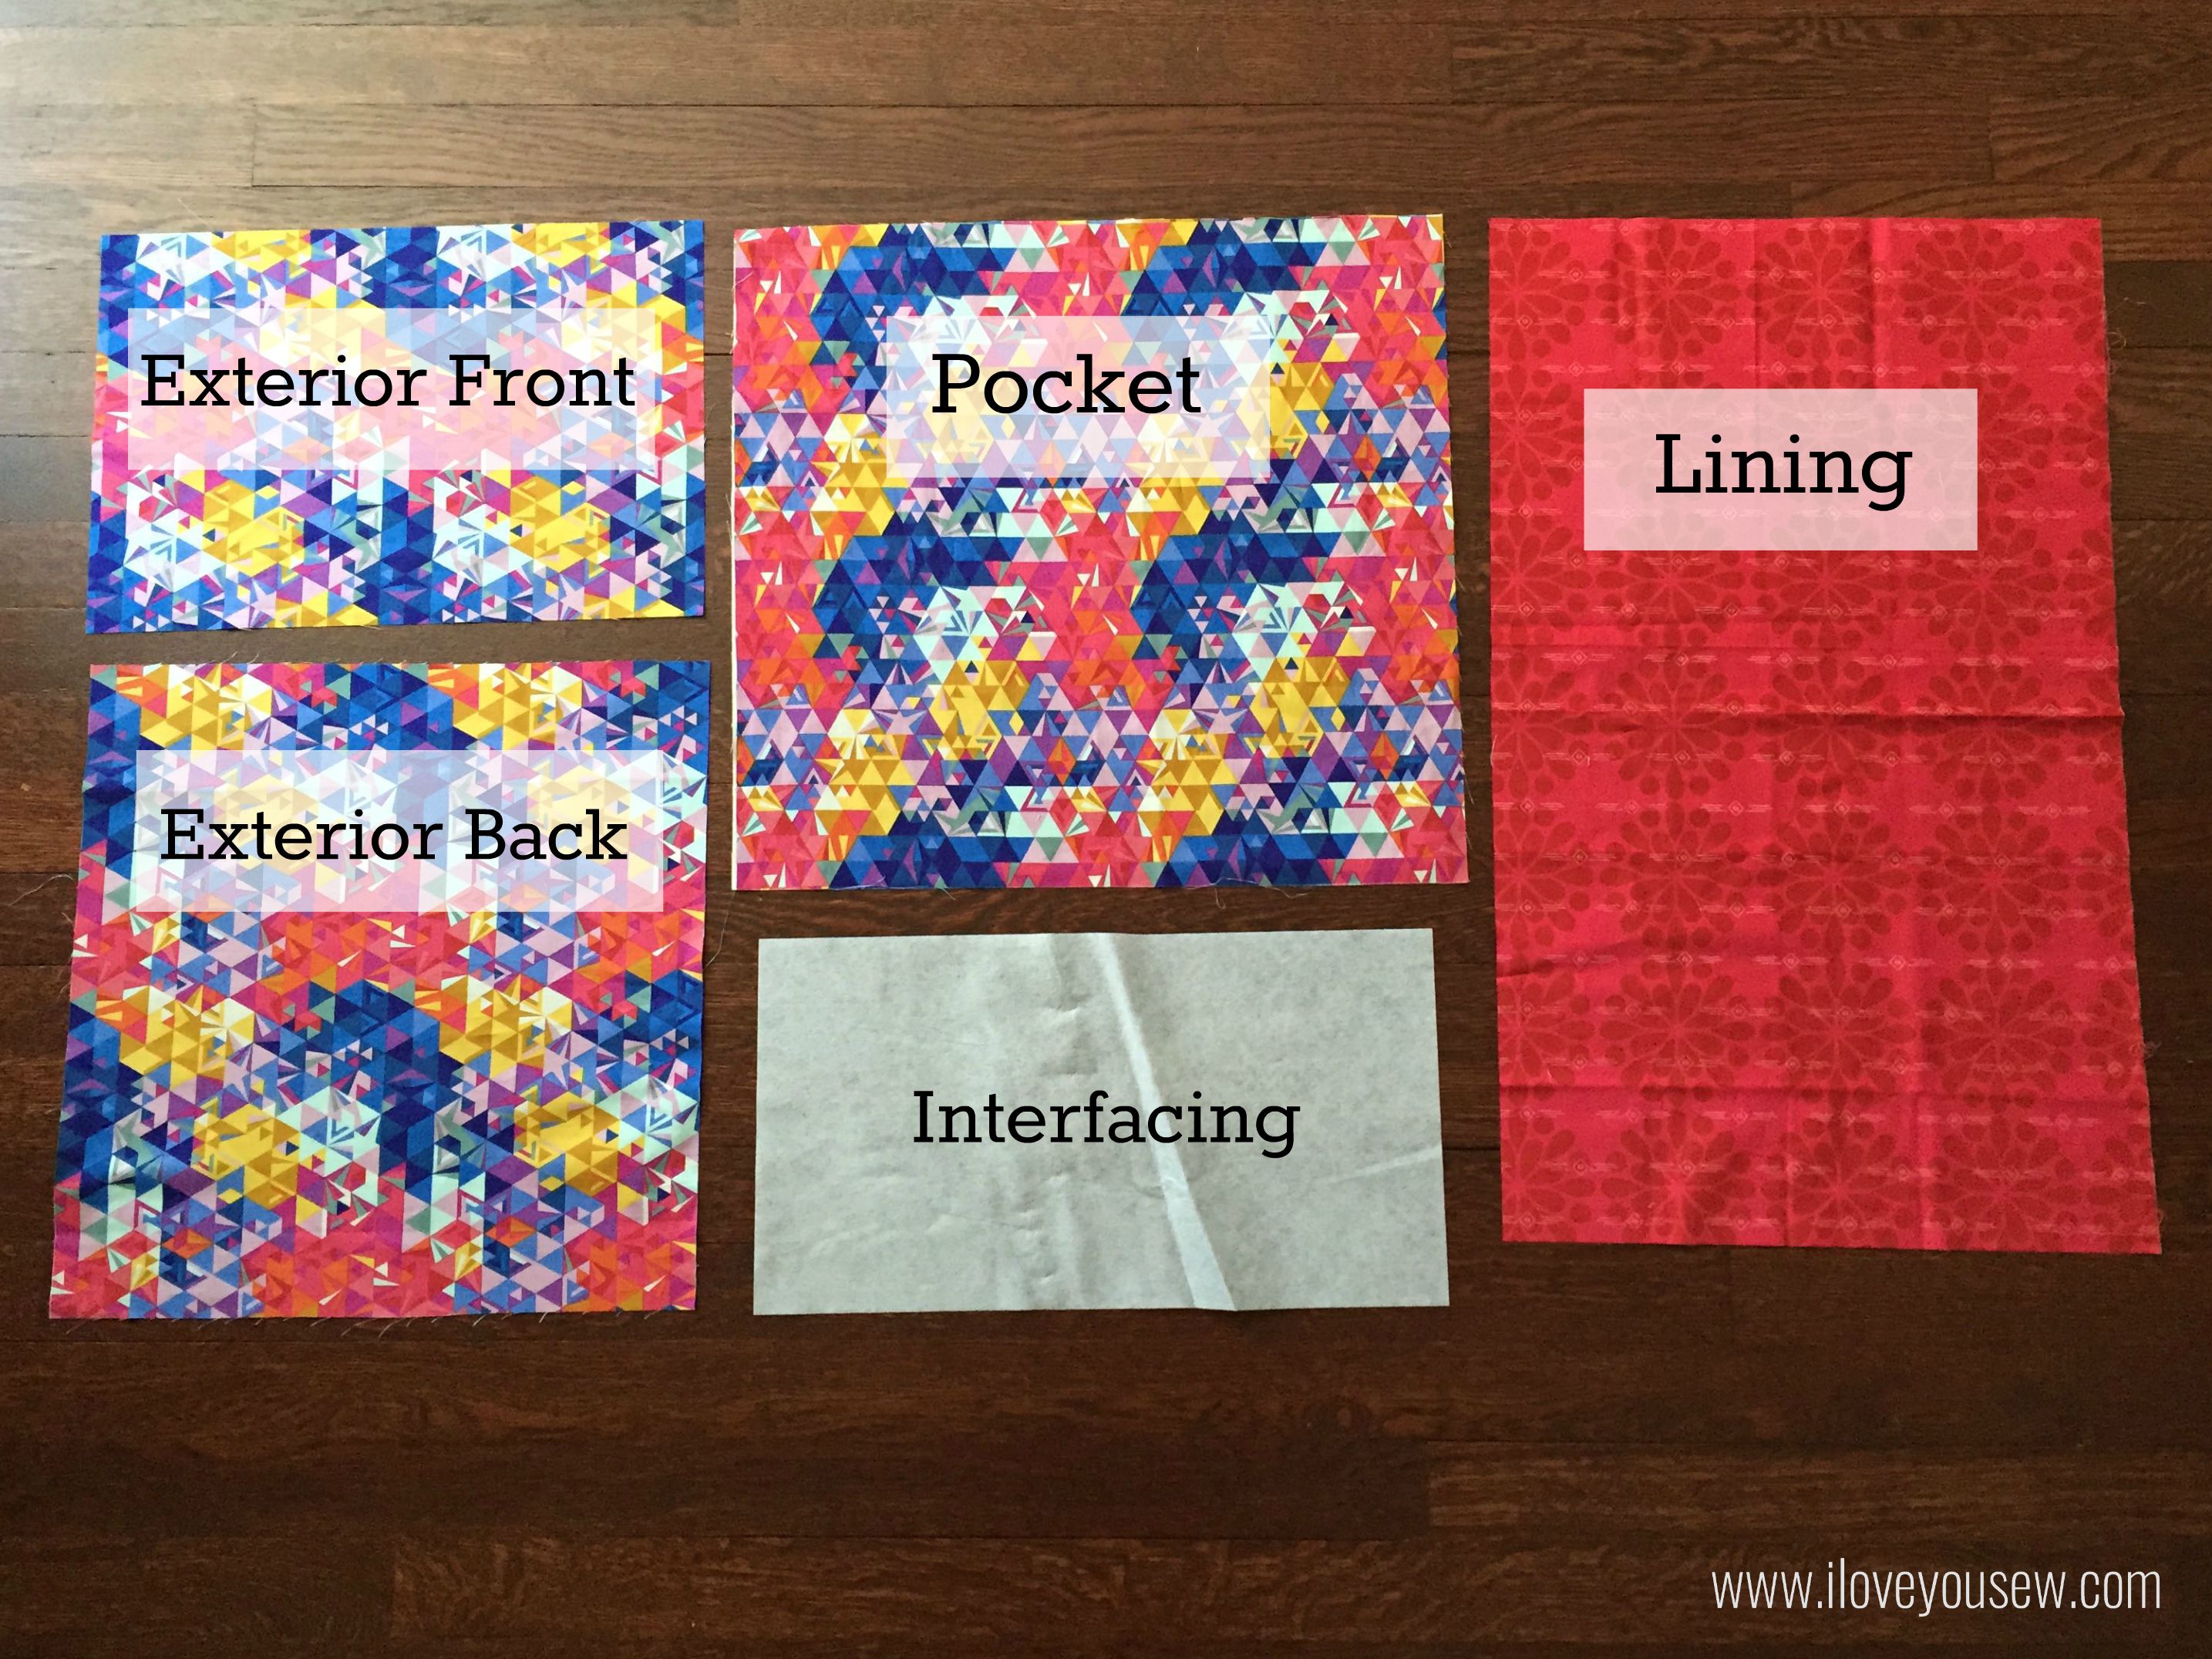
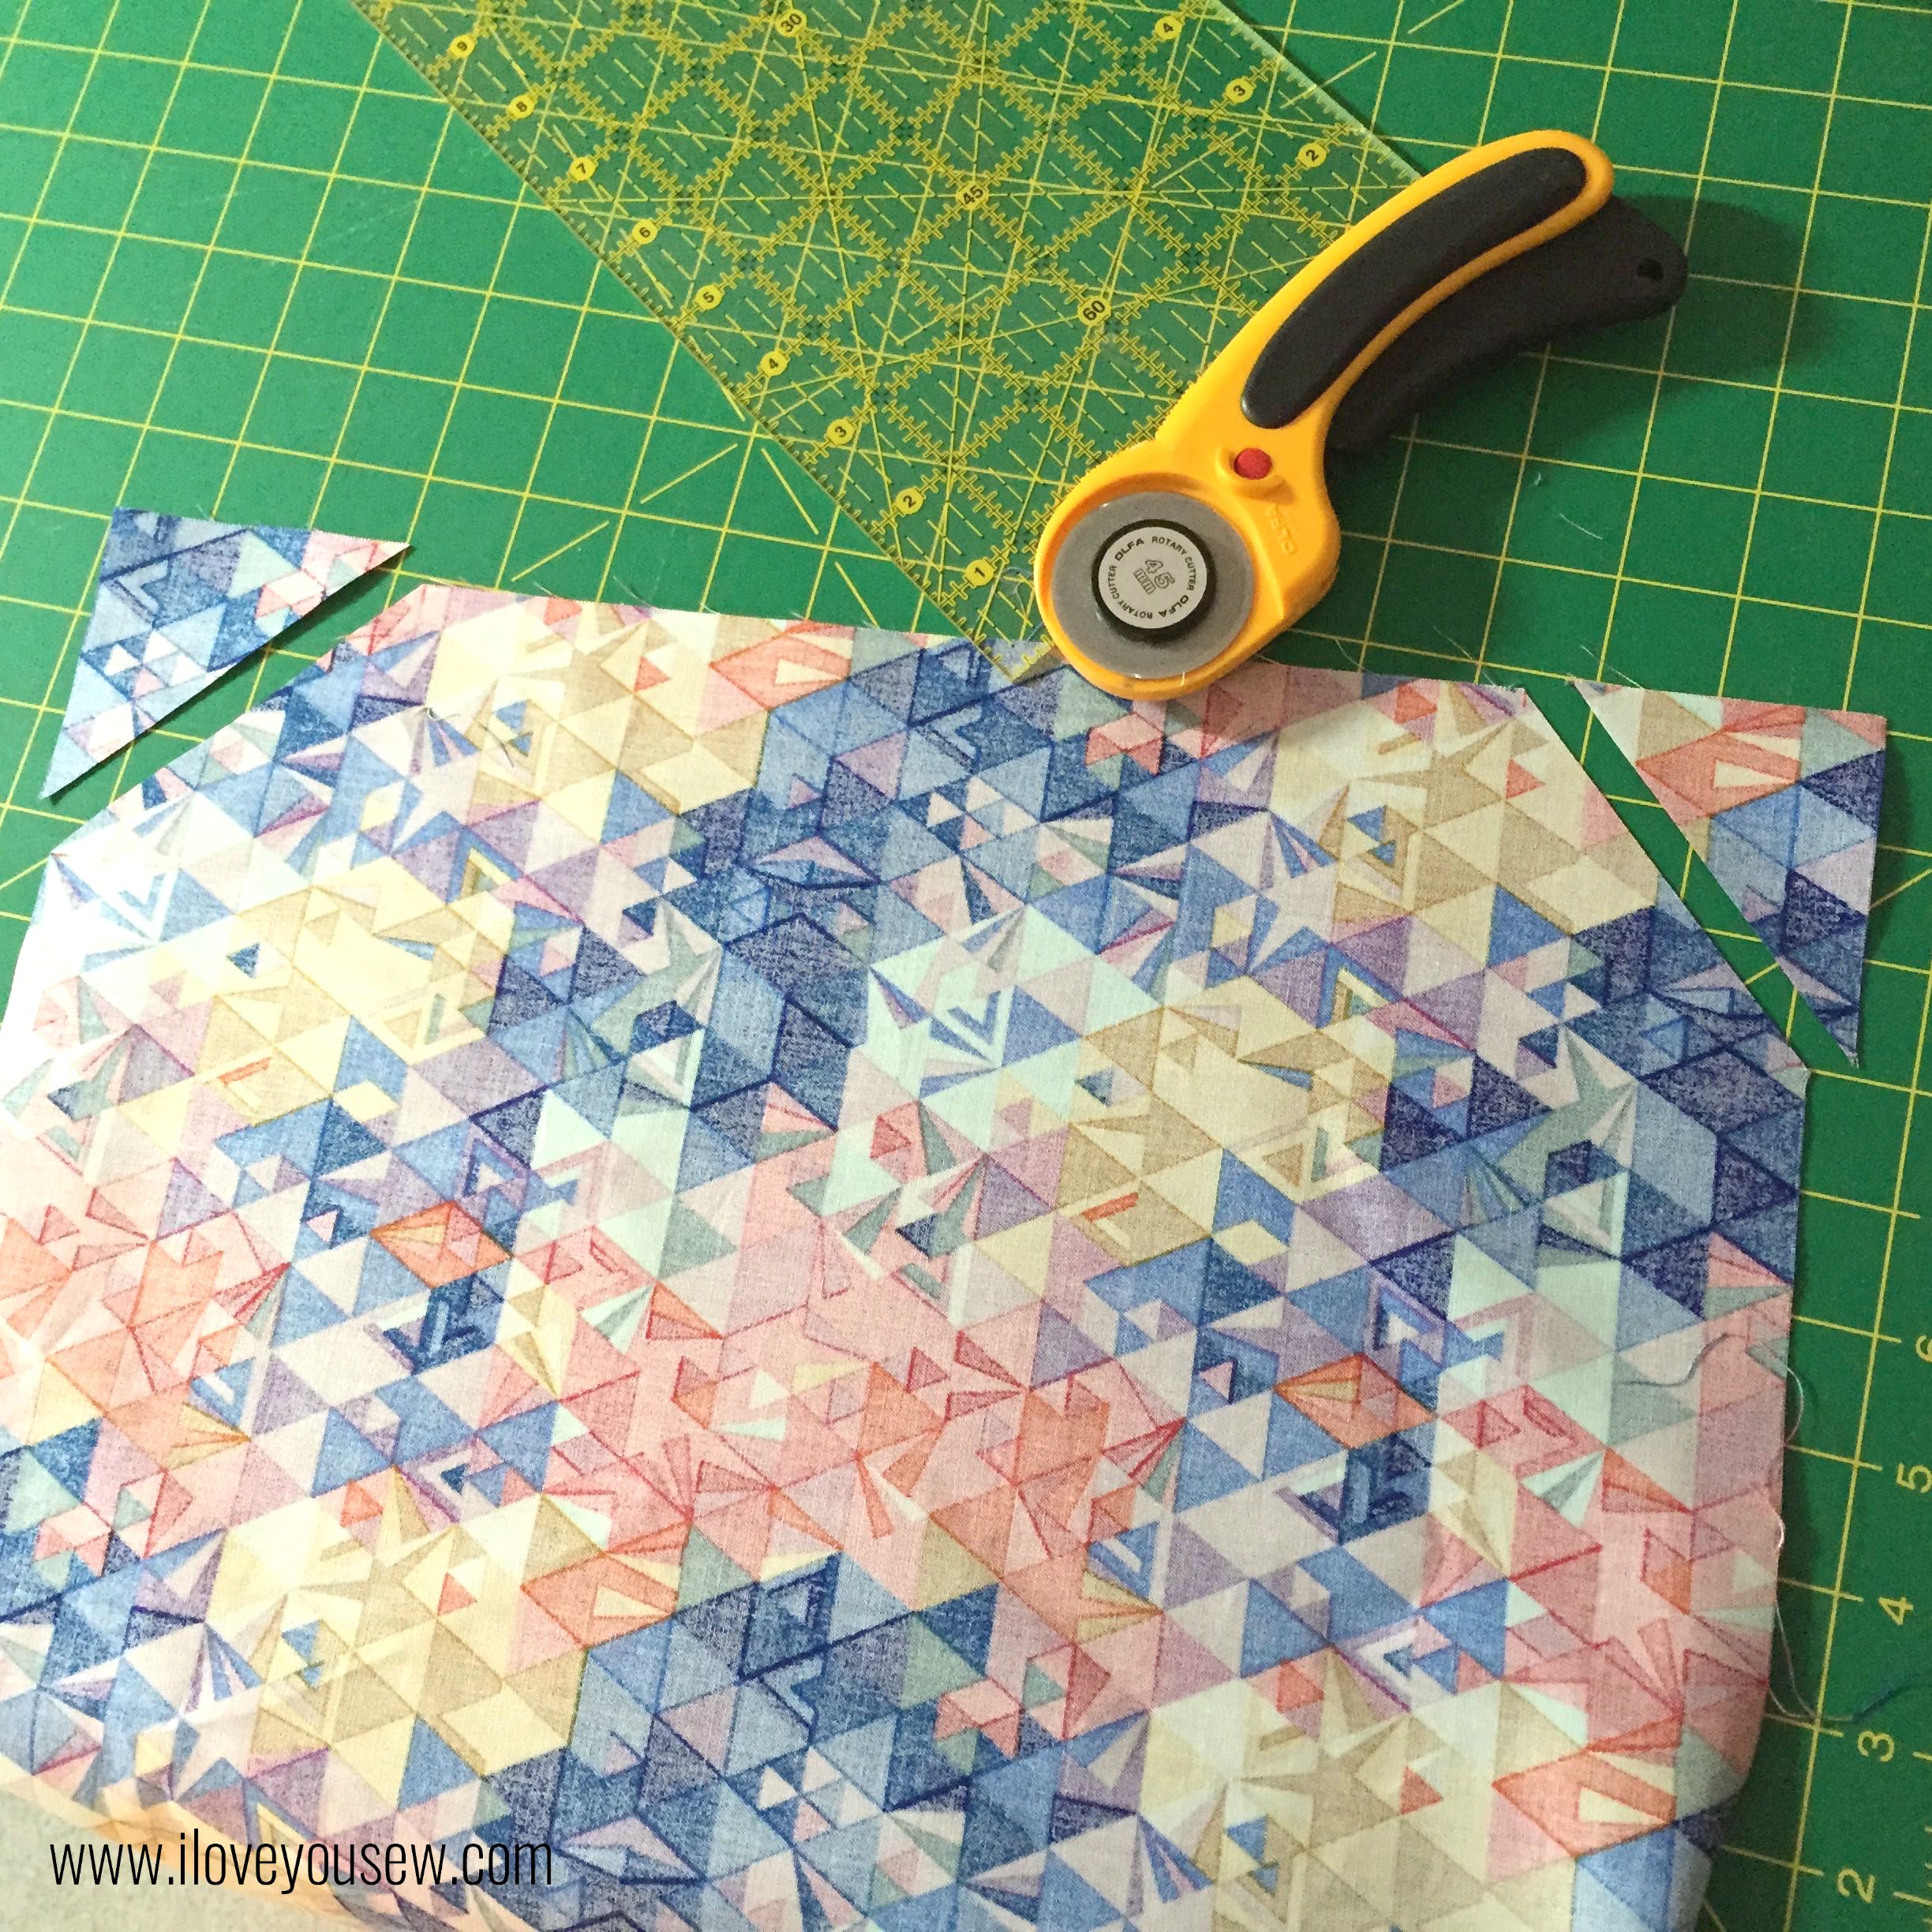
- Use your larger template to cut:
- (1) Body with faux leather
- (1) Lining
- (2) Woven Fusible Interfacings
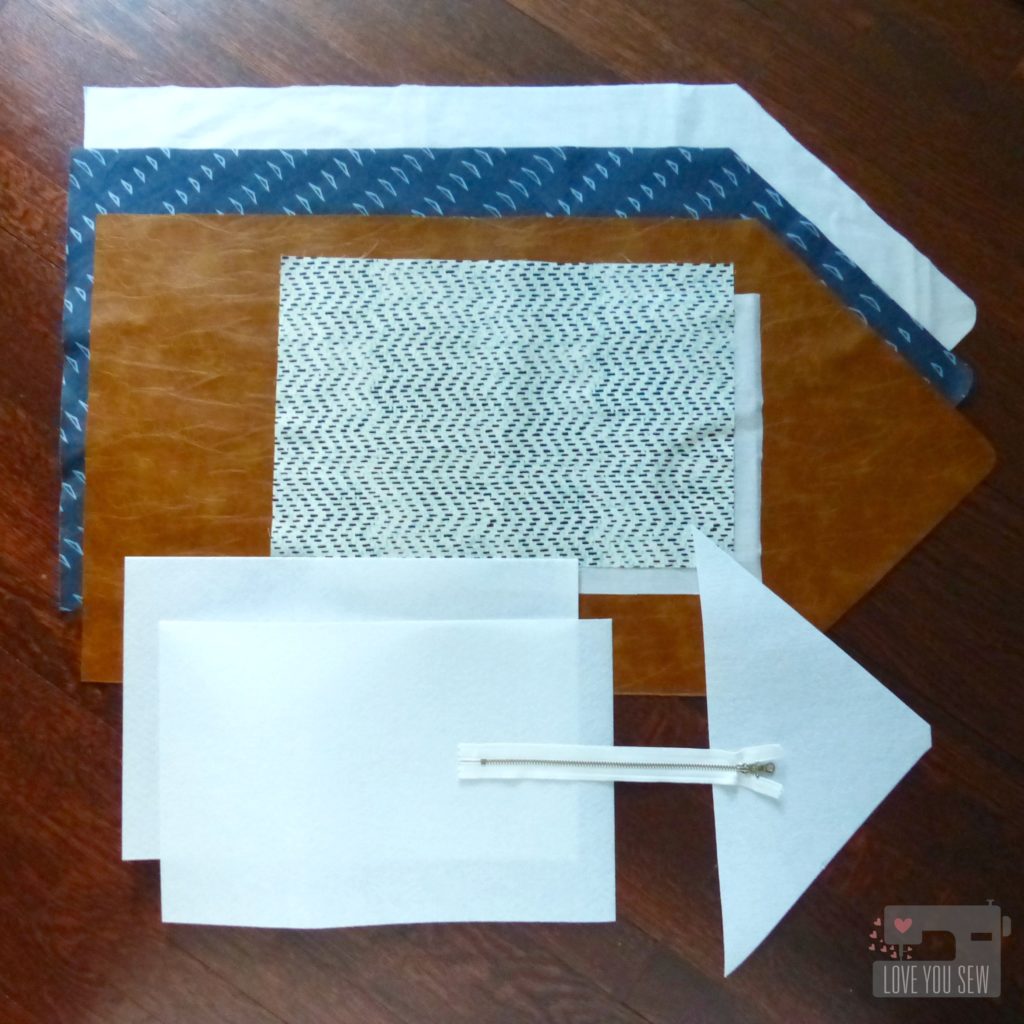
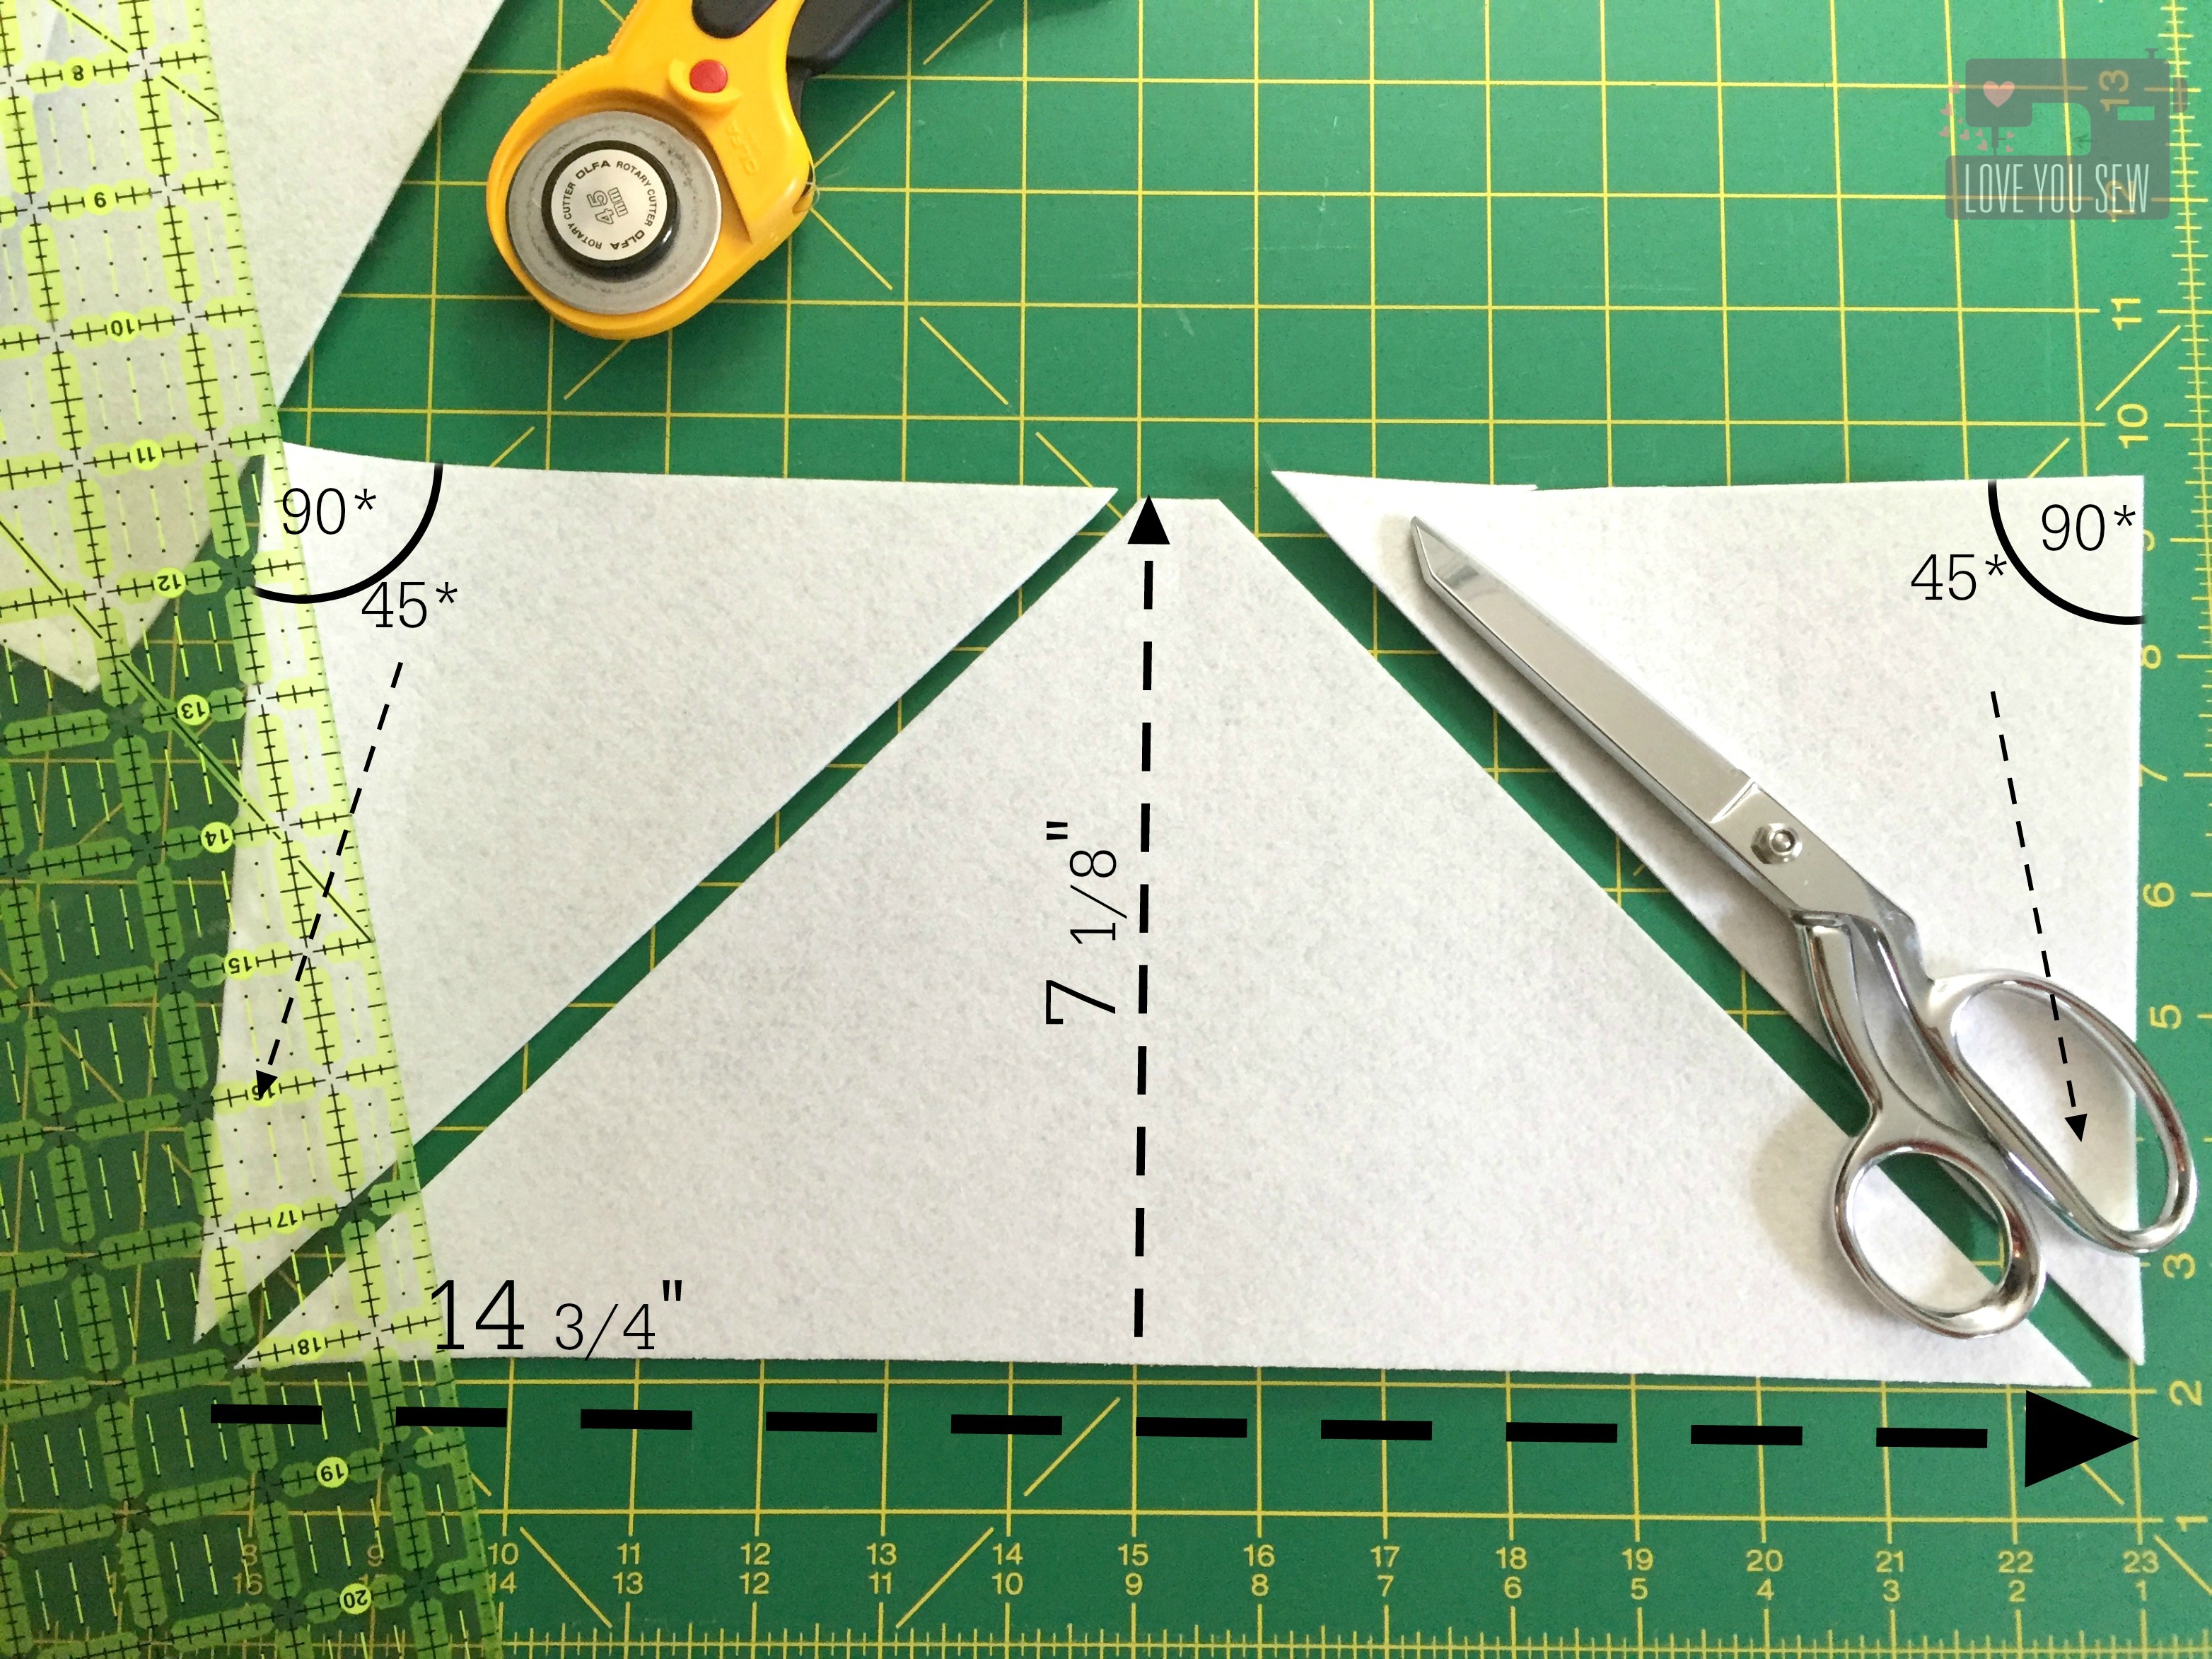
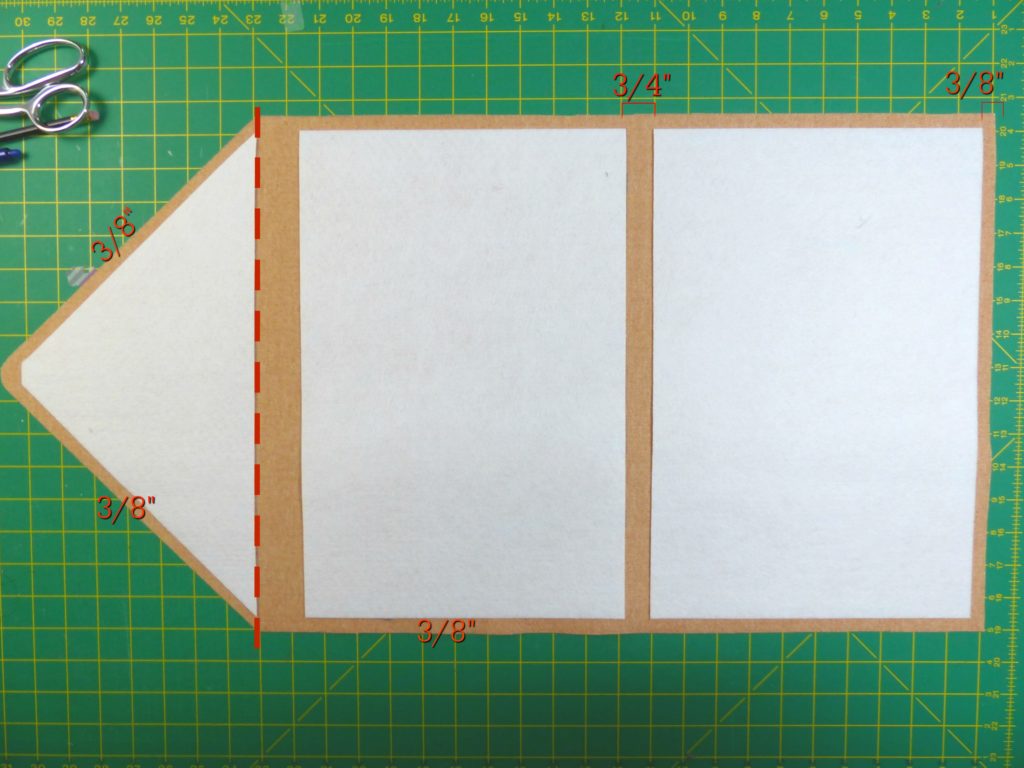
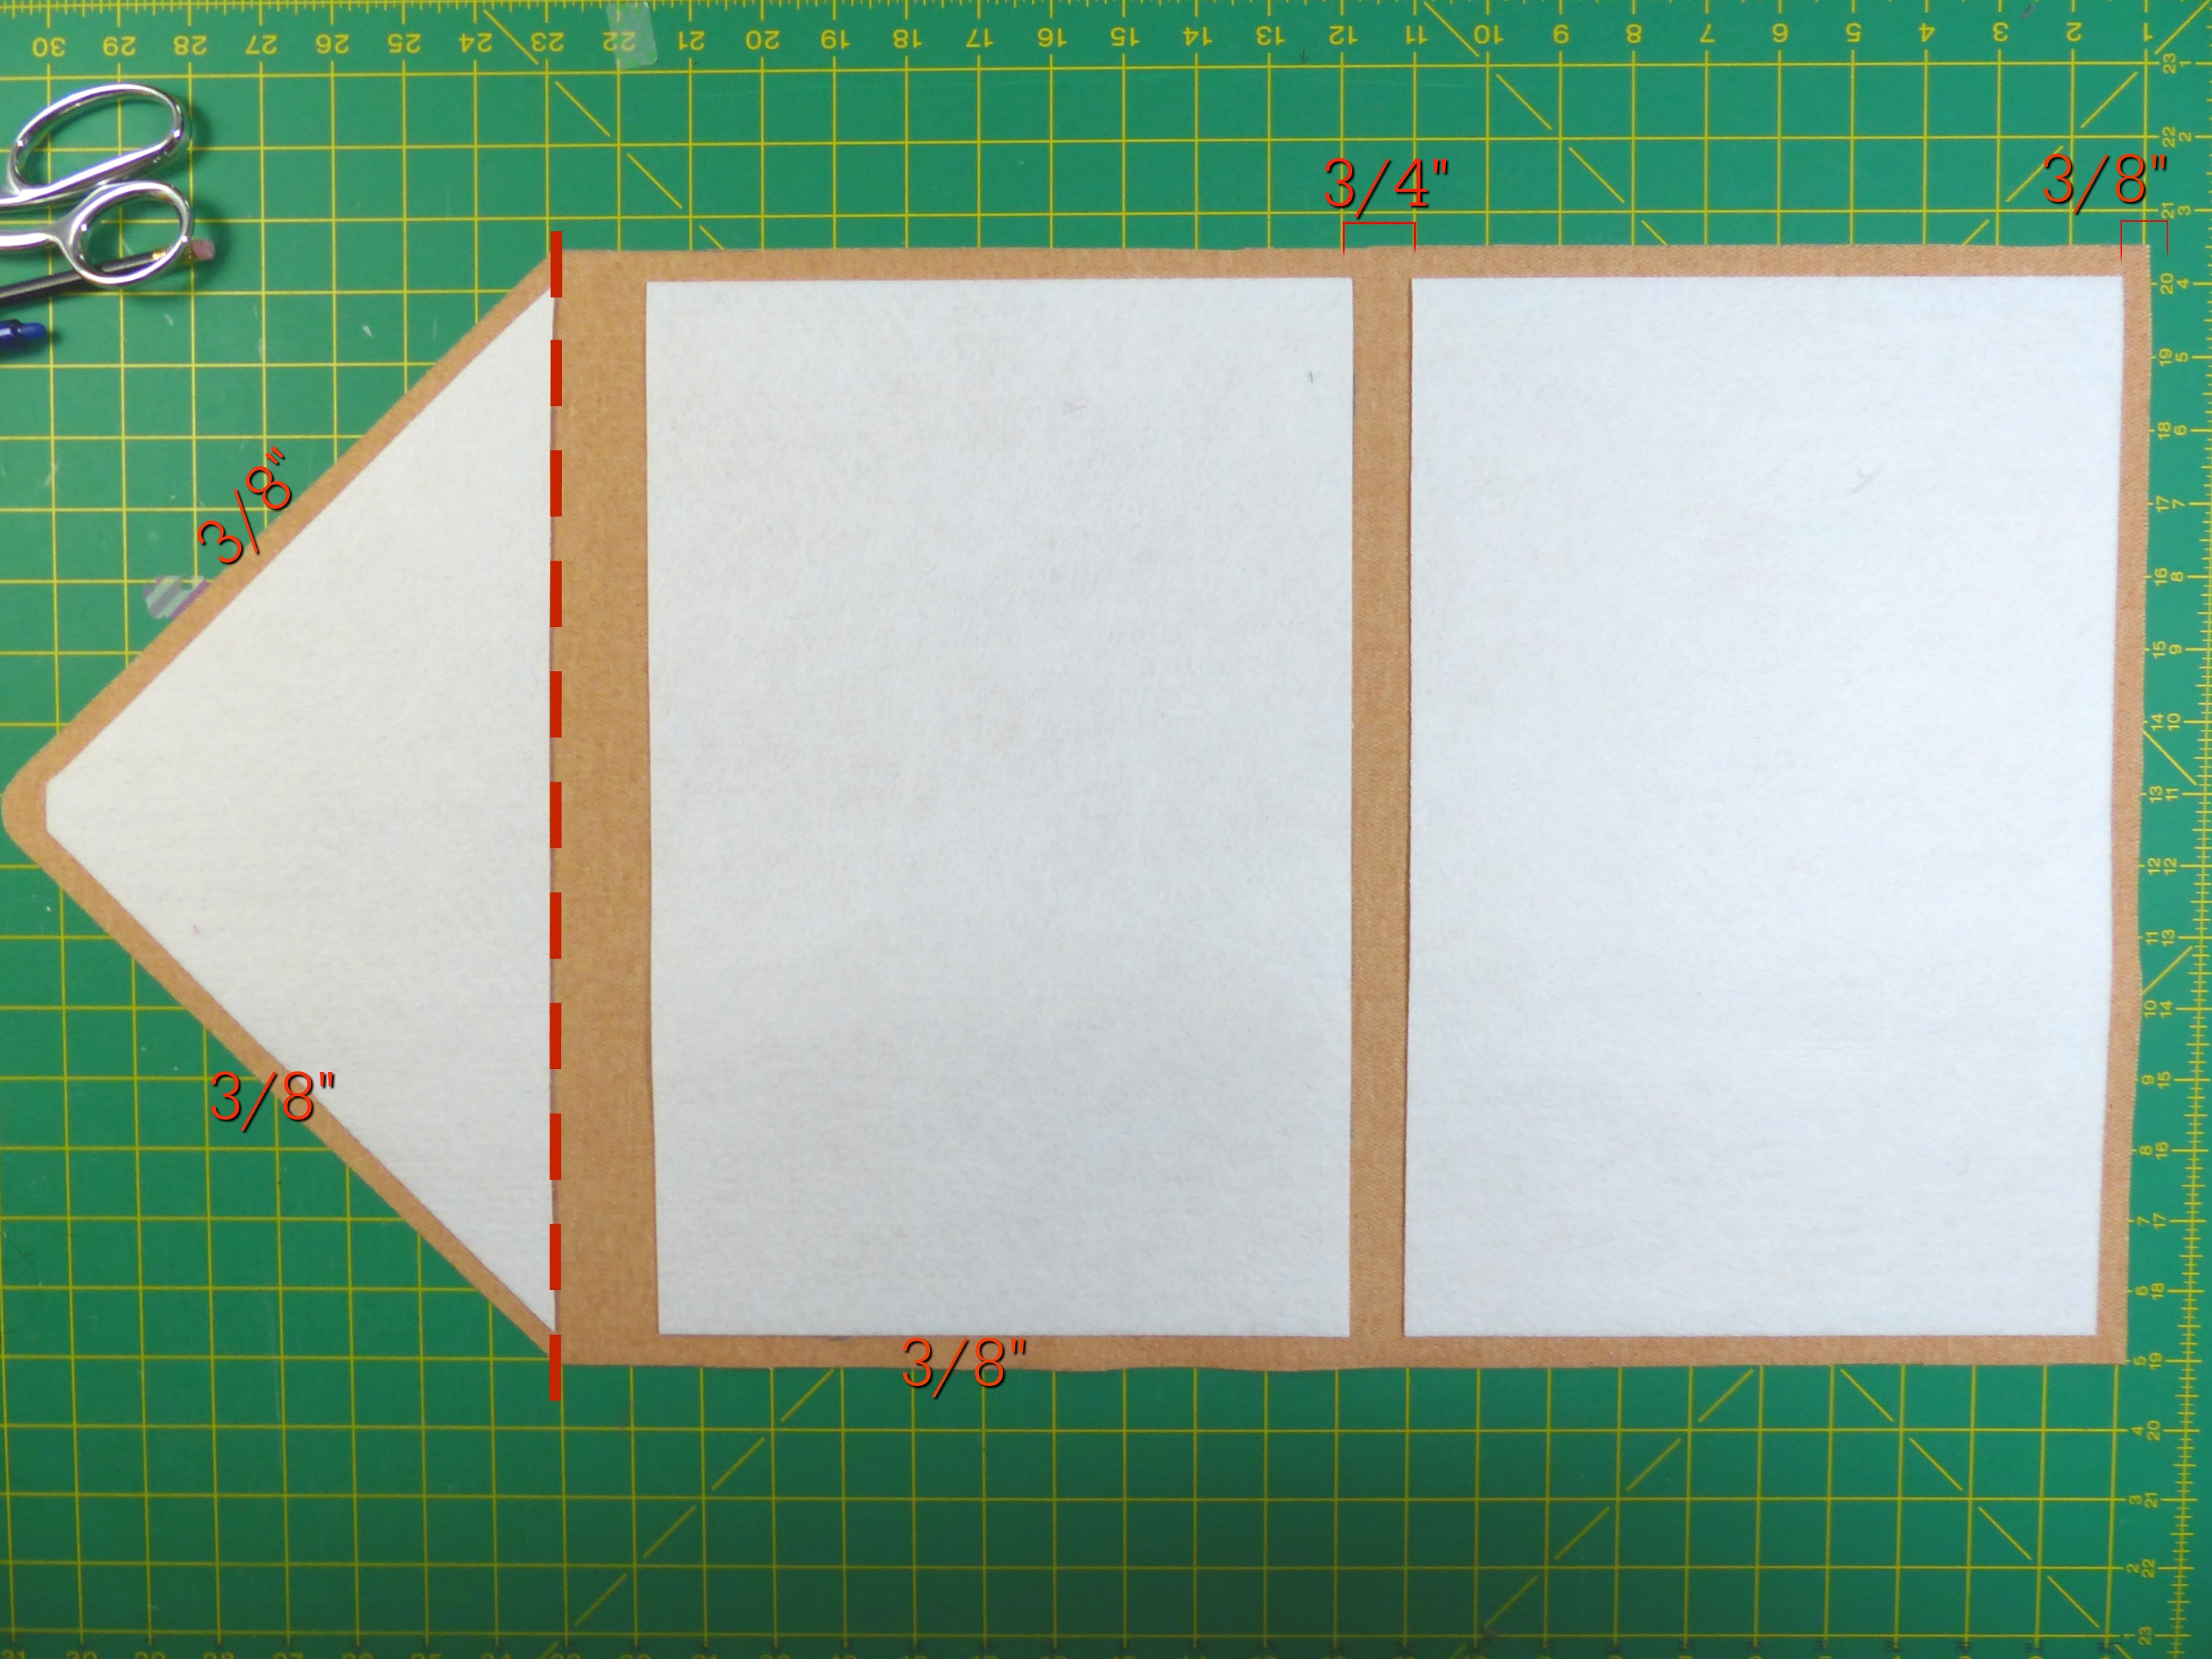
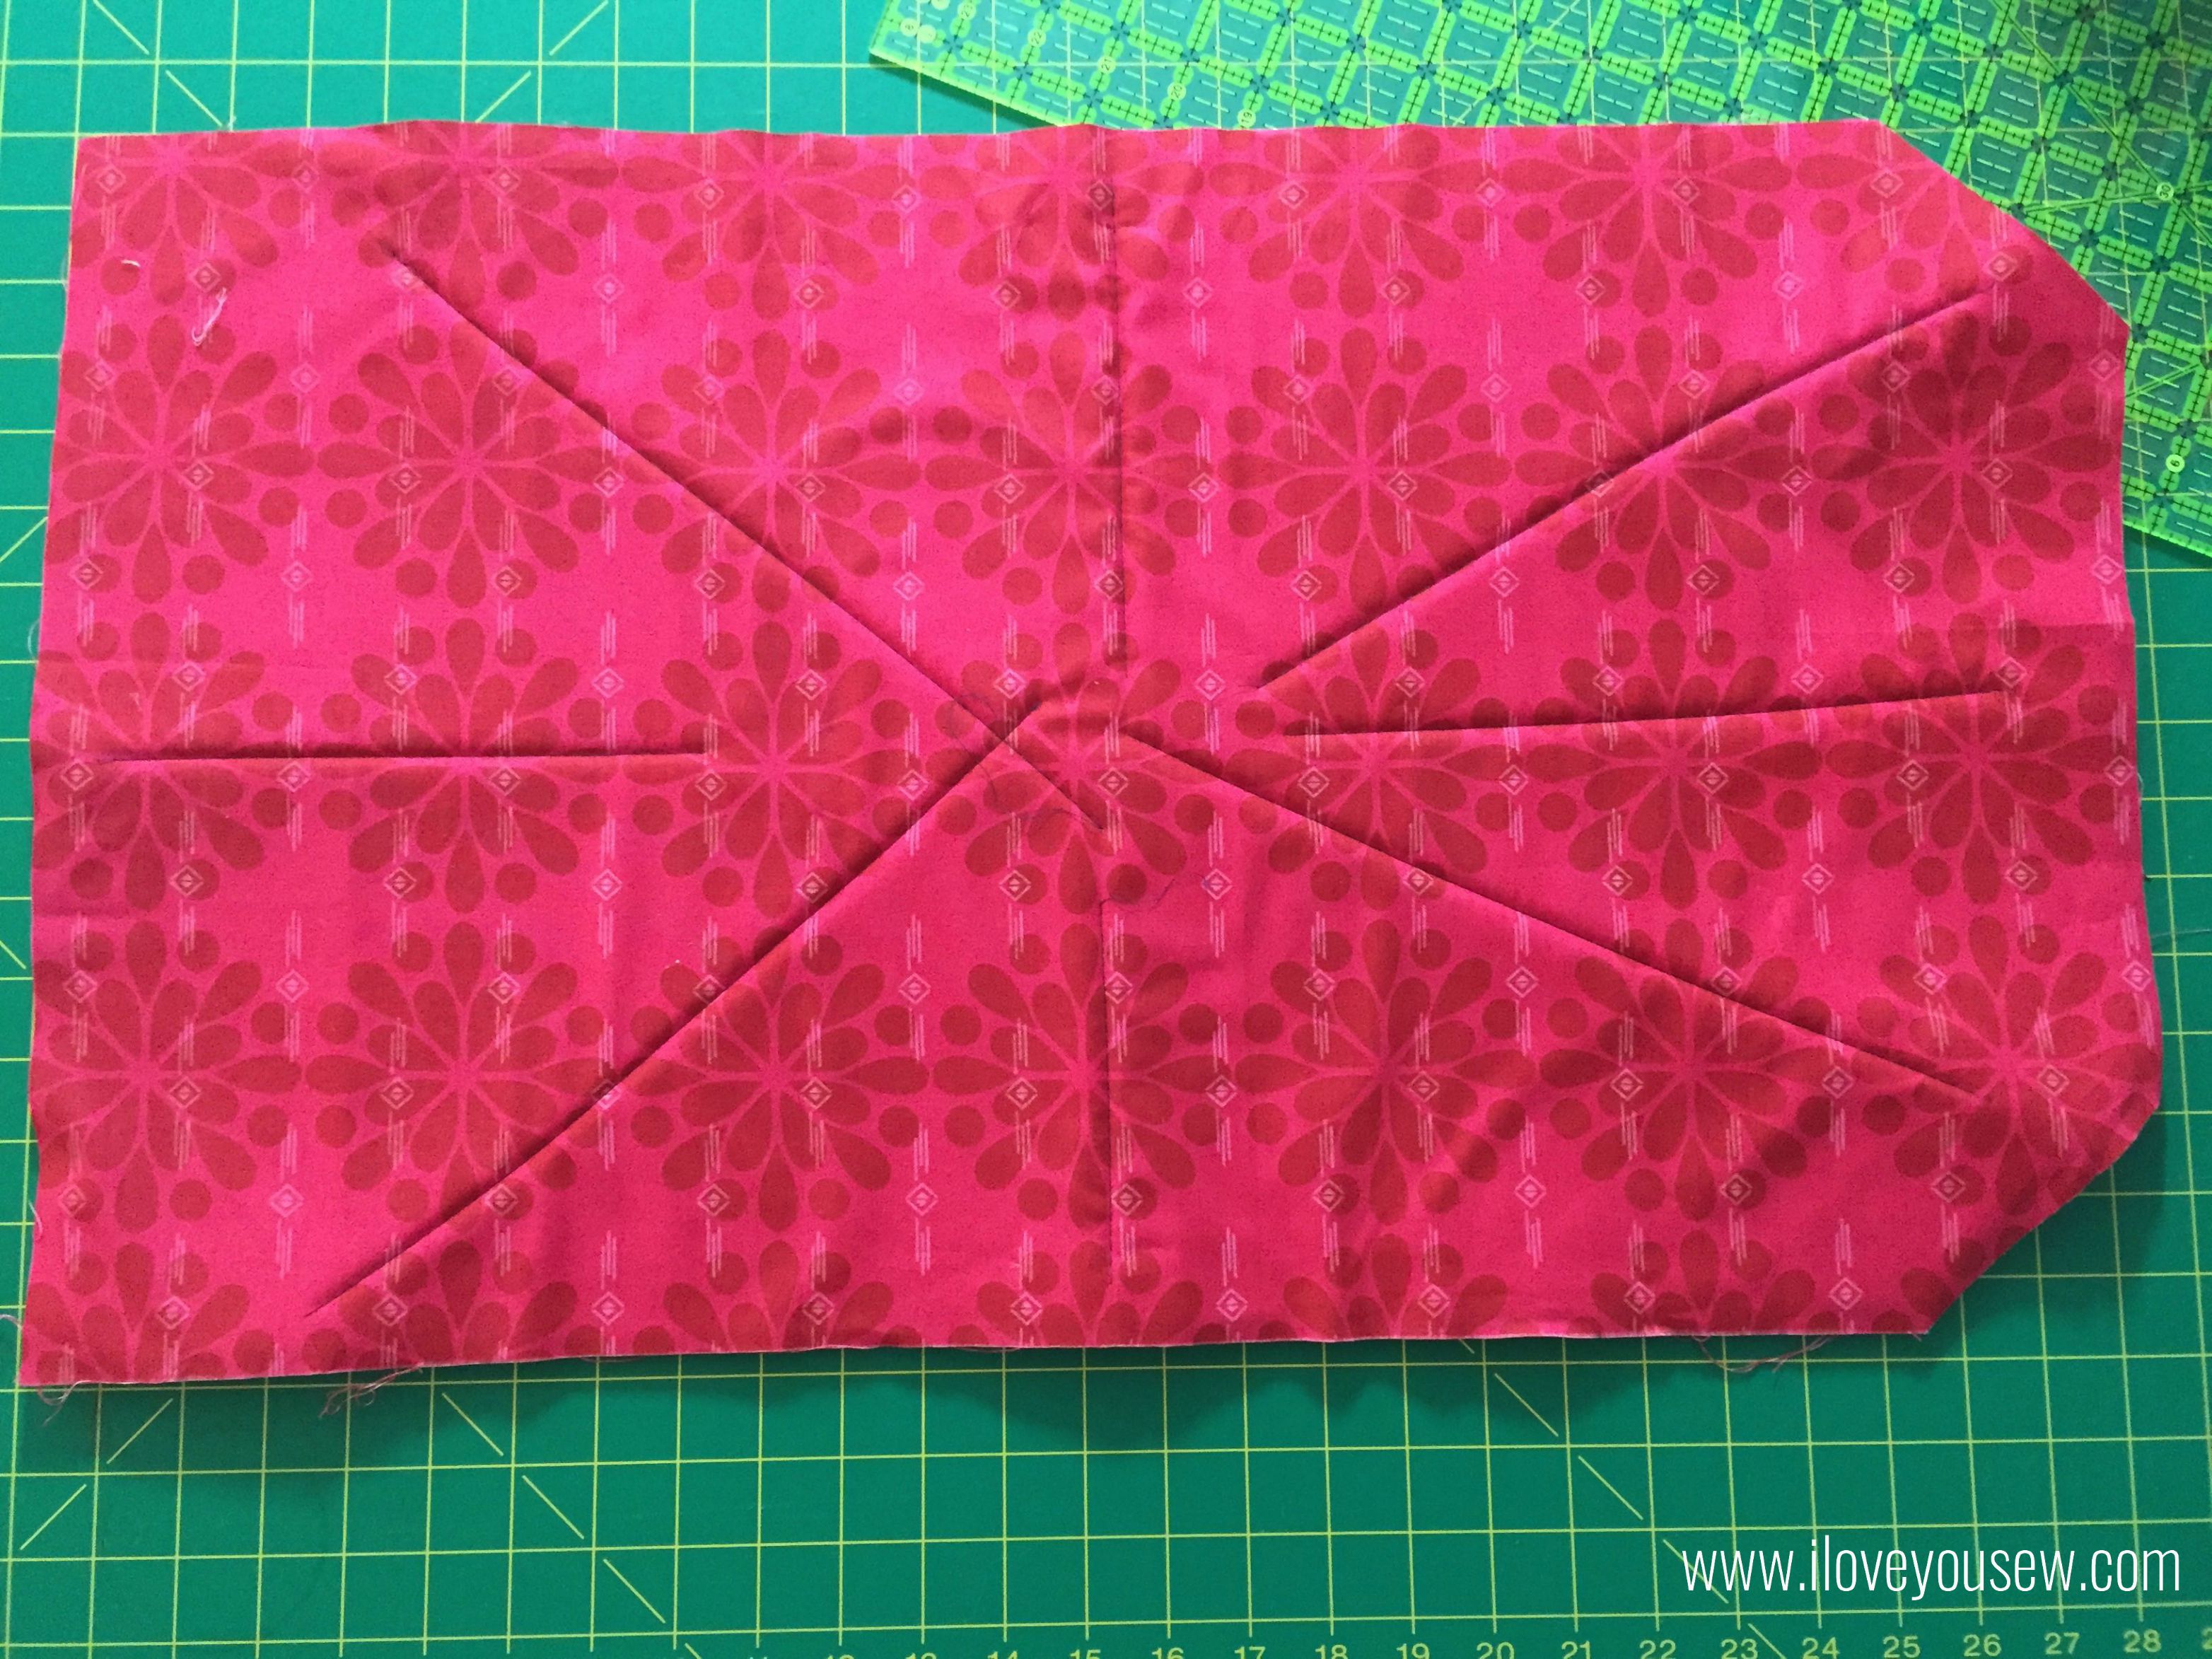
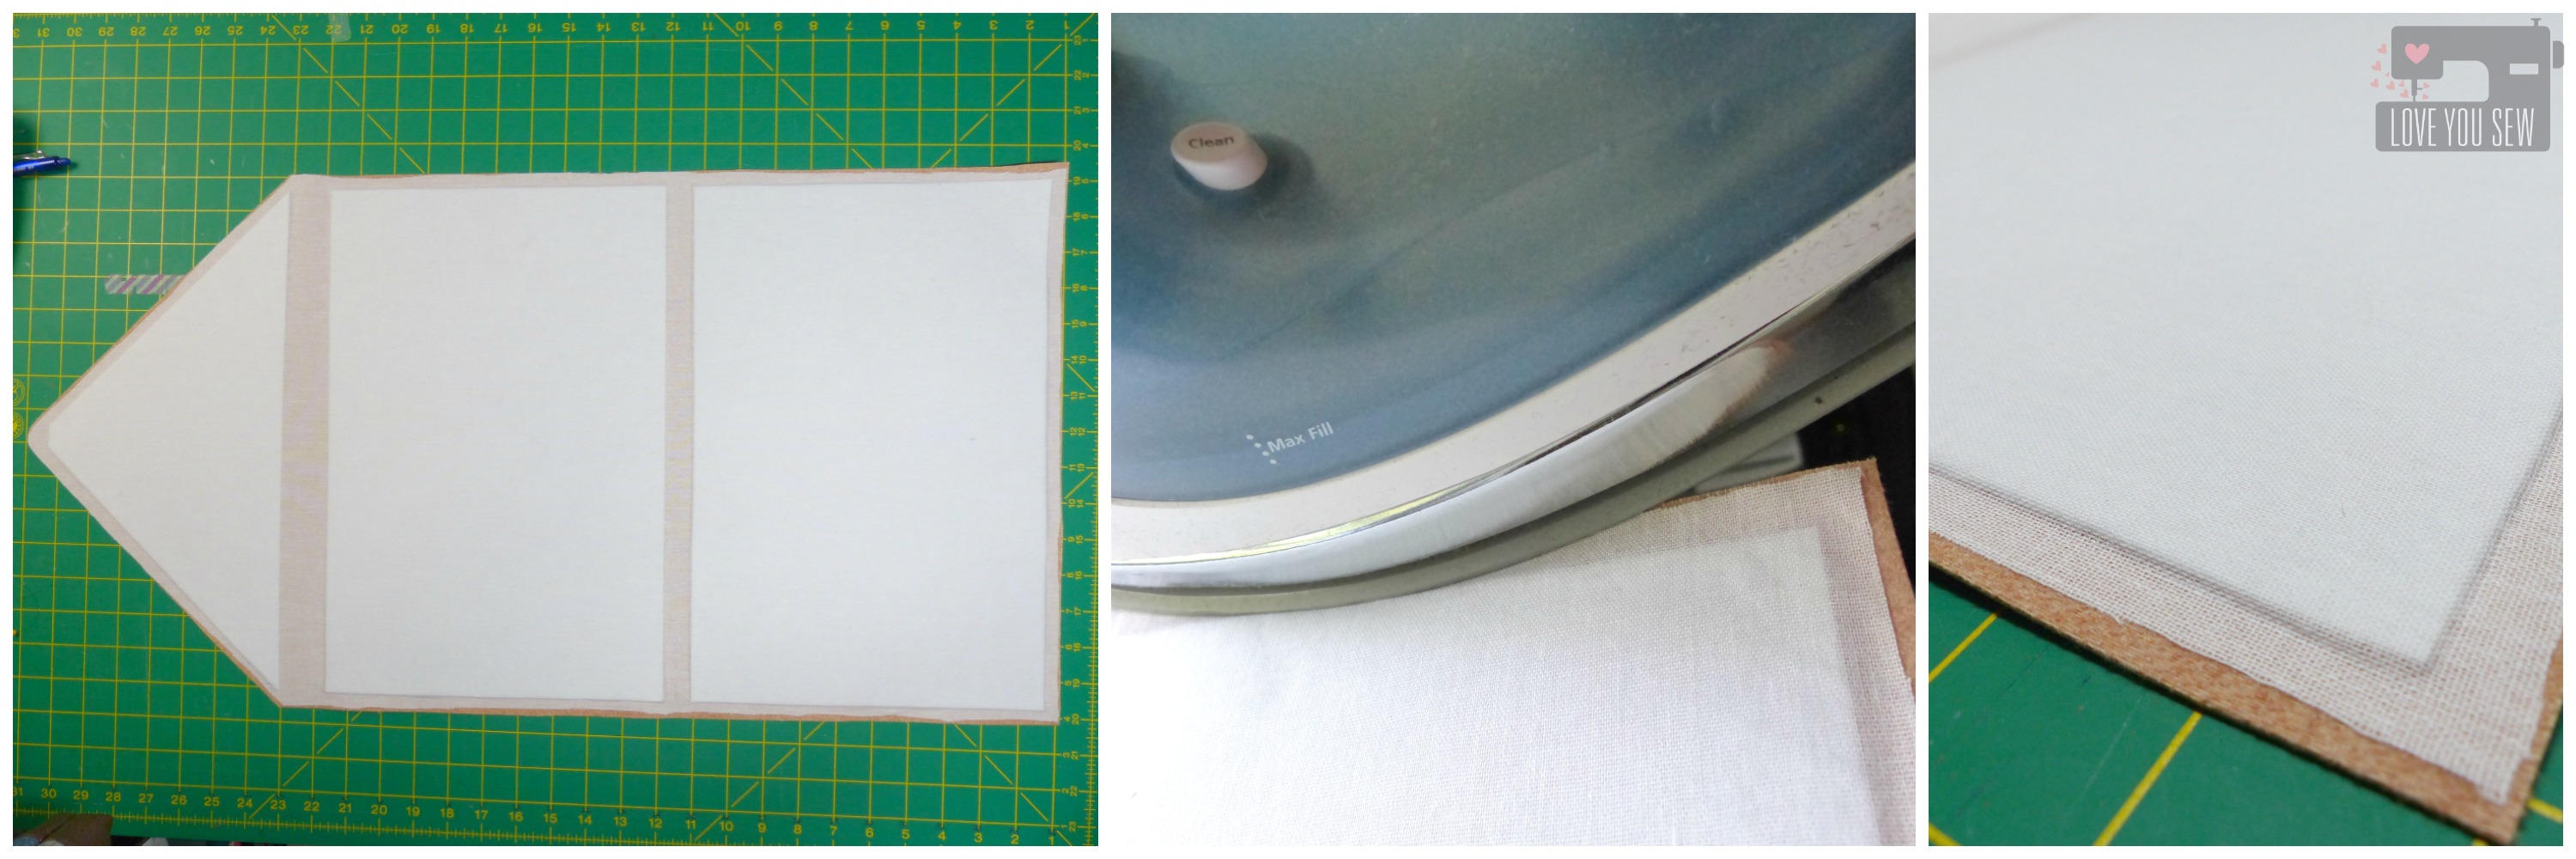
- With the Firm Sew-In Interfacing, cut:
- (2) 14 3/4″ x 9 3/4″ rectangles
- (1) Triangle per the following photo:

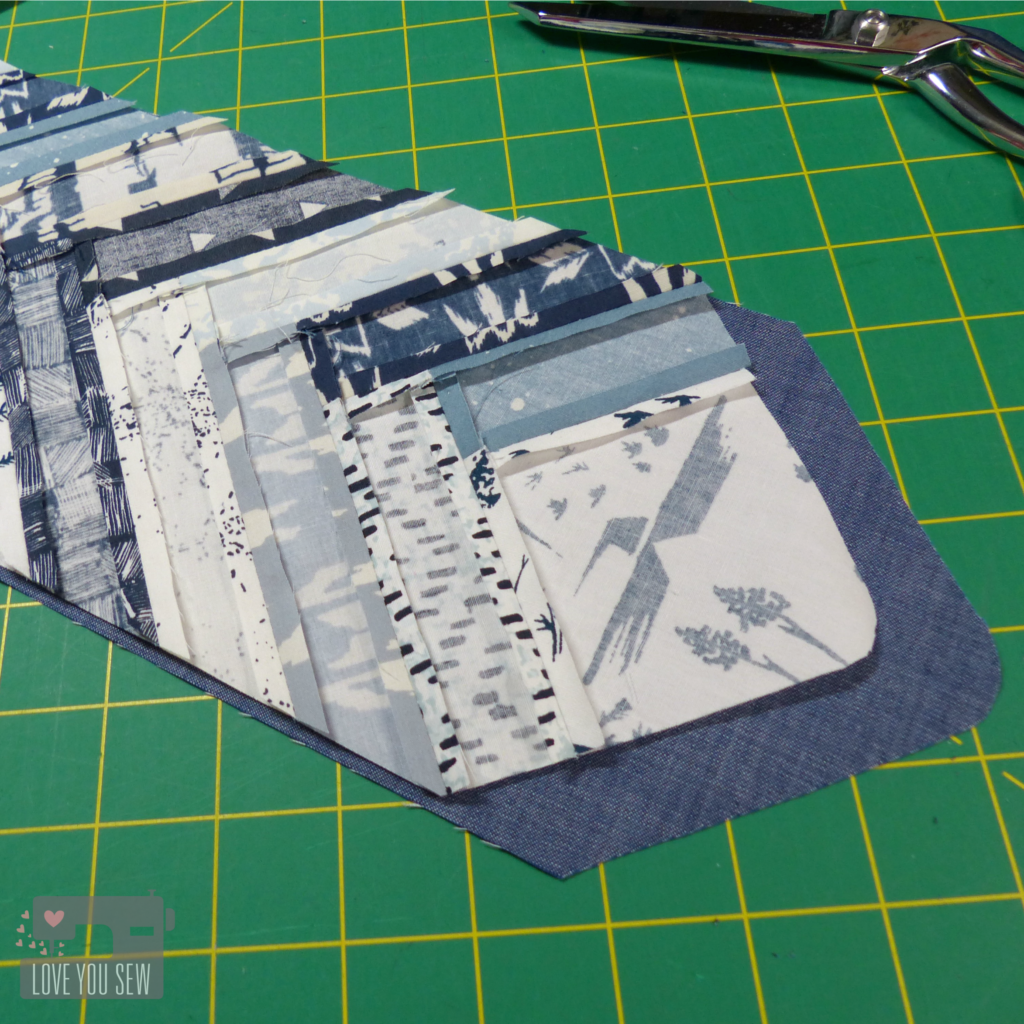
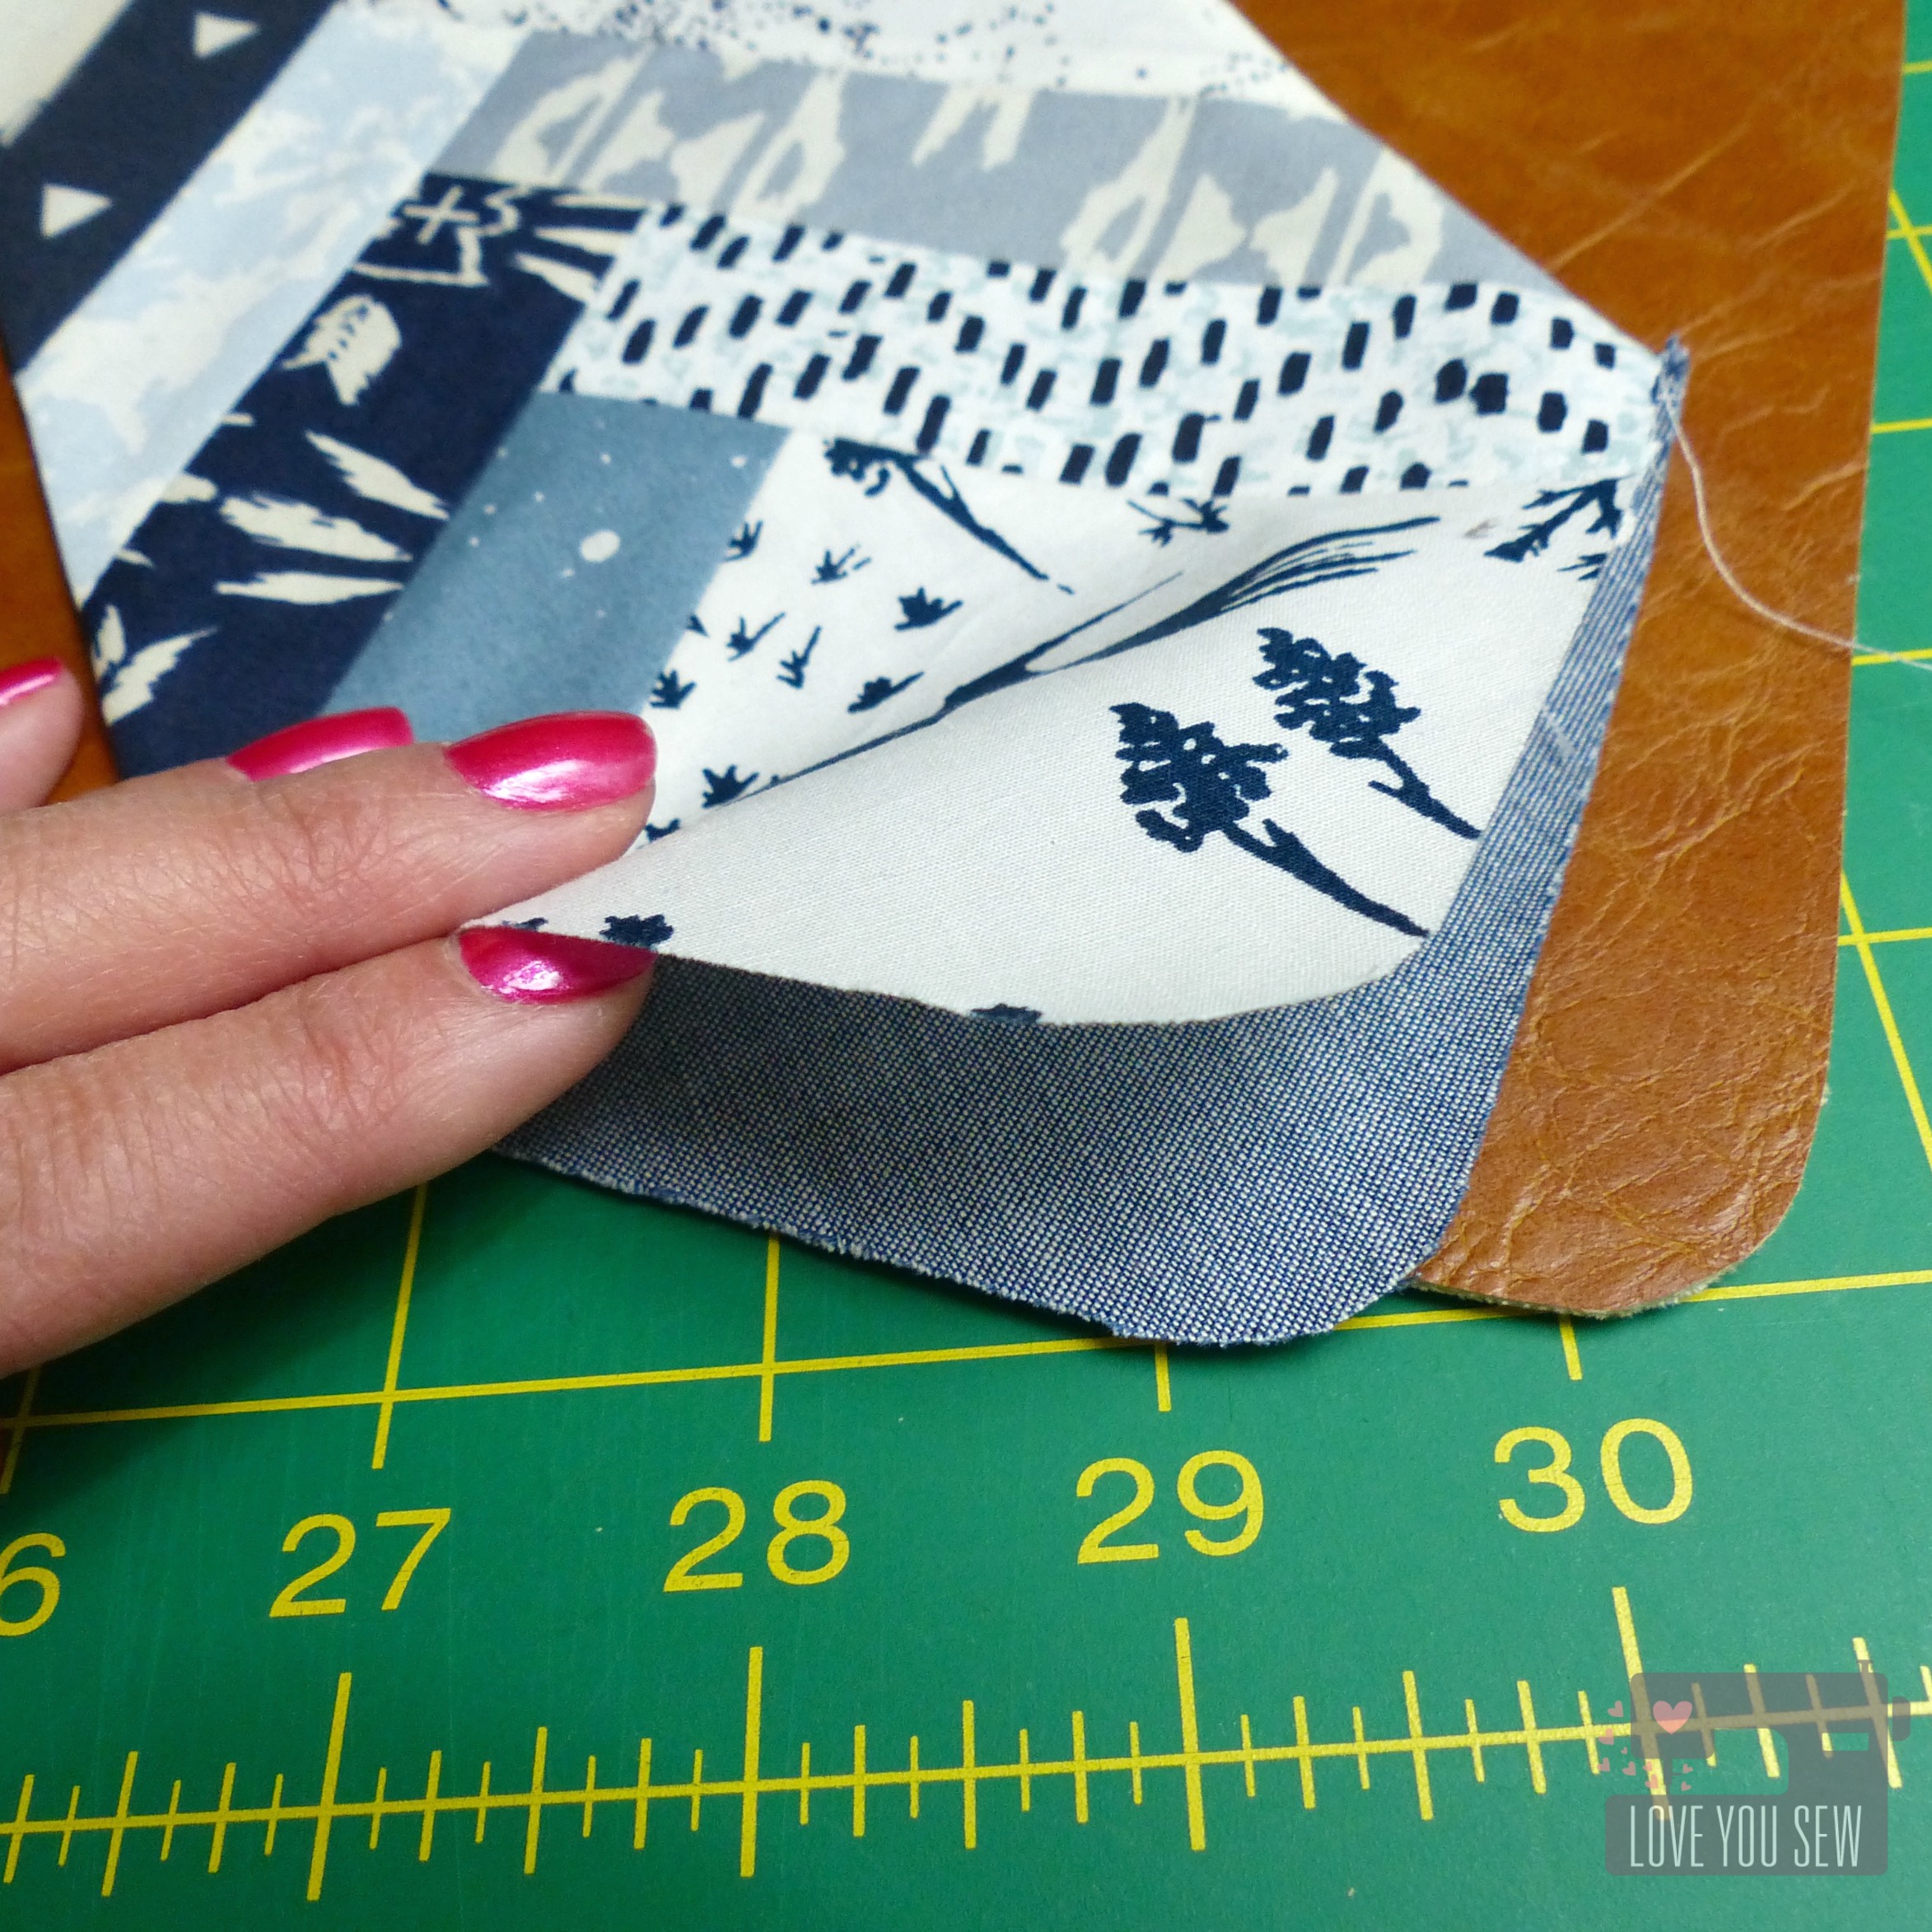
- For pieced Center Panel (as a half log-cabin), cut:
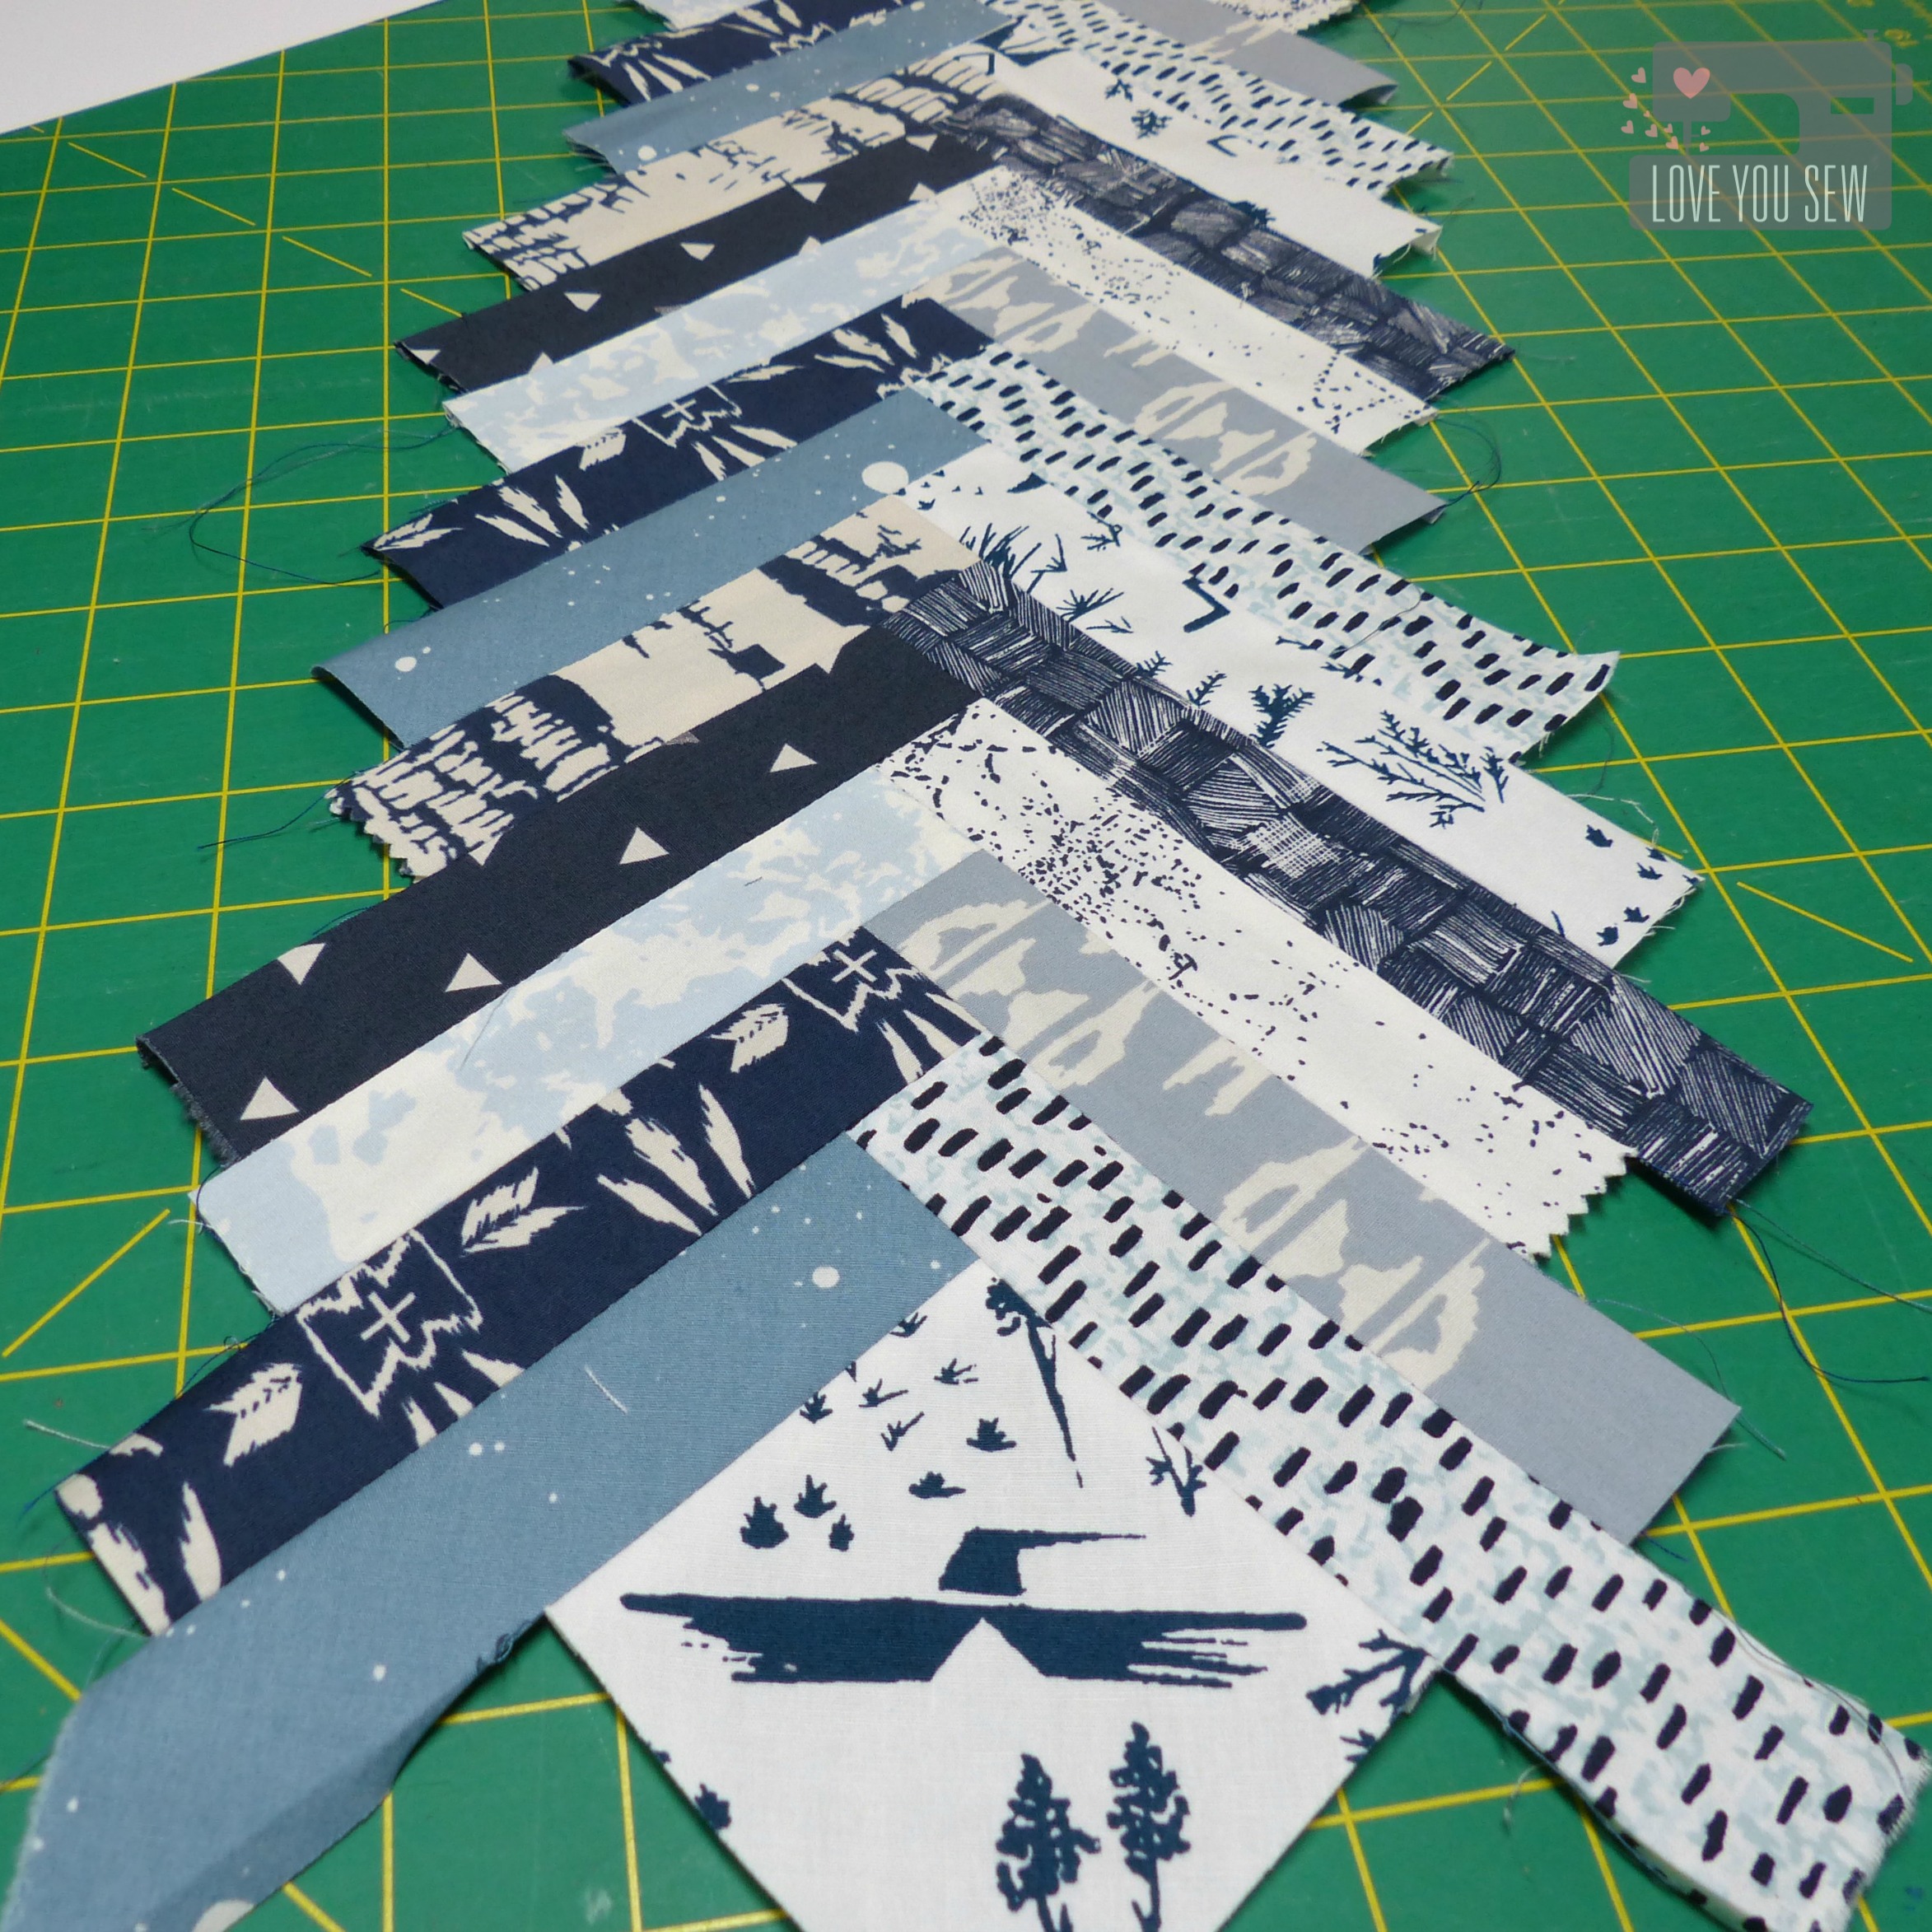
- (1) 2 1/2″ x 2 1/2″ square
- (34) 5″ x 1 1/2″ strips
- Use smaller template to cut (1) Center Panel lining
- For Lining Pockets, cut:
- (1) 16″ x 11″ rectangle with the lining fabric
- (1) 16″ x 11″ rectangle with fusible woven interfacing
- (1) 9″ x 4 1/2″ rectangle with faux leather

Construction:
(1/4″ seam allowance unless otherwise noted)
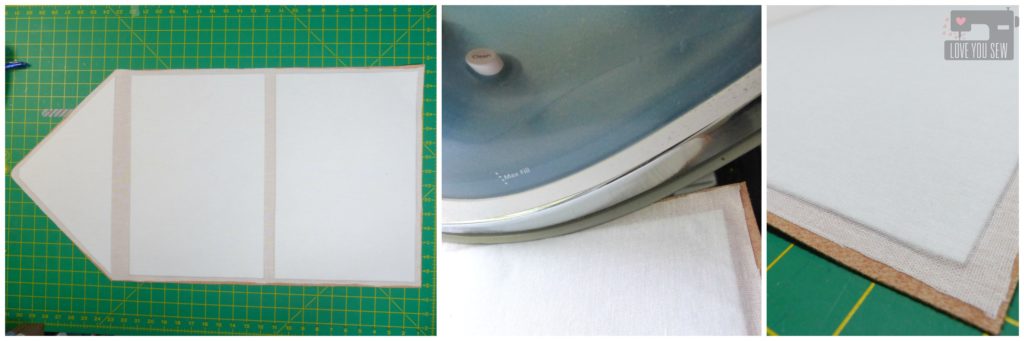
- Interface the body. *Please check and test the heat settings beforehand. Not all vinyl/faux leather is created equal.
- Place the Peltex pieces per the following photo. Leave 3/8″ allowance all around the edge of the vinyl. Keep 3/4″ in between the (2) 14 3/4″ x 9 3/4″ pieces. Make sure you align the Peltex triangle long edge with the top corners of the vinyl. You can can secure them in place with a little spray baste or with Sewline glue pen. *It’s important to have the Peltex split into 3 pieces to give the ease and flexibility where the clutch will fold. It will also alleviate some of the “cracking” appearance that can happen with interfacings that are forced to moved a lot.
- Use one of the fusible woven interfacing pieces and fuse on top of the firm sew-in interfacing. You may need to work the edges of the SF101 around the Peltex with your iron. Set aside.
- Place the Peltex pieces per the following photo. Leave 3/8″ allowance all around the edge of the vinyl. Keep 3/4″ in between the (2) 14 3/4″ x 9 3/4″ pieces. Make sure you align the Peltex triangle long edge with the top corners of the vinyl. You can can secure them in place with a little spray baste or with Sewline glue pen. *It’s important to have the Peltex split into 3 pieces to give the ease and flexibility where the clutch will fold. It will also alleviate some of the “cracking” appearance that can happen with interfacings that are forced to moved a lot.
- Fuse the 2nd piece of fusible woven interfacing to your lining. Set aside
- Fuse the pocket fusible woven interfacing to the pocket lining fabric. Set aside
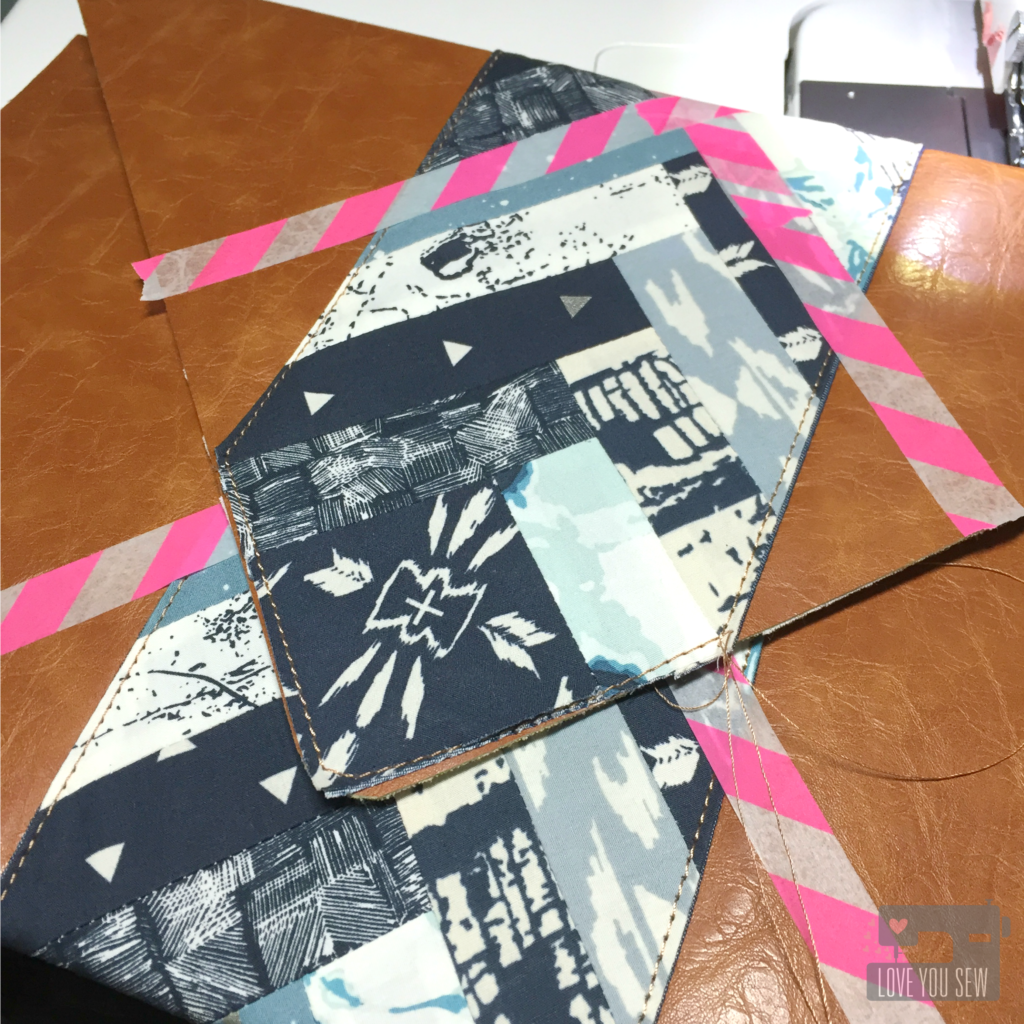
- Prepare Center Panel
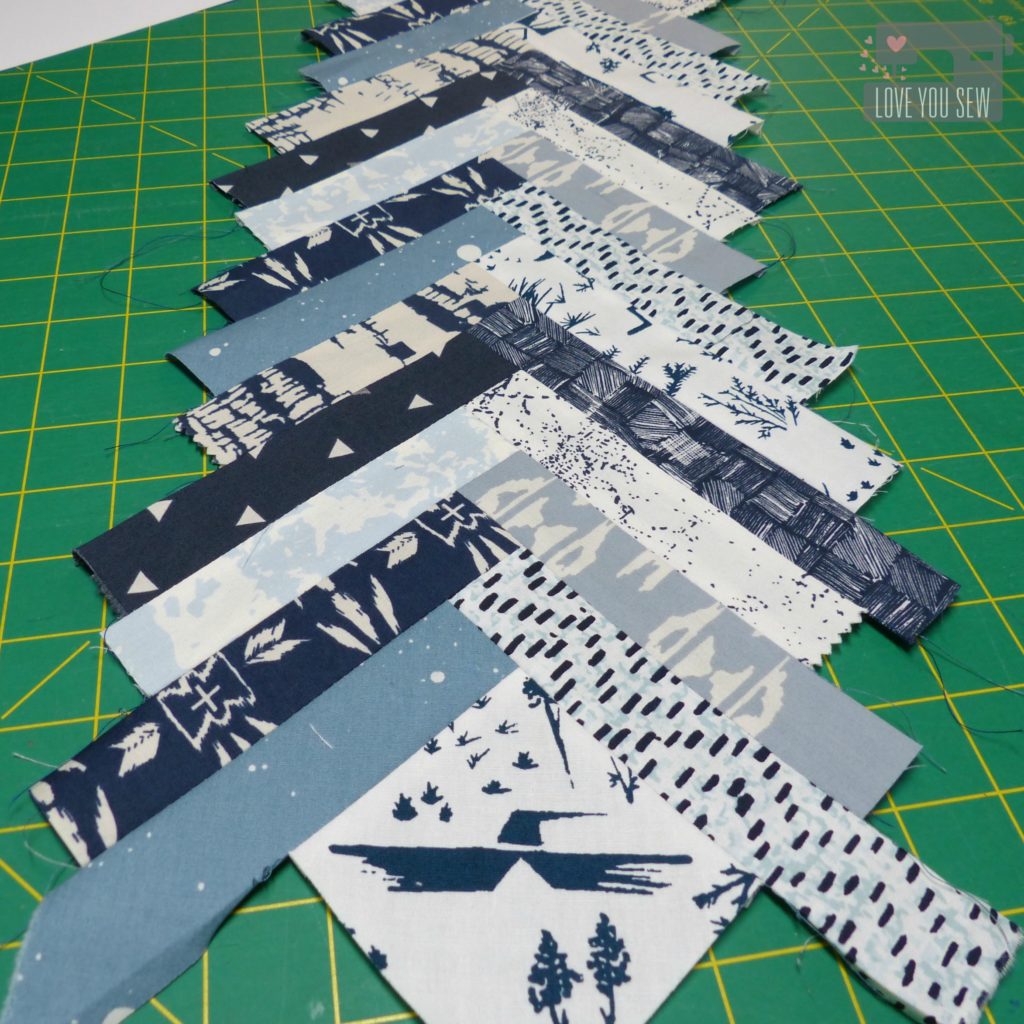
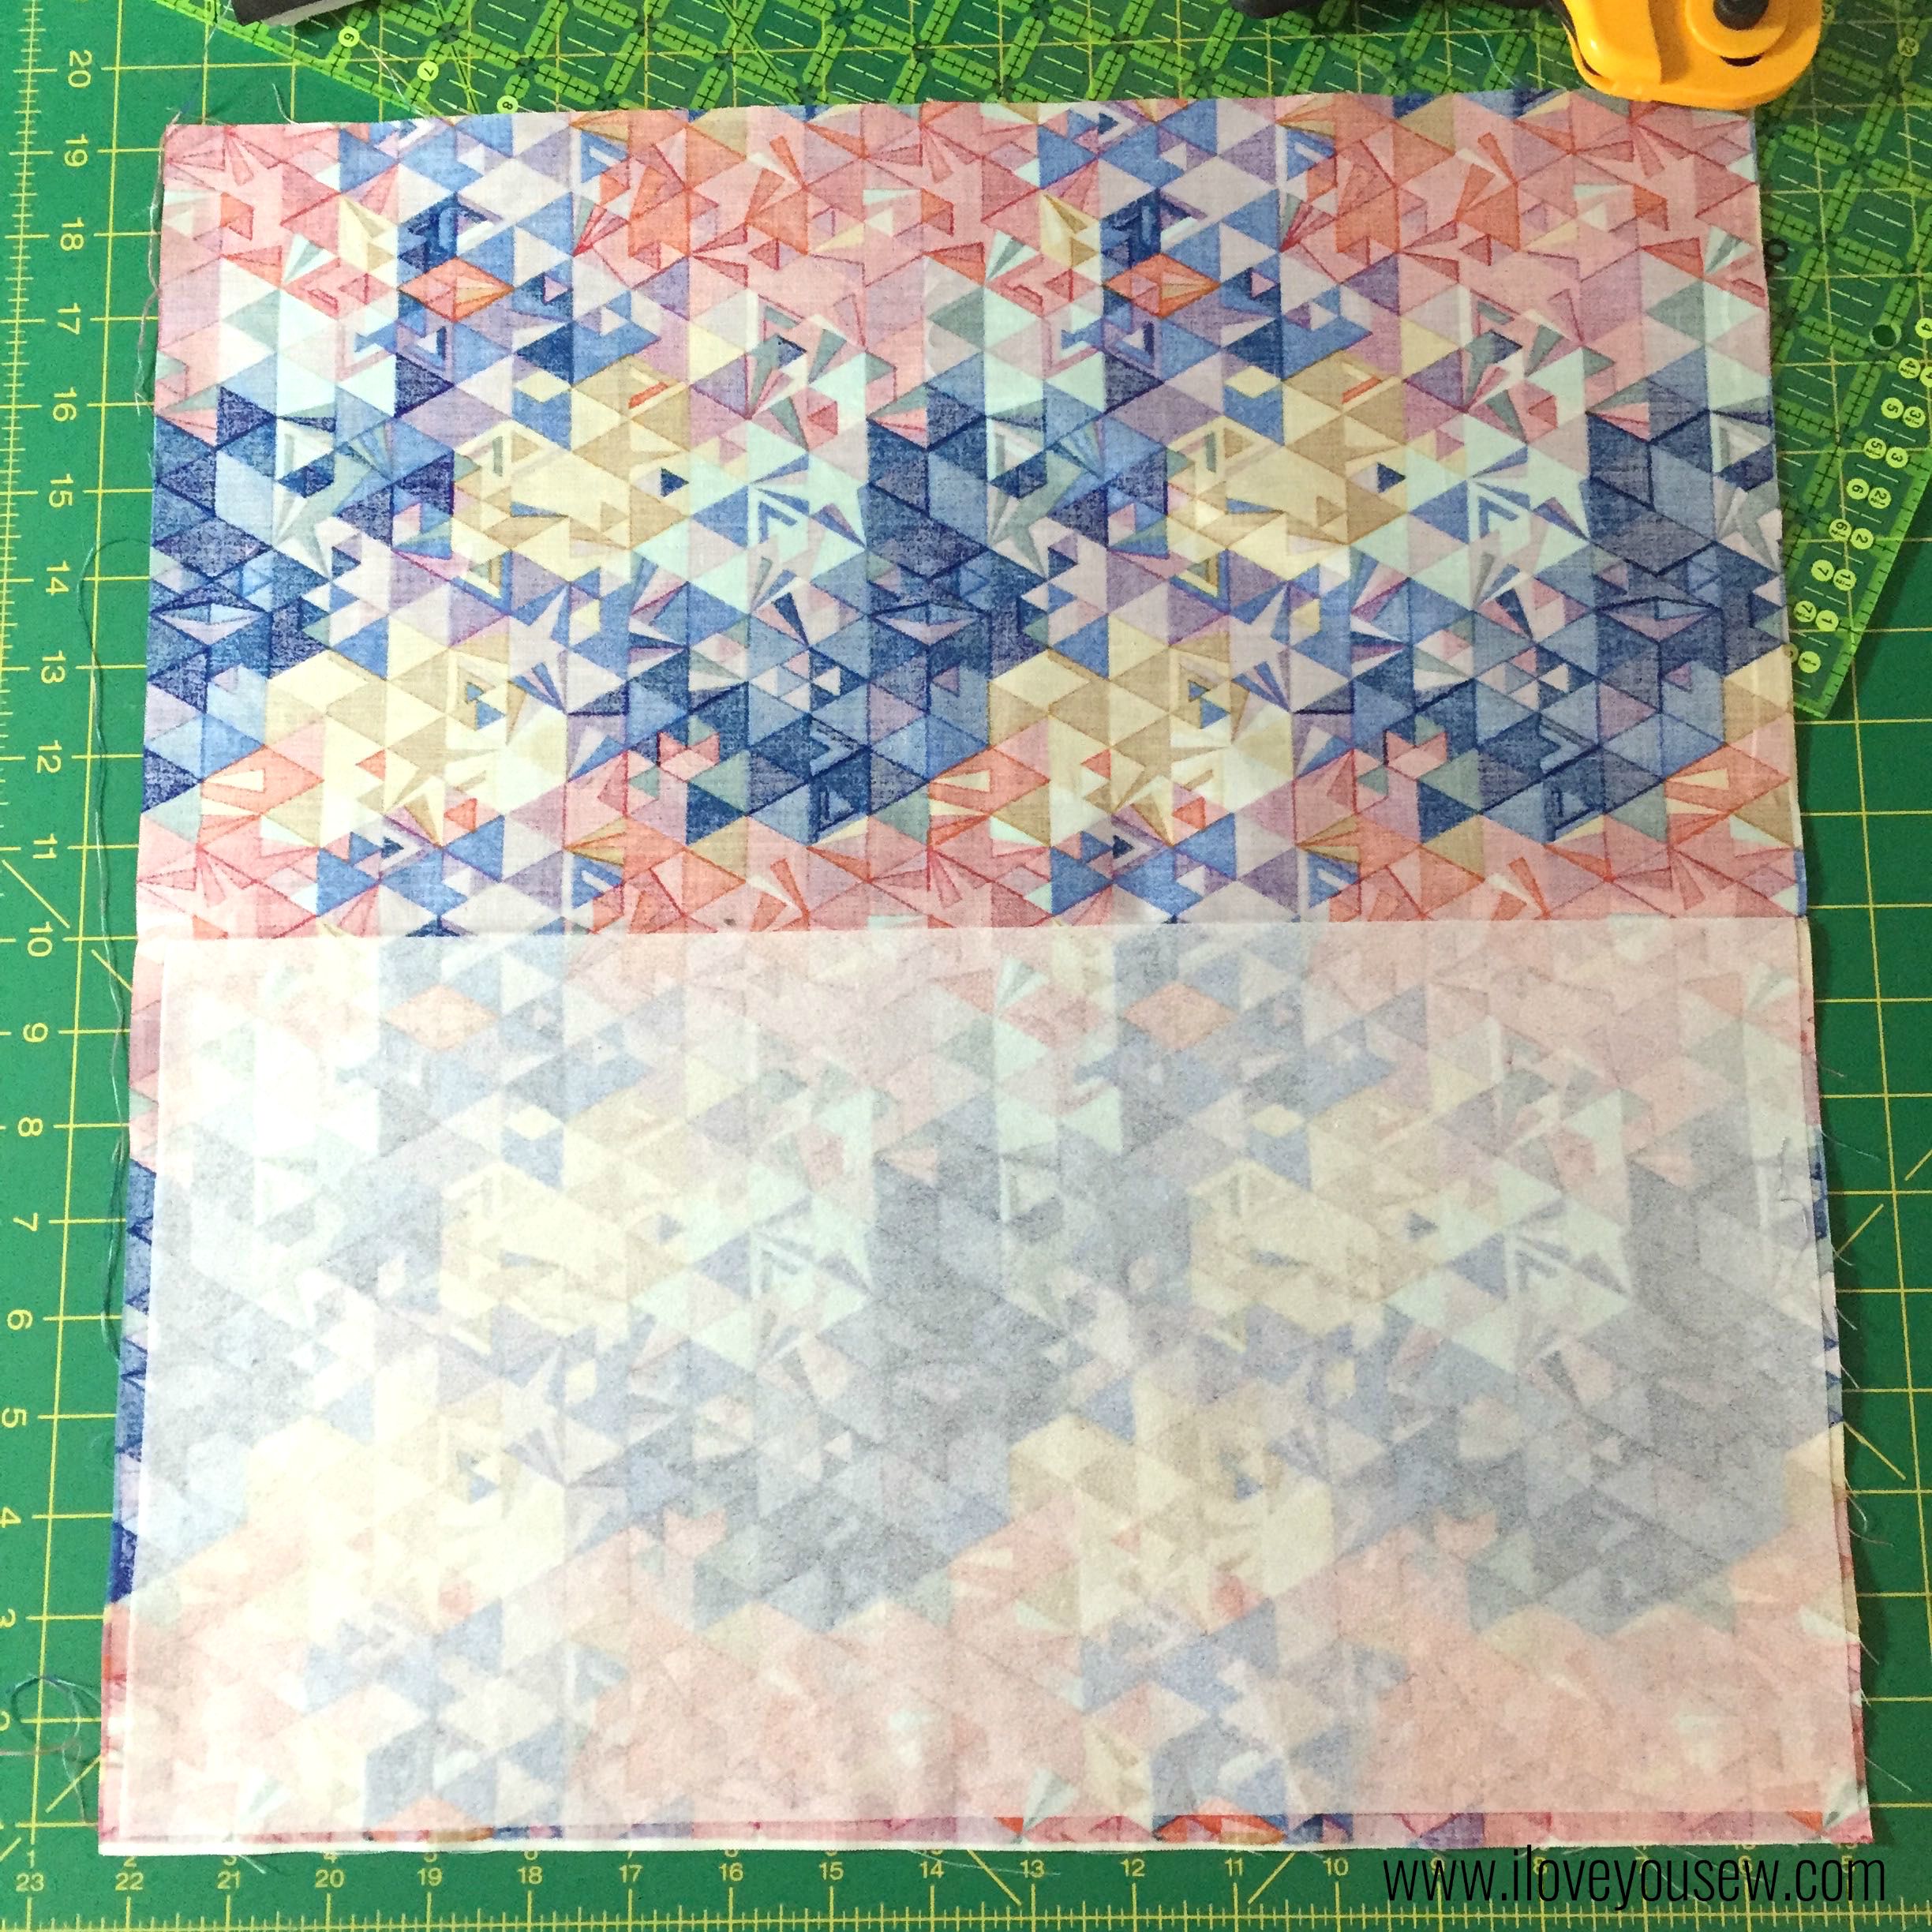
- Piece as desired. I used a traditional half log-cabin design, but you can use anything that you like as long as it can be trimmed to the Center Panel template you created earlier.
- Line up the short-end of the first strip (gray-blue speck) with the edge of the square (eagle) and sew with 1/4″ seam allowance. Press open
- Line up the short end of another strip (navy dashes) with the opposite edge of the square (eagle) and sew. Alternate sides until you have used all 34 strips.
- Use Center Panel template and trim to fit.
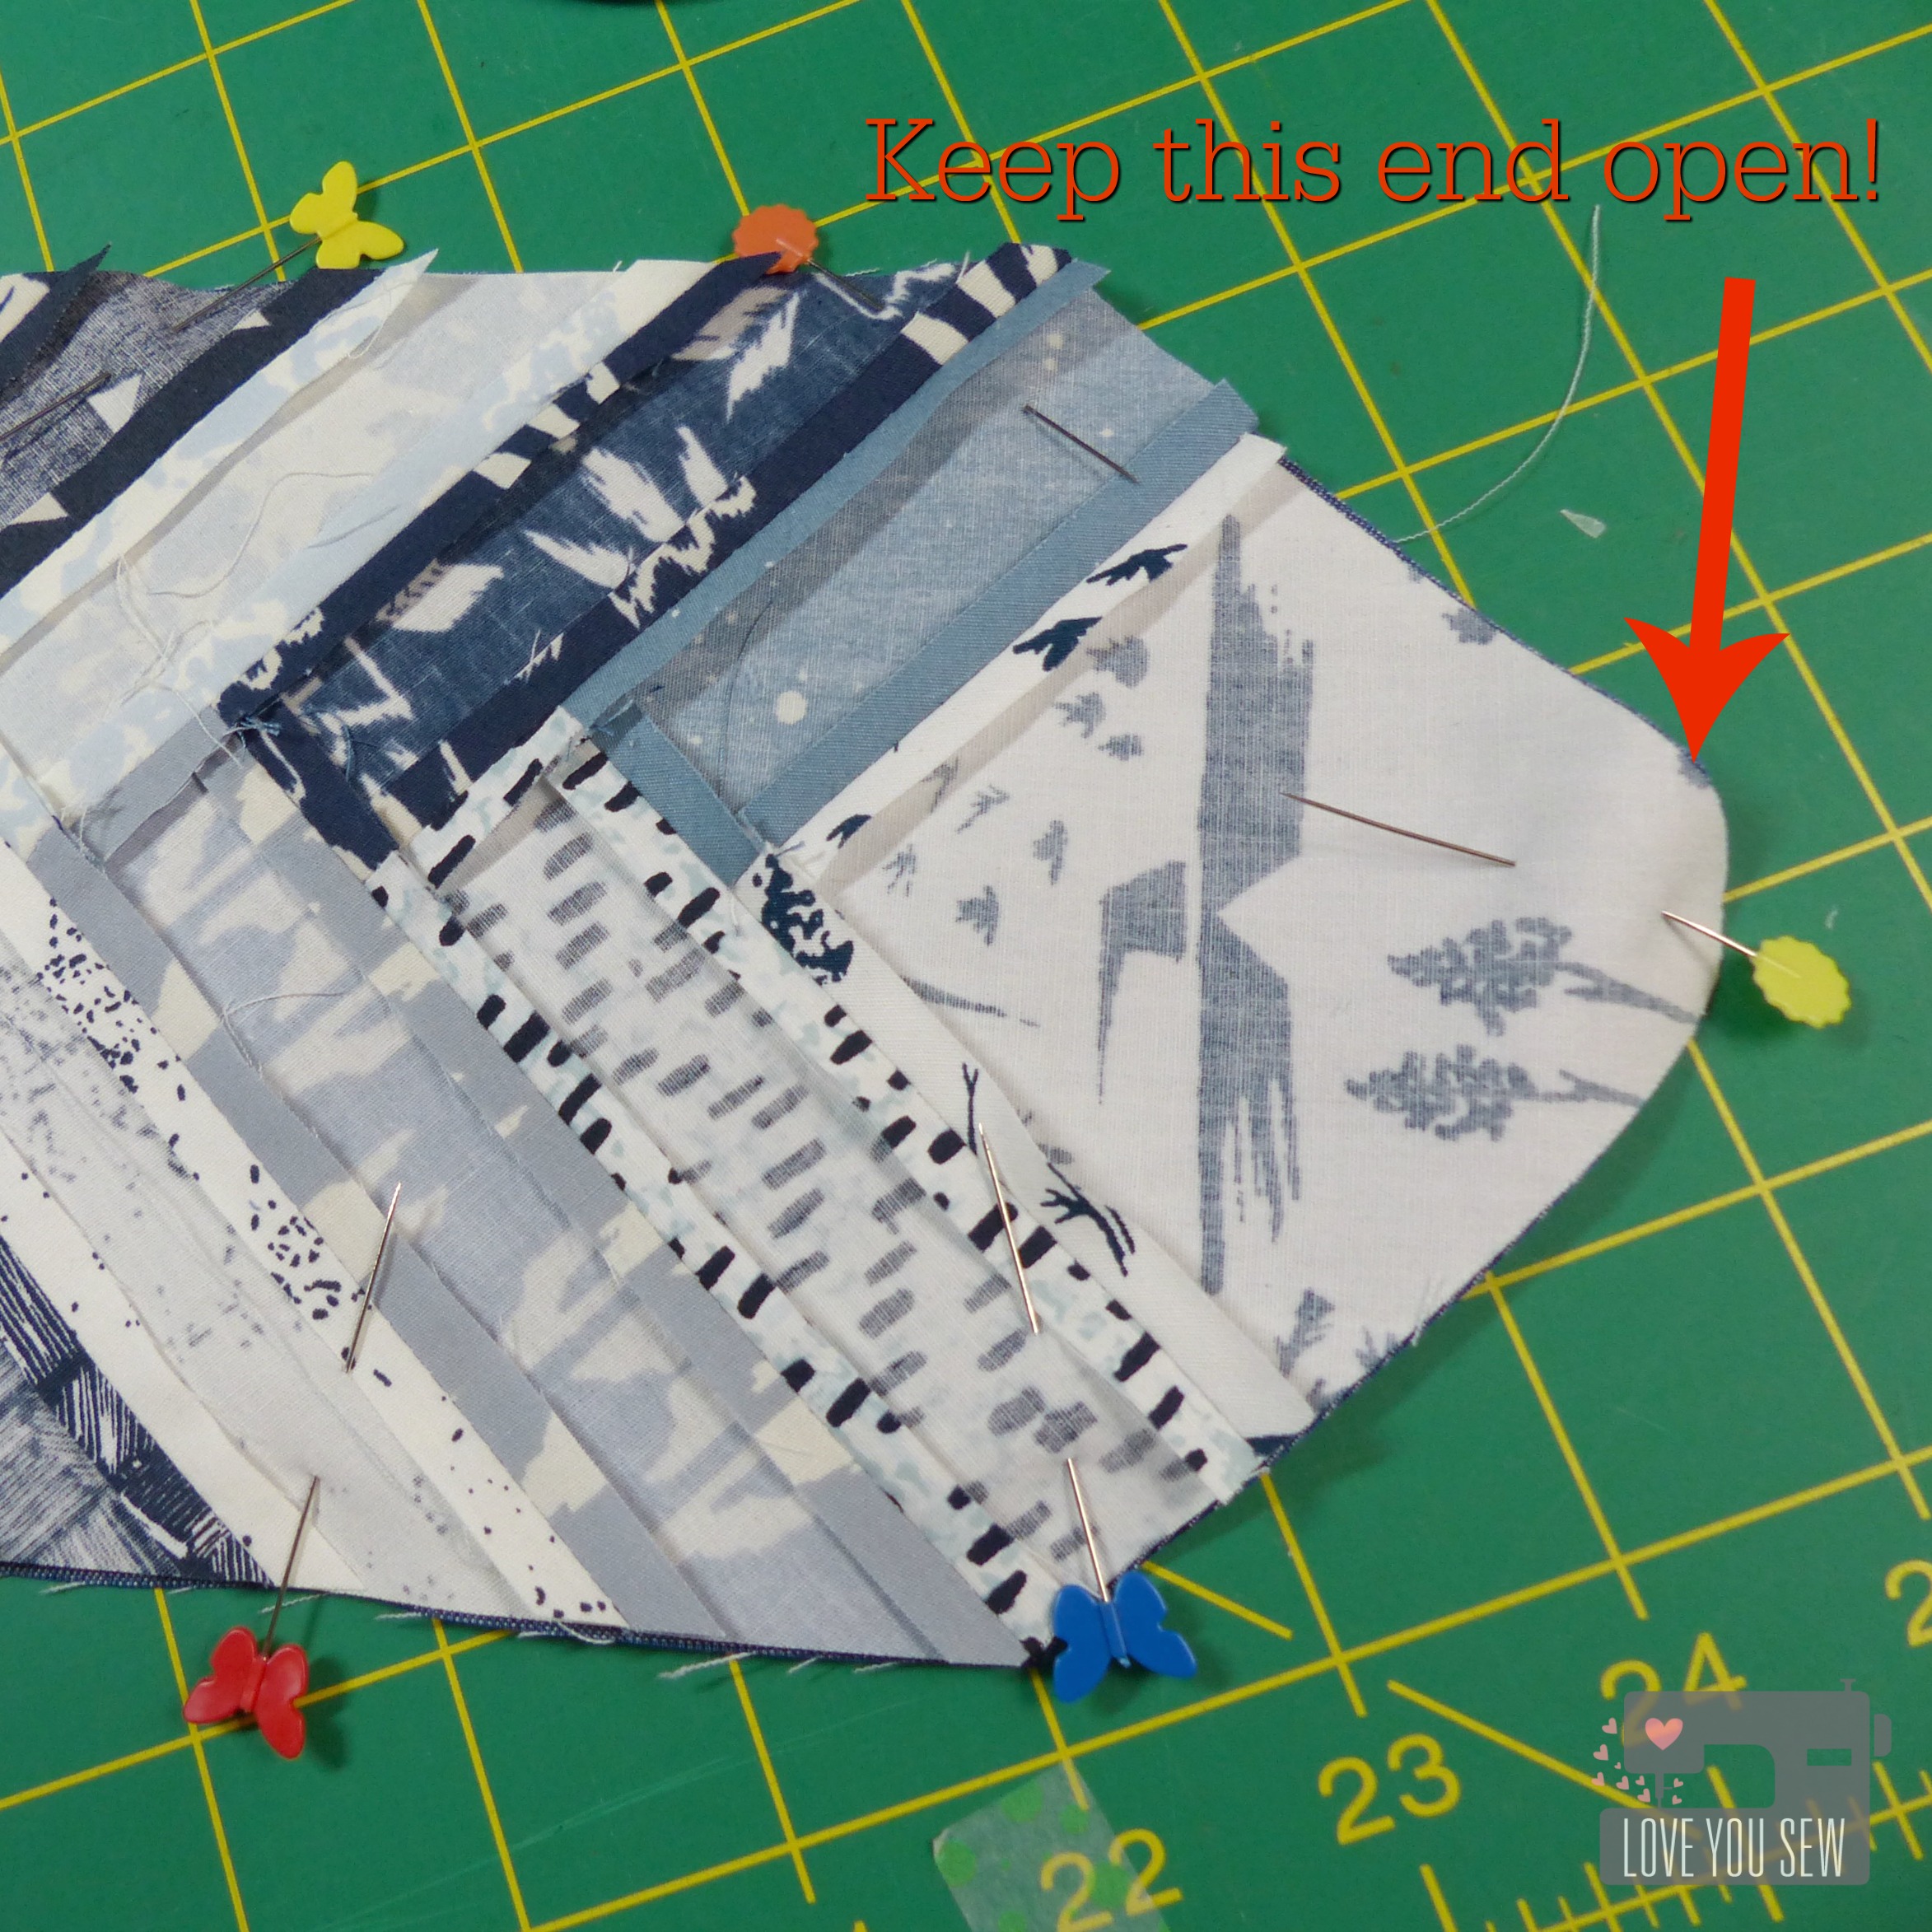
- Assemble the Center Panel by placing the right-sides of the center piecing with the center panel lining.
- Sew all around leaving an opening at the TOP to turn.

- Notch out the BOTTOM and all corners
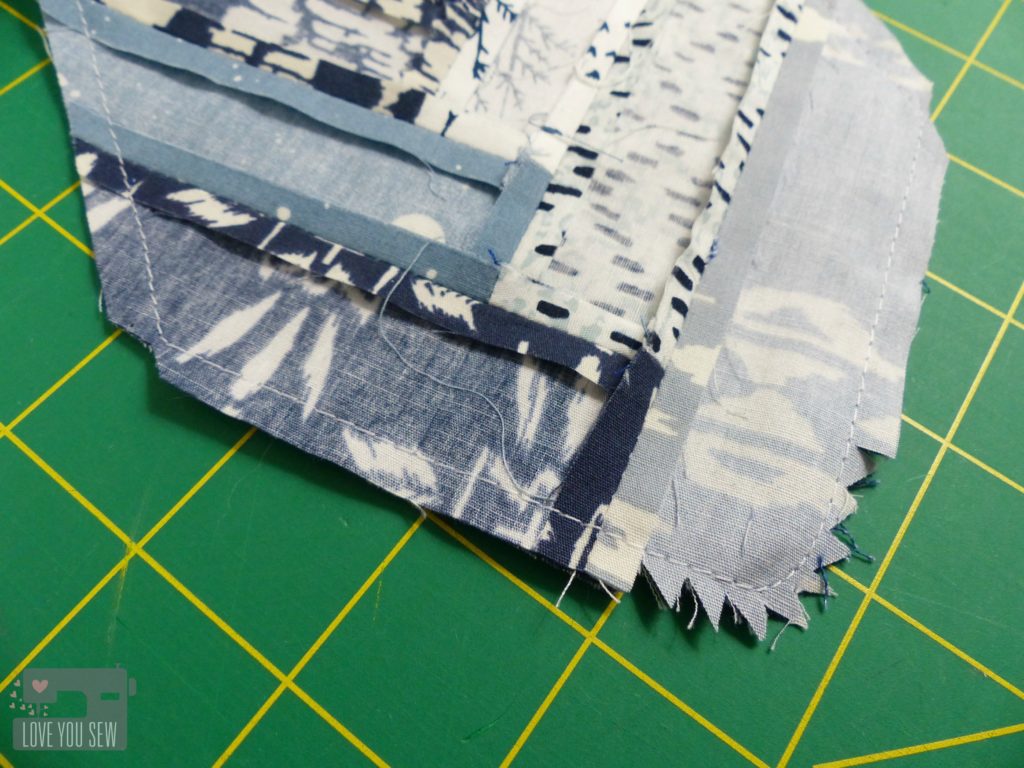
- Pull right-side out and press
- Piece as desired. I used a traditional half log-cabin design, but you can use anything that you like as long as it can be trimmed to the Center Panel template you created earlier.
- Line up the center panel on top of the right-side of the faux leather. Make sure it’s even on both sides of the panel. You can secure it into place using pins since you don’t see the faux leather.
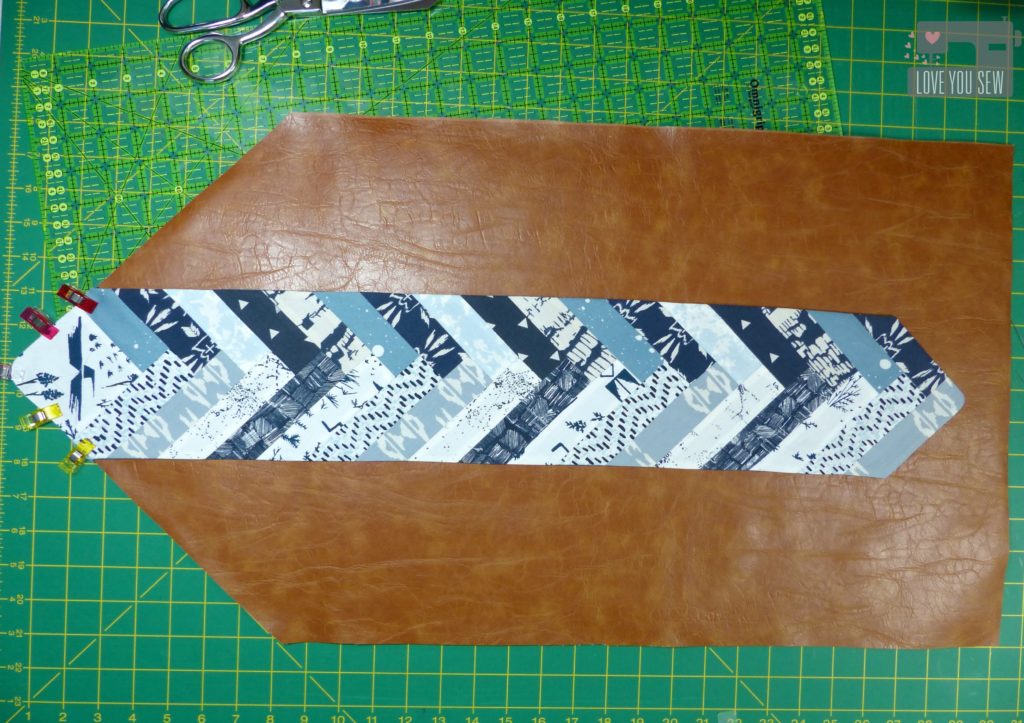
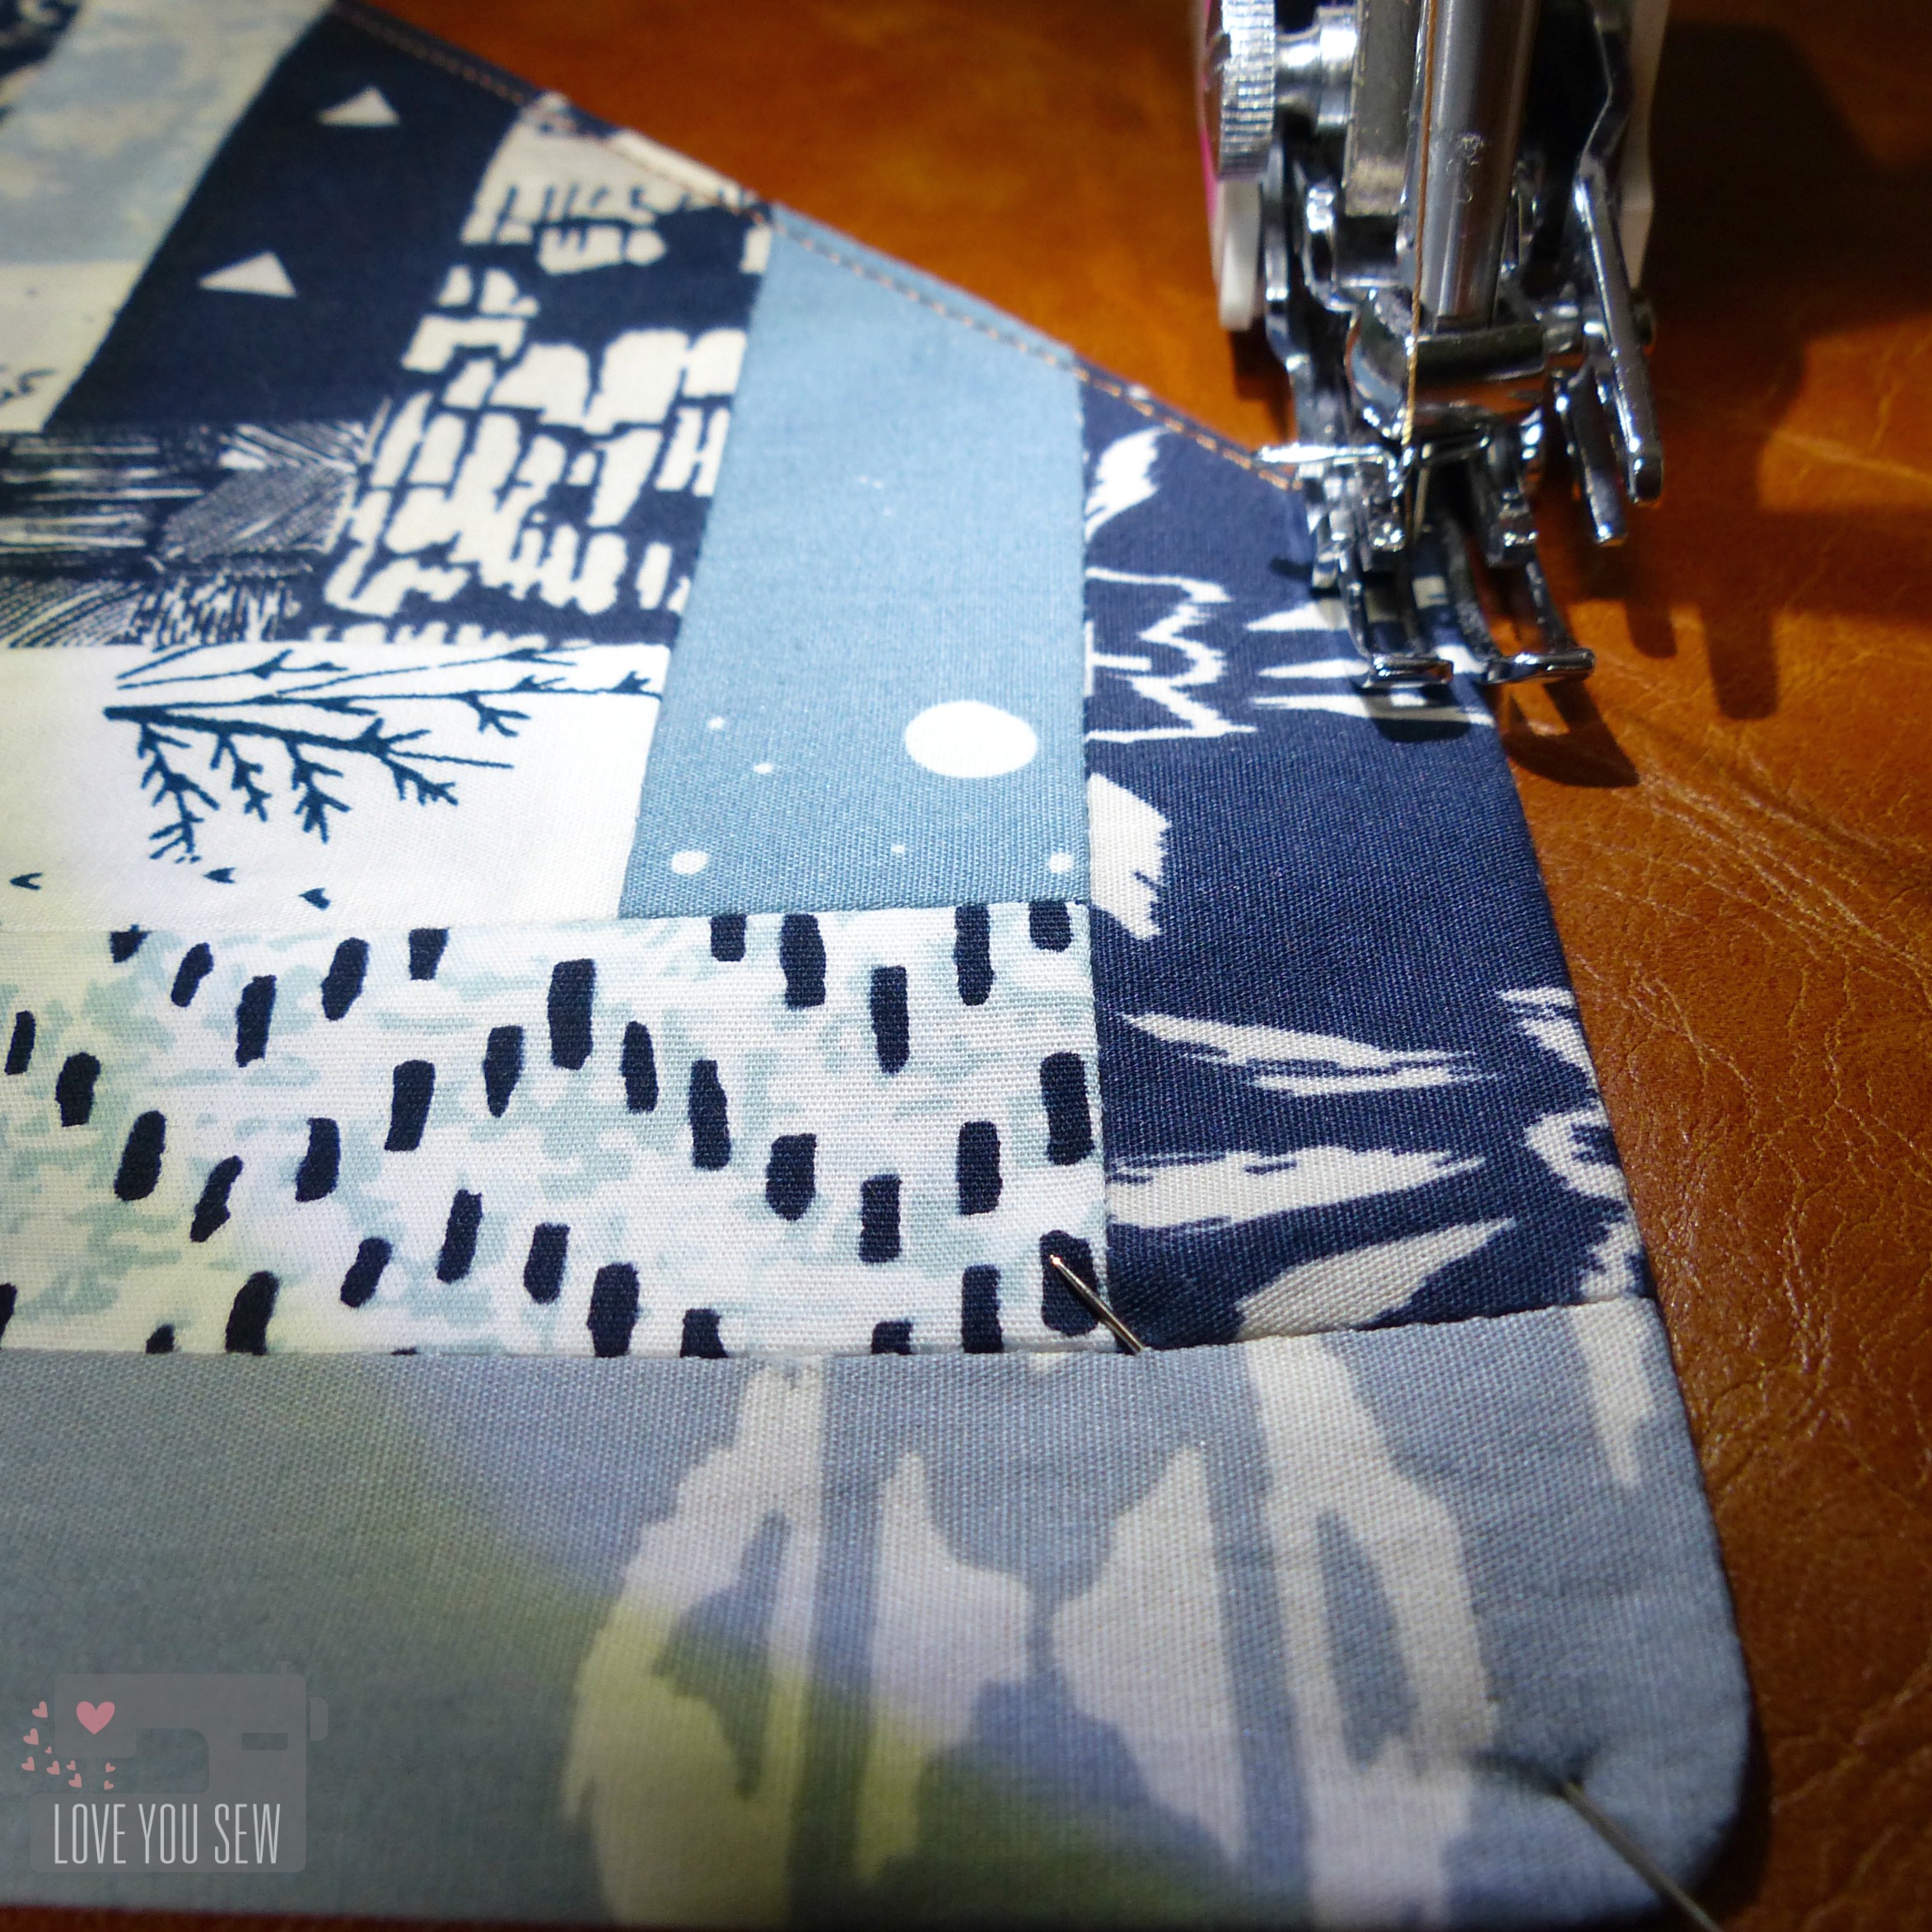
- Topstitch into place. It may seem easier to have sewn this panel onto the vinyl before all of the interfacing, but this is how you will secure all of the Peltex into place and prevent any shifting with use.
 TIPS:
TIPS:
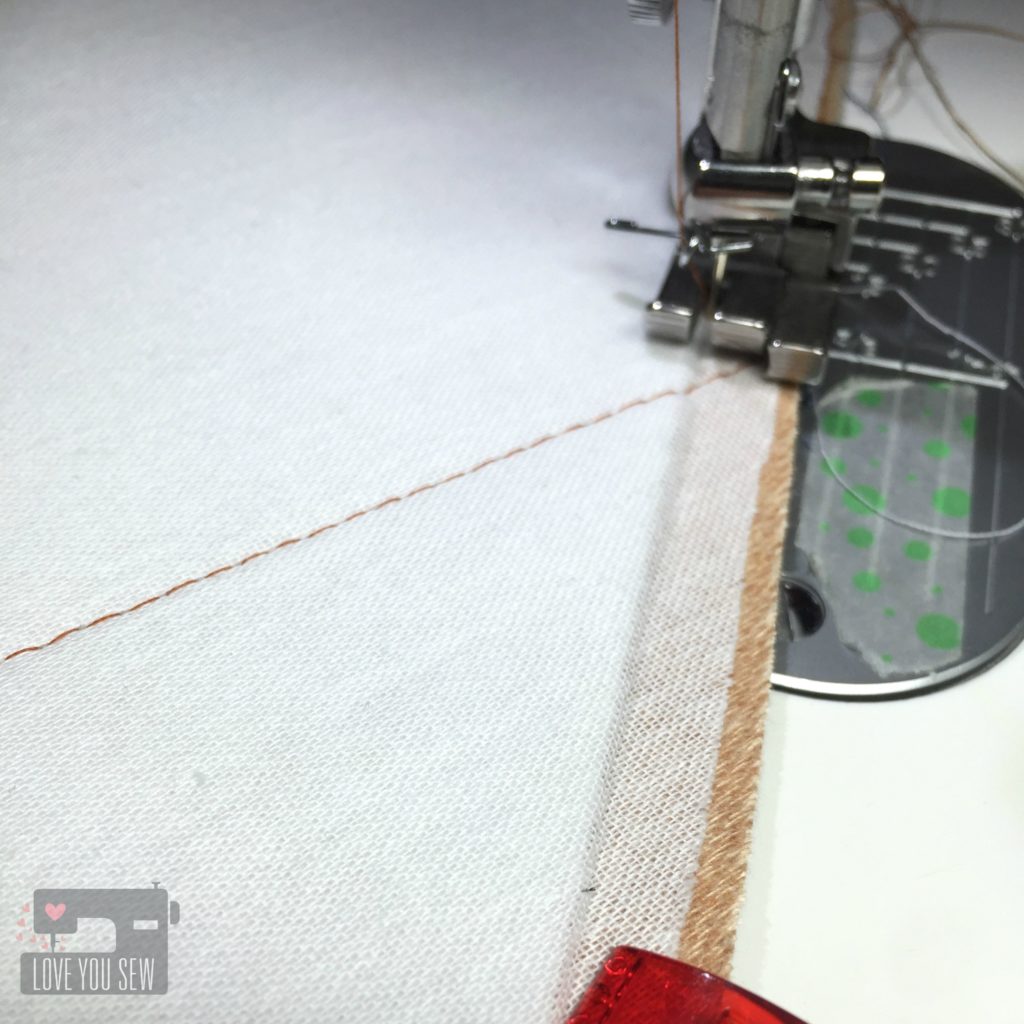
- Use upholstery thread or any other nylon/polyester thread. I like the upholstery for the heavier weight, the sheen, and it glides well through all of the layers.
- Increase your stitch-length to at least 3.0 for a nice look
- Use a walking foot for even stitches
- You may need to increase your needle size if the thread is not pulling through and/or you are getting skipped stitches
- Keep matching all-purpose polyester thread in the bobbin. It helps with skipped stitches.
- At this point, you can quilt the vinyl, if desired. Set the body aside.
- TIP: Use washi tape for your guidelines. Chalk and pen will easily smear off the faux leather.
- TIP: Use washi tape for your guidelines. Chalk and pen will easily smear off the faux leather.
- Attach pockets onto lining
- With the flat edge of the lining on top and right side facing you, measure 3″ down from the straight edge and 3 1/4″ in on either side. Pin (where you will sew) the faux leather into place 1/8″ from the edges (marked in yellow.) You can leave this as a large slip pocket or you can divide it for your cell phone. I marked mine 3 1/2″ in from the edge to hold an iPhone 6. Sew the three edges into place and then the dividing seam (marked by yellow.)
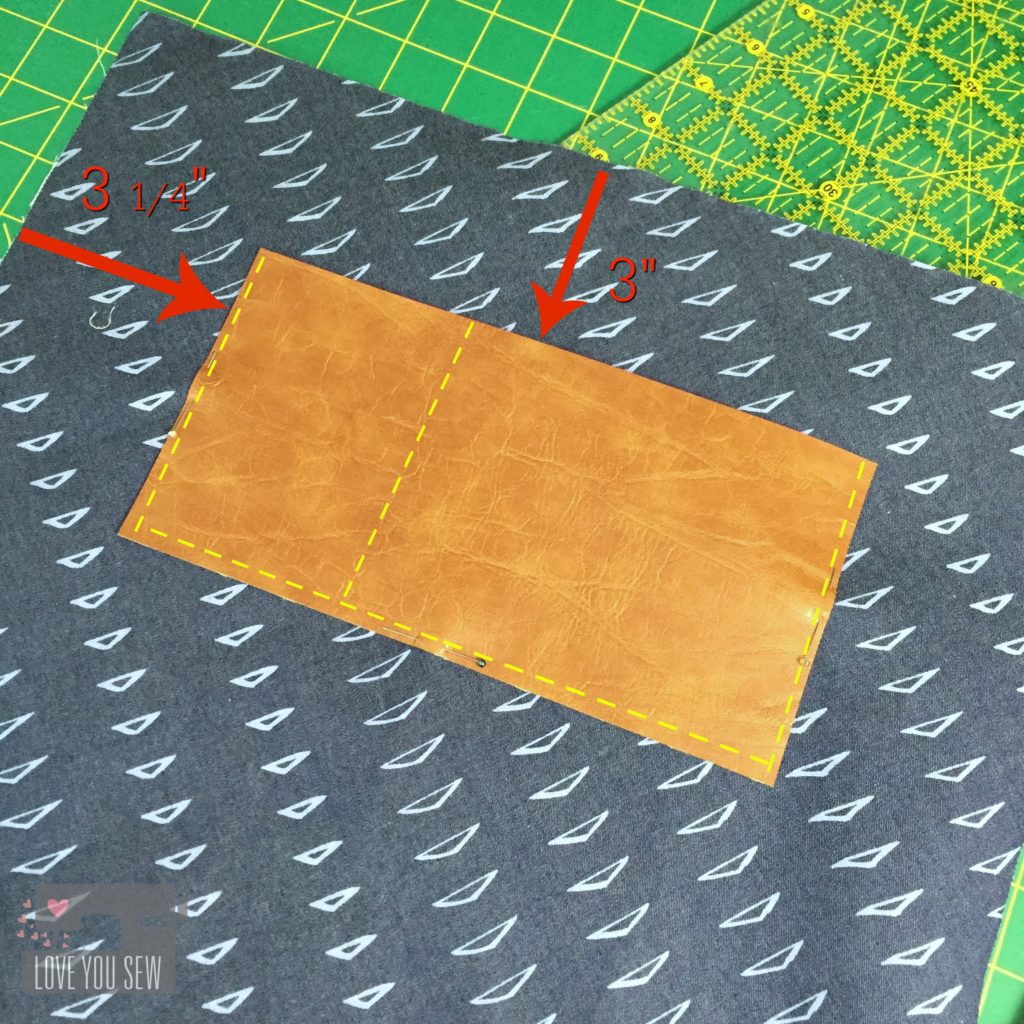
- With the flat edge of the lining on top and right side facing you, measure 3″ down from the straight edge and 3 1/4″ in on either side. Pin (where you will sew) the faux leather into place 1/8″ from the edges (marked in yellow.) You can leave this as a large slip pocket or you can divide it for your cell phone. I marked mine 3 1/2″ in from the edge to hold an iPhone 6. Sew the three edges into place and then the dividing seam (marked by yellow.)
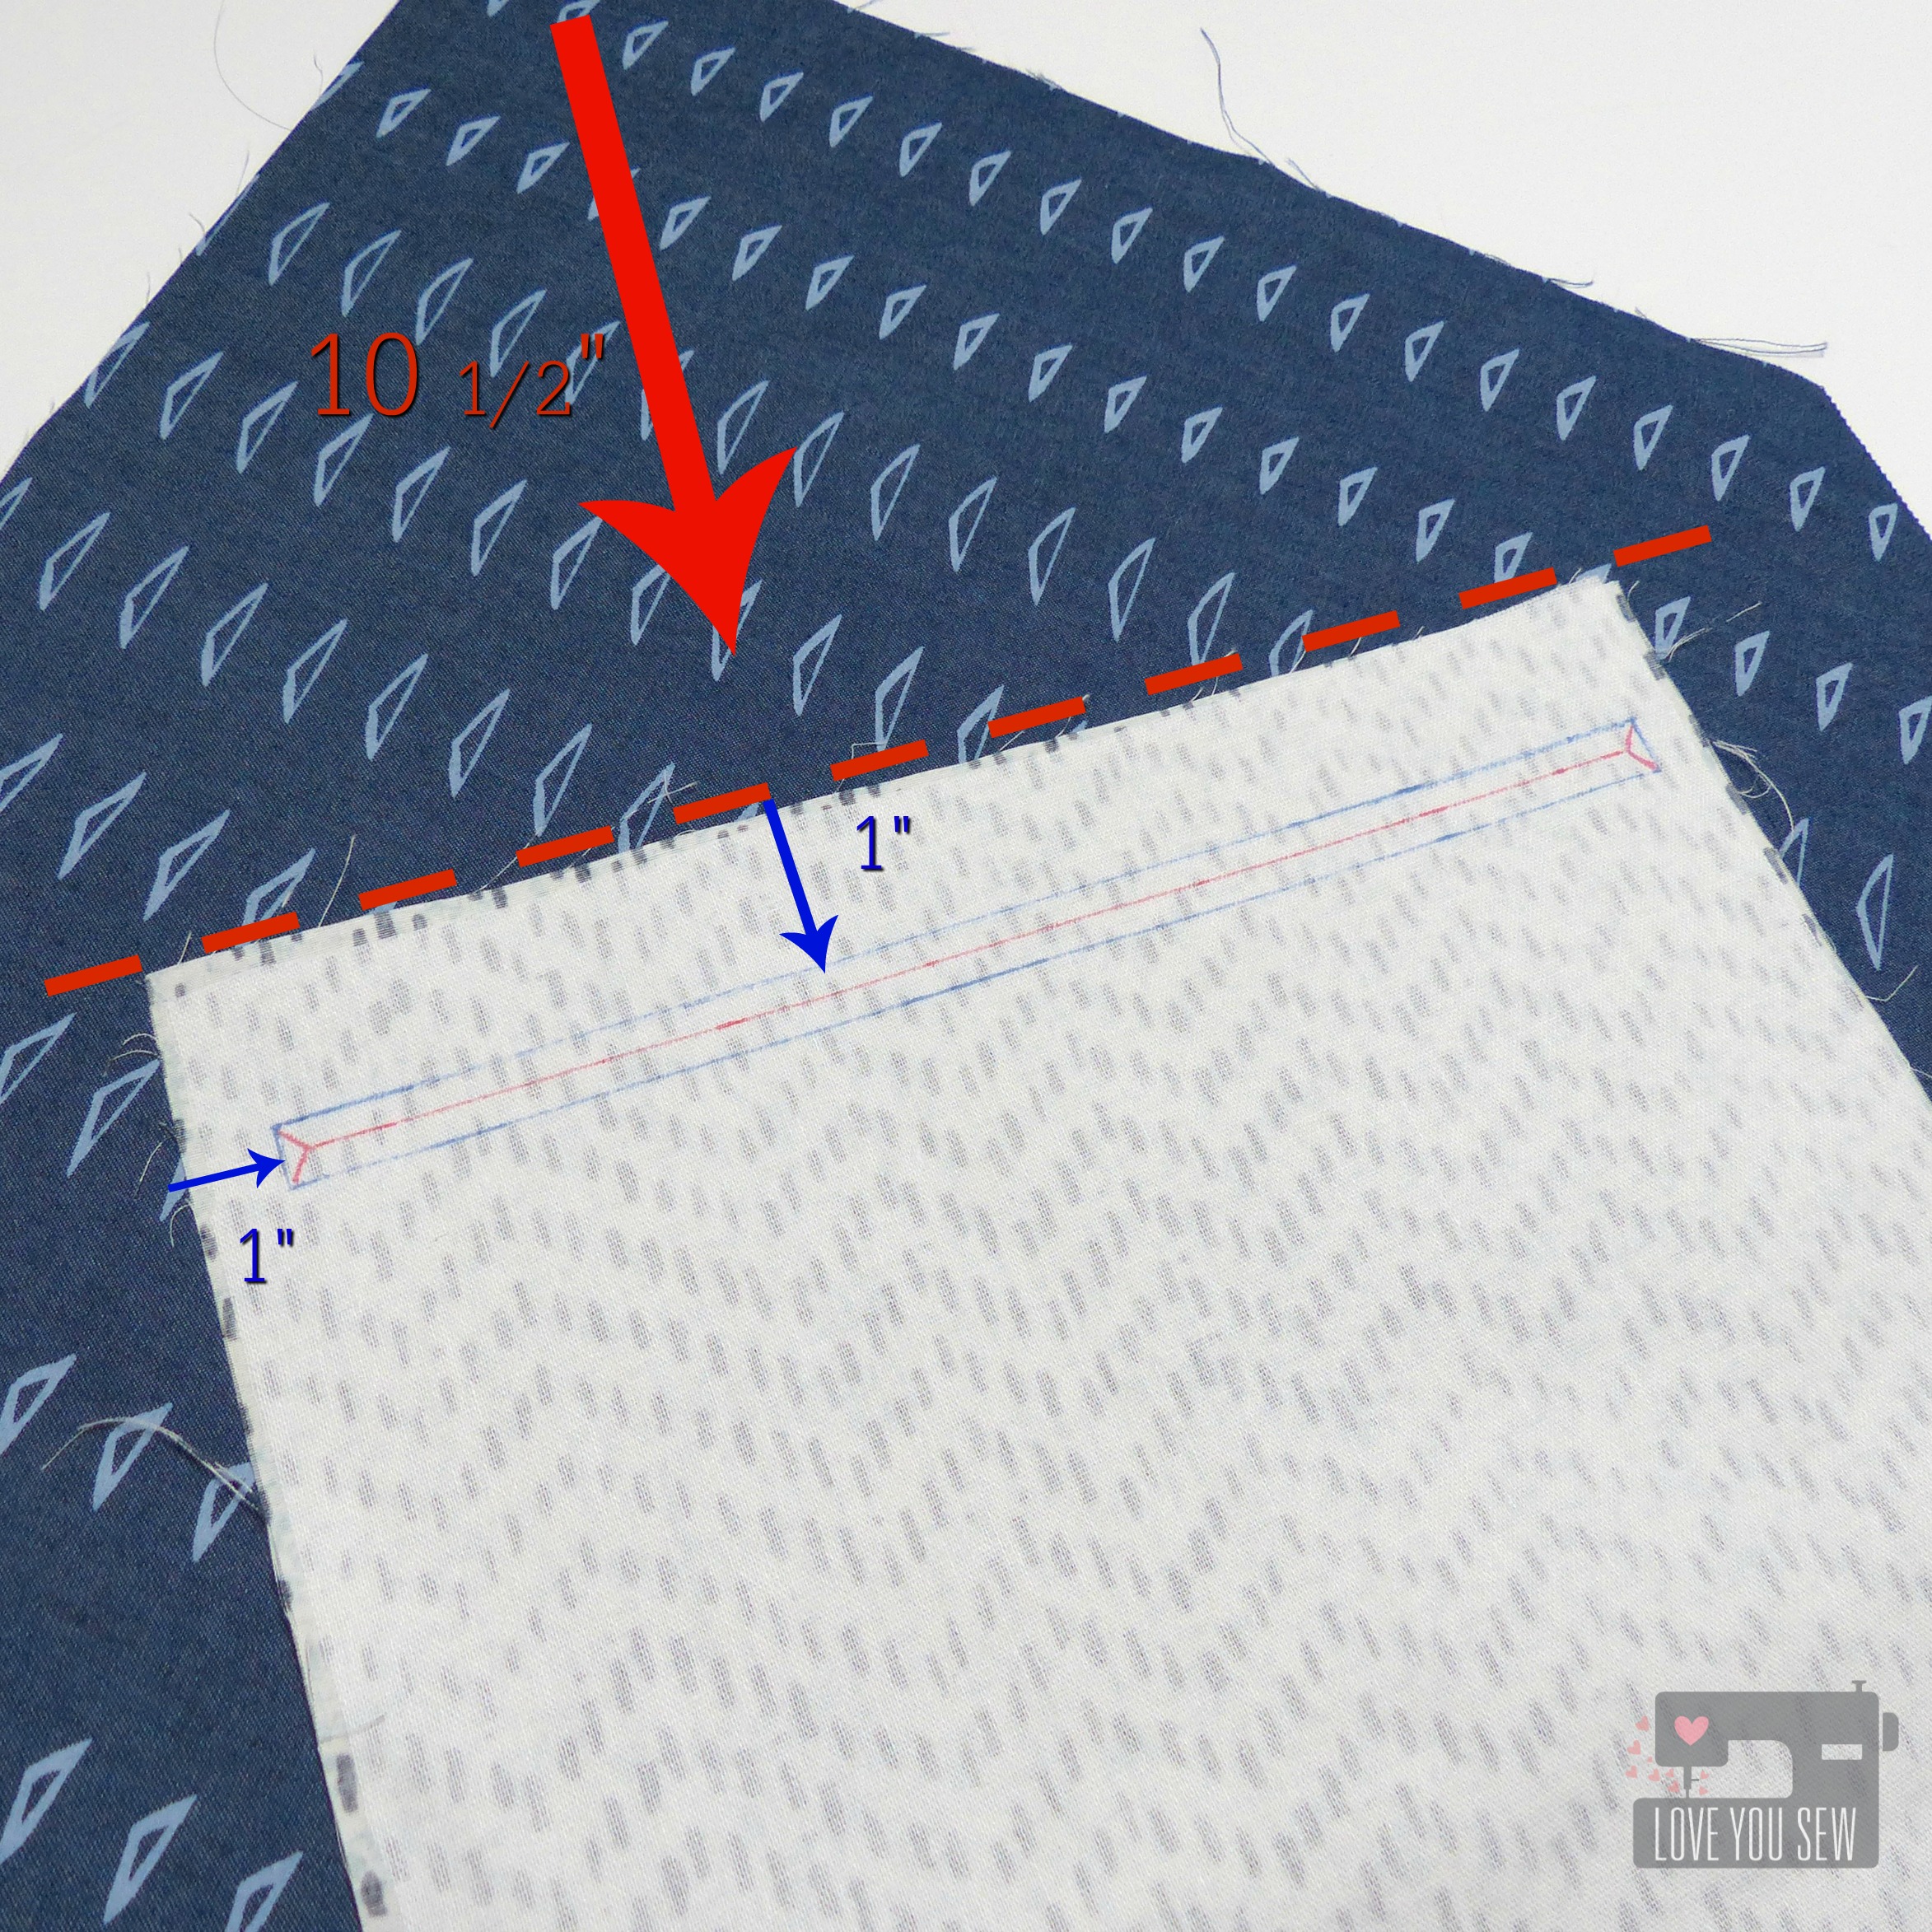
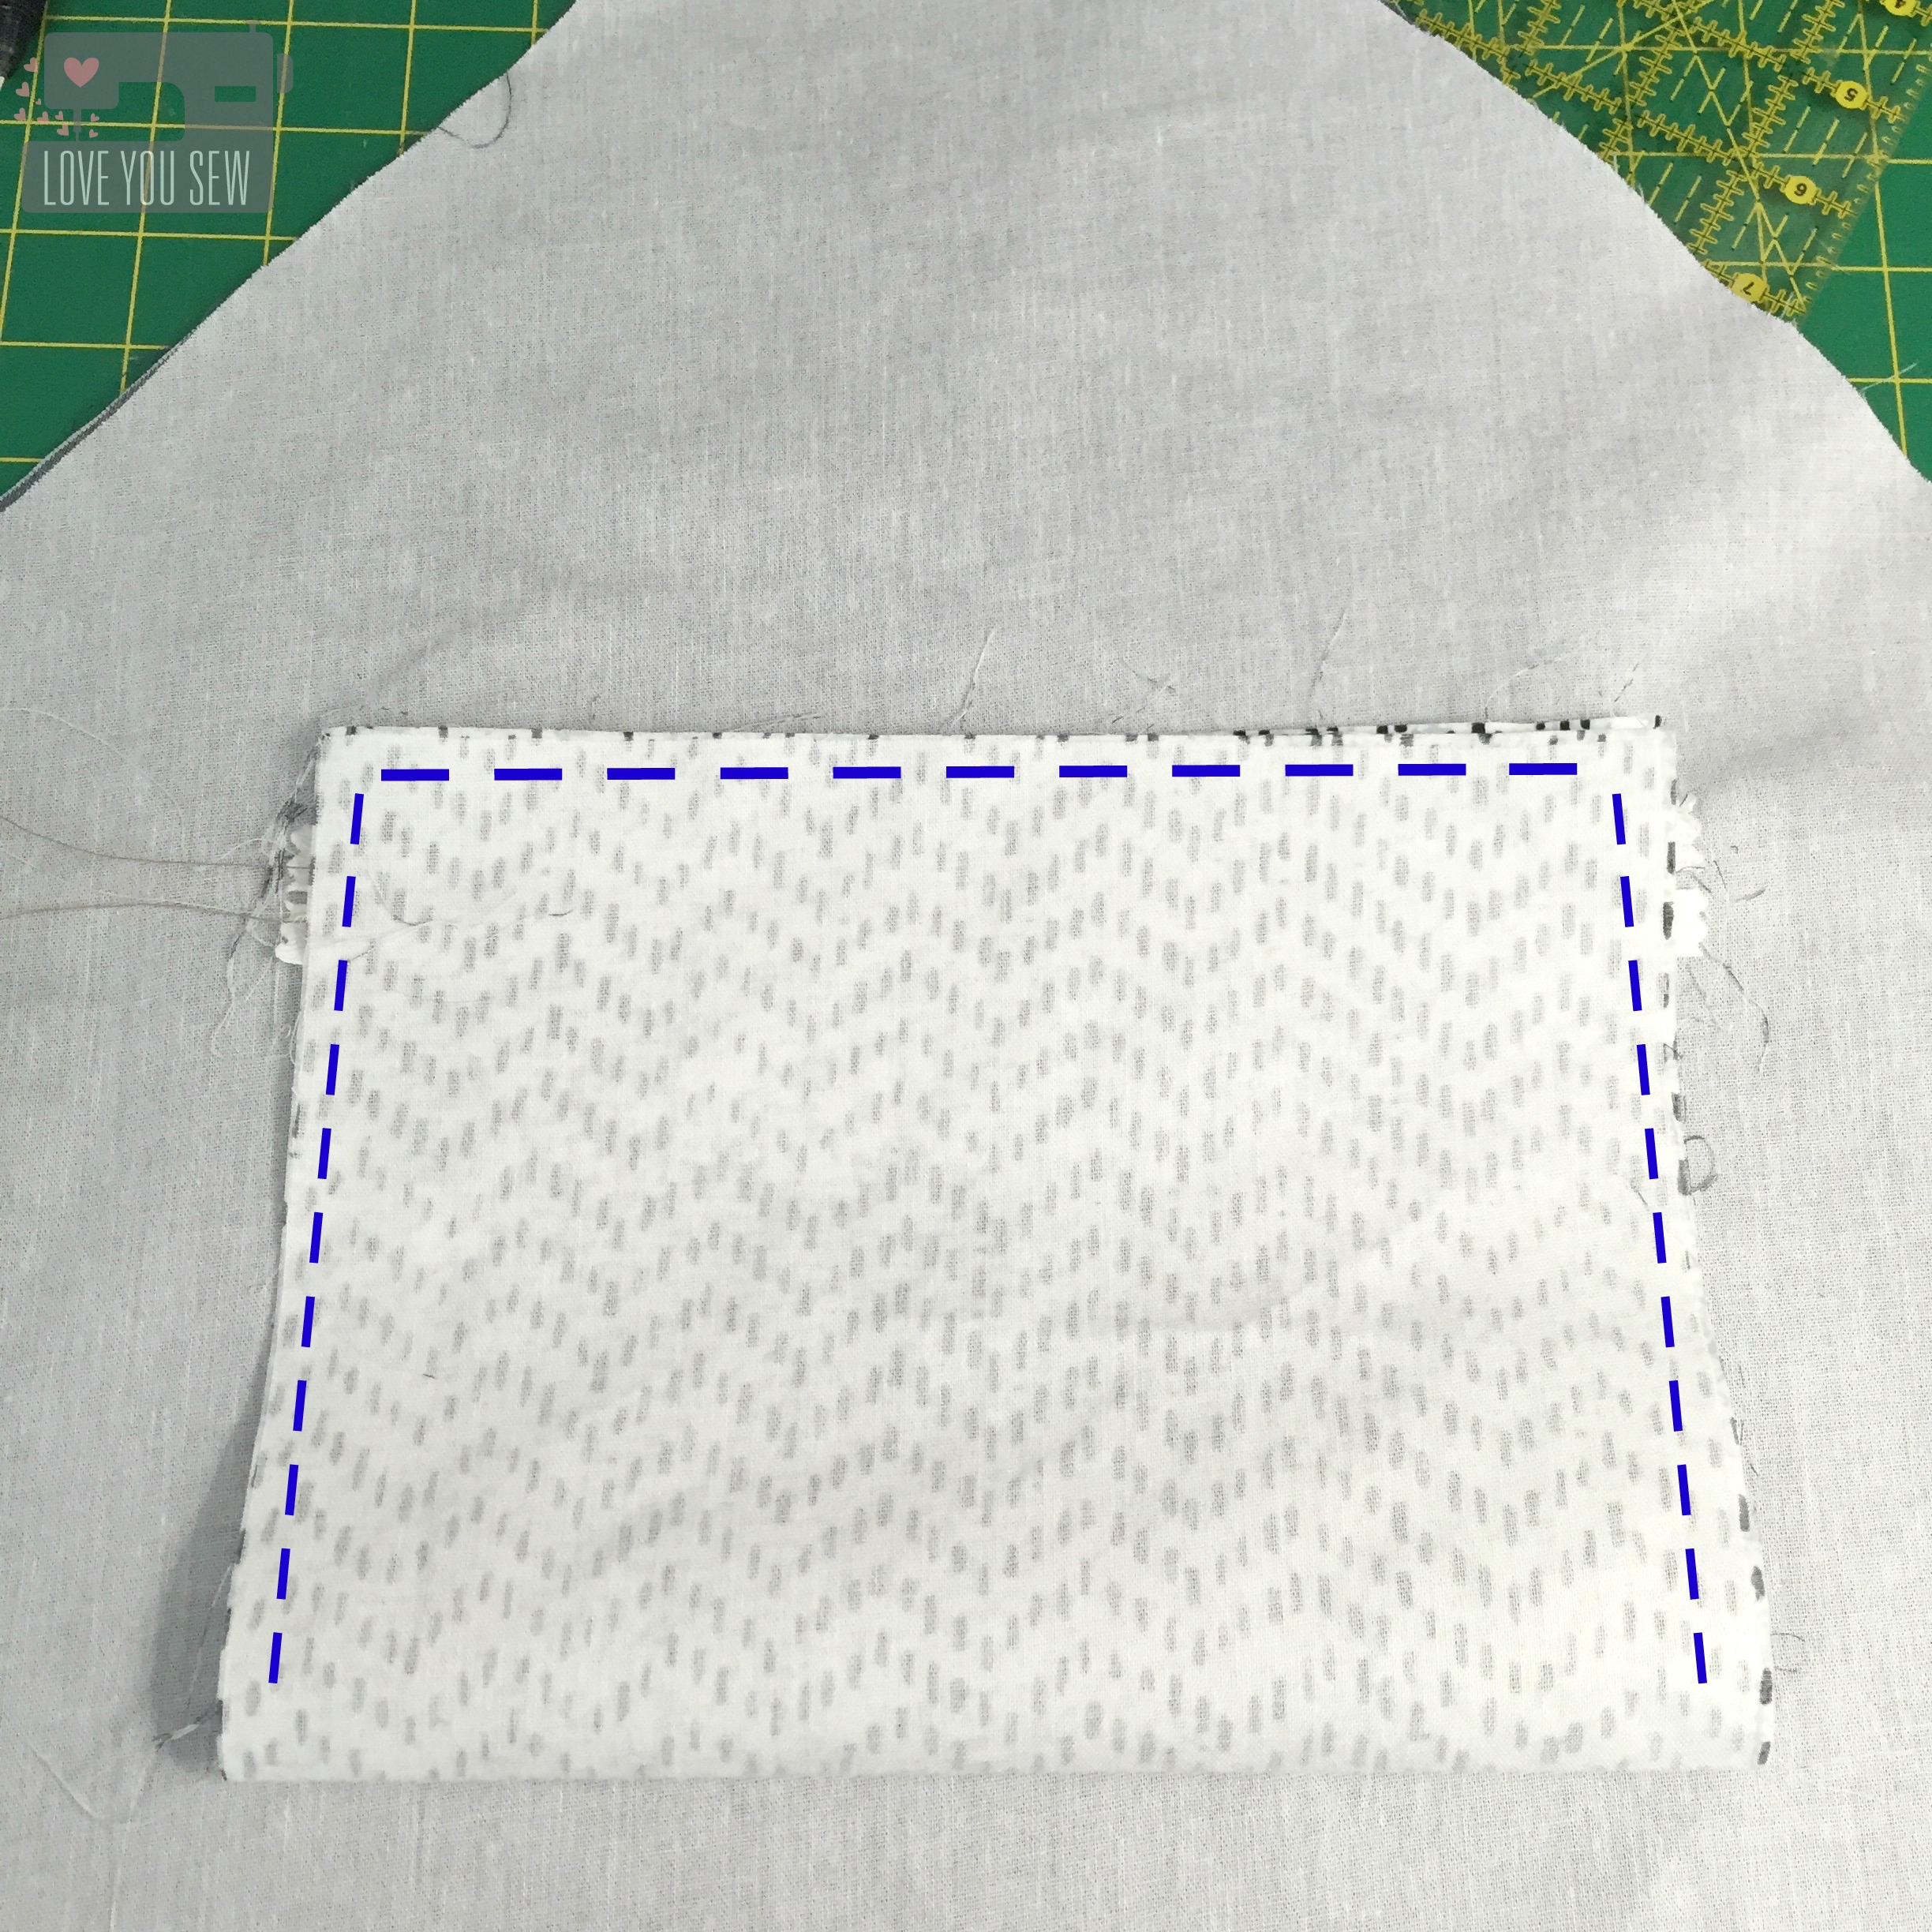
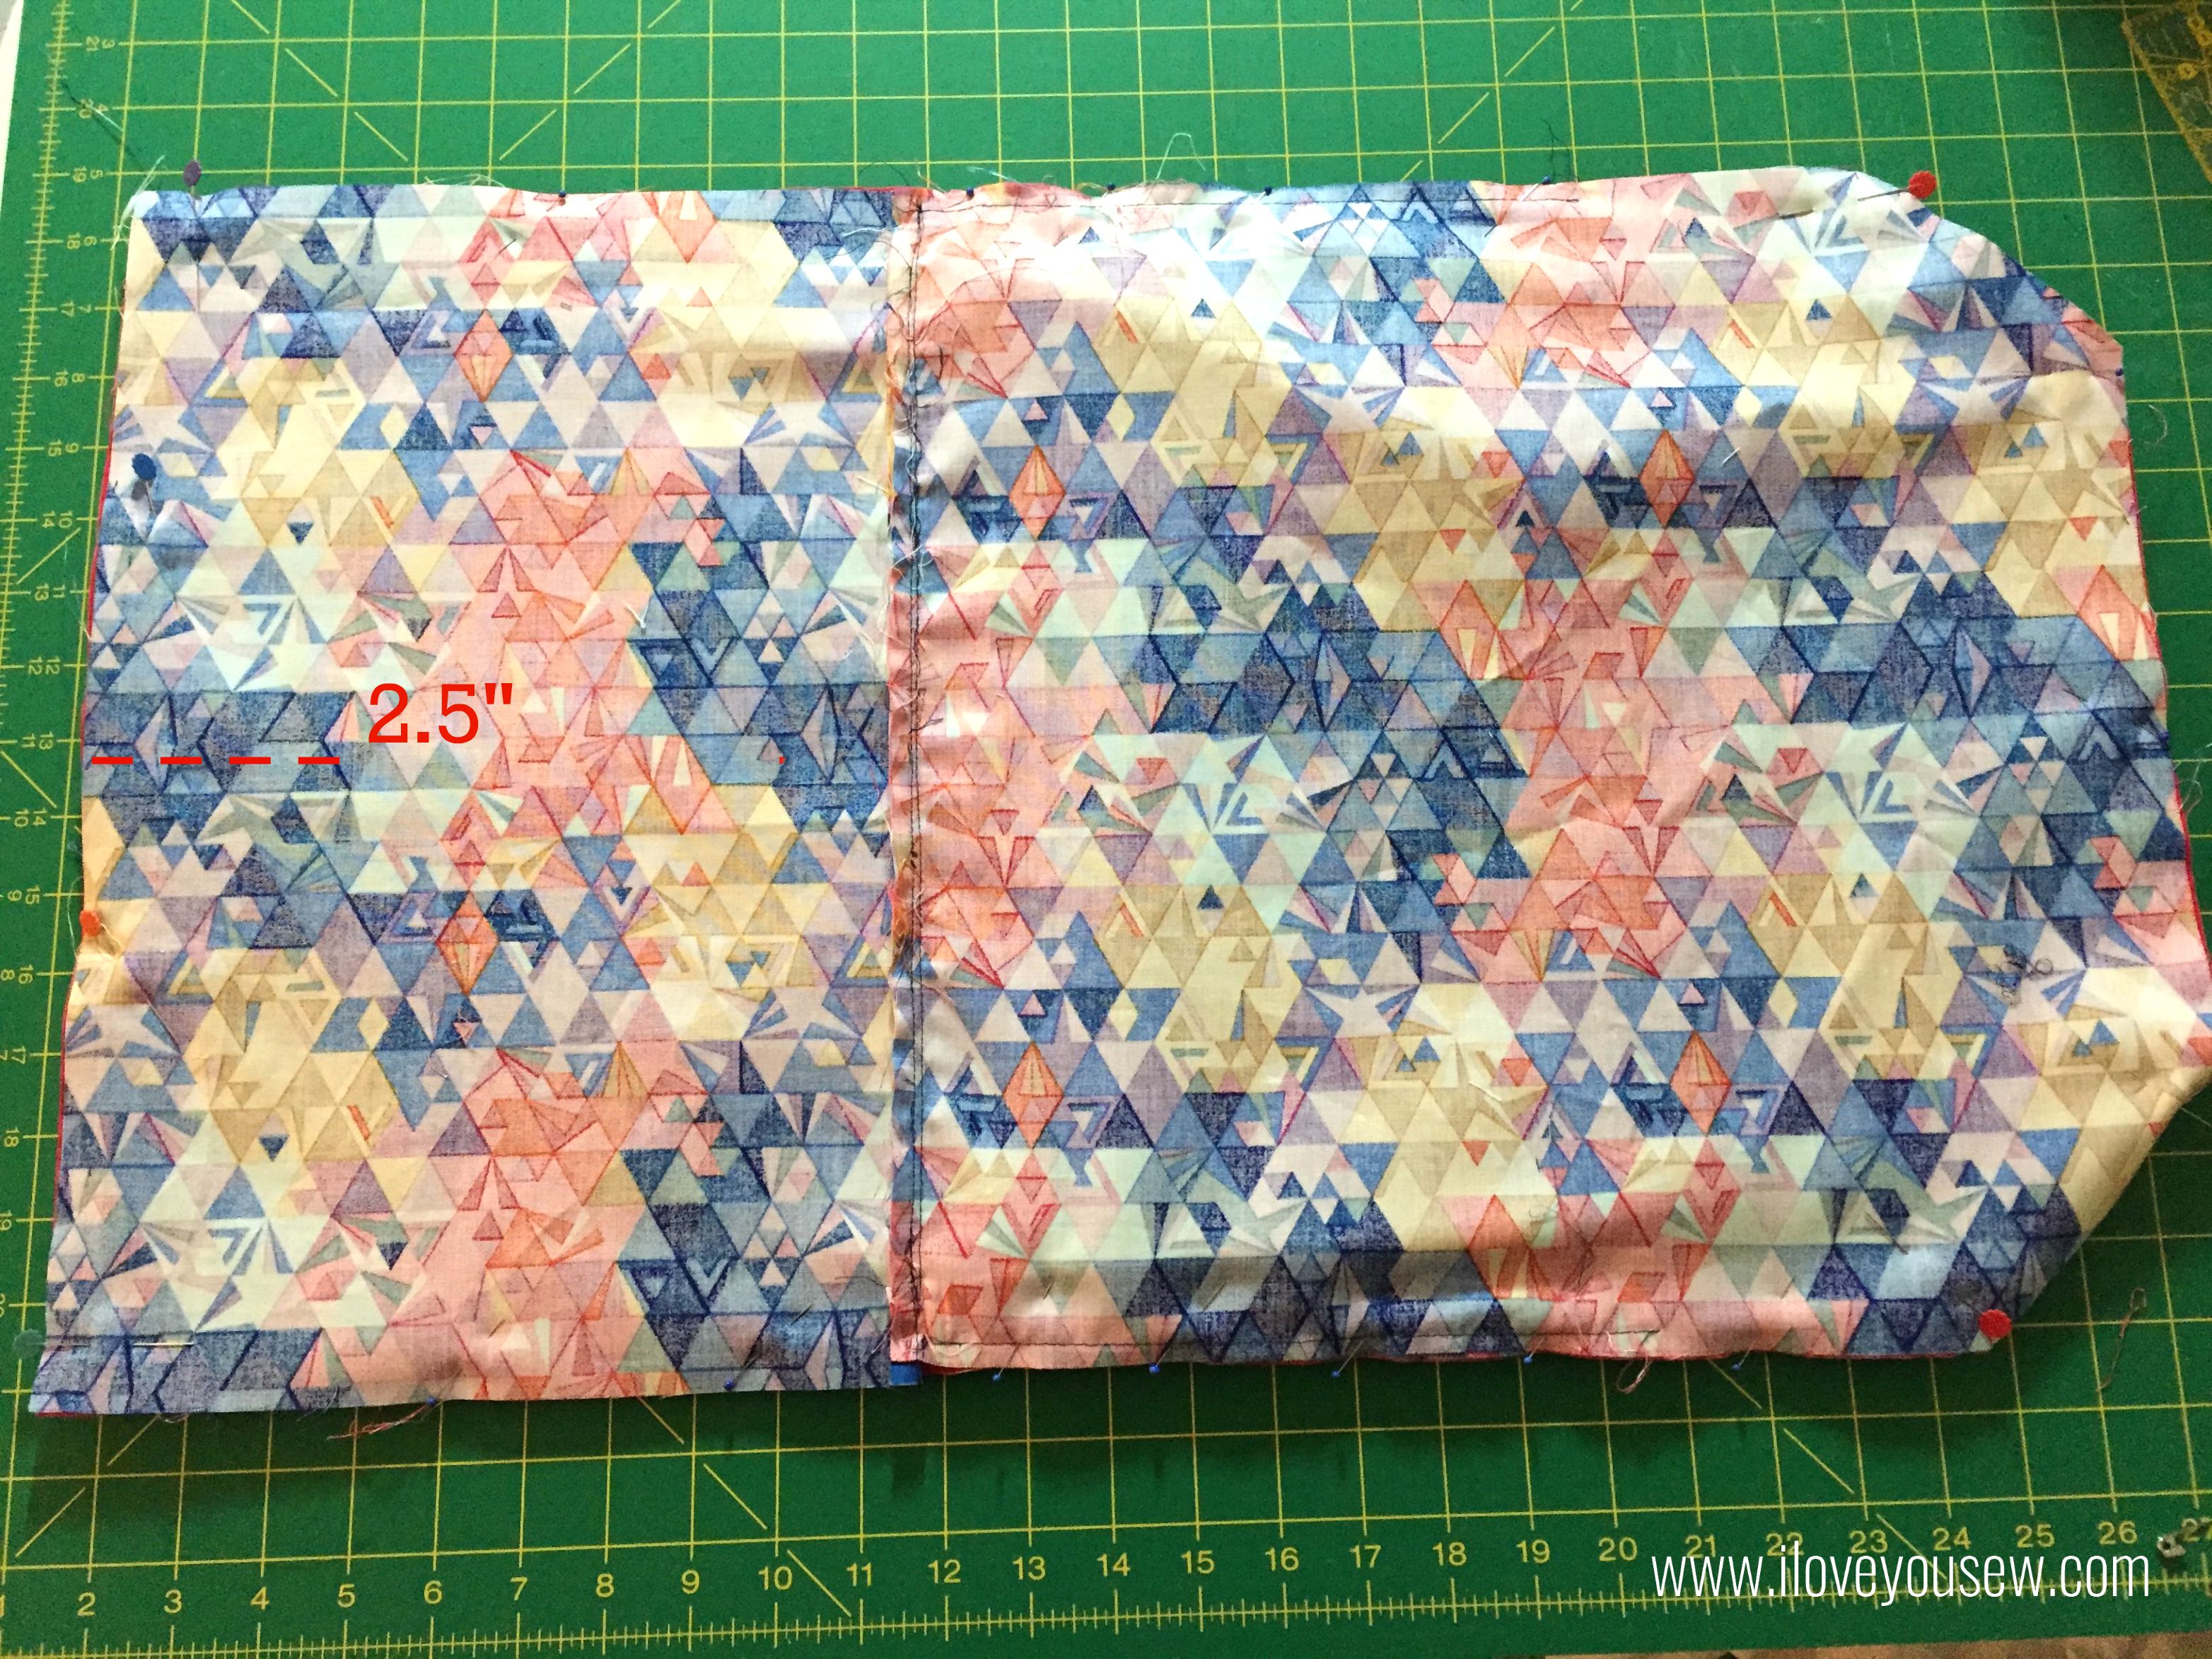
- Turn the lining 180 degrees. With the right-side facing you, mark 10 1/2″ down from the top of the lining and pin the short-side of the pocket lining fabric there. Mark a rectangle 1″ down from the top and sides of the pocket that is 9″ x 3/8″ (blue pen.)
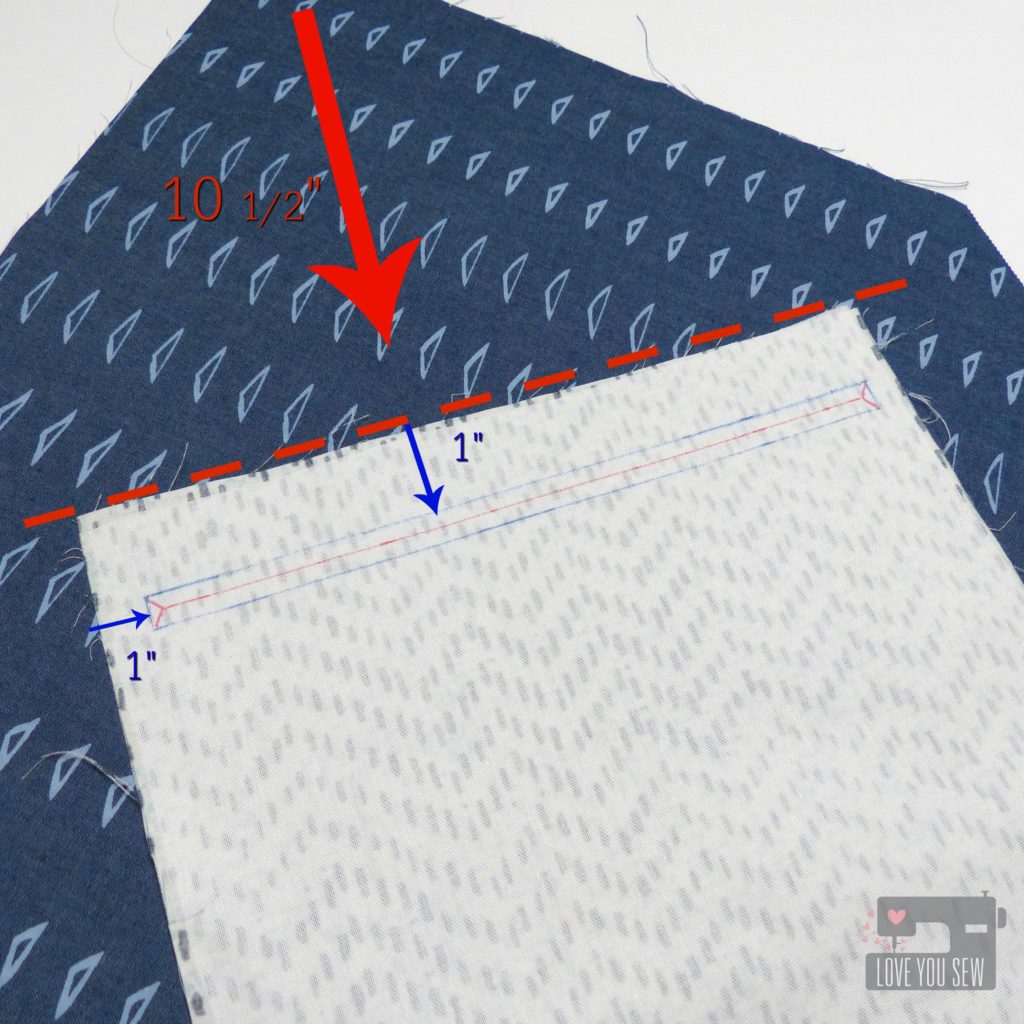
- Sew all-around the 9″ x 3/8″ rectangle on the marks you made. Cut through the rectangle as shown, stopping about 1/4″ from the end (red pen lines.) [Image a]. Make small cuts from the middle out to each corner, getting close to the stitches, but not cutting directly through. Push pocket through the hole [images b & c] and press [image d].
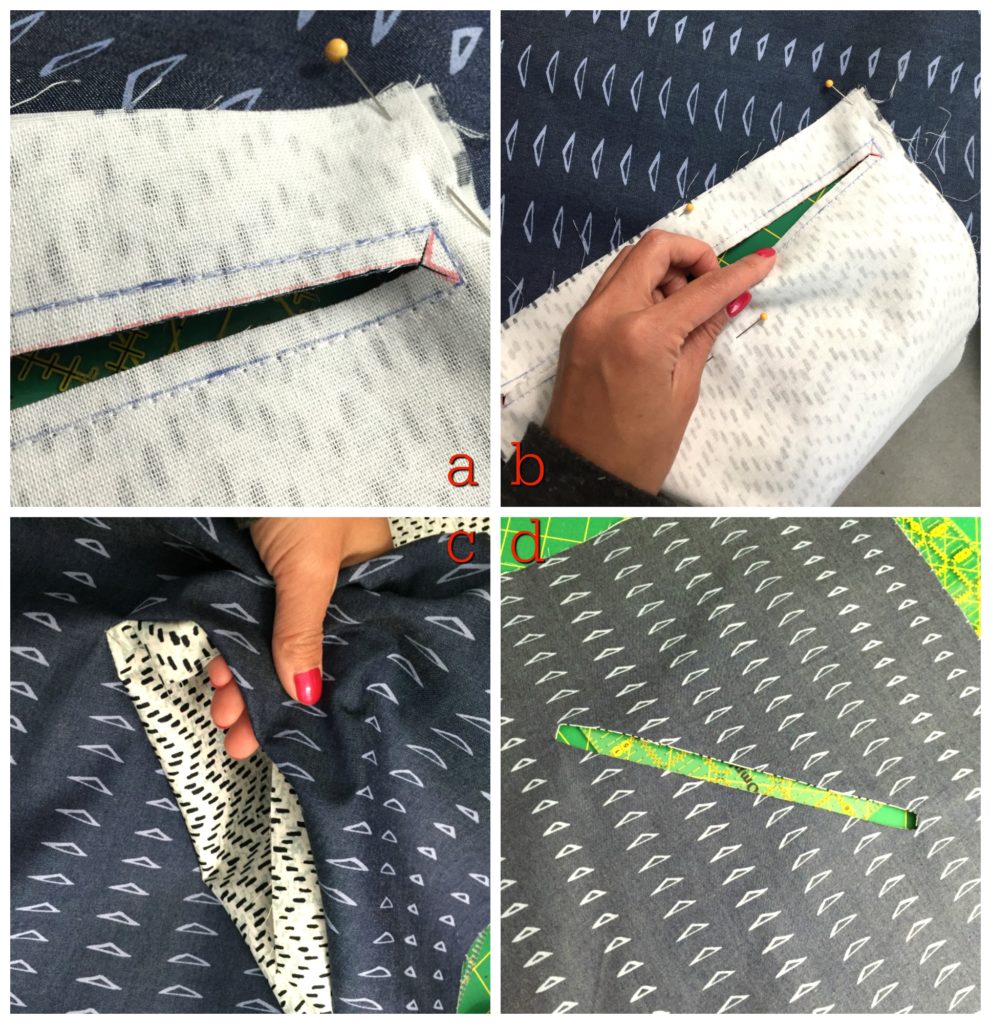
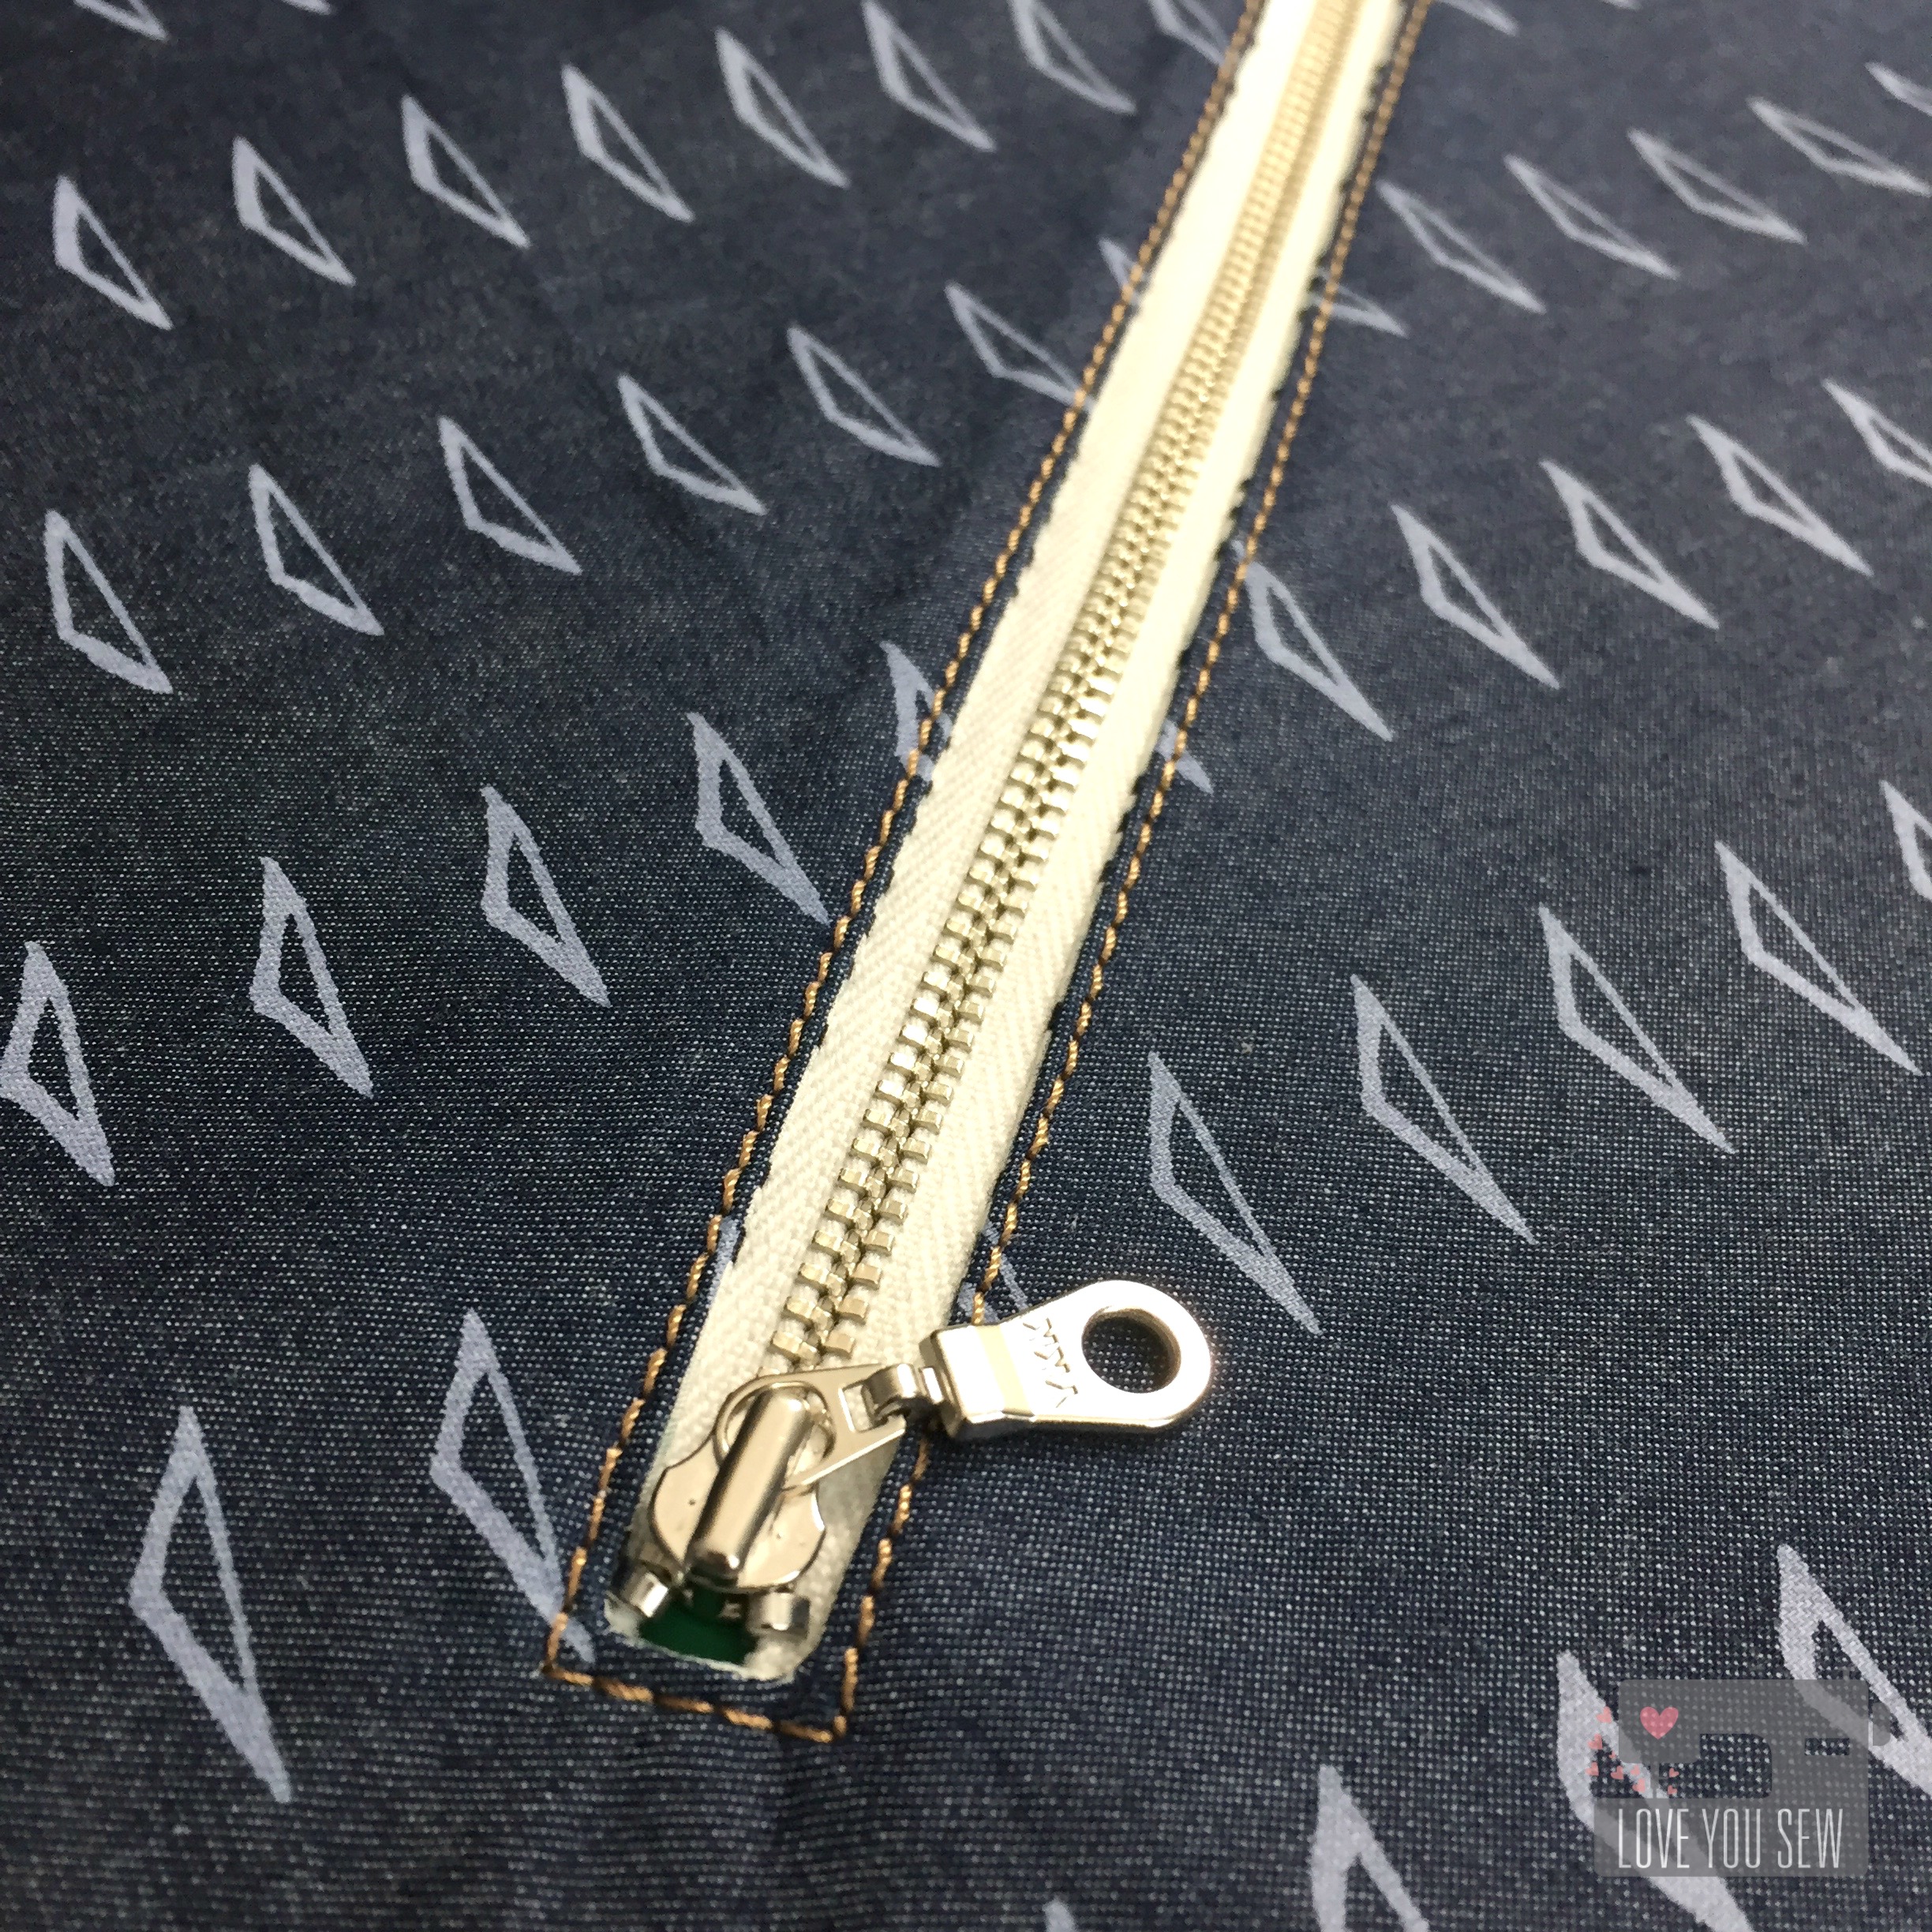
- With the right side of the lining facing you, line up the zipper in the opening just created. Either pin in place or use Sewline glue pen. Sew 1/8″ all around the opening.

- With the wrong-side of the lining facing you, fold up the pocket so the short-sides match. Press on the fold. Pin all around the pocket, but not including the lining. Sew pocket shut (following blue dashed lines in pictures.) Make sure you move the lining out-of-the-way as you sew.


Assembly:
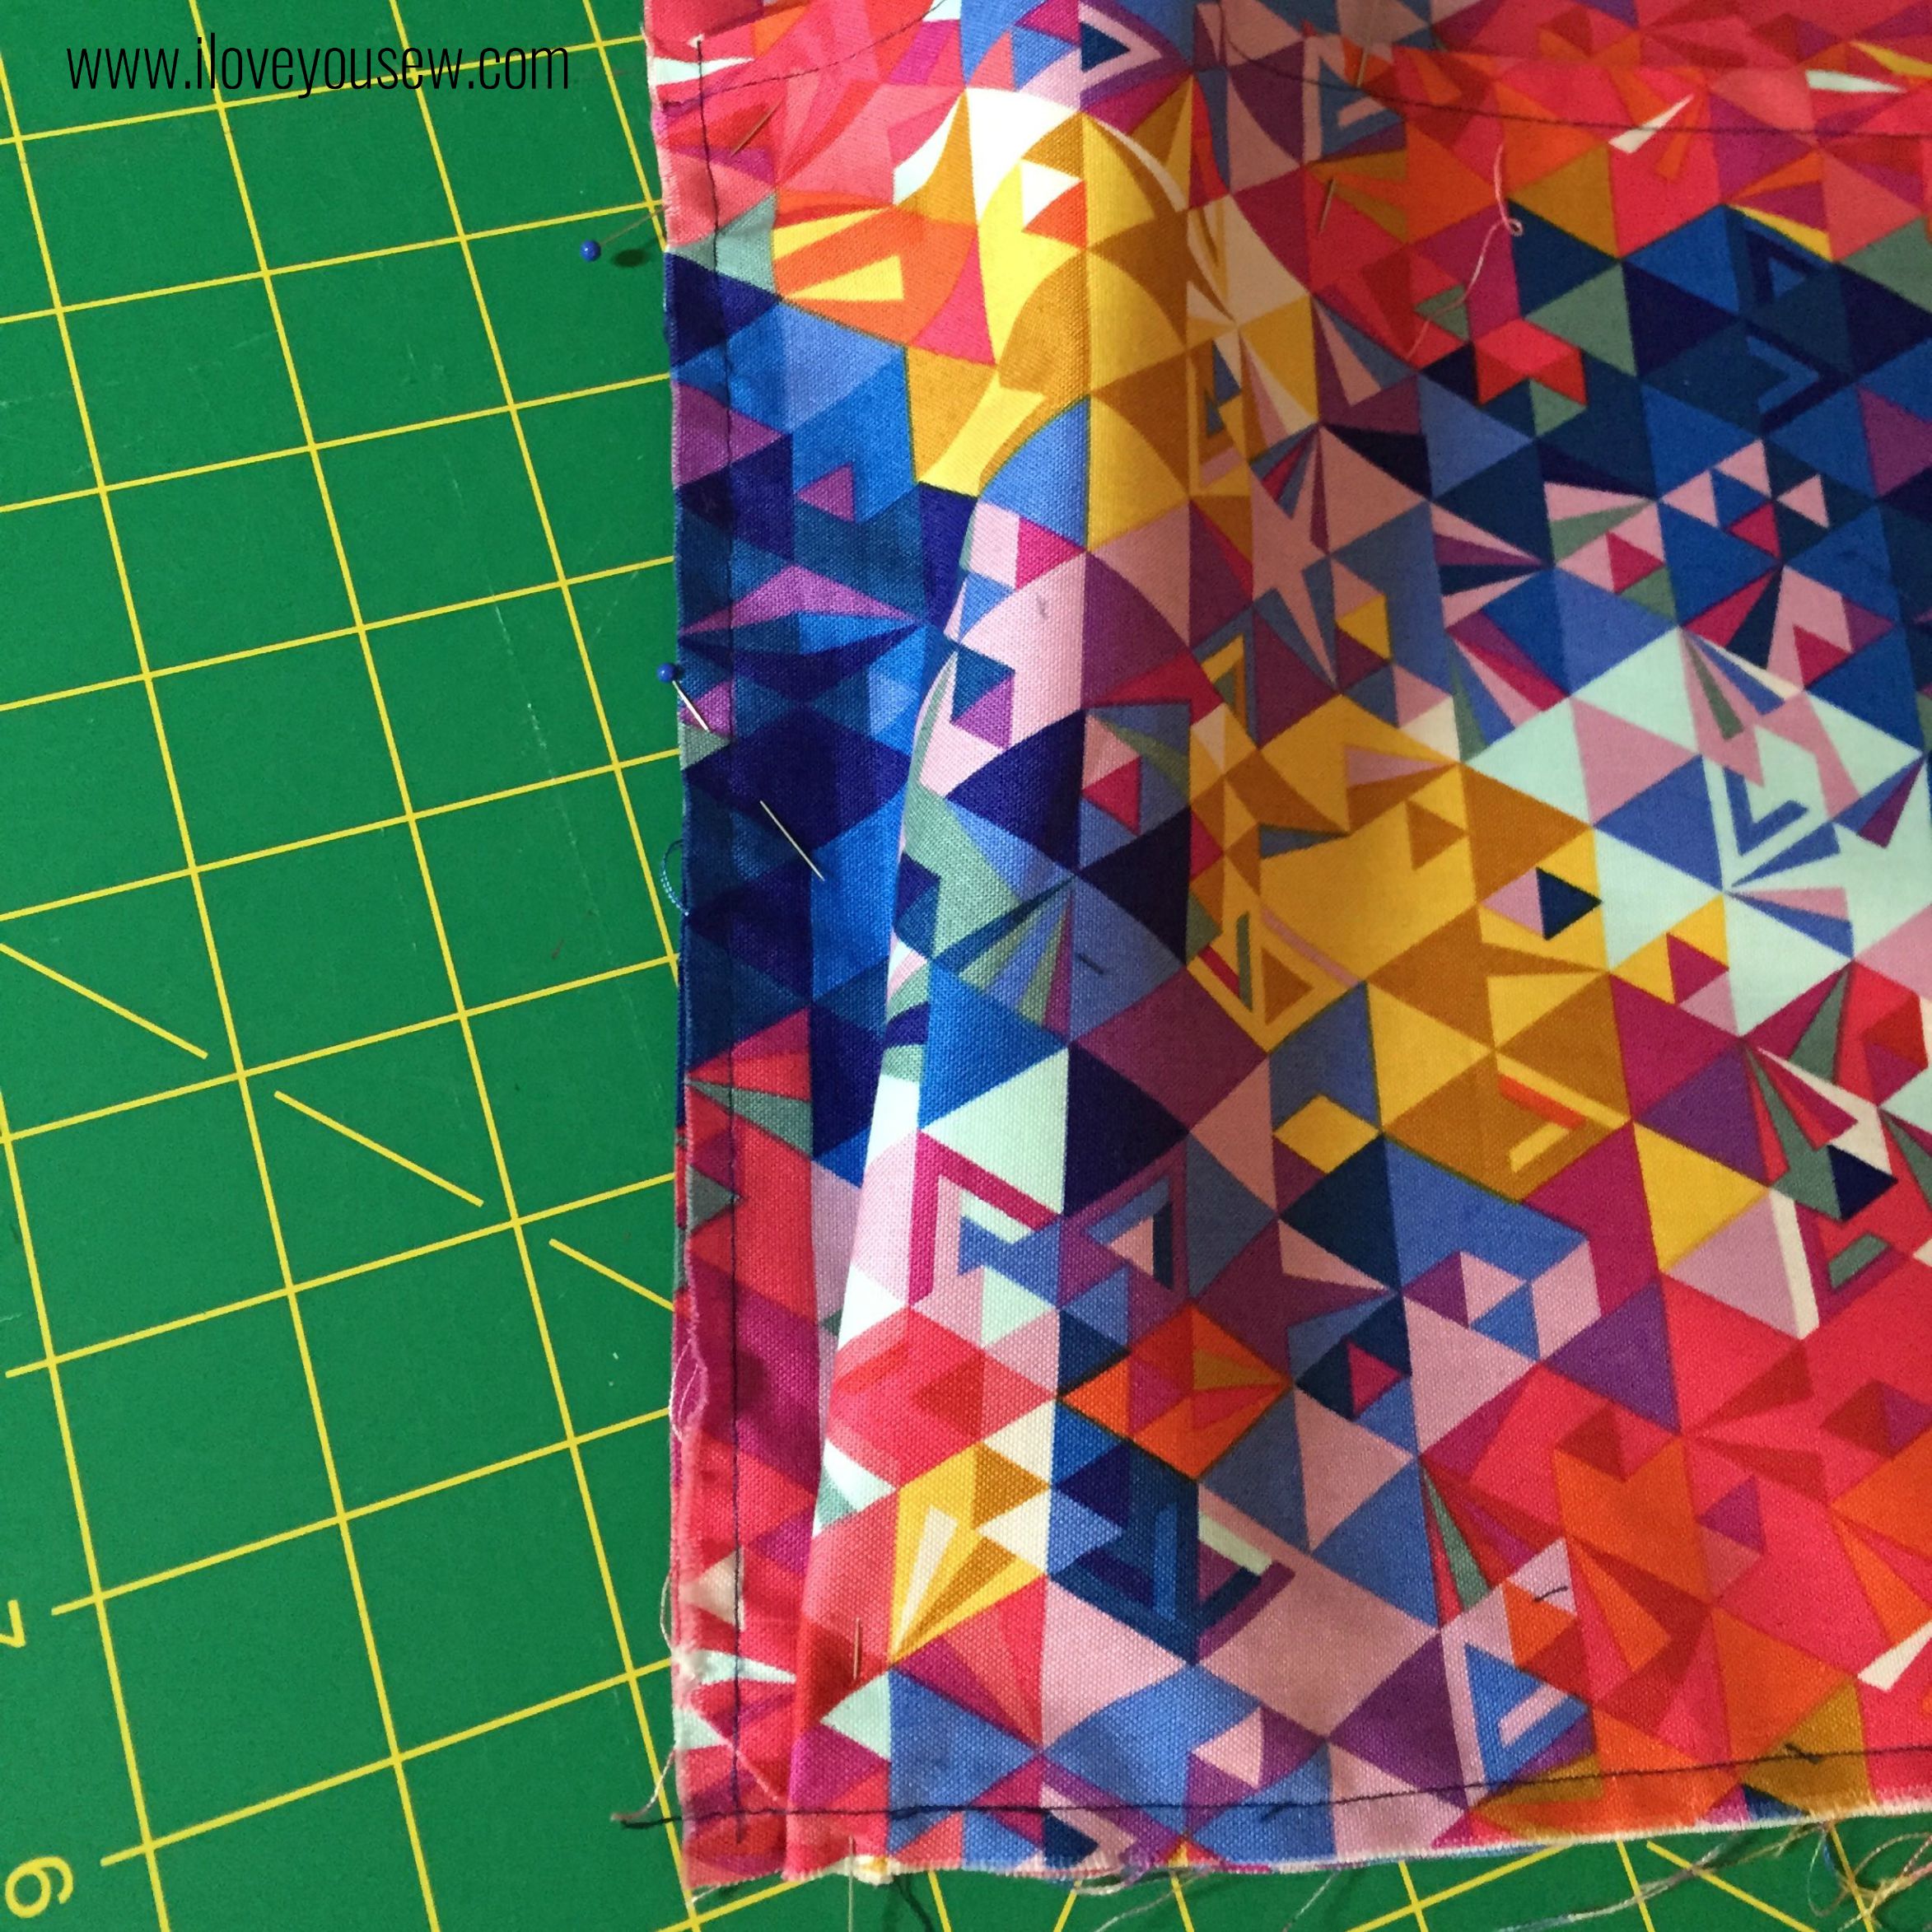
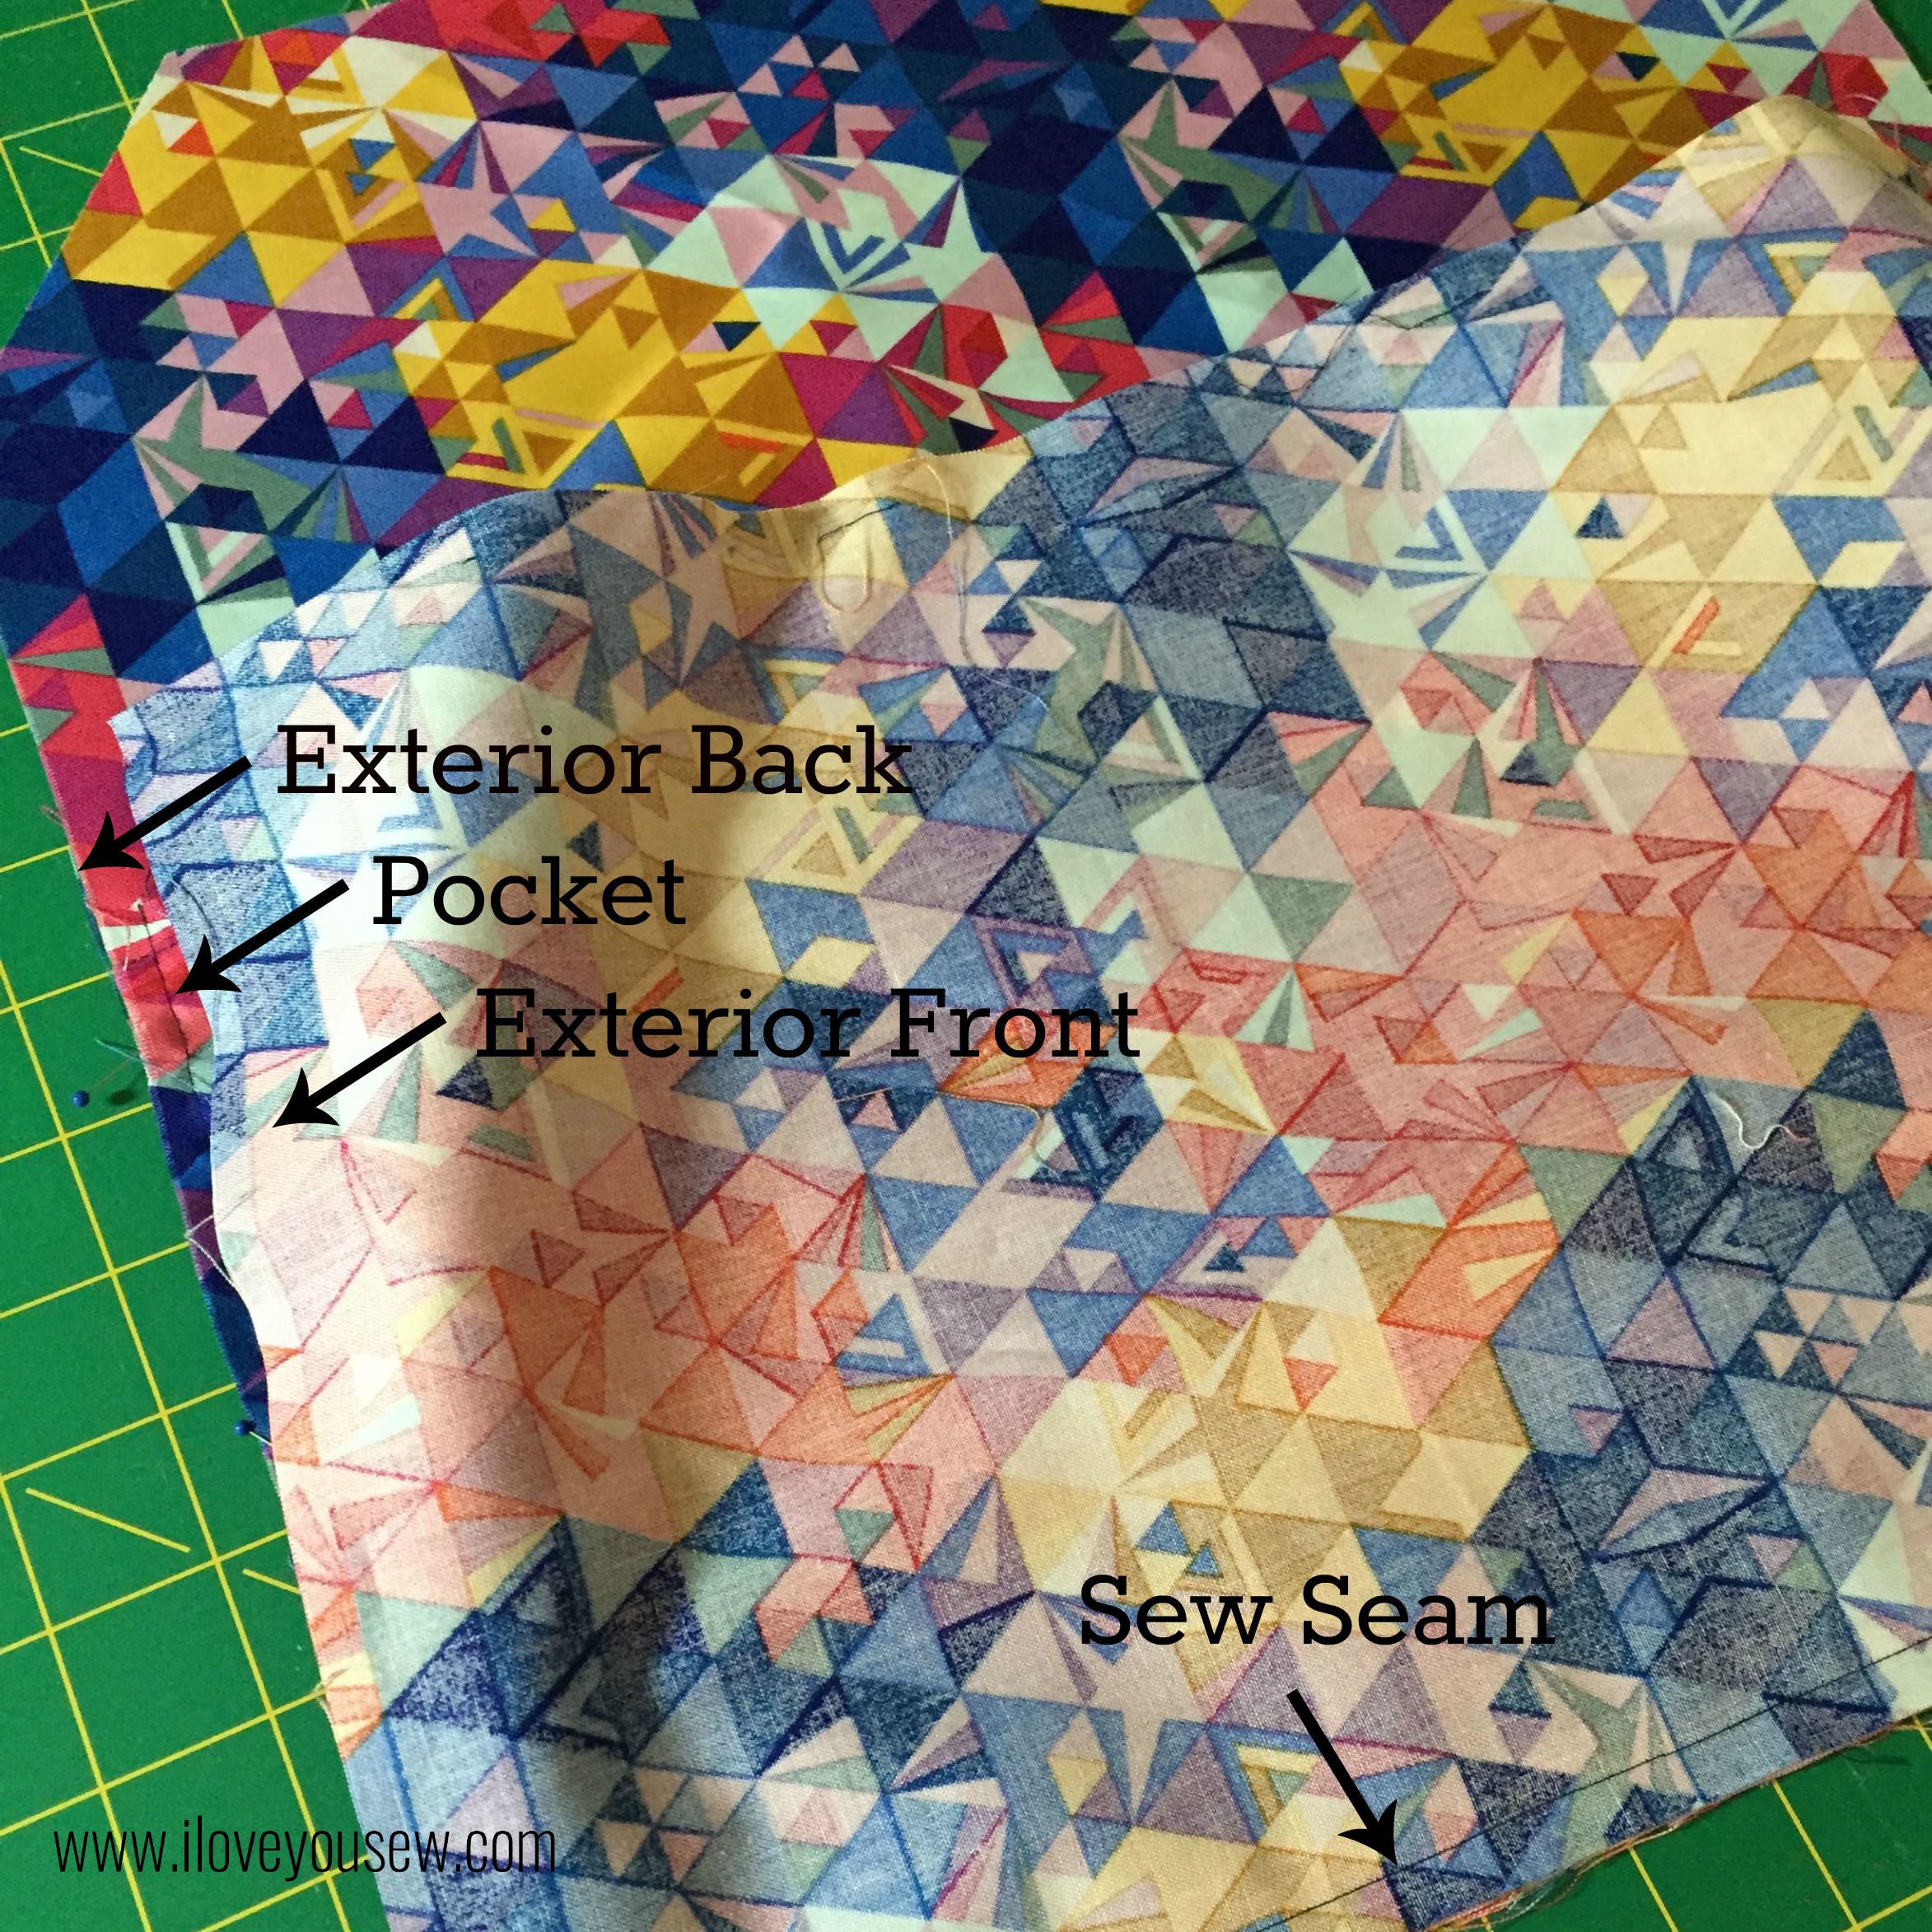
- Now match the right-sides of the lining and body together. Clip in place and sew all around the edge (marked in blue) with a 3/8″ seam allowance. Back-stitch when you start and end leaving a 5″ opening to turn. Notch out corners and the top of the clutch. Be very careful not to cut through any stitches.

- TIP: Use a compensating foot or a zipper foot since the Peltex give you can uneven surface.
- TIP: Use a compensating foot or a zipper foot since the Peltex give you can uneven surface.
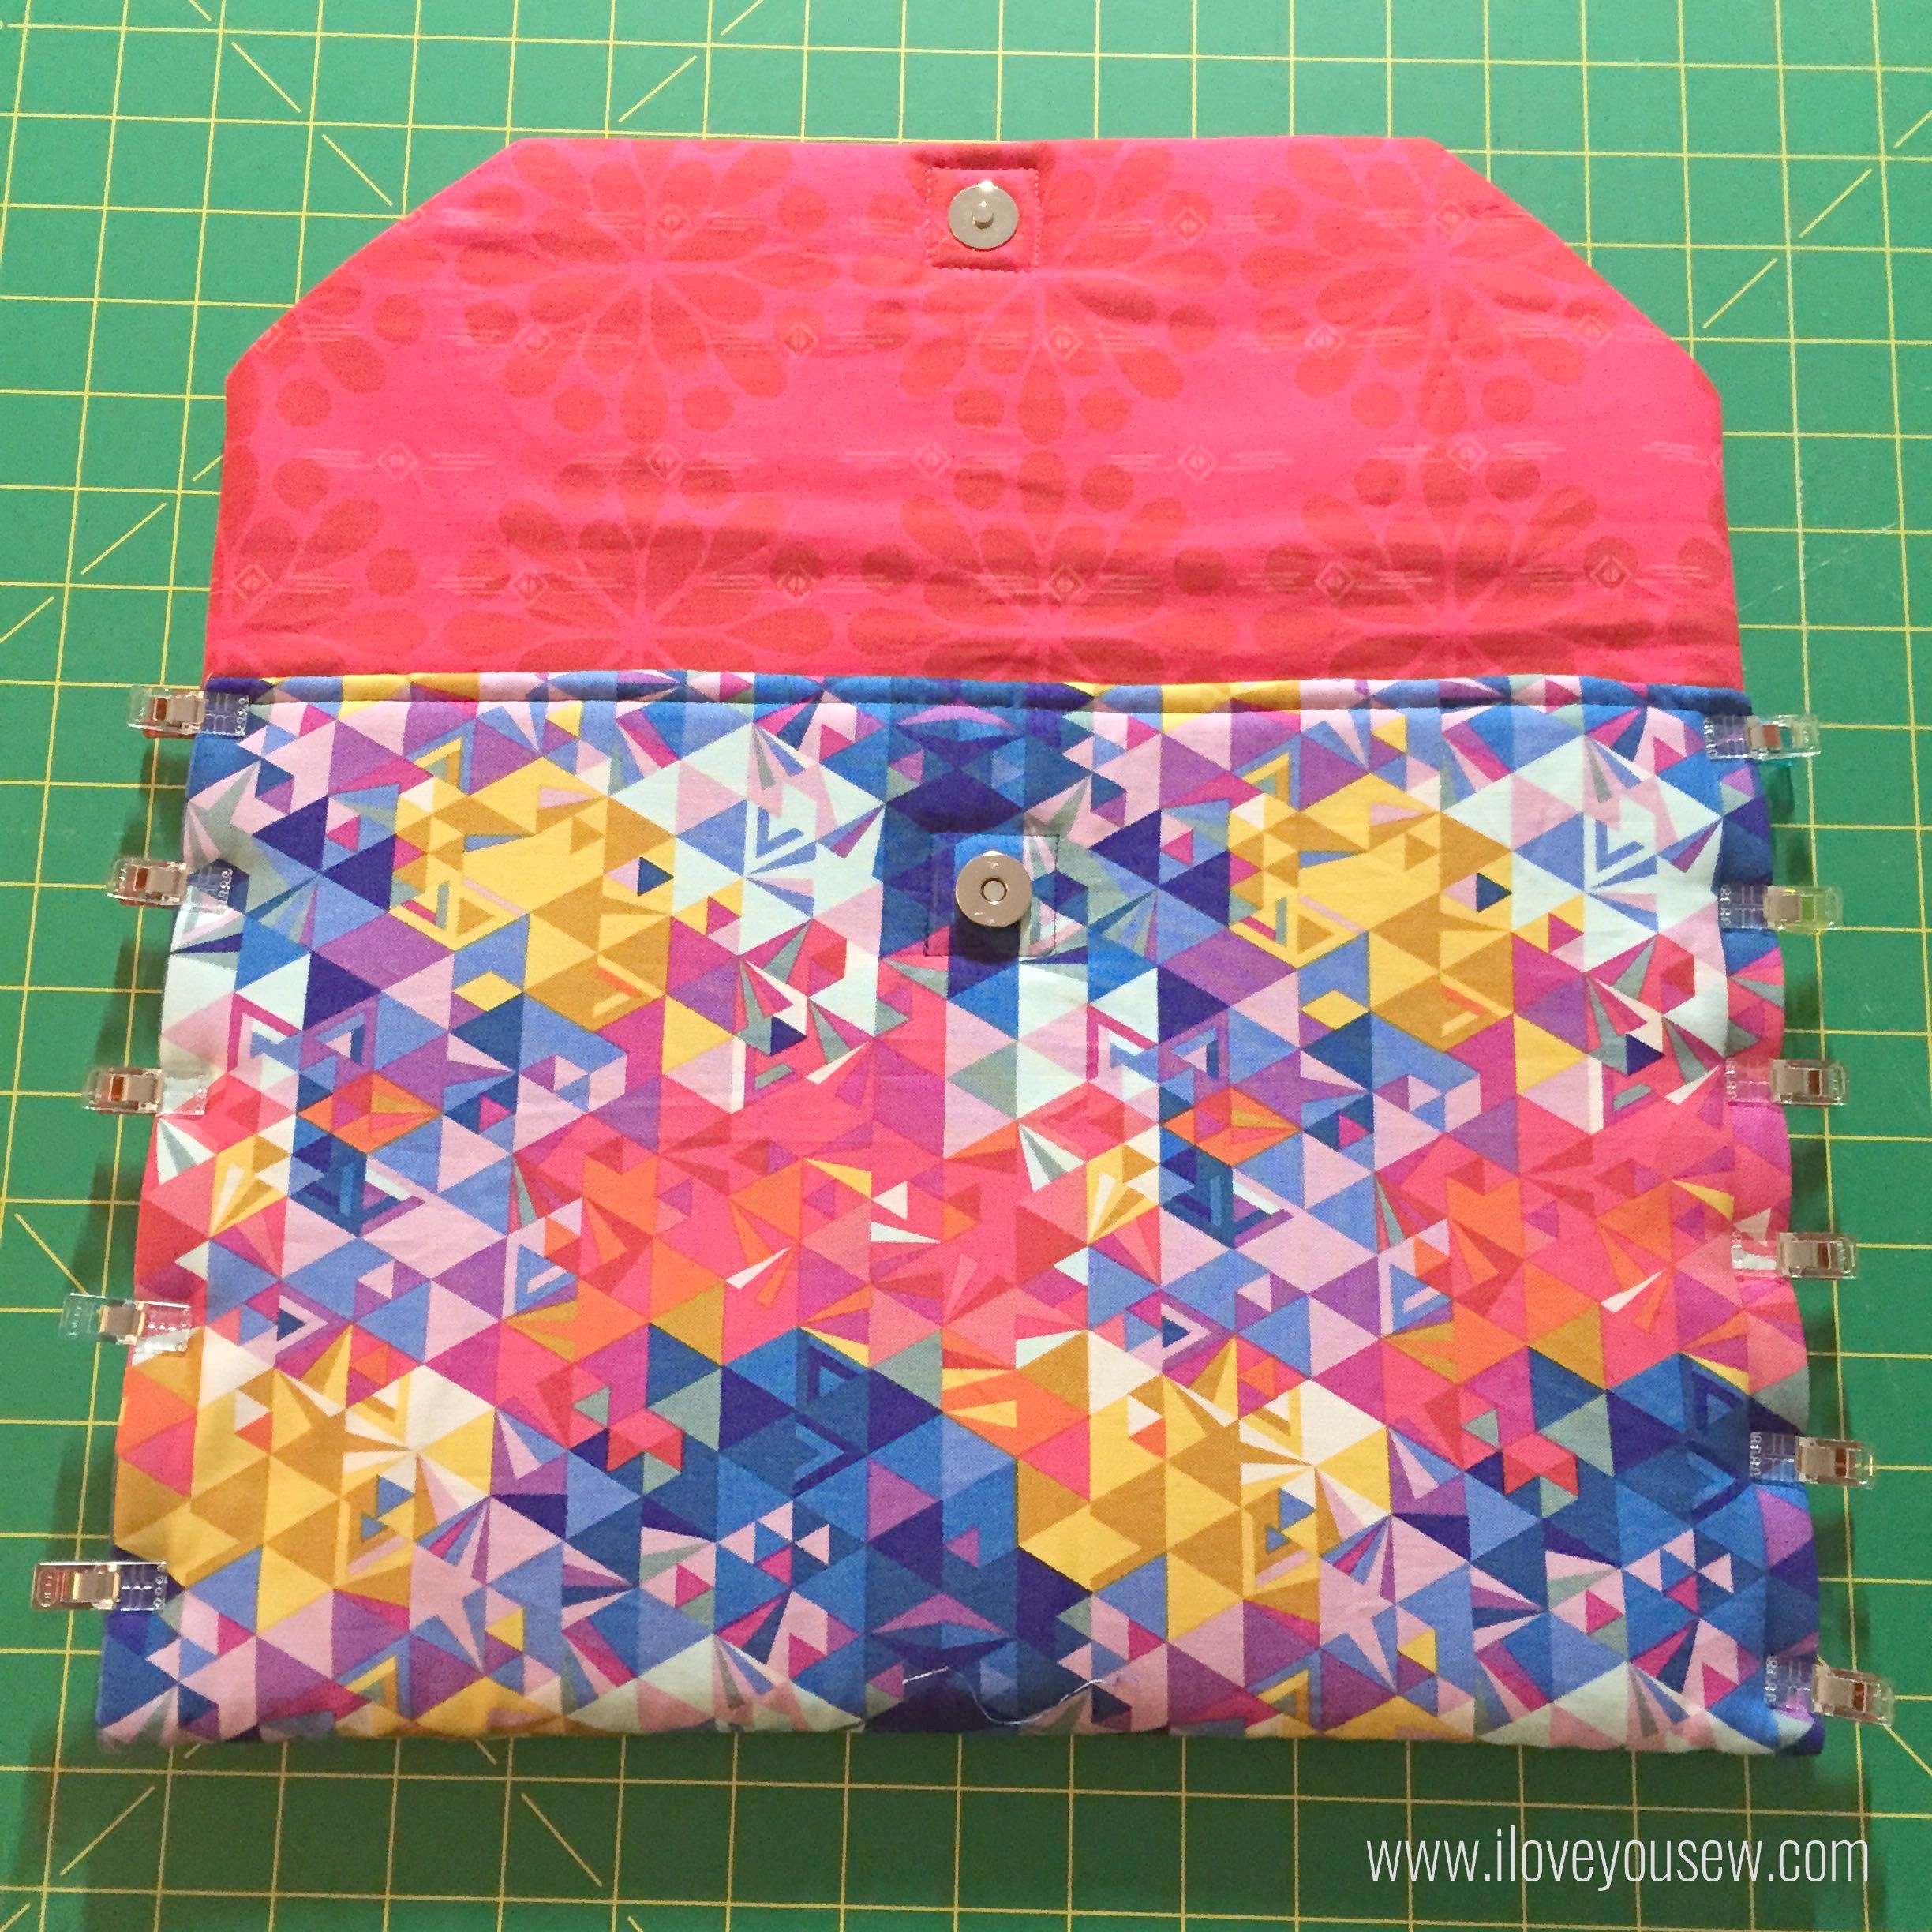
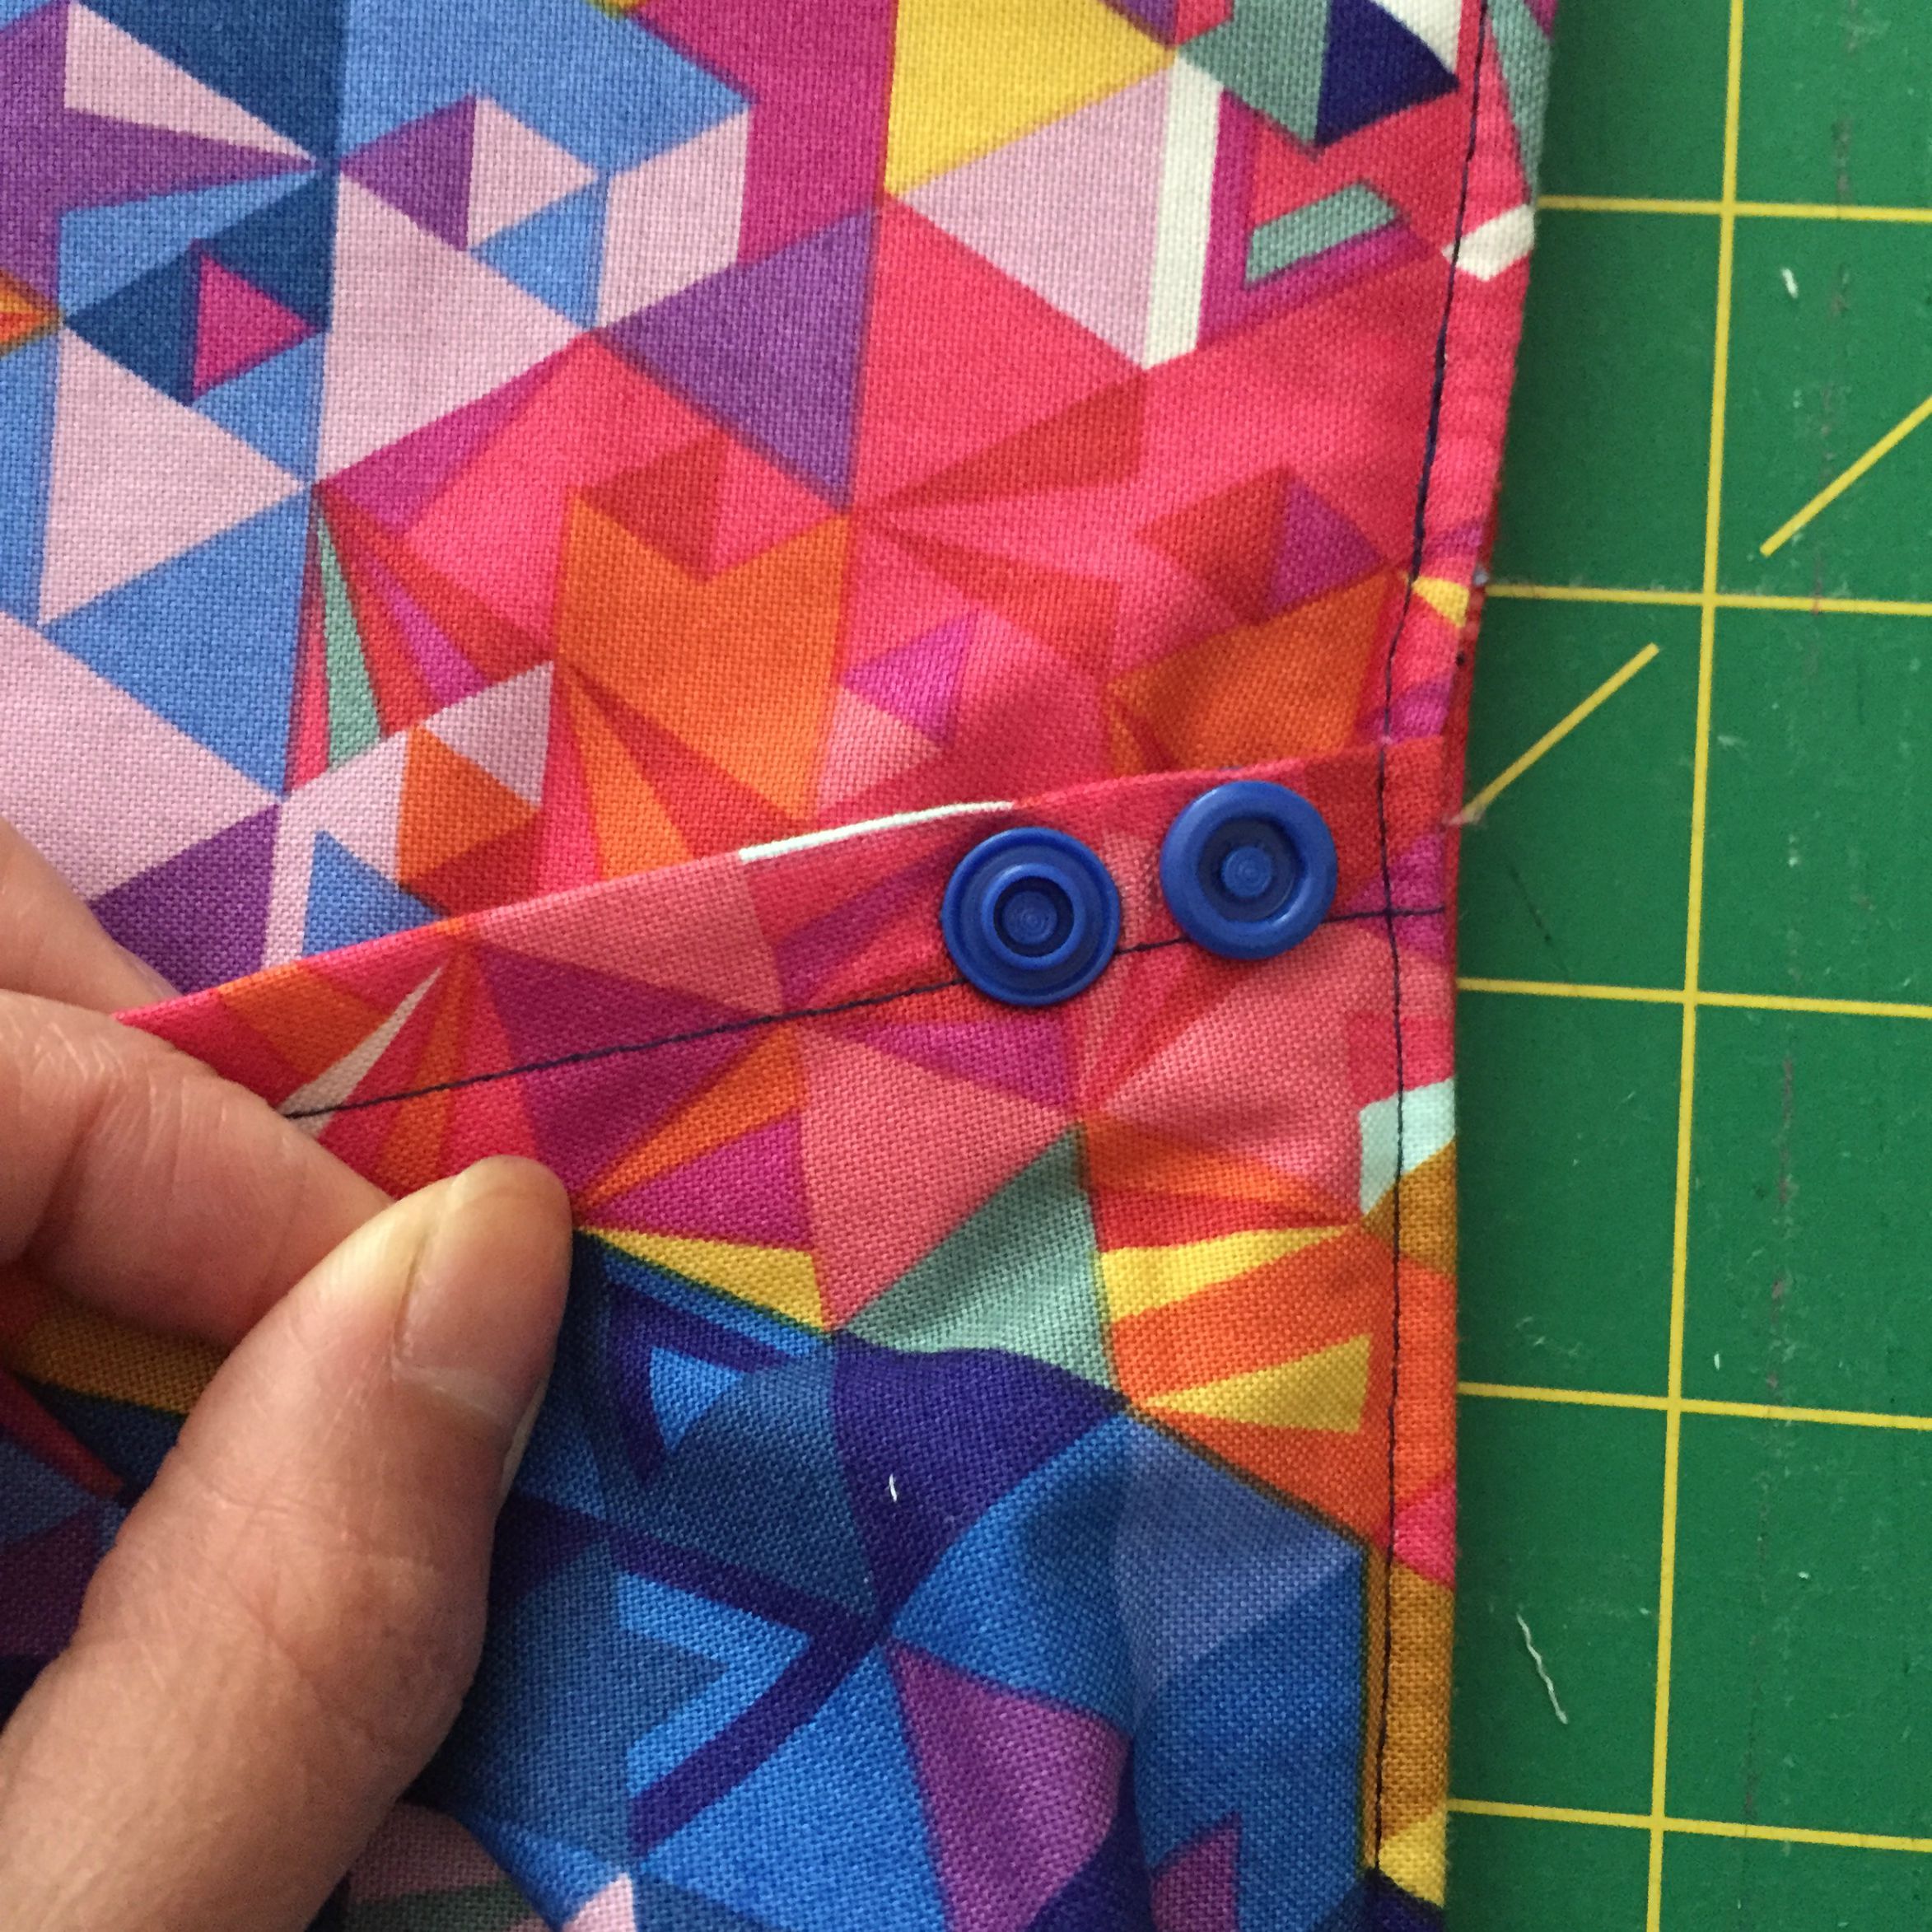
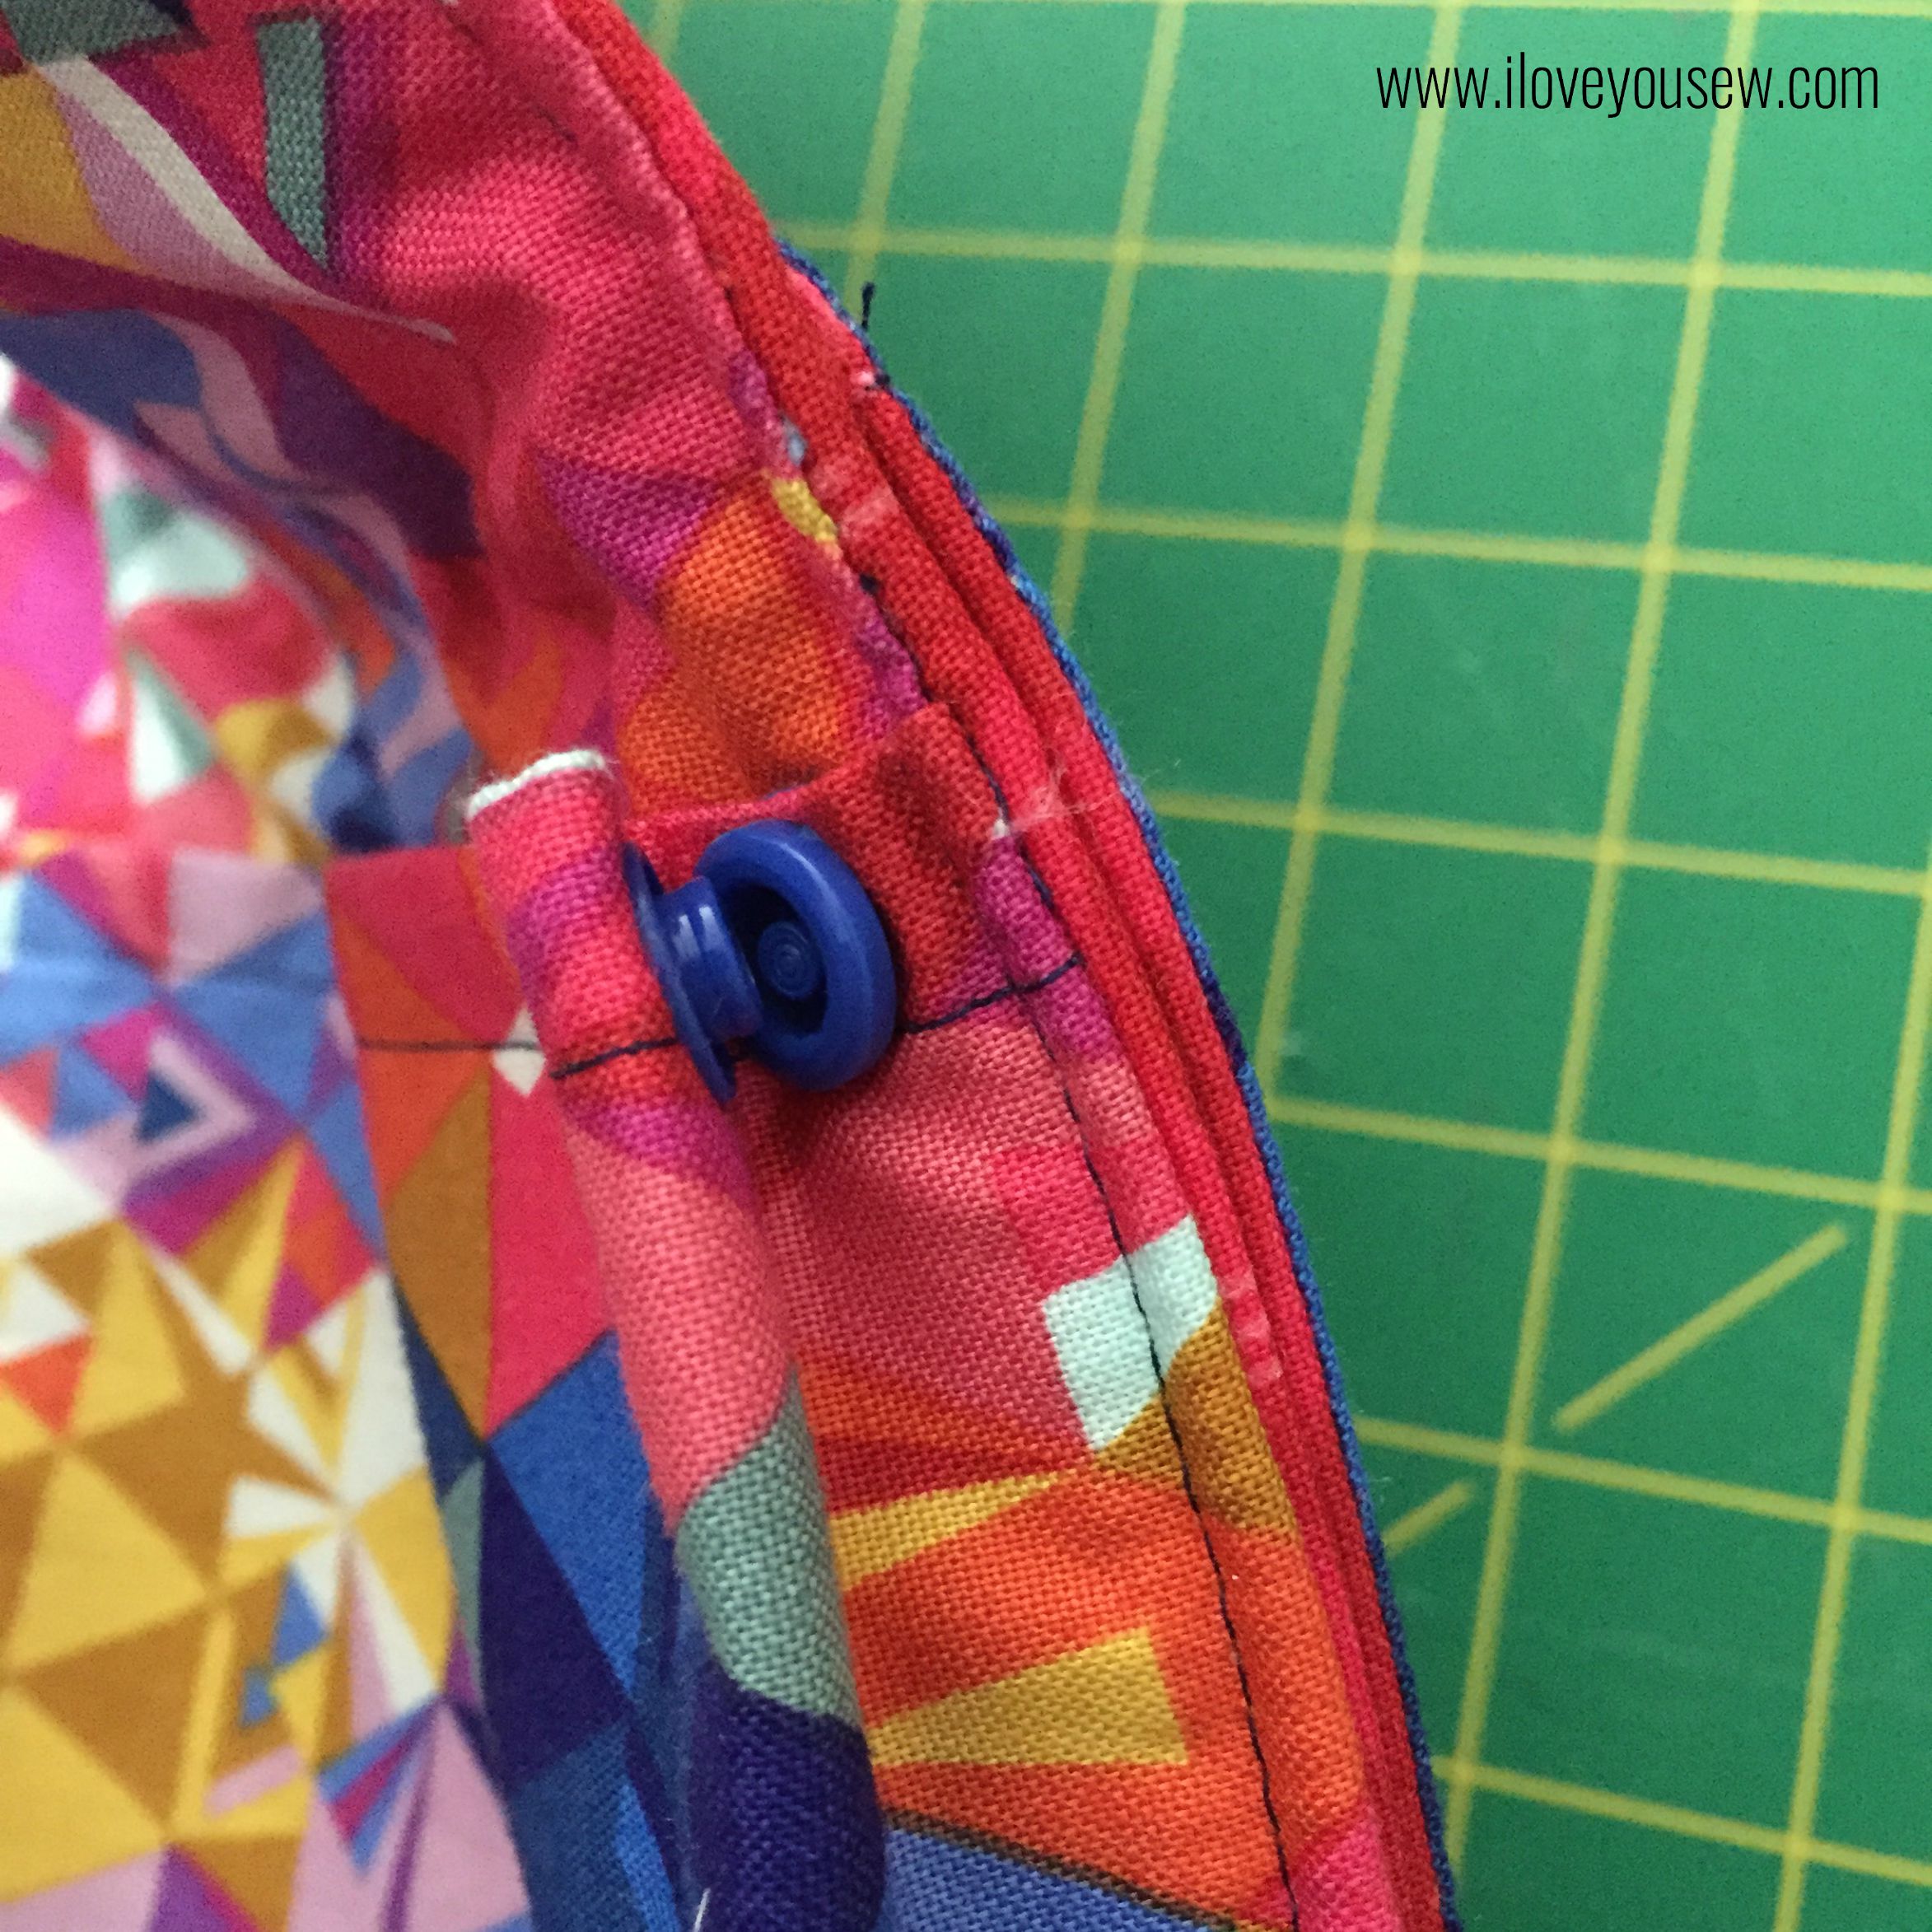
- With wrong sides together, make markings for your magnetic snap and install per manufacturer’s instructions. With the point being so narrow at the top of the clutch, you may need to move your snap up or down to make sure there is enough clearance for all parts of the clasp. For the male part, I marked mine 1 1/4″ down from the top edge of the lining and marked the female where it hit the body (approx. 7″ from straight short side.)
- TIP: Before you install, reinforce where you will cut with a scrap piece of interfacing.

- TIP: Before you install, reinforce where you will cut with a scrap piece of interfacing.
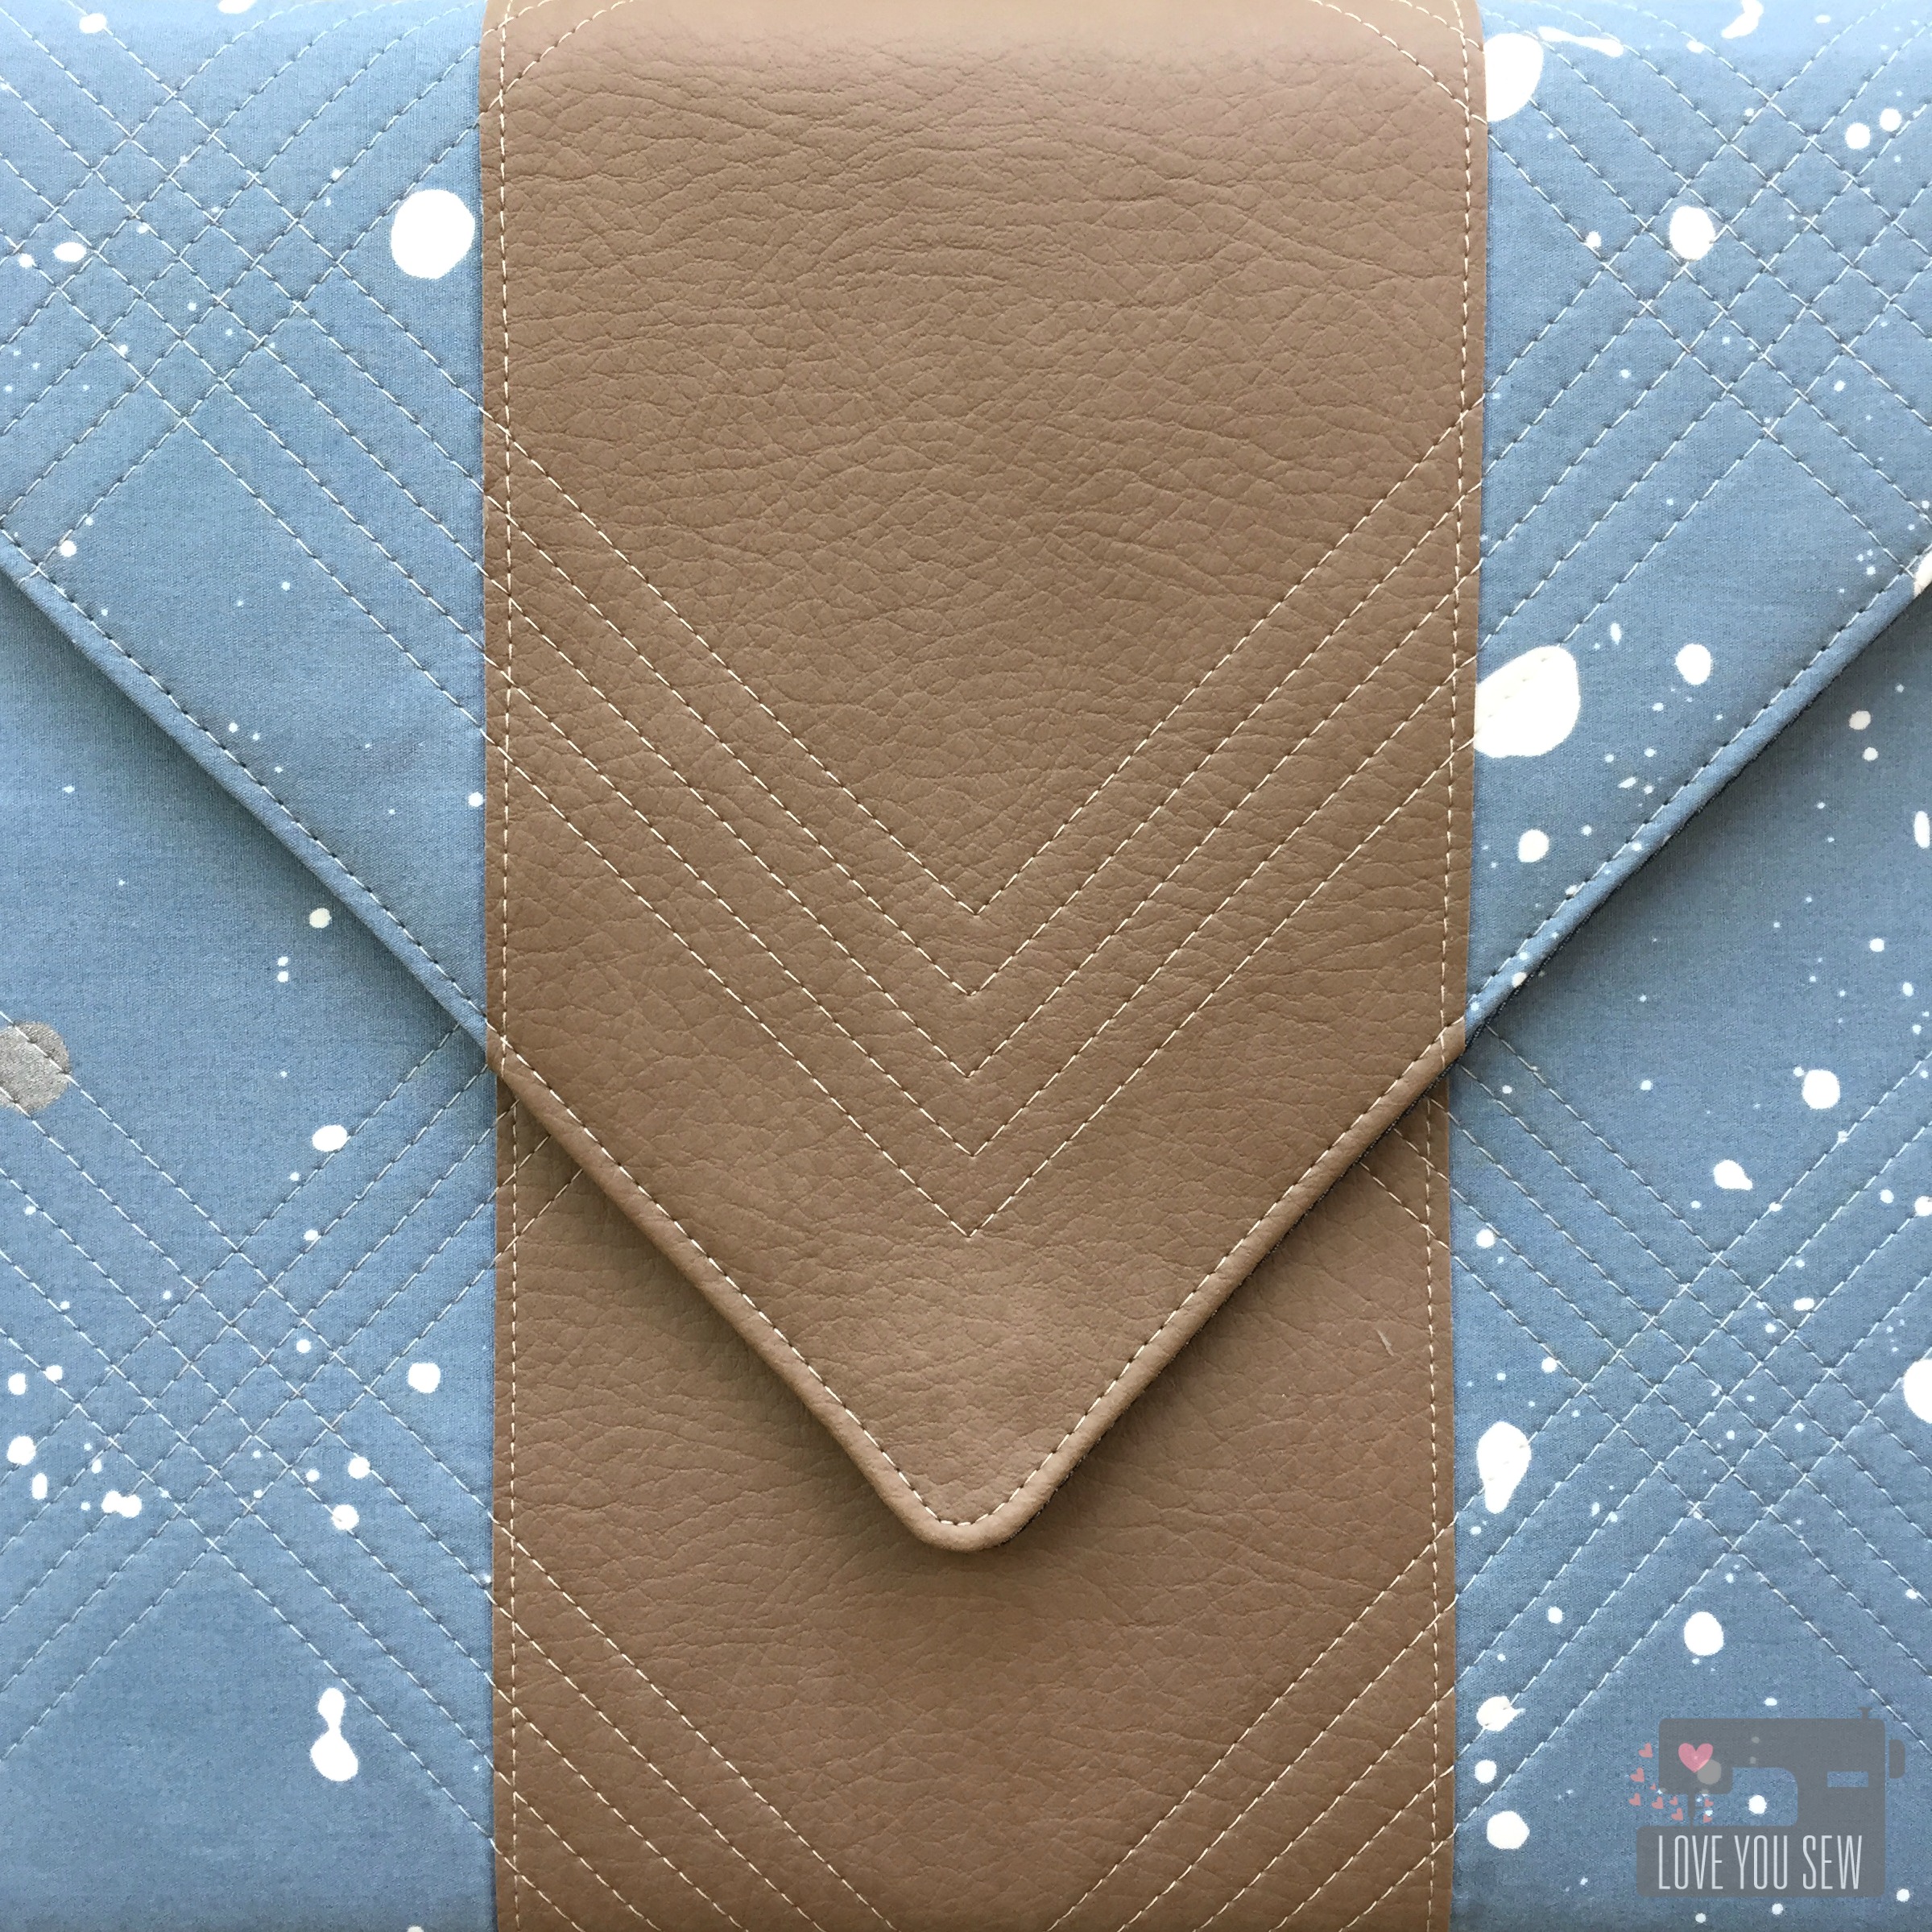
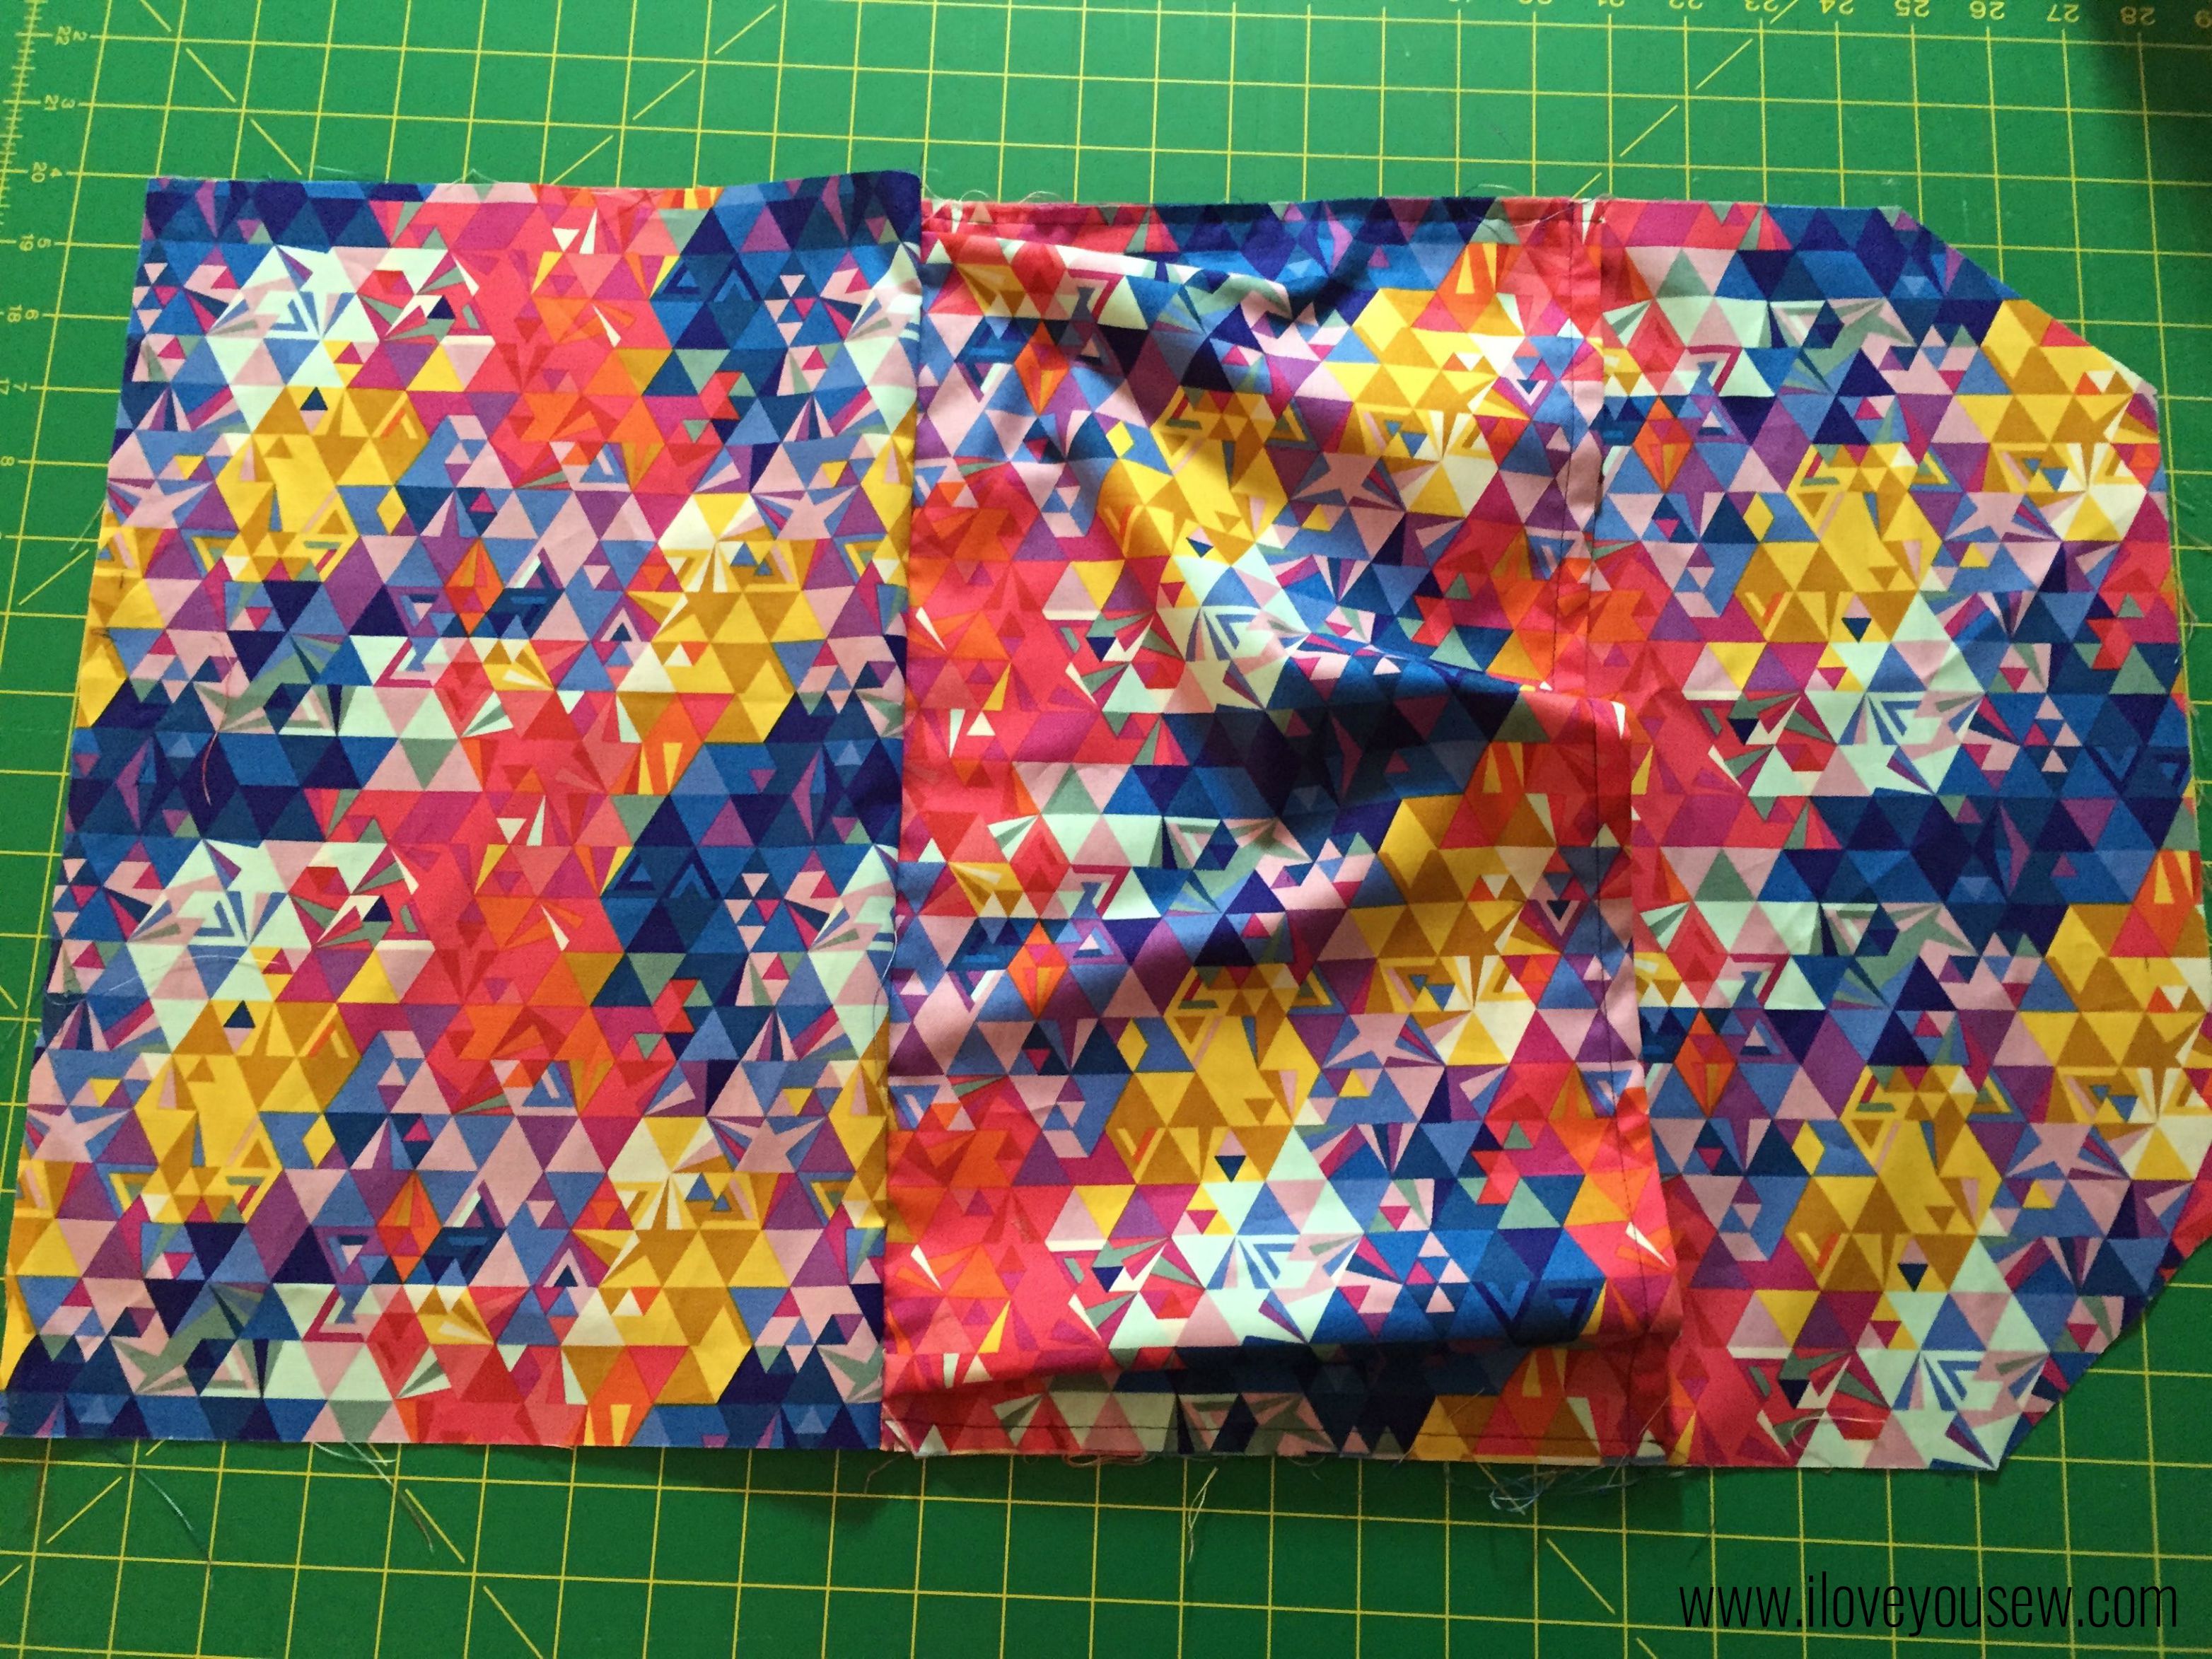
- Turn the body right-side out and press with the lining facing up. Be careful not to press the faux leather directly with your iron.
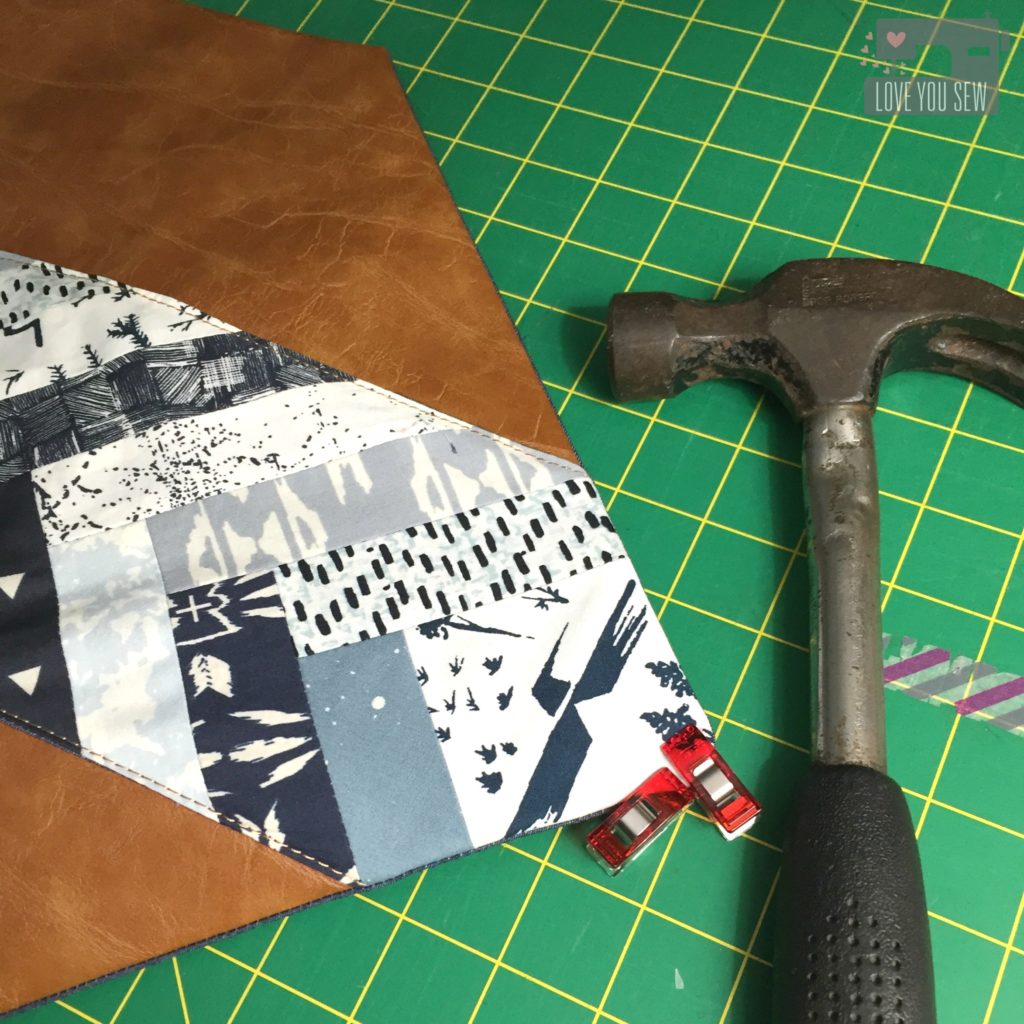
- TIP: Use Clover Clips on the edges to help them stay flat and/or hammer them as well. Hammering helps to flatten the edges so top-stitching will be easier in the next step. Test the hammer method on scrap to make sure the hammer doesn’t leave marks.
 Time to {finally} make the envelope!
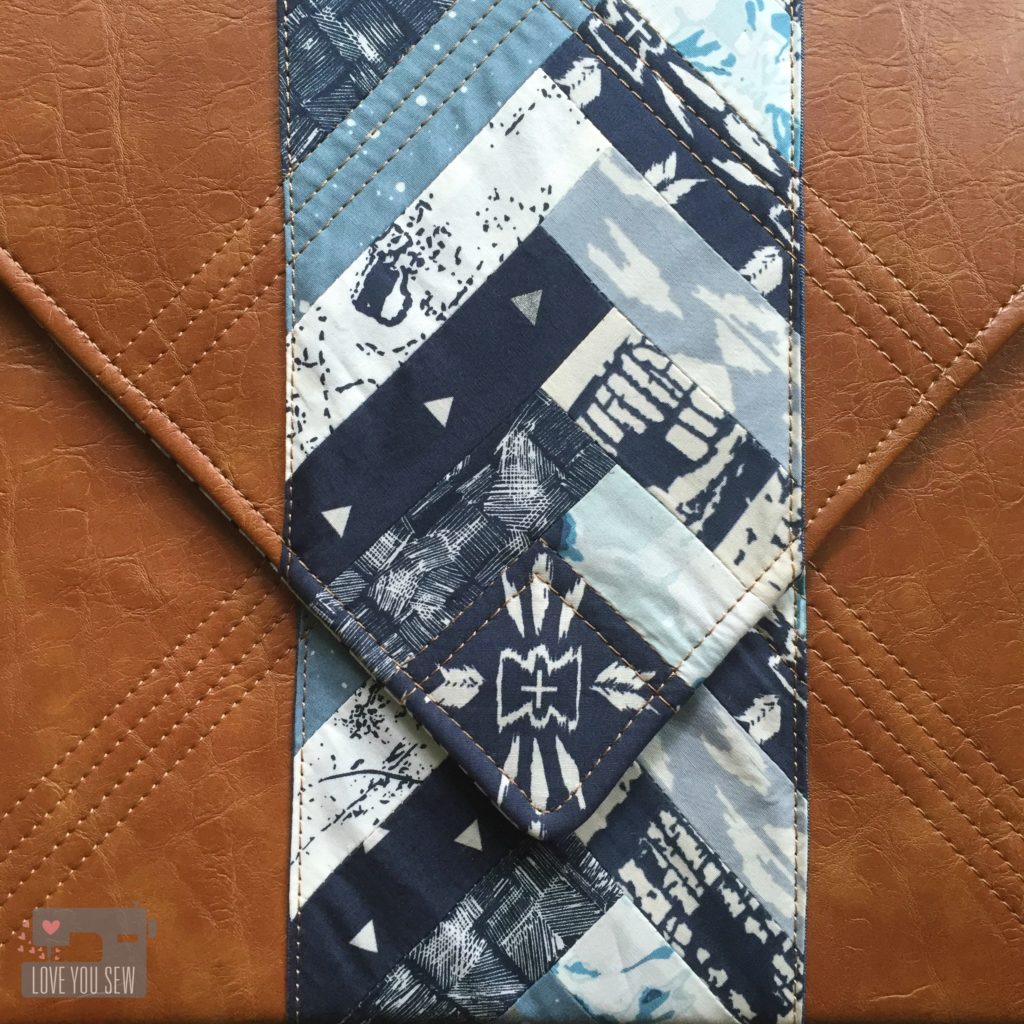
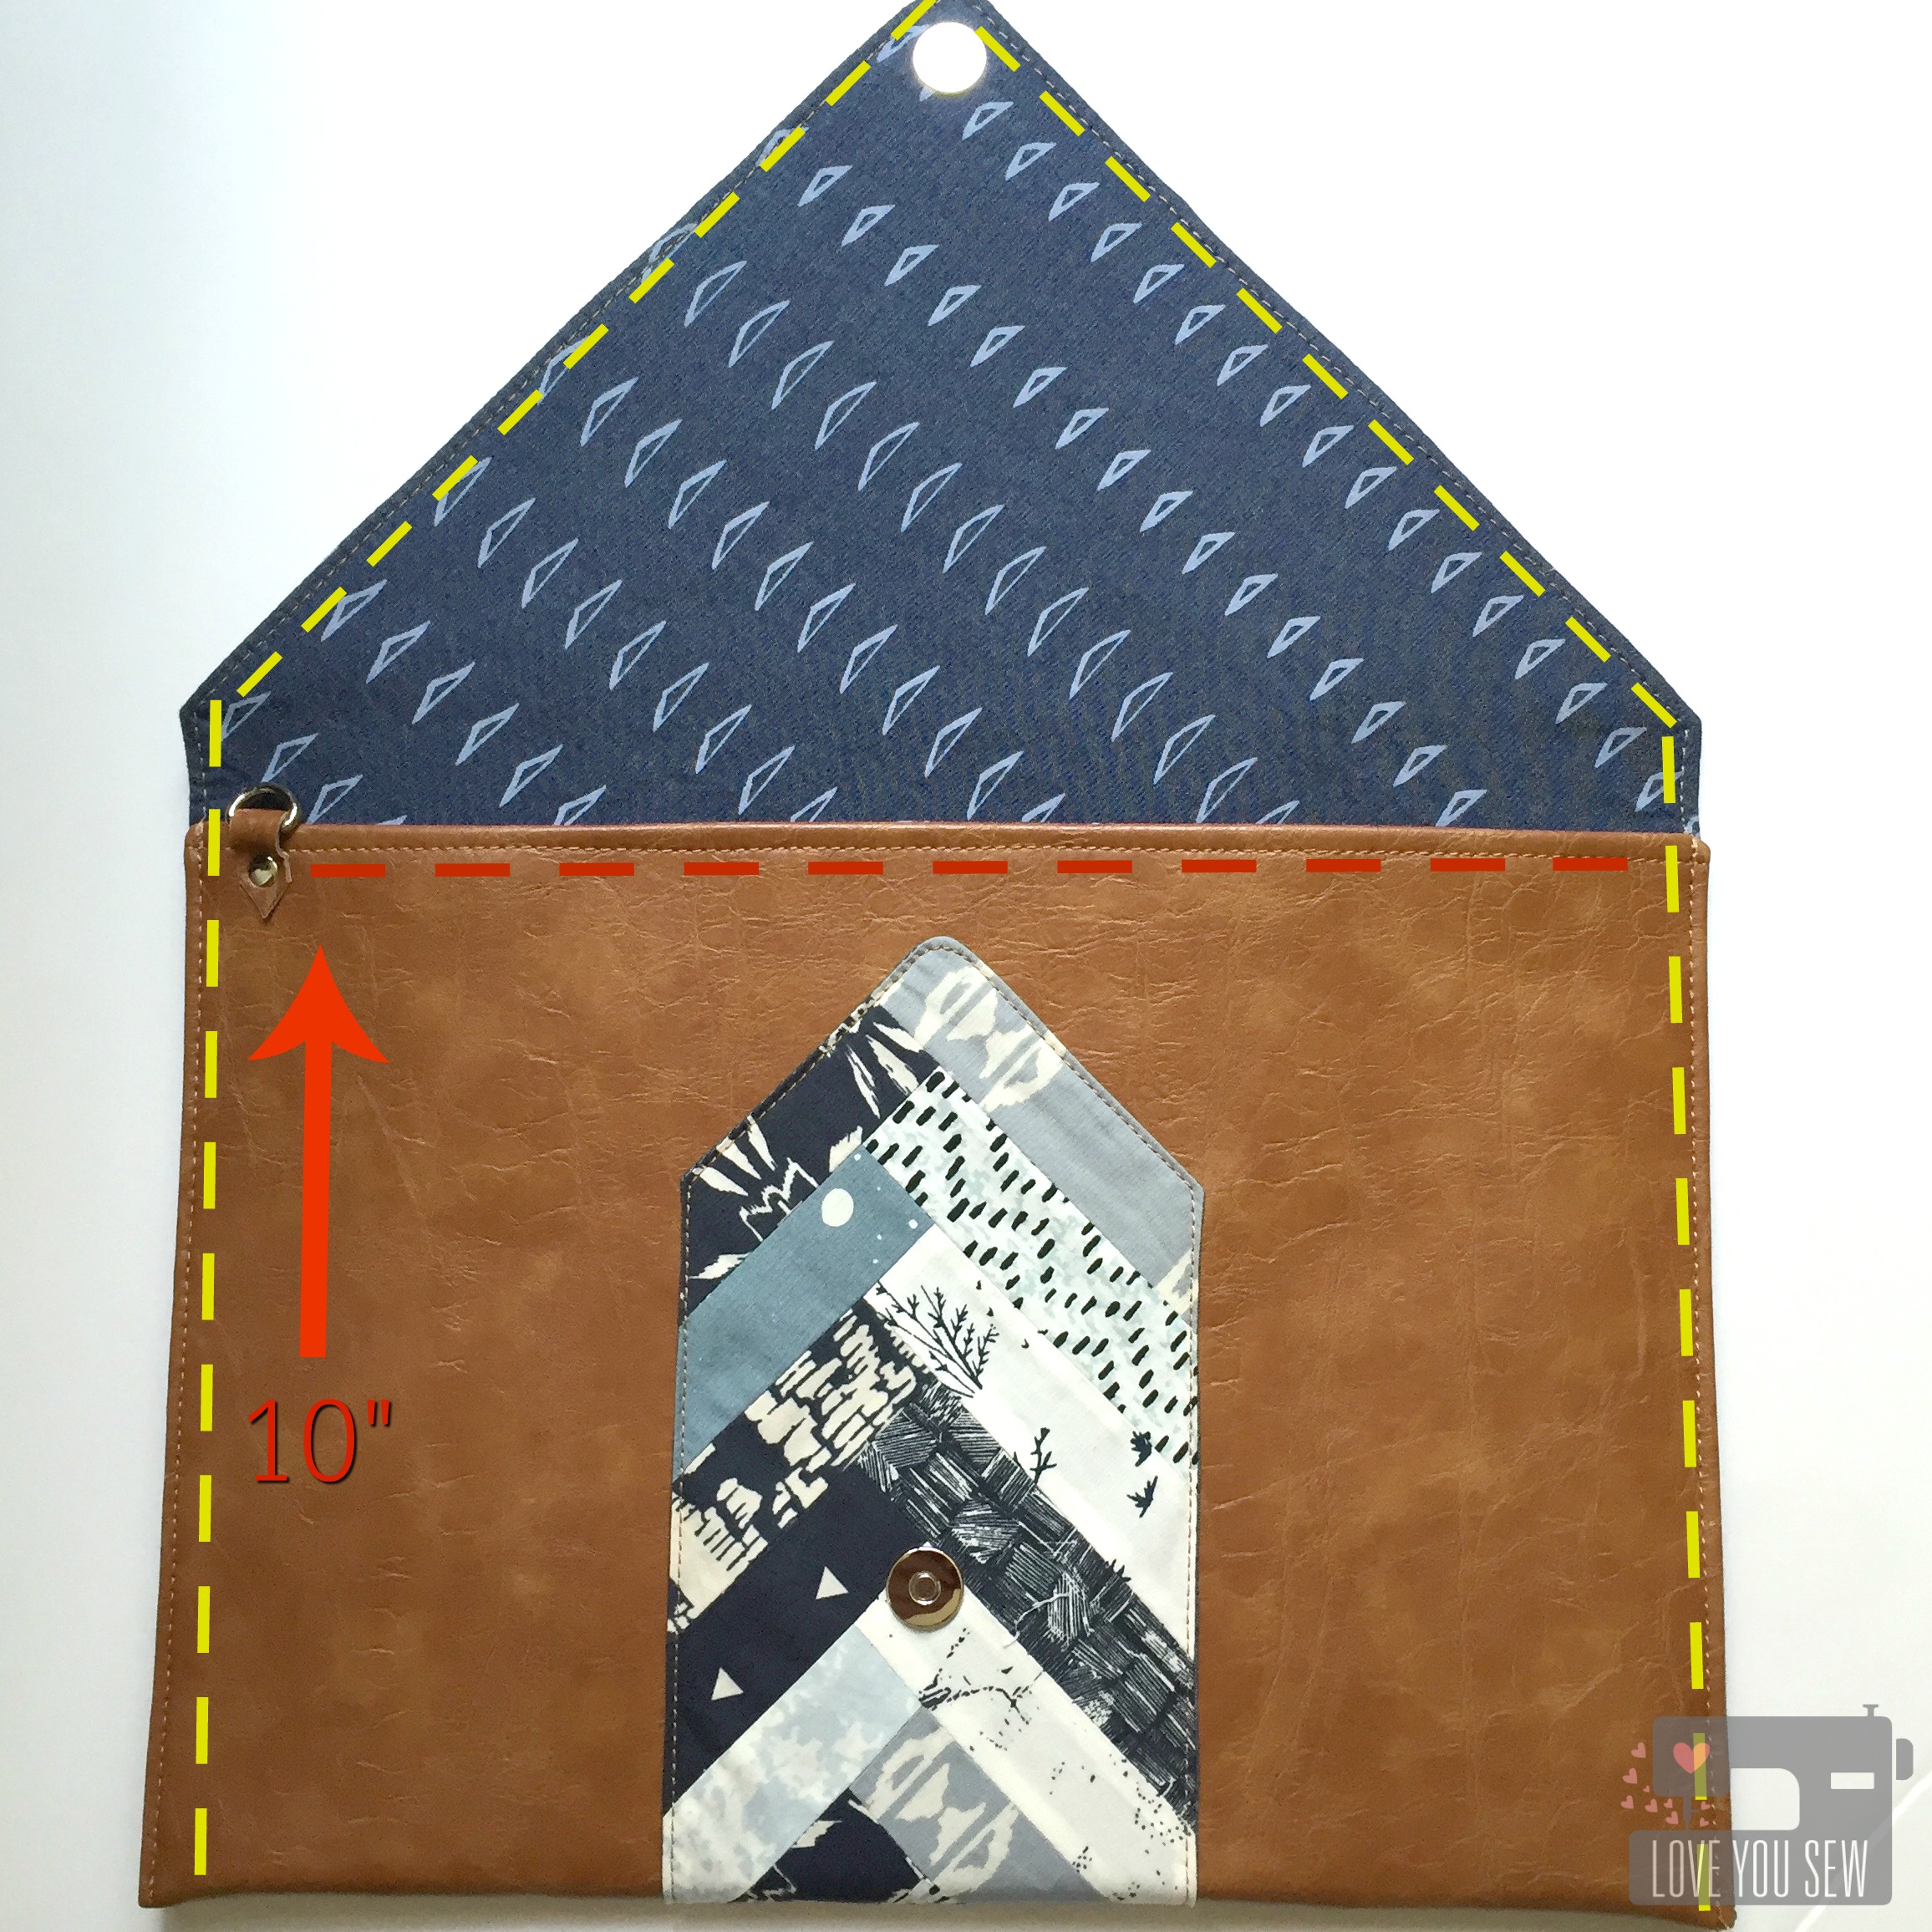
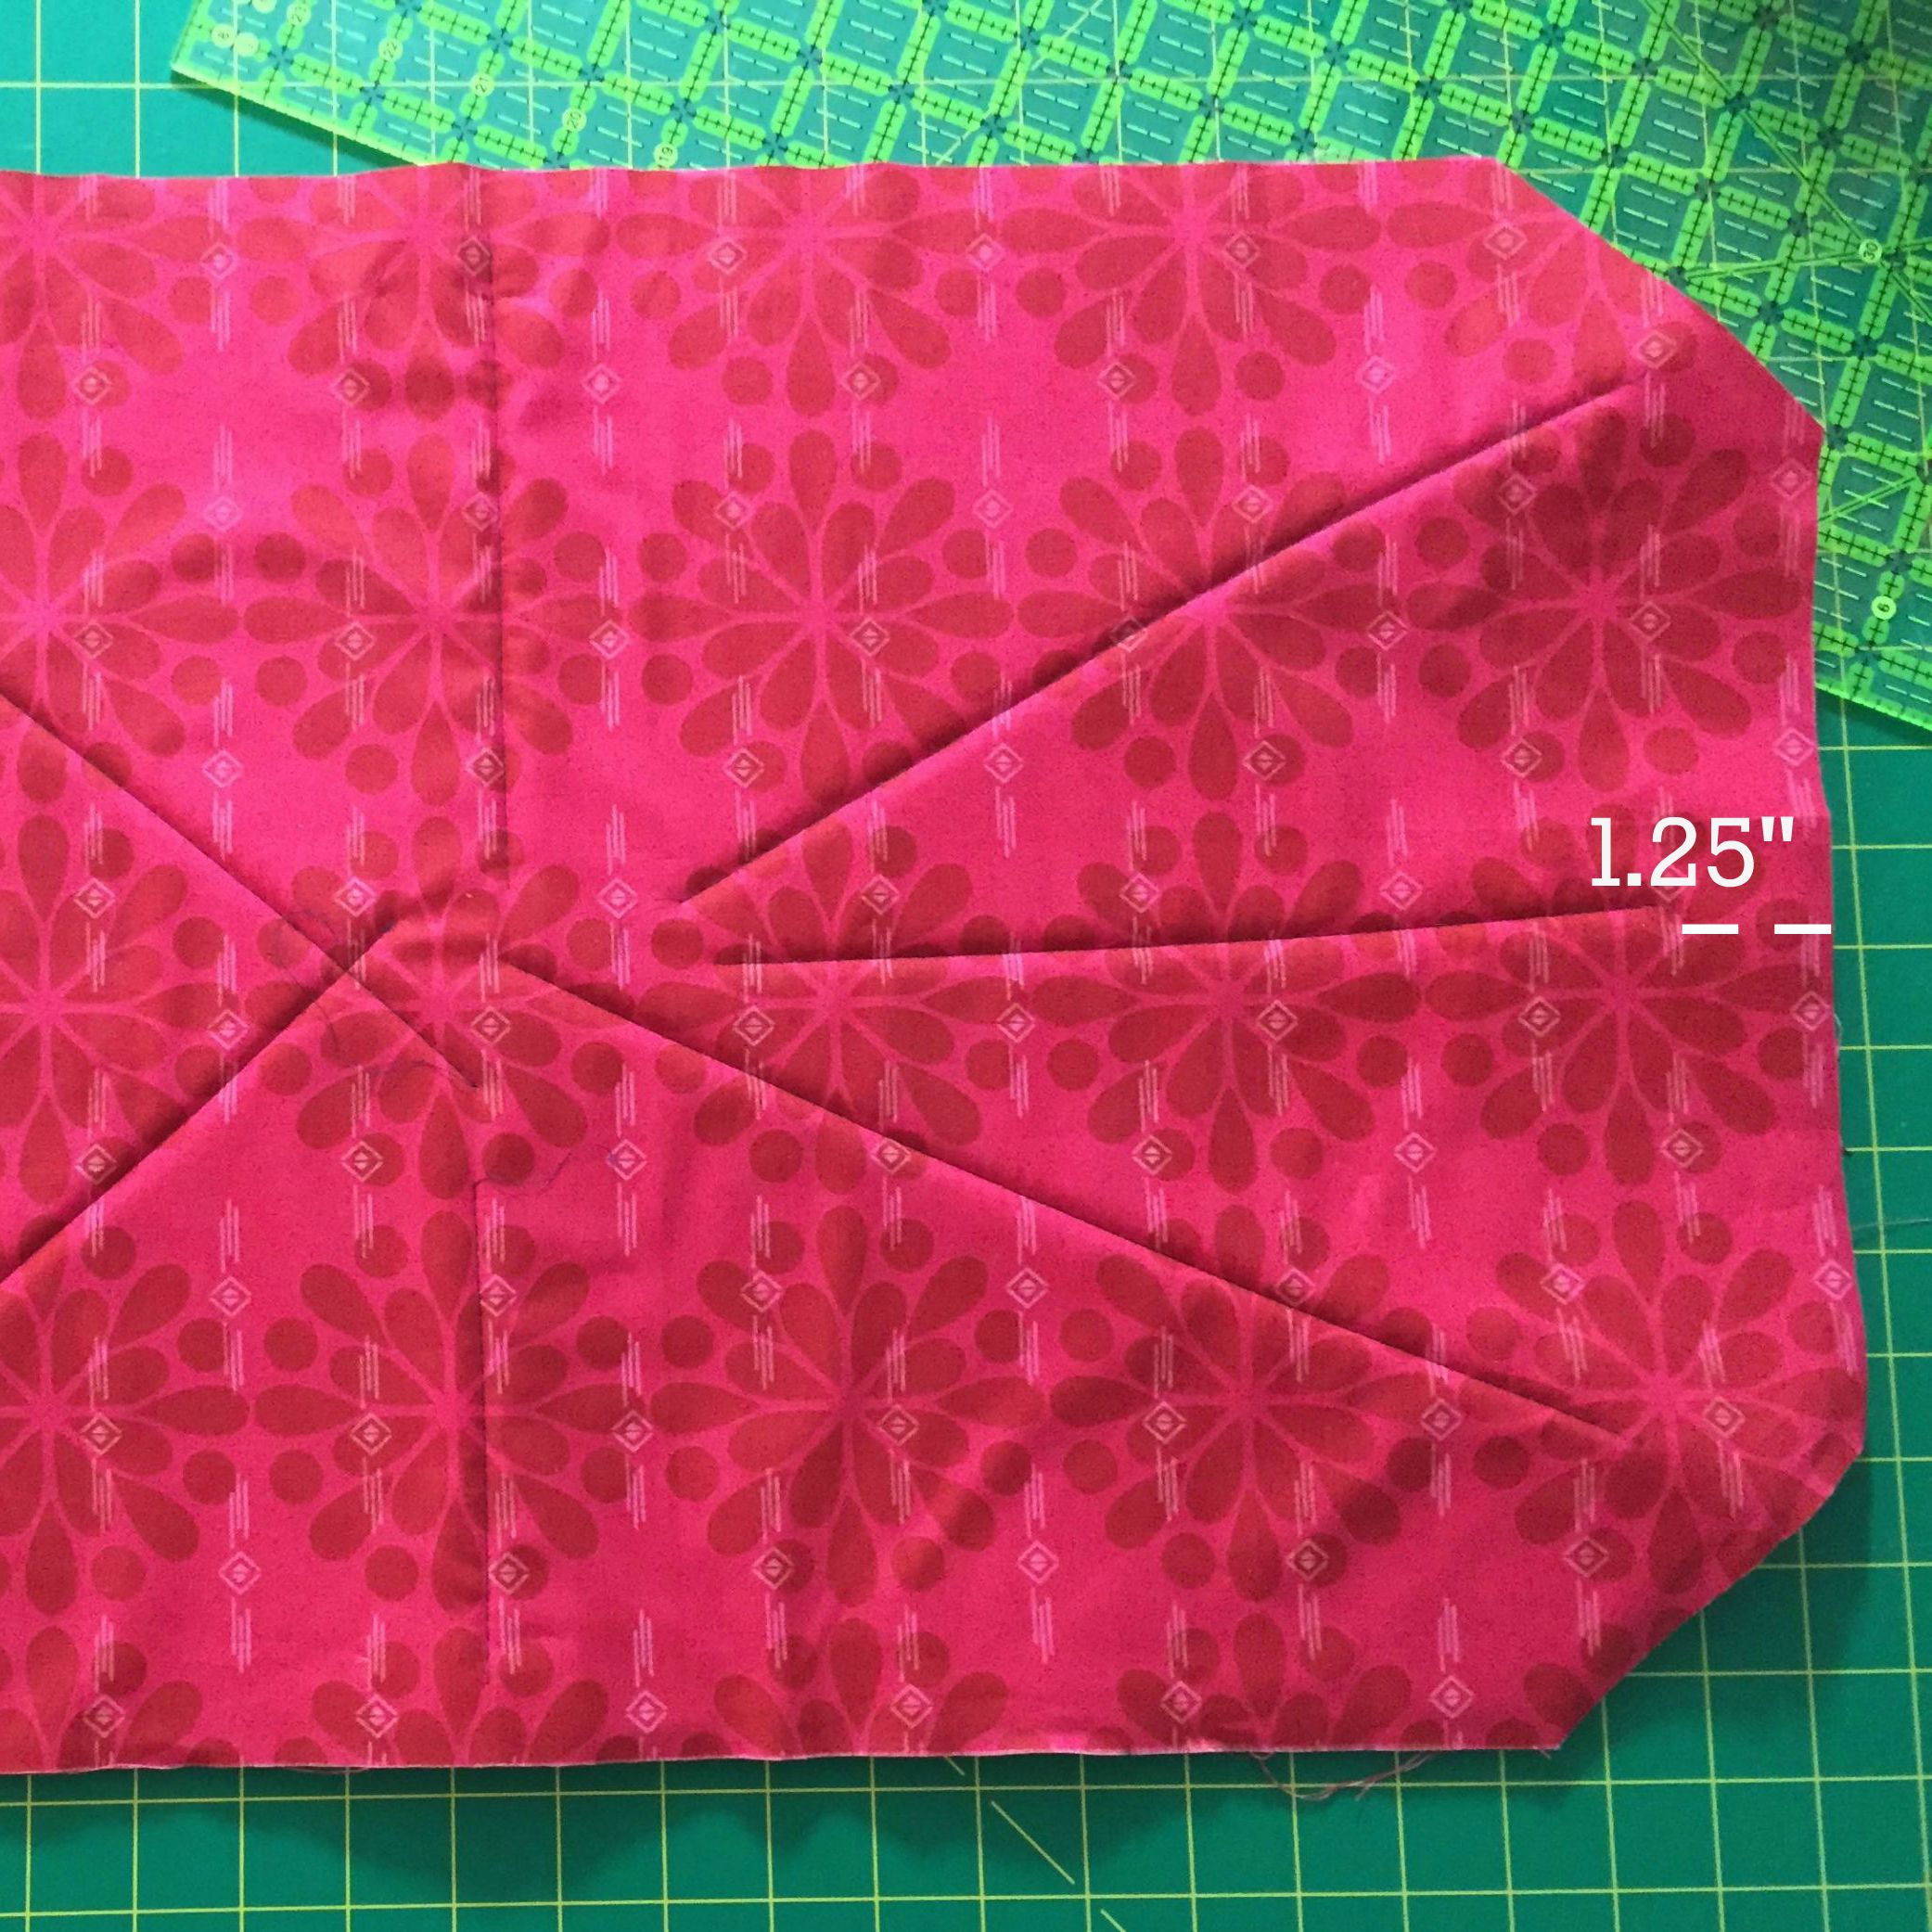
- Top-stitch along the straight short-end of the body (red dashed line)
- Fold the front of the clutch up 10″ to create the main pocket and secure the sides into place with Clover Clips
- Top-stitch all along the clutch (following the yellow dashed line)
- TIPS:
- Use a large 16 or 18 needle to get through all the layers
- Increase stitch-length to 3.5-4.0 and use your walking foot to achieve even stitches
- GO SLOW so that you do not skip stitches
- Hammer the edges again, if needed
- Leave long thread tails so you can pull them through the lining and hide for a cleaner finish
- TIPS:
- Hide thread tails by pulling them toward the lining, knot, then bury.
- Press the lining


If you want to get extra fancy, you can add some additional finishes. Some examples are:
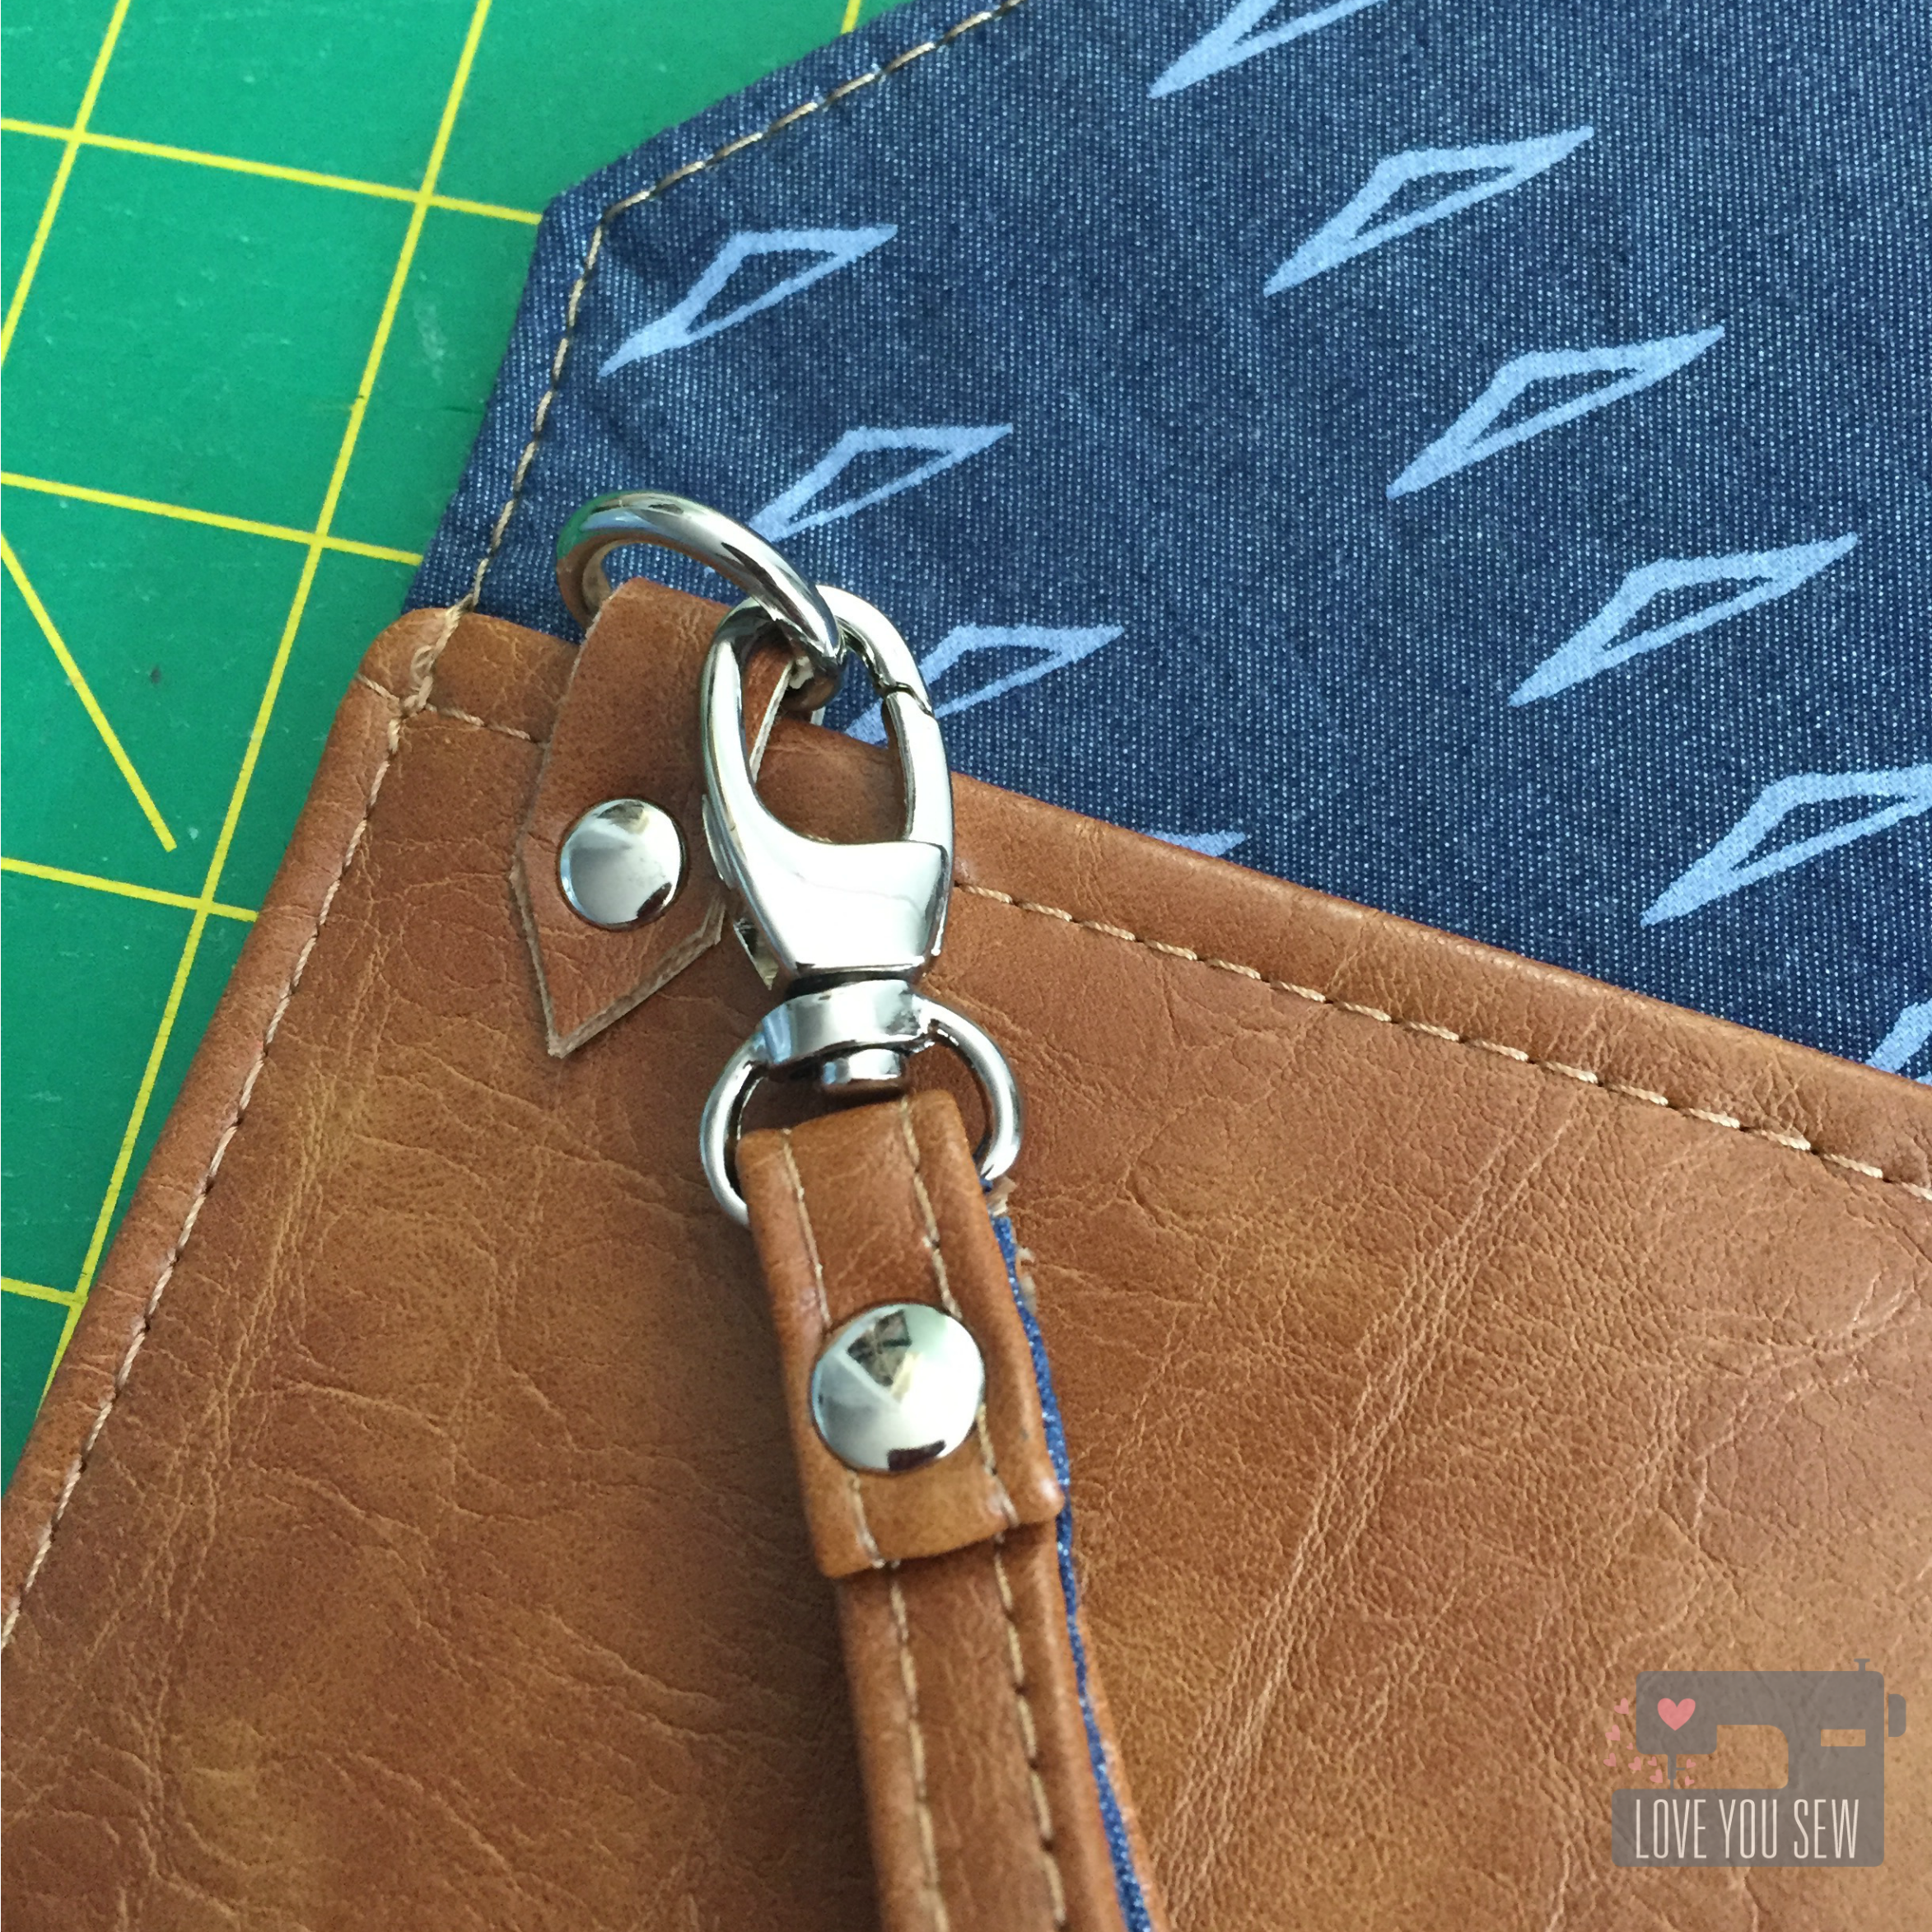
- Sew a wristlet handle with hardware (as shown)
- Just add the D-ring so you can attach some fun tassels.
- Include a key fob on the inside
- Attach rivets and grommets
CONGRATS!!! You have made a #LYSquiltedenvelopeclutch! Please, please share your creations. I would love to see them all!
As long as you credit Love You Sew with the pattern (because it took me a long time to write this all up,) you are free to sell the finished clutch.
Product Details (Sources in Links):
- Faux leather – JoAnn’s Fabrics
- Lining Fabric – Art Gallery Fabrics Denim Studio
- Pieced Panel – Various Prints from Observer by April Rhodes for Art Gallery Fabrics
- Metal Zipper – ZipIt Zippers
- Magnetic Snaps and hardware – Emmaline Bags
- Upholstery Thread – Gutermann
