Erin Backpack Sew Along || Part 4: Create the Front Panel

Welcome Back to the Erin Backpack Sew Along!  We are now on Part 4: Create the Front Panel.  If you missed any of the prior blog posts, you can find them below:


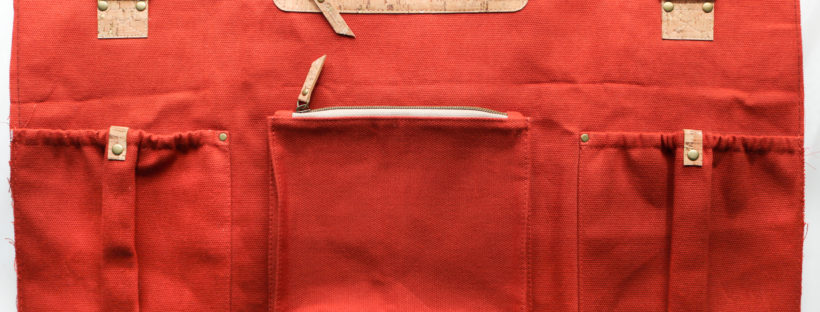
With this part,  we are tackling the entire Front Panel with four different pockets. It seems overwhelming, but I’ve broken down all the pockets into 4 different short videos so you can work at your own pace.
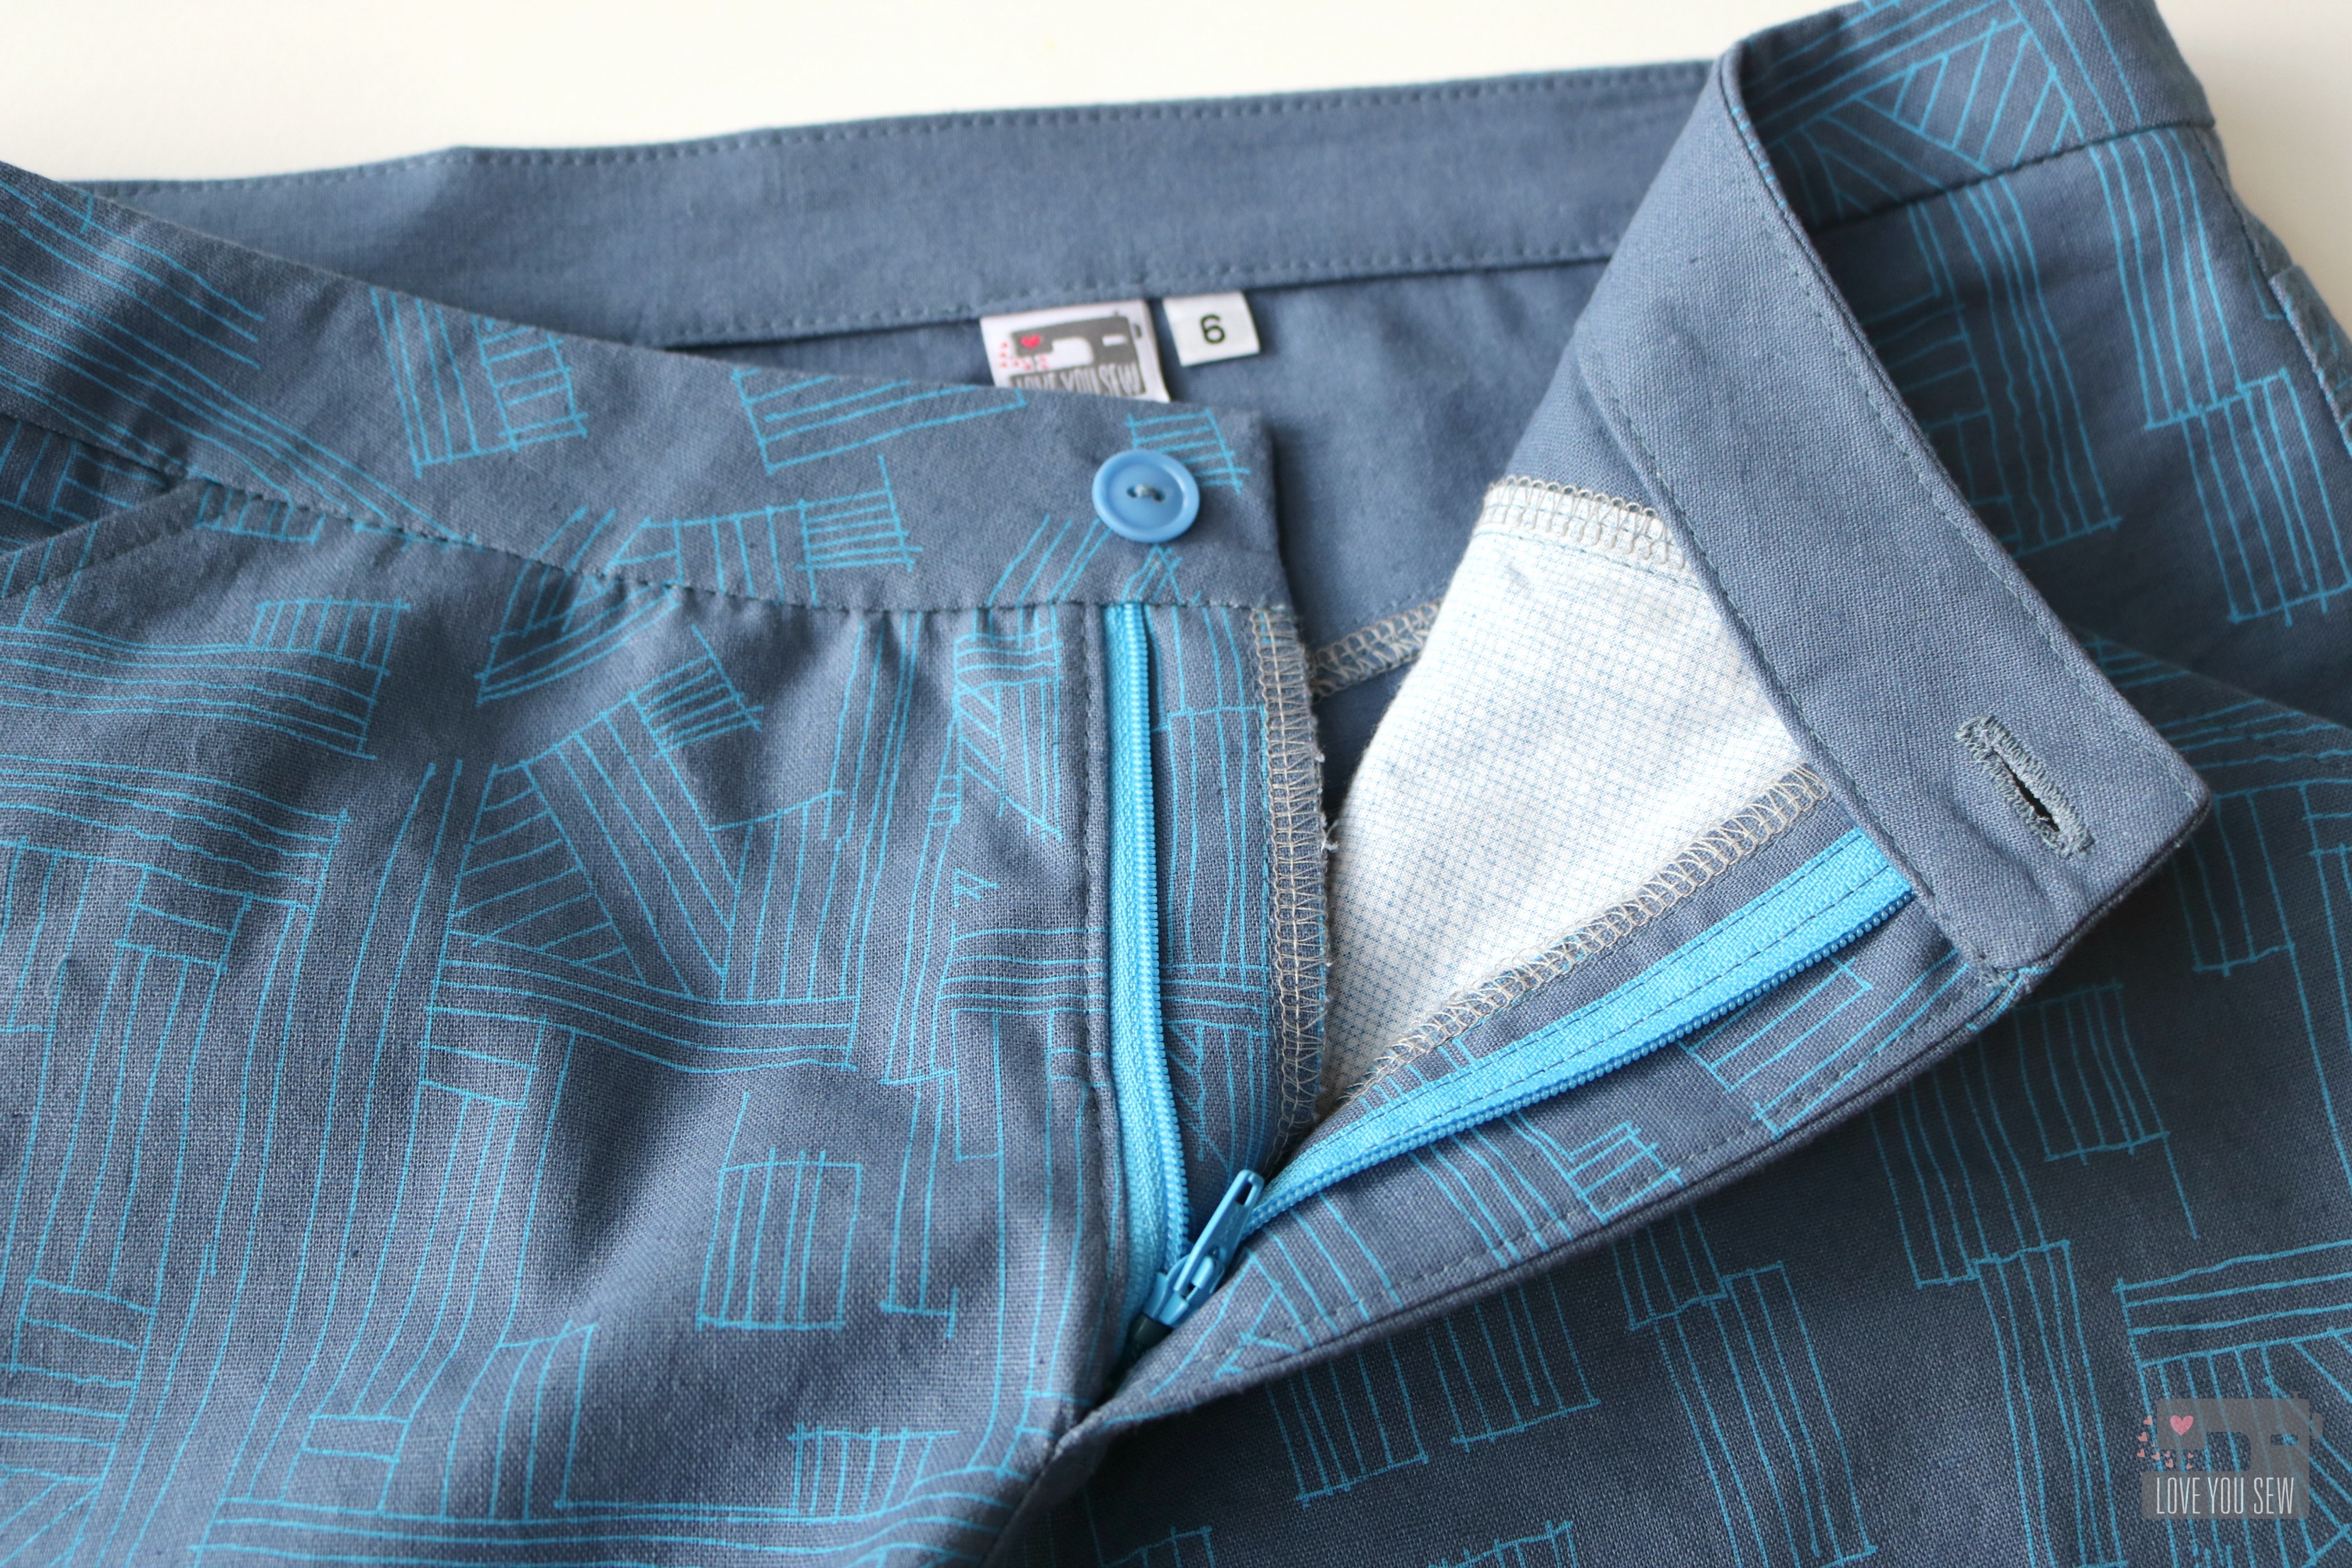
 

WELT Zipper POCKET

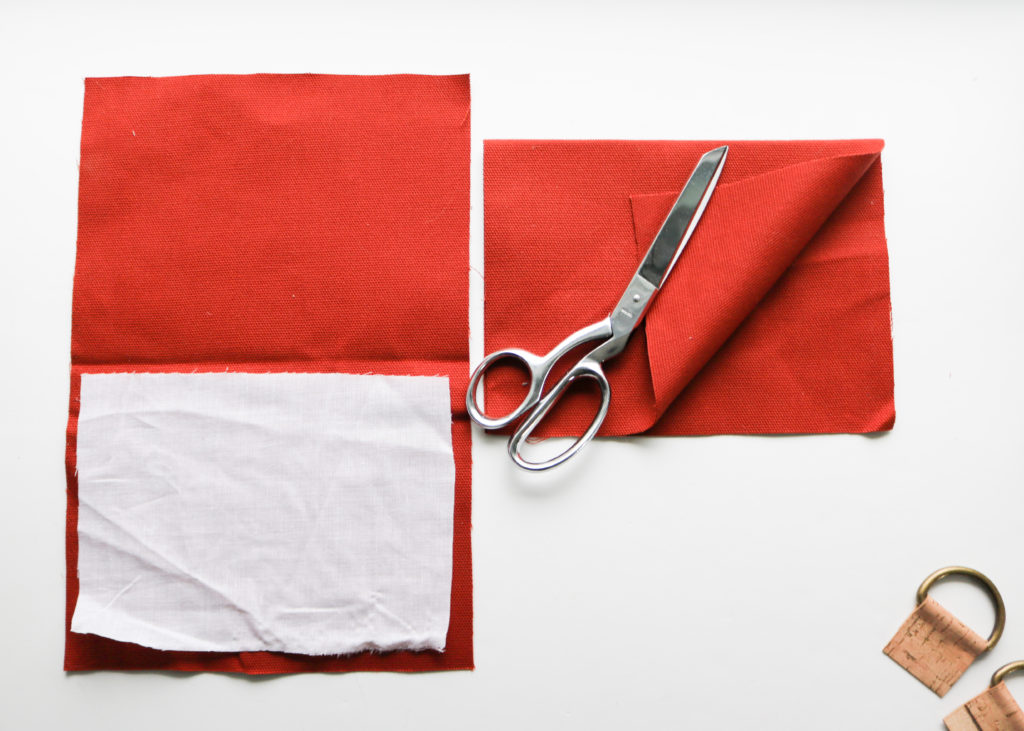
At this point, the Front Panel is the only pattern piece left that hasn’t been basted to foam. This is added later because creating the Front Welt Pocket through foam would produce so much bulk and be very difficult to work with.  I love all of you too much to put you through the extra wrestling and time spent trimming back foam! Ha!

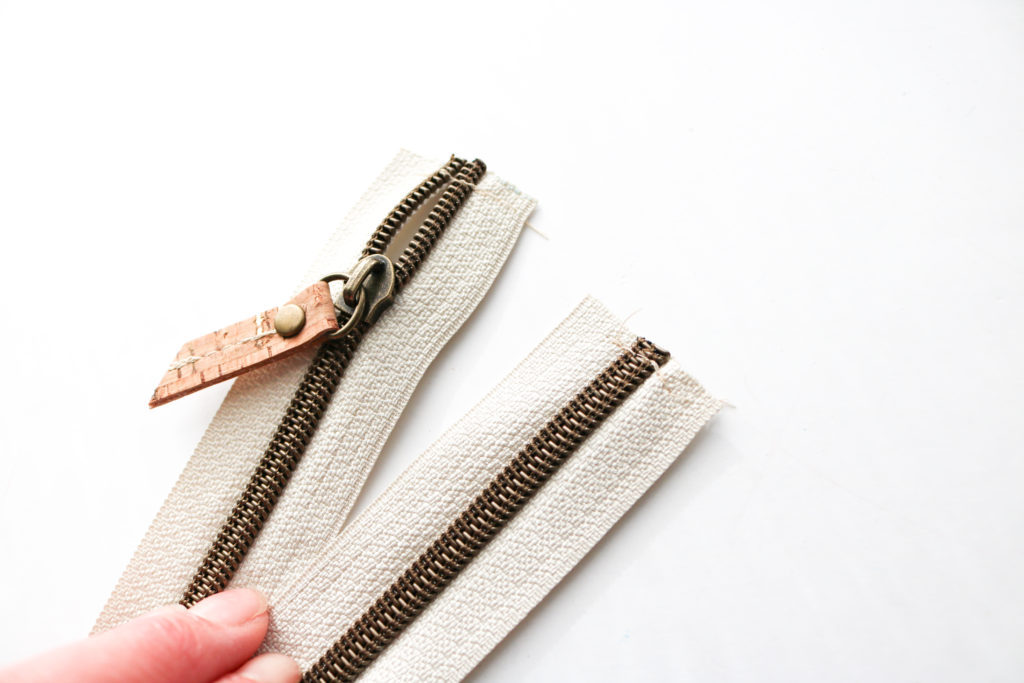
I know you will ask me about the zipper pulls used on my bag 😉 These zippers are from MyHandmadeSpace and yes, I made the tabs myself!  They are approximately 3/8″ x 4″ folded in half and secured with a seam straight up the center.  I added a rivet to balance out the look with the rest of my bag.  These are SUCH a great option to really personalize your bag.  I’m so glad I bought them as a stash option!

Now let’s get to work.  Click into the video about to watch how the Welt Zipper Pocket is created.  Please note the following from the video:

  • I am using “Craft” Tape as an alternative to Wonder Tape. This is only 1/8″ wide, but is permanent.  With the coating on the canvas, I wanted to use a tape that was a little stronger than Wonder Tape. So, to avoid human error, I like to add this directly to the zipper tape first, and not to the lining.
  • While adding on the Zipper Plate, I used glue instead of Wonder Tape.  Again, I was looking for something stronger I could sew through and unfortunately, Craft Tape cannot be sewn through. (Your needle would gum up.)
  • I’m adding the rivets earlier than the instructions.  I don’t know why….but I started going by memory without checking instructions and went out of order. (This is what I get for not checking!) There is not a huge difference if you add them before closing the pocket lining or waiting until after the foam is basted on.  Per the instruction, my intent to add them post foam, was to have extra anchor points against the foam to keep it from separating with the Front Panel.  But there are many other points anchoring the foam to the main fabric with the rest of the pockets and Front Strap Tabs.

TIP: When I sew through an accent fabric and want to minimize punctures, I like to pull the threads through for a clean continuous line of stitches.  However, from the back, I don’t want the threads just hanging inside.  So, I knot the threads and use a light dab of glue to seal them against the fabric.  I like to leave the tails long so that they will be sewn into the pocket later on.


SIDE ELASTIC POCKETS

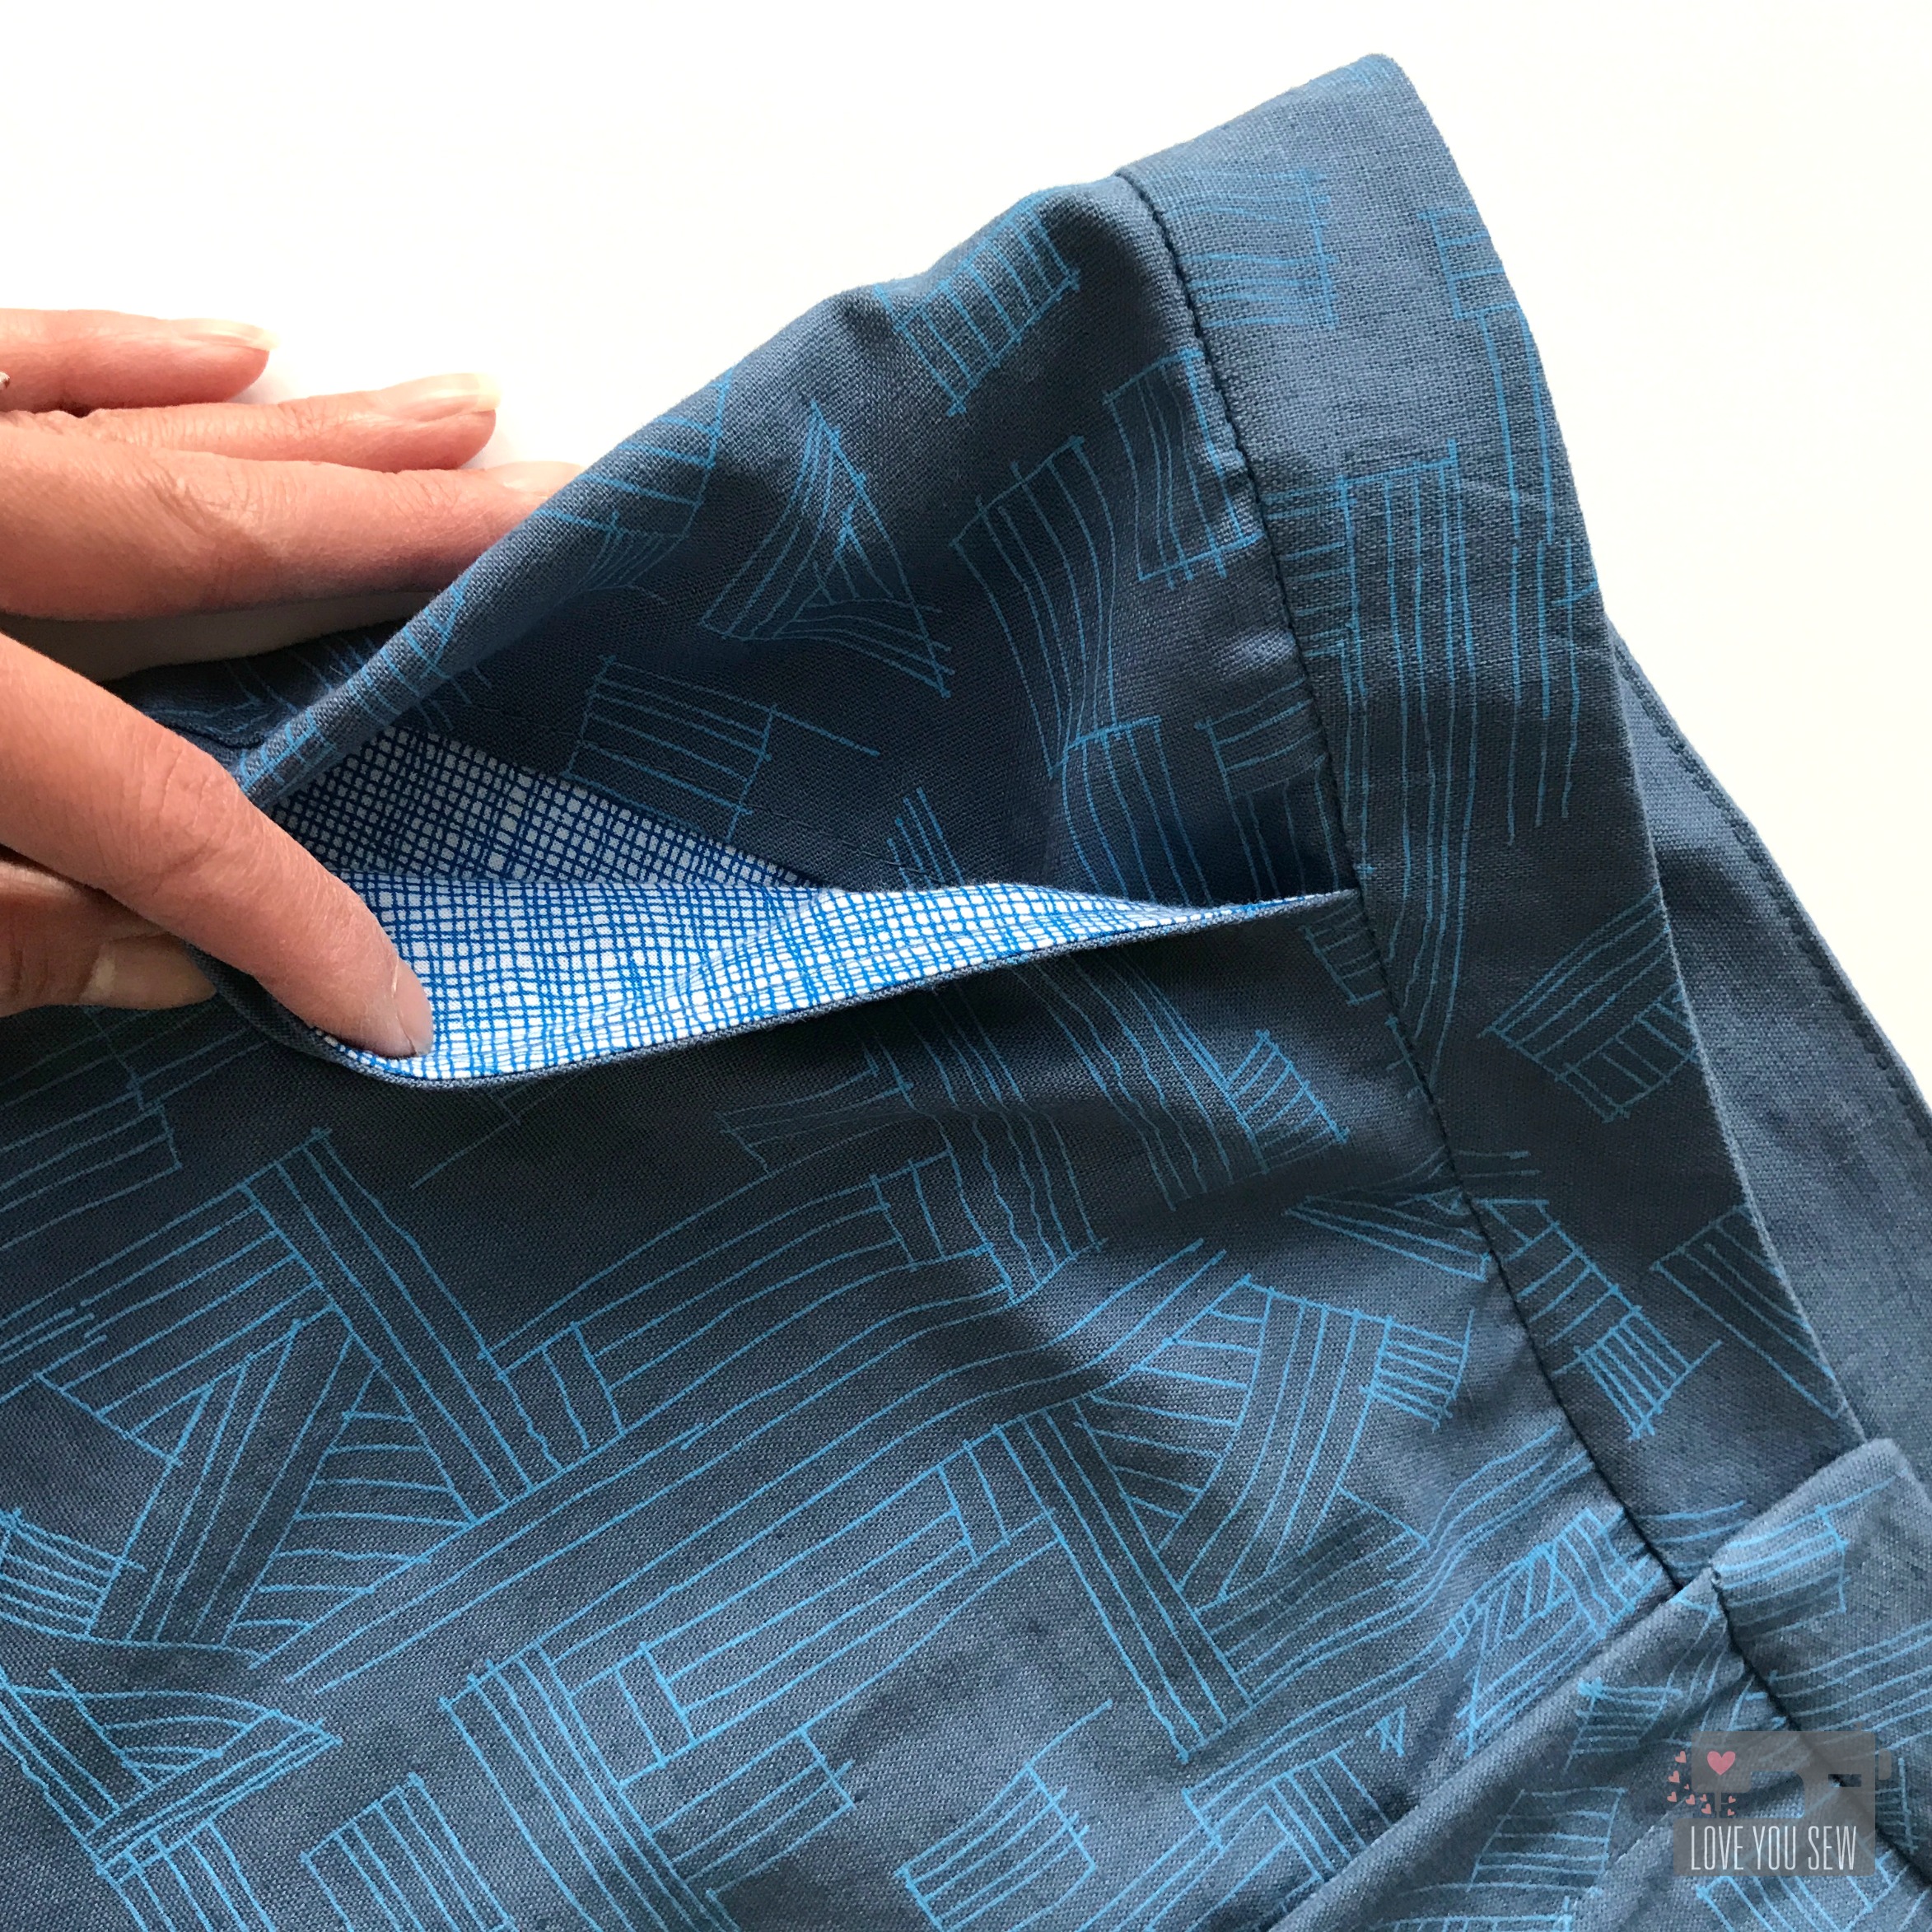
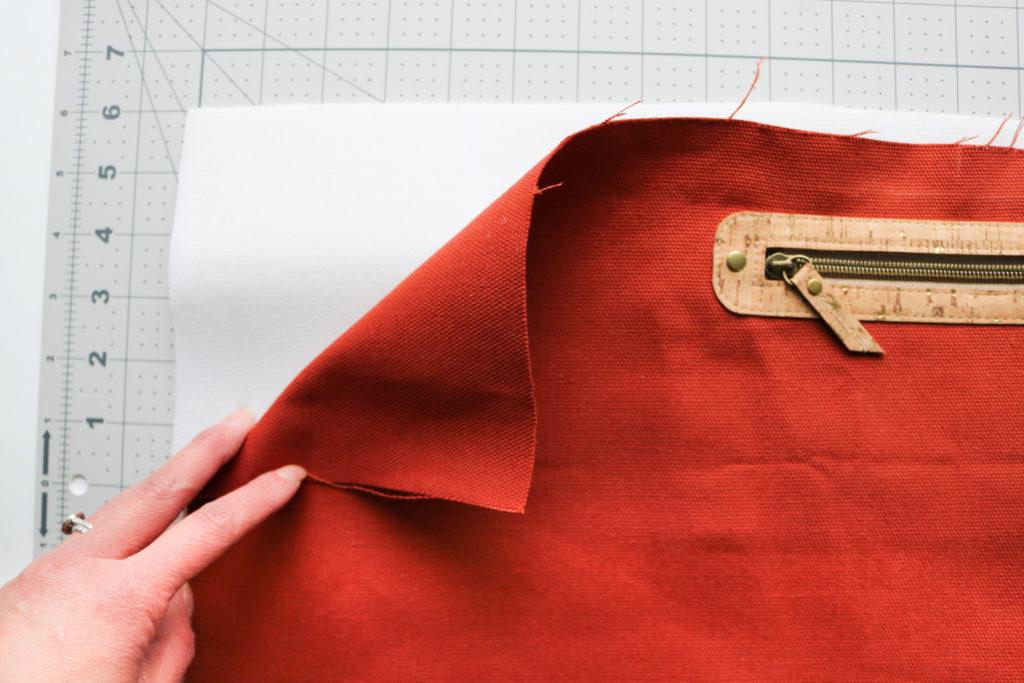
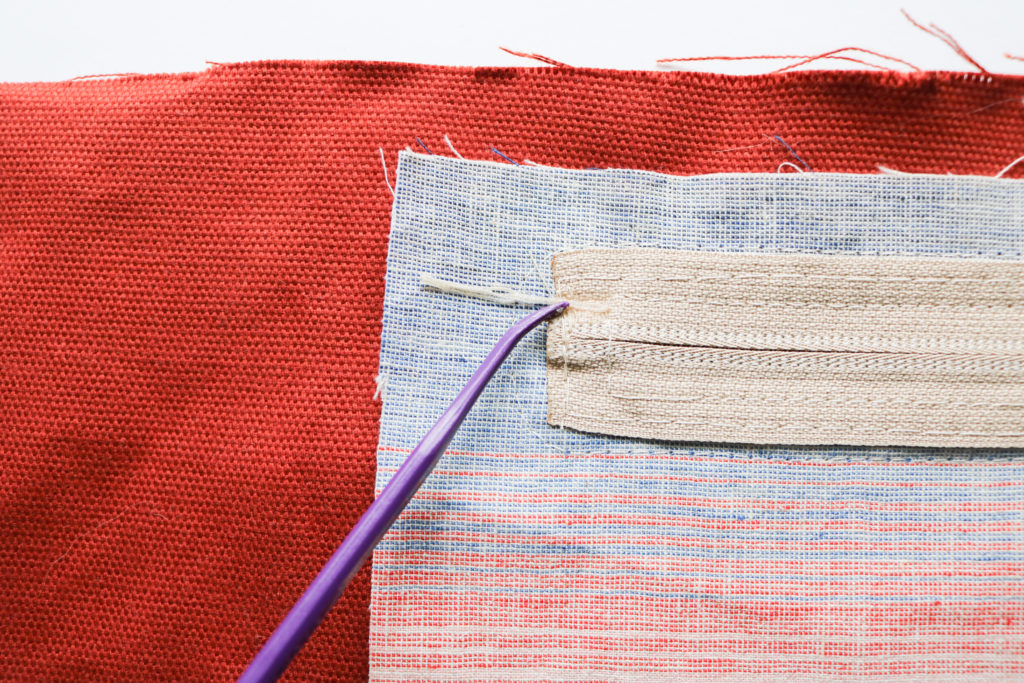
With untreated fabric, interfacing would’ve been fused to the part of the Elastic Side Pocket facing the bag, as seen above on the left.  But, since I’m using a heavy treated fabric, I cannot add heat and fuse to it.  So you will see there is no interfacing to indicate the wrong side of the fabric in the video below.

Click the video to watch how to make and attach the Elastic Side Pockets.  Please note the following:

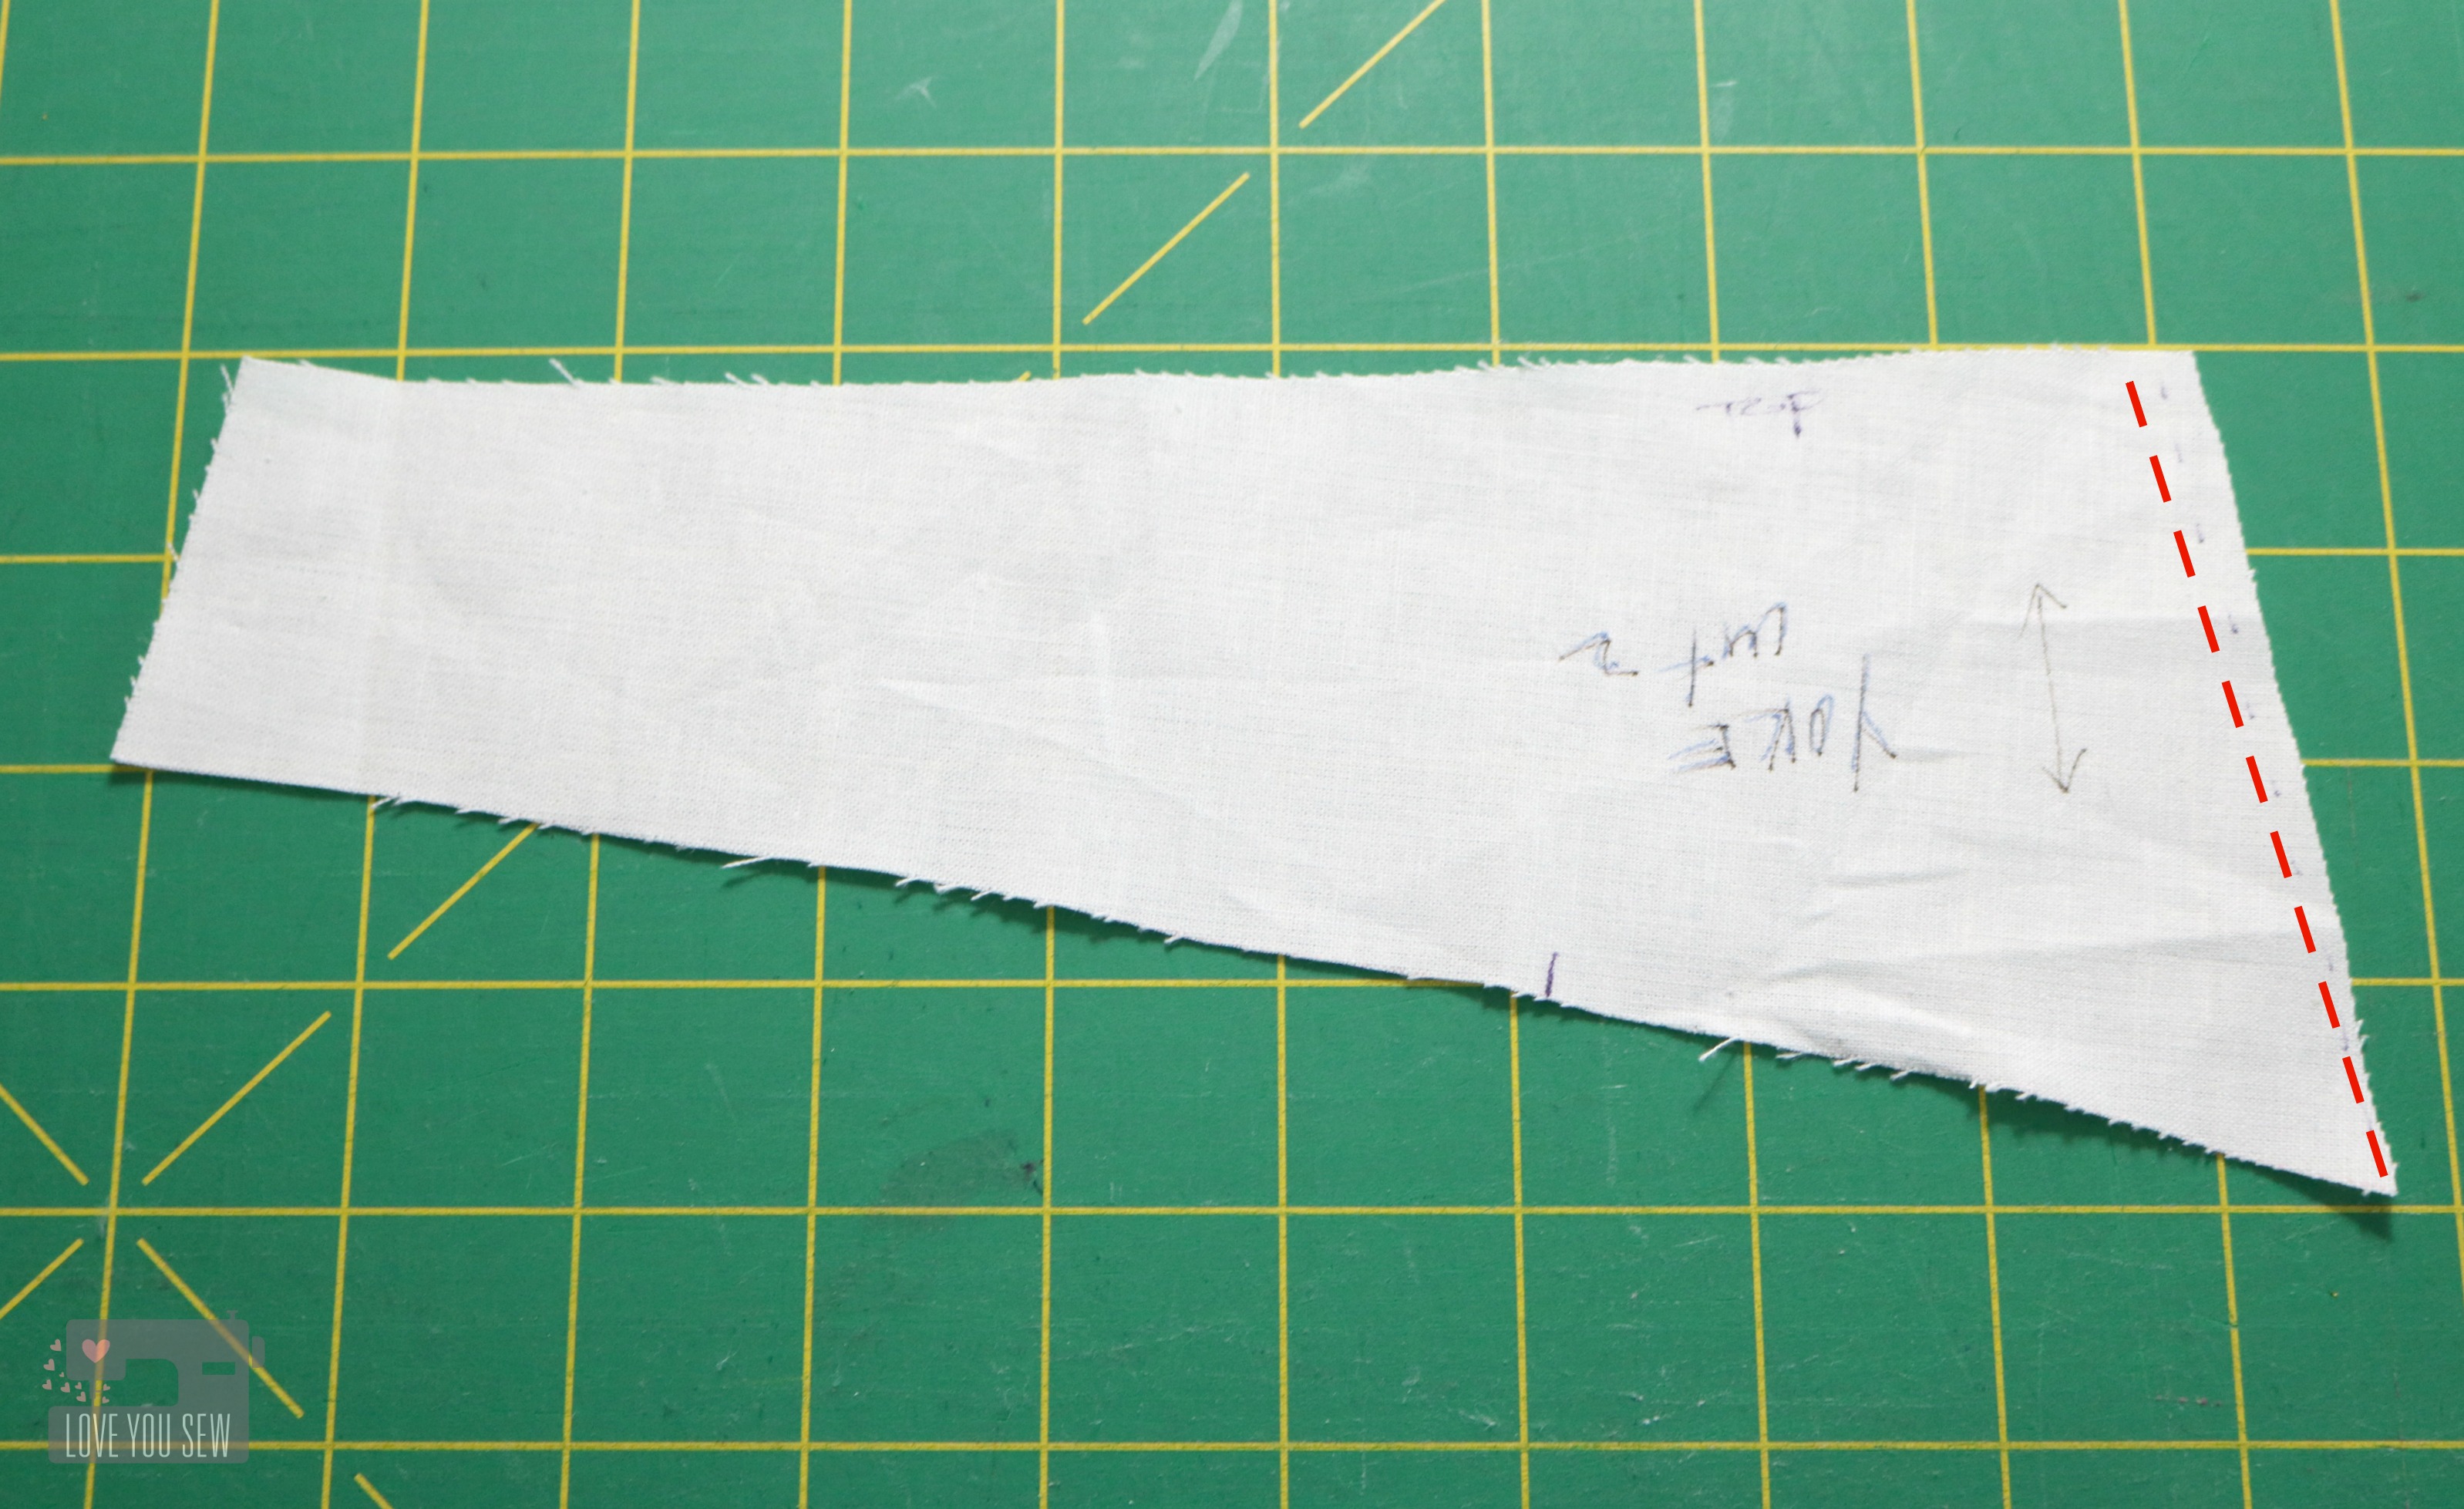
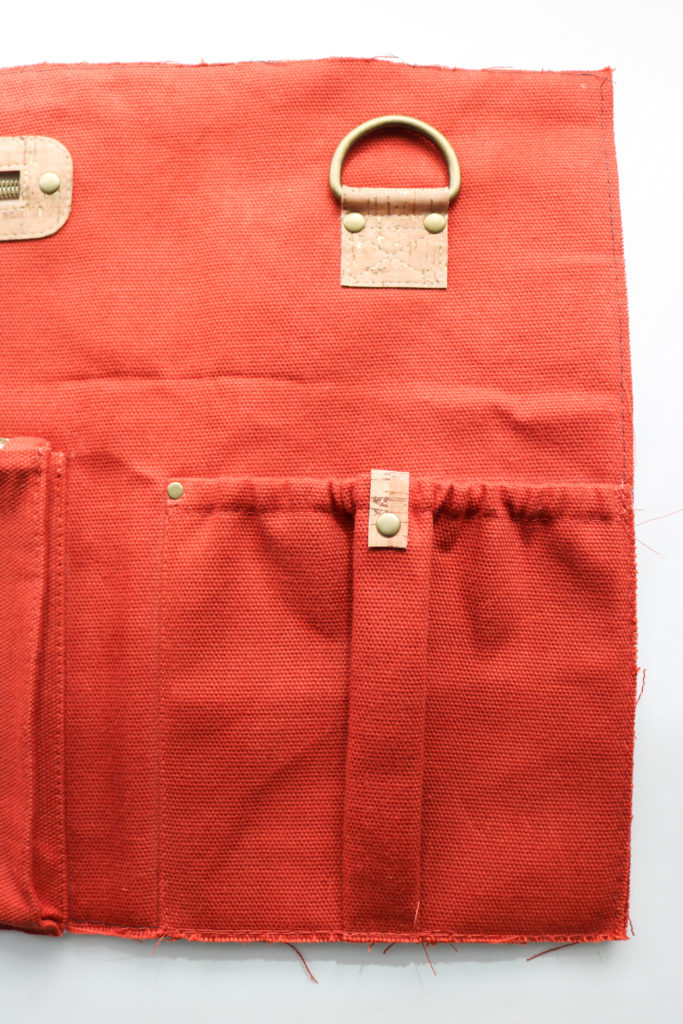
  • For extra durability, I demonstrate how to sew the pocket with an extra triangle at the top of the seam. This helps reinforce that area since it will be pulled on heavily.
  • The size of the rivet used in the triangle has a 6mm cap and is not included in my hardware kit. I thought I would just make it a little different as to not compete with the added embellishment.  This is the same size I use on the zipper pulls as well
  • As an option, you can add in accent fabric with rivets as extra way to highlight pockets. It was an afterthought when making my waxed canvas sample seen here, but I wanted to show you the steps just in case you wanted to add them as well!


POP-OUT POCKET

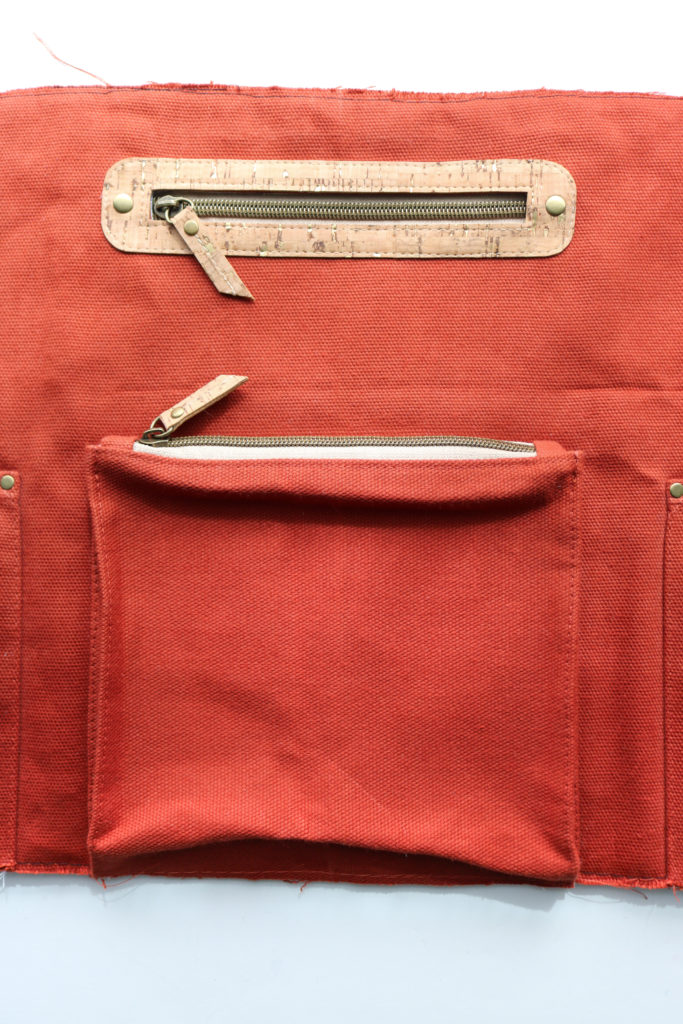
If I am in a clothing store, I will always take a look at it’s bag section.  I like to see what’s popular and if there are any outstanding features.  Well, I saw a 3-D pocket similar to this one that I was determined to figure out on my own because I thought it was a unique way to create one.  With a home machine, my design had to be changed, but the essence is there.   Now, I get to share with all of you how figured out this pocket construction for my bag-makers!

Please click into the video above to view and note the following:

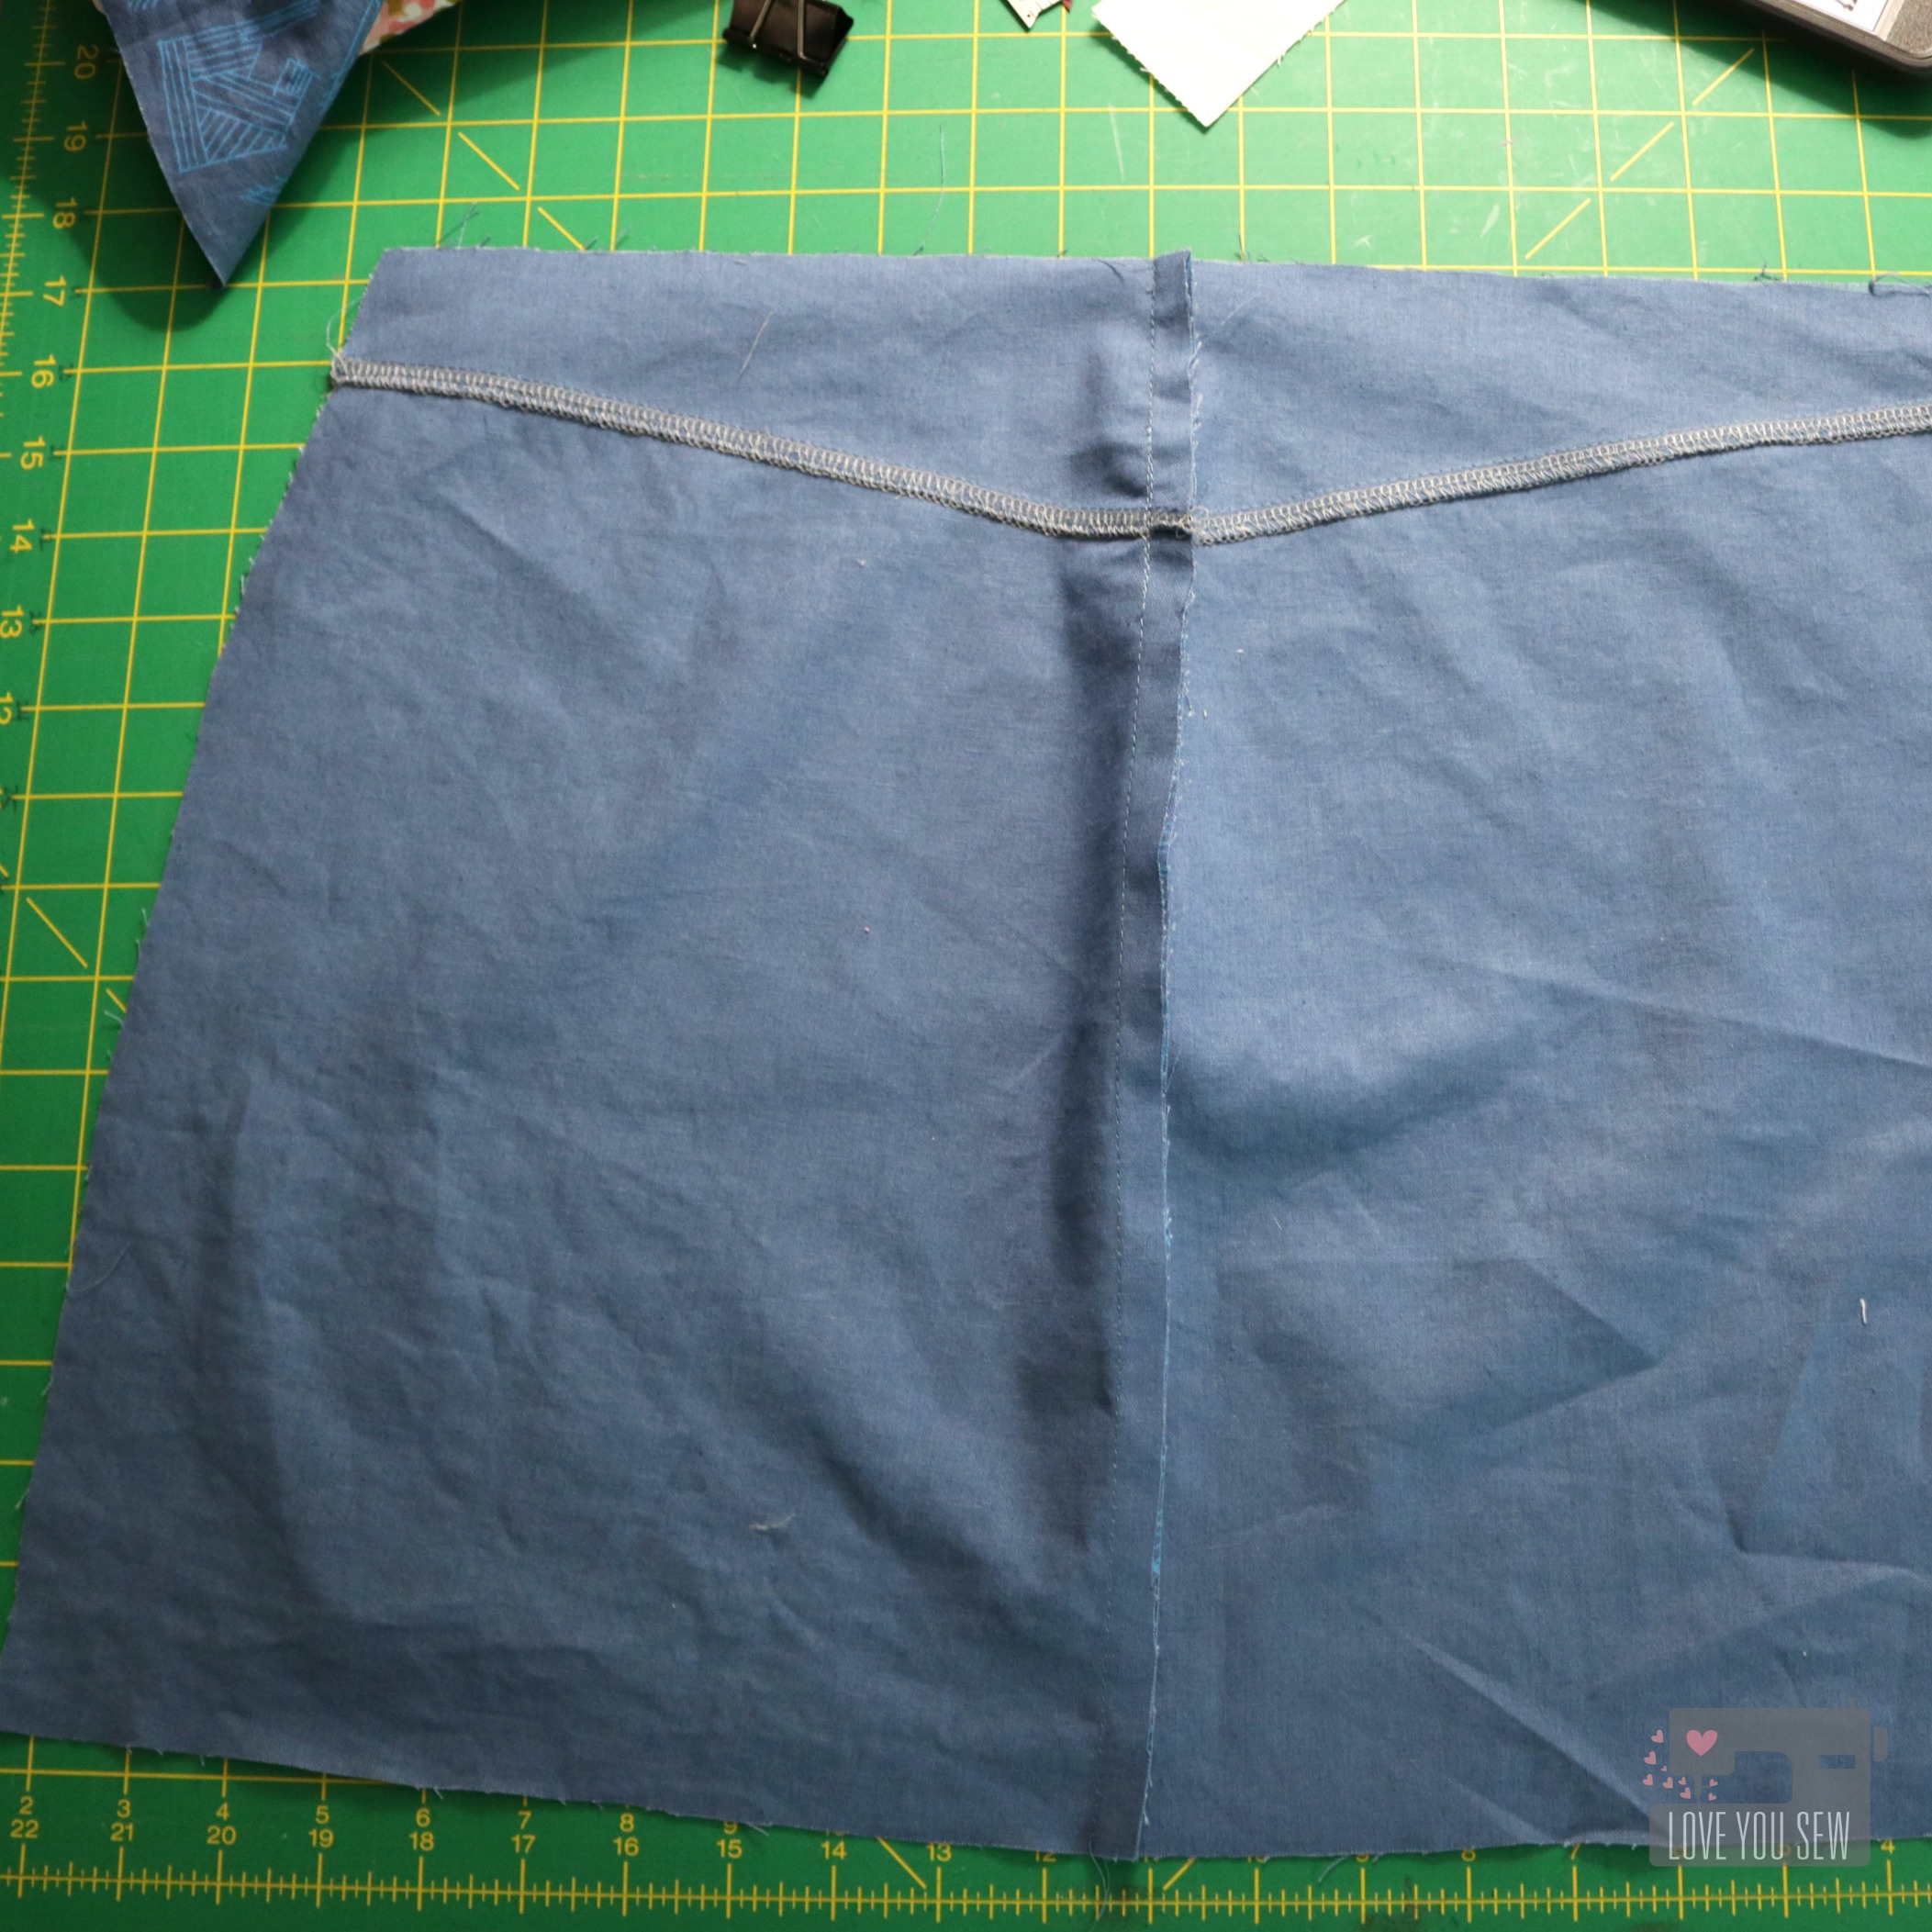
  • When finishing the edge of the Zipper (that’s sewn directly to the Front Panel,) can just zig-zag along the zipper tabs.  But since I primarily work on a straight stitch machine, it would require me to set up a machine.  With the content being so heavy this week, I went with the serger that sits right next to my regular machine.
  • When attaching the Zipper to the Front Panel, I switched feet on the second seam to get a little  closer to the teeth and clear the overlock stitching
  • During the filming, I lost a few segments when attaching the sides down to the Front Panel.  I had to re-film those parts, but the Front Panel was already completed. So you will see that there are no hanging bits of fabric as part if the instructions.  You might  even see some of the Front Strap Tabs.
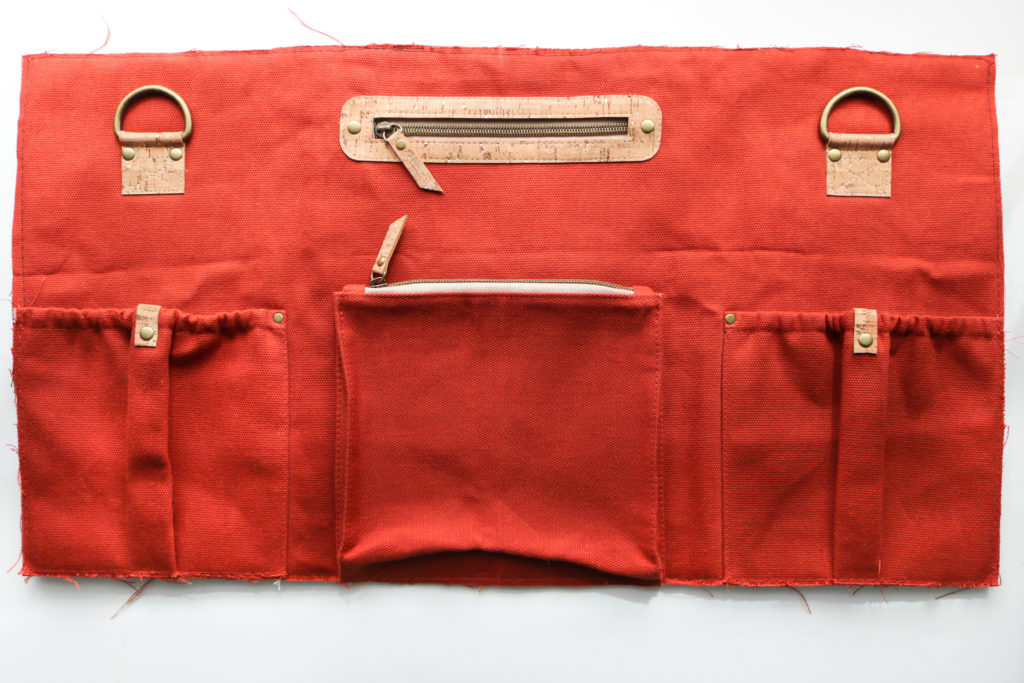
 

FRONT STRAP TABS

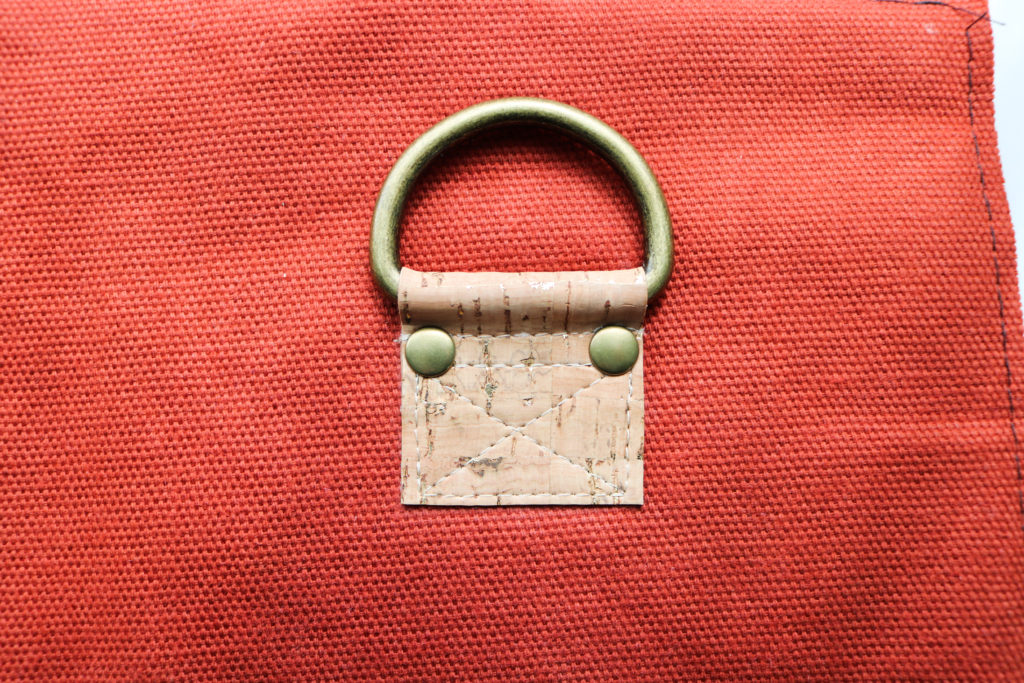
These Front Strap Tabs are for the cross-body and shoulder carrying options.  So all the weight of the bag will be on these spots.  That is why there is so much reinforcement stitching, as well as the added rivets.  You don’t want these ripping out later, so take your time on every stitch!

Click into the video above to watch hoe to attach the Front Strap Tabs and note the following:

  • I work with both my Teflon and Zipper Feet.  I don’t call out the changes, but you can see them in the video
  • For a clean finish, I always like to leave long thread tails and pull them to the back.  With several knots and a dab of glue, those seams will hold just as well as several back-stitches.

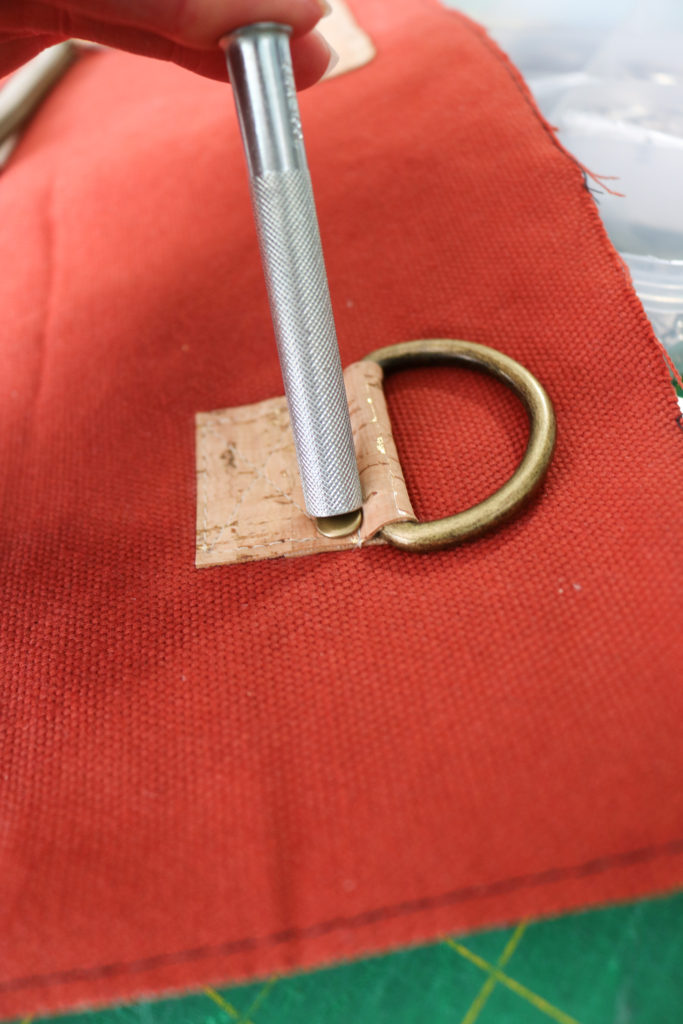
Although a hardware press is a great tool, this is one case when a manual setting tool is better than a press.  The dies require at least an 1/8″ clearance around the rivet caps whereas you hardly need any clearance with the tool seen above.  There are some projects where there isn’t enough throat space with a press to install as well.  So don’t ever get rid of those setting tools!

CONGRATULATIONS on finishing this Part 4 beast!  You are more than half-way done now and doing great!  Check back next week for Part 5: Making the Lining.


Happy Sewing!

Cristy


Please note, this post contains affiliate links.  Please refer to my Disclosures for additional information.

Derby Dress by Love You Sew

Derby Dress: Maxi Hack

Derby Dress Maxi Hack by Love You Sew

I was so excited when D&H Fabrics approached me to collaborate with their exclusive fabric collection with Katie Kortman.  I was asked to make something using one of the three available prints and I knew I would have to make a statement maxi dress using the Dash fabric with the Derby Dress pattern by Christine Haynes.  Katie’s designs are always so colorful and dramatic.  I wanted to make a garment that’s also fun, bold, yet approachable – like the designer, herself!

The Derby Dress (aff link) pattern has been in my library for awhile now.  I’m a sucker for the classic feminine styles which Christine has in her patterns.  I made the knee-length version a few years ago with a rayon challis and it’s still on rotation in my closet.  So I knew a full maxi version would get the same wear…if not more!

Fabric

After checking out the available prints at D&H Fabrics, I fell in love with the vibrant pink and red Dash.  There was just something about these analogous colors that pulled me in.  I admit my garment fabric game is a bit neutral (aka boring) so it felt good to step out of my comfort zone a bit…especially for summer!  If you follow Katie on IG, you know she has her own personal movement to get more of us sewists to use fun color combos.  I SO appreciate the extra fun inspiration and color push 😉

This gorgeous print is made of a 56″ wide lightweight rayon poplin which is incredibly soft with a soft hand and beautiful drape. The tight poplin weave makes the fabric easier to handle than a rayon challis which is much more slippery. With this more delicate fabric, I like to use a smaller universal needle sized 75/11 or 70/10.

The fabric design is printed directly on a white basecloth and washes very well. Most of these pictures were taken after three washes and yes, even with delicate tumble-dry.  (I wash my handmade garments along with my RTW.)  The colors remain saturated and I even sweat through this for hours in 90* heat.

Pattern & Modifications

As I mentioned above, I’ve made this Derby Dress by Christine Haynes before and love the flirty ruffle feature — plus it has pockets!  I actually use this pocket pattern as my go-to for any dresses which need an in-seam pocket.  It’s just a nice shape and perfect size for my hands.  I’ve used these pockets on my Sylvie seen here, and my Alix dress found here.

The front of the Derby is drafted with 3 separate panels for princess seams and the back has 4 panels for additional shaping.  This is great for a solid fabric or a busy print, but I didn’t want to disrupt the dashes in this fabric design.  I definitely did not have enough fabric for all of the pattern matching either…nor the time! So, I used a RTW maxi dress from Target (aff link) I have to work out the width and length of the dress.

I laid the RTW dress over the fabric on the fold and used the facing of the Derby to cut the top of the dress (of course, adding in seam allowances.)  The Derby uses two different facings for the front and back, but I took the easy route and made my front and back pieces identical since all of the panel seams we eliminated.   I then cut out two of the front facings on their own to match the front and back of the Derby.  The straps were later shortened to account for these changes to the neckline.

With the dress lengthened out to a maxi, I also extended the length of the neckline ruffle by 1″ to balance the proportion.  I though the ruffle would be cute on the back as well, but it ended up being  a bit “too much.”  Sometimes you have to know when to edit, and the back looks much better with a clean line.  To play with the neck ruffle, I also added a 7 1/4″ (finished) x WOF ruffle to the bottom of the Derby to make it as close to the ground without touching as possible.  It adds to the flirty feel of the dress and adds some extra swing.

I LOVE how this maxi version of the Derby came out.  The print needed to become a statement dress and I can definitely tell you it turned a lot of heads at the airports!  The lightweight rayon poplin was just perfect with the dress pattern for all the great movement.  It’s the perfect summer dress for travel and pairs beautifully with my vintage denim jacket….so that means I can also extend the season on this make! Yay!!!

Derby Dress by Love You Sew

Project Summary


Are you a bold and colorful person or usually a bit more reserved and neutral like myself?    I have to admit that stepping out of my usual color scheme was a lot of fun and I’m reaching for this dress a lot more than I thought I would!  Try it out if you haven’t already!!!


Hugs and Stitches,

Cristy


The fabric for my dress was provided by D&H fabrics for advertising but I was not contracted to write a blog post.   As always, I like to share my makes and good fabric finds 🙂  There are affiliate links in this post and you can read up about my disclosures here.


Moss Skirt {Review #2}

I had my fabric selected for my Moss Skirt by Grainline Studios months ago…hoping to be able to wear it all summer long.  But as you know, life just happens and selfish sewing gets put on the back burner.  This is the second one I’ve made and love it even more than before.  For the first one I made over a year ago, you can read about it here.

For this version, I used Euclid fabric in Cadet which is a printed linen/cotton blend.  This is slightly heavier than quilting cotton, and makes for the perfect summer weight skirt. With the blend, you get the texture of the linen, but not all the wrinkles. I’m all about less ironing!  By making View A this time, I was able to make this skirt out of one yard of fabric (minus the pockets.)


After learning from my first Moss, I knew I had to adjust the back yoke to get rid of the gap. You can see (on the dotted line above) how I cut into the yoke pattern piece on an angle to leave the room for my rear but move the waistline closer to my back.

The other other learning was to keep my vertical seams unfinished until I was ready to add the waistband and hem. This allowed me to make just slight tweaks to curve my seams, if needed. Once I was satisfied with fit, I serged my seams.


For some fun and to keep the silhouette smooth, I used Architextures Gridlines for my pockets. This allowed me to use some scrap fabric and reduce the bulk if I would’ve kept to the same cotton/linen blend.

As I moved through the pattern pieces, I mimicked the same top-stitching as seen on a pair of ready-to-wear jeans. I love how it turned out! Be sure to increase the stitch length and go slowly to ensure nice straight line.

The great thing about making your clothes, not only for the custom fit, is being able to add so many special touches.  Like the pockets, I added a contrasting zipper and button for fun.  The button came from my MIL’s long hoarded collection and it reminds me of her as I wear this new garment.

For the waistband, I decided to machine stitch the inside down verses slip-stitching it as the pattern calls.  I’m a busy mom and I try to machine wash and dry as much as I can.  For me,  a machine stitch would just hold up better with my lifestyle.  This lady does not have time for all that hand-washing!  I pressed the interior band down just wide enough to just cover the seam and stitches.  (If you have any branding or sizing tags, this is the perfect time to pin them in.)  I used a Sewline glue pen to keep the interior waistband in place while I stitched-in-the-ditch along the exterior.  This allows me to just catch the interior band.


With View A, I hemmed as directed.  This length was perfect on my 5’3″ frame.  It hits a few inches  above the knee, but is perfect for the summer.  If I was any taller, this might be a tad too short for my “mom” lifestyle which requires a lot of bending up and down…and sometimes a bit of unexpected climbing.  🙂

As I’ve been building my handmade wardrobe, I’ve been selective in choosing some slimmer silhouettes for my petite frame.  I am heavier in the arms and legs, thus like to emphasize my waistline.  This is the perfect skirt pattern for just that.  The clean lines and waistband keep everything smooth to draw the eye up and down.  The printing on the fabric is just the right scale to keep everything in place and not over emphasize one part or the other. 😉

I love how I can pair this skirt with just a white tee and the outfit still looks polished.  I’m hoping to extend this skirt’s life with some heavy tights and cute clogs with a slim long-sleeve tee in the fall. Check out my IG feed to see how it pairs with a yellow and white striped tank and the other outfit pairings!


Project Details:

  • Pattern: Moss Skirt by Grainline Patterns
  • Exterior Fabric: Euclid in Cadet by Carolyn Friedlander for Robert Kaufman Fabrics from Fabric.com
  • Pocket Fabric: Architextures Gridlines in  by Carolyn Friedlander for Robert Kaufman Fabrics
  • Piecing and Top-Stitching Thread: Gutermann 236 polyester
  • Zipper: YKK from ZipIt Zippers
  • Button: Vintage (manufacturer unknown)


Happy Sewing!

Cristy


Please note there are affiliate links.