Bias Skirt in Printed Rayon

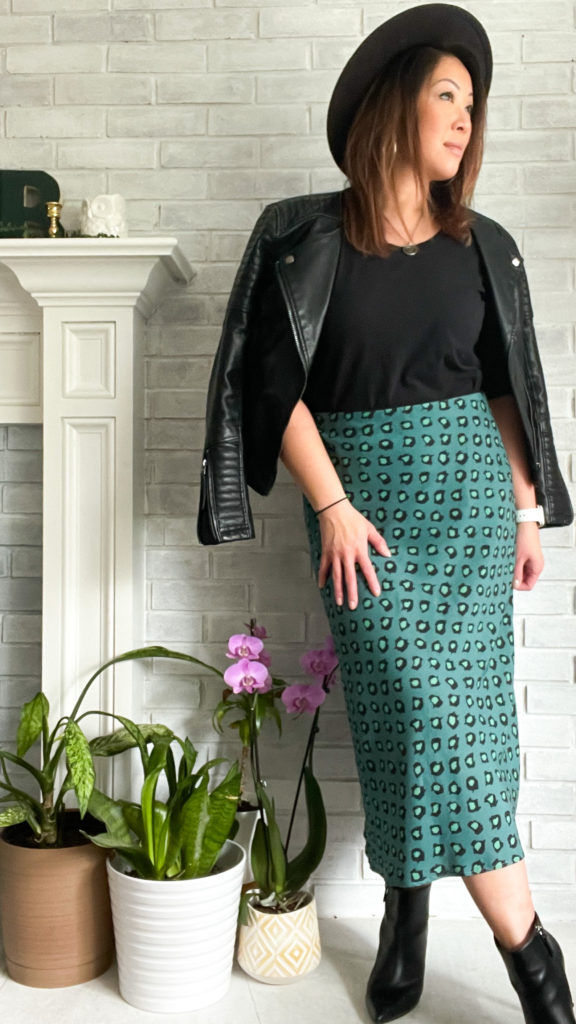
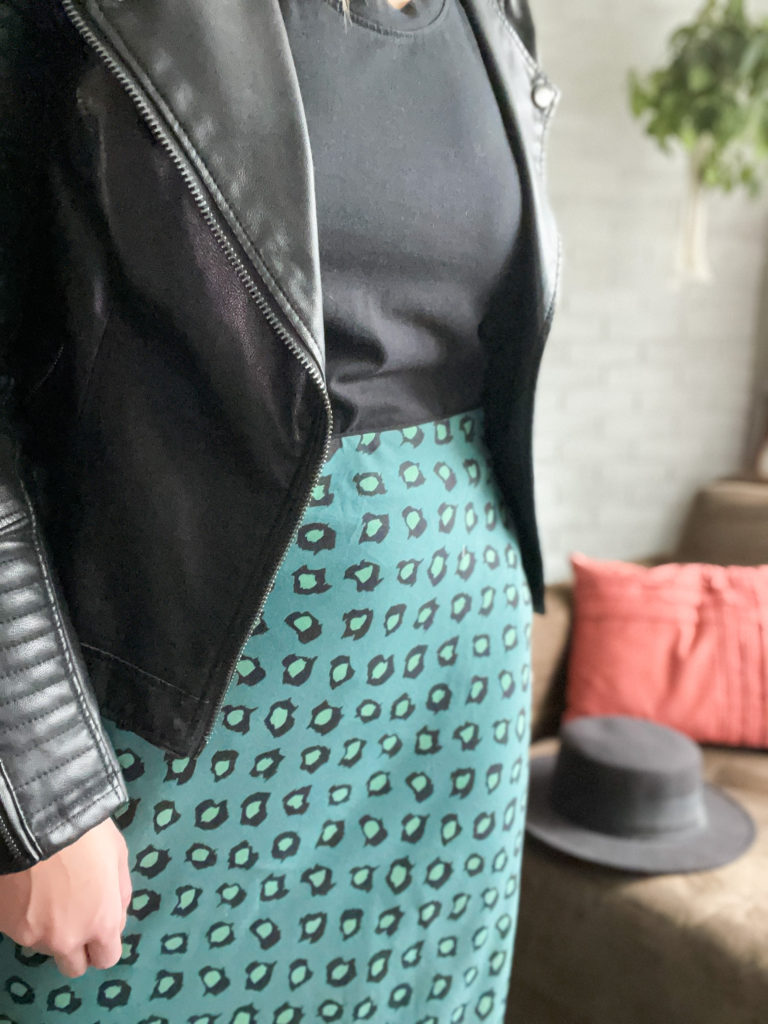
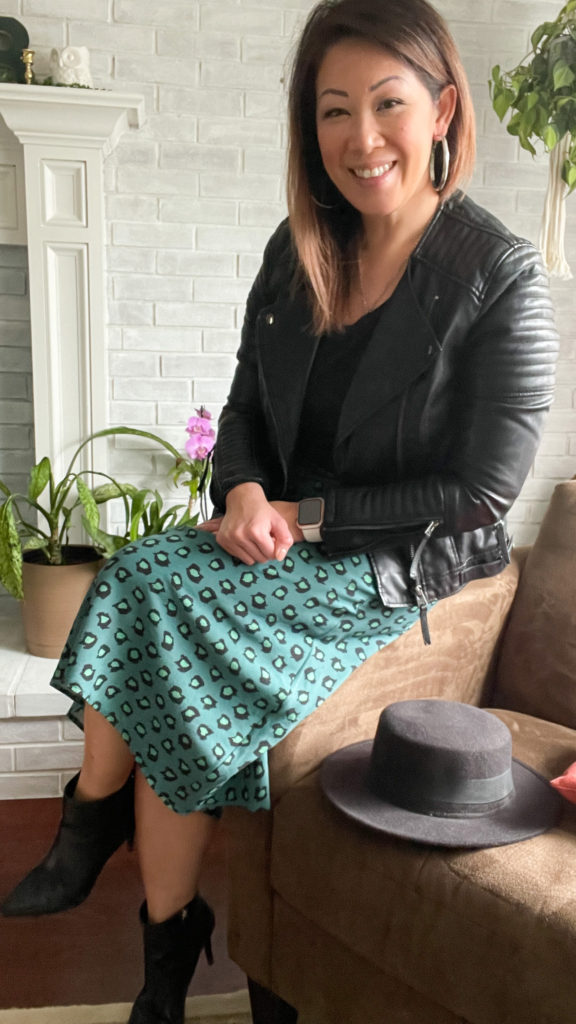
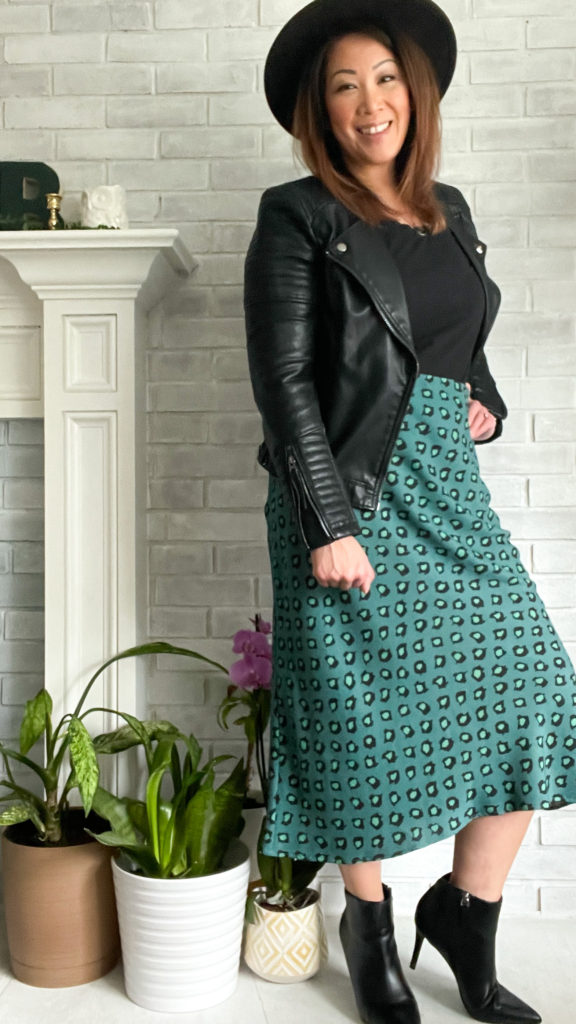
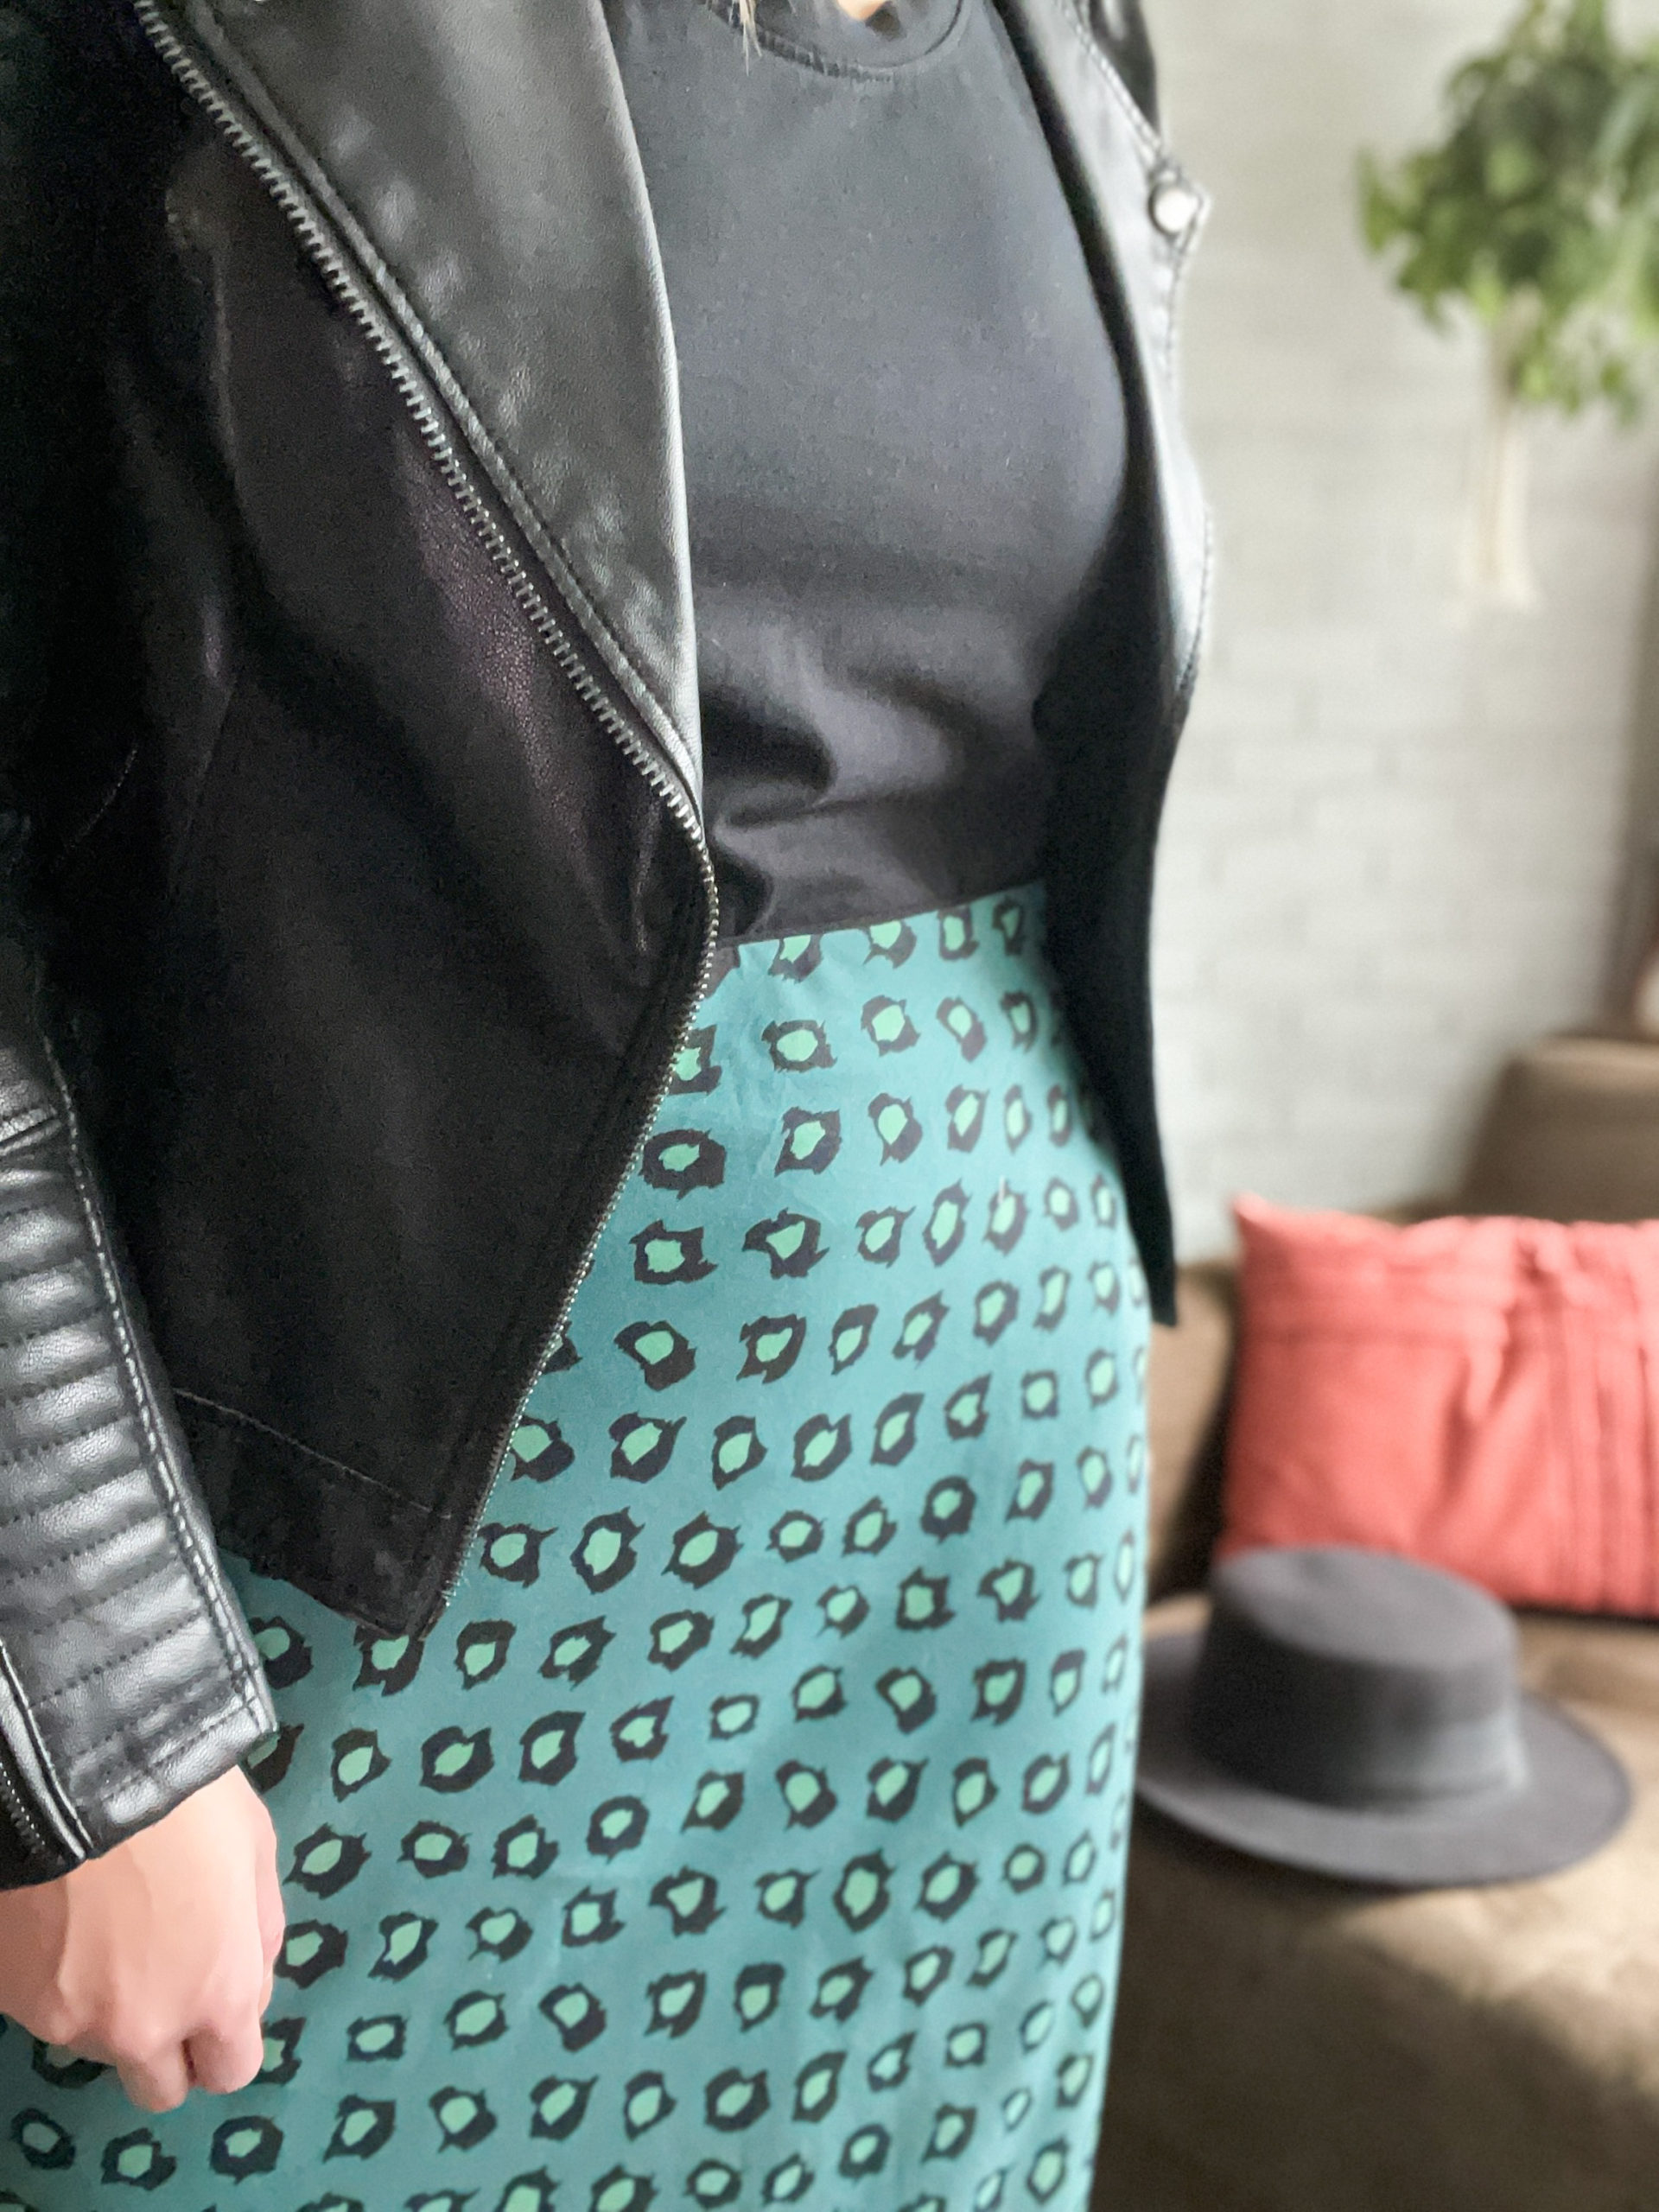
I’ve been wanting to make a bias skirt for awhile now. The simple slip dress has made a comeback from the 90s and is not just a piece of lingerie any longer. The look is more modern layered with big oversized blazers and sweaters. Instead of heels, they are being paired with boots and sneakers for easy streetwear…I’m here for all of it! The bias cut of these dresses are great on any body and provide more fluidity and stretch in woven fabrics. I don’t think I would wear a slinky slip dress as much as a skirt and found the Sati Skirt.
Pattern

This is my very first time sewing a pattern from Russian based designer, Viki Sews. Since I bought the pattern based off a simple Google search (very late at night,) I didn’t realize that she sells her patterns by a SINGLE size and doesn’t include a range! I didn’t even realize it until I was ready to make the skirt and saw there was only one pattern drawing in the file. Of course, it was the wrong size, since I clicked directly through a Google ad….and had to contact the company through Etsy. It took a few days, but customer service was VERY kind and resent me the correct size even though it was completely my own fault for not reading through all of the details. (As an Etsy seller, I’m mad at myself for doing what so many customers do to me! #lessonlearned)
With bottoms, I span about 2 (sometimes 3) different sizes and like to see the drafting lines in order to make the appropriate adjustments for my body. So, I almost always stay away from companies that sell their patterns by a single size (Style Arc is another brand that does this.) Of course, these companies have fantastic patterns I would LOVE to make, but I’m not a formally trained pattern maker and don’t want to make my life harder than I have to! So, it wasn’t surprising to me that I fall into 2 sizes in Viki’s range. Since I already purchased the pattern, I asked for euro size 44 (even though I fell between 42-44.) It’s easier to take in fabric than to add fabric later 😉
The construction of the skirt was pretty simple. I basted the back darts and side seams for fit and did adjust the waist by pulling it in 3/8″ on each side seam (1.5″ total.) Many times, I have to readjust darts, but I think the bias cut helped to settle them smoothly on my back-side. The most difficult part was all in the cutting of the pattern. Although I have a pretty big cutting table, I made sure to cut on the floor to keep the fabric as flat and properly squared off as possible. This helped to keep the fabric design aligned and get a true 45* bias cut.

For the length, I do like how each size comes with 4 different options. Since I’m 5’3″, I chose the shortest version which brought me to a pretty good midi length. I’m sure all of you taller sewists can appreciate accommodations for being up to 6′ tall.
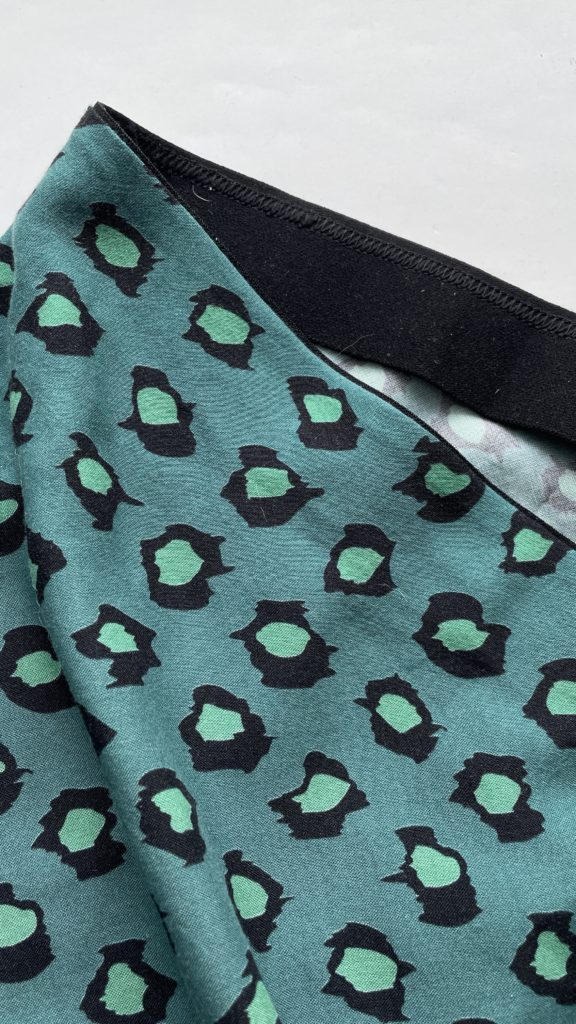
The only real change I made to the pattern was omitting 1 out of the 2 elastics for the waistband. Honestly, I don’t know why the instructions have you sew two together…maybe for more strength? But if you have a good quality waistband knit (that is soft against the skin,) you only need one.
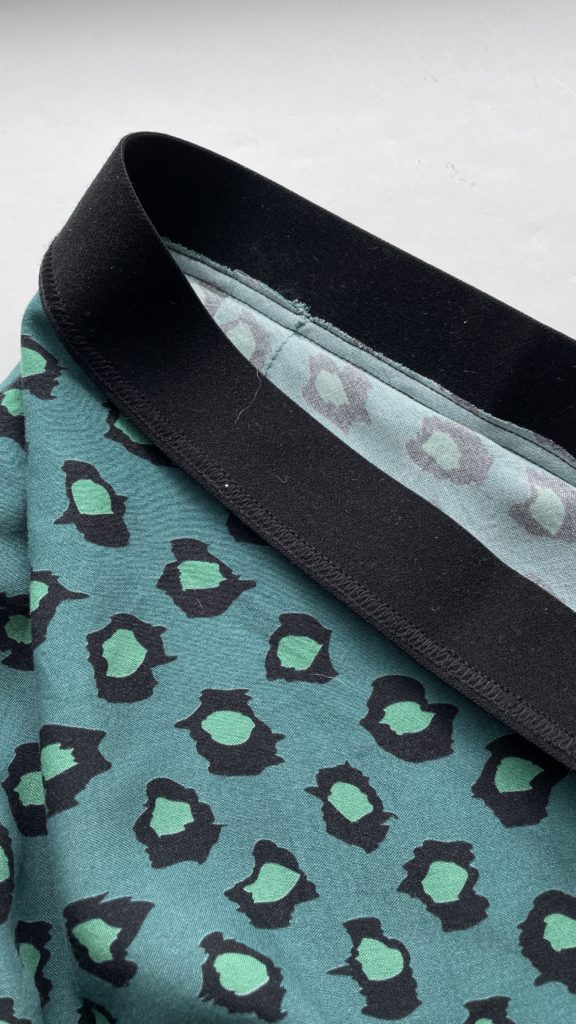
As seen in the pictures, the band is sewn to the right side of the skirt and then folded to the inside where it’s hidden. I used my coverstitch machine, but this could easily be done with just a zig-zag stitch. I adjusted the length on the waistband and also sewed the short ends together on an angle to follow my waistline that goes out rather than just straight.

FABRIC

Speaking of firsts, this is also my first time using rayon from Mimi G for Riley Blake Fabrics. I know RB from quilting and know their woven cotton and jersey knits well. It’s nice that they have expanded out to fashion substrates. With a bias skirt, you want a nice opaque fabric since lining it would defeat a bias skirt’s flowy and body gliding nature. This rayon has a white base cloth with printing on top which definitely works! I purchased this from Melanated Fabrics, but you can always check out Etsy or Amazon for more.

You can check out the skirt’s movement below or on my Instagram here.

As you can see, despite the beginning hurdles, I LOVE my skirt now. The waist adjustments were simple enough that I would recommend this pattern, but I’m hesitant to try out any others from this company which would require more adjustments. The fabric is fantastic and I just love the feel and movement. I just need the weather to warm up a little bit so I can wear it out!

Happy Sewing,

Cristy


I personally bought all of the fabric and patterns for this project. This post may contain affiliate links. You can read about my Disclosures, here.
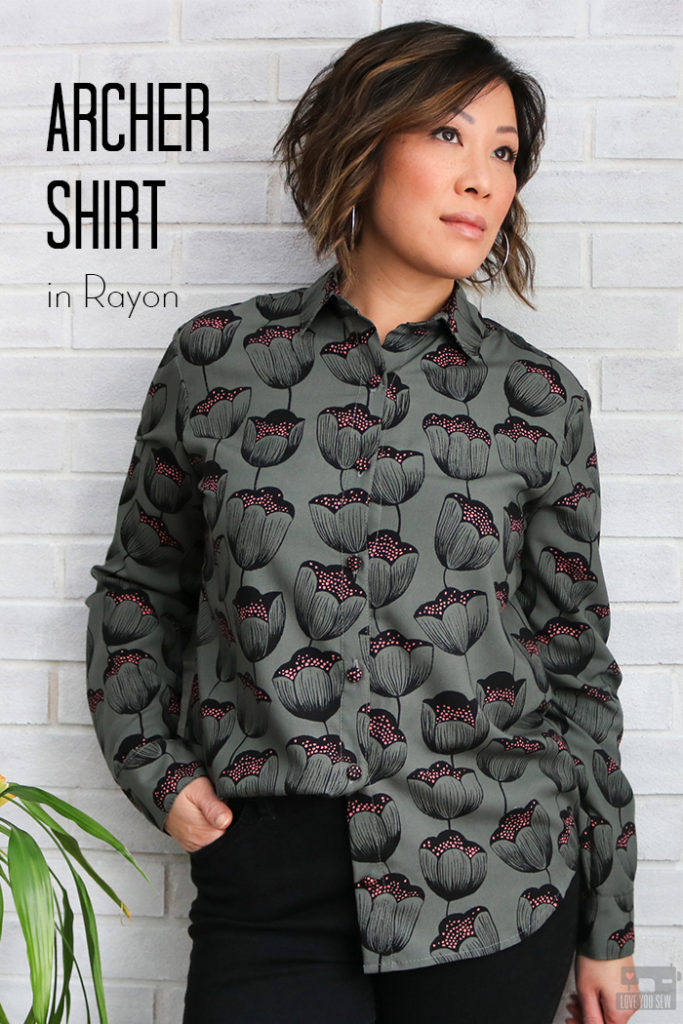
Make the Chicest Archer Shirt with Rayon

Archer by Love You Sew

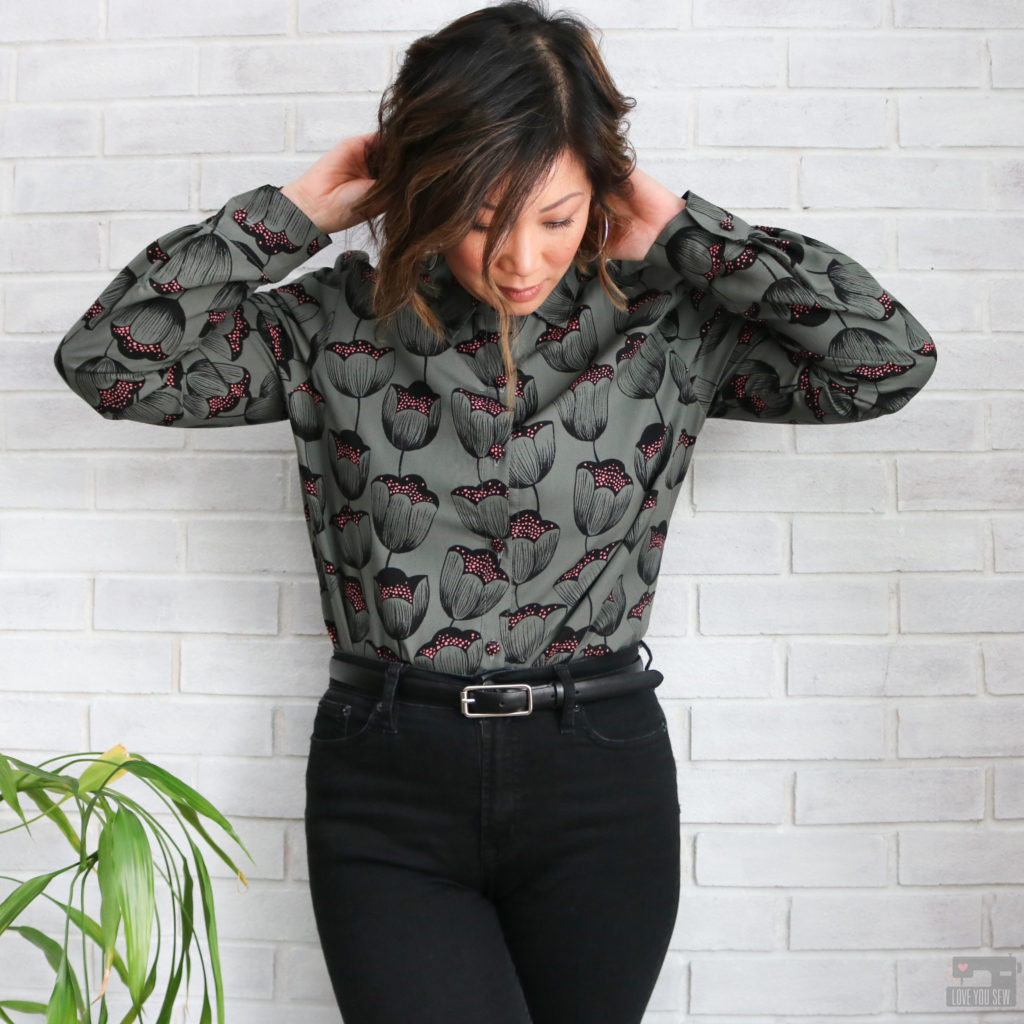
Everyone knows the versatility of a button-up shirt.  It’s an absolute classic silhouette with ease all around the torso  but a crisp collar keeps the style elevated.  The button-up shirt works well in so many different fabrics.  After making my first flannel Archer Shirt with it’s casual feel here, I knew I wanted to flip the script and sew a “fancier” one for going out.


Because of other blogger commitments I have with other companies, it’s sometimes hard to find time to sew projects with my own fabrics without any constraints.  So when I saw Indiesew was hosting #ShirtMonth again, I knew this would be the time to sew my button-up….This is exactly the motivation I needed!  This month is dedicated to highlighting fabrics,  patterns and techniques for all shirts with a placket.  You can read more about the month here.  I’ve really enjoyed joining in on so many of these sewing challenges on Instagram and hope you do too!

Fabric

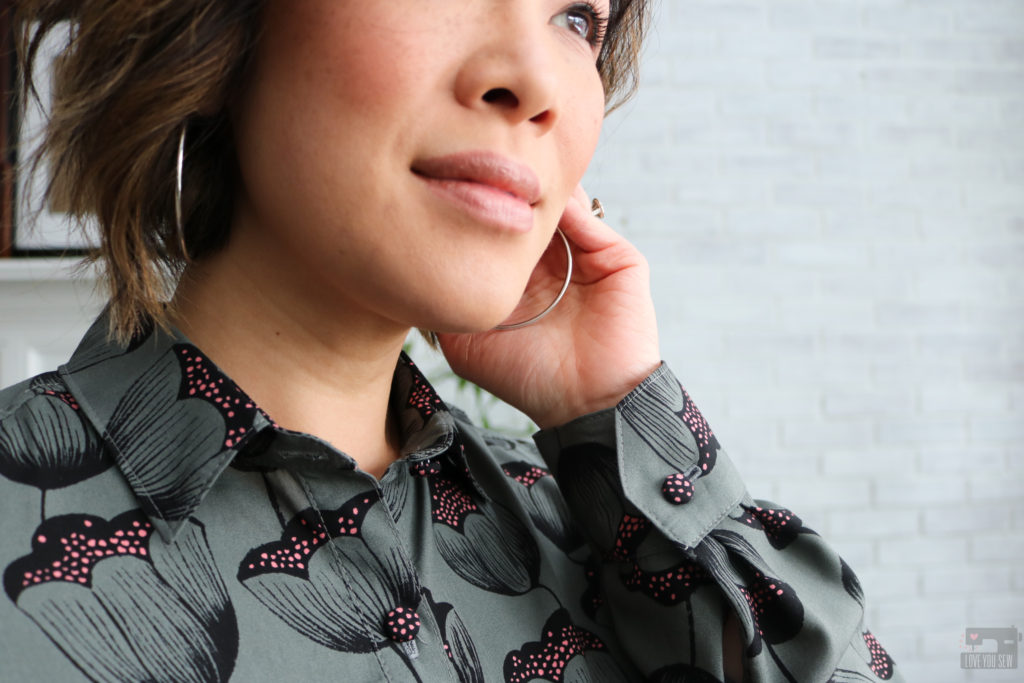
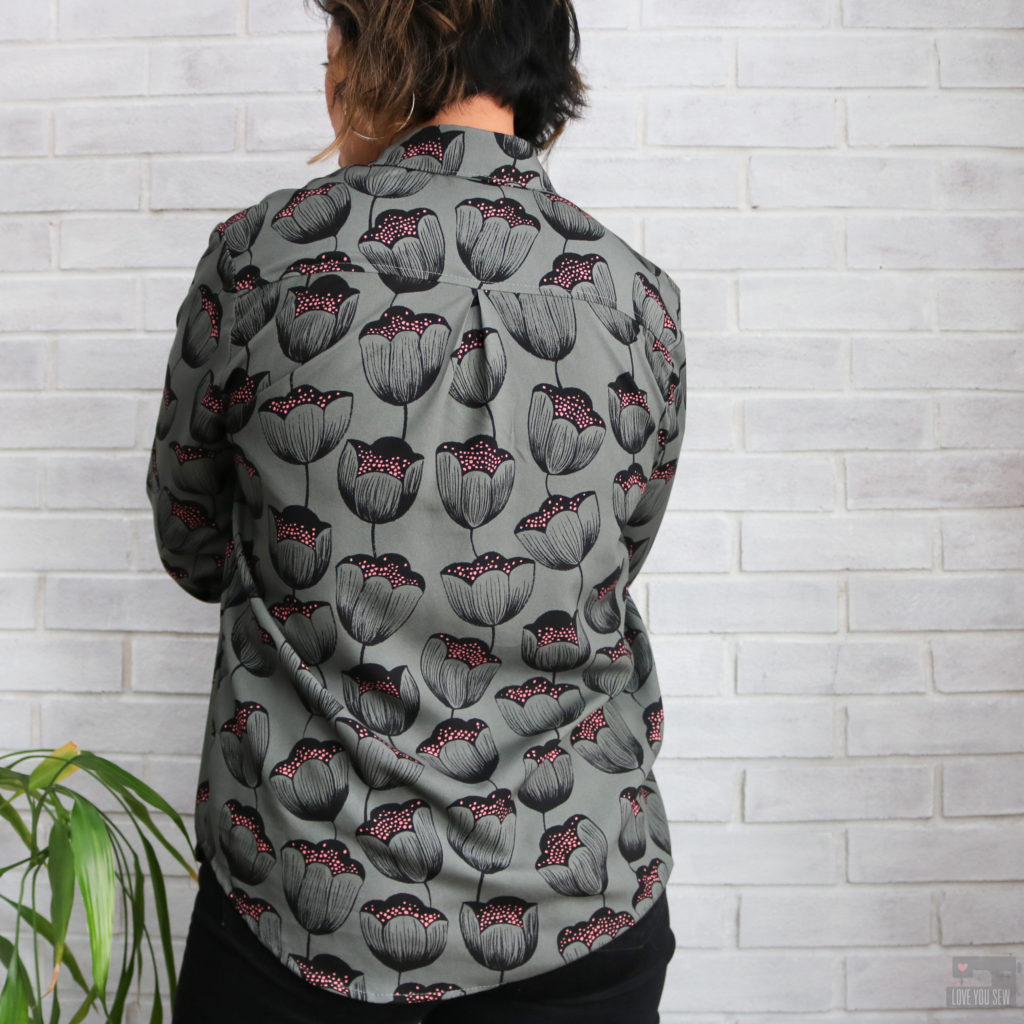
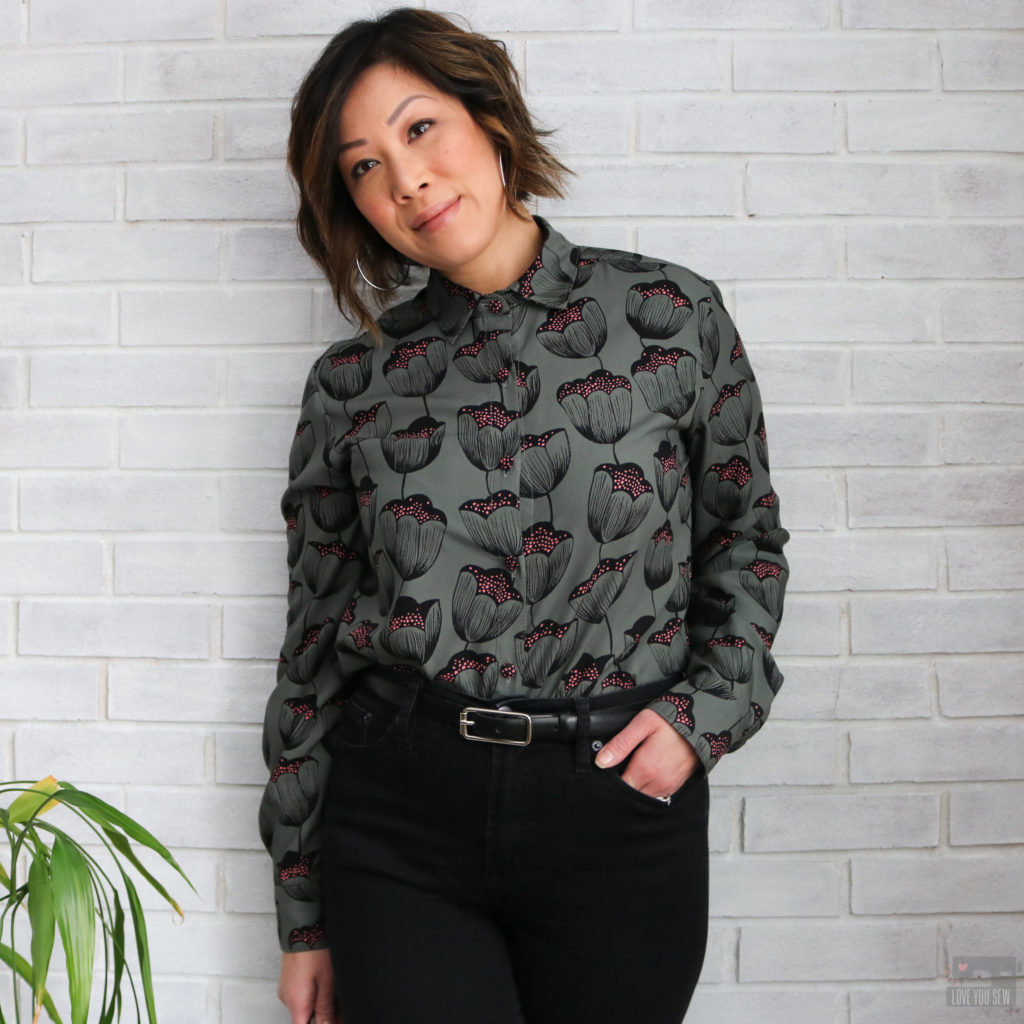
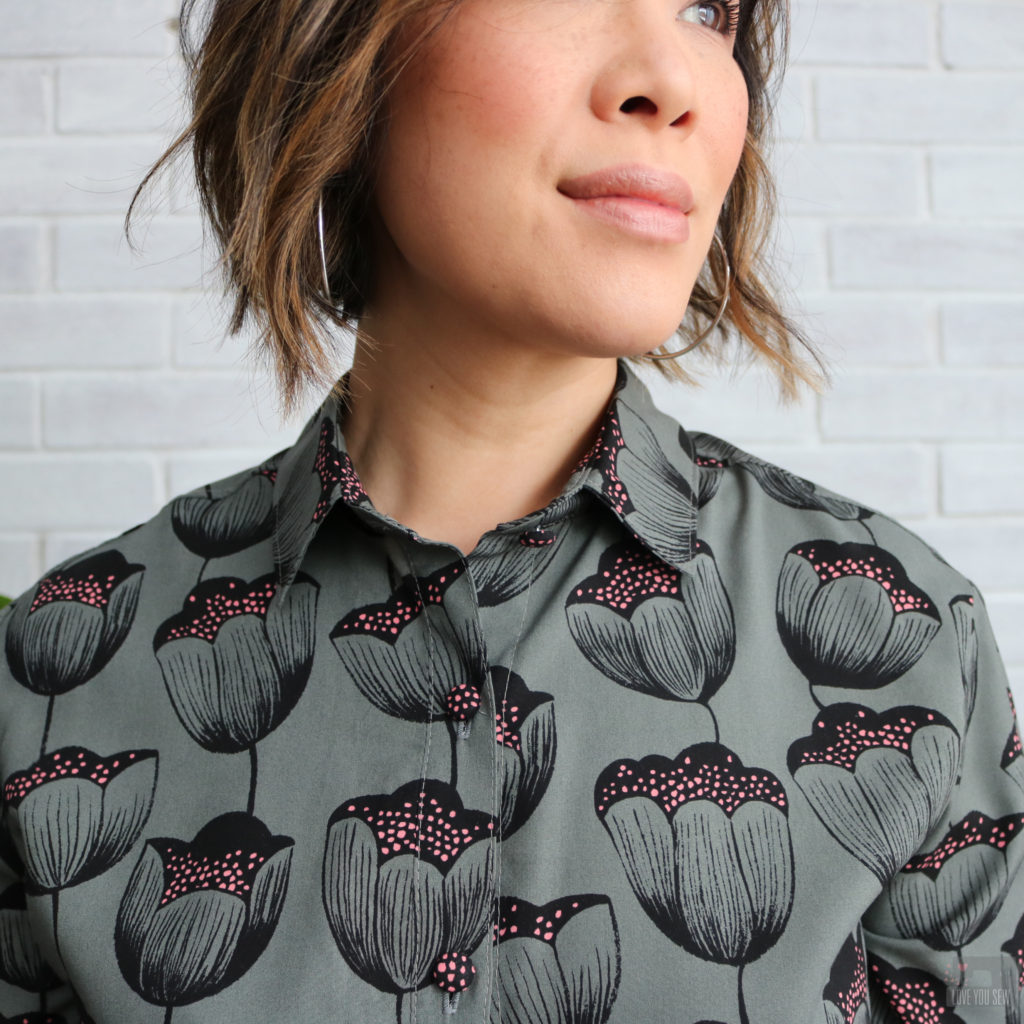
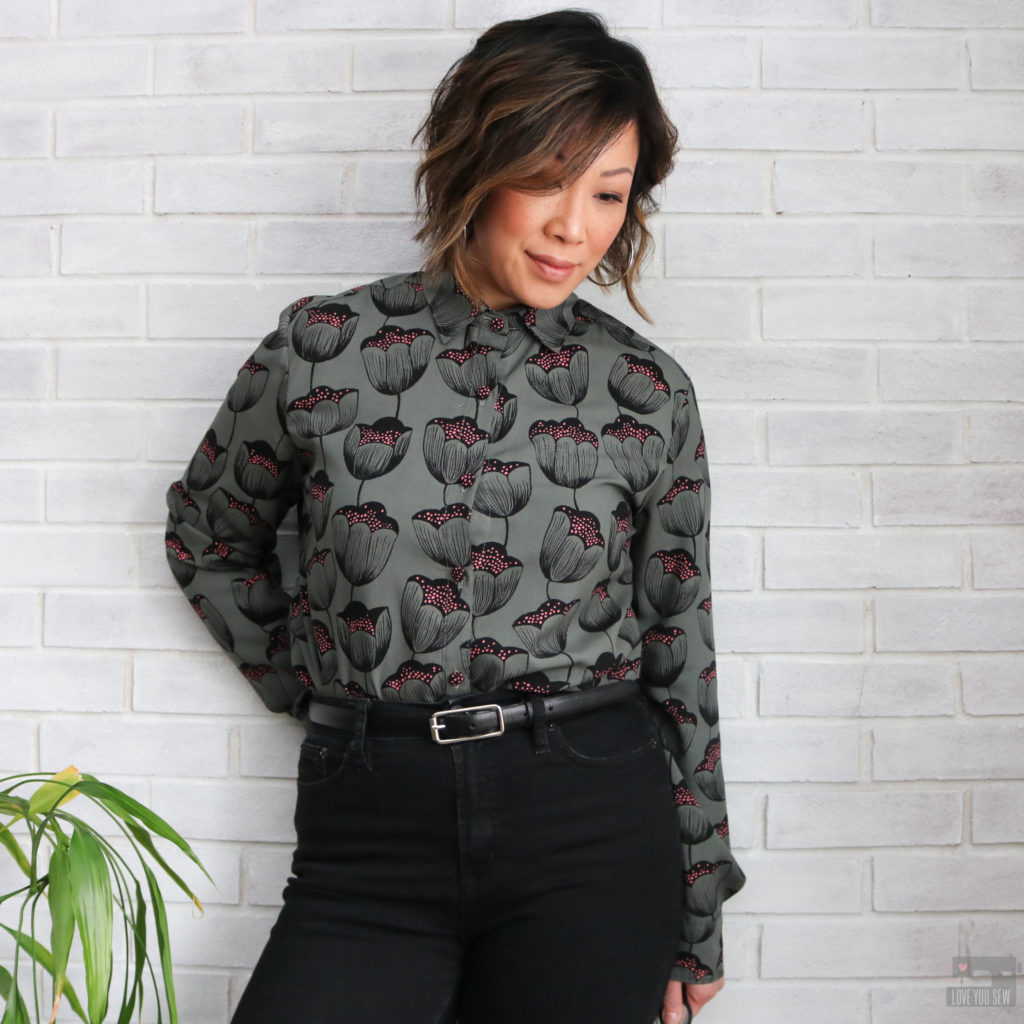
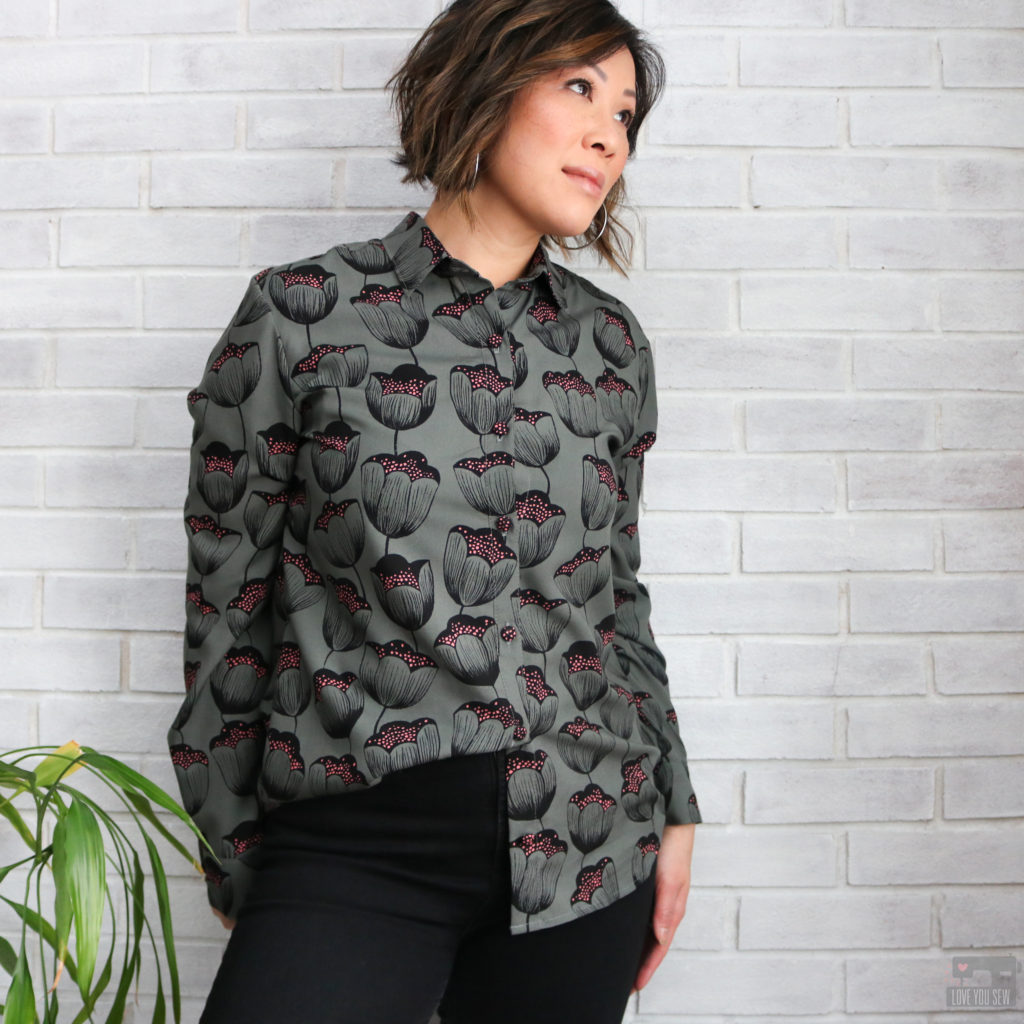
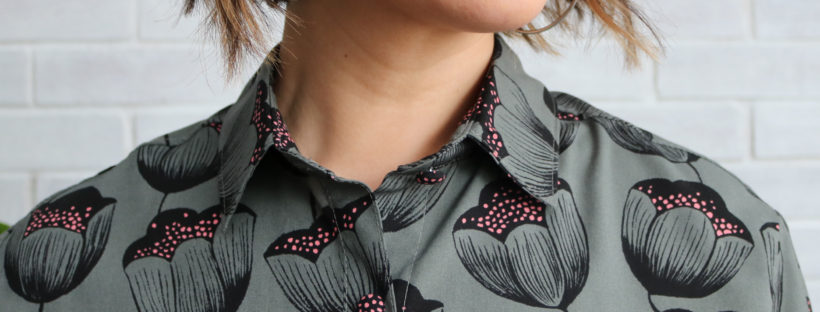
This Cotton + Steel rayon designed by Sarah Watts caught my eye the first time I saw it.  I’m very fond of my dark neutrals and love the extra pops of pink over this moody floral print.  And if you’ve ever felt C+S rayon challis, you know it’s incredibly soft and silky.  The drape is fantastic and makes for beautiful dresses and tops.  I’m a big fan and have quite a bit of their rayon in various prints in my wardrobe.  When this print went on sale at Fabric.com awhile ago (it’s since sold out,) I knew I had to grab 2 1/2 yards of it.  It been sitting in my stash for well over a year and I knew this would make a sharp looking Archer Shirt.

Tips:

  • Use a fine needle – I like a 75/11 or 70/10
  • The fabric can be pretty slippery, so pin more often than you normally would for a quilt cotton
  • Use finer needles like these which leave small holes in your delicate fabrics.

Pattern

I first made the Archer Shirt (pattern by Grainline Studio) in a soft cotton flannel which you can read about here on the Imagine Gnats blog.  It was such a great casual relaxed shirt that I could wear with jeans or leggings.  I wanted the same ease of getting dressed, but knew a rayon Archer would just be so much more sophisticated for the days I need to be dressed up.

Although the thought of making a button-up can seem pretty daunting, there is so much help out there!  Grainline has a full sew-along that has been broken up into very digestible chunks.   since this is also an older pattern, you can find plenty of inspiration on social media with a quick call to our bestie, Google 😉

FIT

I made a size 8 according to my measurements and graded out a size in the hip like a usually have to do with a woven top (my hips measure two sizes larger than my waist.)  There were no other adjustments made. Although, I would shorten the sleeves on a dressier version by 1/2″ to have it look more polished.  (I like the longer sleeve on my flannel version since it helps keep my hards warm in these colder months.)

Interfacing

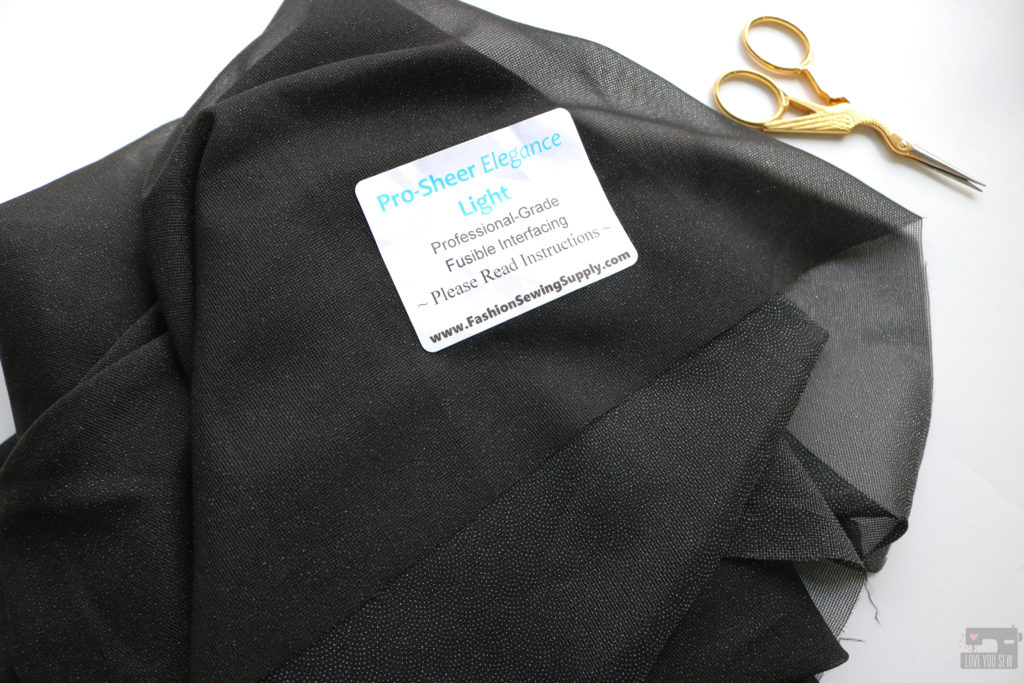
What’s very different for me with this rayon project is the interfacing.  Awhile back, I used Pellon Lightweight Apparel interfacing with this rayon jacket and it has bubbled with use (ugh!)  I have to pretty much re-iron the jacket every time I want to wear it since the bubbling all over the front and back yokes.  What a drag, right???  Thanks to all of you smarties on Instagram, I learned about FashionSewlingSupply.com and purchased a few different garment interfacing like this  ProSheer Elegance in black.  Not only did it fuse well, it still allows for some drape.  I was able to sew the entire shirt while flipping the collar and cuffs inside out…and there was NO bubbling!  I’m completely sold on this stuff and won’t buy my apparel interfacing from the big box stores anymore.  These interfacings definitely costs more, but it’s well worth it to save all of my sewing time!

Based on how lightweight this interfacing is, I used it on both sides of the collar stand.  The patterns calls for it only on the inside, but I wanted to make sure the collar stands up nicely and doesn’t just flop over.  I’m happy with how it turned out and would recommend this if you are using other lightweight fabrics like lawn, voile, crepe de chine, silk and gauze.


Buttons

I love being able to use up my MIL’s button stash as much as I can, but I couldn’t find enough plain black buttons for this shirt.  Fortunately, I bought these 1/2″ buttons years ago, which can be covered in just about any fabric.  I was able to use all the scraps to make these buttons.  It’s such a fun and easy way to add special details to a garments which are uniquely my own.  You can see how I used them on this Felix Dress and how I used them on my Alix Dress to cover up some negative space on the yoke.

How I wear it

After investing all this time making the Archer and in the effort to be more sustainable, I want to make sure I can wear all my makes over-and-over again.  I like following other fashion influencers and RTW companies for inspiration.  Below are three ways to wear a button-up for me.

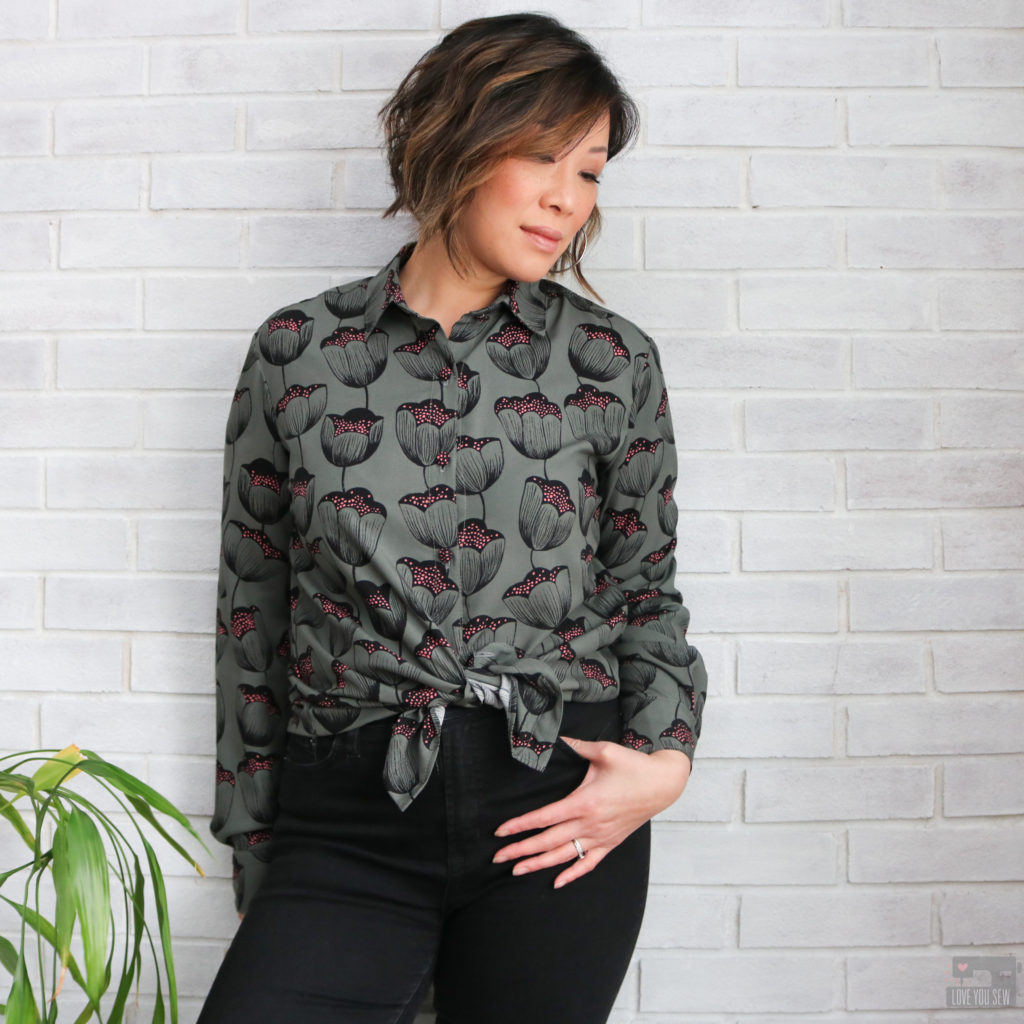
1.  With high-waisted pants on trend, I like being able to tie a button up.  It still can camouflage my mid-section but looks so stylish and playful as well.  Plus, you can conceal a lost button in case that ever happens 😉  I think a flannel button-up tied up over shorts is such a classic summer look too.

2.  For the hipster look, I like to fasten all the buttons up through the collar.  This along with tucking in the shirt with high waisted jeans (as shown) keeps the outfit polished.  Pair it with a sleek belt and I’m ready for drinks with the ladies downtown!

3.  Finally, I have the half-tuck (also known as the French tuck.)  This is definitely another on-trend way to wear any top…whether it be a tee or even a heavy sweater.  I like how it’s more casual and breaks up the hem line for more visual interest.

Which way would you wear your #MeMade button-up shirt?  I hope you enjoyed this post and join in on #ShirtMonth whether it be this year or next!


Happy Sewing!

Cristy


This post may contain affiliate links for which I may receive a small commission only if you make a purchase.  Thanks for support, friends!

Art Gallery Rayon :: Cookie Blouson Jacket

I’m kicking things off with Art Gallery Fabric‘s Rayon Blog Hop today!  Rayon is their newest substrate and I can’t even tell you how much I luuuurve it.  I was lucky enough to get an advanced preview when April Rhodes release her Heritage Fabrics and I just am obsessed with the drape and feel of this fabric.  You can read more about it here.

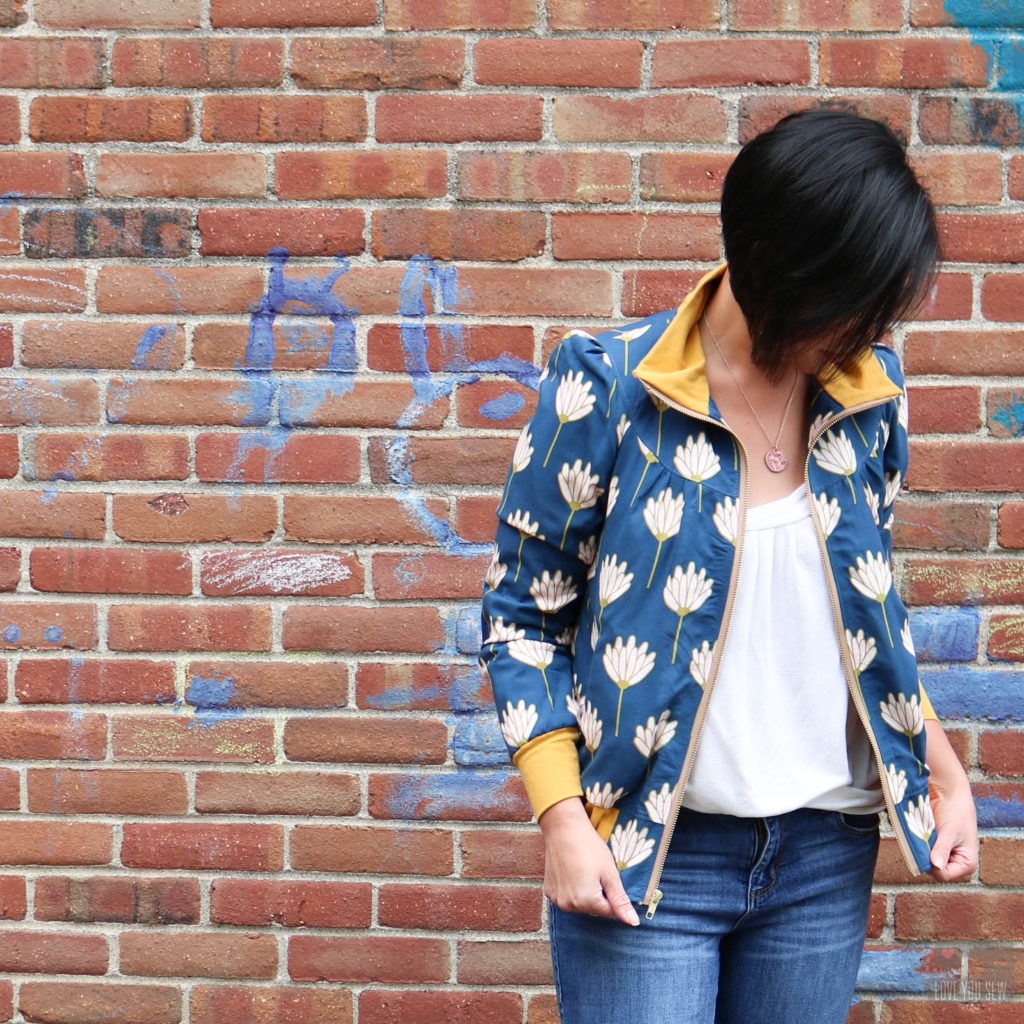
When most people hear “Rayon,” they think of summery dresses or slippery nightgowns.  But in this blog hop, we were tasked to come up with other ways to use the fabric.  As fall was approaching and while I was looking through the fashion blogs, the maker light bulb went off when I started to see bomber jackets.  The 90s fashion trends are back (some I’d rather not relive…) and I thought a fun bomber made of rayon would be perfect to ride the satin and army green trends showing up on the streets right now.  Check out my Pinterest Board here to see my inspirations.

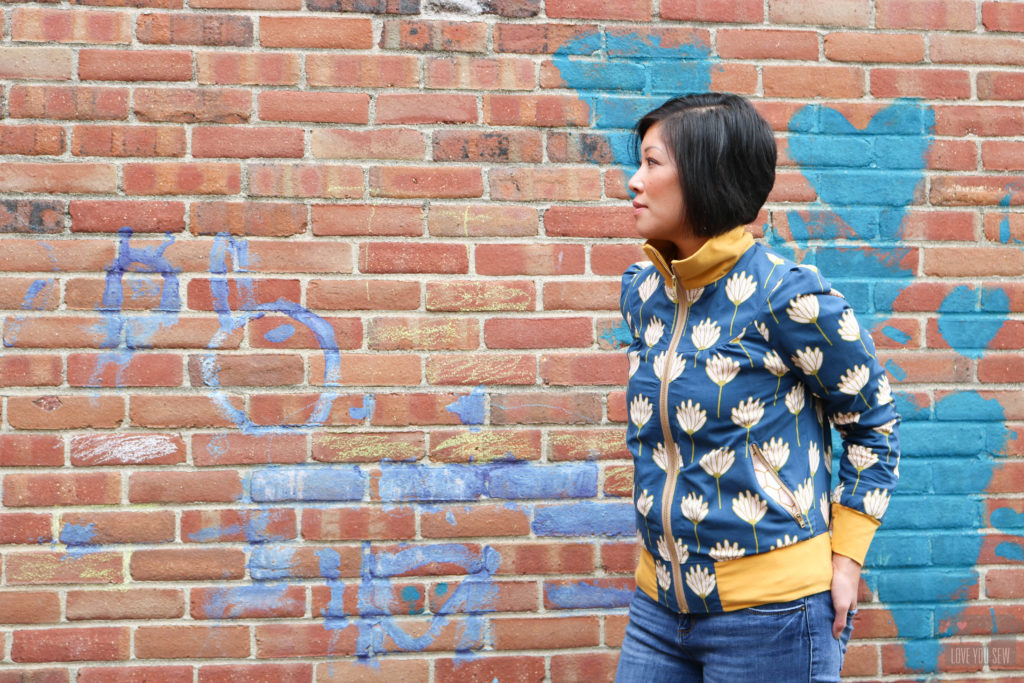
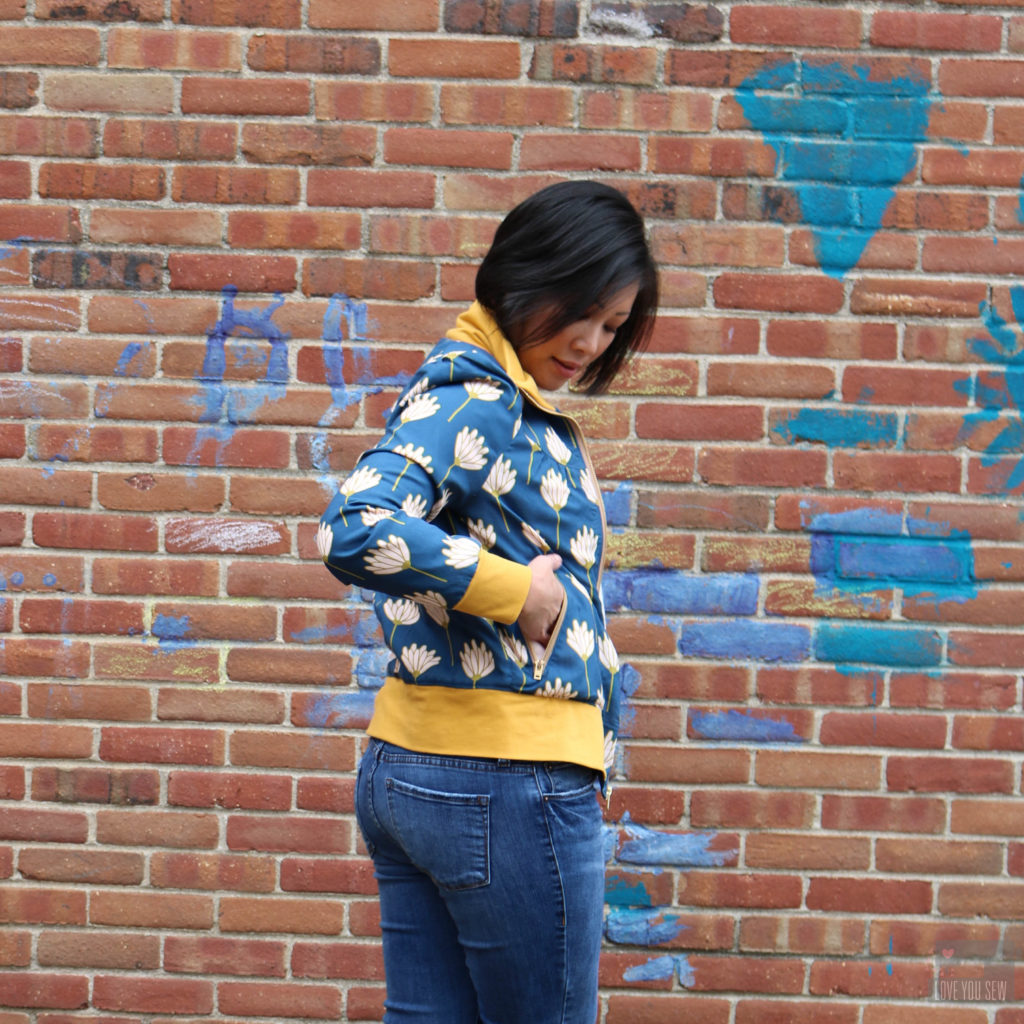
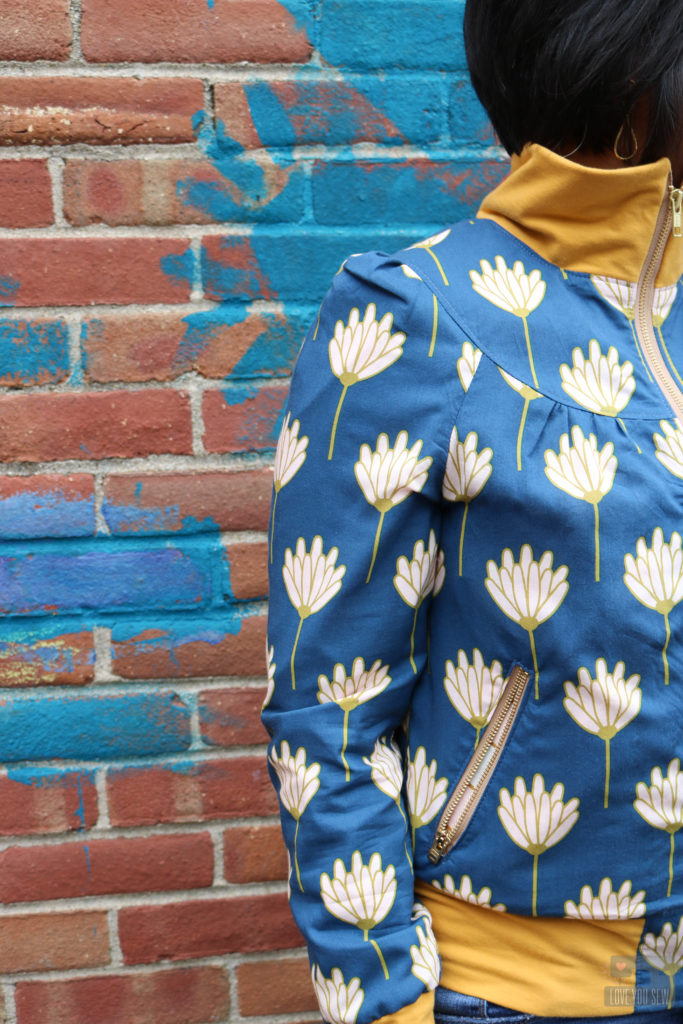
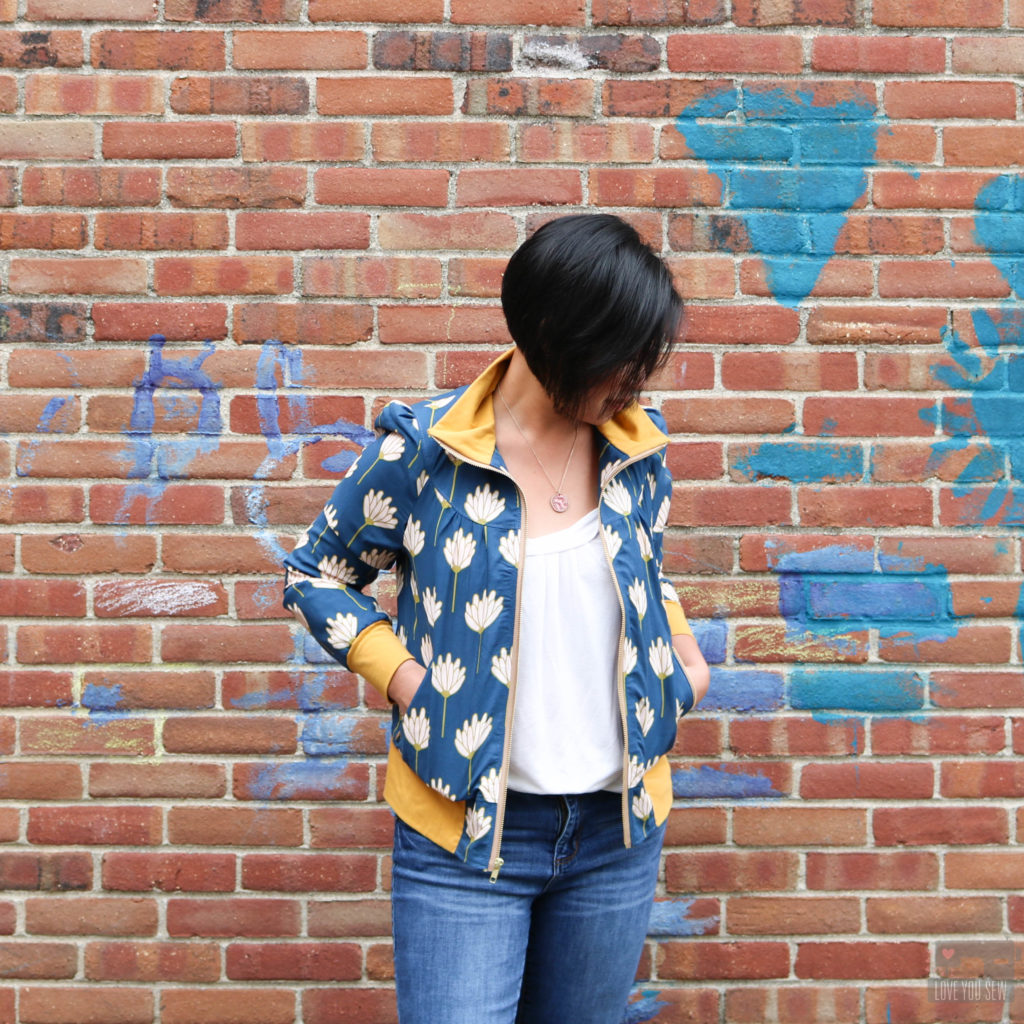
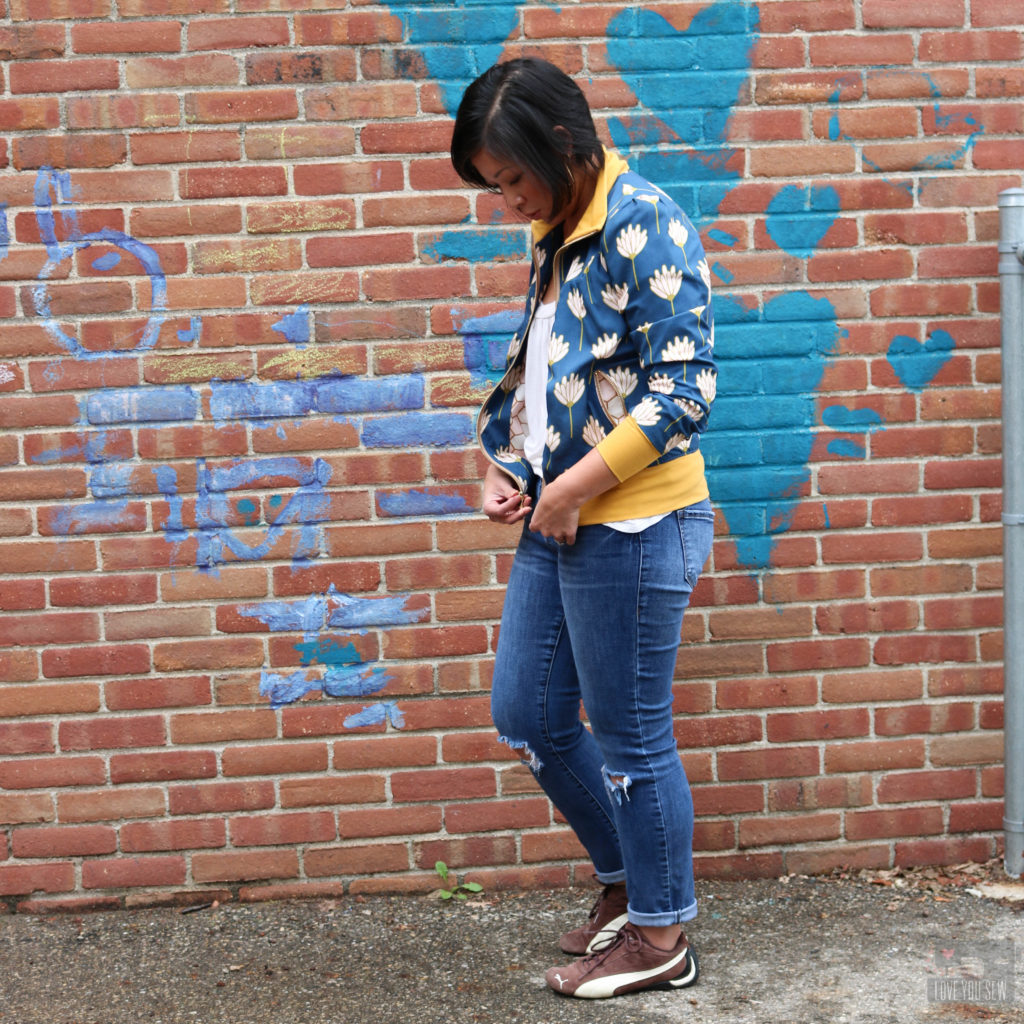
I’ve had my eye on the Cookie Blouson by Waffle Patterns for awhile now.  The design is a great feminine take  on a track jacket with the gathered sleeves and gathered body around the yokes.  Even though it’s a track style versus a bomber, I knew this pattern would give me the same feel…The only difference  is the collar.

I was in-between sizes per the measurements, but after reviewing the finished measurements, I decided to size down for a more fitted look.  With the fabric and bold pattern, this jacket would look great in heels as much as in sneakers 🙂 I wanted to make sure it would be a great jacket to wear indoors and out.

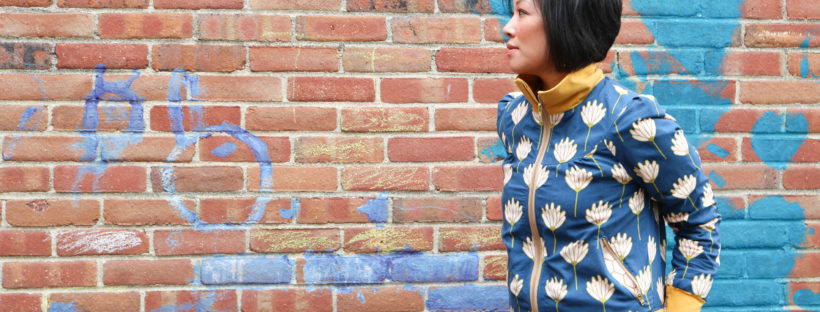
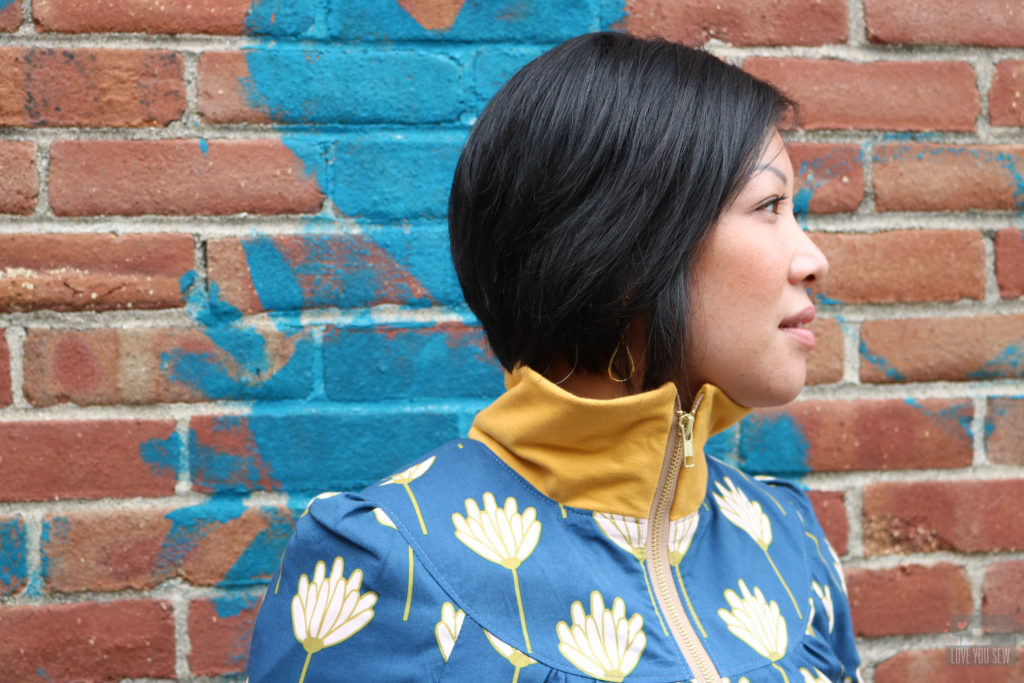
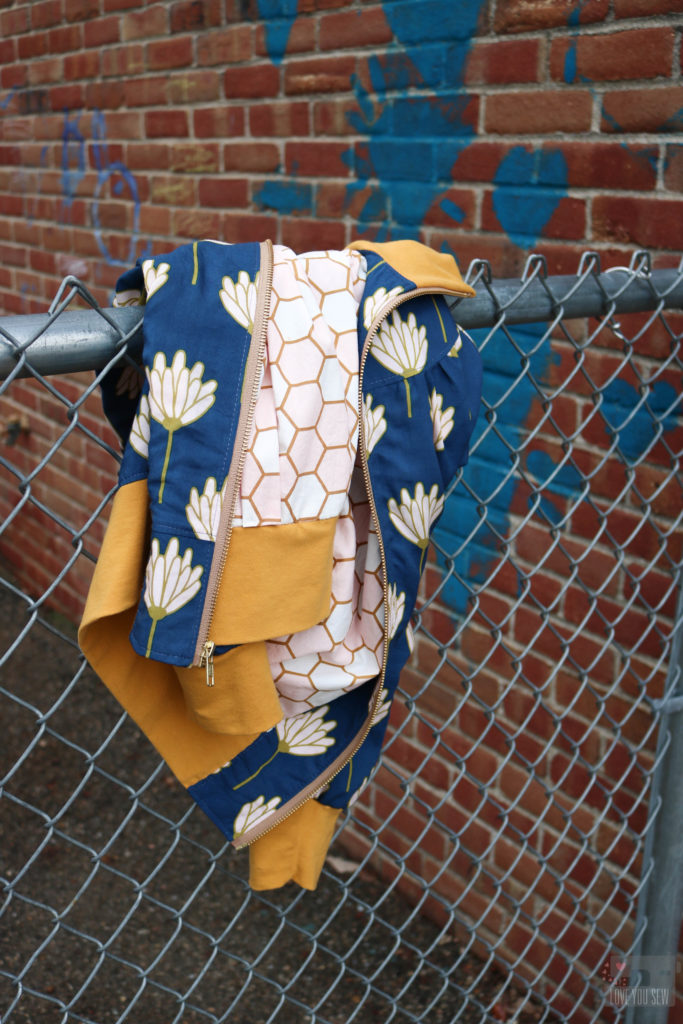
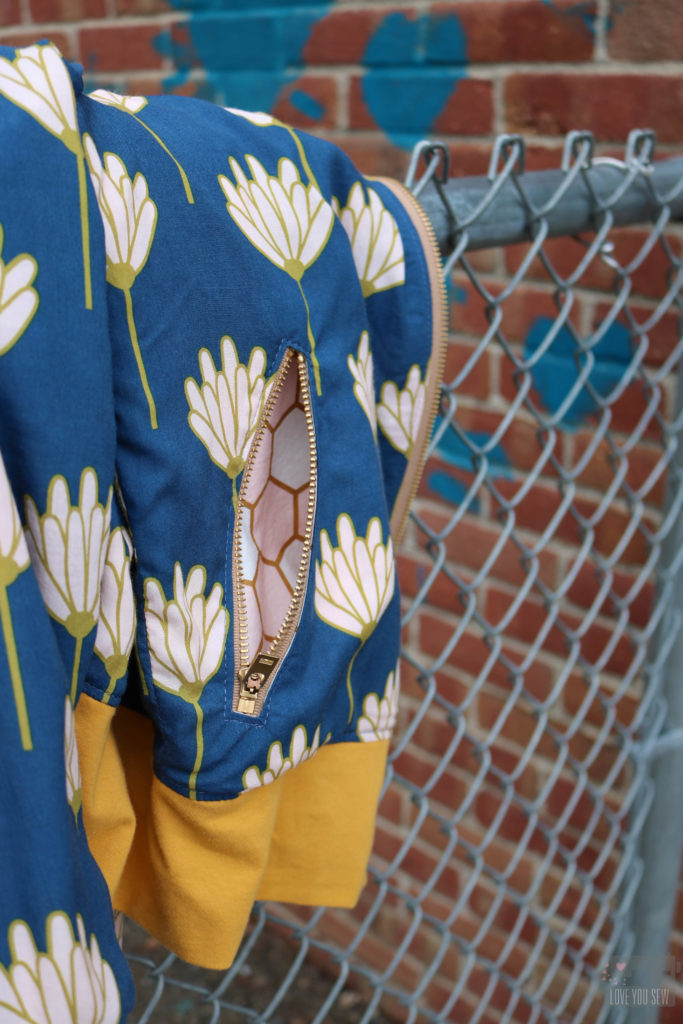
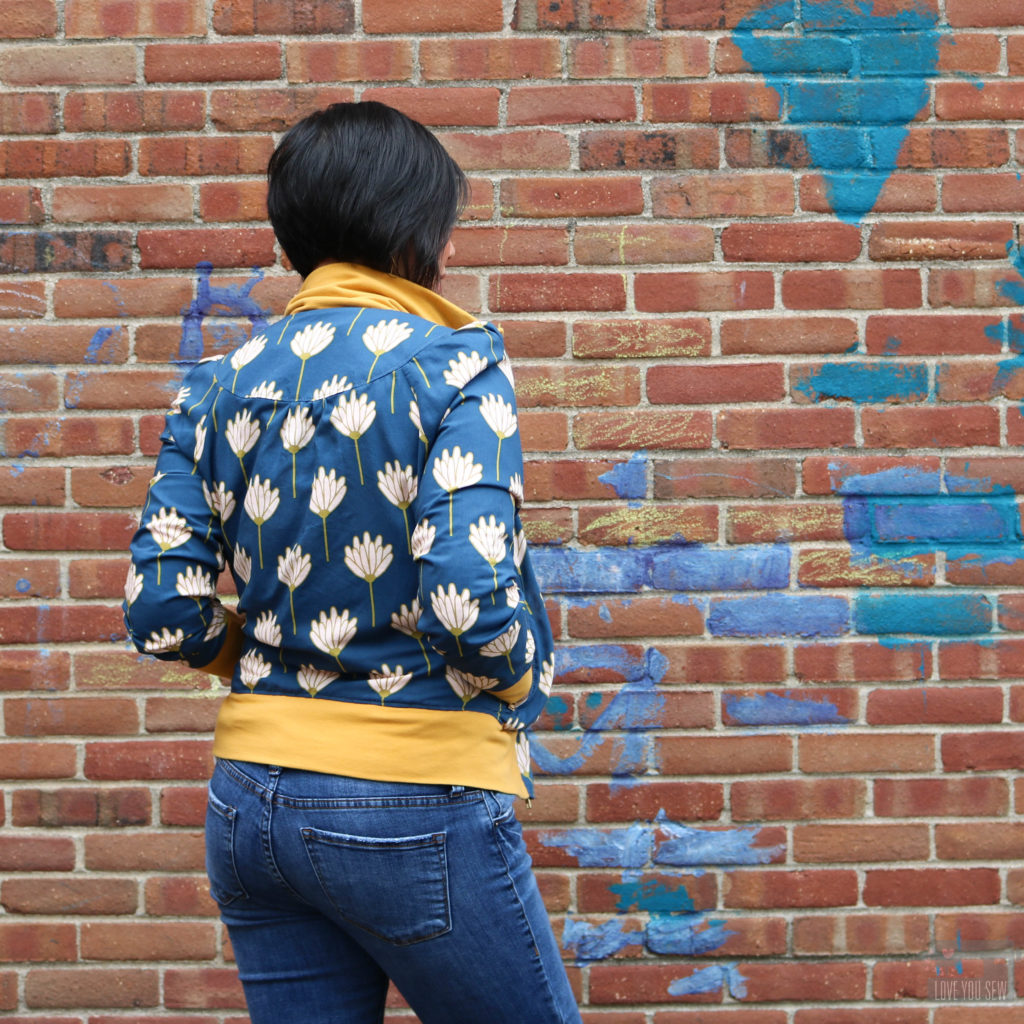
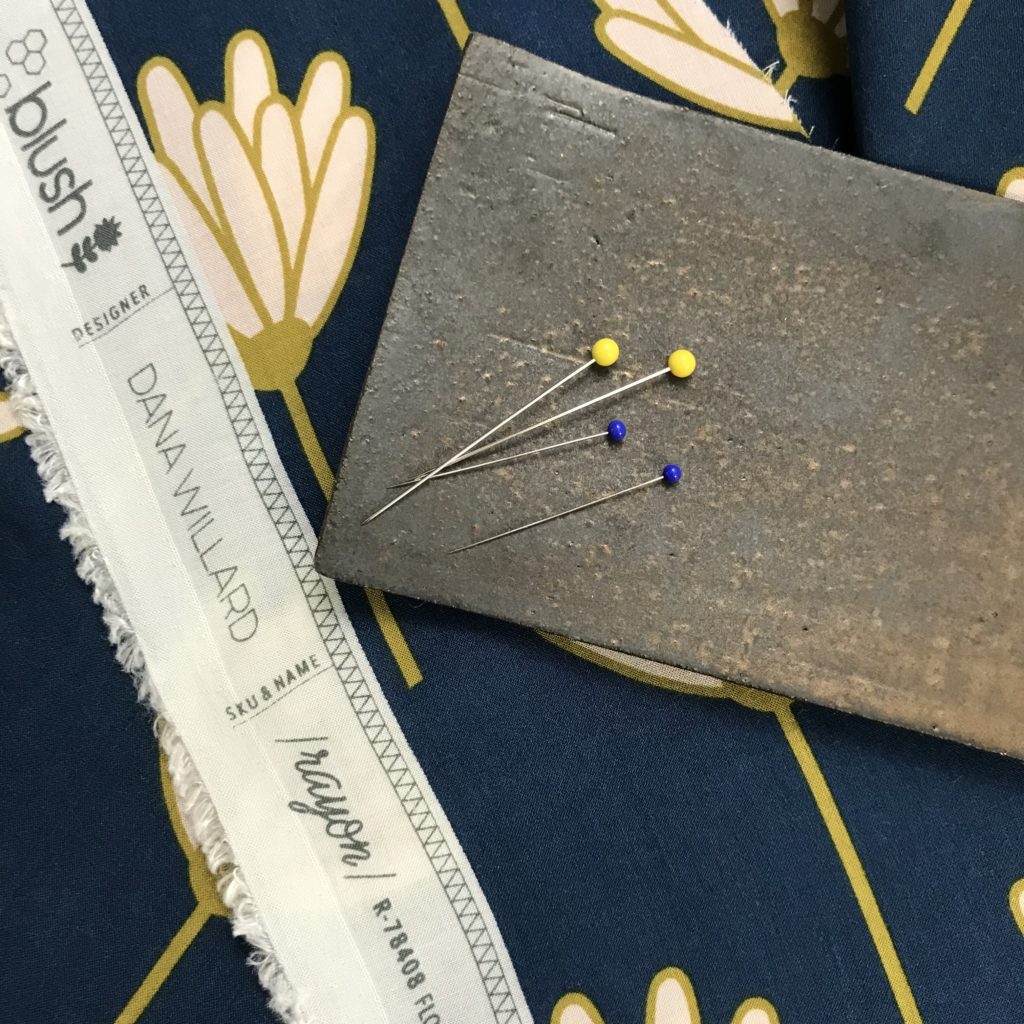
For the right statement fabric, I chose Floret Sunkissed from the Blush fabrics collection by Dana Willard as the shell.  For the interior, I used Hex Rose from the same collection, but in quilting cotton.  AGF Solid Knit in Sahara Sun was a great complementary color to really make this jacket pop and add some fun!

While working through the jacket, it was very important to reinforce the high stress areas since rayon is so delicate.  I used Pellon 906F interfacing around all the metal zippers (due to their extra weight) and even on the exterior yokes to provide some additional structure as well.

These zipper pockets are such a great detail.  However, the pattern called for a 5″ zipper opening.  After taking 1/2″ allowance away for the zipper head and stopper, I would be left with a 4.5″ opening….which is pretty tight (and I have small hands!)  I increased the opening to 6″ for a little more room to maneuver because I HAVE to use pockets if they are there.

With the track collar, I wanted it to stand up when zipped, but it also needed to handle the weight of the metal zipper.  So I doubled up the layers of the Solid Knit jersey.  Not only does the collar stand up (mission accomplished,) but it keeps my neck extra warm!

For the construction of this jacket, I used Polyester thread throughout for the strength.  A jacket is going to experience a good bit of wear and this thread allows for a bit more give and movement.  However, I used matching Sulky Rayon Thread for all of the top-stitching to match the sheen of the fabric.  I’m pretty hooked on the look of rayon thread….it’s so beautiful!

The Cookie Blouson pattern itself, was not too difficult.  Even with the zippers, I would rate this as advanced beginner.  But then came the lining…   It was a free add-on via a few blog posts by Waffle Patterns.  The pattern designer’s first language is not English, so the translations were a bit rough.   I was pretty frustrated at some points, but made it work.  I would consider the lining at an intermediate level because you are essentially drafting your own pattern pieces.  If I would’ve known this beforehand, I probably would’ve skipped the pattern altogether because I needed a lining with a rayon shell.  But, of course, I love the final product 🙂


I’ve made a handful of Rayon garments, and have a few tips I’d like to share:

  • For accurate cuts, I cut on the floor for an even cutting surface…especially if you are pattern matching.  Any fabric hanging off the edge of a cutting table can pull and distort your cut.
  • Don’t be shy with fabric weights.  This points to the slippery and shifty nature of rayon.  You want an even and accurate cut.  Iron and smooth out your fabric with your fabric aligned and then set the weights down.
  • A small rotary cutter is great to cut out patterns because scissors can cause movement and shifts in your fabric as you cut.  (This doesn’t matter as much if you aren’t pattern matching.)
  • I use ultra fine pins (with the blue heads, shown above) for construction.  The traditional quilting pins (with the yellow heads) are a bit larger and can cause pulls in the fabric.  With the slippery rayon, I also use a lot more pins that I would with cotton – probably twice as many to keep my fabrics aligned together.

Project Summary:

  • Exterior Shell Fabric:  Floret Sunkissed Rayon by Dana Willard for Art Gallery Fabrics
  • Lining Fabric: Hex Rose Quilting Cotton by Dana Willard for Art Gallery Fabrics
  • Accent Knit: Sahara Sun Solid Knit by Art Gallery Fabrics
  • Pattern:  Cookie Blouson by Waffle Patterns
  • Piecing Thread:  Gutermann Polyester
  • Top-Stitching Thread: Sulky Rayon 50 wt
  • Zippers: YKK Brass separating and jeans zippers in Camel by Wawak Sewing Supplies

Don’t forget to stick around all this AND next week for the rest of the #AGFrayonbloghop.  I’m so excited to check out all of the projects alongside you!

Monday, October 9 – Cristy @loveyousew_ (you are here!)

Tuesday, October 10– Nicole @modernhandcraft

Wednesday, October 11 – Sarah @sariditty

Thursday, October 12 – Jesy @needle_ink_and_thread

Friday, October 13 – Danyella @madesewmodern

Monday, October 16 – Nichole @wildboho

Tuesday, October 17 – Cynthia @cnytz51

Wednesday, October 18 – Vicki @orchidowlquilts

Thursday, October 19 – Amanda @pinkmandarinhandmade

Friday, October 20 – Jenn @jennrossotti


I hope you have found some inspiration or just enjoy some fabric eye-candy!  Do you have a rayon project lined up or on the wishlist?  I’d love to hear what you would make.


Happy Sewing Friends!

Cristy


***This post was sponsored by Art Gallery Fabrics.  While the fabric was provided for the post, the ideas, execution and post are all my own work and words.  Please also note there are affiliate links which help run this blog.  Thanks for your support!