We are in the thick of the holiday season and I thought I did some pretty good seasonal planning. I made gifts for my nieces and nephew early since I went to visit them in November and even got my fancy holiday dress finished by my husband’s birthday a few weeks ago. But then I shared my Tiny Sophia Bag with all of you on Instagram and my feed (DMs too!) filled up with requests for this pattern. You caught me in a moment of weakness because I said, “Sure, why not?! This is probably the time when you would like this pattern the most!” So why not add another “thing” to the list…famous last words. Lol!
You can purchase the Tiny Sophia Bag here.
If you have been following my stories on IG, I shared these itty bitty purses by Jaquemus which I’ve been seeing all over the fashion reports. Although completely useless as an actual purse (and WAY too expensive *eyeroll*) I still wanted one…but of course, in my own DIY way! Spoiler alert – my way is MUCH more cost effective.
Over the summer, I toyed around with some paper templates to make a tiny bag for fun, but nothing really came out of it. Then a visit back east to see my family made me really notice the wireless ear pods my brother was wearing. Shortly after that, Lizzo came out on the red carpet with a tiny Valentino bag! Combine these events and it made me wonder if the pods had a carrying case…aaaand if that case could also be a purse!
Namesake
As I was developing this pattern and making all of the prototypes, I knew this bag would be named after my niece, Sophia. (All of my bag patterns are named after one of my nieces.) Miss Sophia is a petite lil’ lady and the absolute CUTEST…just like this bag! She is always game for a little fun and adventure, which makes her a great travel companion. Since her dad was also part of the inspiration, it’s only fitting that this bag is named after her.
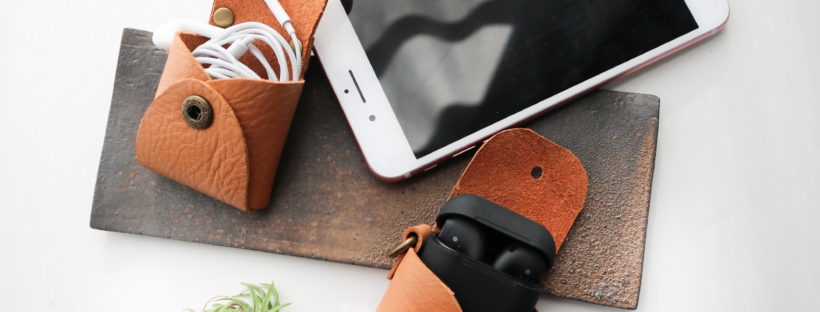
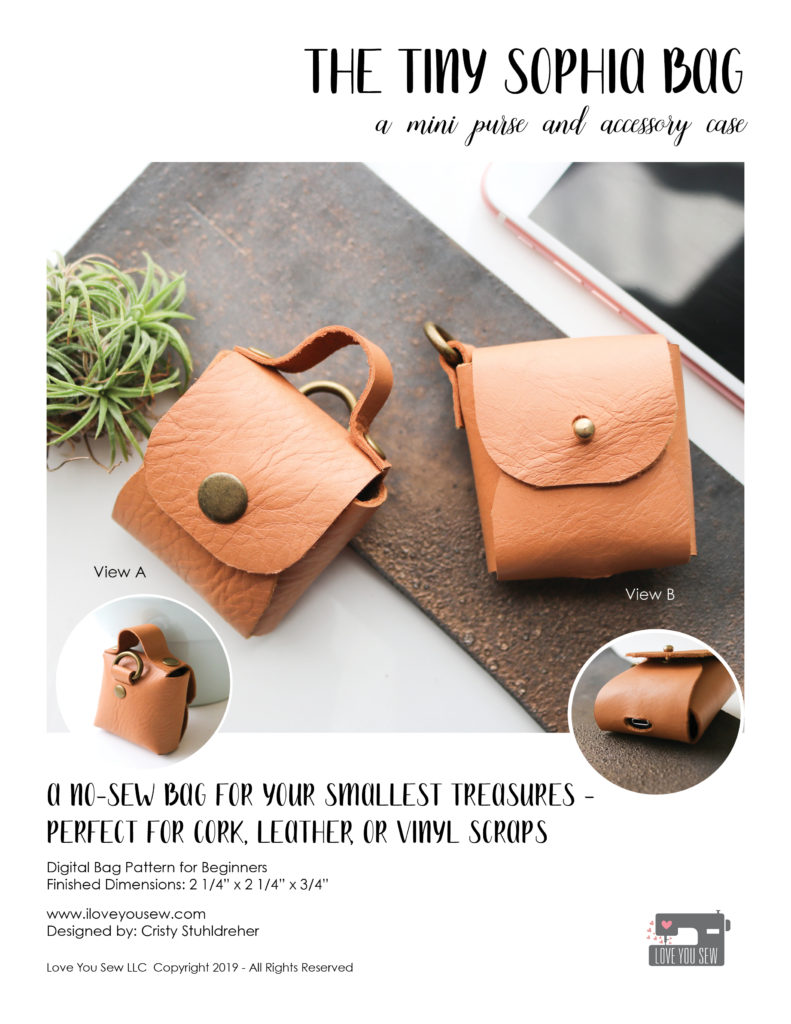
View B
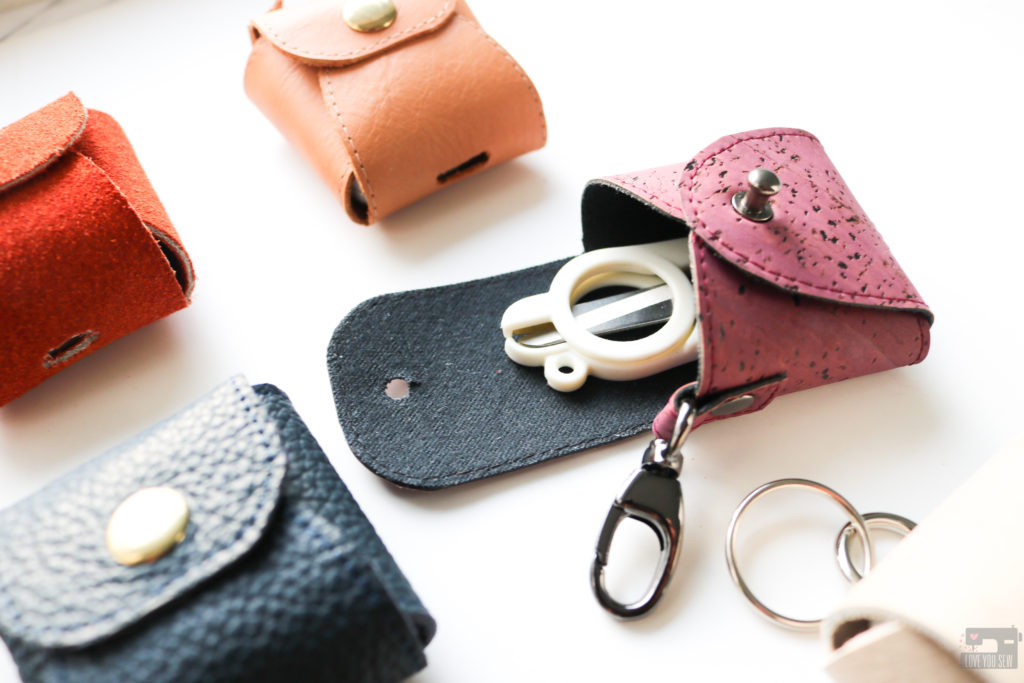
Features
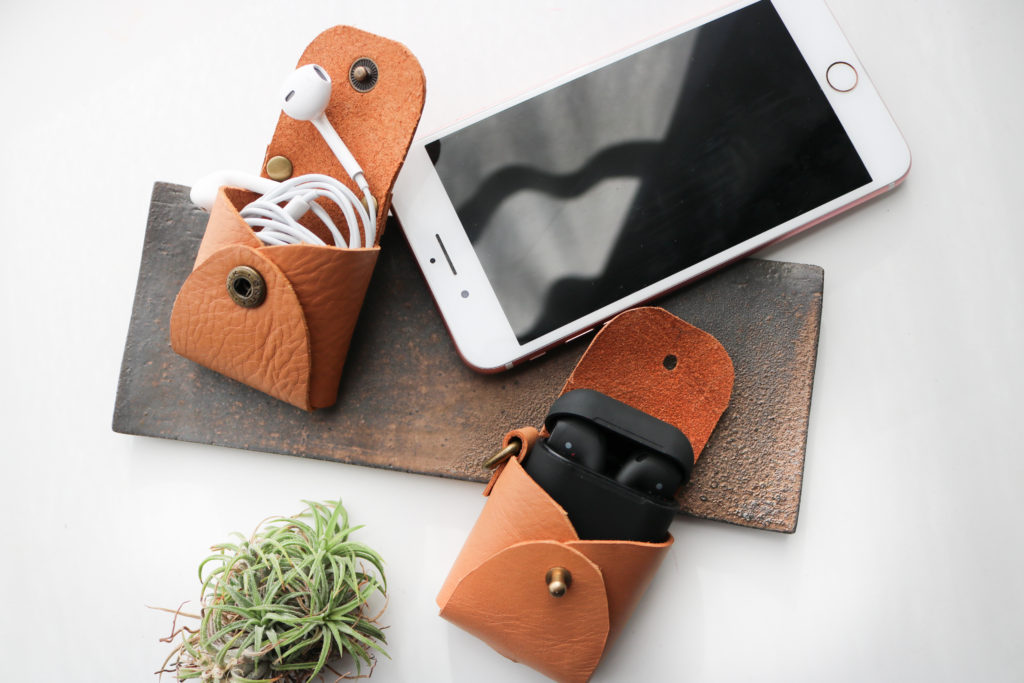
I know there are a ton of aftermarket pod cases out there and I thought a leather one would be chic and beautiful. After a few hours (with my husband and boys at basketball practice,) I was able to draft a headphone case AND a bag by switching up the options. This is no-sew pattern with two different views and the features can certainly be mixed and matched!
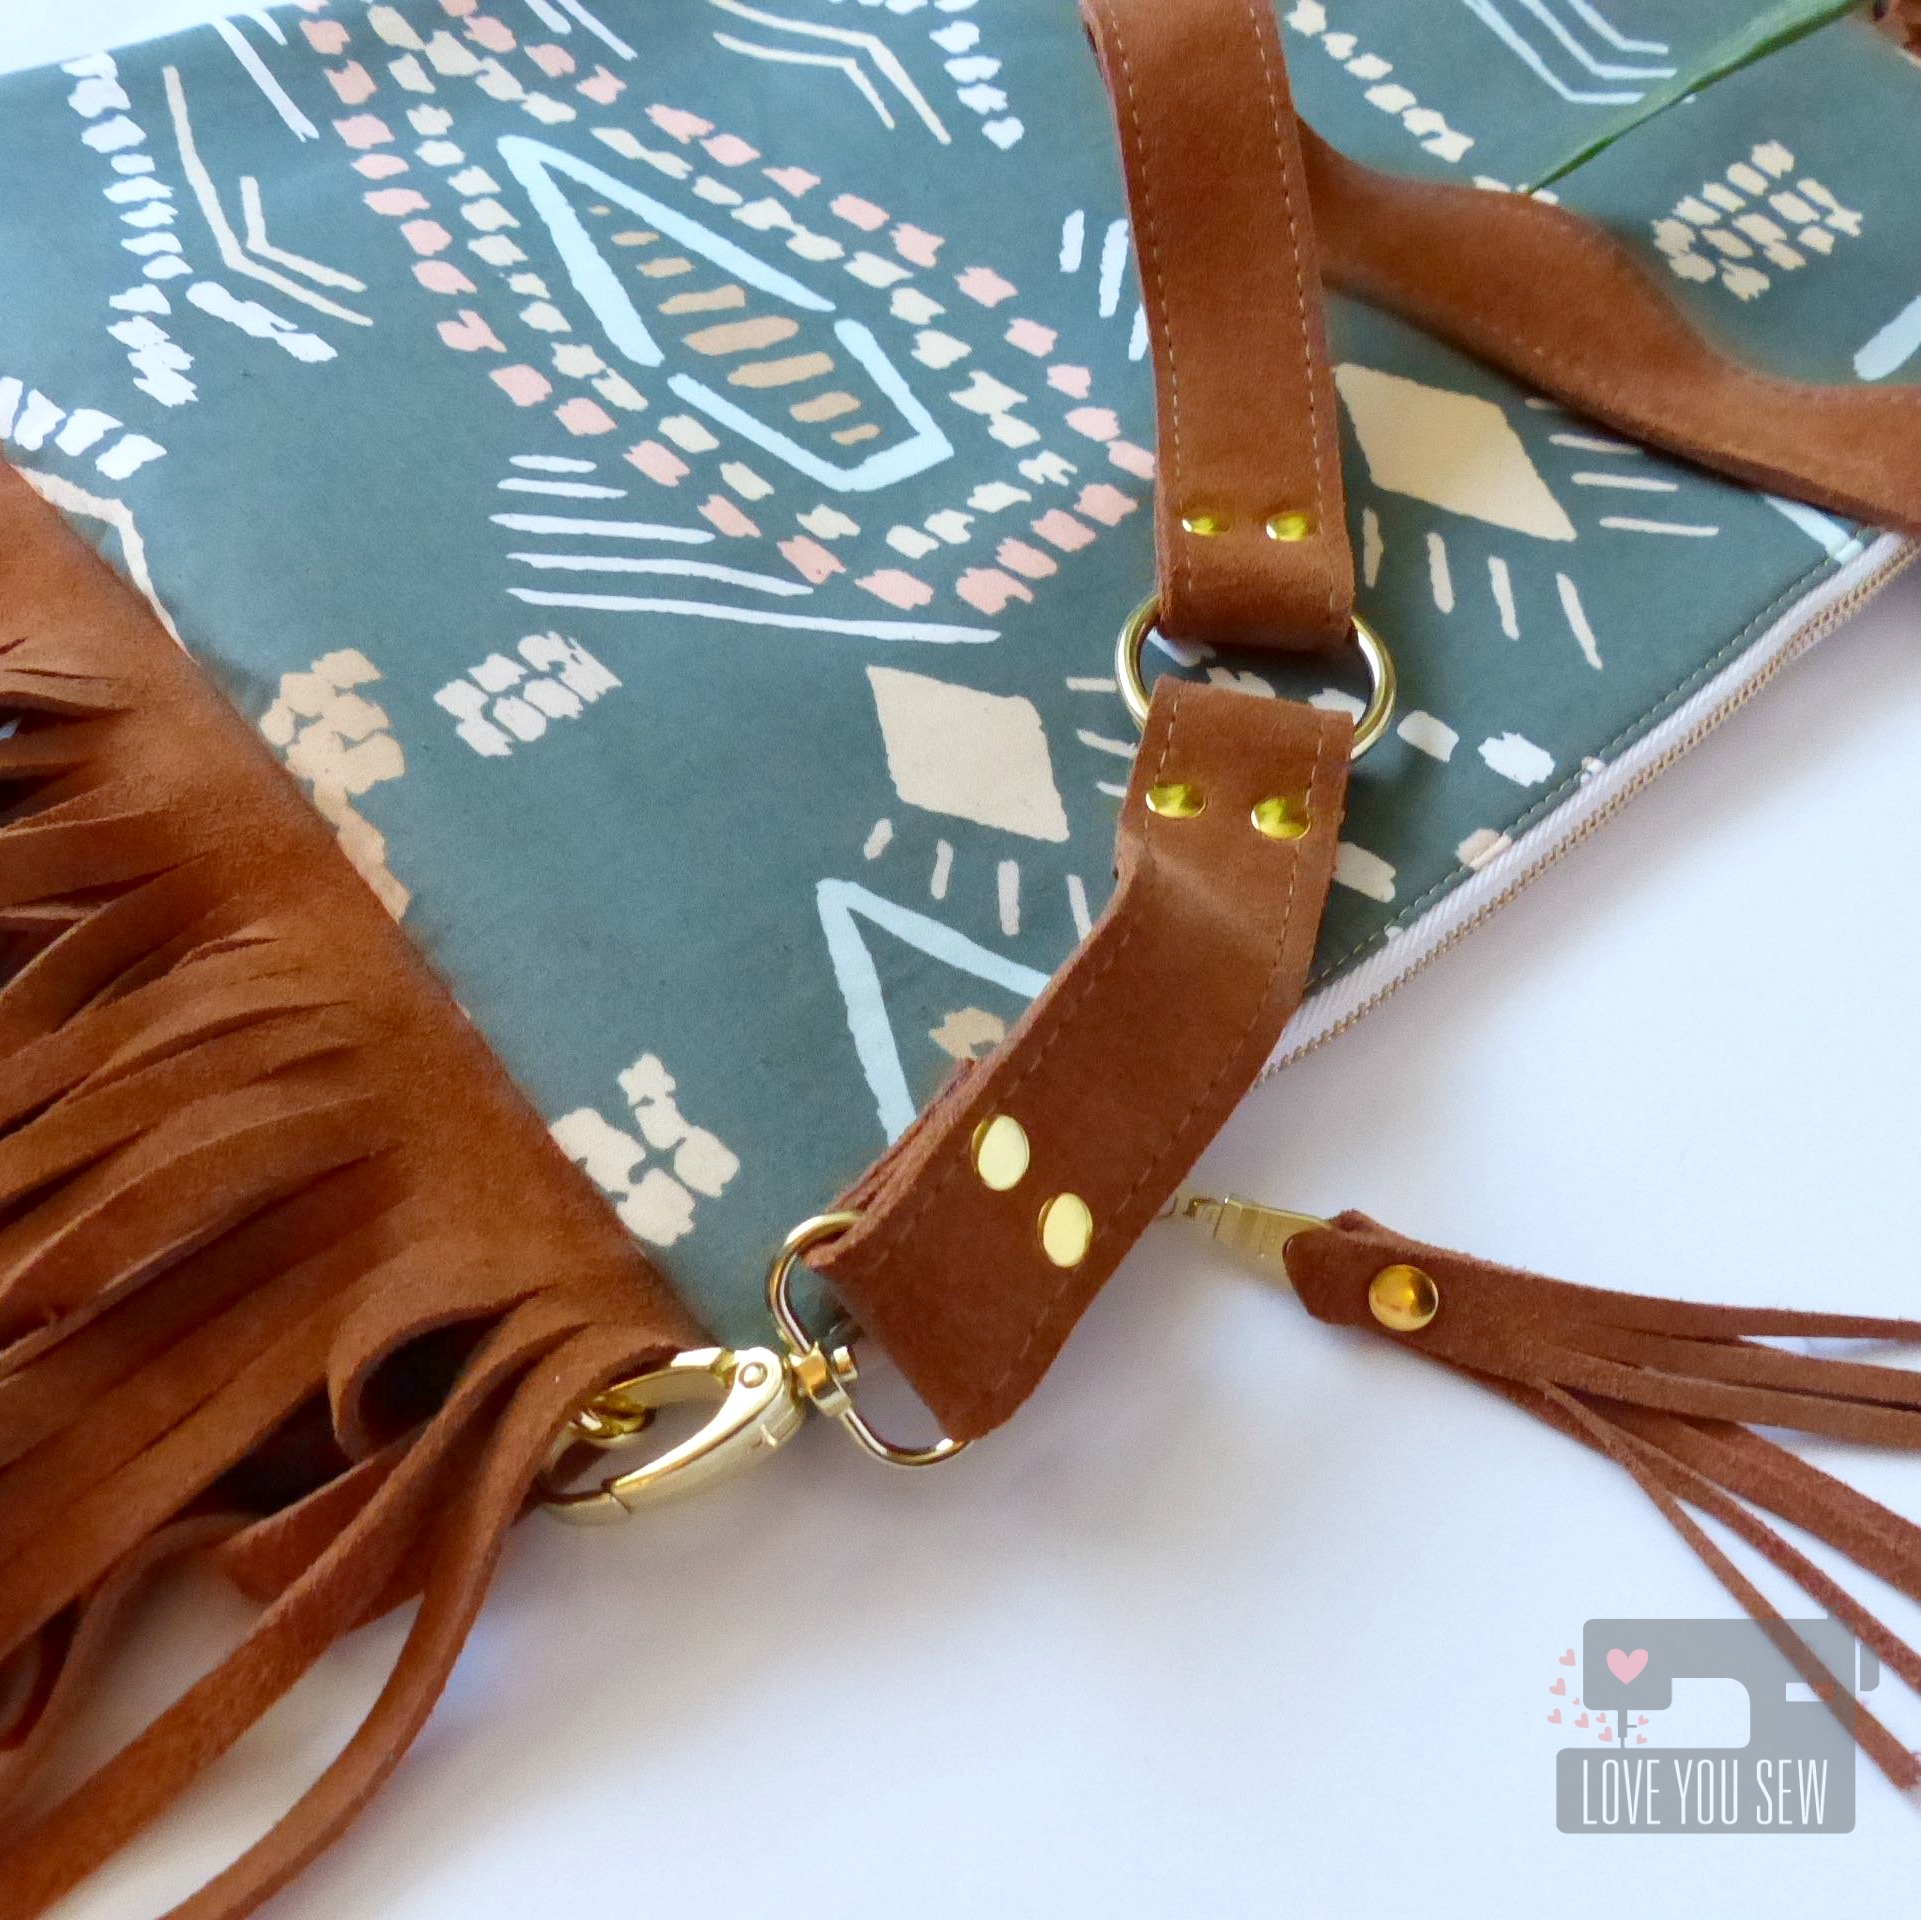
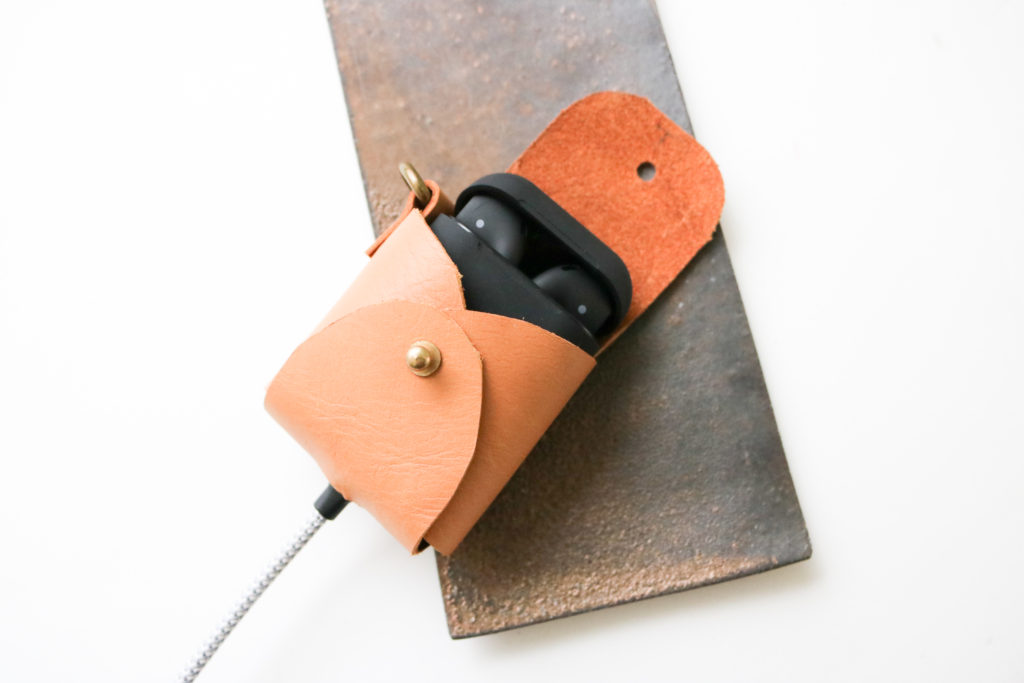
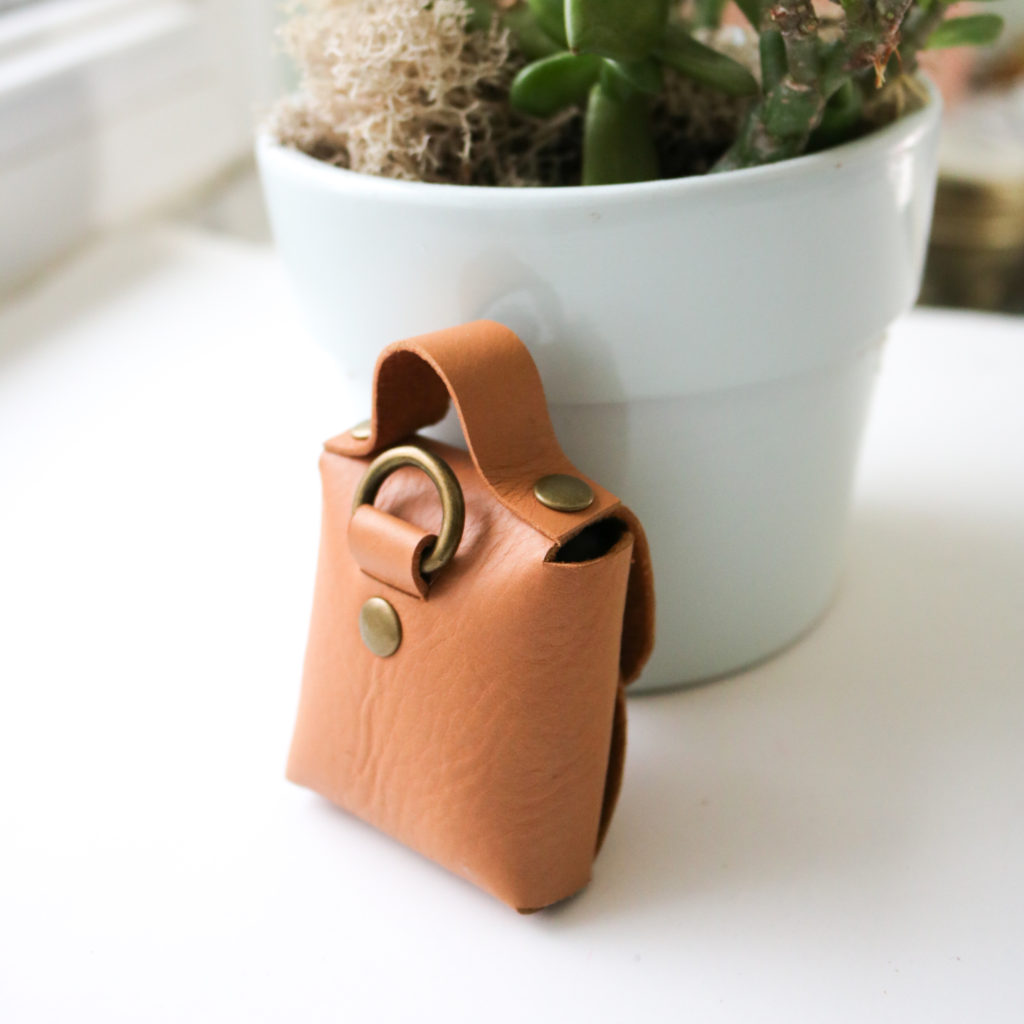
- View A “Mini Purse” – This has a strap on the top flap with a D-ring on the back and a snap closure.
- View B “Accessory Case” – This has a bottom slot opening for a charger and the D-ring is set on the side. A button stud is used as the closure.
View A
Hardware
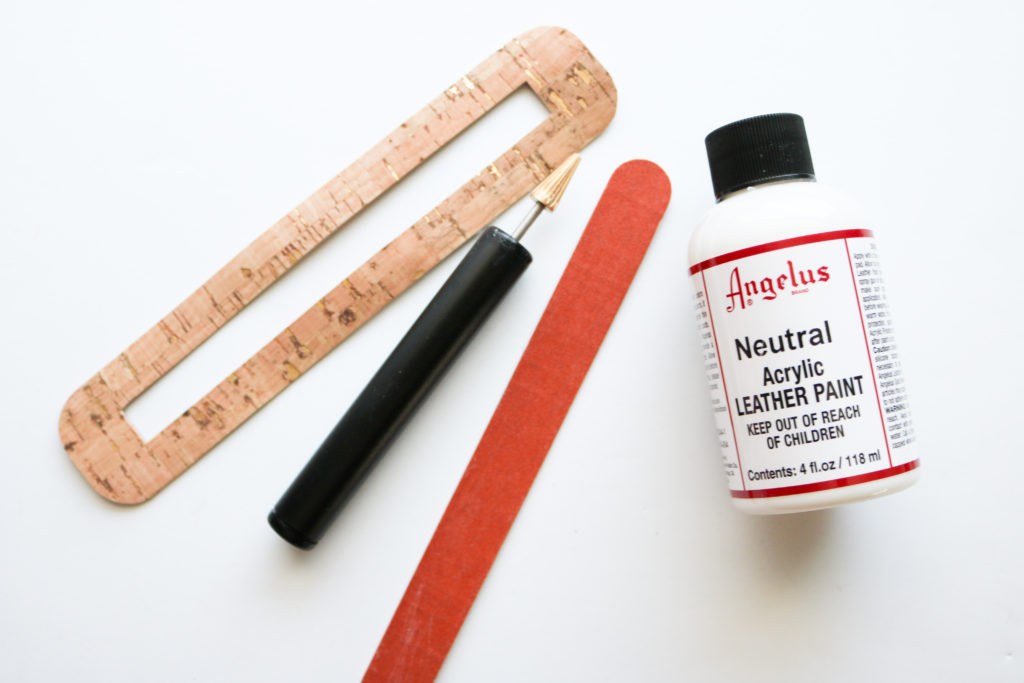
The Tiny Sophia Bag requires rivet and snap or button stud installation. This is assumed in the pattern (and I promise I will add more posts about how I install.) I want to let you know my favorite suppliers:
- Rivets: For a long time, I set these just using just a hammer and anvil. You can find these tools in my shop, here. Emmaline Bags carries a wide variety of sixes in different finishes. (Pictured above are the “small” rivets in Antique brass.)
- Snaps: I’m a big fan of double-cap spring snaps from Gold Star Tool. These are the same ones I used for my Kelly Anorak which you can find here. (On the cover photo, I have a size 20 ligne brass snap.)
- Button Studs (screw on): These are THE best, since there are no special setting tools needed…just a screwdriver. I grab most of mine from Amazon and I like the Tandy ones (when I’m in a pinch for timing since there is a store nearby.) I think the 6mm/7mm head ones are a good proportion for this small bag. (The 8mm head studs are used in my Kelly Waist Bag pattern)
New SVG Files
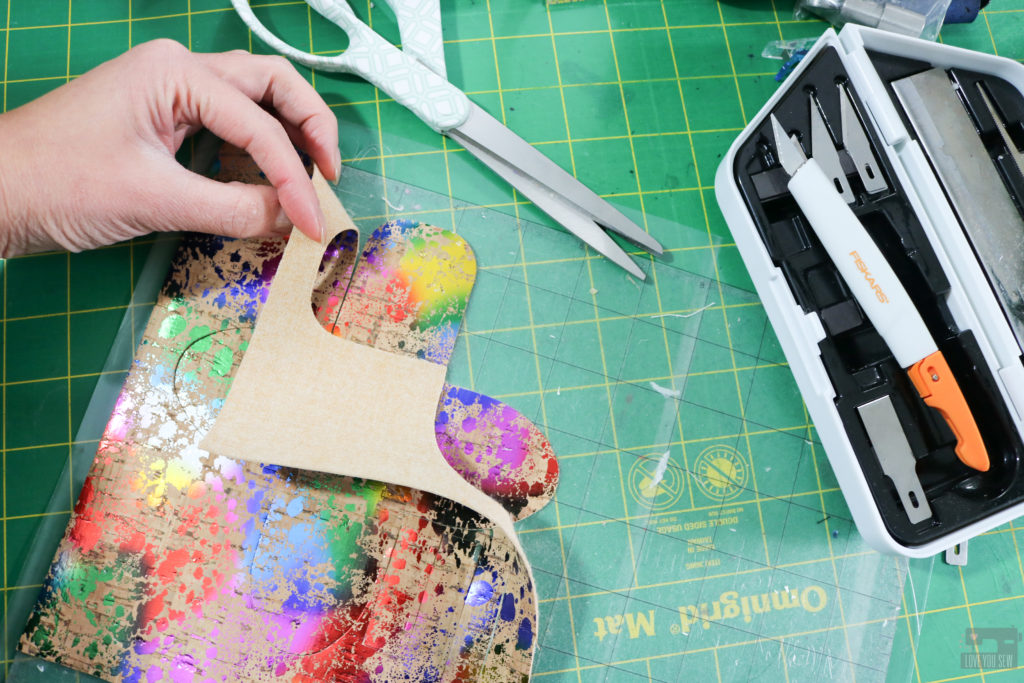
A big addition to this pattern release is the inclusion of SVG (scalable vector graphic) files which you can use with most electronic cutting machines. I’ve always imported images and traced my own files, but have never created ones from Illustrator before. So, I was pleasantly surprised to see how this pattern cut on my machine! I have an old Silhouette Cameo with a straight knife and the cork cut so well on setting #7. It did not like leather though…I’m hoping the rotary blades do much better. There are three files for the different views and an extra one to combine all of the features together. Please let me know what you think about this new feature!
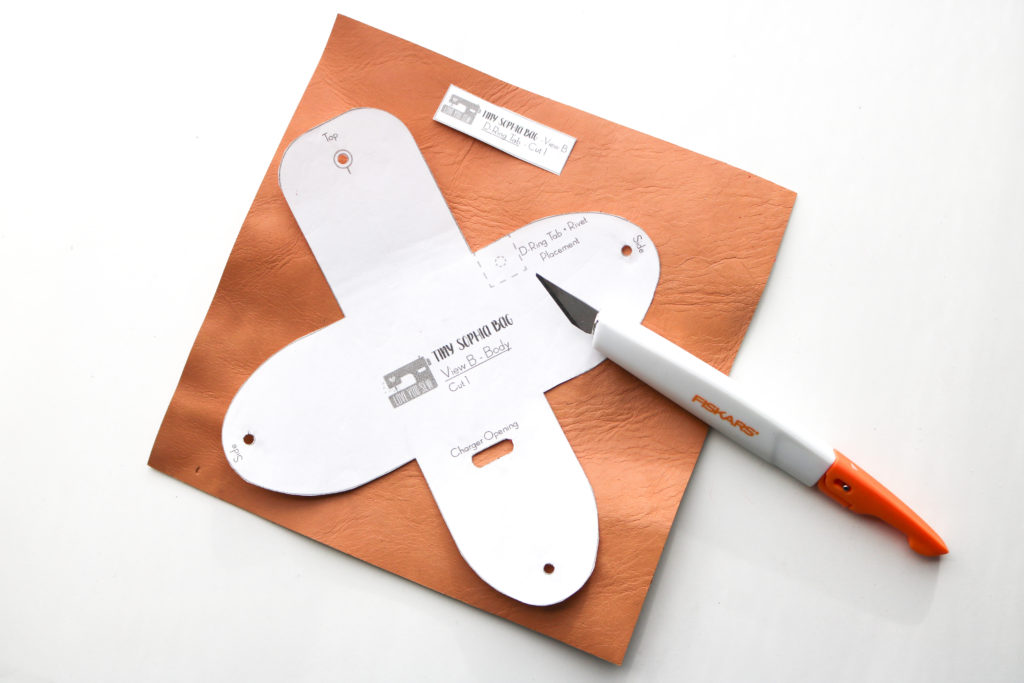
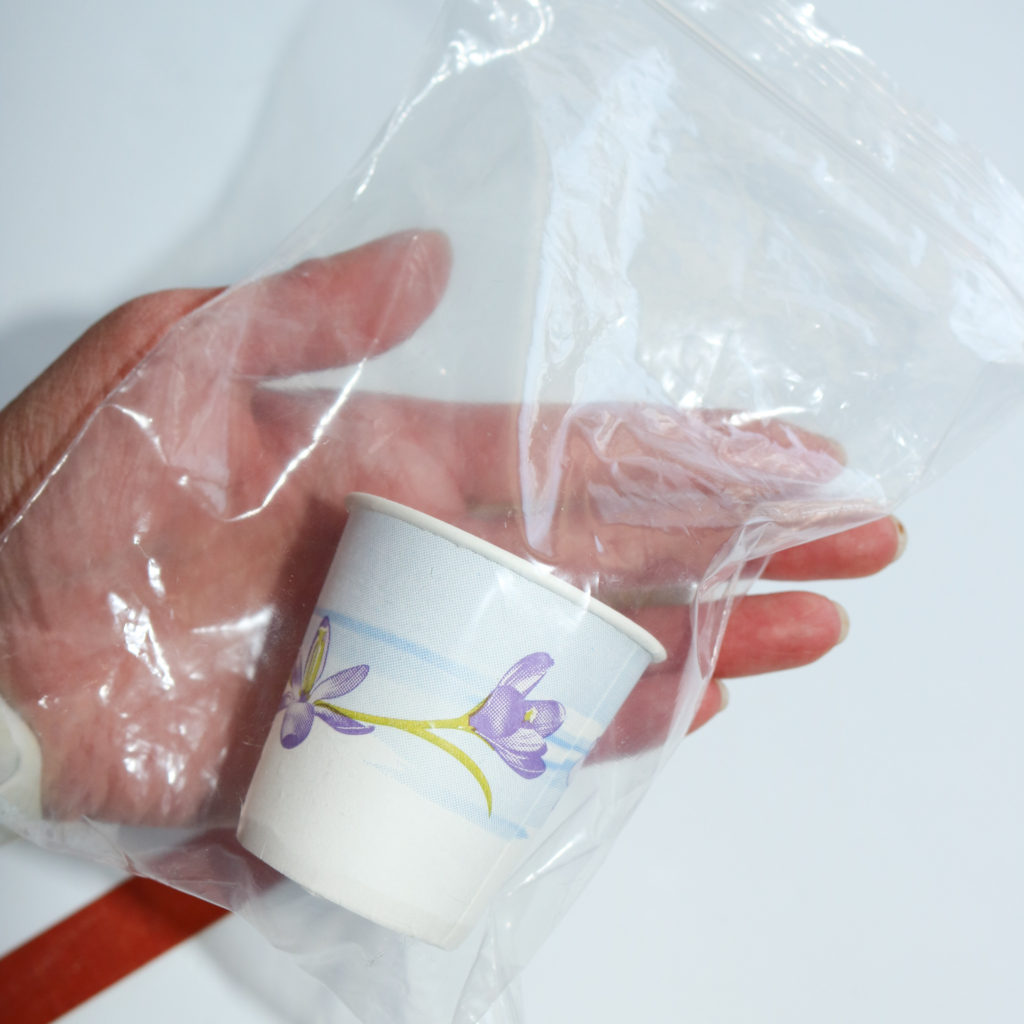
Cutting by Hand
For those who don’t have a cutting machine, please know that I made all of these Tiny Sophia Bags by hand. After making lots of leather bags and over a dozen of these minis, here are a few tips and tricks that will help you though.
- I LOVE this heavy duty multi-blade craft knife set by Fiskars. The different blades are great depending on the type of cut you need to make…my fave is the 1/2″ straight edge one.
- The pattern essentially looks like a cross, so the edges are right angles. If you match up the sides with a ruler, you’ll have a smoother (and more accurate) cut.
- Use a metal ruler with a craft knife for the straight edges.
- For thicker leather/suede, you might want to use a box cutter for a stronger blade and press down on the ruler so it doesn’t drag.
- Speaking of blades, remember to use a new one that’s nice and sharp for clean cuts.
- With the curves, try to find household objects like bowls that match to balance your knife against.
- For the back D-Ring opening, one of my testers said a button-hole cutter like this one is great for cutting the edges.
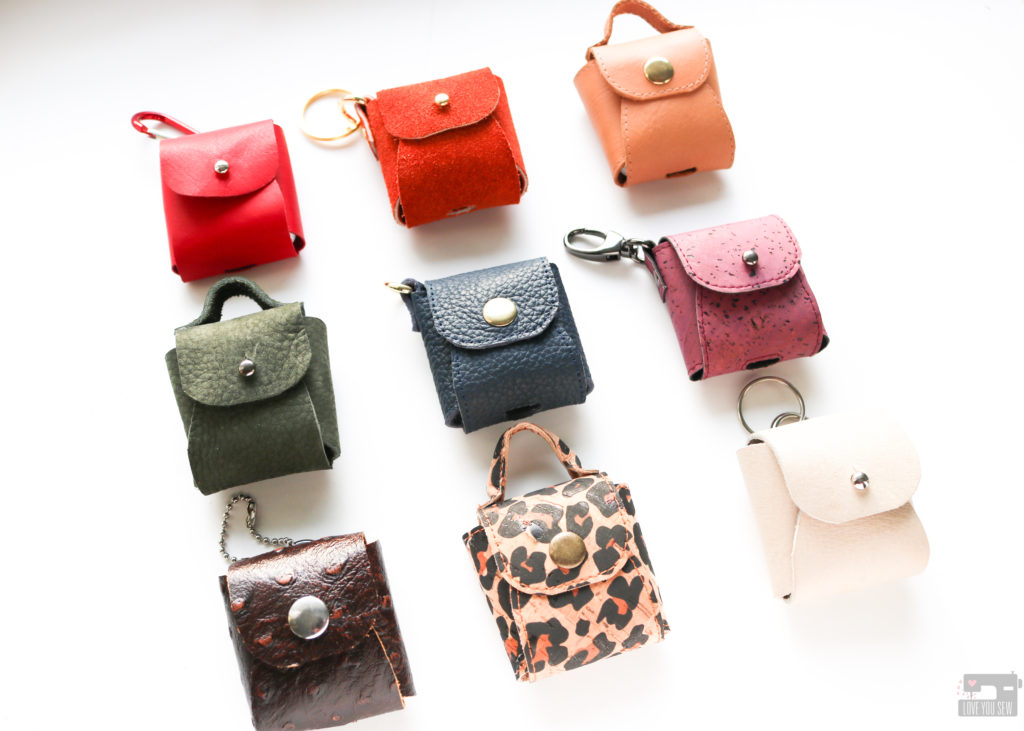
Customize
There are so many different ways to customize your Tiny Sophia Bag. Luckily, I have a nice stash of leather scraps from thrifting and from friends. You can use leather, suede, faux leather, and even cork! Based on the thickness of your substrate, you may have to adjust the position of the holes which is also covered in the the pattern 😉
Check out #TheTinySophiaBag on social media to see all of the different versions. I like the extra stitching around the edges to make the bag look more polished (don’t forget to use that leather needle and teflon or walking foot!) Many of my testers used decorative hardware too. I can’t wait to see what you do!
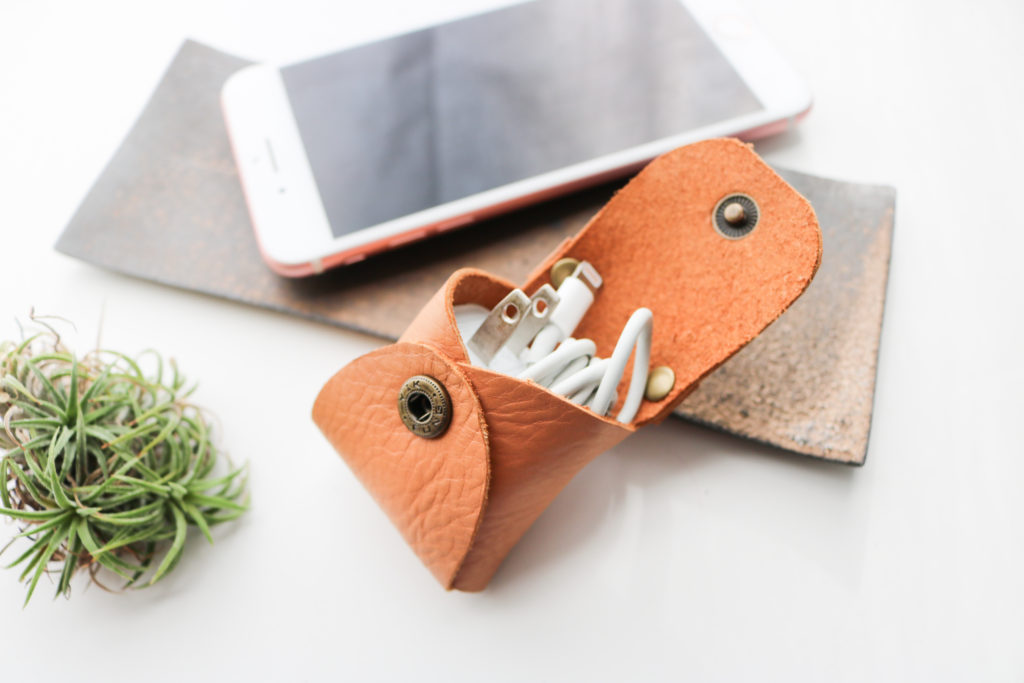
If you are ready for the cutest little purse, you can grab the Tiny Sophia Bag pattern, here. Use it to carry your trinkets, coins, and all the smartphone accessories. One of my testers mad bags for her daughters’ dolls! I’m adding one of these on my Christmas tree and will use it later to hang off my purse for my own headphones.
How would you use your Tiny Sophia Bag?
Happy Sewing!
Cristy
This post may contain affiliate links. You can read about my Disclosure, here.