Quilted Toddler Sleeping Bag

SleepingBagTitle

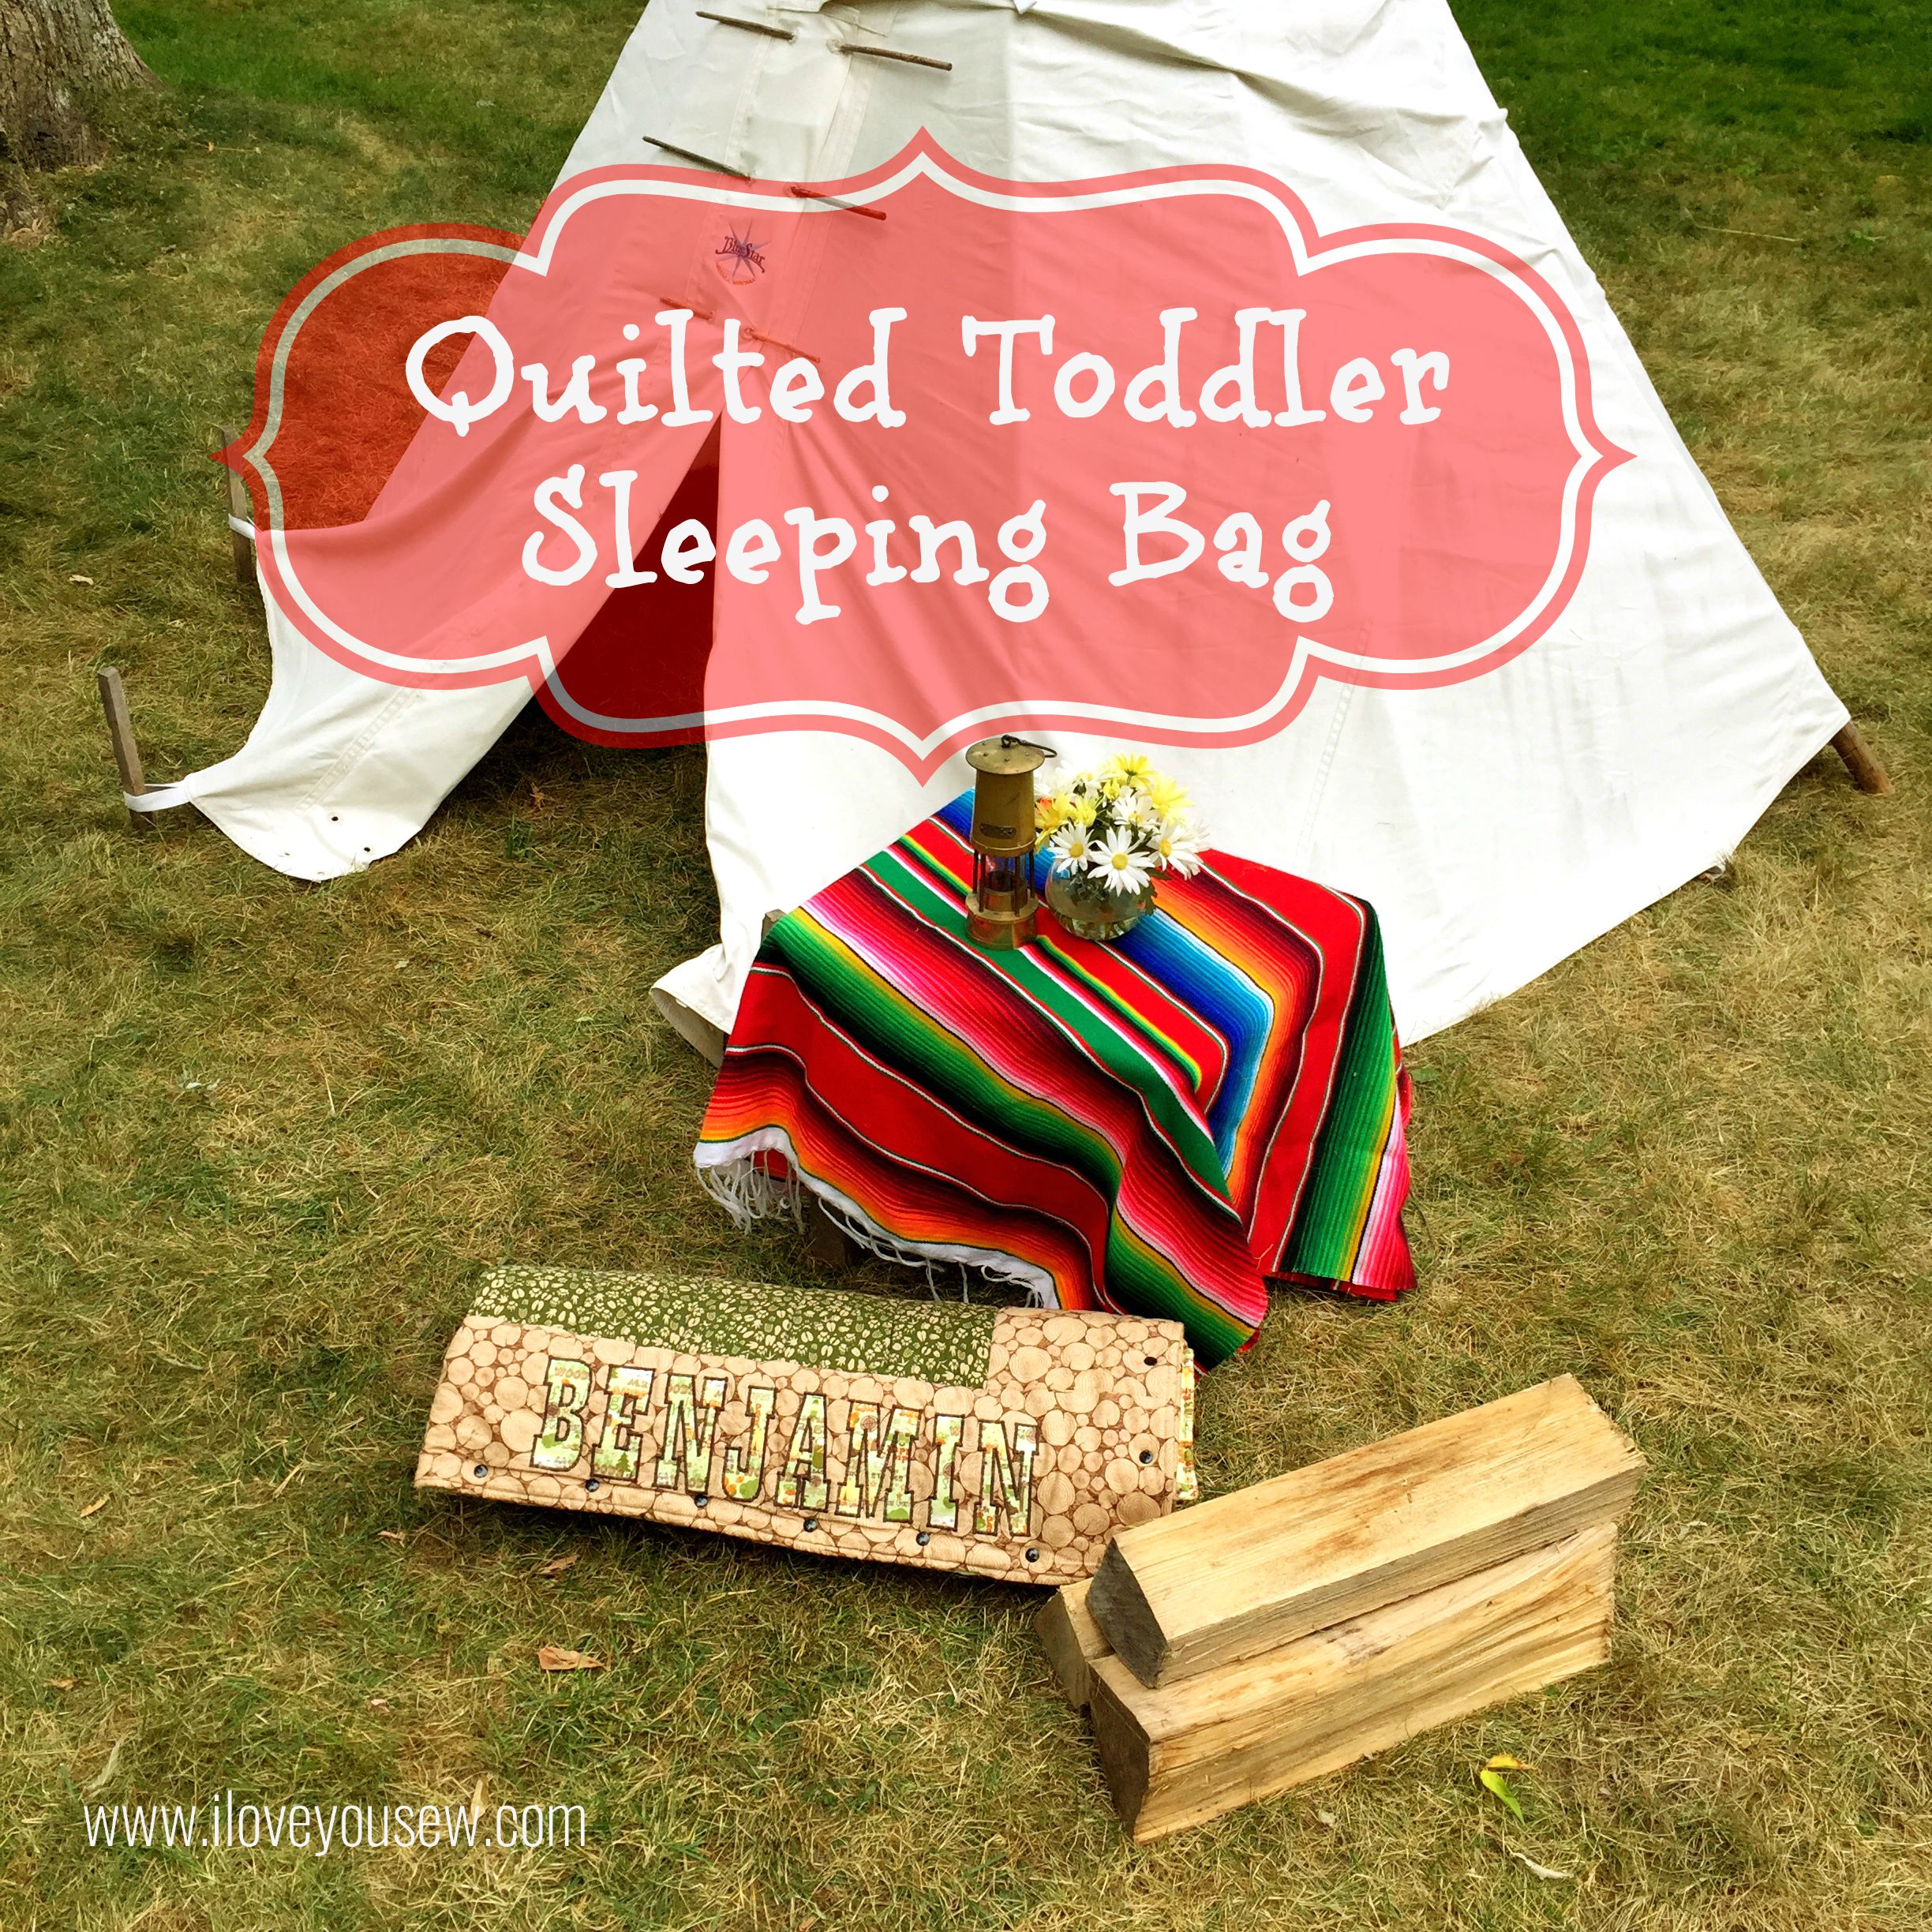
This week, I’m doing a little throw-back of toddler sleeping bags I made for my boys last year.  I wasn’t a blogger then and figured I’d write a post in honor of our annual trip to the lake.  We brought these puppies along for each of our sons and I couldn’t help take some fun new photos along beautiful Lake Leelanau in Northern Michigan.

SleepingBagHalfOpen

My boys are at a fun age when we can now have little sleepovers in the family room.  This adorable sleeping bag was exactly what I wanted for each of my kids to have their own.  I LOVE the idea of having the sides snap so that you can pull them apart and have a great throw blanket!  Duel-purpose items are key!  The pattern and tutorial can be found on The Sewing Rabbit’s blog.

SleepingBagOpen

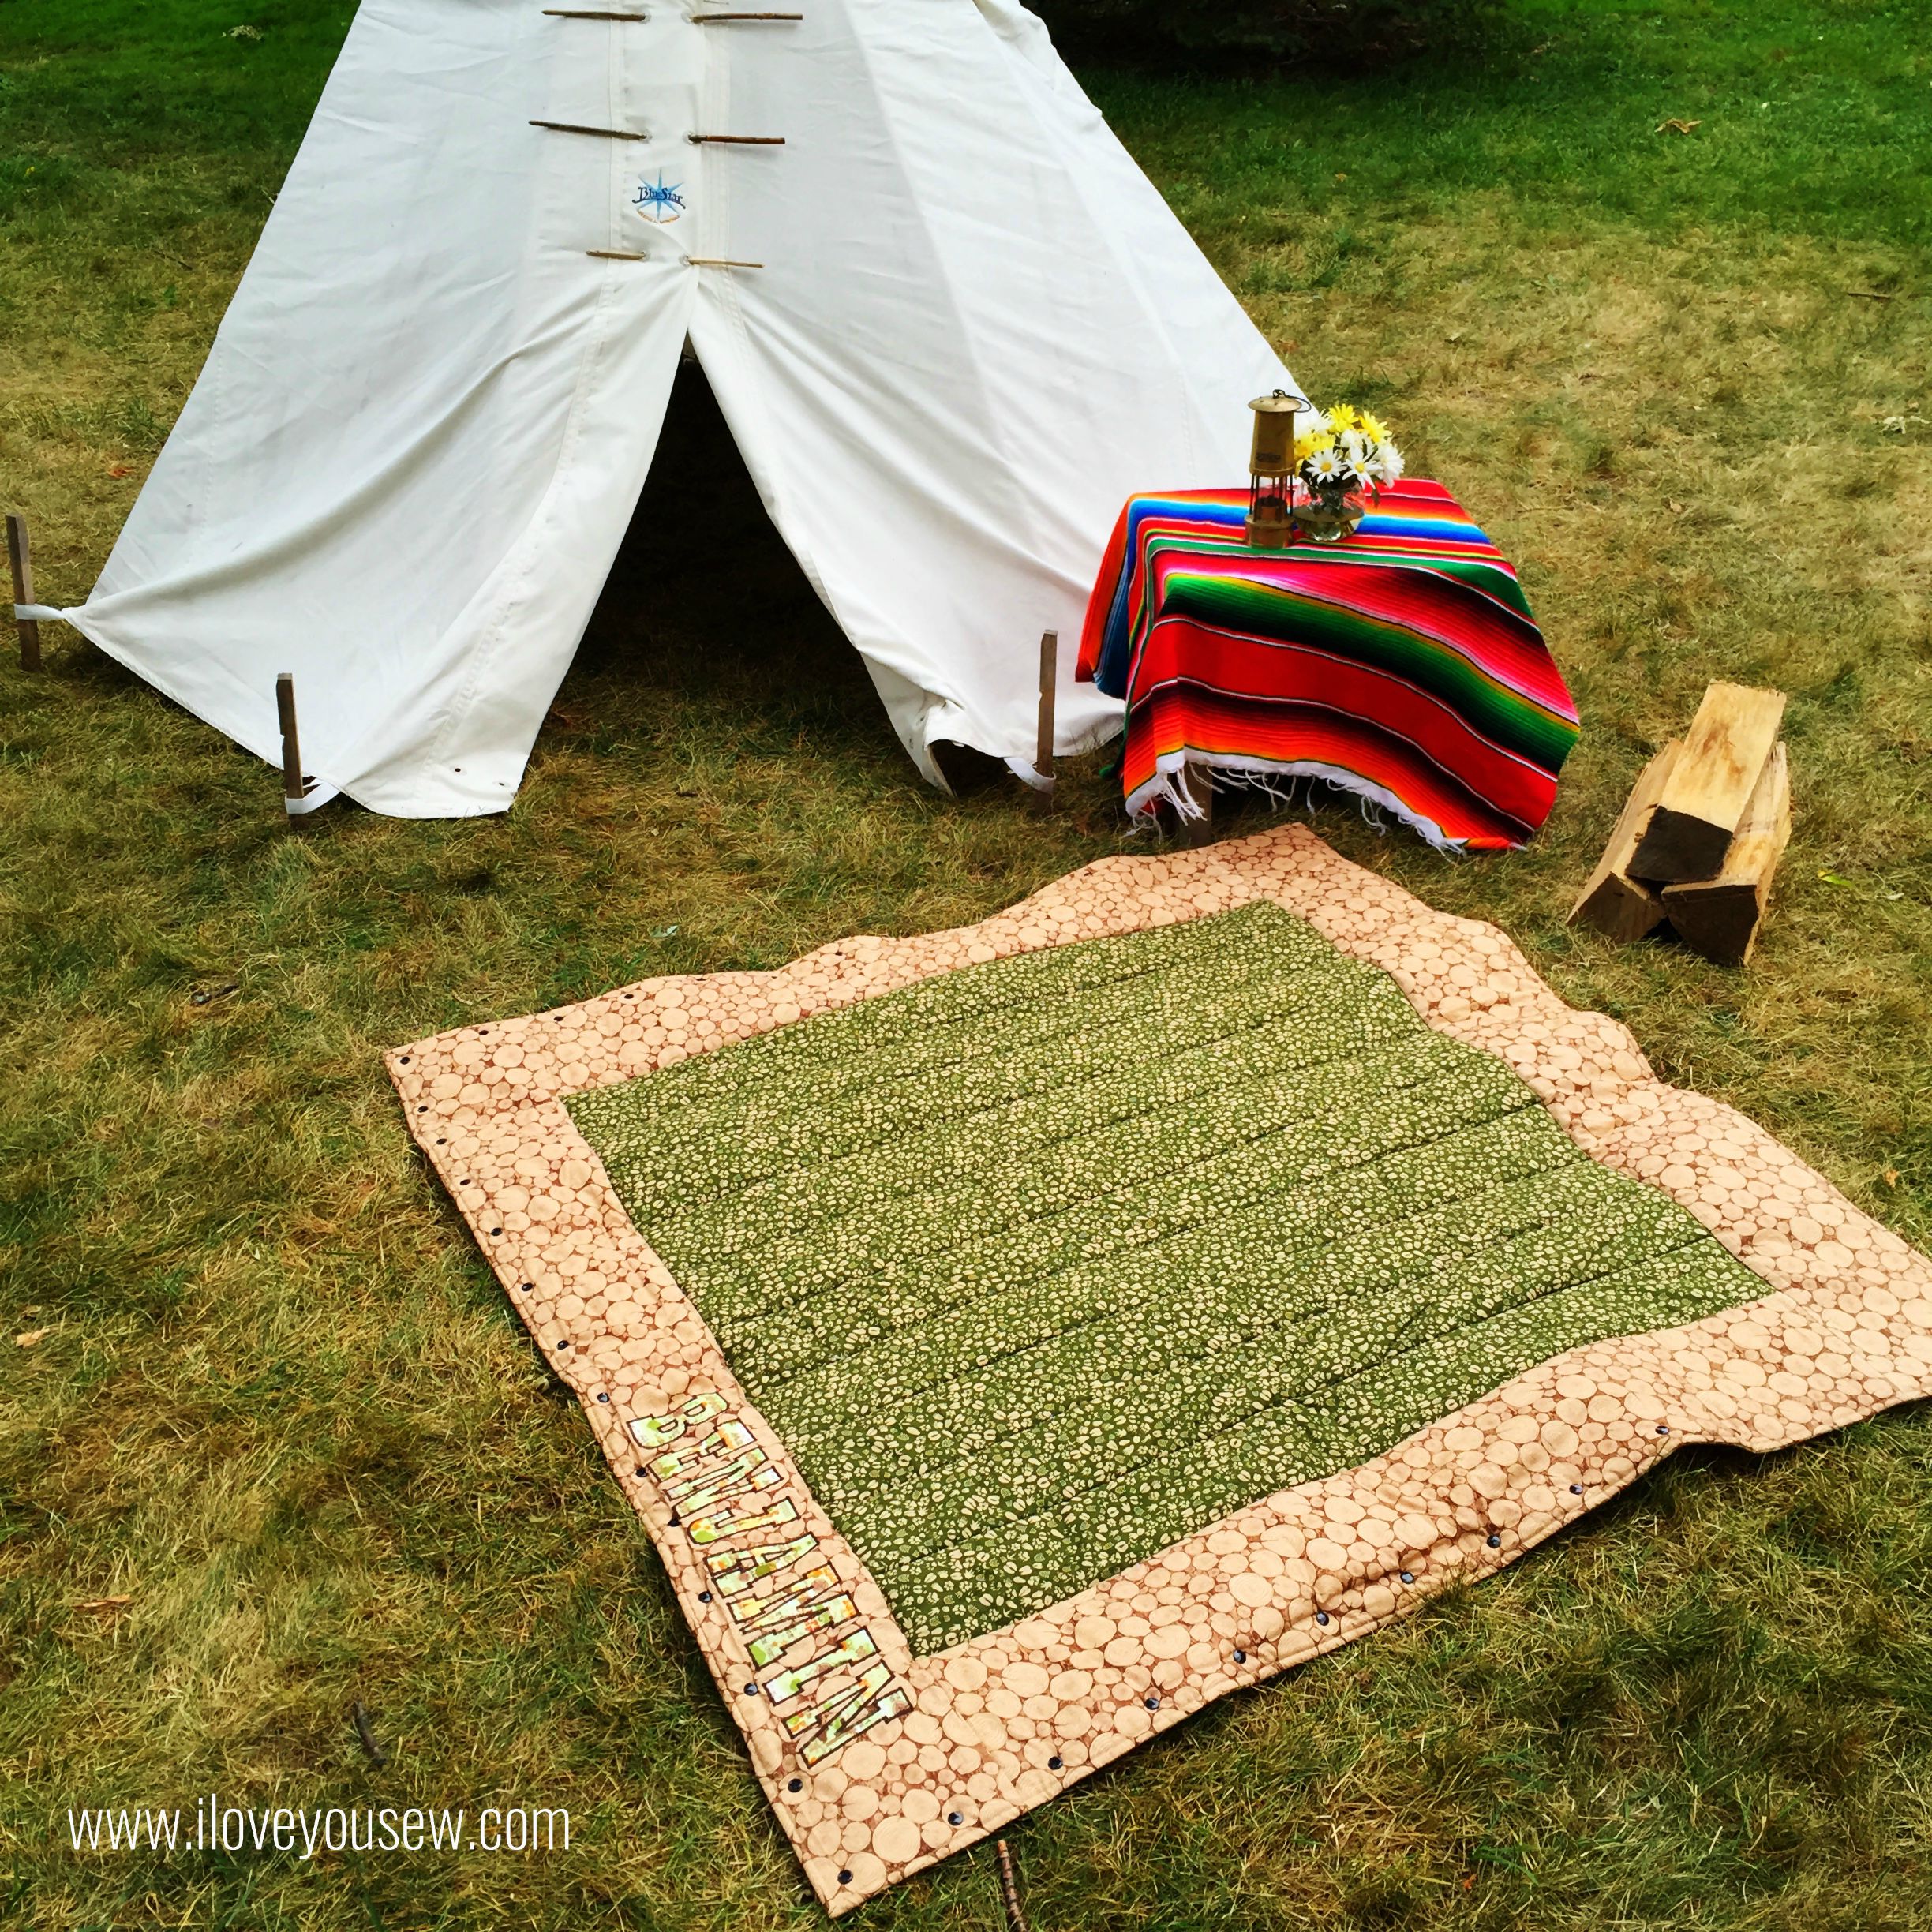
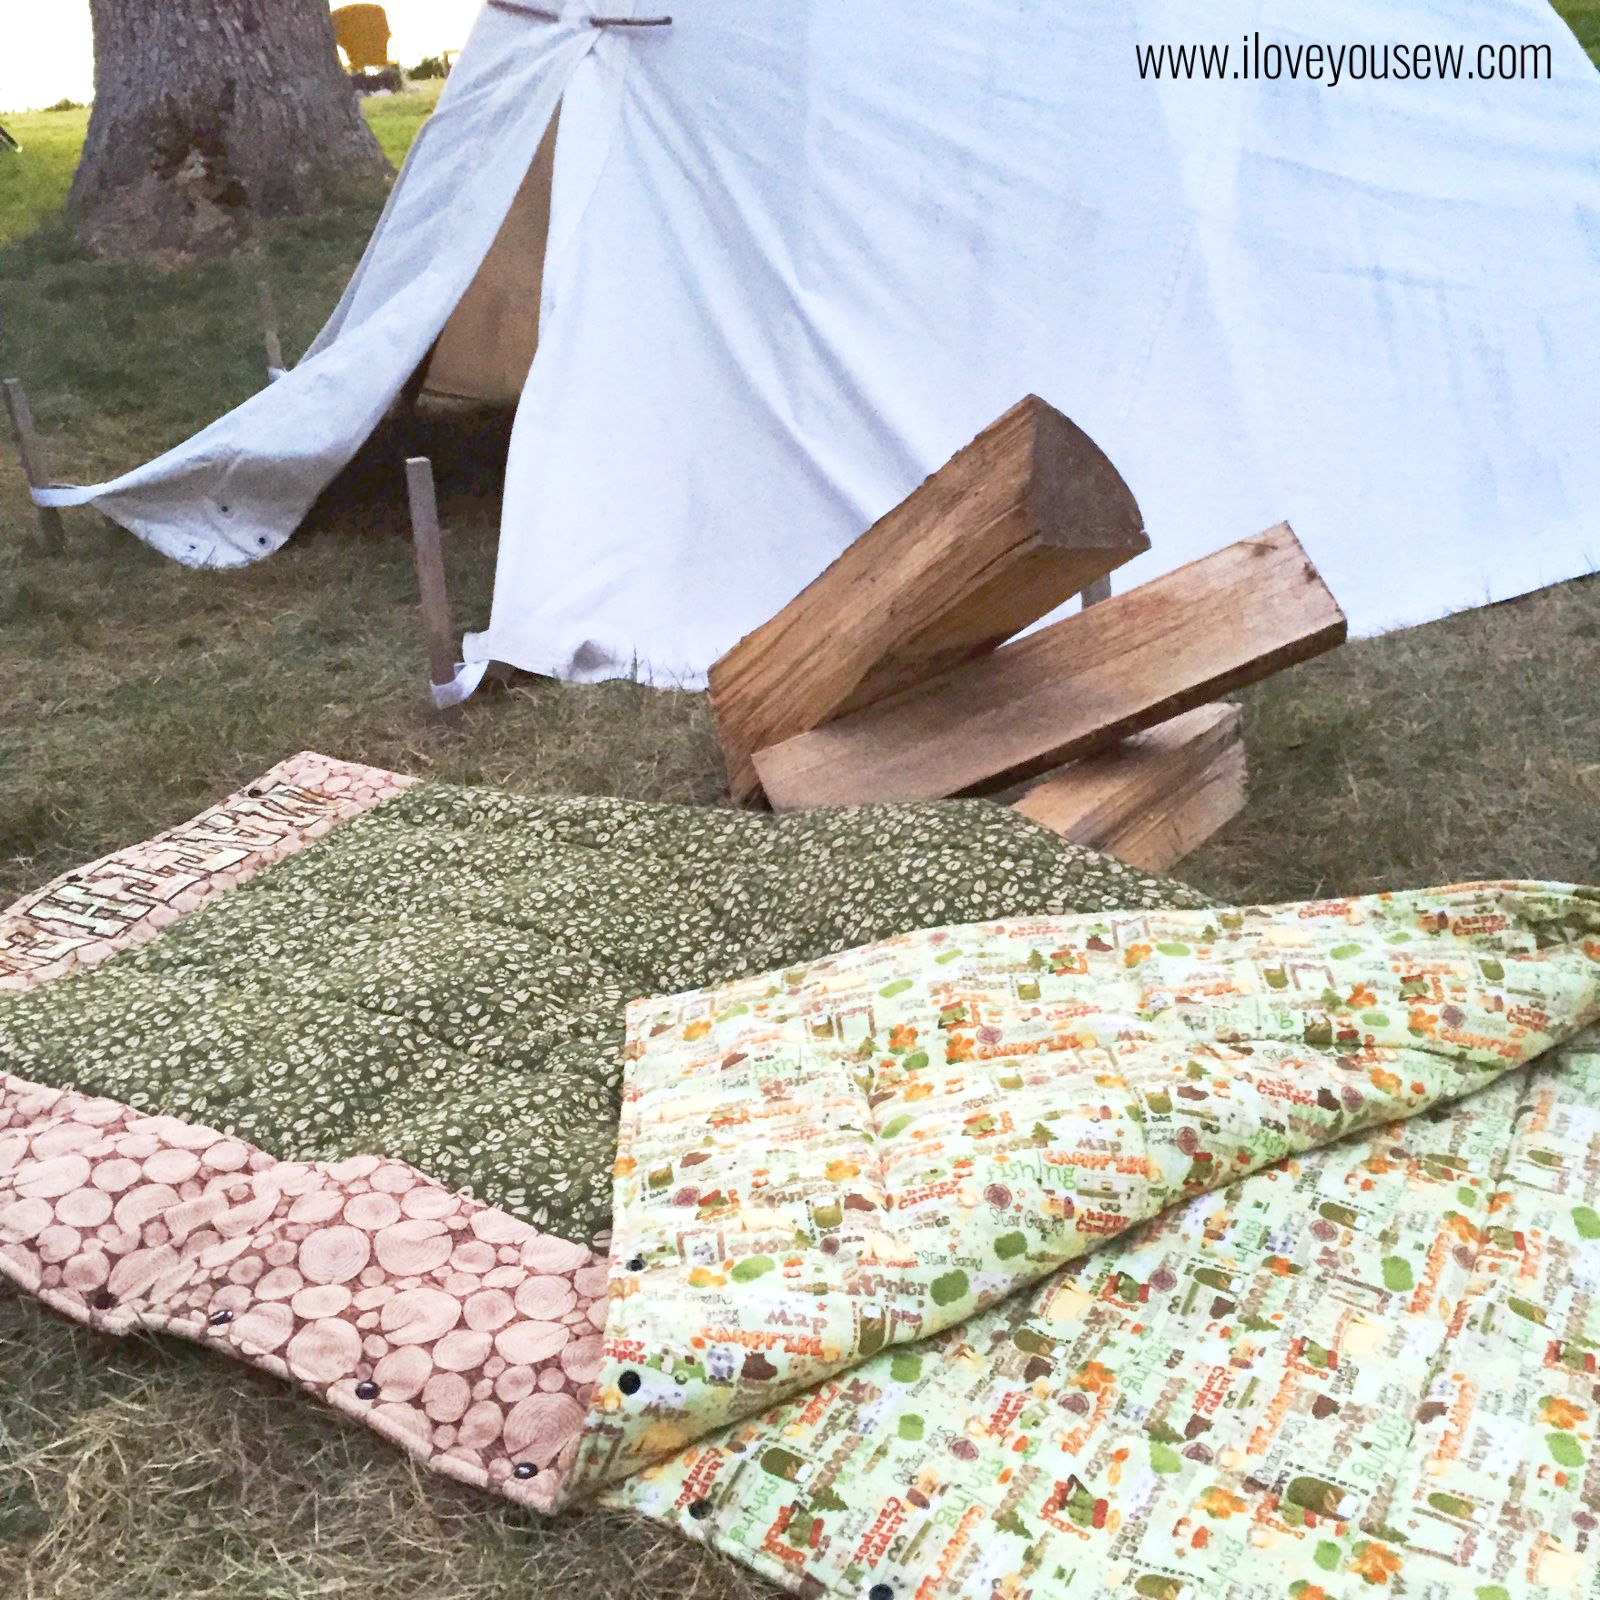
For the fabric, I used some fun outdoor-inspired designs from the Camp-A-Lot collection by Bo Bunny for Riley Blake Designs.  Unfortunately, all of the fabrics are out of print (OOP) but you can still find certain patterns online.  I used quilt weight Firewood in chocolate for the border, Tracks in green for the center and then Main in green flannel for the backing.

SleepingBagInterior

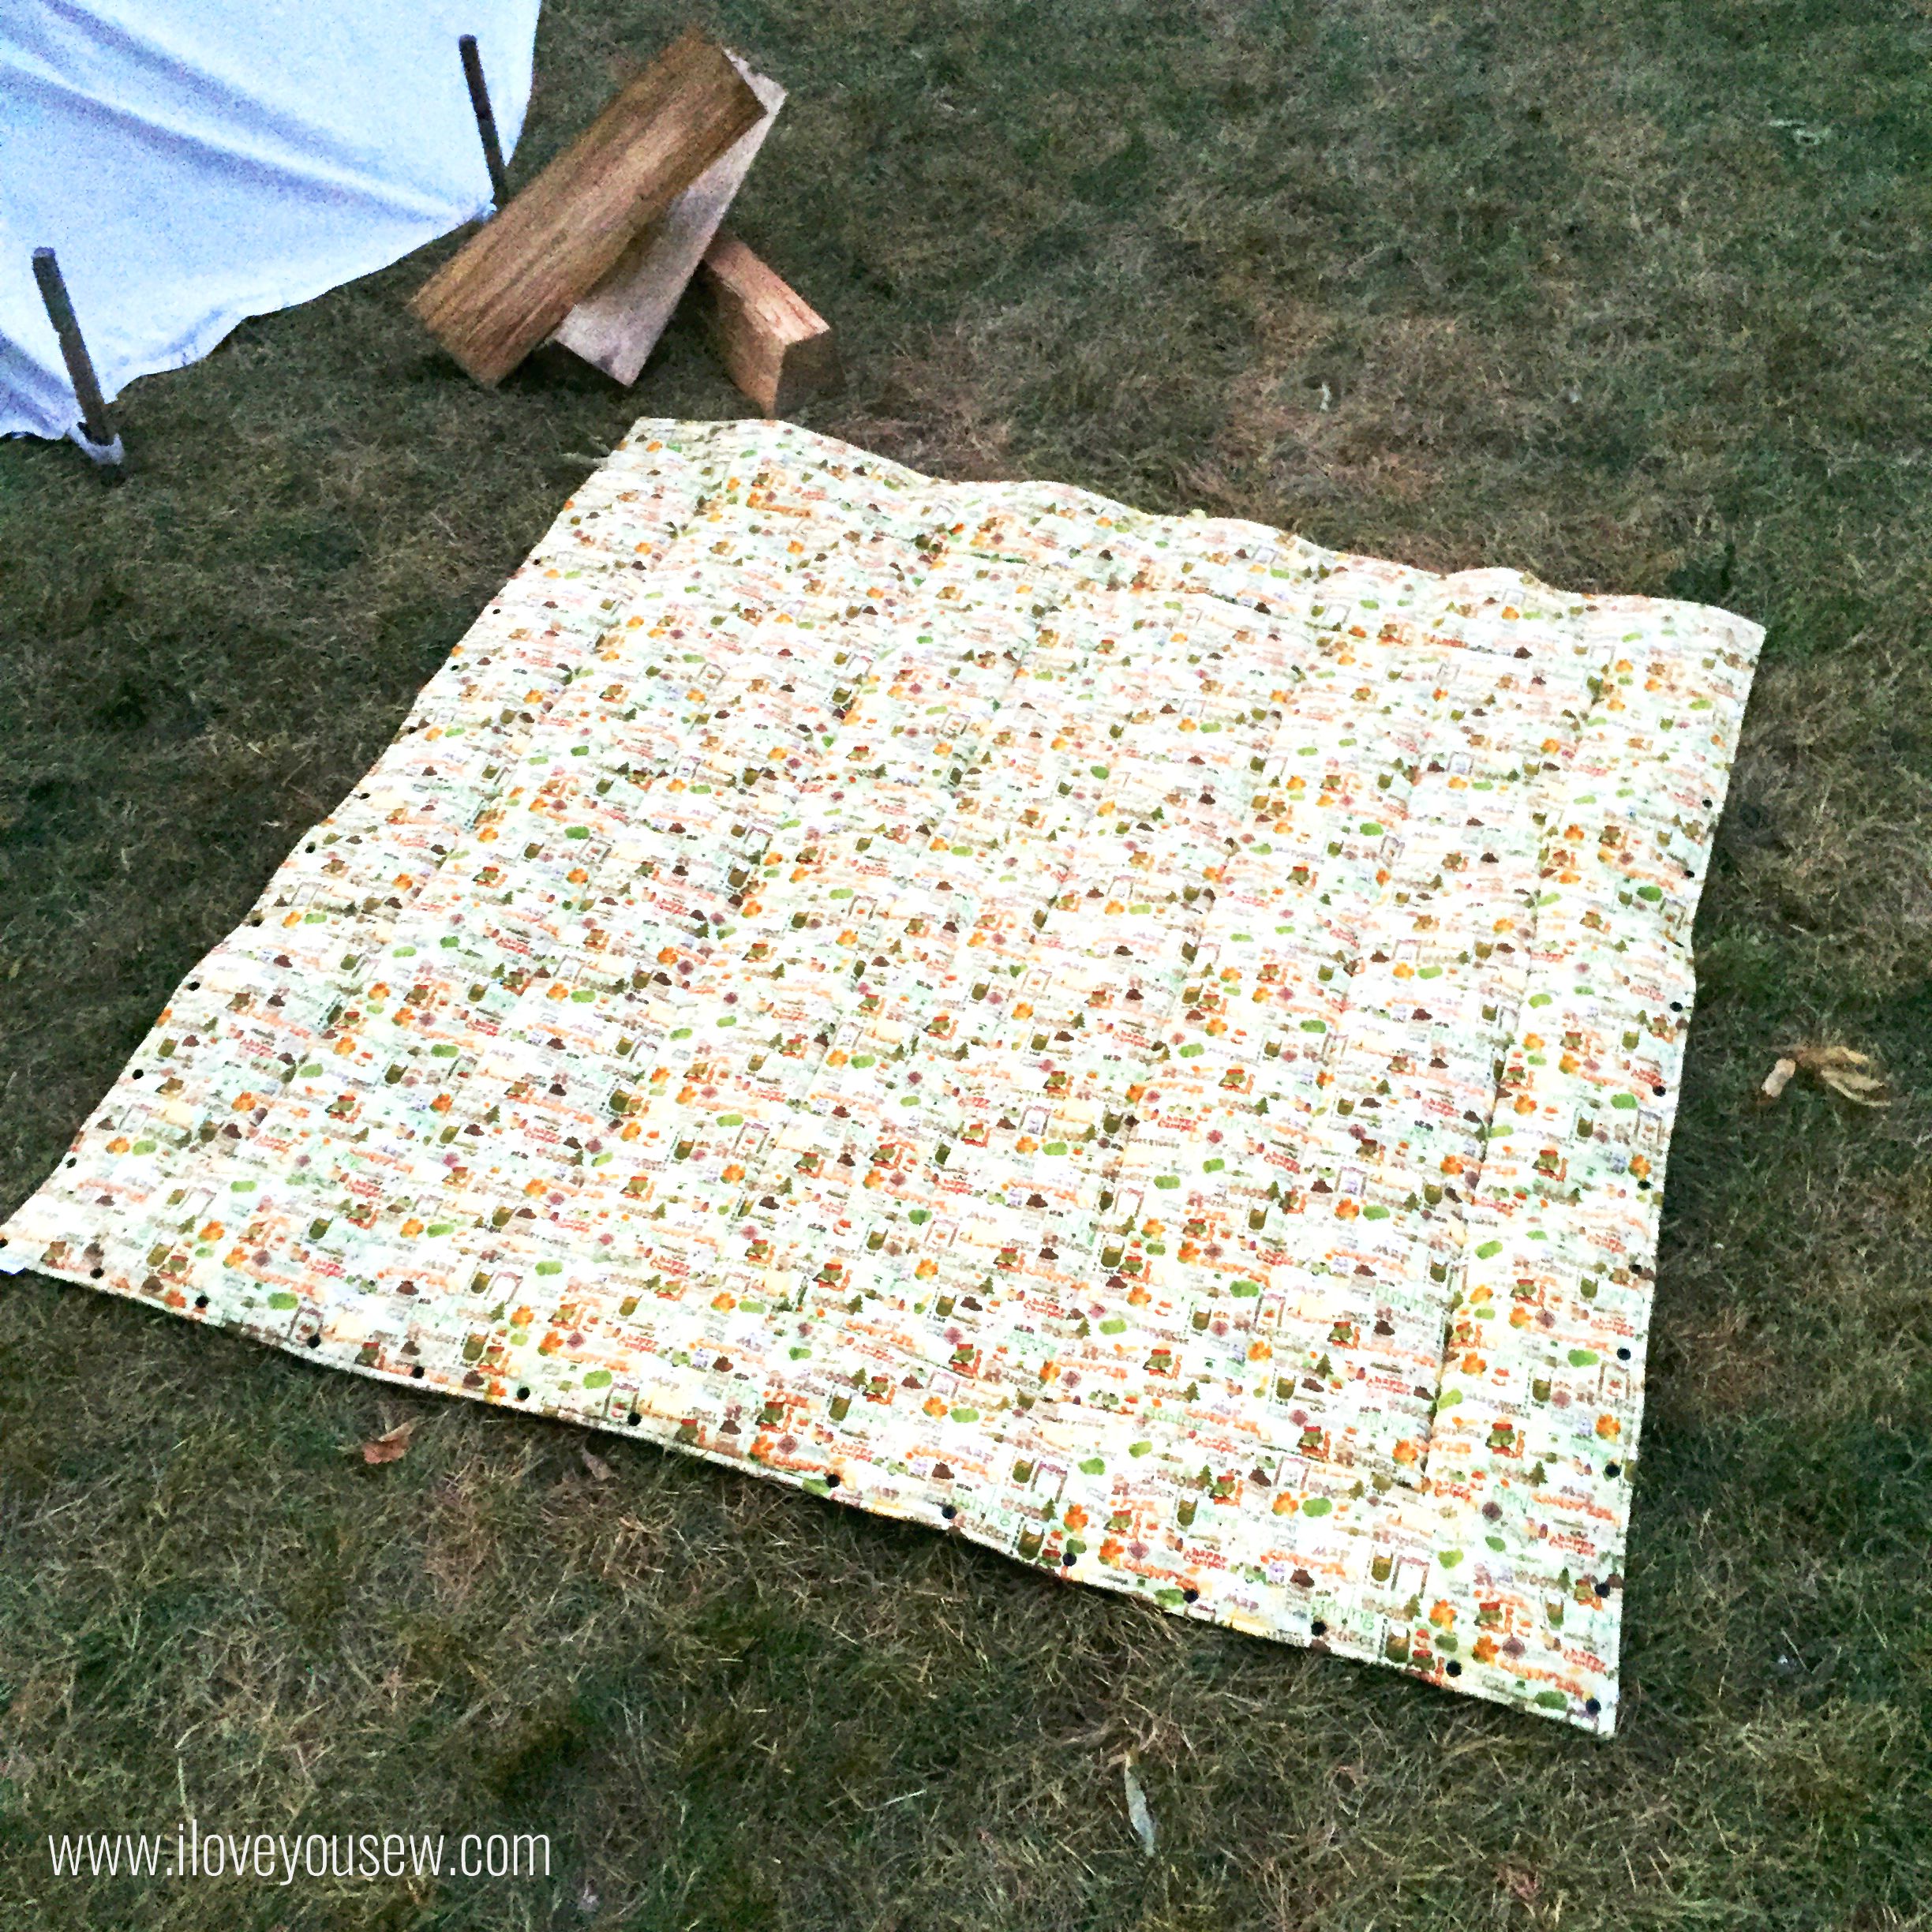
My boys are still young and I wanted fun patterns for them that weren’t too mature.  They are already growing up too fast!  Plus, I just loved the flannel backing. It makes for an awesome “I Spy” game…bonus!!!  These sleeping bags should last them awhile for indoor fun, but I know we’ll have to get them “real” outdoor ones soon enough.

SleepingBagSnaps

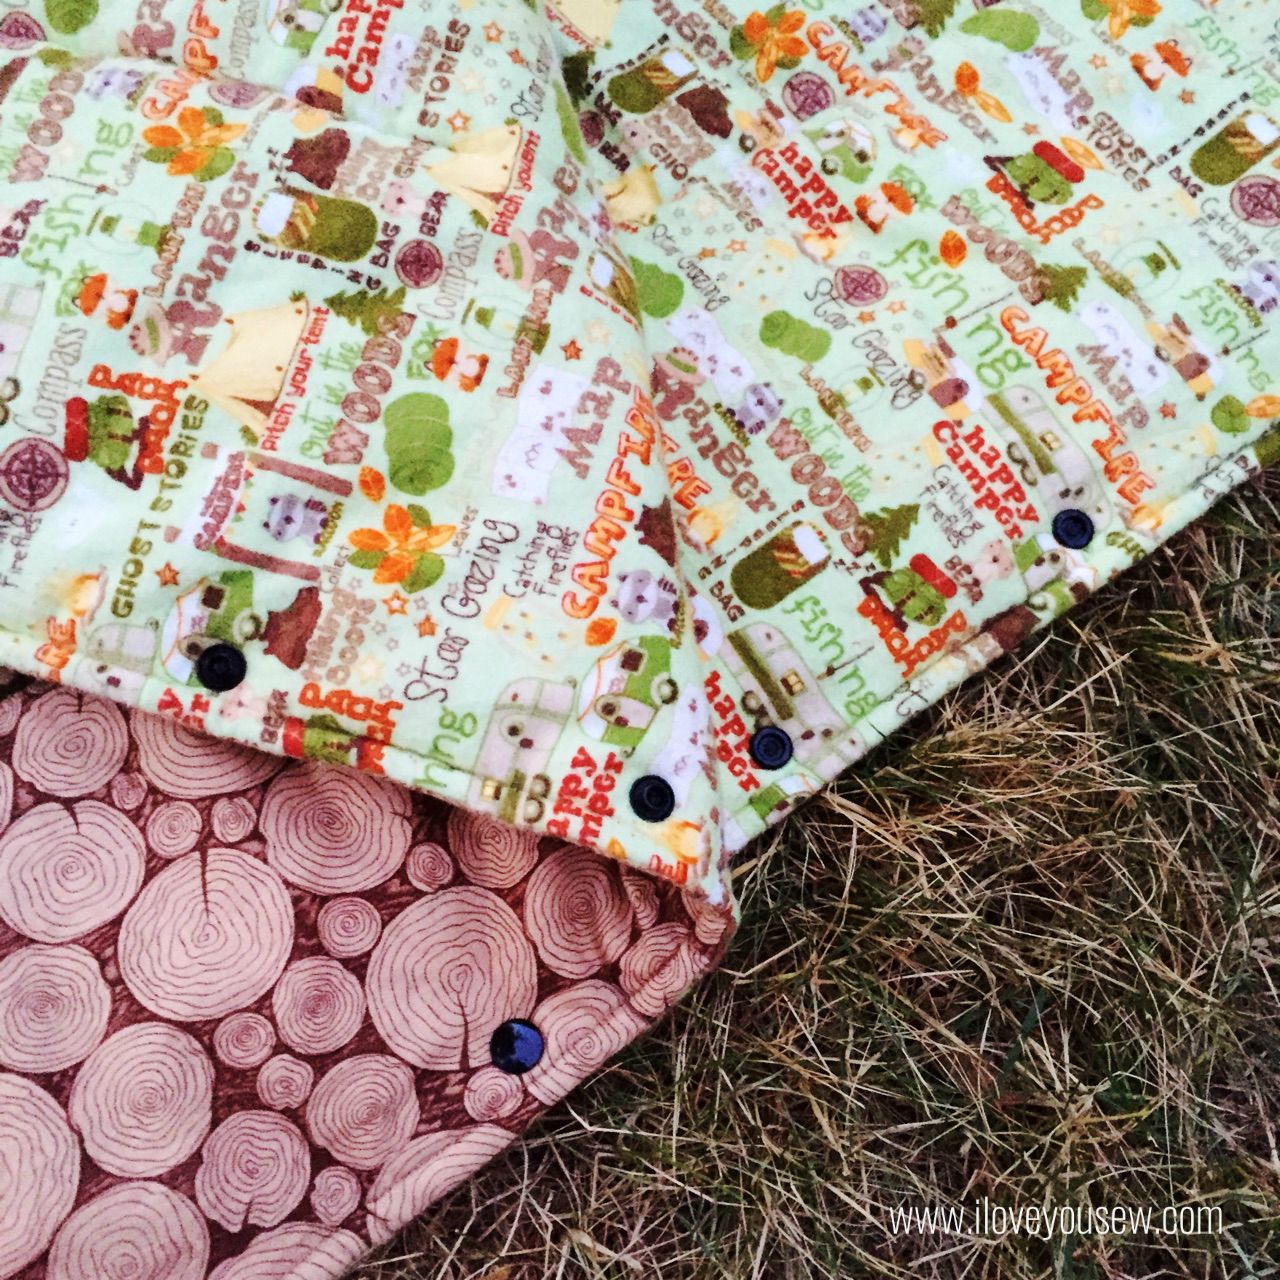
Luckily, I’m a very loyal fan of KAM Snaps.  If there is a reason to use them, I do!  I was so happy to see them in this tutorial because I have a ton of colors in my craft stash.  They hold well, but are easy enough for little hands to fasten together. There is spacing in between that allows air to come through on the bad, but remember, these are not intended for outdoor use….so I’m perfectly happy to use them!

SleepingBagRolledCloseup

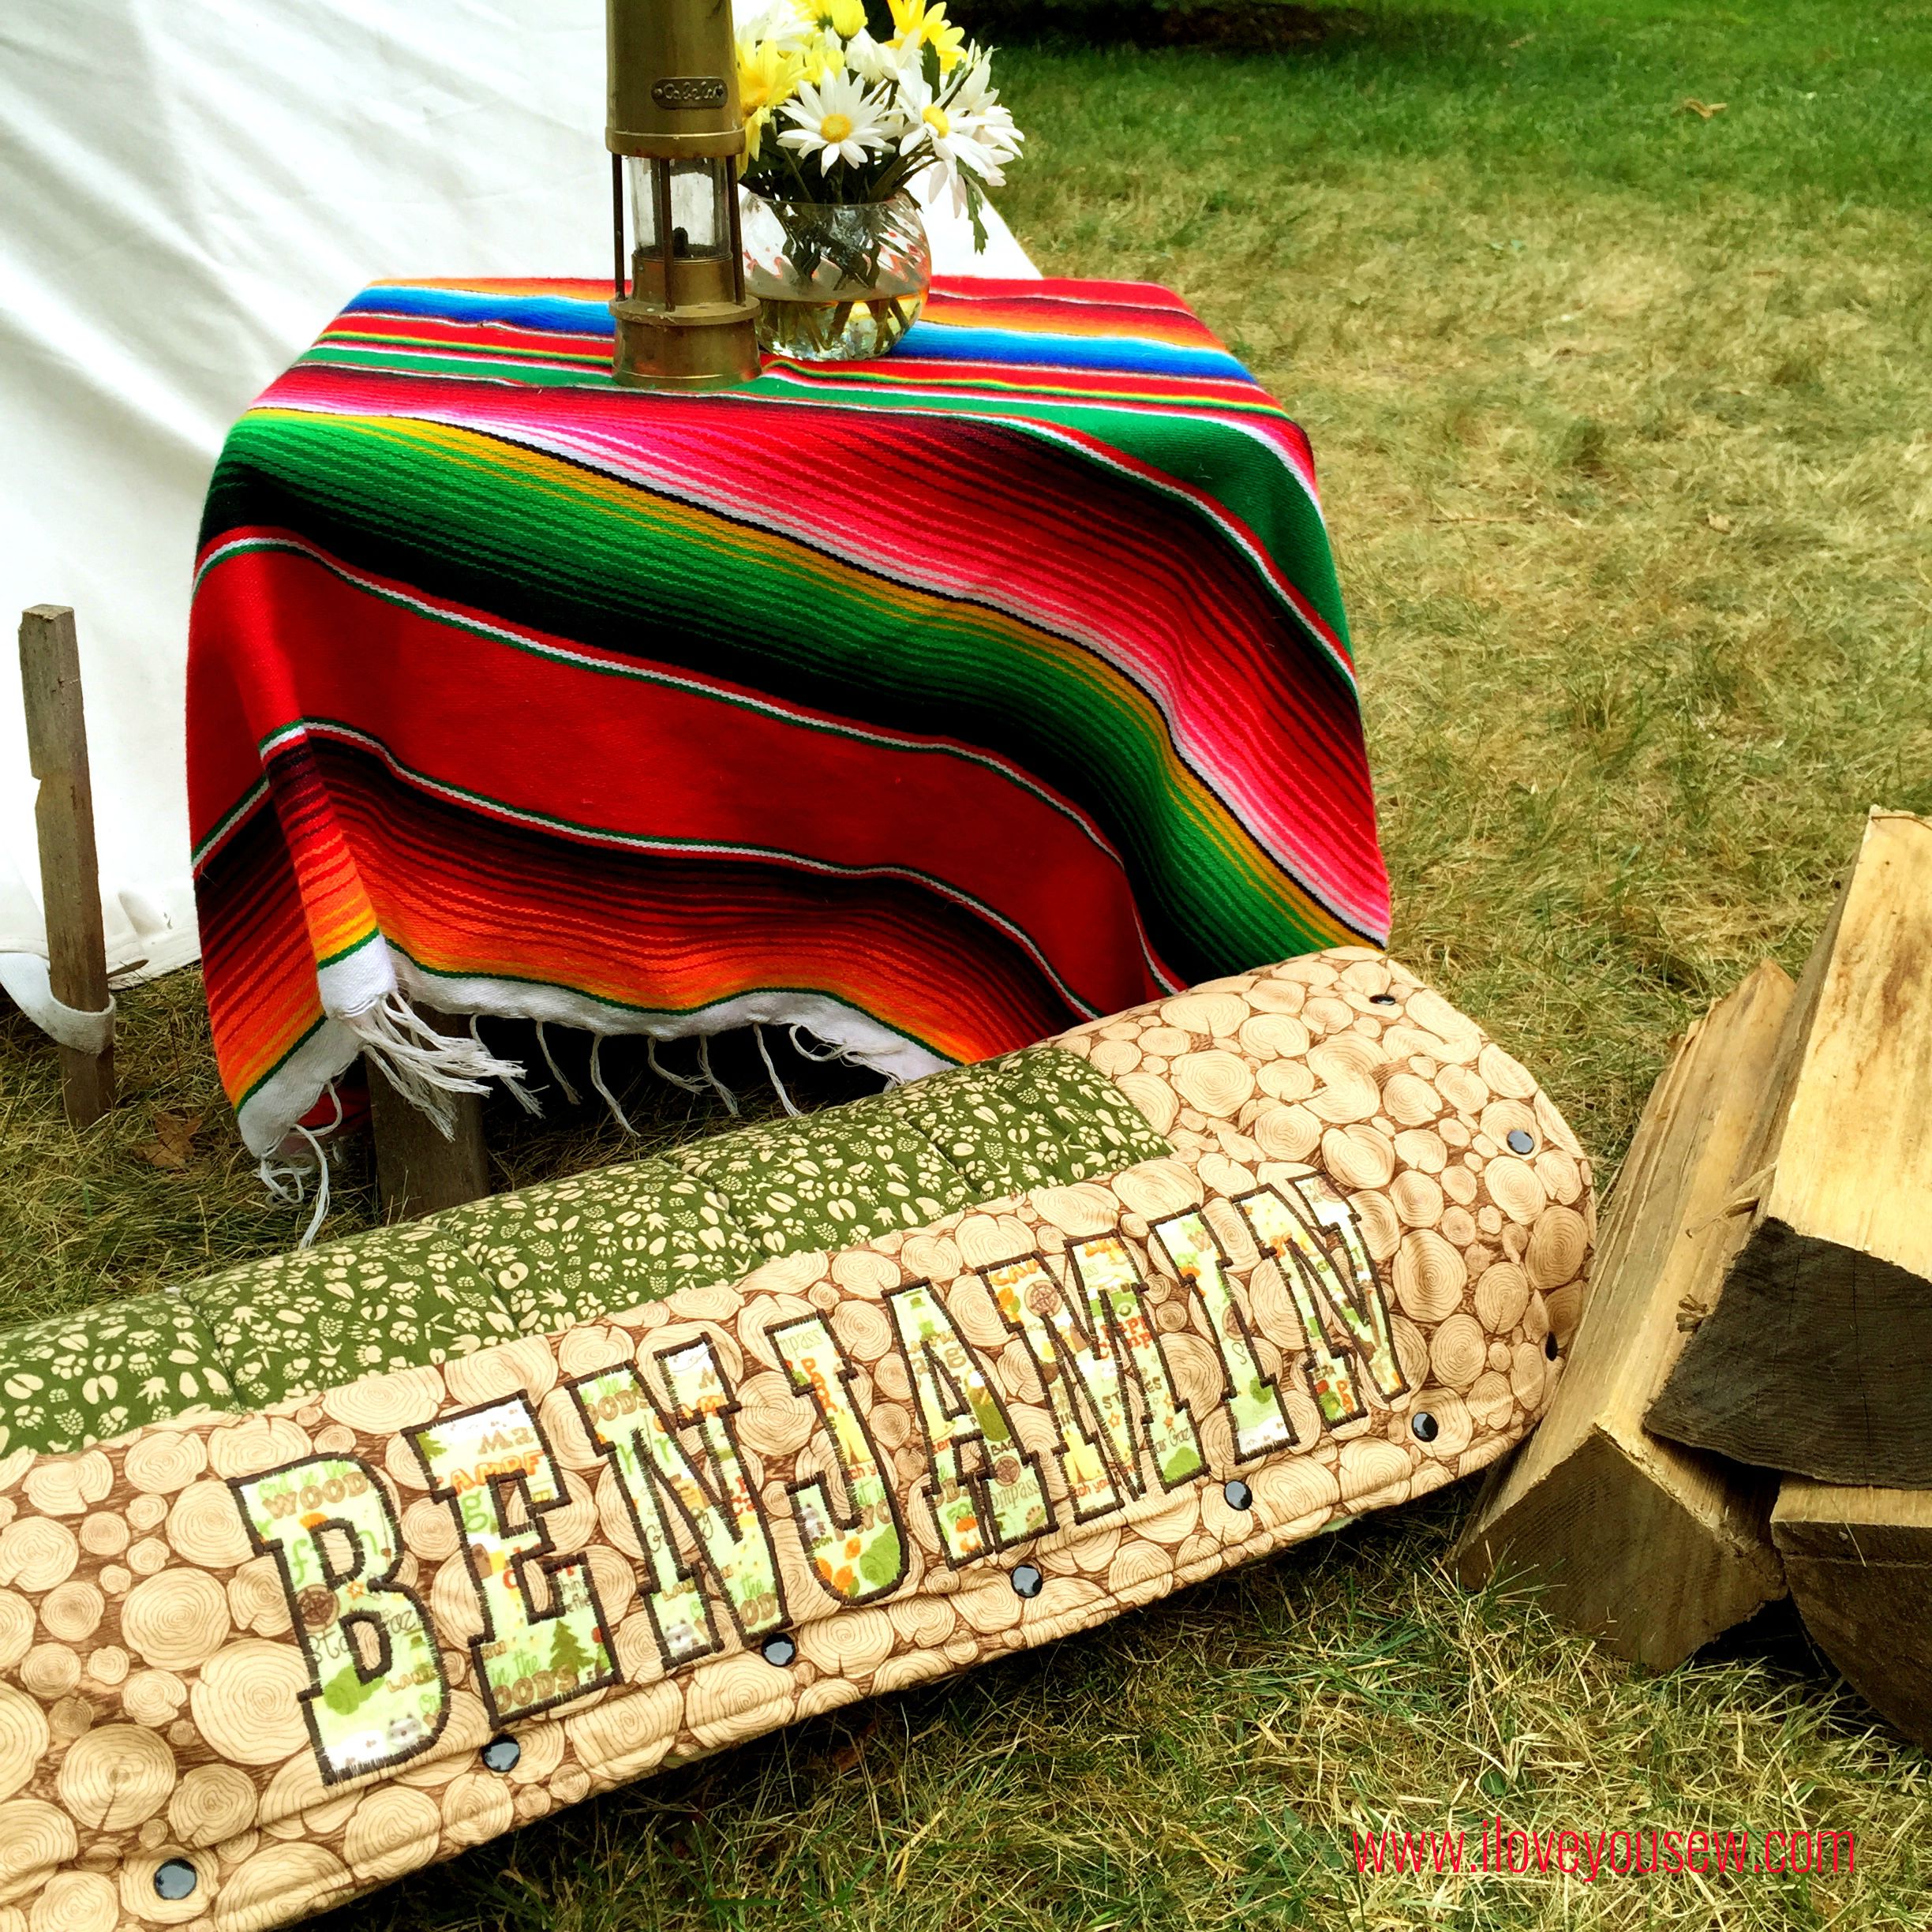
The only modifications I made to the tutorial were increasing the width between quilted lines to about 4″ apart.  As you know, I’m not a fan of actual quilting, so this made for light work!   I also added appliqué letters to personalize each bag.  As a mom, I know how important it is to avoid any fights and keeping each boy accountable for their own stuff helps!  And yes, monograms are also super cute and special 🙂 To attached the appliqué letters, I used a tight zig-zag stitch to cover the edges and to mimic embroidery.  This process takes awhile but the results are worth the extra time!

I hope you are all enjoying your summer (northern hemisphere, peeps!) and get to make a special little person one of these sleeping bags!  Back to some family fun for me…


Hugs and Stitches,

Cristy


Sew It Yourself Kimono

Kimono Title

Boho style is all over the place right now and I thought I’d try to catch up with this Sew It Yourself Kimono.  The wrap is part of the Bohemian Chic trend which is all about being unconventional, artsy and spirited. To me, it’s a very relaxed and airy style but the “chic” part keeps it classy.

I’ve been in a fashion rut ever since having my little guys. I’m much happier (and more comfortable) in my yoga pants and a t-shirt any day. But whenever I have a “girls trip” with my hip city friends, I feel like the frumpy charity case…so I decided to do something about it!

I’ve been eying up Kimonos for awhile, but when Sew Caroline had a post referencing her FREE pattern on IG one day, I knew I had to suck it up and make my own. The pattern is one size fits most and being a whopping 5’3″, it was good for me 😉

KimonoFabric

When selecting fabric for a Kimono, you need some good drape.  I knew anything from April Rhodes, was gonna be perfect.  Luckily, one of my favorite prints came in voile, so I snagged up Dreamcatching Flare from the Wanderer collection right away.  For trim, I wanted some earthly lace.  I tried to get a friend to crochet some for me (hehehe,) but ended up at my local JoAnn’s!  Who knew they had such a selection?!?  As I was gathering supplies, I thought I should make two styles….so I picked up Leah Duncan’s Bare Nopal Gloom from Morning Walk in voile at my Local Quilt Shop (LQS).  For the trim on this one, I used some delicate vanilla lace from my stash to complement the steely blue.

Version A- Morning Walk:

Morning Walk Finished Side

Sew Caroline‘s pattern and instructions are pretty straight-forward and simple.  However, I did get hung up on how she attached the trim to the sleeves.  I tried to find some pattern reviews online to show me how, but couldn’t find any (at least without having to pay subscription fee.) The following are the steps as I interpreted them so there would be some pictures out in cyber world 😉

Encased Trim 1

With the right-side facing up, measure 3/4″ down from the end of the sleeve and mark.

Encased Trim 2

Pin the trim right-side facing the sleeve fabric on the line marked.

Encased Trim 3

Sew the trim onto the sleeve with a 1/4″ seam allowance.

Encased Trim 4

Fold the end of sleeve up 1/2″ and press (not pictured.)  Fold up another 1/2″ press and pin in place. Sew 1/8″ from edge fold next to lace.

Encased Trim 5

Fold the entire casing to the inside of the sleeve and press.  Sew on top of the inside seam (under my index finger) to secure .

After I added the lace on each sleeve, I tried on the Kimono and wasn’t 100% happy with this technique.  The sleeves “belled” out on their own and didn’t lay down as nicely.  The extra folding and all the seams made the sleeves stiffen out a bit.  However, I left the sleeves be and hoped that some washing will soften them out.

With the lace on the bottom of the Kimono, I decided to test out a French Seam technique that would drape more and allow for more of the lace to show.

FrenchSeamCollage

Clockwise from top-left:

  1. Serge or straight-stitch with wrong side of fabric and lace together.
  2. Fold the seam over with fabric and lace are right-facing.  Press and sew 1/4″ seam
  3. Fold lace out and press. Sew seam in place.
  4. Outside of Kimono finished.


Version B- wanderer:

After making the Morning Walk Kimono, I made a few adjustments with this Wanderer one.  The first adjustment was to make the back a little longer with the colder autumn season quickly approaching.  I’ll wear this with denim jeans and leggings to go along with the amazing burnt orange color.
Dreamcatcher Finished Side Arm Down


I cut the back piece 2″ longer than the pattern piece.  After attaching the front pieces to the back, I folded the entire Kimono in half and made a cut connecting the original length of the front pieces to the longer back.  This made for the nice drop to hide my bum 😉

Dreamcatcher Finished Side

The second change I made was how I attached the lace.  I wanted to have as much of the lace showing because it’s just gorgeous and I didn’t want to stiffen up the sleeves like with Morning Walk. The lace was attached with my serger (blade disengaged) and then I top-stitched it into place.

Dreamcatcher Finished Front

The interior isn’t as pretty as the original pattern instructions, but I don’t mind one bit.  I got all the extra length and flow I expect from a Kimono.  The width and the weight of the lace will most likely keep the inside seams hidden away…

I absolutely love both versions of Sew Caroline’s Kimono pattern and definitely recommend this as a beginner garment.  I can’t wait to strut around with some more Boho Chic style this season 😉  What are you making this fall?  I need some suggestions for some future wardrobe fillers!


Happy stitching,

Cristy

Quilted Sunset

Quilted Sunset on Appalachian Trail

Quilted Sunset on Appalachian Trail

I love this quilt and so happy I was able to make it with local designer, April Rhodes‘ collection, Wanderer, for Art Gallery Fabrics.  It is a beautiful follow-up to her Arizona collection.  If you don’t have any in your stash already, you NEED to get some!

I am fortunate to live in Columbus, OH where April resides.  When she was having her launch for Wanderer, I knew I HAD to go….and I was not disappointed.  This collection is just absolutely gorgeous!  I love the deep oranges and mustards with the complementary blues and  black.  The photographic patterns are so unique too.  It’s a beautiful personal view into her world.

When I was there, I picked up a full fat quarter bundle of the entire collection…20 pieces altogether plus some extra yardage because it was all just so pretty!

As I stared at the FQ bundle in my sewing dungeon, I knew I wanted to make a quilt with every single fabric. A basic square quilt came to mind…but with a twist.  I like square quilts to show off larger fabric patterns but I didn’t want it to be boring since every quilter makes one.  With the warm and cool color ways for Wanderer, they reminded me of a sunset.  So I came up with this pattern with an offset “sun” moving into darkness.

Fully pieced and completed quilt top

Each square measure 4.5″ (unfinished) and the quilt is 11 x 16 blocks.  Finished, the quilt is approximately 44″ x 64″.  I used two yards for backing and a little over 1/3 yard for binding.

The quilting is straight-line diagonal starting in the “sun” and echoes out to the edges. It is supposed to mimic the rays coming off and I’m very happy with how it turned out!  You can see the quilting best in the top picture.  I used Aurifil 2021 for all the piecing and quilting.  It was perfect to blend through all the colors in this collection and is one I happen to use a lot.

Close-up of backing and binding with Aurifil

For the binding, I machine attached it to the front and hand-stitched it to the back.  This method takes much longer, but I love the clean look of no visible stitches.  Plus, I’m too OCD and cannot get the machine binding to look as good on the back as it does on the front if sewn through…one day I’ll perfect it.  Aurifil 2225 was the perfect match to my binding and accompanied me on my trip 😉


The finished quilt photos were all taken on our family vacation in Tennessee’s Great Smoky Mountains.  I brought the quilt along to hand sew in the car, but didn’t anticipate the gorgeous photo opps in store for me.  But I am SO happy I finished it in time for our drive deep into the national park.  If you ever get a chance to go, please do…and bring your quilts!  It was just breathtaking!


Please share any quilts you make with this pattern!  I’d love to see them 🙂


Happy Stitching,

Cristy