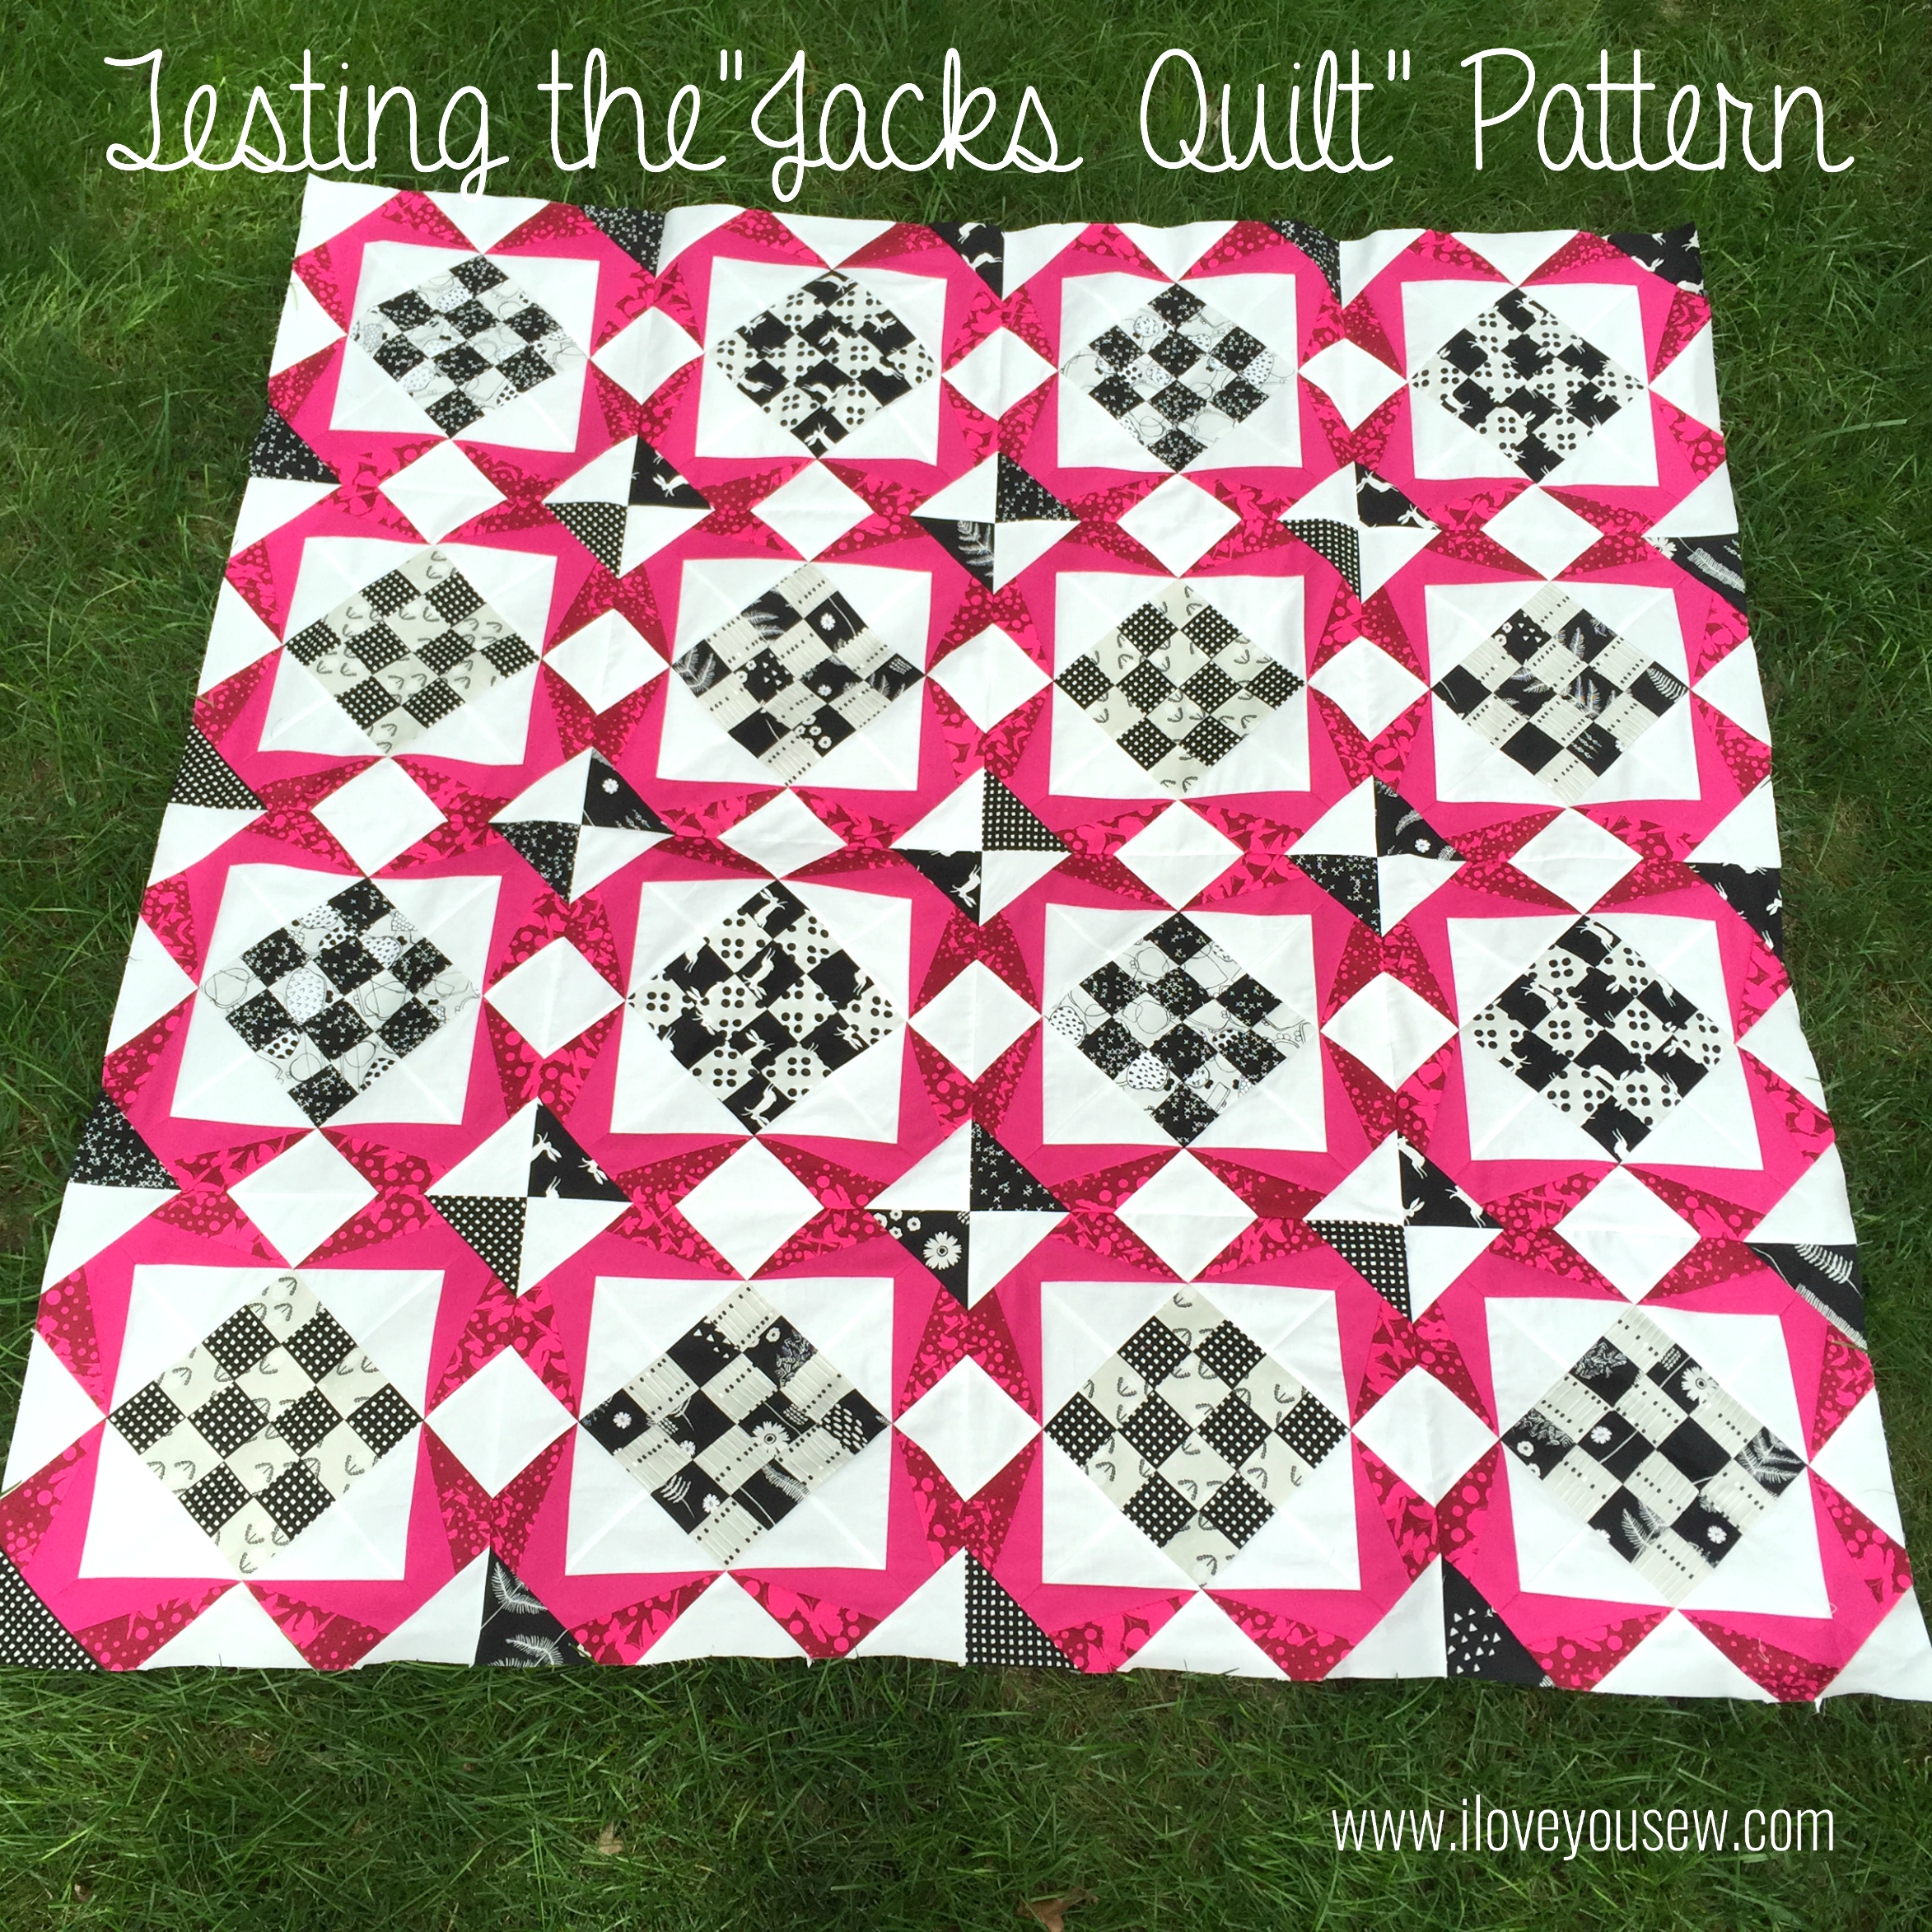
The “Jacks Quilt” pattern has just been released by Bryan House Quilts and I was fortunate enough to be one of the testers. I’m SO excited to finally reveal my #SecretSewing project! It’s tough not being able to show what I’ve been working on lately…especially since it’s just so darn pretty 🙂
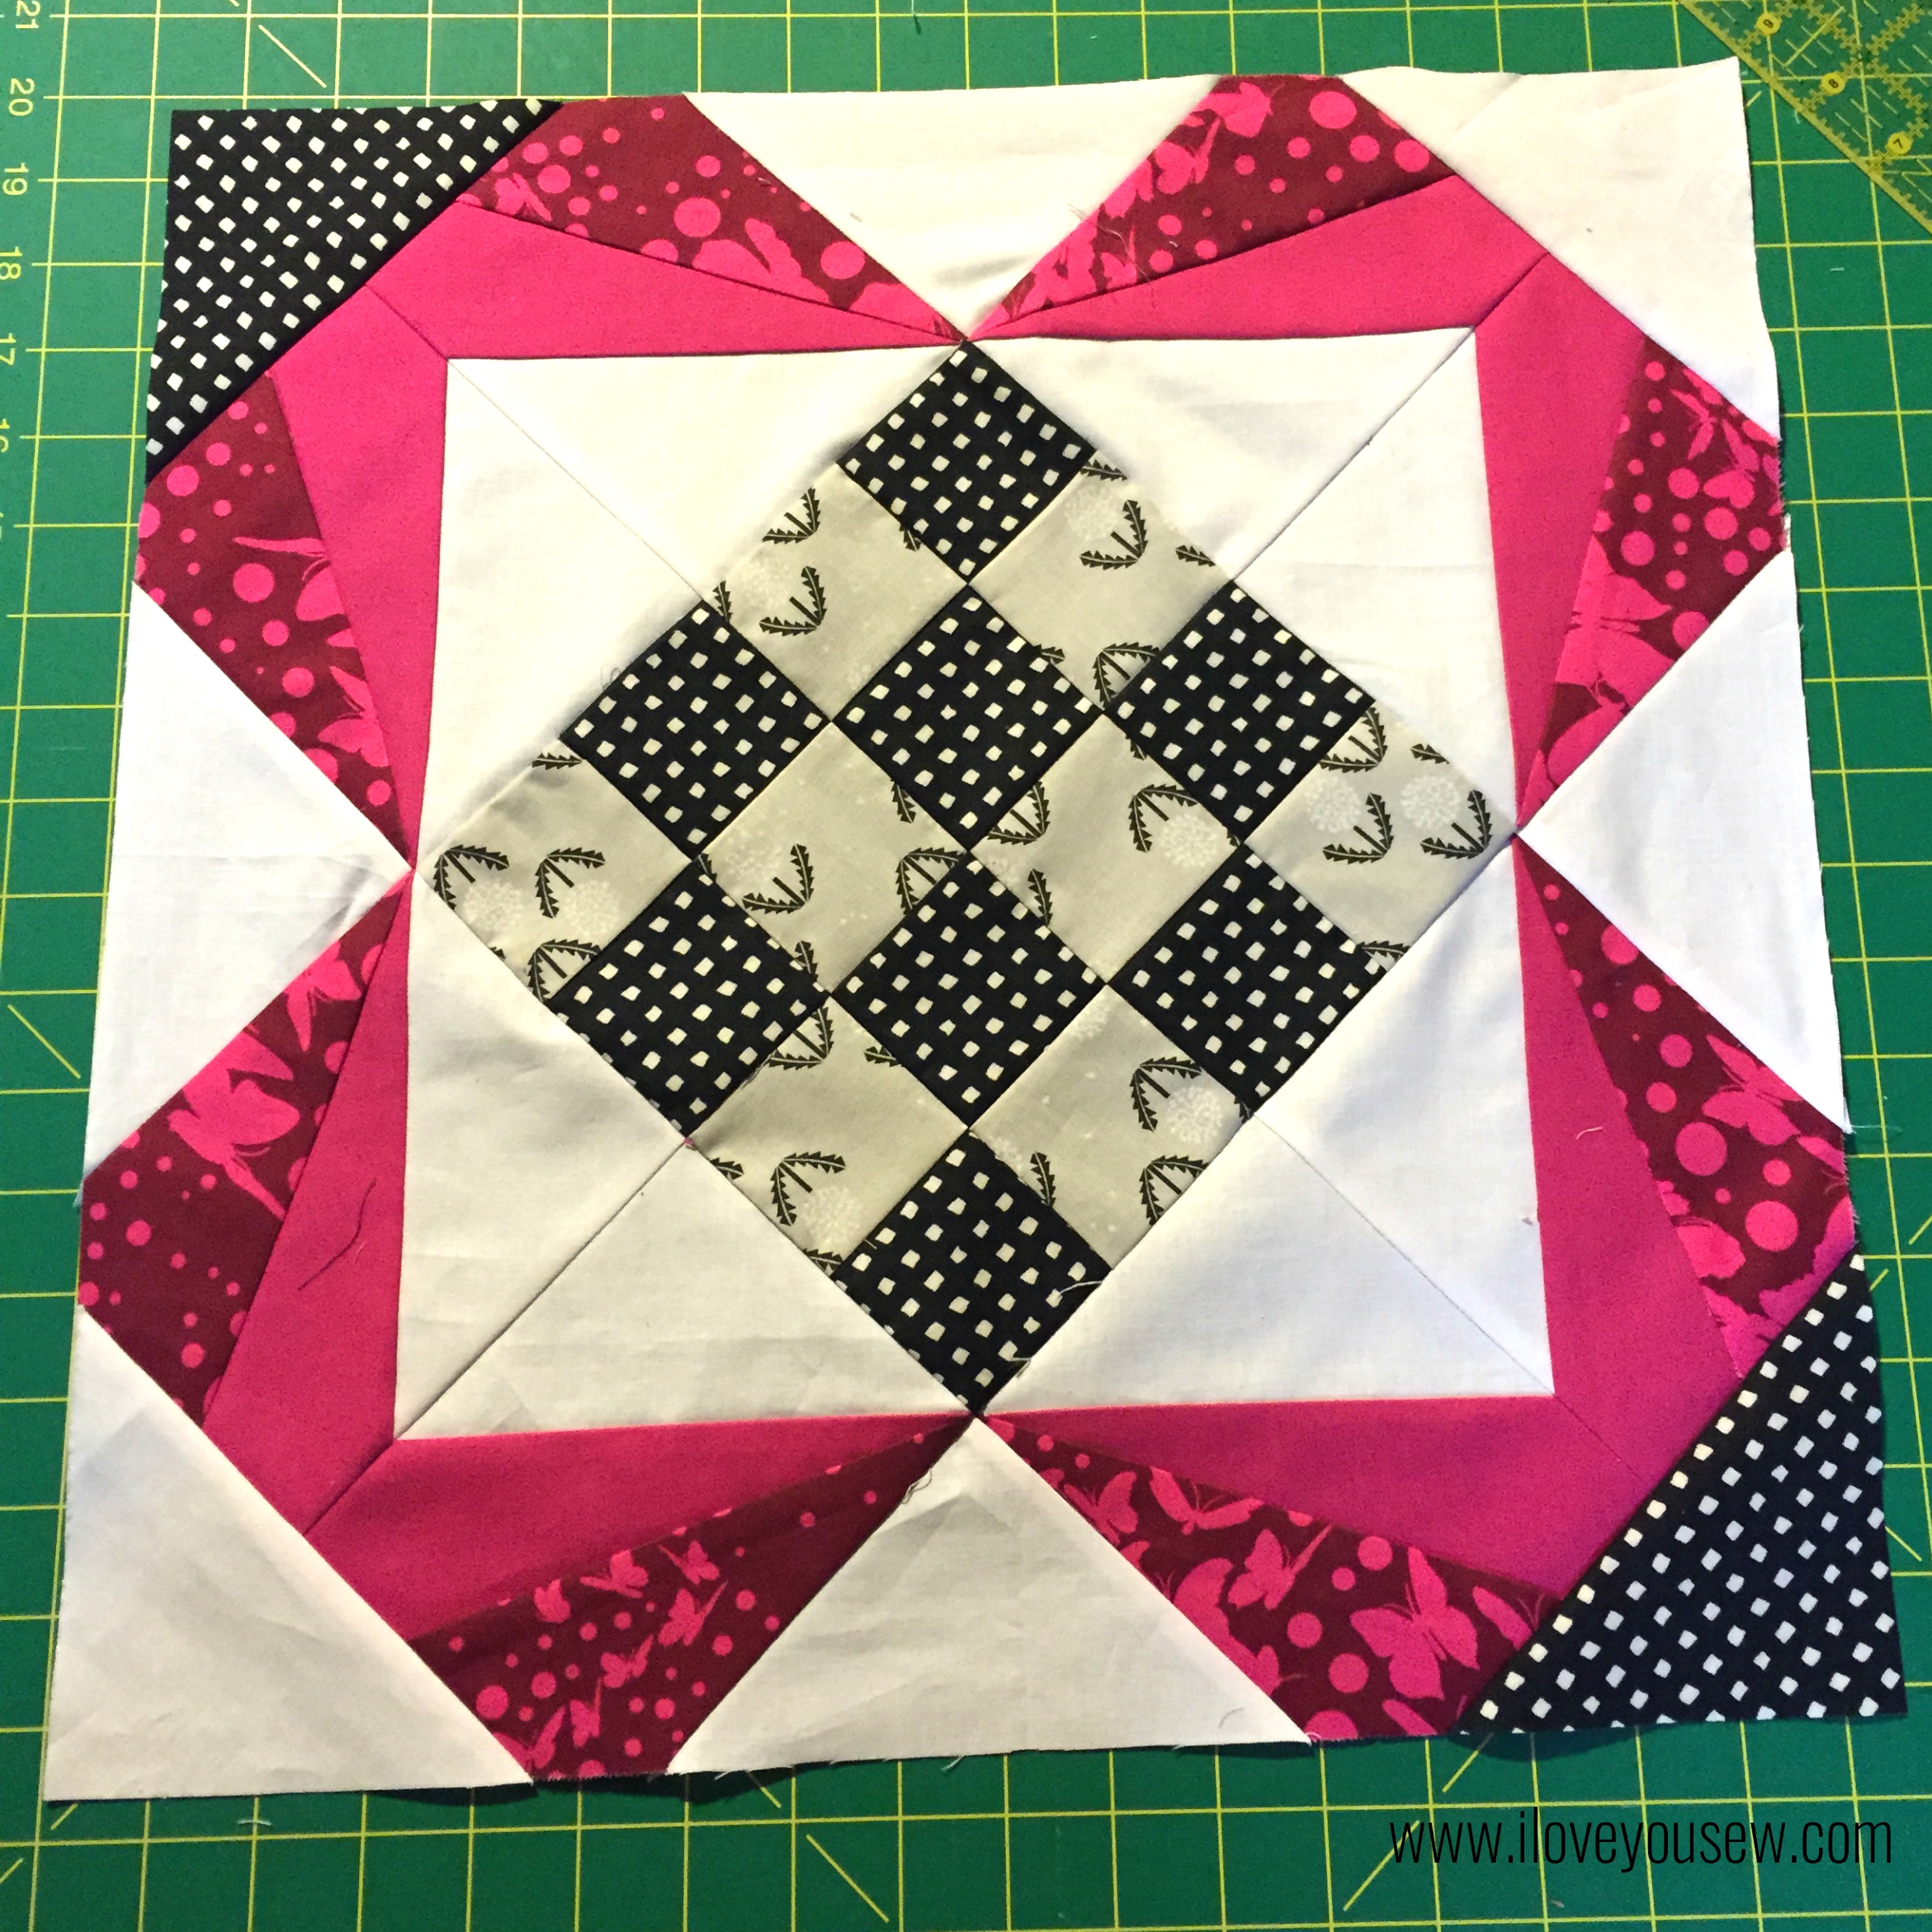
This quilt pattern is gorgeous! You can find the pattern in Becca’s shop currently for 30% off as part of it’s new release (discount code on her blog.) This design is based off of a 16-patch and paper-pieced stars and has so much versatility. You can omit the patches and play with the number of blocks to have completely different looks.
There are five different sizes you can make. I opted for the throw, which is a 4 x 4 block. It’s a generous size and I could (always) use another couch quilt 🙂 Not mentioned is the possibility to make a mini with a 2 x 2 block (approx 34″ x 34″.) This would be a perfect baby quilt or stroller blanket.

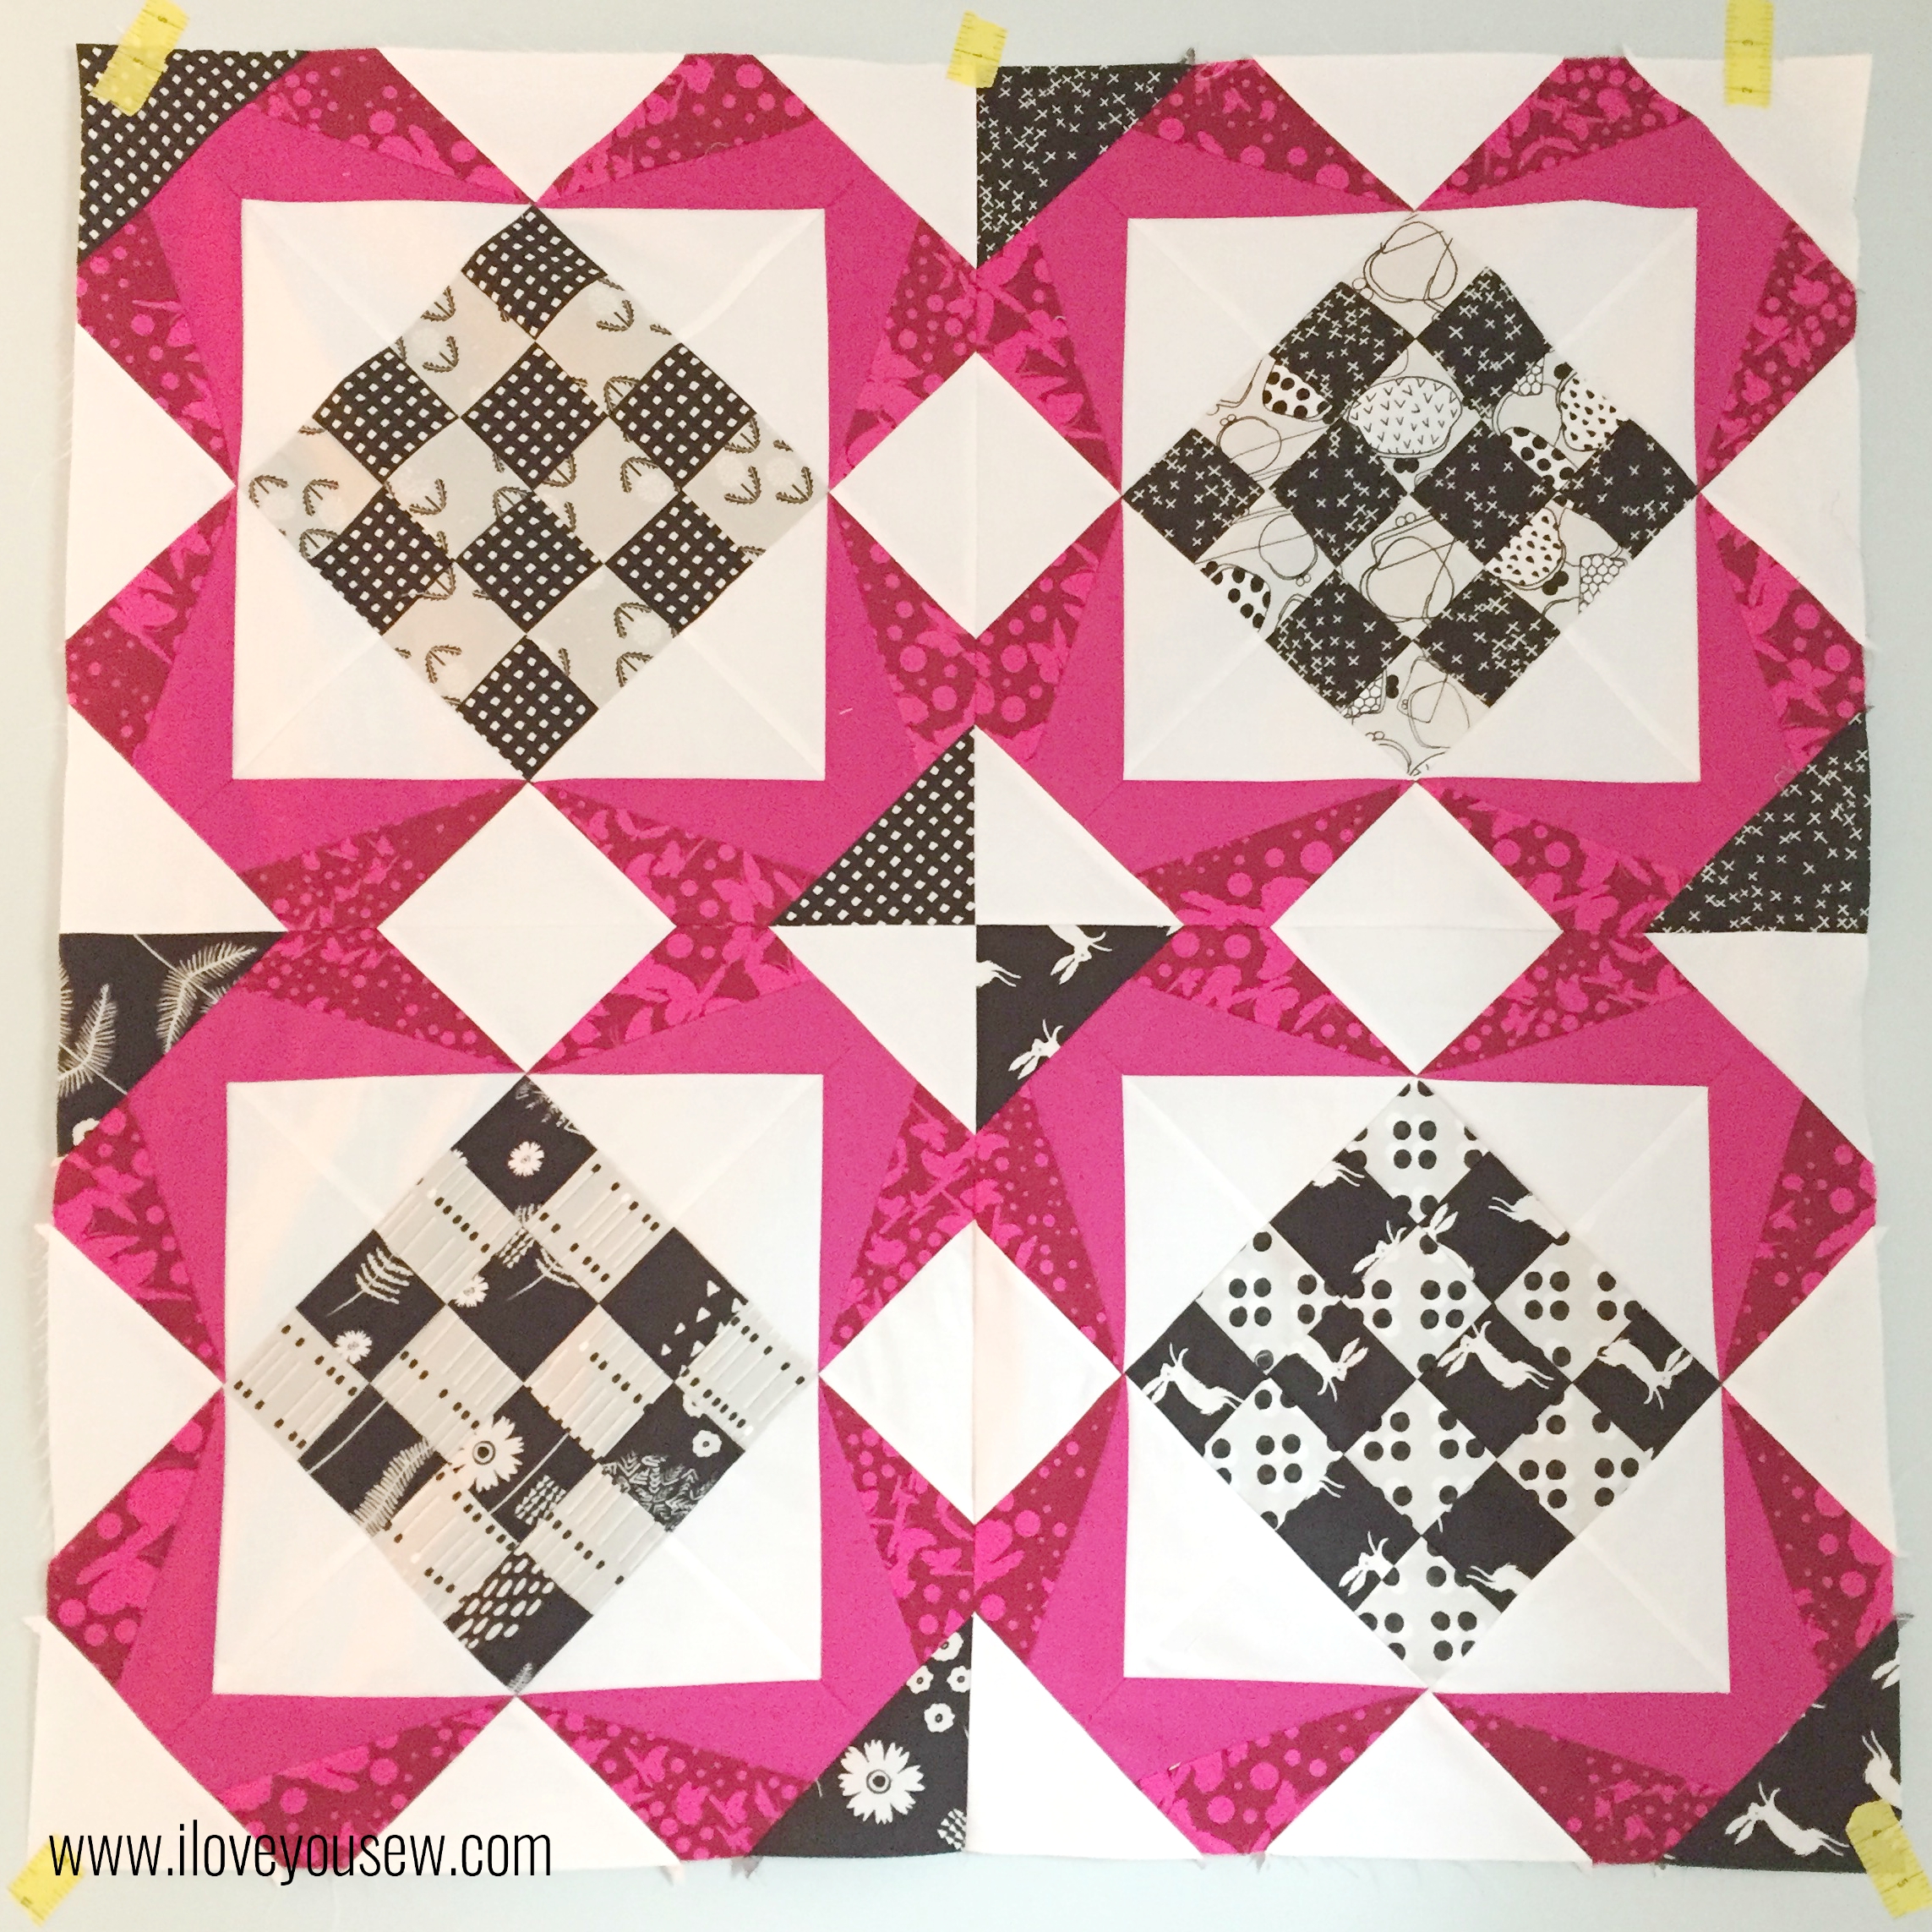
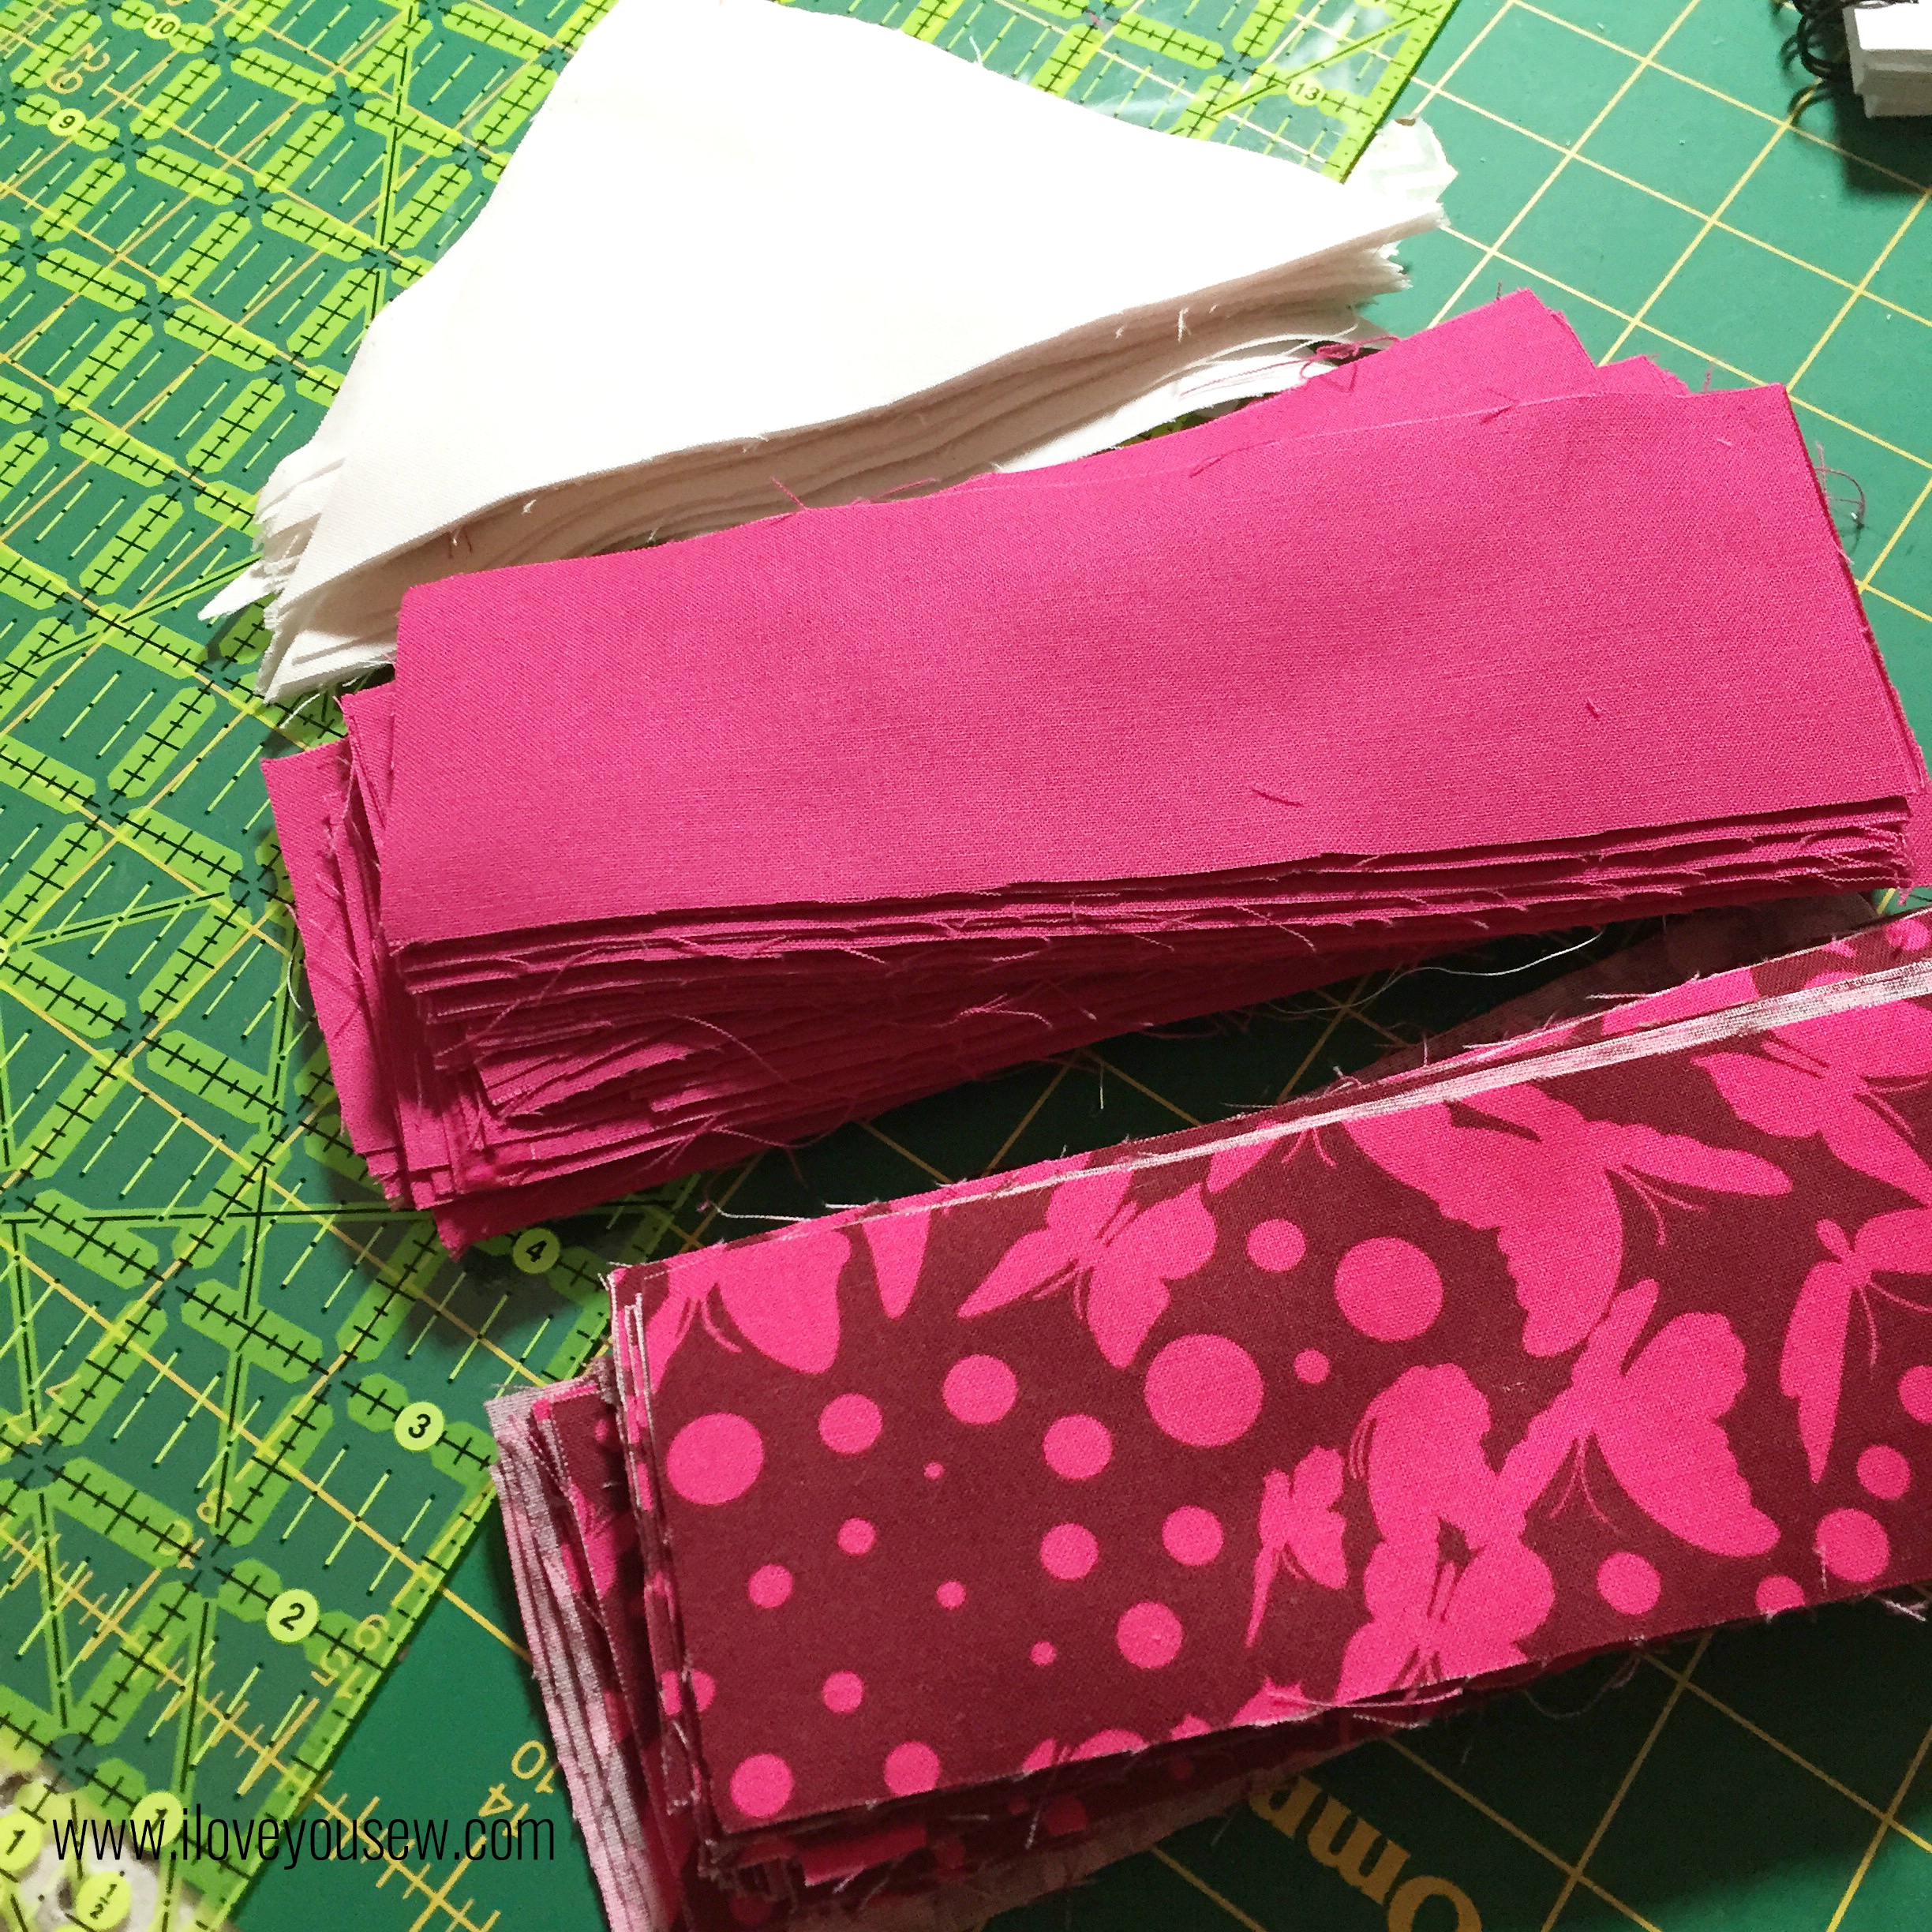
When I received this pattern, I knew I was going to use my Black and White Cotton + Steel bundle. The 16-patch made for some good mixing and matching of the fabrics for a checkerboard look. To bring out the stars and add some fun, I chose Tula Pink’s Butterfly Swarm in Jam from her Moonshine collection. This saturated fuchsia was perfect against the Black and White. I paired the Butterfly Swarm with Kona Cotton in Valentine to complement, but not compete against the busy fabric. All of these fabrics were balanced out with Kona Cotton in Snow to make the design of the quilt pop out. I added Architextures Grid in Black as possible binding, but I’m not entirely sold on it just yet…
There is a good amount of paper-piecing involved for the stars, but luckily it involves only three fabrics per Star Spoke and they are a generous size. Becca provides great instruction on the process to help you along. If you are new to this and need some more help, this is a great video tutorial on paper-piecing as well.
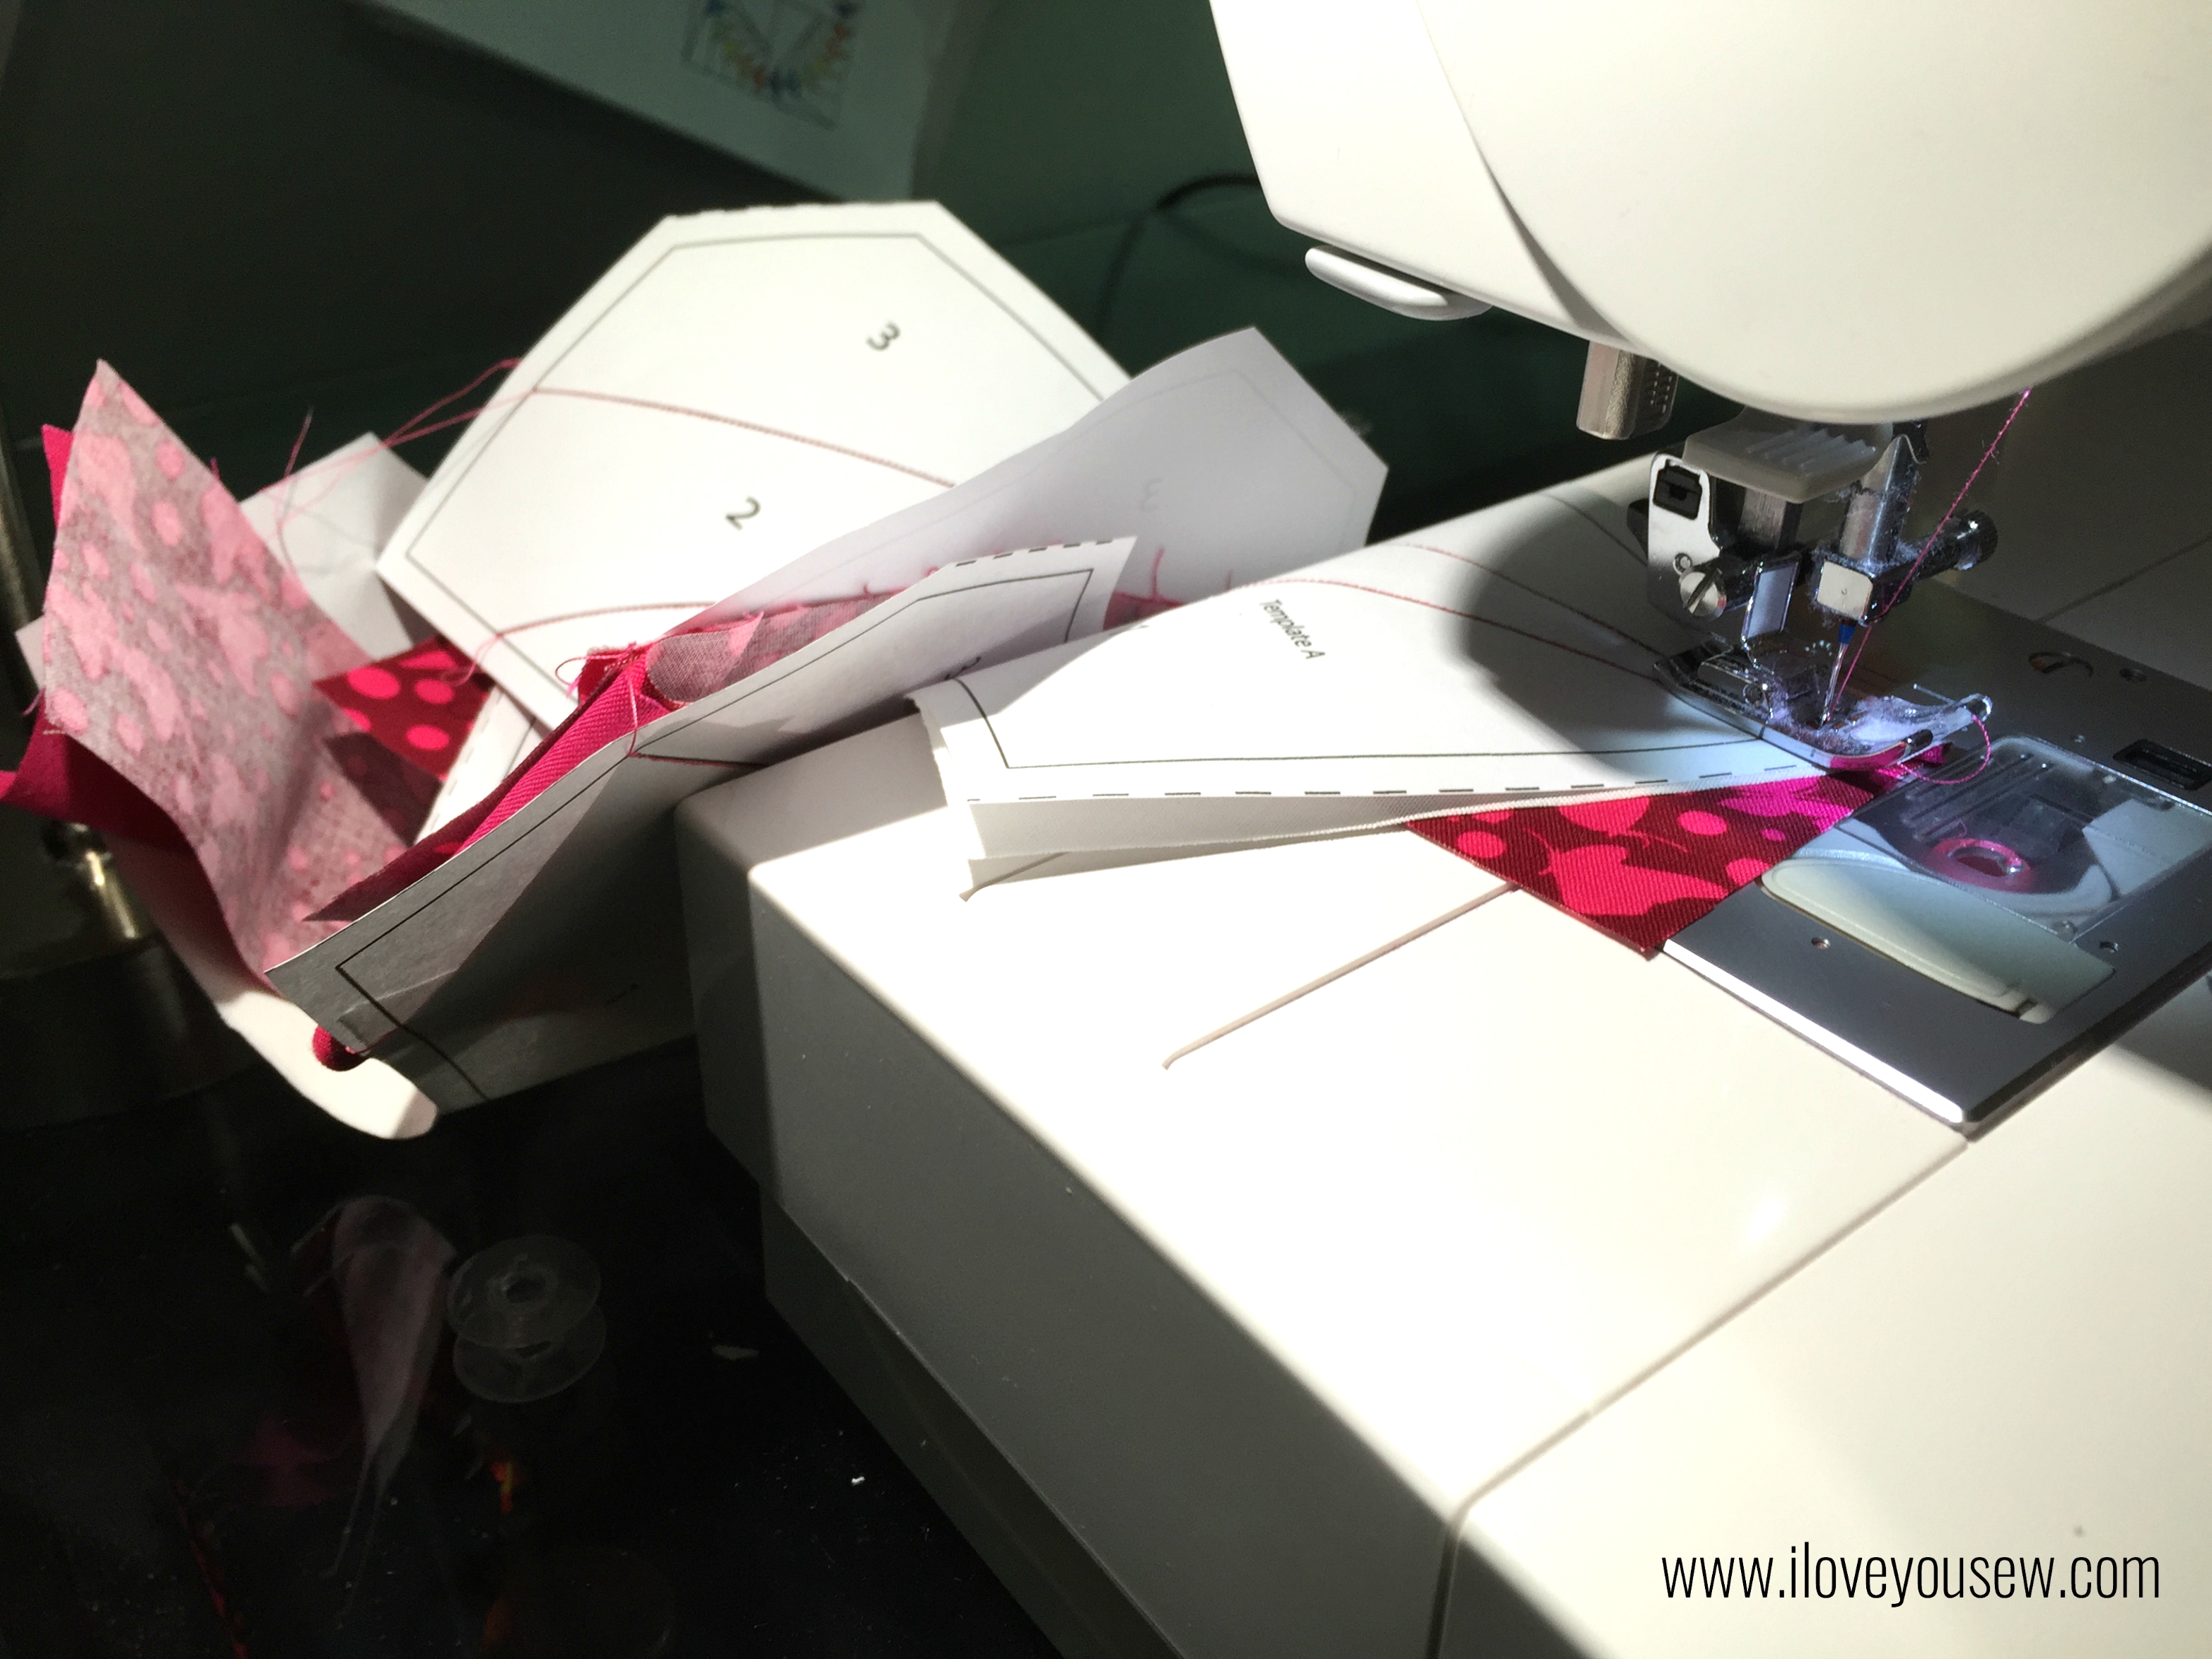
I found that prepping all the fabric at once and setting up an assembly line worked the best for me. Then I could have a “modified” chain-piecing line. This is “modified” because you generally do not sew through the seam allowance on paper-piecing templates, so I had to lift the presser foot to pull the templates through vs continually feeding fabric.

When attaching the spokes together, I decided not to nest the seams to keep the look of the triangles clean (since they were white and you could see through to the seam allowance.) So to match up the points, I pinched the ends where they met.
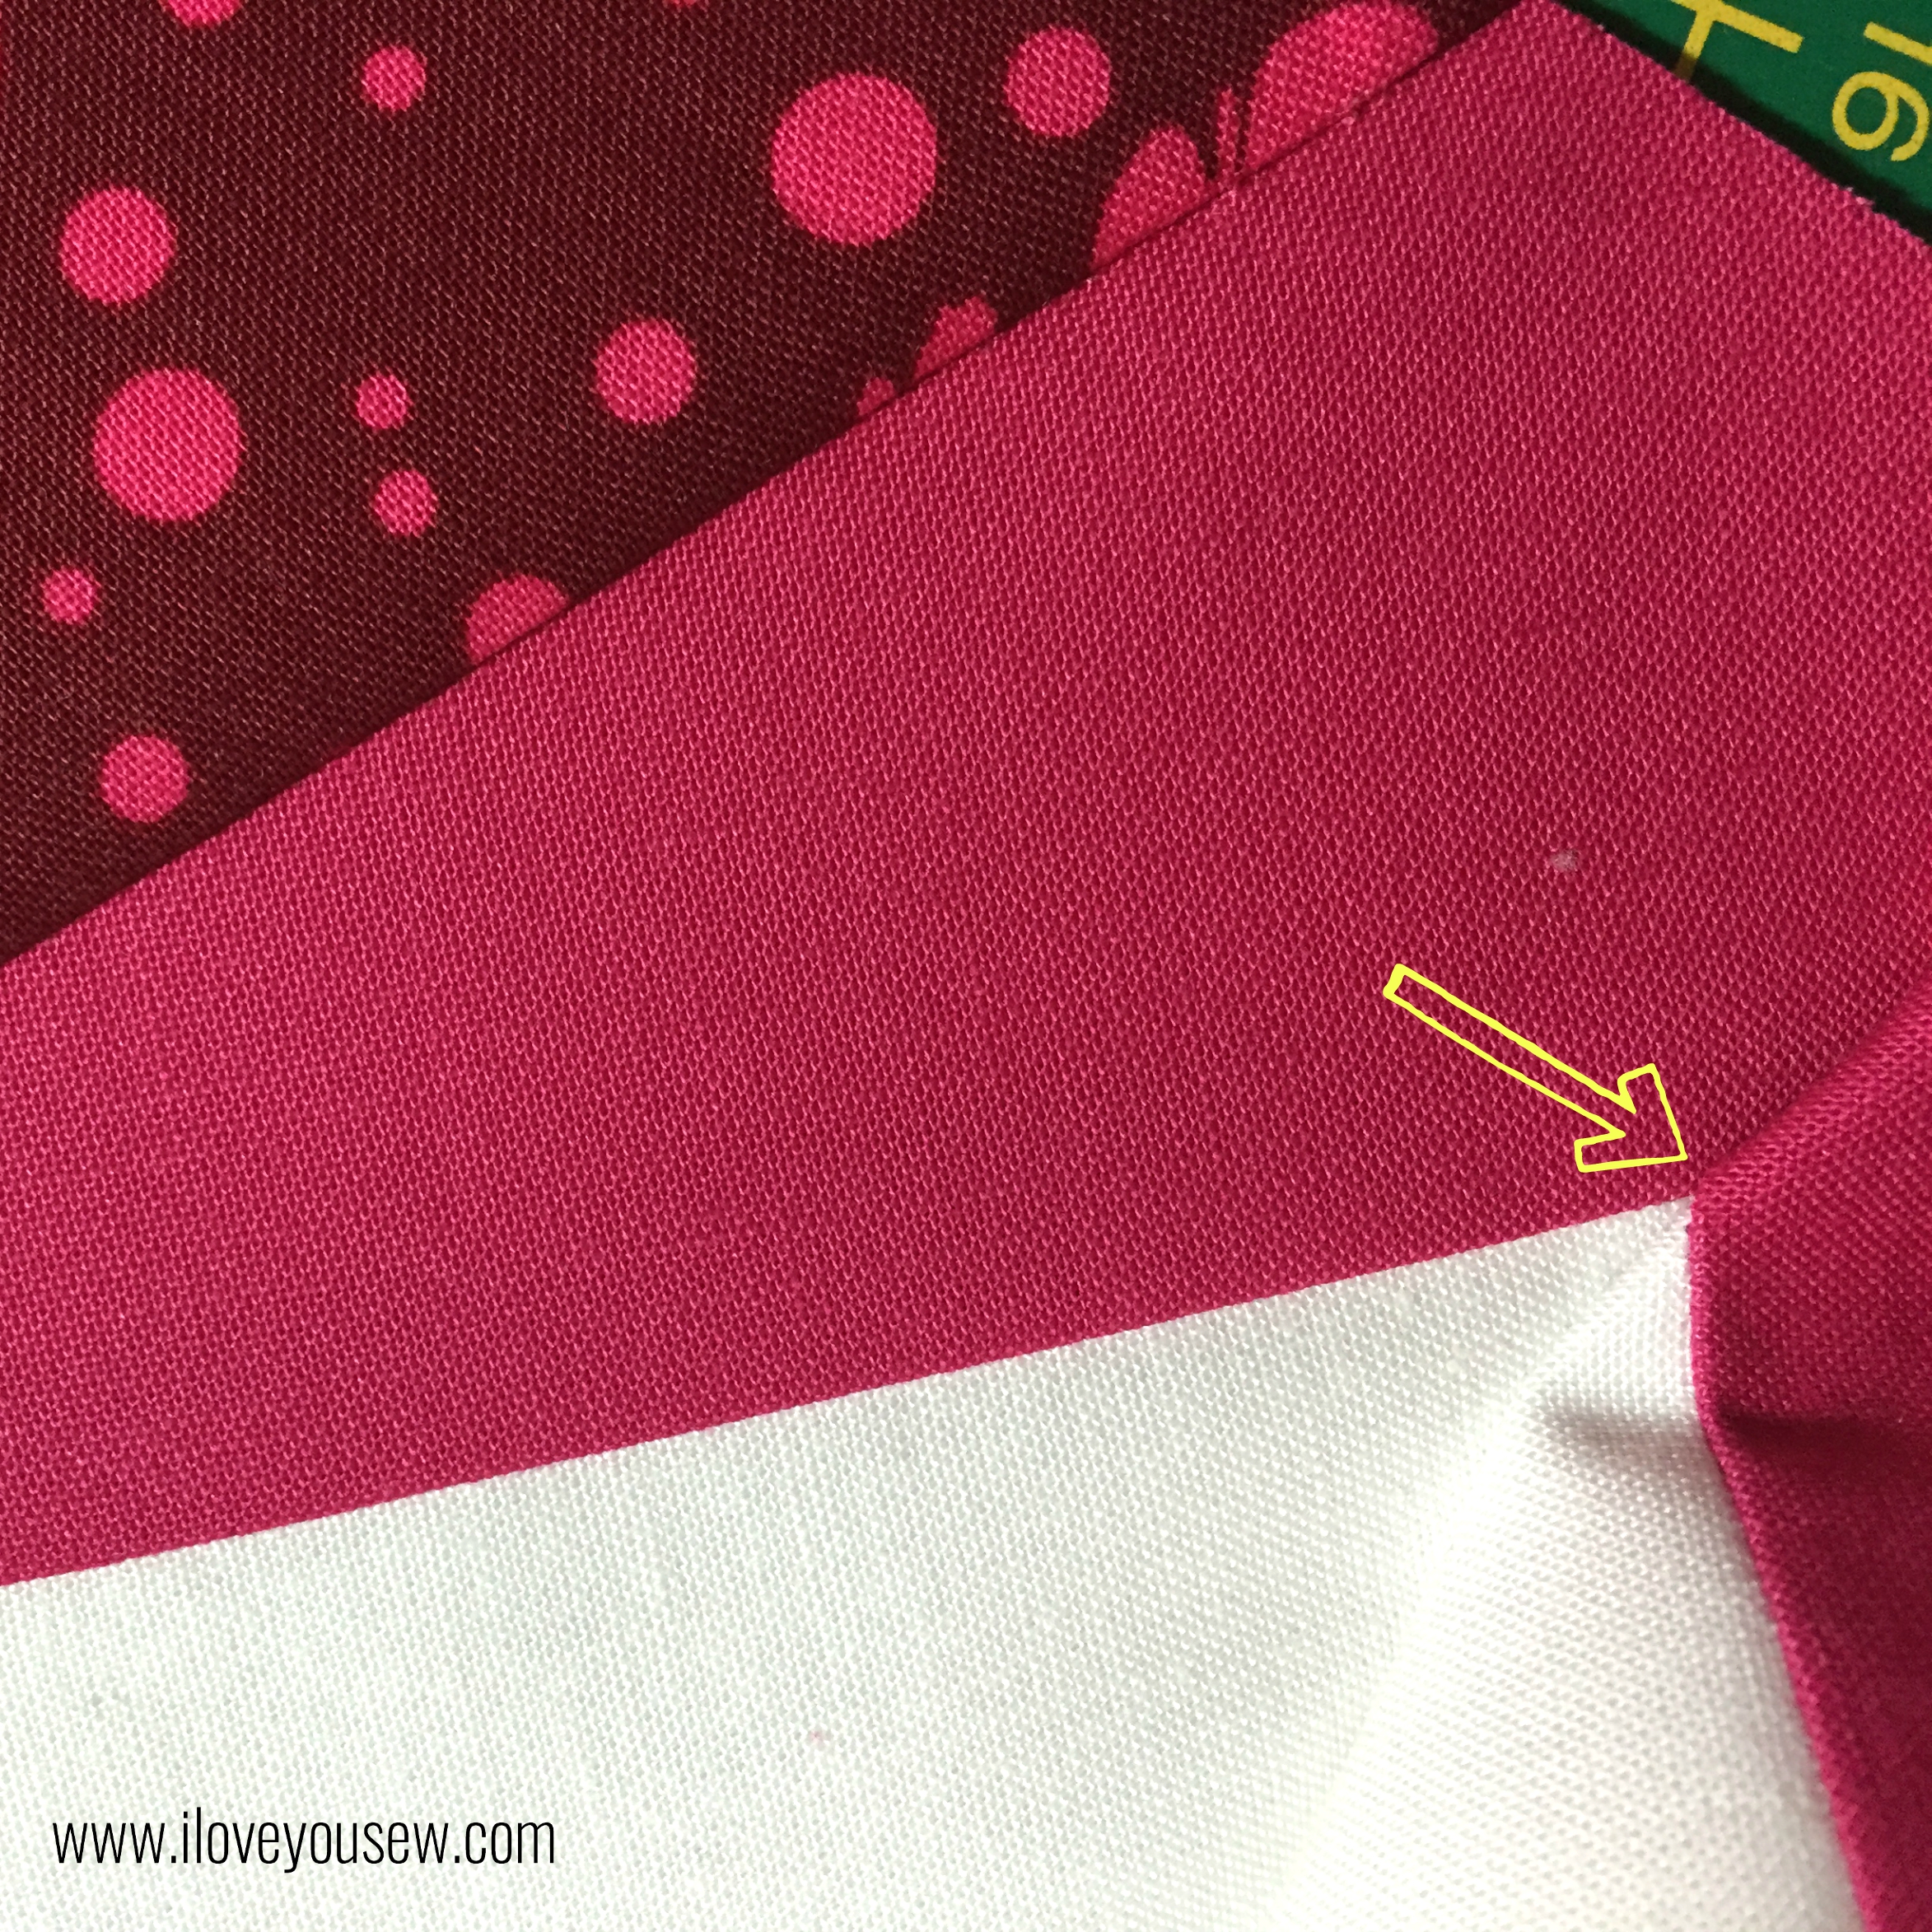
Then I flipped over the pieces to check that the points indeed matched. I pinned the pieces and sewed away 🙂
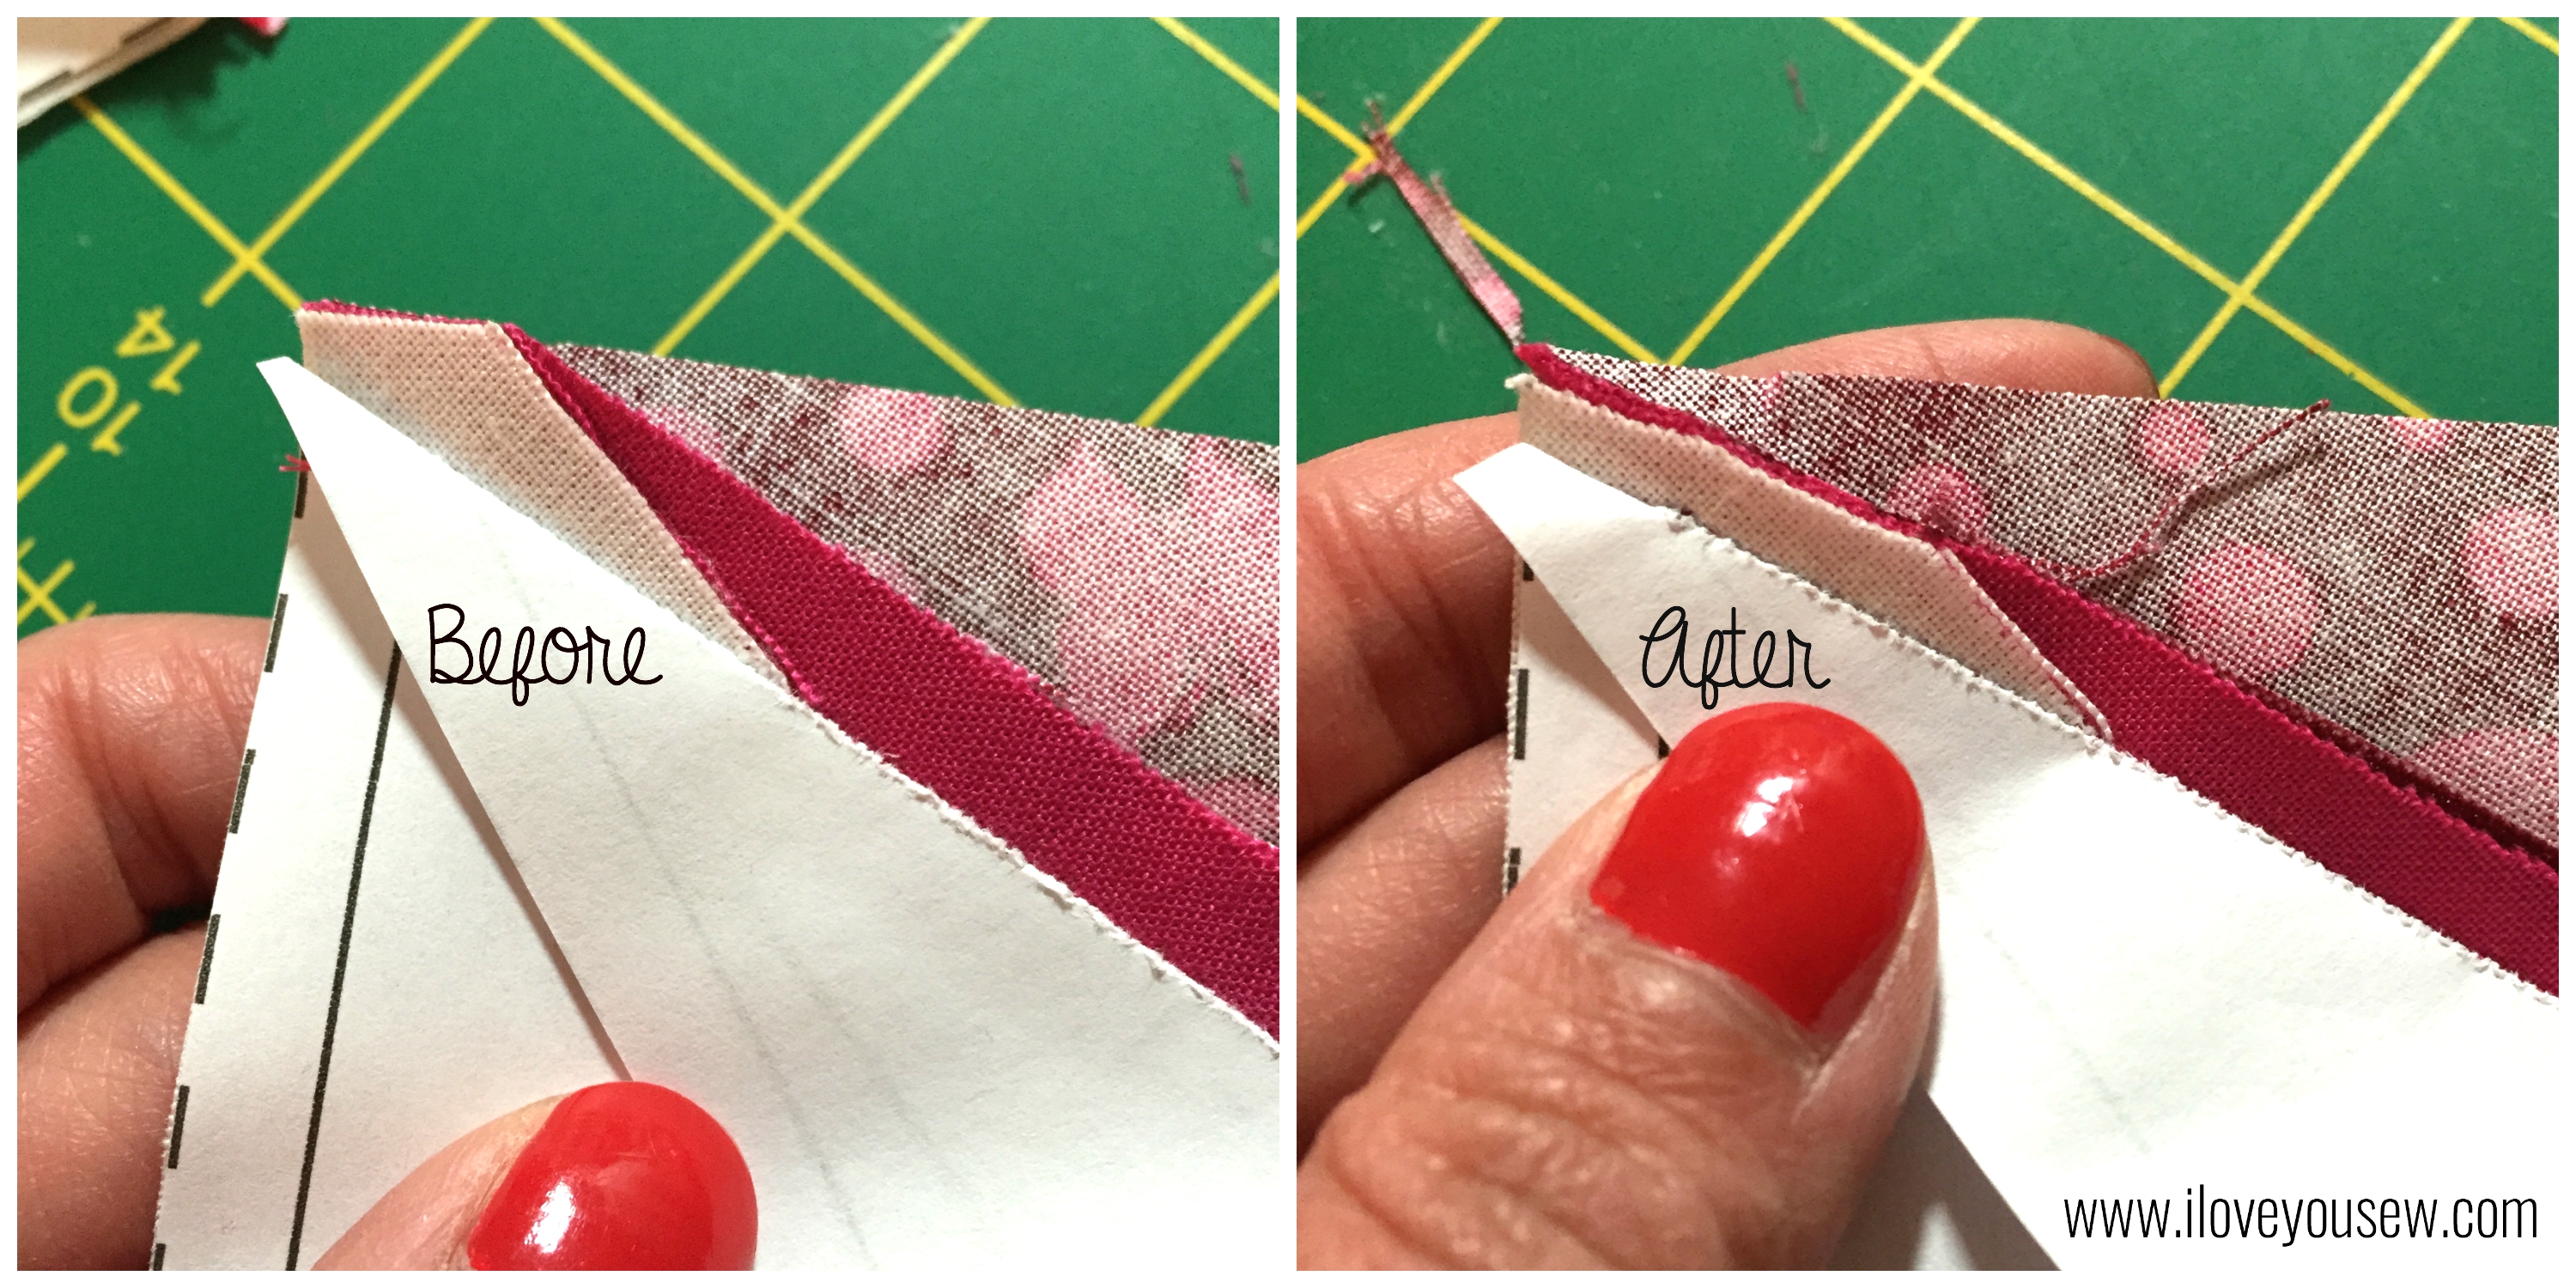
A great tip from Becca was to grade the seam allowances of the stars as you assemble the blocks. This takes out some of the bulk and allows the blocks to lay better for pressing. The points of the stars get pretty bulky otherwise.
So far, I’ve completed the quilt top and am waiting on the backing fabric to arrive so I can quilt this puppy. I can’t wait to show you more….plus, this will be my first quilt completed on my new sewing machine….eek!!!
***For pictures and the post of the completed “Jacks Quilt,” go here.***
Happy Stitching,
Cristy
The pattern was provided by Bryan House Quilts as part of testing. All material was purchased and selected by myself. All opinions and comments are my own and have not been influenced by 3rd parties.


