The Claire Fold-over Clutch was my very first published pattern just over a year ago. I can’t believe it’s been that long already. I put my own twist on the popular bag style with a large easy access pocket on the back and the simple use of leather one side of the bag – making it easier to sew. You can read more about my design here and see lots of different versions with #clairefoldoverclutch on Instagram.
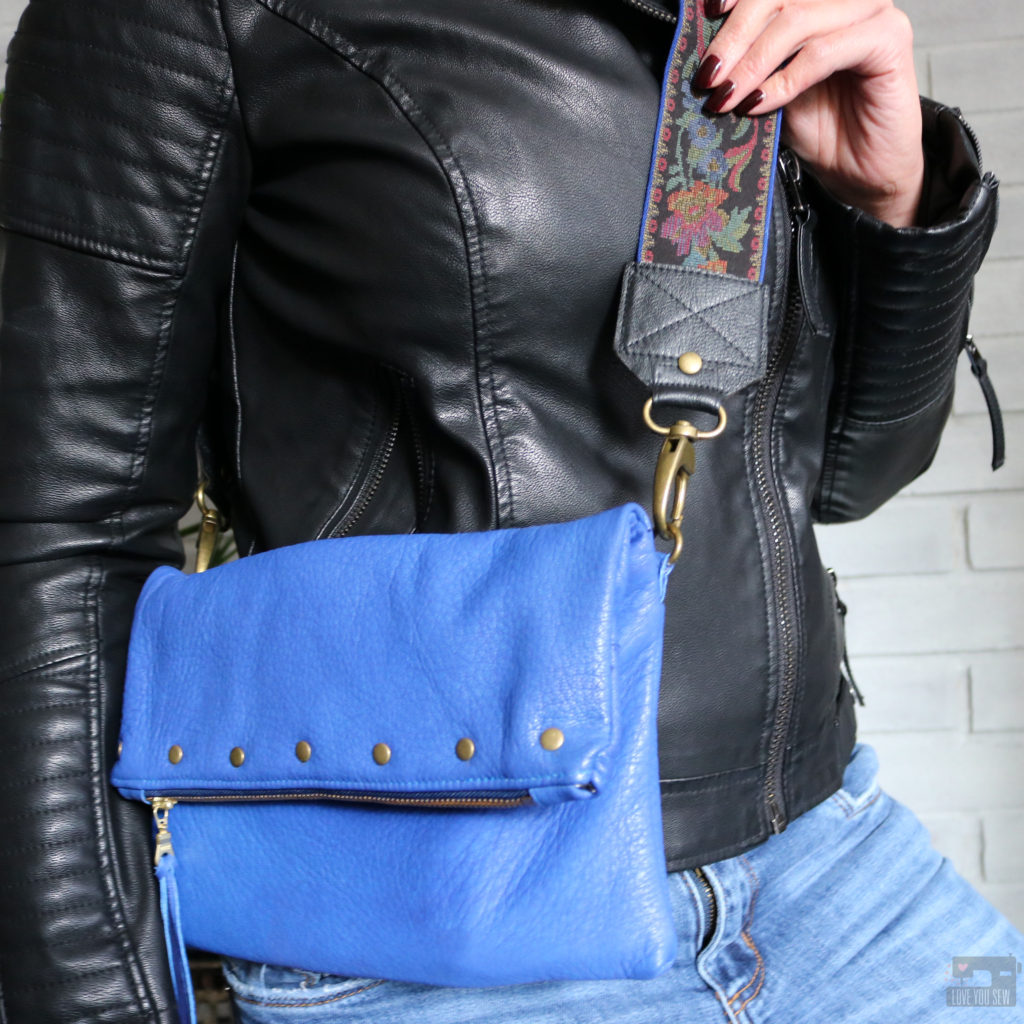
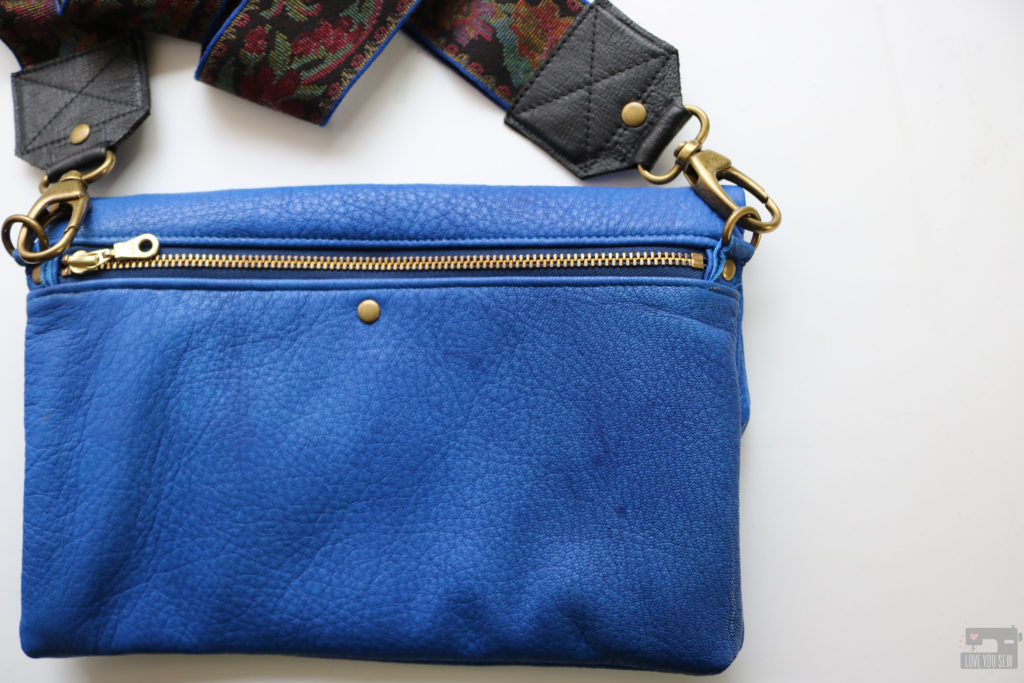
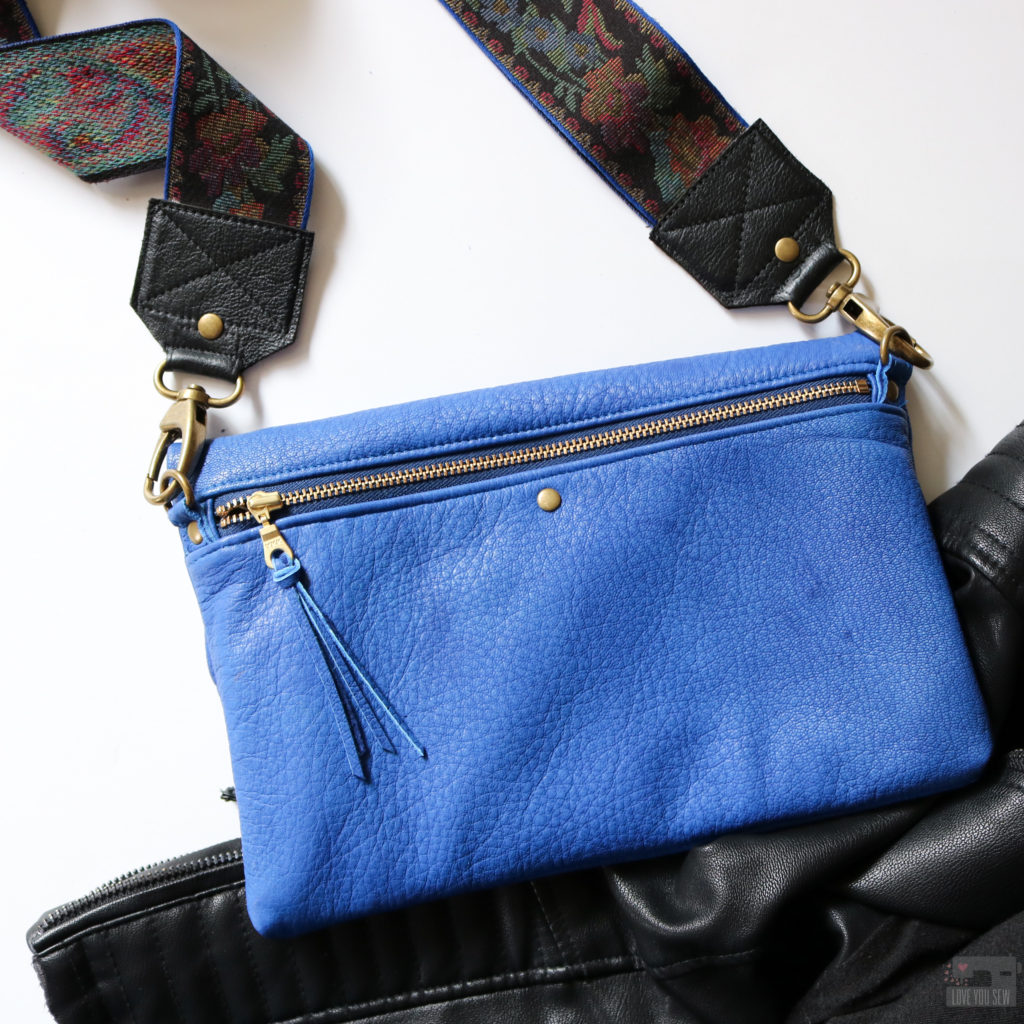
My designs are meant to be practical, but also chic enough to work with new trends and fashion with just a change of fabric. This is the case with the Claire. Although it was written to use both fabric and leather, I thought it would be fun to make a full leather version — in cobalt blue for a real statement bag. This blue leather is pretty edgy and gave me rock ‘n roll vibes right away. So, I thought a guitar strap would give the bag a new look all on it’s own…even after making dozens of other Claire Fold-over Clutches!
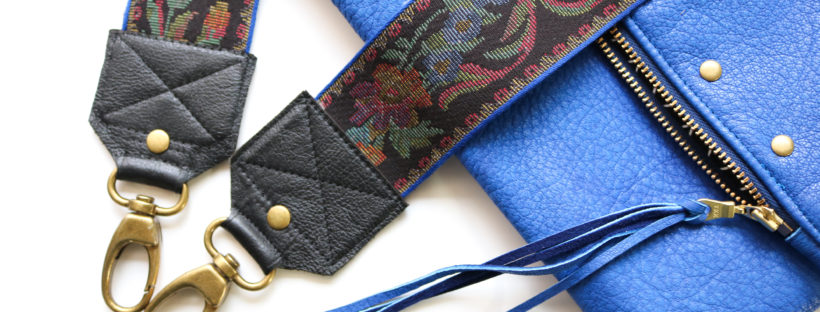
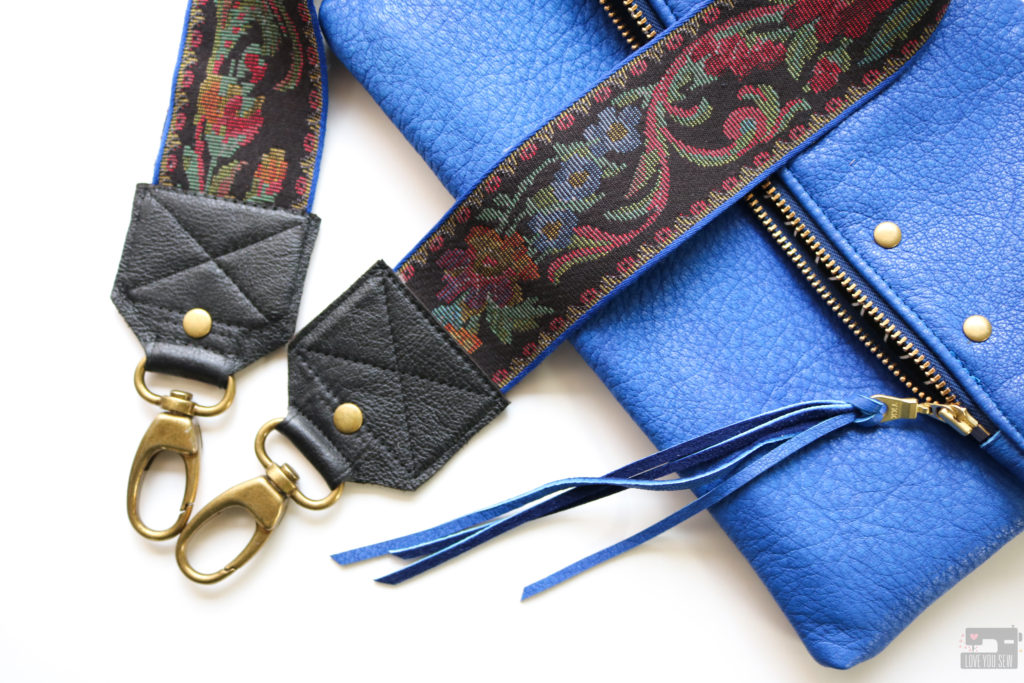
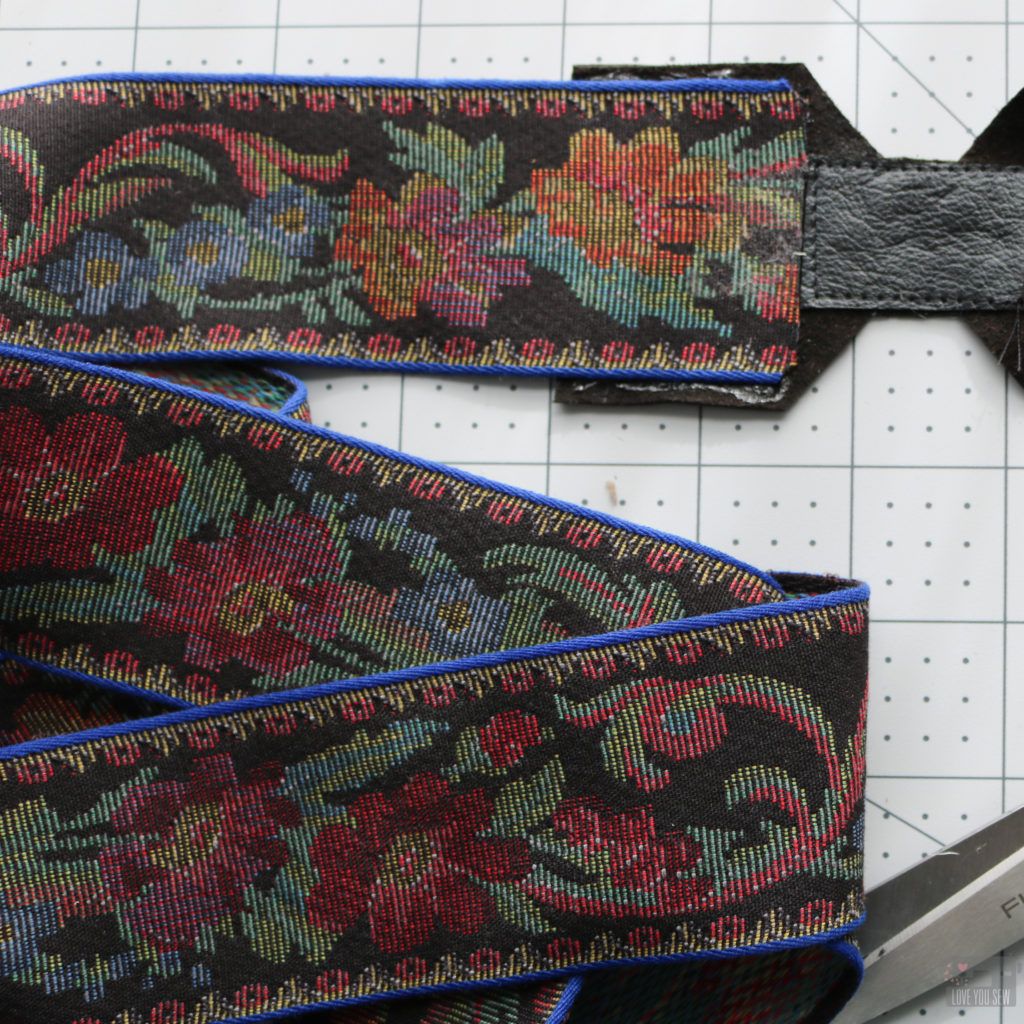
This amazing woven tapestry-like ribbon was found at a yard sale a few years ago. I think I bought it for $1-2 and was drawn to the bright blue edges contrasting against that moody floral motif. I like mixing up new and old looks, so this trim was definitely all me. The leather was picked up from a destash group and so I was able to grab an amazing deal. The seller was getting out of her baby shower business and had so many pretty pieces of leather to get rid of. Her loss was definitely my gain!
Make the Claire Fold-over Clutch
To make the bag itself, you will need the pattern and instructions from my shop here. The main modification I made was to use leather on both sides of the exterior, instead of just one. (I would only recommend this ONLY if you have a machine strong enough to handle all of the layers.) But if you are just beginning, try out an all fabric version or one with very thin leather/vinyl.
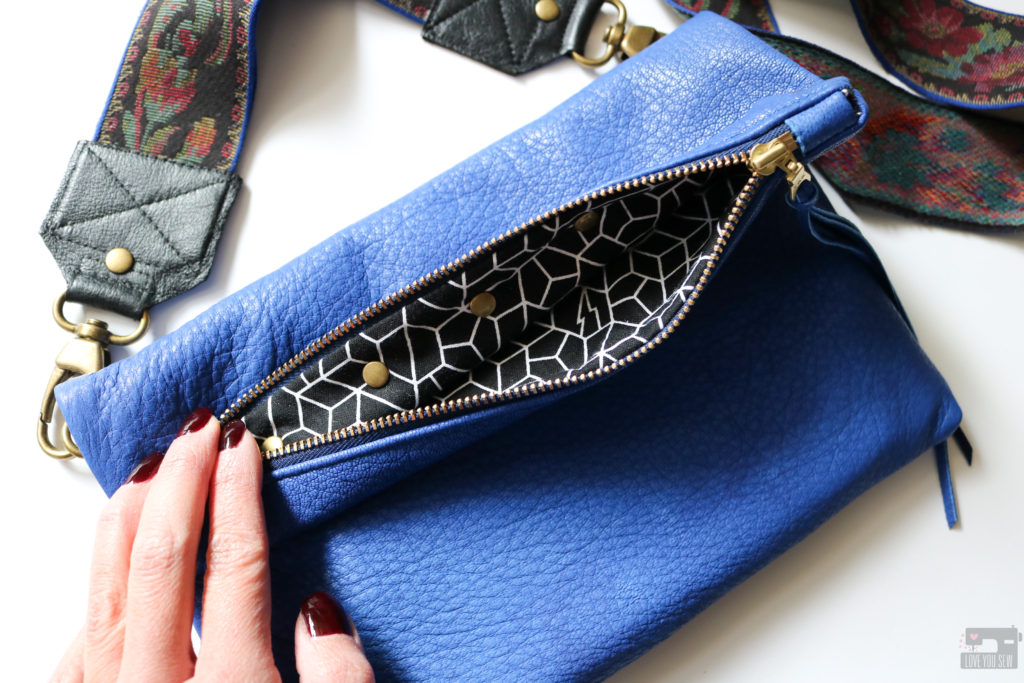
Since the bag is made of solid color all around, I made sure to add in some accents and interest with metal. I used metal zippers (which I actually installed at the wrong places — I should definitely remember to read my own instructions…but I thought going from memory was good enough. Wrong!) If I was using fabric, I would have swapped out the zippers, but with leather, the needle holes are permanent and I didn’t want to mess with all of that and just moved on! In light of my zipper faux pas, I added a line of rivets along the top zipper (through the lining) to play with the same edgy feel of the cobalt leather. What do you think?
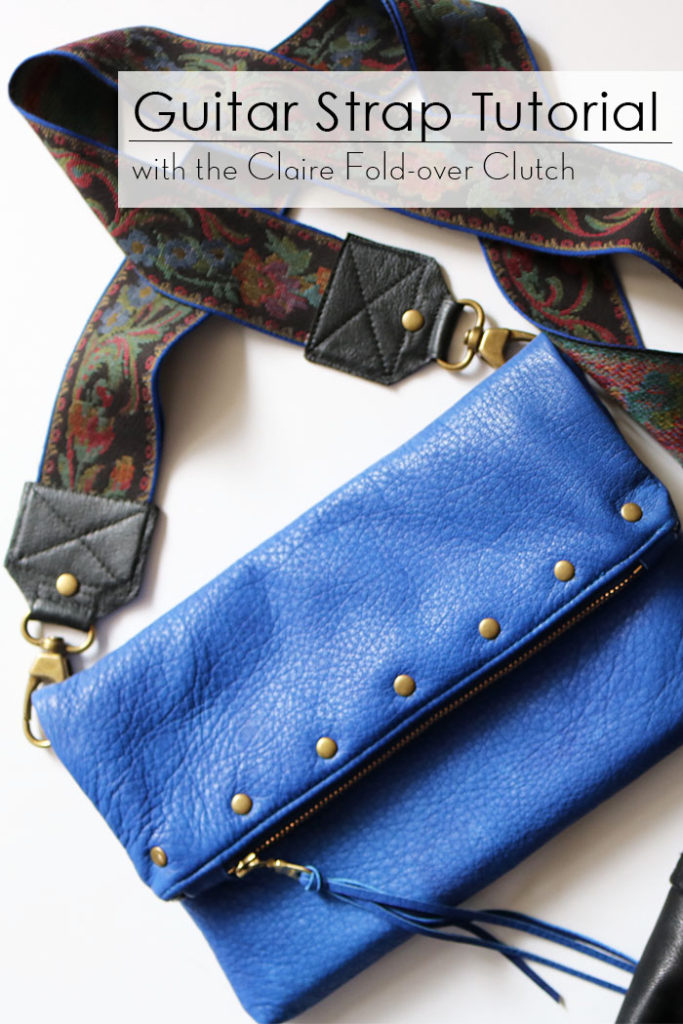
Make the Guitar Strap
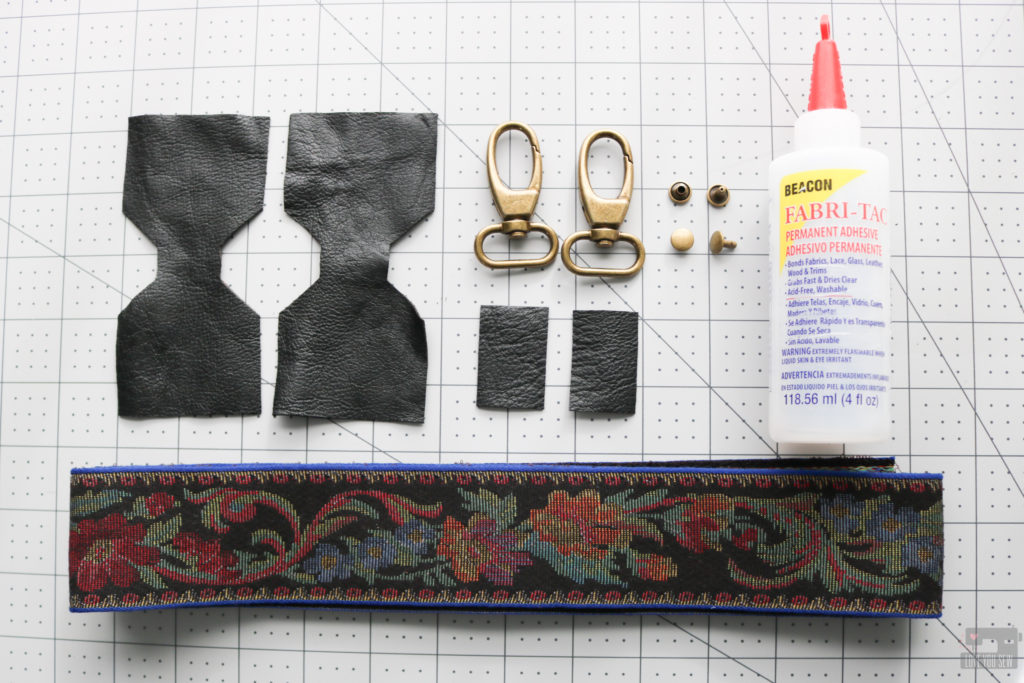
For the strap, you will need the pattern pieces below. I drafted the ends for 1 1/2″ or 2″ wide straps. Anything else more narrow won’t give you that guitar-strap, but feel free to widen/narrow the pattern for your own look!
Instructions:
1. Use the templates to cut out pattern pieces based on whether you have 1 1/2″ wide or 2″ wide strap. You will have (2) Strap ends and (2) Reinforcements.
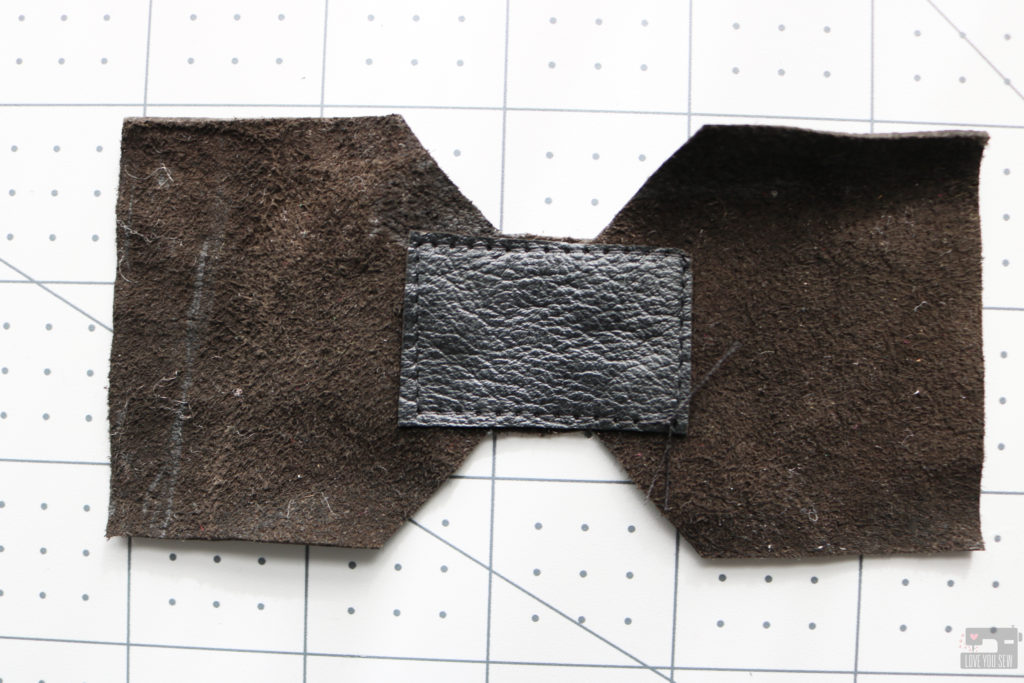
2. With each Strap End wrong-side facing up, center a Reinforcement as shown with wrong sides together. Glue baste in place. It’s tempting to skip this step, but this will help your leather from stretching and distorting with time and wear.
3. With the leather needle installed, stitch 1/16″ around all four sides of the Reinforcement. Repeat with other Strap End.
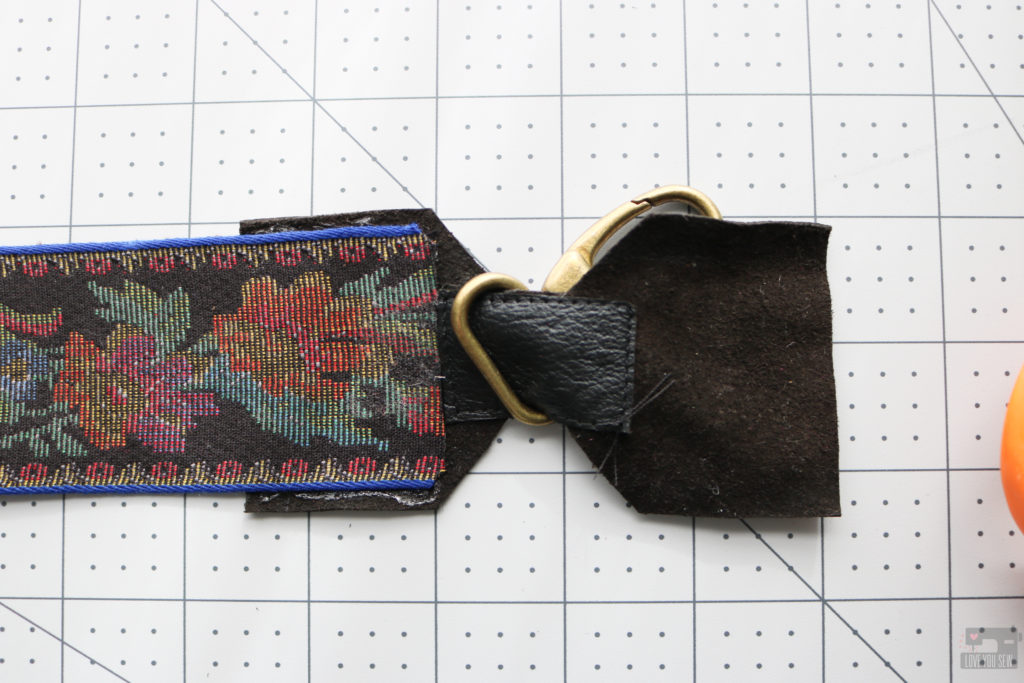
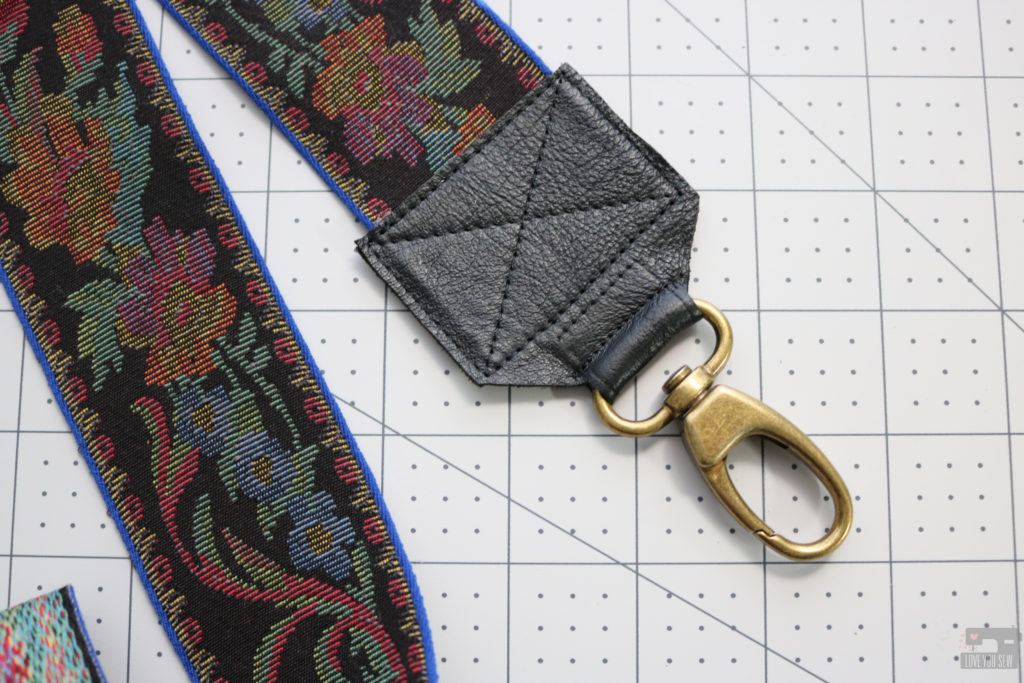
4. Take Ribbon and center it on one half of the Strap End with wrong sides together, aligning it to the Reinforcement. (You may need to cut off the ribbon’s corners so they don’t hang out of the Strap Ends.) Clip or glue into place. Repeat with other Strap End.
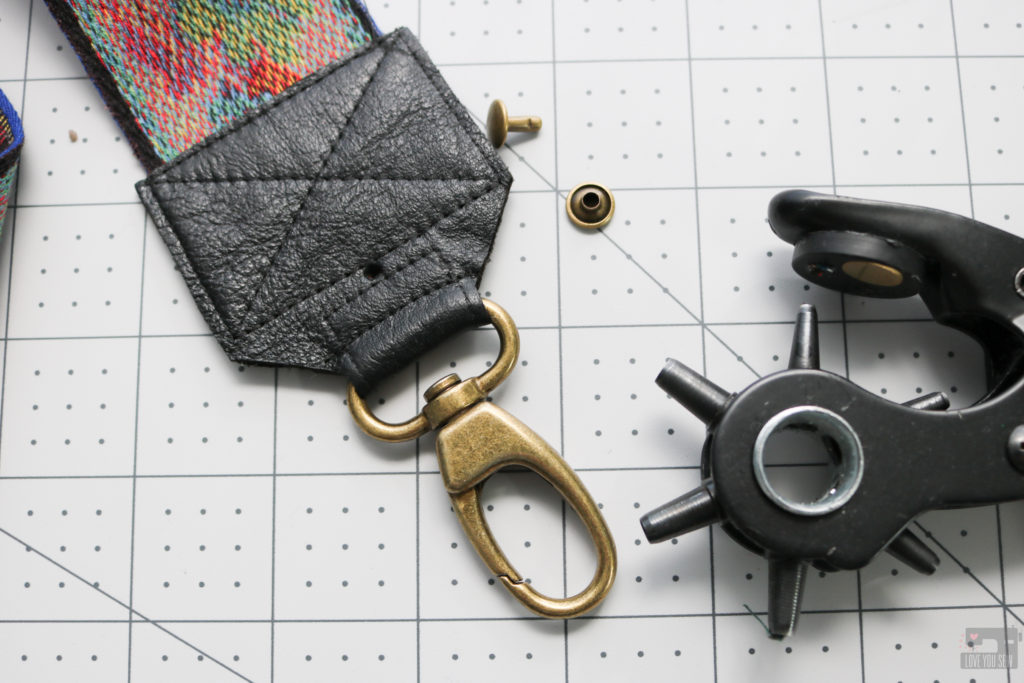
5. Slide one Swivel Clasp onto the Strap End. Repeat with other Strap End.
5. Flip the other side of the Strap End up so it is folded in half with wrong sides together, encasing the clasp. Clip or glue together. Repeat with other Strap End.
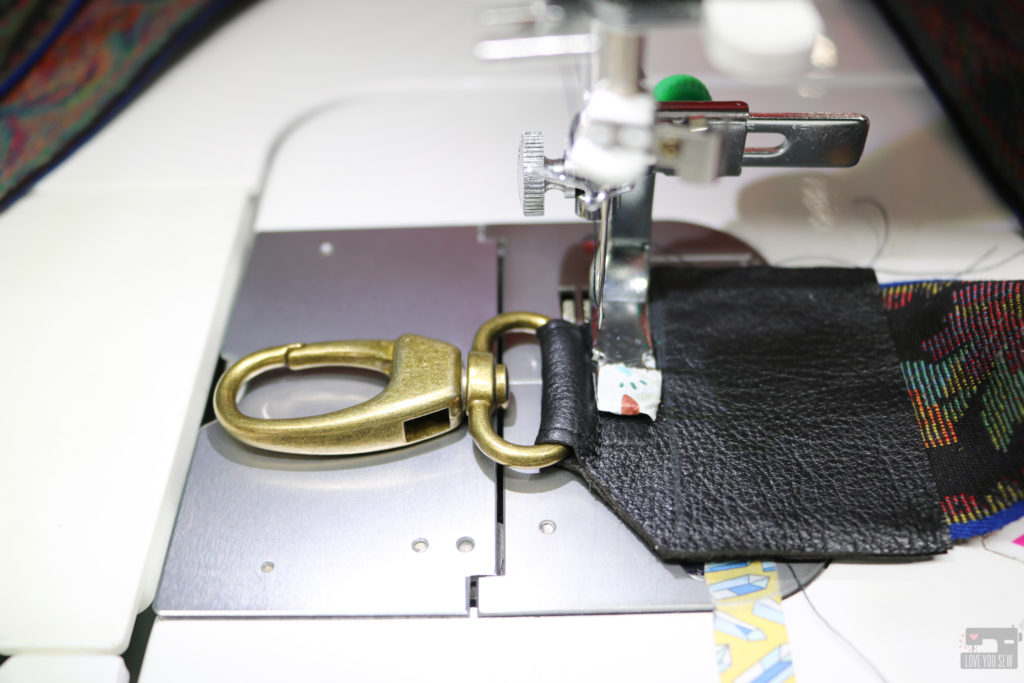
6. Use your Zipper Foot to sew a seam to secure the Strap End onto the Swivel Clasp, sewing as close to the clasp as possible. Back-stitch well. Repeat for the other Strap End. TIP: Add washi tape under the foot if you don’t have a Teflon Zipper Foot like me.
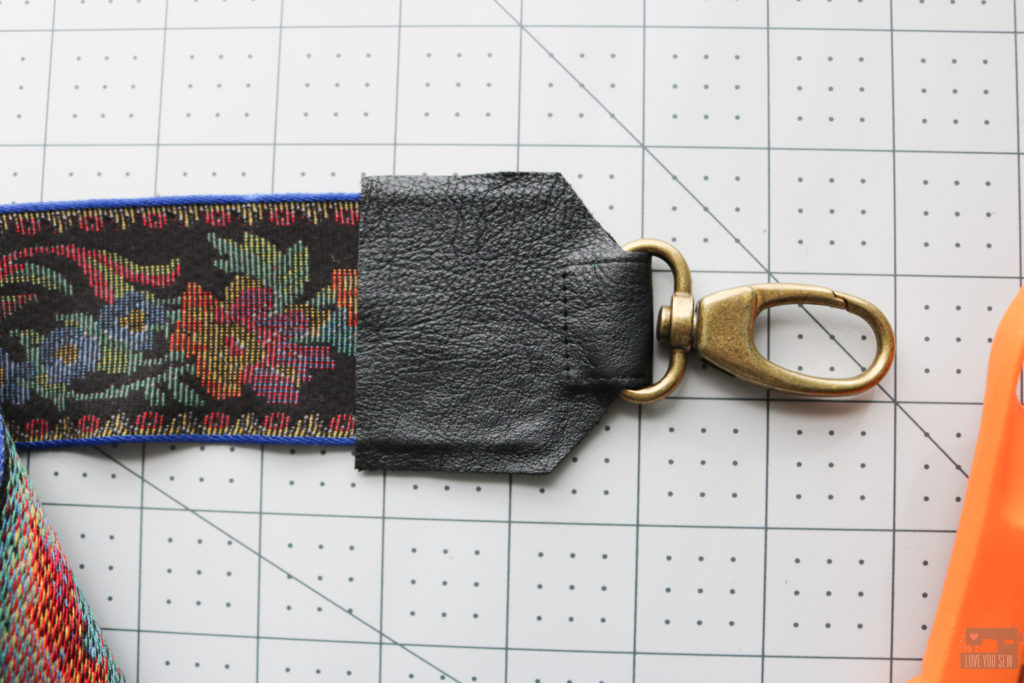
7. Switch to a Teflon or Walking Foot and top-stitch each Strap End together with the Ribbon using the stitch guide on the template. Repeat with other Strap End.
8. Finish with rivets, if desired. Congratulations on your new guitar strap!
It doesn’t stop here! I’ve been seeing beautiful striped belt strappings used on designer bags like here on my Pinterest page. I’m already planning out my spring bags with these looks! You can use this same method to easily update any bag for the changing seasons or add new life to a great hand-me-down or thrifted find. The options are really endless. Enjoy and let me know how you like the tutorial!!!
Happy Sewing Friends!
Cristy
This post may contain affiliate links. Please visit my Disclosures page for all details.
I’m a fan of fashion. But as a mom (and as a work-at-home one,) there isn’t much motivation to step past the yoga pants and a clean (smelling) tee most days. I do admit, when I can get my act together, it does make me feel good to step out of my slip-on Vans. Now that both my kids are in school, I’ve been making a conscientious effort to bring my fashion game back – nothing crazy, but pulled together looks using cues from today’s trends. Like Boho.
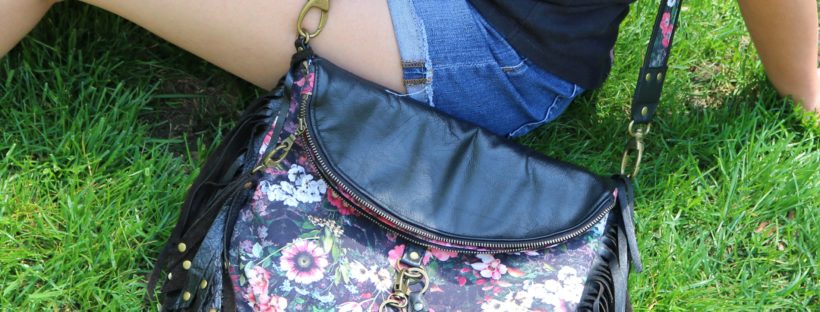
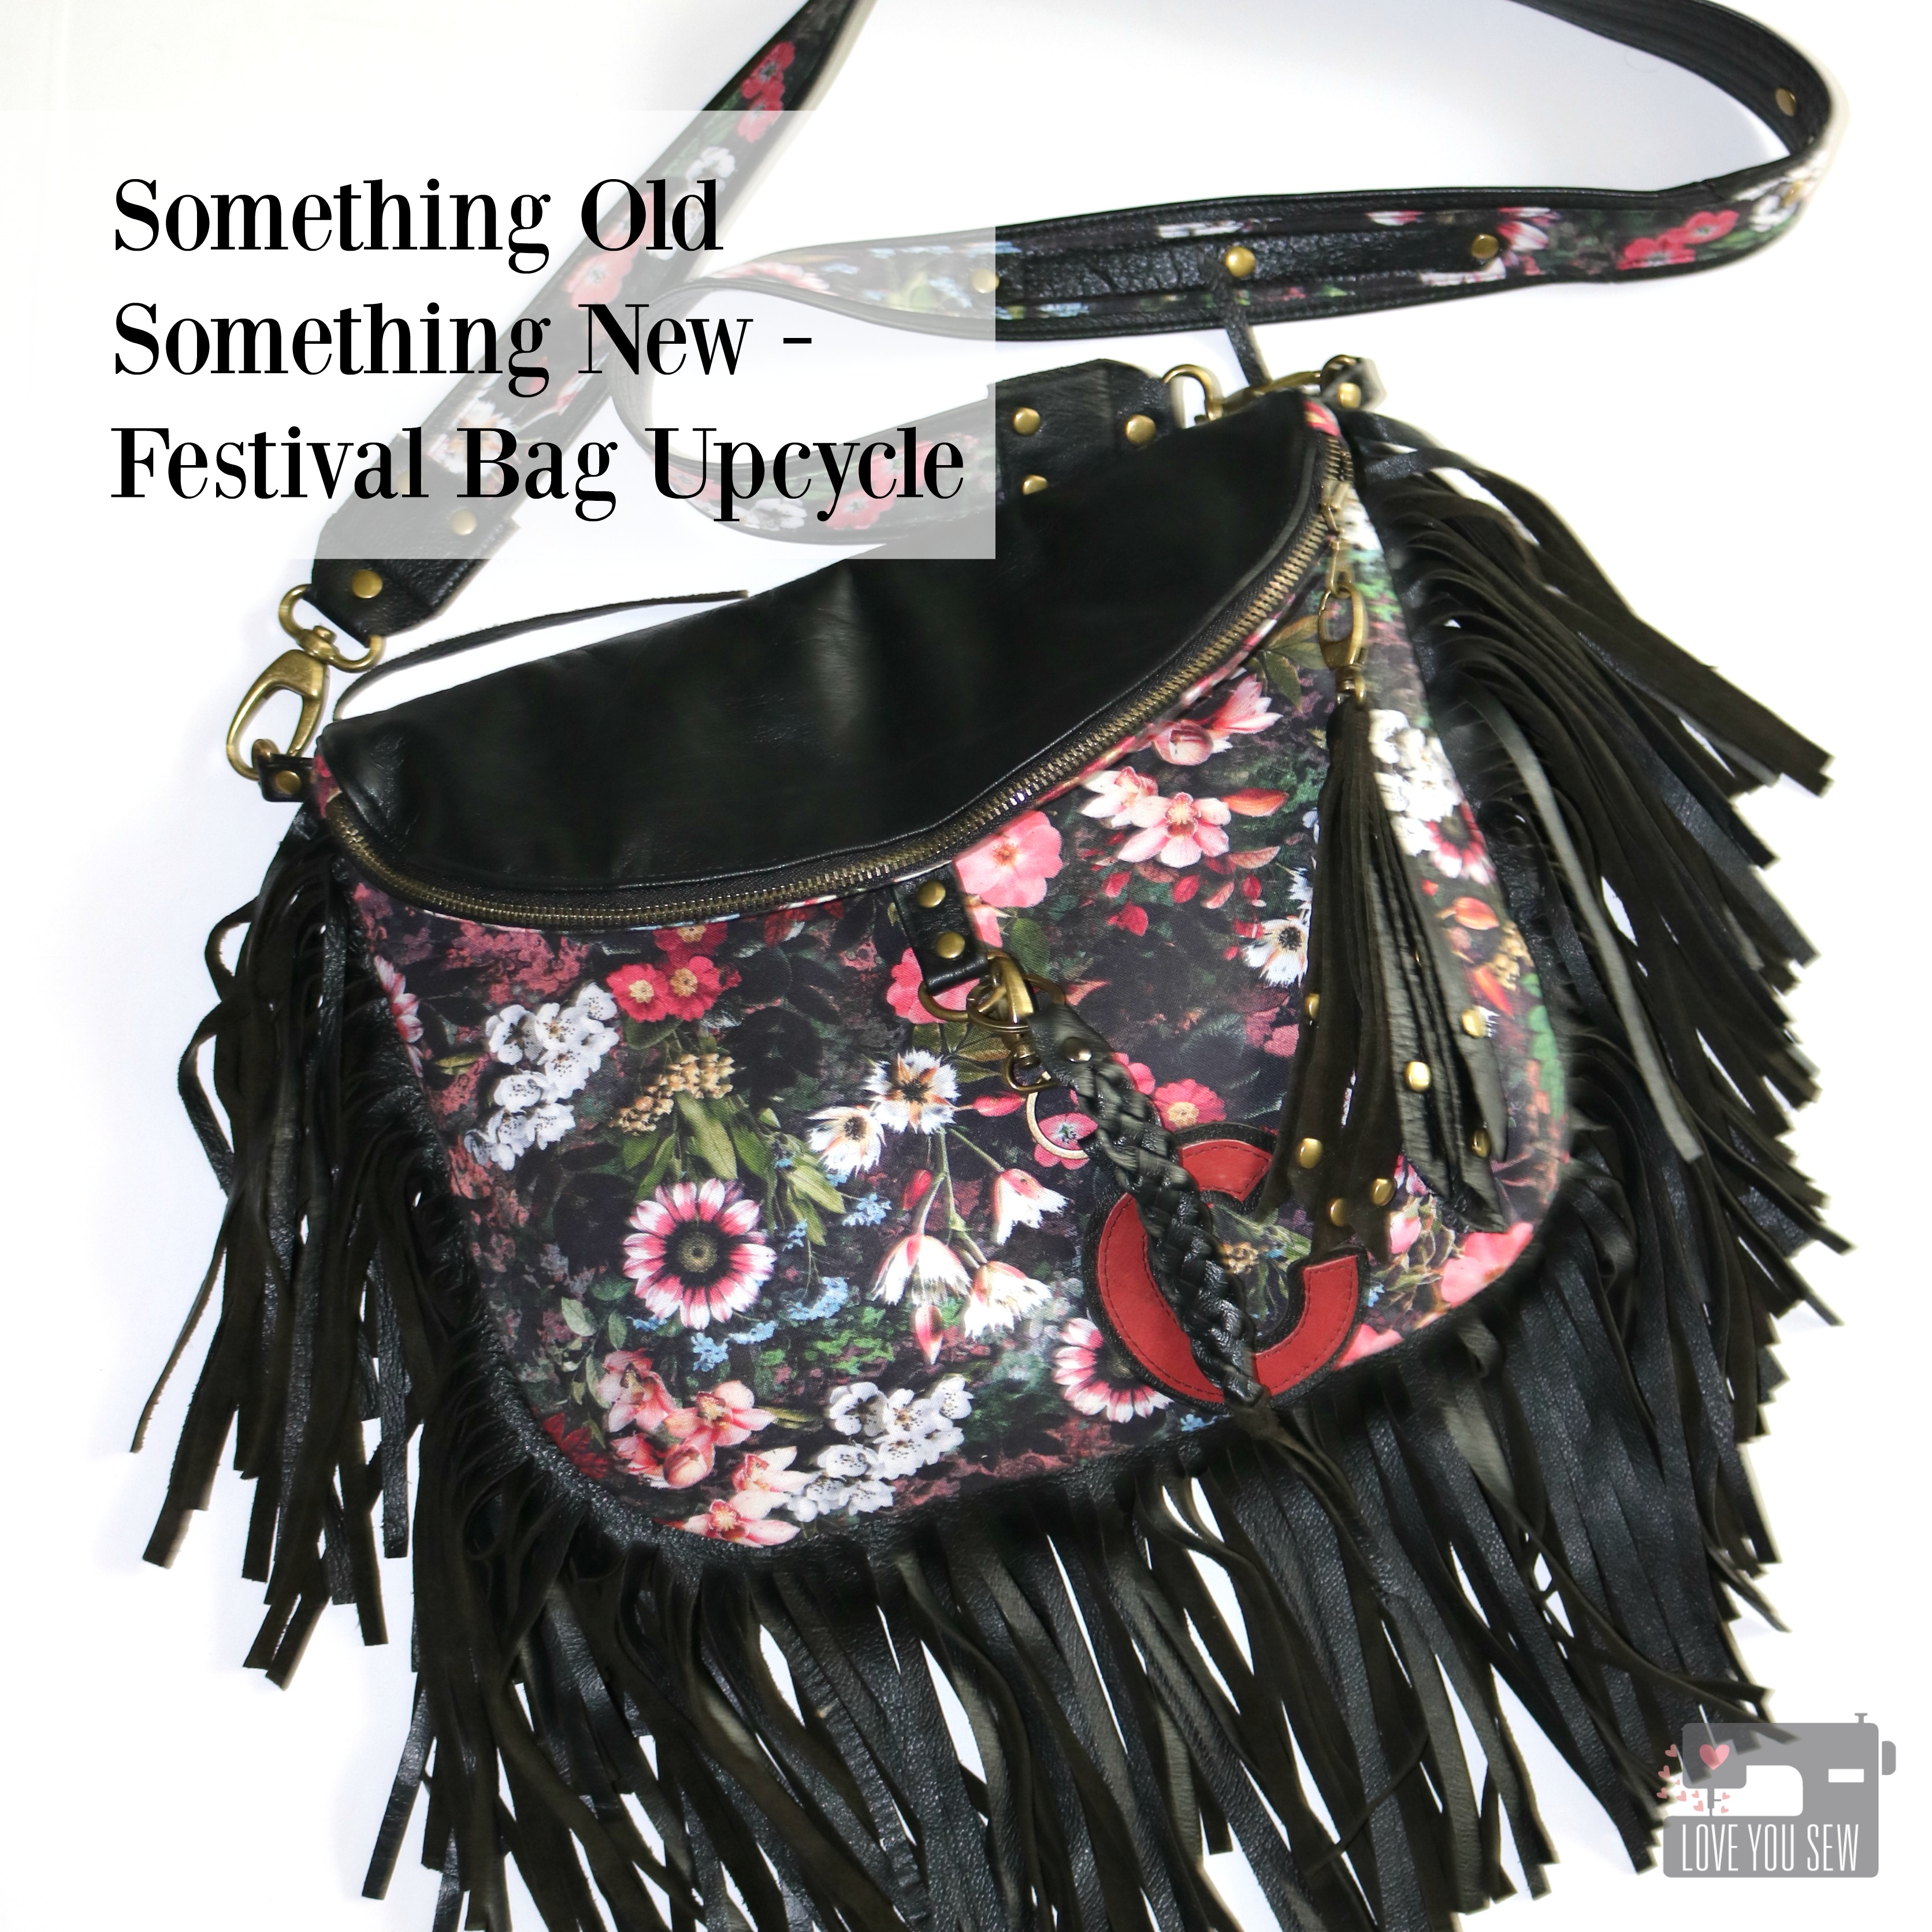
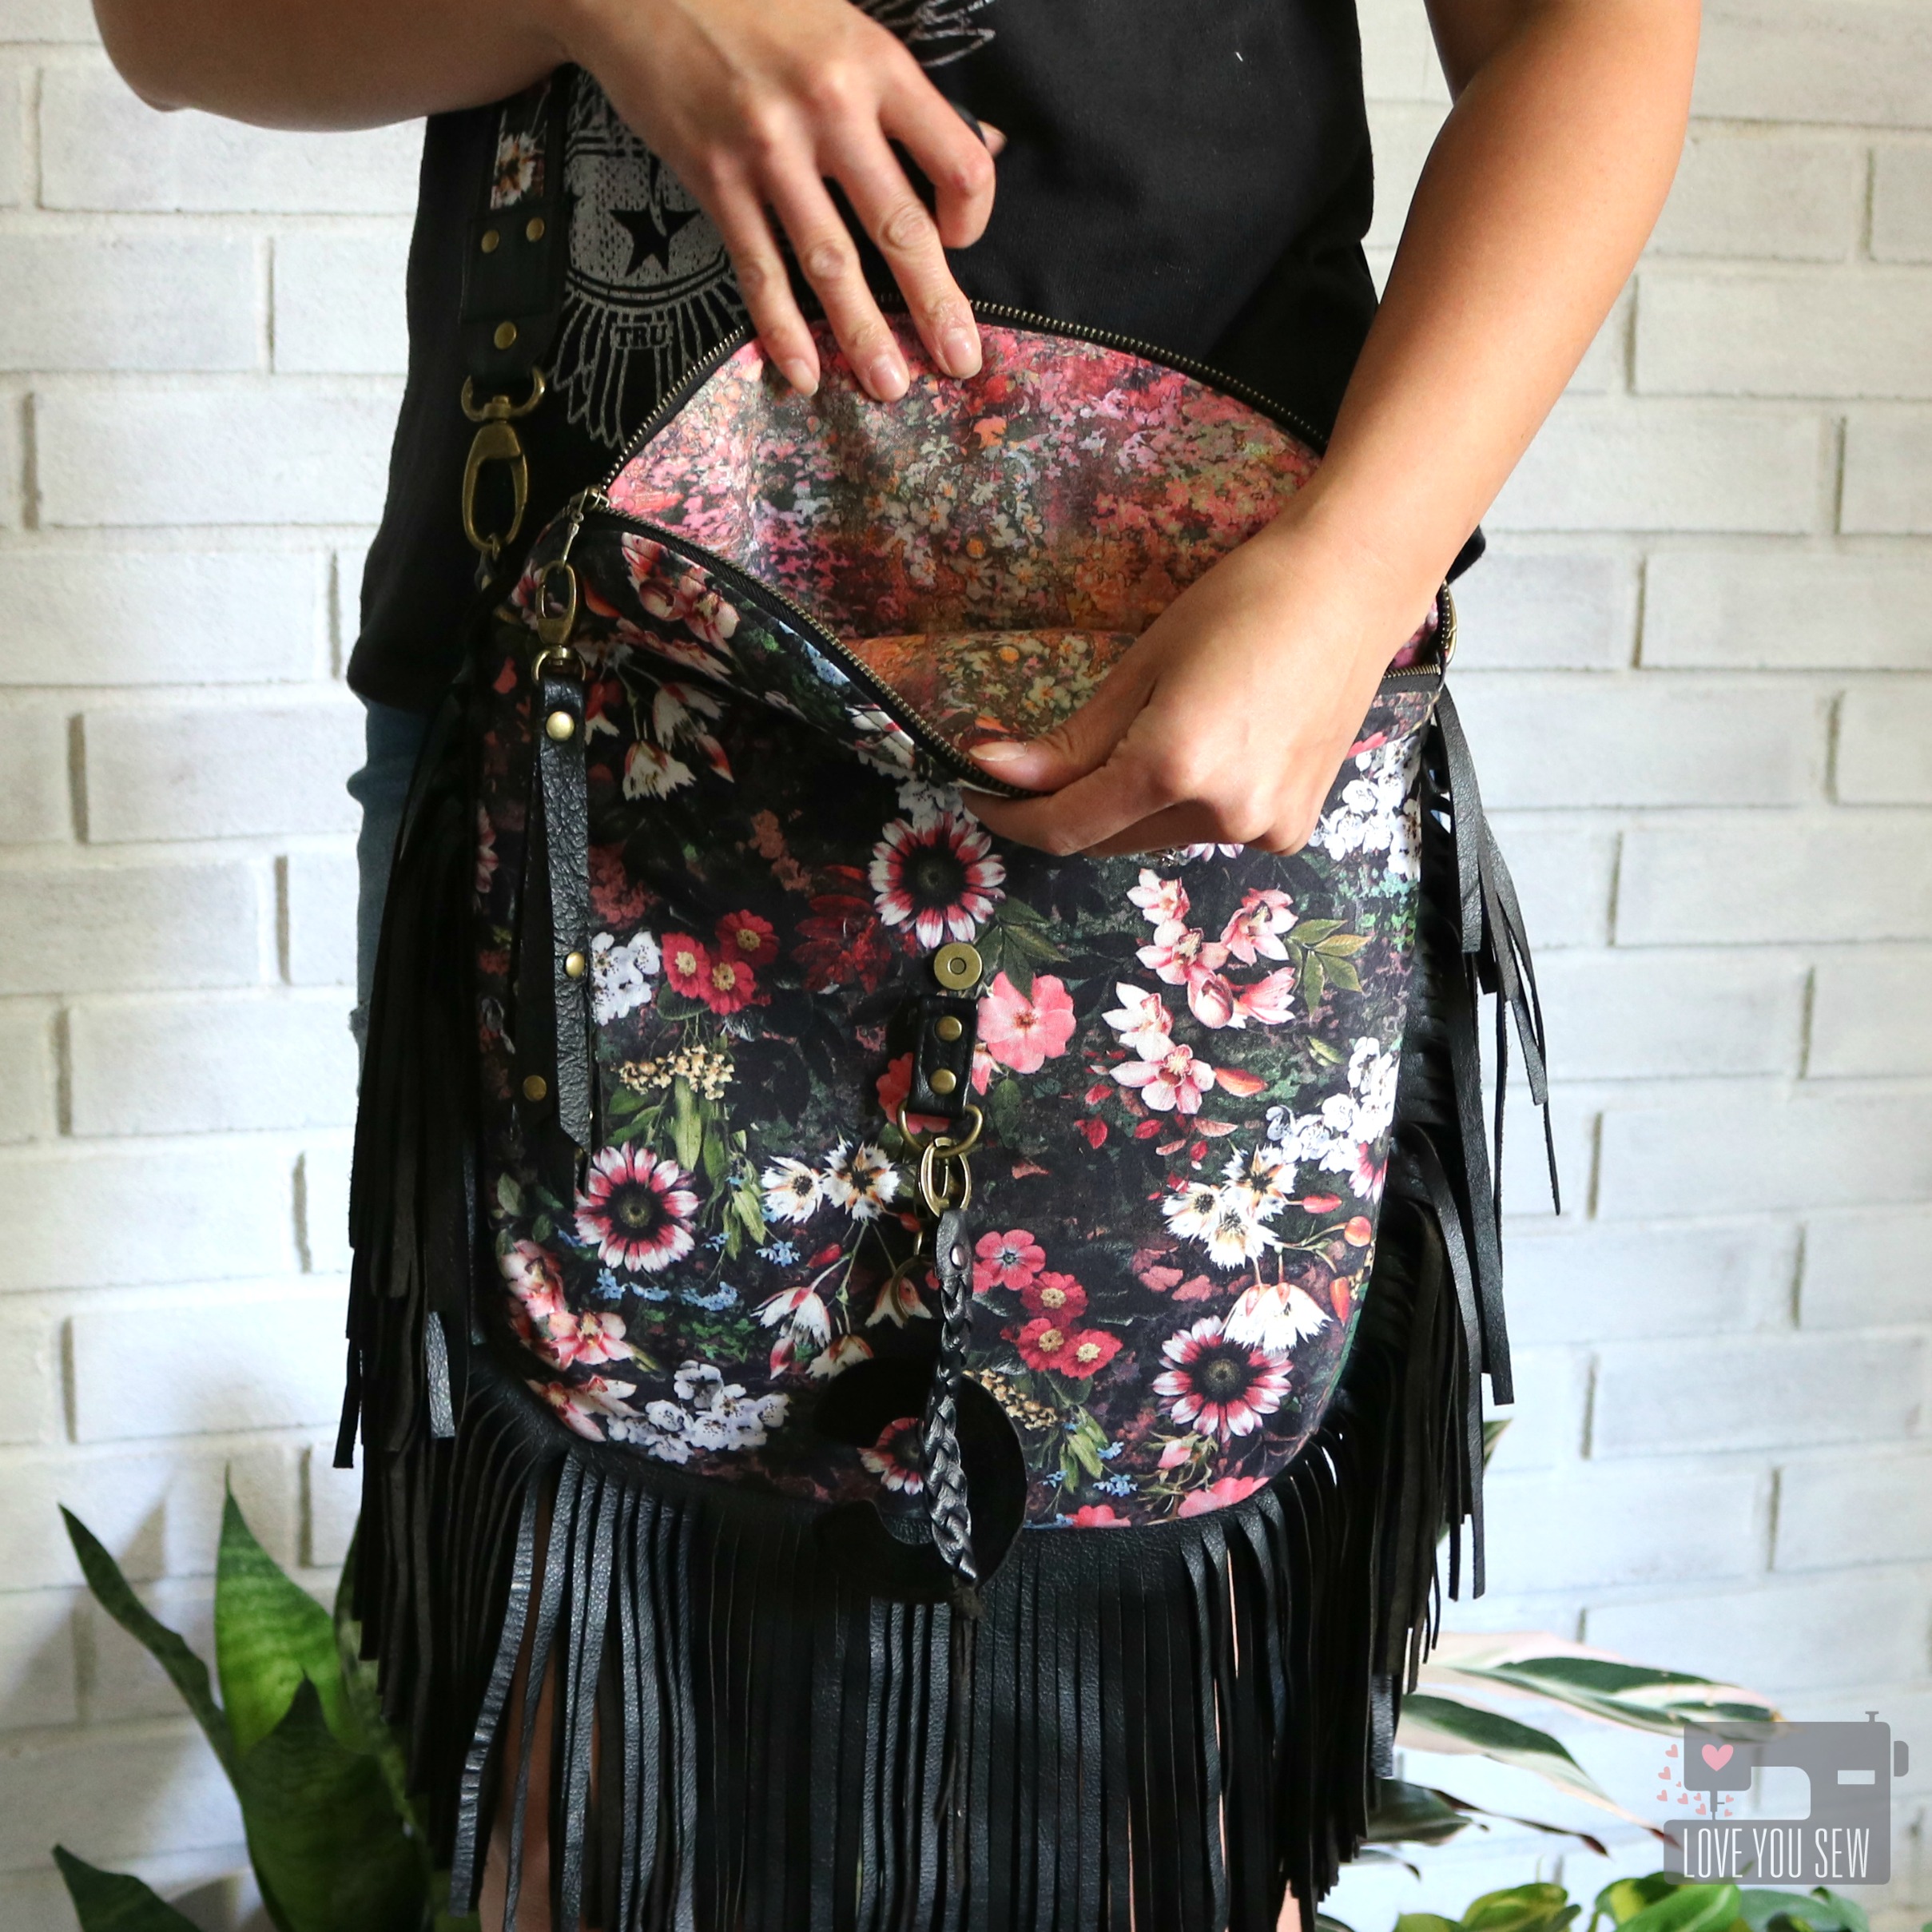
I love the relaxed (aka loose fitting) style of Bohemian fashion. I grew up near the Philadelphia Folk Festival so I saw a lot of 70’s hippie clothes and I love the laid back vibe. Pair that with my urban life in the city for 10+ years and the result is this “Festival Bag.” It’s an edgier take on Boho with the dark floral, leather and antique brass hardware.
When RJR Fabrics asked me to work with some of their new fabrics, this Reverie line pretty much blew my mind. I tend to work with more graphic prints, but the photo-realistic imagery in these Digiprints are amazing. The best part, is that these fabrics feel JUST like their other high quality quilt cottons so you know you are working with the good stuff.
This Floral Fantasy print with the the dark background is just gorgeous. I love the style contrast of soft flowers with the intense black (which is how I like to mix up my own closet.) I like combining hard elements with something very soft and feminine. I also like a mix of textures. So this soft quilt cotton HAD to be paired with some leather and lots of hardware, right?
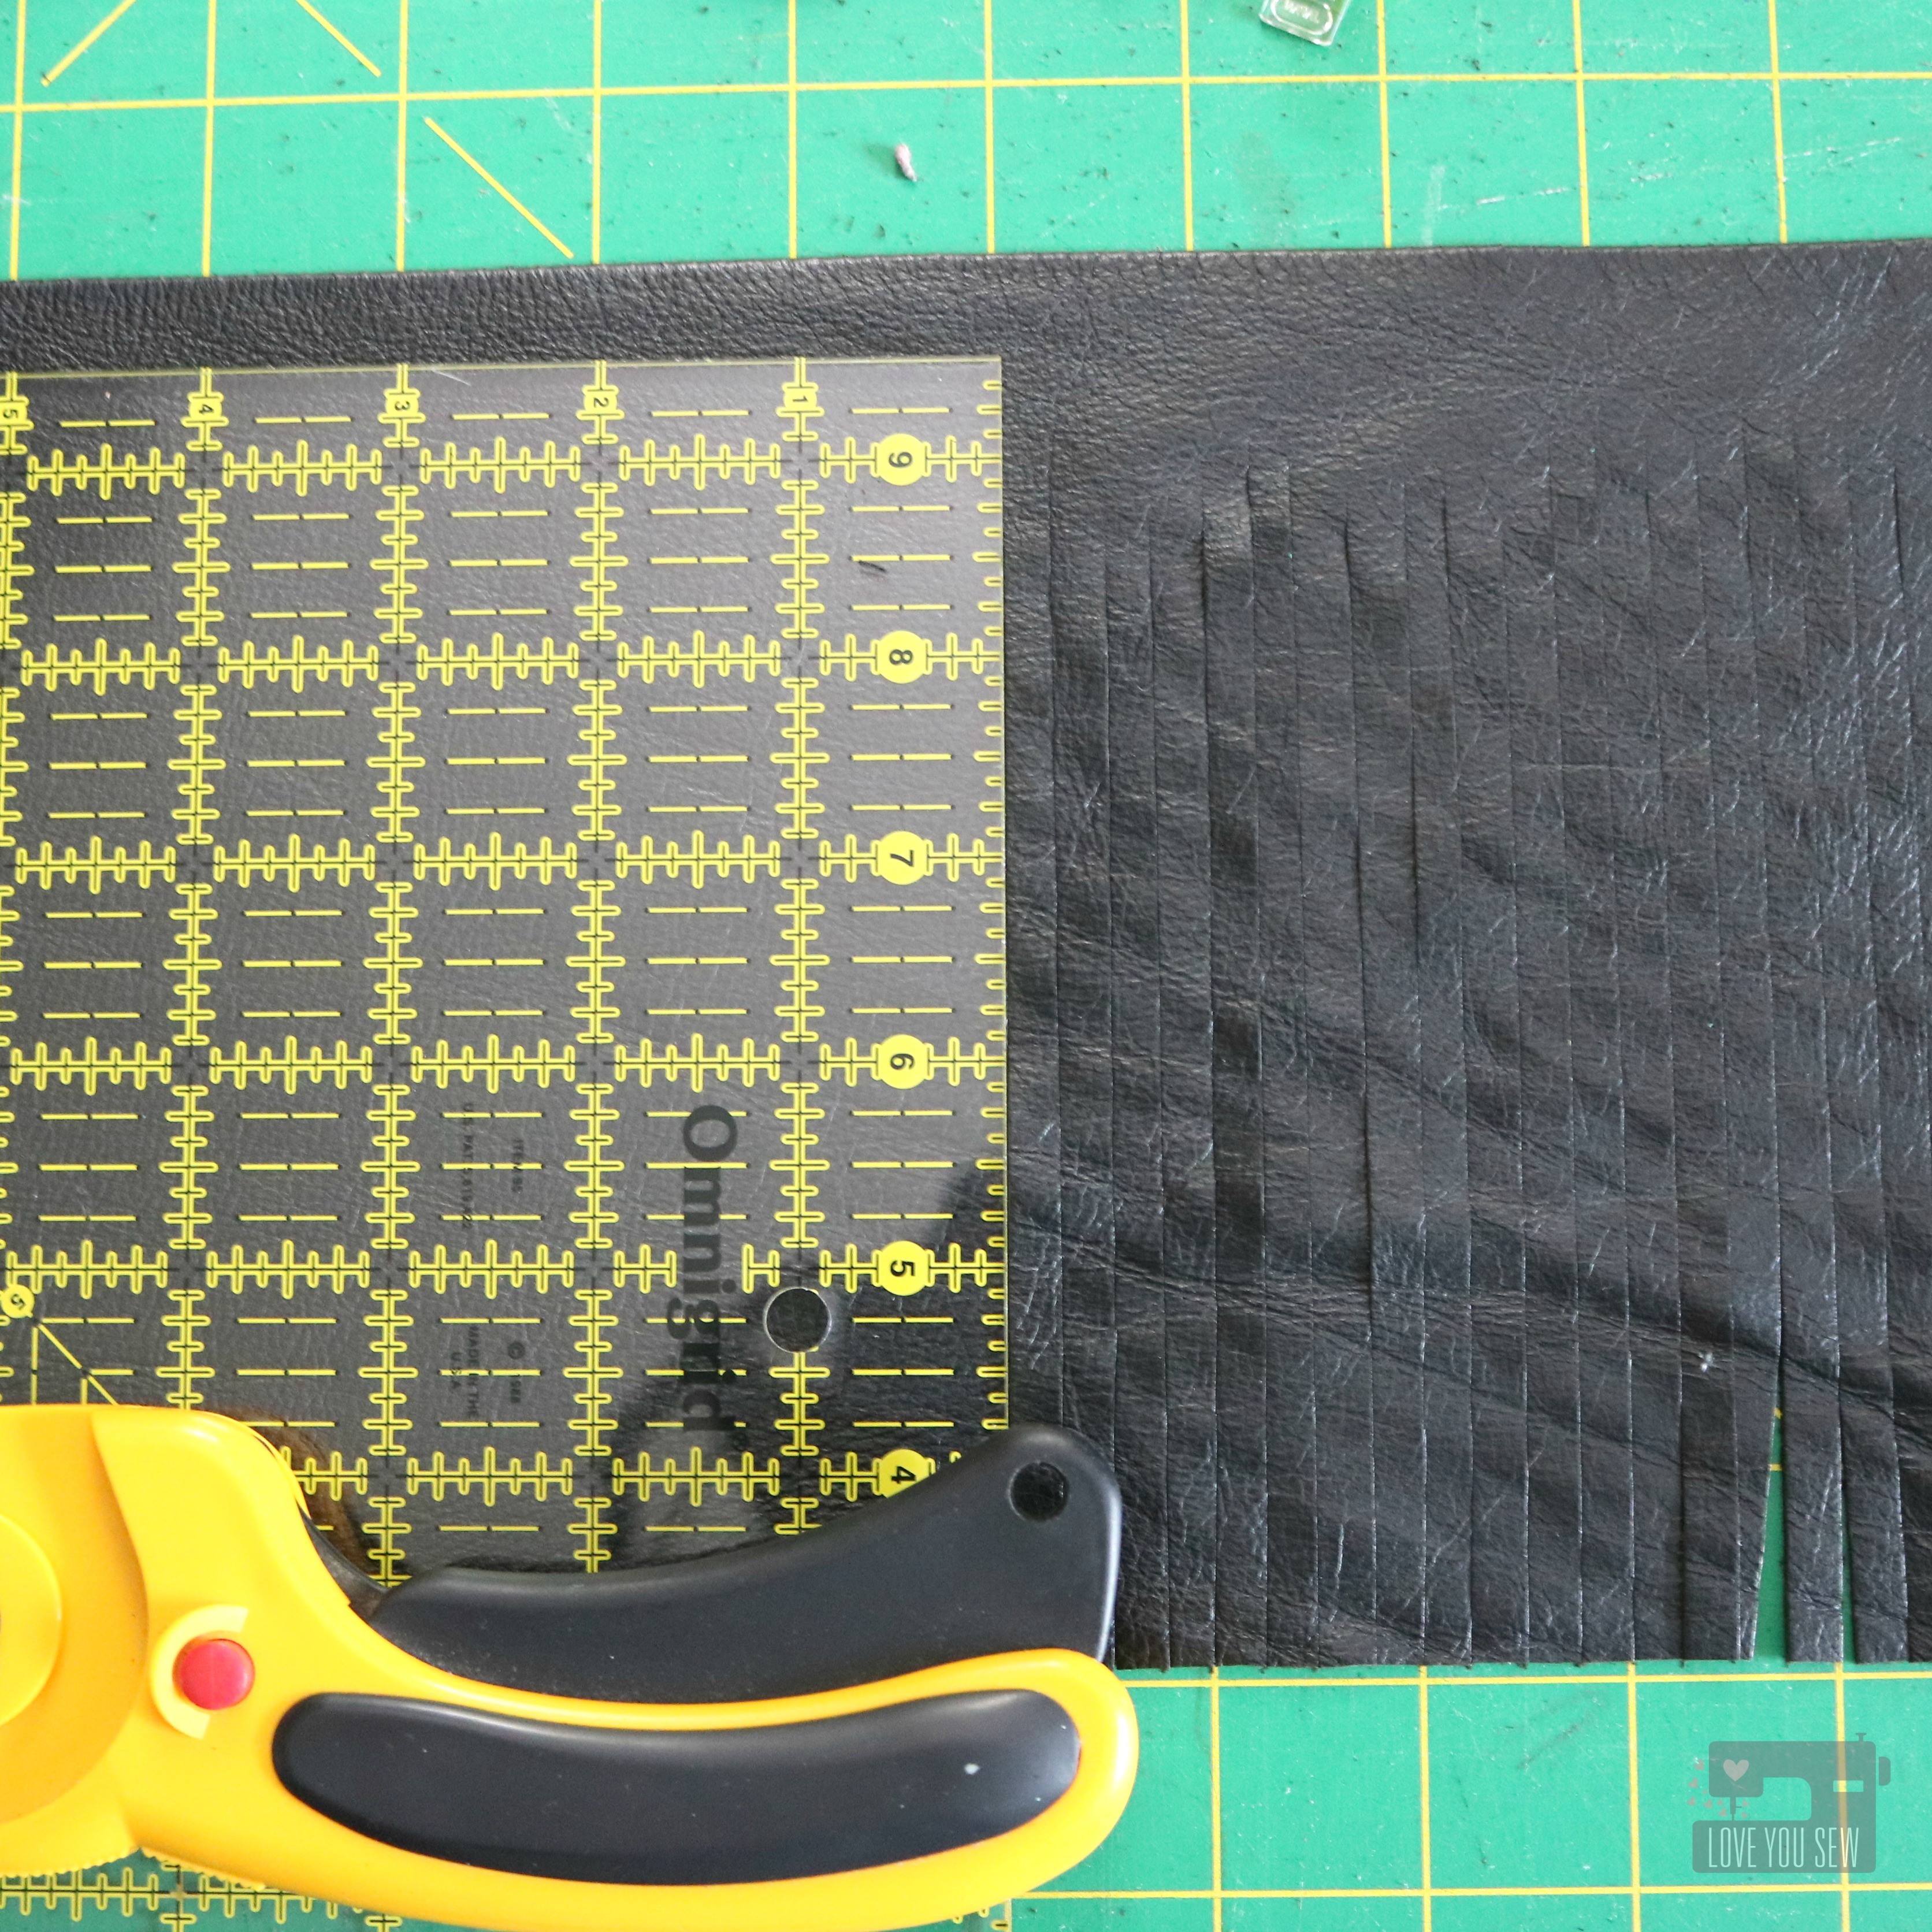
My mom knew I was upcycling old leather coats and gave me this great long duster about a year ago. I’m happy to finally use it. This coat is such a great upcycle coat because of its size and the design. Too bad the shape…errr…lack of….just doesn’t work now. There are so many large pieces of leather to use in any project. I used about 70% of this coat and I might use the rest on a future clutch…
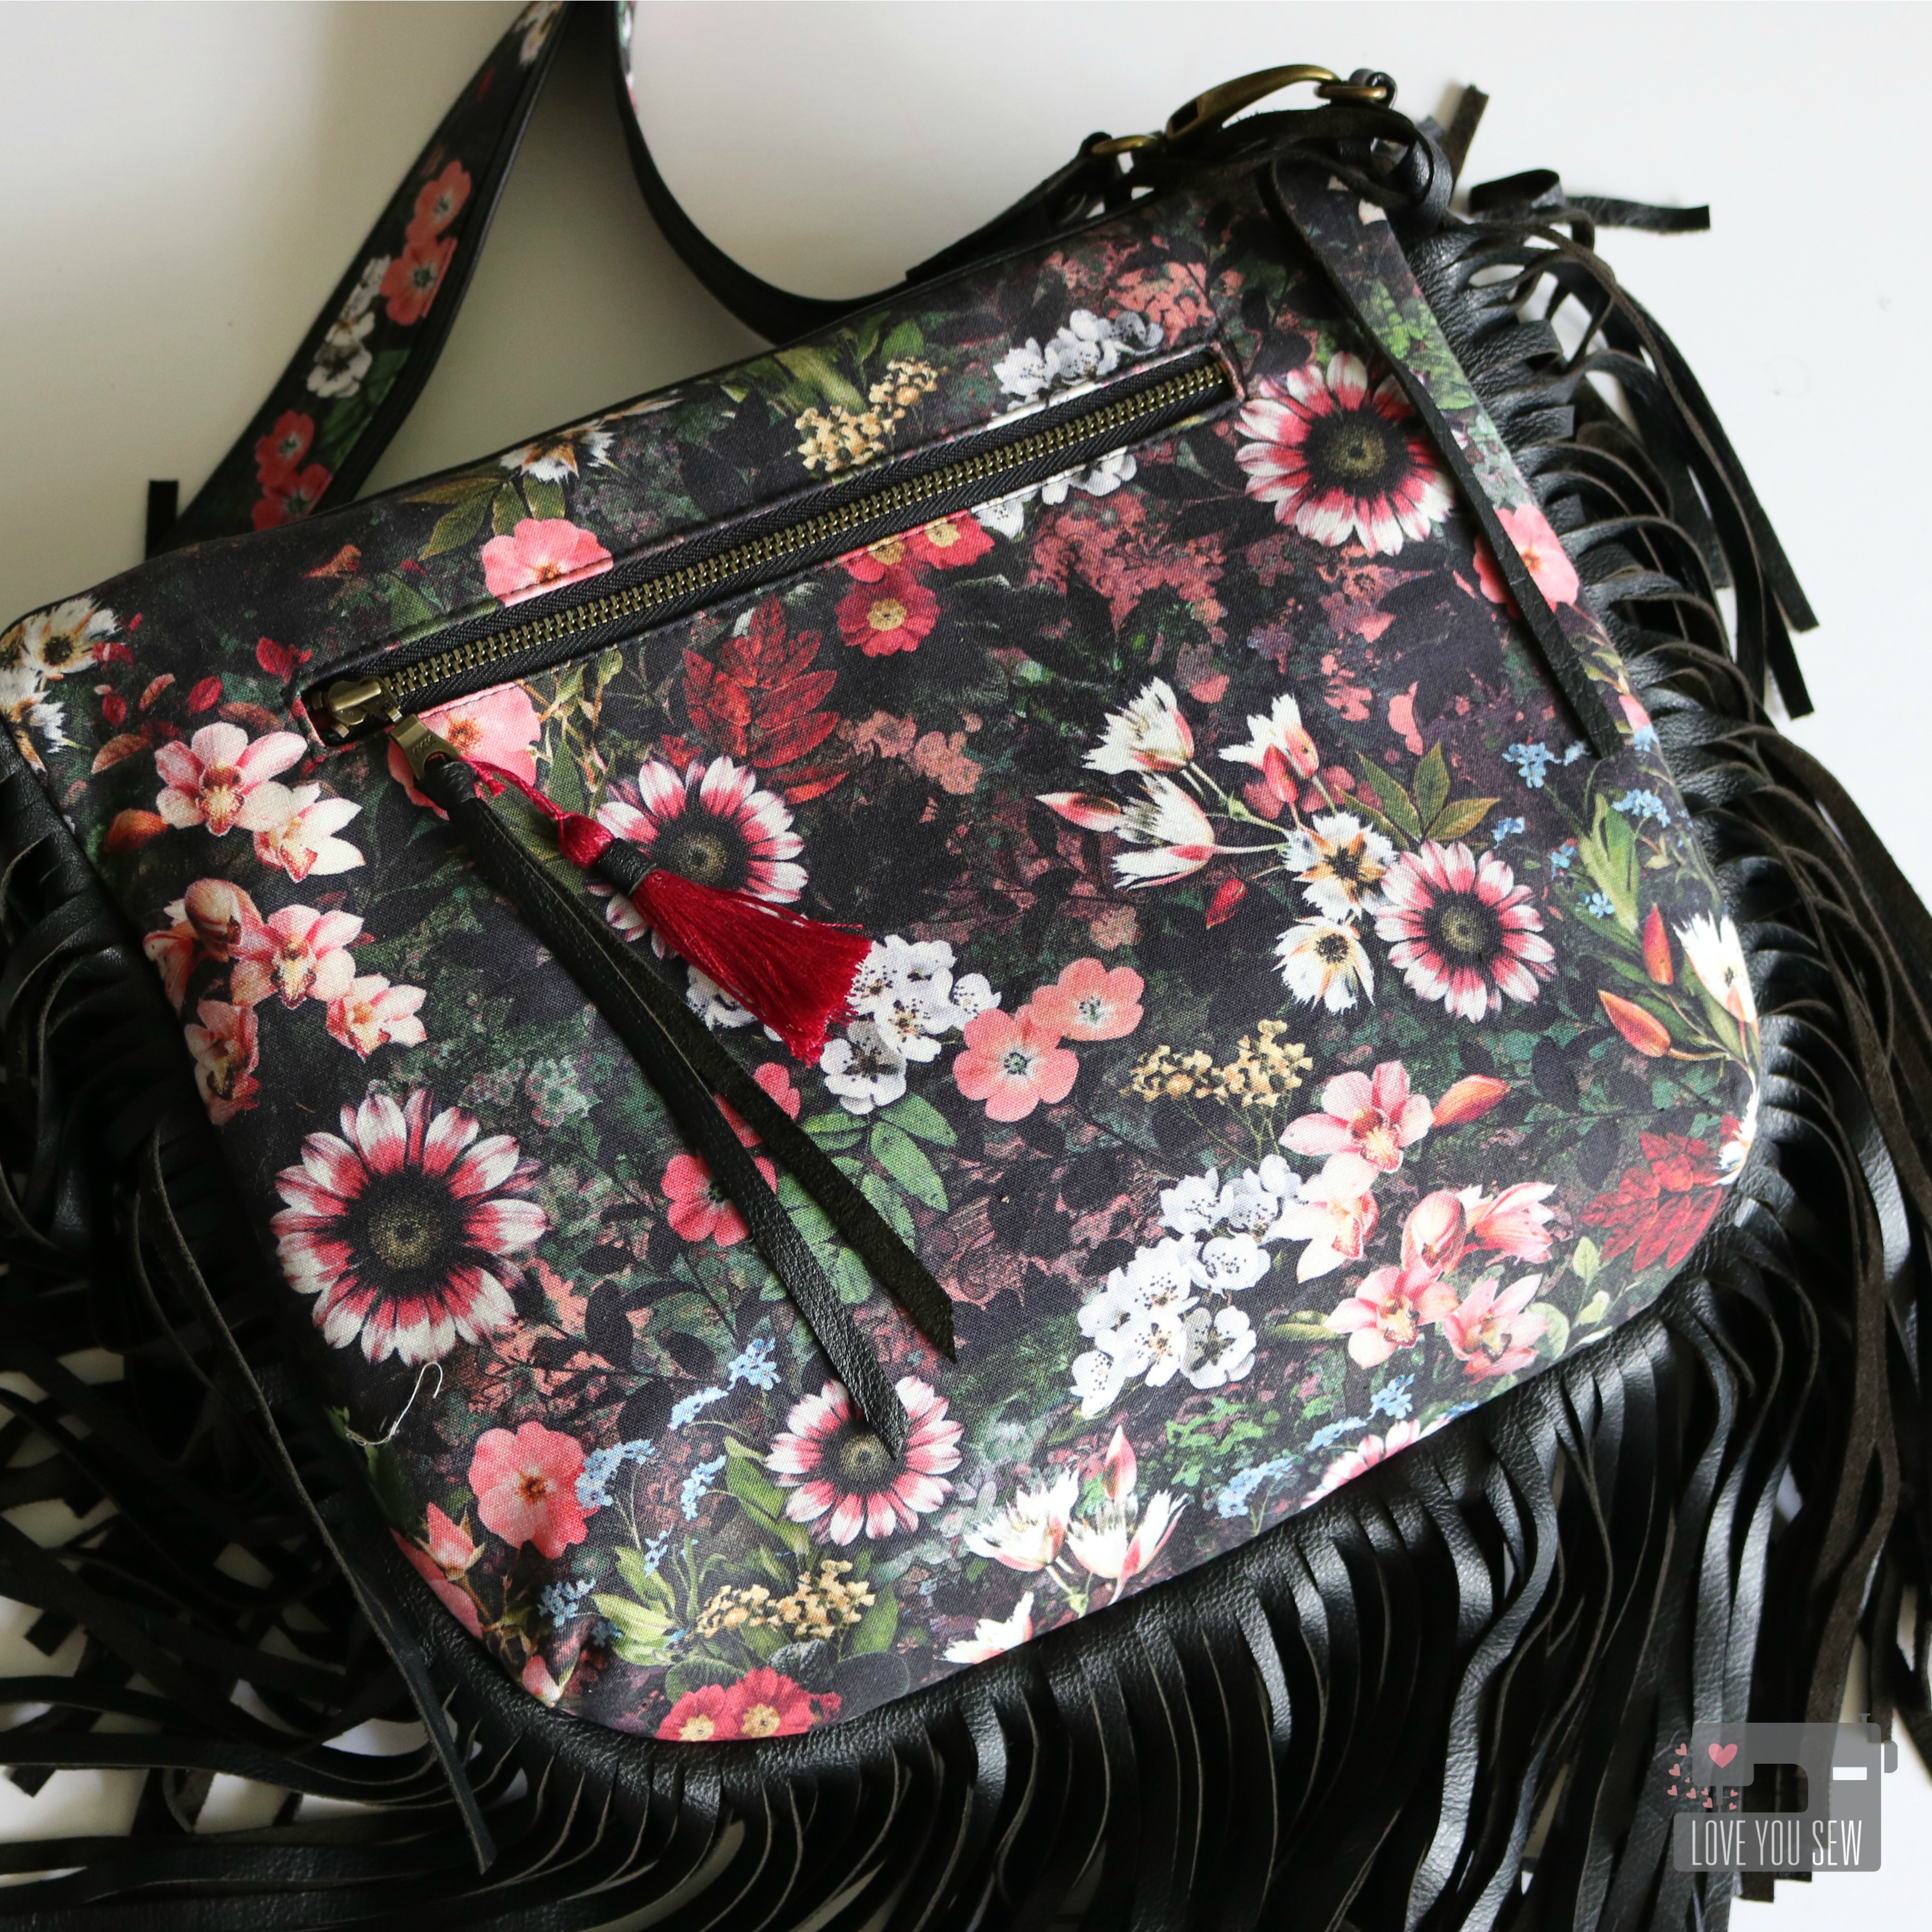
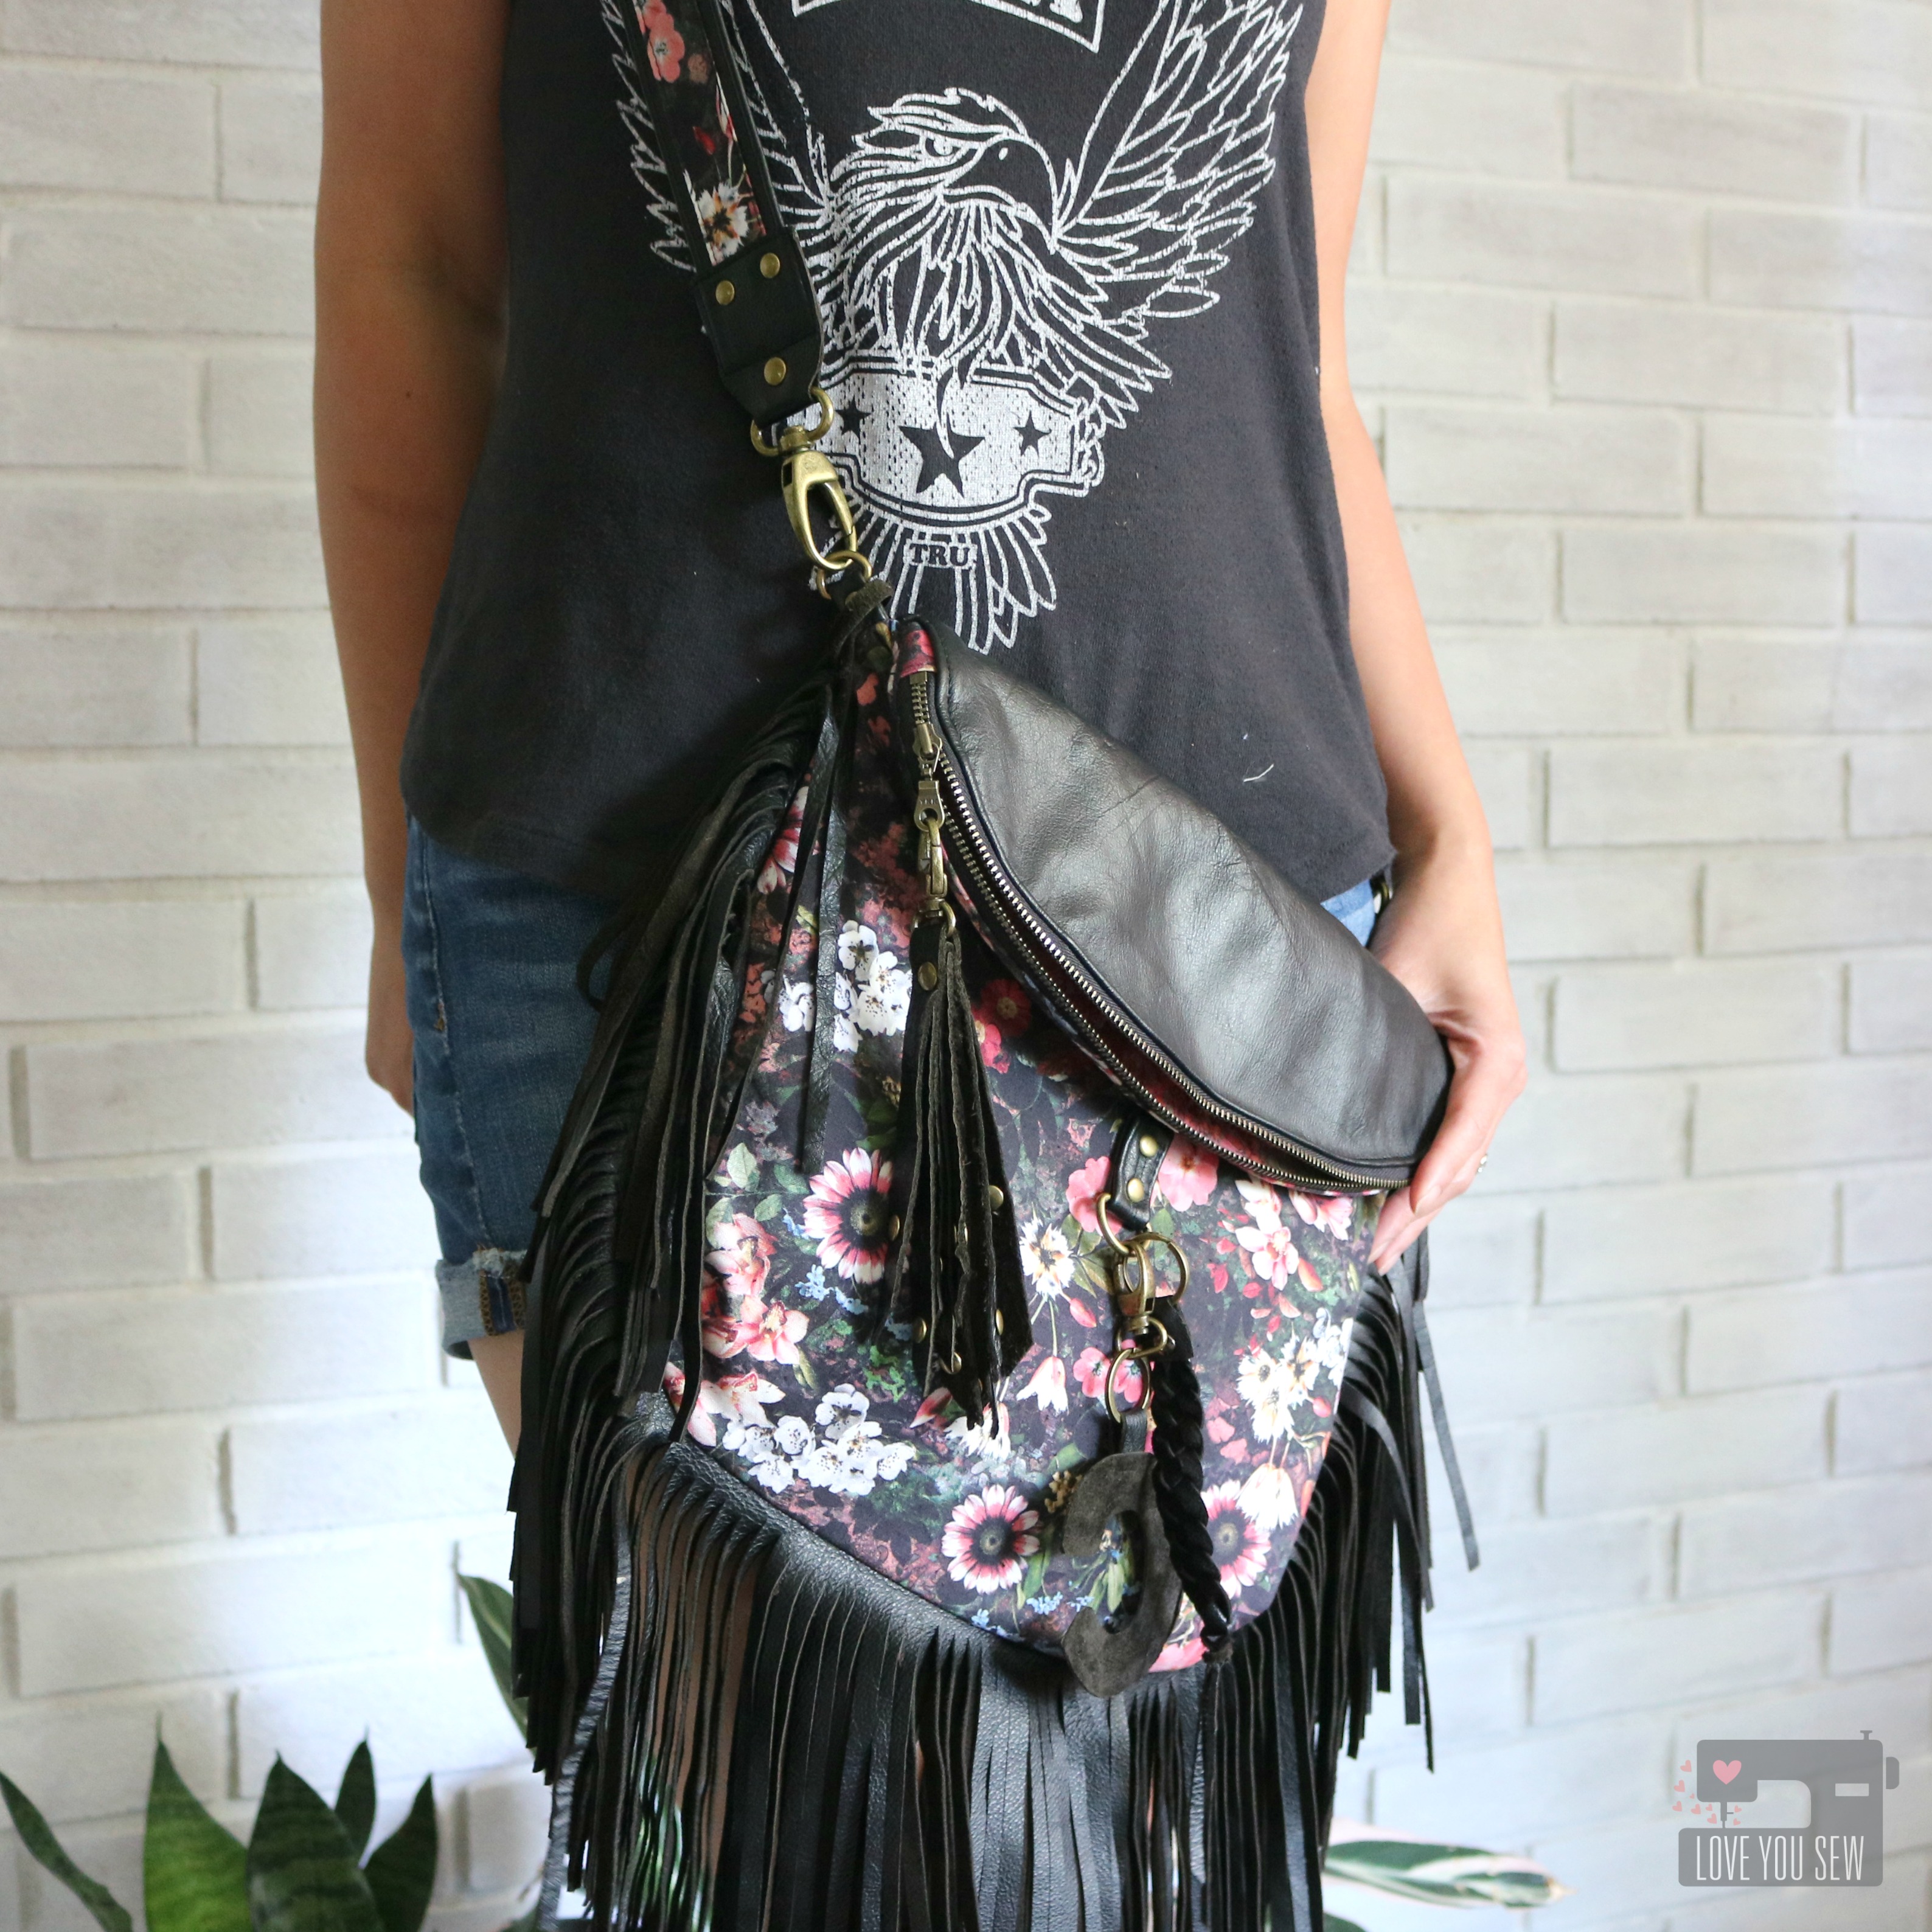
The larger pieces were all cut into 1/4″ fringe and double-layered all around the bag. Fringe is one of my favorite things in a bag. It’s so much fun to walk and feel the swing of the leather. The pieces add movement and life to everyday running around.
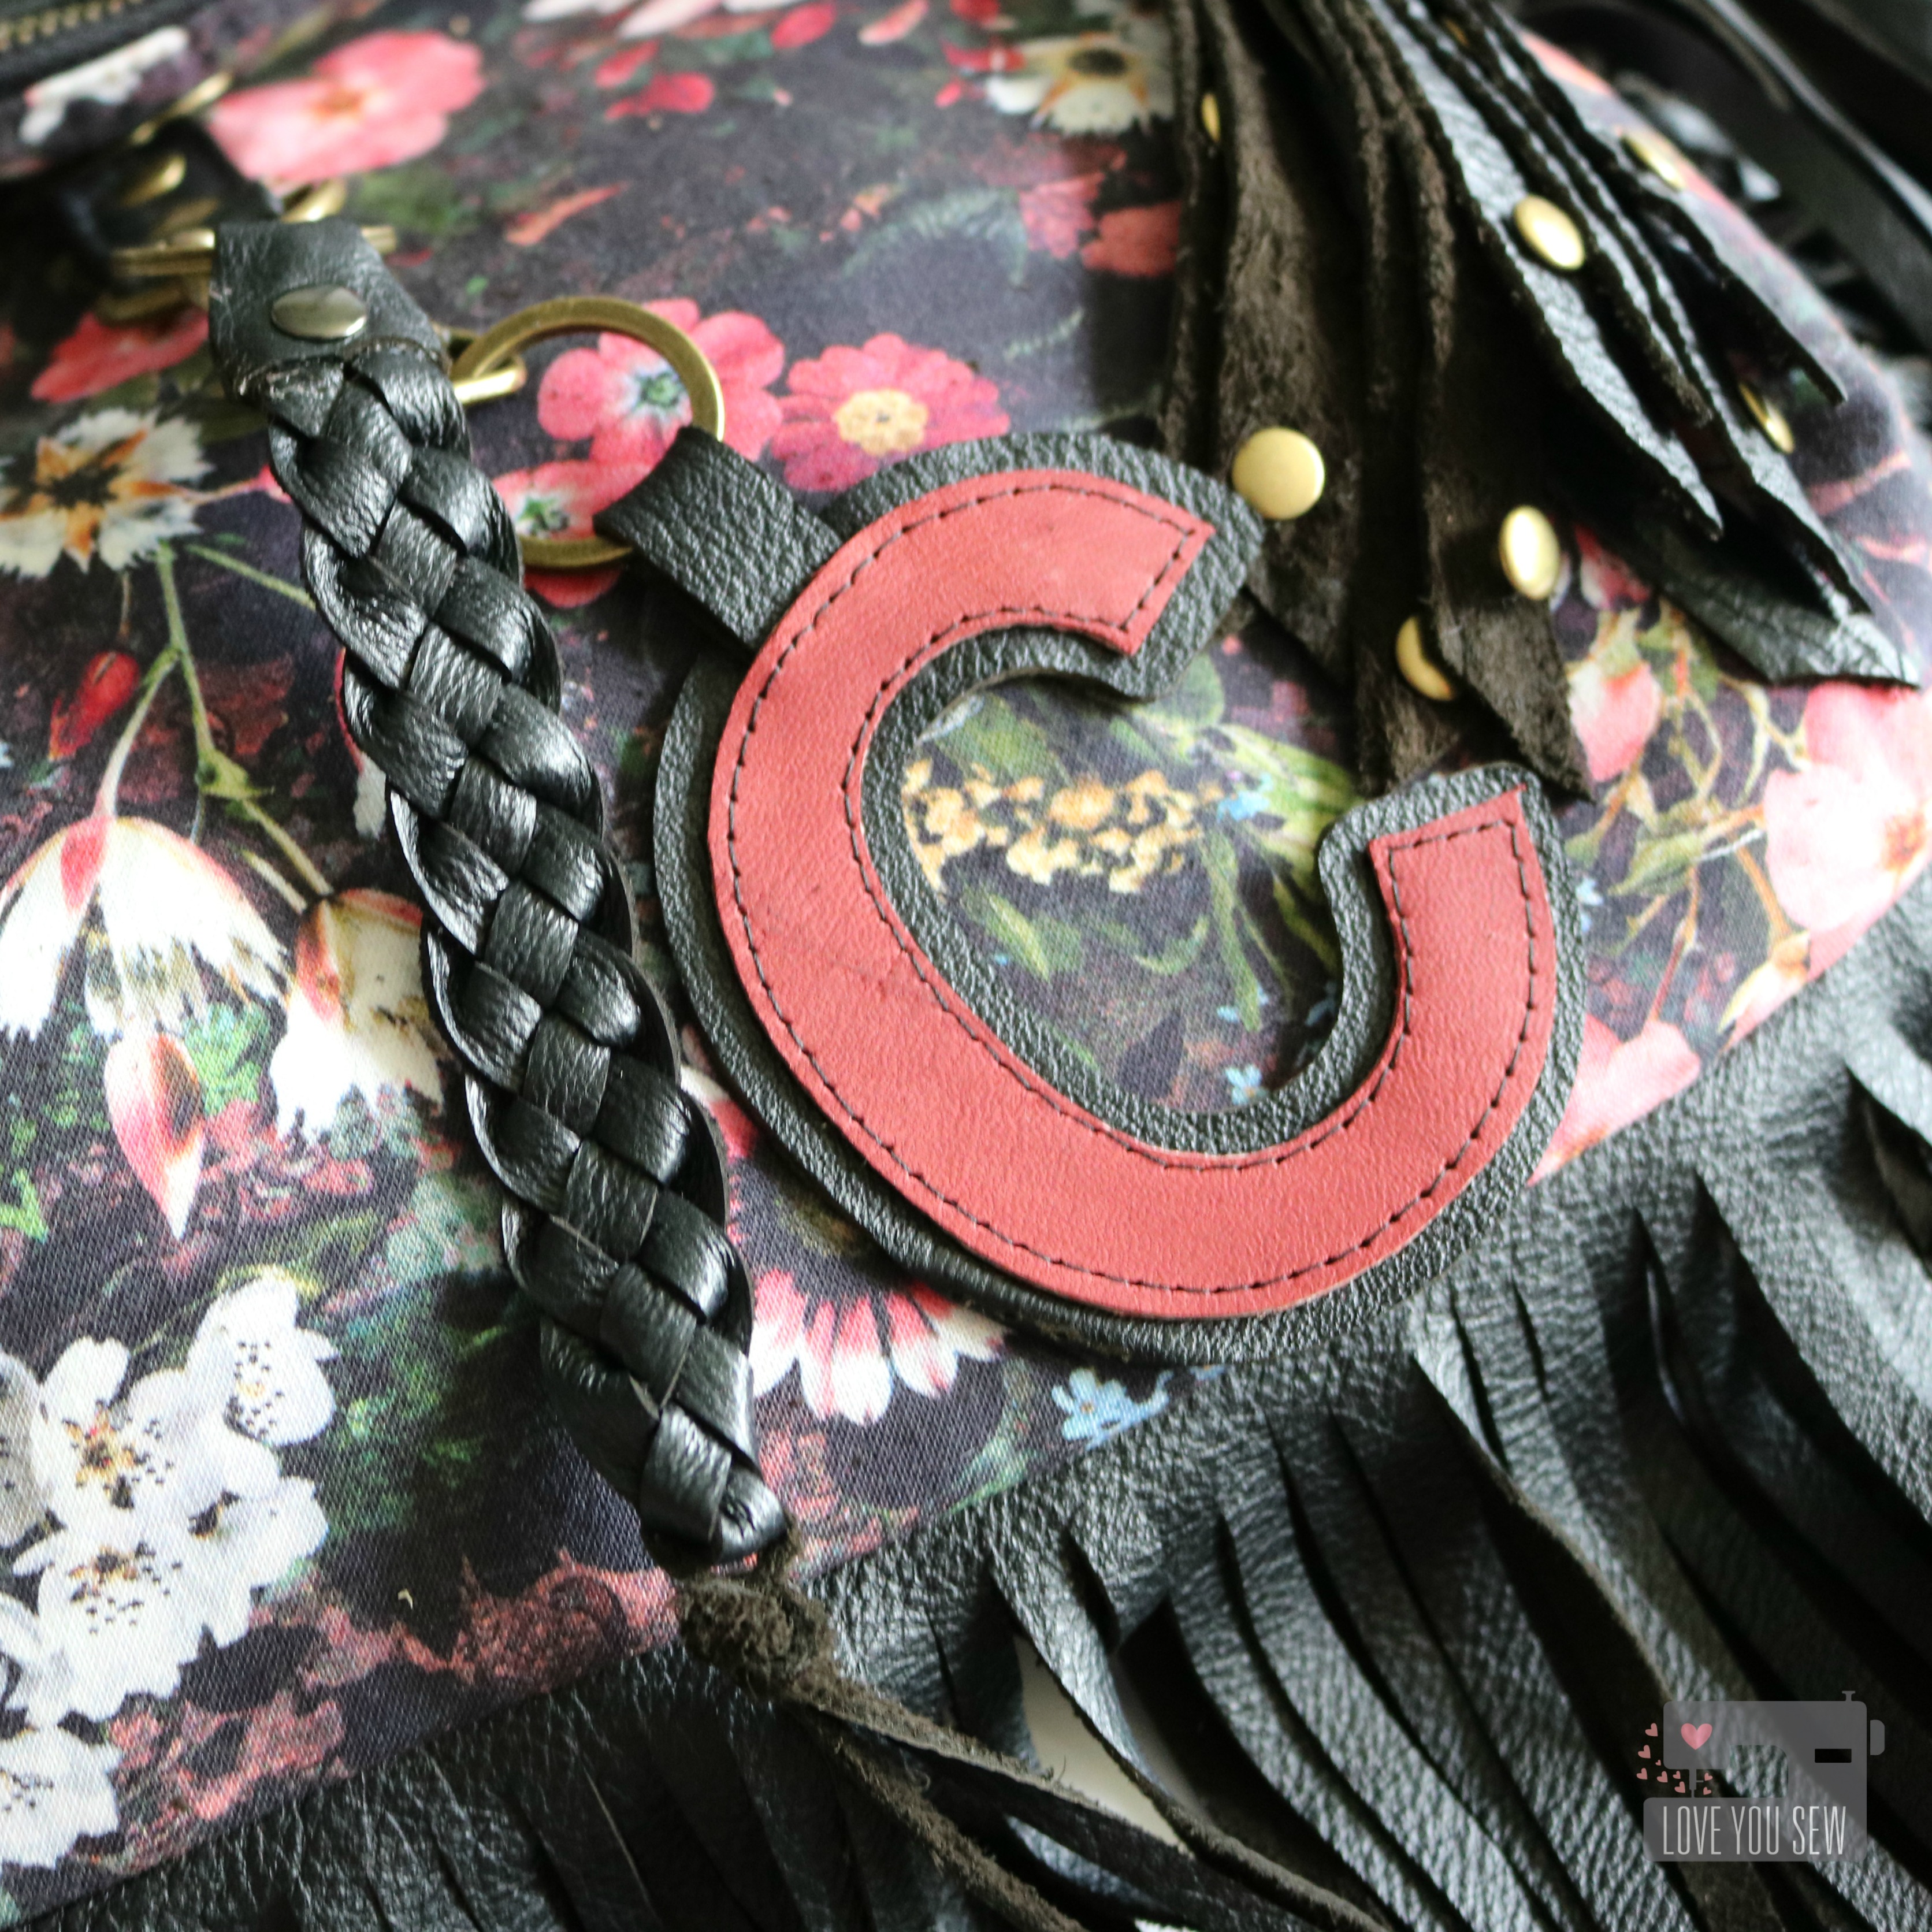
More leather was added to the top flap and I saved all the scraps. They are great to use in zipper pulls and bag charms. You can see I made some tassels and added lots of rivets. I also used my Silhouette Cameo to cut out my intials. Long skinny scraps can be turned into beautiful braids like this one as well.
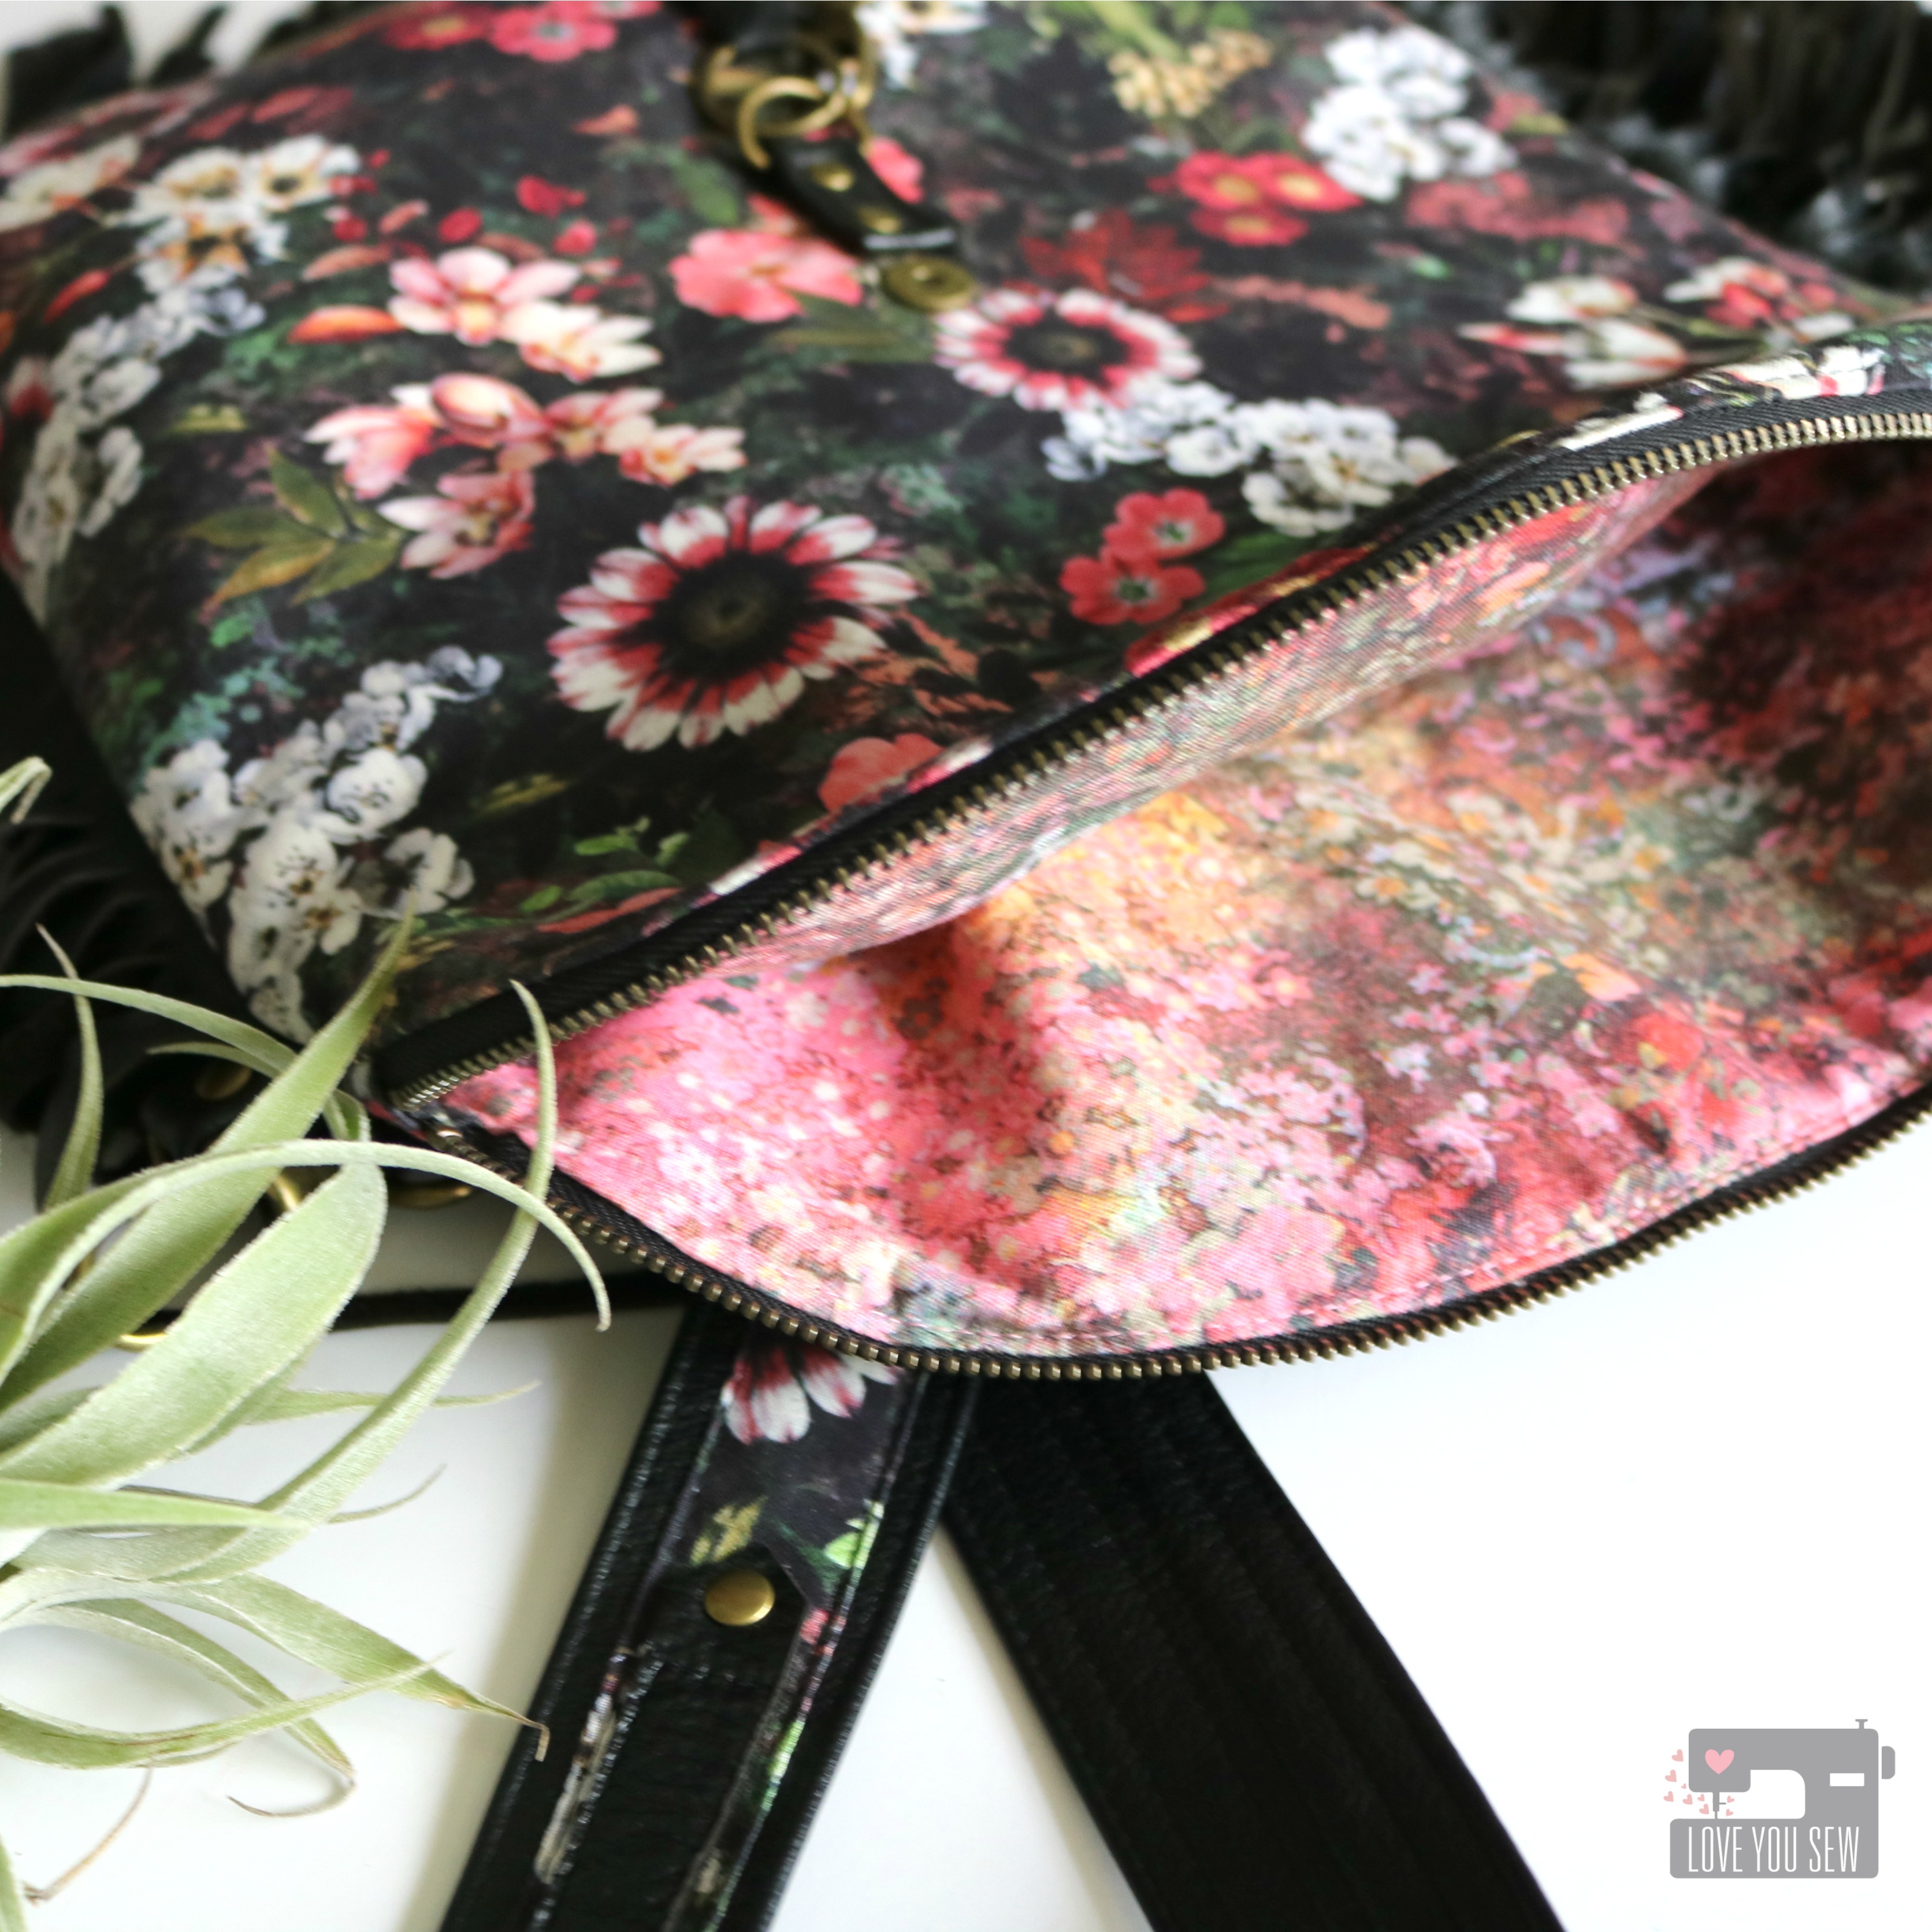
On the inside of the bag, there is more Reverie with the Mirage in Bloom print. It is the perfect complement to this style bag. It is a mottled floral which gives a very contemporary feel with the more muted tones.
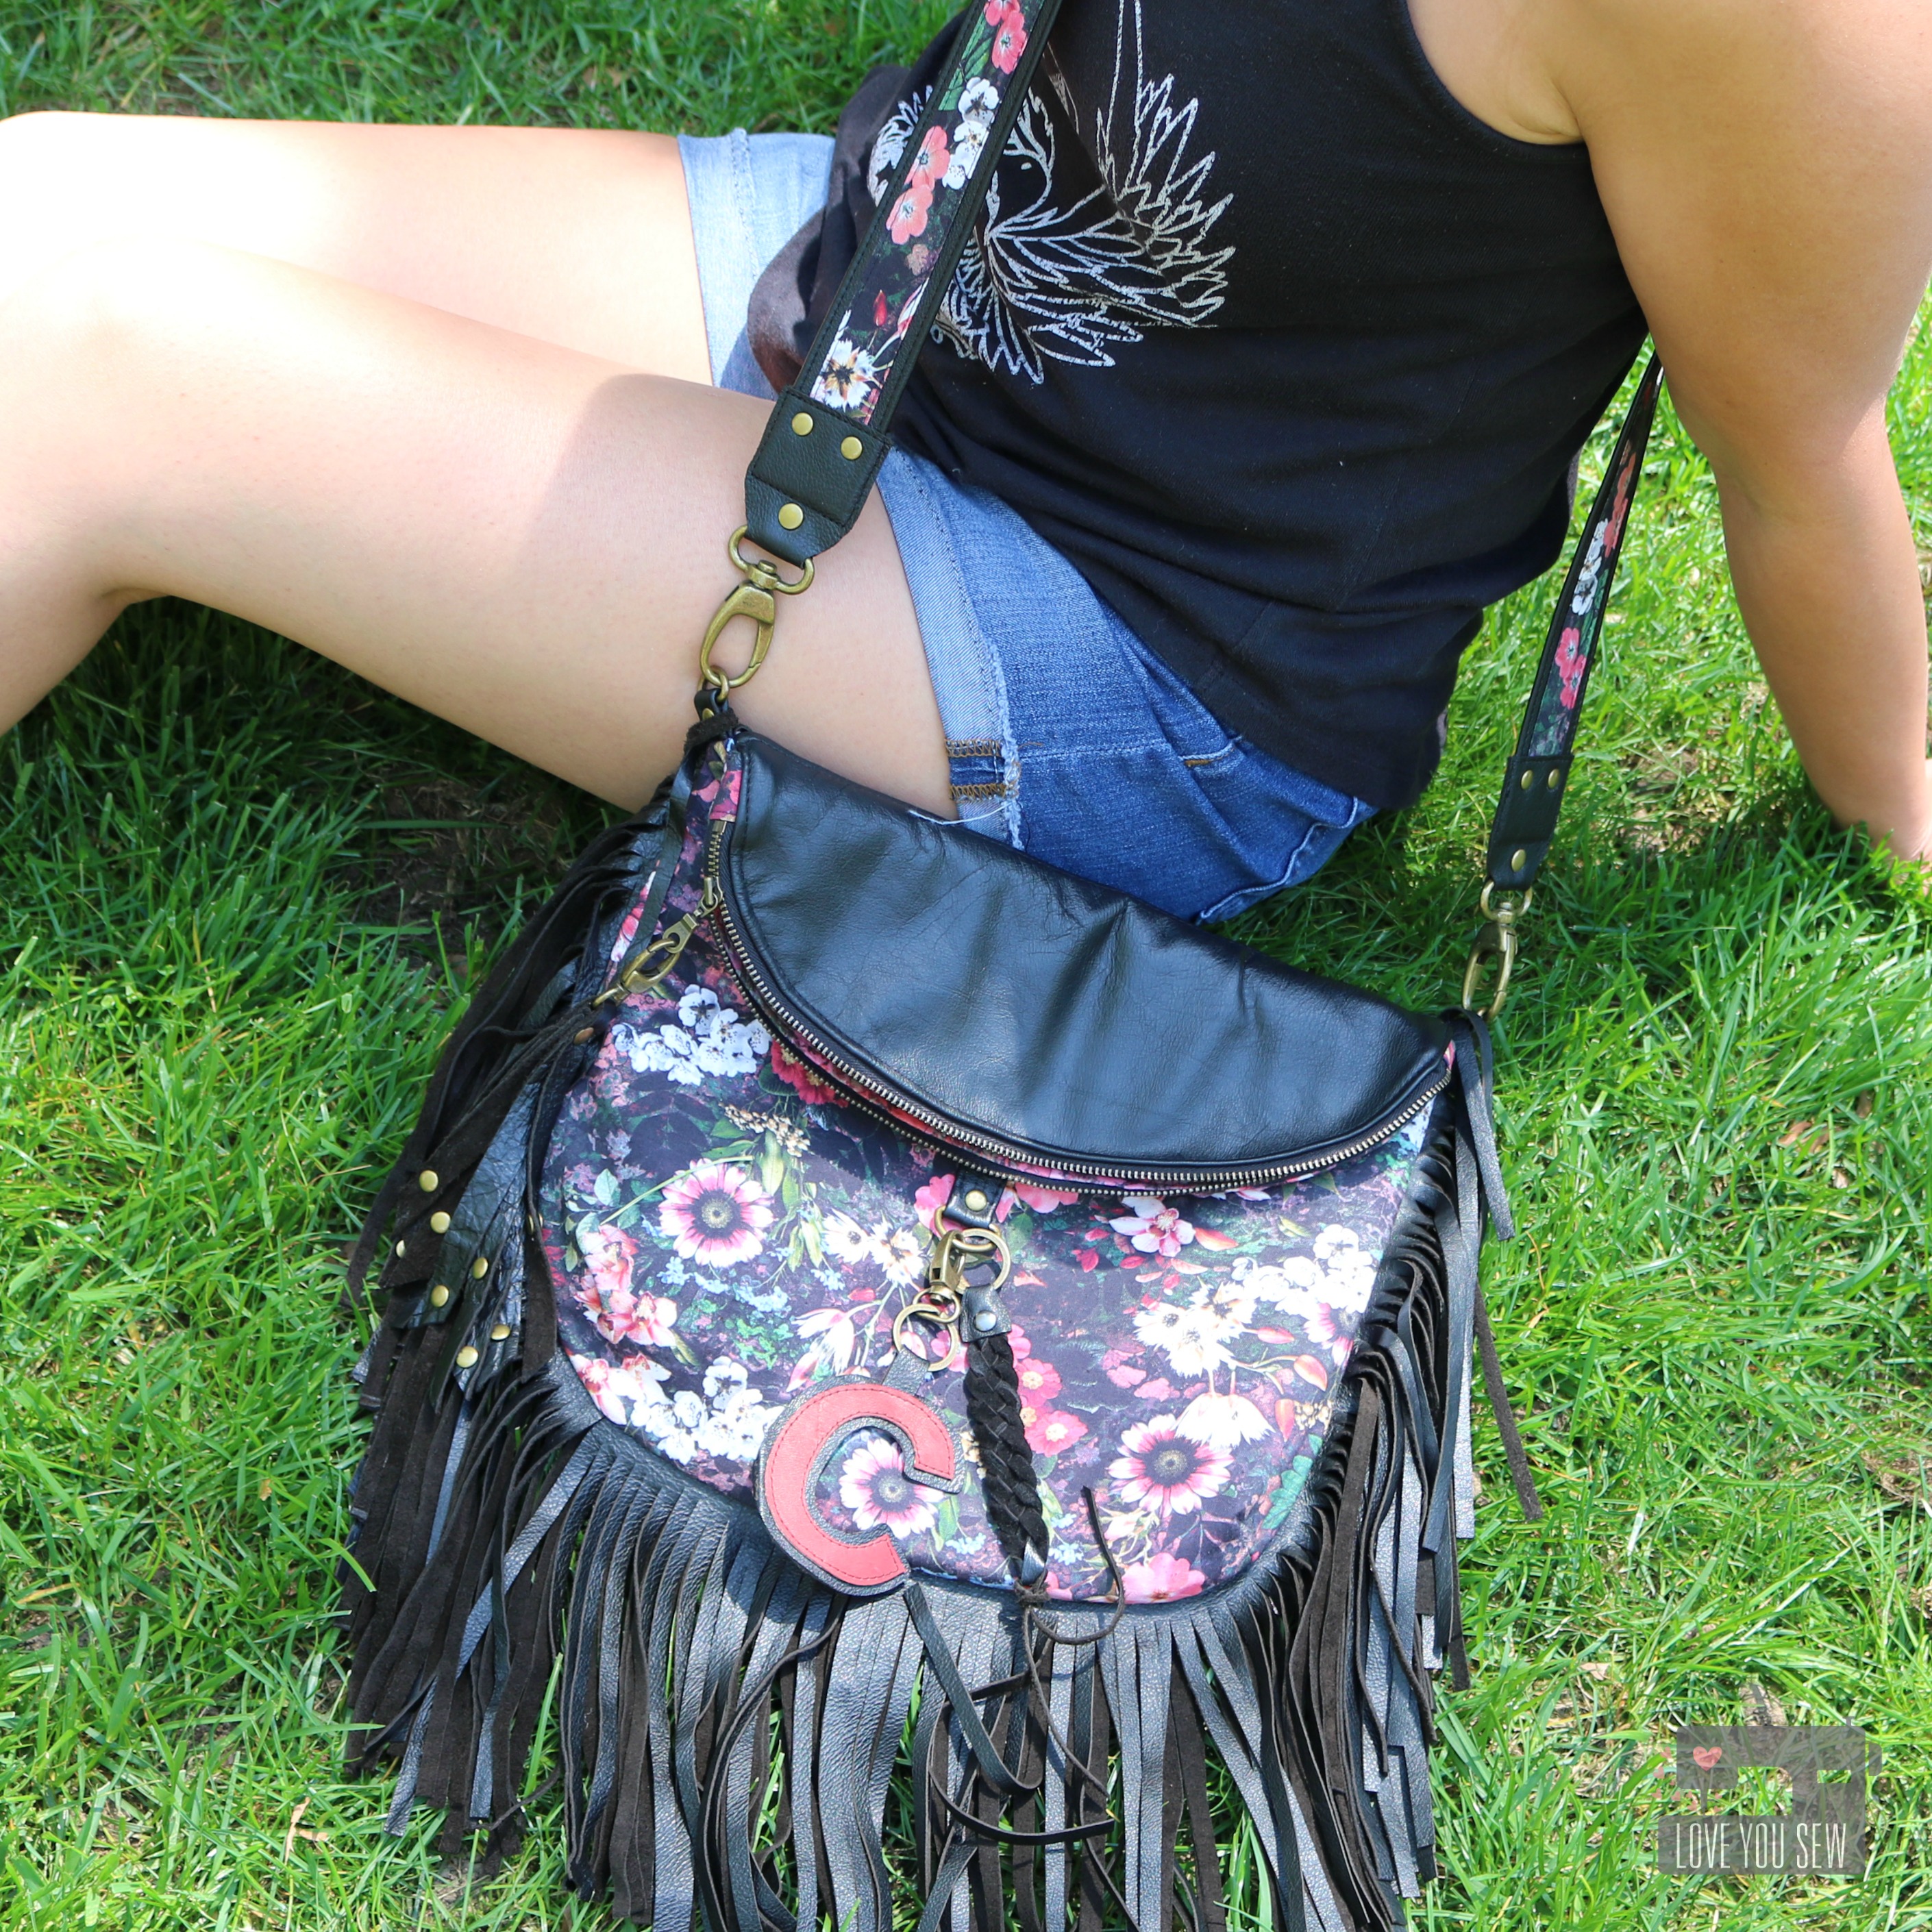
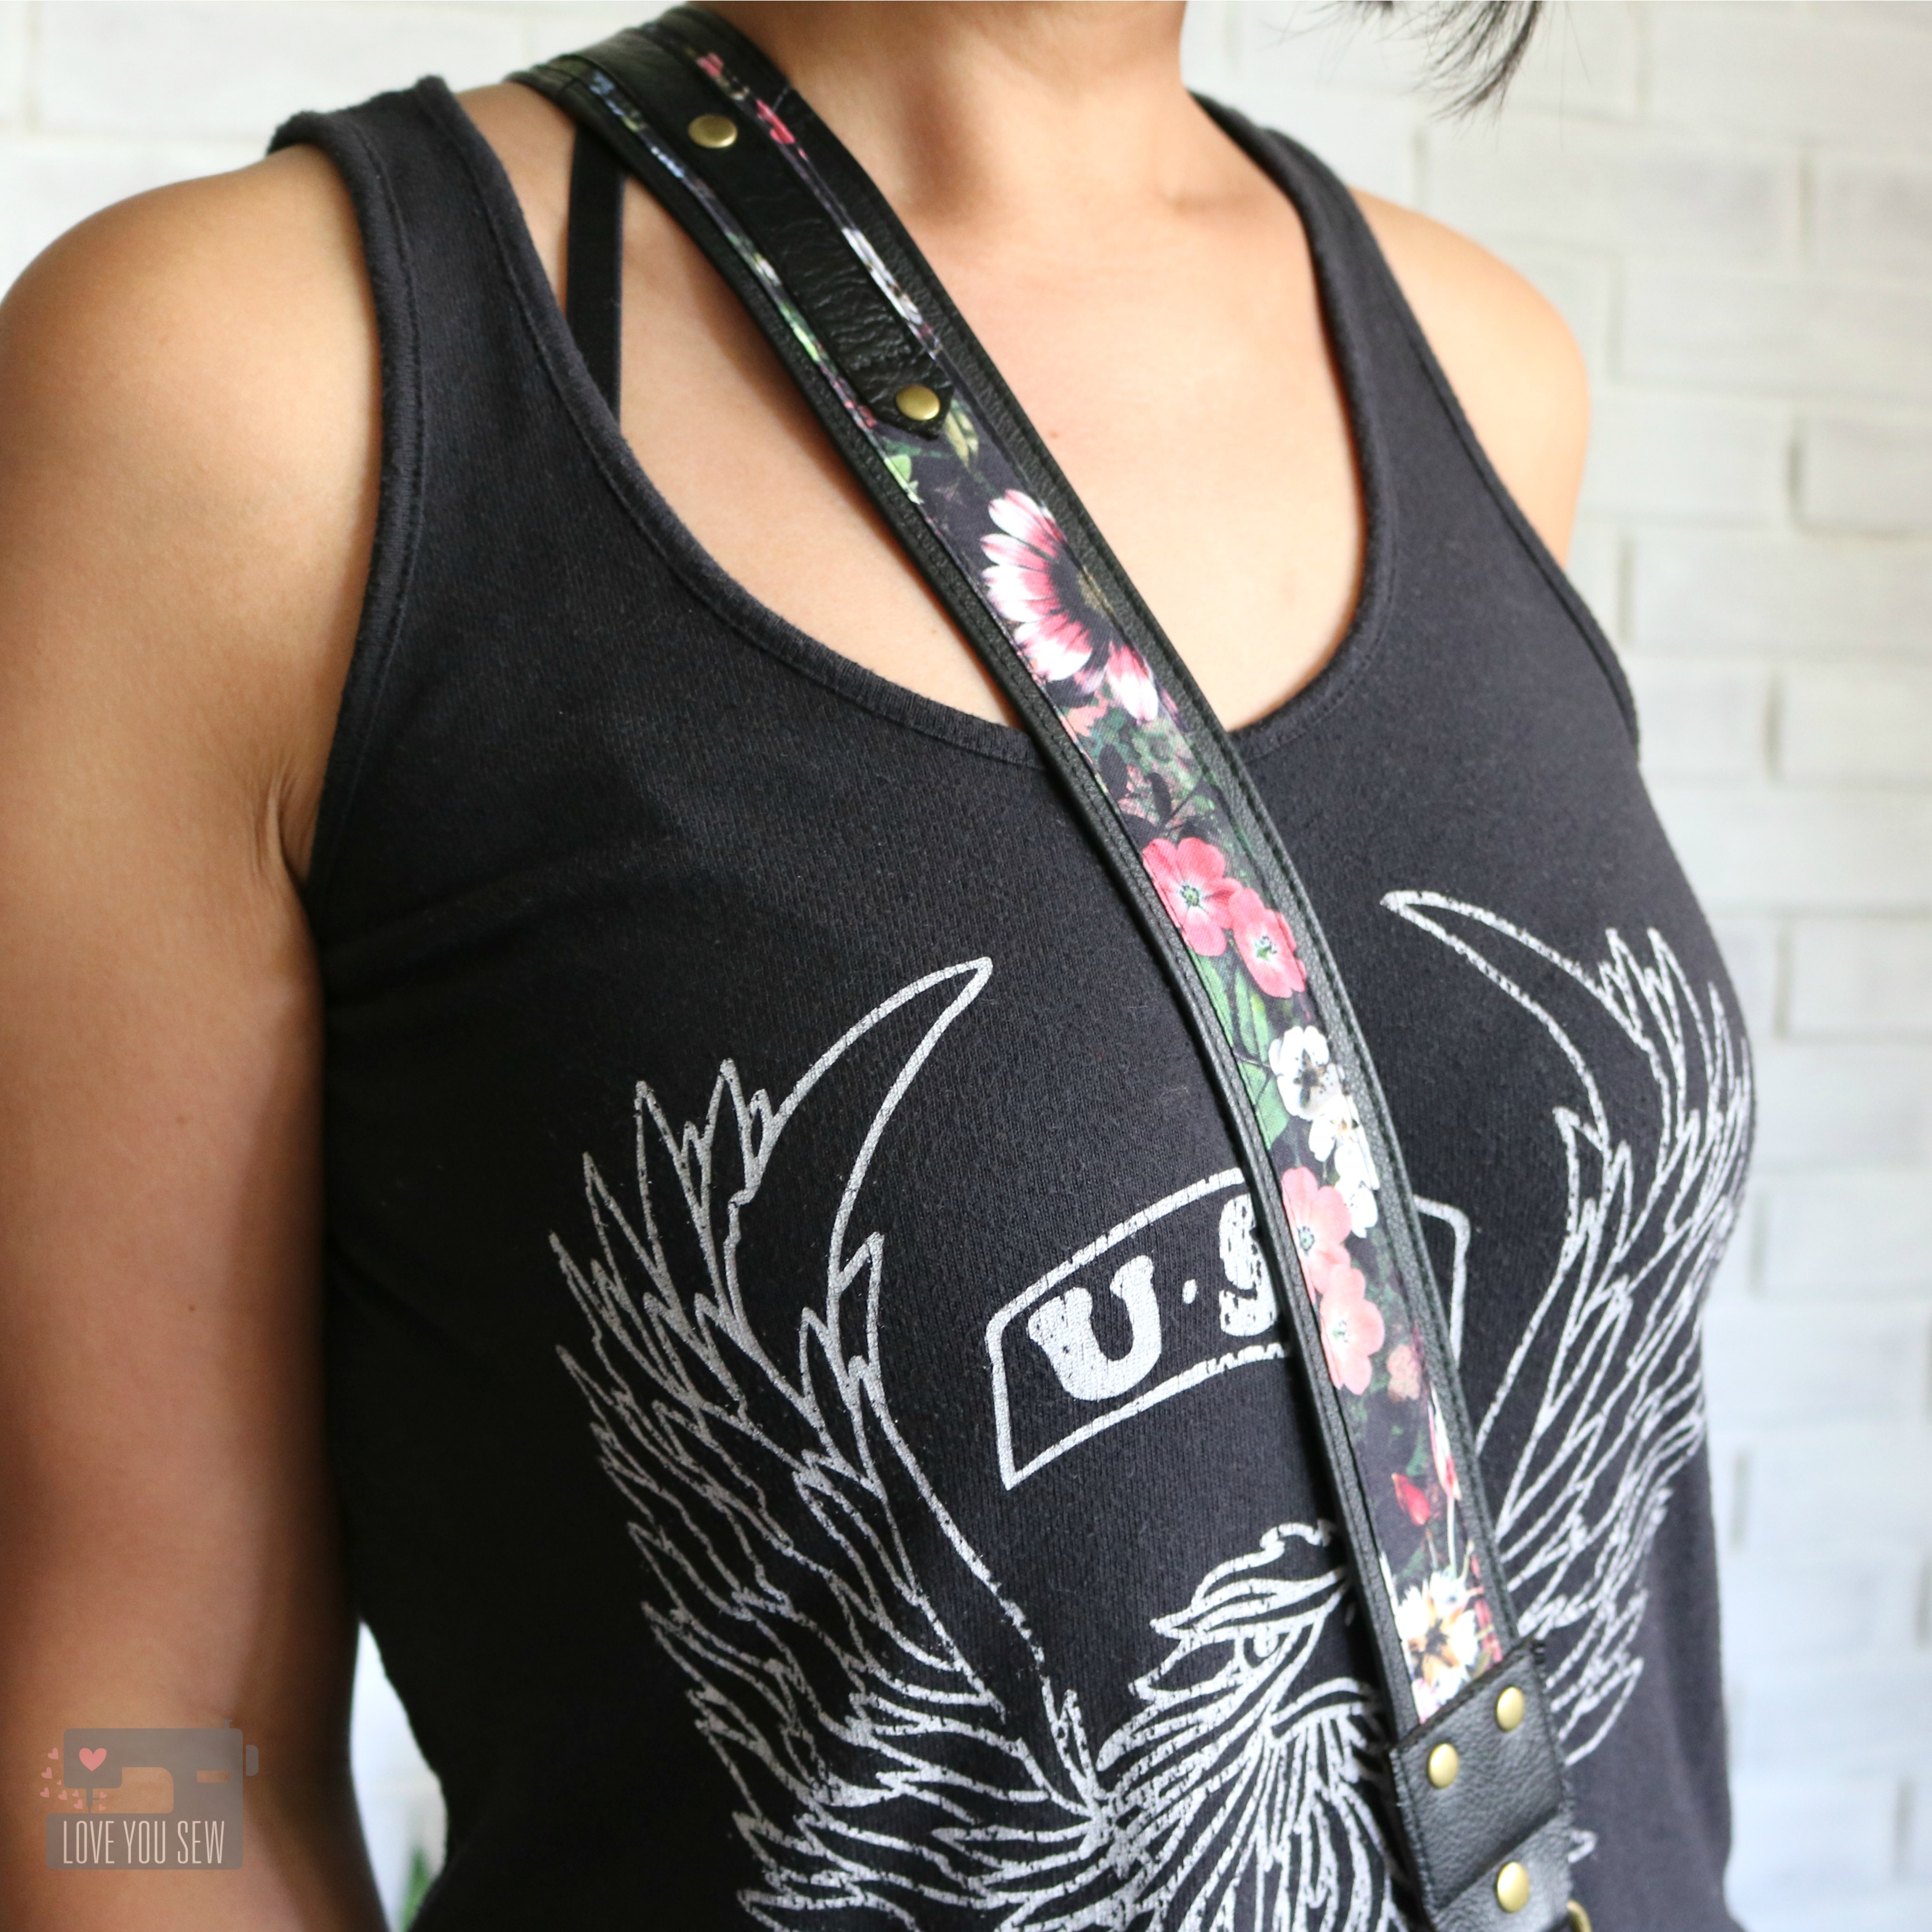
With spring music festivals in the news, I decided to make the bag strap differently than I usually would. Taking inspiration from the bands themselves, I modeled the strap after guitar ones. The leather strap is about 1 1/2″ wide with Floral Fantasy on top and another layer of leather all stitched in place with added rivet accents.
I am so in love with how this strap and bag turned out. I can’t wait to “rock” it all summer long.
This website uses cookies to improve your experience while you navigate through the website. Out of these cookies, the cookies that are categorized as necessary are stored on your browser as they are essential for the working of basic functionalities of the website. We also use third-party cookies that help us analyze and understand how you use this website. These cookies will be stored in your browser only with your consent. You also have the option to opt-out of these cookies. But opting out of some of these cookies may have an effect on your browsing experience.
Necessary cookies are absolutely essential for the website to function properly. This category only includes cookies that ensures basic functionalities and security features of the website. These cookies do not store any personal information.
Any cookies that may not be particularly necessary for the website to function and is used specifically to collect user personal data via analytics, ads, other embedded contents are termed as non-necessary cookies. It is mandatory to procure user consent prior to running these cookies on your website.