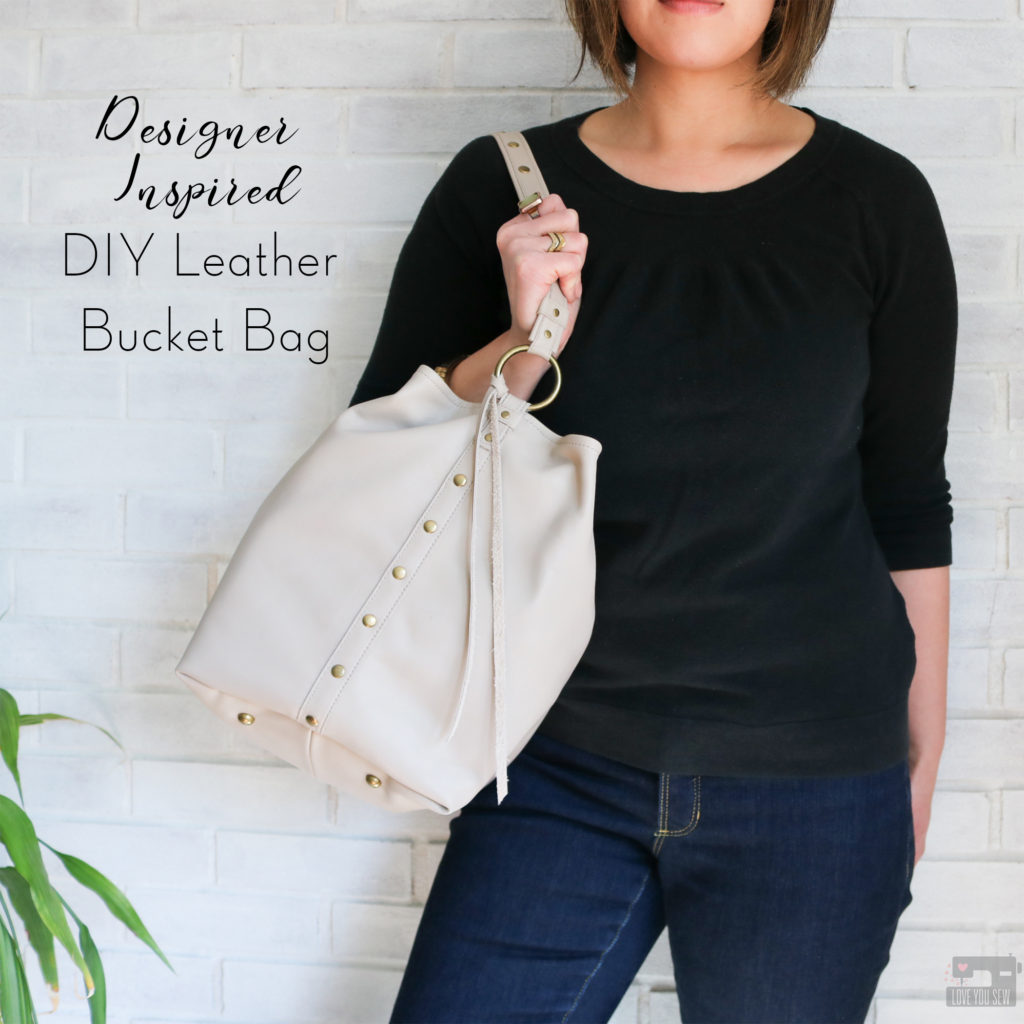
Designer Inspired DIY Leather Bucket Bag

Even though it’s snowing as I write this (thanks Ohio weather,) I can’t help but think about spring and all of my wardrobe planning ahead.  I do love my cozy sweatshirts and thick sweaters, but I am SO ready for all of this blustery cold weather to go away!  Before I even get started on my warmer weather garments, I was already thinking about accessories with the help of my friends over at Measure – A Fabric Parlor.
If you don’t know about Measure, it’s a beautiful shop in Savannah, GA which sells incredibly unique fabrics like African wax prints, designer overstocks, and hand painted leather.  I am fortunate enough to be one of the Measure Makers, a group of inspirational sewists working with all the gorgeous products at the shop.  When I was asked to work with their fabrics, it was the leather which caught my attention first.  I have a deep love for sewing with leather and not all fabric shops carry it.
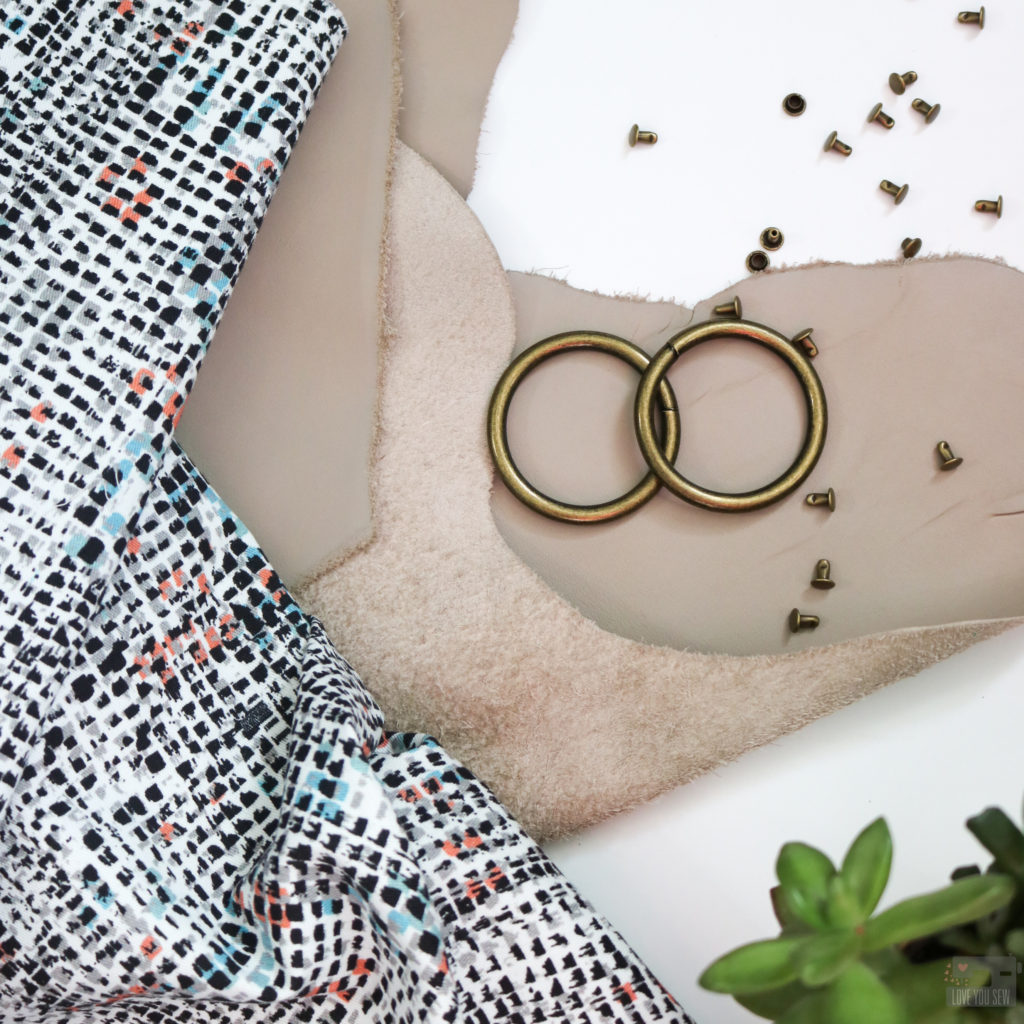
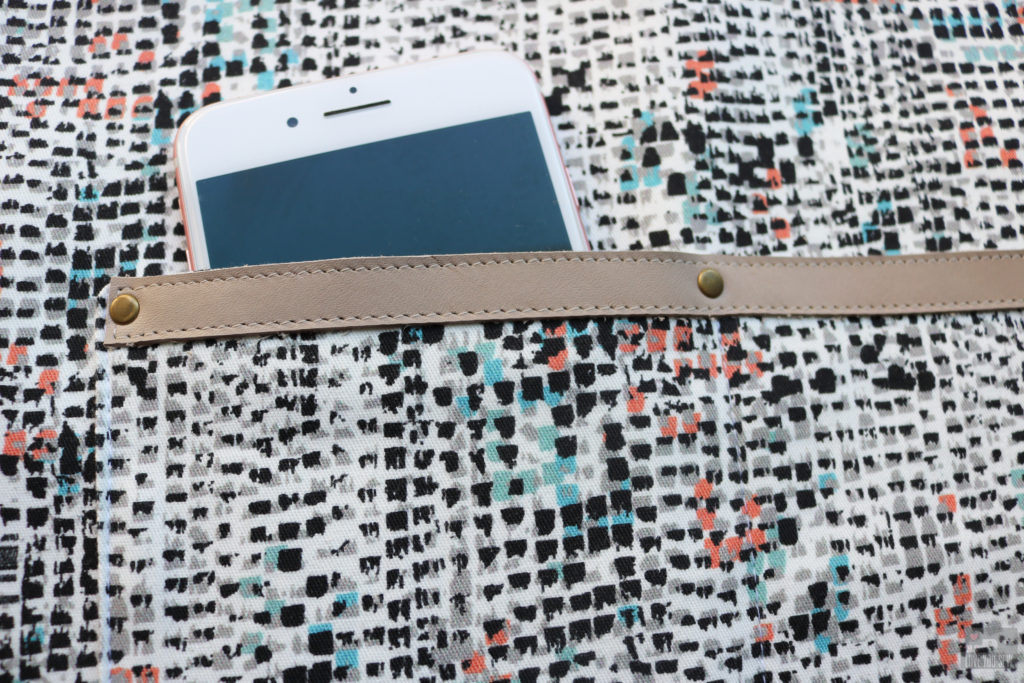
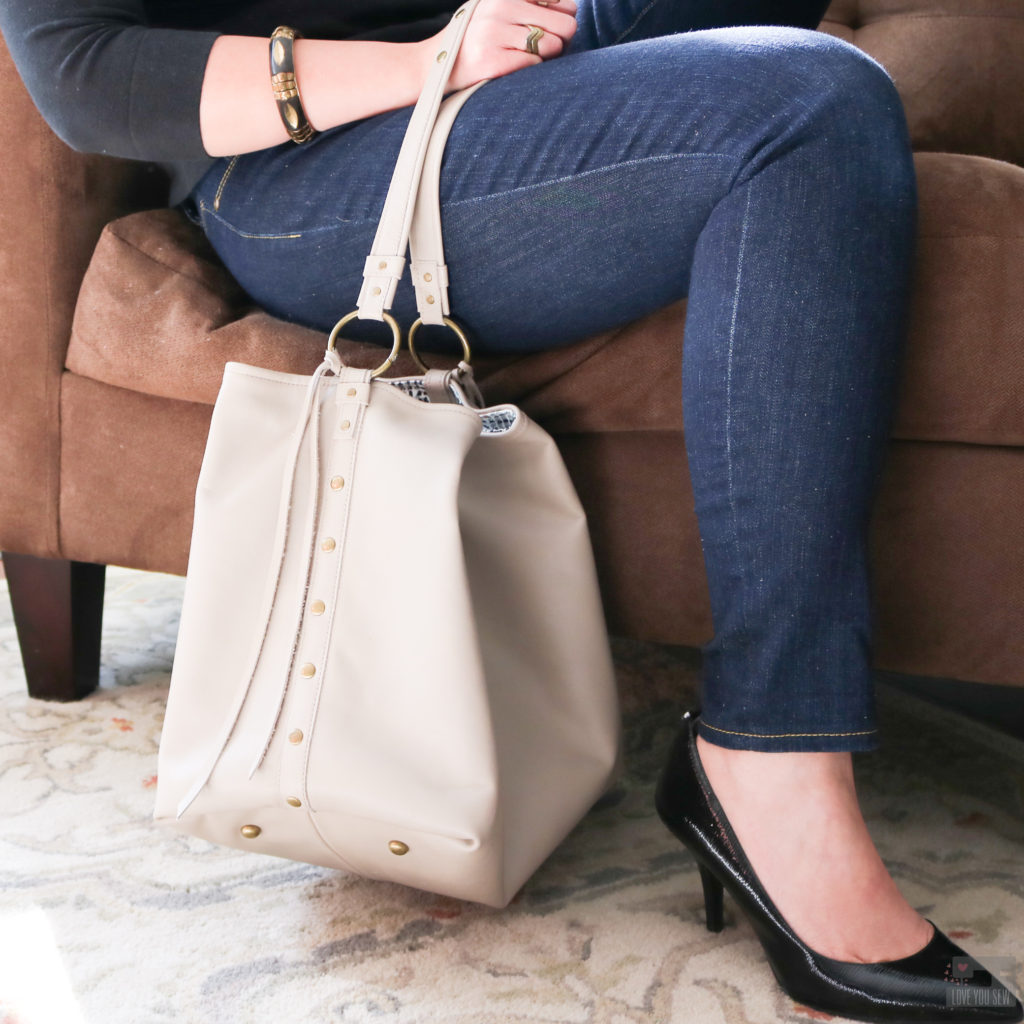
When I saw this Glazed Cowhide (#12023,) I knew the taupe color would be the perfect neutral for the spring…especially once I bring all the color back into my clothes.  Since I make a lot of bags out of quilt cottons and canvases, my bags all tend to have some kind of print and it would be nice to have something solid again.  With that said, I still am always jonesing for something fun and this graphic Abstract Check on stretch cotton twill (shown above) was what I needed for the lining.  I like a busy print to hide my mess and punches of coral and aqua are a great complement to the taupe.
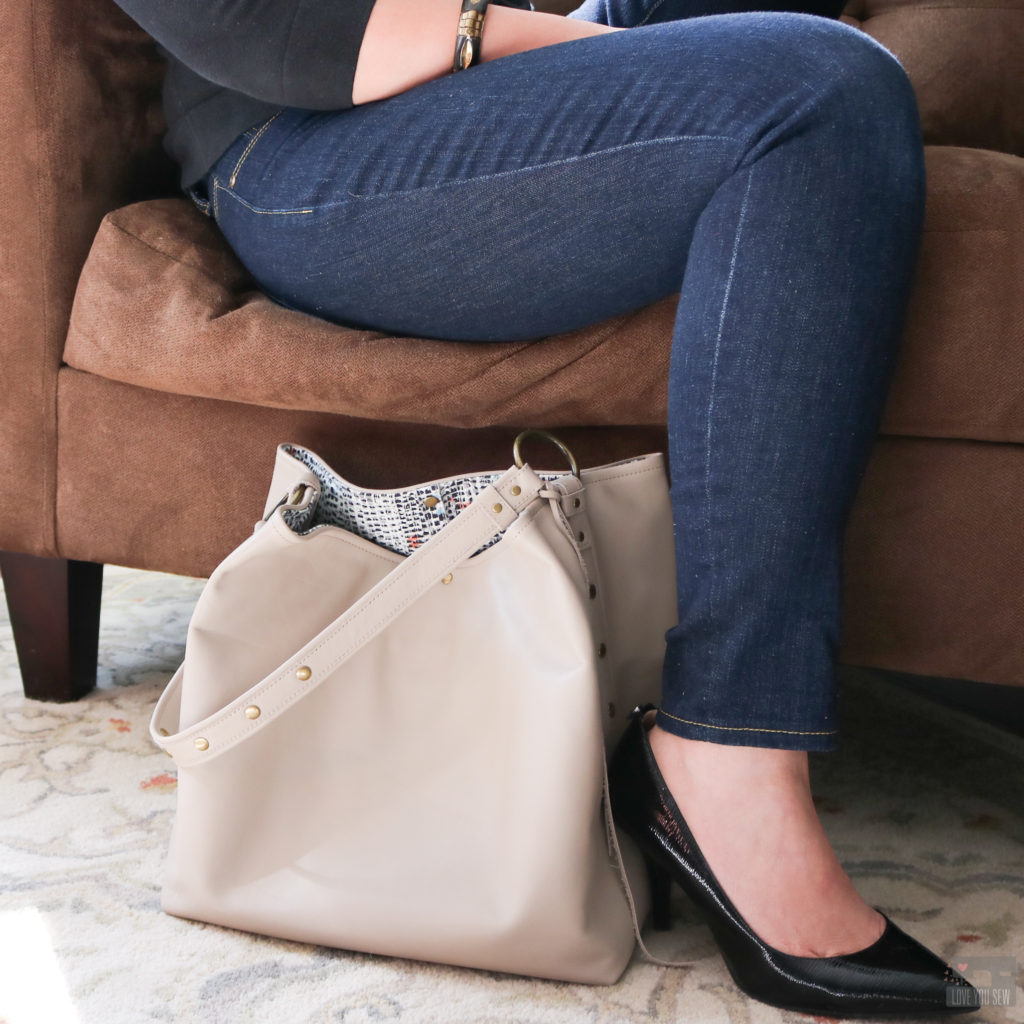
My inspiration for this bag came straight off the runway….literally just one month ago.  I saw Rebecca Minkoff tease some photos on her instagram of the Kate Medium Bucket Bag and I was done.  I love the smooth solid leather of the bag mixed with the hardware and thick chain strap.  It is just so classy, but I always dig a hard edge and the Kate bag is just that….along with a $350 price tag!
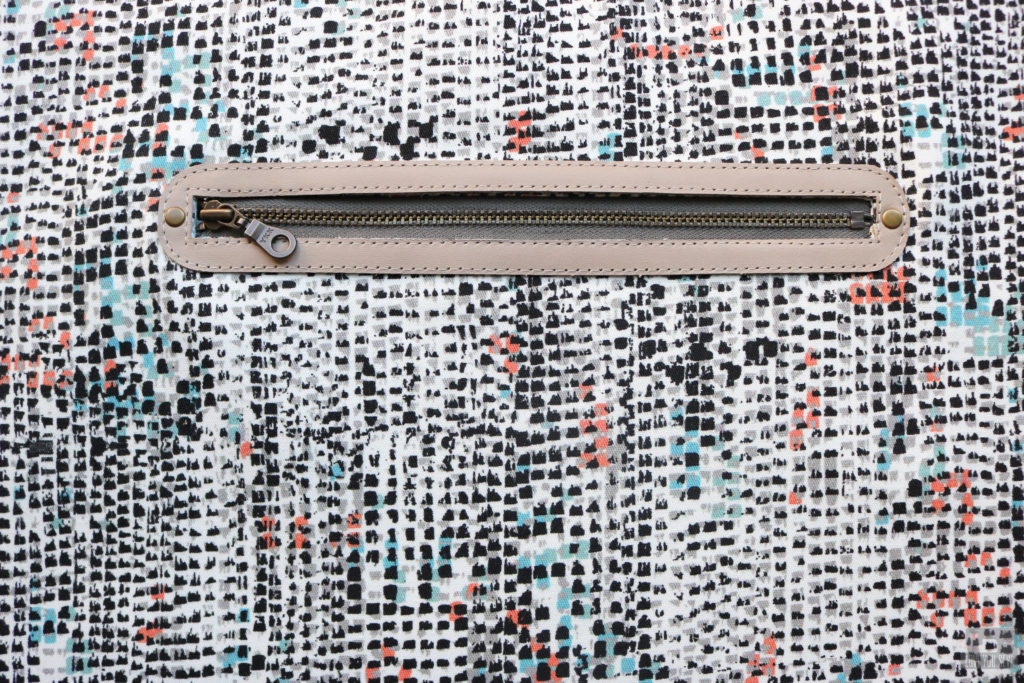
Well, I knew I would NOT be buying that bag, but could make something pretty darn close.  I used the shape of the bucket bag as my jump-off point and made sure to add a lining which is not in the RM version.  I know Rebecca Minkoff is a multi-million dollar company, but who doesn’t want pockets in her bag???  As standard practice for almost all of my bags, I added a roomy zipper pocket along with a divided slip pocket for my phone.
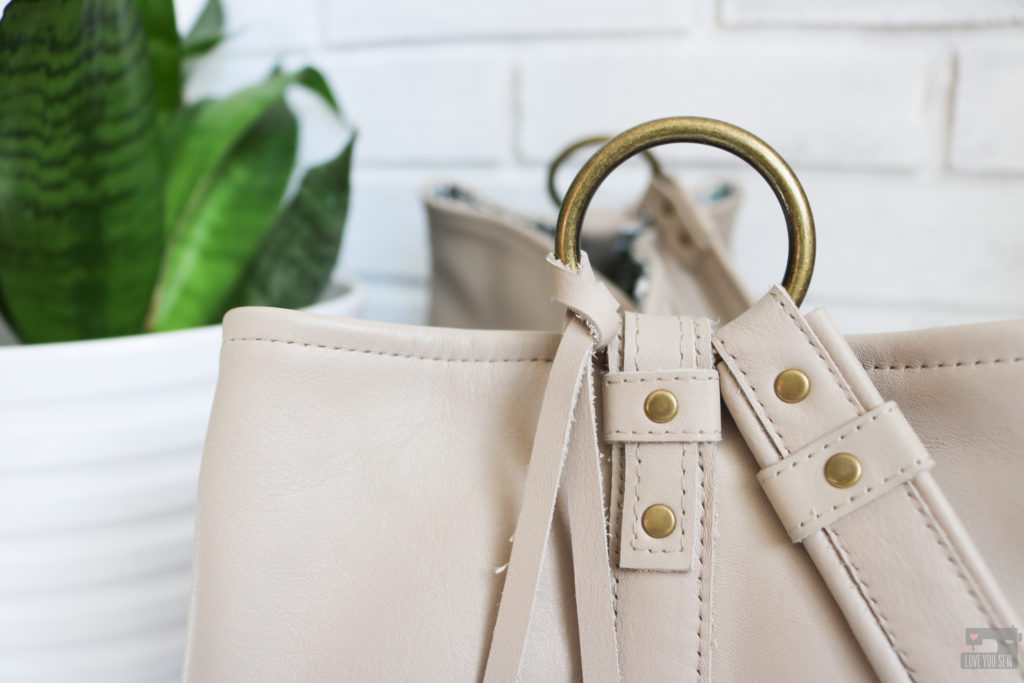
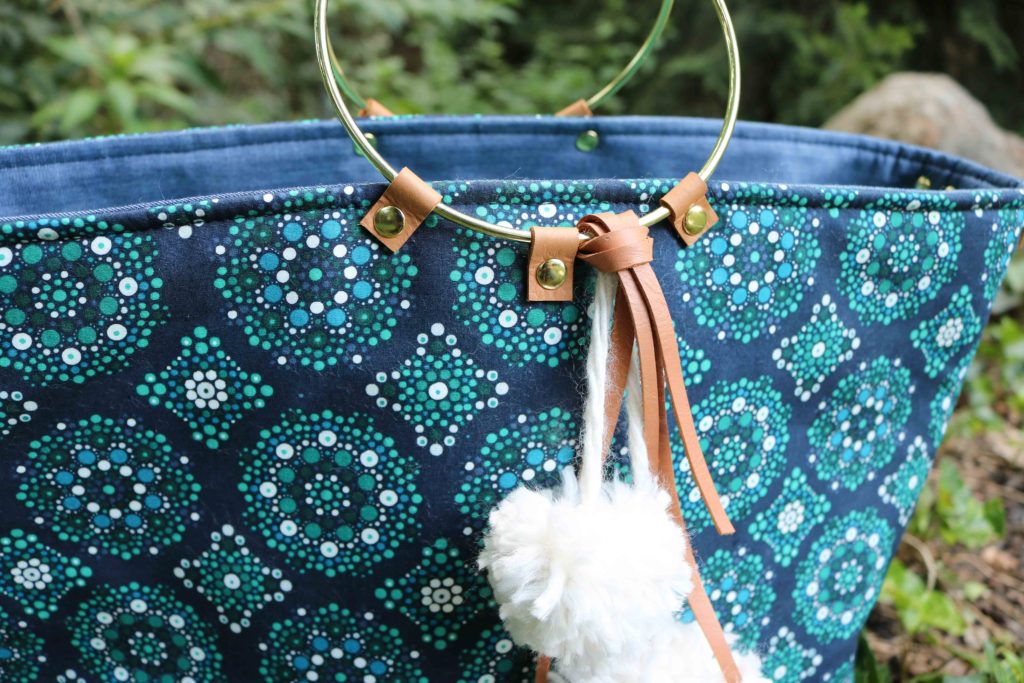
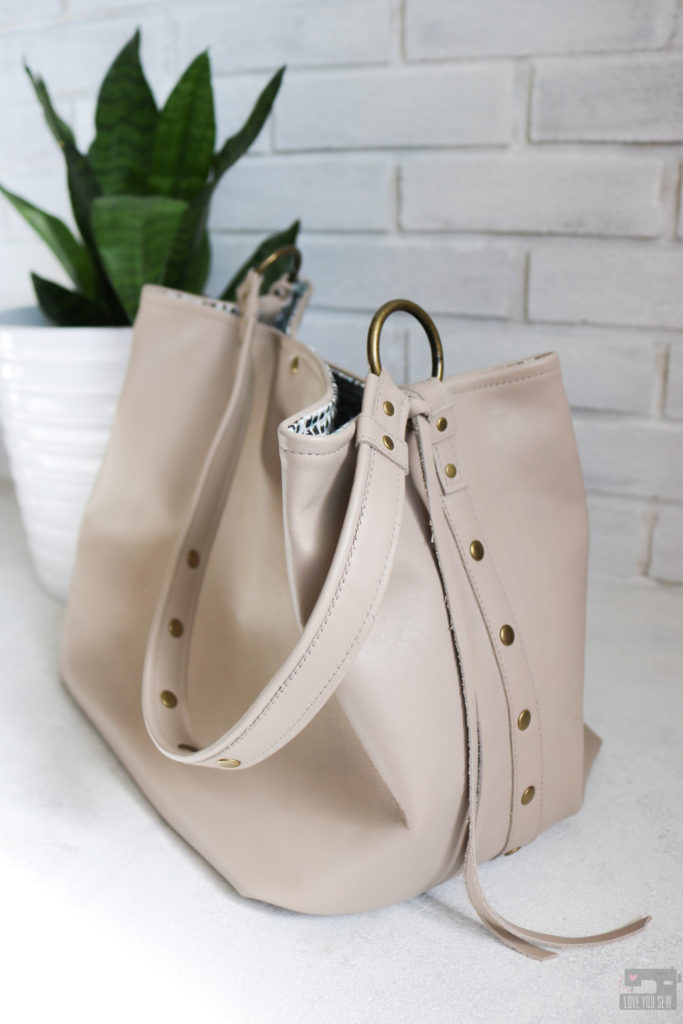
I already had these great circle rings in my stash and wanted to have the same look as my inspiration bag with them anchored high on the sides.  This was a bit tricky because I needed them to stand up and also deal with a lot of strain.  So you can see in the picture how I doubled up on leather to keep the ring in place while adding more strength.
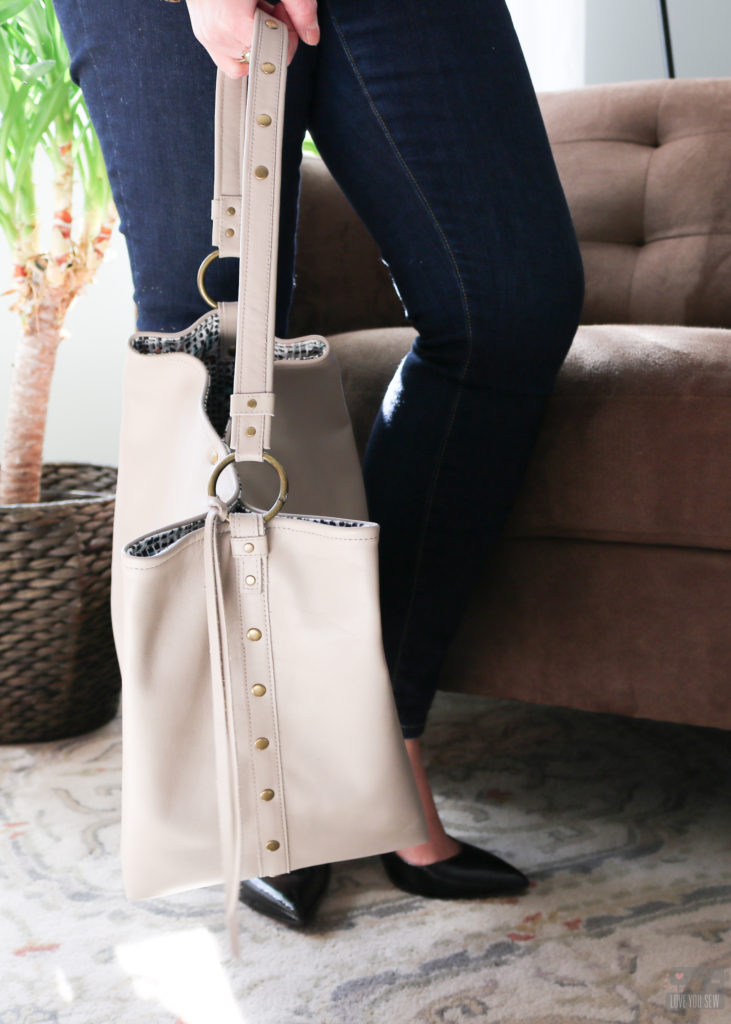
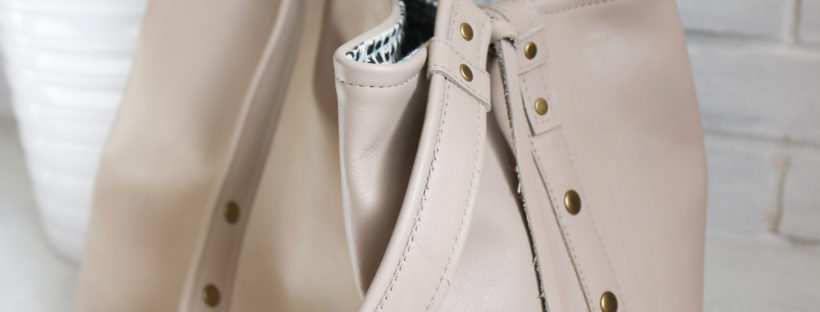
The other feature I loved from the Kate bag was the hardware along the side seam.  It looks like RM used stud buttons and with industrial production, was able to go directly through the seams.  I, however, used just rivets and through a little illusion, moved my rivet line about 1/4″ over so the holes would be punch through the body and not the seam.
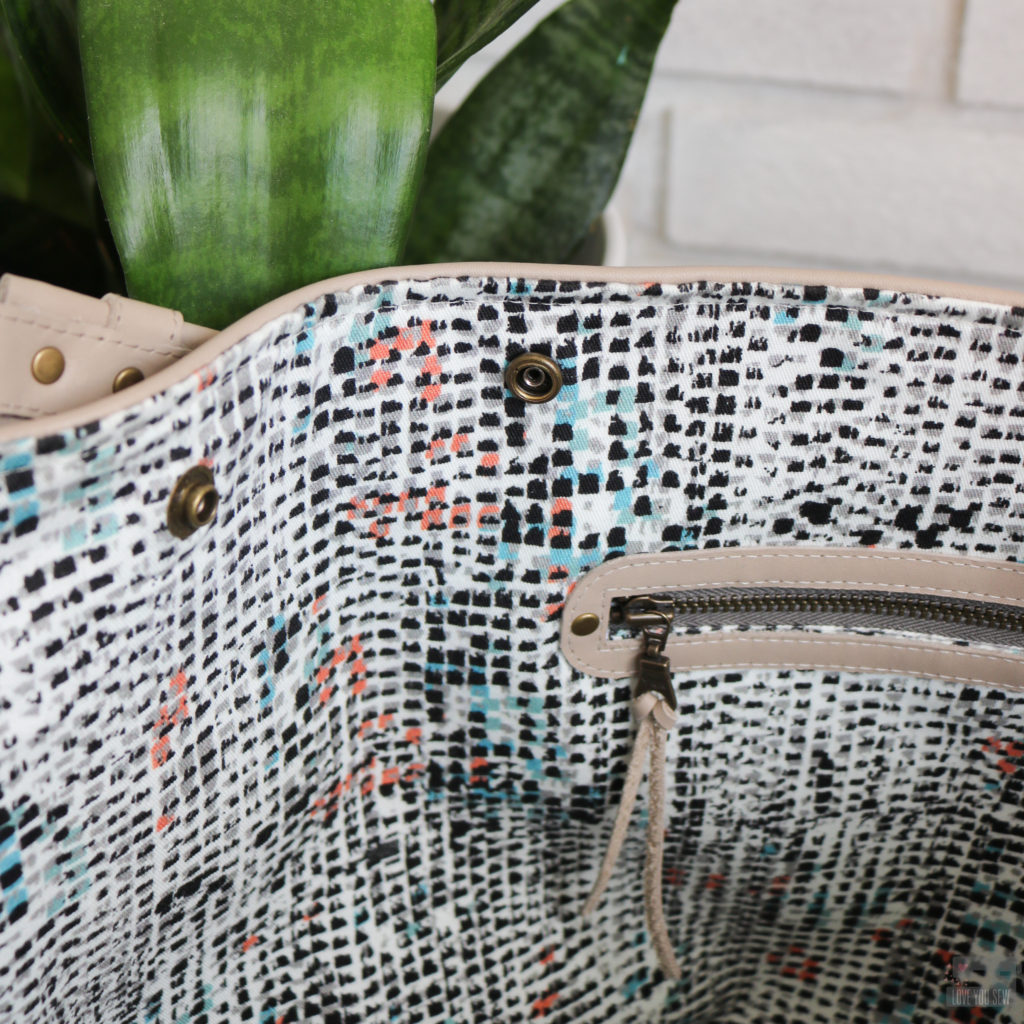
Since I based my bag dimensions all on all of the inspo pictures and description, my bag looks a bit larger and wasn’t laying the way a bucket bag should.  The center was collasping into itself and so I knew I needed to create that structure.  I was already 90% finished with the bag at this point, but luckily I could dig through the lining and add some interior snaps.  I feel great when my years of “collecting” random hardware pays off!
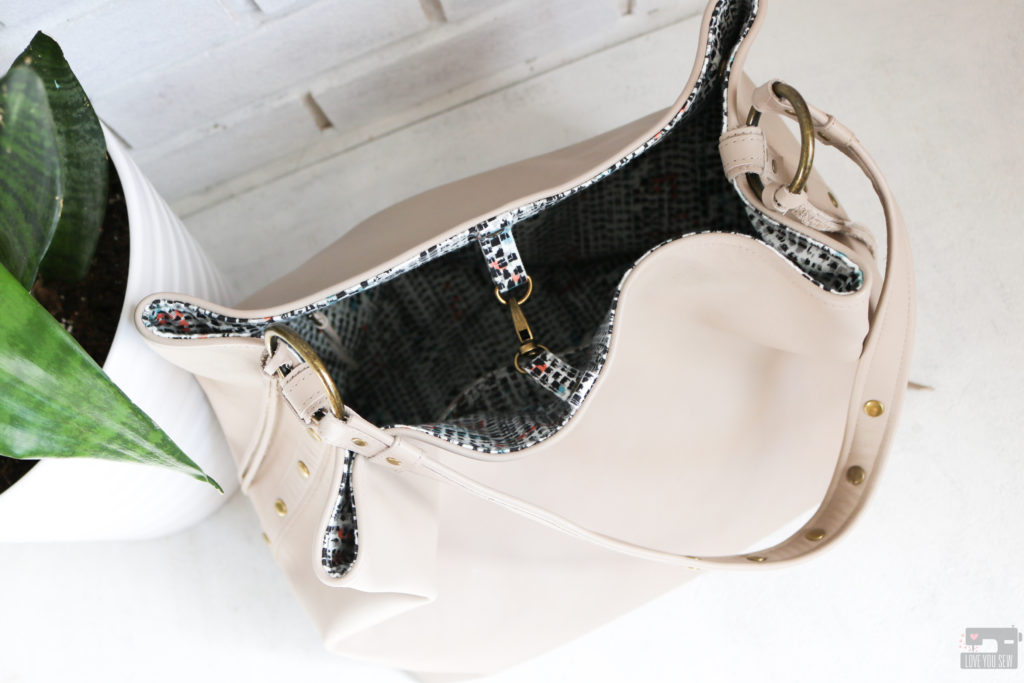
The snaps along with the swivel clasp and d-ring (as part of my original design) gave my DIY bucket bag the exact shape I was trying to mimic.  Thank goodness because I’m not sure what I would have done as an alternative…maybe just kept a ton of stuff in my bag to keep it full??
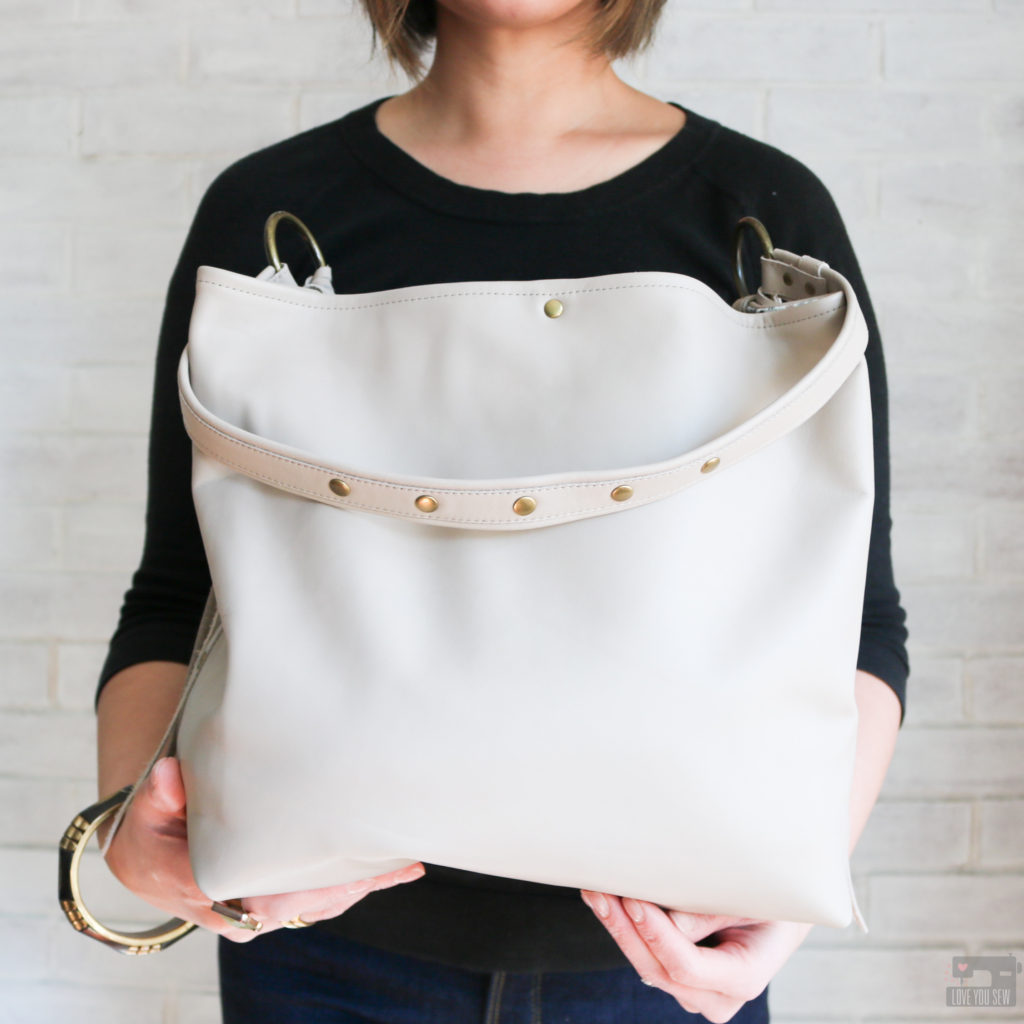
While I didn’t have a big chain for my bag strap, I decided to bring up the look of the side seams with the top-stitching and rivets.  Using rivets all along the strap looked a bit too much IMO and so I edited to just five along the top of the strap.  This allows enough negative space to come through and balance with the plain front of the bag.
I had a lot of fun adding hardware all over my bag, but I did not overlook adding some protective feet.  After all of this work and the hours put into my bag, I knew I had to take care of this beautiful leather.  Adding feet on the bottom of the bag helps dirt stay off and protects the bag from potential floor scuffs.  It also looks gorgeous and is a nice hidden detail.
Tips

While I was able to get through this project on my domestic sewing machine, make sure to check if your machine can handle the layers on scraps, first with hand cranking and then sloooooowly taking it stitch by stitch.  Thinner leathers are easier to handle than thicker hides, but you can hammer and even shave your leather to make it thinner.  You may need to increase stitch length and adjust tension to compensate.


Project Details:

How do you think I did with using designer inspiration to make my own leather bag?  I hope you are able to find your own runway inspo this spring!


Happy Sewing!

Cristy


Leather and Fabric were provided by Measure for this post and as part of participation as a Measure Maker.  The project idea is completely original and all thoughts/opinions are my own. There maybe affiliate links with the Project Details.  Any compensation as part of purchases through these links help to host, secure, and maintain this website.  Thanks for your support!


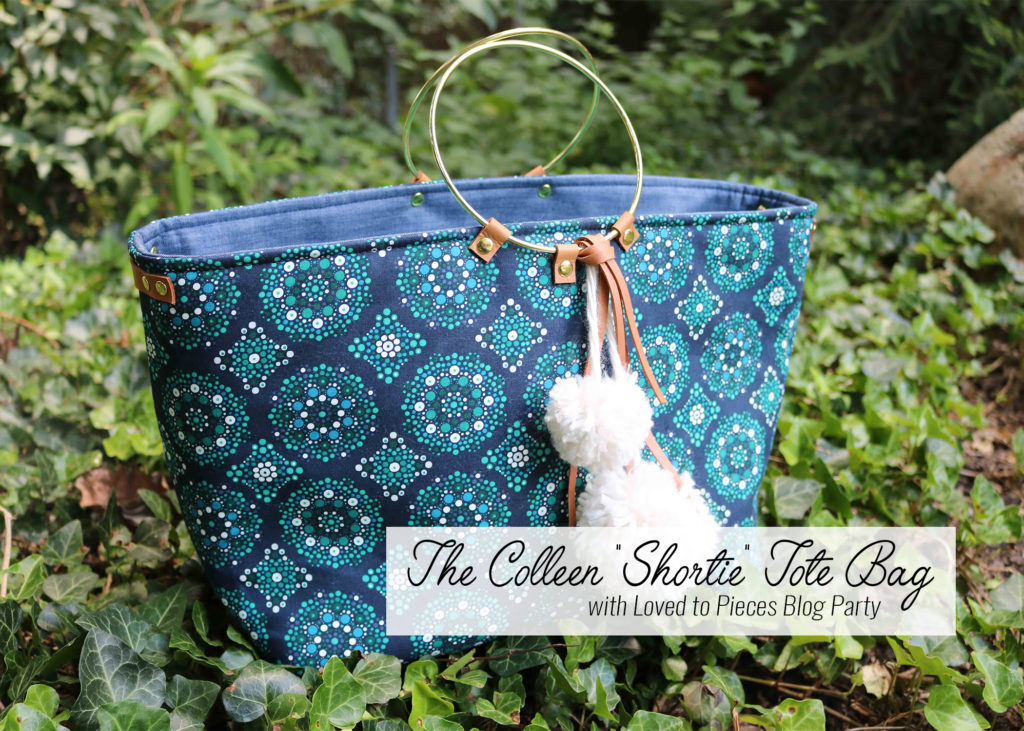
Colleen “Shortie” Tote Bag with Loved to Pieces Blog Party

When Mathew Boudreaux (aka Mister Domestic) throws a party, you know it’s gonna be big and fabulous!  And this Blog Party is living up to all the hype with over three weeks of amazing projects using Mathew’s debut fabric collection, Loved to Pieces.  I’m so honored to be a part of all the festivities, so I thought I would bring my new Colleen Tote along for the ride.

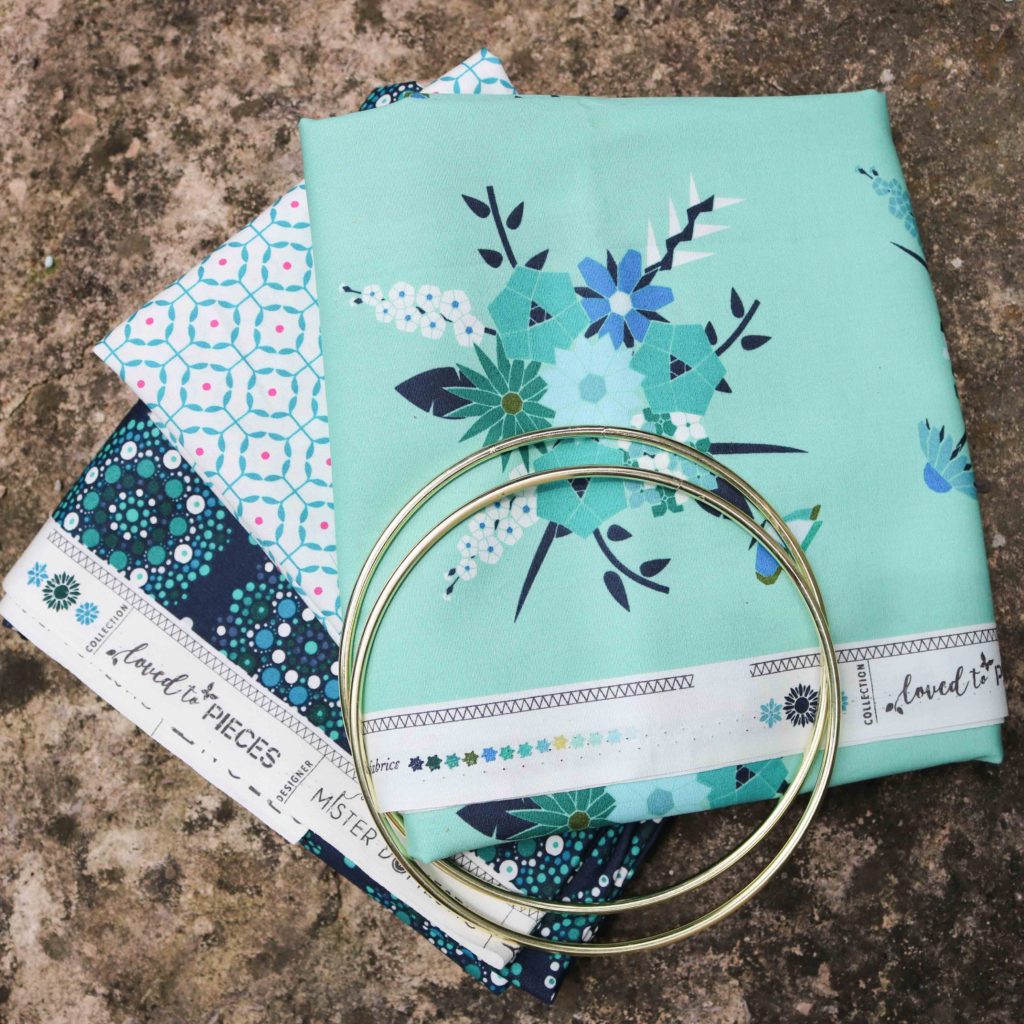
Loved to Pieces is a beautiful fabric collection inspired by Mathew’s love of English paper piecing and his sweet daughter’s love of florals.   I love the mix of blues and teals complemented with sharp pinks for a lot of fun.  There is a great mix of quilt cottons, rayons, and knits for all kinds of great projects. For more inspiration, you can view the look book here.

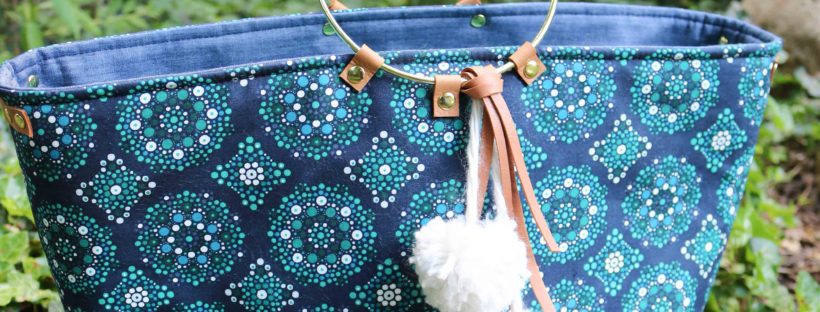
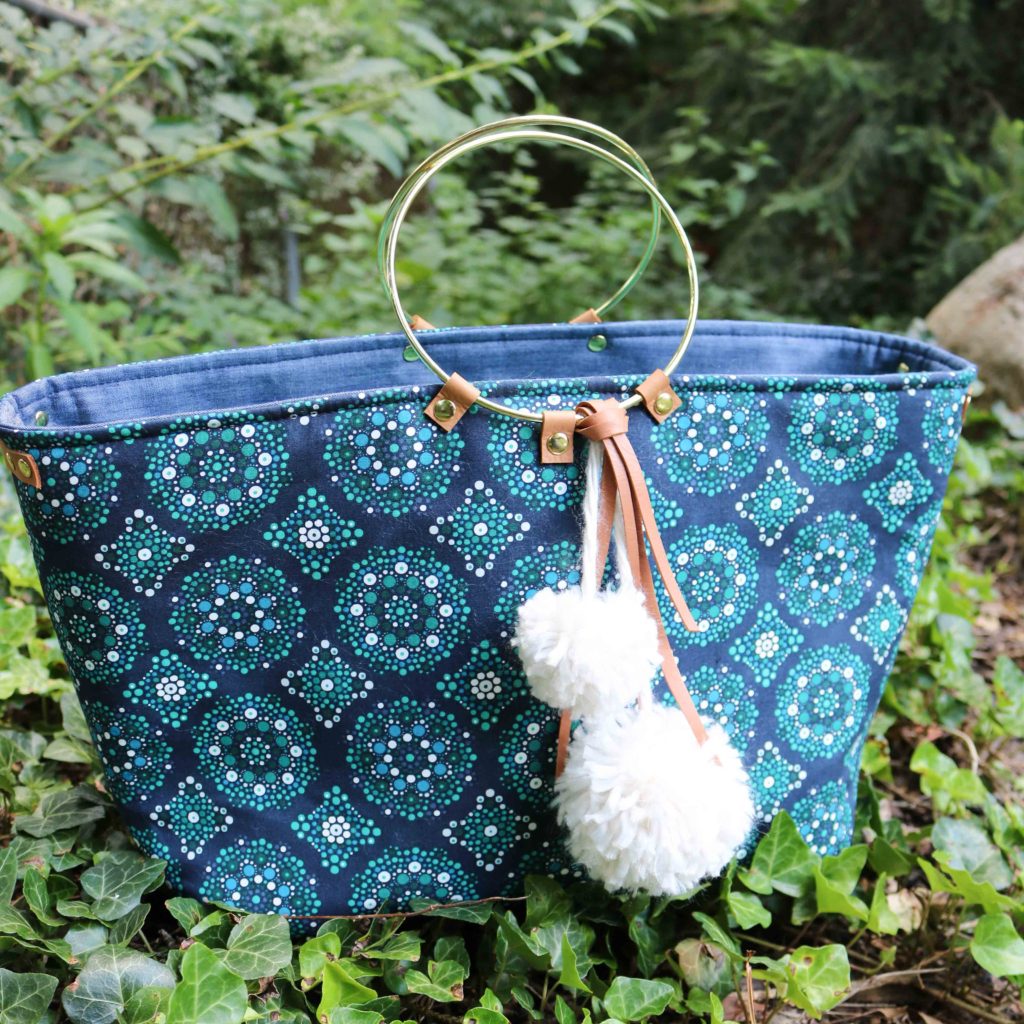
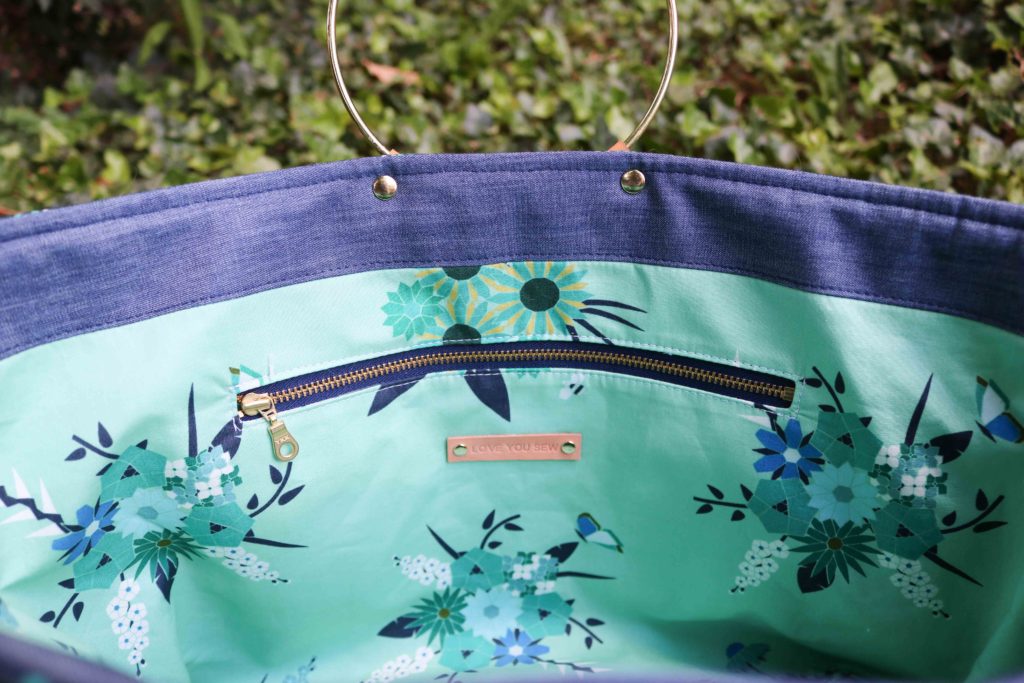
For my Colleen Tote, I wanted to go for a chic look and let the print stand on it’s own. For the exterior, I selected Mandala Drops Midnight with it’s striking and hypnotic design.  Plus, it’s a nice dark print that’s perfect for the exterior of a bag to hide any dirt or debris.  I like the linings to pop a bit, so  Pieced Bunches Cool was ideal with the gorgeous geometric florals.  The pinks in the collection are such a nice complement and I had to add a bit of Reap and Sew Light inside the zipper pocket.  Finally, the interior contrast band is Art Gallery Fabric’s Indigo Shadow Smooth Denim.

I’ve been seeing brass metal rings all over the handmade and fashion world for a little while now.  They are used in macrame weavings, dreamcatchers, floral arrangements and I saw heavy usage of this accent in handbags this past spring.  I was so inspired and I knew I had to add this unique hardware to one of my own bags.

These rings have a solid 5″ diameter and would make fantastic bag handles.  However, to use the rings as handles, I knew I couldn’t make a huge heavy bag.  So I decided to make a “shortie” version of my Colleen Tote pattern.  This entailed shortening the exterior, linings, and coordinated woven interfacings all by 3″.  The zipper pocket was then shortened by 6″ overall.

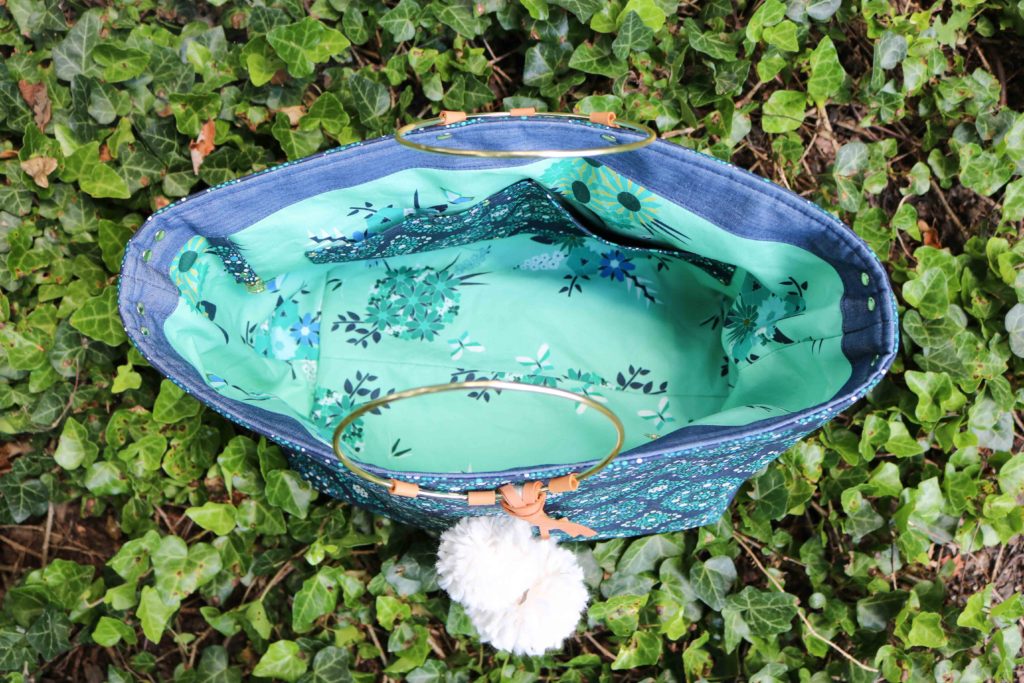
Instead of using fusible fleece, I used Soft and Stable to keep the bag more structured.  This was in order to hold the weight of the rings and to keep them upright.  The exterior had to be basted 1/4″ all around  the pattern piece to keep the fabric nice and smooth.  The Soft and Stable really  makes the bag look so polished.

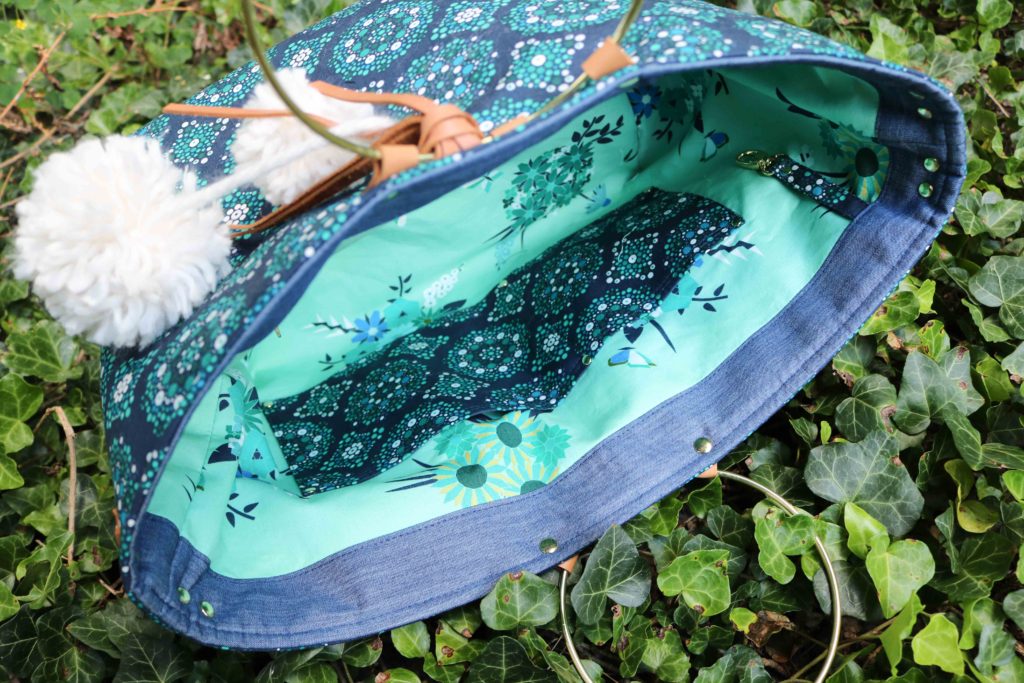
Everything else in the pattern was all kept the same (minus the handles, of course.) There is still a nice roomy slip pocket for your phone and sunglasses and the zipper pocket to tuck away the essentials.  The fob is essential to keeping those keys in check!

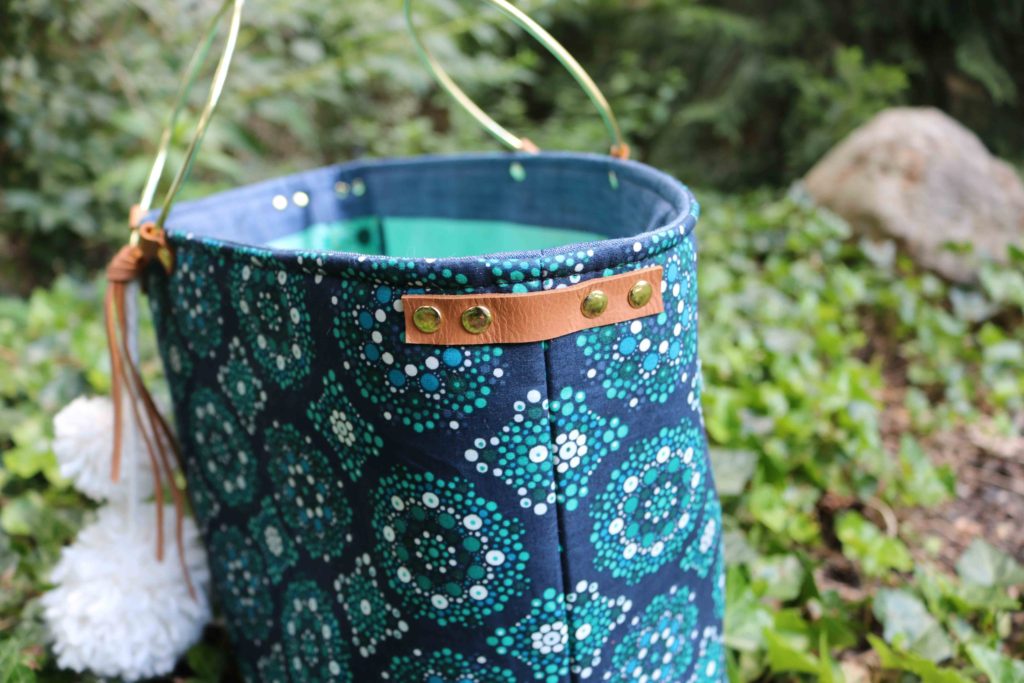
These rings could have been stitched into place, but I opted to used leather and rivets to add more texture and interest.  The ring was first secured with the center rivet while the exterior panel was still flat and not sewn on the sides.  Once the tote was completely finished, I then added the other rivets to the left and right of the initial one.  This is why you can only see two rivets on the lining for each handle.

I added some extra leather and rivets to balance out all the hardware around the handles.  With a  nice clean exterior, I decided to add just a little more fun and to keep this bag on trend with some pom-poms and leather lacings (all using scraps from my stash of crafting goodies!)

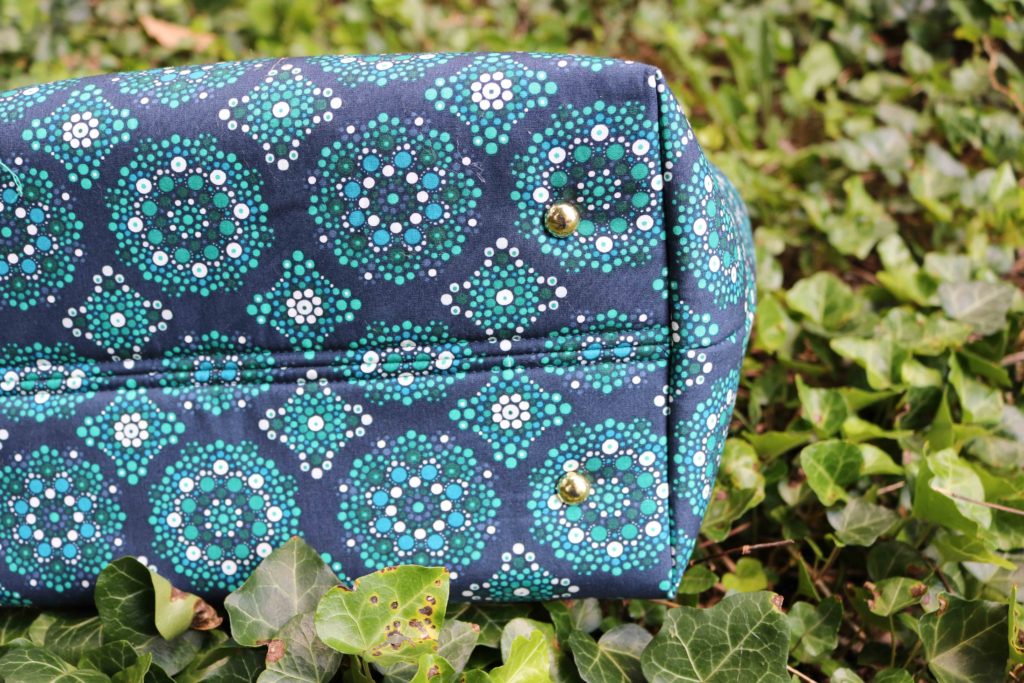
Last, but certainly not least, is the Colleen’s bottom.  With the ring handles, this is not a bag you just sling over a chair back.  So, I make sure to take care of this lady by added some shiny shoes.  Whether the tote has to sit on another chair or (heaven forbid) the floor, she will be protected!


Project Details:


For the full Loved to Pieces Blog party line-up, check out:


Thanks for visiting and partying with me here!  Don’t forget to head over to Mister Domestic’s Instagram feed to see how you can win a bundle of these delicious fabrics!

Happy Sewing,

Cristy


Fabric was provided for the blog post.  However, the project conception and all opinions are my own.  Please note there maybe affiliate links for which I may receive a nominal commission if you make a purchase.  This helps keep the website ticking along.  Thanks always for your continued support!
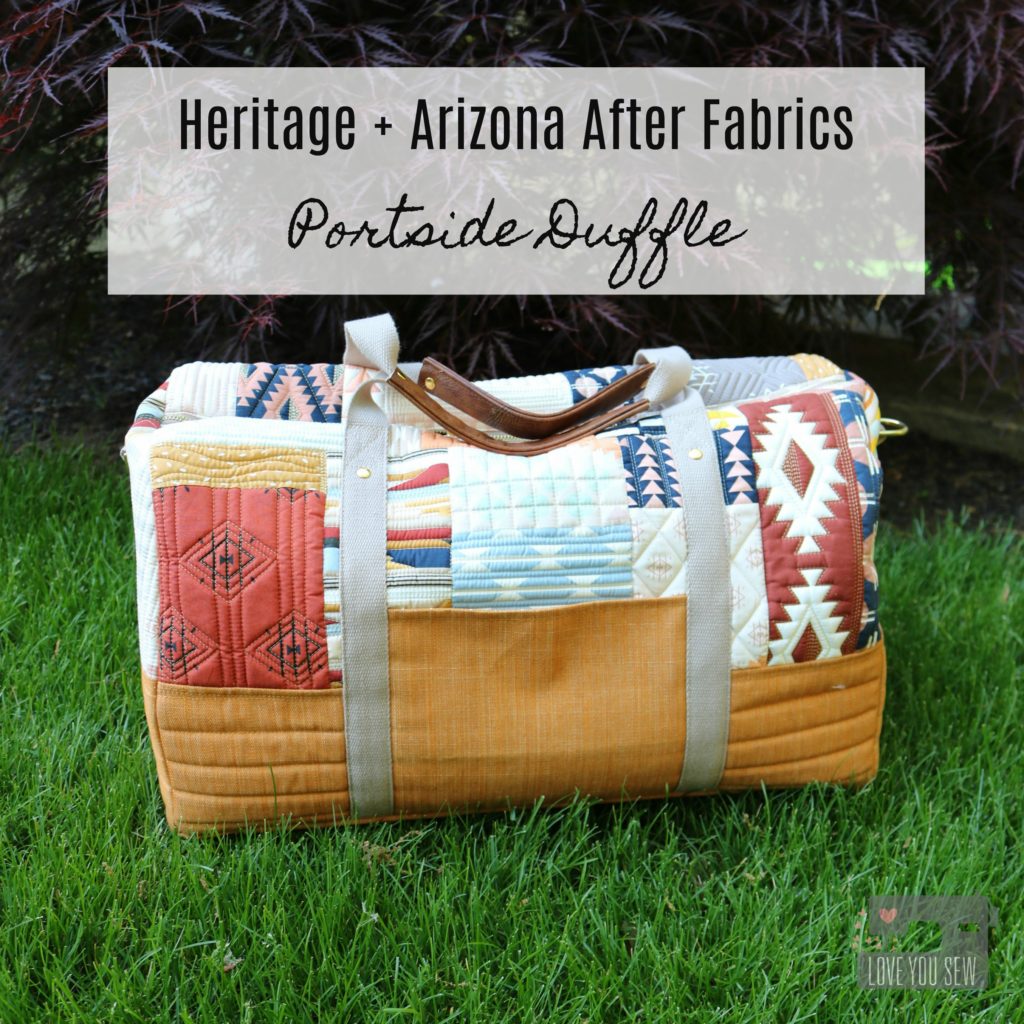
Heritage and Arizona After Fabrics :: Portside Duffle

April Rhodes has done it again.  She has just dropped not one, but TWO new fabric collections with Art Gallery Fabrics.  Arizona After is a gorgeous extension of April’s inaugural Arizona line with some new prints and some recolored with soft dusty pink and blues along with some deep rust and mustard.  The color combos she puts together are always so striking.  Heritage fabrics consists of garment focused substrates…including the new RAYON.  With April’s clothing patterns, she has always been a designer who knows scale for the quilters and the garment sewist alike.  It’s the perfect collection for the me-made makers!
Beyond the fabrics, April’s inspiration for the collections is just so touching.  The way she talks about her family and memories of her father and grandmother is just pure love.  Truly awesome. I love how a lot of the designs were just a part of April’s everyday life and over time, have been permanently imprinted in her head.  To bring these images to life brings so much light to her eyes and it’s been amazing to witness it all. These fabrics are just gorgeous and I’m happy she’s shared them with all of us….because whoa, right?!?

When I was asked to make a bag for April’s Spring Quilt Market Booth, I (of course) agreed.  She has become a dear friend and I will always help her, as she has helped me in so many ways.  April asked me to make a larger duffle and suggested a quilt-as-you-go method for easy patchwork because with Market…comes some tight deadlines.  I got to immediate work, but quickly realized I had to Turn. It. Up.

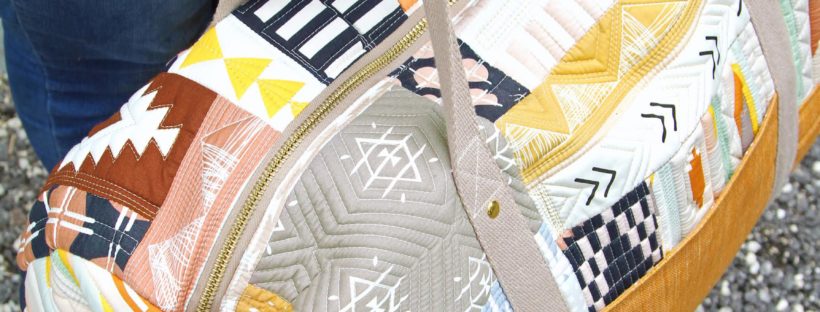
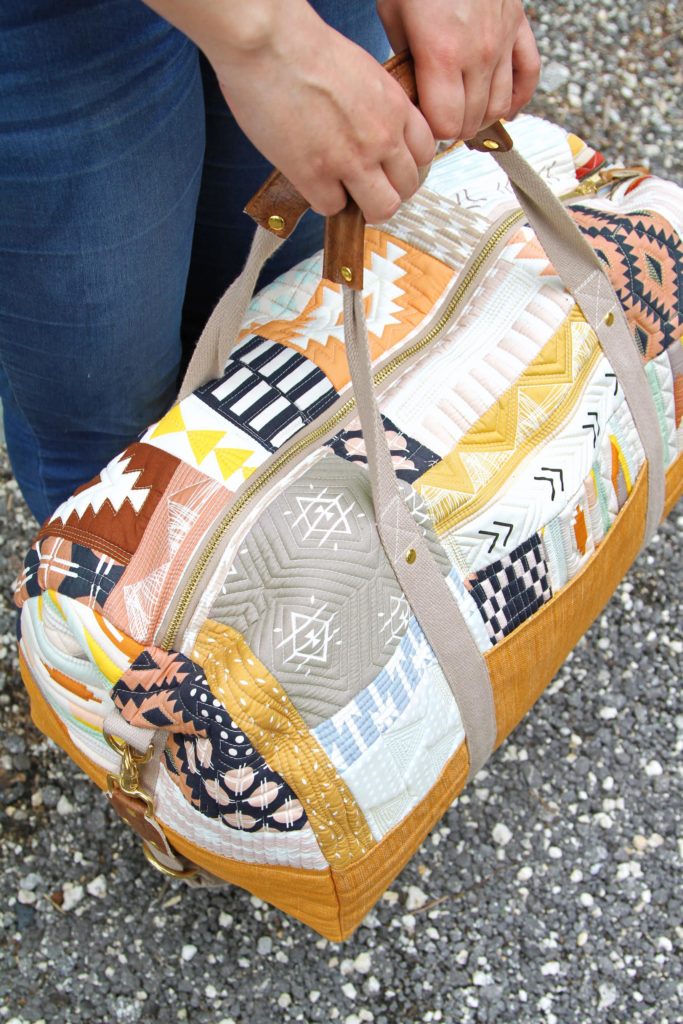
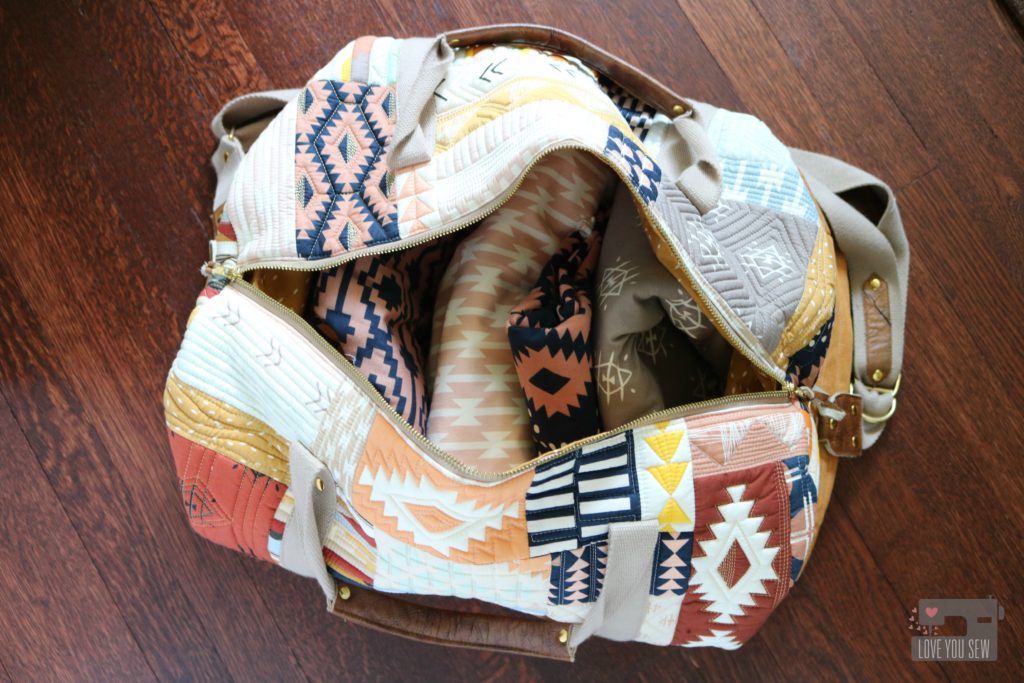
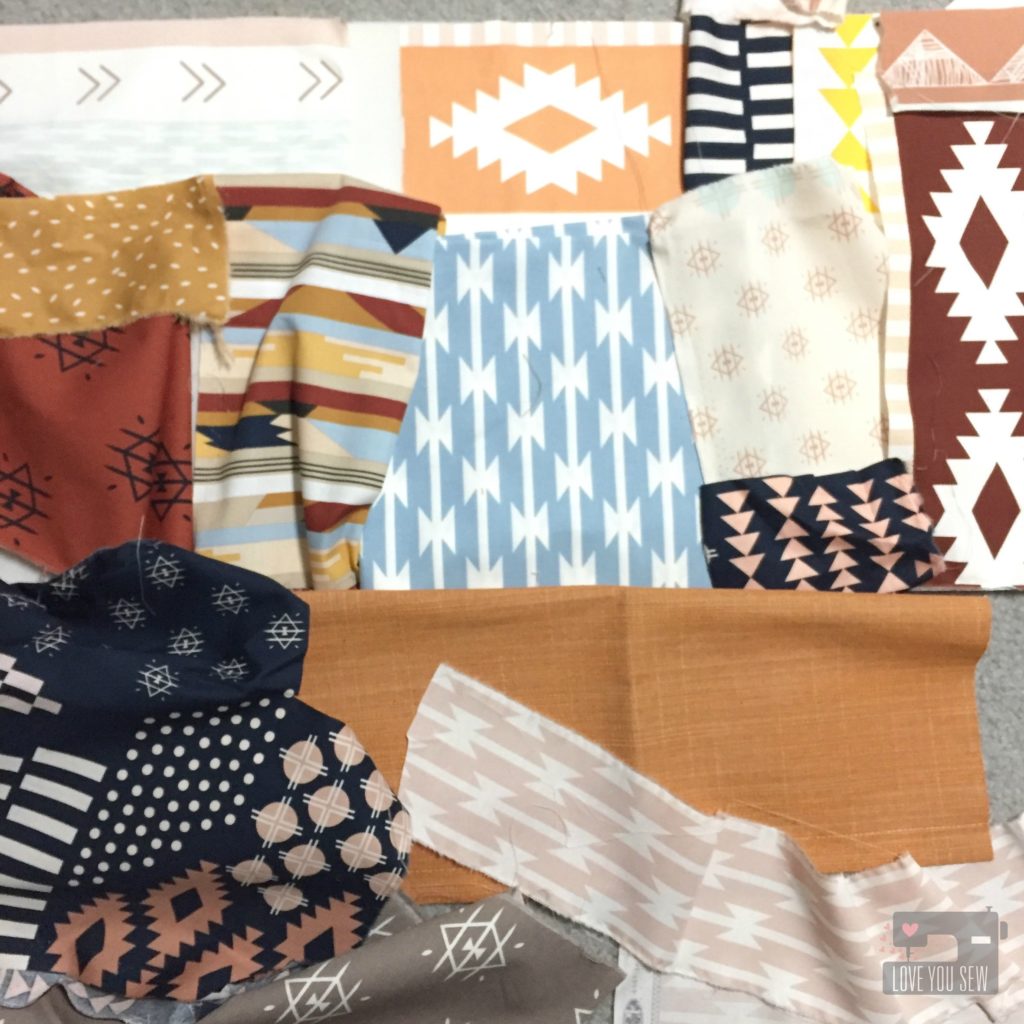
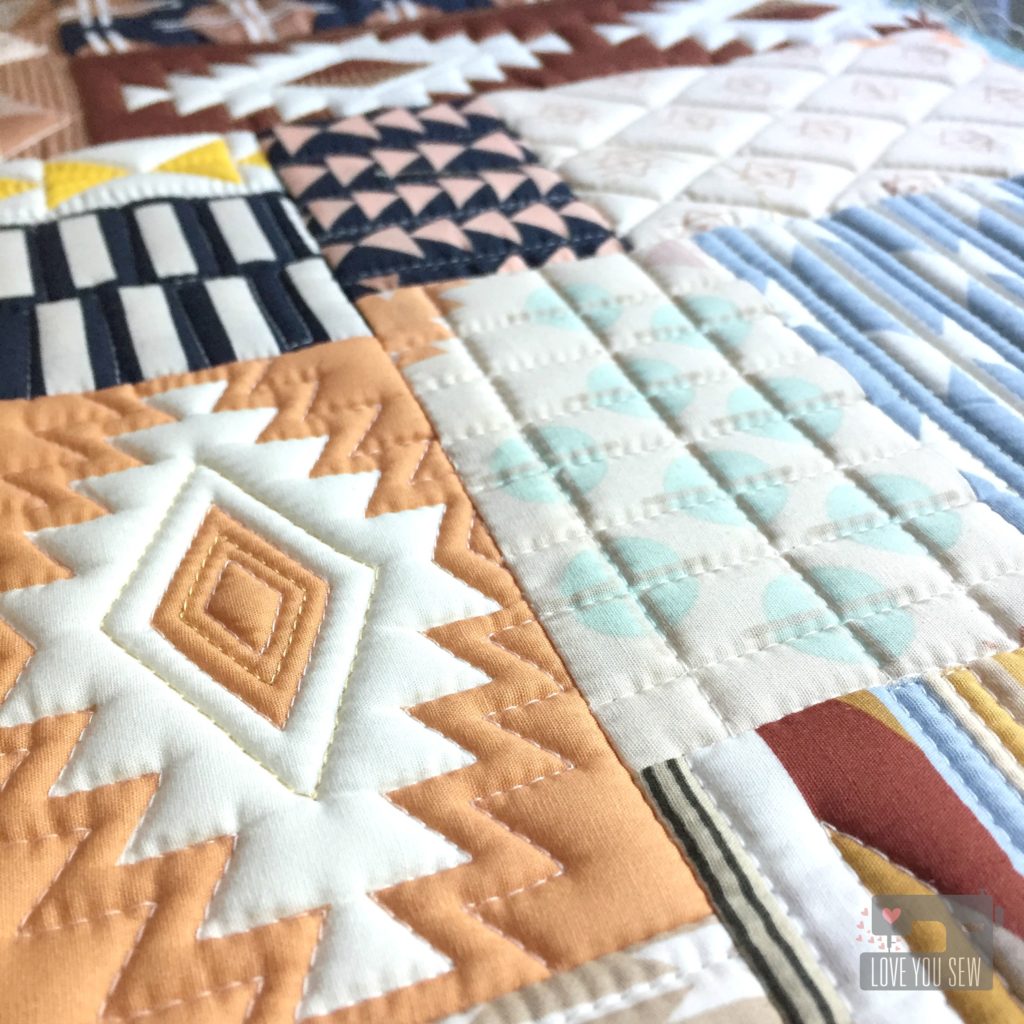
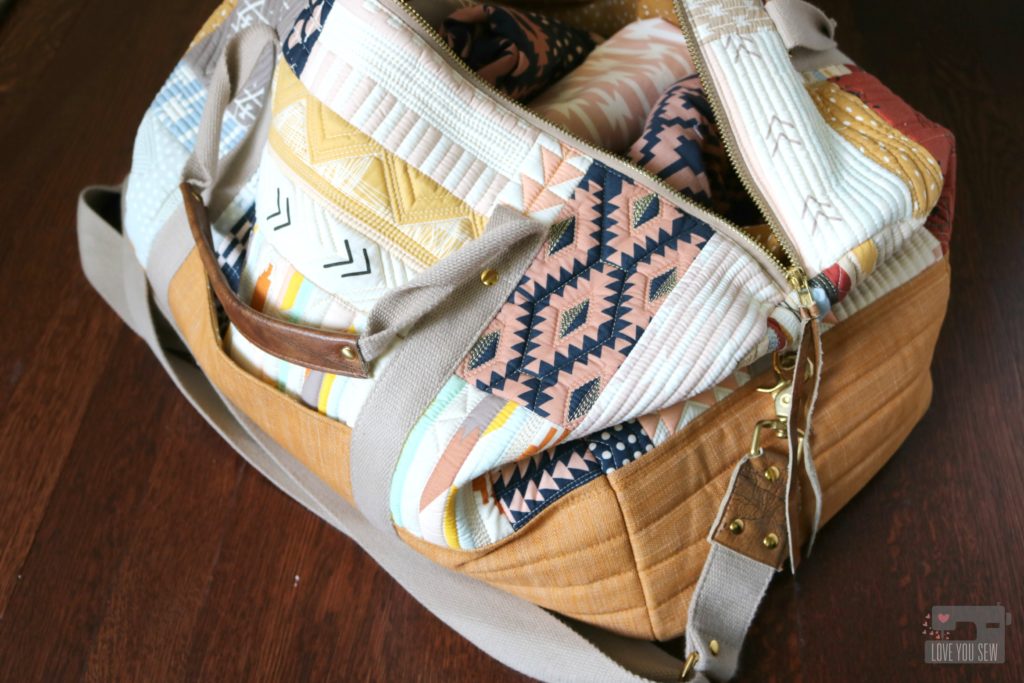
All 14 quilt cottons in the Arizona After collection was used to make the Portside Duffle Bag by Grainline Studios.  It’s the perfect bag to showcase these fabrics with all that surface area.  I loved playing with all the color combos while mixing and even deconstructing, some of the prints.

Once I started to quilt with my walking-foot on the Soft and Stable, that texture just got me.  I knew I had to add more and more quilting…and change up the designs with each print. Then it dawned on me….ooooh, metallic thread would be A-mazing with this palette.  The gold really brings out the colors and I’m so happy with how it turned out. TIP: Cut a larger piece of soft and stable than the pattern requires. Quilt and then cut to size. Don’t forget to baste those edges!

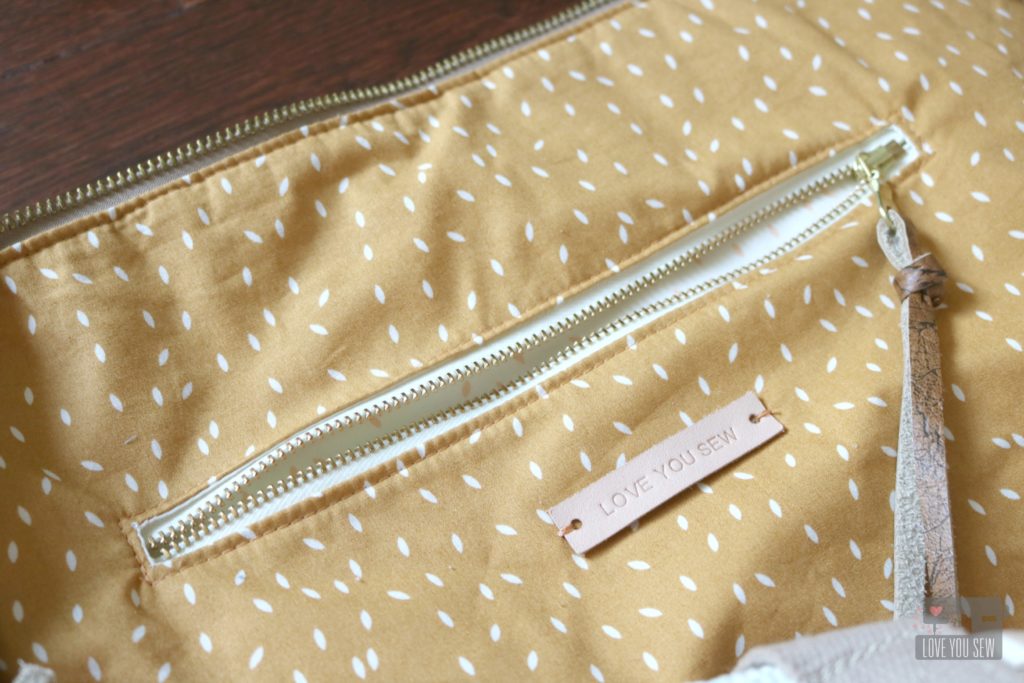
Art Gallery’s textured denim in Canyon Sunset was the perfect complement to Arizona After and is a nice durable fabric for the bottom accent of the duffle bag.  On the inside, I used the Scattered Wood print and added an additional zip pocket…because we can always use some extra pockets.  I love the look of brass zippers and with the gold thread, this combo obviously had to happen.

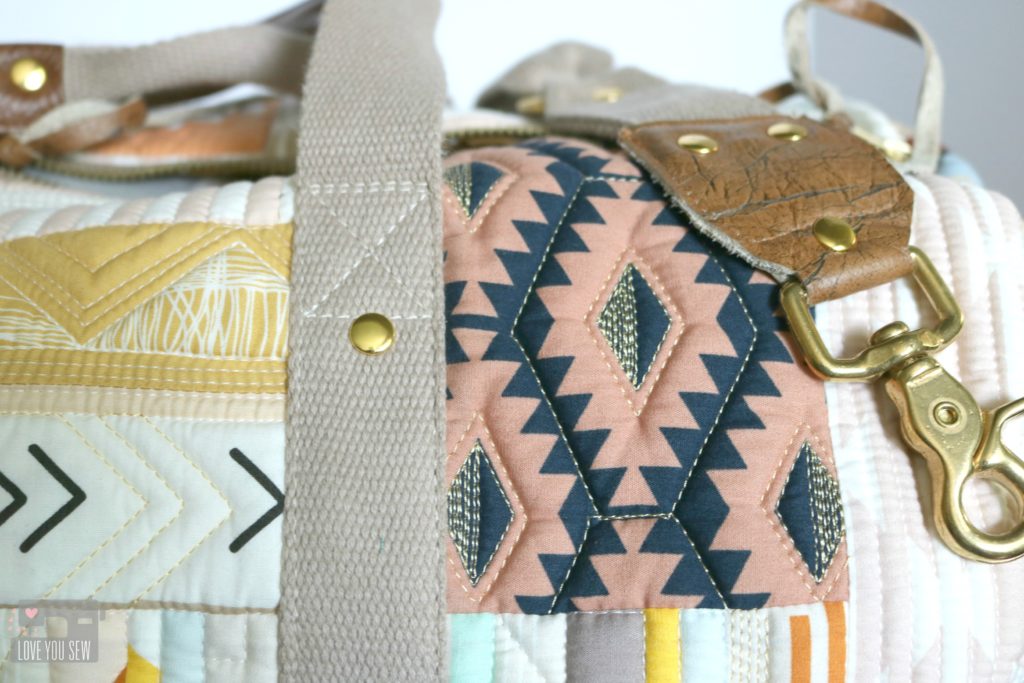
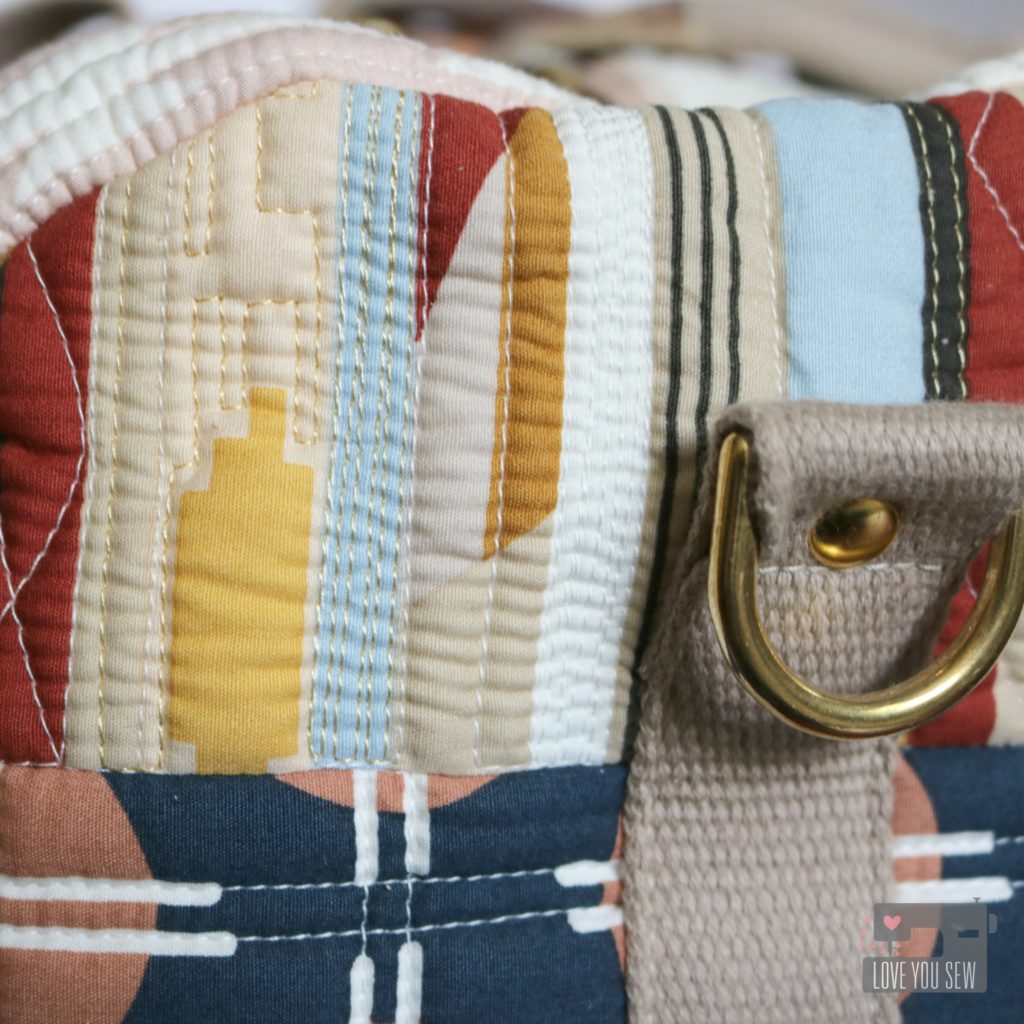
For more texture and to turn this bag up another notch, I used hardware from ARmercantile combined with some leather from my sacred stash.  Guitar-inspired bag straps are popping up all-over the place and I just had to add that look to this duffle.  The added rivets bring out more of the brass and help round out the look.  Who says a quilted bag can’t be modern and on-trend?  I love being able to combine my love of quilting with my love of bag-making….and the gorgeous fabric definitely helps.  Thank you Arizona After for the inspo!

Make sure to check back on April’s blog and Instagram all throughout July for the up-to-date info on the Blog Tour.  Next up will be an Instagram loop on July 5th and I heard there maybe prizes involved 😉

Last, but not least, don’t forget to tag #heritagefabrics and #arizonaafterfabrics with all of your makes.  I can’t wait to see all of them!

Project Summary:


Fabric and pattern for the Arizona After + Heritage Blog Tour was provided.  There are affiliate links in the Project Summary.


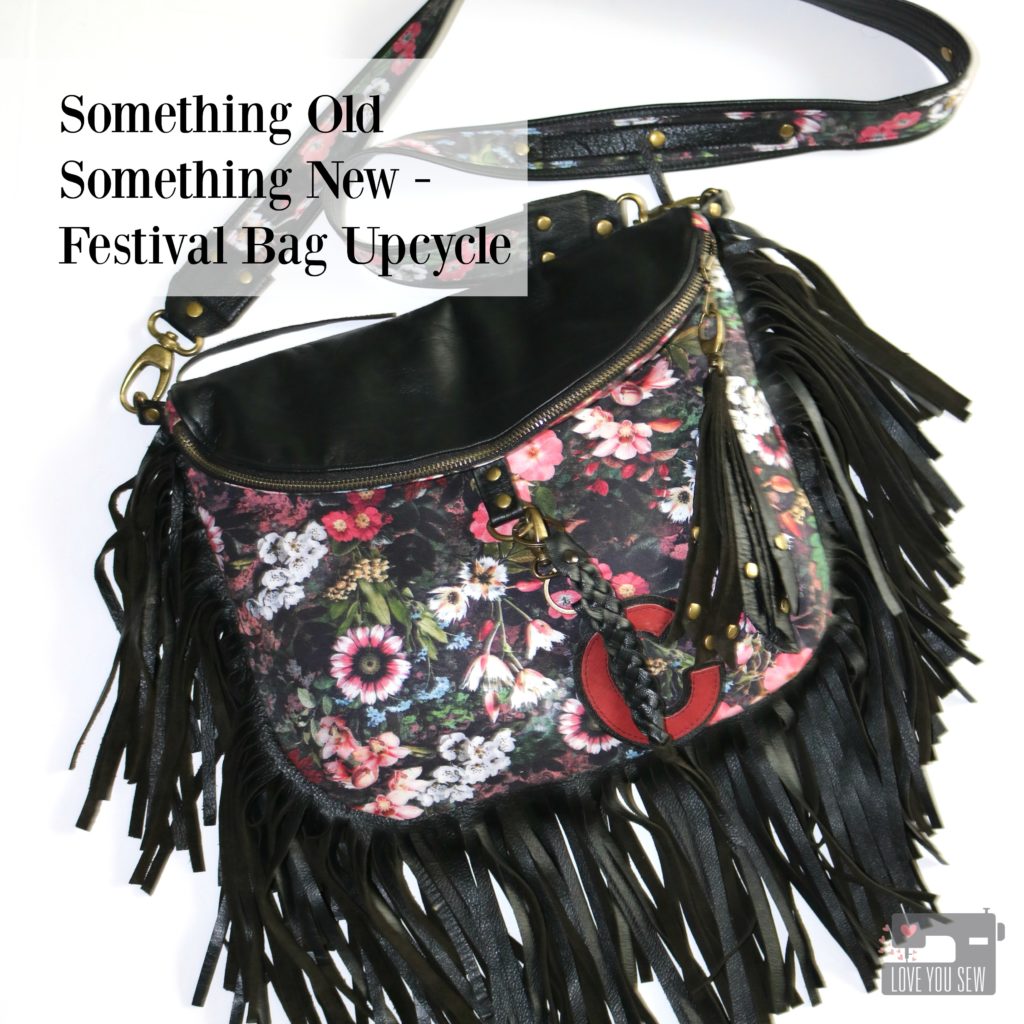
Something Old Something New – Festival Bag Upcycle

I’m a fan of fashion.  But as a mom (and as a work-at-home one,) there isn’t much motivation to step past the yoga pants and a clean (smelling) tee most days.  I do admit, when I can get my act together, it does make me feel good to step out of my slip-on Vans.  Now that both my kids are in school,  I’ve been making a conscientious effort to bring my fashion game back – nothing crazy, but pulled together looks using cues from today’s trends.  Like Boho.

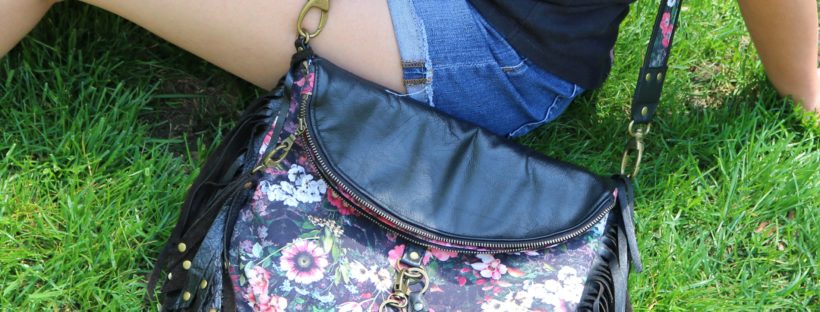
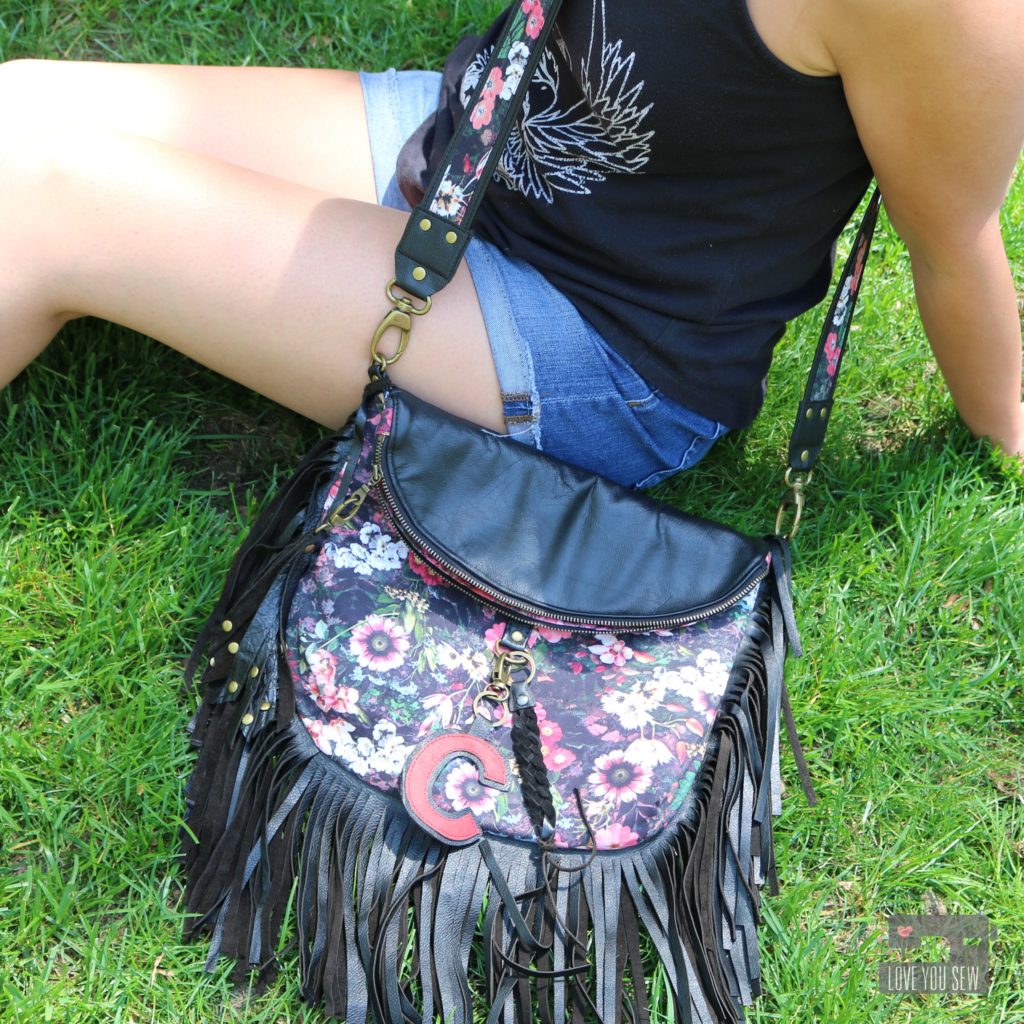
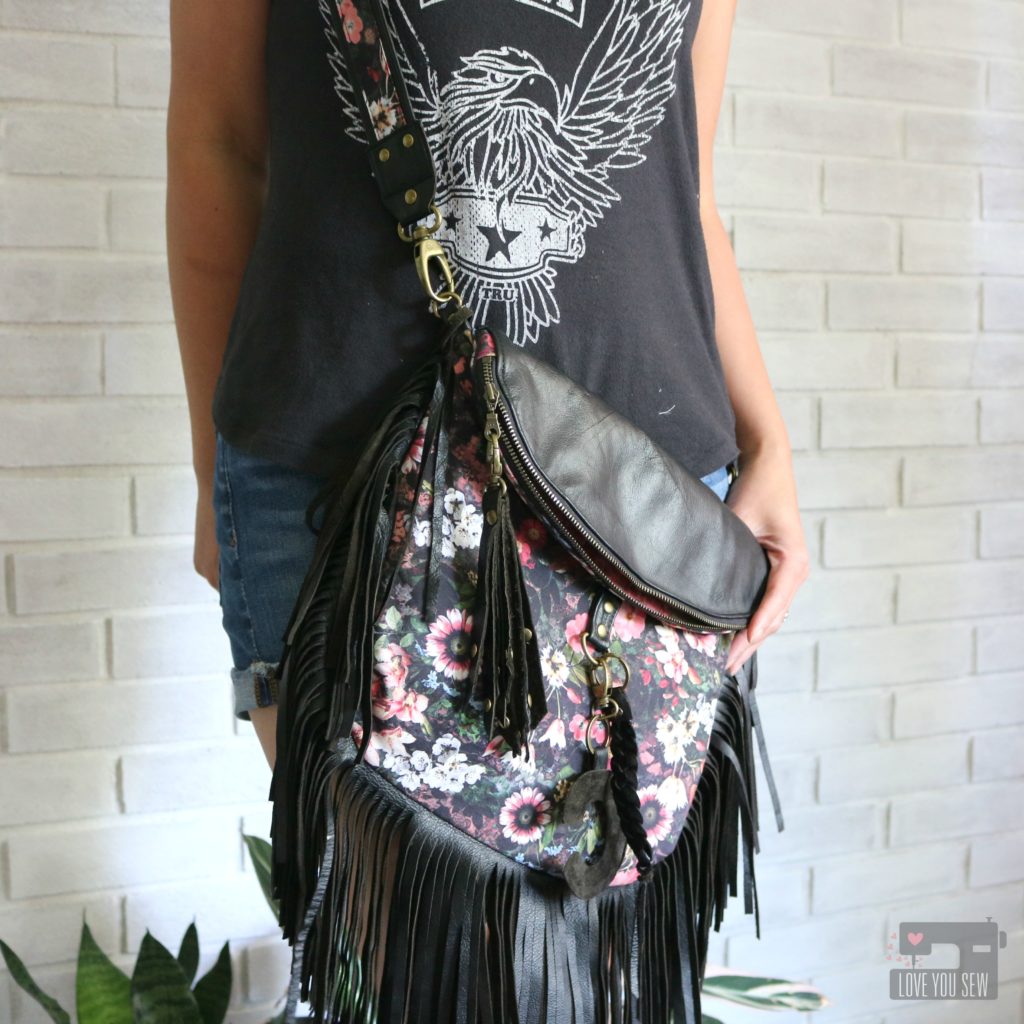
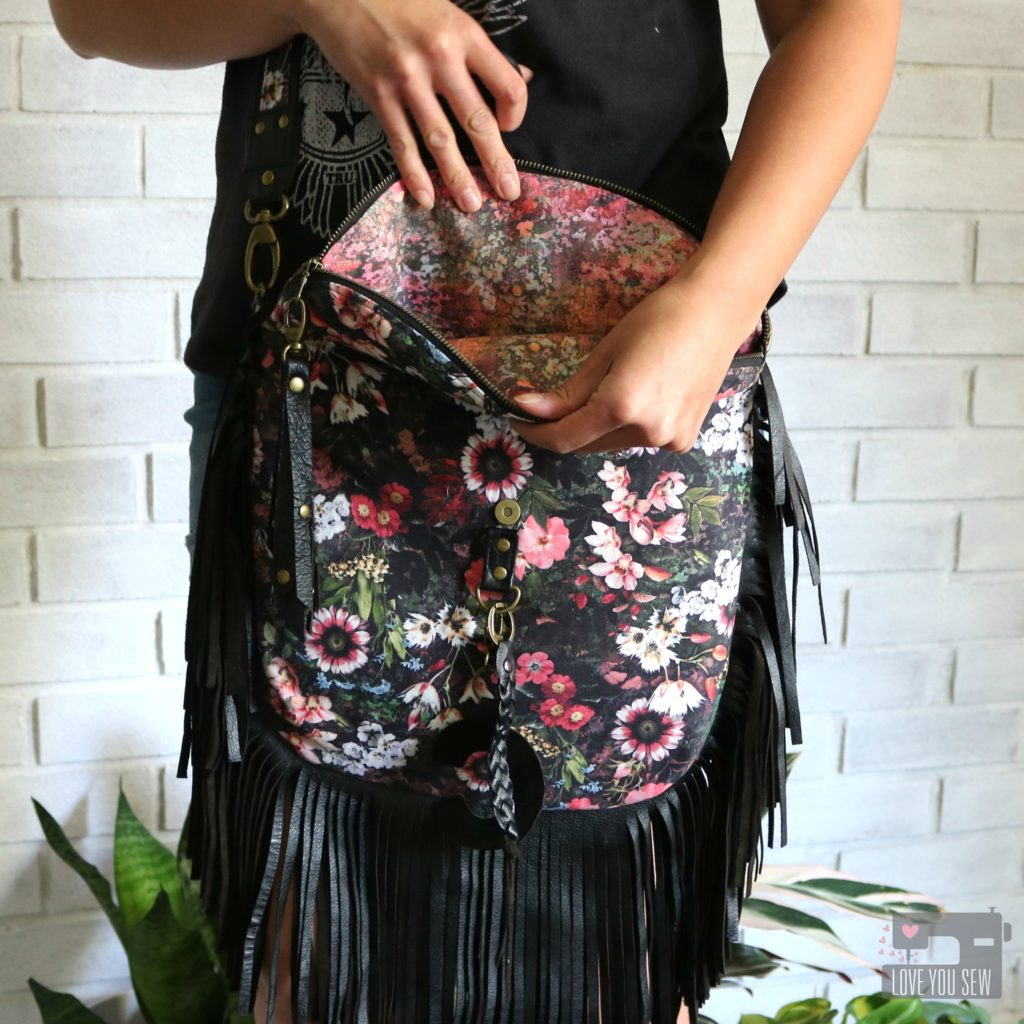
I love the relaxed (aka loose fitting) style of Bohemian fashion.  I grew up near the Philadelphia Folk Festival so I saw a lot of 70’s hippie clothes and I love the laid back vibe.  Pair that with my urban life in the city for 10+ years and the result is this “Festival Bag.”  It’s an edgier take on Boho with the dark floral, leather and antique brass hardware.

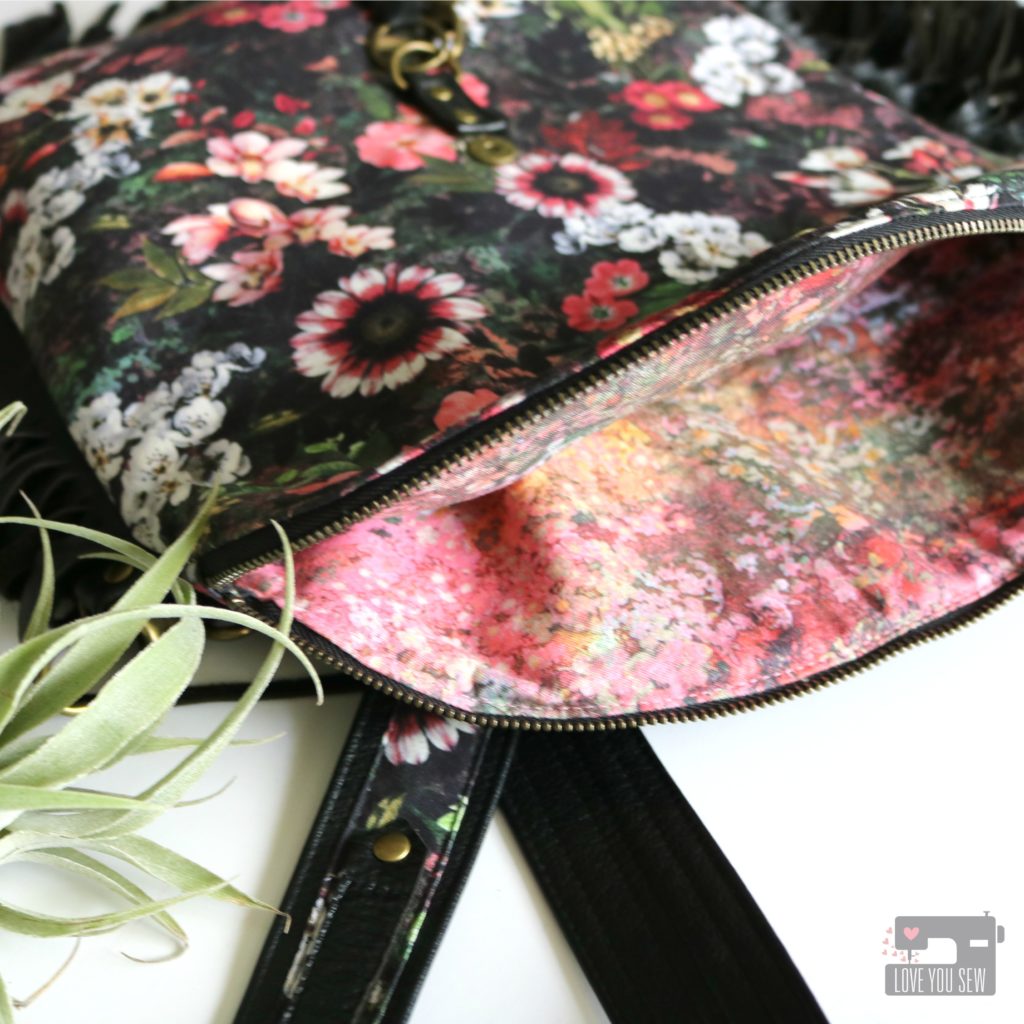
When RJR Fabrics asked me to work with some of their new fabrics, this Reverie line pretty much blew my mind.  I tend to work with more graphic prints, but the photo-realistic imagery in these Digiprints are amazing.  The best part, is that these fabrics feel JUST like their other high quality quilt cottons so you know you are working with the good stuff.

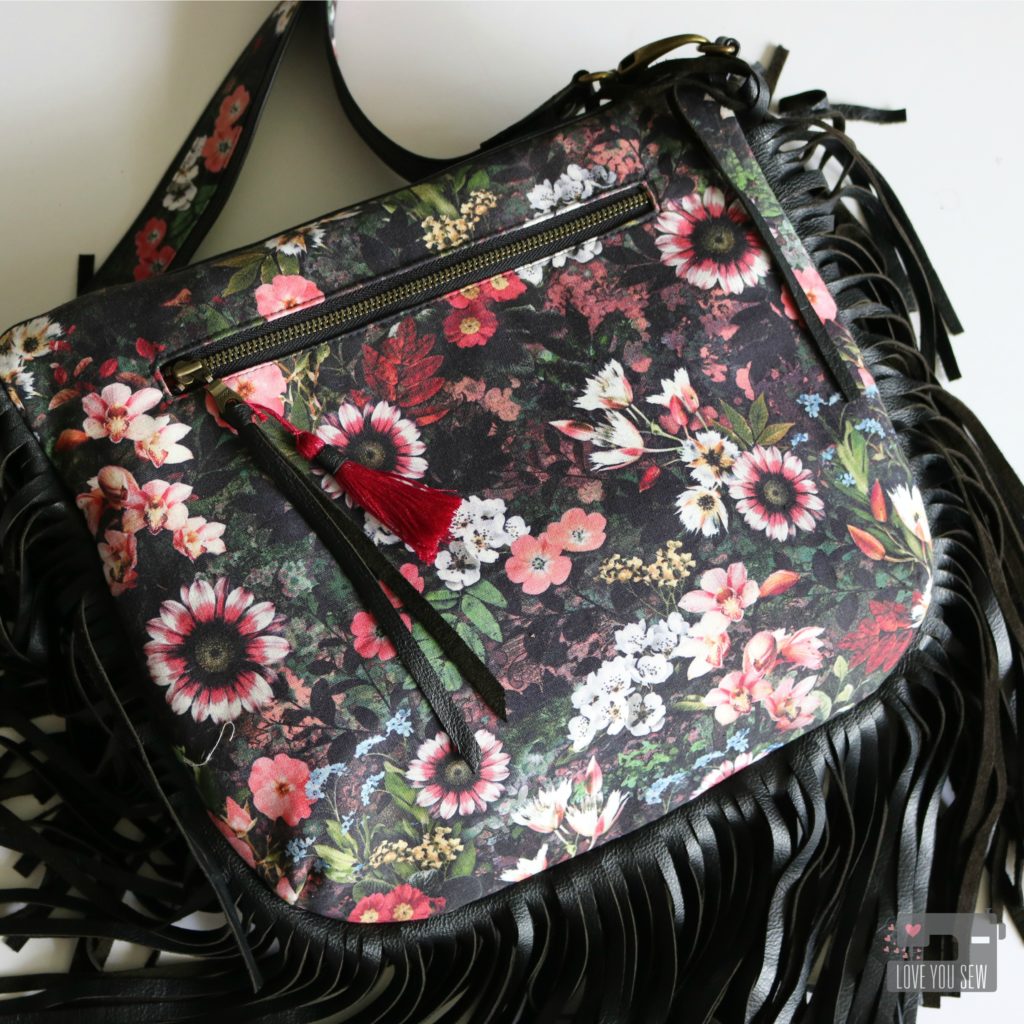
This Floral Fantasy print with the the dark background is just gorgeous. I love the style contrast of soft flowers with the intense black (which is how I like to mix up my own closet.)  I like combining hard elements with something very soft and feminine. I also like a mix of textures. So this soft quilt cotton HAD to be paired with some leather and lots of hardware, right?

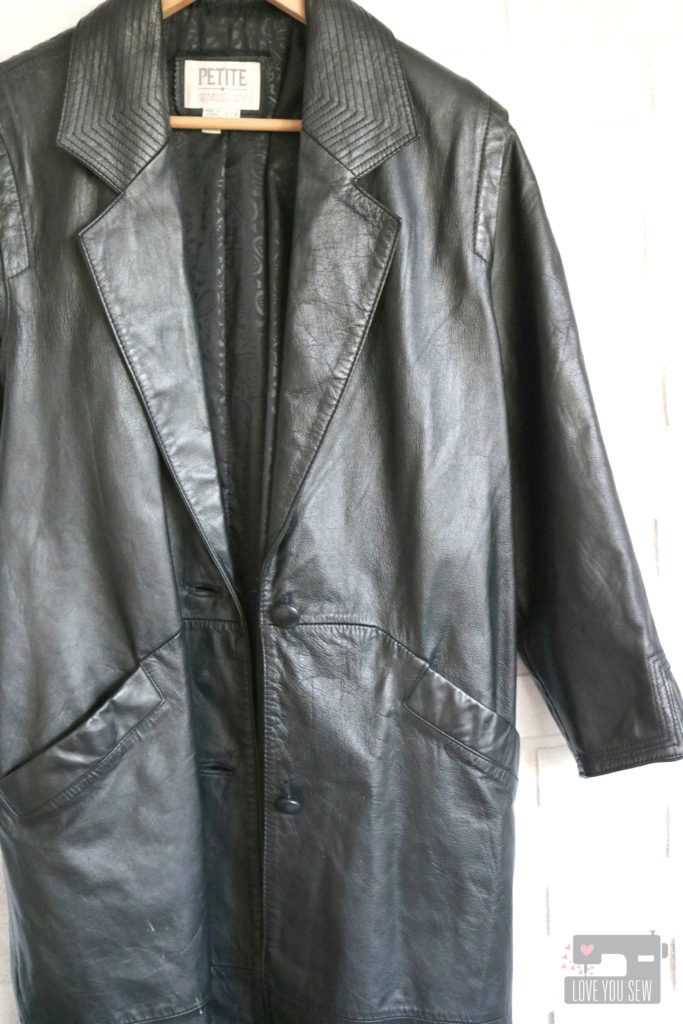
My mom knew I was upcycling old leather coats and gave me this great long duster about a year ago. I’m happy to finally use it.  This coat is such a great upcycle coat because of its size and the design. Too bad the shape…errr…lack of….just doesn’t work now. There are so many large pieces of leather to use in any project.  I used about 70% of this coat and I might use the rest on a future clutch…

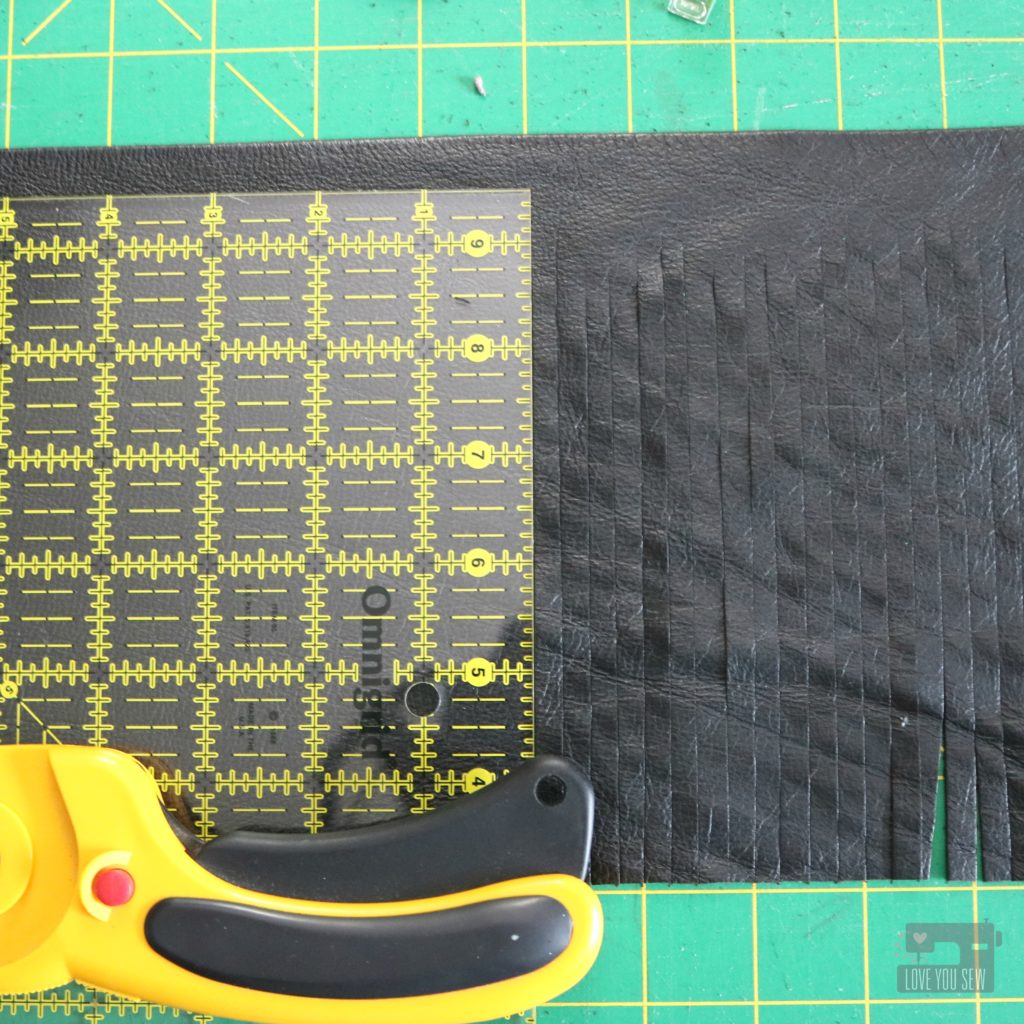
The larger pieces were all cut into 1/4″ fringe and double-layered all around the bag. Fringe is one of my favorite things in a bag.  It’s so much fun to walk and feel the swing of the leather. The pieces add movement and life to everyday running around.

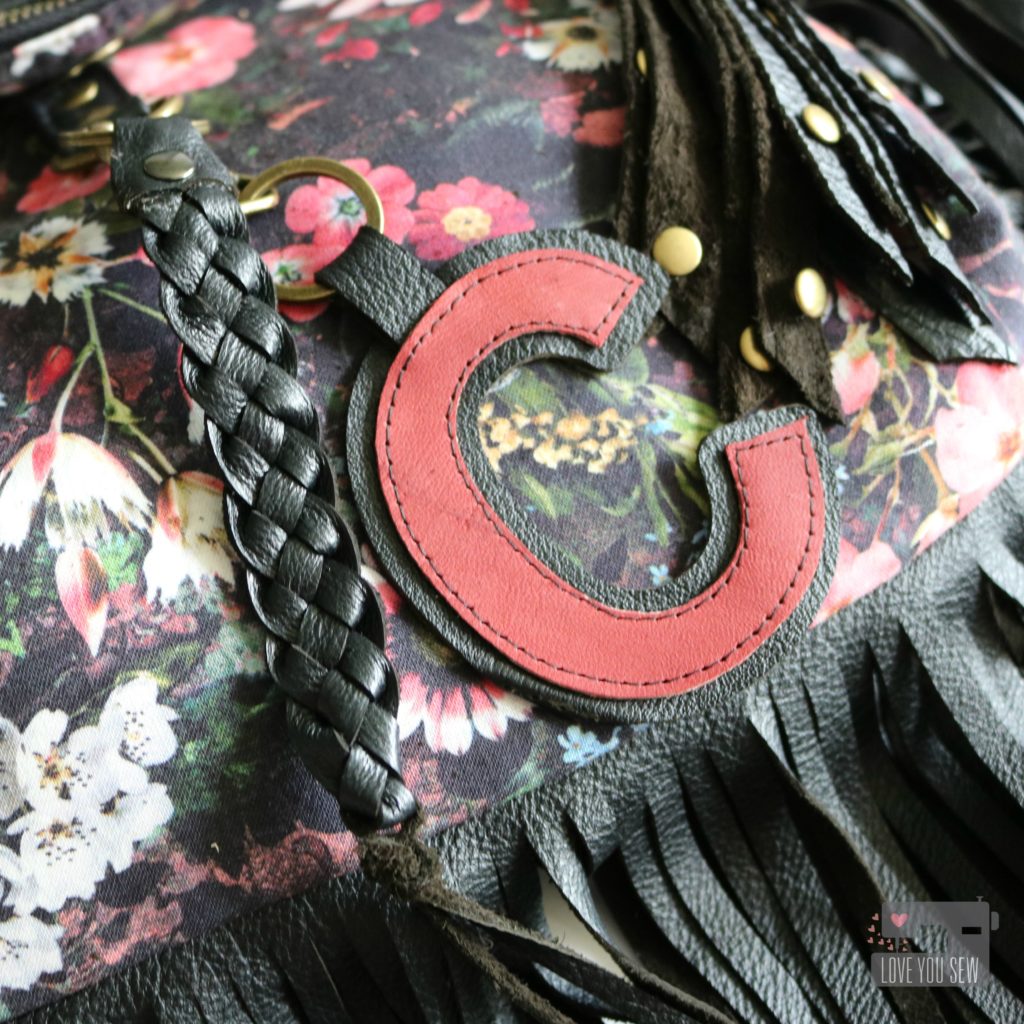
More leather was added to the top flap and I saved all the scraps. They are great to use in zipper pulls and bag charms. You can see I made some tassels and added lots of rivets. I also used my Silhouette Cameo to cut out my intials. Long skinny scraps can be turned into beautiful braids like this one as well.

On the inside of the bag, there is more Reverie with the Mirage in Bloom print. It is the perfect complement to this style bag. It is a mottled floral which gives a very contemporary feel with the more muted tones.

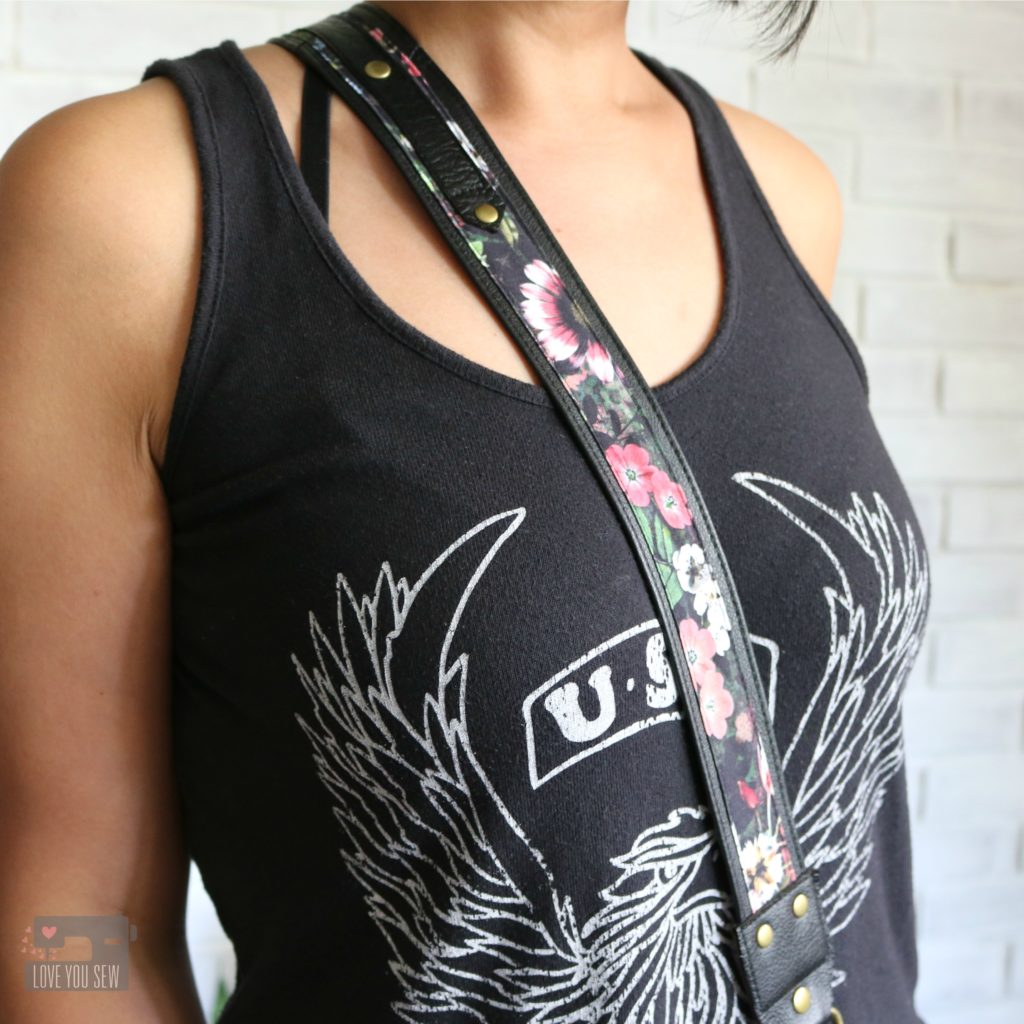
With spring music festivals in the news, I decided to make the bag strap differently than I usually would. Taking inspiration from the bands themselves, I modeled the strap after guitar ones. The leather strap is about 1 1/2″ wide with Floral Fantasy on top and another layer of leather all stitched in place with added rivet accents.

I am so in love with how this strap and bag turned out. I can’t wait to “rock” it all summer long.


Project Details:


This post may contain affiliate links.  Any compensation received helps to keep this blog running.

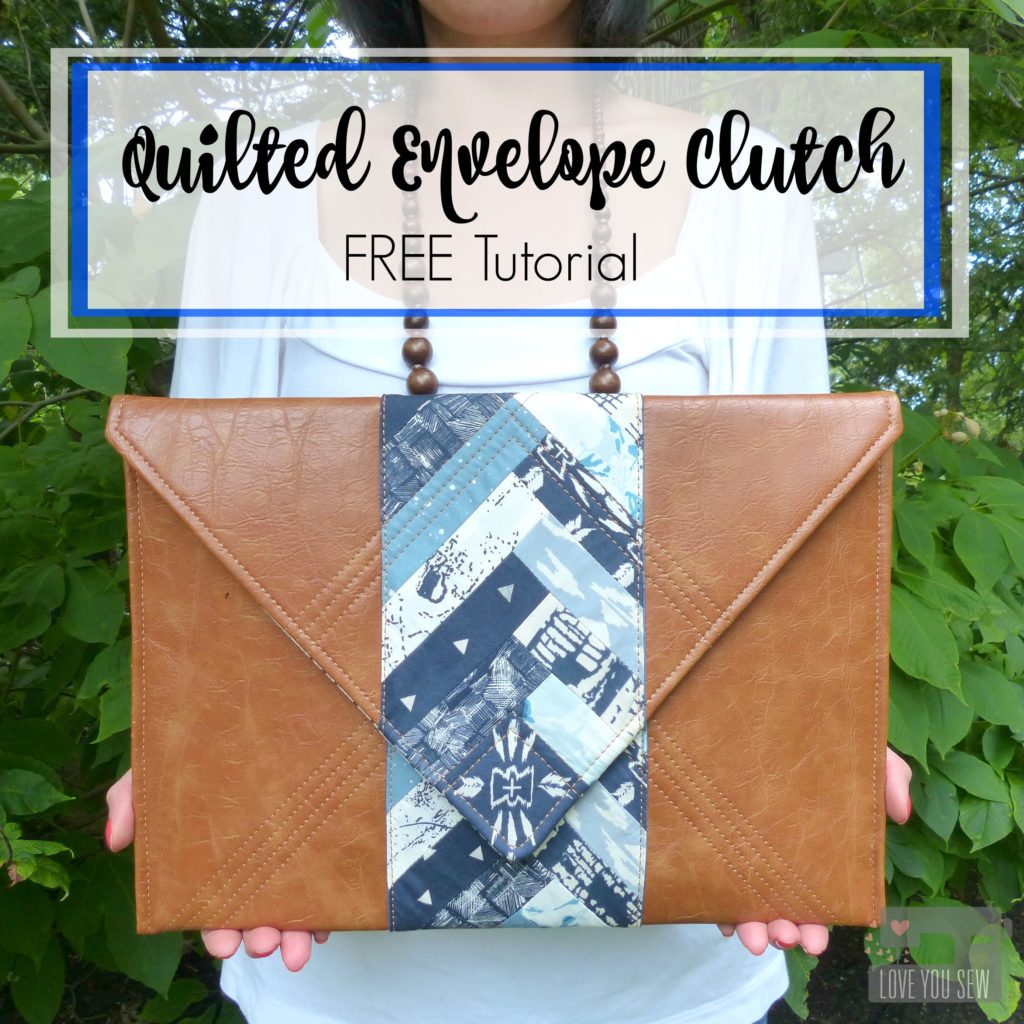
Quilted Envelope Clutch :: Free Tutorial

quilted-envelope-clutch_title

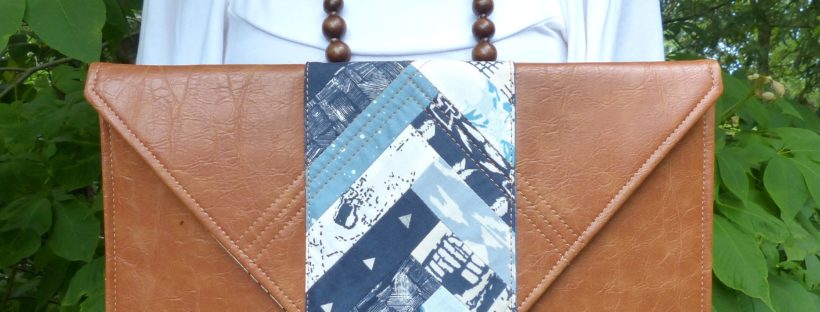
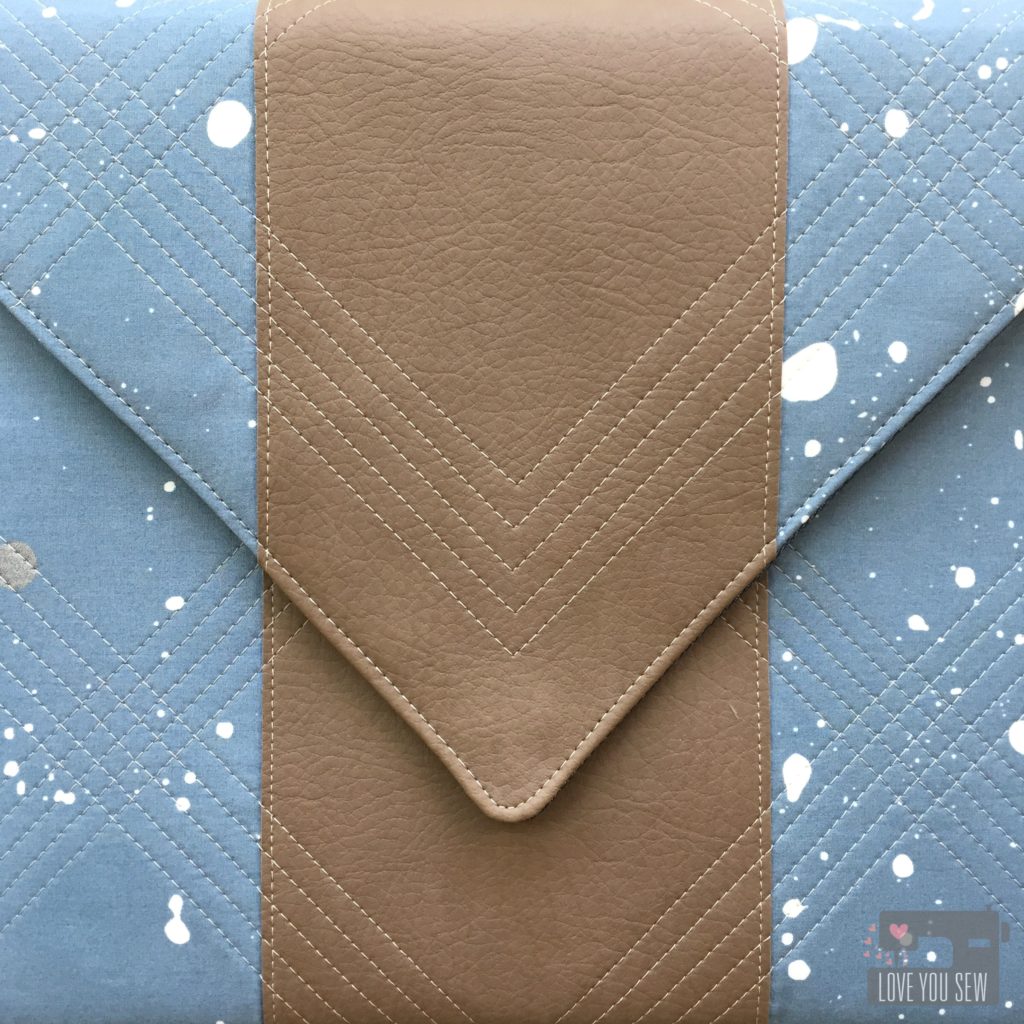
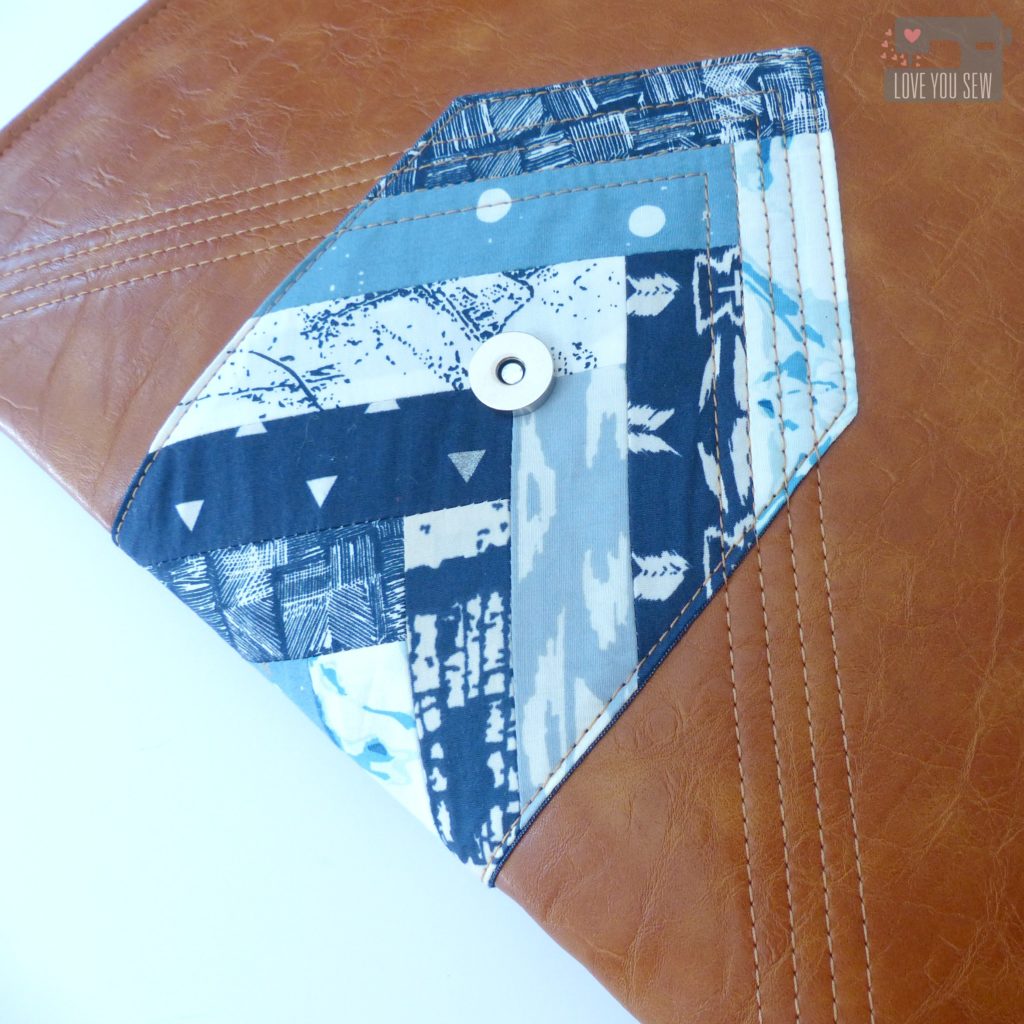
Envelope Clutches are everywhere right now and I was inspired by it simple and timeless shape.  This Quilted Envelope Clutch design is over-sized to give you ample room for all of your essentials, but still is nice  enough to go from day to night.  It’s a sleek bag when paired with the right faux (or real) leather.  Coincidentally, this clutch design also fits a MacBook Pro perfectly, so its versatile and you can change up the fabrics to make it as laptop holders.

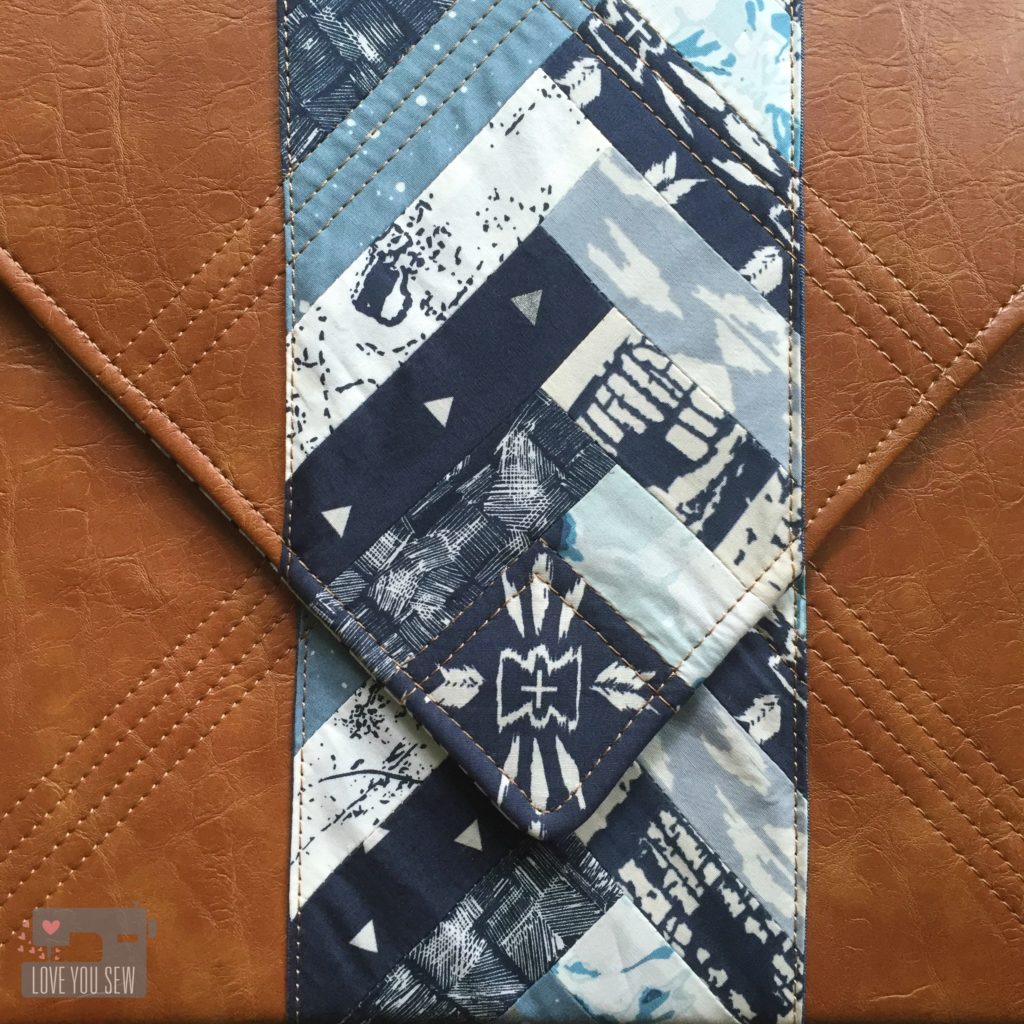
As I wrote in last week’s post from the Observer blog tour here, I like to show how hip and modern quilting can be.  I love how the piecing of a half log-cabin accentuates the envelope shape and the monotone palette keeps it chic.  Simple quilting adds enough texture and detail without being over-the-top…or over-worked.

This tutorial is for the faux leather version and finishes at approximately 14 3/4″ x 10 1/2″.  As with all patterns, don’t jump the gun…please ready through the instructions in their entirety.  Shoot me an email and/or leave me a comment if you have any questions.  Enjoy!

Materials Required:

  • Faux leather/ Vegan leather / Vinyl (1/2 yd)
  • Lining & Pocket Fabric (1 yd)
  • Pieced Panel scraps (1/4 yd)
  • Pieced Panel Lining Fabric (1/4 yd)
  • Woven Fusible Interfacing [Pellon SF101] (2 1/2 yds)
  • Ultra-firm Sew-In Interfacing [Pellon 70 Peltex] (1 yd)
  • 9″ Zipper
  • Magnetic Snap
  • Coordinating Thread(s)
  • Poster Board (optional for cutting pattern templates)
  • Spray Baste or Fabric Glue Pen (optional)
  • Clover Clips

 Cutting Instructions: 

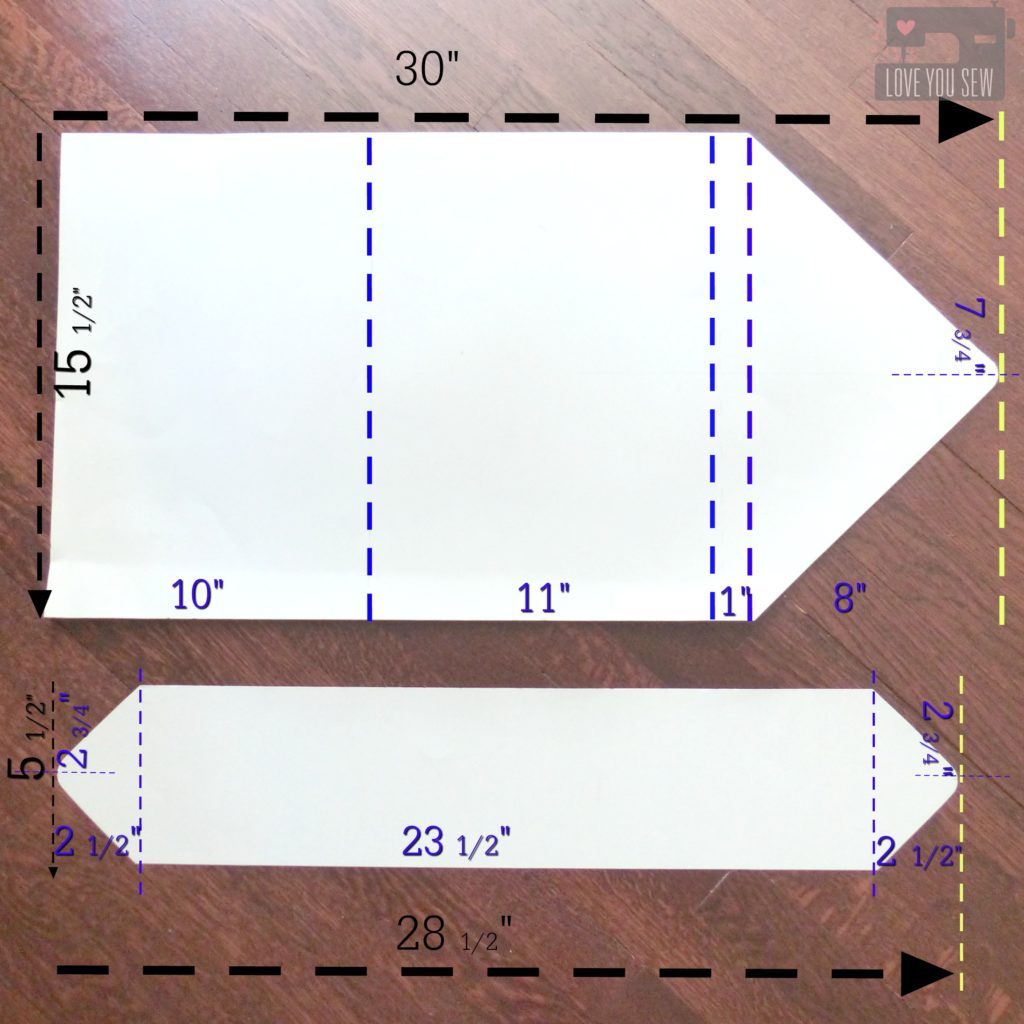
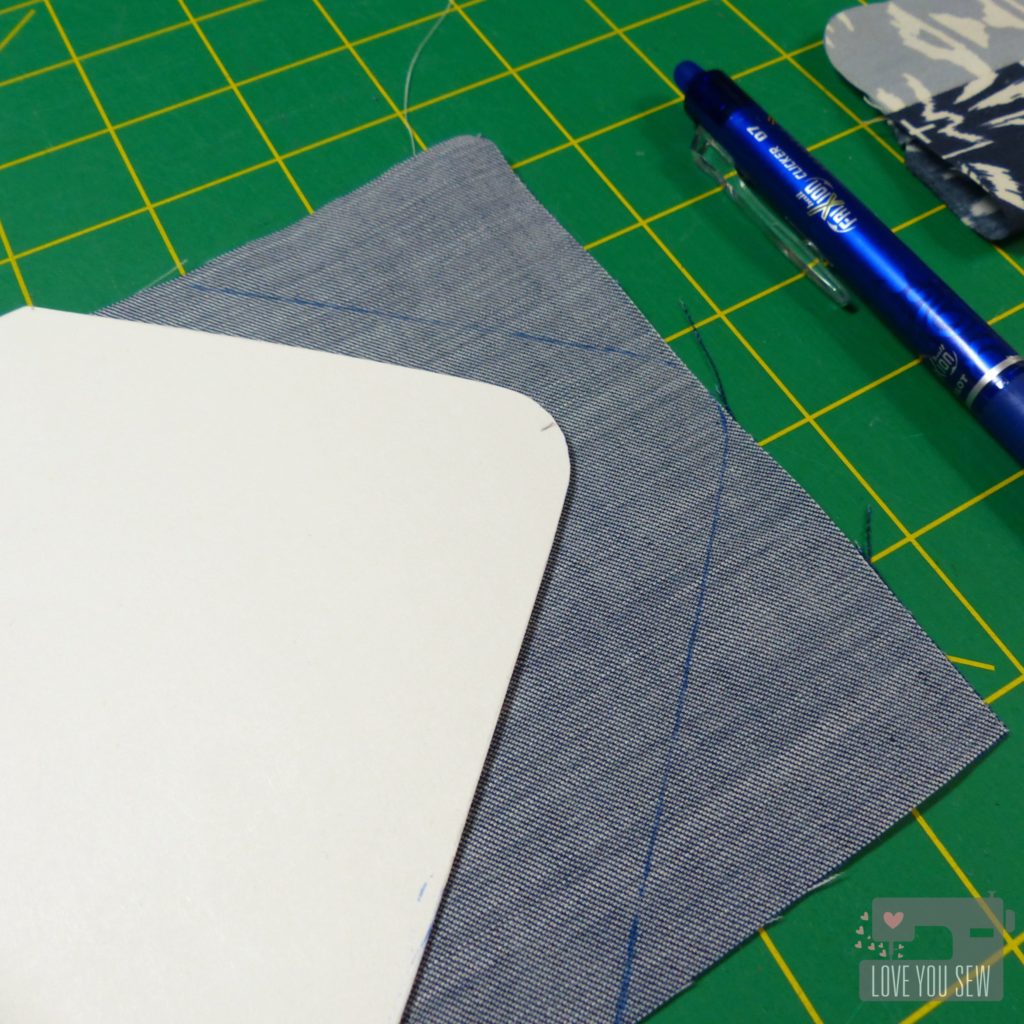
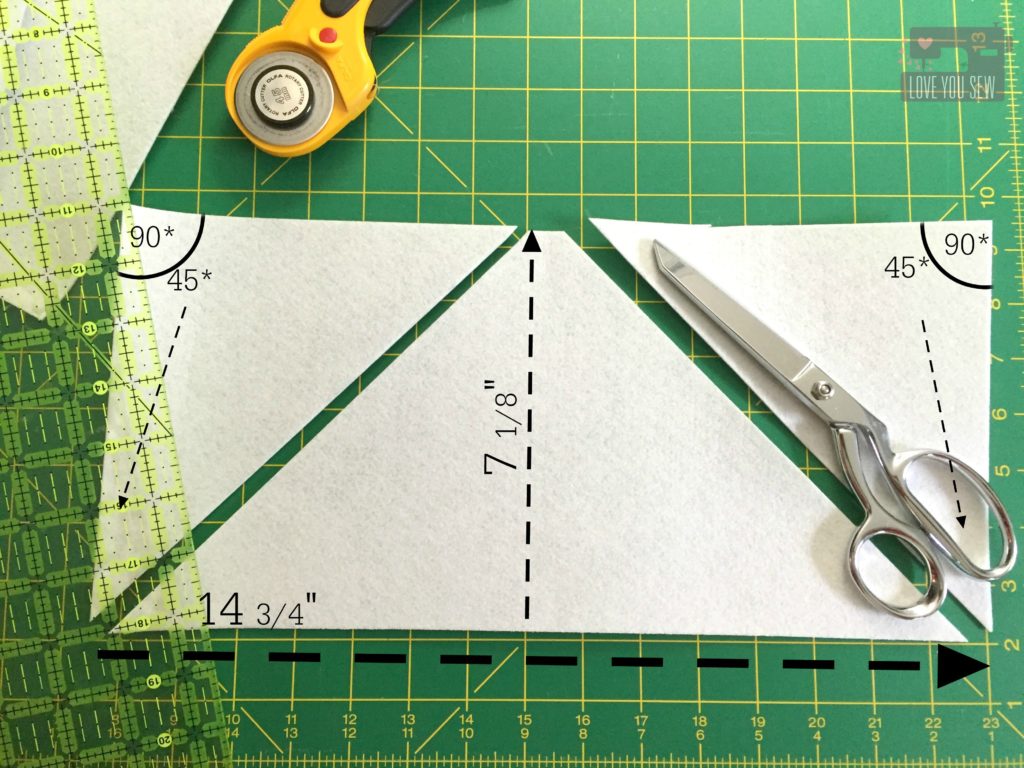
  1. Create the body and center panel cutting templates following the black numbers.  Make markings for the numbers and lines in purple.
    • Cut the angles by finding the mid-point of the short-sides of each template.  cutting-template
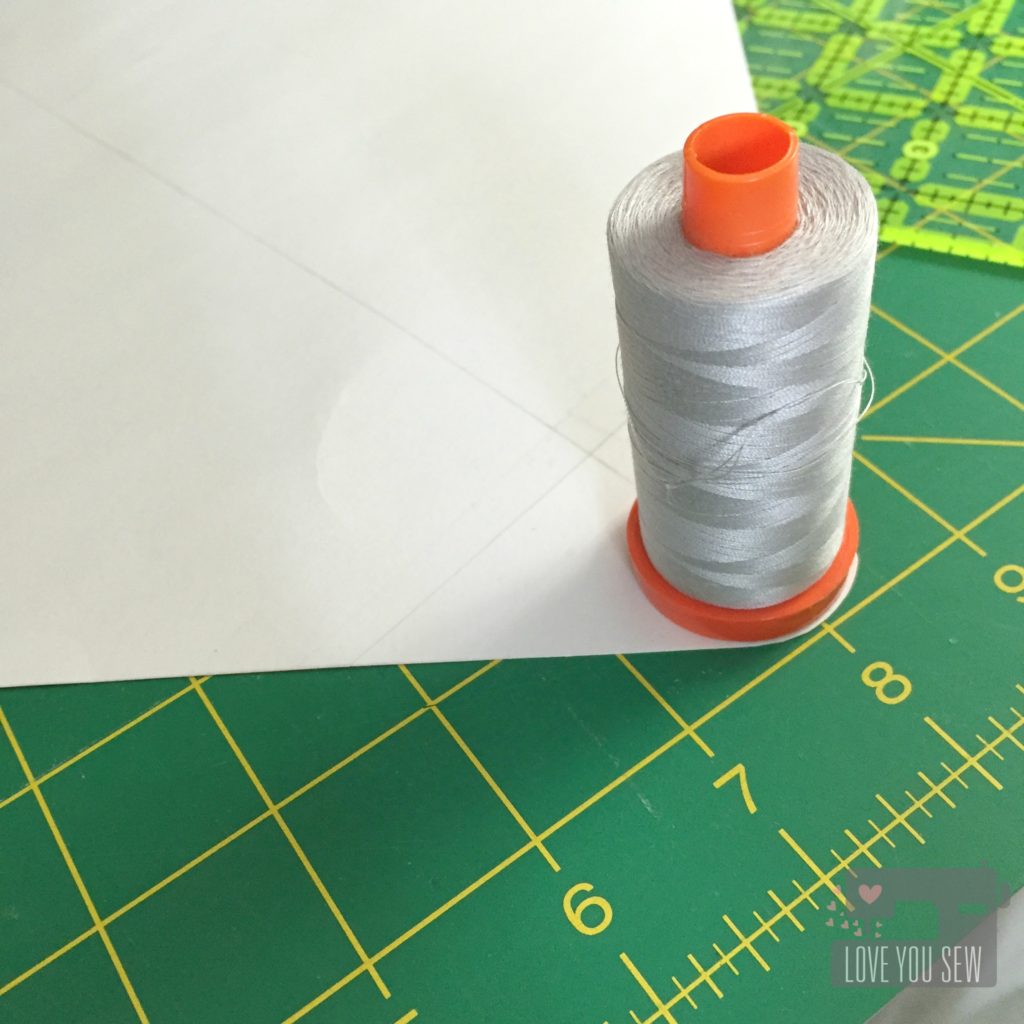
    • Round out each of the “envelope points” using a large spool of threadimg_7001
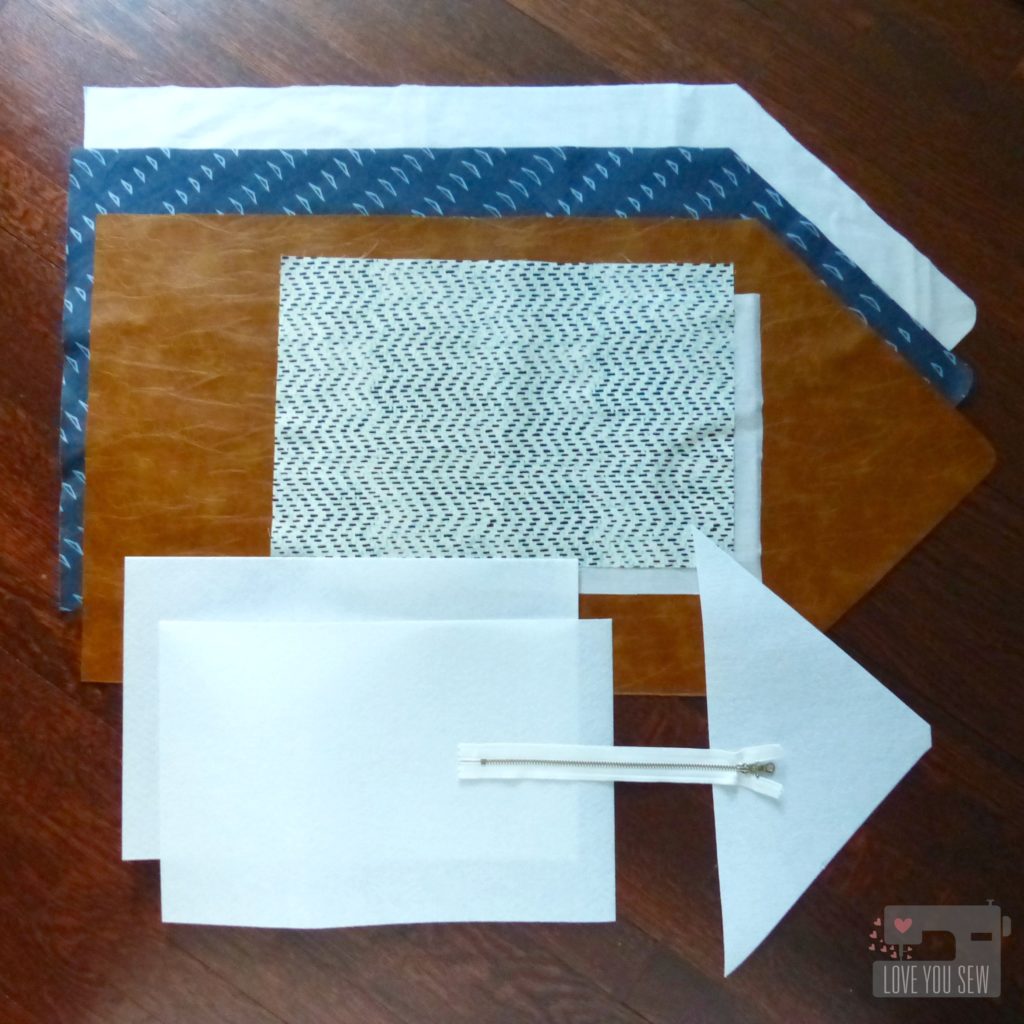
  2. Use your larger template to cut:
    • (1) Body with faux leather
    • (1) Lining
    • (2) Woven Fusible Interfacingsp1060660
  3. With the Firm Sew-In Interfacing, cut:
    • (2) 14 3/4″ x 9 3/4″ rectangles
    • (1) Triangle per the following photo:img_7014a
  4. For pieced Center Panel (as a half log-cabin), cut:
    • (1) 2 1/2″ x 2 1/2″ square
    • (34) 5″ x 1 1/2″ strips
    • Use smaller template to cut (1) Center Panel liningp1060674
  5. For Lining Pockets, cut:
    • (1) 16″ x 11″ rectangle with the lining fabric
    • (1) 16″ x 11″ rectangle with fusible woven interfacing
    • (1) 9″ x 4 1/2″ rectangle with faux leather

Construction:

(1/4″ seam allowance unless otherwise noted)

  1. Interface the body.  *Please check and test the heat settings beforehand.  Not all vinyl/faux leather is created equal.

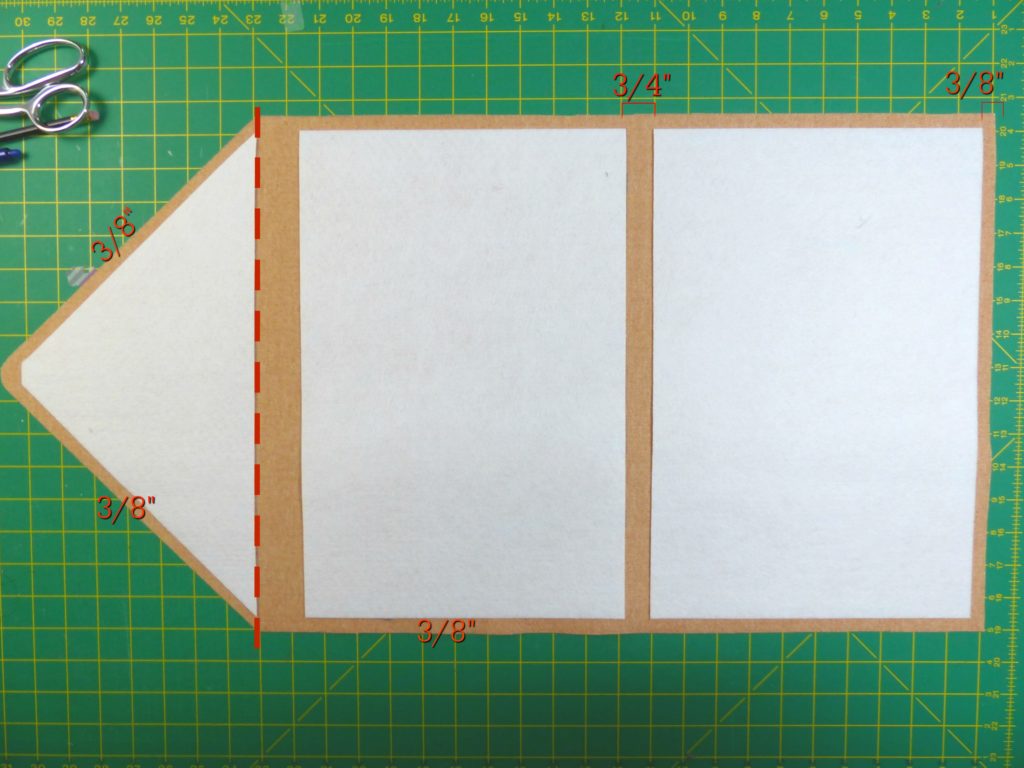
    • Place the Peltex pieces per the following photo.  Leave 3/8″ allowance all around the edge of the vinyl.  Keep 3/4″ in between the (2) 14 3/4″ x 9 3/4″ pieces.  Make sure you align the Peltex triangle long edge with the top corners of the vinyl.  You can can secure them in place with a little spray baste or with Sewline glue pen.  *It’s important to have the Peltex split into 3 pieces to give the ease and flexibility where the clutch will fold.  It will also alleviate some of the “cracking” appearance that can happen with interfacings that are forced to moved a lot.p1060663
    • Use one of the fusible woven interfacing pieces and fuse on top of the firm sew-in interfacing.  You may need to work the edges of the SF101 around the Peltex with your iron. Set aside.interface-vinyl
  2. Fuse the 2nd piece of fusible woven interfacing to your lining.  Set aside
  3. Fuse the pocket fusible woven interfacing to the pocket lining fabric.  Set aside
  4. Prepare Center Panelp1060670
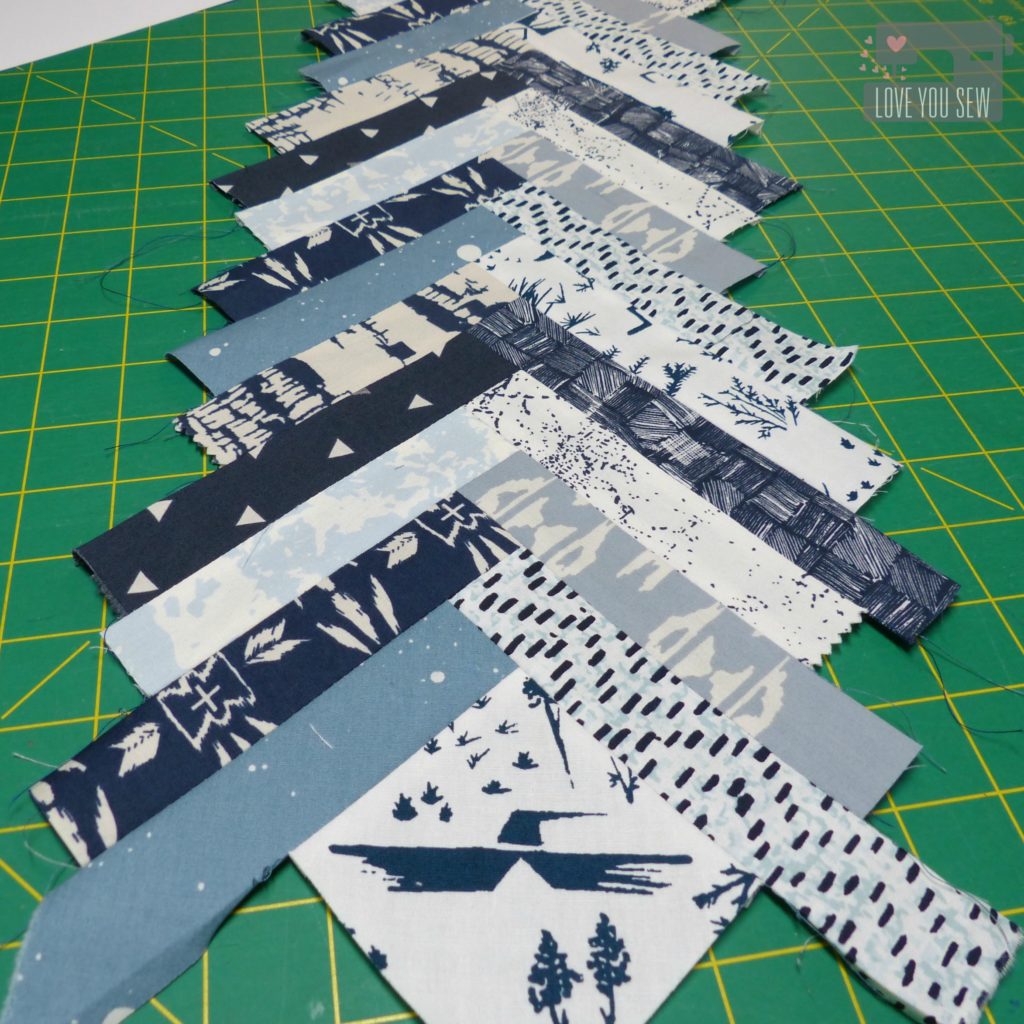
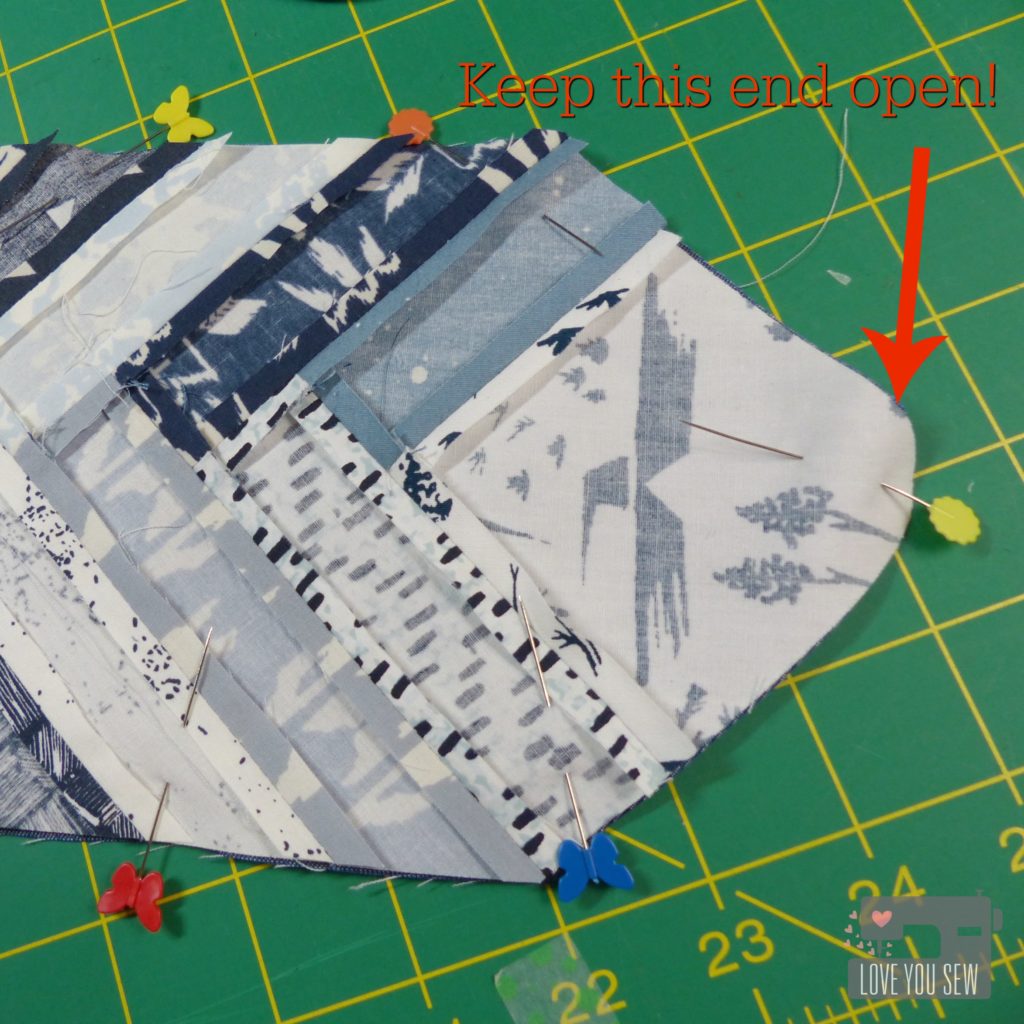
    • Piece as desired.  I used a traditional half log-cabin design, but you can use anything that you like as long as it can be trimmed to the Center Panel template you created earlier.
      • Line up the short-end of the first strip (gray-blue speck) with the edge of the square (eagle) and sew with 1/4″ seam allowance.  Press open
      • Line up the short end of another strip (navy dashes) with the opposite edge of the square (eagle) and sew.  Alternate sides until you have used all 34 strips.
      • Use Center Panel template and trim to fit.
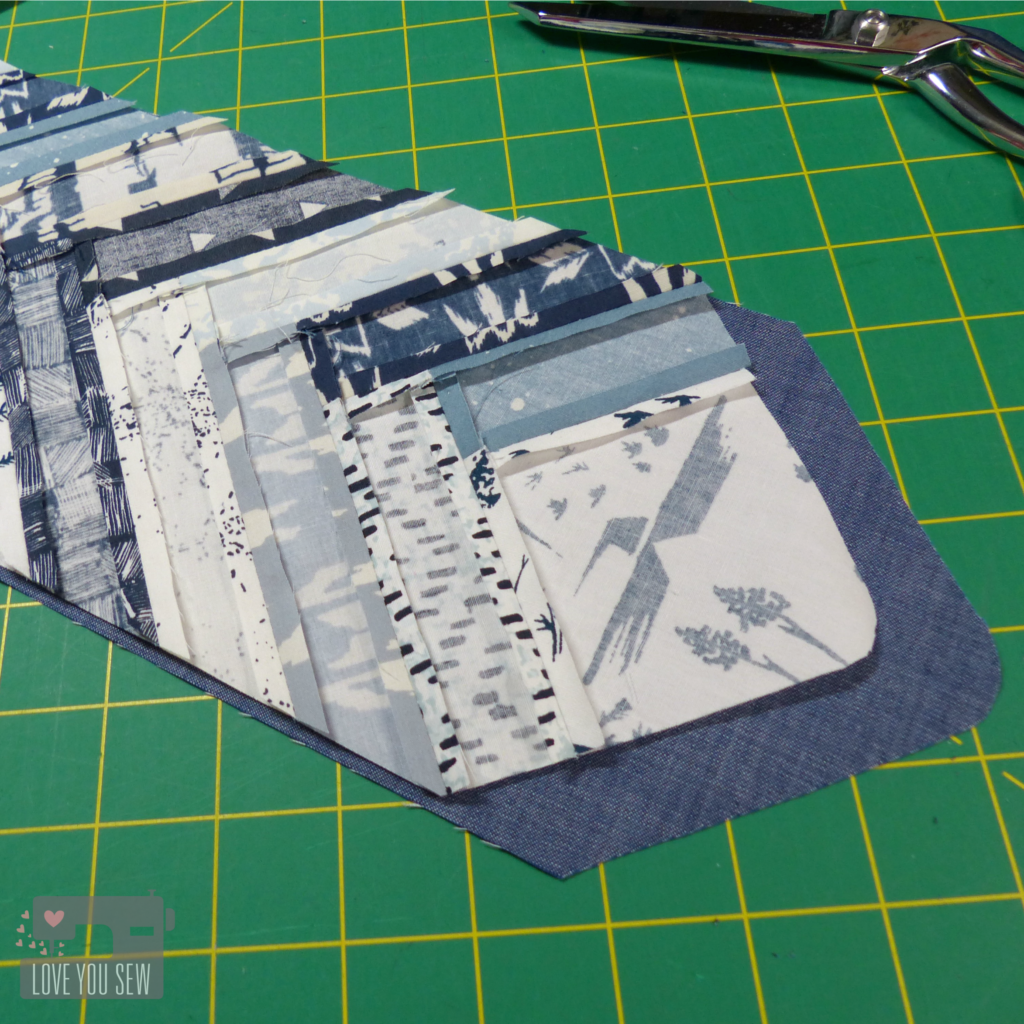
    • Assemble the Center Panel by placing the right-sides of the center piecing with the center panel lining.p1060675
    • Sew all around leaving an opening at the TOP to turn.p1060676
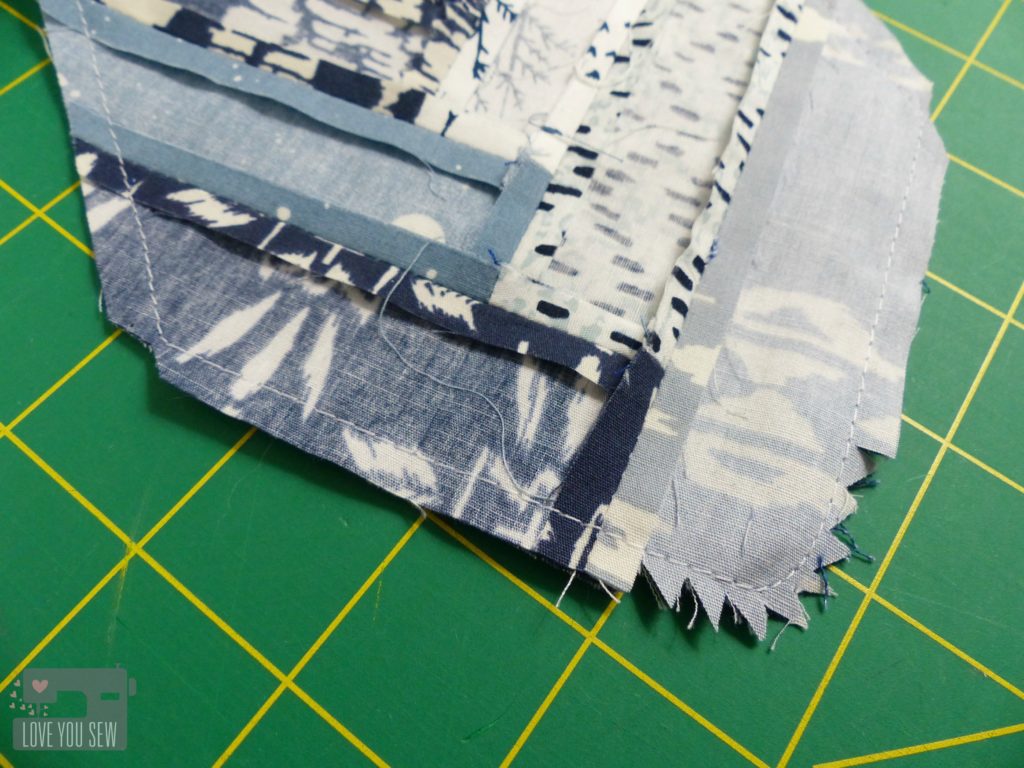
    • Notch out the BOTTOM and all cornersp1060678
    • Pull right-side out and press
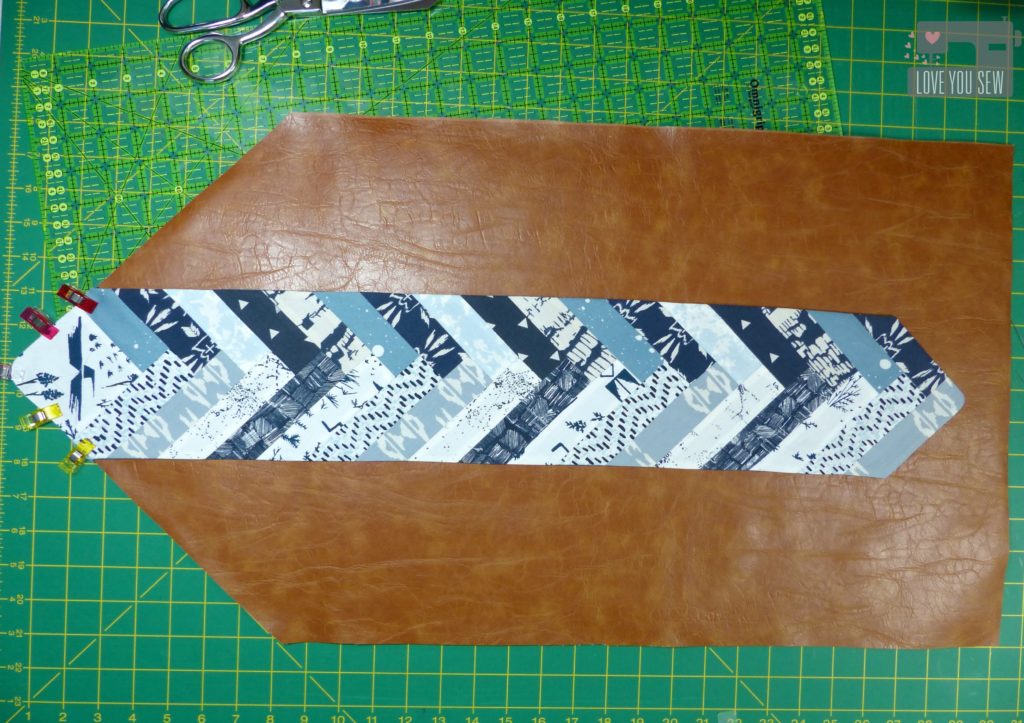
  5. Line up the center panel on top of the right-side of the faux leather.  Make sure it’s even on both sides of the panel.  You can secure it into place using pins since you don’t see the faux leather.p1060680
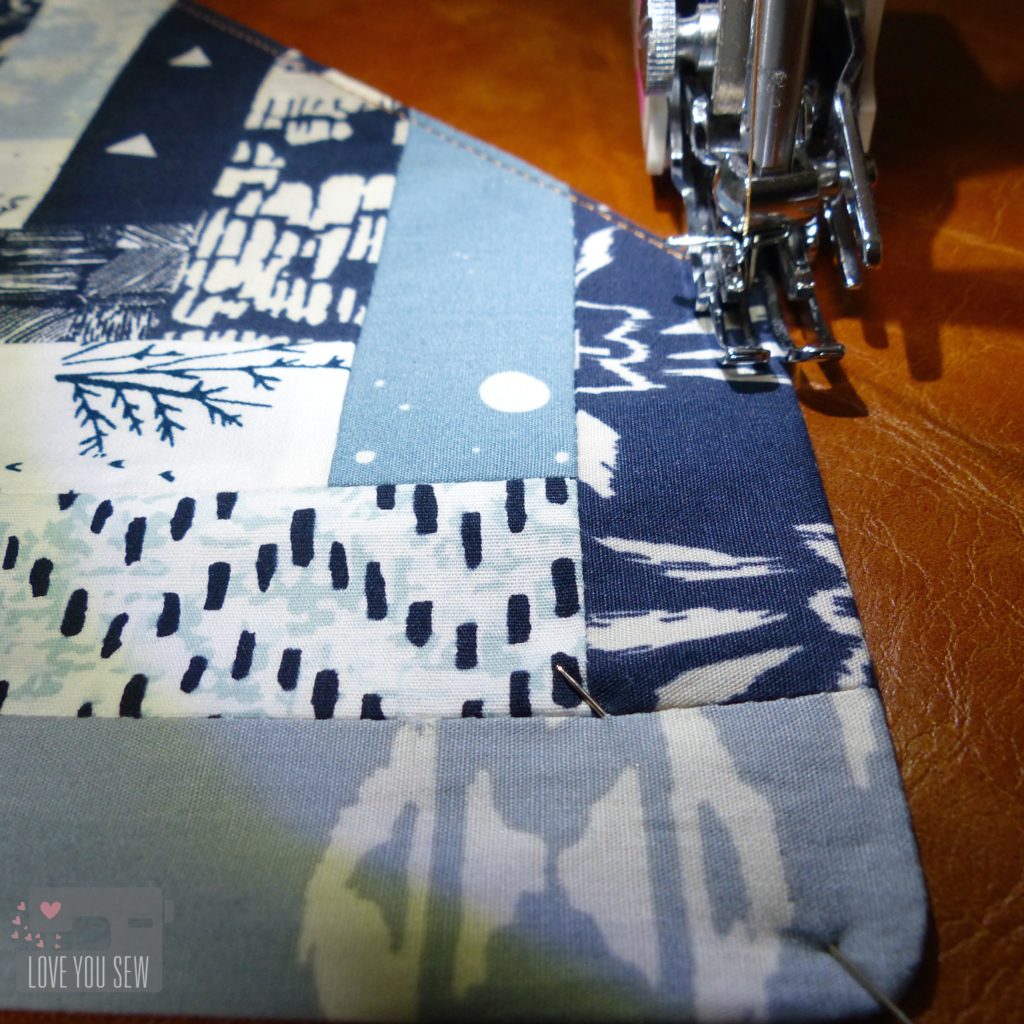
  6. Topstitch into place.  It may seem easier to have sewn this panel onto the vinyl before all of the interfacing, but this is how you will secure all of the Peltex into place and prevent any shifting with use.p1060683TIPS:
    • Use upholstery thread or any other nylon/polyester thread.  I like the upholstery for the heavier weight, the sheen, and it glides well through all of the layers.
    • Increase your stitch-length to at least 3.0 for a nice look
    • Use a walking foot for even stitches
    • You may need to increase your needle size if the thread is not pulling through and/or you are getting skipped stitches
    • Keep matching all-purpose polyester thread in the bobbin.  It helps with skipped stitches.
  7. At this point, you can quilt the vinyl, if desired.  Set the body aside.IMG_6780 IMG_6880
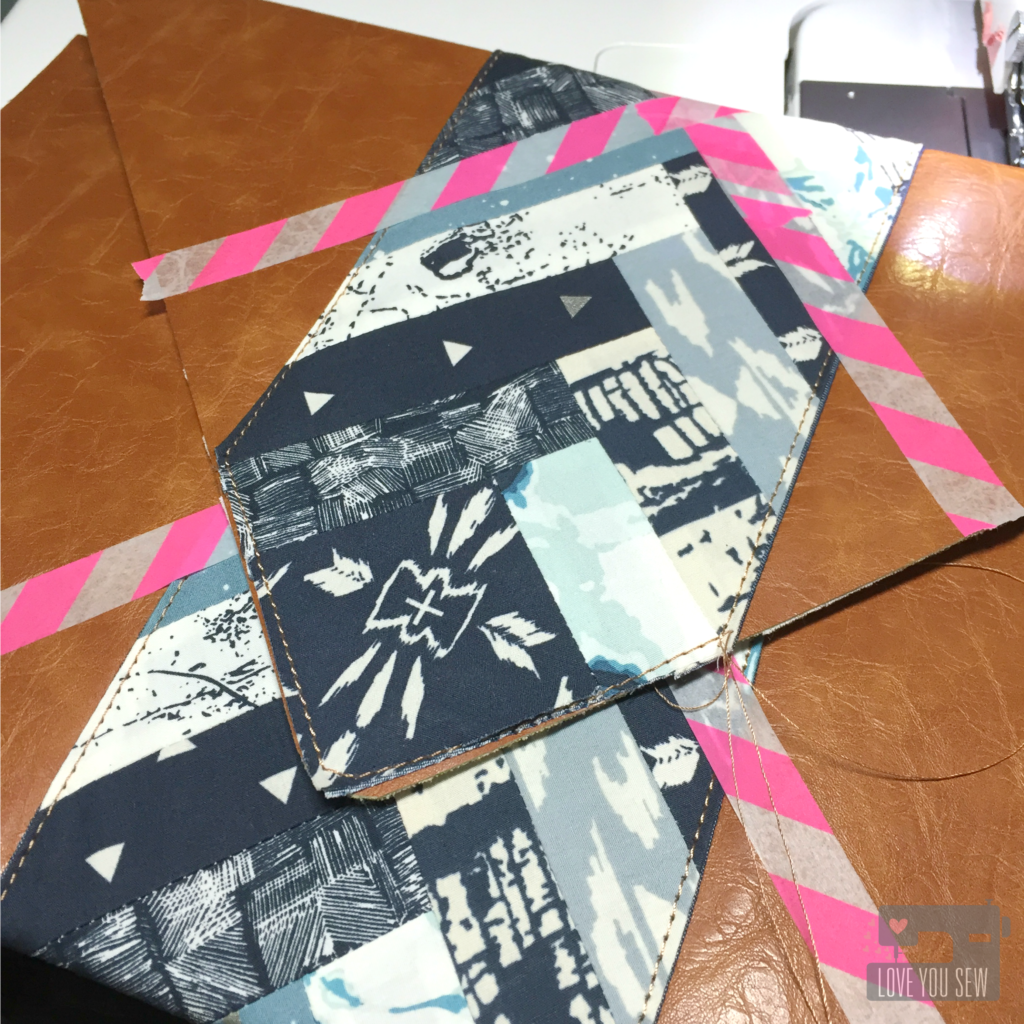
    • TIP:  Use washi tape for your guidelines. Chalk and pen will easily smear off the faux leather.IMG_6772
  8. Attach pockets onto lining
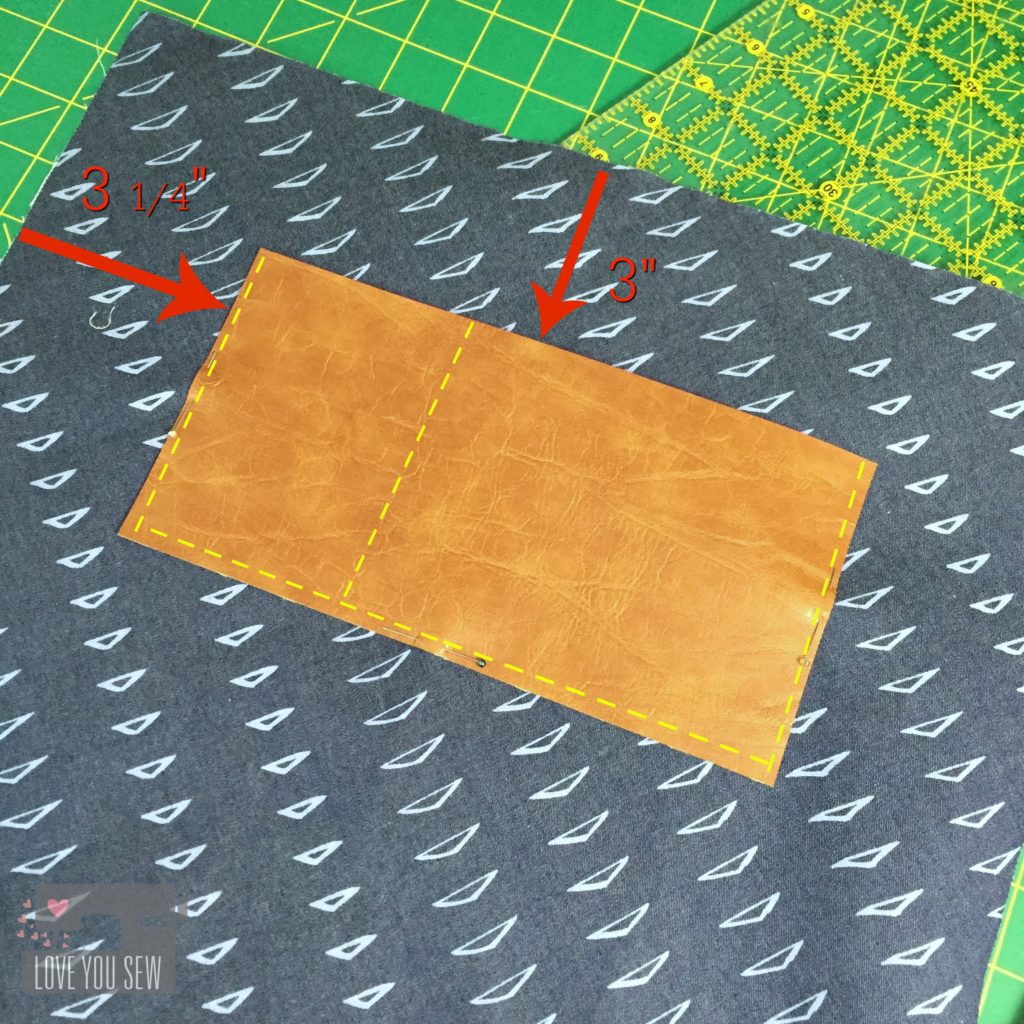
    • With the flat edge of the lining on top and right side facing you, measure 3″ down from the straight edge and 3 1/4″ in on either side.  Pin (where you will sew) the faux leather into place 1/8″ from the edges (marked in yellow.)  You can leave this as a large slip pocket or you can divide it for your cell phone.  I marked mine 3 1/2″ in from the edge to hold an iPhone 6. Sew the three edges into place and then the dividing seam (marked by yellow.)img_7026
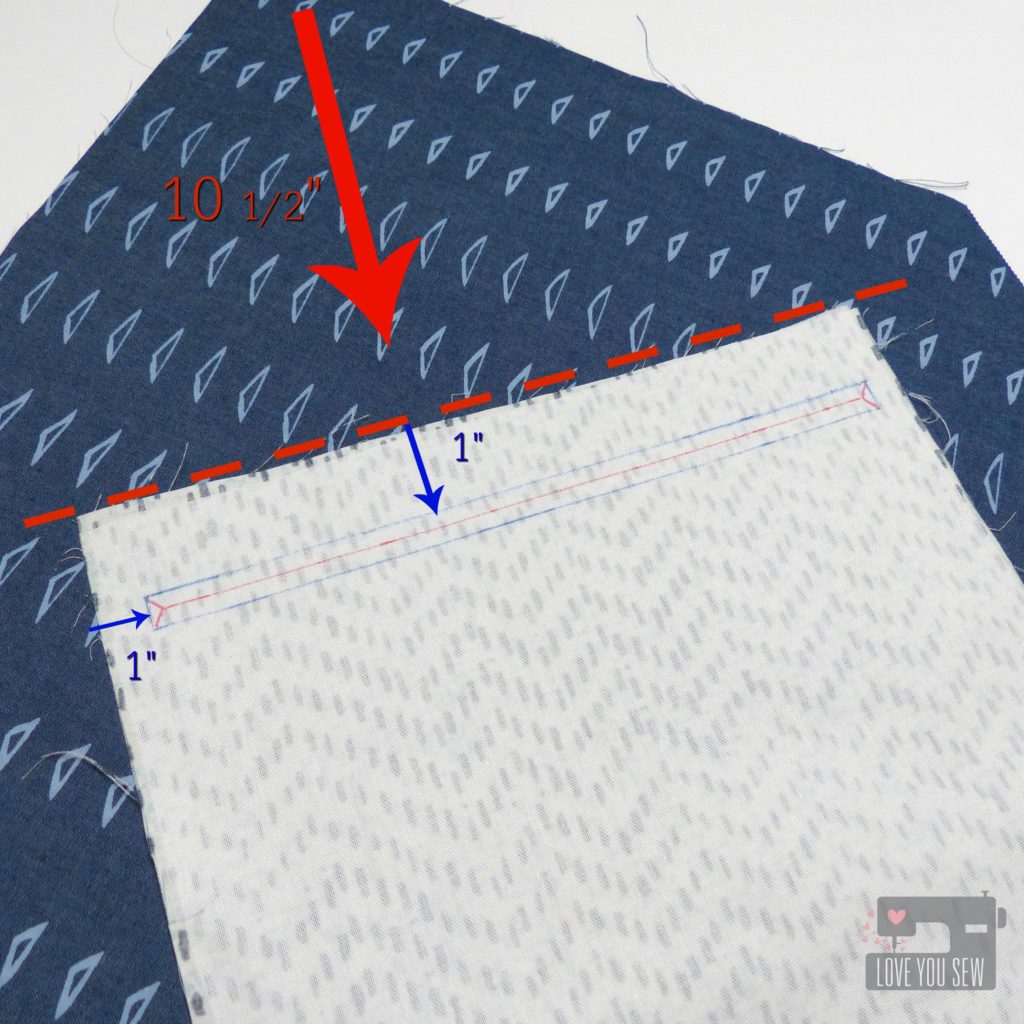
  9. Turn the lining 180 degrees.  With the right-side facing you, mark 10 1/2″ down from the top of the lining and pin the short-side of the  pocket lining fabric there.  Mark a rectangle 1″ down from the top and sides of the pocket that is 9″ x 3/8″ (blue pen.)  p1060690
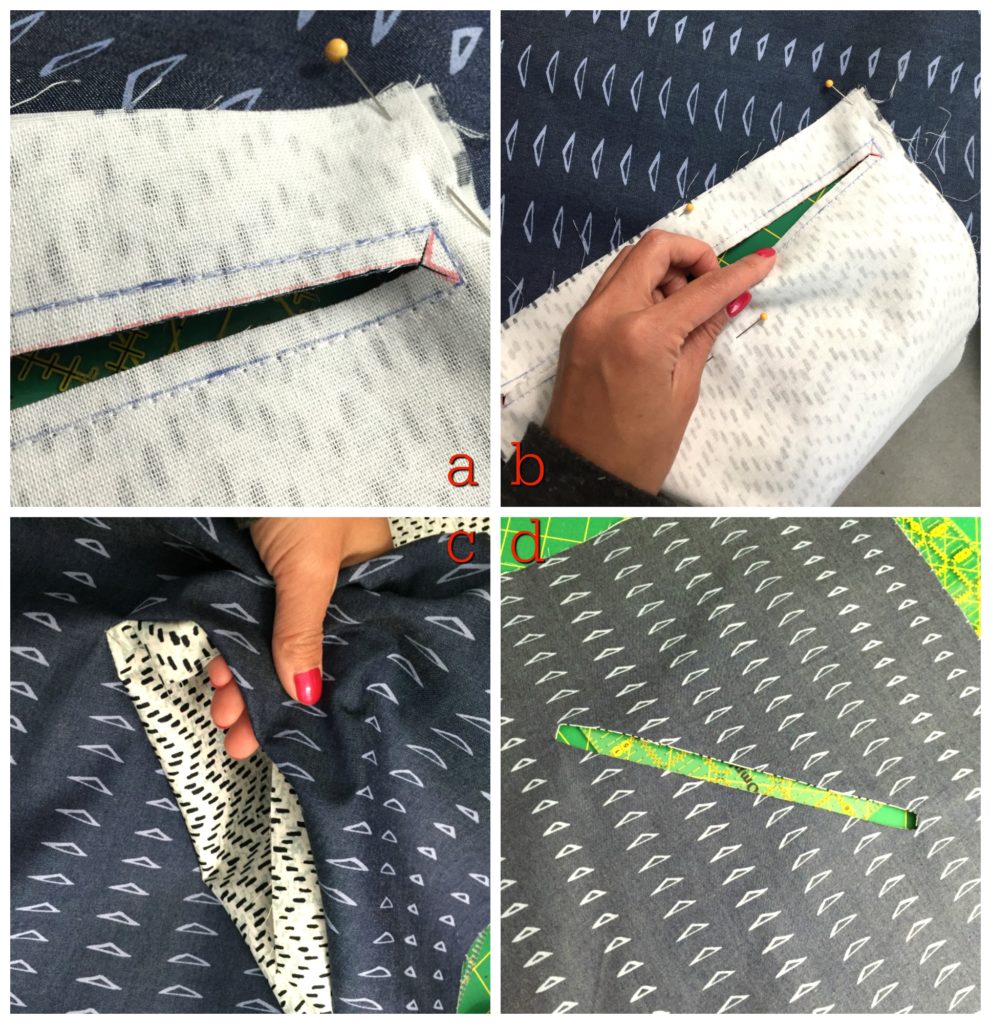
  10. Sew all-around the 9″ x 3/8″ rectangle on the marks you made.  Cut through the rectangle as shown, stopping about 1/4″ from the end (red pen lines.) [Image a]. Make small cuts from the middle out to each corner, getting close to the stitches, but not cutting directly through.  Push pocket through the hole [images b & c] and press [image d].lining-pocket-collage
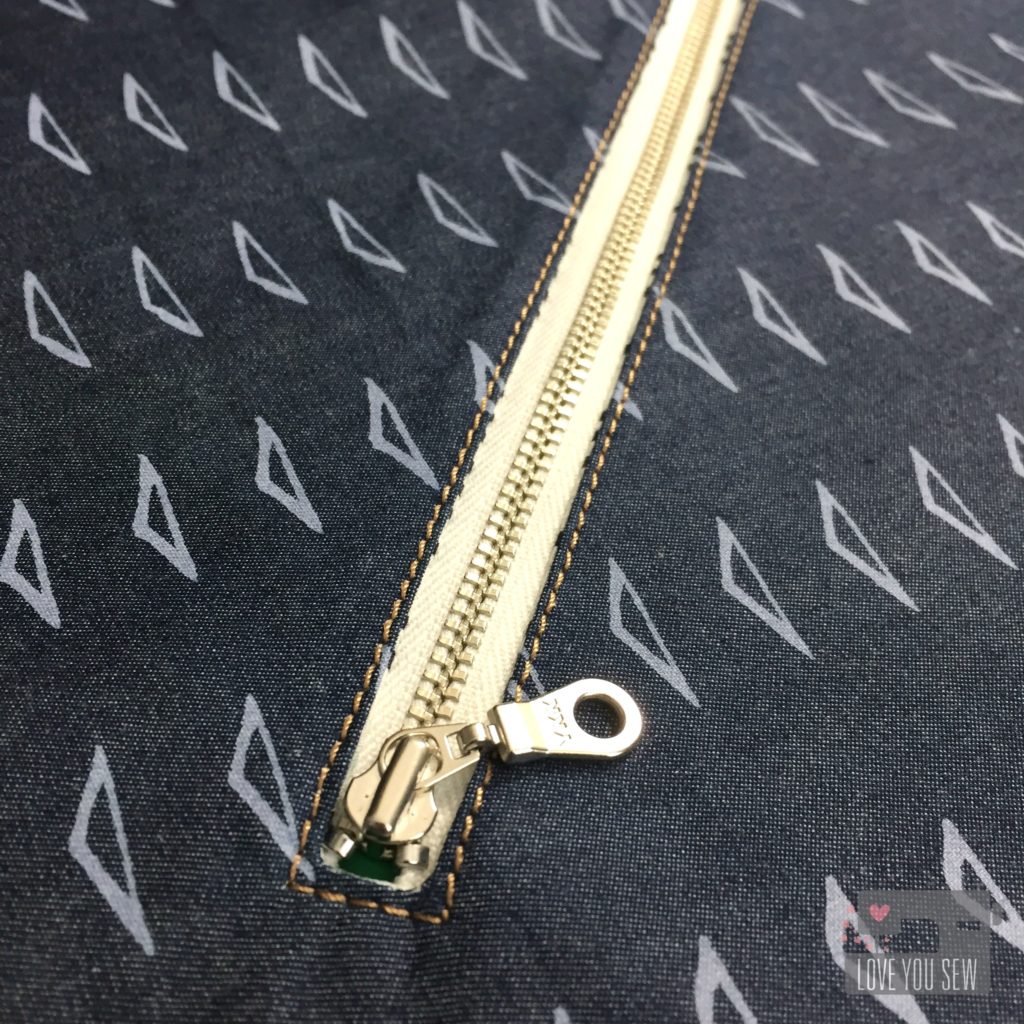
  11. With the right side of the lining facing you, line up the zipper in the opening just created.  Either pin in place or use Sewline glue pen.  Sew 1/8″ all around the opening.img_7024
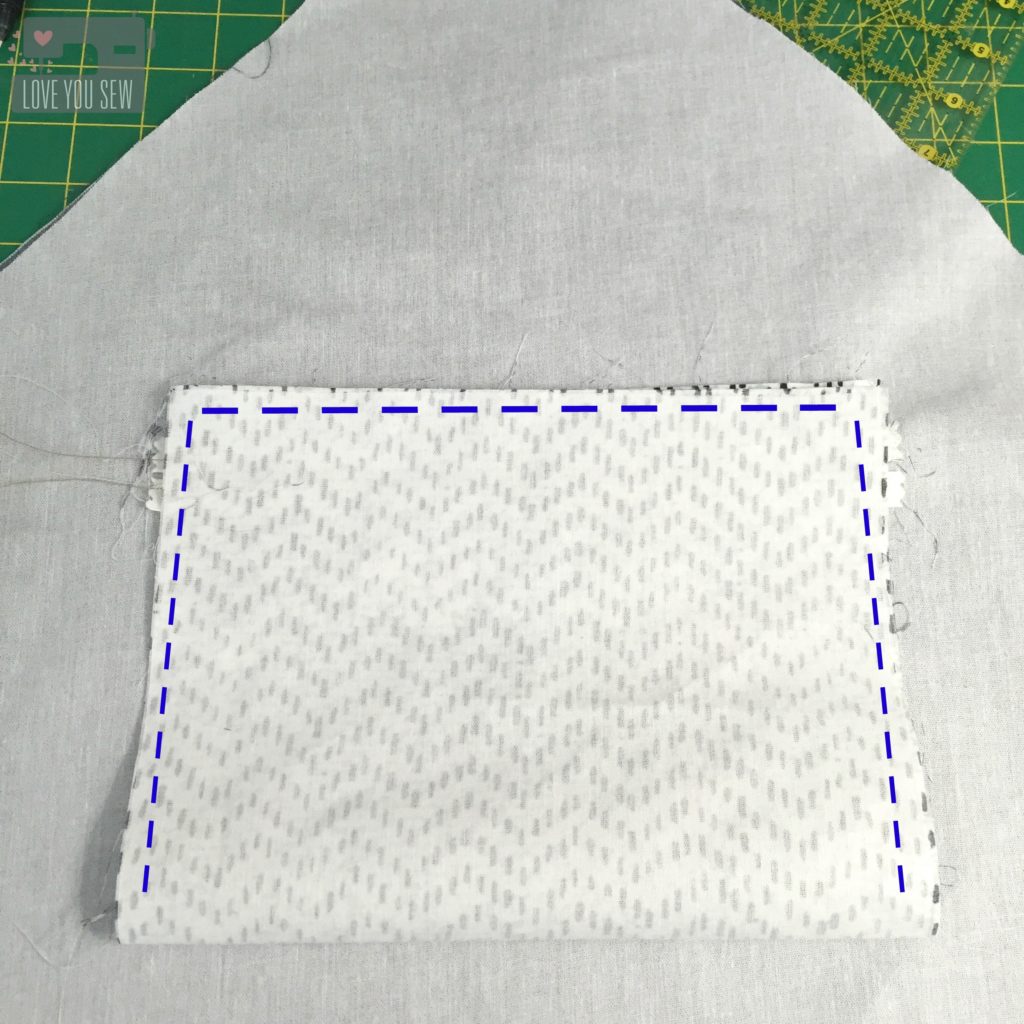
  12. With the wrong-side of the lining facing you, fold up the pocket so the short-sides match.  Press on the fold.  Pin all around the pocket, but not including the lining. Sew pocket shut (following blue dashed lines in pictures.)  Make sure you move the lining out-of-the-way as you sew.img_7025

Assembly:

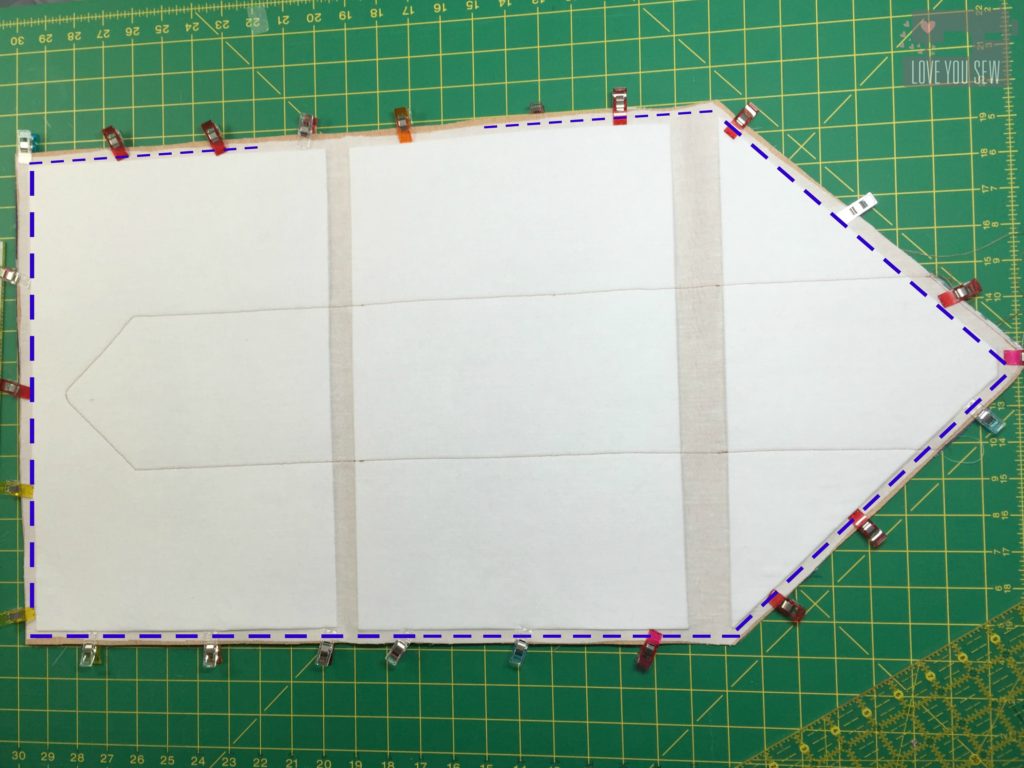
  1. Now match the right-sides of the lining and body together.  Clip in place and sew all around the edge (marked in blue) with a 3/8″ seam allowance.  Back-stitch when you start and end leaving a 5″ opening to turn. Notch out corners and the top of the clutch.  Be very careful not to cut through any stitches.img_7032
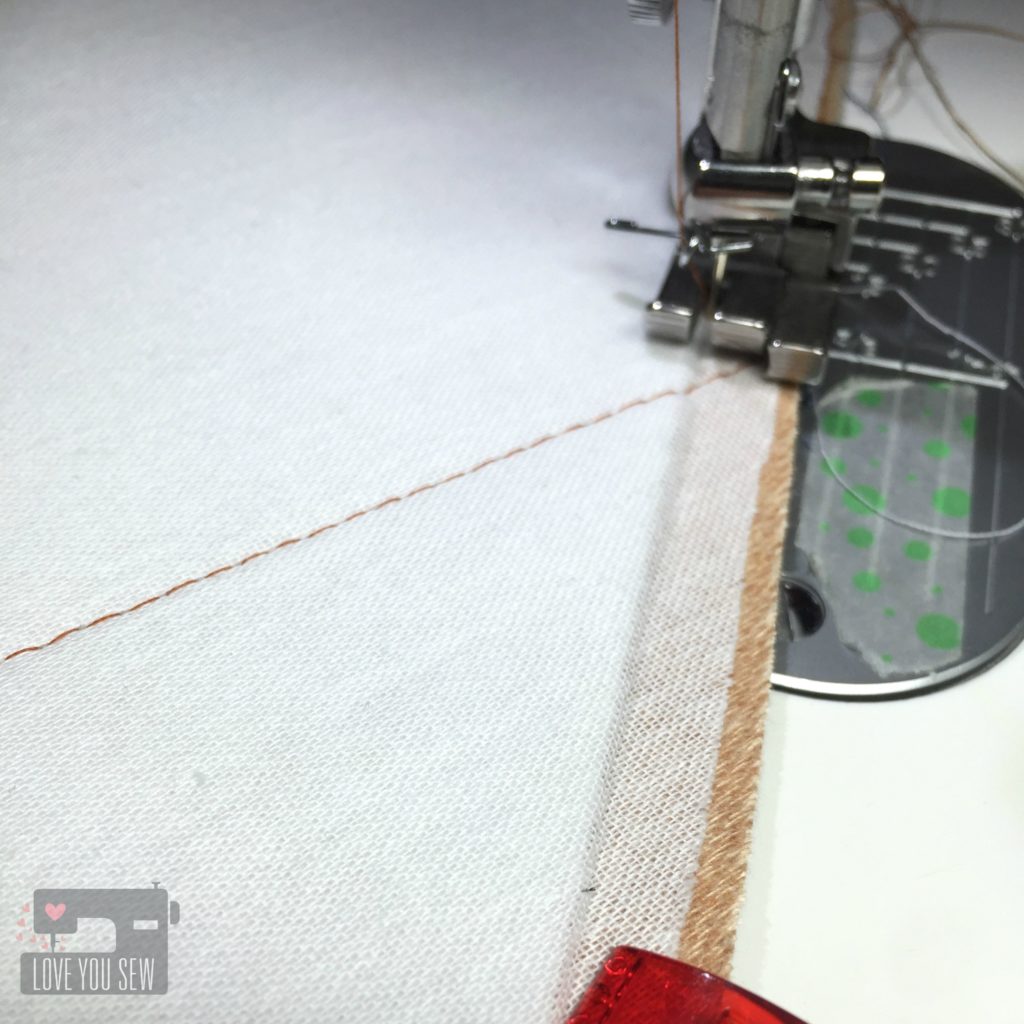
    • TIP:  Use a compensating foot or a zipper foot since the Peltex give you can uneven surface. img_7034
  2. With wrong sides together, make markings for your magnetic snap and install per manufacturer’s instructions.  With the point being so narrow at the top of the clutch, you may need to move your snap up or down to make sure there is enough clearance for all parts of the clasp.  For the male part, I marked mine 1 1/4″ down from the top edge of the lining and marked the female where it hit the body (approx. 7″ from straight short side.)
    • TIP: Before you install, reinforce where you will cut with a scrap piece of interfacing.p1060602
  3. Turn the body right-side out and press with the lining facing up.  Be careful not to press the faux leather directly with your iron.
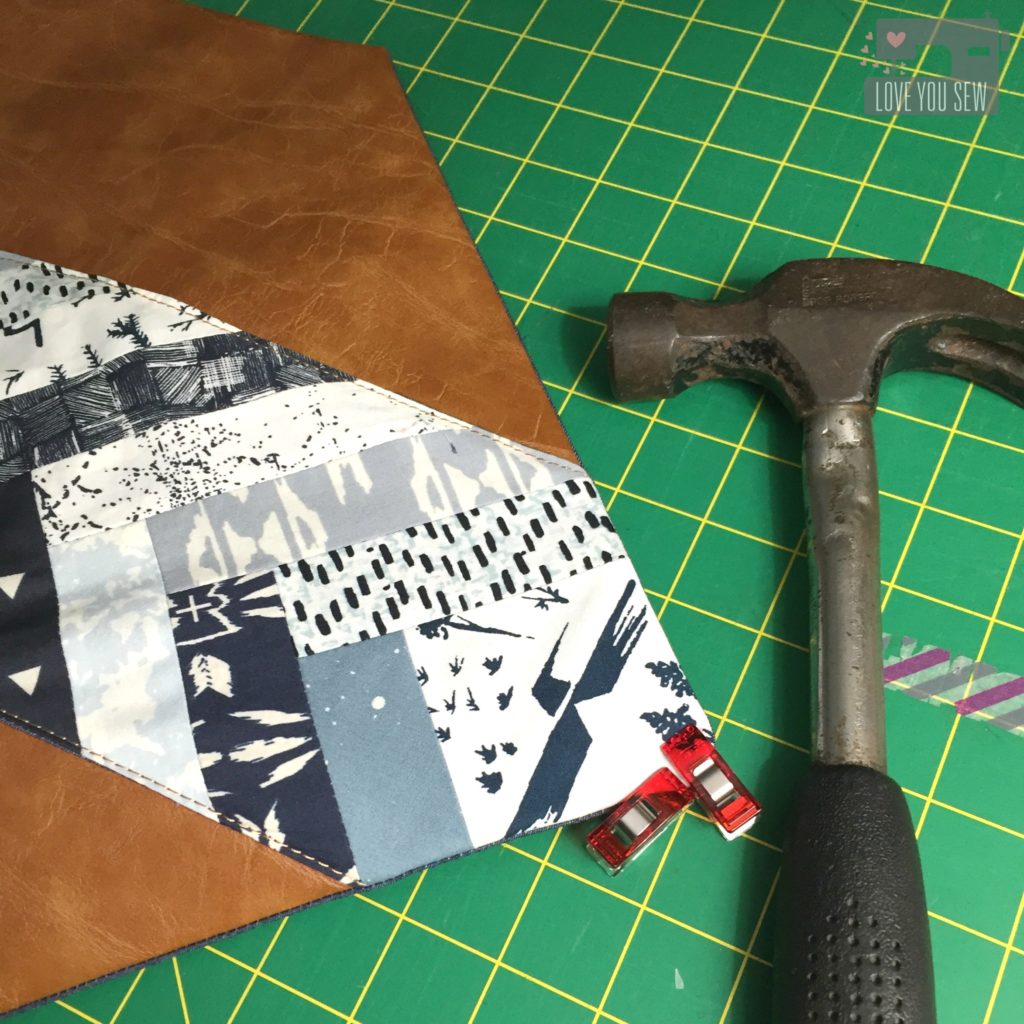
    • TIP:  Use Clover Clips on the edges to help them stay flat and/or hammer them as well.  Hammering helps to flatten the edges so top-stitching will be easier in the next step.  Test the hammer method on scrap to make sure the hammer doesn’t leave marks.
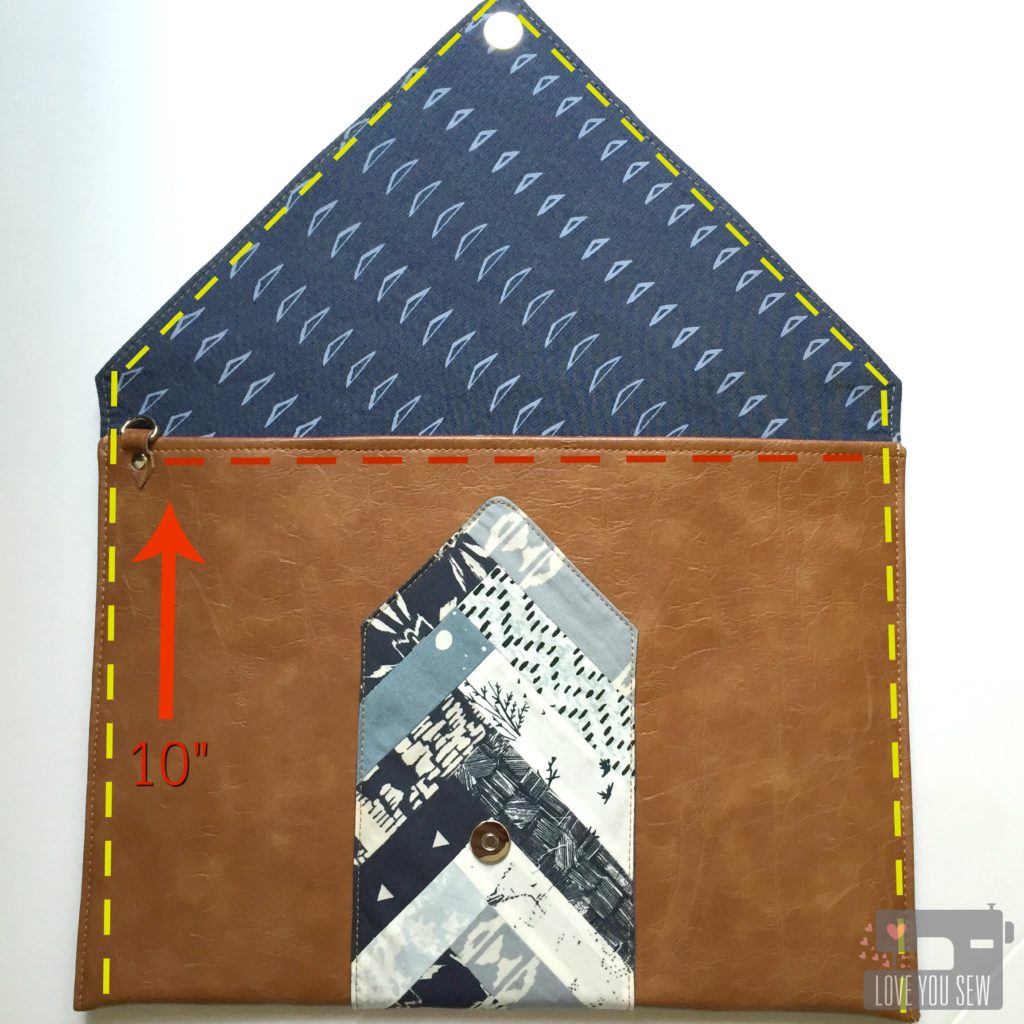
  4. img_7036Time to {finally} make the envelope!
    • Top-stitch along the straight short-end of the body (red dashed line)
    • Fold the front of the clutch up 10″ to create the main pocket and secure the sides into place with Clover Clips
    • Top-stitch all along the clutch (following the yellow dashed line)
      • TIPS:
        • Use a large 16 or 18 needle to get through all the layers
        • Increase stitch-length to 3.5-4.0 and use your walking foot to achieve even stitches
        • GO SLOW so that you do not skip stitches
        • Hammer the edges again, if needed
        • Leave long thread tails so you can pull them through the lining and hide for a cleaner finish
    • Hide thread tails by pulling them toward the lining, knot, then bury.
    • Press the lining

img_7063

If you want to get extra fancy, you can add some additional finishes.  Some examples are:

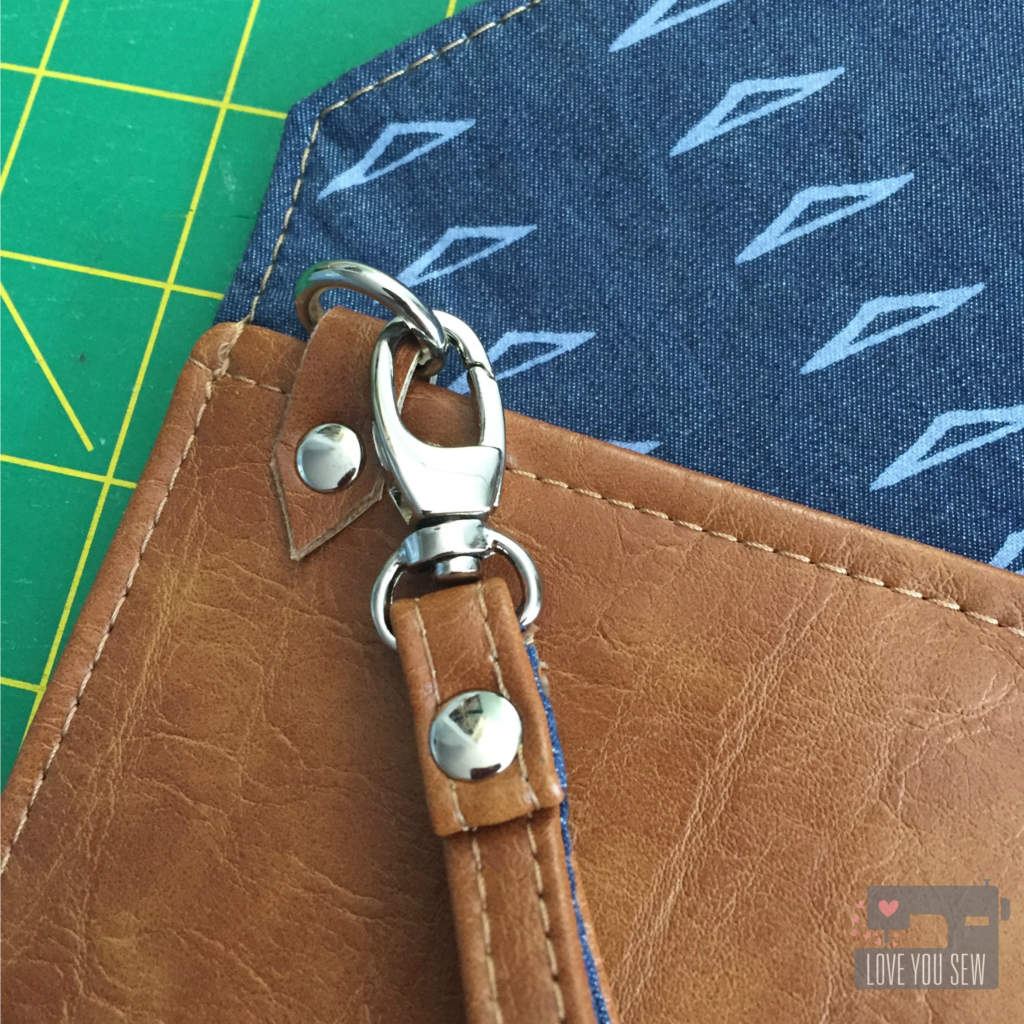
  • Sew a wristlet handle with hardware (as shown)
  • Just add the D-ring so you can attach some fun tassels.
  • Include a key fob on the inside
  • Attach rivets and grommets

img_7042


CONGRATS!!!  You have made a #LYSquiltedenvelopeclutch!  Please, please share your creations.  I would love to see them all!

As long as you credit Love You Sew with the pattern (because it took me a long time to write this all up,) you are free to sell the finished clutch.

Product Details (Sources in Links):