Colleen “Shortie” Tote Bag with Loved to Pieces Blog Party

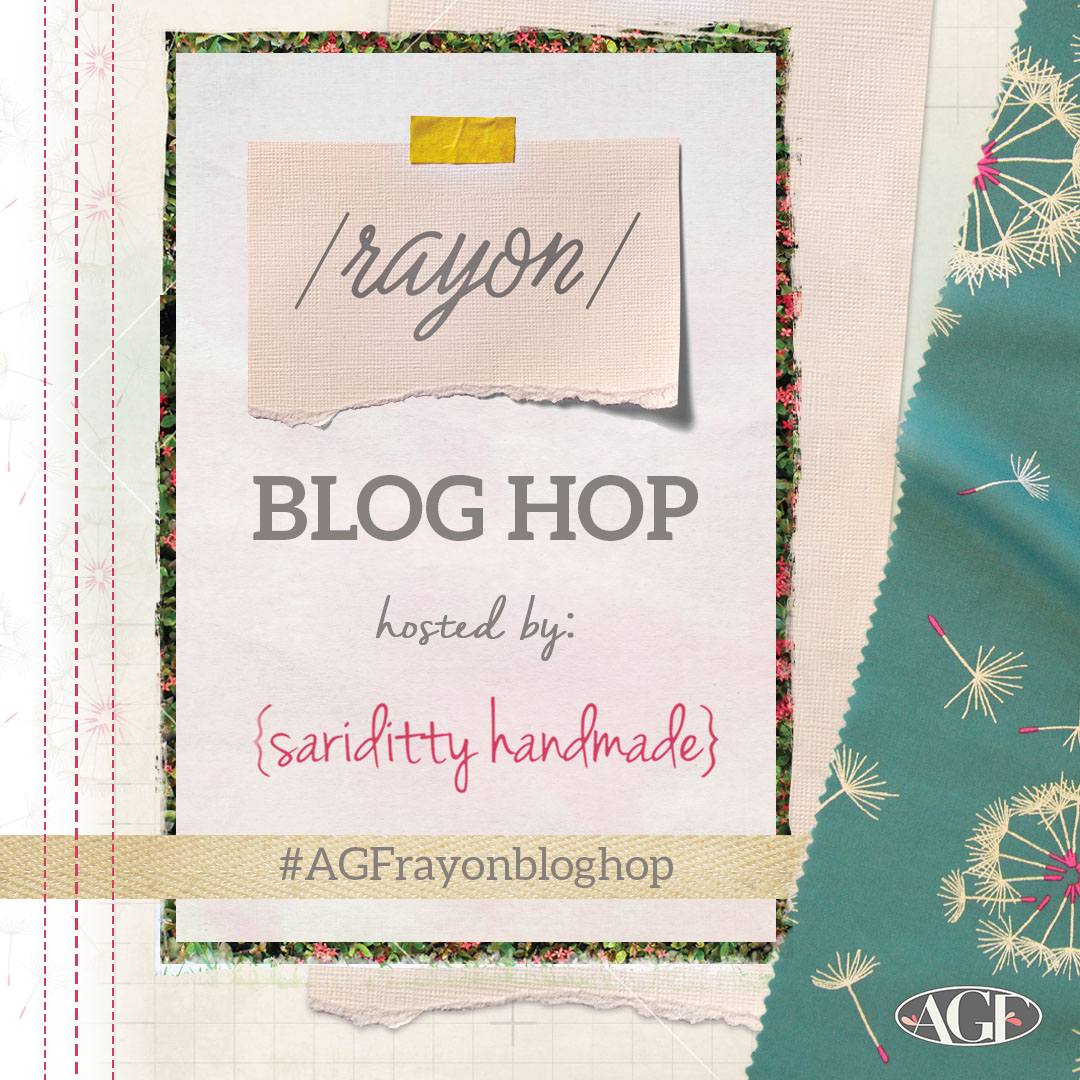
When Mathew Boudreaux (aka Mister Domestic) throws a party, you know it’s gonna be big and fabulous!  And this Blog Party is living up to all the hype with over three weeks of amazing projects using Mathew’s debut fabric collection, Loved to Pieces.  I’m so honored to be a part of all the festivities, so I thought I would bring my new Colleen Tote along for the ride.

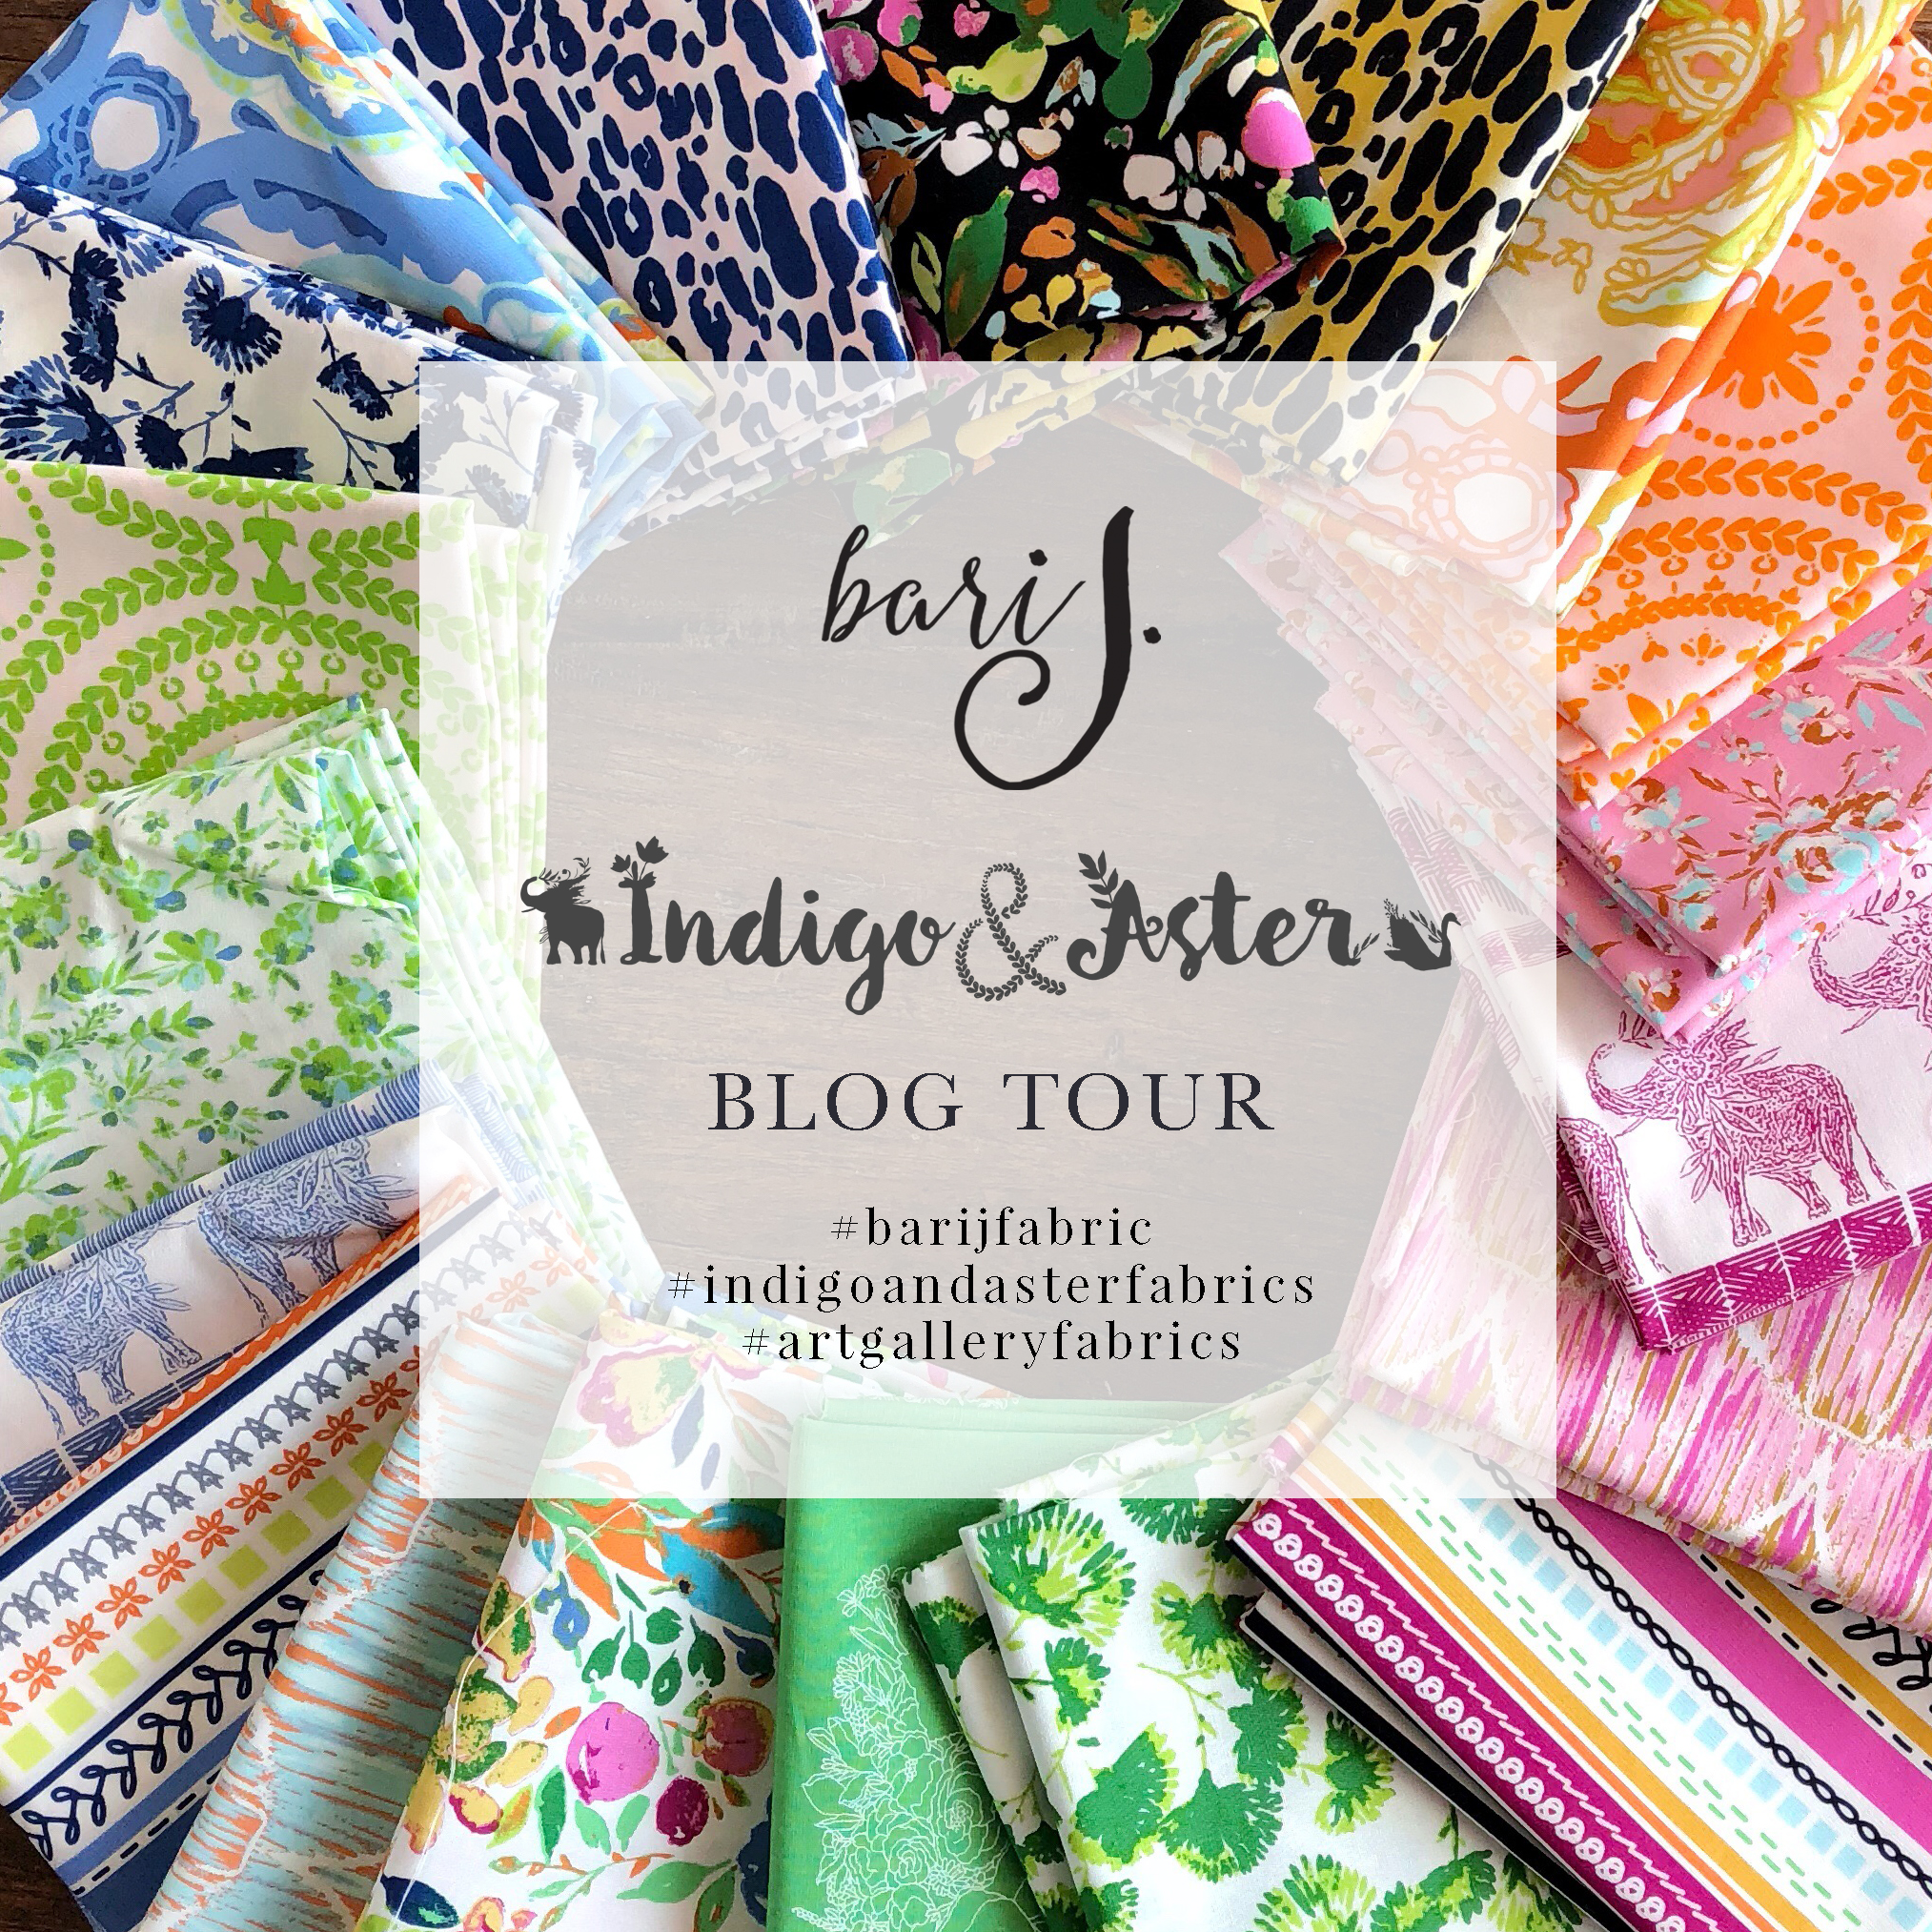
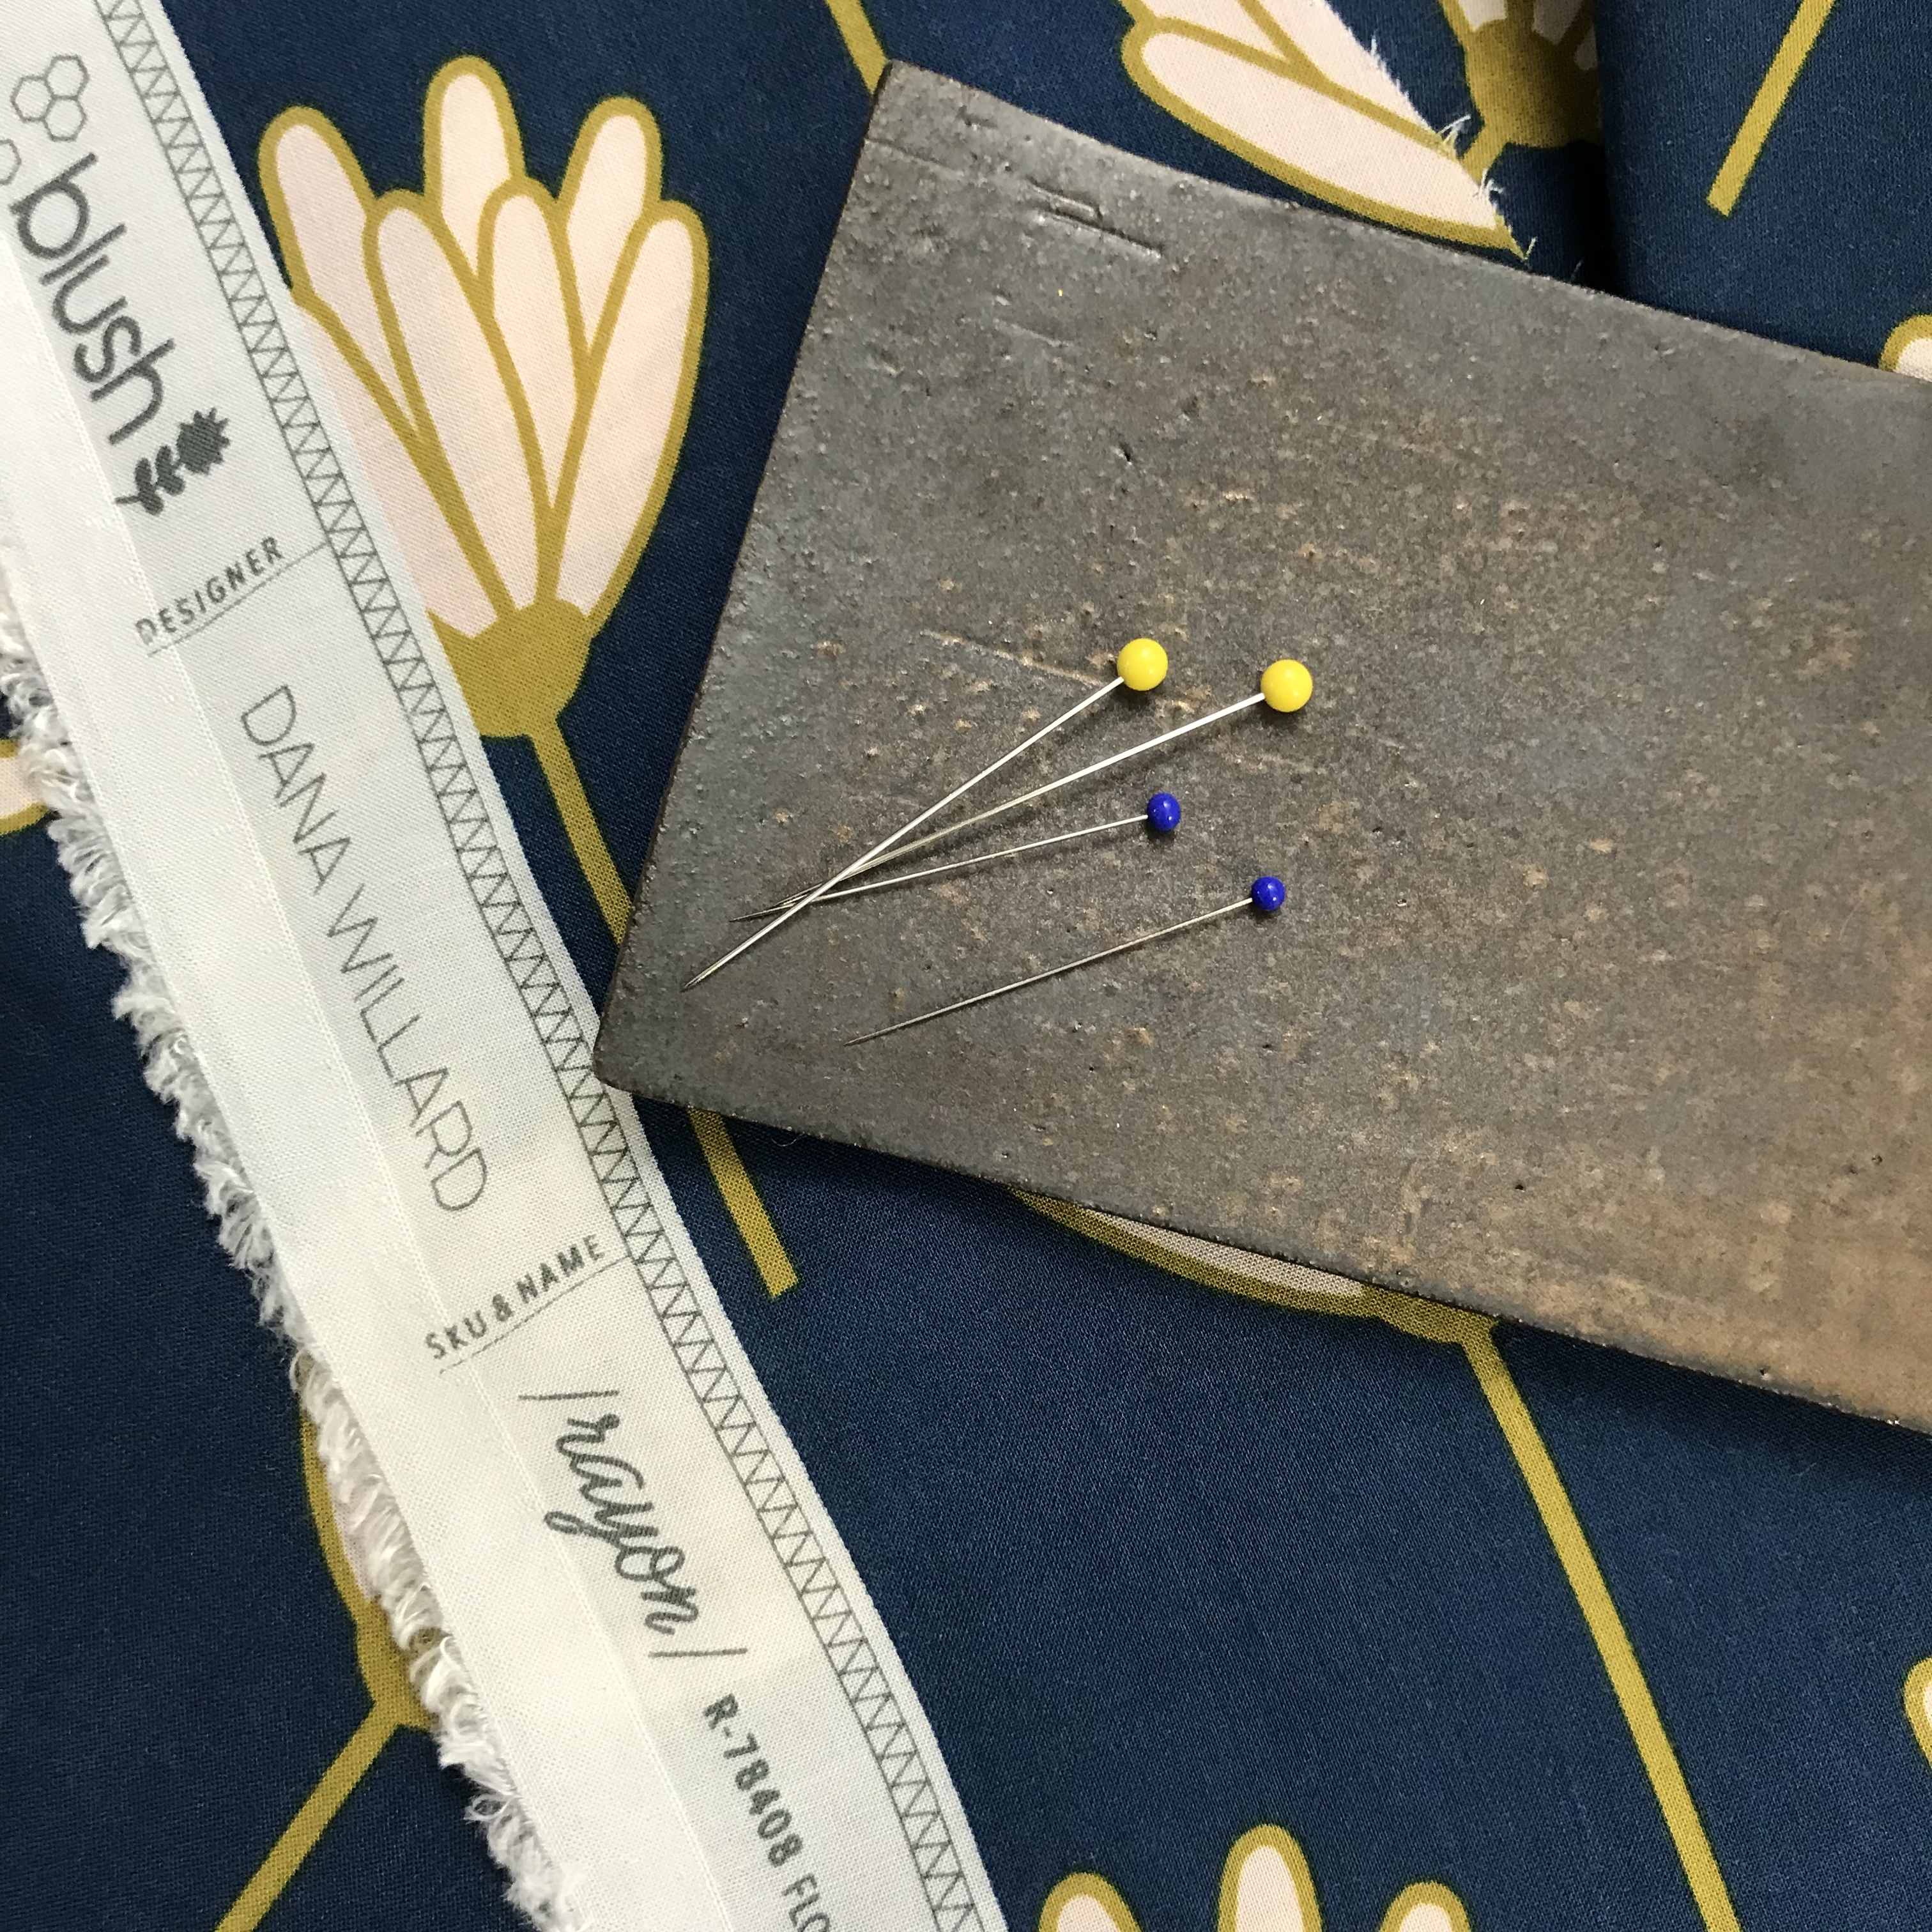
Loved to Pieces is a beautiful fabric collection inspired by Mathew’s love of English paper piecing and his sweet daughter’s love of florals.   I love the mix of blues and teals complemented with sharp pinks for a lot of fun.  There is a great mix of quilt cottons, rayons, and knits for all kinds of great projects. For more inspiration, you can view the look book here.

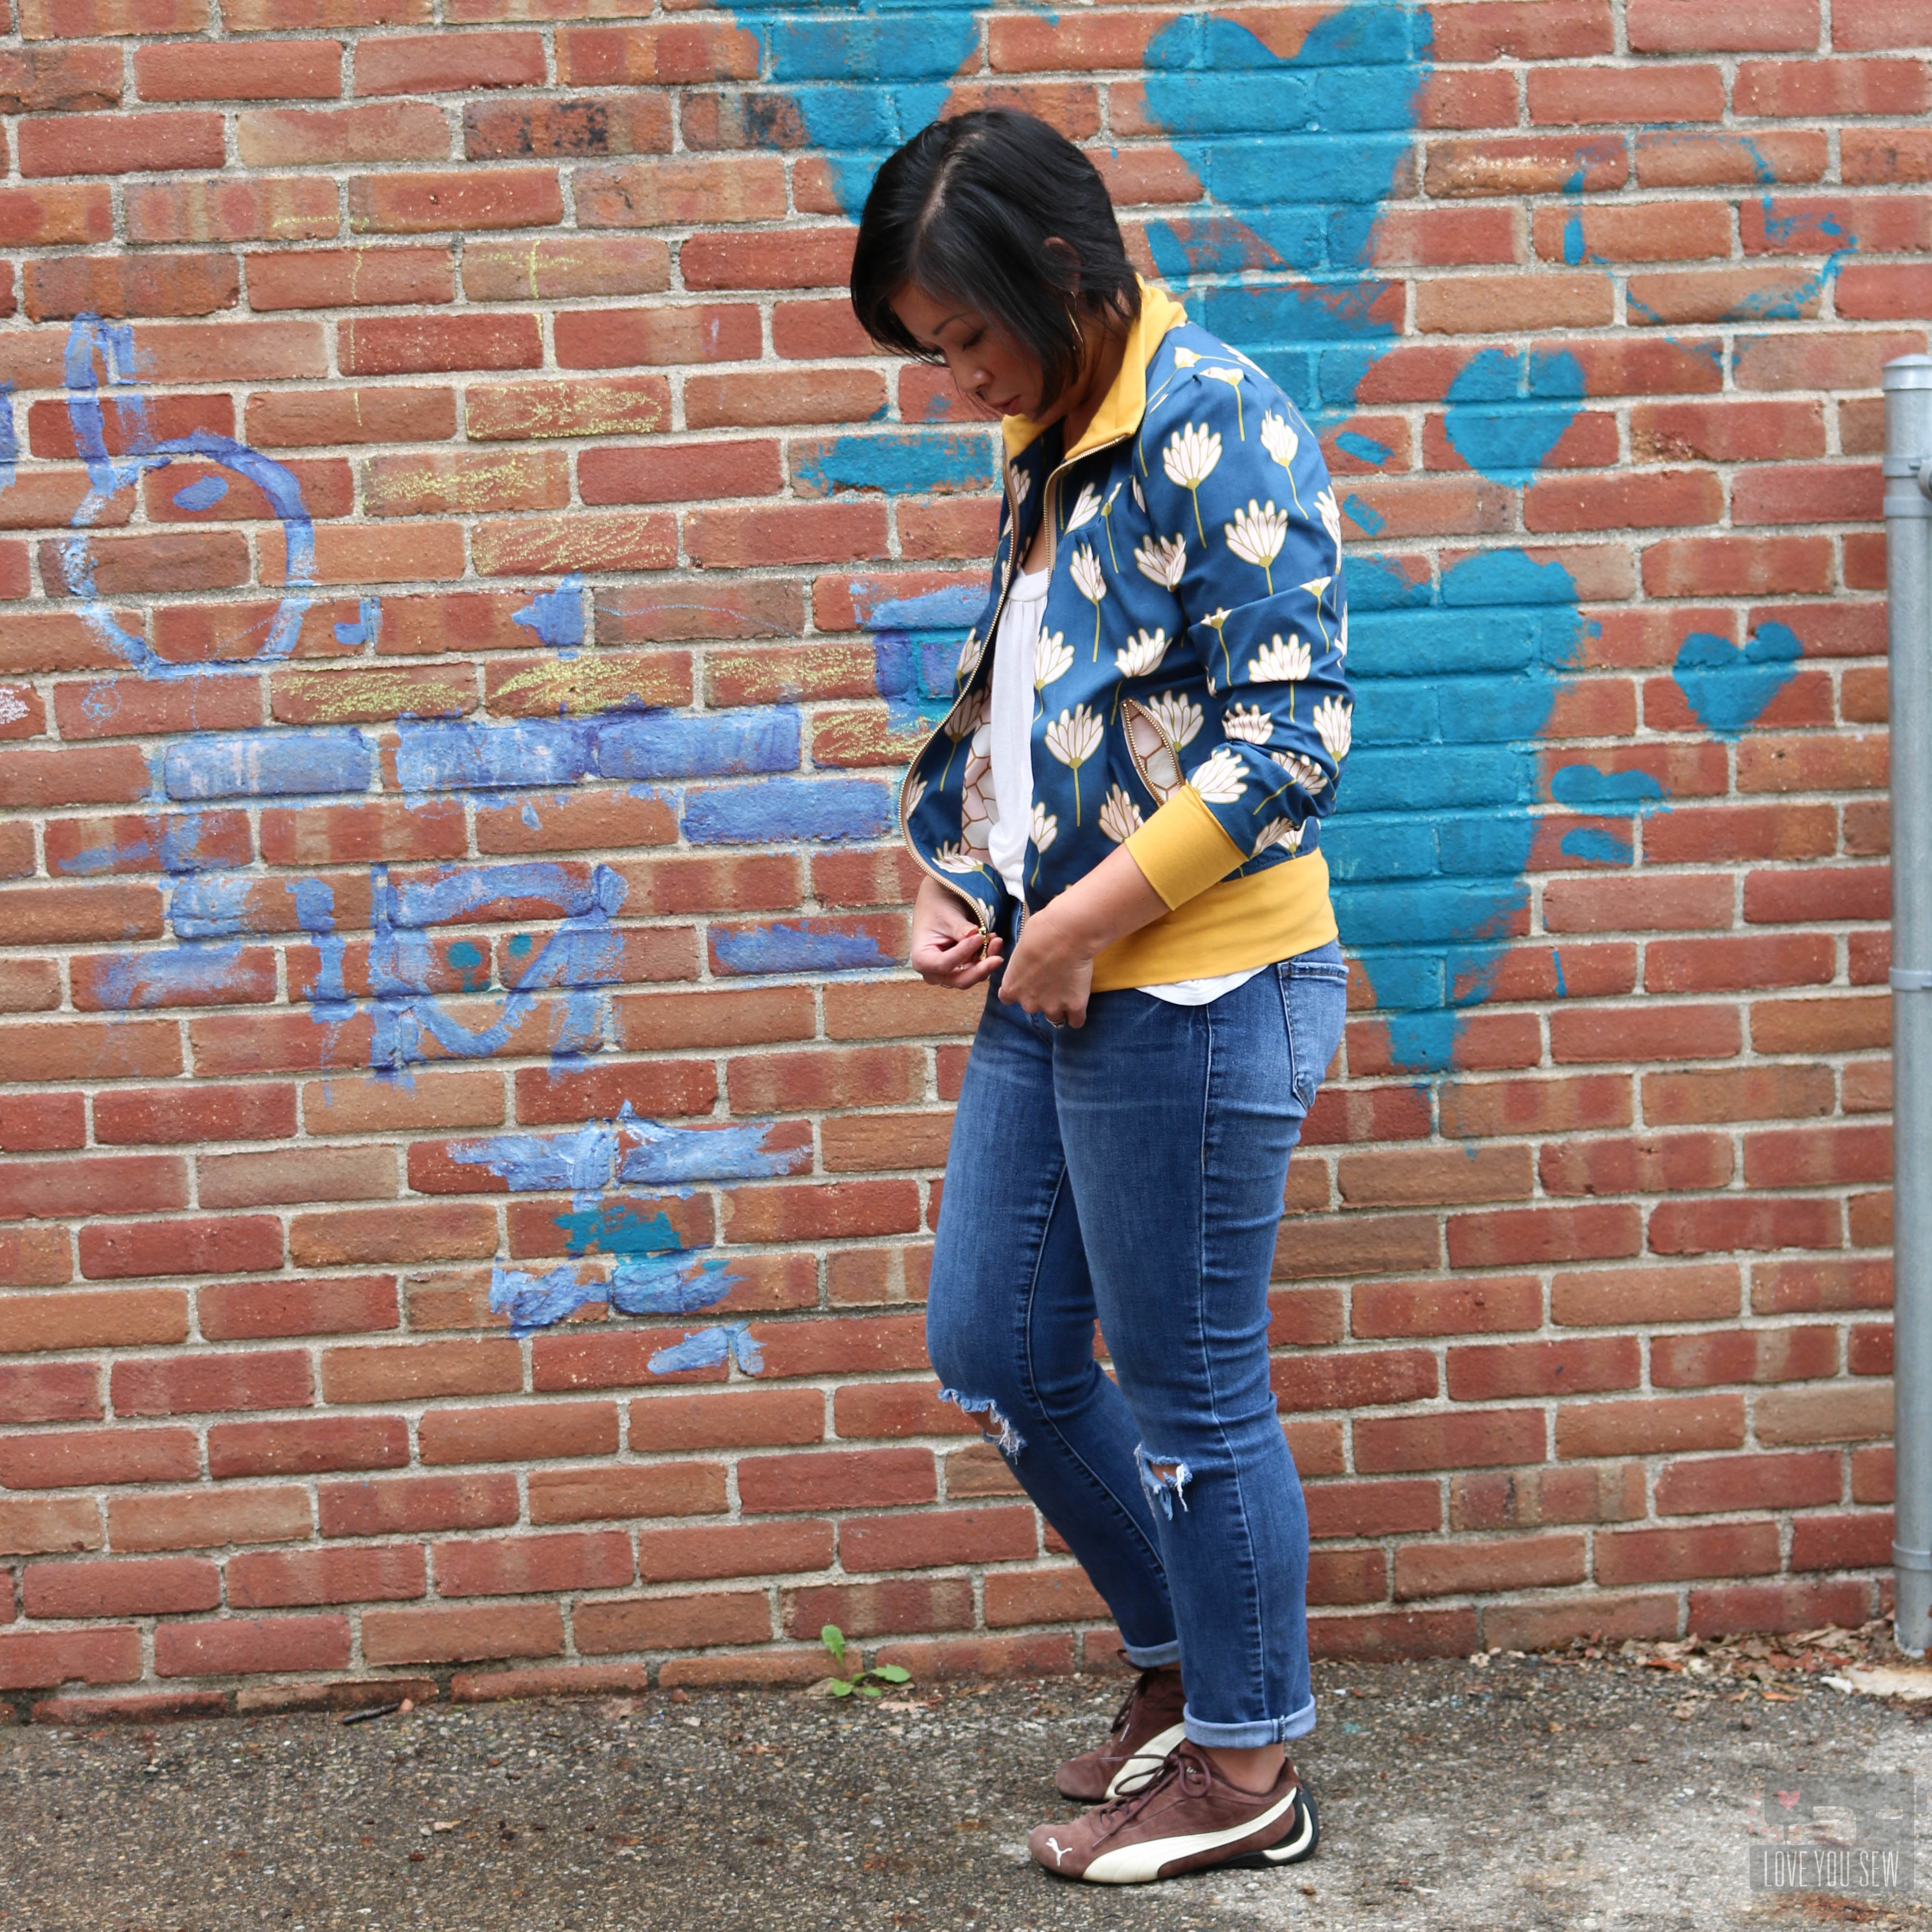
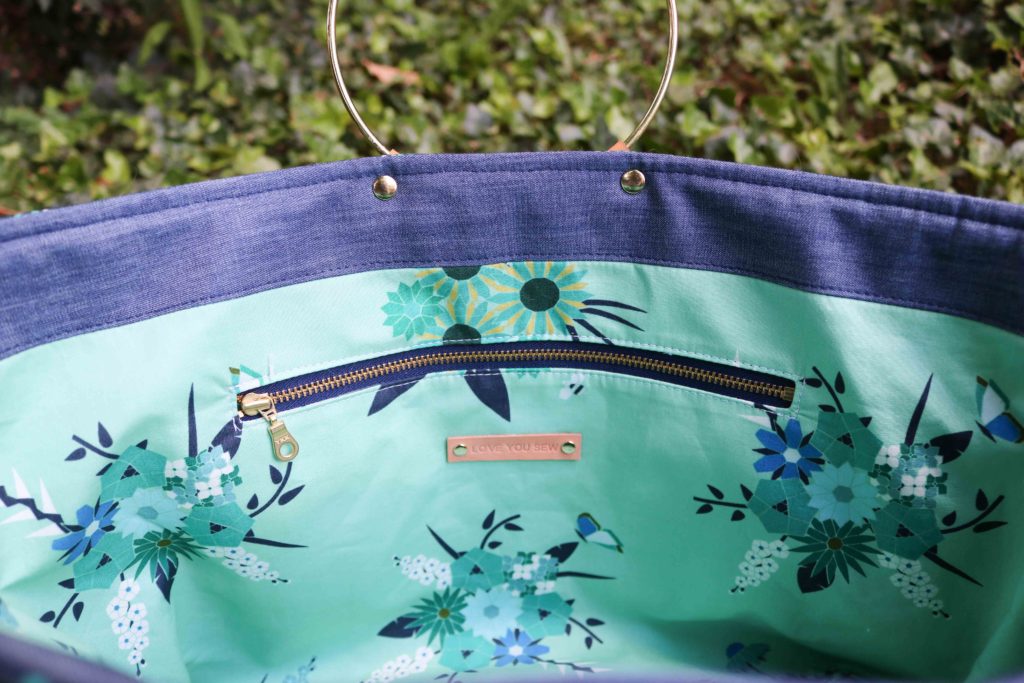
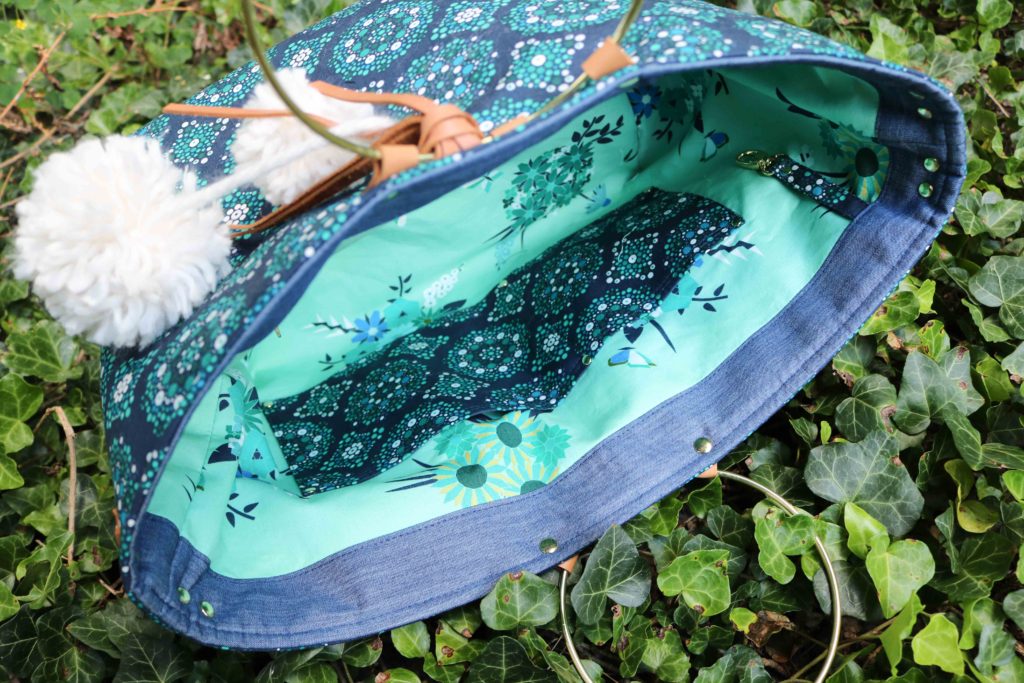
For my Colleen Tote, I wanted to go for a chic look and let the print stand on it’s own. For the exterior, I selected Mandala Drops Midnight with it’s striking and hypnotic design.  Plus, it’s a nice dark print that’s perfect for the exterior of a bag to hide any dirt or debris.  I like the linings to pop a bit, so  Pieced Bunches Cool was ideal with the gorgeous geometric florals.  The pinks in the collection are such a nice complement and I had to add a bit of Reap and Sew Light inside the zipper pocket.  Finally, the interior contrast band is Art Gallery Fabric’s Indigo Shadow Smooth Denim.

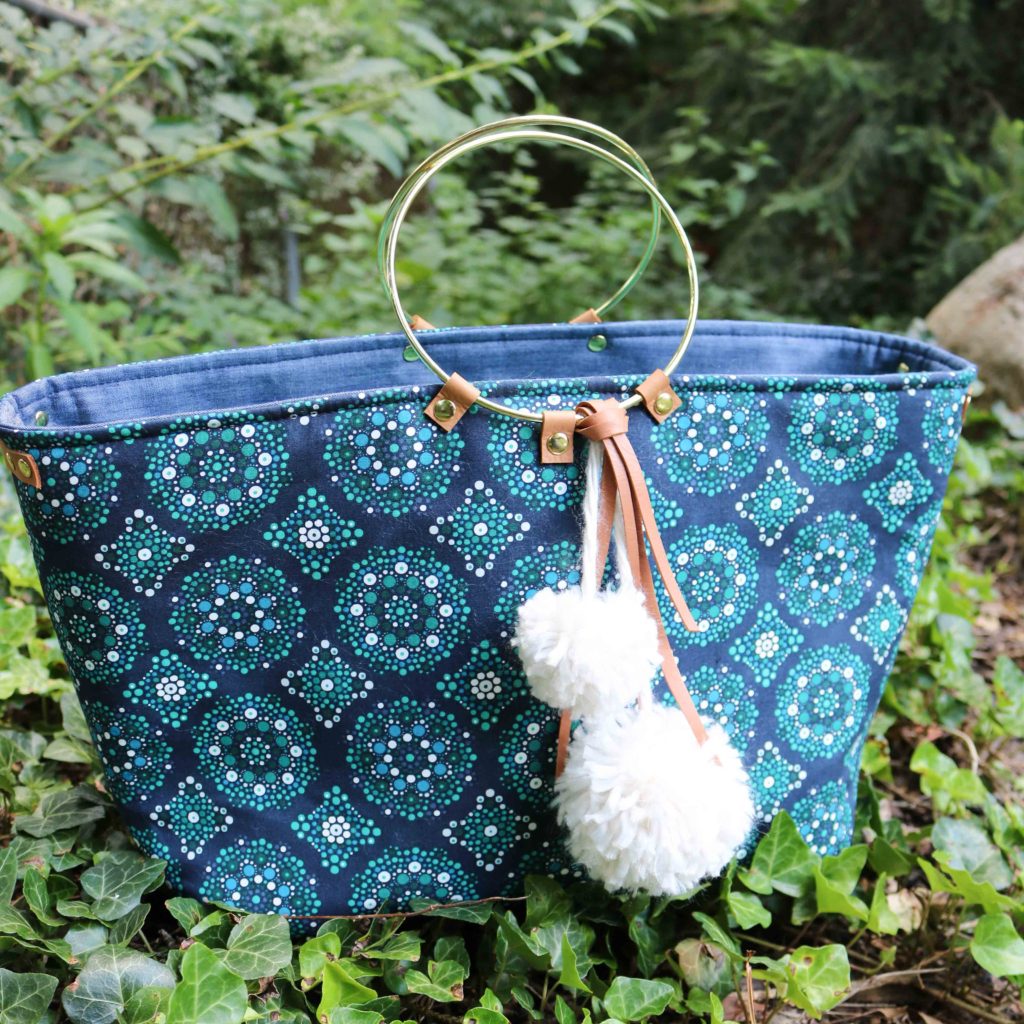
I’ve been seeing brass metal rings all over the handmade and fashion world for a little while now.  They are used in macrame weavings, dreamcatchers, floral arrangements and I saw heavy usage of this accent in handbags this past spring.  I was so inspired and I knew I had to add this unique hardware to one of my own bags.

These rings have a solid 5″ diameter and would make fantastic bag handles.  However, to use the rings as handles, I knew I couldn’t make a huge heavy bag.  So I decided to make a “shortie” version of my Colleen Tote pattern.  This entailed shortening the exterior, linings, and coordinated woven interfacings all by 3″.  The zipper pocket was then shortened by 6″ overall.

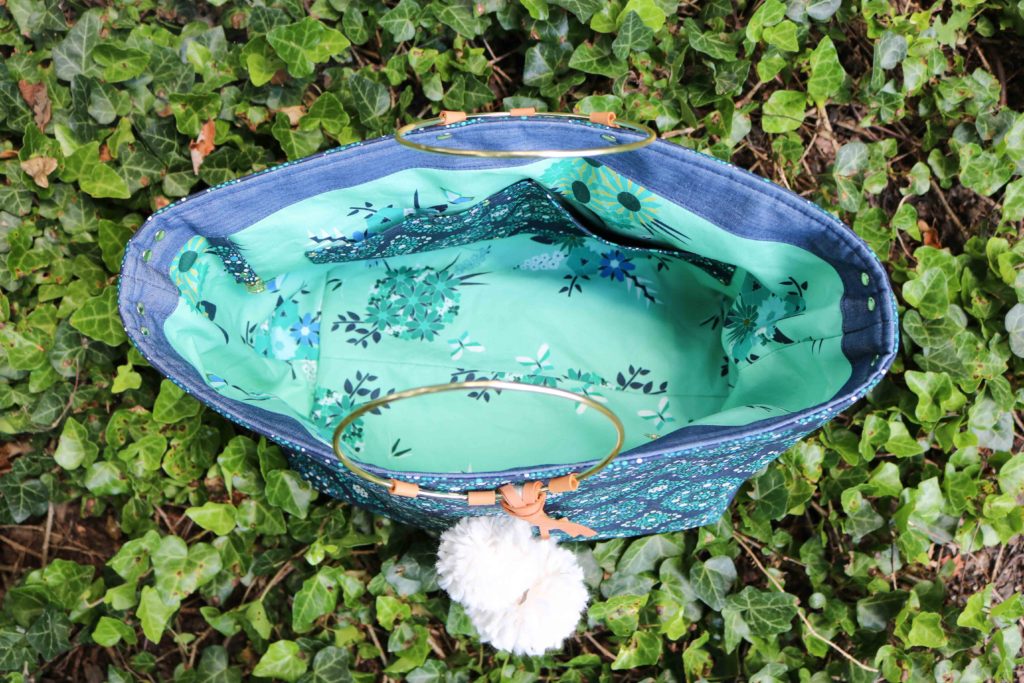
Instead of using fusible fleece, I used Soft and Stable to keep the bag more structured.  This was in order to hold the weight of the rings and to keep them upright.  The exterior had to be basted 1/4″ all around  the pattern piece to keep the fabric nice and smooth.  The Soft and Stable really  makes the bag look so polished.

Everything else in the pattern was all kept the same (minus the handles, of course.) There is still a nice roomy slip pocket for your phone and sunglasses and the zipper pocket to tuck away the essentials.  The fob is essential to keeping those keys in check!

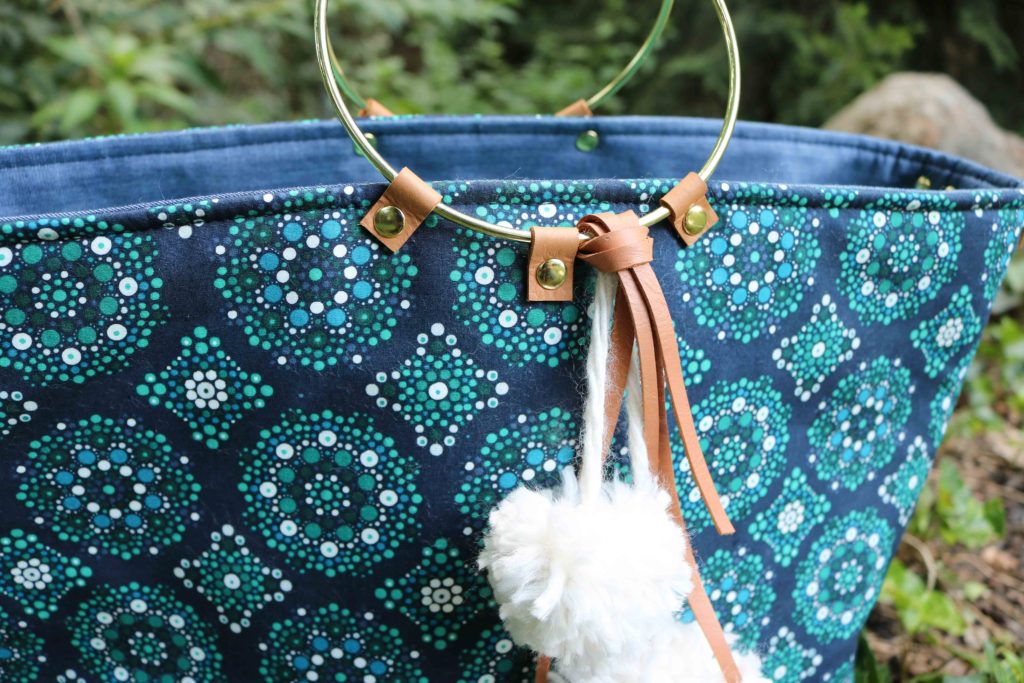
These rings could have been stitched into place, but I opted to used leather and rivets to add more texture and interest.  The ring was first secured with the center rivet while the exterior panel was still flat and not sewn on the sides.  Once the tote was completely finished, I then added the other rivets to the left and right of the initial one.  This is why you can only see two rivets on the lining for each handle.

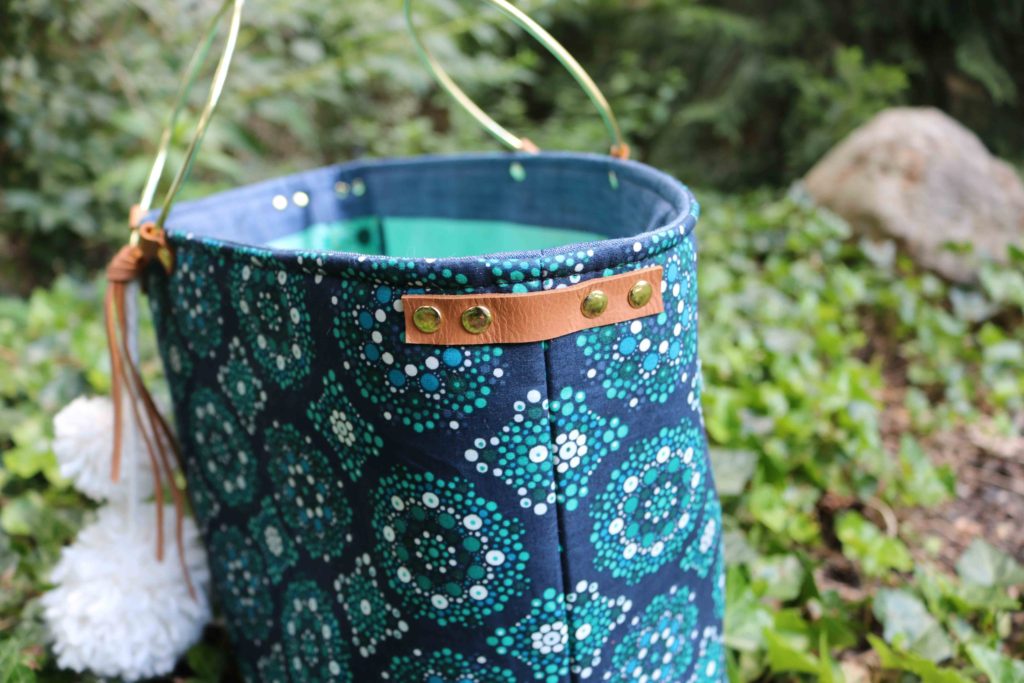
I added some extra leather and rivets to balance out all the hardware around the handles.  With a  nice clean exterior, I decided to add just a little more fun and to keep this bag on trend with some pom-poms and leather lacings (all using scraps from my stash of crafting goodies!)

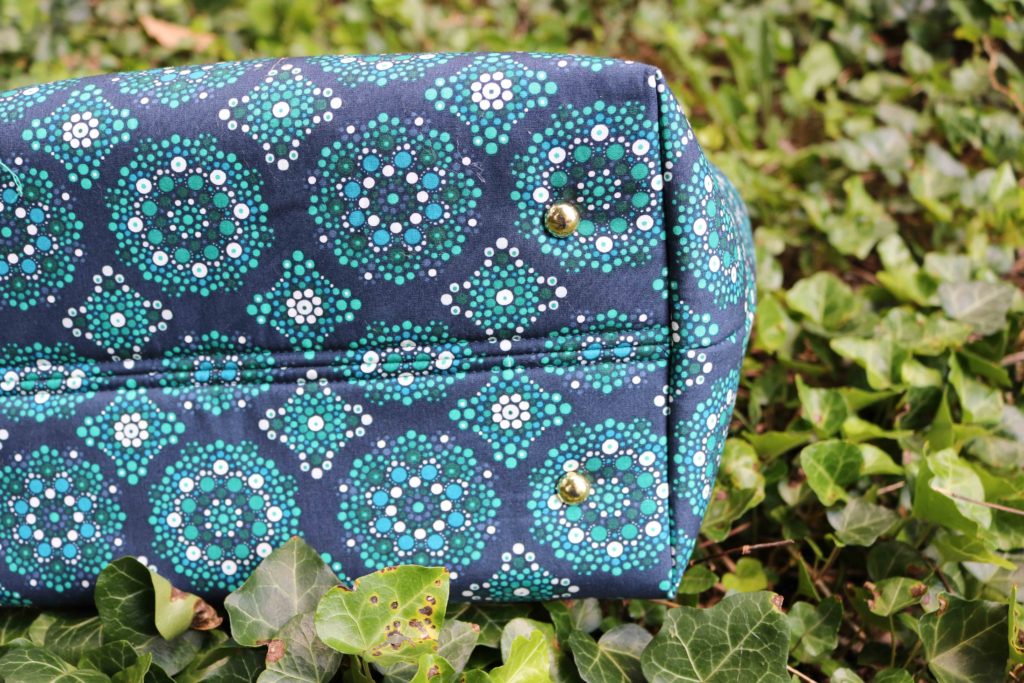
Last, but certainly not least, is the Colleen’s bottom.  With the ring handles, this is not a bag you just sling over a chair back.  So, I make sure to take care of this lady by added some shiny shoes.  Whether the tote has to sit on another chair or (heaven forbid) the floor, she will be protected!


Project Details:


For the full Loved to Pieces Blog party line-up, check out:


Thanks for visiting and partying with me here!  Don’t forget to head over to Mister Domestic’s Instagram feed to see how you can win a bundle of these delicious fabrics!

Happy Sewing,

Cristy


Fabric was provided for the blog post.  However, the project conception and all opinions are my own.  Please note there maybe affiliate links for which I may receive a nominal commission if you make a purchase.  This helps keep the website ticking along.  Thanks always for your continued support!

Girls’ Racerback Dresses with the Indigo and Aster Fabric Blog Tour

What I miss by having two boys, I tend to make up by sewing my for nieces.  There is nothing cuter than little versions of dresses I would make for myself!  I definitely indulge them quite a bit and that was the case when this lovely La Floraison jersey knit from the Indigo and Aster fabric collection arrived at my doorstep.  These flowers had to be made into a sweet little dress for my niece’s upcoming birthday and then it turned into another dress for her new baby sister…and then turned into adding a top for their mom as well.  I couldn’t stop when the fabric is this beautiful!

This vibrant floral print is from the new Bari J. fabric collection for Art Gallery Fabrics.  While the main focus is on all the animals (you HAVE to check them out!) it wouldn’t be Bari J. without some of her signature painted flowers.  I love how these pinks and blues pop against the white background.

My feisty little niece here is turning three soon and still loves her dresses and being quite active too.  I made her some Racerback dresses before and really enjoy this simple (and FREE!) pattern by Hey June Handmade.  It’s a clean A-line silhouette and the fact that it’s made for knits means easy dressing and more play!

And when making a dress for one girl, there was no way I could leave out my newest niece.  She deserves some handmade love too.  I mean, look at those rolls!  <3  Fortunately, this Racerback dress pattern takes up very little fabric and everything came together quickly with the four-way stretch knit.

After thinking about my nieces being cute in their matching outfits, I thought I’d add my sister to the mix because….why not!?!  To keep with the racerback style, I sewed up the Rumi Tank by Christine Haynes.  You can see other versions of this tank I’ve made here because I absolutely love it and it’s a definite tried and true pattern for me.

Look at my ladies.  Making all of these garments was SO worth it and and you can see how one idea quickly led into three!  The cute factor is pretty high…from my completely biased post of view 😉  I just love how nice this print looks on my niece and my sister.  It’s playful enough, yet the design bring out a sophistication as well.

With so many great colors, the  La Floraison jersey knitis also great for using up some smaller pieces of scrap fabric, like some Art Gallery Solid Knit in Dark Ocean.  I made sure to differeniate the dresses a little bit to help my sister with laundry time!  We all know how little clothes can get misplaced often…

Don’t forget to swing over to Bari J.’s blog  to keep up with the #IndigoandAsterFabric blog tour and check out what you might have missed.   There are so many good projects, my head is swirling with so many new ideas!  What would you make from these gorgeous fabrics?

Happy Sewing Friends!

Cristy


***Fabric was provided as part of the Blog Tour.  Project conception and opinions in the post are always my own.

Art Gallery Rayon :: Cookie Blouson Jacket

I’m kicking things off with Art Gallery Fabric‘s Rayon Blog Hop today!  Rayon is their newest substrate and I can’t even tell you how much I luuuurve it.  I was lucky enough to get an advanced preview when April Rhodes release her Heritage Fabrics and I just am obsessed with the drape and feel of this fabric.  You can read more about it here.

When most people hear “Rayon,” they think of summery dresses or slippery nightgowns.  But in this blog hop, we were tasked to come up with other ways to use the fabric.  As fall was approaching and while I was looking through the fashion blogs, the maker light bulb went off when I started to see bomber jackets.  The 90s fashion trends are back (some I’d rather not relive…) and I thought a fun bomber made of rayon would be perfect to ride the satin and army green trends showing up on the streets right now.  Check out my Pinterest Board here to see my inspirations.

I’ve had my eye on the Cookie Blouson by Waffle Patterns for awhile now.  The design is a great feminine take  on a track jacket with the gathered sleeves and gathered body around the yokes.  Even though it’s a track style versus a bomber, I knew this pattern would give me the same feel…The only difference  is the collar.

I was in-between sizes per the measurements, but after reviewing the finished measurements, I decided to size down for a more fitted look.  With the fabric and bold pattern, this jacket would look great in heels as much as in sneakers 🙂 I wanted to make sure it would be a great jacket to wear indoors and out.

For the right statement fabric, I chose Floret Sunkissed from the Blush fabrics collection by Dana Willard as the shell.  For the interior, I used Hex Rose from the same collection, but in quilting cotton.  AGF Solid Knit in Sahara Sun was a great complementary color to really make this jacket pop and add some fun!

While working through the jacket, it was very important to reinforce the high stress areas since rayon is so delicate.  I used Pellon 906F interfacing around all the metal zippers (due to their extra weight) and even on the exterior yokes to provide some additional structure as well.

These zipper pockets are such a great detail.  However, the pattern called for a 5″ zipper opening.  After taking 1/2″ allowance away for the zipper head and stopper, I would be left with a 4.5″ opening….which is pretty tight (and I have small hands!)  I increased the opening to 6″ for a little more room to maneuver because I HAVE to use pockets if they are there.

With the track collar, I wanted it to stand up when zipped, but it also needed to handle the weight of the metal zipper.  So I doubled up the layers of the Solid Knit jersey.  Not only does the collar stand up (mission accomplished,) but it keeps my neck extra warm!

For the construction of this jacket, I used Polyester thread throughout for the strength.  A jacket is going to experience a good bit of wear and this thread allows for a bit more give and movement.  However, I used matching Sulky Rayon Thread for all of the top-stitching to match the sheen of the fabric.  I’m pretty hooked on the look of rayon thread….it’s so beautiful!

The Cookie Blouson pattern itself, was not too difficult.  Even with the zippers, I would rate this as advanced beginner.  But then came the lining…   It was a free add-on via a few blog posts by Waffle Patterns.  The pattern designer’s first language is not English, so the translations were a bit rough.   I was pretty frustrated at some points, but made it work.  I would consider the lining at an intermediate level because you are essentially drafting your own pattern pieces.  If I would’ve known this beforehand, I probably would’ve skipped the pattern altogether because I needed a lining with a rayon shell.  But, of course, I love the final product 🙂


I’ve made a handful of Rayon garments, and have a few tips I’d like to share:

  • For accurate cuts, I cut on the floor for an even cutting surface…especially if you are pattern matching.  Any fabric hanging off the edge of a cutting table can pull and distort your cut.
  • Don’t be shy with fabric weights.  This points to the slippery and shifty nature of rayon.  You want an even and accurate cut.  Iron and smooth out your fabric with your fabric aligned and then set the weights down.
  • A small rotary cutter is great to cut out patterns because scissors can cause movement and shifts in your fabric as you cut.  (This doesn’t matter as much if you aren’t pattern matching.)
  • I use ultra fine pins (with the blue heads, shown above) for construction.  The traditional quilting pins (with the yellow heads) are a bit larger and can cause pulls in the fabric.  With the slippery rayon, I also use a lot more pins that I would with cotton – probably twice as many to keep my fabrics aligned together.

Project Summary:

  • Exterior Shell Fabric:  Floret Sunkissed Rayon by Dana Willard for Art Gallery Fabrics
  • Lining Fabric: Hex Rose Quilting Cotton by Dana Willard for Art Gallery Fabrics
  • Accent Knit: Sahara Sun Solid Knit by Art Gallery Fabrics
  • Pattern:  Cookie Blouson by Waffle Patterns
  • Piecing Thread:  Gutermann Polyester
  • Top-Stitching Thread: Sulky Rayon 50 wt
  • Zippers: YKK Brass separating and jeans zippers in Camel by Wawak Sewing Supplies

Don’t forget to stick around all this AND next week for the rest of the #AGFrayonbloghop.  I’m so excited to check out all of the projects alongside you!

Monday, October 9 – Cristy @loveyousew_ (you are here!)

Tuesday, October 10– Nicole @modernhandcraft

Wednesday, October 11 – Sarah @sariditty

Thursday, October 12 – Jesy @needle_ink_and_thread

Friday, October 13 – Danyella @madesewmodern

Monday, October 16 – Nichole @wildboho

Tuesday, October 17 – Cynthia @cnytz51

Wednesday, October 18 – Vicki @orchidowlquilts

Thursday, October 19 – Amanda @pinkmandarinhandmade

Friday, October 20 – Jenn @jennrossotti


I hope you have found some inspiration or just enjoy some fabric eye-candy!  Do you have a rayon project lined up or on the wishlist?  I’d love to hear what you would make.


Happy Sewing Friends!

Cristy


***This post was sponsored by Art Gallery Fabrics.  While the fabric was provided for the post, the ideas, execution and post are all my own work and words.  Please also note there are affiliate links which help run this blog.  Thanks for your support!

Feliz Pattern Blog Tour

I love Straightgrain patterns.  That’s it…’just gonna put it out there.  You know I can’t stop making girls’ dresses and An’s designs are always at the top of my list.  She creates children’s garment patterns with beautiful clean lines and they are just so chic!  You can read about my previous Nova dress here

Straightgrain patterns always includes several variations to give you a number of different styles and the Feliz is not different. You can choose from a PDF or paper pattern from her online store here.  With the pattern, you can make a tunic or dress with 6 different sleeve options, two different back closures, and two different skirts.  It’s great to get so much versatility out of one pattern and I think An’s are a great value for all which she provides.

Of course, I picked the dress version. I make all my dresses as gifts (since I’m a boy mom) and dresses count as a full outfit 🙂 It makes me happy to work on a tiny garments (purely because of the cute factor) and my nieces are happy to get some custom clothes.

Did you see the flutter sleeve options?  SO cute!!! The soft waves are so feminine and really soften out this silhouette. It was hard for me to choose between the narrow and wide options. But I settled on the wider for just a little more arm coverage.

With the back of the Feliz dress, I knew I wanted to make a button closure. But instead of buttons, I used KAM snaps. I have quite a collection in my stash and they make for very quick dressing and undressing.


I happened to have Cotton and Steel’s yarn dyed gingham in Sky and was able to make this dress with just one yard of it!  There wasn’t enough left for lining, but Kona Snow worked in perfectly.  I’m so glad I saved the fabric from becoming a scarf (like I initially planned) because the Feliz is just the such a darling pattern and pairs well with this sweet fabric.

I think my model agrees! She would not take off this dress after our photo shoot.  Can you blame her at all?  I’m thinking I need some gingham love in my wardrobe soon…

The sizing is spot on with this pattern.  My model is a 3T for length, but is still pretty slim, so the 2T fit her well…and of course, I pre-washed all the fabric so there is no surprise shrinkage.  The dress hits her at just the right spot on the knees and is the perfect for some playtime!


I like the lift on the sleeves with a woven fabric.  It adds a little more drama 🙂  But if you used something lighter, like a double-gauze, it would be more draped.

I really love the versatility of this pattern and can’t wait to make a few more!  What combo would you make?

If you need even more Feliz eye-candy, please check out #felizpattern on social media and visit all the bloggers part of the blog tour:

Happy Sewing Friends!
Cristy

FREE Woodland Mushroom Quilt Block :: Fabric.com Fall Block Party

It’s Week #2 of the 9-week Fabric.com Fall Block Party and I’m ready to take you into the deep woods…  I just love this season with the air getting crisp, the foliage changing colors, and the weather is cool enough for a good long hike.  It’s so much fun to explore the wilderness, especially with my young boys.  We find so many little critters, unique leaves, and lots of different plant-life.  Our own discoveries made me think of the quintessential Woodland Mushroom.

For this design, I wanted a fun scrappy mushroom to go along with all the different colors and textures we see out in nature.  The 12.5″ x 12.5″ (unfinished) block is based mainly on half-square triangles and you will love how just a little rearraging can give your block a new look.

For the Woodland Mushroom, I stuck to the Kona party theme found here, but prints are my key to scrappiness 🙂  These are the fabrics I selected (from top to bottom):

As I was making the block I was thinking of all the ways I could the mushroom as decor….because my house need some help!  I thought of all the fabric signs we see in big box stores with witty sayings all bound together with living picture frames (just a piece of wood at the top and bottom.)  Then it dawned on me to use pant hangers!  I know a lot of you already use them to display blocks, but I thought I would turn it up a notch and refinish a few.

I found these two pant hangers for a total of $0.60 at my local thrift shops.  Both were blonde wood with the same nickel finish on the wire.  With a little fine sandpaper, I took the shine off the entire hanger and used materials I had around the house to refinish it.  A watered down brown acrylic craft paint gave me the “stain” and I happened to have this gorgeous hammered bronze spray paint leftover from another forgotten DIY project.  A few layers of clear coat topped it off to protect the fabric against any paint which may rub off.

The hanger makeover really makes the piece more modern with an industrial rustic feel.  It works well with this fall palette and displays my Woodland Mushroom mini perfectly!  It will be easy to change out mini’s over time and through the different seasons.

Here is the mini displayed with some upcycled “ribbon” cut from a burlap coffee bag and leftover lace from my sister’s wedding.  It is displayed on a mantle with a wreath hanger and helps to bring the random decor I had around the house together.

And if mantle or table-scapes aren’t your thing, the pant hanger make it easy to display a mini quilt on your front door.  I think quilts should be the “new” wreaths, don’t you think?  We should get on that movement!

I hope you enjoyed our walk in the woods!  To make your own Woodland Mushroom block, visit Fabric.com’s blog here.


Don’t forget to keep sewing along and follow the rest of these amazing designers and their Fall #fabricdotcomblock party patterns!

Sept 12 – Fall Geese

Kristi Schroeder – Initial K Studio – @initialkstudio

Sept 19 – Woodland Mushroom

Cristy Stuhldreher – Love You Sew – @loveyousew_ (You are here!)

Sept 26 – Mod Tartan

Jenn Rossotti – Ginger Peach Studio – @jennrossotti

Oct 3 – Time Lapse

Christopher Thompson – The Tattooed Quilter – @thetattooedquilter

Oct 10 – Double Windmill

Haley Anderson – Happiness in the Making – @happinessinthemaking

Oct 17 – Antlers

Lisa Hofmann-Maurer – Sew What You Love – @sewwhatyoulove

Oct 24 – Gather

Elise Baek – Elise & Emelie – @eliseandemelie

Oct 31 – Forest Floor

Sarah Thomas – Sariditty -@sariditty

Nov 7 – Flutter By

Nicole Young – Lillyella – @lillyellasworld


Happy Foraging!

Cristy


***This post was sponsored by Fabric.com and there are affiliate links.  The block design, instructions and post are my own original work with my own opinions.