Pattern Review: Aida Top in Verona Voile

This post was originally published August 13, 2019 for the Imagine Gnats Blog.  Since the shop closed in early 2020, I have republished my contributors posts (with permission) to this blog.  I have included some additional thoughts and pictures after some real-life wear and tear.  Enjoy!

In Ohio, we are in the dog days of summer, and this hazy heat is beating down on all of us. It’s at the point of just scorching outside or freezing inside almost all buildings with the air conditioning blasting to compensate for the weather.

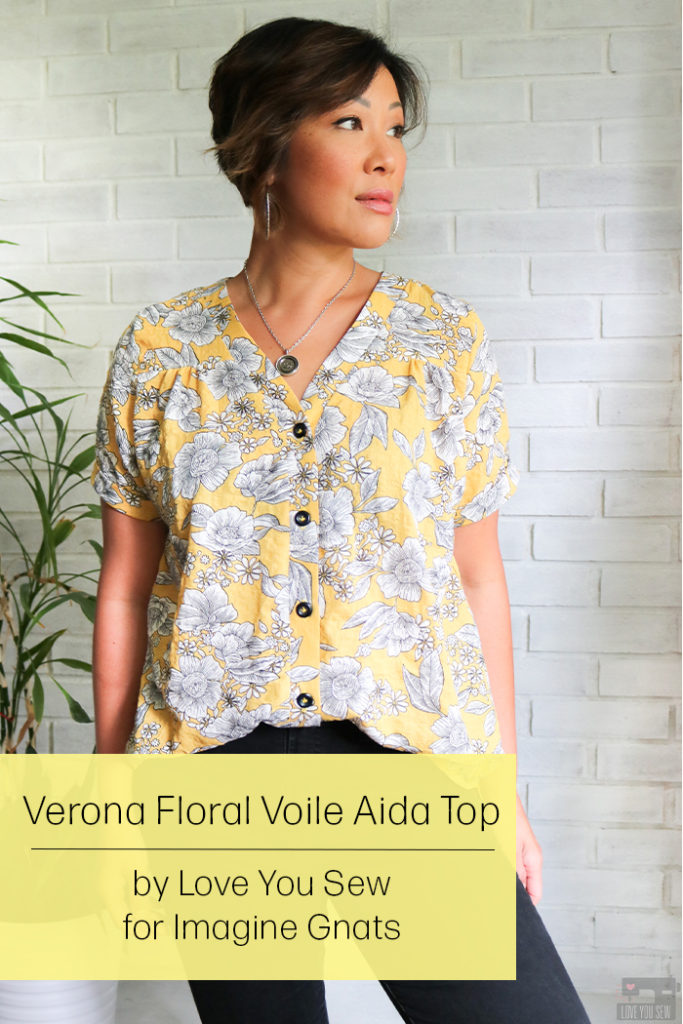
So, I’ve been on the hunt for a lightweight woven fabric and a shirt pattern with some nice ease for a loose and breezy top (enter my voile Aida top). I was so happy to see this Verona Voile (aff link) and had to have it!  Then all I could think about was pairing it with the Aida Top by Sew Liberated.

Fabric

When I first saw the Verona, I loved that it was voile. I love the lightweight characteristics of this type of fabric, but was curious to the fact that it’s a 50/50 of cotton and rayon. Well, now I can say that it’s a great combination because it allows more drape which makes for a great summer fabric.

If you look closely, you’ll be able to see the great puckered texture the Verona Floral Voile has after washing. It’s not like a seer-sucker with the same repeat waffle texture, but it’s like striped puckering which has been woven in. It’s absolutely gorgeous, and I became a quick fan…since I don’t have to worry about wrinkles anymore!

There are two colors of this Verona Voile Floral – navy blue and yellow. Since I just finished a few blue chambray projects, I wanted to add a little color to my wardrobe with the yellow.

It’s not a color I wear a lot, but I figured I’d go big with the yellow and large flowers since it WAS going to be a summer shirt after all 😉

Pattern

The Aida Top is a new addition to the Imagine Gnats pattern library, and I was pretty stoked to sew it up. It had everything I was looking for: lots of ease, shirt-tail hem, v-neck, button placket, AND written for lightweight woven fabrics.

I was mostly drawn to the v-neck button placket because its a popular style I’ve been seeing with strappy tanks lately.

Based on my measurements, I am an 8 in the bust and also in the waist. With my hips (that don’t lie), I clock at a size 12. With all the ease in this top and after reading some other reviews, I felt pretty comfortable sewing a straight size 8.

You can see in the profile shot of the shirt that the voile Aida top still clears my backside with room to spare! Woohoo!

There are two views of the Aida with either a flat-front or with gathering, and I chose the latter. I like the extra shaping and added texture it has. I also sewed the shirt-tail hem as written, but I think a cropped boxy version would also be great in this pattern.

My arms are on the heavier side for a size 8. RTW woven shirts are generally tight around my biceps and were always tough for me to find since I didn’t want to wear something that was then bigger everywhere else.

My arms fit into the sleeves as drafted, but I wanted a little more ease to be consistent with the look of the top. I reduced the seam allowance by 1/4″ for a little extra breathing room. I also added a 1″ cuff on each sleeve for an extra detail and visual interest.
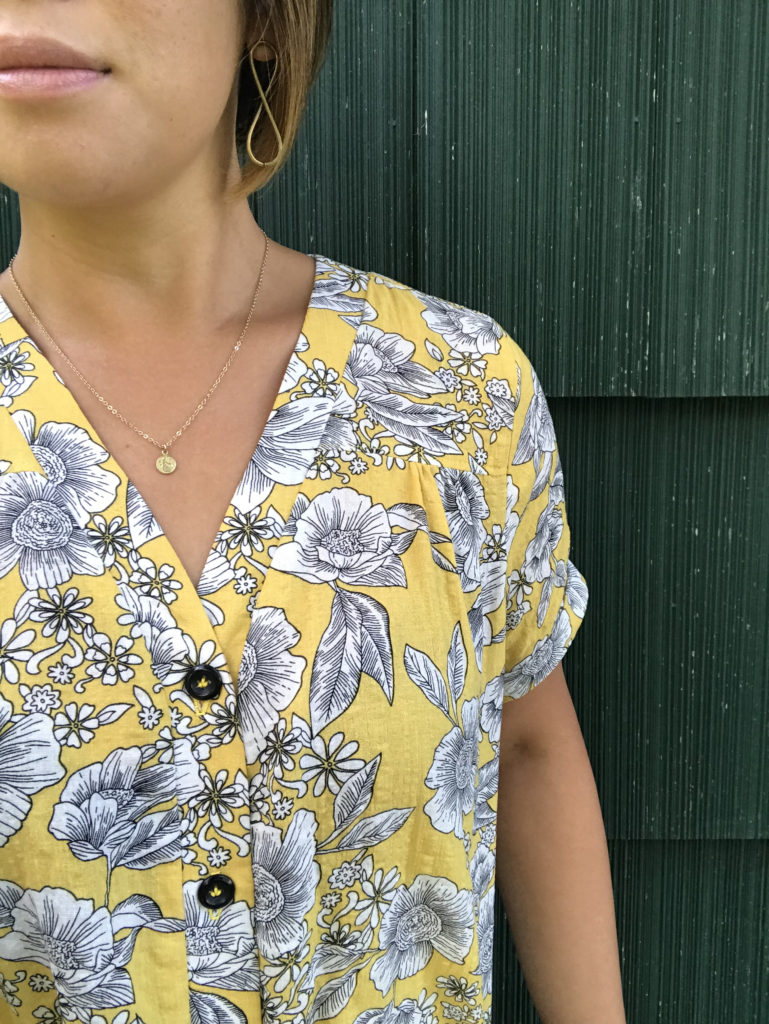
Since I love to use buttons from my MIL’s old stash, I found 5 black ones which were pretty close matches. The pattern calls for 7, but I thought 5 was enough.

Even though I didn’t use the recommended 7, I do wish there was a button template just to know where to place the top button. I had to do a good bit of trial and error to figure out where it should go while keeping a flat neckline, but everything did work out!

The Aida Top in this Verona rayon/cotton voile is just a dream shirt for the summer. I wore it during a heat wave and was so impressed with the airiness and soft feel….making the heat (slightly) more bearable 🙂

I hope you grab some of this fabric and make a voile Aida top of your own soon!!!
{Edited May 2, 2020}

Since making this top in August, I’ve worn it at least another dozen times and have yet to iron it –so the textured voile is definitely a winner!  The fabric washes well and the texture is still perfectly waffled.  I just broke it out for the first time this year since the temperatures jumped about 20*F.  But with Covid-19 quarantine and all the additional baking happening… I need some coverage while still being  breathable, and this is it.  The  Aida is still a winner in a my book!  Below are updated links if you would like to make your own:


Happy Sewing!

Cristy


This post may contain affiliate links.  You can read about my disclosures here.

Pattern Review || Fibre Mood Holly Dress

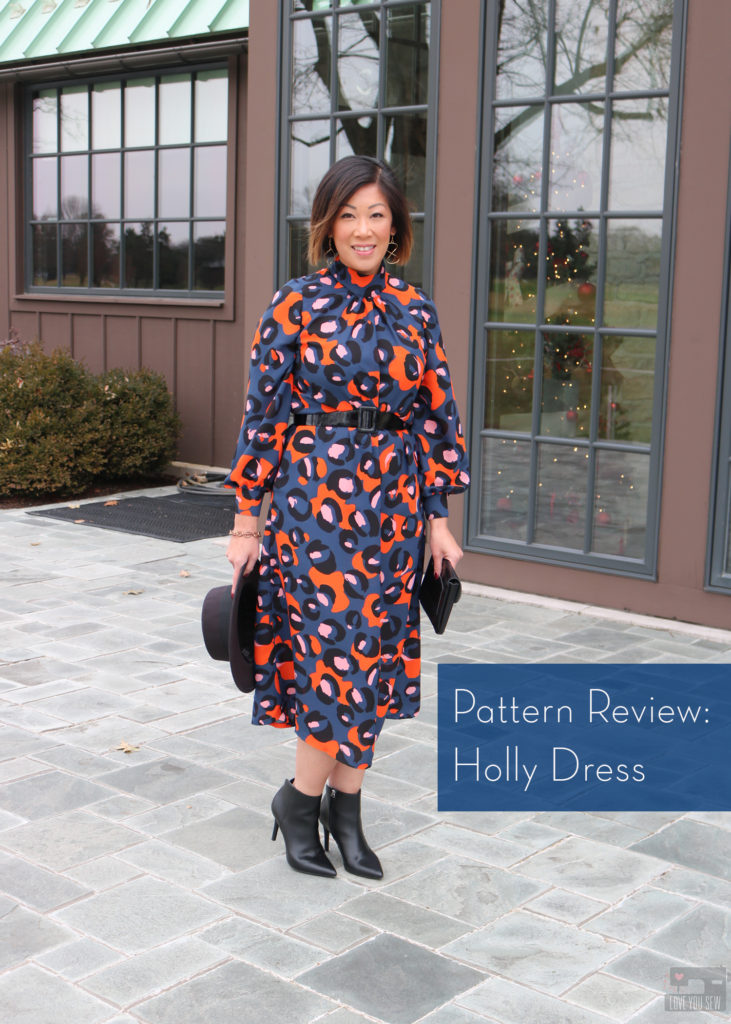
Things got pretty busy around the holidays, so it’s about time I get back to the blog.  I can’t believe it’s March already and I’m just getting around to reviewing the Fibre Mood Holly Dress I made back in November!  We are in the midst of Covid-19 self-quarantine and blogging a bit is helping me deal with the current environment along with feeling some kind of accomplishment for the day.  I hope this post brings some distraction to all of you at this unbelievable time in our world.

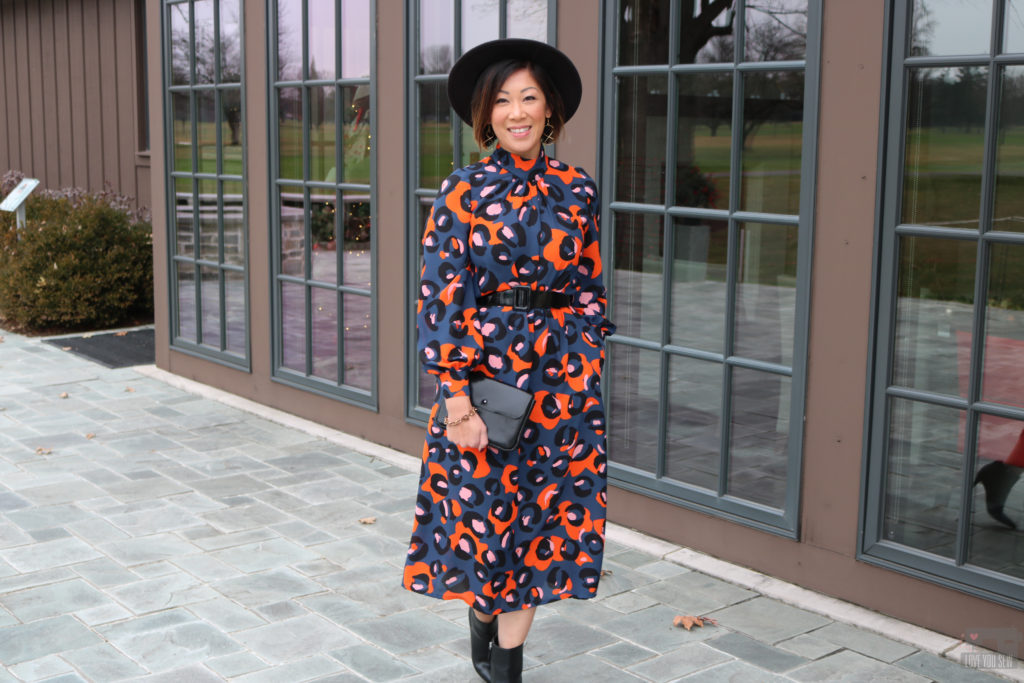
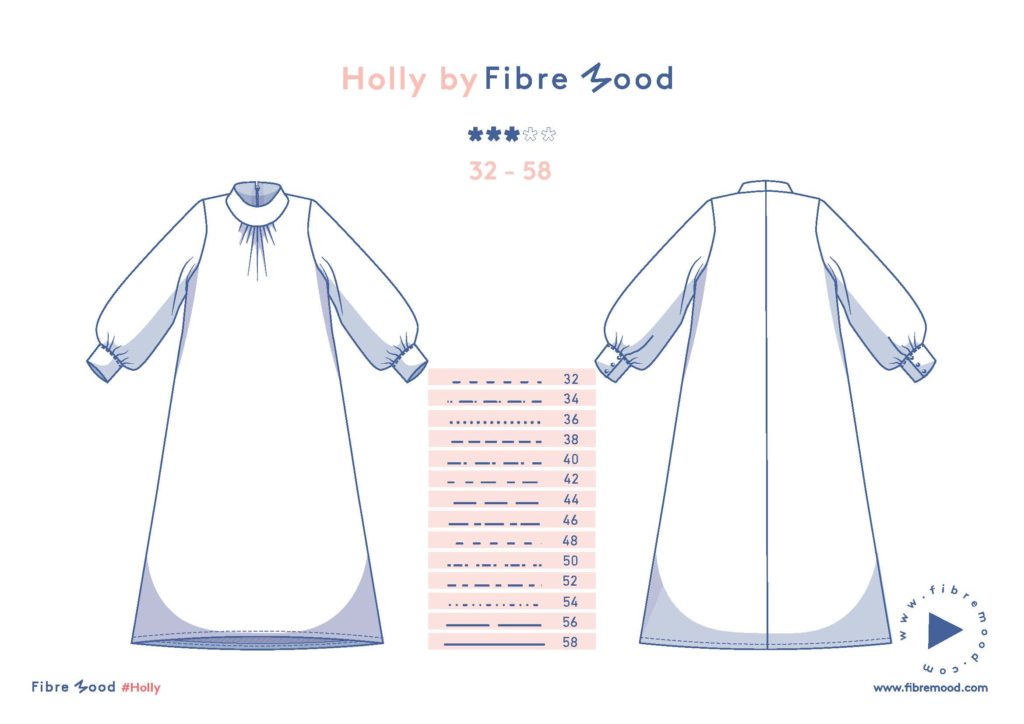
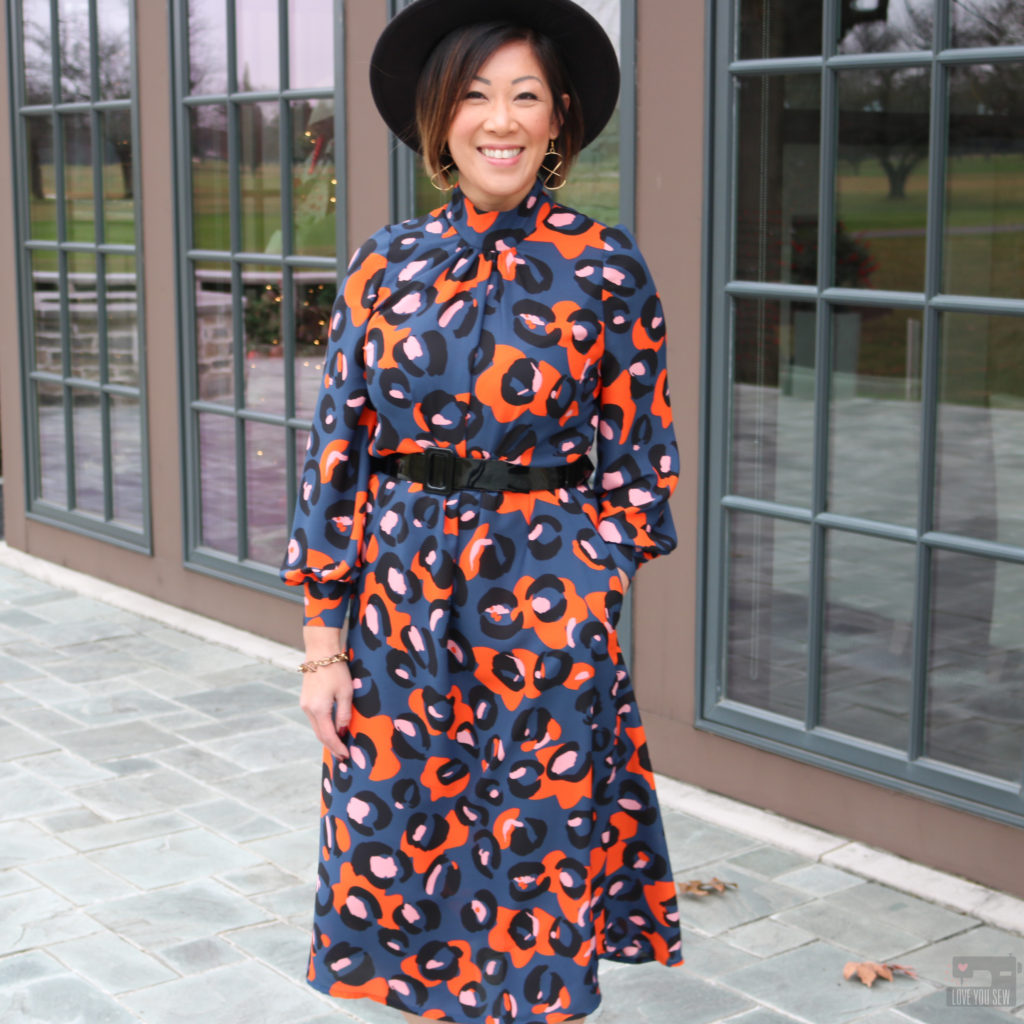
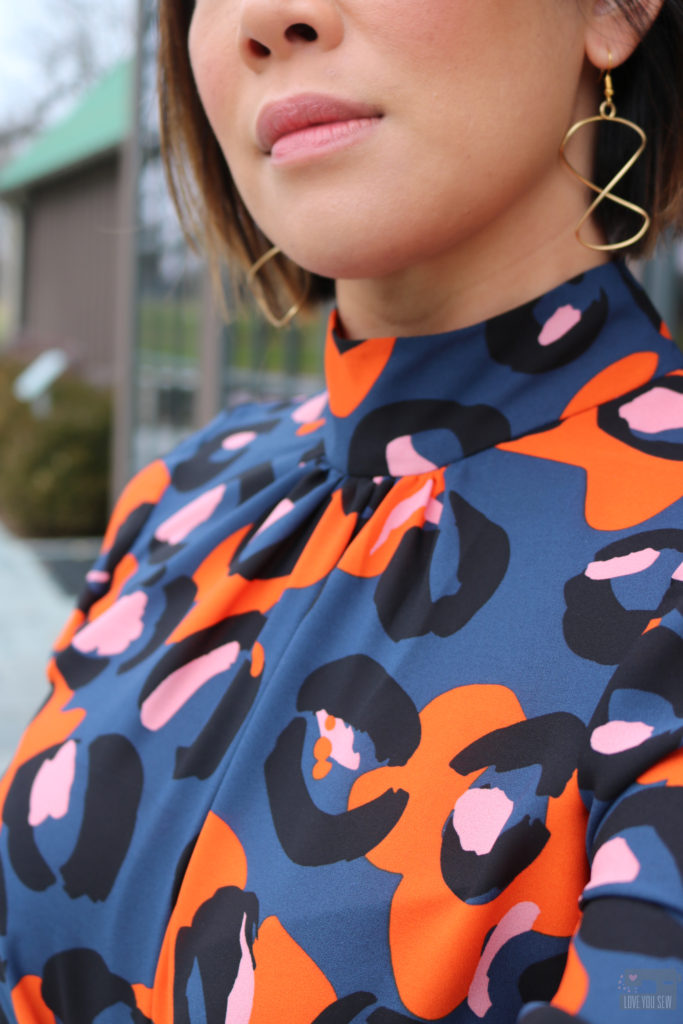
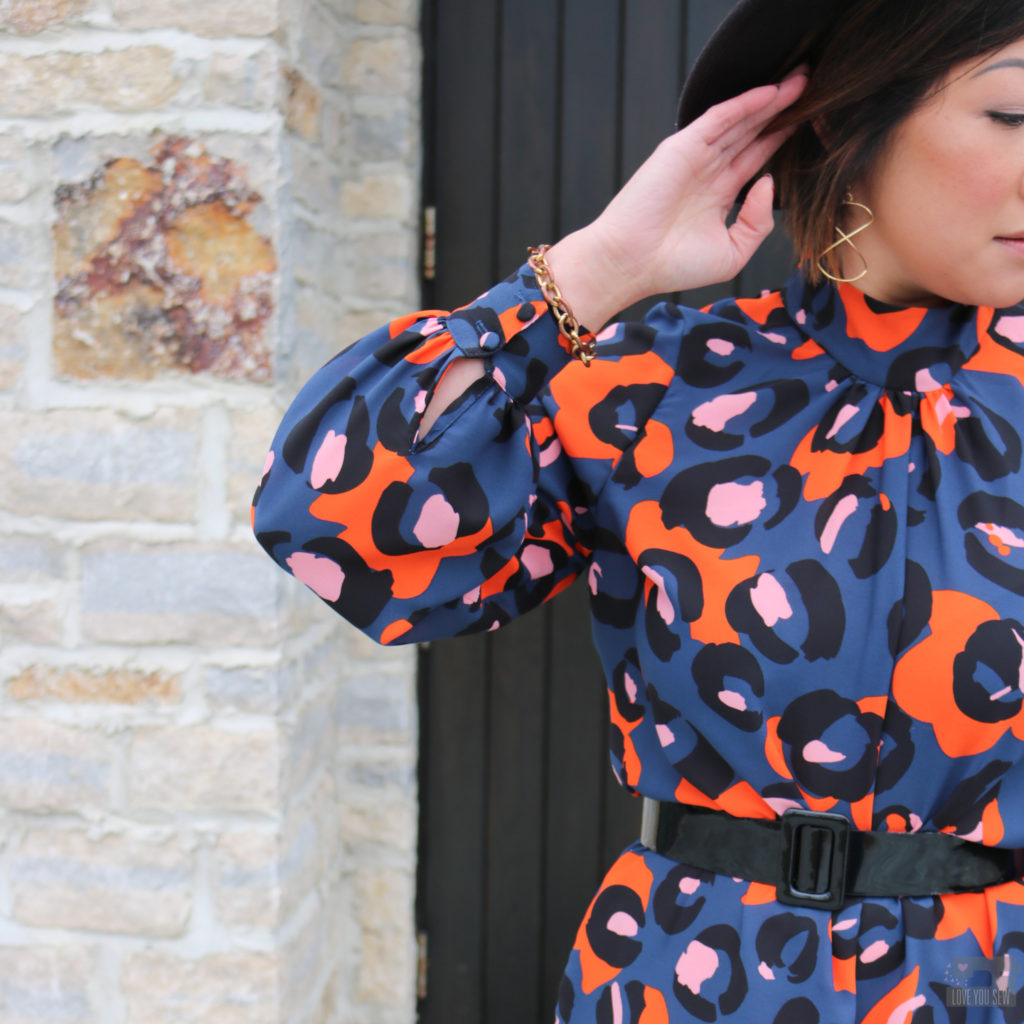
With the 2019 fashion trends bringing “prairie” style along with bold statement sleeves, I was on the hunt for a pattern that was still modern and not full “Laura Ingalls Wilder.”  Then I happen to see a version of the Fibre Mood Holly Dress on Instagram and knew it was for me!  I loved the clean high collar, full sleeves with button placket and the perfect midi length!

Pattern

I had never made a Fibre Mood pattern before.  The company is a European based sewing magazine (available in several different languages) which also sells their digital patterns a la cart here.  When I purchased this pattern in November of 2019, there are a few things to note about the pattern:

  • It  was available only in A4 paper sizing
  • You had to add in your own seam allowances (SA)….to every single pattern piece.  Yikes!  I’m not used to doing that, since I’m accustomed to US patterns which includes the SA already.  But, I still wanted to make the dress badly and was willing to take the extra time
  • Since purchasing this pattern, Fibre Mood has started to add SA to their new pattern launches and has made their digital patterns available in US Letter and AO (copy shop) formats.  This pertains to only the new patterns being released in new magazines, but they might go back to old patterns.  I’m crossing my fingers!

The nice thing about a pattern without SA, is that you can tissue-fit it without having to do all of the math (subtracting the seam allowances) to your body.  The down-side is this process is VERY time intensive…even with the double pencil trick!

Fabric

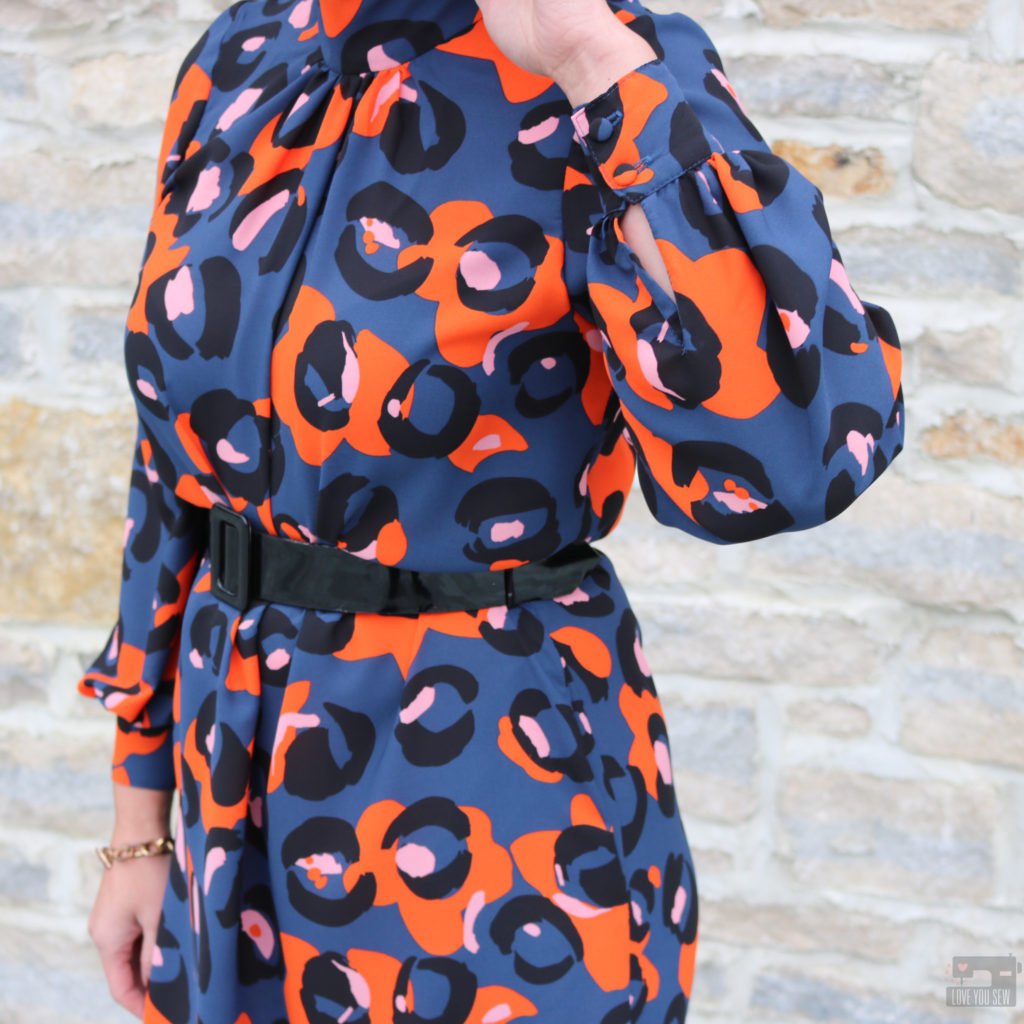
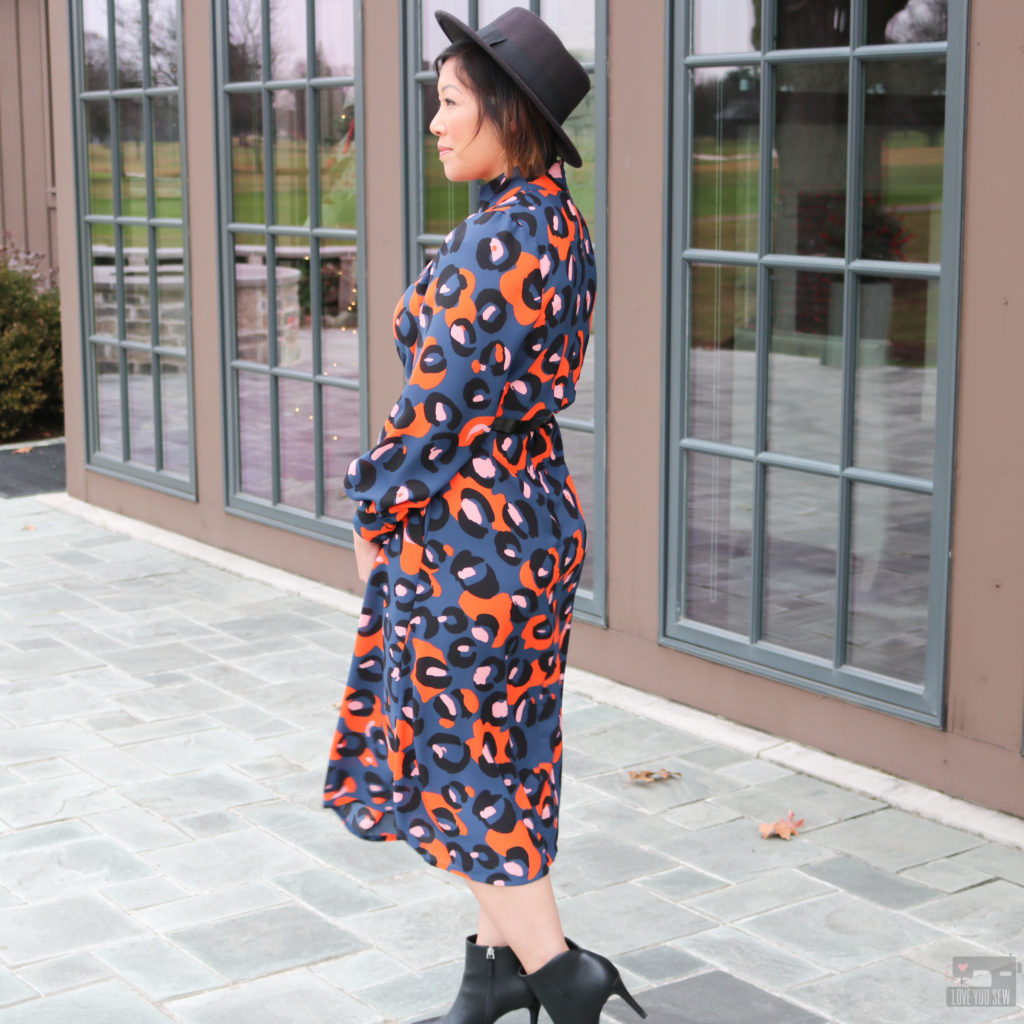
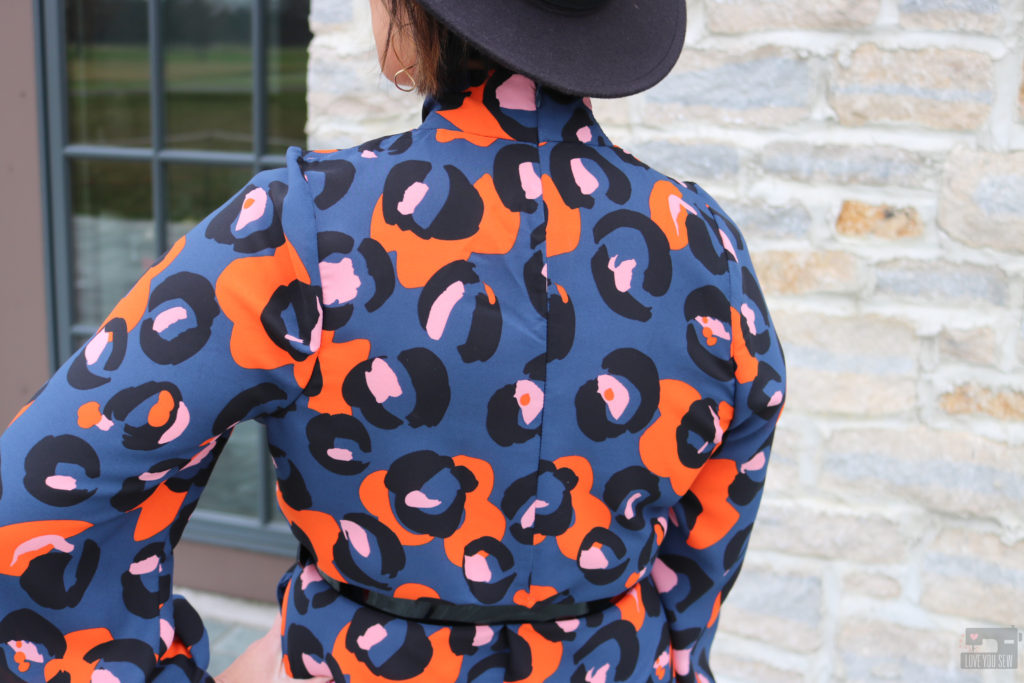
I fell in love with this Telio polyester crepe over the summer with leopard also making its resurgence as the hot print of the moment.  Since everyone and their mother is wearing animal print, I wanted to enjoy the trend but be a little different in this bold orange and blue combo.  I purchased a few yards with no plan in mind until I found the Holly Dress.  I paired this fabric with the pattern to really make the dress more modern to balance to the high neck and more traditional ballon sleeves.

The fabric is lightweight with fluid drape and needed to be cut with care due to it’s shiftiness.  I did not cut on the fold and opted to cut everything out as one layer of fabric.  This crepe is also semi-sheer so you would need a lining, but I opted to just wear a slip underneath the dress afterwards.

Construction

I measured between a 38 and a 40, but opted for the 40 since I needed the clearance over my hips.  Although I made a straight 40, next time I will widen the shoulder and possibly add a little length to the sleeve….which is surprising because I am 5’3″ and usually have to narrow the shoulders with American patterns.  Other modifications included:

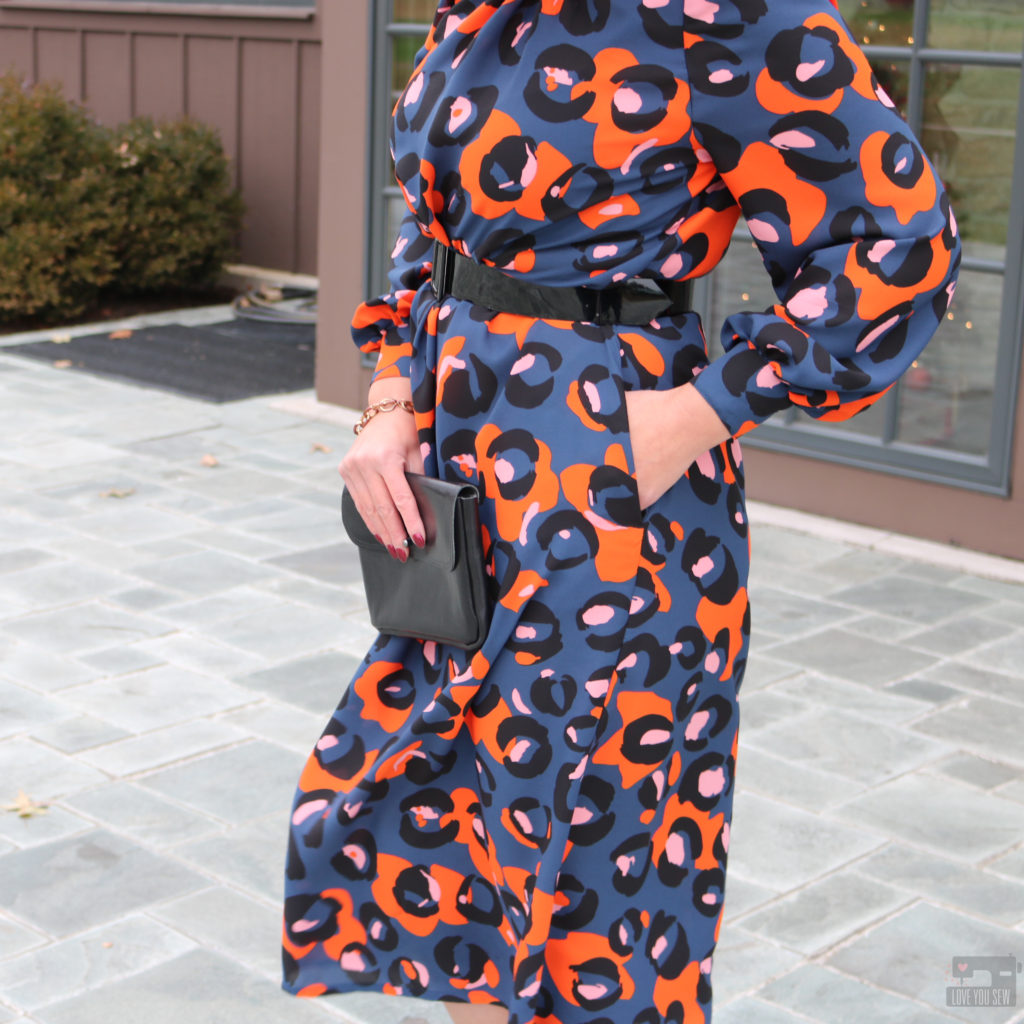
  • Omitted belt for a solid RTW one – I knew I wanted to tone down the pattern just a little bit to eventuate the waist and not be completely lost in the print.
  • Used basting stitches to help set in the sleeve (they were not part of the instructions.)
  • Swapped out the 24″ invisible zipper for a 16″ which I had on hand – There was still plenty of clearance to get the dress on and off

  • Hacked in pockets using the Derby Dress pattern pieces – This is my go-to pattern piece when I want in-seam pockets.

  • Narrowed the neckband by 1″ in total by taking out (2) 1/2″ wedges where the band meets the shoulder seams.

  • Made fabric covered buttons for an elevated look using a kit similar to this.

Final Thoughts

Overall, I really love this dress.  The fabric and pattern were a perfect pairing for my style and wardrobe needs.  I’ve worn it out for date nights with my husband and can’t wait to bring it into spring!  I would definitely make this pattern again, just with a slight widening of the shoulders and maybe a different length just for some variety.

What do you think about this dress style?  Are you into leopard print too?


Hugs and Stitches,

Cristy


This post may contain affiliates links.  You can read my full disclosure here.  I bought the fabric and pattern on my own.  But after making this garment, have since become a member of the Fibre Mood ambassador team.

Peppermint PJs Review

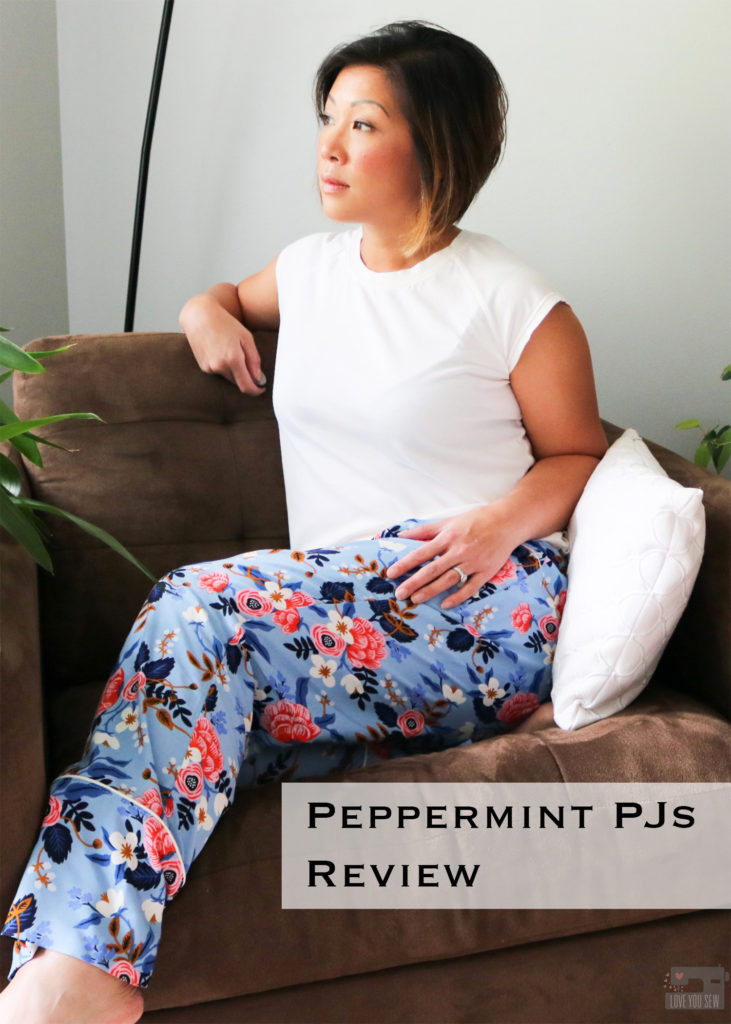
What great timing on the launch of these Peppermint Pajamas by Blank Slate Patterns. We’re heading into holiday season and I’ve always sewn family PJs for Christmas Eve. I’ve also always drafted my own (making different tweeks every year) and have yet to add pockets. Well, now I actually have a pattern (that fits!) and won’t have to spend as much time making my holiday pajamas!

Pattern

The Peppermint Pajamas comes with patterns for BOTH the woven pants and the knit top. This is like a 2-for-1 pattern with sizes ranging from XXS-3X (bust 30″ – 53″ and hips 33″ – 55″.)

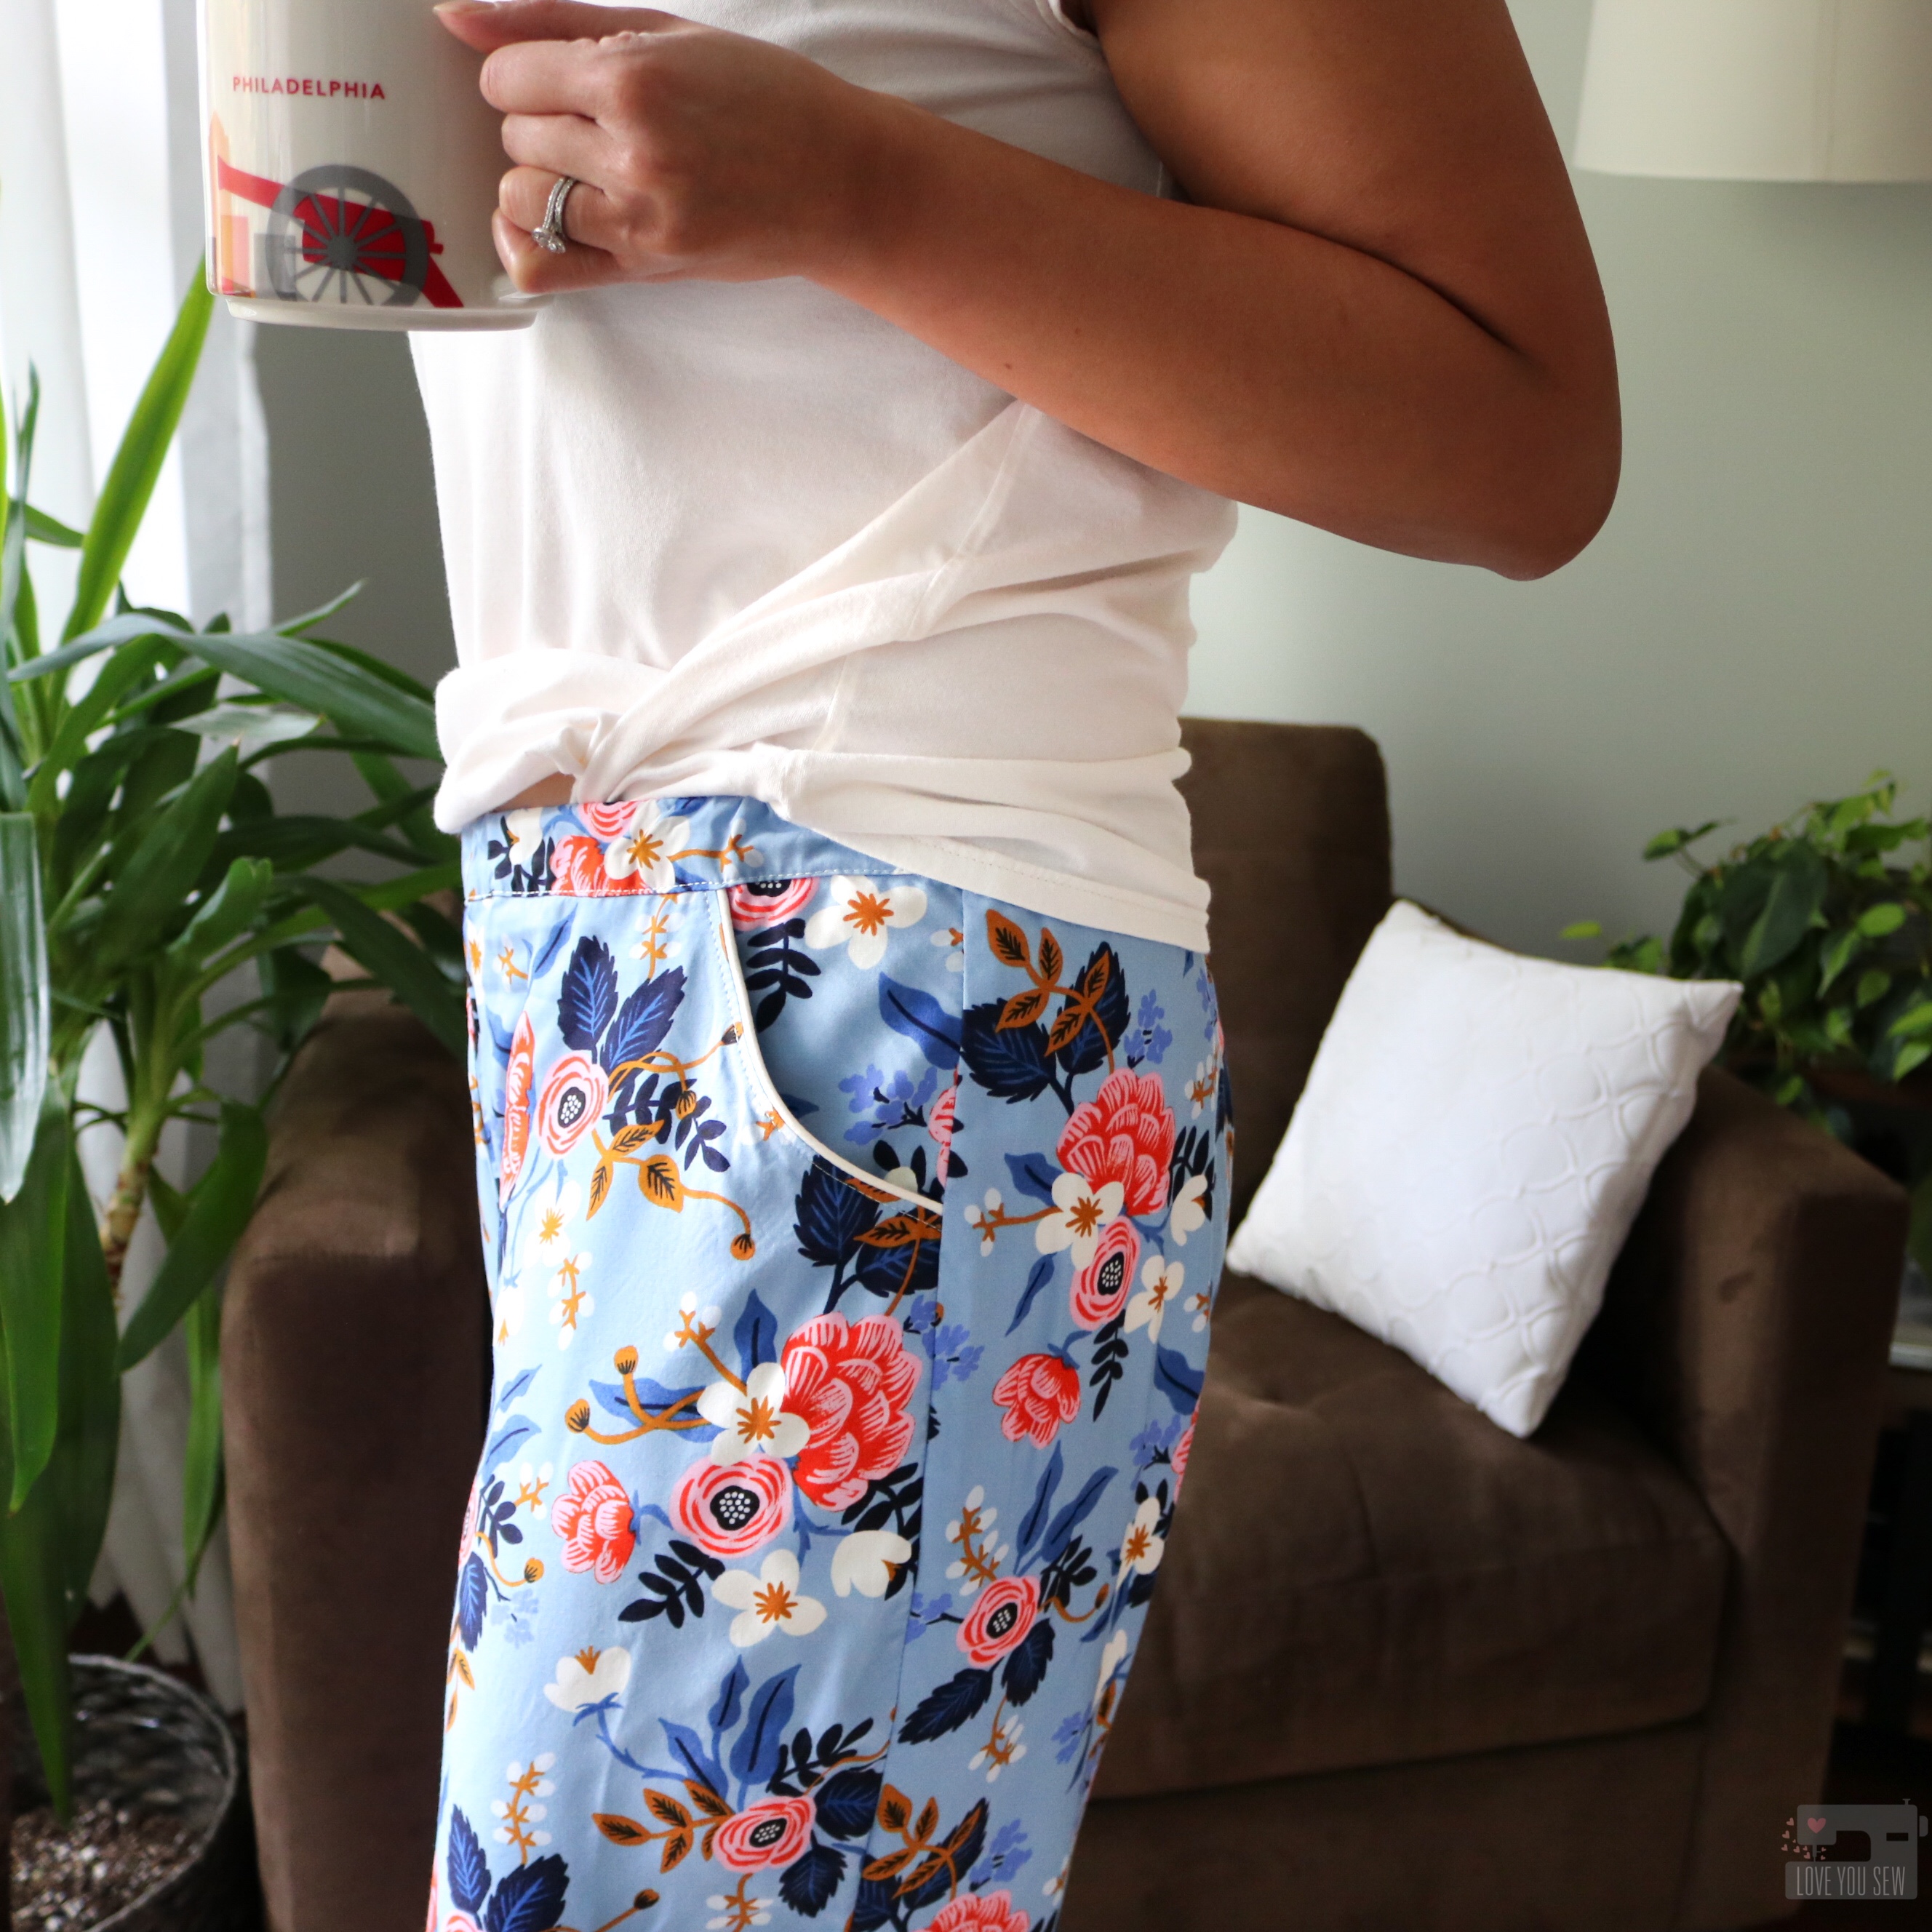
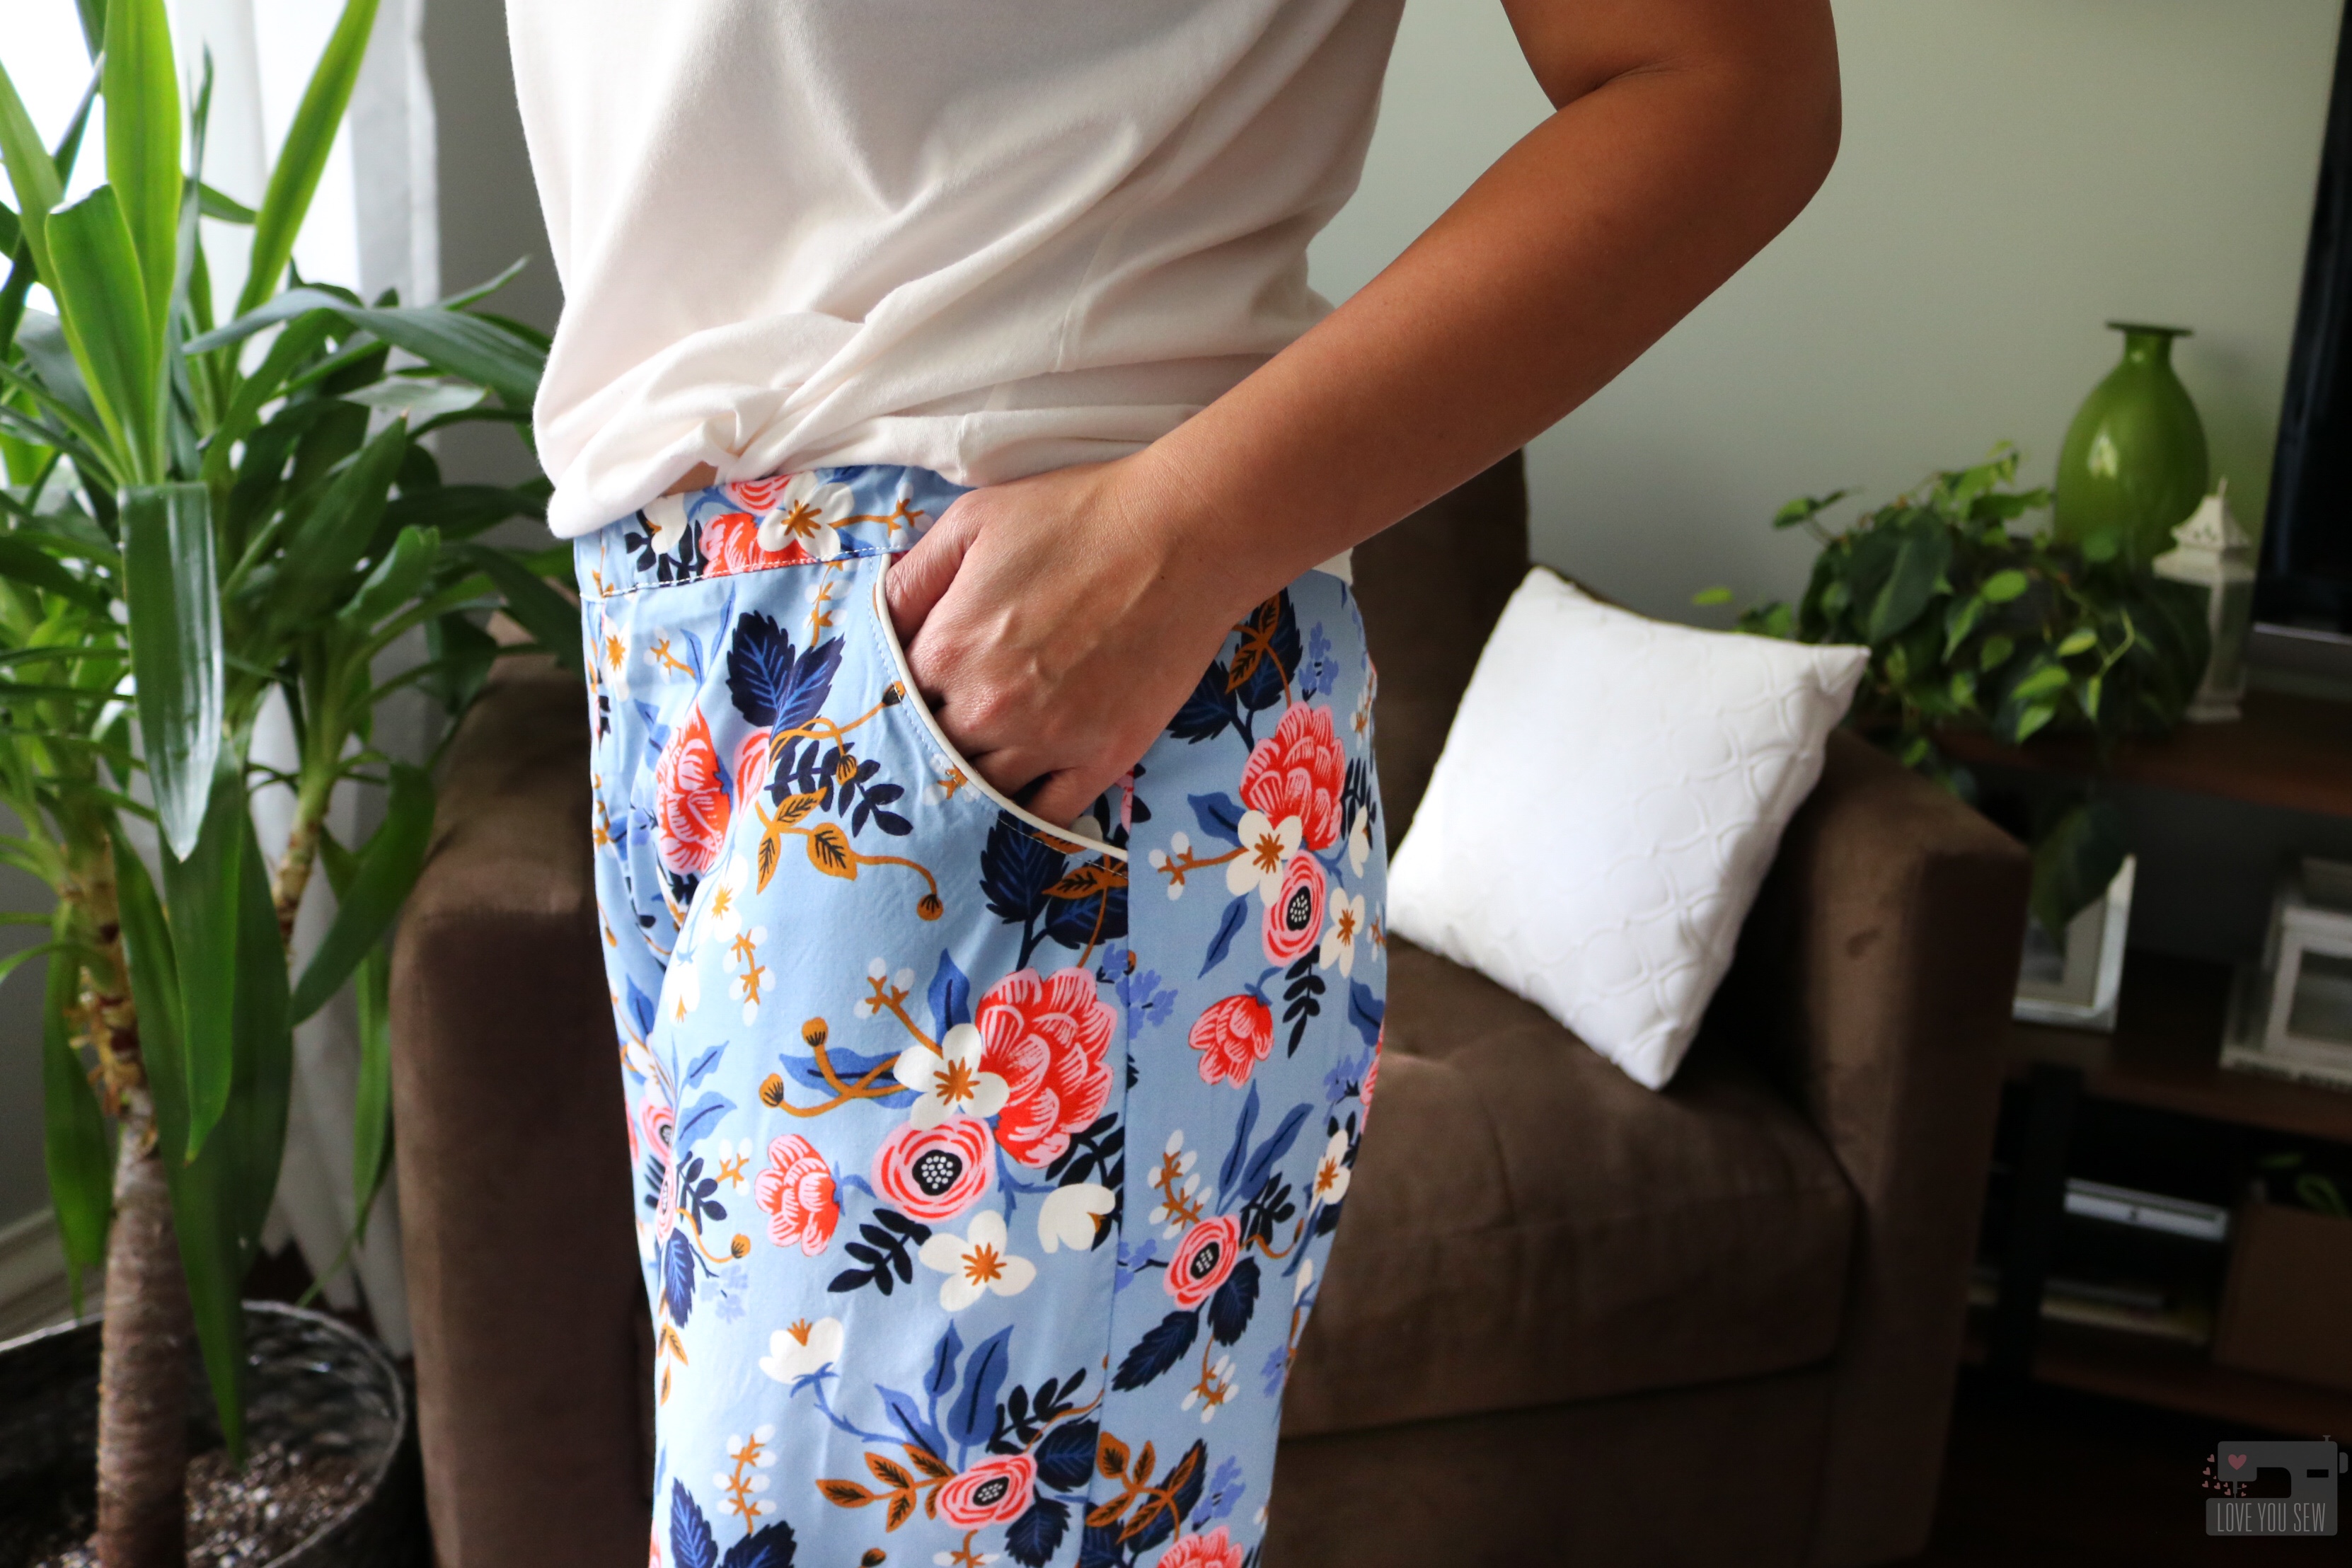
The pants feature an elastic waist, roomy slash pockets, and a separate cuff. The bottoms can be made into shorts, capris (by leaving off the cuffs) and full-length pants.

For the knit top, it features a crew-neck with raglan sleeves. You can make cap sleeves like I did, or use the long sleeve option. It has a nice relaxed slim fit for shaping, but not body-con tight.

Fabric

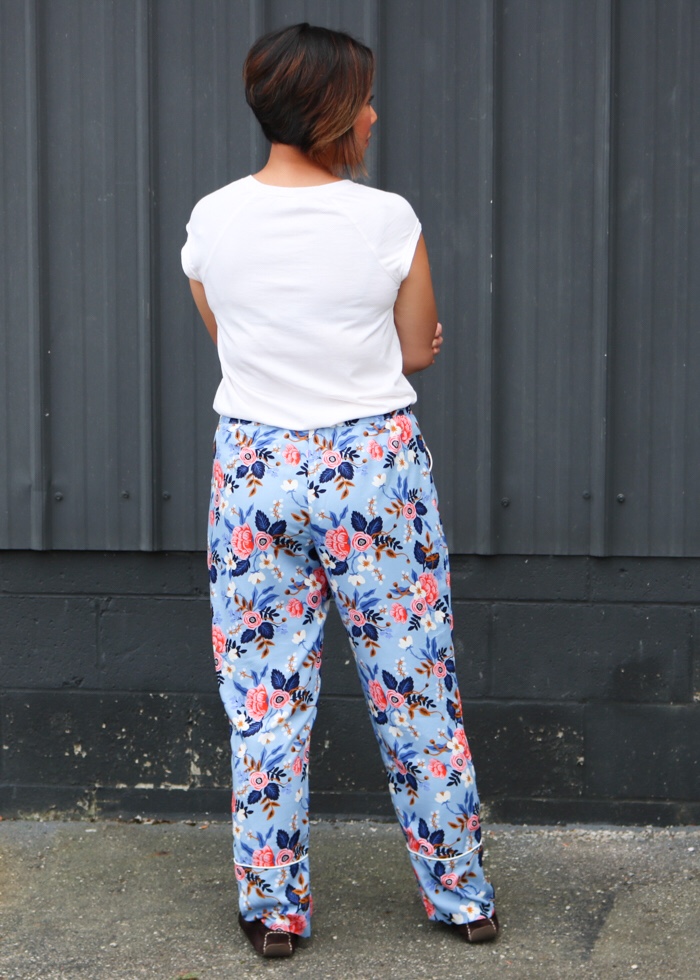
I knew I wanted something luxurious for my first pair of Peppermint pants. I am usually a boxers gal and wear all of my old flannel Xmas ones in colder months. I’ve been very conscious lately of my fabric consumption and was happy to find this Rifle Paper Co floral already in my stash. It is a Rayon Challis and feels incredible!. It has a soft hand, wonderful drape and feels silky to the touch. However, with these features, it can be very slippery to handle. With Rayon, I always use twice as many pins I usually do and I try not to pick a design which requires fabric matching – it is already hard enough to sew a new pattern!

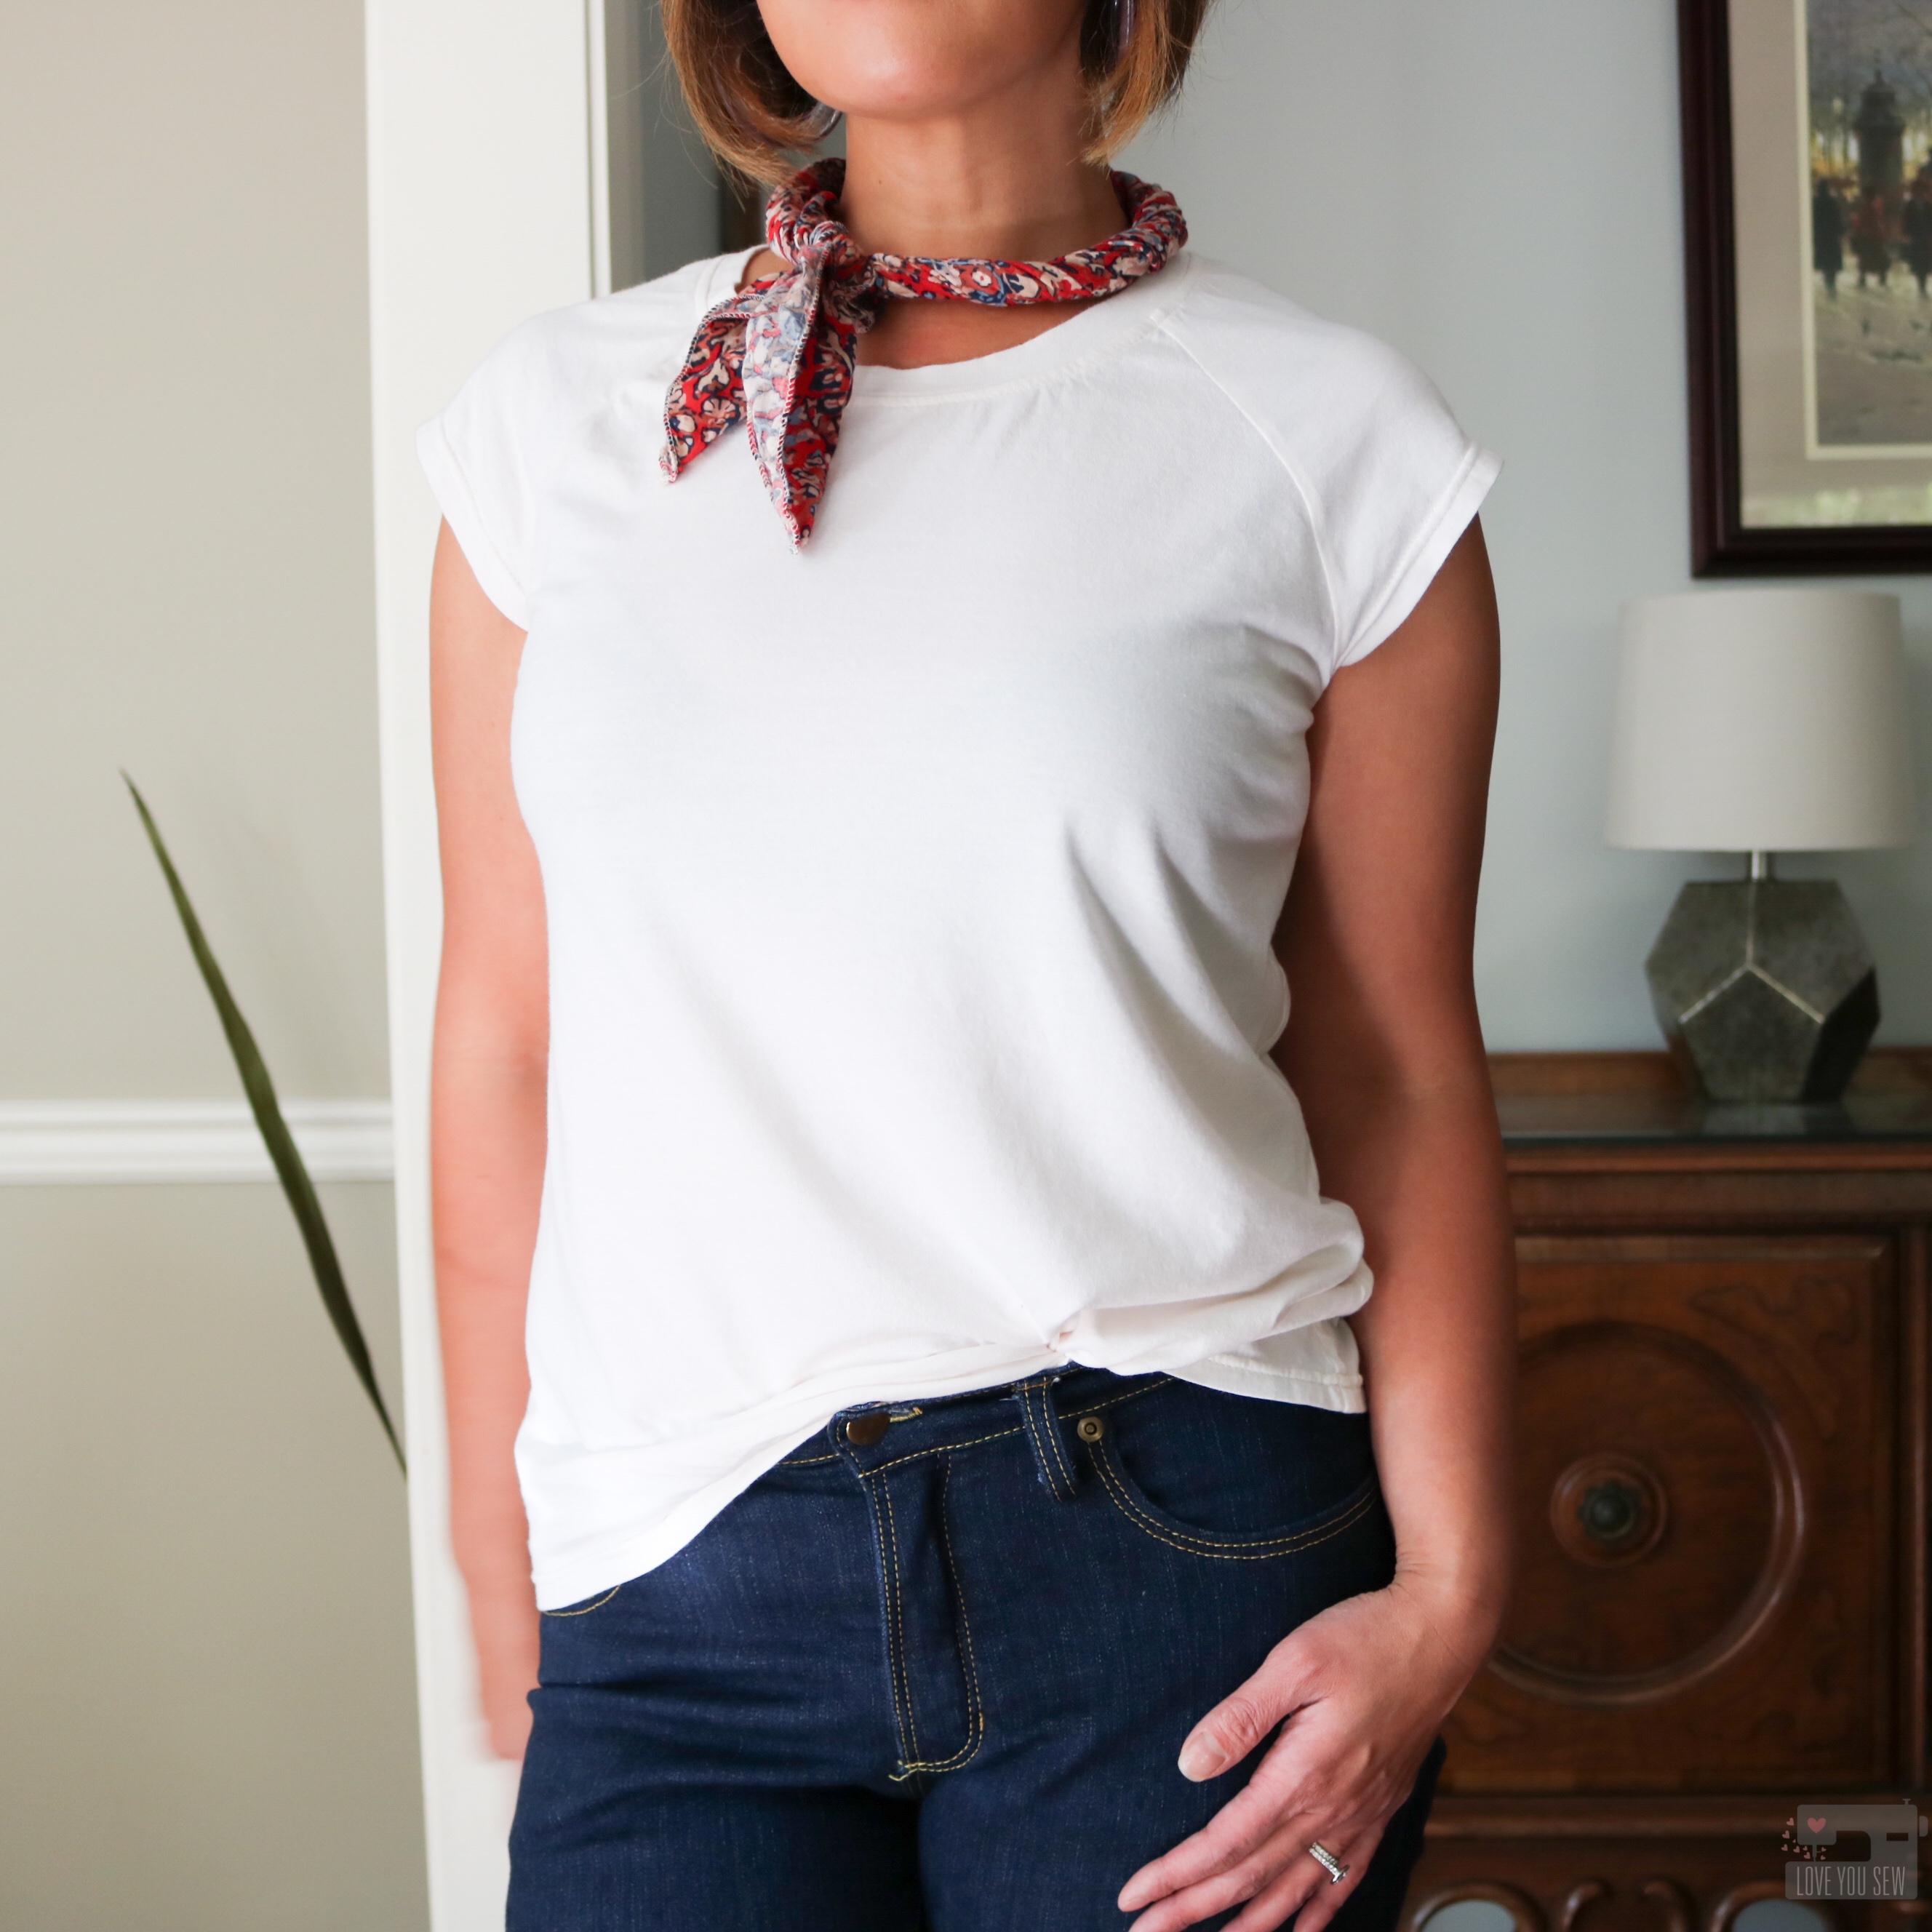
For the top, I dug into my stash again and found just enough of this Robert Kaufman Dana modal knit to make the cap-sleeve version. It’s a nice off-white cream color and so soft. The knit is a bit lighter and slightly sheer, but is perfect if you are looking for a tissue tee or for some great drape. I purchased this from Imagine Gnats, but this is a staple from RK and you can find it also at Fabric.com, here.

Modifications

With pants, I always measure all across the board. I’m a small in the waist and am in-between a medium and large in the hips. But since the Peppermint PJs are meant for lounging, I sized up to the large and then graded the waist to a medium since the elastic would pull the sides in more. I love the extra room – perfect for laying on the couch for family movie night! I also made my regular pants adjustments of extending the crotch by 1/2″ and deepening the seat by 3/8″.

Since I was working within my stash, I did not have a contrasting rayon that would work with my floral print. So I added piping where the cuffs attached to help keep the look cohesive. I also added piping at the pockets to balance out the look.

As you know, I’m also a shortie at 5’3″. I used the shorten/lengthen line to reduce the front and back legs by 2″. On the cuff, I took another 2″ off the total length because I didn’t want this delicate fabric to drag on the floor at all. So overall, I took 4″ off each leg.

With the top, I made a straight medium with the cap sleeve and didn’t make any additional adjustments. The length is great for a PJ tee and I think this is great pattern for any basic tee. It’s a great neutral to wear with jeans and a light jacket for fall!

Final thoughts

The Peppermint PJs were great basics to sew and I love the video on Melly Sews YouTube channel on making the waistband. It’s always great to get that double-check while sewing to ensure the correct construction! I think this is beginner-friendly and a great value with two patterns for the price of one! I hope you enjoy making this set as much as I did!!!

Hugs and Stitches,

Cristy


The pattern was gifted to me by Blank Slate Patterns, but I was not required to write a blog post. All thoughts and opinions are my own. Also, this post may contain affiliate links. You can read about all of my disclosures, here.

Derby Dress by Love You Sew

Derby Dress: Maxi Hack

Derby Dress Maxi Hack by Love You Sew

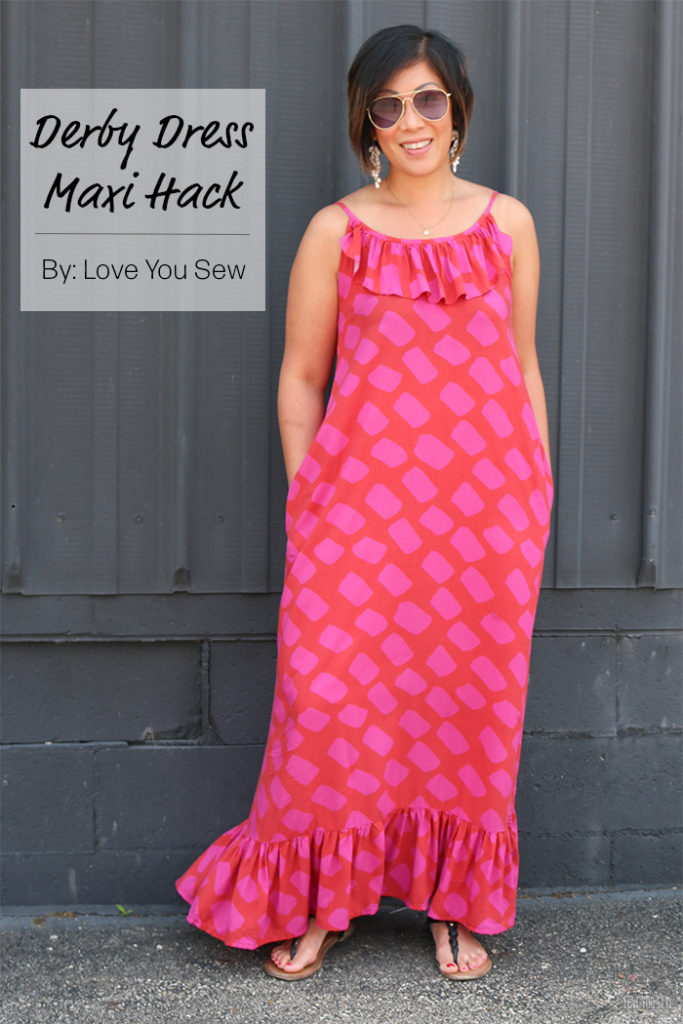
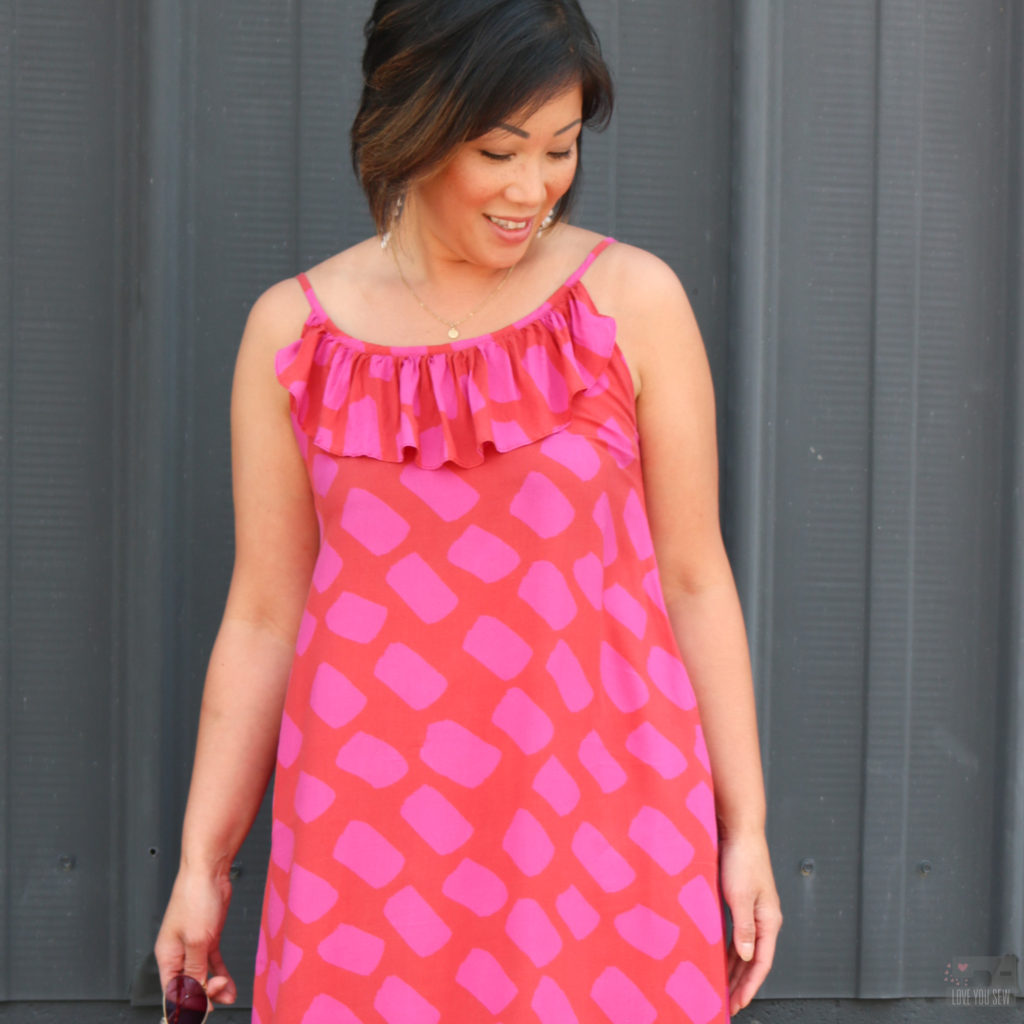
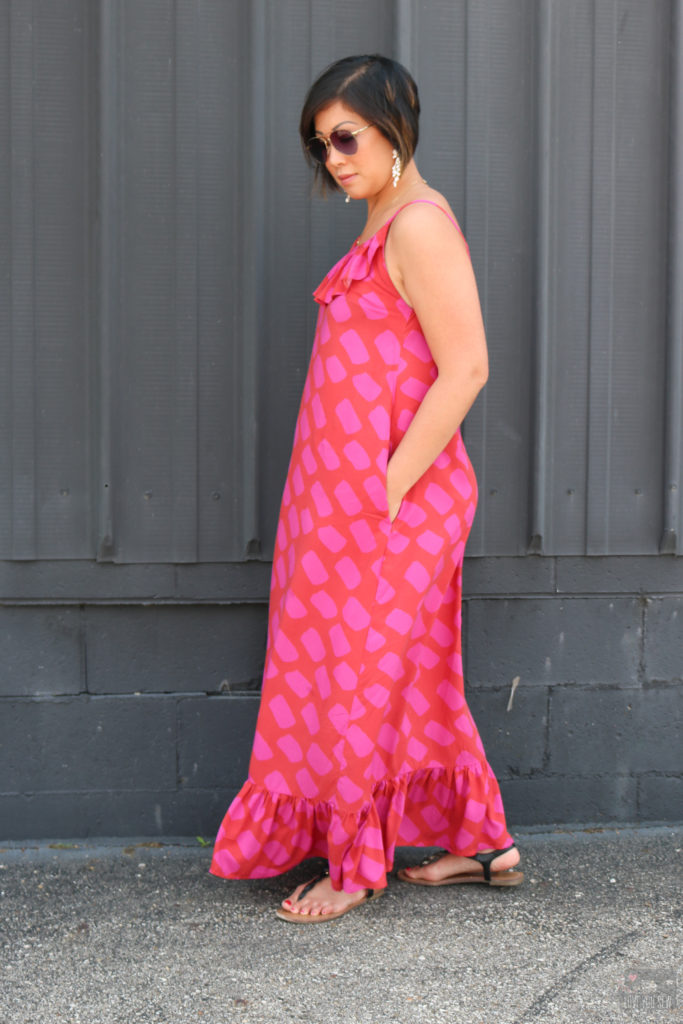
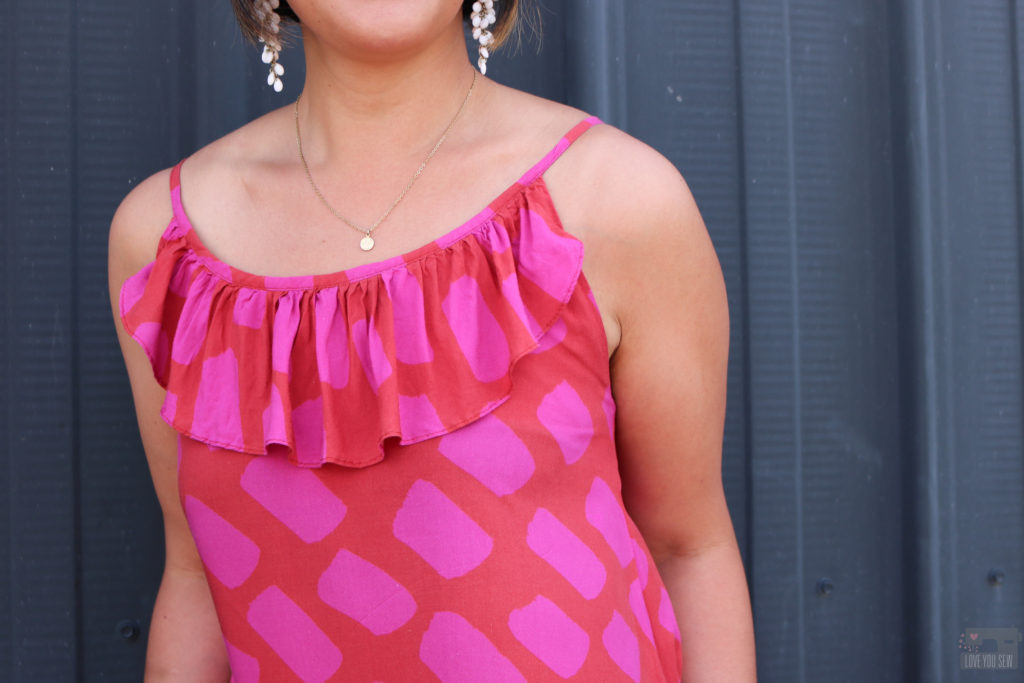
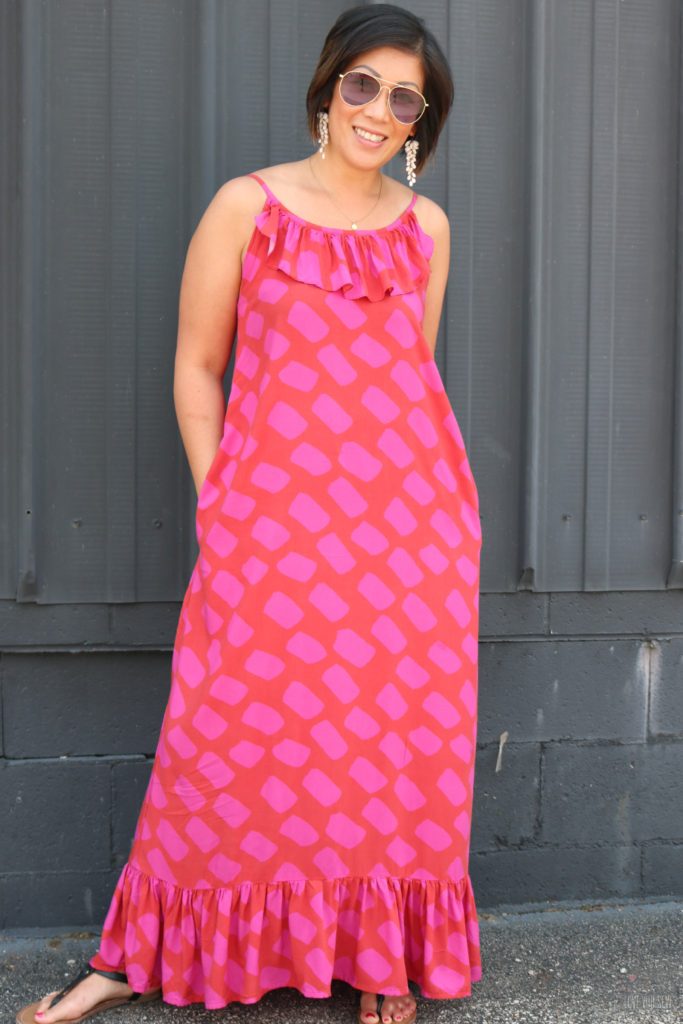
I was so excited when D&H Fabrics approached me to collaborate with their exclusive fabric collection with Katie Kortman.  I was asked to make something using one of the three available prints and I knew I would have to make a statement maxi dress using the Dash fabric with the Derby Dress pattern by Christine Haynes.  Katie’s designs are always so colorful and dramatic.  I wanted to make a garment that’s also fun, bold, yet approachable – like the designer, herself!

The Derby Dress (aff link) pattern has been in my library for awhile now.  I’m a sucker for the classic feminine styles which Christine has in her patterns.  I made the knee-length version a few years ago with a rayon challis and it’s still on rotation in my closet.  So I knew a full maxi version would get the same wear…if not more!

Fabric

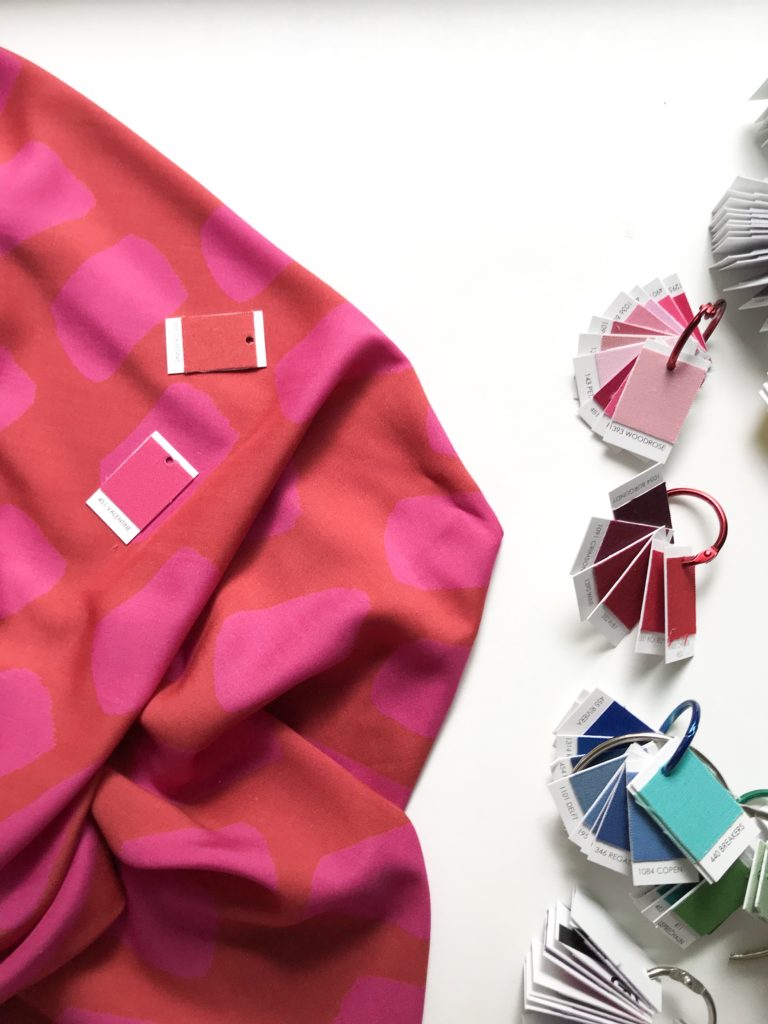
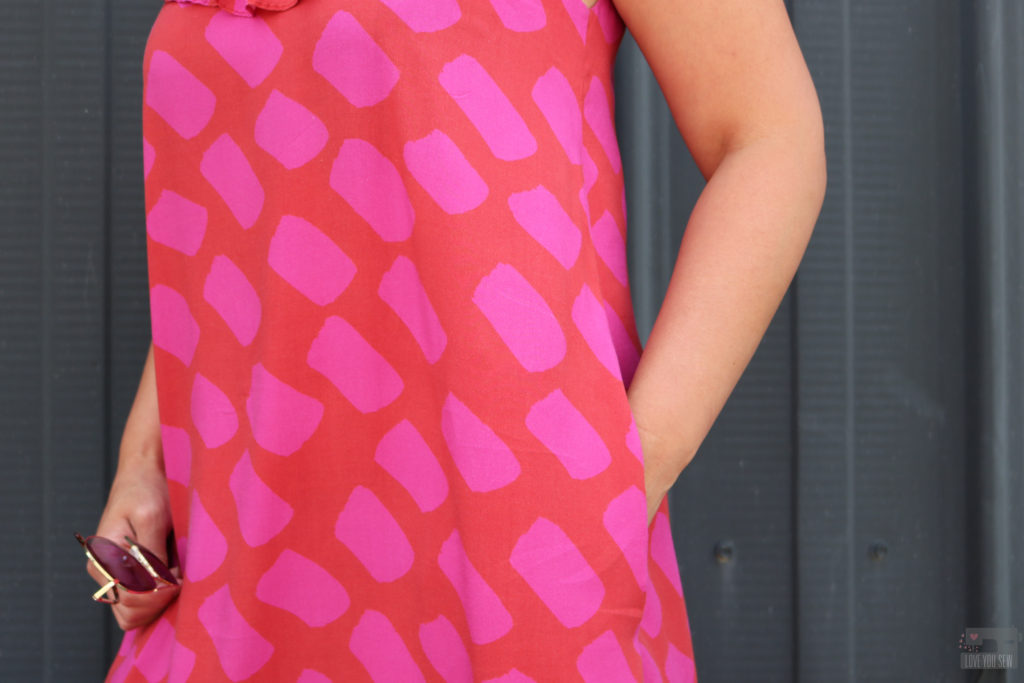
After checking out the available prints at D&H Fabrics, I fell in love with the vibrant pink and red Dash.  There was just something about these analogous colors that pulled me in.  I admit my garment fabric game is a bit neutral (aka boring) so it felt good to step out of my comfort zone a bit…especially for summer!  If you follow Katie on IG, you know she has her own personal movement to get more of us sewists to use fun color combos.  I SO appreciate the extra fun inspiration and color push 😉

This gorgeous print is made of a 56″ wide lightweight rayon poplin which is incredibly soft with a soft hand and beautiful drape. The tight poplin weave makes the fabric easier to handle than a rayon challis which is much more slippery. With this more delicate fabric, I like to use a smaller universal needle sized 75/11 or 70/10.

The fabric design is printed directly on a white basecloth and washes very well. Most of these pictures were taken after three washes and yes, even with delicate tumble-dry.  (I wash my handmade garments along with my RTW.)  The colors remain saturated and I even sweat through this for hours in 90* heat.

Pattern & Modifications

As I mentioned above, I’ve made this Derby Dress by Christine Haynes before and love the flirty ruffle feature — plus it has pockets!  I actually use this pocket pattern as my go-to for any dresses which need an in-seam pocket.  It’s just a nice shape and perfect size for my hands.  I’ve used these pockets on my Sylvie seen here, and my Alix dress found here.

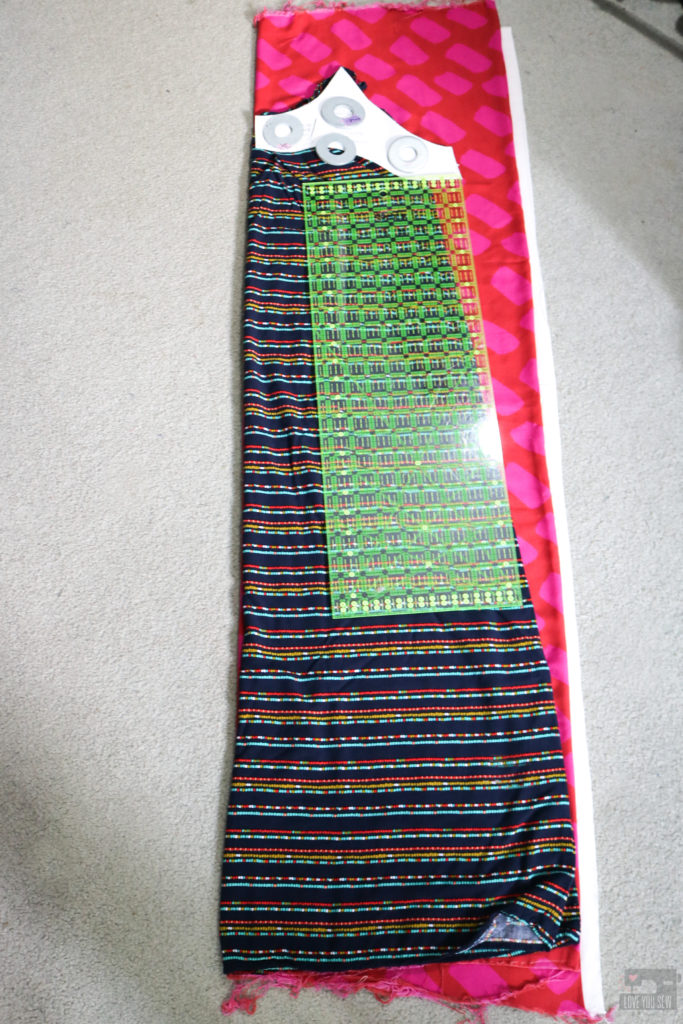
The front of the Derby is drafted with 3 separate panels for princess seams and the back has 4 panels for additional shaping.  This is great for a solid fabric or a busy print, but I didn’t want to disrupt the dashes in this fabric design.  I definitely did not have enough fabric for all of the pattern matching either…nor the time! So, I used a RTW maxi dress from Target (aff link) I have to work out the width and length of the dress.

I laid the RTW dress over the fabric on the fold and used the facing of the Derby to cut the top of the dress (of course, adding in seam allowances.)  The Derby uses two different facings for the front and back, but I took the easy route and made my front and back pieces identical since all of the panel seams we eliminated.   I then cut out two of the front facings on their own to match the front and back of the Derby.  The straps were later shortened to account for these changes to the neckline.

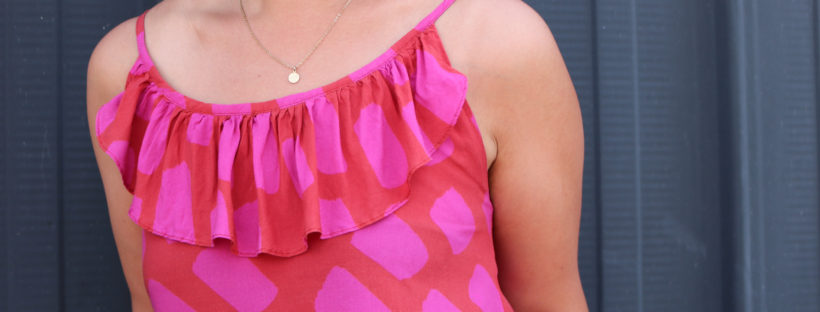
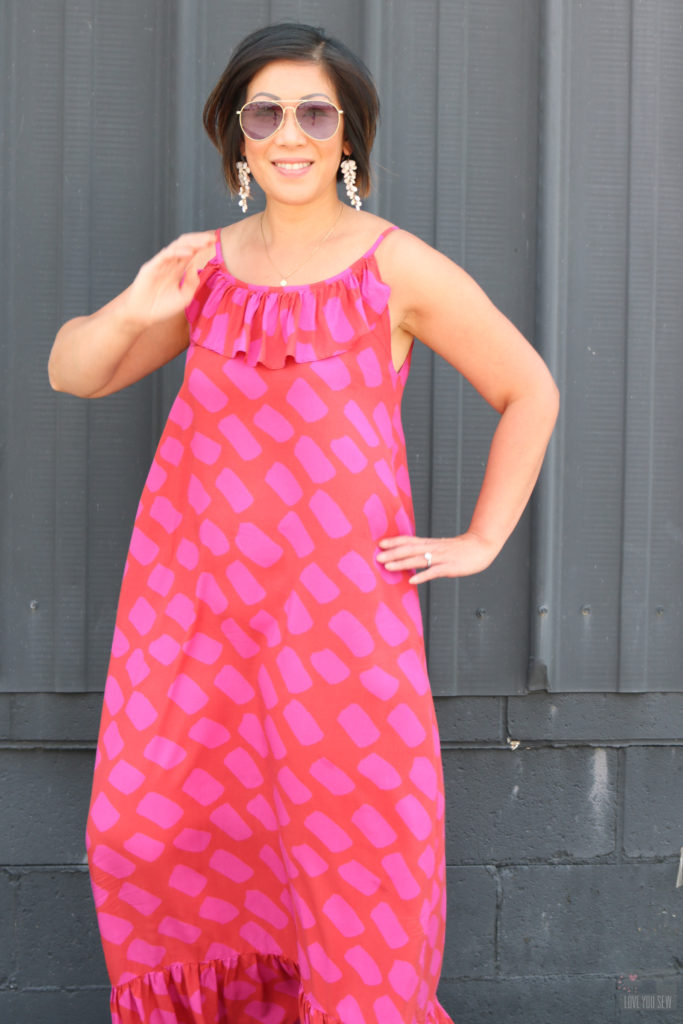
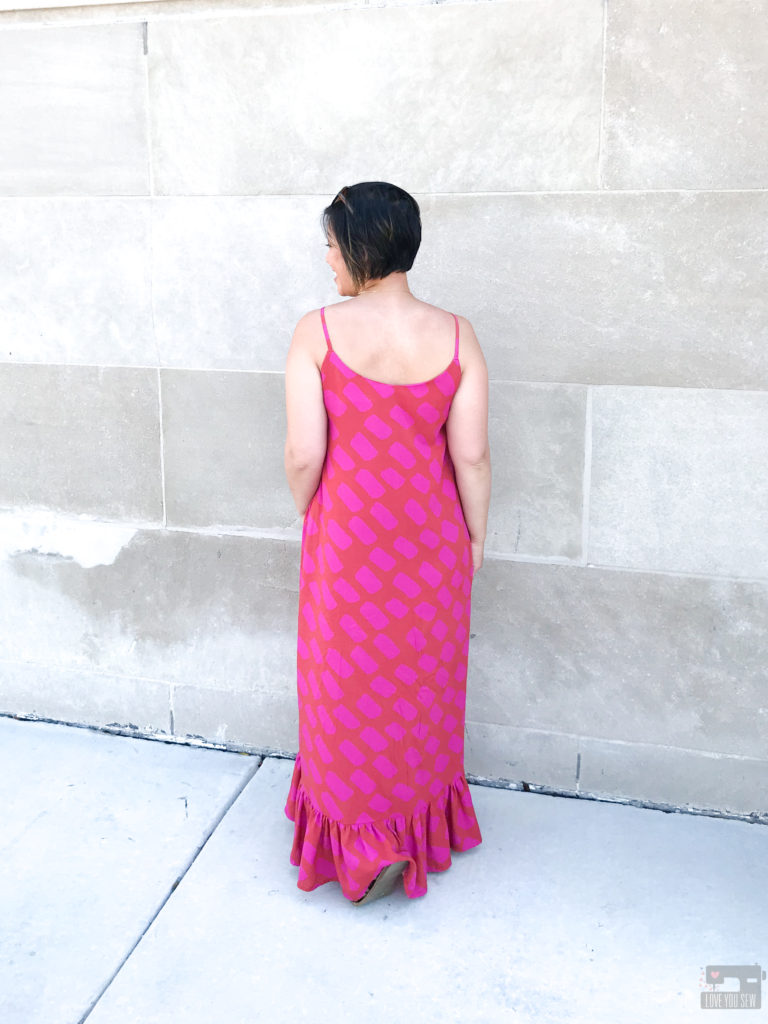
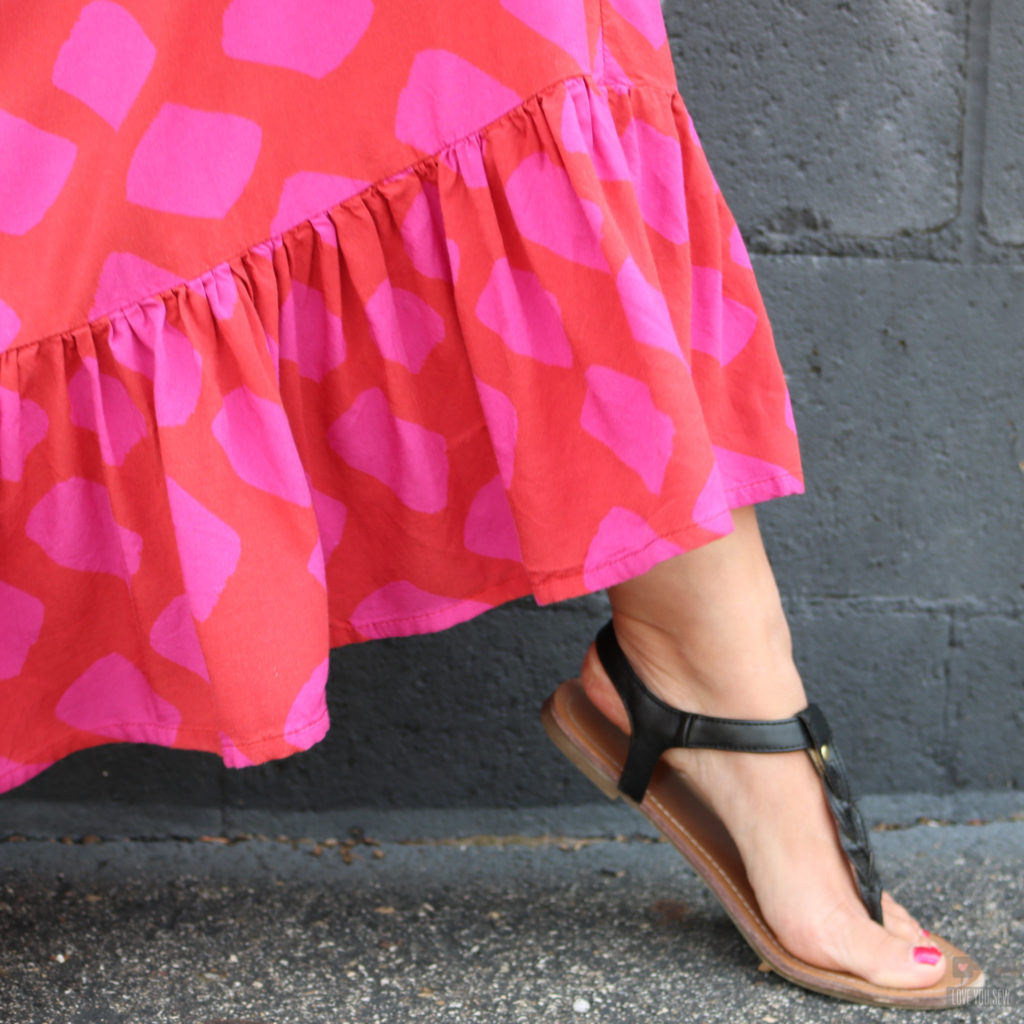
With the dress lengthened out to a maxi, I also extended the length of the neckline ruffle by 1″ to balance the proportion.  I though the ruffle would be cute on the back as well, but it ended up being  a bit “too much.”  Sometimes you have to know when to edit, and the back looks much better with a clean line.  To play with the neck ruffle, I also added a 7 1/4″ (finished) x WOF ruffle to the bottom of the Derby to make it as close to the ground without touching as possible.  It adds to the flirty feel of the dress and adds some extra swing.

I LOVE how this maxi version of the Derby came out.  The print needed to become a statement dress and I can definitely tell you it turned a lot of heads at the airports!  The lightweight rayon poplin was just perfect with the dress pattern for all the great movement.  It’s the perfect summer dress for travel and pairs beautifully with my vintage denim jacket….so that means I can also extend the season on this make! Yay!!!

Derby Dress by Love You Sew

Project Summary


Are you a bold and colorful person or usually a bit more reserved and neutral like myself?    I have to admit that stepping out of my usual color scheme was a lot of fun and I’m reaching for this dress a lot more than I thought I would!  Try it out if you haven’t already!!!


Hugs and Stitches,

Cristy


The fabric for my dress was provided by D&H fabrics for advertising but I was not contracted to write a blog post.   As always, I like to share my makes and good fabric finds 🙂  There are affiliate links in this post and you can read up about my disclosures here.
 

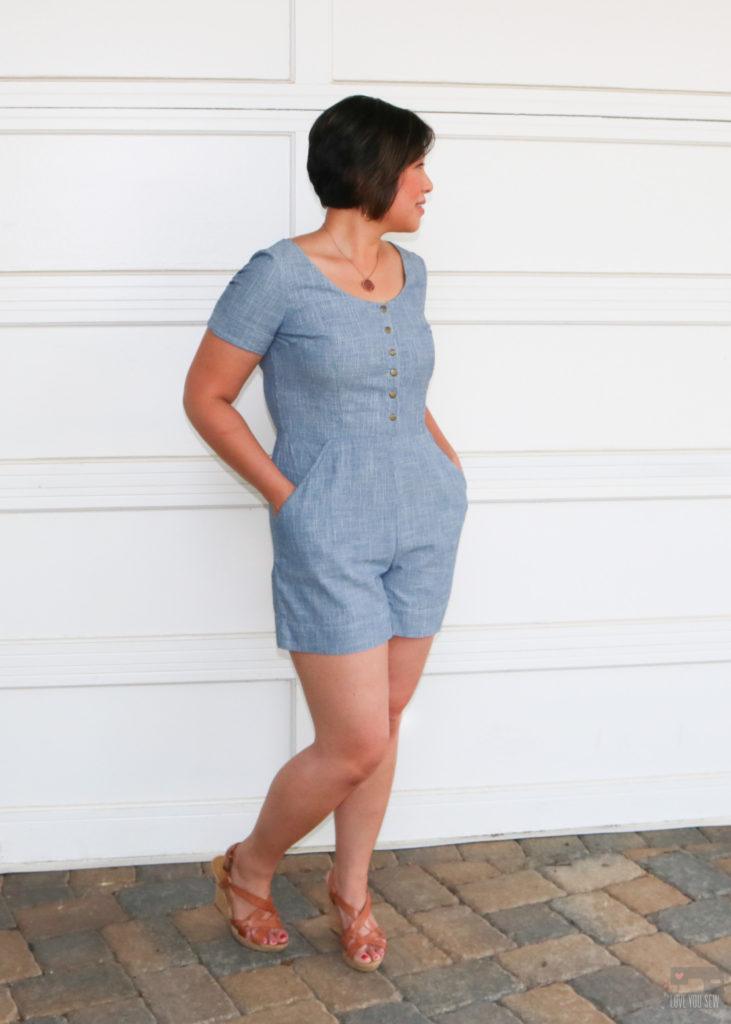
Holly Jumpsuit by Love You Sew

Holly Jumpsuit Review

Holly Jumpsuit by Love You Sew

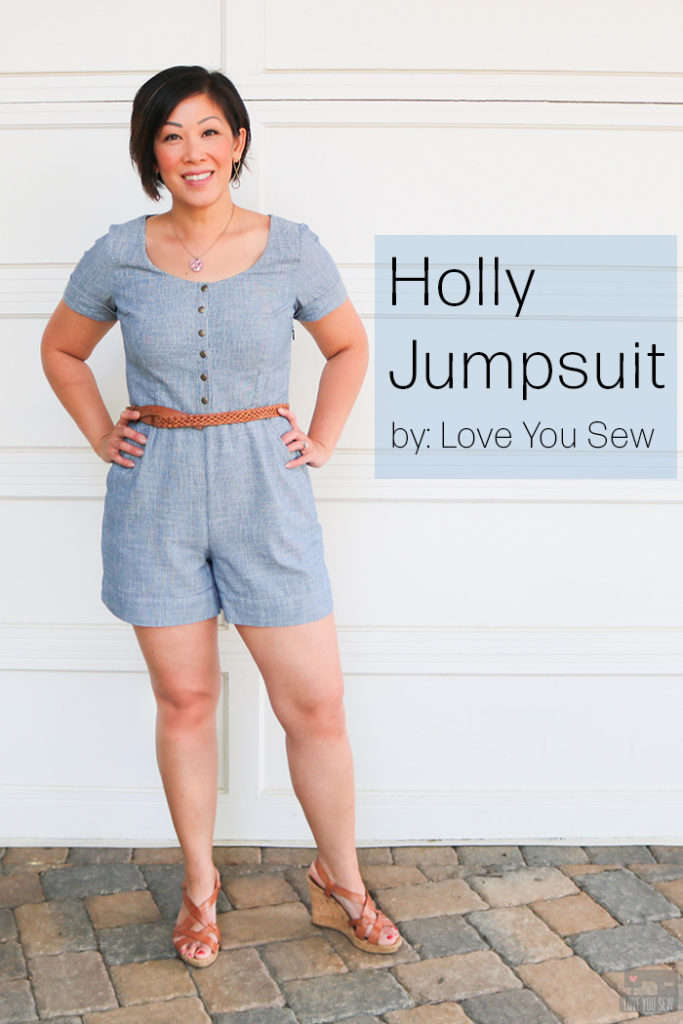
When I sew my own clothes, I like to know they will last for awhile.  So when the jumpsuit and romper trend came out, I was very hesitant to make one.  I wasn’t sure the one-piece look would be right on me.  Oh, and there IS that issue of completely undressing when using the restroom! But alas, after a couple of years seeing so many different versions of a romper, I finally took the plunge with the By Hand London Holly Jumpsuit.
Holly Jumpsuit by Love You Sew

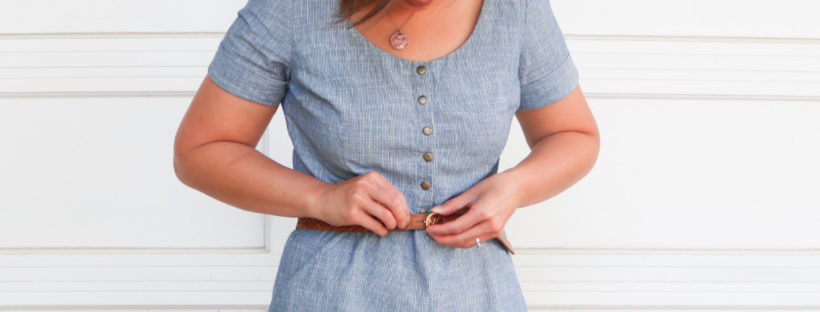
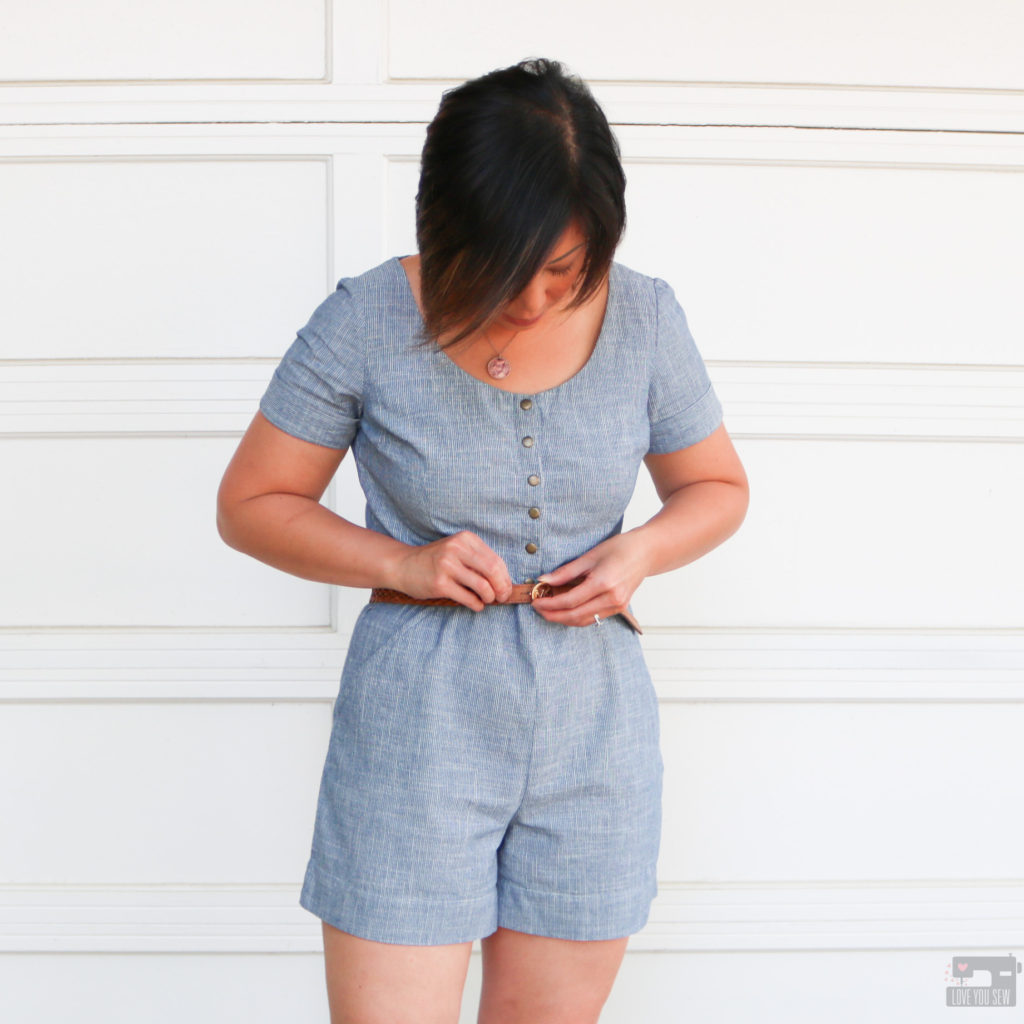
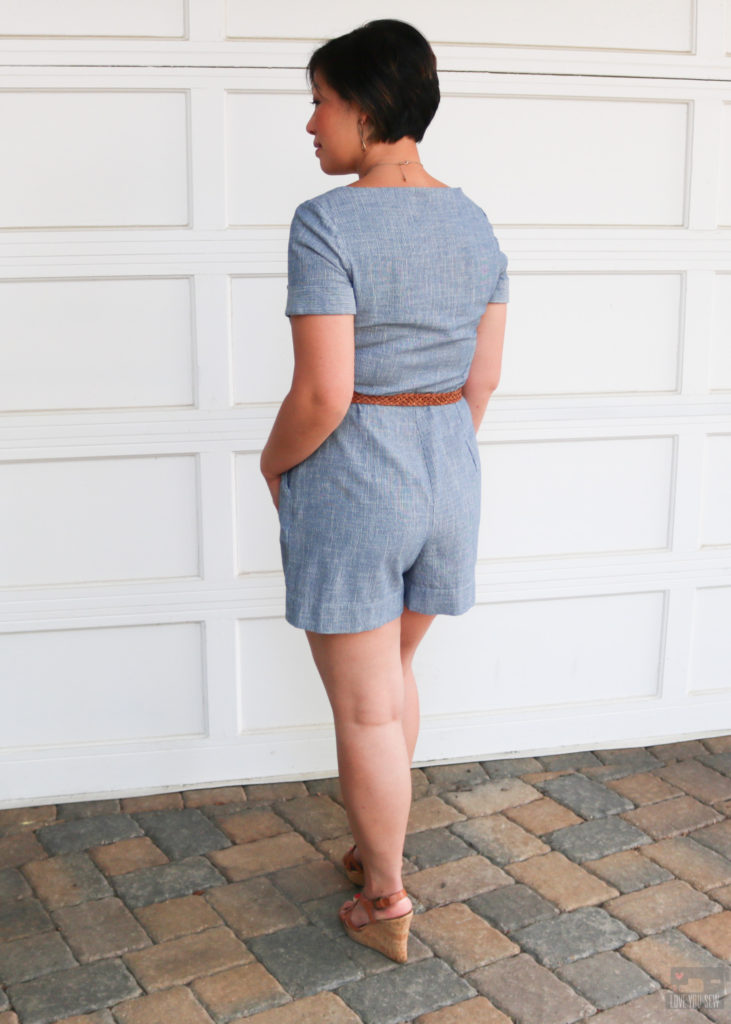
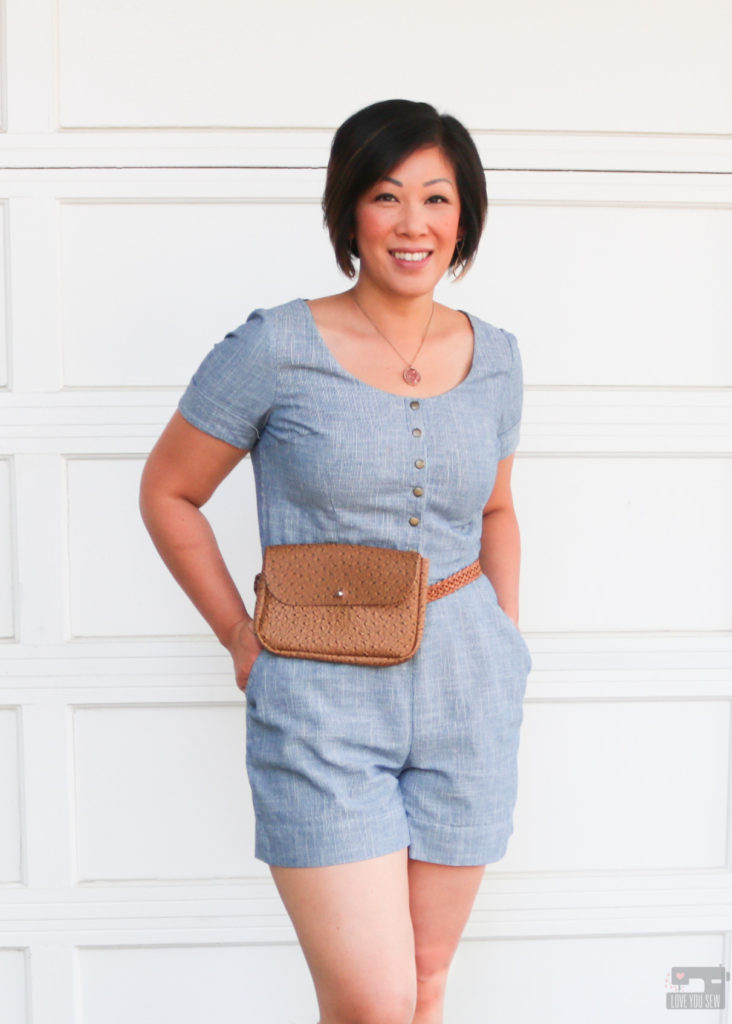
With many of the RTW rompers I’ve seen, they either have a very loose low v-neck wrap (probably for easier bathroom breaks) or the bottoms are way too short for my age bracket.  I fell for the Holly Jumpsuit with the nice open scoop neck (while still being modest,) the tailored waist and the 4″ inseam which is long enough for me, but could be a little too short for all of you  over 5’3″.

Holly Jumpsuit by Love You Sew

I initially bought the Holly Jumpsuit for the trouser view to help make a traditional Vietnamese Áo Dài.  I loved the wide leg, high rise, and the clean waistband which was perfect. However, it’s now been a few years and the Áo Dà has yet to be sewn…I know, I know…it will eventually happen!  However, I have made a pair of culottes using some rayon twill seen above.  These are such a great summer make.

Holly Jumpsuit by Love You Sew

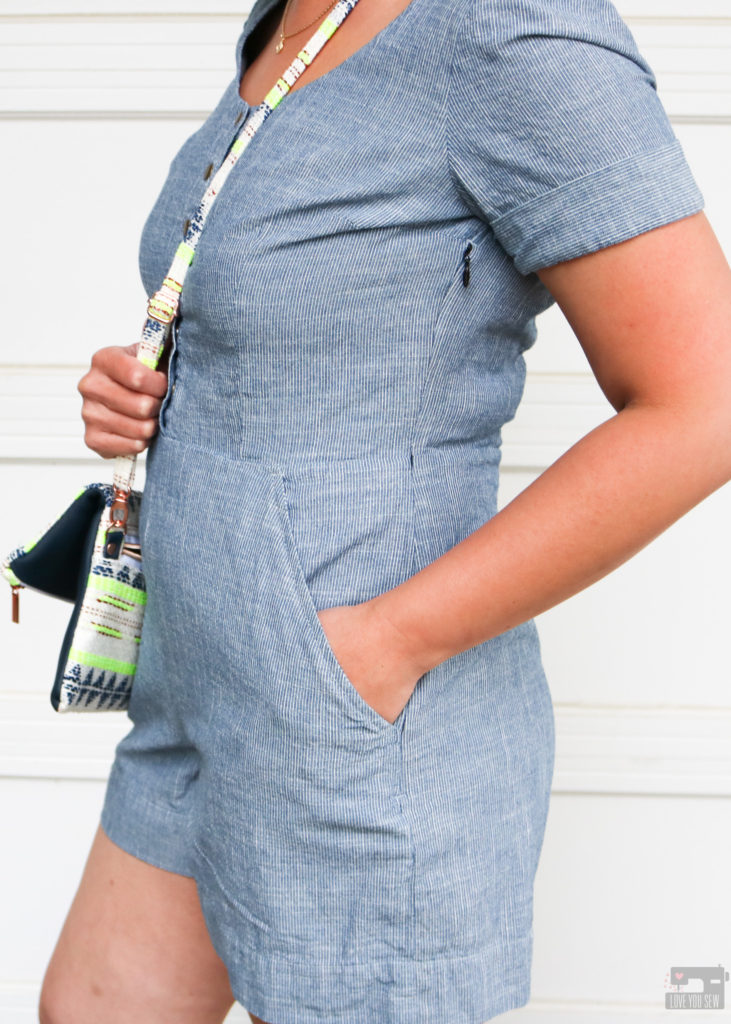
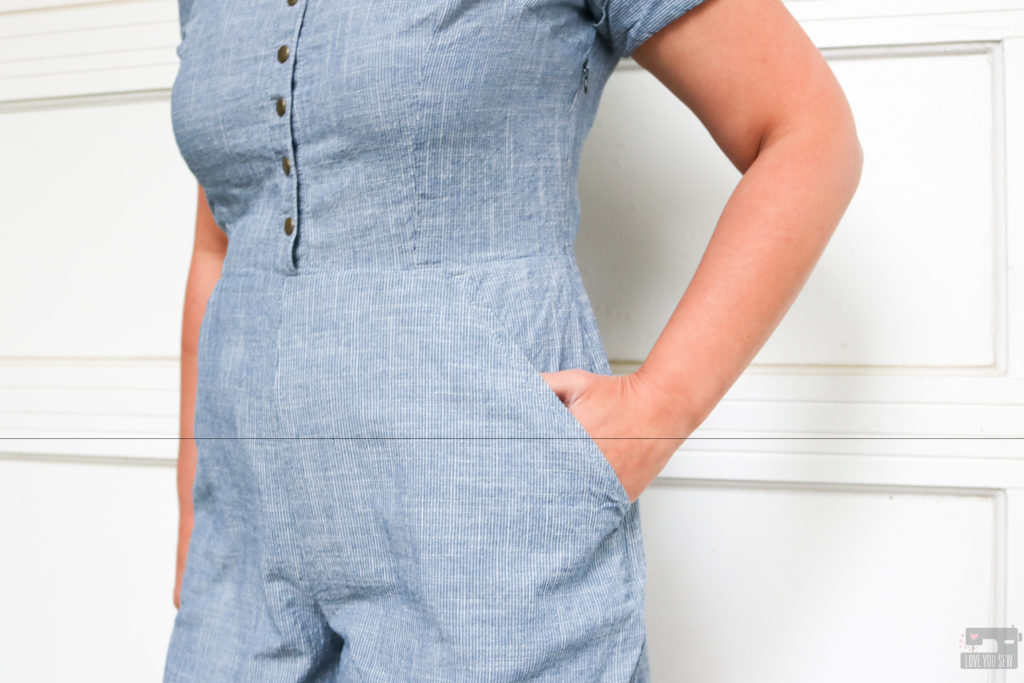
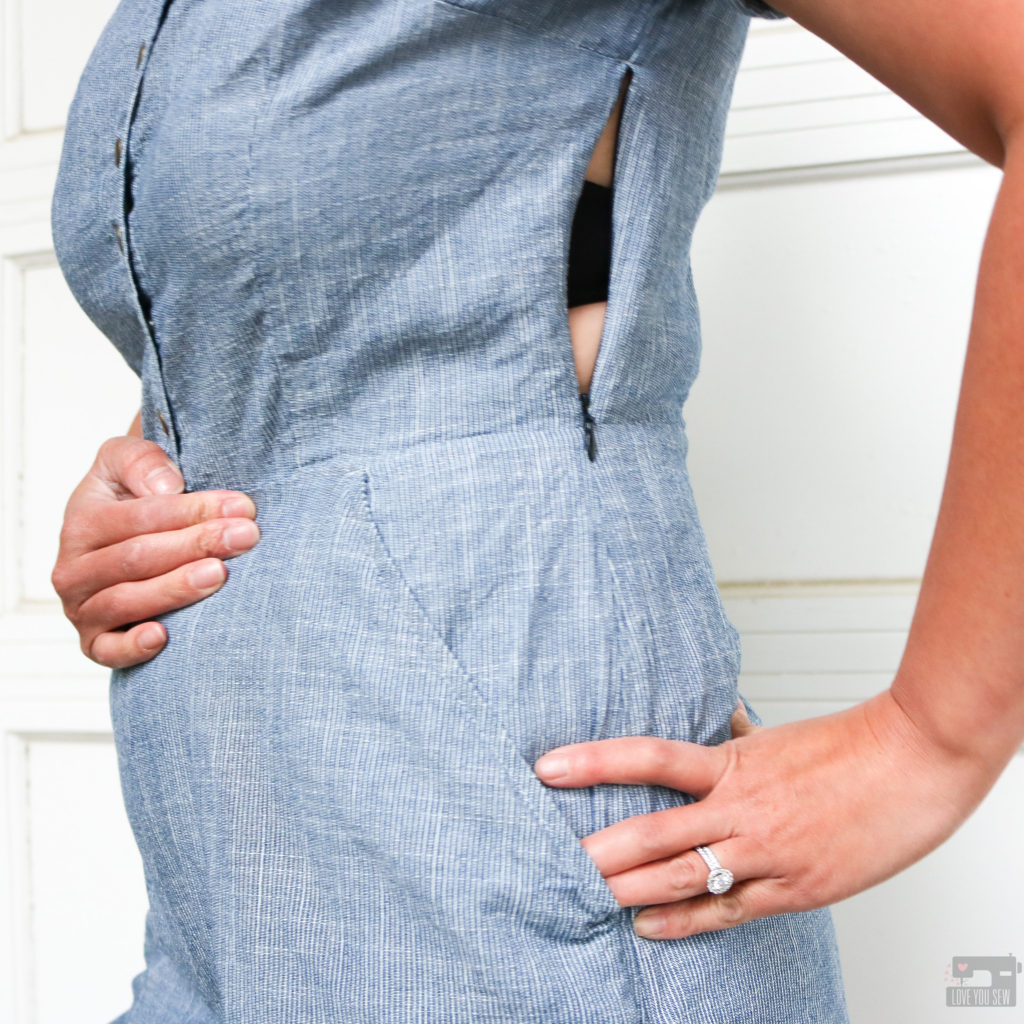
I know what you’re thinking….The big question with all rompers and jumpsuits is always, “How do you pee?”  There is a nice long invisible zipper which extends from the side dart down to the hip.  This allows you to slip the romper on and off in combination with unbuttoning the placket.  I wish I had a blue zipper to match my Holly when I was making this in time for a party, but I went with the only invisible zipper I had on-hand — black.  With the smart placement of the zipper, you can only see the pull when I have my arm up…and it’s still very discreet.

Holly Jumpsuit by Love You Sew

Fabric

When I was looking for fabric, I wanted something light enough to wear during warm weather, but structured enough to hold it’s shape and not wrinkle easily. Since this was my first romper, I also was looking for a simple print that could help camouflage any imperfections.

Holly Jumpsuit by Love You Sew

I was happy to find this great Vintage Chambray Stripes at Imagine Gnats. It’s a classic micro stripe with that railroad-esque feel.  I love the blue and how neutral it is for any occasion.  I can just switch up accessories to give it a different feel.  At 4.5 oz this is still light enough with a soft hand and the 100% cotton content makes it breathable for the summer.

Pattern

Holly Jumpsuit by Love You Sew

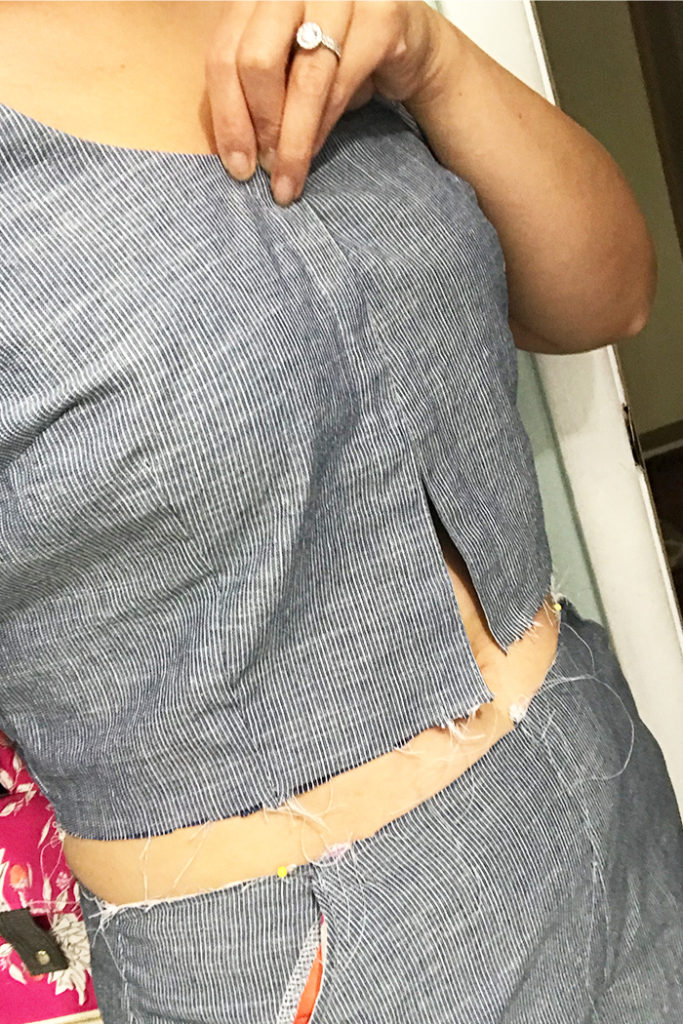
For the romper, I used view A and made a size UK10/US12 for both the bodice and bottoms based on my measurements. Since I already made the culottes, I knew I wouldn’t need any adjustments on the bottoms, but I did forget to take into account that I shortened the rise on them previously.  So, my romper ended up being too short! *Cue head-slap* Fortunately, I had enough fabric (thanks to the extra wide WOF) left to remake the bottoms.  Since there is no fly, it wasn’t too much of a set-back.  I’ll turn the first set with the lower rise into shorts by adding on the waistband found in View C.  Phew!

Holly Jumpsuit by Love You Sew

These are the additional modifications I made to the Holly:

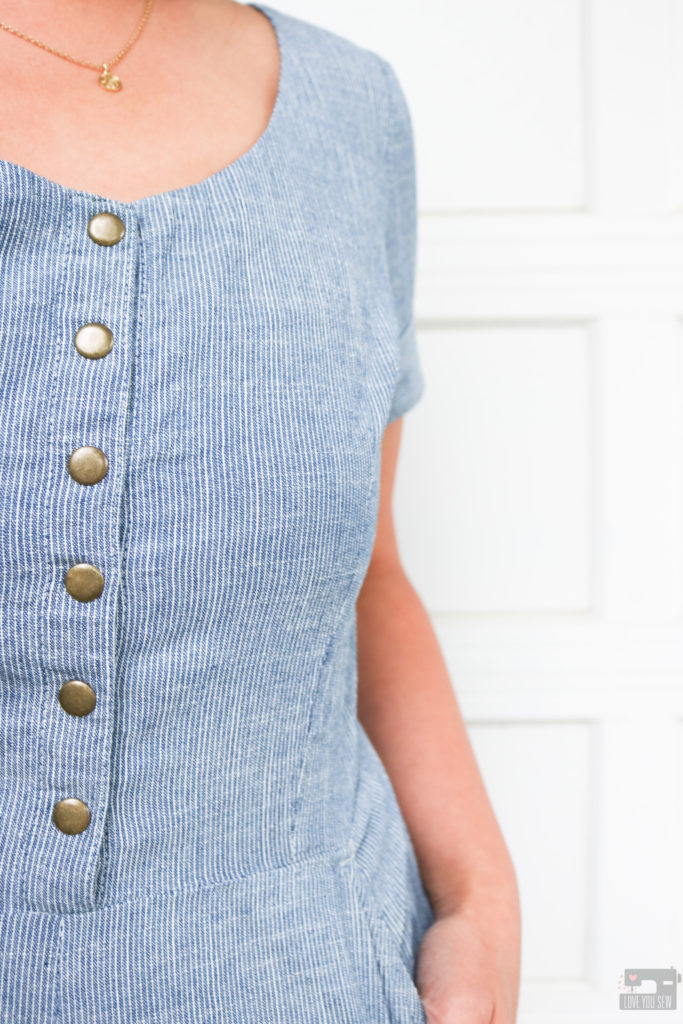
  • Added lightweight woven interfacing in the placket to hold the snaps, but I would add it even if I used buttons for more stability
  • Used metal snaps instead of buttons for faster bathroom breaks 😉
  • Added slash pockets by drafting a pocket and the facing  (the one thing missing with the pattern)
  • Decreased the seam allowance for the sleeve and increased the armscye to match
  • Reduced seam allowance to 3/8″ between the bodice and shorts for more crotch room

Holly Jumpsuit by Love You Sew

When I make this again, I would consider the following modifications:

  • Slight broadback adjustment – There is a little bit of tightness across my shoulder blades.
  • Bicep adjustment for even more ease – After wearing this to an event (with lots of sweating!) I think adding in more arm ease would allow more air flow and an easier time getting the romper off and on.
  • Increase the bodice length by 1/2″ – I’m only 5’3″ but if I raise my arms all the way up, I get some cameltoe, which is surprising. Most patterns are drafted for 5’5″-5’8″ that I’ve seen, and usually I have to shorten the bodice on a pattern.
  • Lower the side darts by ~1/2″ – Everything looked good when I was finished, but after an additional washing, the darts look a little too high.

Holly Jumpsuit by Love You Sew

Final Thoughts:

For my first romper, I am SO pleased with this make. I love the slim fit around the waist and the ample ease around the buttocks and thighs.  This is a great pattern for my fellow pear shapes! But it is certainly still great for other body shapes as well with just simple changes to the darts. This fabric was great for the pattern but I may use a woven with just a little stretch next time and probably won’t need those broadback and bicep adjustments.

Holly Jumpsuit by Love You Sew

Project Summary:

Now that I’m done with my very first romper, I think I’m ready for another.  Do you have any good romper/jumpsuit patterns to recommend?  Let me know in the comments.  I would love to hear your thoughts!


Happy Sewing,

Cristy


This post may contain affiliate links for which I may receive compensation.  This helps keep ads off the blog and helps me to keep this website afloat.  Thank you for your support.