
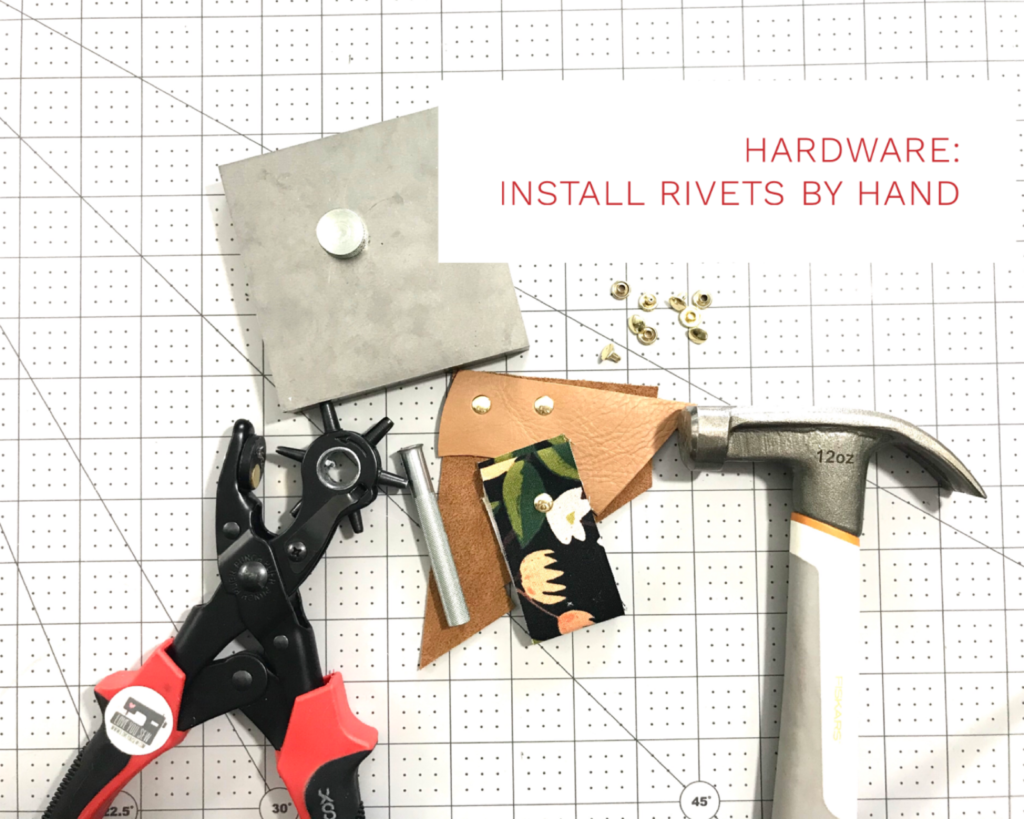
Of all the things I’m asked about in my sewing, I get the most questions about hardware. It’s such an easy way to take a project to the next level like with the Megan Bucket Bag and Claire Foldover Clutch hack. ‘Just an extra touch of metal can really take a bag from “homemade” to “handcrafted.” That’s exactly what I was looking for in my bag creations. Before I got a “fancy” hardware press, I installed all my rivets by hand for at least a year. And even with the press, I still set them manually based on my needs. Below is a quick video to show you how to install rivets and lots of my personal tips as well!
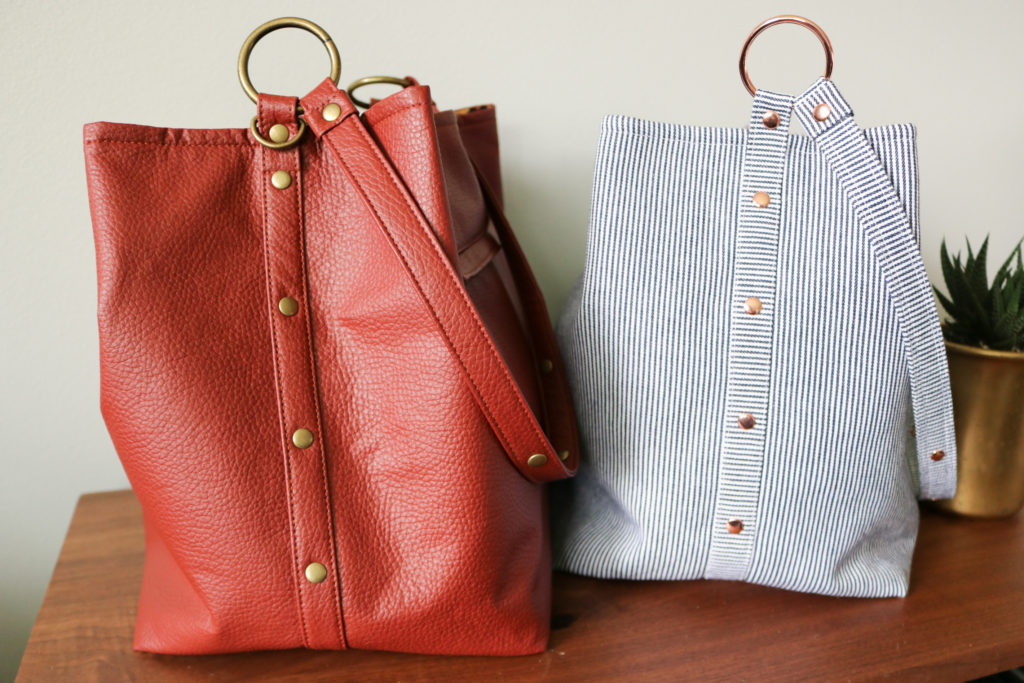
Megan Bucket Bag
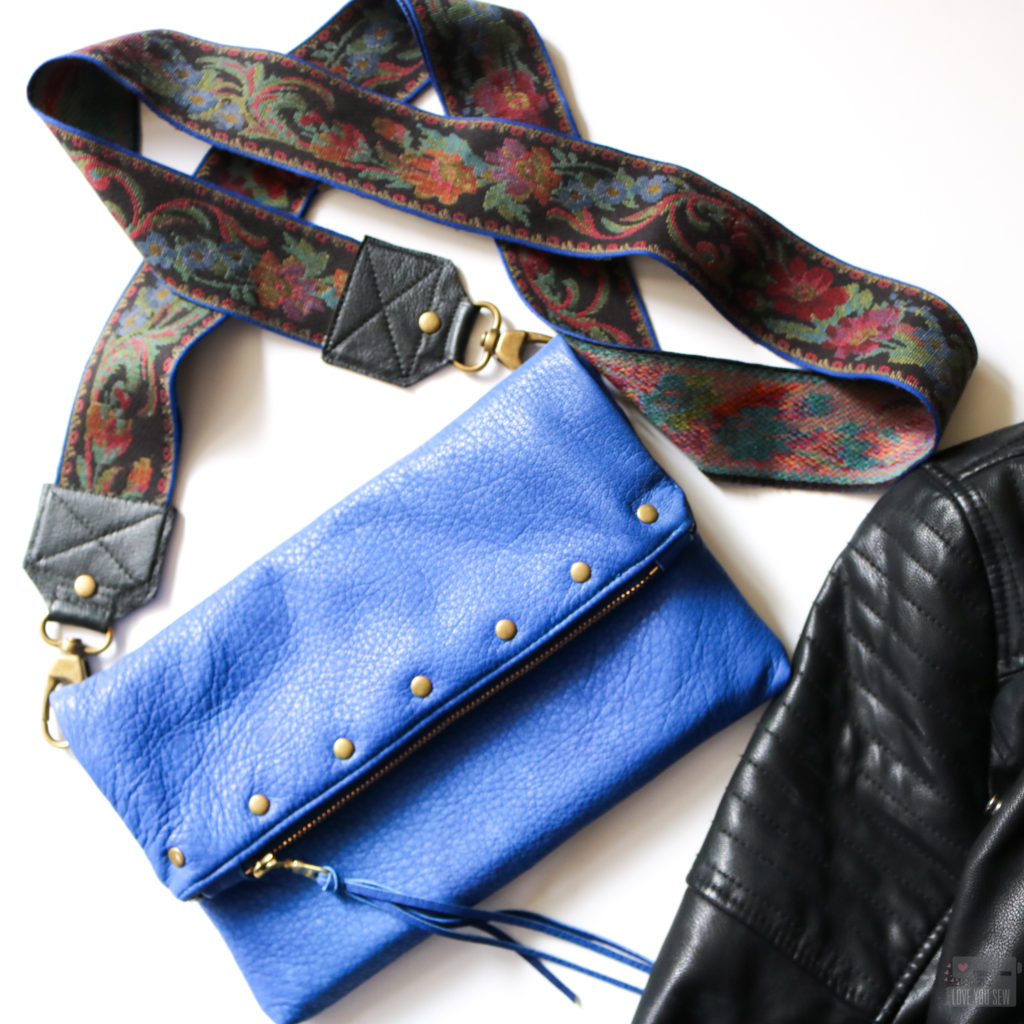
Claire Fold-over Clutch
Materials
First, you need the right materials. Below are the materials and links (some affiliate) which I use in the video.
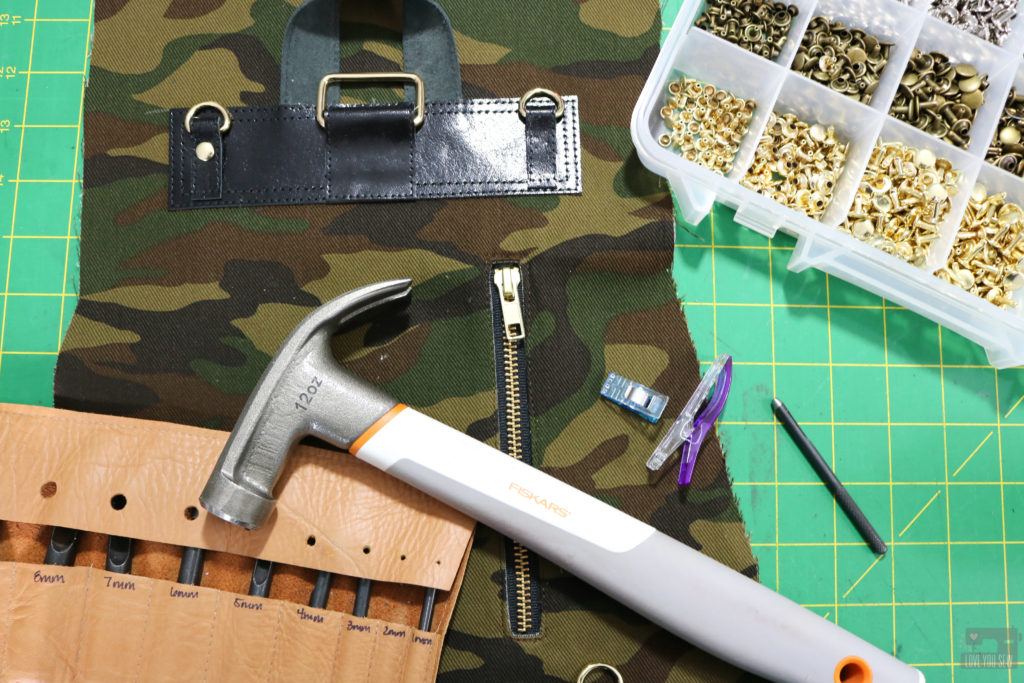
- Steel Jeweler’s Bench – This is a small but mighty block and handles all of my own personal hardware needs. I used to set rivets on the basement floor (which you shouldn’t do, but we’ll discuss that later) and this block is such a game changer so I can use my own cutting table and not have to go down two flights of steps.
- Fabric Hole Punch Pliers – This type of punch plier is by far my favorite. The bed of the tool where you place your fabric is plastic vs. metal. Some people like the metal bed because it will last longer, but I MUCH prefer the plastic bed because you will get better cuts and the actual hole bit will stay sharp longer. Yes, the bed will begin to wear away but there is a replacement and each one will last you a long time…probably longer than the bit.
- Rivet Setter – My preferred tool is this larger 9mm one because I personally use rivets with caps this large. This will be able to set smaller ones too!
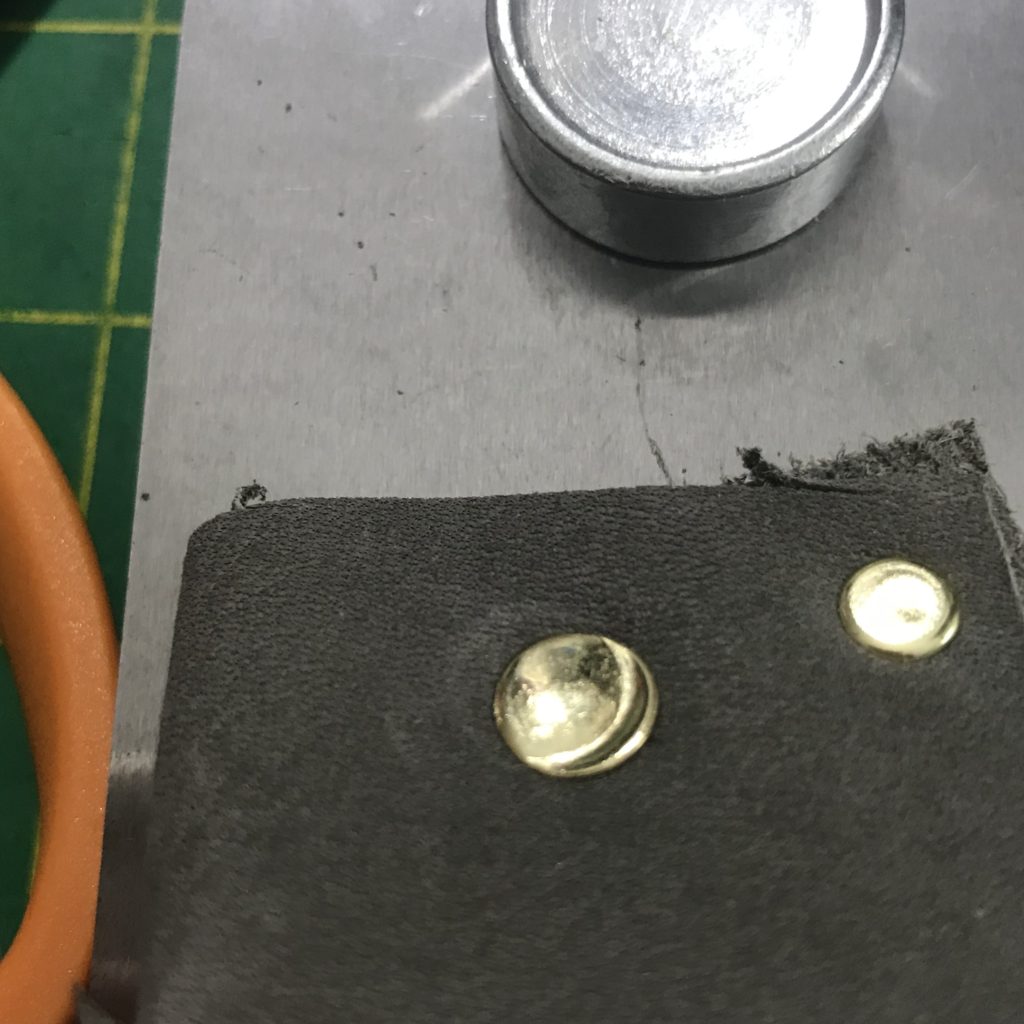
- Concave Anvil – Since I’m using double-cap rivets, a concave anvil is needed to keep the shape of the other cap, else it will completely flatten.
- Hammer – I’ve used a few different hammers – small and large and I really like this Fiskar’s one. The grip is comfortable and the 12 oz head allows for a good solid strike. You can certainly use a mallet instead, but I’ve had good luck with just a hammer.
- Double-Cap Rivets – These are the “small” rivets with an 8 mm head and 6 mm stem. I use this size the most for decorative application and will move up to a longer stem for thick folded straps. I prefer double to single cap rivets purely for inventory purposes to handle all of my needs.
Process
In the video, I take you through both leather and fabric applications which are pretty much the same. I included a few tips but want to elaborate a little more based on my own experience.
- Work at counter-height – For me, my results are MUCH better when I work at counter-height (while standing) versus working on the floor. I know when you first start out, the concrete basement or garage floor might be the hardest surface you have and this is definitely how I started out with rivet application. But there is something about leaning over a project that increases the arc (maybe?) of my swing and I ended up with a lot of crooked, ill-placed rivets. So, if you can, I highly suggest working on an old table – over one of the legs for extra stability.
- Select the right size rivet for EACH project – Initially, you may get the urge to just buy one size to fit all of your needs, but there is a reason there are SO many difference size combinations. While the cap is more for aesthetics, the stem length is key in a proper application. I recommend about 3-5mm stem longer than the thickness of your project when you finger-press down on it. You want the stem to be long enough to mushroom into the cap. Else, your project may pull apart later with use. But you don’t want it so long that it could “over-mushroom” and damage the cap. The extra length also provides more opportunity for a crooked installation. So, that’s why you want to minimize your risk. 6mm and 8mm posts were pretty much all I used for a long time and then I expanded out later when I was working with thicker substrates
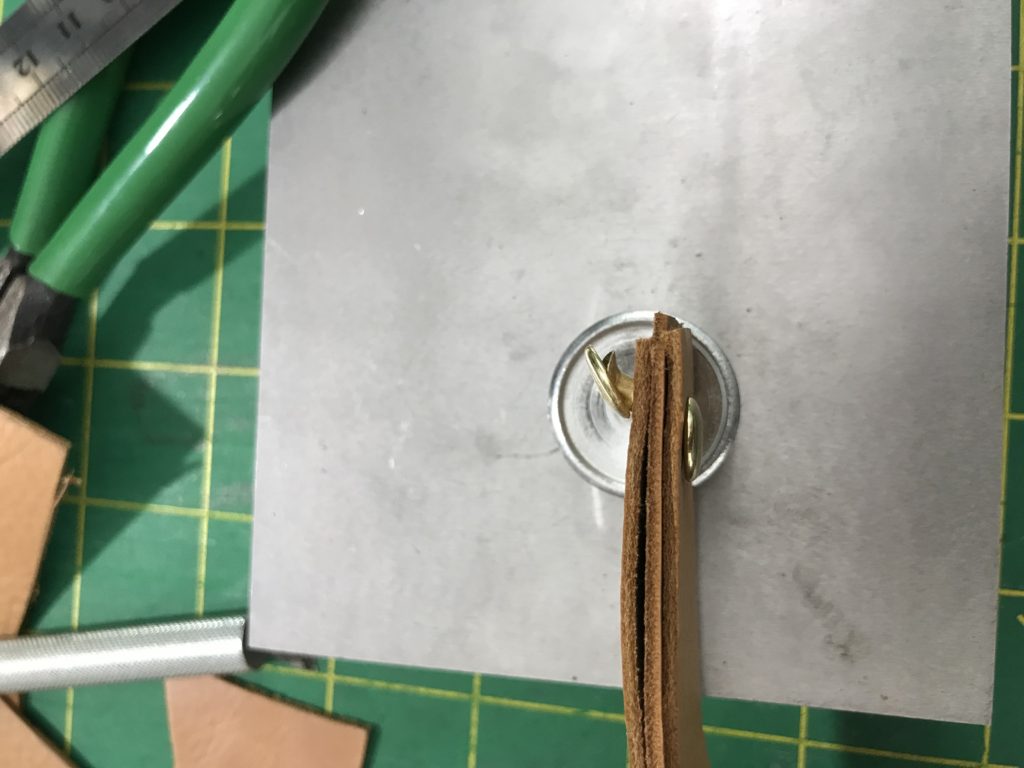
- Hold Setter down at base close to rivet – This provides the most control so the setter is aligned and straight over the rivet. If you hold the setter too high, the impact of the hammer may move the setter and you could get an unsightly imprint on the cap.
- Spin the rivet between your fingers to check for a proper application (1:18 in video) – You know that the rivet is completely installed when you can’t rotate it between your fingers. It shouldn’t be able to move at all. If the rivet is still loose or you can still see the stem, go back and install again.
Abbey Convertible Backpack
If you do have a crooked installation or accidentally mis-aligned the setter on a rivet cap, I’ll show you how to remove a rivet with next week’s blog post. Please share below if you have even more tips to help along fellow readers!
Enjoy!
Cristy
This post may contain affiliate links. Please read about all of my disclosure here.


