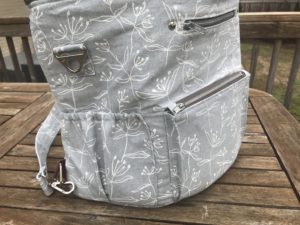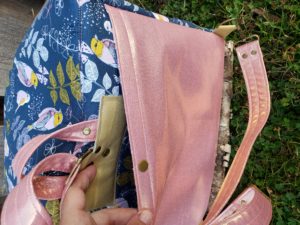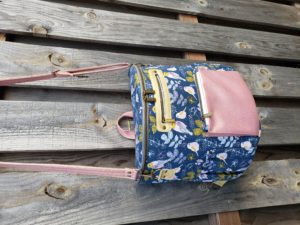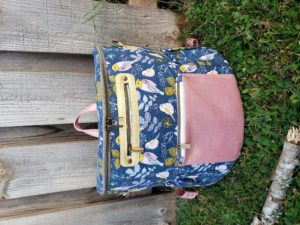
Spring Roll Pouch Launch

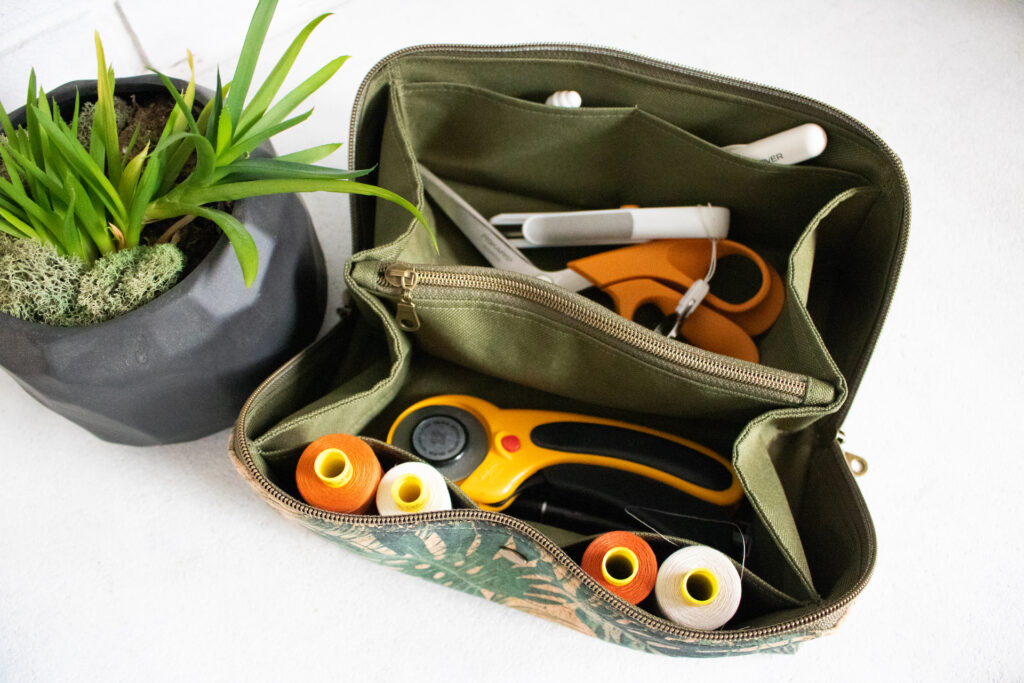
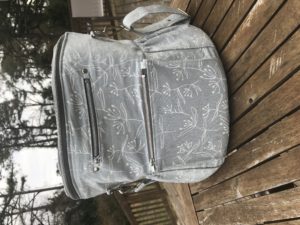
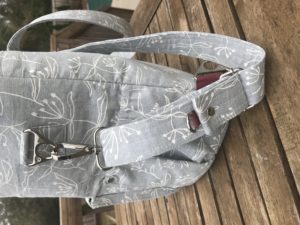
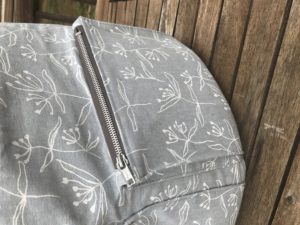
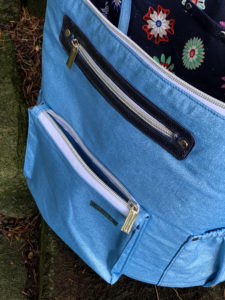
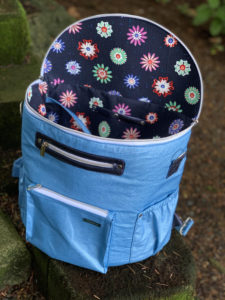
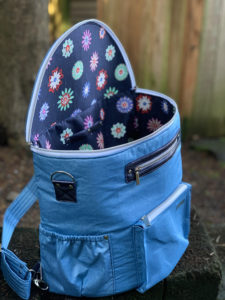
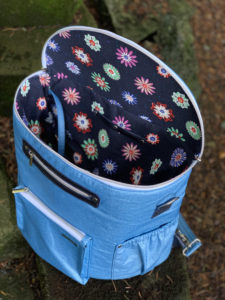
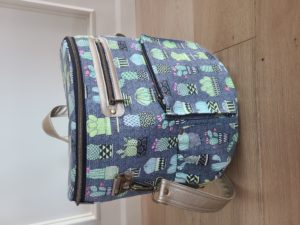
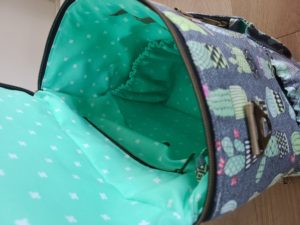
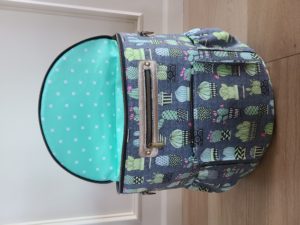
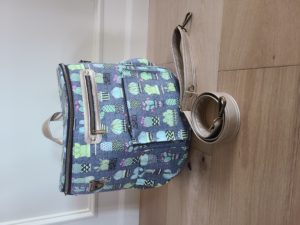
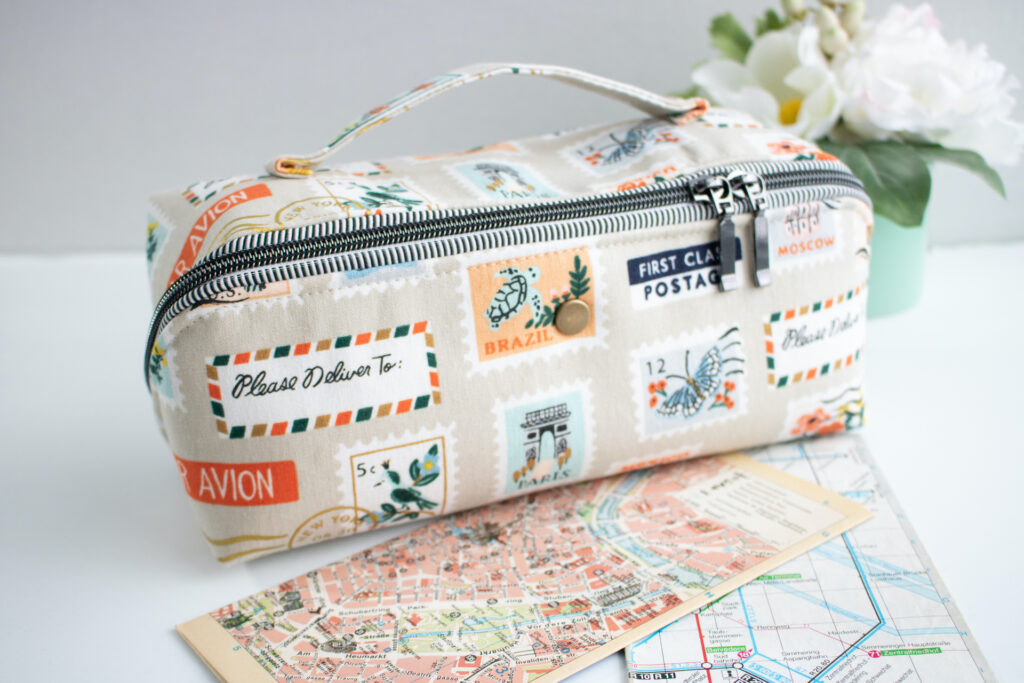
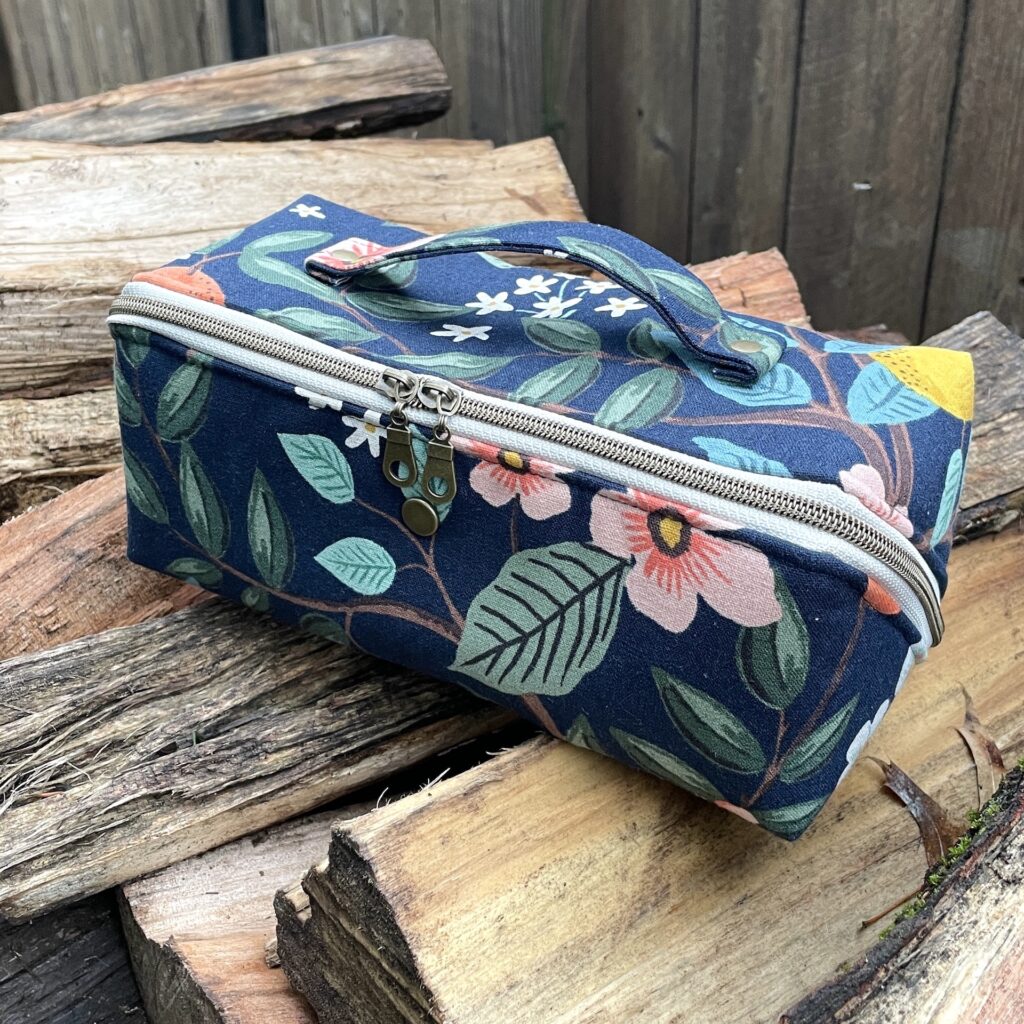
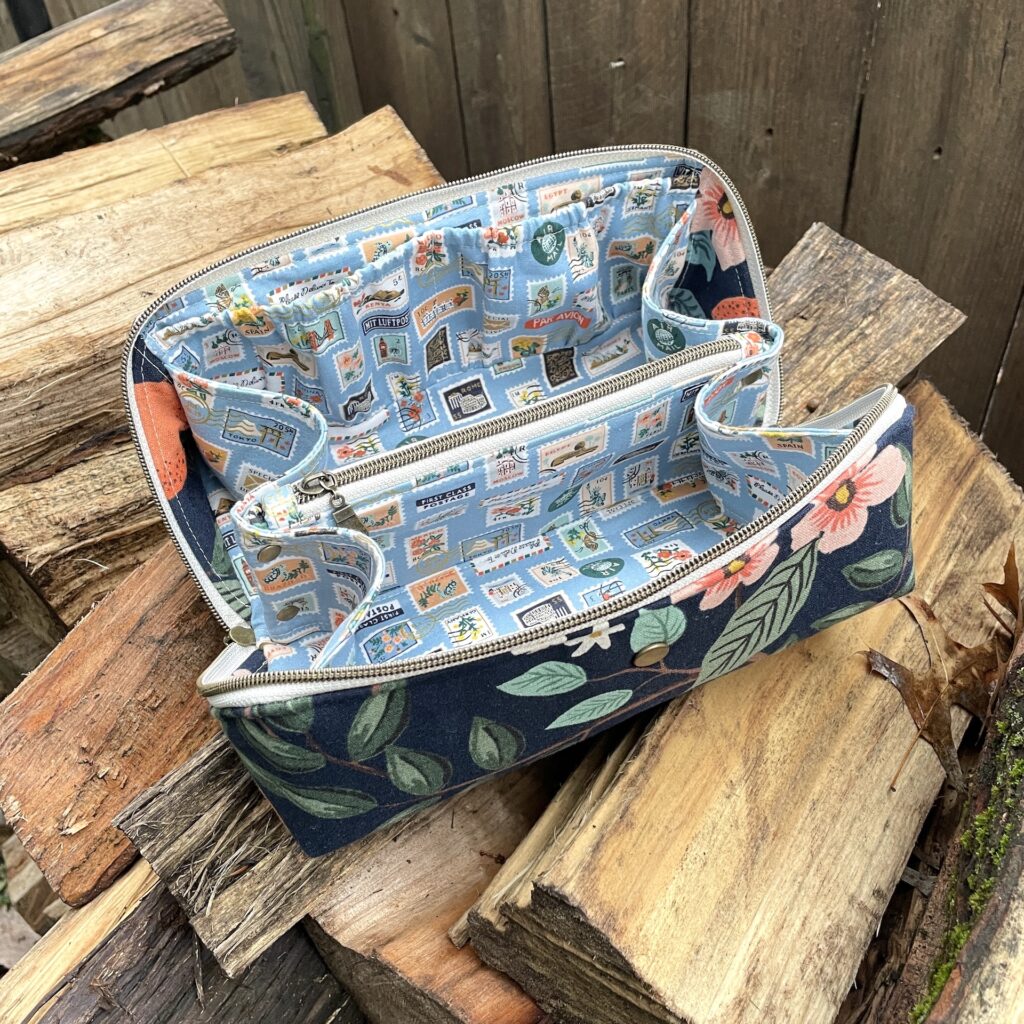
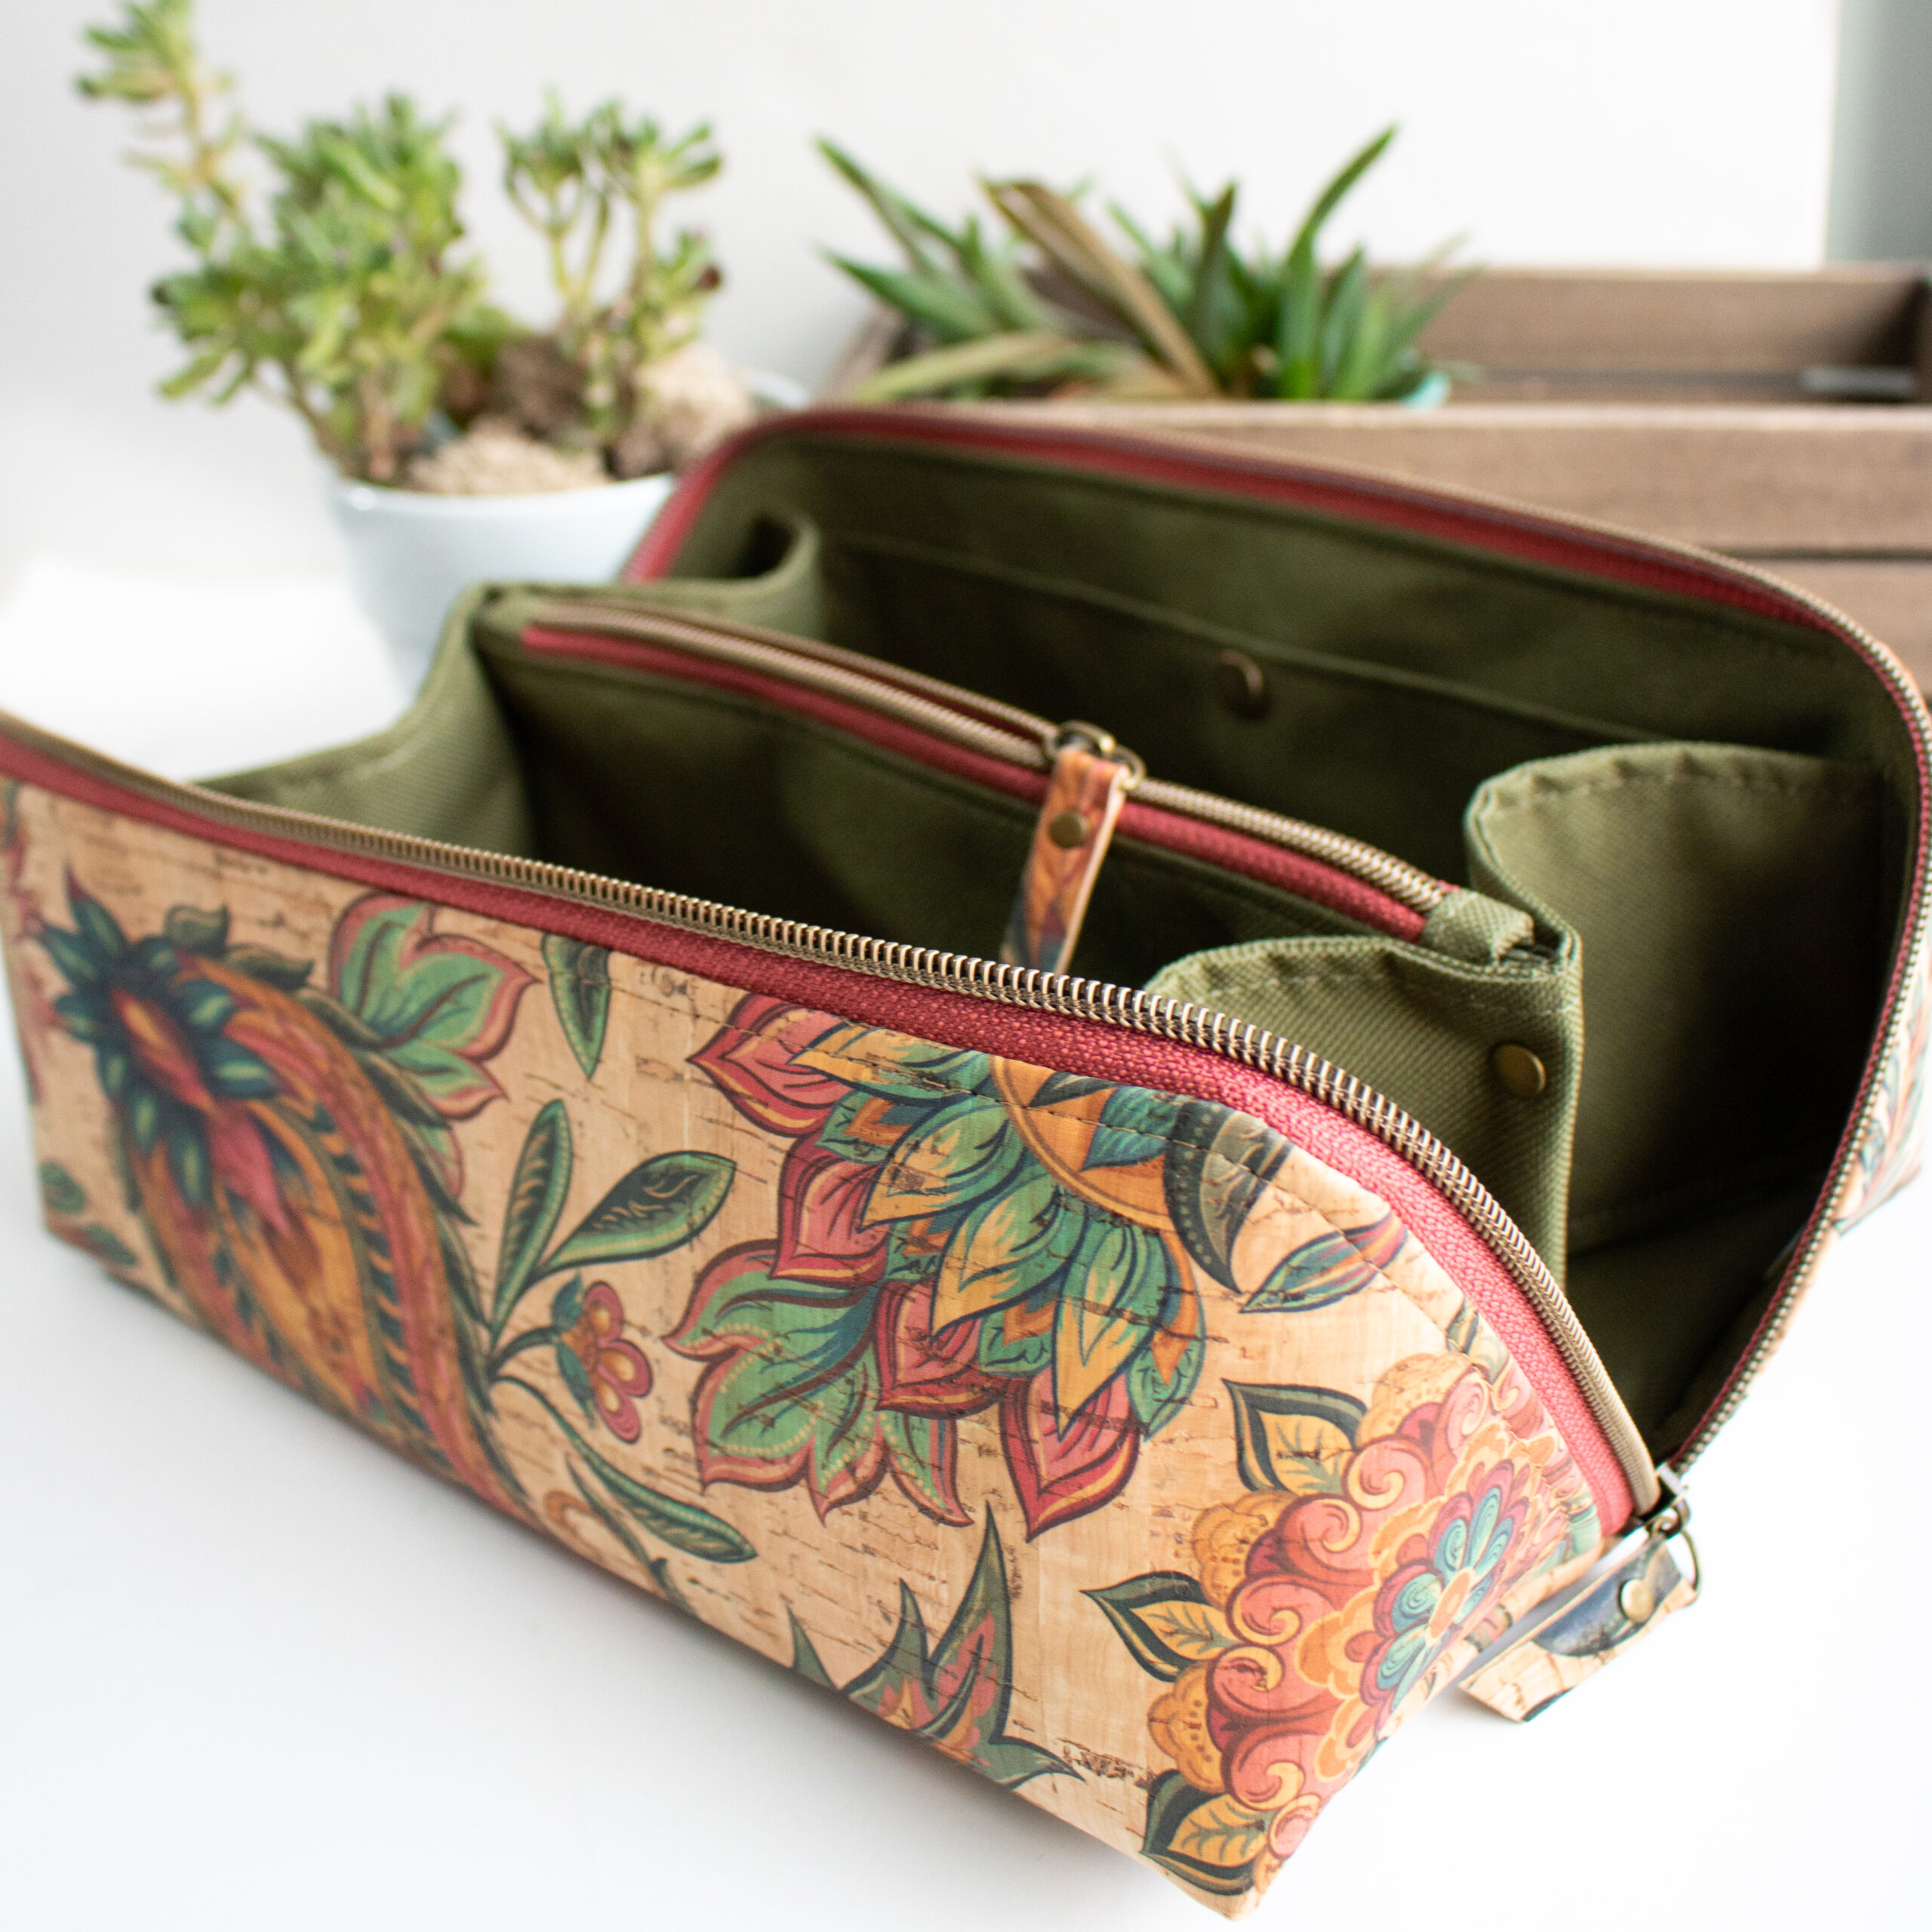
It’s been quite awhile since I’ve released a bag pattern, but I’m back with the Spring Roll Pouch! Just like my favorite food, the Spring Roll Pouch wraps up so much goodness in one little package. This multi-purpose accessory bag has a great rectangular shape and an angled zipper at the side, making the pouch open to twice its footprint! The main zipper opens to reveal a divided compartment with ample room for all of your craft supplies, cords, skin care and even toys!
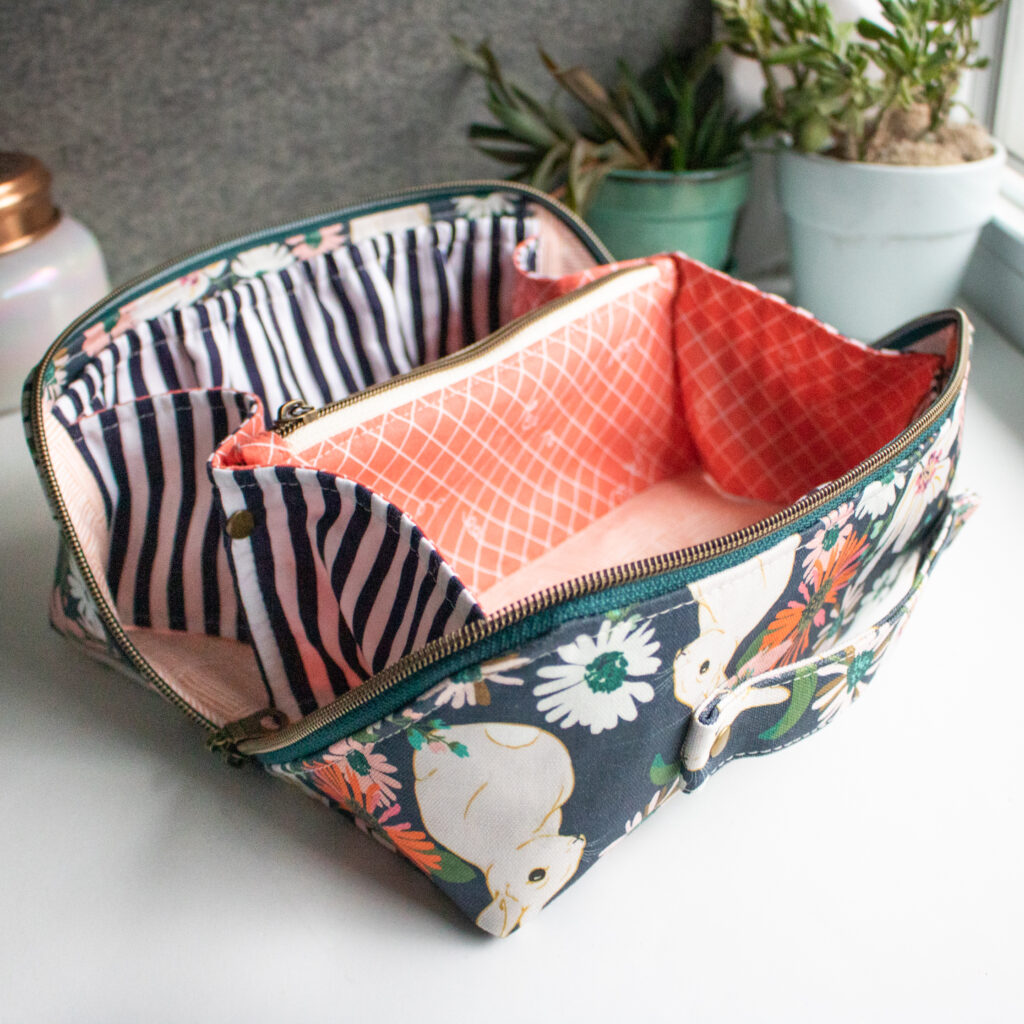
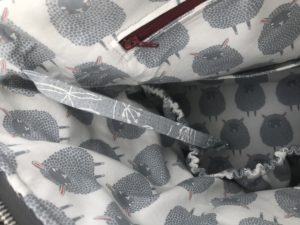
With a single piece exterior, this bag has been simplified with sleek style and minimal seams. There are four different inside options of the bag for you to mix and match for your needs. If you want to keep things basic, you can even leave them all off for a streamline version of the pouch. Best of all, the lining finishes with hidden seams for a clean and polished look.
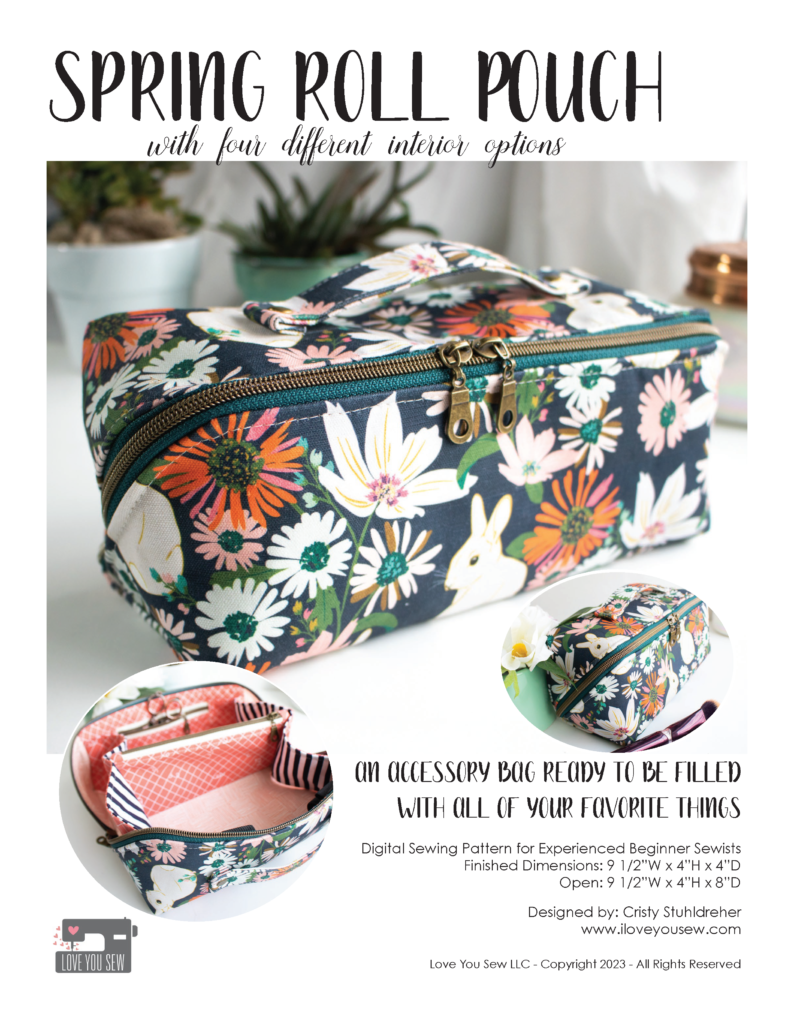
In this bag you will learn how to sew Y-seams (Dots are your friends!) This is when three seams will join together and its definitely needed in the lining. You will also use nylon zipper tape and learn several finishing techniques. This pattern shows how to make a divided compartment pocket and how to make other pocket styles.
Inspiration

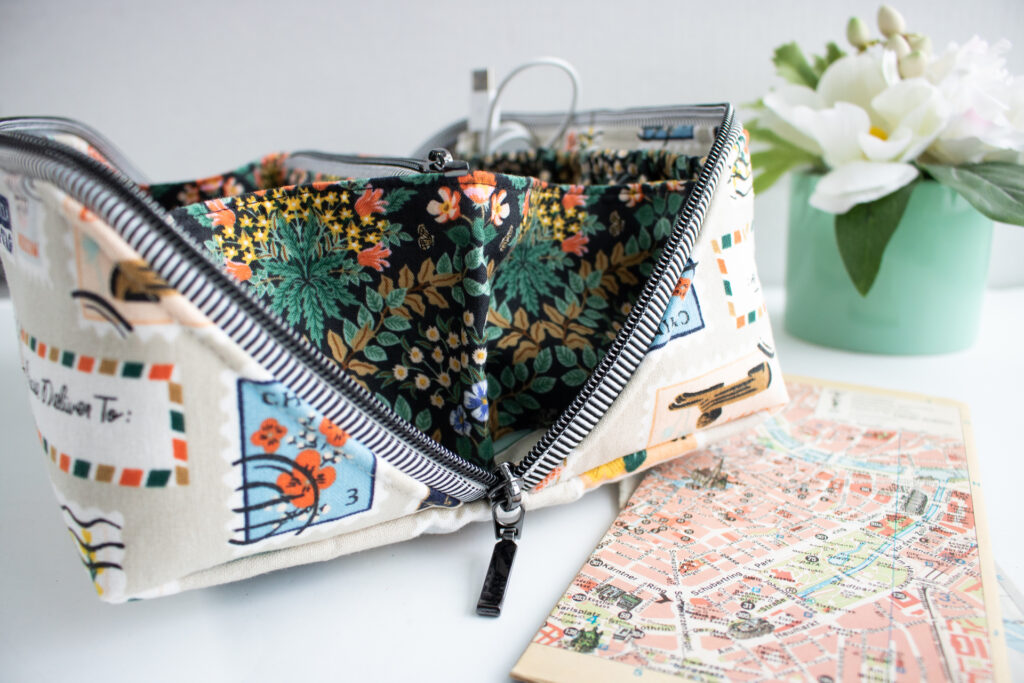
When I saw this unique angled zipper and how it can be used to open a pouch to twice its initial footprint, I was intrigued! But of course, I wanted to make the design better than the cheap version I saw in the wild. This meant making it more sleek and most importantly, compatible for a domestic sewing machine.

As I was playing around with ideas, I wondered if it was possible to have a one-piece exterior….and it was! This keeps the Spring Roll Pouch streamline and with less seams, means less sewing. And less sewing, means some saved time! My other main objective was to have a clean finish. This means NO binding (I think you all suffered enough with the Christine Sling) and I wanted to make sure my next release was traditionally “birthed.” 😉
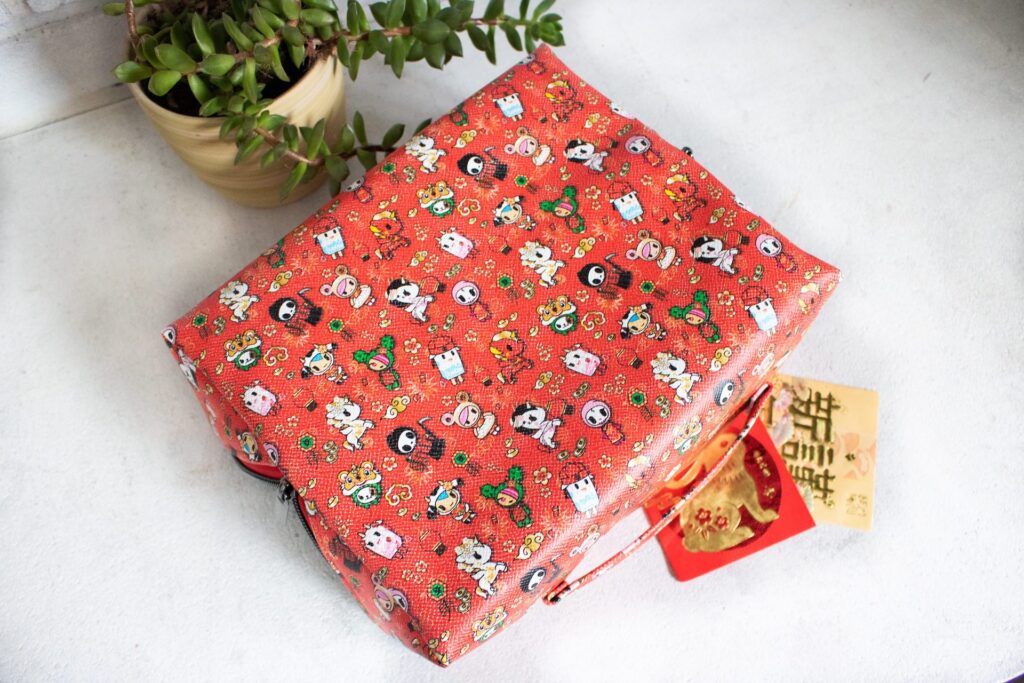
Even after figuring out the design and construction, the name is always the hardest part. But since the Lunar New Year was quickly approaching and I was thinking about all my favorite foods, this pouch reminded me of the yummy Spring Roll. With the bag opening wide and how it “rolls” back up, Spring Roll had to be the name.
Bag Features

  • Large Zipper Opening
  • Wide Handle
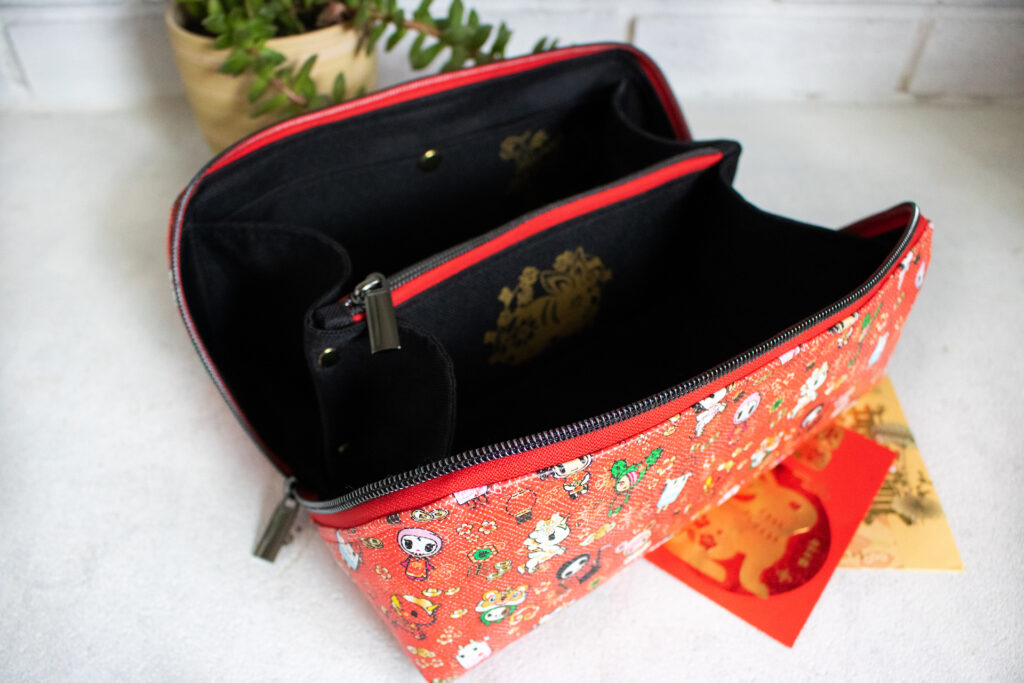
  • Divided Zipper Compartment
  • Clean Finish – No Bias Tape
  • Different Interior Options: Slip Pocket, Elastic Pocket, Flat Zipper Pocket, Elastic Slots
Materials Needed

FABRIC

HARDWARE

  • (1) 22” #5 Nylon Zipper Tape with (2) pulls (Idle Blooms, Wawak, Amazon, By Annie)
  • (1) 8” #5 Nylon Zipper Tape with (1) pull
  • (6) Sets of Rivets (8 mm post length) (optional)

The Spring Roll Pouch uses exactly 1 yd of zipper tape, if you choose the Flat Zipper Pocket option. Otherwise, you just need 30″ to complete the bag. I love using nylon zipper tape because of it’s versatility, color and finish options, and how I, personally, don’t need to switch out presser feet for the #5 width. Due to the trickiness of the zipper installation, I used nylon zipper so that it could easily be sewn across and not have to be mindful of ends and stoppers.

FRONT/BACK OPTIONS

  • Elastic Pocket – (1) 10” length of 1/4” Elastic
  • Slip Pocket- (1) 12.5mm (or smaller) Snap Set 
  • Zipper Pocket- (1) 6” #5 Nylon Zipper Tape with (1 pull)
  • Elastic Slots- (2) 6” length of 1/2”-1” wide Elastic

Based on your selection for the Front and Back of the Spring Roll Pouch, you’ll need these optional notions.
Fabric Recommendations

It’s important to know that this pattern was written for canvas and quilt cotton fabrics. The bag making world is huge and there are SO many different fabrics out there. With that number of fabrics combined with all the different types of interfacing, I always have to have some constraint or else the instructions would go on forever. As you select your fabrics, keep in mind the weight, structure and feel with the intended finished bag. Home decor and/or bottom-weight fabrics such as cotton or linen blend canvas, duck cloth, and denim with weights of ~ 6-8 oz/sq yard would be great for the Main Fabric. The Lining is based on quilt cotton and woven fabric with similar weights of ~4 oz/sq yard, such as linen or chambray.

You can use quilt batting, sew-in fleece, or foam with the Main fabric. The quilt batting/sew-In fleece will you a softer, pliable feel while helping to cover the feel of the inside seams. The foam will provide more structure and loft, with more of that “plump” look. If you are using foam, the interior can be made completely with Lining fabric. But if you opt to use batting or sew-in fleece, use Main Fabric for the Base and Front/Back pieces to get added stability.
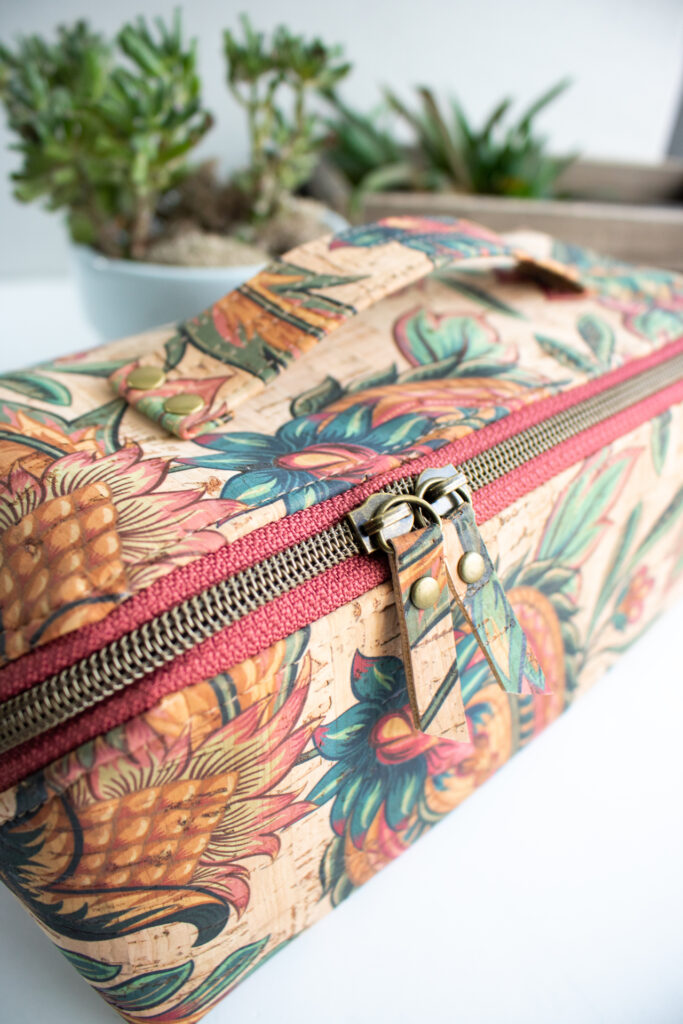
If you decide to use vinyl, cork, leather or other fabrics with a heavier hand, you may be able to omit interfacing, but still optionally use batting for soft structure. You can also possibly omit interfacing on the interior of the bag if using waterproof canvas, oilcloth, and other coated fabrics with a heavier hand. Due to the angled zipper and the trickiness of closing the pouch, it is recommended to NOT use vinyl, cork or leather as your Base or Front/Back pieces.

With the dimensions I used, I’m very proud that you can use 1/2 yards of fabric and if you want to get scrappy, the interior can be made from fat quarters. The Lunar New Year custom vinyl and cork fabrics I used were sold as 18″ long rolls and the exterior fits right on…even with a little room to spare!

As I was working on this pattern, you KNOW I had to use plenty of other substrates to see how they would look and handle with the Spring Roll Pouch…all in the name of research, right?!? The cork and vinyl versions definitely come together quickly with the omission of interfacing. However, if you are new(er) to bag making, I HIGHLY recommend making your first bag with the canvas/quilt cotton combo.
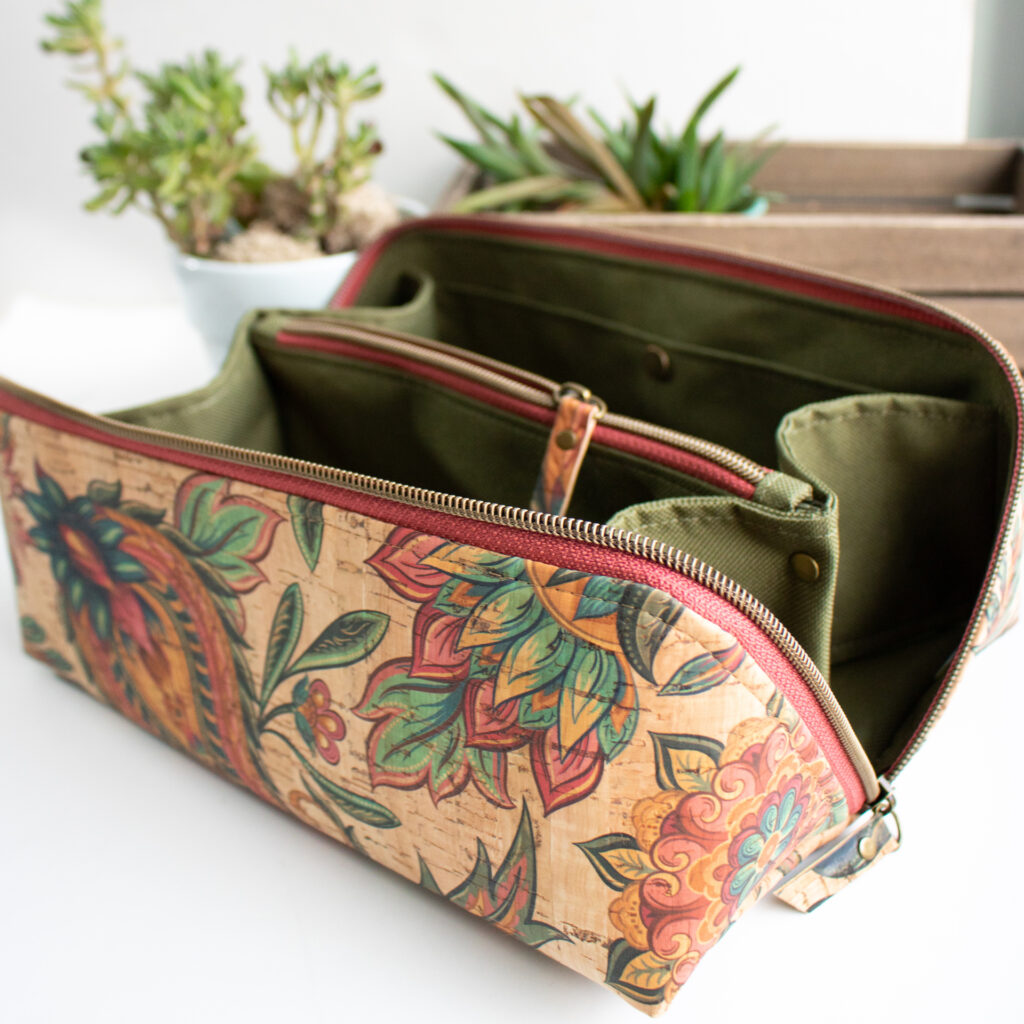
I’ve included lots of different versions in this post and the following are my favorite combinations as you select your fabrics:

  • Stamps Version
    • Main = Cotton/Linen Canvas with Soft & Stable Foam
    • Lining = Quilt Cotton with Canvas for Front/Back and Bases
    • Interfacing = Woven
  • Bunnies Version
    • Main = Cotton/Linen Canvas with Cotton Quilt Batting
    • Lining = Quilt Cotton with Canvas for Front/Back and Bases
    • Interfacing = Woven
  • Navy Floral Version
    • Main = Cotton/Linen Canvas with Soft & Stable Foam
    • Lining = Quilt Cotton
    • Interfacing = Woven
  • Cranberry Vinyl Version
    • Main = Light Faux Leather
    • Lining = Ottertex Waterproof Canvas with Faux Leather
      • omitted inner lining of Divider Pocket, inner lining of Slip Pocket and inner Gussets
    • Interfacing = none
    • Handle = made with single fold
  • Cork Floral and Palm Versions
    • Main = Cork only (Portuguese made from Cork and Cloth)
    • Lining = Ottertex Waterproof Canvas
      • omitted inner lining of Divider Pocket, inner lining of Slip Pockets
    • Interfacing = none
    • Handle = made with single fold
  • Lunar New Year Version
    • Main = Vinyl only (custom printed from Sewful Therapy)
    • Lining = Ottertex Waterproof Canvas
      • omitted inner lining of Divider Pocket, Slip Pocket, and Flat Zipper Pocket
    • Interfacing = none
    • Handle = made with single fold

Construction

This bag was designed with a domestic sewing machine (I use a Juki 2010Q,) so a home machine with some heavier needles will do the trick. It is for an experienced beginner who is familiar with sewing zippers, basting, and y-seams. Although this bag looks complicated, the steps are more simple that you would imagine!
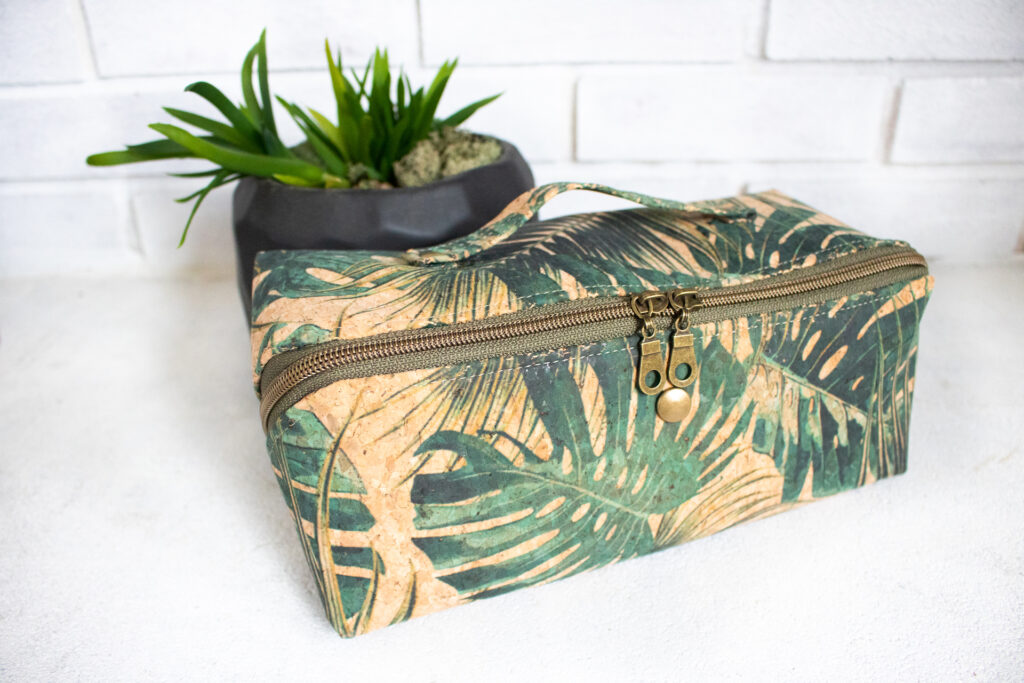
Currently, there is one video on my Love You Sew YouTube Channel that takes you through the most difficult parts of closing the Spring Roll Pouch, but I WILL make a full tutorial soon. Honestly, I didn’t think this pattern would be as popular as it has been and I try to direct my time and resources toward patterns that have a bigger customer base. Well, you definitely let me know and I’ll be working on it this upcoming week.
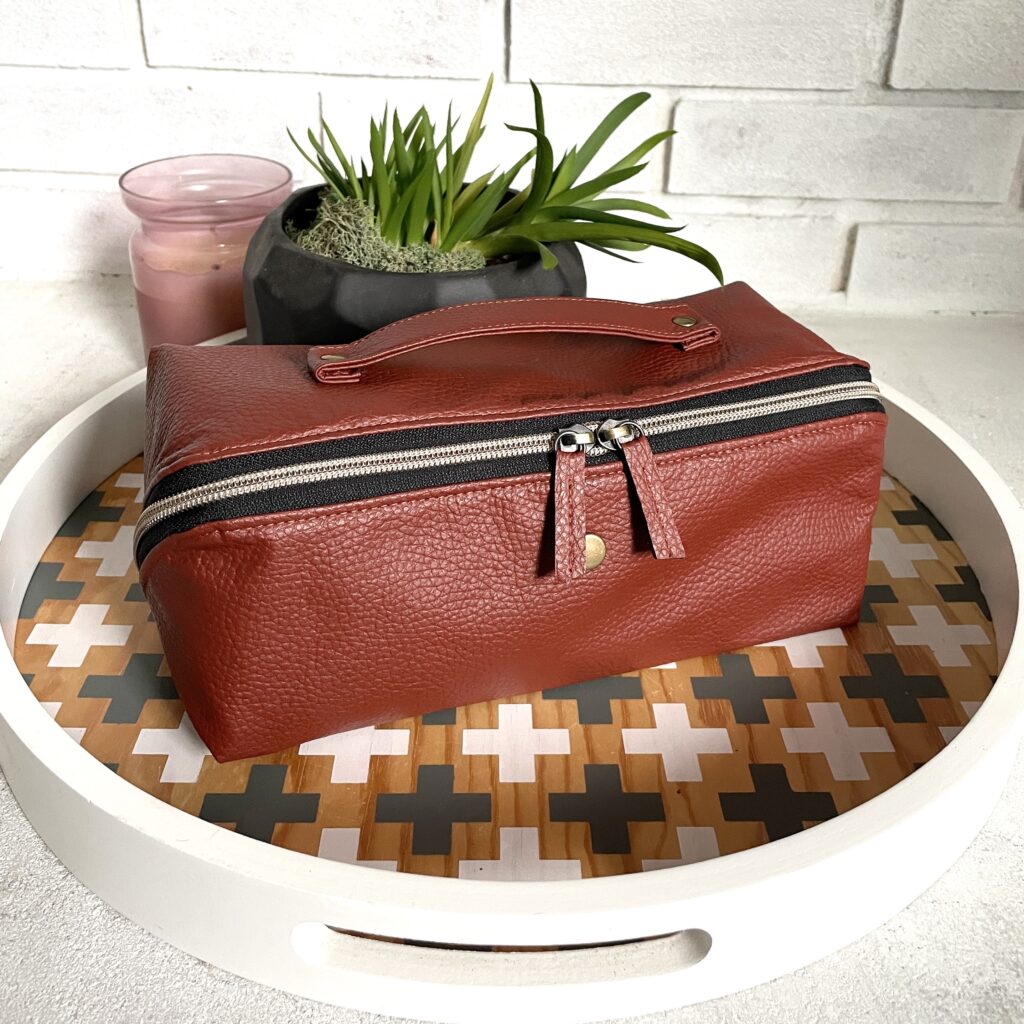
I hope all of you love the Spring Roll Pouch as much as I have loved writing and designing the pattern for you! Don’t forget to tag your social media posts with #springrollpouch and #loveyousew patterns so I can see your beautiful makes!

Happy Sewing,

Cristy

*This post may contain affiliate links for which I may receive a small commission that helps me run this website. I appreciate all of your support.
Erin Backpack Tester Round-Up

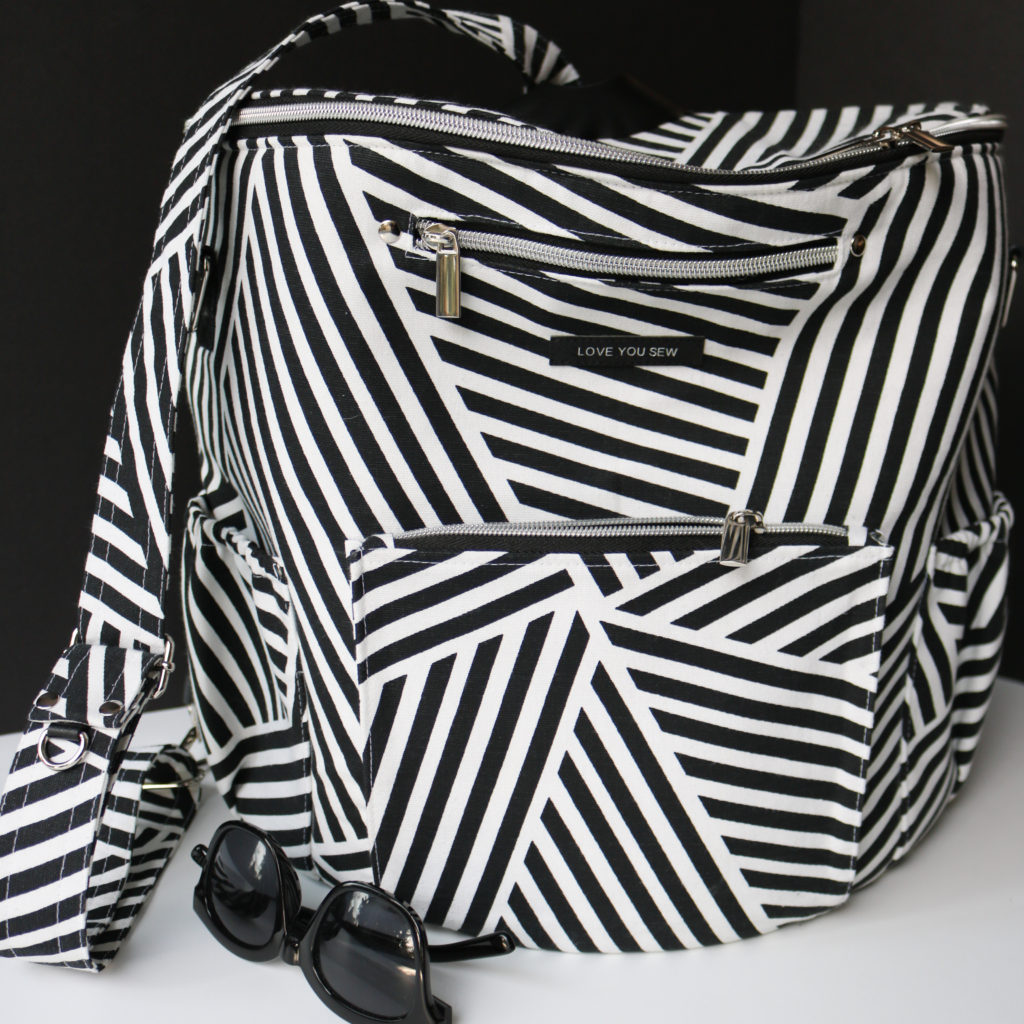
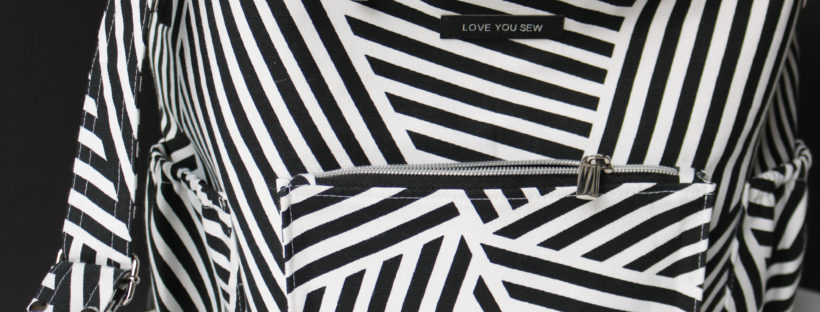
Striped Erin Backpack by Love You Sew

One of my samples

Love You Sew patterns could not happen without the support of my AMAZING testing team. You can count the number of my published patterns on two hands now, but I still feel SO new to the game. With every pattern, I’ve been learning more about design and the testing process.  I have them to thank all of them for supporting me and even bearing through some of the growth pains…
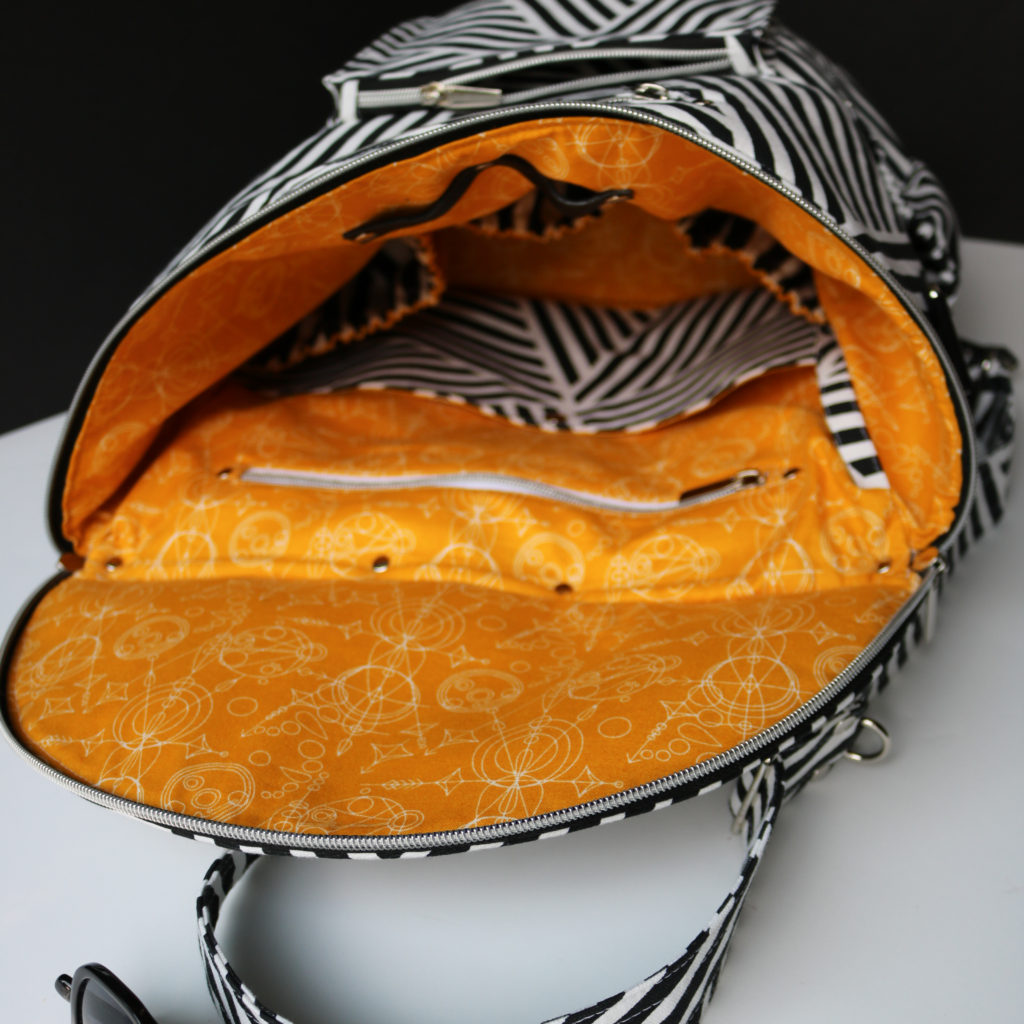
Erin Backpack by Love You Sew - Interior View

Early Sample with different play of rivet placements

This last call out to test the Erin Backpack  came right smack in the middle of the holiday season and while COVID numbers were climbing around the nation. It left my group MUCH busier personally and unavailable to test.  I still wanted to release this pattern before Christmas for those stuck at with new stay-at-home orders in place so they could have a good winter project.  With these conditions, only a few testers could complete the bag, but there is still a TON of inspiration below.  You can also see other versions of the Erin Backpack here and here.
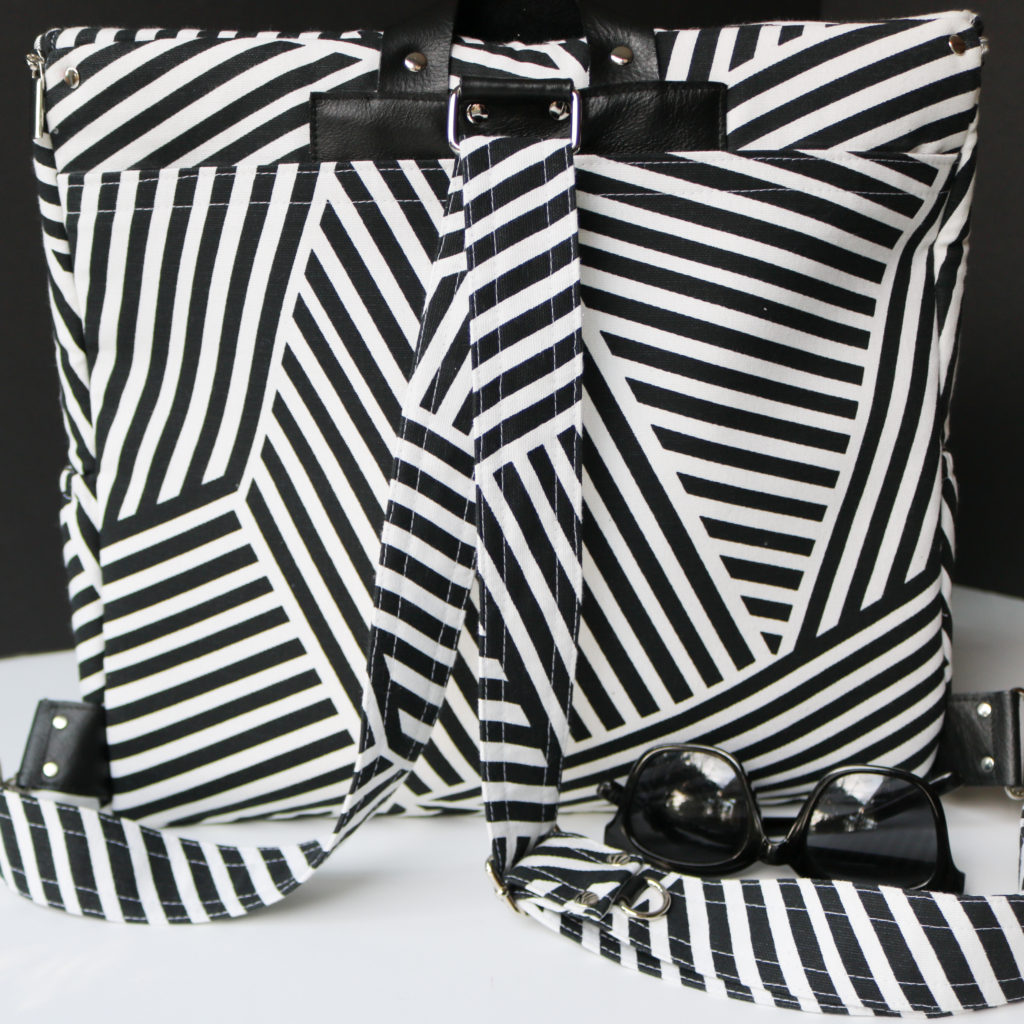
Erin Backpack by Love You Sew - Back View

Early Sample – Back View

This is one of my early samples while I was still playing around with construction ideas.  Detailed information on it as follows (with affiliate links):

TESTER VERSIONS

Without further ado, this first bag was made by Jean W.  She used hardware which you can find here along with metal zippers on the outside and nylon on the inside. I absolutely love the fun sheep lining she used  — It is SO incredibly cute! This next bag is made by Maggie M.  She is a prolific bag maker and you can snag many of her makes for your very own (just DM her!)  At first, I thought Maggie used a pink glitter vinyl for her backpack and it’s just regular cotton.  Way to get the look of vinyl on a bag!   I always enjoy seeing how Maggie plays with color and prints in her makes and this is no exception. Nela B. is both a quilter and bag-maker! You gotta check out her makes…including her incredible piecing skills here on Instagram. The best part of bag-making is the at interior can be just as good as the outside.  Nela used a beautiful floral print for the lining  swapped around some of the interior features to make it uniquely her  own! Carrie F. is the newest tester to join the team and also makes her bags to sell.  You NEED to check out her Etsy shop for some beauties.  She  came through with this gorgeous succulent version of the backpack. She is expecting (congrats!!!) and already has plans to use her new creation as a diaper bag. As you can see, there are all different ways to personalize your Erin Backpack. With a change of fabric and zipper, you can truly give each bag a completely new look. I can’t wait to see what you do with this pattern. Don’t forget to use #ErinBackpack and #LoveYouSewPatterns so I can see your beautiful makes on social media! For Erin Backpack Introductory post, head here. For Erin Backpack Sew-Along, come back soon — It’s tentatively planned for March 2021.   Hugs and Stitches! Cristy      
This post may contain affiliate links.  For my full disclosure, read here.
Colleen Tote Bag Gemology Tour

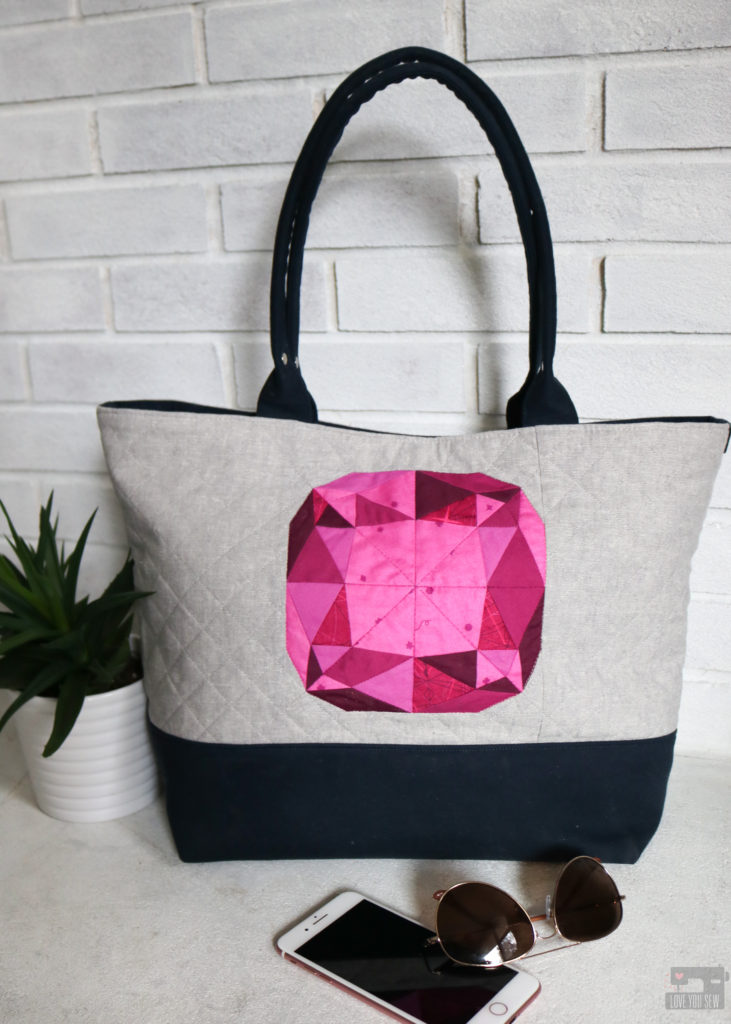
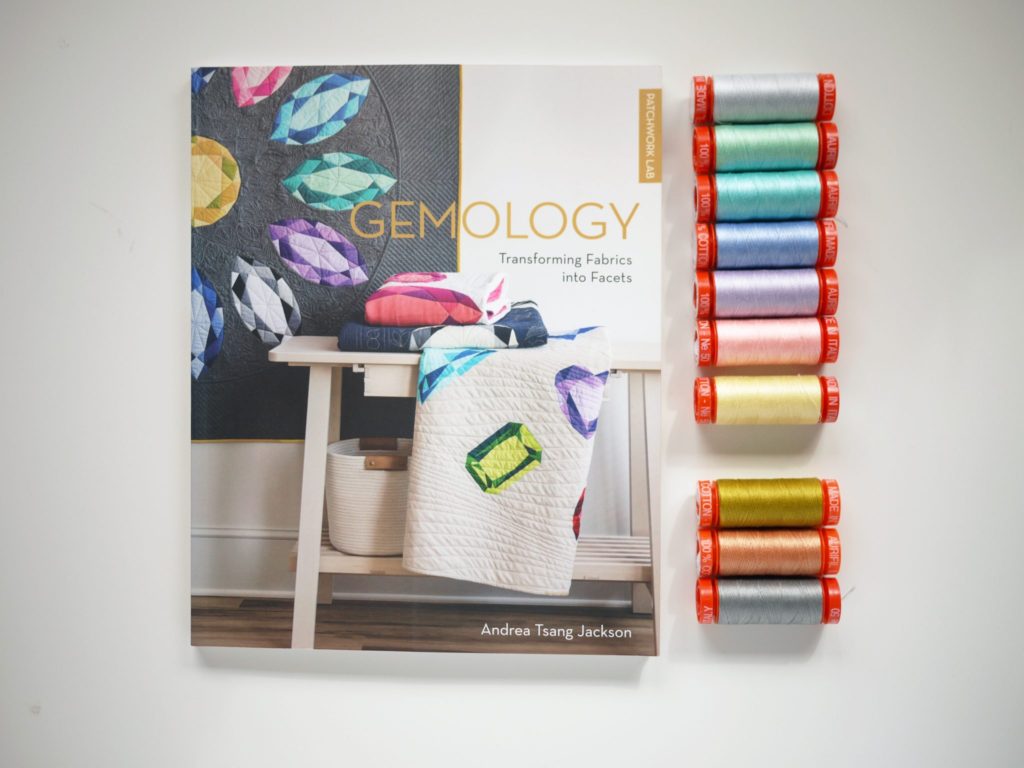
Gemology Blog Tour with the Colleen Tote

Today is my day on the Gemology Blog Tour supporting my friend, Andrea Tsang Jackson and her new quilting book, Patchwork Lab – Gemology. I had the absolute pleasure of meeting Andrea earlier this year at QuiltCon – Nashville after following her on Instagram with her amazing quilt art for so long.  We met over coffee and had SUCH a great conversation about building businesses in the fiber arts world and also being immigrants in North America.  Our stories are very similar and one of the reasons why I was thrilled when she asked me to be a part of this tour!!!

Colleen Tote Bag Gemology Tour

This new Patchwork Lab – Gemology book is absolutely beautiful and jam-packed with designs featuring nine different gem shapes which you can adjust into four different sizes ranging from a 6″ to a 24″ square block. There are additional instructions to make 5 quilts and a sweet little coin purse. The great thing about the book is that it is not just another quilting book. There is SO much additional information about how light hits the facets producing different colors and info about birthstones themselves.  It really gives you extra appreciation of the blocks as you construct them.

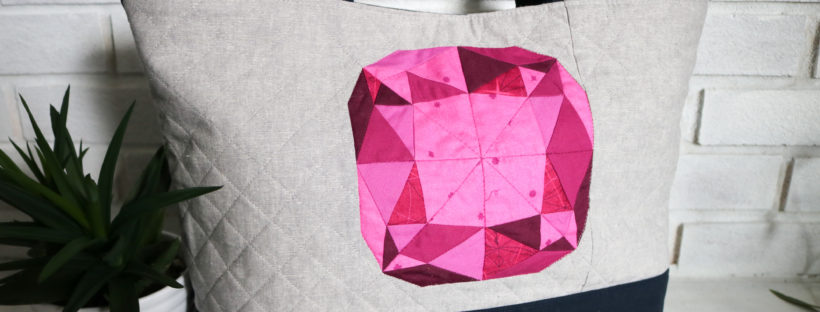
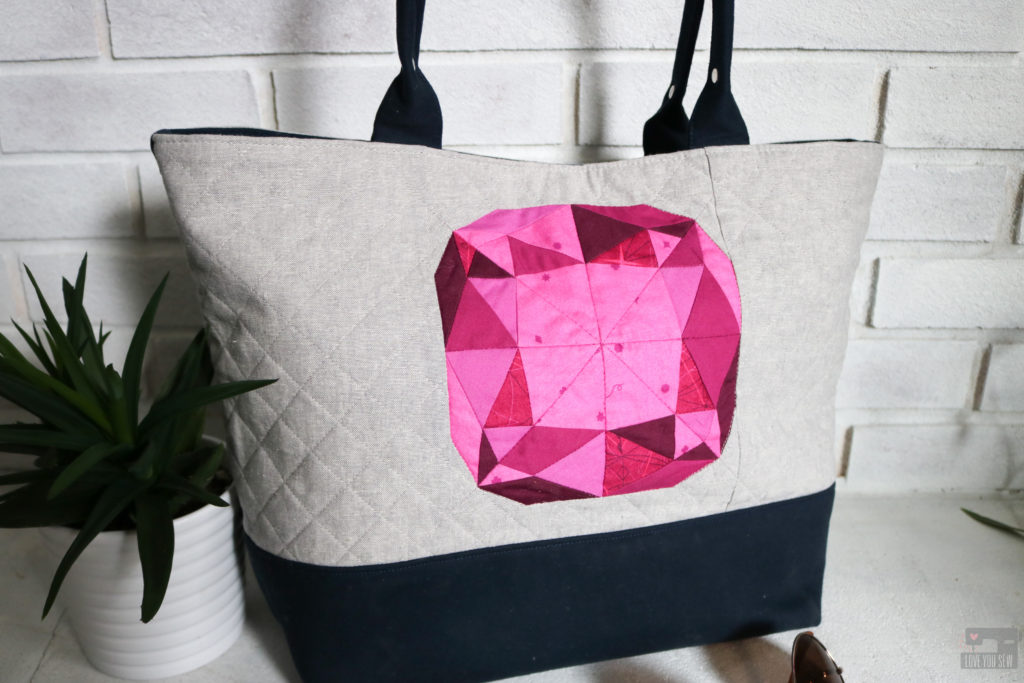
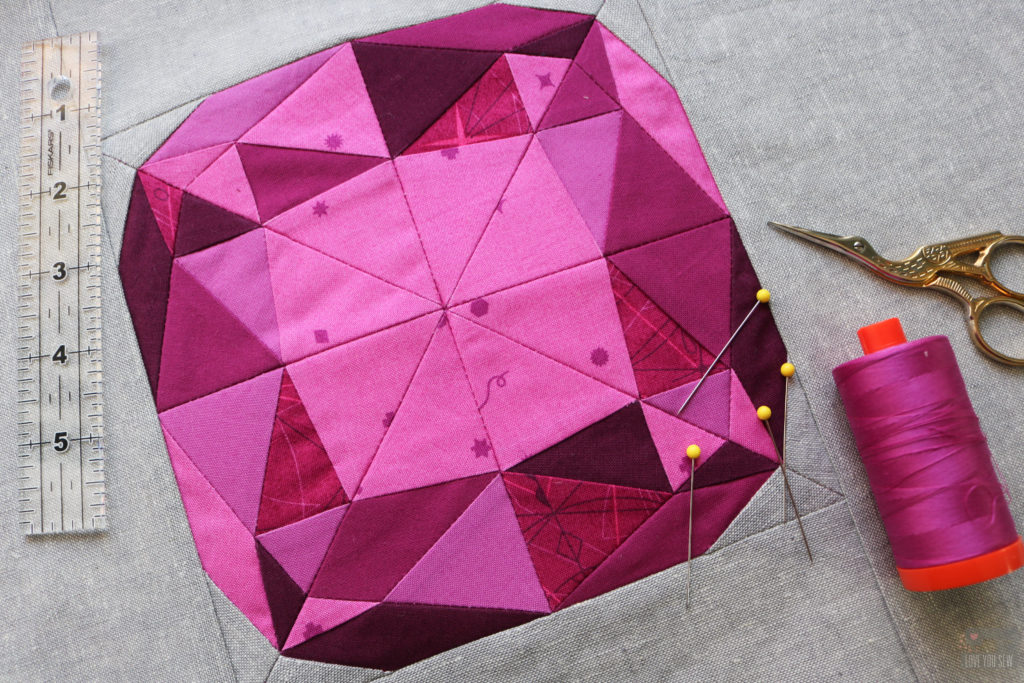
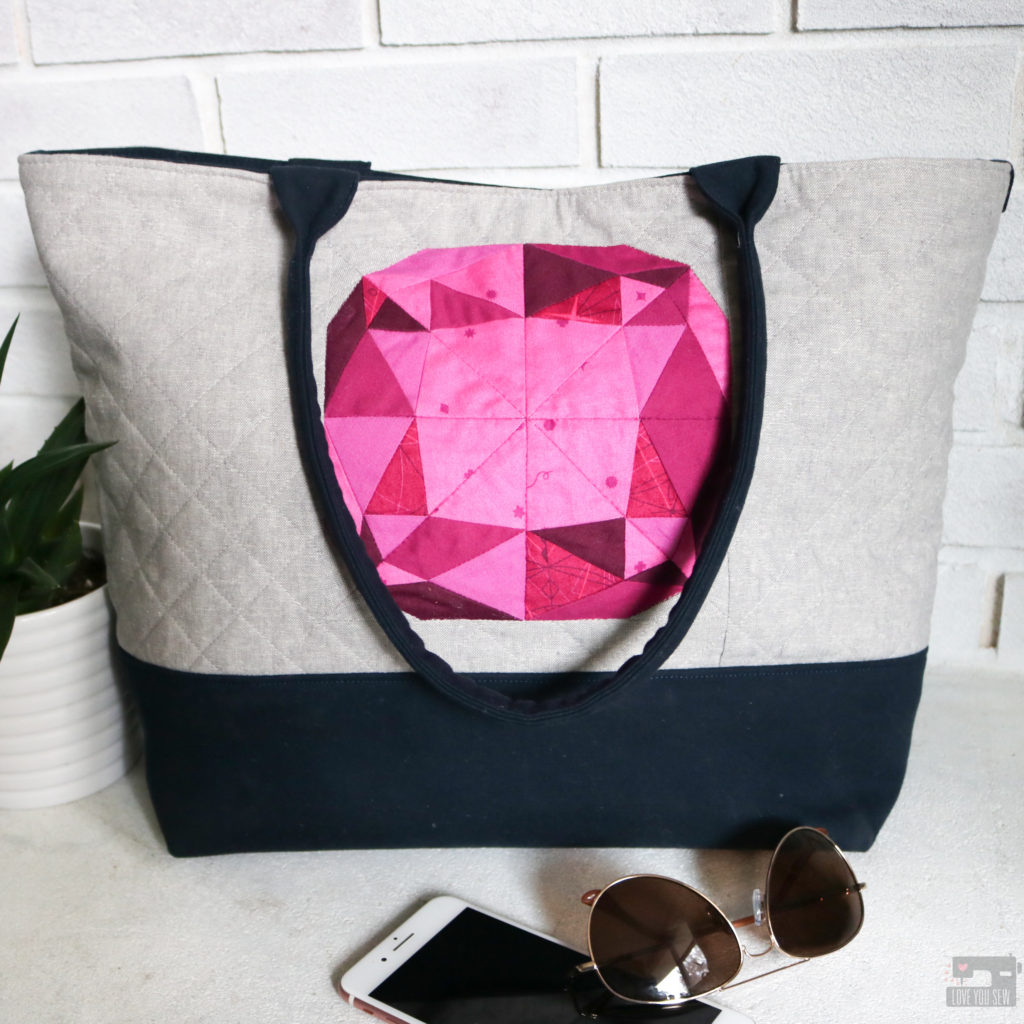
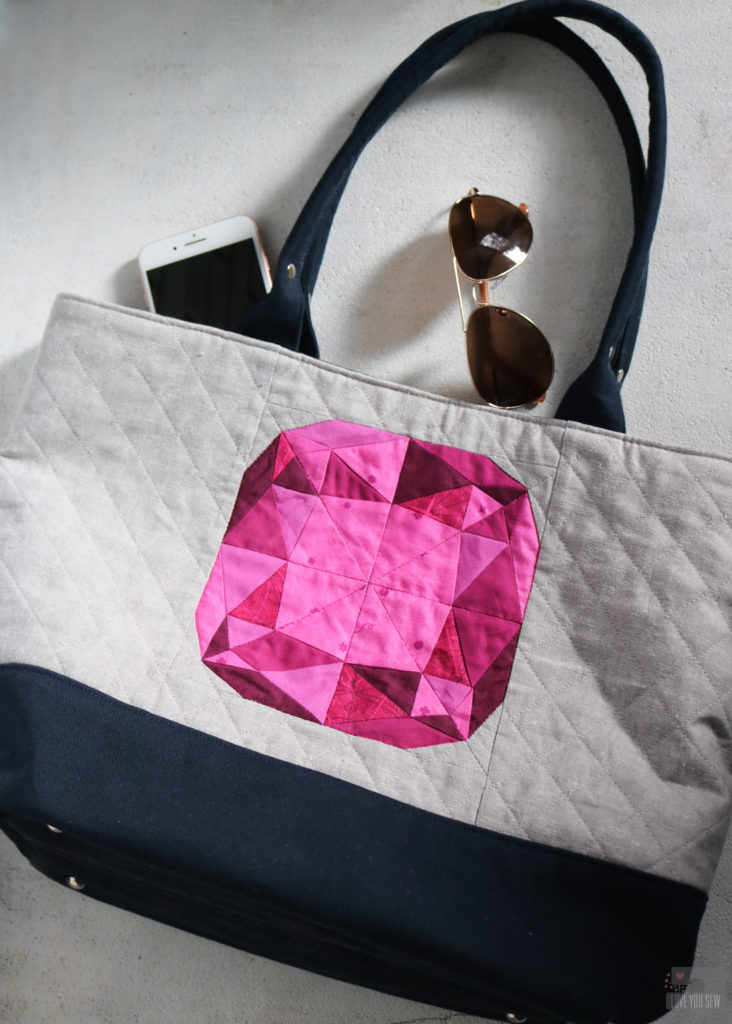
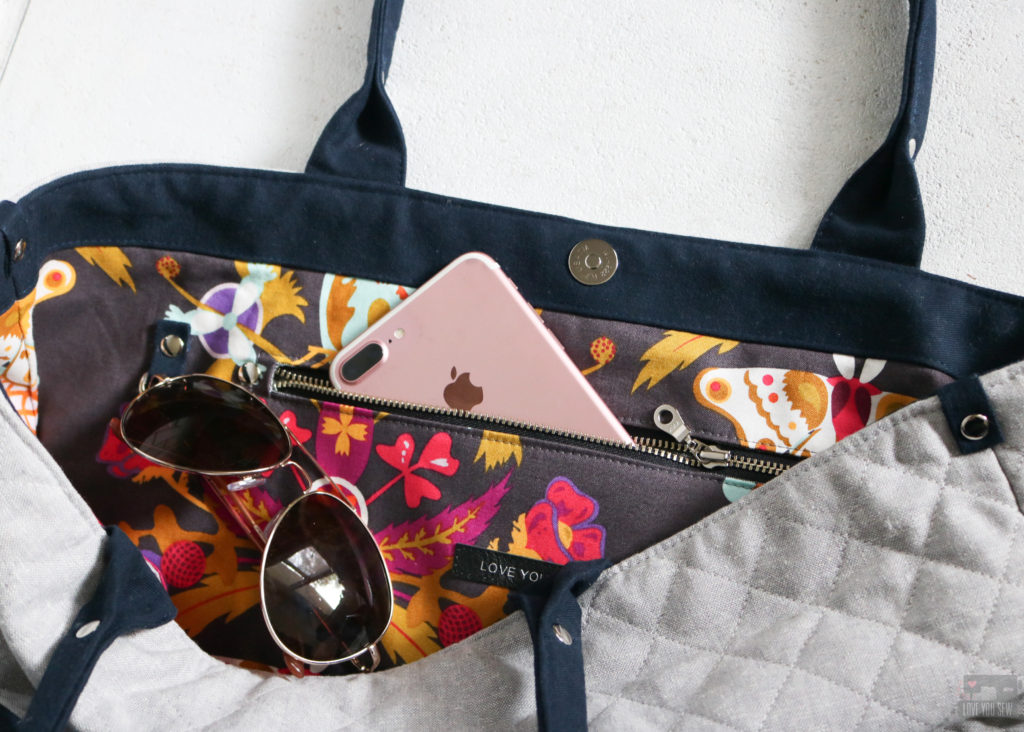
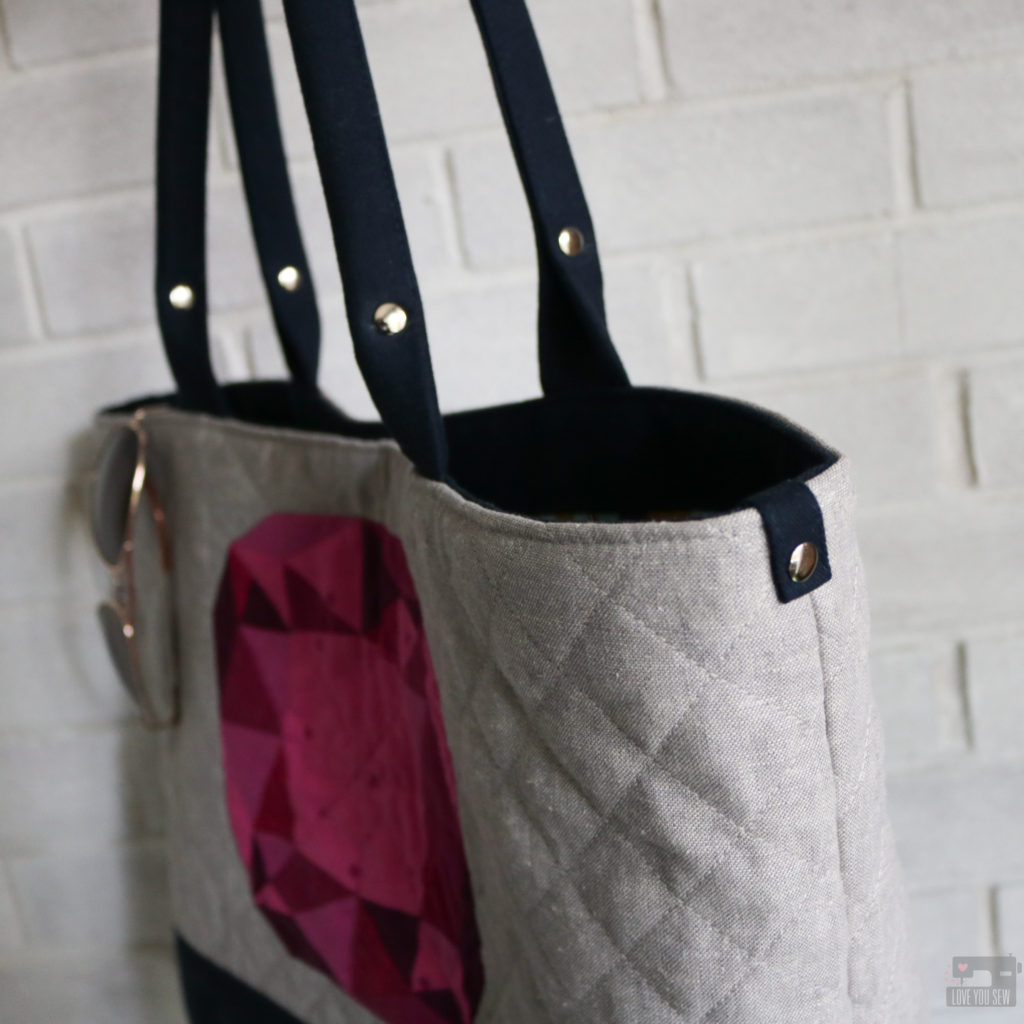
I knew after seeing the book, I would use the  6″ block for the exterior of my Colleen Tote Bag pattern.  When I first designed this bag, the quilter in me wanted enough open space on the exterior to eventually use quilt blocks to add some fun flair to the outside.  I’m so glad I finally got a chance to make this happen with the Cushion cut pattern.

Fabric

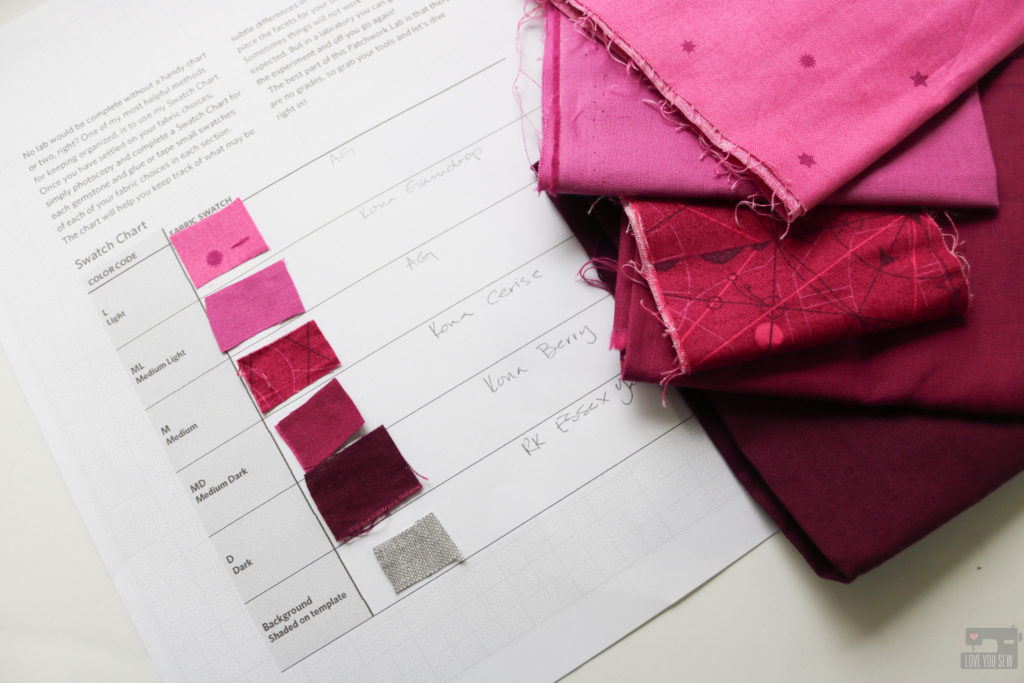
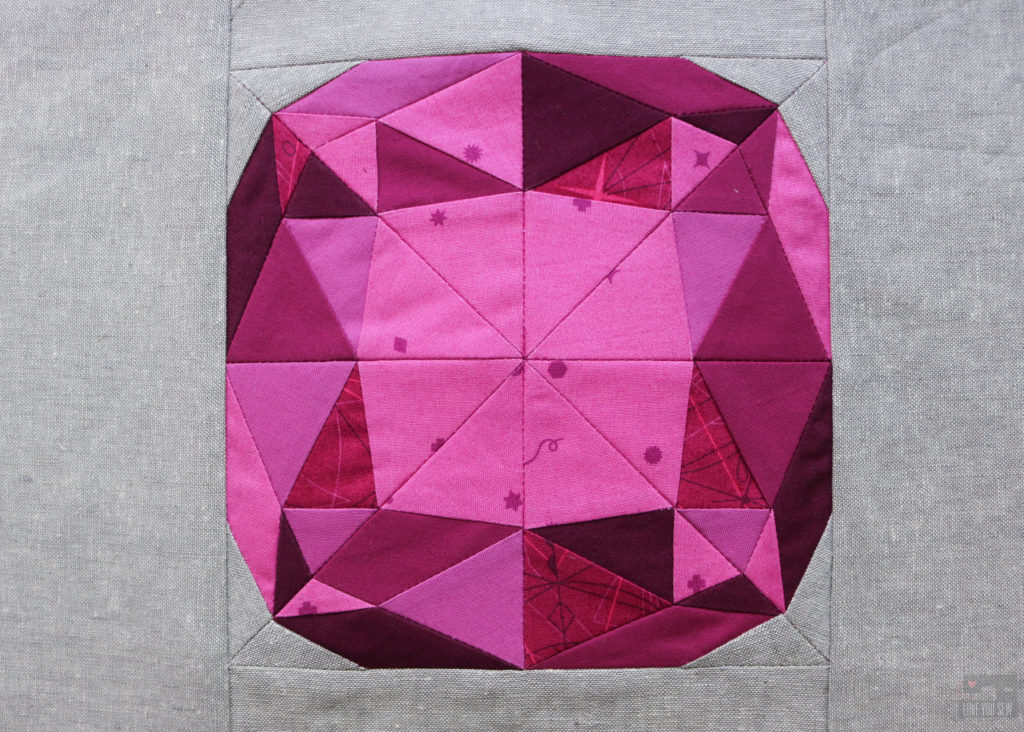
There are great fabric suggestions in the book for many of the birthstones, but I decided to use my own stash and make up my own gem. The Swatch Chart reference sheet is definitely a must IMO. It helped me sort out my fabrics and was a great visual reference as I was piecing the block together.

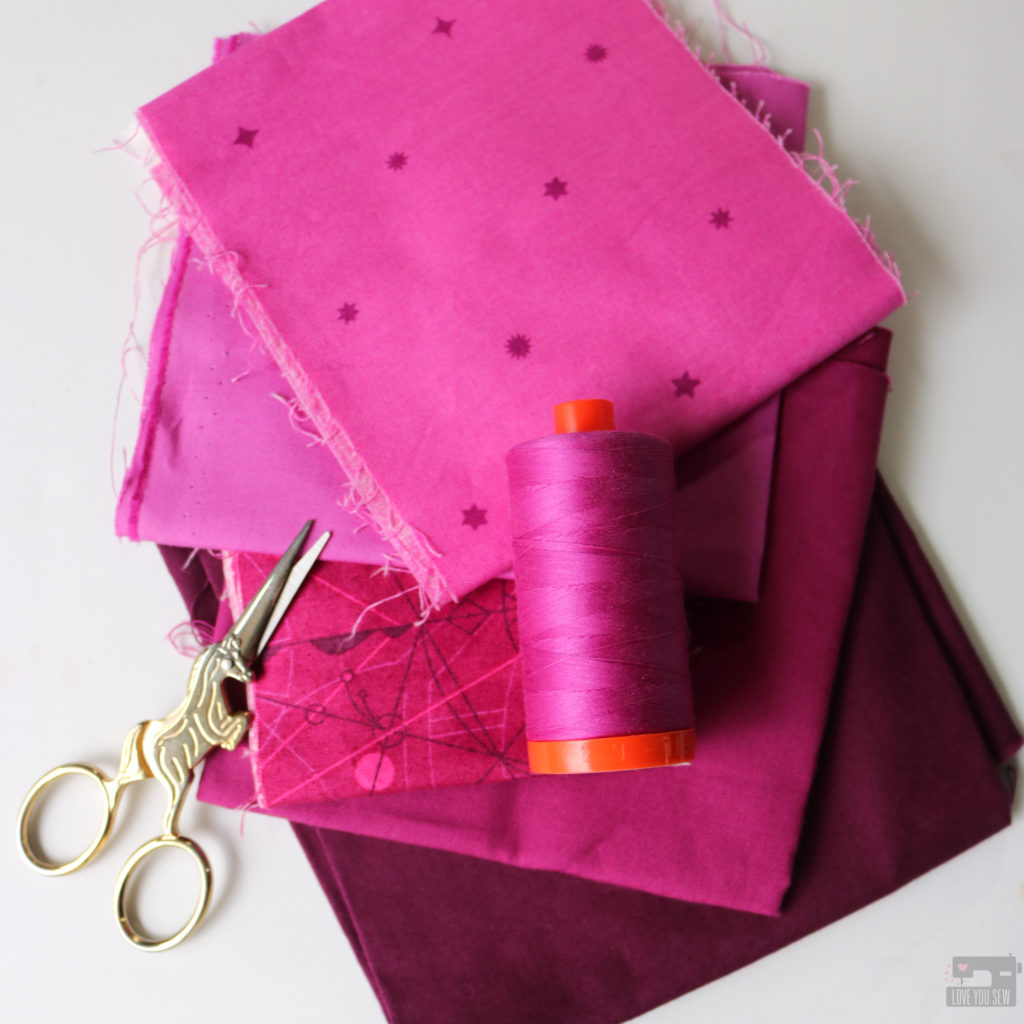
I really wanted the gem to pop on a bag so I used the following in the magenta family: (aff links)

For the rest of the bag, I used:

To Make the Side Panel with Gem Block

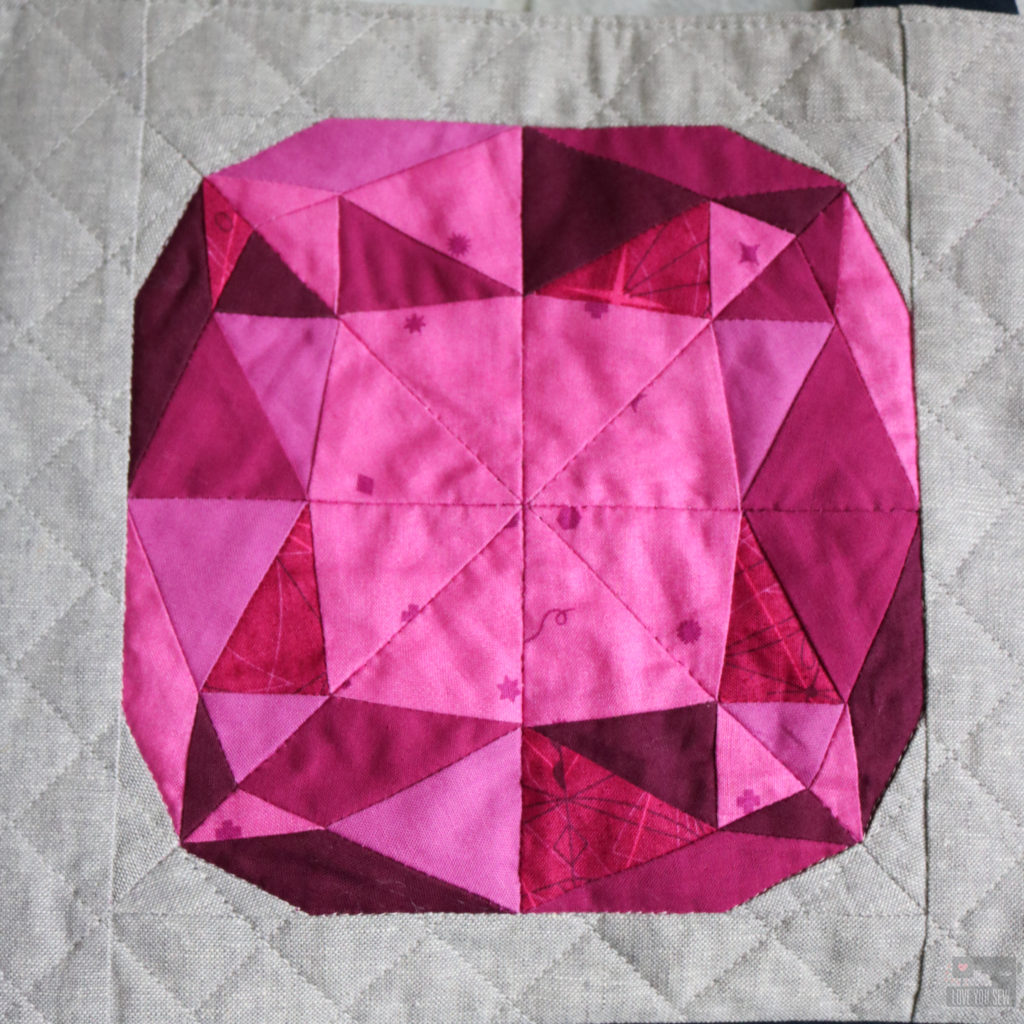
With this bag, I knew I wanted the exterior to be quilted for the texture and also to help secure the block to the interfacing. When doing this for a bag, it is always important to cut the fabric larger than what is needed, quilt it, THEN come back and cut it to size. Quilting will always shrink down a block and can become pretty significant difference if you are using more lofty batting or interfacing.

Since the finished panel would be 20 1/2″ x 10″, I added 3″ wide borders to the top and bottom (referred to as the “sides” in the book) and then 12 1/2″ x 7″ to the sides.  Instead of using fusible fleece as the interfacing, I swapped it out with Pellon 988 Sew-in Fleece.

I used matching Aurifil 2535 to stitch-in-the-ditch around the gem and then on all the intersecting seams that ran completely across the the pattern.  For the background, I used Aurifil 2615 to sew 1″ blocks at a 45* angle, stopping when I hit the gem. The nice part about quilting a bag panel is that you can leave the thread tails and just tie them off without having to bury any of them!

To cut the panel and create equal spacing above and below the block, you find the center horizontally and cut 4 3/4″ below the line and then 5 1/4″ above the line. The measurements are not equal to account for the different seam allowances as written in the Colleen Tote pattern.

Other Modifications

Every time I make a pattern (whether my own or someone else’s) I can’t help but add some different features so each one is unique.  I believe that every bag has it’s own personality and calls out for different features. I made the following changes to this Colleen:

  • Extended the key fob to 16″ in total length
  • Added a interior D-ring
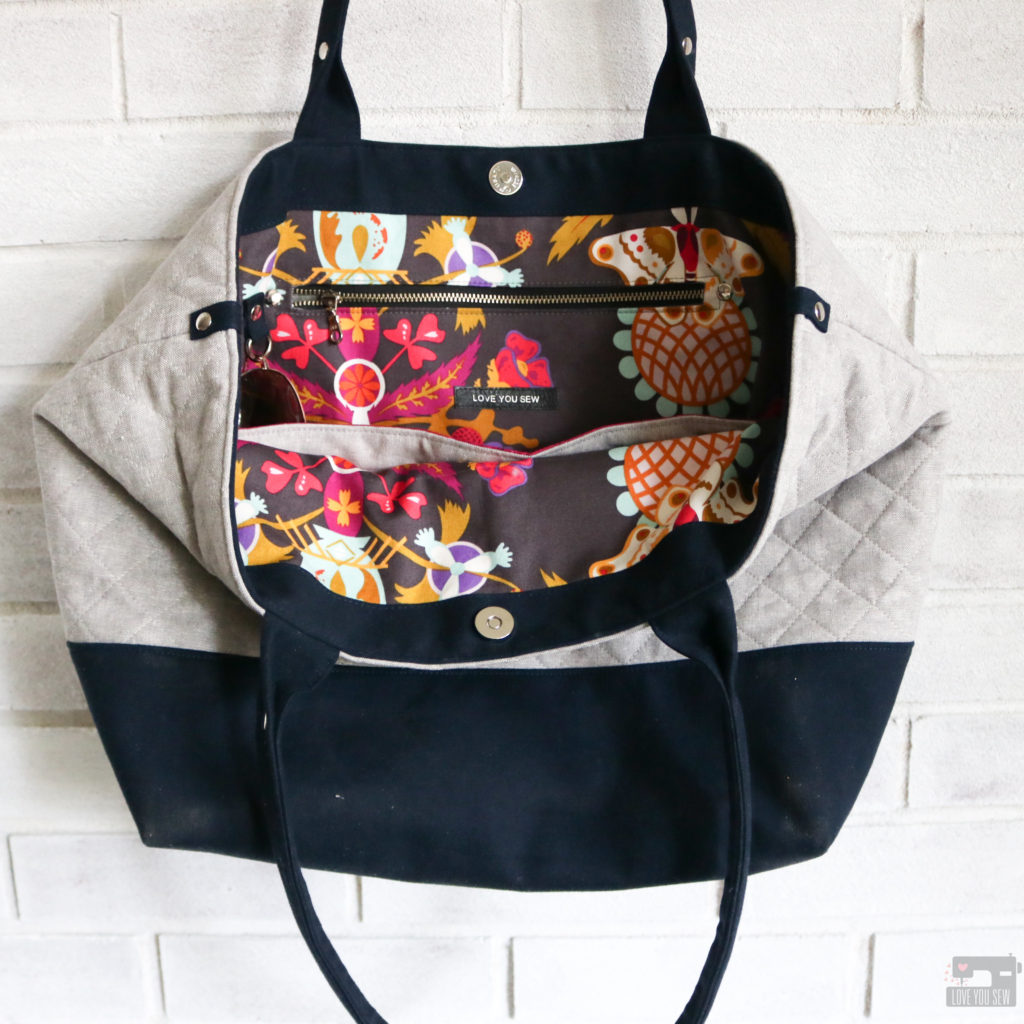
  • Added a magnetic snap to the interior band
  • Pieced the line with some of the Sangria Compass to bring some of the Gem colors to the interior
  • Added Purse Feet following the add-on instructions here.
  • Broke up the gray a little more on the exterior with some accent tabs and rivets.

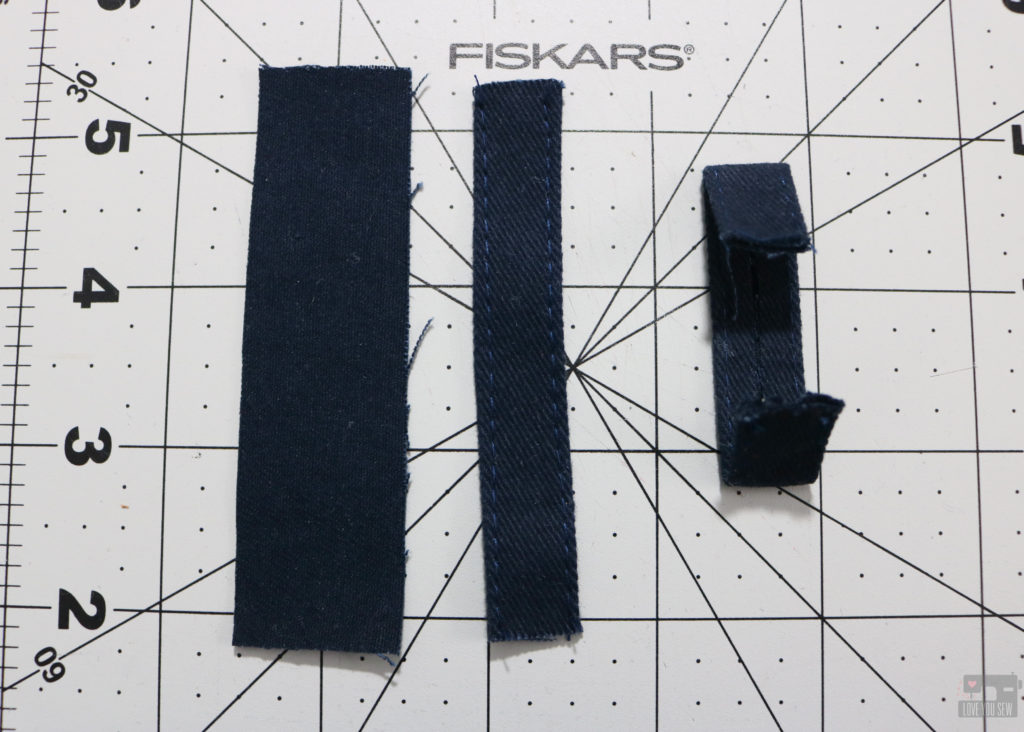
I did this by using the scraps I cut out of the bottom accent fabric.  You will need (2) 3 1/2 x 1″ strips.  Fold each long side to the center creating a single-fold tape and top-stitch 1/16″ along each side.  Fold down each short end by 3/4″ with wrong sides together.

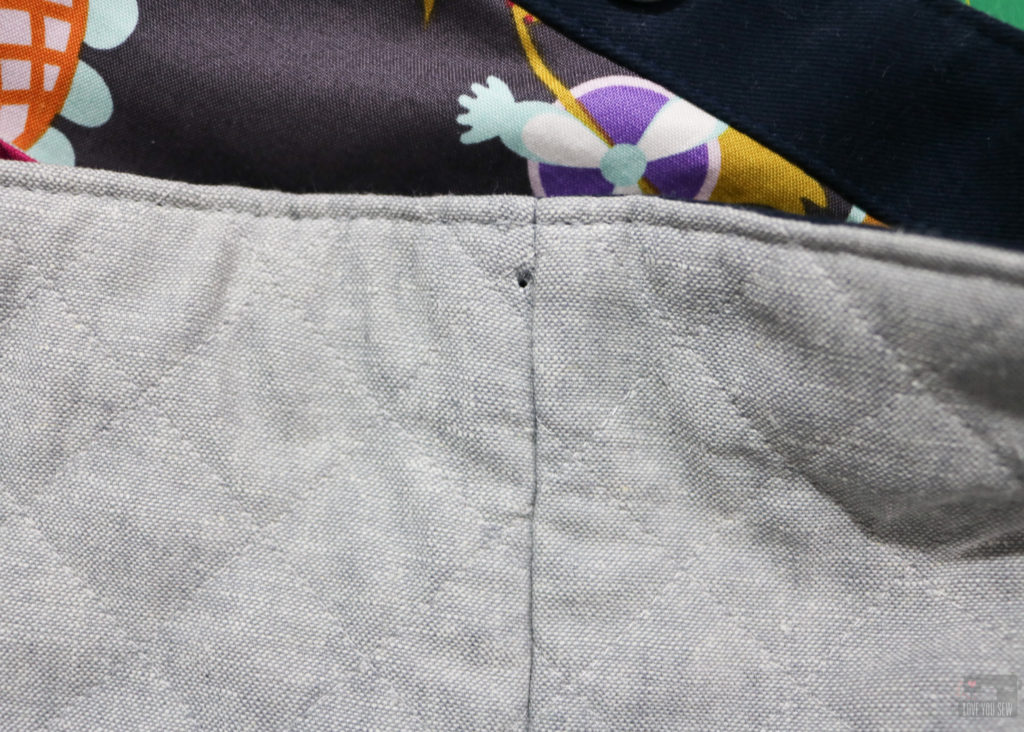
The trick to adding these tabs over the top of the bag is to fold the tab and cut those holes first.  Then place it over the edge of the bag and mark it just to the left of the side seam and cut the hole in the bag.  By moving the hole you won’t cut into the side seam but it will appear that the tab is centered from far away!  Add the rivet and now you have a cute tab that makes this look more high-end.

Please make sure you follow Andrea @3rdstoryworshop to keep up with the rest of the Gemology Blog Tour.  You can find her blog and shop her book here.

Tomorrow, Rebecca Makas is up with her Gemology Project.  Click to find her here.

I hope you enjoyed the new spin on the Colleen Tote Bag and all of the gemstone inspiration from Patchwork Lab – Gemology!


Hugs and Stitches,

Cristy


This post is in collaboration with Andrea Tsang Jackson for which I received a complimentary copy of her book.  //  This post may also contain affiliate links and you can read all the details in my Disclosures here.

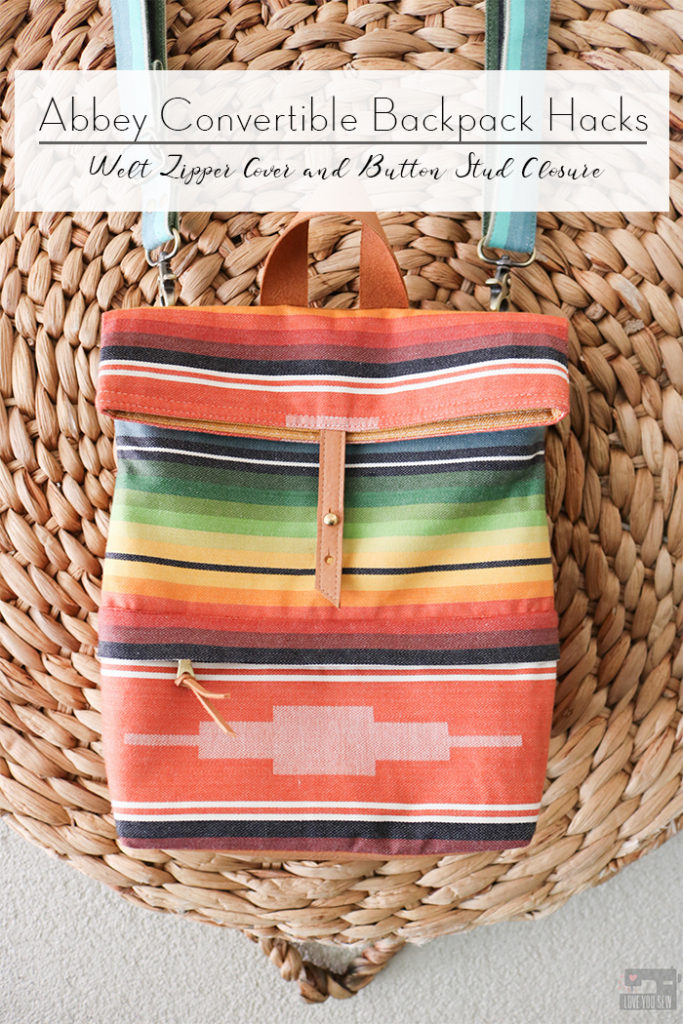
Abbey Hacks by Love You Sew

Abbey Convertible Backpack Hacks with Welt Zipper Cover + Button Stud Closure

Abbey Hacks by Love You Sew title

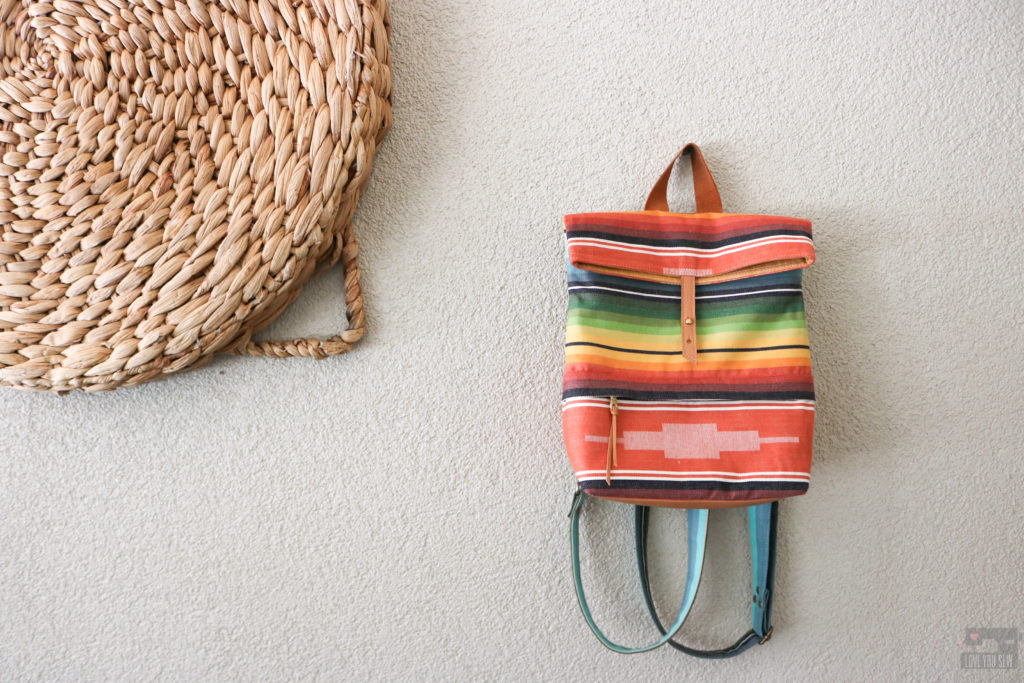
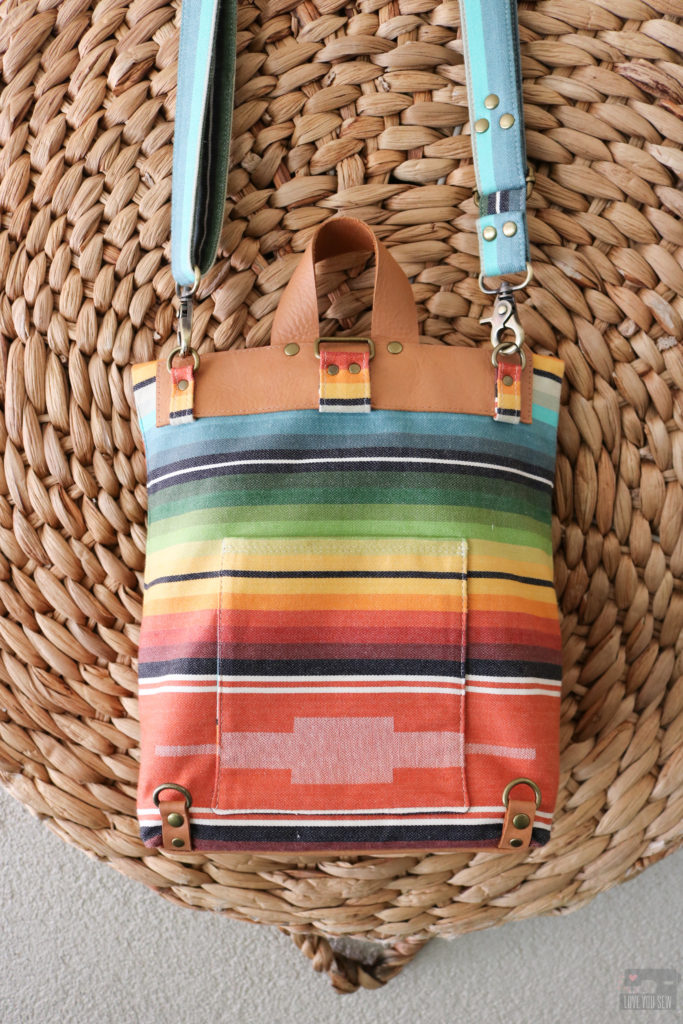
Hacking patterns is just so much fun when you can add more personal details to a project. Today, I’m sharing what I did for the backpack I made for real-life Abbey (the bag’s namesake.)  This post includes a cover for the front zipper, button stud and leather accents, and where I’ve added rivets. The Abbey Convertible Backpack is the latest pattern I’ve published and you can read up more about here, as well as check out all of the incredible tester photos for inspiration.

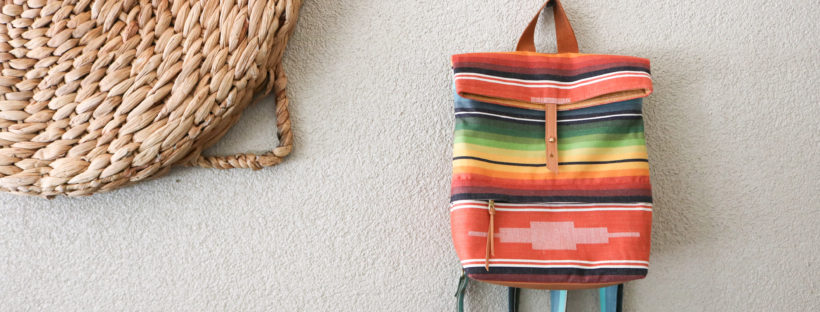
My Abbey is one of my nieces with a such a kind heart and adventurous spirit.  She is incredibly intelligent and is now a physical therapist in Michigan.  She has always been a straight shooter and that’s why I love her and hope to catch her sometime this summer.  Abbey is quite the outdoors-person and goes backpacking on her own all the time.   This southwestern-insprired woven fabric reminds me of her and all the probable sunsets (and sunrises) she’s seen on her many trips.

Front Zipper Cover

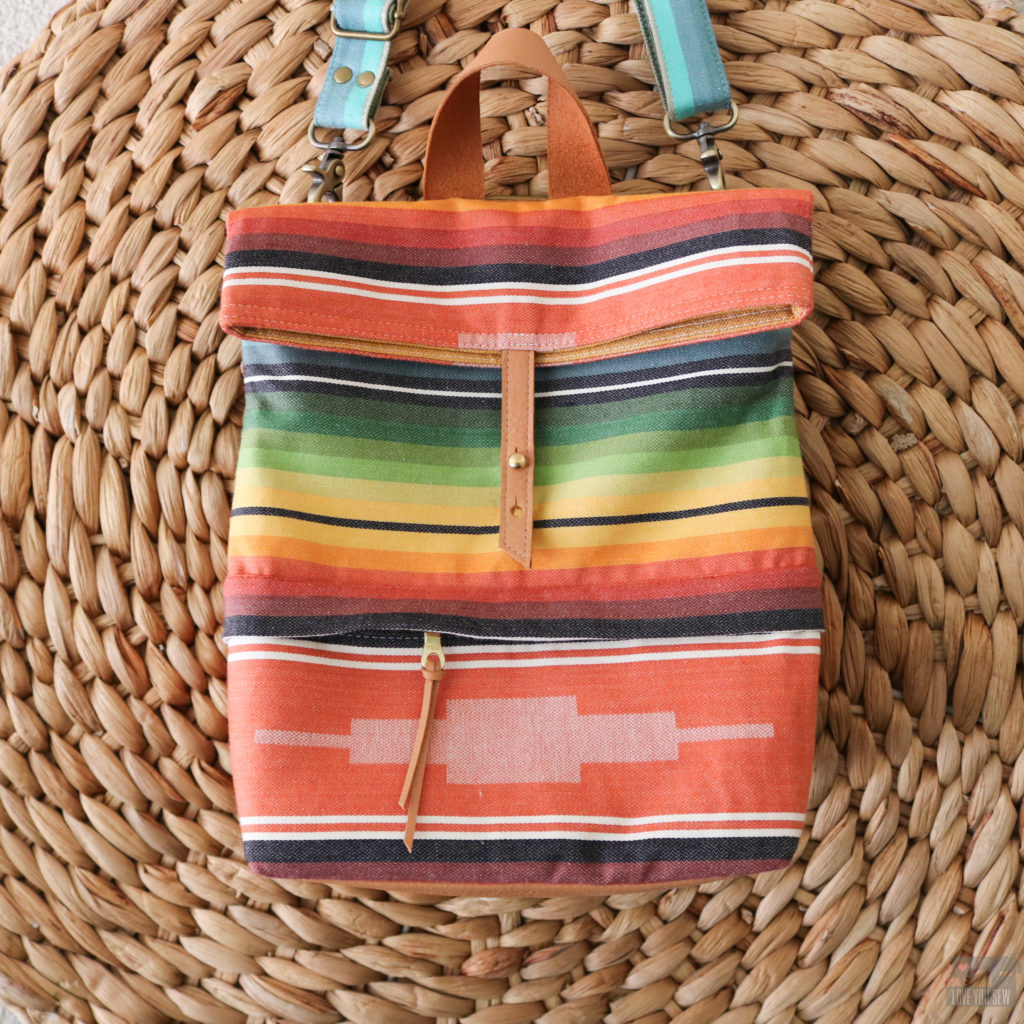
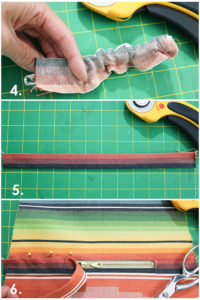
With the bold stripes on this woven fabric, I thought the exposed welt zipper on the original sewing pattern broke up the fabric design too much.  I wanted the stripes to continue all around the bag to show off its beauty and not compete with it.  So, I made a simple cover by creating a tube which runs the length of the bag and is secured right above the zipper opening.

To make the cover, follow all of the steps to complete the welt zipper pocket on the original pattern found here and then:

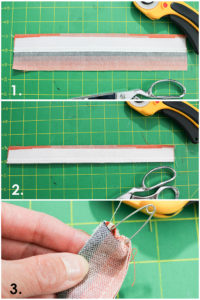
  1. Cut (1) 12″ x 2 1/2″ of Main Fabric and (1) 12″ x 1″ of Woven Interfacing.  Fold the Cover in half length-wise with right sides together.  Place the long edge of the woven interfacing wrong side together against the fold. Fuse the interfacing per manufacturer’s instructions.
  2. Re-fold the Cover with RST and sew 1/4″ seam along the raw long edge creating a tube. Back-stitch well
  3. Use a safety pin and attach it within the seam allowance.  With the safety pin closed, push it through the tube.
  4. Carefully direct the safety pin through to the other side of the tube pulling the tube right side out.
  5. Press the tube flat with seam at the top.
  6. Line up the Cover with the Welt Zipper opening covering the top-stitching and extend that line all the way out to the sides of the Front Exterior.  Pin the Cover into place.  Carefully top-stitch the cover to the Front Exterior with a 1/16″ seam allowance using a zipper foot and moving the zipper pull out of the way, as needed.  Trim the sides of the cover to match the sides of the Front Exterior.  Sew the rest of the Abbey as instructed.

Rivet Accents

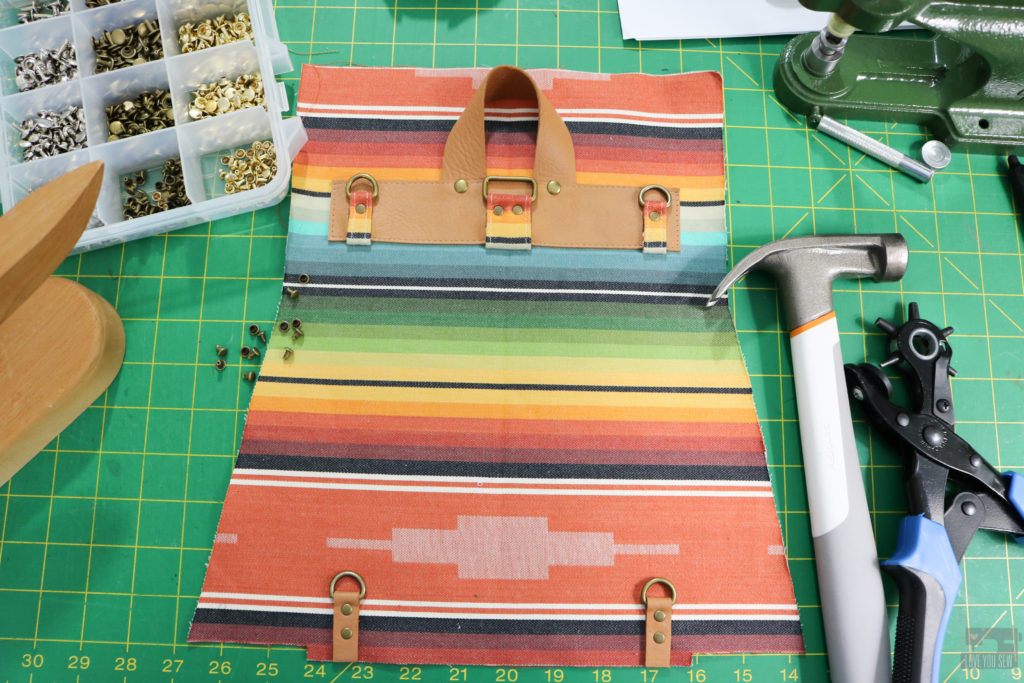
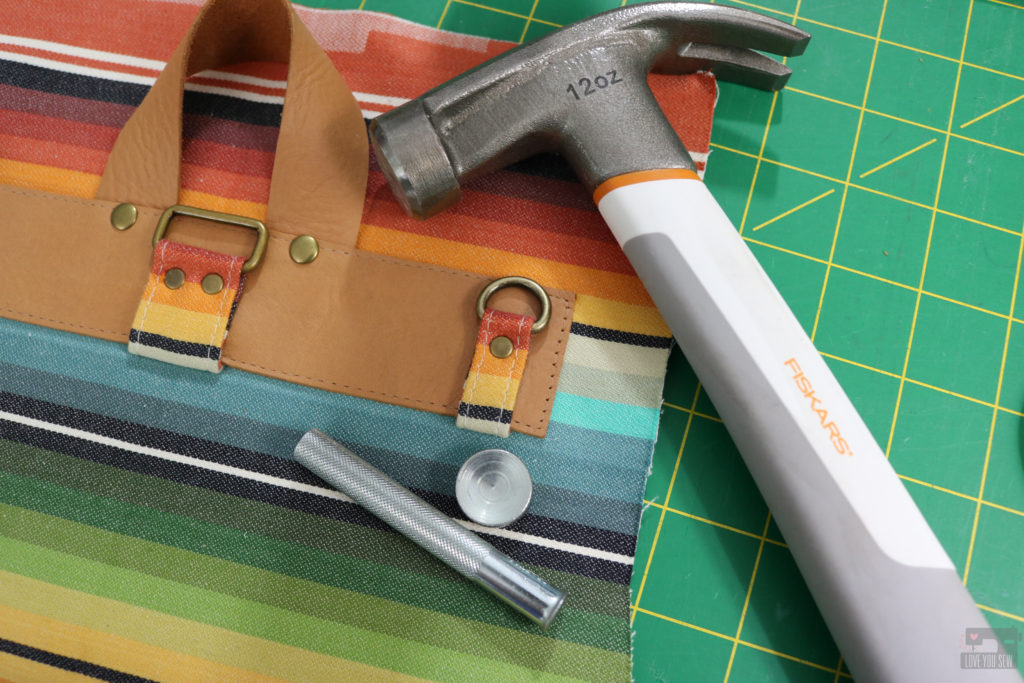
I LOVE adding rivets to my bags.  They give such a professional and polished look which really elevates any handmade accessory.  The best part is they are also functional — allowing me to secure parts (especially thick substrates) of the Abbey together which would otherwise have to be sewn.

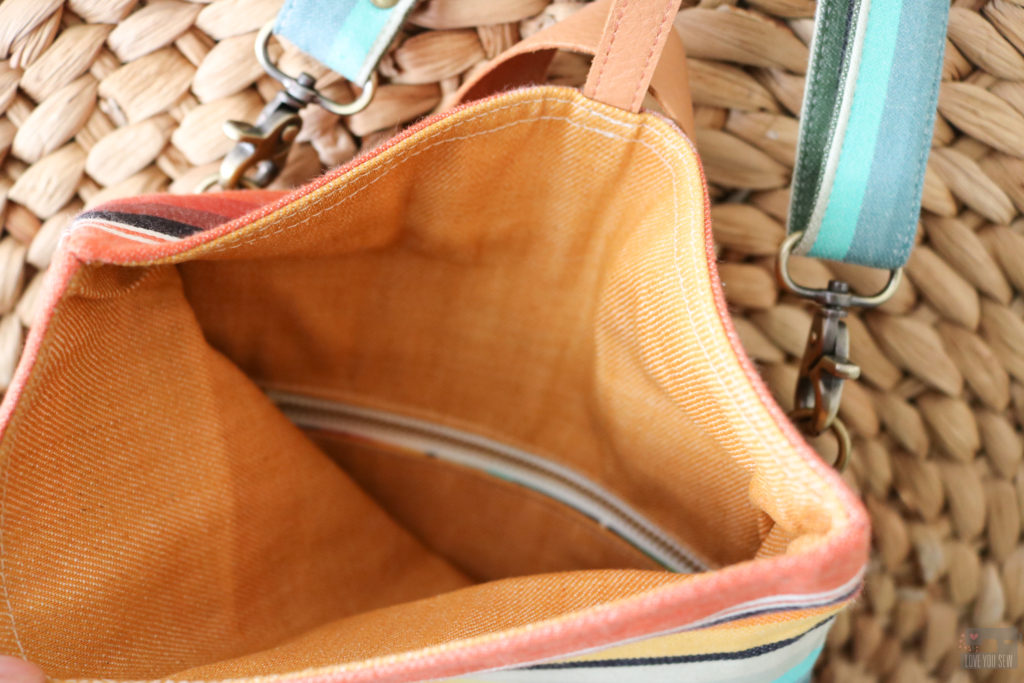
Rivets were used in making the strap and also at many of the connection points with all the hardware connectors. You can see how I used two different sized caps to vary the look.  I use a hardware press to install most of my rivets, but when I need to get close up to the rings like here on the Handle Base, I’ll use manual setting tools like this set from Tandy Leather (aff link.)

Leather Closure Tab with Button Stud

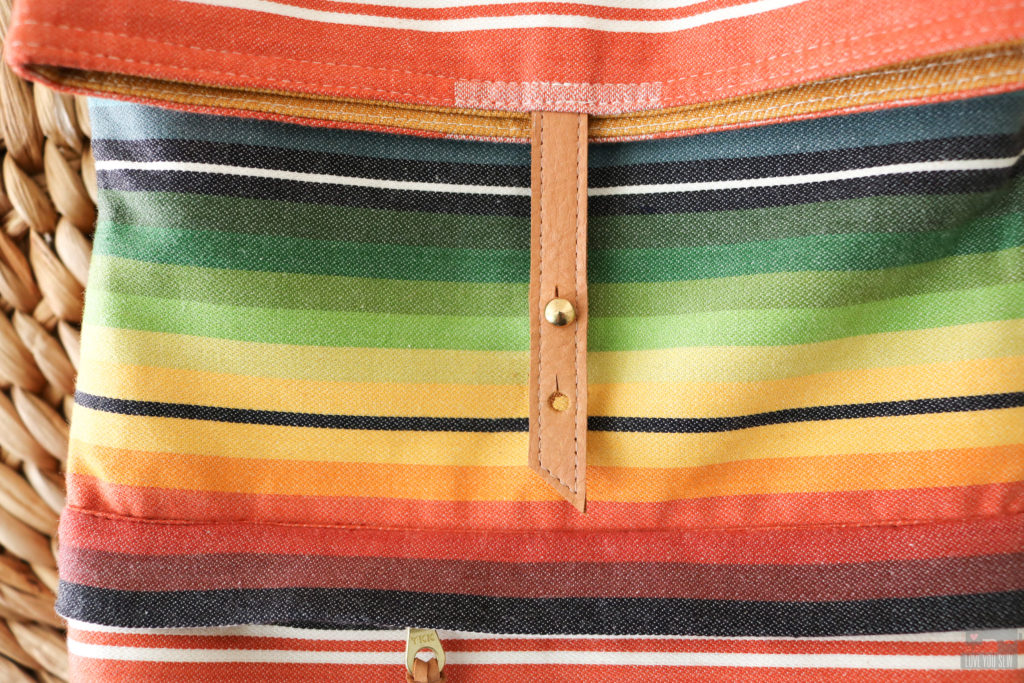
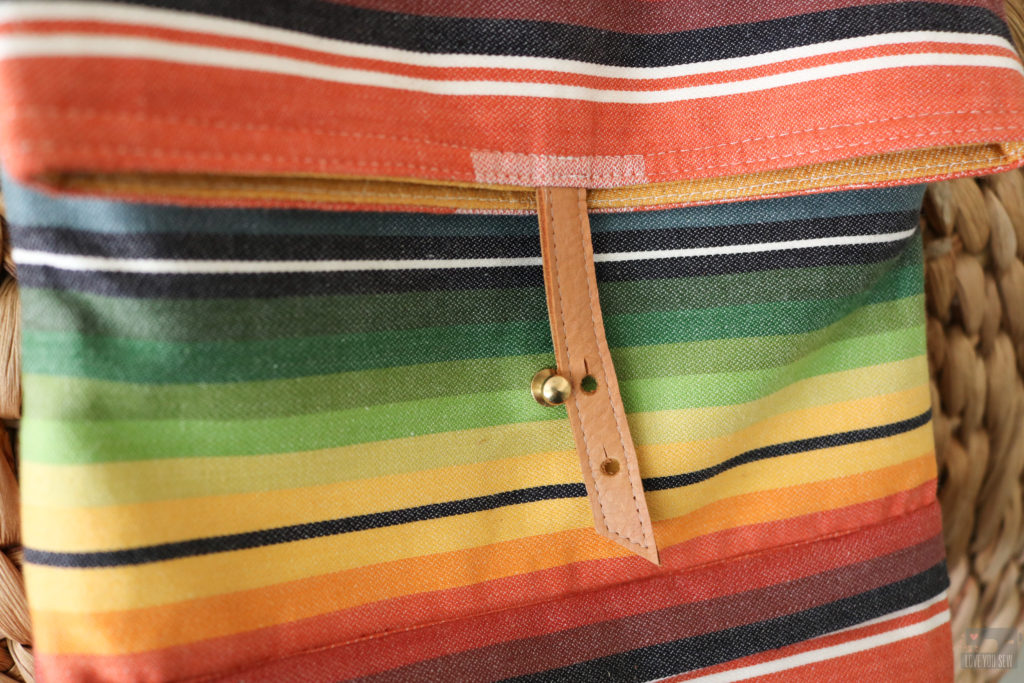
As part of the cutting instructions of the Abbey Convertible Backpack, I also added in finished dimensions if you would like to use leather, vinyl, cork or suede accents, like I did with this bag.  I used leather with the Handle, Handle Base, lower D-Ring Connectors, Bottom and Closure Tab.  However, I did change up the Closure Tab with the addition of a Button Stud.

I used a 8mm brass screw-in Button Stud (aff link) in lieu of the magnetic snap to keep the bag closed.  It was attached it to the Exterior front by punching a hole for the screw (using the same placement as the magnetic snap) and adding a touch of glue inside the stud to hold.  It’s really that easy and a big reason why I love  to use them, just like with my free Kelly Waist Bag Pattern.

For the Closure Tab:

  • Cut (2) 1/2″ x 4 1/4″ pieces of leather and glued them wrong sides together. Cut an angle on one end 3/8″ down for just some visual interest.
  • Top-stitch 1/8″ all around the closure using a walking (or Teflon) foot and leather needle
  • For the button holes, use a 4mm hole punch to cut (2) holes –  1″ and 1 3/4″ from the longest end of the Closure Tab.  Add a 1/8″ vertical cut at the top of each opening.  This allows the Button Stud to fit through the hole, but not to fall out on it’s own with movement and wear.  TIP:  I would recommend adding the holes after the bag is fully assembled so you can check placement.

These are all simple hacks to really change up the look of the Abbey Convertible Backpack and to make it personal.  The leather accents help to add more sophistication to the look as well.  Who can tell this bag is even handmade?!?  I hope Abbey loves her new bag and continues to enjoys her outdoor treks!

Project Summary:


Are you digging the hacks to my bag patterns?   Let me know if there any you would like to see in the comments below.  I will try to make them happen!


Happy Sewing Friends,

Cristy


This post may contain affiliate links for which I may receive a small commission if you would make a purchase.  Any compensation goes directly to running this website and keeping it as ad-free as I can.  Thanks for your support!

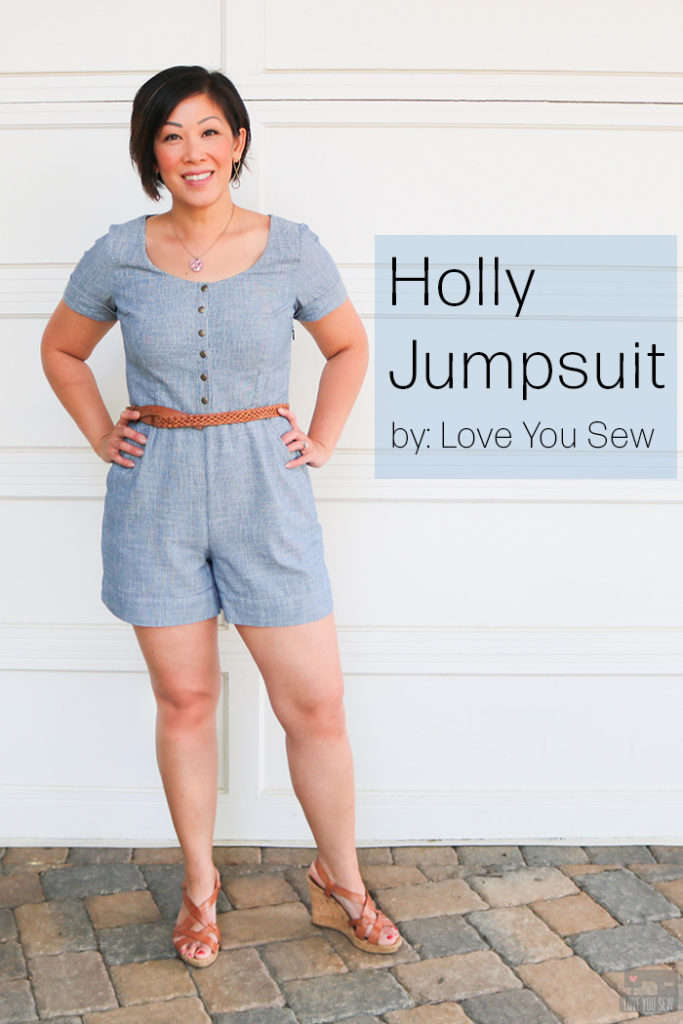
Holly Jumpsuit by Love You Sew

Holly Jumpsuit Review

Holly Jumpsuit by Love You Sew

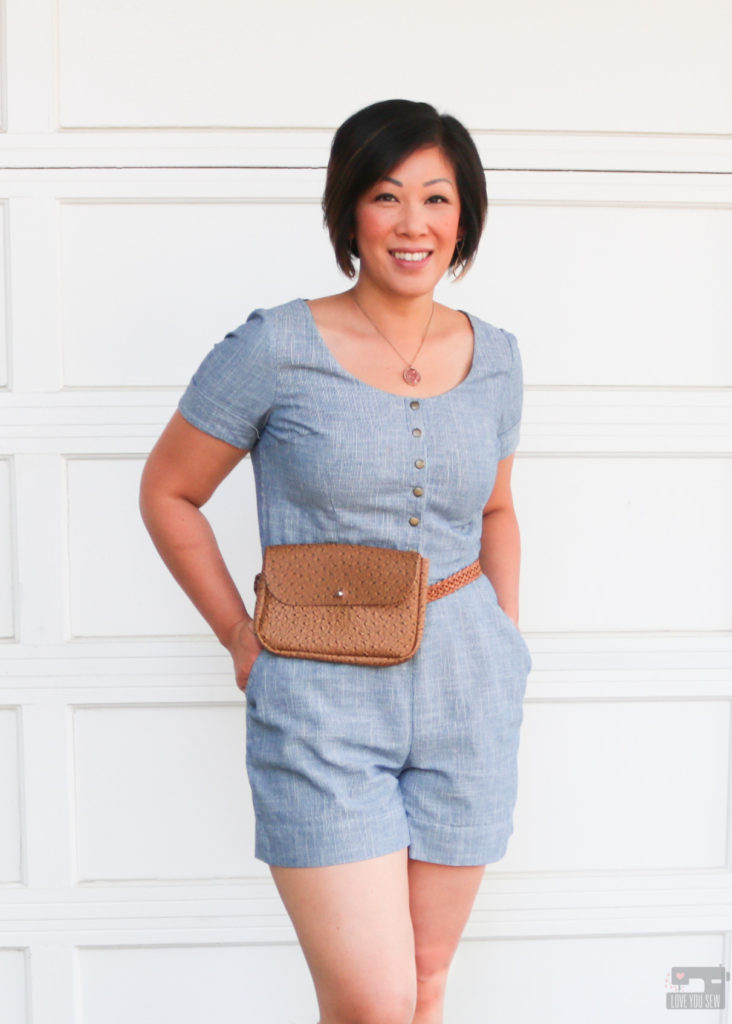
When I sew my own clothes, I like to know they will last for awhile.  So when the jumpsuit and romper trend came out, I was very hesitant to make one.  I wasn’t sure the one-piece look would be right on me.  Oh, and there IS that issue of completely undressing when using the restroom! But alas, after a couple of years seeing so many different versions of a romper, I finally took the plunge with the By Hand London Holly Jumpsuit.

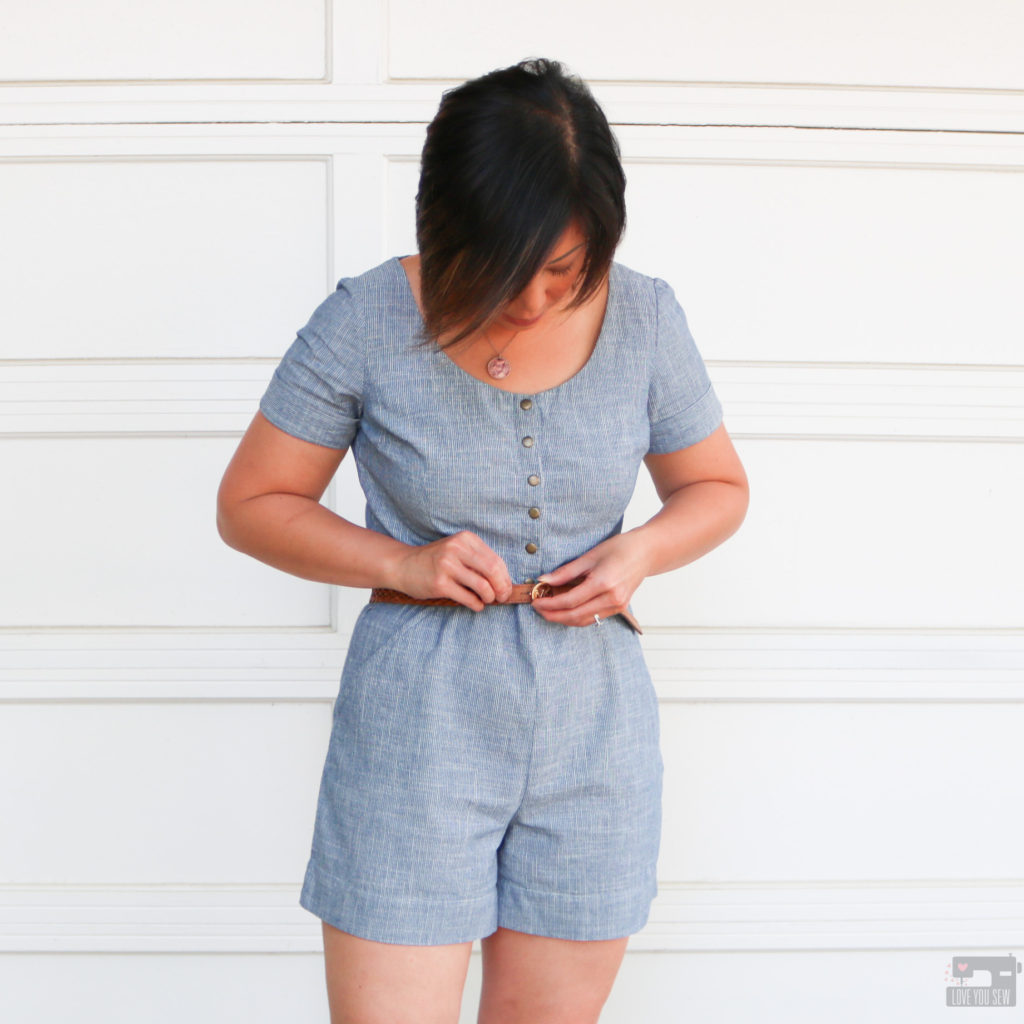
Holly Jumpsuit by Love You Sew

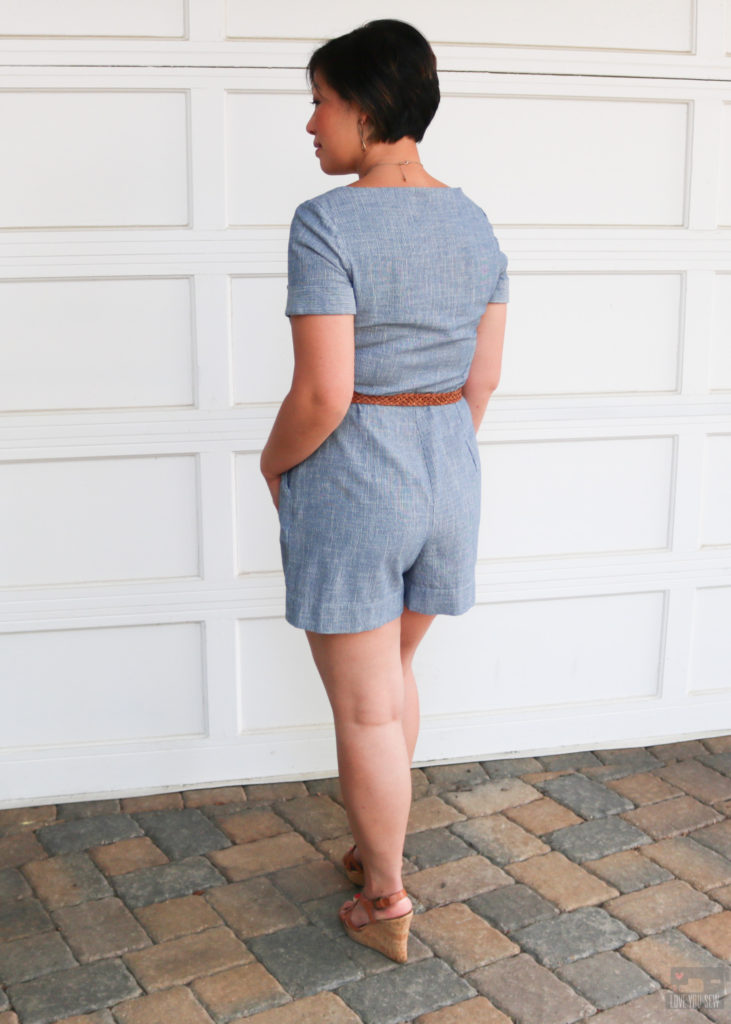
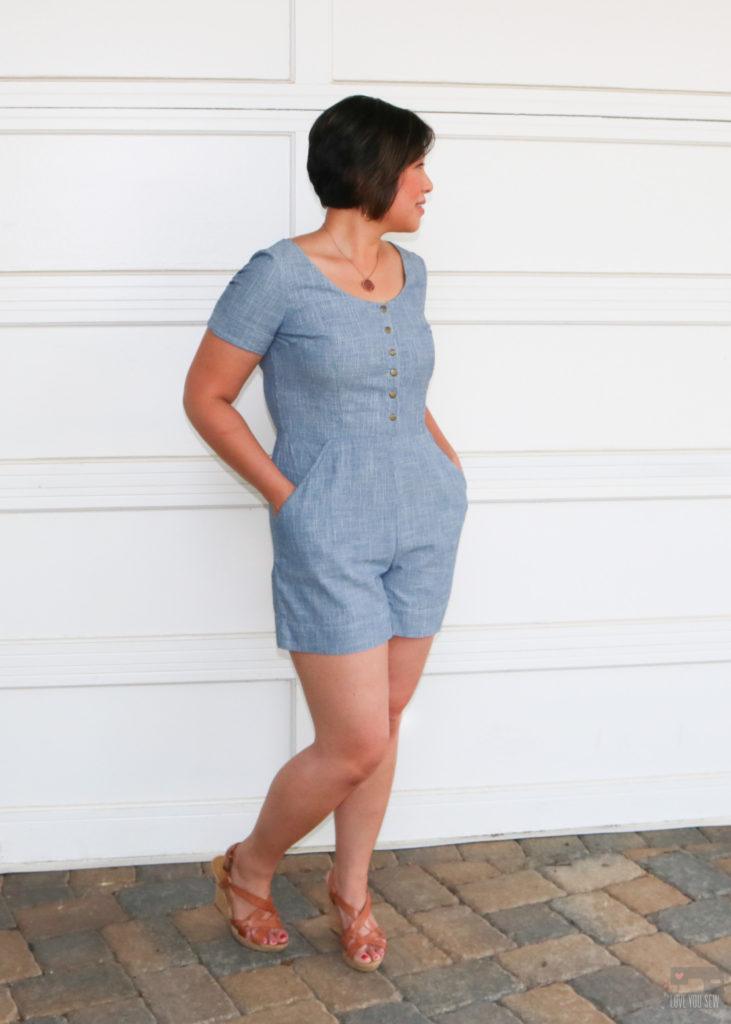
With many of the RTW rompers I’ve seen, they either have a very loose low v-neck wrap (probably for easier bathroom breaks) or the bottoms are way too short for my age bracket.  I fell for the Holly Jumpsuit with the nice open scoop neck (while still being modest,) the tailored waist and the 4″ inseam which is long enough for me, but could be a little too short for all of you  over 5’3″.

Holly Jumpsuit by Love You Sew

I initially bought the Holly Jumpsuit for the trouser view to help make a traditional Vietnamese Áo Dài.  I loved the wide leg, high rise, and the clean waistband which was perfect. However, it’s now been a few years and the Áo Dà has yet to be sewn…I know, I know…it will eventually happen!  However, I have made a pair of culottes using some rayon twill seen above.  These are such a great summer make.

Holly Jumpsuit by Love You Sew

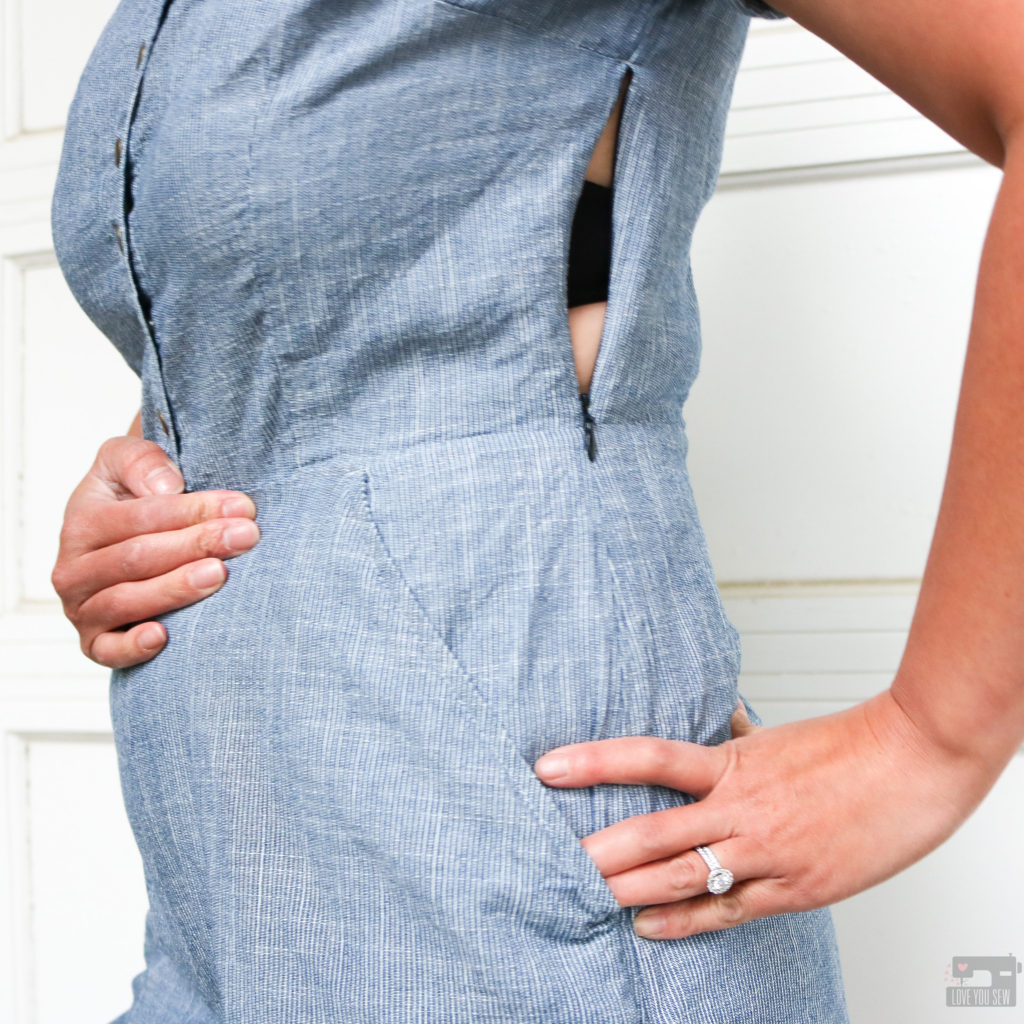
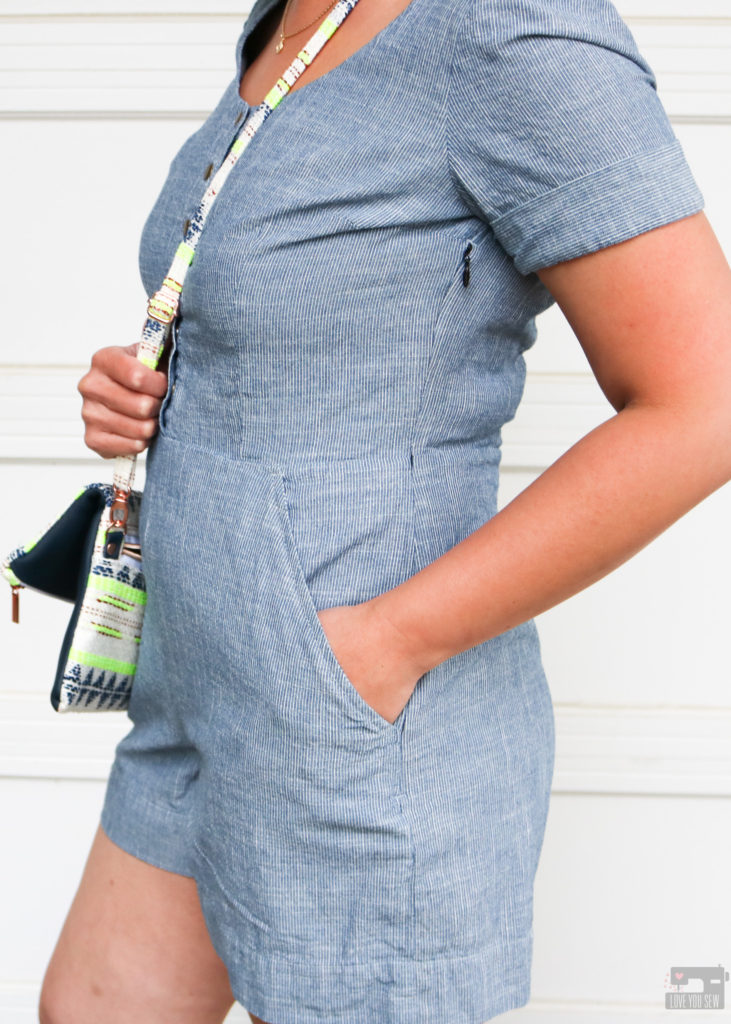
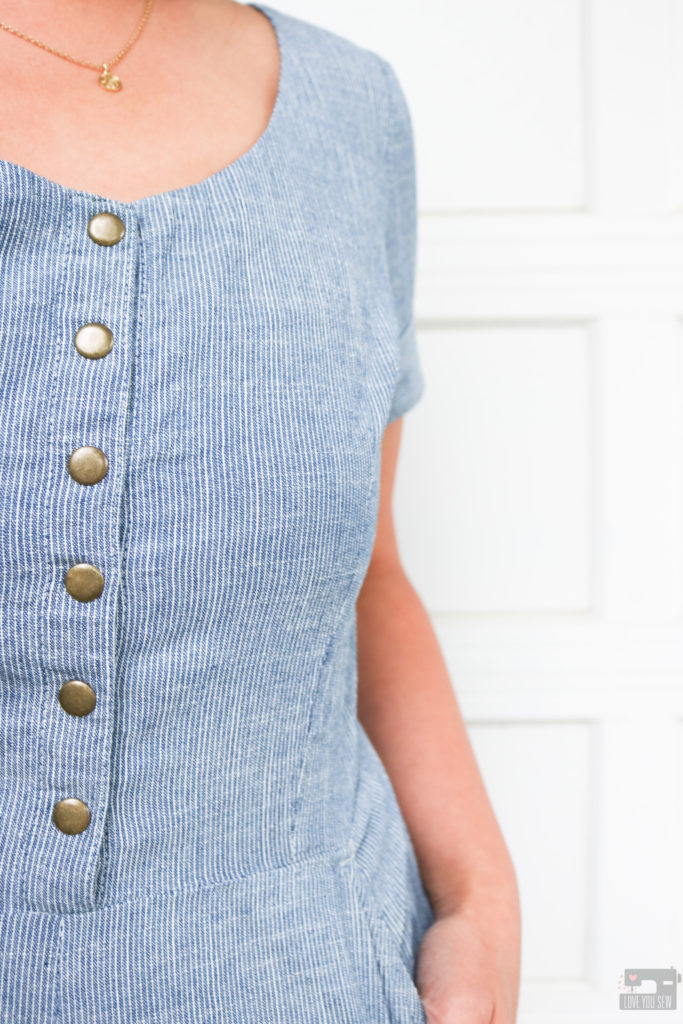
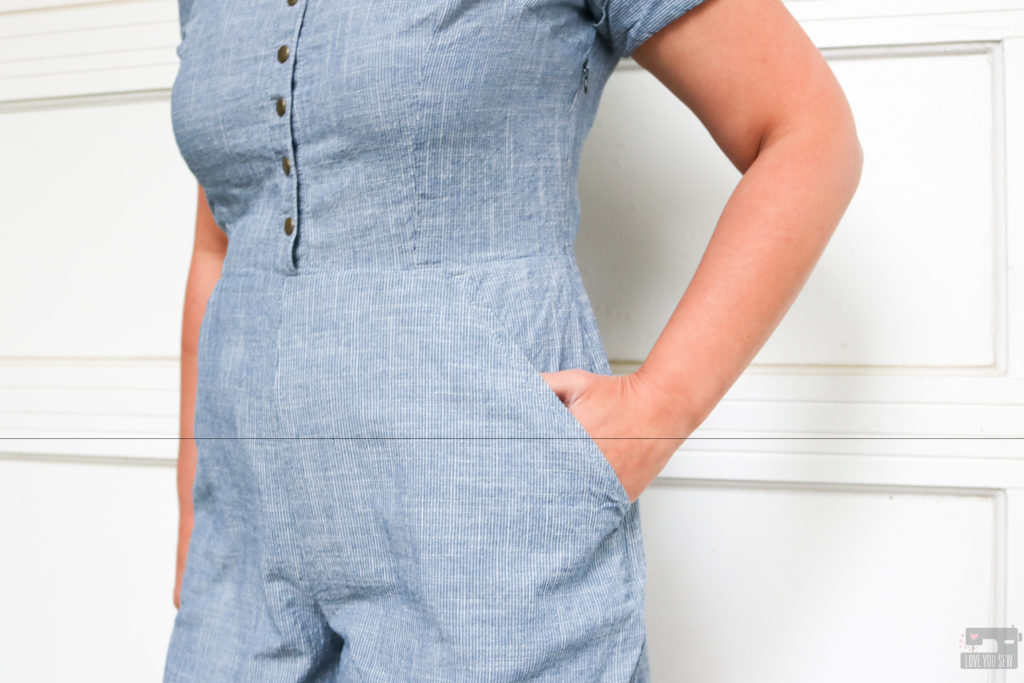
I know what you’re thinking….The big question with all rompers and jumpsuits is always, “How do you pee?”  There is a nice long invisible zipper which extends from the side dart down to the hip.  This allows you to slip the romper on and off in combination with unbuttoning the placket.  I wish I had a blue zipper to match my Holly when I was making this in time for a party, but I went with the only invisible zipper I had on-hand — black.  With the smart placement of the zipper, you can only see the pull when I have my arm up…and it’s still very discreet.

Holly Jumpsuit by Love You Sew

Fabric

When I was looking for fabric, I wanted something light enough to wear during warm weather, but structured enough to hold it’s shape and not wrinkle easily. Since this was my first romper, I also was looking for a simple print that could help camouflage any imperfections.

Holly Jumpsuit by Love You Sew

I was happy to find this great Vintage Chambray Stripes at Imagine Gnats. It’s a classic micro stripe with that railroad-esque feel.  I love the blue and how neutral it is for any occasion.  I can just switch up accessories to give it a different feel.  At 4.5 oz this is still light enough with a soft hand and the 100% cotton content makes it breathable for the summer.

Pattern

Holly Jumpsuit by Love You Sew

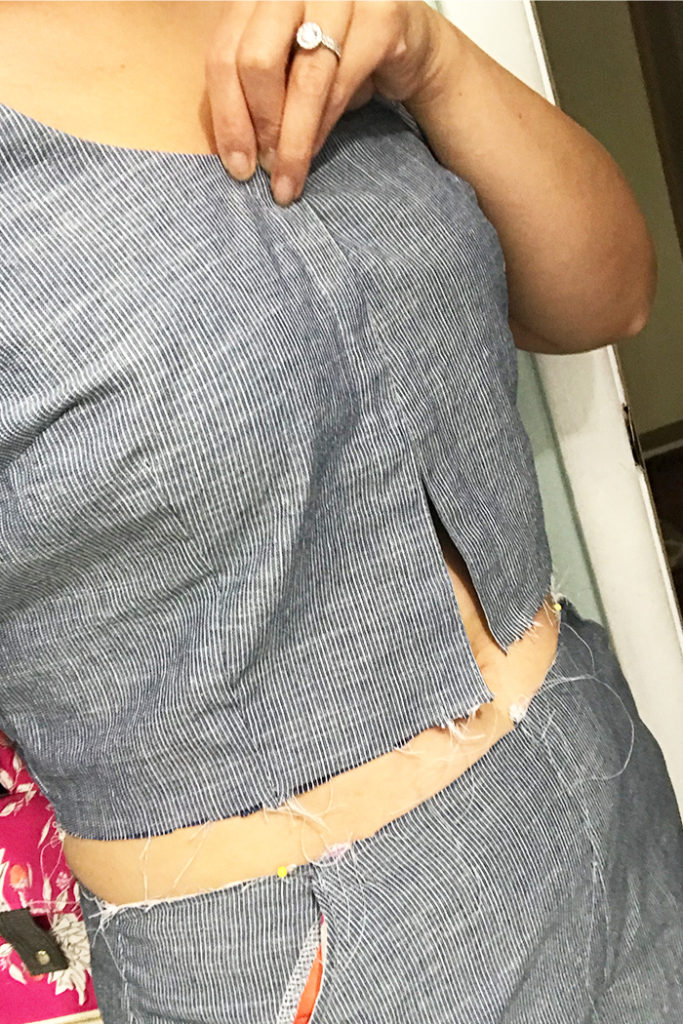
For the romper, I used view A and made a size UK10/US12 for both the bodice and bottoms based on my measurements. Since I already made the culottes, I knew I wouldn’t need any adjustments on the bottoms, but I did forget to take into account that I shortened the rise on them previously.  So, my romper ended up being too short! *Cue head-slap* Fortunately, I had enough fabric (thanks to the extra wide WOF) left to remake the bottoms.  Since there is no fly, it wasn’t too much of a set-back.  I’ll turn the first set with the lower rise into shorts by adding on the waistband found in View C.  Phew!

Holly Jumpsuit by Love You Sew

These are the additional modifications I made to the Holly:

  • Added lightweight woven interfacing in the placket to hold the snaps, but I would add it even if I used buttons for more stability
  • Used metal snaps instead of buttons for faster bathroom breaks 😉
  • Added slash pockets by drafting a pocket and the facing  (the one thing missing with the pattern)
  • Decreased the seam allowance for the sleeve and increased the armscye to match
  • Reduced seam allowance to 3/8″ between the bodice and shorts for more crotch room

Holly Jumpsuit by Love You Sew

When I make this again, I would consider the following modifications:

  • Slight broadback adjustment – There is a little bit of tightness across my shoulder blades.
  • Bicep adjustment for even more ease – After wearing this to an event (with lots of sweating!) I think adding in more arm ease would allow more air flow and an easier time getting the romper off and on.
  • Increase the bodice length by 1/2″ – I’m only 5’3″ but if I raise my arms all the way up, I get some cameltoe, which is surprising. Most patterns are drafted for 5’5″-5’8″ that I’ve seen, and usually I have to shorten the bodice on a pattern.
  • Lower the side darts by ~1/2″ – Everything looked good when I was finished, but after an additional washing, the darts look a little too high.

Holly Jumpsuit by Love You Sew

Final Thoughts:

For my first romper, I am SO pleased with this make. I love the slim fit around the waist and the ample ease around the buttocks and thighs.  This is a great pattern for my fellow pear shapes! But it is certainly still great for other body shapes as well with just simple changes to the darts. This fabric was great for the pattern but I may use a woven with just a little stretch next time and probably won’t need those broadback and bicep adjustments.

Holly Jumpsuit by Love You Sew

Project Summary:

Now that I’m done with my very first romper, I think I’m ready for another.  Do you have any good romper/jumpsuit patterns to recommend?  Let me know in the comments.  I would love to hear your thoughts!


Happy Sewing,

Cristy


This post may contain affiliate links for which I may receive compensation.  This helps keep ads off the blog and helps me to keep this website afloat.  Thank you for your support.