Expanding your sewing repertoire is always so exciting, but there can also be some challenges along the way. As I wrote the Emma Stadium Bag, I included some tips with construction specific to my pattern, but thought you might appreciate more general guidance when sewing with clear or other see-through vinyl!

First, let’s talk about vinyl. This term is used for a lot of different flexible plastic substrates, but I am referring to sewable 100% PVC (polyvinyl chloride,) which is generally polished on one or both sides and you can see through it. Vinyl is a tough and durable substrate that can be used to provide moisture and/or humidity protection. This type of vinyl is available it many different colors and even thicknesses.

Vinyl is measured by gauge number. This refers to the thickness of the vinyl sheet. Most big box craft stores carry from 8-20 gauge and hardware stores can carry even thicker products. But for our sewing purposes, I think 8-20 gauge is within our wheelhouse. The 8 gauge is the thinnest at 0.008″ which is the most flexible and the easiest to sew. I think this is a great size if you are using this for a window in a pouch or organizer project. I wouldn’t recommend this for the body of a bag or pouch because it would be able to hold it’s shape well (unless you are going for the slouchy look!) On the opposite end, the 20 gauge is thickest at 0.020″ and is more rigid, but still flexible. I would recommend this thickness for projects which you want to keep the shape intact, like a tote or pouch. However, not all domestic sewing machines will be able to handle the thickness. My semi-industrial Juki 2010Q can handle this after some tension adjustments, but I think 12 gauge is the best bet to start for most machines IMO. Please test the gauges and see what you like best!

Let’s start with vinyl prep and handling. The following are a few tips to get you started:
- Do NOT use your Favorite Fabric Scissors – Use your “paper” or “all-purpose” scissors to cut through the vinyl because it could dull your fabric ones – especially if you are using a higher gauge. I have an old rotary cutter marked for all-purpose use. Generally, when my fabric rotary blade gets dull, I move it over to the “all-purpose” Fiskars cutter and use that on these special projects and when I’m trimming PDF paper patterns.
- Use Clips to Hold Vinyl Together – Whether you like to use Clover Clips or binder clips, these all do the same job. They hold vinyl together without leaving a permanent hole like a sewing pin would. I’ve also heard of others using paper clips and even bobby pins too.
- Do NOT Directly Iron onto Vinyl – This will melt and leave permanent marks on the plastic. If you do have deep creases that you would like smoothed out, you can hover the iron above the vinyl or use a pressing cloth with light and quick presses. A heat gun or a hair-dryer (on low setting) can also help. Make sure you don’t have multiple layers of vinyl directly touching each other as you use heat or they can melt together.

Now, let’s get into sewing with vinyl! Below are tips from my own experience. Please let me and other readers know if you have any additional tips of your own in the comments section below. I would love to read them!!!

- Use a Teflon Foot (preferred) or a Walking Foot – Vinyl is notorious for it’s “stickiness” when rubbed against a metal presser foot. A smooth Teflon foot doesn’t create the same friction as a metal one would and allows the vinyl to pass through the feed dogs. I prefer this foot for it’s slim profile and the ability to maneuver around more than the clunky Walking Foot. However, the Walking Foot does do a great job with the extra set of feed dogs to help shift the vinyl through. Other machines may have leather/vinyl specific feet as well with rollers. I don’t have these with my Juki and can’t speak to them specifically. Relieving presser foot pressure (if available on your machine) will also help reduce friction.
- Grab some Washi Tape – If you don’t have any of the feet mentioned above, you can try to use washi tape (available at most craft stores) and adhere it to the bottom of your regular foot. I use this method with my zipper foot (pictured above) since I rarely have the need for a Teflon one. I will caution that you do need a higher quality tape where the sticky side remains where it’s suppose to and doesn’t transfer to the non-sticky side. $1 bin tapes are usually like this and if you have any tackiness on the right side of the tape, it pretty much negates it’s use.

- Reduce friction on your Sewing Machine Bed – Some vinyls are stickier than others when moving across the painted table of your sewing machine. (It glides over smoothly on the bare metal plate.) You should test how the vinyl glides against your machine before starting. If there is quite a bit of sticking, I recommend detaching the extended table and/or laying down several pieces of washi tape on top of it. This will allow the vinyl to glide a bit more. You may also have to lift the vinyl as you sew to avoid contact with your machine, working a few inches at a time.
- Use Regular/Sew-All Polyester Thread – You want a nice strong thread with the vinyl, but you don’t want anything that is too thick because it will create more rubbing. This is the same if sewing with faux or real leather. There is more friction when you use a thicker thread and although you can also switch to a larger needle, sometimes you just can’t get a needle large enough and will end up with skipped stitches.
- ALWAYS use a Brand New Sharp Needle – Since you are puncturing plastic, a brand new needle is essential. If it is dull, this can effect timing and can lead to skipped stitches.
- Practice sewing on scraps – Vinyl will leave permanent holes, so it’s important to get your tension and stitch-length right before sewing. As you increase thickness, you may also have to increase your stitch-length to compensate.

As for the care of vinyl, it is always a good idea to keep any type of it away from prolonged sun exposure. This will keep your vinyl the same color as purchased and keeps it malleable. You can use a damp cloth to wipe away messes.

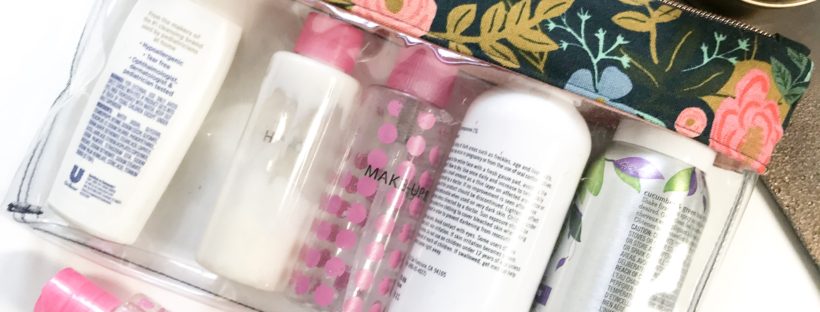
Now that you have the tips and tricks down, are you ready to sew with vinyl? All of the clear vinyl bags in these images are 12 gauge clear from JoAnn Fabrics (aff link.) If you stop by the store, you can ask for swatch samples in the other gauges. You can also order clear vinyl from Fabric.com (aff link) which ships to many countries. If you are into some of the specialty vinyls, I LOVE Sew Hungry Hippie’s shop (aff link.) This is where I bought the rainbow vinyl in the pictures above and I’ve been eyeing up all the glitter offerings.
You can grab the Emma Stadium Bag digital pattern here for your first clear vinyl project 😉

Hugs and Stitches,
Cristy
This post may contain affiliate links. You can read my full disclosure here.


Hi ! I’m here to learn how to sew a plastic badge holder for lanyards.. i have a few friends who are Nurses, so I’d like to make them personal badge holders. What gauge pvc would you suggest for that? 12? Thank you very much for all your hard work in this post. It’s very appreciated. Take care.
Hello! For durability, I would go as high (20) as your machine can handle since an ID badge doesn’t require as much flexibility, but does need to be strong. The thinner vinyls are better for a project that you might have to turn inside-out or need to scrunch together. Good luck!