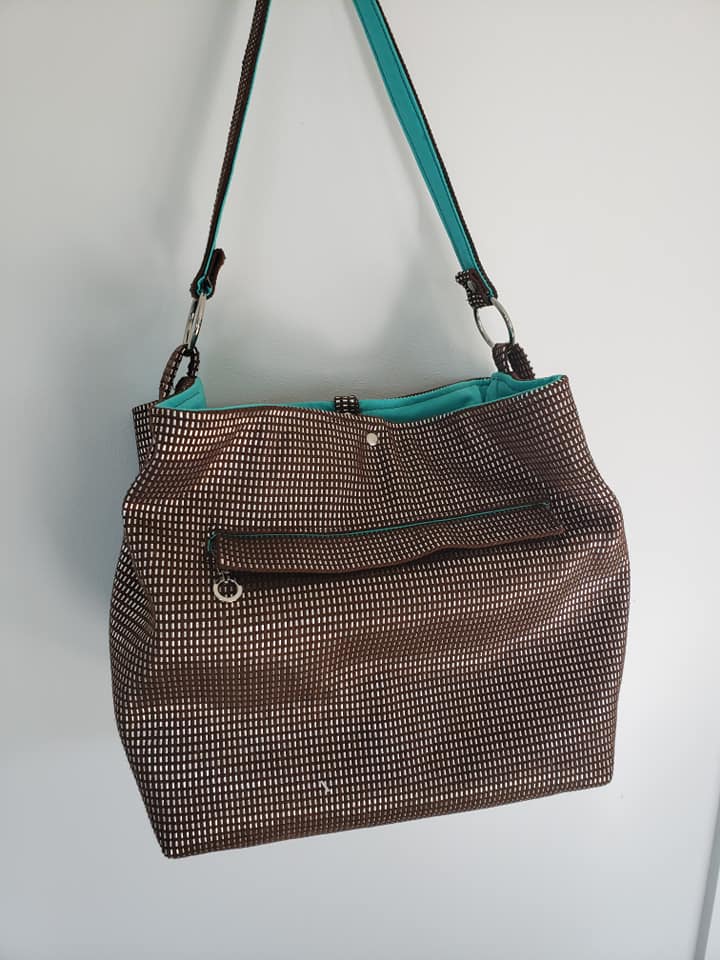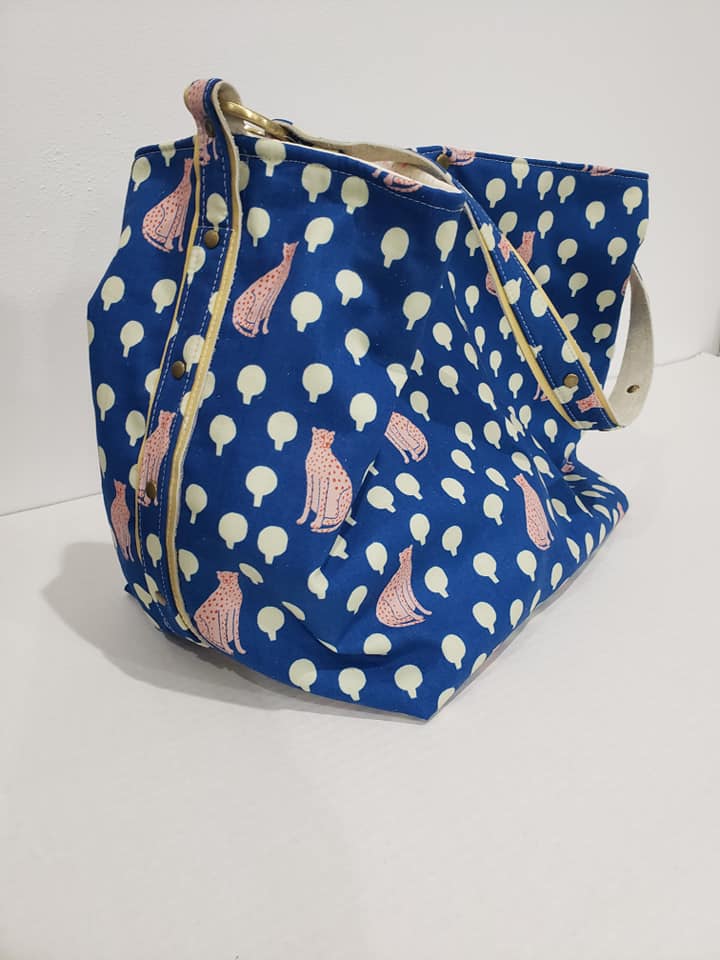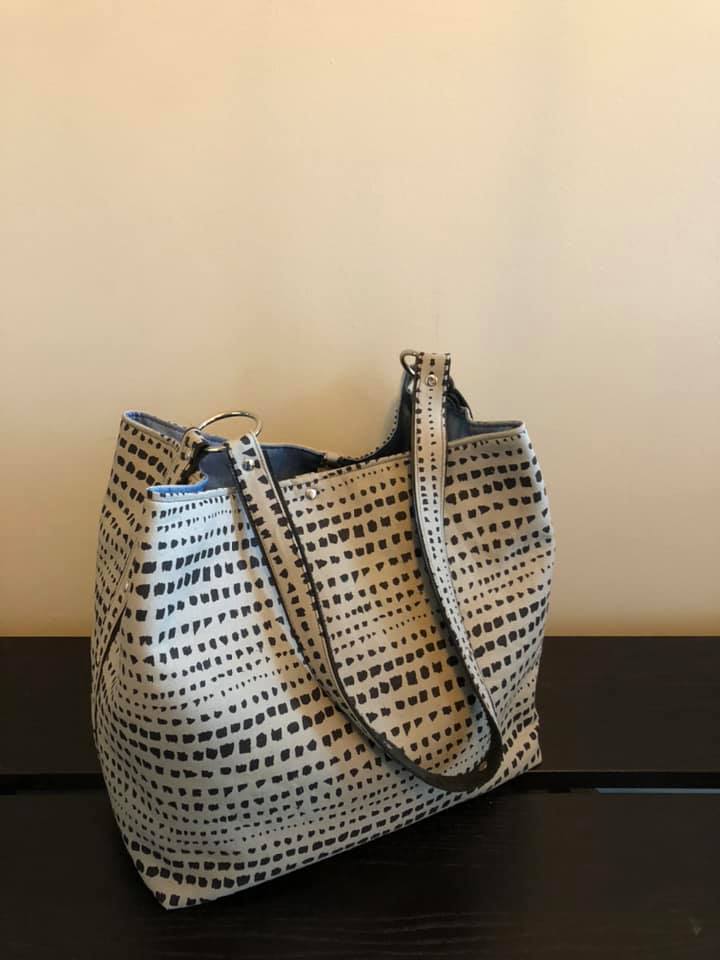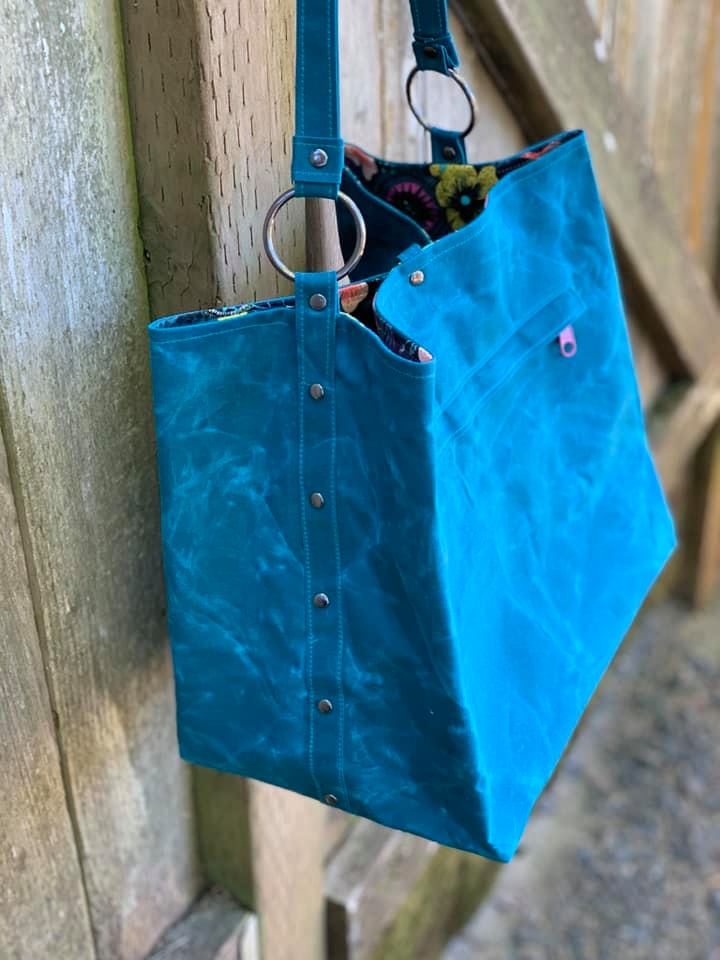
Megan Bucket Bag – Sewing Pattern

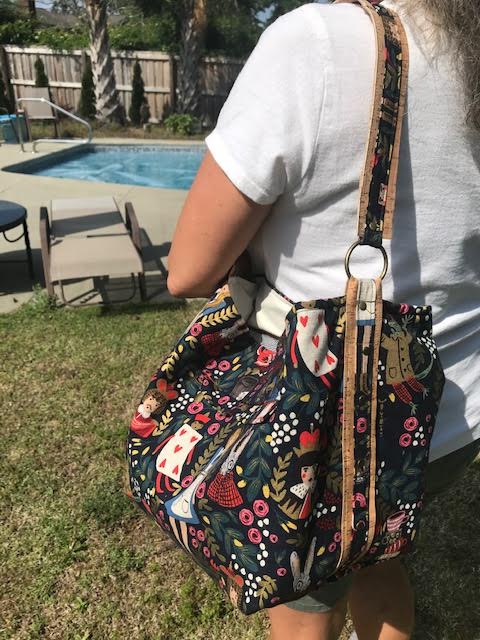
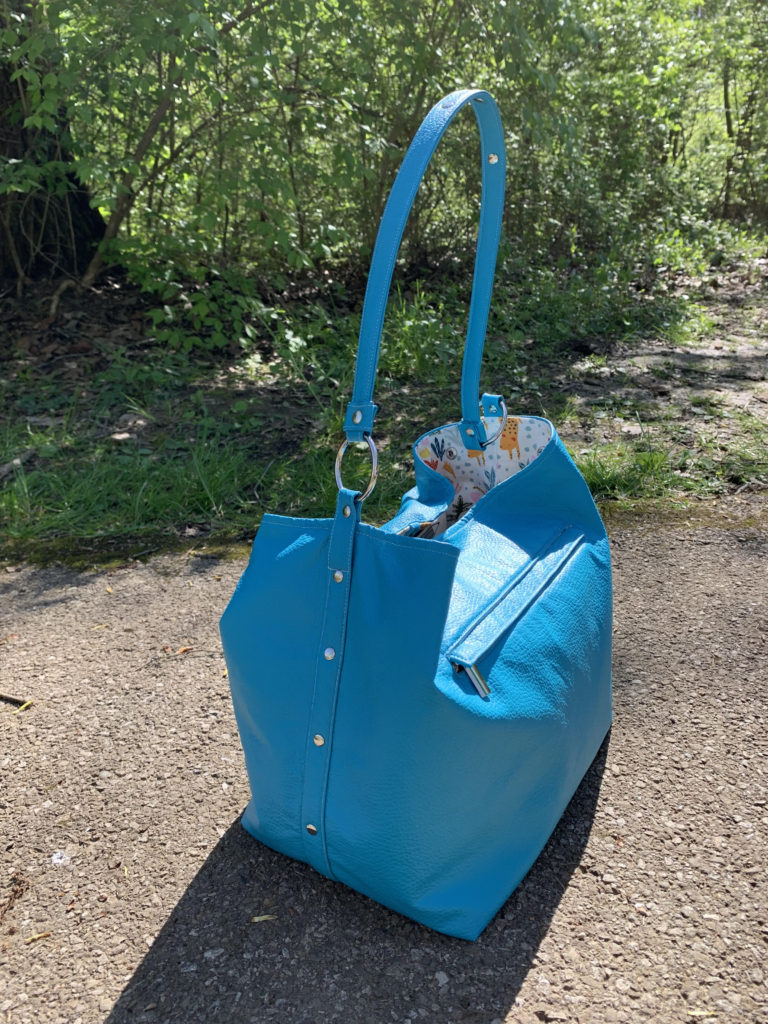
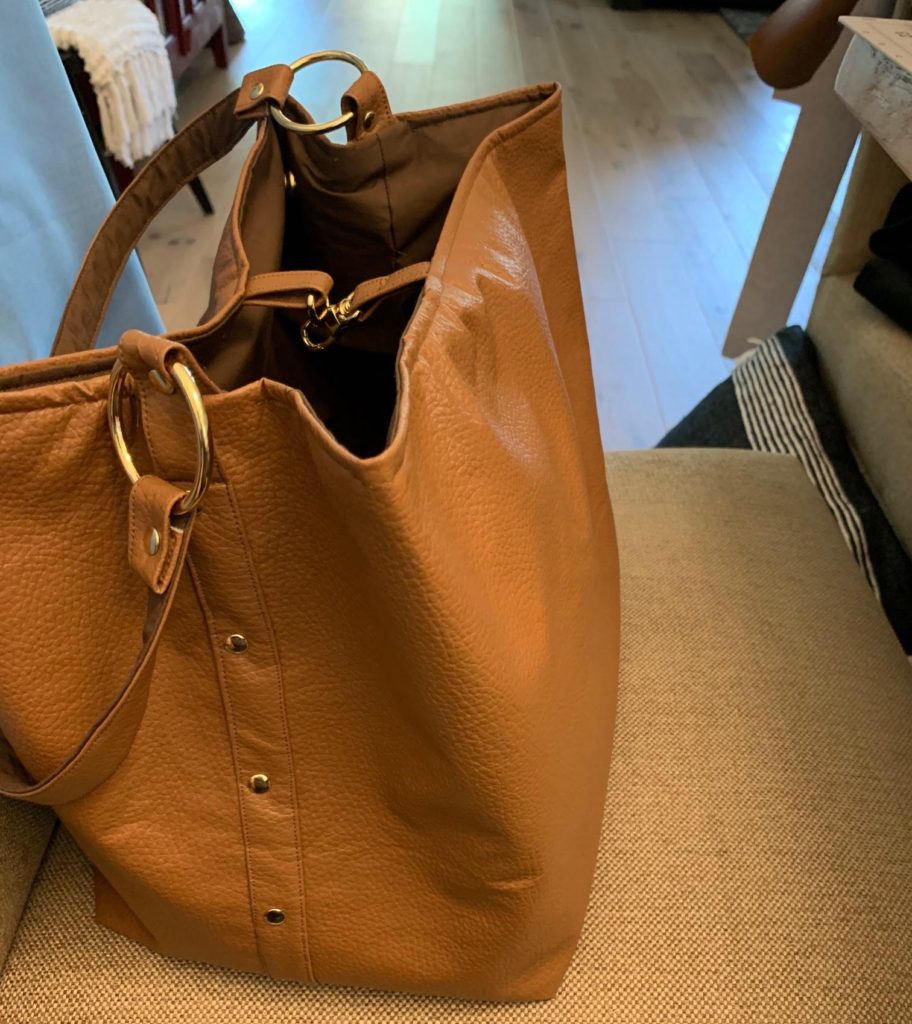
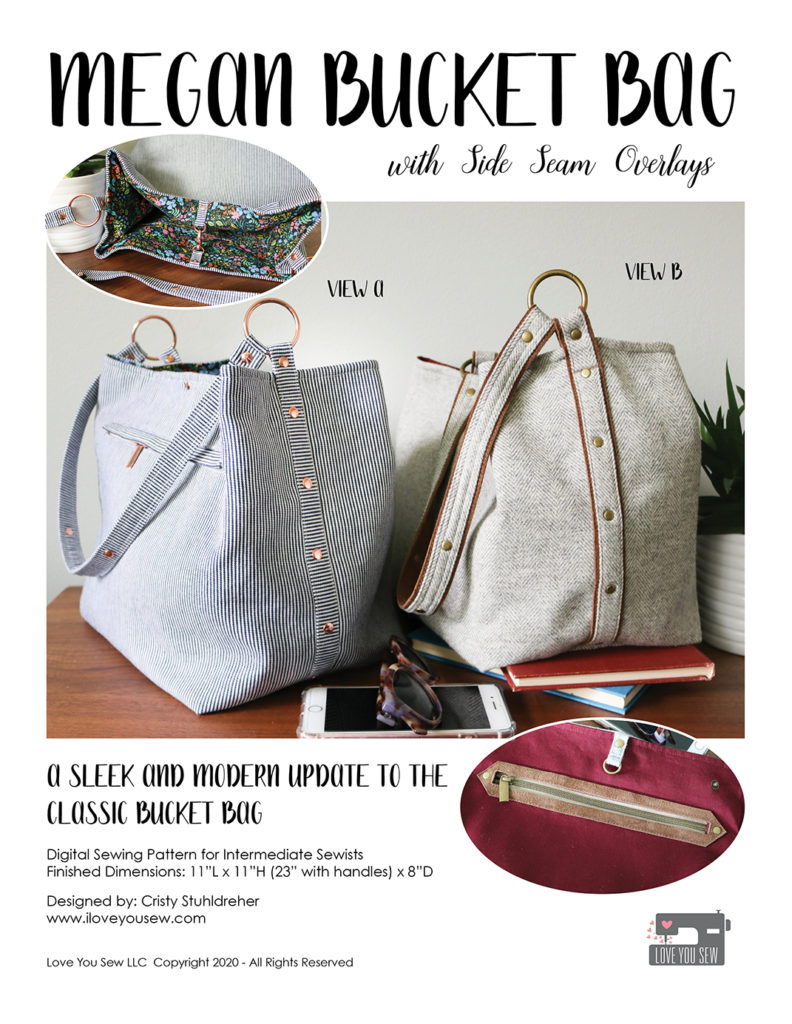
She is HERE!!!!!  What started as just a fun experiment in bag design (just for myself!) has turned into the latest new pattern, the Megan Bucket Bag.  This has been a labor of love with over a year passing since I first made it…..and then an extra month delay as the country locked down and I turned my efforts to PPE.  At times, it seemed like this pattern would never be published, but with all of your encouragement and an incredible tester team, it is available today in my shop!

Namesake

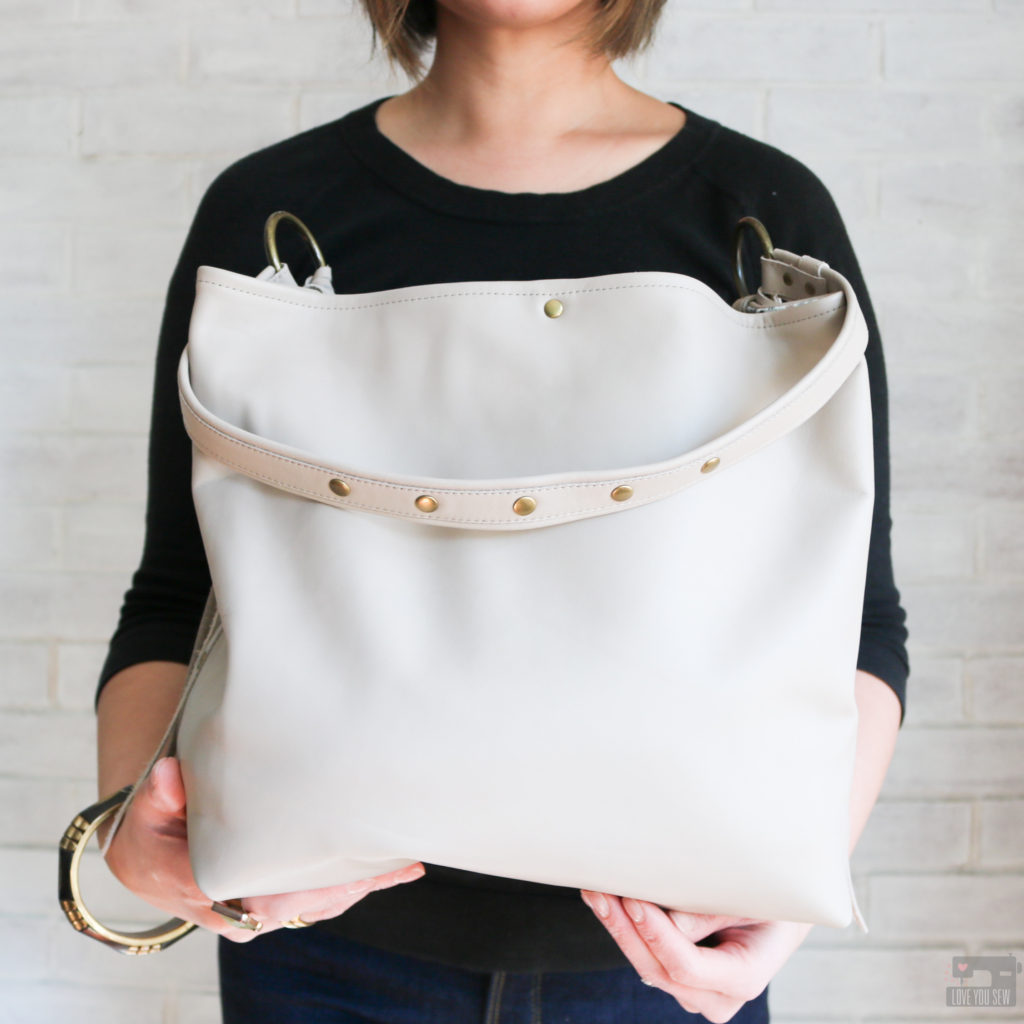
This bag is named after another one of my sweet nieces, Megan.  Every time I would see her, she always carried around a large purse and I knew a generously sized bucket bag would HAVE to be her’s!  She was always an avid reader and so this bag can carry around a small library if needed.  Megan loves  theater and has SUCH a beautiful voice.  It only made sense to have plenty of mix and match bag options for whatever “role” would come next.  Like my dear Megan, this bag is practical yet has just enough edge to stand out from the crowd.

Background
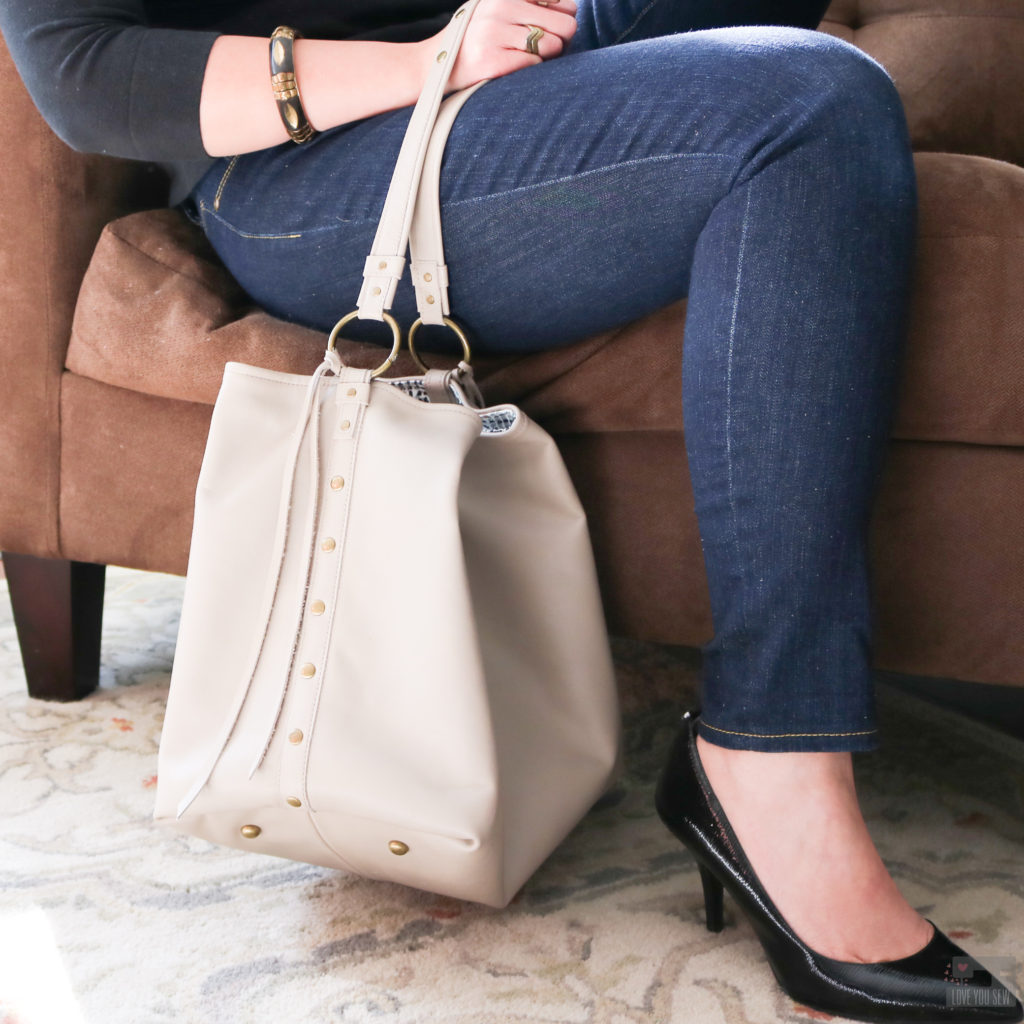
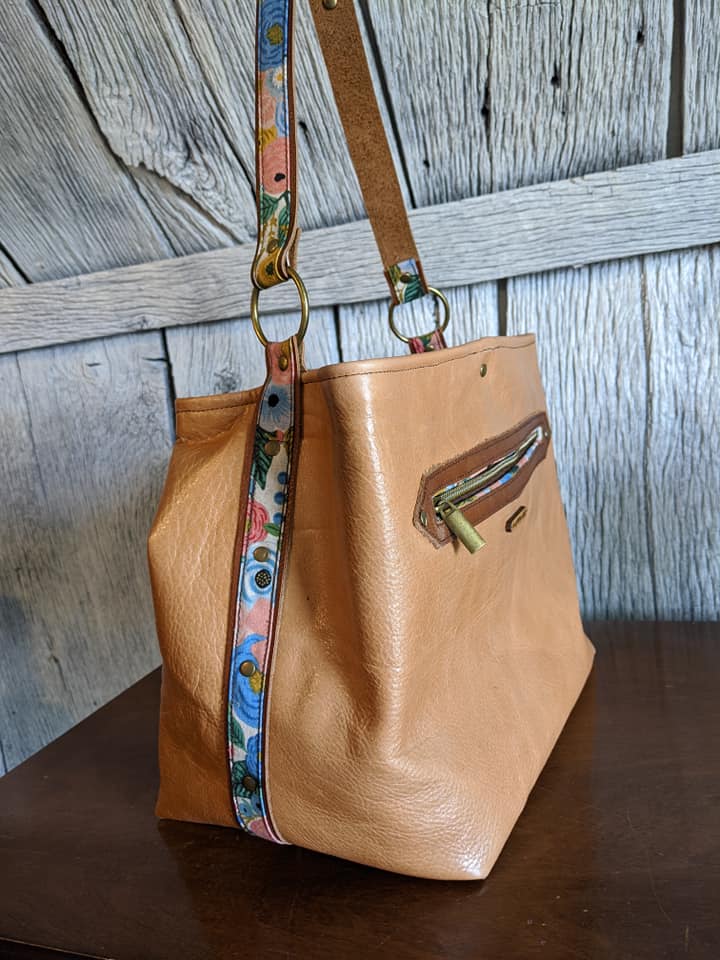
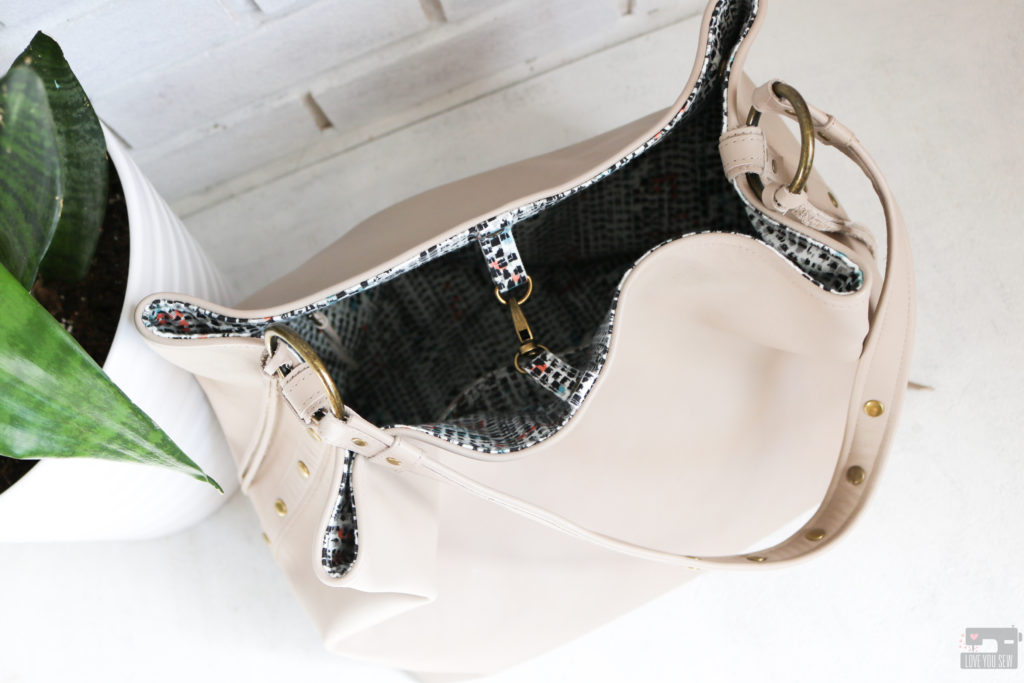
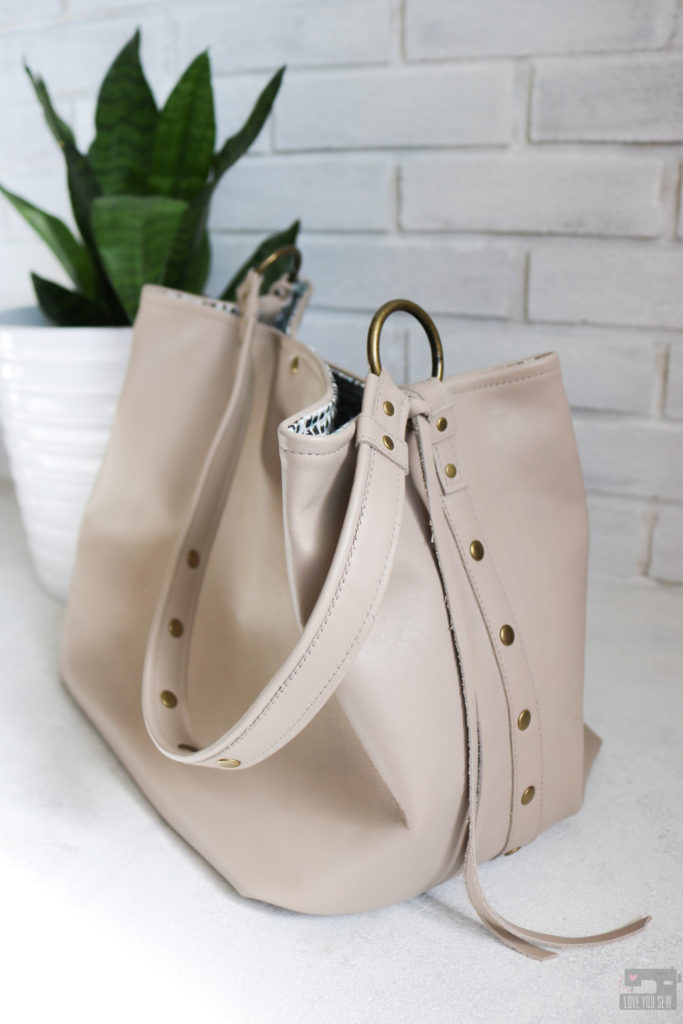
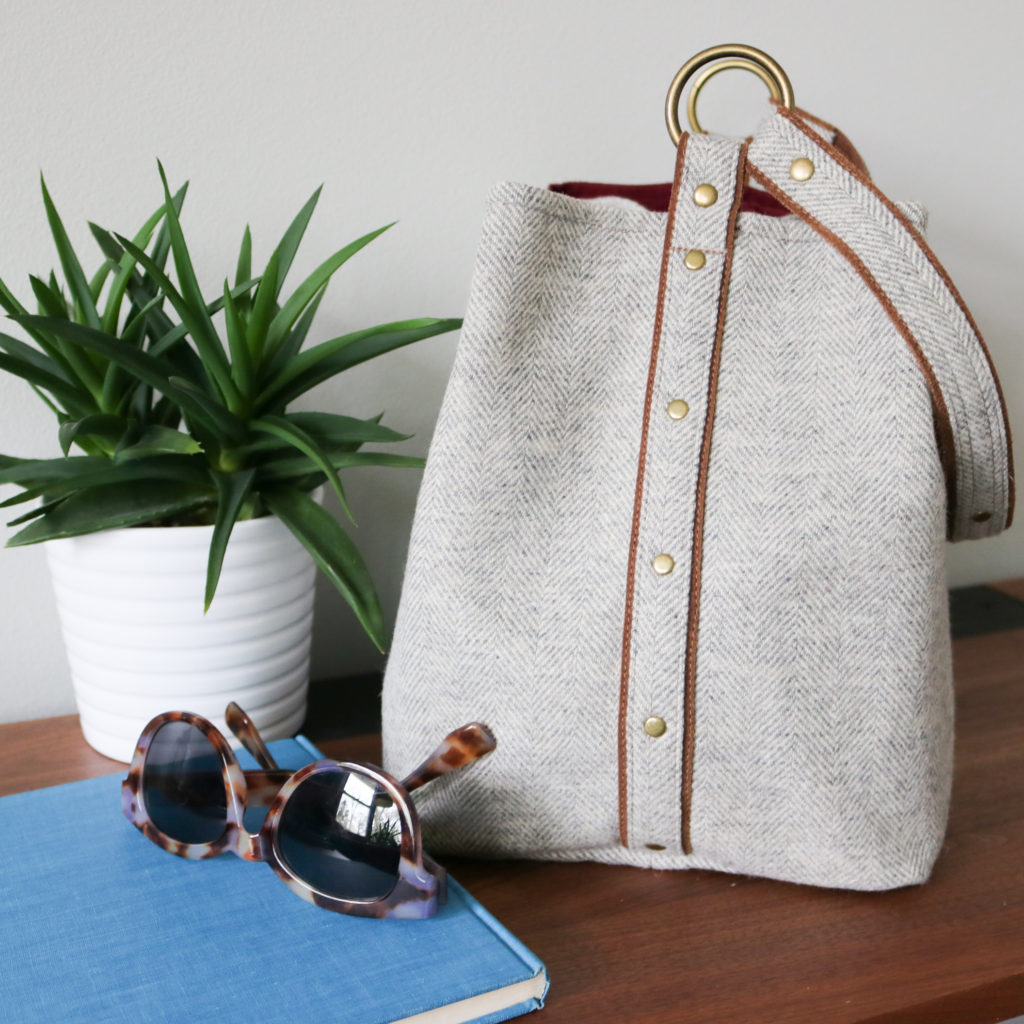
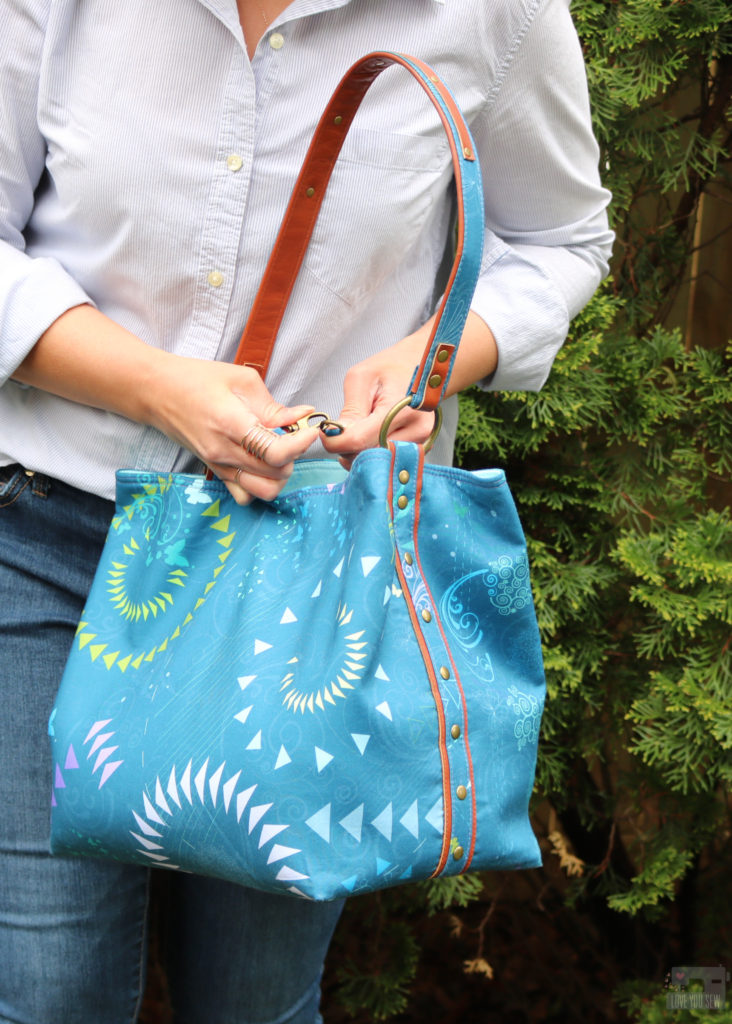
I’ve made nine different versions of the Megan Bucket Bag, starting with the OG, made with buttery taupe cowhide, which you can read about here.  This is STILL my everyday bag with the neutral color and has really held up well – as you would expect from genuine leather!  However, in order to turn this design into a bag pattern, I knew I had to edit it down.  For me, this is the hard part of creating patterns.  I had to adapt all of the features so that you could also make it in fabric, in leather, or a mix of both! This was another prototype version you can check out here.  This was my first fabric version I made while, of course, holding onto the leather details.  I still love that extra thin piece of leather on top of the strap….I’ll have to remember that for my next Megan bag!
Features
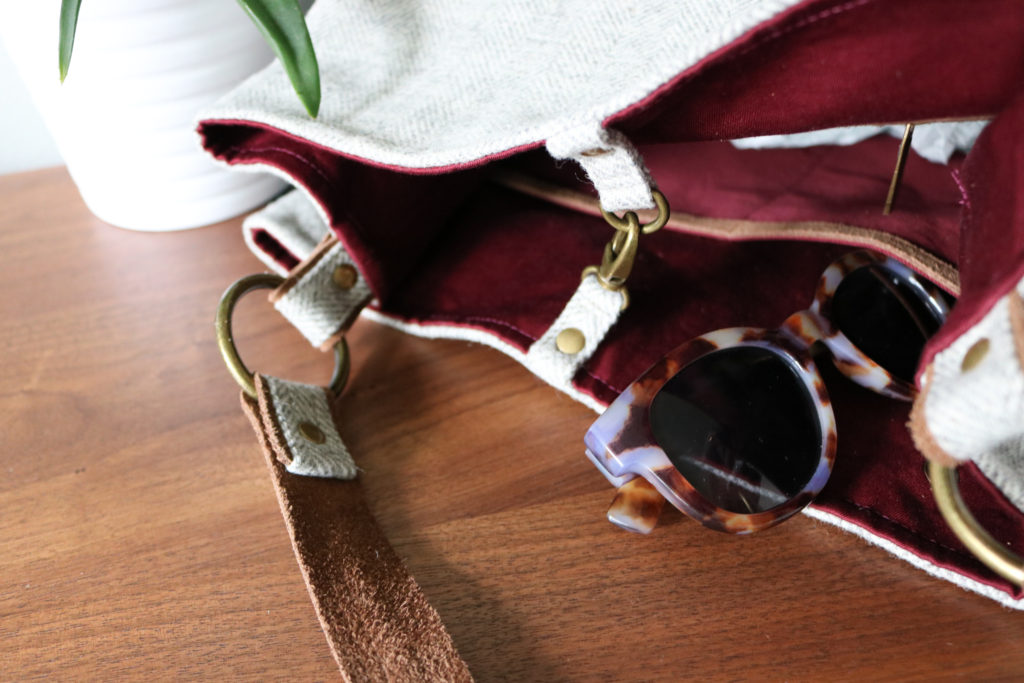
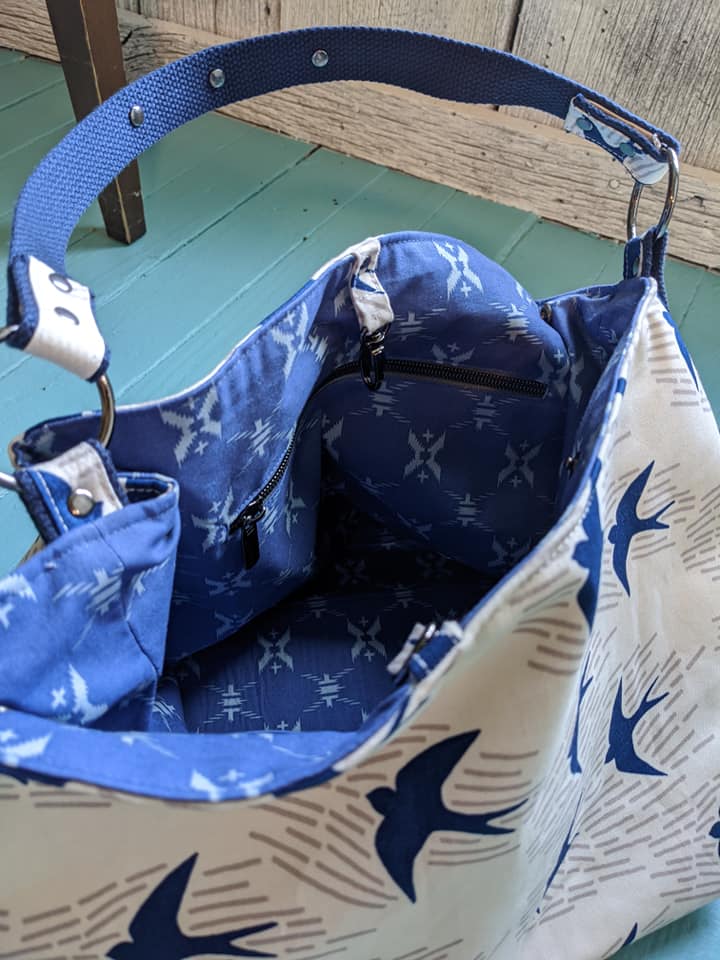
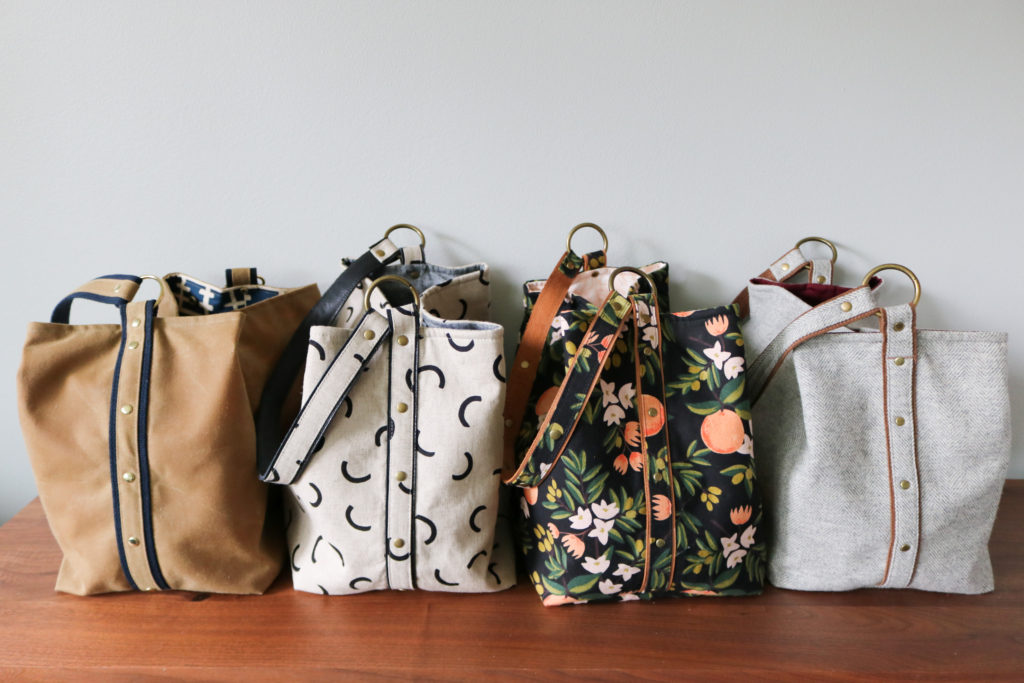
After teaching many bag classes and workshops, I know that many students want to make professional looking bags, but don’t necessarily have all the right equipment – including a heavy duty sewing machine.  So my goal with the construction, was to use some alternative techniques to take the bulk out of bag-making.  This helps to think outside the box so you can make bags with a wider array of equipment…not just industrial grade machines. “The Megan Bucket Bag is a fresh take on the classic slouchy bag silhouette, but with a more pronounced cube shape. The lines are clean with side seams hidden by overlays and rivets. There are two different views whether you want to make the Megan out of one fabric, or if you would like to use a raw-edge accent fabric to add a little more depth to the look.  With this pattern, you will learn different strap making techniques to take the bulk out of your fabric and gain ways to present a welt zipper pocket with plates or a cover. You will also learn an off-set bag technique for the overlays that won’t compromise your side seam stitching. There are plenty of options with snaps and the use of accent fabric for you to mix and match for your perfect bag.” This is a pattern for you to learn:
  • 2 -layer straps
  • Off-set overlay sewing to keep the integrity of the side seams
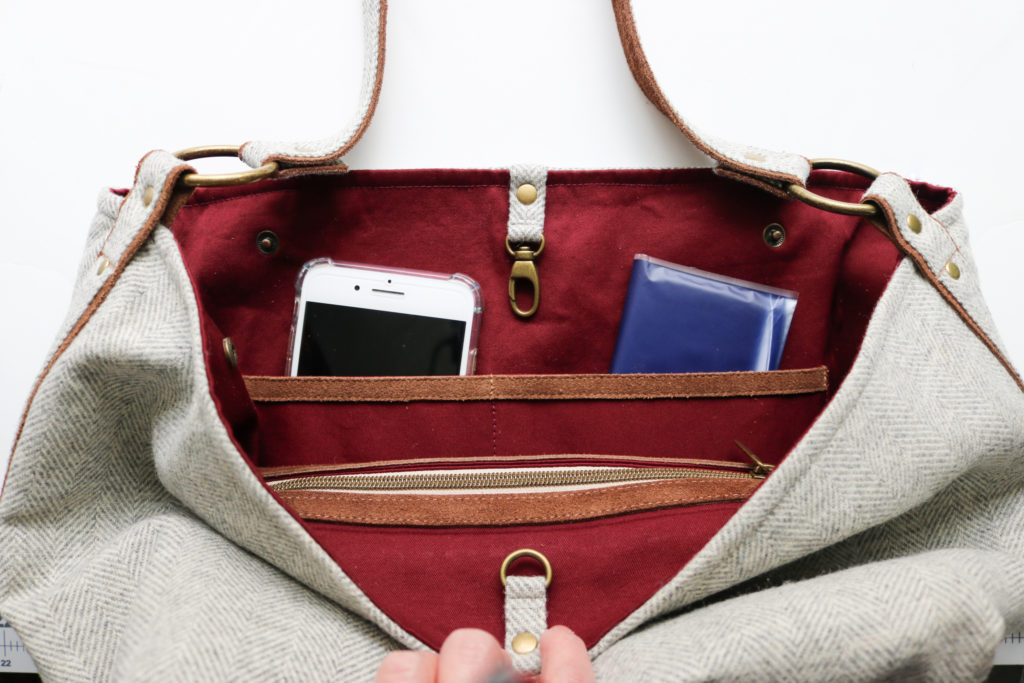
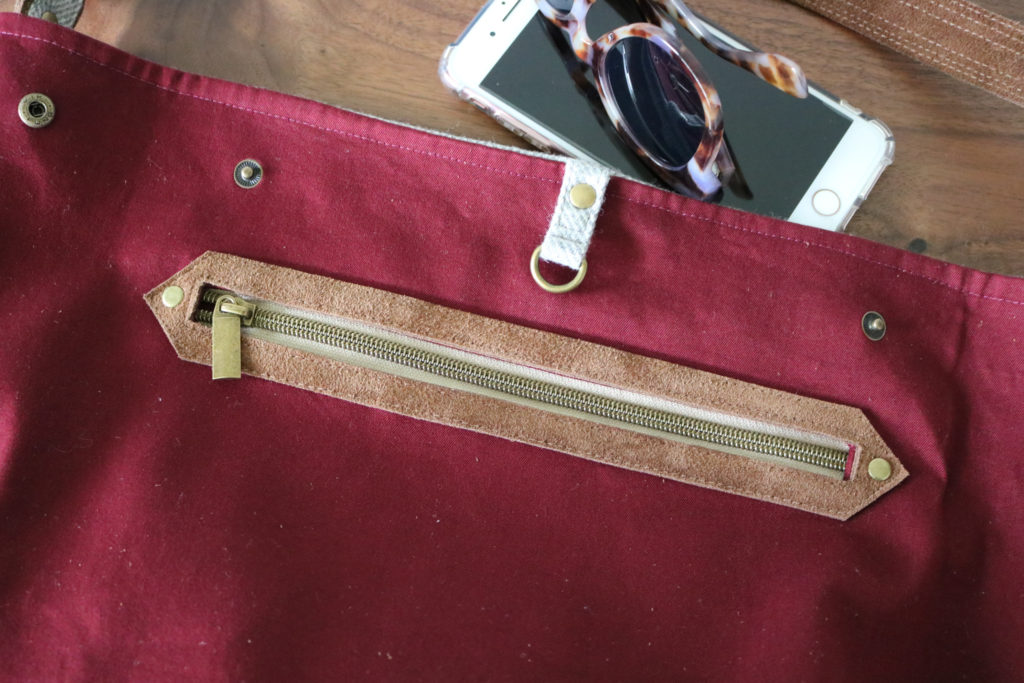
  • 4 different ways to present a welt zipper pocket with 2 plate options, a cover, or left bare.
  • Slip Pocket with an overlay
  • Connectors to help hold sides together
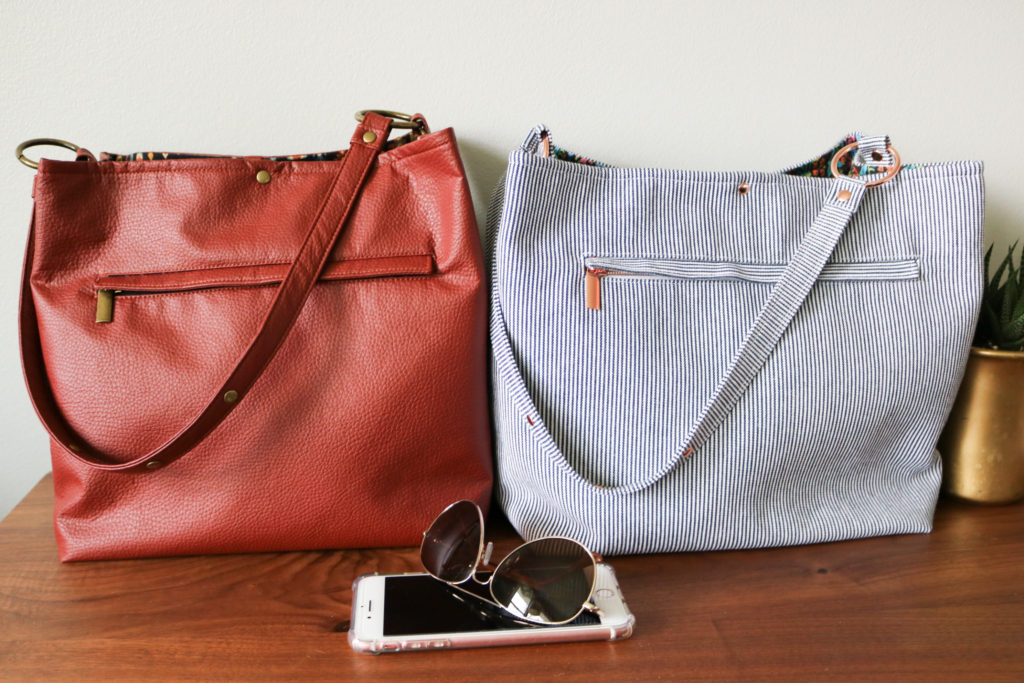
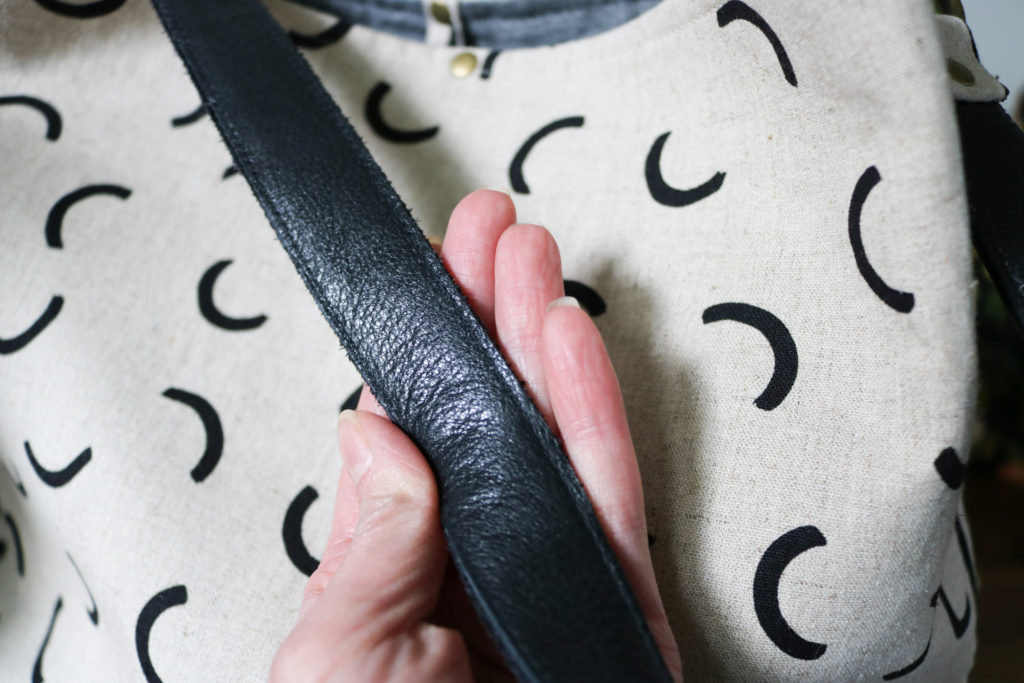
View A was designed for a single fabric and perfect for a newer bag-maker who wants to just use canvas.  This is a great way to start and learn new purse techniques without having to deal with other substrates.  However, this same version can be used with a single faux leather and still have a striking look. This view has a handy outside pocket with a cover to keep the look smooth and sleek but still has other details like the strap loops to add more interest. View B uses an accent fabric such as leather, suede, cork or vinyl that can be left raw edged without fraying.  These substrates are great looks to add more depth and texture to a bag.  The accent fabric is incorporated on to the side overlays, strap, and is used as decorative plating against the zipper pocket and slip pocket.  However, you can also swap out the accent fabric with some webbing to speed up your project. This pattern was written with mid-weight accent fabrics in mind with 2-3mm thickness to have enough structure in the strap.  However, I know there are a number of other fabrics you may want to use that are lighter and thinner – especially many types of cork.  Consider adding a second layer of accent fabric to the back of the strap as shown below.  Play around and see what you like!
Hardware
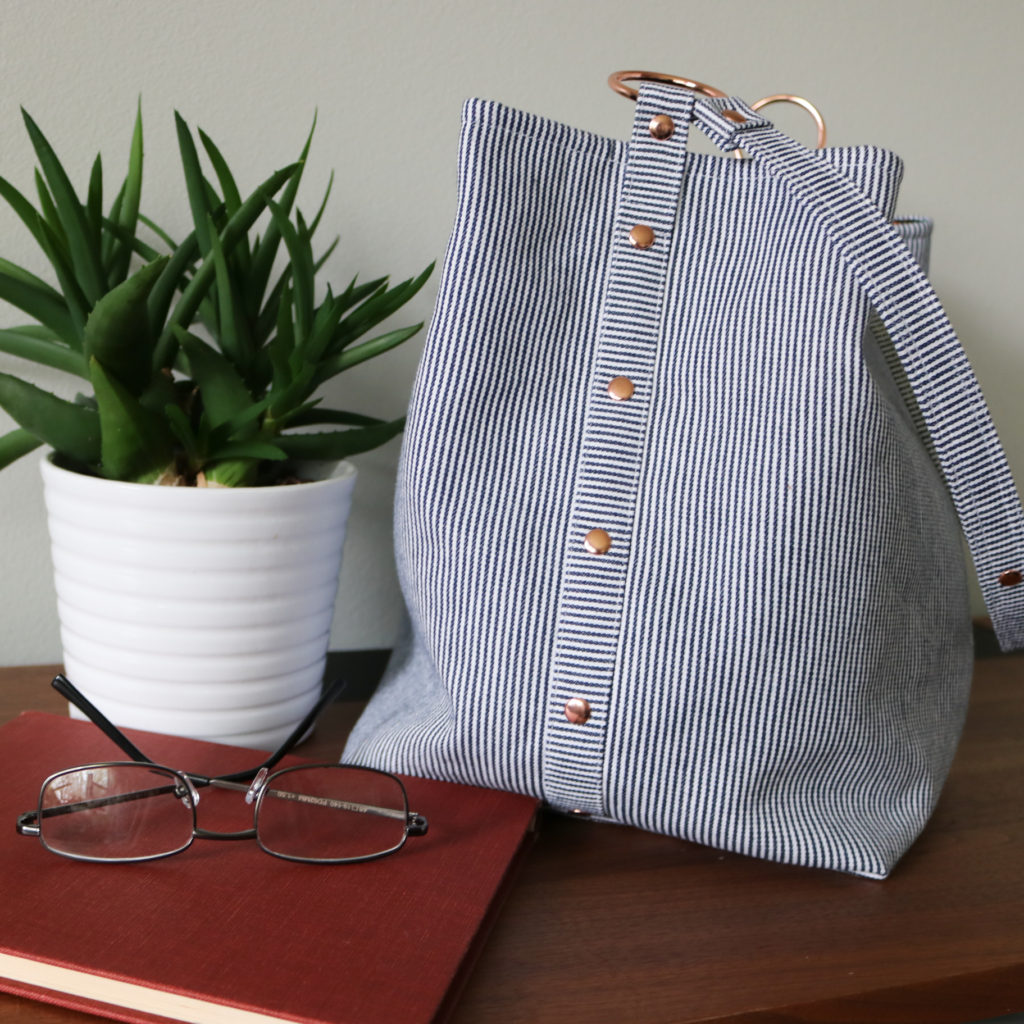
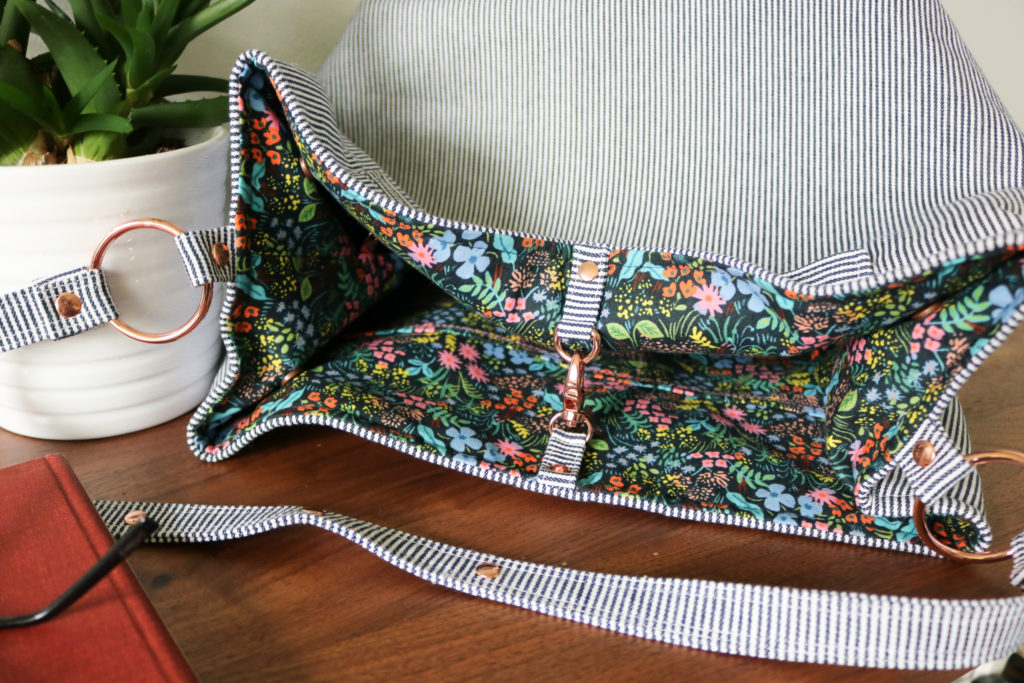
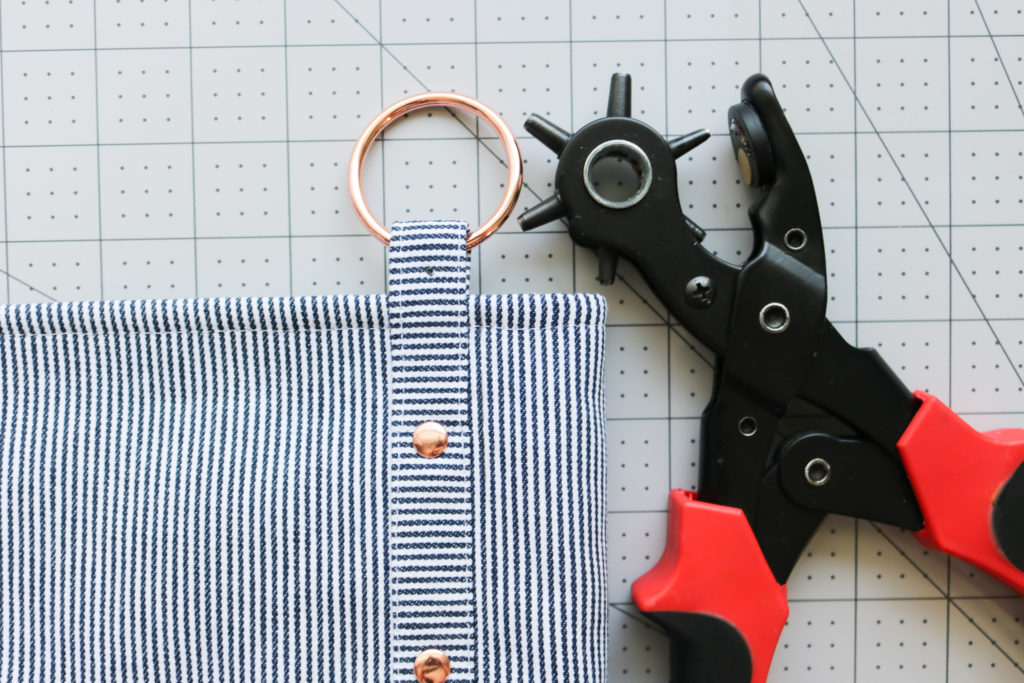
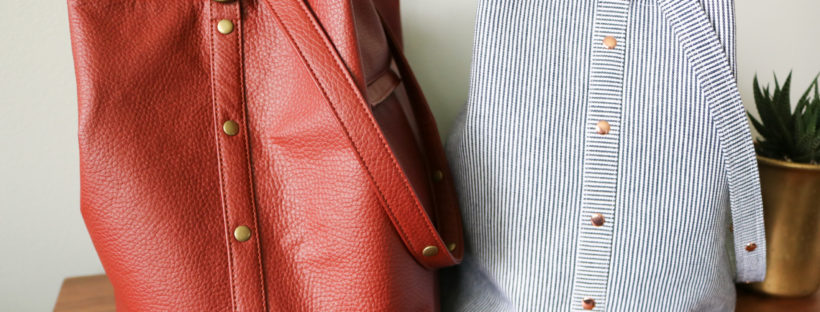
The main aesthetic element to the Megan Bucket Bag is the side overlay with a row of bright beautiful rivets.  Although I’ve used rivets for a long time with my bags, they were only in the patterns as alternation options for securing straps and such.  This time, the rivets are the featured stars and are not just for looks, but also for structural purposes.  They help secure the strap in place around the gorgeous O-rings.  This give such a strong, yet delicate look. To help hold the shape of the bag and keep contents safe, four sets of snaps are added to the lining.  They help keep the cube shape of the Megan while still staying slouchy like a good bucket bag does.  The purse can then be easily expanded by just releasing the snaps. Although the pattern includes the use of rivets and snaps, there are no actual instructions to install them.  Since there are SO many different types of hardware out there with multiplied by different tastes of the sewist, there was no way to include instructions for everything.  Rivets can be single sided and double-sided.  They can be shaped like pyramids, domes, or flat like burrs.  Snaps also have a number of  different sizes and features as well.  I prefer “spring” double cap snaps, but you can use magnetic or even sew-in snaps too!  This pattern allows you to use YOUR preference of material.   But just like with interfacing, you must remember to follow manufacturer’s instructions.  I’ll be showing my preferred methods of rivet and snap installations all next week, so keep an eye out!!! There are truly SO many different ways to make the Megan Bucket Bag.  If you are ready to make your own, click below for the pattern AND the hardware kits….it doesn’t get any easier, right?
|| Click HERE to shop the Megan Bucket Bag Pattern || 

|| Click HERE to shop The Hardware Kits ||
Project Details:

Tester Inspiration

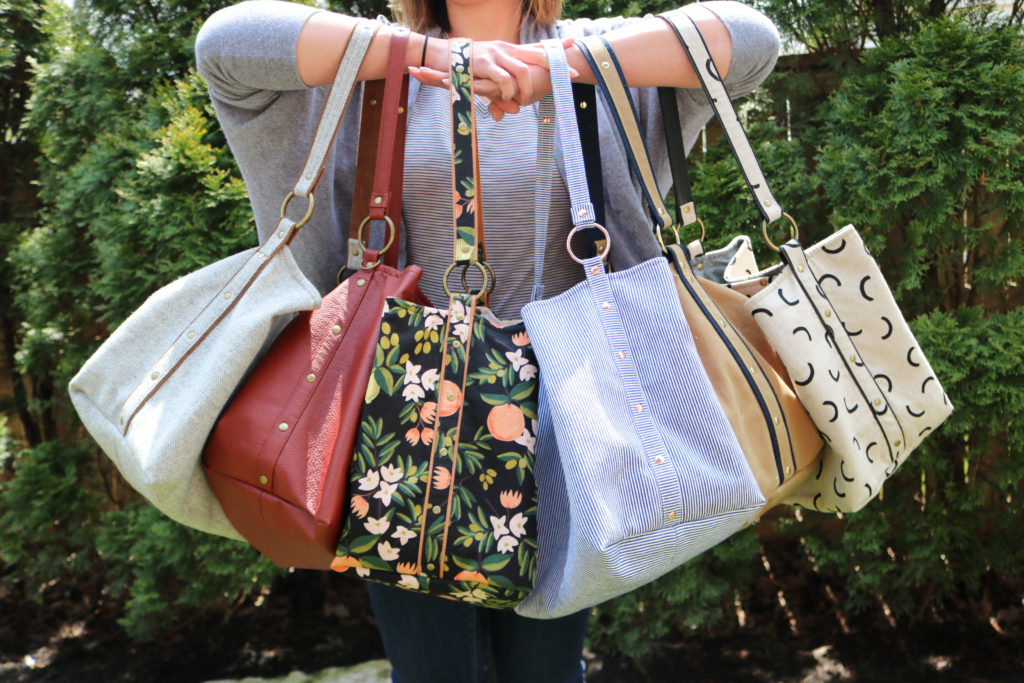
There is nothing better than seeing all of your makes with my patterns.  Here are even more great versions from my testers to inspire your Megan Bucket Bag: I cannot wait to see all of your makes!!! Happy Sewing, Cristy
This post may contain affiliate links. Please read my full disclosure here.
Introducing The Tiny Sophia Bag

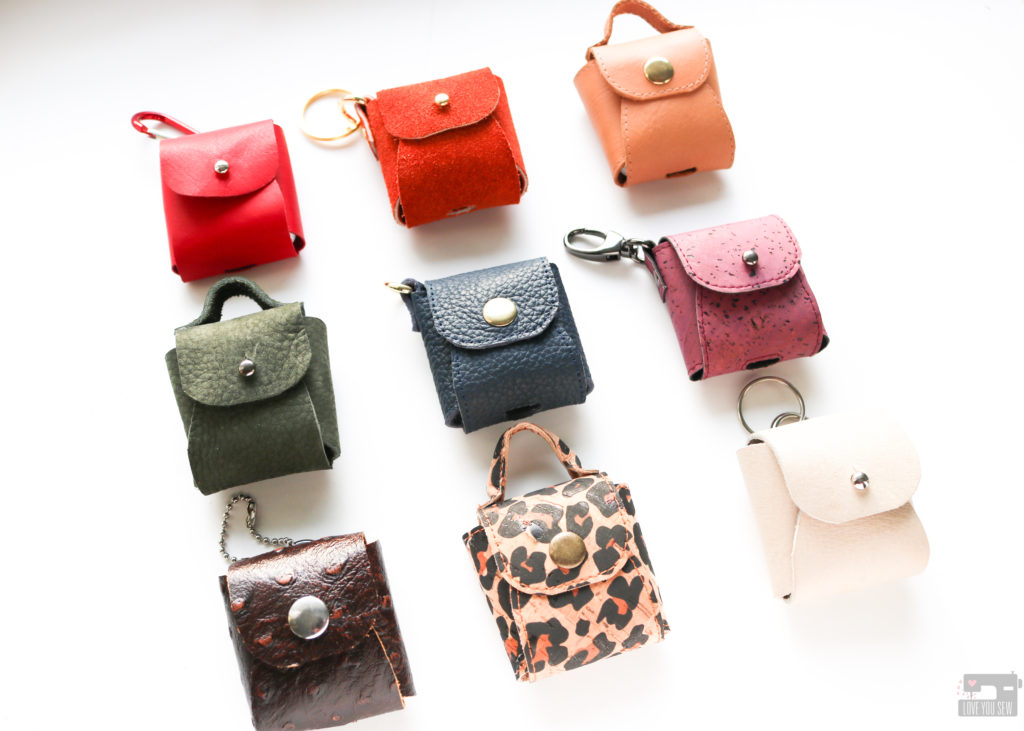
We are in the thick of the holiday season and I thought I did some pretty good seasonal planning.  I made gifts for my nieces and nephew early since I went to visit them in November and even got my fancy holiday dress finished by my husband’s birthday a few weeks ago.  But then I shared my Tiny Sophia Bag with all of you on Instagram and my feed (DMs too!) filled up with requests for this pattern.  You caught me in a moment of weakness because I said, “Sure, why not?!  This is probably the time when you would like this pattern the most!”  So why not add another “thing” to the list…famous last words. Lol!

You can purchase the Tiny Sophia Bag here.

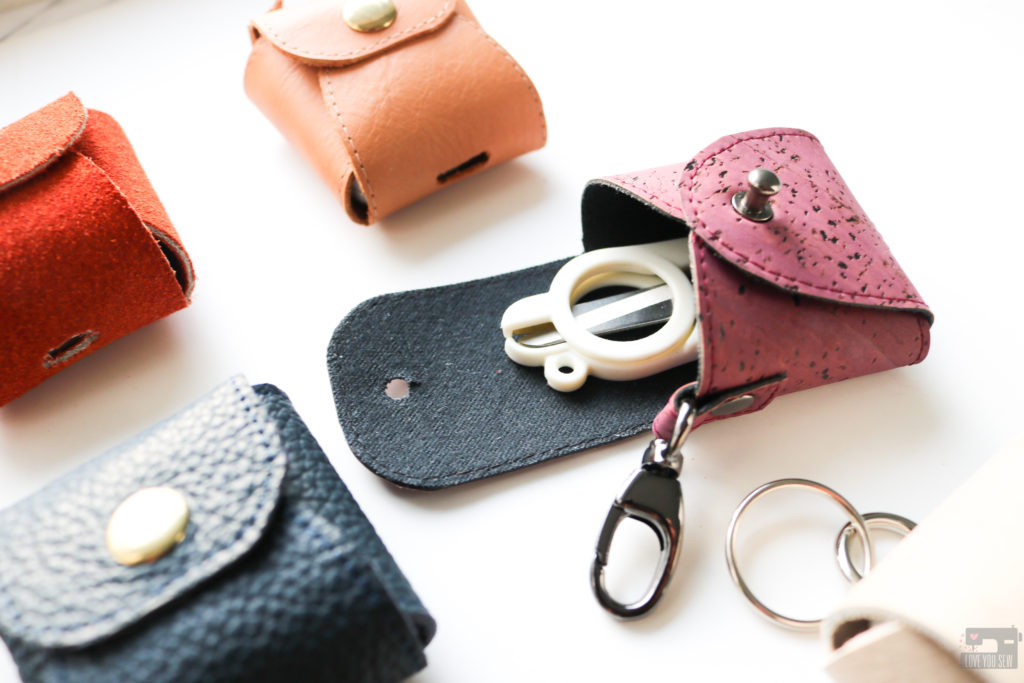
If you have been following my stories on IG, I shared these itty bitty purses by Jaquemus which I’ve been seeing all over the fashion reports.  Although completely useless as an actual purse (and WAY too expensive *eyeroll*) I still wanted one…but of course, in my own DIY way!  Spoiler alert – my way is MUCH more cost effective.

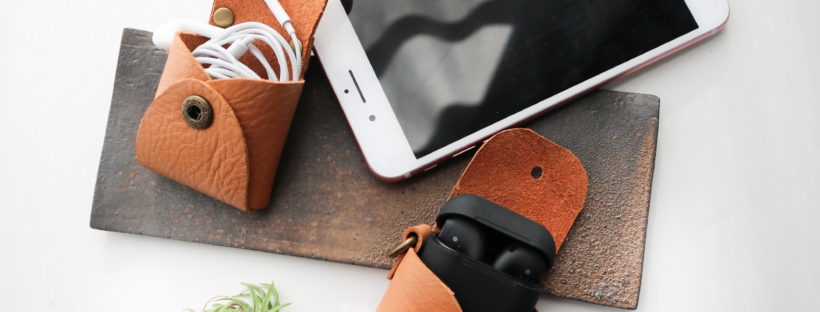
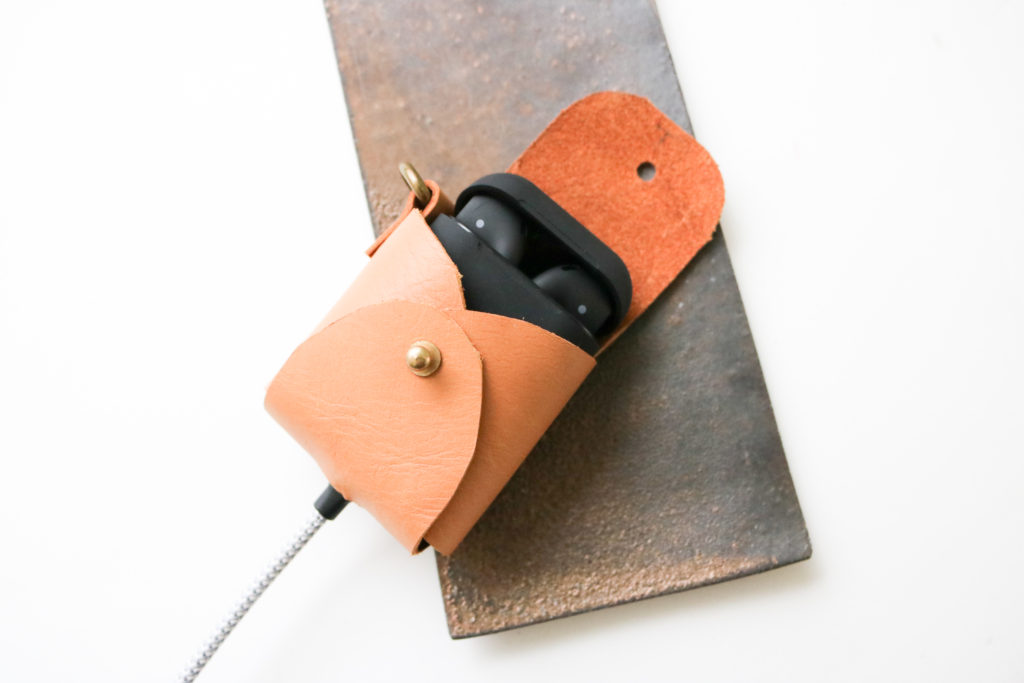
Over the summer, I toyed around with some paper templates to make a tiny bag for fun, but nothing really came out of it.  Then a visit back east to see my family made me really notice the wireless ear pods my brother was wearing.  Shortly after that, Lizzo came out on the red carpet with a tiny Valentino bag!  Combine these events and it made me wonder if the pods had a carrying case…aaaand if that case could also be a purse!

Namesake

As I was developing this pattern and making all of the prototypes, I knew this bag would be named after my niece, Sophia.  (All of my bag patterns are named after one of my nieces.)  Miss Sophia is a petite lil’ lady and the absolute CUTEST…just like this bag!  She is always game for a little fun and adventure, which makes her a great travel companion.  Since her dad was also part of the inspiration, it’s only fitting that this bag is named after her.

View B

Features

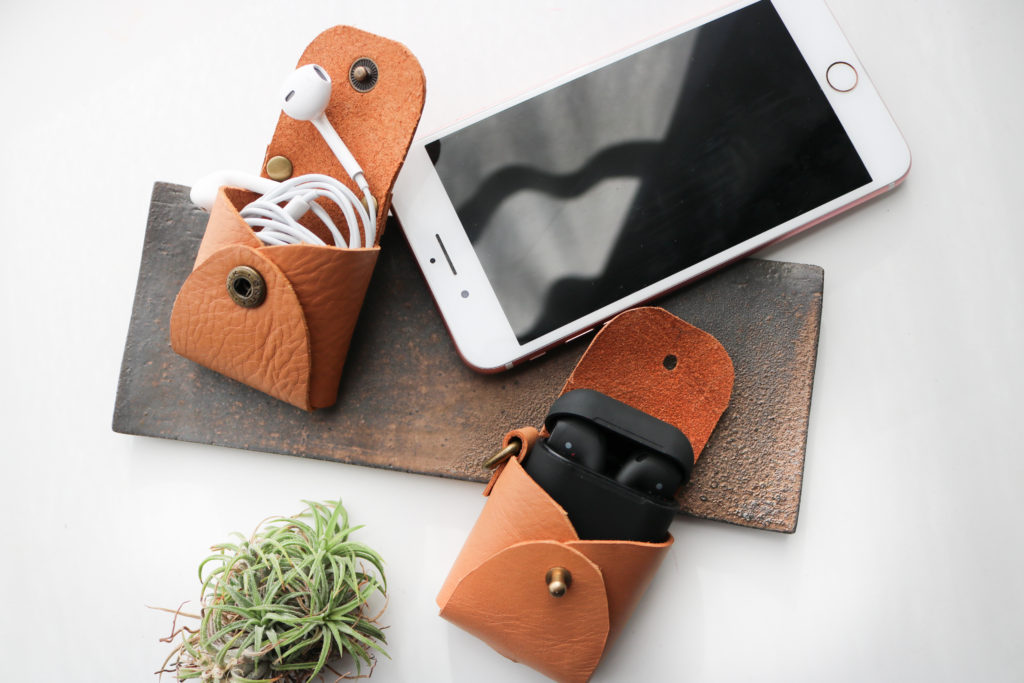
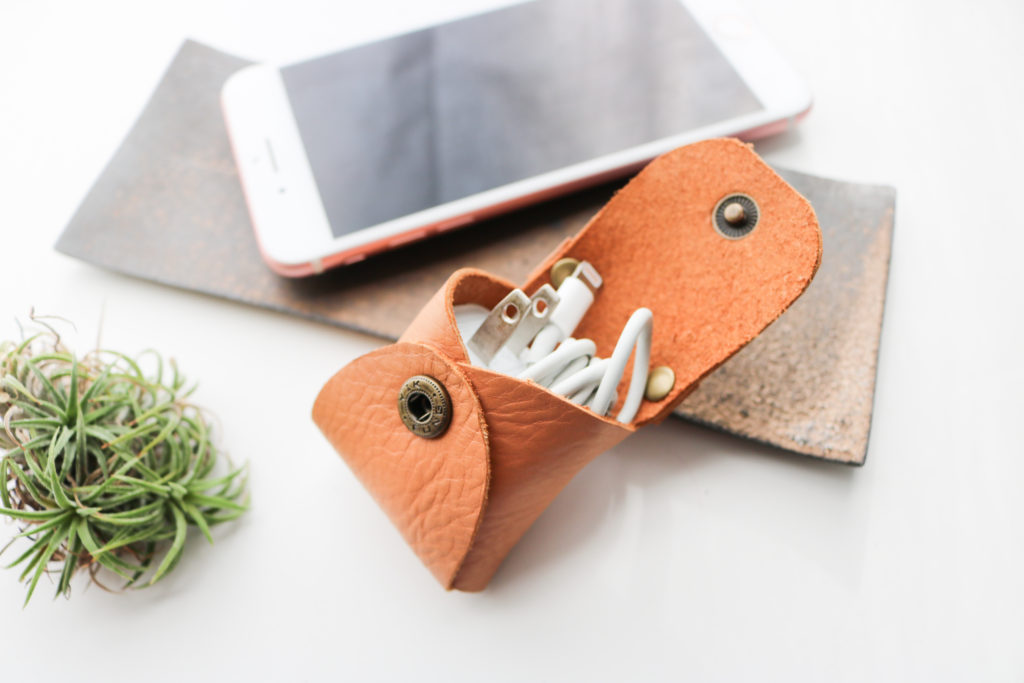
I know there are a ton of aftermarket pod cases out there and I thought a leather one would be chic and beautiful.  After a few hours (with my husband and boys at basketball practice,) I was able to draft a headphone case AND a bag by switching up the options.  This is no-sew pattern with two different views and the features can certainly be mixed and matched!

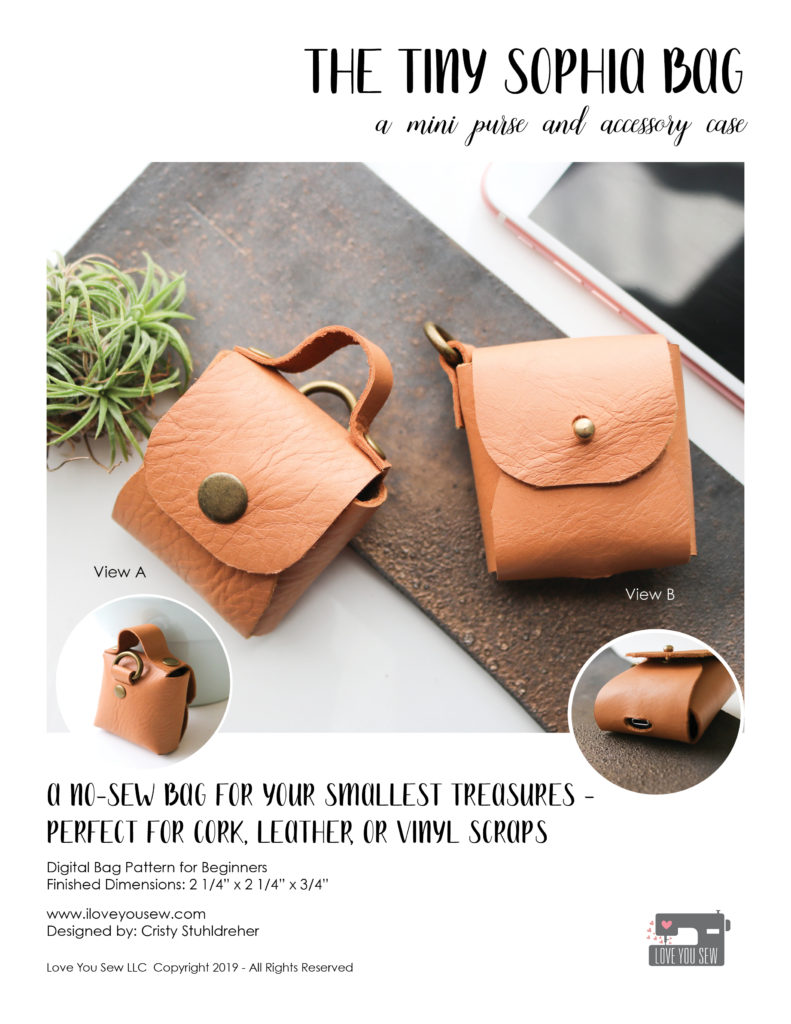
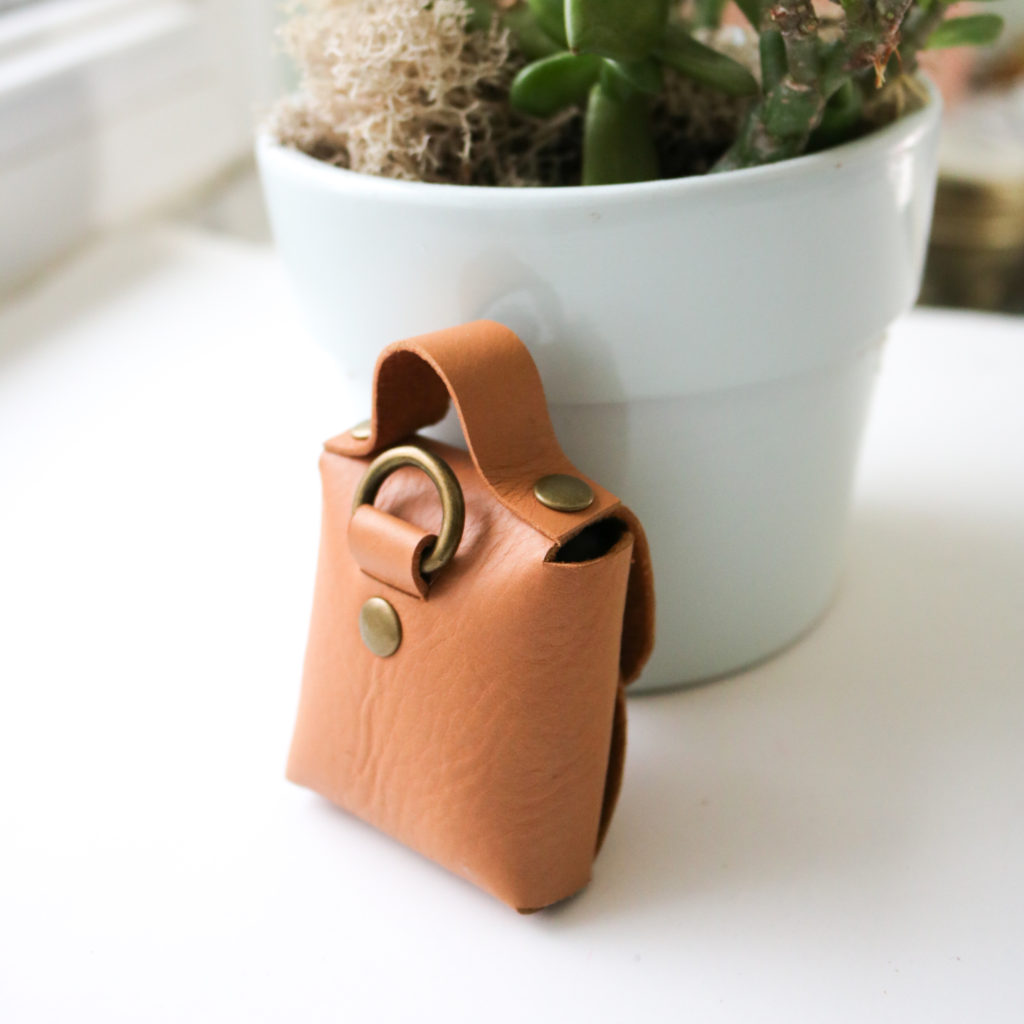
  • View A  “Mini Purse” – This has a strap on the top flap with a D-ring on the back and a snap closure.
  • View B “Accessory Case” – This has a bottom slot opening for a charger and the D-ring is set on the side.  A button stud is used as the closure.

View A

Hardware

The Tiny Sophia Bag requires rivet and snap or button stud installation.  This is assumed in the pattern (and I promise I will add more posts about how I install.)  I want to let you know my favorite suppliers:

  • Rivets:  For a long time, I set these just using just a hammer and anvil.  You can find these tools  in my shop, here.  Emmaline Bags carries a wide variety of sixes in different finishes. (Pictured above are the “small” rivets in Antique brass.)
  • Snaps: I’m a big fan of double-cap spring snaps from Gold Star Tool.  These are the same ones I used for my Kelly Anorak which you can find here. (On the cover photo, I have a size 20 ligne brass snap.)
  • Button Studs (screw on): These are THE best, since there are no special setting tools needed…just a screwdriver.  I grab most of mine from Amazon and I like the Tandy ones (when I’m in a pinch for timing since there is a store nearby.)  I think the 6mm/7mm head ones are a good proportion for this small bag.  (The 8mm head studs are used in my Kelly Waist Bag pattern)

New SVG Files

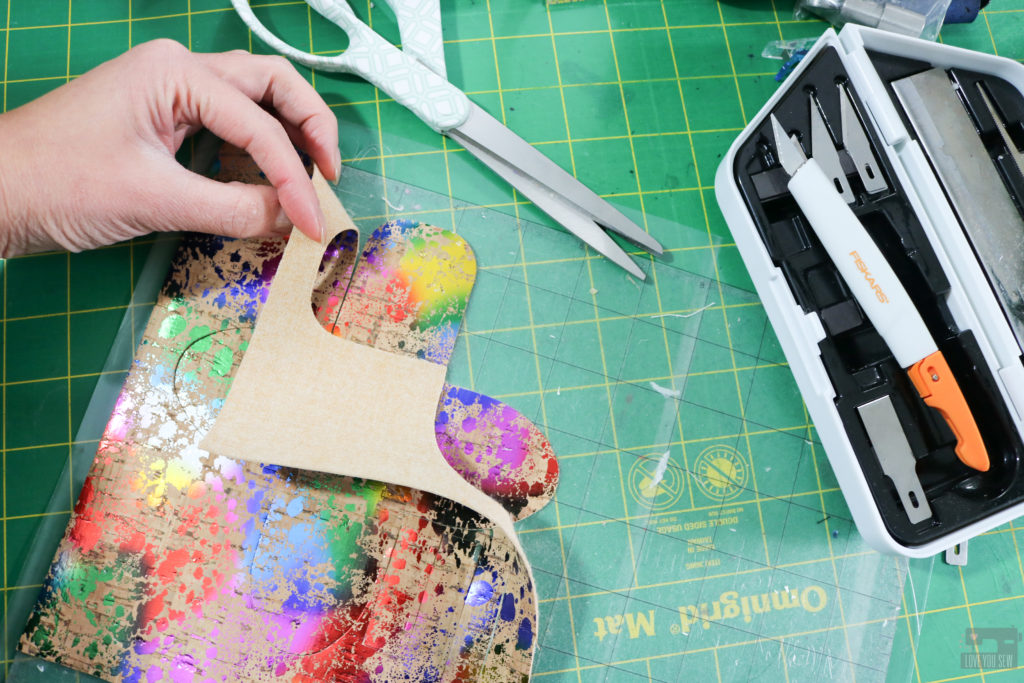
A big addition to this pattern release is the inclusion of SVG (scalable vector graphic) files which you can use with most electronic cutting machines.  I’ve always imported images and traced my own files, but have never created ones from Illustrator before.  So, I was pleasantly surprised to see how this pattern cut on my machine!  I have an old Silhouette Cameo with a straight knife and the cork cut so well on setting #7.  It did not like leather though…I’m hoping the rotary blades do much better.  There are three files for the different views and an extra one to combine all of the features together.  Please let me know what you think about this new feature!

Cutting by Hand

For those who don’t have a cutting machine, please know that I made all of these Tiny Sophia Bags by hand.  After making lots of leather bags and over a dozen of these minis, here are a few tips and tricks that will help you though.

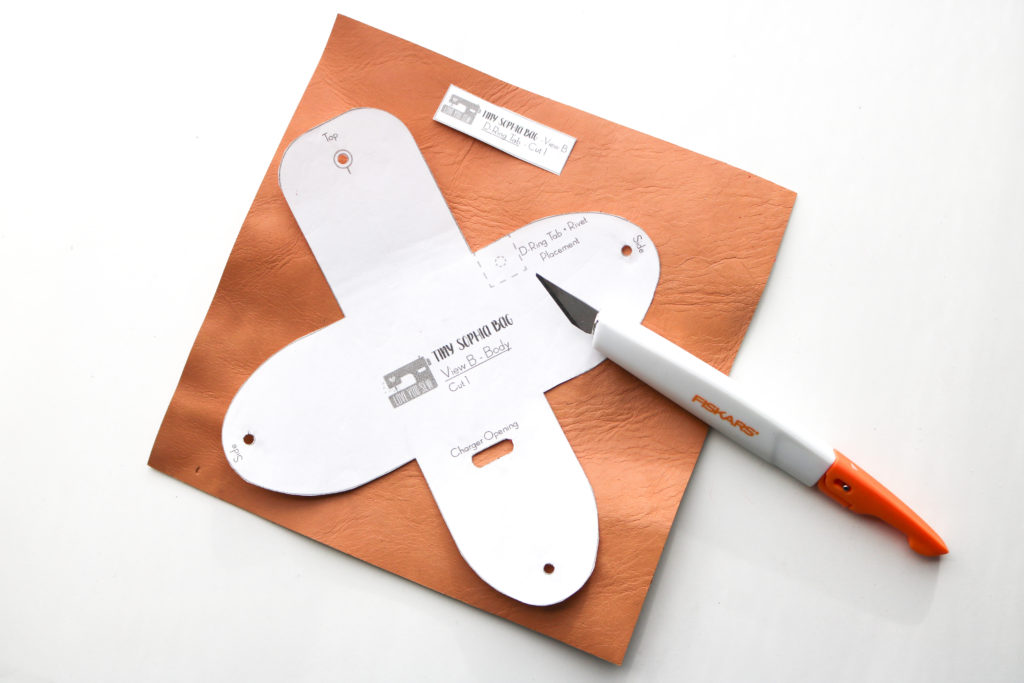
  • I LOVE this heavy duty multi-blade craft knife set by Fiskars.  The different blades are great depending on the type of cut you need to make…my fave is the 1/2″ straight edge one.
  • The pattern essentially looks like a cross, so the edges are right angles.  If you match up the sides with a ruler, you’ll have a smoother (and more accurate) cut.
  • Use a metal ruler with a craft knife for the straight edges.
  • For thicker leather/suede, you might want to use a box cutter for a stronger blade and press down on the ruler so it doesn’t drag.
  • Speaking of blades, remember to use a new one that’s nice and sharp for clean cuts.
  • With the curves, try to find household objects like bowls that match to balance your knife against.
  • For the back D-Ring opening, one of my testers said a button-hole cutter like this one is great for cutting the edges.

Customize

There are so many different ways to customize your Tiny Sophia Bag.  Luckily, I have a nice stash of leather scraps from thrifting and from friends.  You can use leather, suede, faux leather, and even cork!  Based on the thickness of your substrate, you may have to adjust the position of the holes which is also covered in the the pattern 😉

Check out #TheTinySophiaBag on social media to see all of the different versions.  I like the extra stitching around the edges to make the bag look more polished (don’t forget to use that leather needle and teflon or walking foot!)  Many of my testers used decorative hardware too.  I can’t wait to see what you do!

If you are ready for the cutest little purse, you can grab the Tiny Sophia Bag pattern, here.  Use it to carry your trinkets, coins, and all the smartphone accessories.  One of my testers mad bags for her daughters’ dolls!  I’m adding one of these on my Christmas tree and will use it later to hang off my purse for my own headphones.

How would you use your Tiny Sophia Bag?


Happy Sewing!

Cristy


This post may contain affiliate links.  You can read about my Disclosure, here.

Emma Stadium Bag by Love You Sew

Tips and Tricks – Sewing with Clear Vinyl

Expanding your sewing repertoire is always so exciting, but there can also be some challenges along the way. As I wrote the Emma Stadium Bag, I included some tips with construction specific to my pattern, but thought you might appreciate more general guidance when sewing with clear or other see-through vinyl!

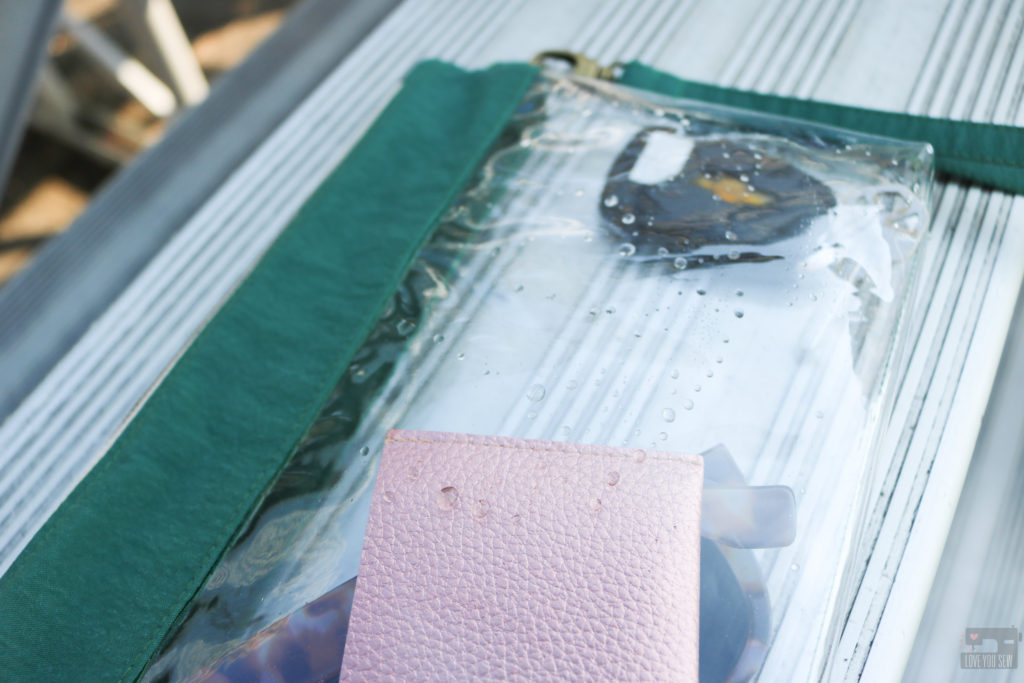
First, let’s talk about vinyl. This term is used for a lot of different flexible plastic substrates, but I am referring to sewable 100% PVC (polyvinyl chloride,) which is generally polished on one or both sides and you can see through it. Vinyl is a tough and durable substrate that can be used to provide moisture and/or humidity protection. This type of vinyl is available it many different colors and even thicknesses.

20 gauge (above) vs 12 gauge (below)

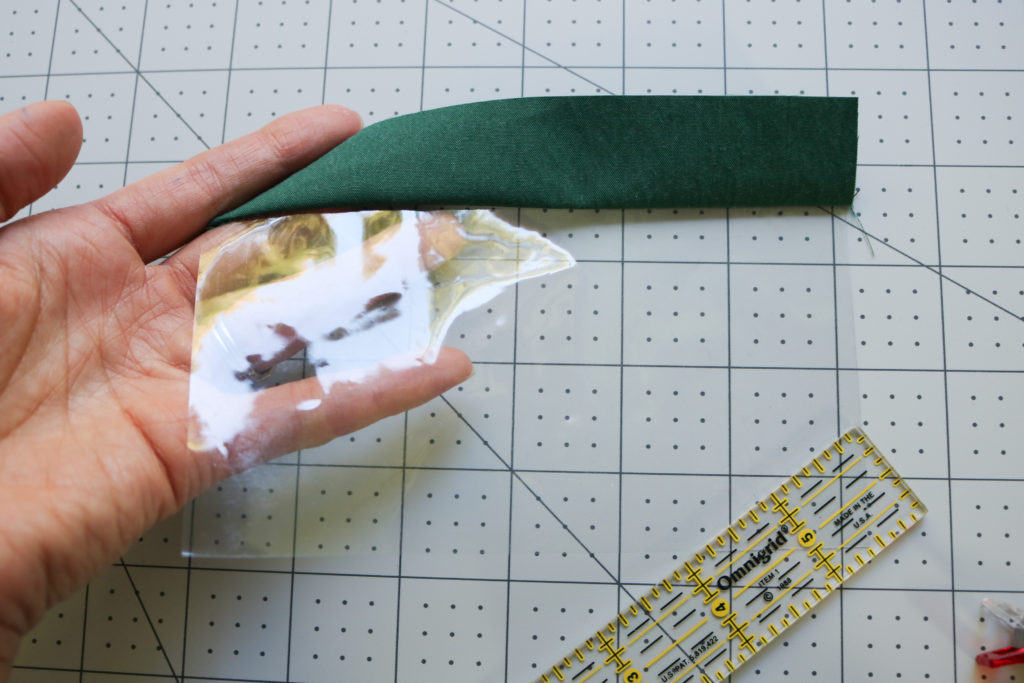
Vinyl is measured by gauge number. This refers to the thickness of the vinyl sheet. Most big box craft stores carry from 8-20 gauge and hardware stores can carry even thicker products. But for our sewing purposes, I think 8-20 gauge is within our wheelhouse. The 8 gauge is the thinnest at 0.008″ which is the most flexible and the easiest to sew. I think this is a great size if you are using this for a window in a pouch or organizer project. I wouldn’t recommend this for the body of a bag or pouch because it would be able to hold it’s shape well (unless you are going for the slouchy look!) On the opposite end, the 20 gauge is thickest at 0.020″ and is more rigid, but still flexible. I would recommend this thickness for projects which you want to keep the shape intact, like a tote or pouch. However, not all domestic sewing machines will be able to handle the thickness. My semi-industrial Juki 2010Q can handle this after some tension adjustments, but I think 12 gauge is the best bet to start for most machines IMO. Please test the gauges and see what you like best!

Let’s start with vinyl prep and handling. The following are a few tips to get you started:

  • Do NOT use your Favorite Fabric Scissors – Use your “paper” or “all-purpose” scissors to cut through the vinyl because it could dull your fabric ones – especially if you are using a higher gauge. I have an old rotary cutter marked for all-purpose use. Generally, when my fabric rotary blade gets dull, I move it over to the “all-purpose” Fiskars cutter and use that on these special projects and when I’m trimming PDF paper patterns.
  • Use Clips to Hold Vinyl Together – Whether you like to use Clover Clips or binder clips, these all do the same job. They hold vinyl together without leaving a permanent hole like a sewing pin would. I’ve also heard of others using paper clips and even bobby pins too.
  • Do NOT Directly Iron onto Vinyl – This will melt and leave permanent marks on the plastic. If you do have deep creases that you would like smoothed out, you can hover the iron above the vinyl or use a pressing cloth with light and quick presses. A heat gun or a hair-dryer (on low setting) can also help. Make sure you don’t have multiple layers of vinyl directly touching each other as you use heat or they can melt together.

Now, let’s get into sewing with vinyl! Below are tips from my own experience. Please let me and other readers know if you have any additional tips of your own in the comments section below. I would love to read them!!!

Left to Right: Teflon Foot, Walking Foot and Zipper Foot (with washi tape)
  • Use a Teflon Foot (preferred) or a Walking Foot – Vinyl is notorious for it’s “stickiness” when rubbed against a metal presser foot. A smooth Teflon foot doesn’t create the same friction as a metal one would and allows the vinyl to pass through the feed dogs. I prefer this foot for it’s slim profile and the ability to maneuver around more than the clunky Walking Foot. However, the Walking Foot does do a great job with the extra set of feed dogs to help shift the vinyl through. Other machines may have leather/vinyl specific feet as well with rollers. I don’t have these with my Juki and can’t speak to them specifically. Relieving presser foot pressure (if available on your machine) will also help reduce friction.
  • Grab some Washi Tape – If you don’t have any of the feet mentioned above, you can try to use washi tape (available at most craft stores) and adhere it to the bottom of your regular foot. I use this method with my zipper foot (pictured above) since I rarely have the need for a Teflon one. I will caution that you do need a higher quality tape where the sticky side remains where it’s suppose to and doesn’t transfer to the non-sticky side. $1 bin tapes are usually like this and if you have any tackiness on the right side of the tape, it pretty much negates it’s use.
  • Reduce friction on your Sewing Machine Bed – Some vinyls are stickier than others when moving across the painted table of your sewing machine. (It glides over smoothly on the bare metal plate.) You should test how the vinyl glides against your machine before starting. If there is quite a bit of sticking, I recommend detaching the extended table and/or laying down several pieces of washi tape on top of it. This will allow the vinyl to glide a bit more. You may also have to lift the vinyl as you sew to avoid contact with your machine, working a few inches at a time.
  • Use Regular/Sew-All Polyester Thread – You want a nice strong thread with the vinyl, but you don’t want anything that is too thick because it will create more rubbing. This is the same if sewing with faux or real leather. There is more friction when you use a thicker thread and although you can also switch to a larger needle, sometimes you just can’t get a needle large enough and will end up with skipped stitches.
  • ALWAYS use a Brand New Sharp Needle – Since you are puncturing plastic, a brand new needle is essential. If it is dull, this can effect timing and can lead to skipped stitches.
  • Practice sewing on scraps – Vinyl will leave permanent holes, so it’s important to get your tension and stitch-length right before sewing. As you increase thickness, you may also have to increase your stitch-length to compensate.

As for the care of vinyl, it is always a good idea to keep any type of it away from prolonged sun exposure. This will keep your vinyl the same color as purchased and keeps it malleable. You can use a damp cloth to wipe away messes.

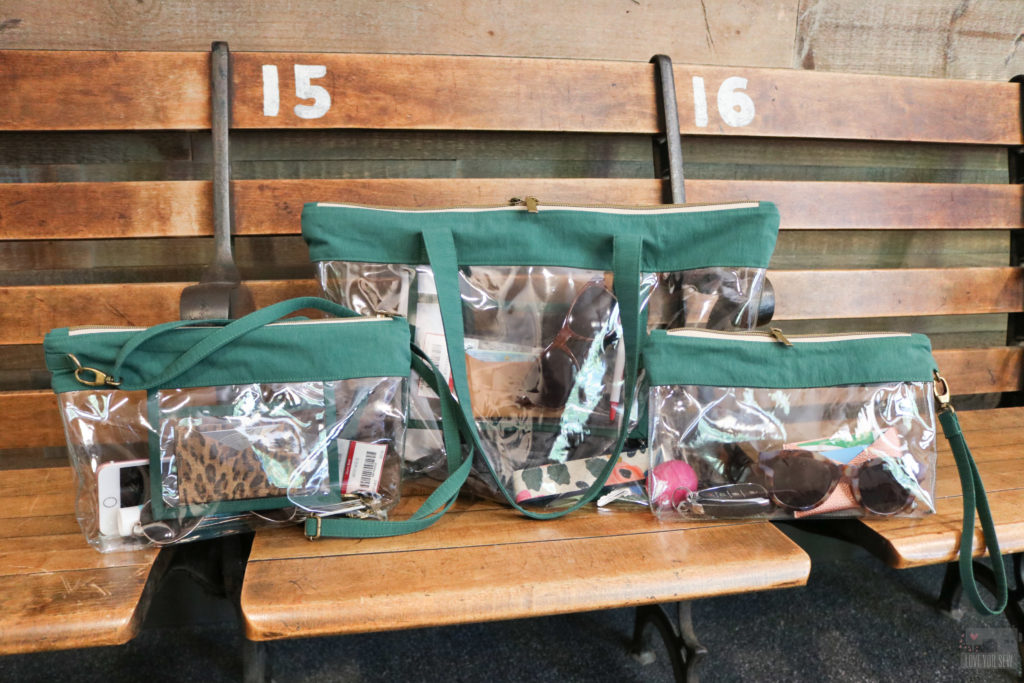
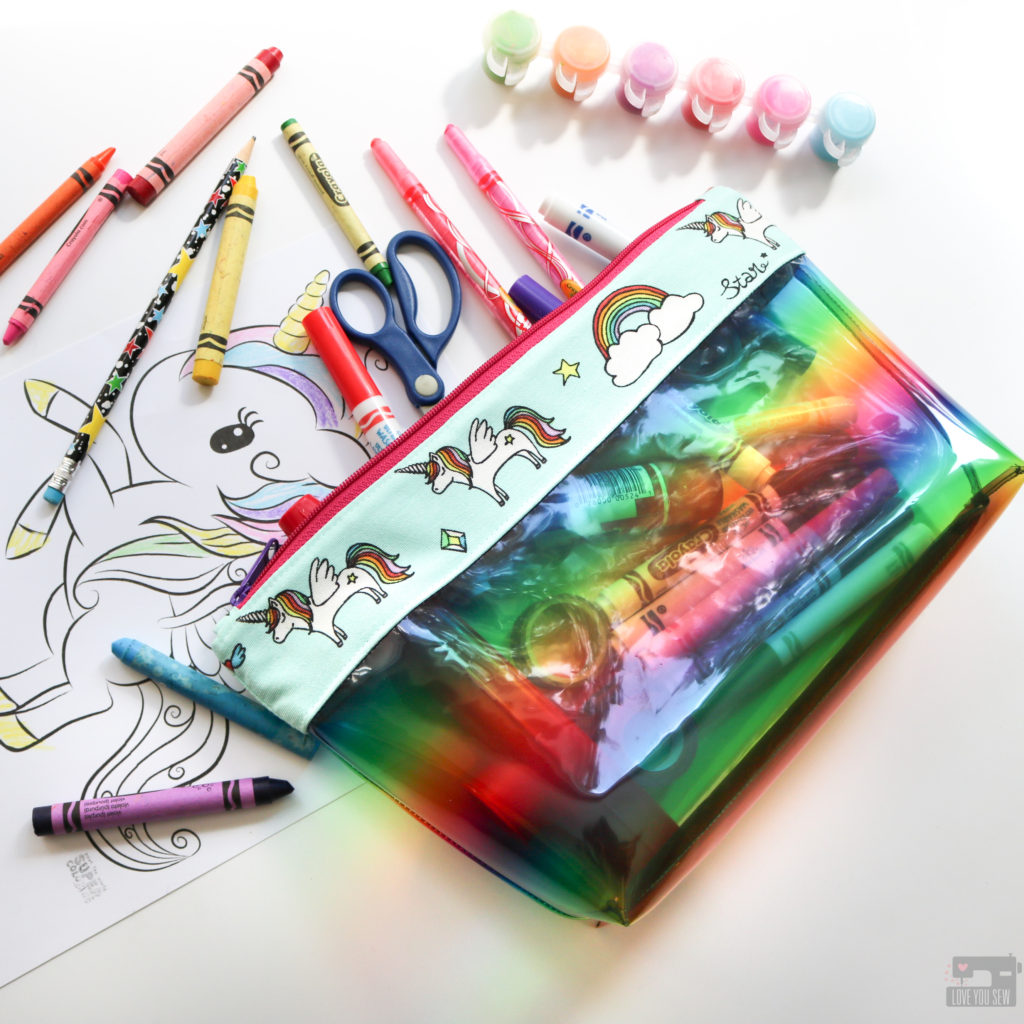
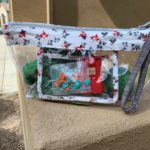
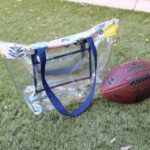
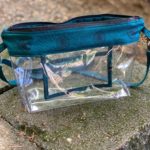
Now that you have the tips and tricks down, are you ready to sew with vinyl? All of the clear vinyl bags in these images are 12 gauge clear from JoAnn Fabrics (aff link.) If you stop by the store, you can ask for swatch samples in the other gauges. You can also order clear vinyl from Fabric.com (aff link) which ships to many countries. If you are into some of the specialty vinyls, I LOVE Sew Hungry Hippie’s shop (aff link.) This is where I bought the rainbow vinyl in the pictures above and I’ve been eyeing up all the glitter offerings.

You can grab the Emma Stadium Bag digital pattern here for your first clear vinyl project 😉

Hugs and Stitches,

Cristy


This post may contain affiliate links. You can read my full disclosure here.
Emma Stadium Bag by Love You Sew

The Emma Stadium Bag – Intro

Emma Stadium Bag by Love You Sew

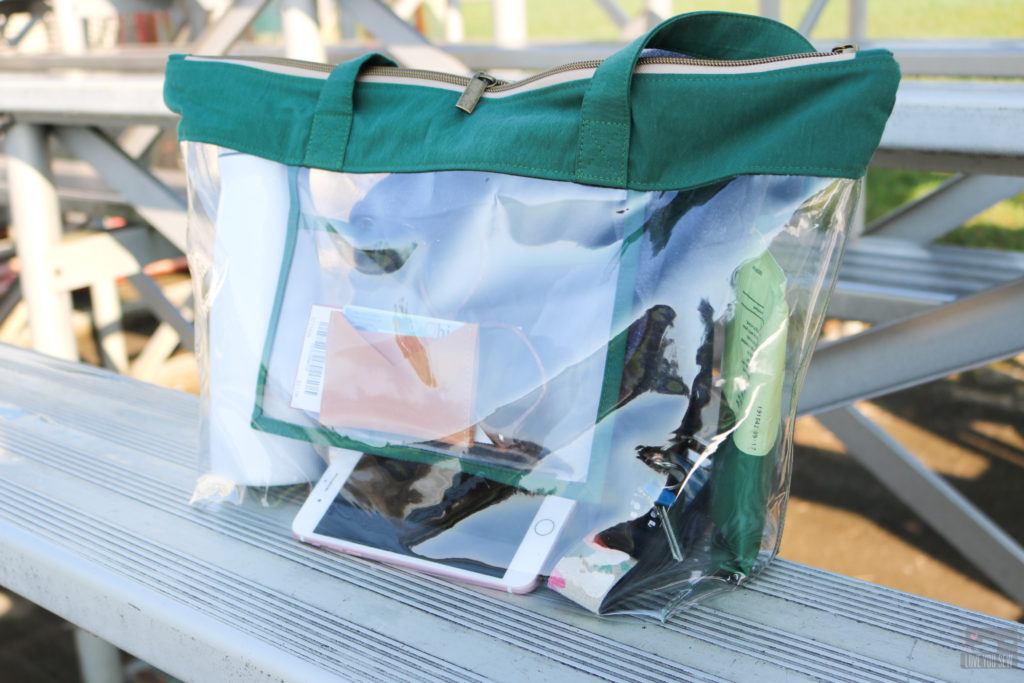
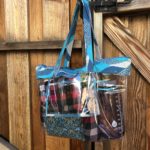
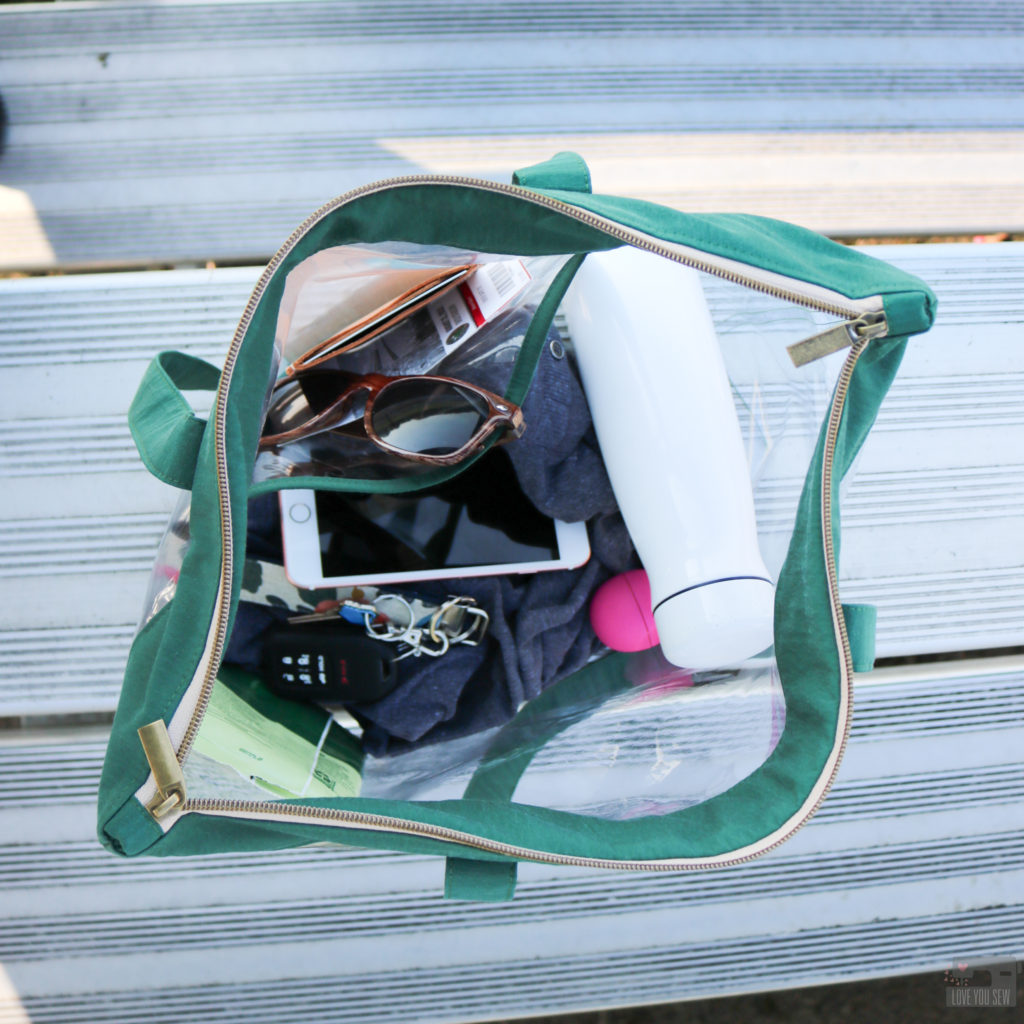
Right before I left for a college football game last year, there was just something that made me check the stadium’s bag policy, even though I’ve attended games at the same venue for years.  Thank goodness I did because it turned out, I couldn’t bring in the bags I always used to!  I could either bring in a small wristlet that couldn’t even fit my phone, or opt to bring in a clear bag to accommodate more of my stuff.  With this game being out of state and lots of walking around the campus, I knew I had to bring a clear bag.  With some remnant vinyl and scraps of canvas from my stash, the Emma Stadium Bag was born.

At first, I didn’t think this bag would be a pattern.  It was a just a quick late night project based on need rather than want.  But with public safety on the forefront of large gatherings, there has been a continuous change of bag policies across other public venues and schools.  We are seeing the need for more and more clear bags to ensure safety for all.  Even with this movement, I know us, bag-makers still love to add our own personal spin to a make.   We have the power to make things our own and I hope you are able to use the Emma Bag to keep your own style and show off your personality while out and about.

Original from Fall 2018 – I didn’t have the right hardware late & improvised with leather and plenty of rivets

The Namesake

As with all my bag patterns, they are named after one of my eleven nieces.  Emma is the youngest girl on my husband’s side of the the family but she is far from the “baby” of the bunch.  This young lady has so much grit and confidence from being her household’s resident jock.  Emma has played travel, club, and high school soccer which allows her to criss-cross the midwest for tournaments.  She is also an incredibly talented track star, so it’s only fitting that the bag inspired by sports venues is named after my strong and beautiful Emma.

Features

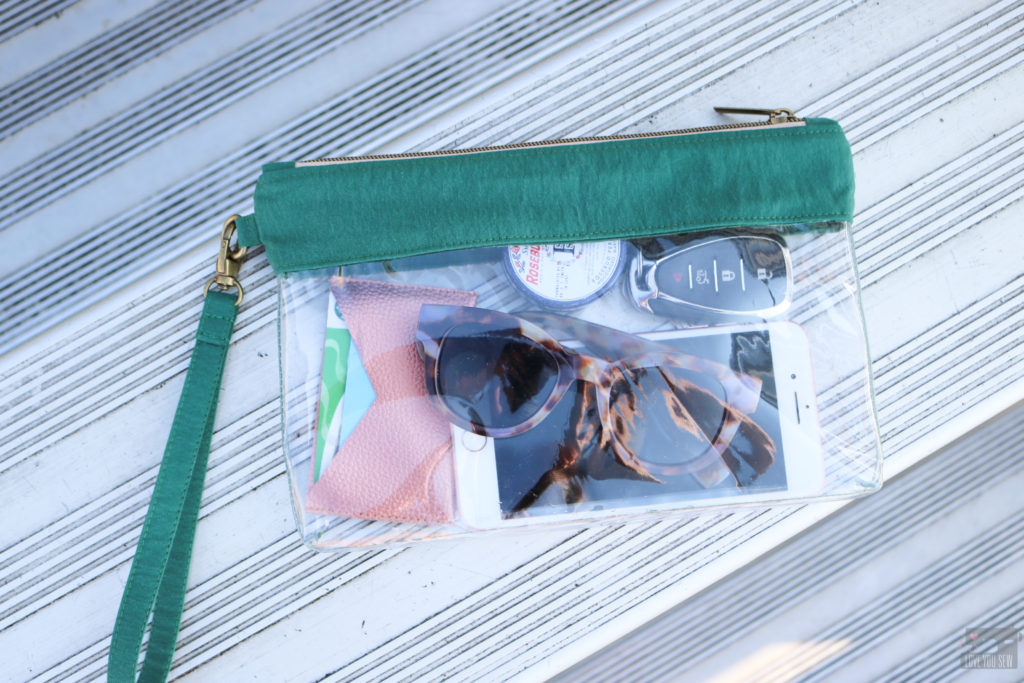
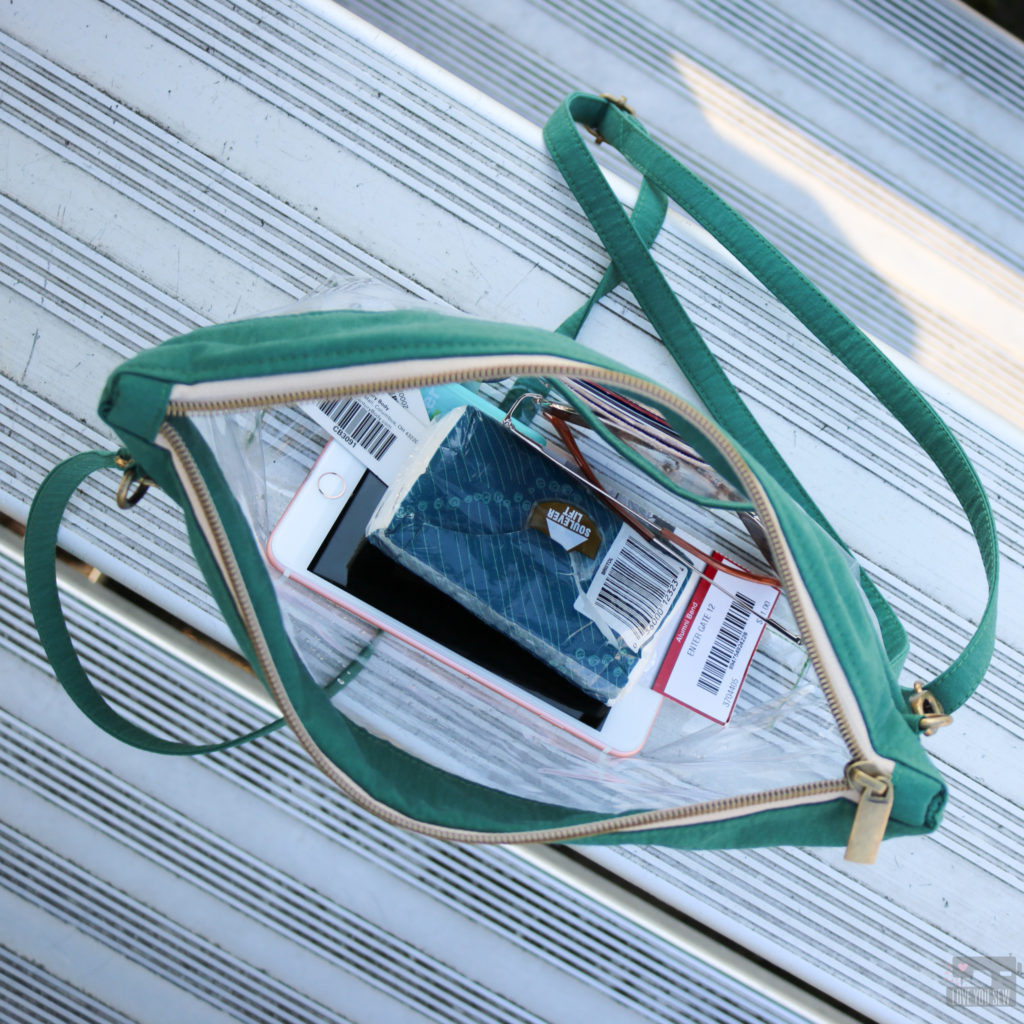
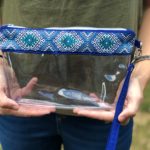
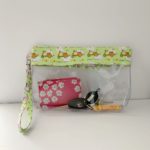
The Emma Stadium bag is based on using clear vinyl as the main body with a fabric zipper top.   This makes the zipper easier to sew on and allows you to use your favorite fabric to stay unique and stand out from the crowd. Not only does the zipper keep your belongings from falling out, it keeps strangers’ hands out too.  It helps protects your phone and wallet from the elements, as well as from that possible beer spill 😐

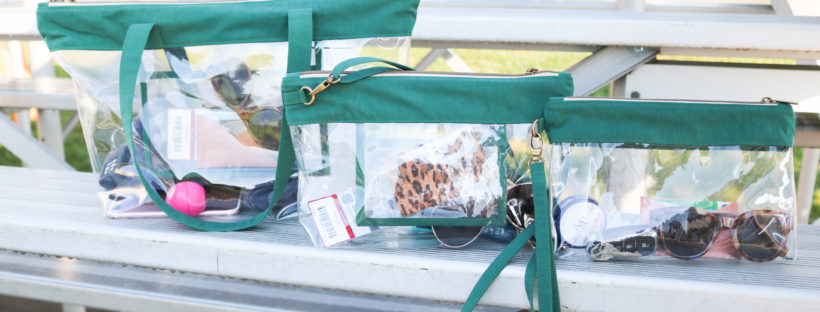
This is my first pattern offered in multiple sizes.  I did a little crowd-sourcing on Instagram and asked all of you about my ideas for this bag.  Initially, I thought I would write a pattern for the maximum sized bag allowed in the NFL – thinking you would want to maximize your space.  But you told me smaller was actually better!  So, I listened hard and have THREE different sizes available for all of your needs.

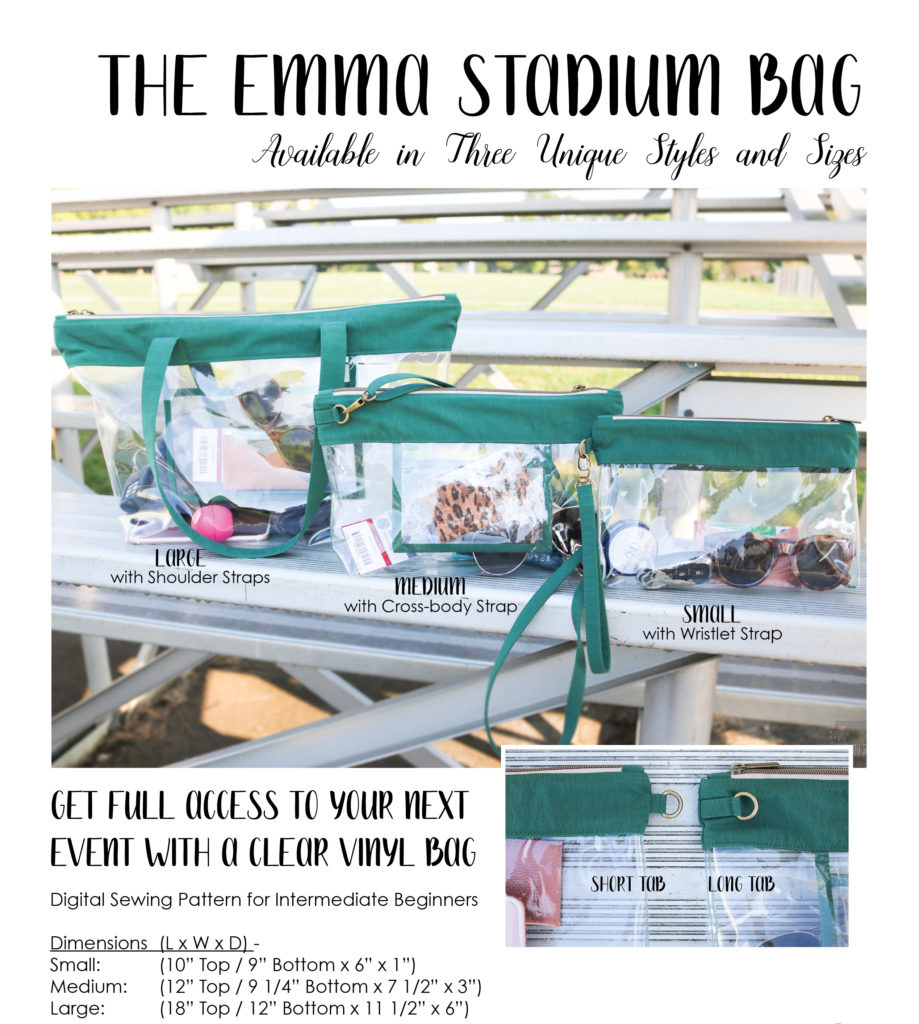
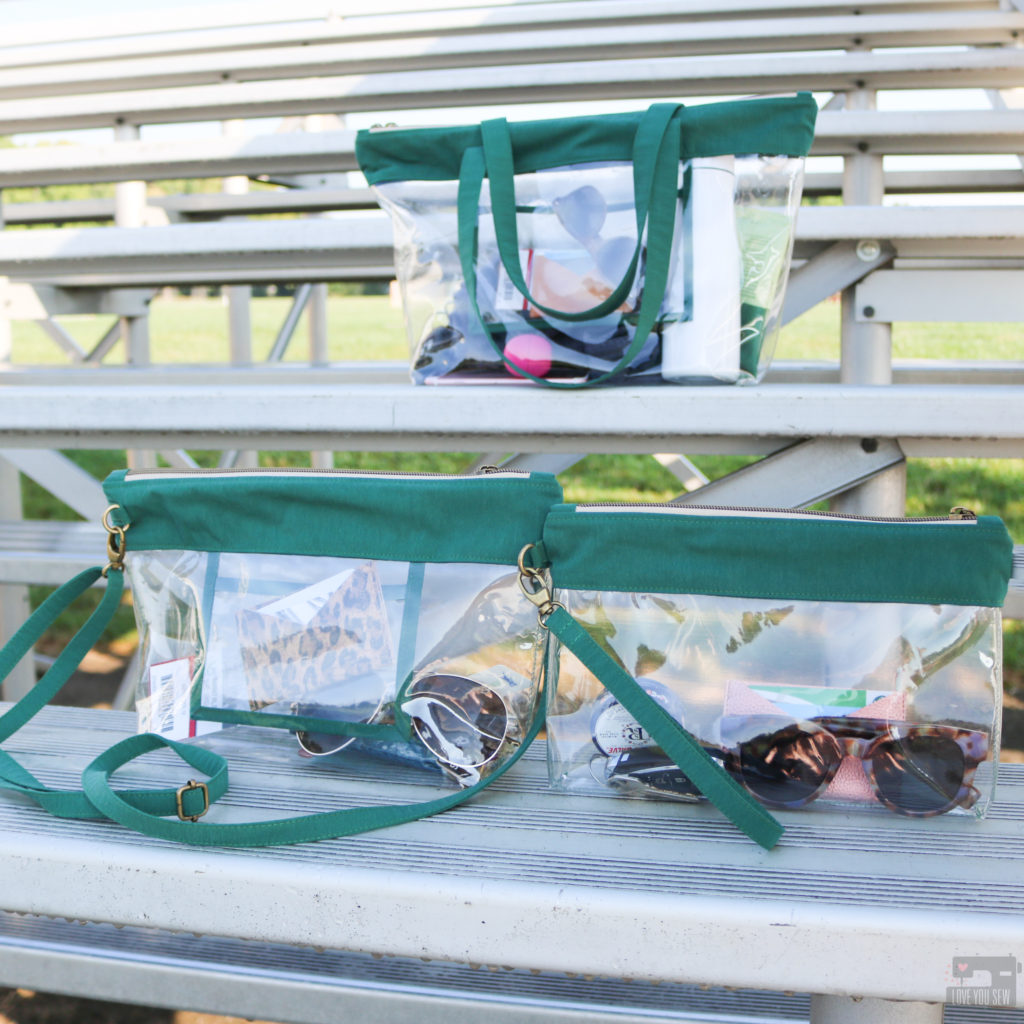
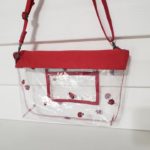
  • Small with Wristlet strap – This size is for the light packer who just needs the essentials.  It fits a cell phone, sunglasses, a small wallet like the Shuffle Cardholder, plus tissues, keys and lip balm.

  • Medium with Cross-body Strap- This a great size to hold more items while still having the ease of a cross-body.  You can hold items for a whole day’s worth of activities from tail-gate to the game.  I like this size in colder weather to hold earmuffs, hand warmers, and gloves.

  • Large with Shoulder sStraps- The large bag, will hold the most when you want to bring in all of the above plus an extra sweatshirt or blanket.  It can hold seat cushions and all the game-day merch you want to buy!  *While it does not exactly conform to the NFL/PGA policy.  It IS the same on a volume basis.  I don’t know if you would run into issues, since all security is different.  You can open the zipper when going through security if they ask to measure the bag.

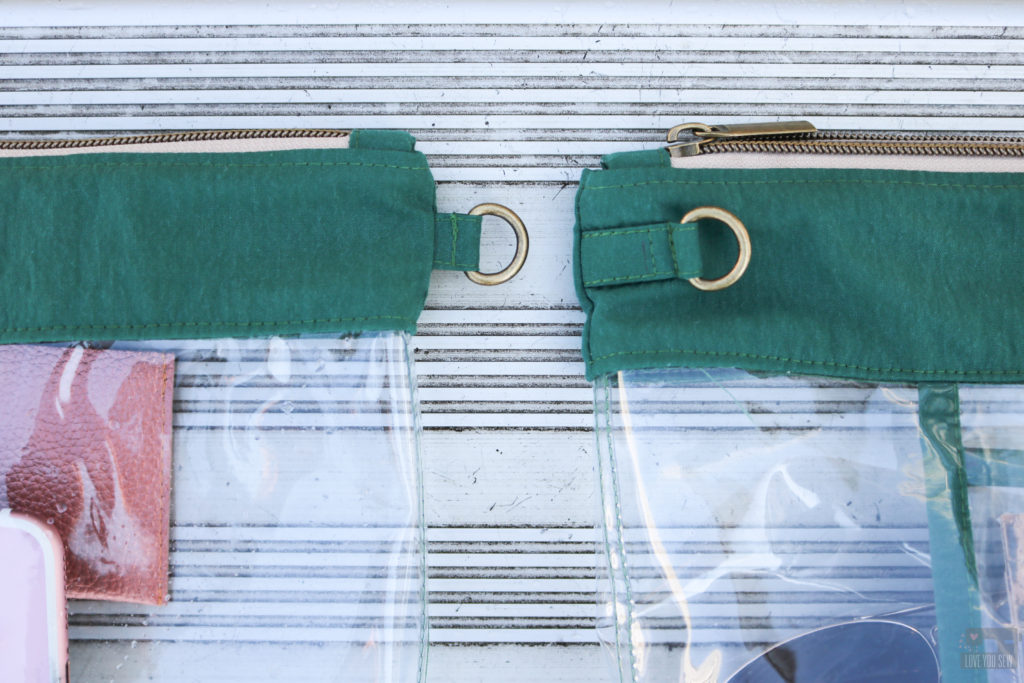
  • Although each size has it’s own instructions for straps, you can mix and match the styles along with two different ways to attach D-ring tabs.  There is a short optional that leaves an “ear” on your bag while the long option sews the tab back onto the body for a smooth side silhouette.
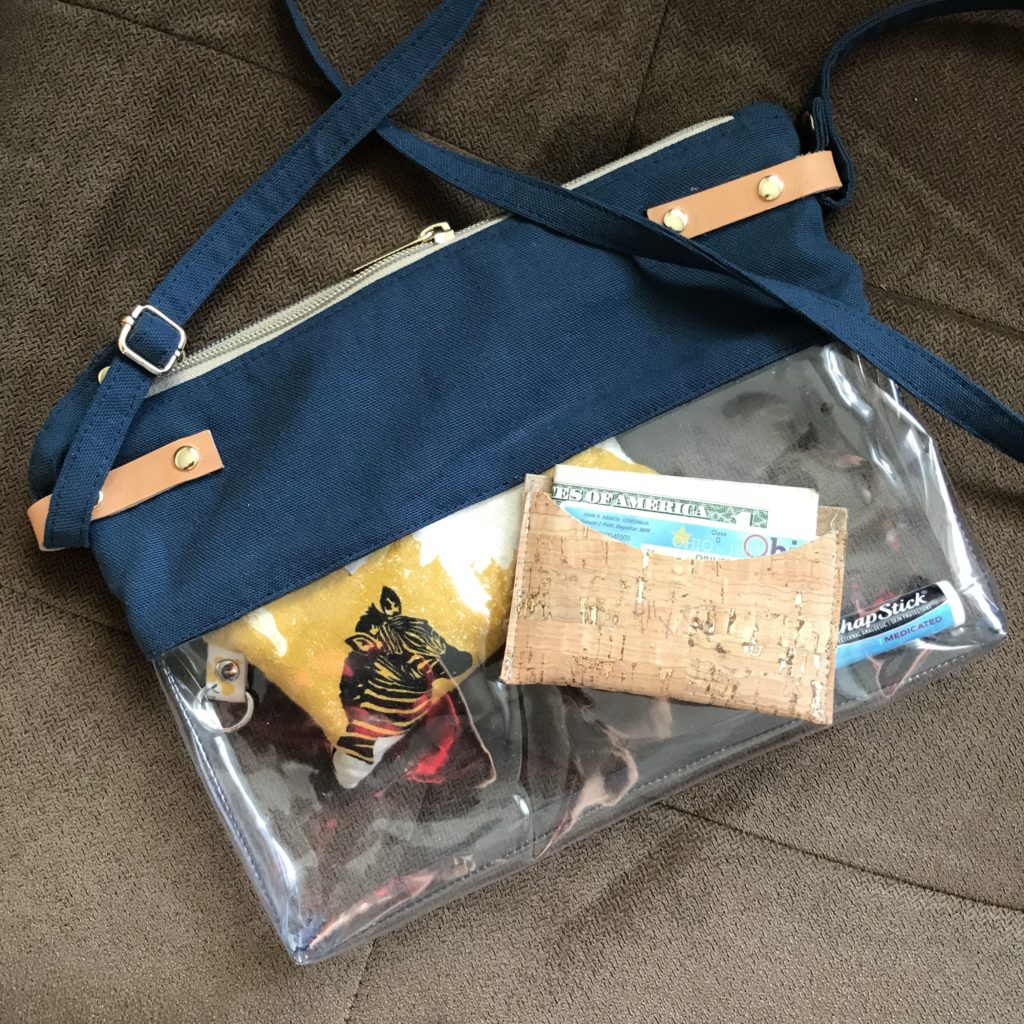
  • Pockets – The medium and large sizes include instructions to include slip pockets for extra organization.  This is perfect for your tickets and slim wallets.
  • Vinyl side seams are sewn down for smooth interior – Your hands won’t be scratched by hanging seam allowances, especially if using a more rigid vinyl.
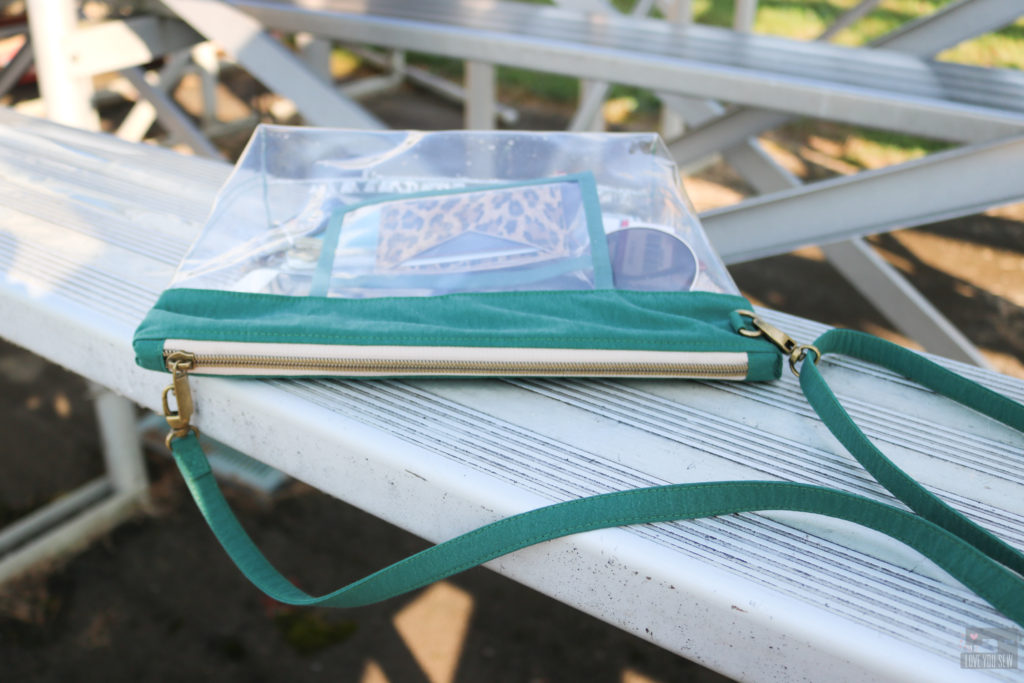
  • Fabric Zipper Top completely encloses the vinyl body for a clean finish inside and out

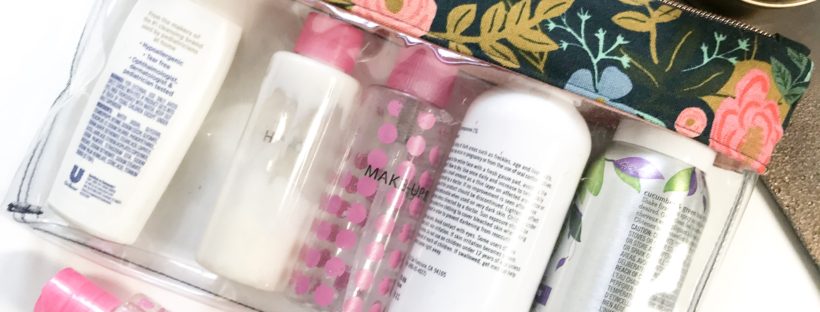
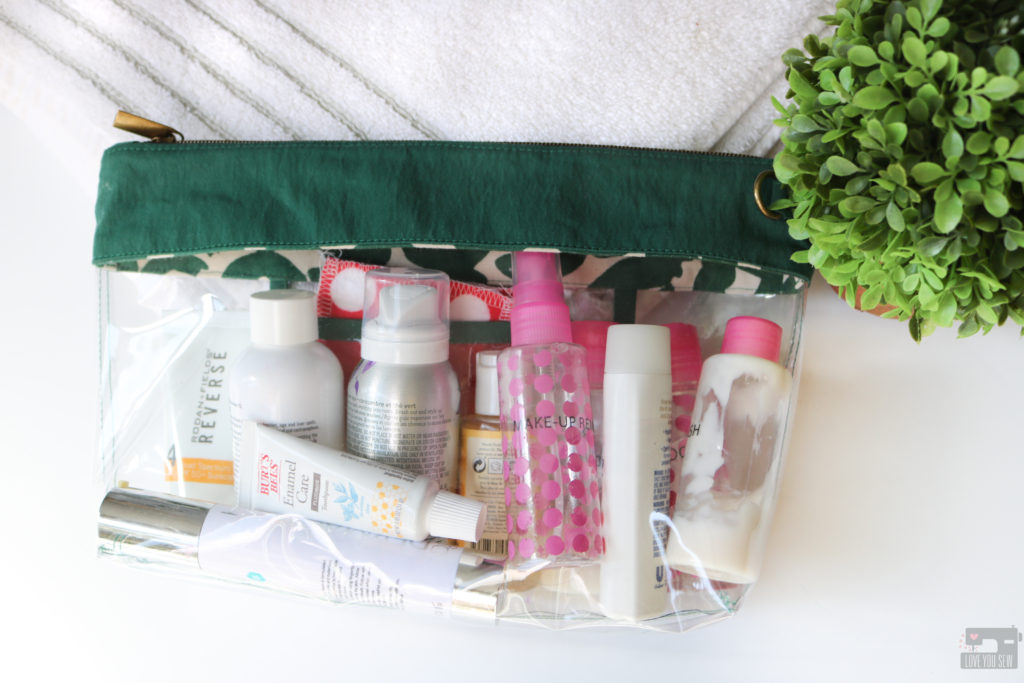
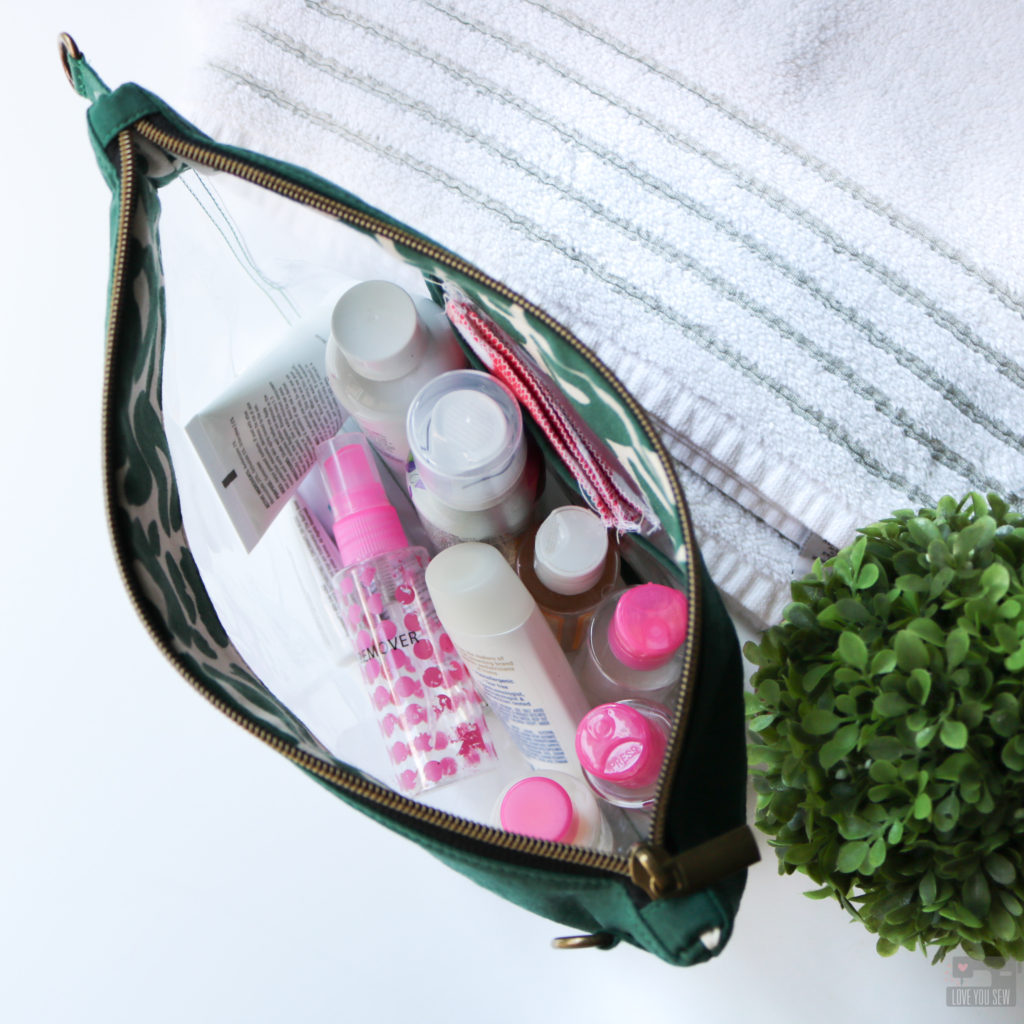
The Emma Stadium Bag is definitely not just for sporting events.  Many concert halls have similar policies and many schools are adopting a clear bag policy.  If you’ve ever worked in retail, there has generally been a clear bag policy to avoid theft.  The large size can double as a school/work bag with its generous sizing.   The medium size makes for a great project bag for yourself or the kids!  It can hold lots of art supplies and you can easily wipe down the sides.  It’s also a great toiletry bag for travel and the gym.  With the TSA a permanent fixture at airports, the small can be used in lieu of all of those quart sized bags – saving the planet and your contents from spillage!

Fabrics

The body of the Emma Stadium Bag is about 2/3 vinyl, so there is not much fabric involved to make this bag.  The zipper top was designed to use Quilt Cotton and other similar weight woven fabrics.  This allows you to use your favorite fabrics and customize each of your makes.  All of my examples are using a waterproof lightweight canvas which makes them great for the outdoors and for my traveling adventures with the family.

Vinyl thickness is measured by gauge number – with the smaller number being thinner compared to a larger number.  A 20 gauge will provide a more rigid bag, but a 12 gauge is easier to sew and more pliable when trying to manipulate your bag under your sewing machine.

Supplies

Tester Inspiration

Check out all of the amazing tester versions of the Emma Bag.  I love their uses of different fabric and how they decided to use their bags.  Click on each image to find the maker on Instagram.

I hope you enjoy making the Emma Stadium Bag as much as I have loved designing it!  You can find other examples of the bag by following #EmmaStadiumBag and find my other patterns with #LoveYouSewPatterns.

Hugs and Stitches!

Cristy


This post may contain affiliate links.  You can read about my Disclosures here.
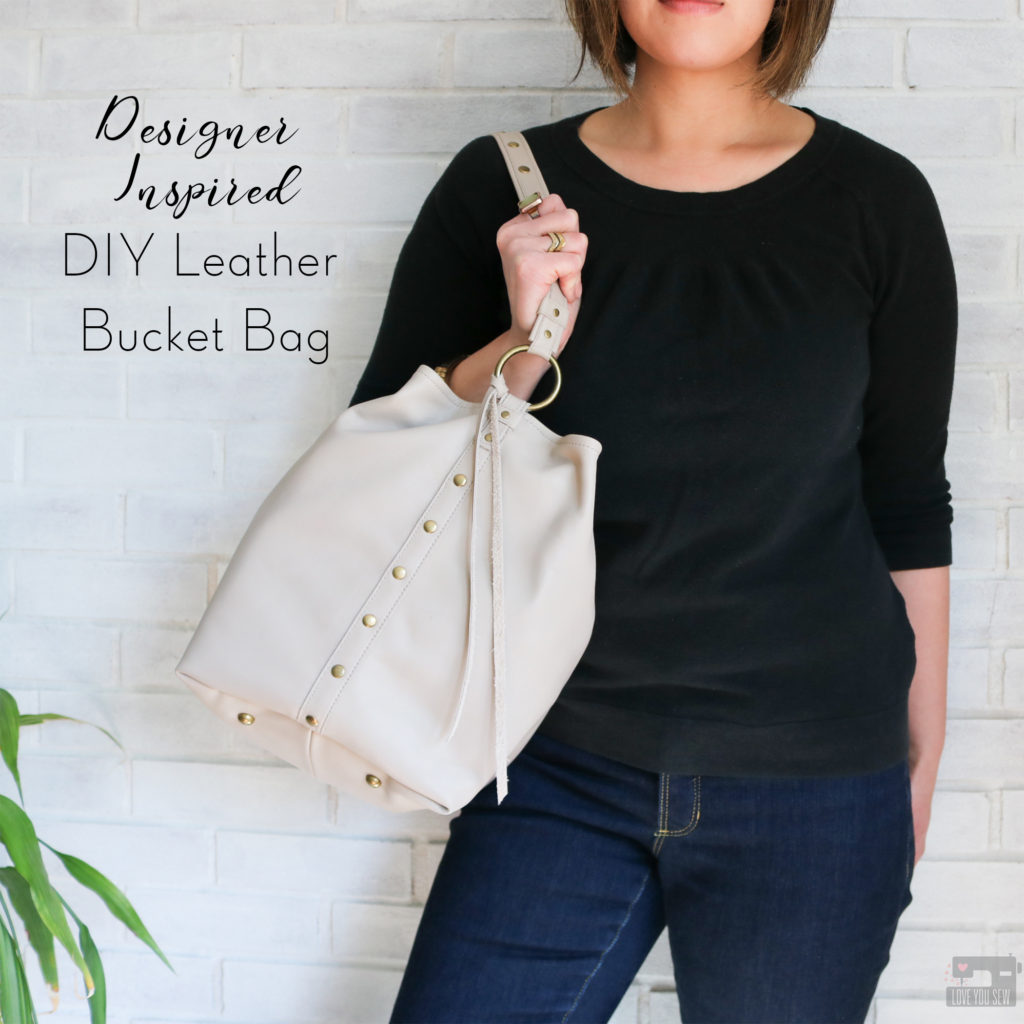
Designer Inspired DIY Leather Bucket Bag

Even though it’s snowing as I write this (thanks Ohio weather,) I can’t help but think about spring and all of my wardrobe planning ahead.  I do love my cozy sweatshirts and thick sweaters, but I am SO ready for all of this blustery cold weather to go away!  Before I even get started on my warmer weather garments, I was already thinking about accessories with the help of my friends over at Measure – A Fabric Parlor.

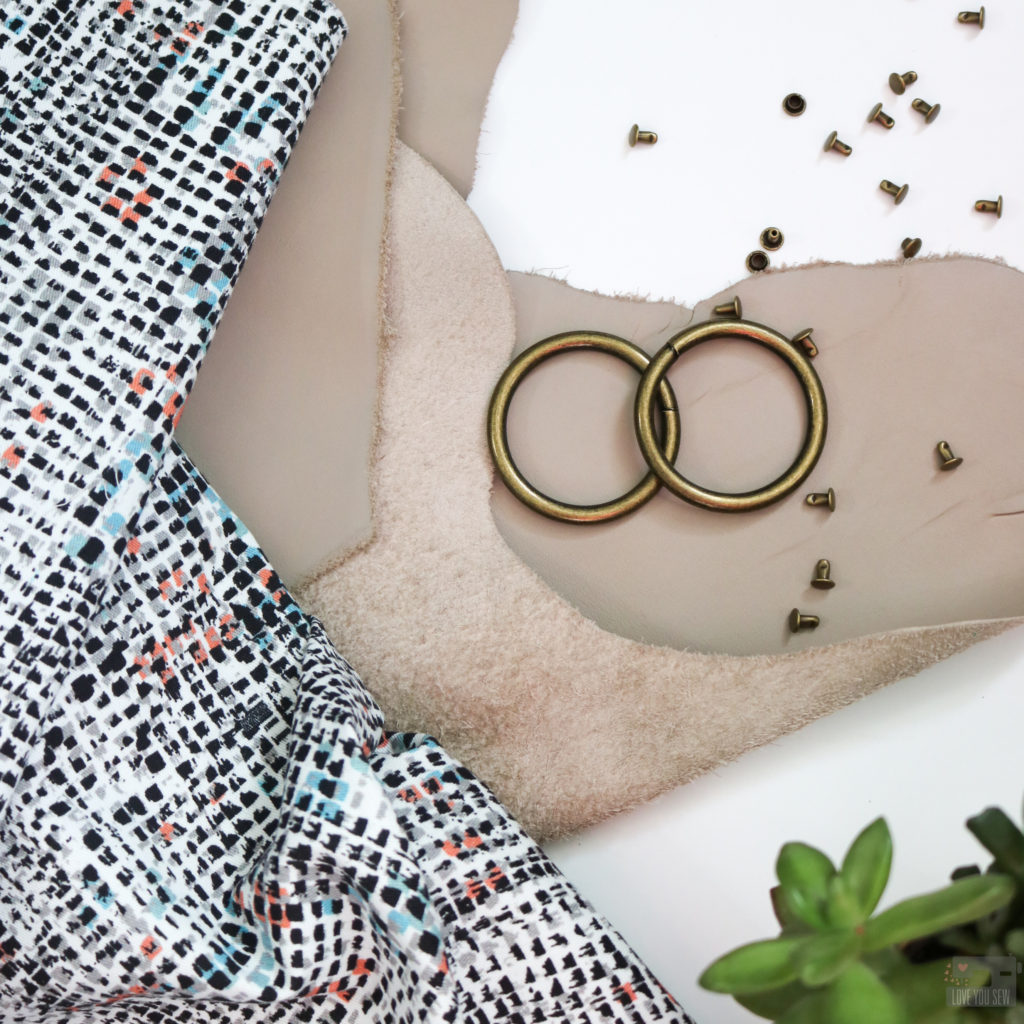
If you don’t know about Measure, it’s a beautiful shop in Savannah, GA which sells incredibly unique fabrics like African wax prints, designer overstocks, and hand painted leather.  I am fortunate enough to be one of the Measure Makers, a group of inspirational sewists working with all the gorgeous products at the shop.  When I was asked to work with their fabrics, it was the leather which caught my attention first.  I have a deep love for sewing with leather and not all fabric shops carry it.

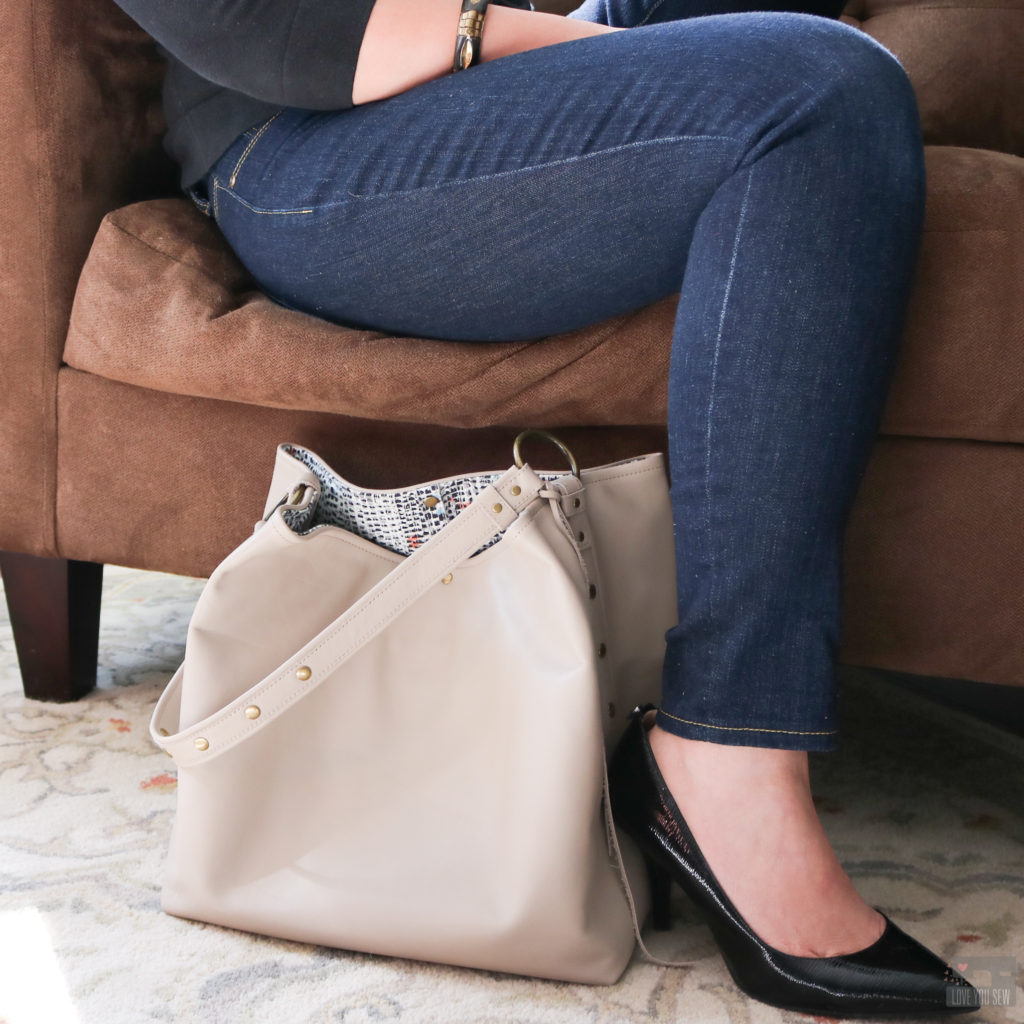
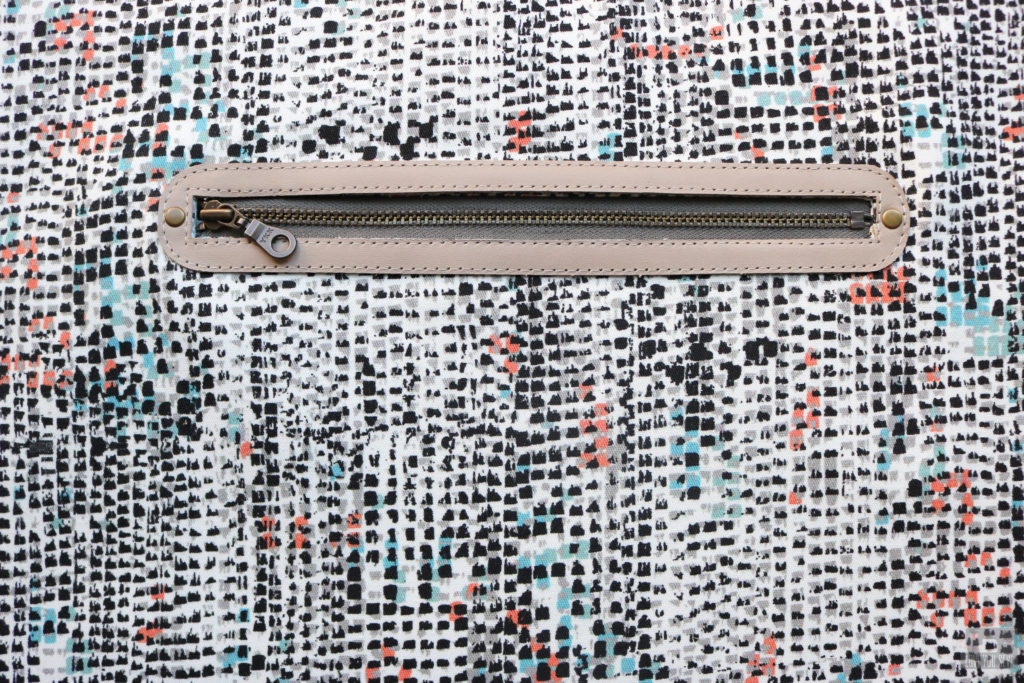
When I saw this Glazed Cowhide (#12023,) I knew the taupe color would be the perfect neutral for the spring…especially once I bring all the color back into my clothes.  Since I make a lot of bags out of quilt cottons and canvases, my bags all tend to have some kind of print and it would be nice to have something solid again.  With that said, I still am always jonesing for something fun and this graphic Abstract Check on stretch cotton twill (shown above) was what I needed for the lining.  I like a busy print to hide my mess and punches of coral and aqua are a great complement to the taupe.

My inspiration for this bag came straight off the runway….literally just one month ago.  I saw Rebecca Minkoff tease some photos on her instagram of the Kate Medium Bucket Bag and I was done.  I love the smooth solid leather of the bag mixed with the hardware and thick chain strap.  It is just so classy, but I always dig a hard edge and the Kate bag is just that….along with a $350 price tag!

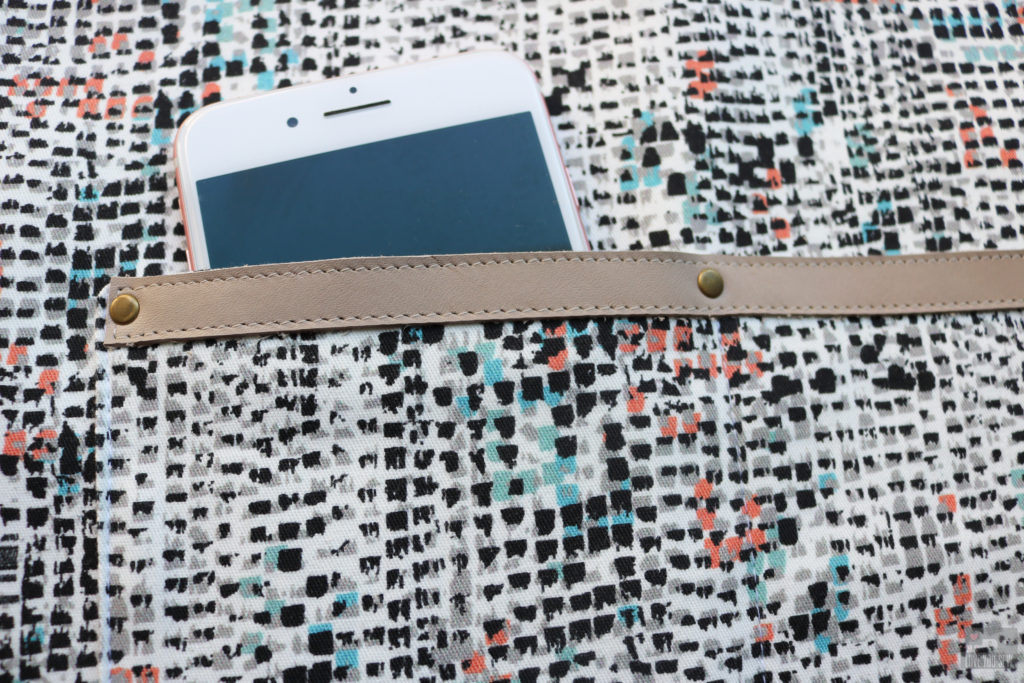
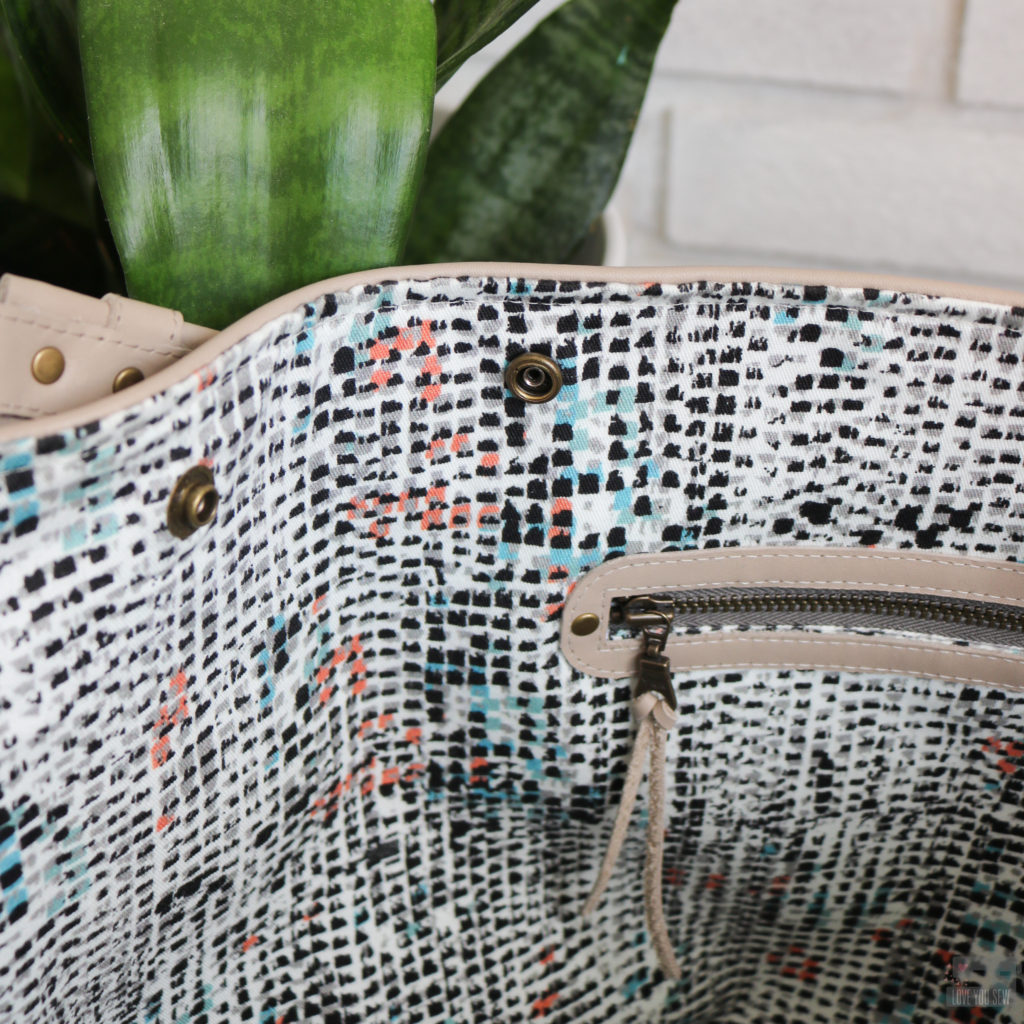
Well, I knew I would NOT be buying that bag, but could make something pretty darn close.  I used the shape of the bucket bag as my jump-off point and made sure to add a lining which is not in the RM version.  I know Rebecca Minkoff is a multi-million dollar company, but who doesn’t want pockets in her bag???  As standard practice for almost all of my bags, I added a roomy zipper pocket along with a divided slip pocket for my phone.

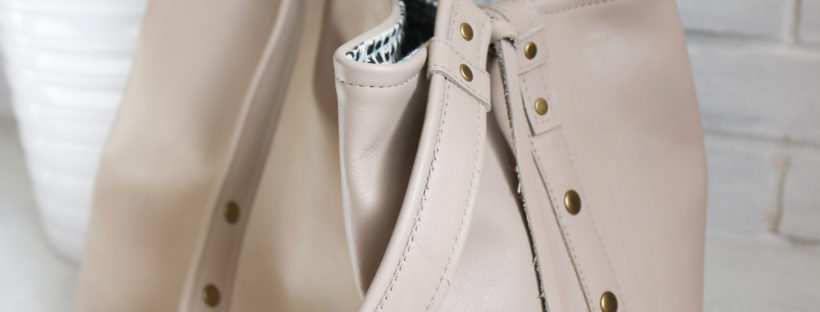
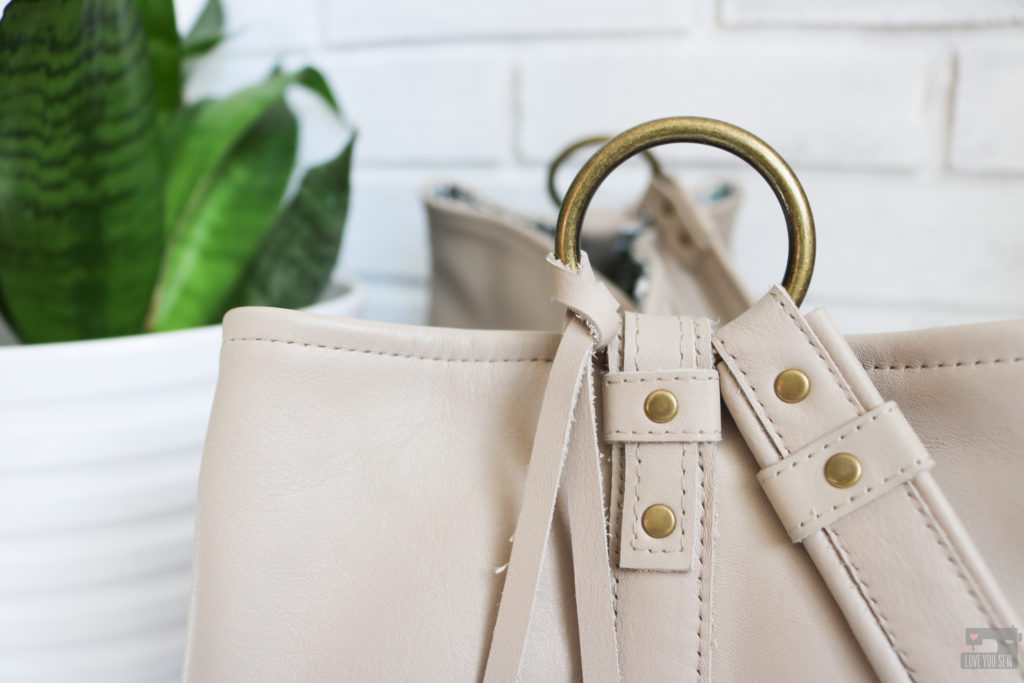
I already had these great circle rings in my stash and wanted to have the same look as my inspiration bag with them anchored high on the sides.  This was a bit tricky because I needed them to stand up and also deal with a lot of strain.  So you can see in the picture how I doubled up on leather to keep the ring in place while adding more strength.

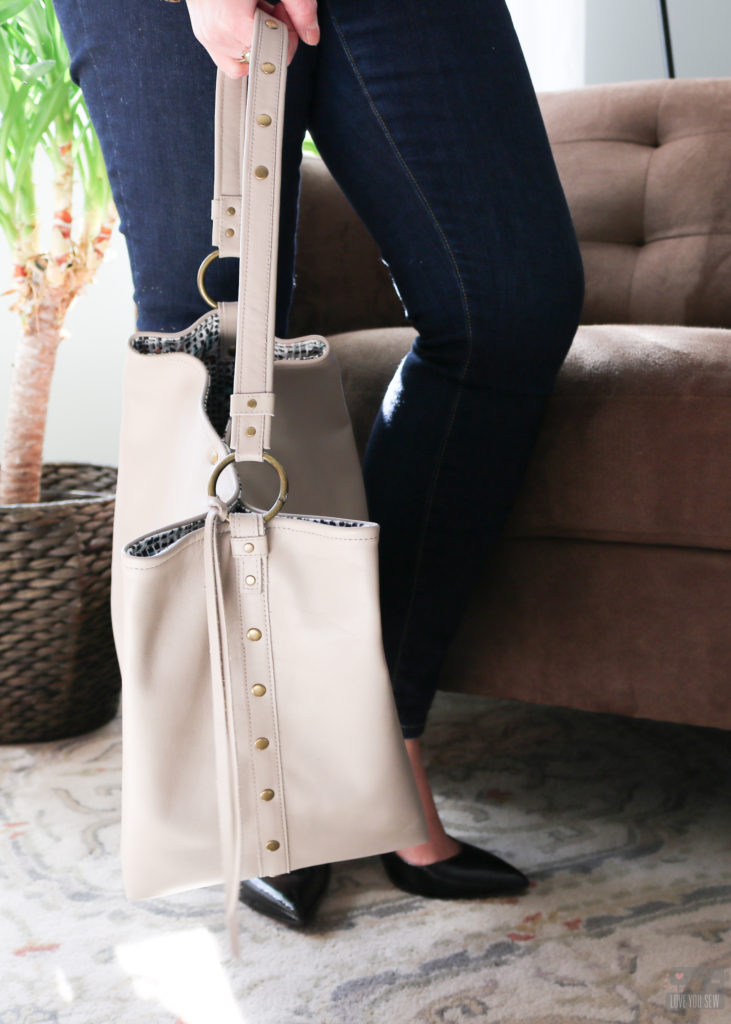
The other feature I loved from the Kate bag was the hardware along the side seam.  It looks like RM used stud buttons and with industrial production, was able to go directly through the seams.  I, however, used just rivets and through a little illusion, moved my rivet line about 1/4″ over so the holes would be punch through the body and not the seam.

Since I based my bag dimensions all on all of the inspo pictures and description, my bag looks a bit larger and wasn’t laying the way a bucket bag should.  The center was collasping into itself and so I knew I needed to create that structure.  I was already 90% finished with the bag at this point, but luckily I could dig through the lining and add some interior snaps.  I feel great when my years of “collecting” random hardware pays off!
The snaps along with the swivel clasp and d-ring (as part of my original design) gave my DIY bucket bag the exact shape I was trying to mimic.  Thank goodness because I’m not sure what I would have done as an alternative…maybe just kept a ton of stuff in my bag to keep it full??

While I didn’t have a big chain for my bag strap, I decided to bring up the look of the side seams with the top-stitching and rivets.  Using rivets all along the strap looked a bit too much IMO and so I edited to just five along the top of the strap.  This allows enough negative space to come through and balance with the plain front of the bag.

I had a lot of fun adding hardware all over my bag, but I did not overlook adding some protective feet.  After all of this work and the hours put into my bag, I knew I had to take care of this beautiful leather.  Adding feet on the bottom of the bag helps dirt stay off and protects the bag from potential floor scuffs.  It also looks gorgeous and is a nice hidden detail.

Tips

While I was able to get through this project on my domestic sewing machine, make sure to check if your machine can handle the layers on scraps, first with hand cranking and then sloooooowly taking it stitch by stitch.  Thinner leathers are easier to handle than thicker hides, but you can hammer and even shave your leather to make it thinner.  You may need to increase stitch length and adjust tension to compensate.
 

Project Details:

How do you think I did with using designer inspiration to make my own leather bag?  I hope you are able to find your own runway inspo this spring!


Happy Sewing!

Cristy


Leather and Fabric were provided by Measure for this post and as part of participation as a Measure Maker.  The project idea is completely original and all thoughts/opinions are my own. There maybe affiliate links with the Project Details.  Any compensation as part of purchases through these links help to host, secure, and maintain this website.  Thanks for your support!