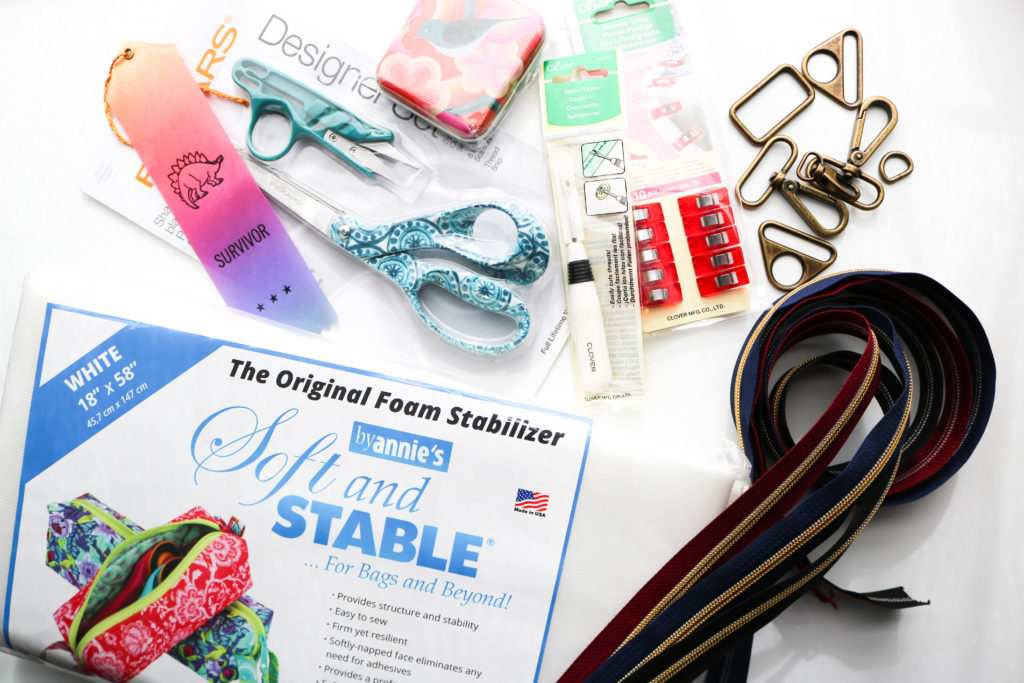
The Christine Sling pattern pulls together a classic camera bag silhouette with a modern wide statement strap. The possibilities of fabric combinations are truly endless. For a full rundown of pattern specifics, including features and where to source materials, check out the Christine Sling Intro here.
TESTER BAGS
As I develop a pattern, there are so many considerations that have to take place. My first priority is to always make a bag approachable for beginning sewists who have basic domestic machines. That’s why I like to always like to have full fabric versions of a pattern, but I also like to show more complex versions with other substrates for more advanced bag-makers. My testing group runs the gambit of experience and I am so appreciative of their knowledge and different skillsets.
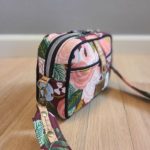
Carrie (@carriedwithyou) made not one, but TWO tester versions of the Christine Sling. Her first make was this sweet floral version with natural cork accents and metal-look nylon zippers. Then…Carrie went to the other side of the spectrum for a dark and sleek version of the bag using some webbed matte vinyl and incredible red accents. She used seatbelt webbing for the strap giving the whole look some chic vibes! You can find out her patterns and finished bags for sale at www.carriedwithyou.com.
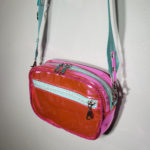
Maggie (@ms.maggiemakes) is an incredible bag-maker and I love her use of different fabric patterns and color. Her version of the Christine Sling did not disappoint my expectations at all! She used this great pink mirror-effect vinyl along with a mix of donut quilt cotton for her bag. I love the way she using upholstery trim for the piping instead of the “plain” stuff I used. It makes her bag SO much fun! Follow her instagram to see her makes…many are for sale too 😉
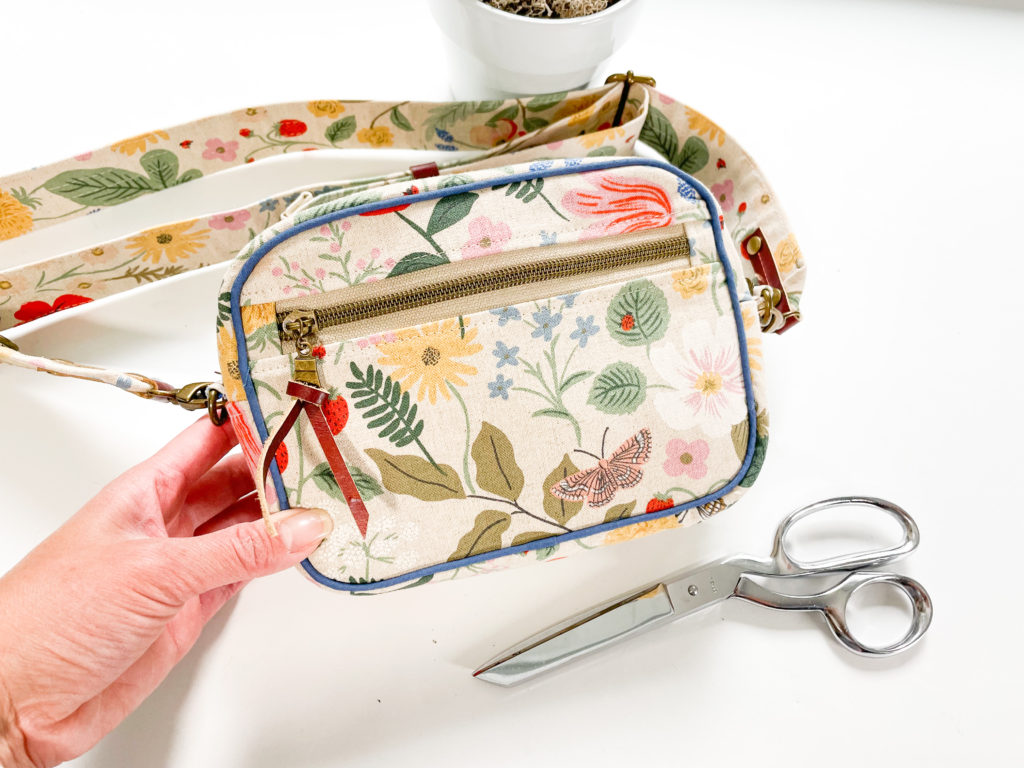
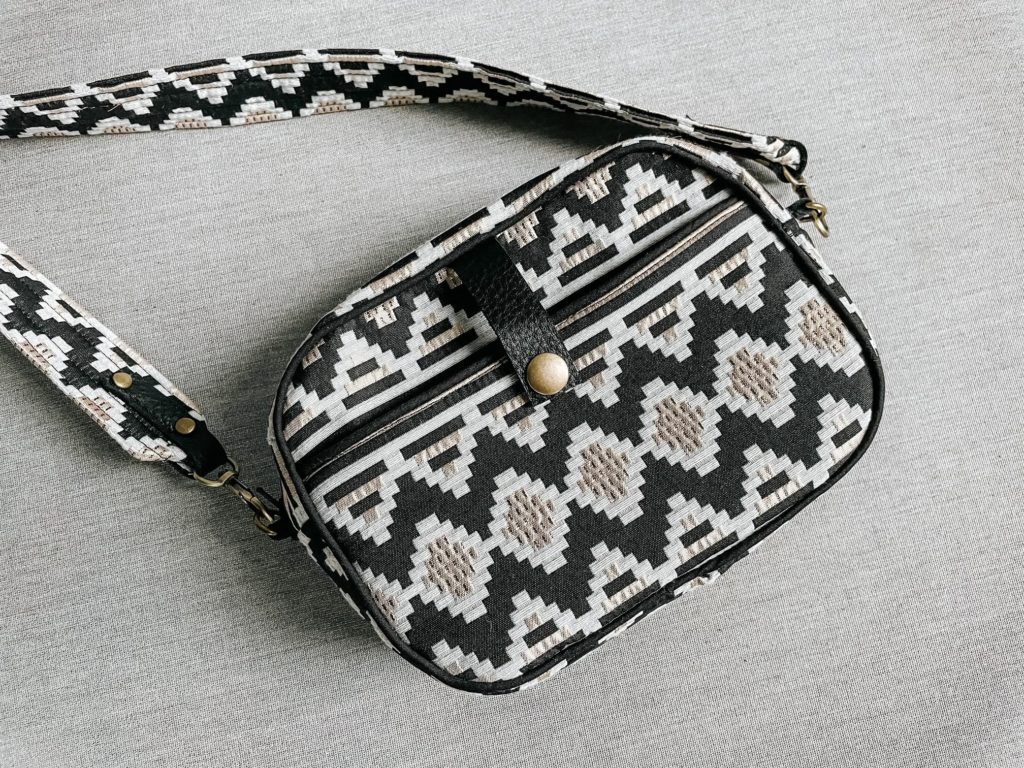
Mallory (@malloryhillmakes) is a local friend and also my copy-editor. She makes incredible bags and clothes, which makes her invaluable with technical knowledge. Her boho version of the Christine is just perfect for everyday! The leather accents and piping, help to give more depth and framing to the bag. It will make a statement with any outfit! You can follow her blog at www.malloryhill.com.
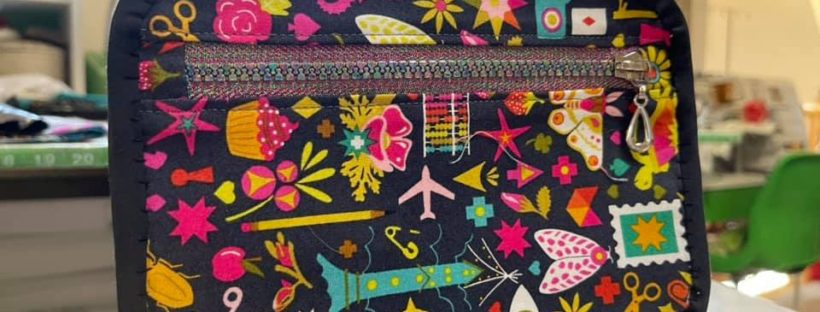
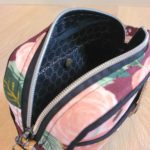
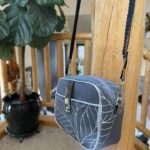
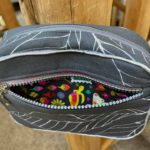
Robbin (@sewfarmquilter) is the newest team member of the testing group. I have been following her since my quilting days and was so happy to know she wanted to test the Christine! Her version of the bag is very classy and demure on the outside, but pure party on the inside. I’m a sucker for a wild bag lining (since RTW ones are always boring!) and this one is perfect. If you can see, Robbin scalloped the edges of her leather accents to add more texture and appeal. It is such a great look! Check out all of Robbin’s makes on her instagram.
I’ve said it before and I’ll say it again, but NOTHING is more heart-warming than it is to see my patterns sewn up by all of YOU! For a full-range of different takes on the Christine Sling, check out the hashtag, #christinesling, on Instagram. You know I follow it 😉 and LOVE being tagged in all of your makes.
These pictures are so inspirational and I hope you are able to get some ideas when you make your Christine Sling. Pattern available here.
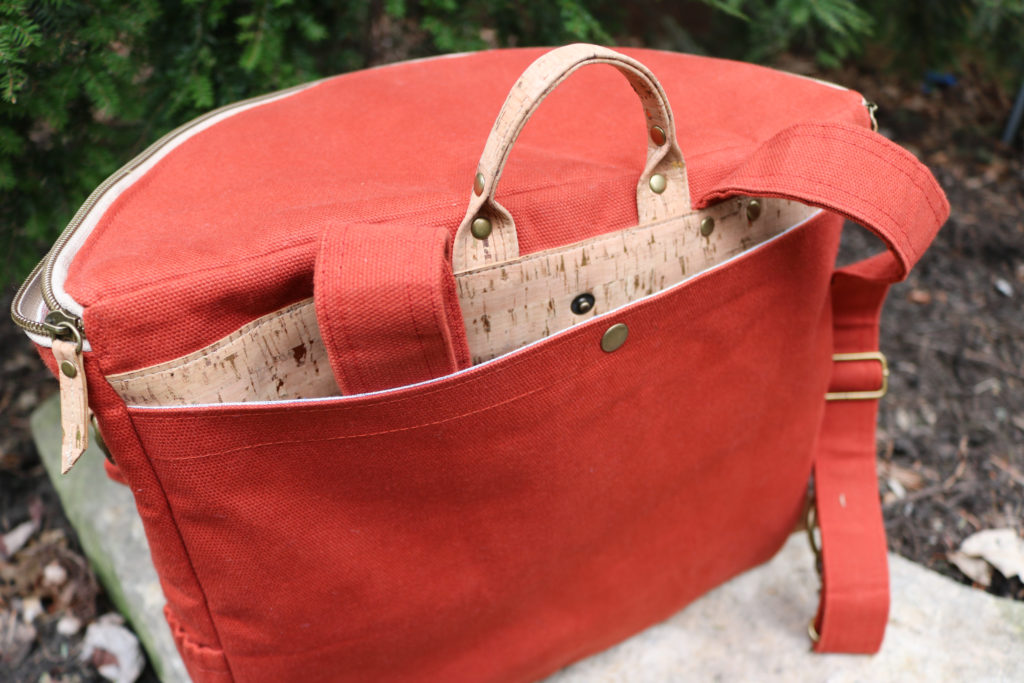
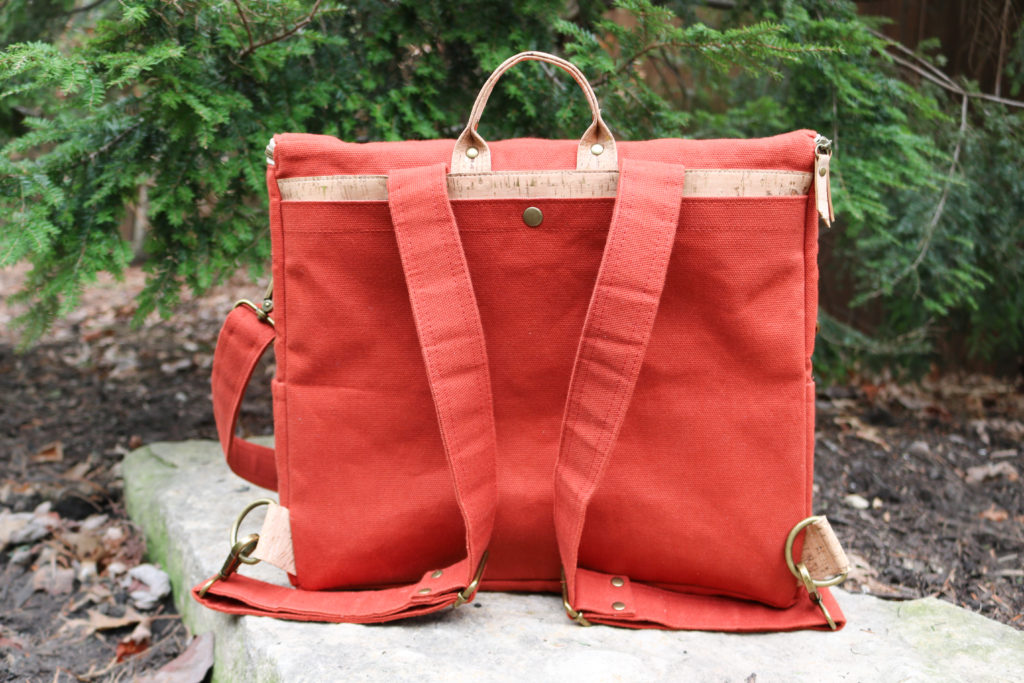
Welcome Back to the Erin Backpack Sew Along! We are now at the FINISH — Part 6: Final Bag Assembly! If you missed any of the prior blog posts, you can find them below:
It’s now time to put the bag altogether and add all the dimension. To make sewing a little easier, remove the sewing machine table to better maneuver the bag around the free arm. Take time sewing even though the videos are short…most segments have been sped up 4x-6x the normal speed!
ASSEMBLE the exterior
To assemble the exterior part of the bag, click into the video above. Note the following as you watch:
You can always unzip zipper to help ease the bag under the machine
Don’t be afraid to use finger and arm muscles to keep thick layers together. Move up to a larger needle, if needed
Backstitch well over pocket seams
Go back and stitch Y-seam corners, if needed. I have to go back all the time!
With Main bottom, trimmed SA in half instead of notching due to thickness of canvas and foam.
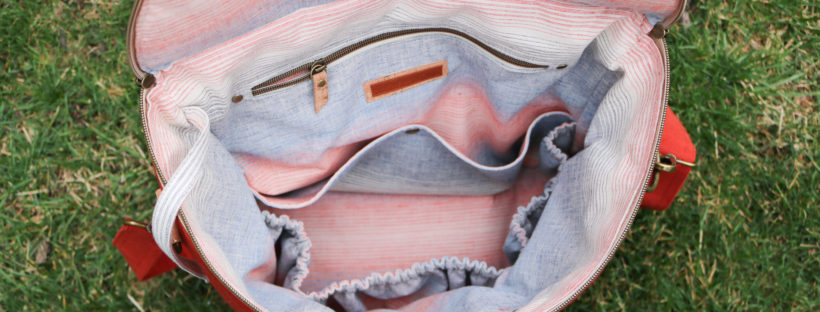
ADD LINING To FINISH BAG
Items to note:
I added the Craft/Wonder tape to the Lining while it was free and unattached to the bag. This makes it a little easier than waiting later as instructed in the pattern
Trim back any foam or fabric that maybe creating bulk, especially at the zipper ends.
When attaching the Lining, fold in the seam allowance to see where placement should be BEFORE gluing.
Again, move slowly for even stitching around the zipper
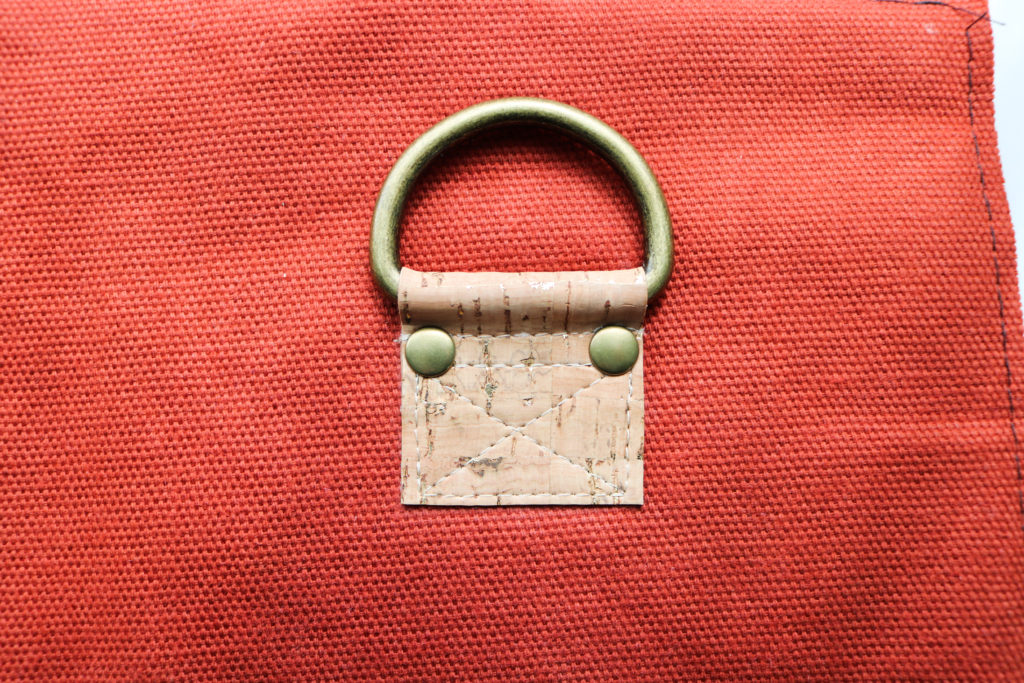
If you haven’t added the rivets onto the Back Strap Tabs, you can add them on now. (I’ve decided to leave them off of my version.)
CONGRATULATIONS on your new Erin Backpack! Make sure to post your pictures on Instagram using #ErinBackpackSewAlong #ErinBackpack and #LoveYouSewPatterns to win the prize pack! Entries are open until the end of the month!
Thank you to everyone who has joined along for my very first sew along! I’ve learned quite a bit about video editing while trying to provide you the right content to navigate through this pattern. I hope you enjoyed it! Let me know your thoughts in the comments.
Happy Stitching!
Cristy
This post may contain affiliate links. Please read here for all of my Disclosures.
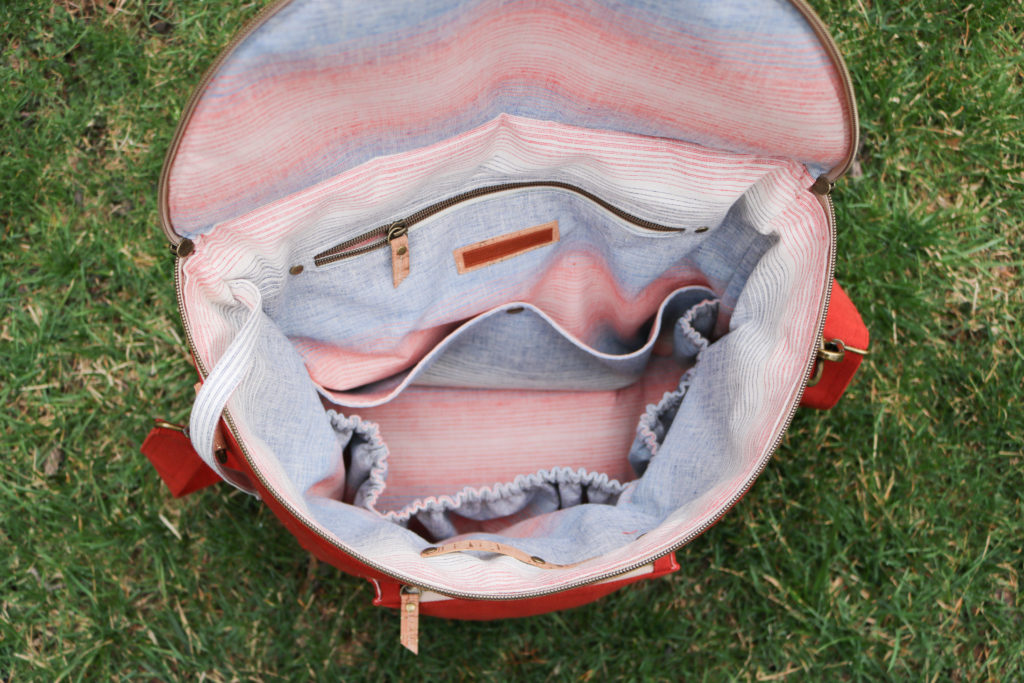
Welcome Back to the Erin Backpack Sew Along! We are now on Part 5: Make the Lining. If you missed any of the prior blog posts, you can find them below:
With this part, we will tackle the entire lining and even assemble it!
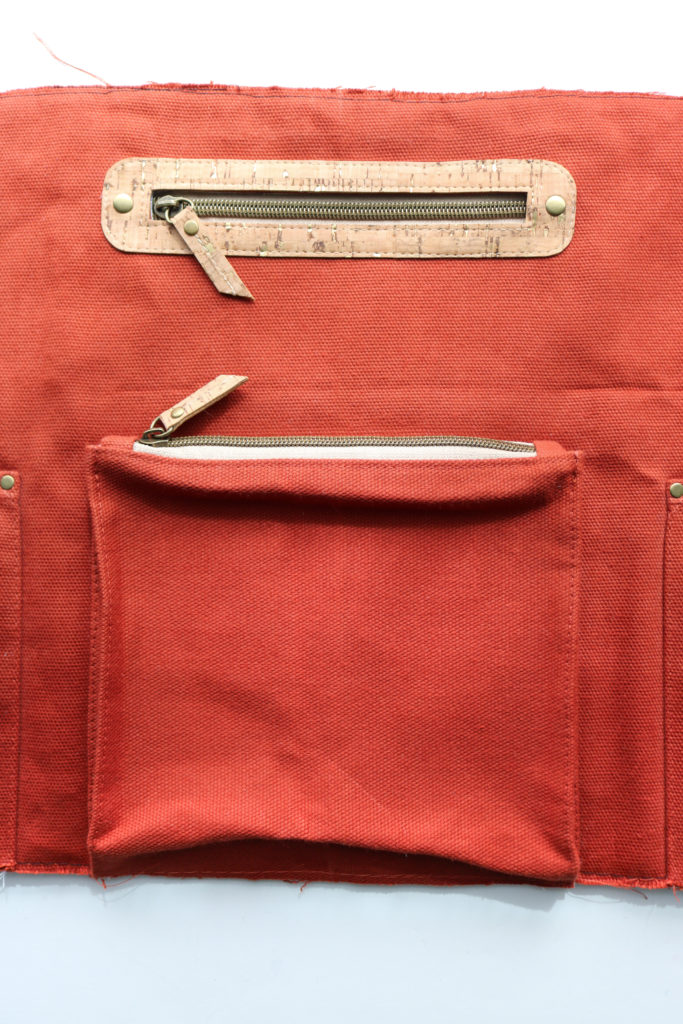
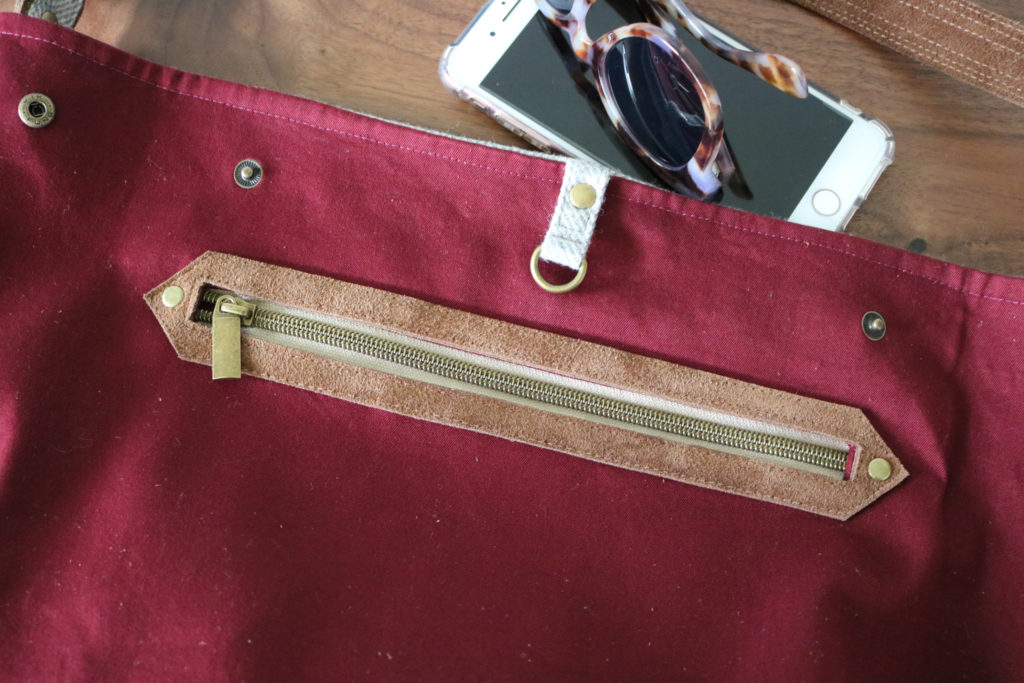
Zipper pocket
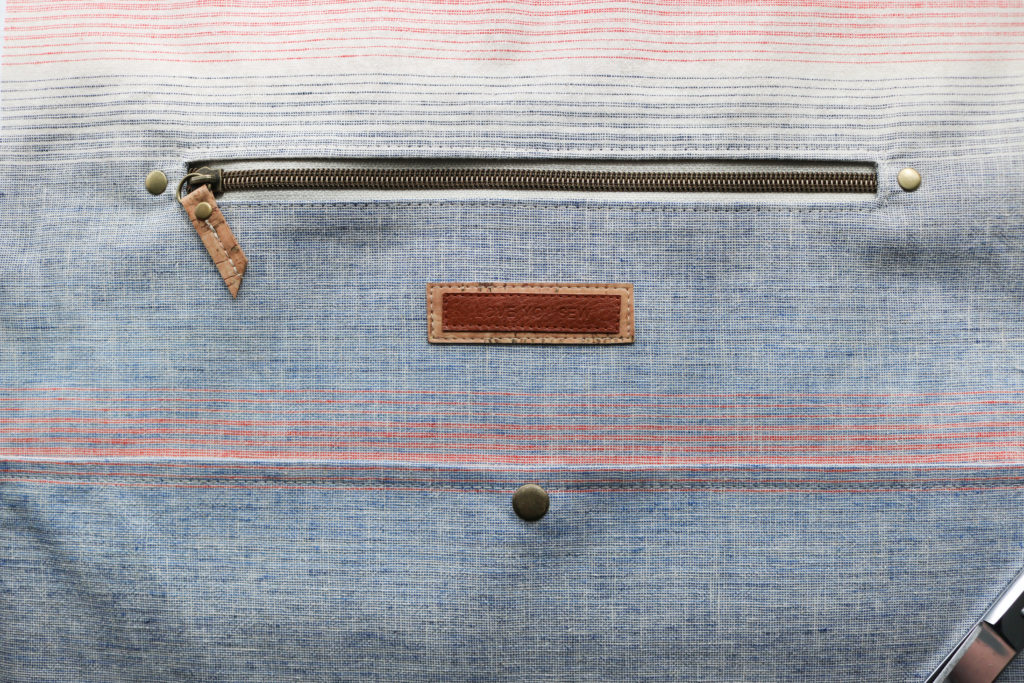
The interior Welt Zipper Pocket is constructed the same way as the outside one, except without the Zipper Plate. So, we don’t have to go through all of the steps again. If you need a fresher, you can head back to Part 4.
With this pocket, there is no basting, just a regular topstitch to secure the zipper to the lining (as shown above.) .
For some more visual interest, you can always add another Zipper Plate or add in some rivets. I placed one on with side of the zipper opening, 3/8″ from each end AFTER pocket has been closed up. This helps add a little more security to the pocket lining.
You may have noticed that I added in a branding tag. This is not apart of the instructions, so I skipped it in the video. But if you would like to add one in this same spot, I sew the tag after finishing the Welt Zipper Pocket. The leather stamped tags are from ViVi in Oz.
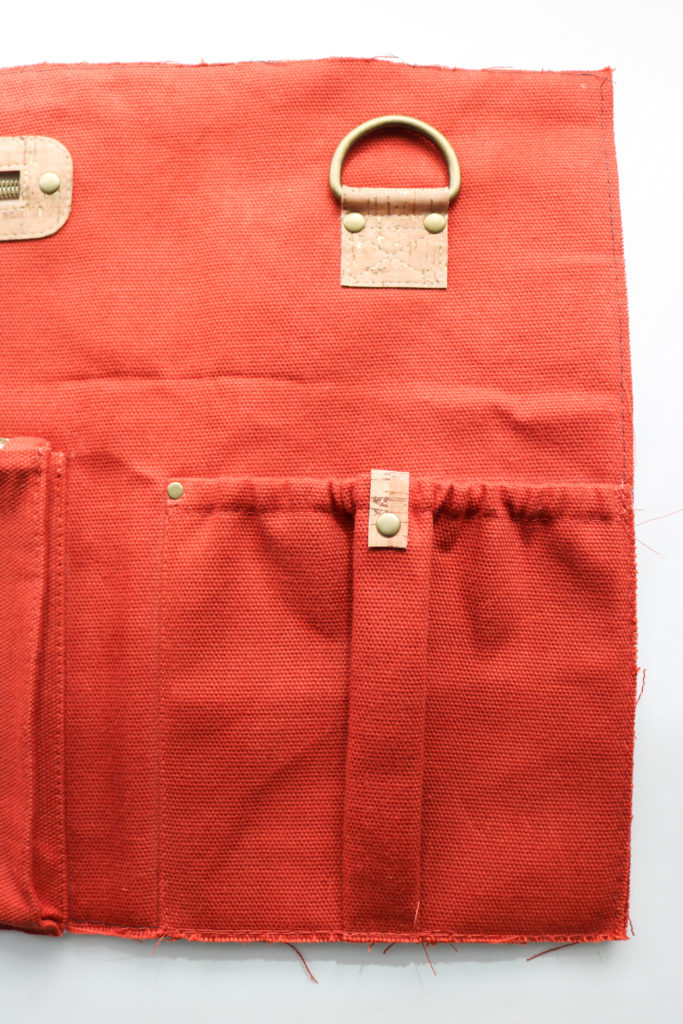
Slip Pocket, Elastic Pockets and assembly
The rest of the Lining construction and assembly can be found in the video above. You can view the different sections timestamped as follows:
Slip Pocket (00:10)
Elastic Pockets (01:35 )
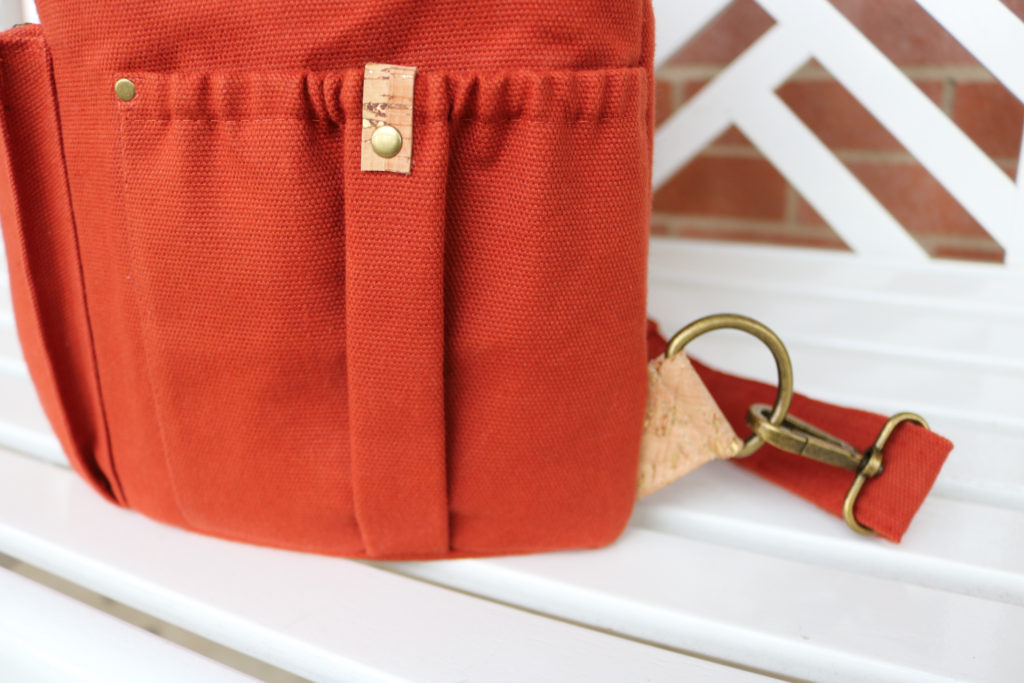
Accessory Strap (04:25)
Key Fob (04:58)
Assembly (05: 06)
Items to note:
You can get extra hardware help by clicking on these posts -> Rivets -> Spring Snaps
May need to adjust the length of elastic based on what type/style you are using. You want to have enough pulled in so that the Elastic pocket is bunched up enough to equal the length of the Front Lining.
DON’T skip the 2nd line of baste stitching for the gathering. It makes life MUCH easier –especially when trying to gather stiffened fabric from the interfacing.
If you would like to take the option of adding rivets to the Elastic Pockets, make sure to NOT punch the holes directly on a seam.
Yes, the Front Lining IS suppose to be shorter than the Back Lining. This takes the width of the zipper into account and incorporates it as part of the backpack’s front wall.
Can you taste the finish? The very last of the Erin Backpack sew along comes later this week, Part 6: Final Assembly. I hope you have been enjoying the process. Don’t forget to use #erinbackpack #erinbackpacksewalong and #loveyousewpatterns on Social Media! I’m so excited to see your finished bags!
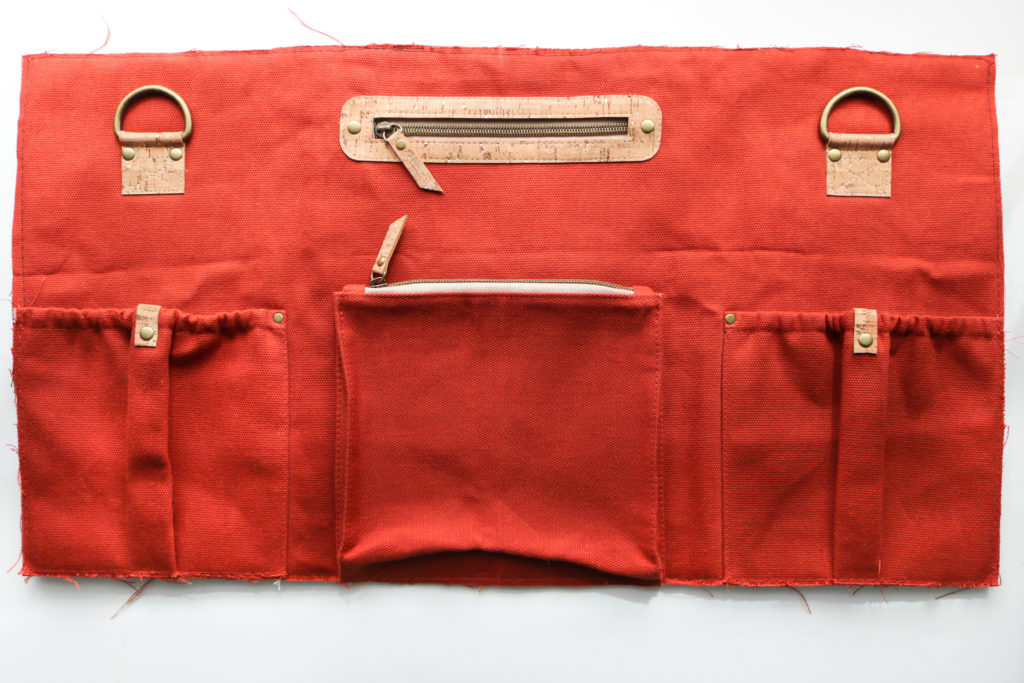
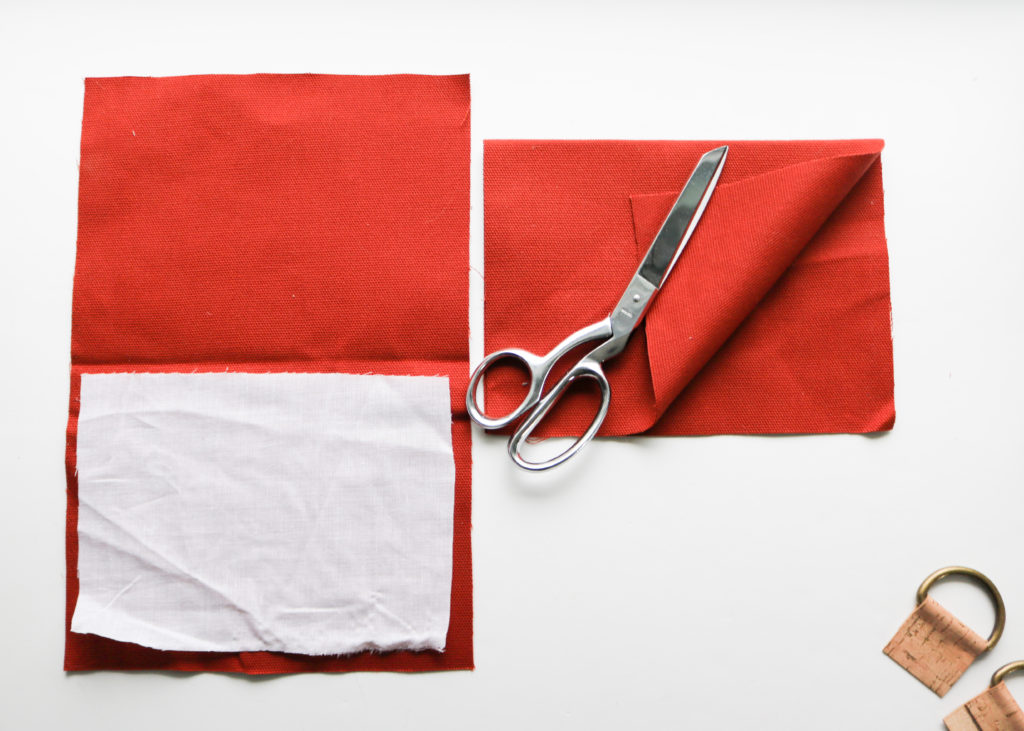
Welcome Back to the Erin Backpack Sew Along! We are now on Part 4: Create the Front Panel. If you missed any of the prior blog posts, you can find them below:
With this part, we are tackling the entire Front Panel with four different pockets. It seems overwhelming, but I’ve broken down all the pockets into 4 different short videos so you can work at your own pace.
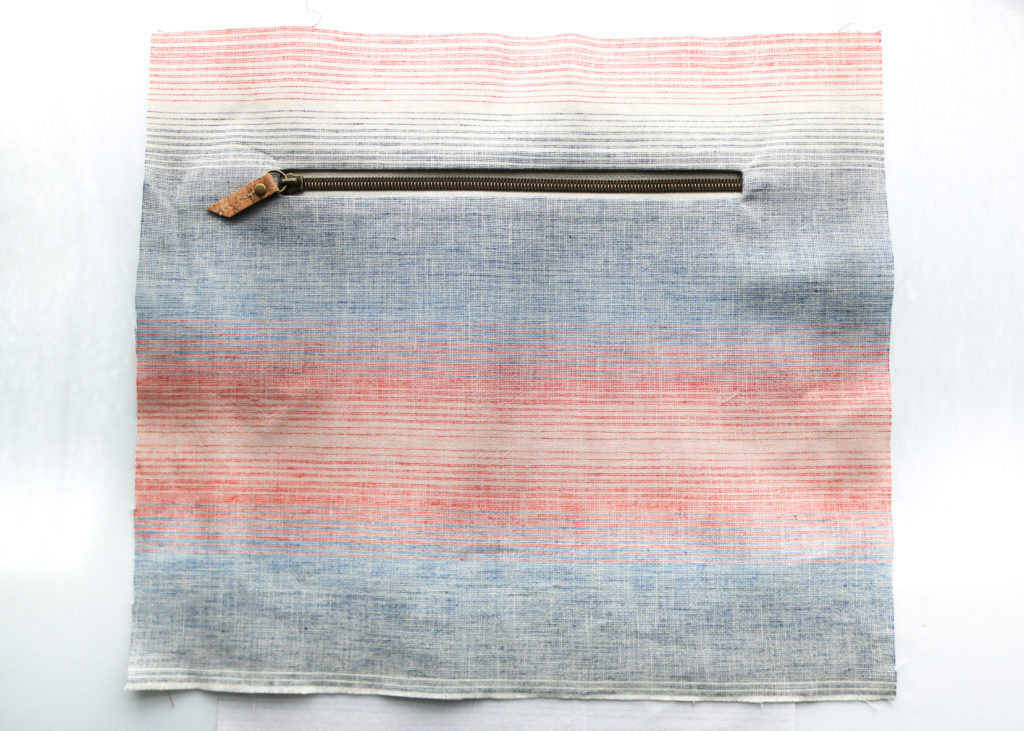
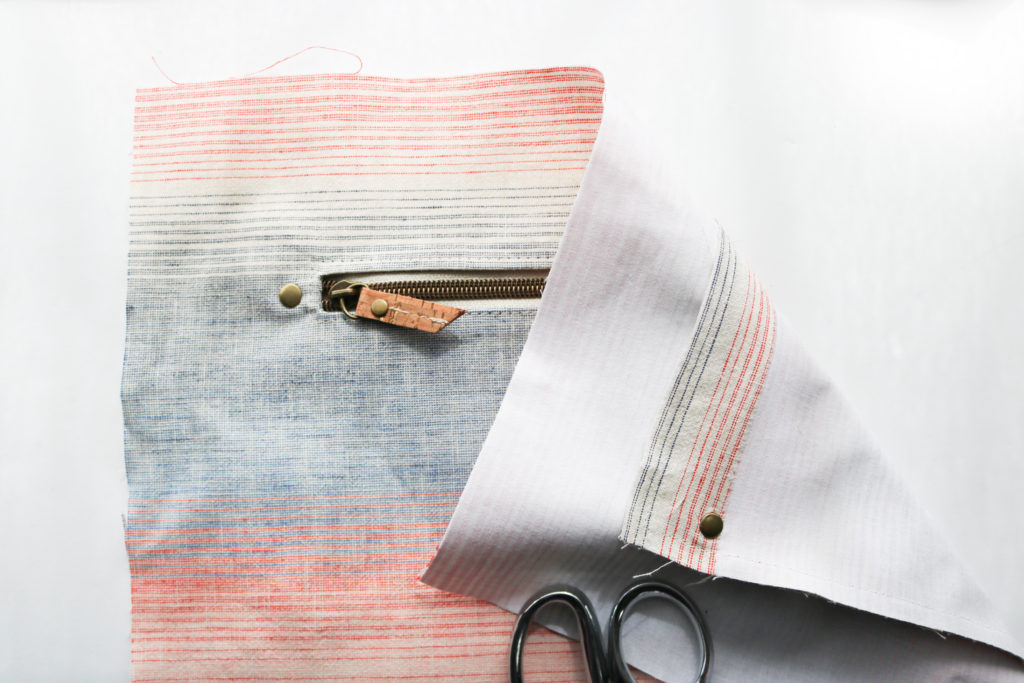
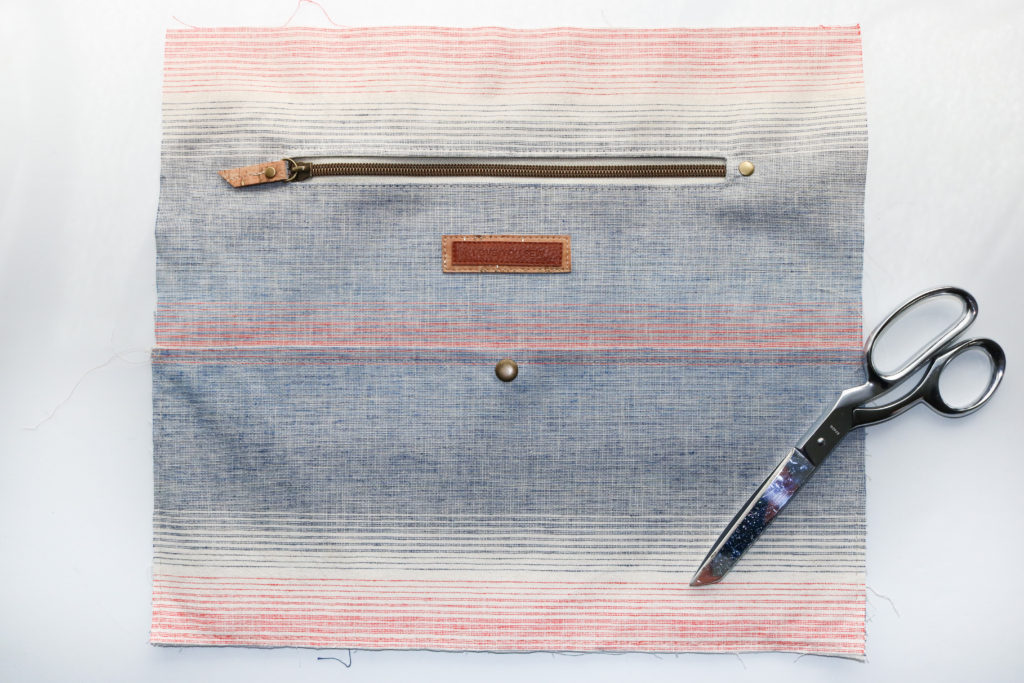
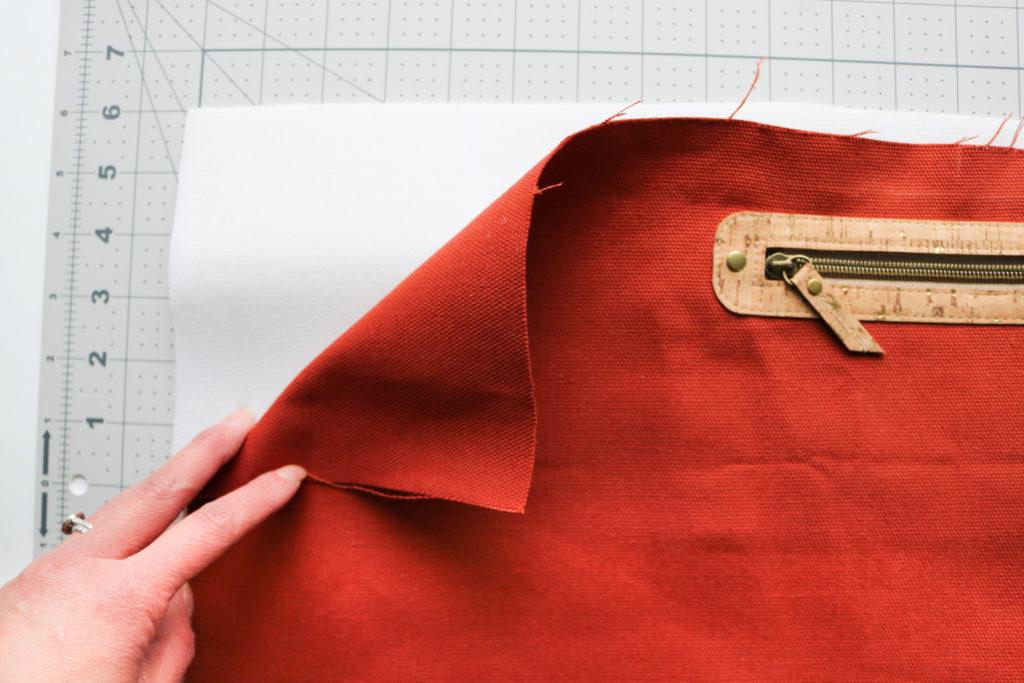
WELT Zipper POCKET
At this point, the Front Panel is the only pattern piece left that hasn’t been basted to foam. This is added later because creating the Front Welt Pocket through foam would produce so much bulk and be very difficult to work with. I love all of you too much to put you through the extra wrestling and time spent trimming back foam! Ha!
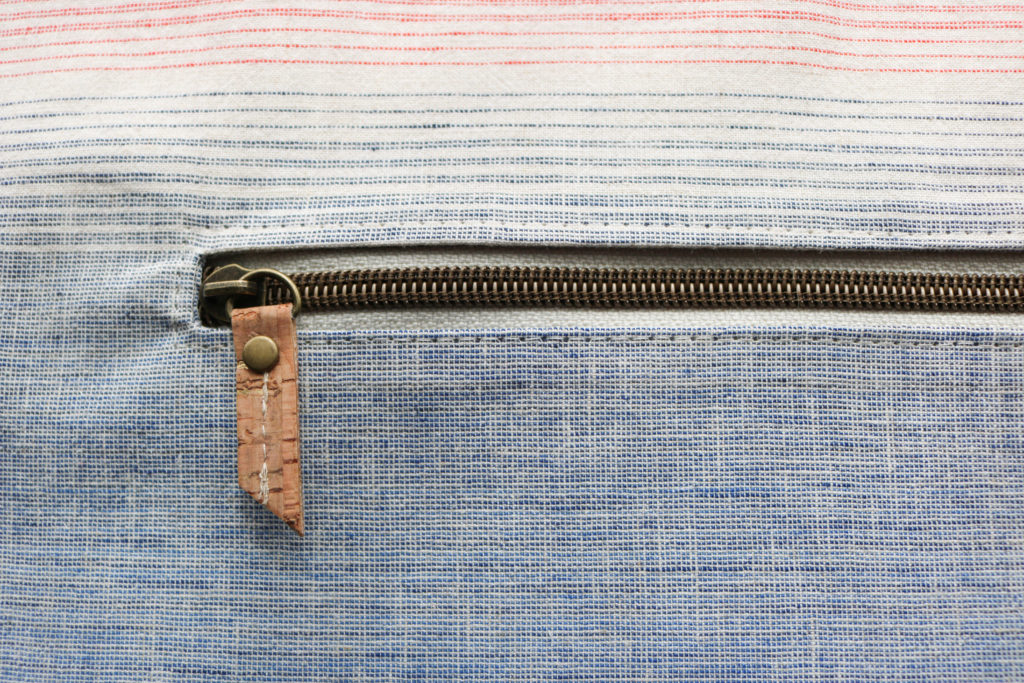
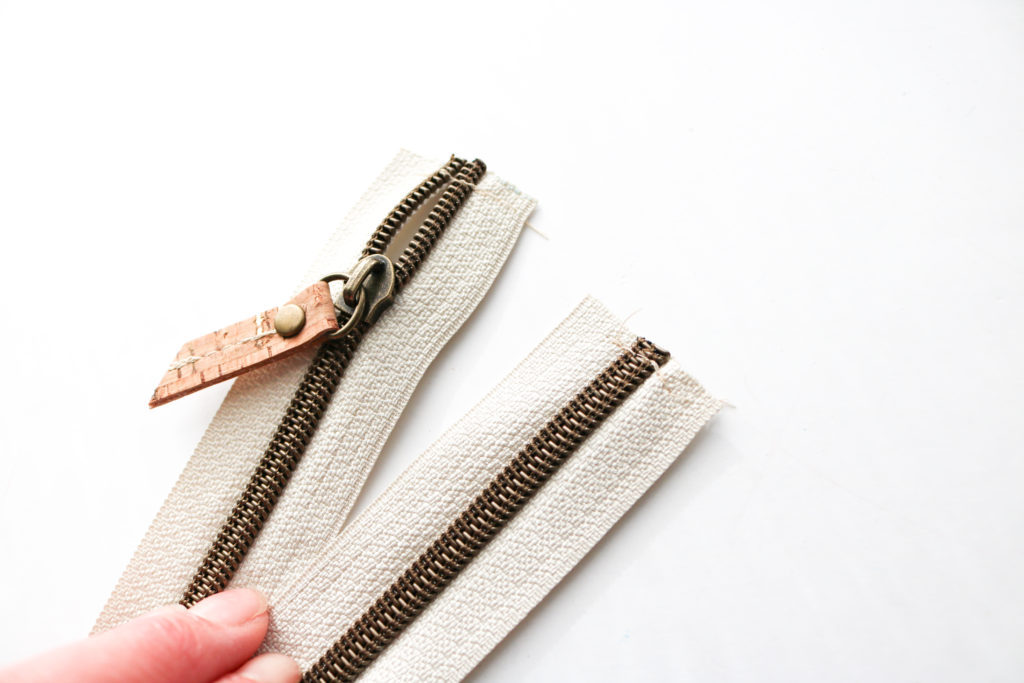
I know you will ask me about the zipper pulls used on my bag 😉 These zippers are from MyHandmadeSpace and yes, I made the tabs myself! They are approximately 3/8″ x 4″ folded in half and secured with a seam straight up the center. I added a rivet to balance out the look with the rest of my bag. These are SUCH a great option to really personalize your bag. I’m so glad I bought them as a stash option!
Now let’s get to work. Click into the video about to watch how the Welt Zipper Pocket is created. Please note the following from the video:
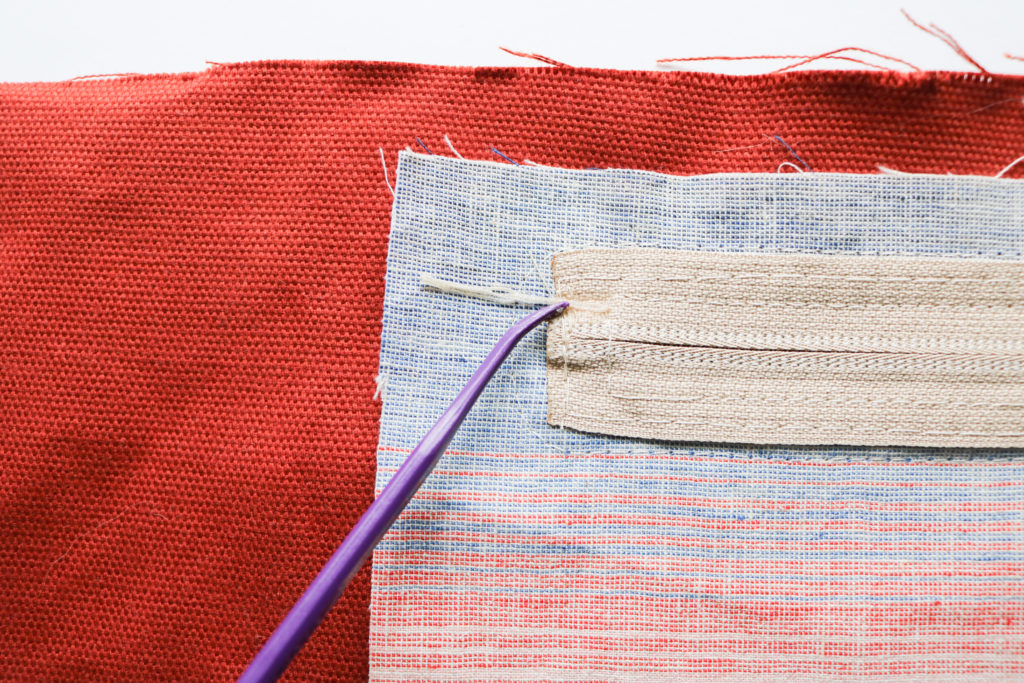
I am using “Craft” Tape as an alternative to Wonder Tape. This is only 1/8″ wide, but is permanent. With the coating on the canvas, I wanted to use a tape that was a little stronger than Wonder Tape. So, to avoid human error, I like to add this directly to the zipper tape first, and not to the lining.
While adding on the Zipper Plate, I used glue instead of Wonder Tape. Again, I was looking for something stronger I could sew through and unfortunately, Craft Tape cannot be sewn through. (Your needle would gum up.)
I’m adding the rivets earlier than the instructions. I don’t know why….but I started going by memory without checking instructions and went out of order. (This is what I get for not checking!) There is not a huge difference if you add them before closing the pocket lining or waiting until after the foam is basted on. Per the instruction, my intent to add them post foam, was to have extra anchor points against the foam to keep it from separating with the Front Panel. But there are many other points anchoring the foam to the main fabric with the rest of the pockets and Front Strap Tabs.
TIP: When I sew through an accent fabric and want to minimize punctures, I like to pull the threads through for a clean continuous line of stitches. However, from the back, I don’t want the threads just hanging inside. So, I knot the threads and use a light dab of glue to seal them against the fabric. I like to leave the tails long so that they will be sewn into the pocket later on.
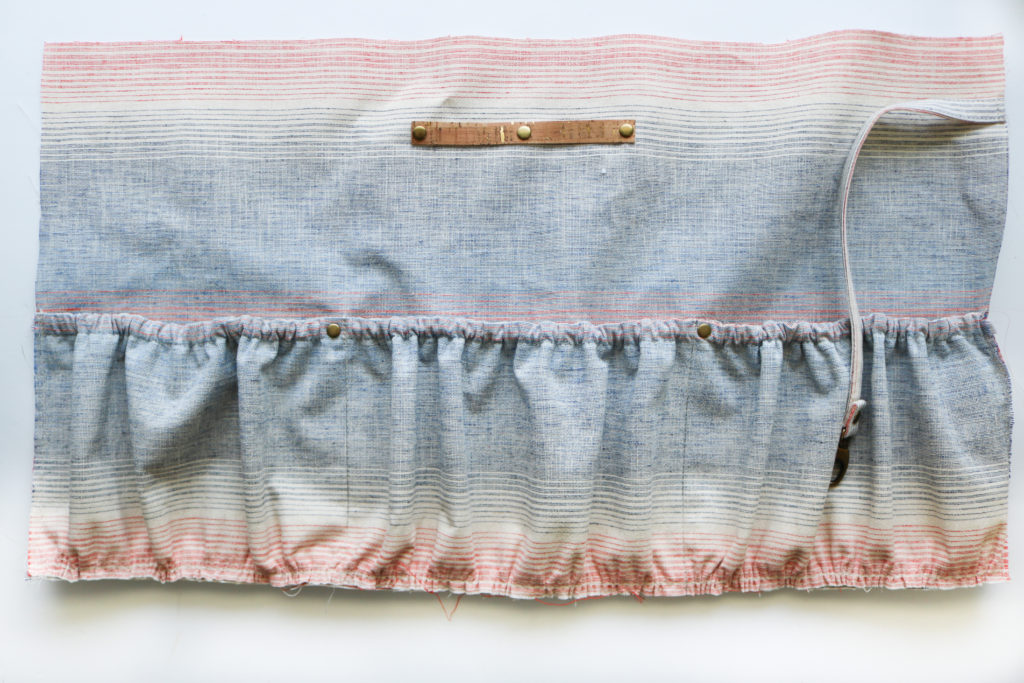
SIDE ELASTIC POCKETS
With untreated fabric, interfacing would’ve been fused to the part of the Elastic Side Pocket facing the bag, as seen above on the left. But, since I’m using a heavy treated fabric, I cannot add heat and fuse to it. So you will see there is no interfacing to indicate the wrong side of the fabric in the video below.
Click the video to watch how to make and attach the Elastic Side Pockets. Please note the following:
For extra durability, I demonstrate how to sew the pocket with an extra triangle at the top of the seam. This helps reinforce that area since it will be pulled on heavily.
The size of the rivet used in the triangle has a 6mm cap and is not included in my hardware kit. I thought I would just make it a little different as to not compete with the added embellishment. This is the same size I use on the zipper pulls as well
As an option, you can add in accent fabric with rivets as extra way to highlight pockets. It was an afterthought when making my waxed canvas sample seen here, but I wanted to show you the steps just in case you wanted to add them as well!
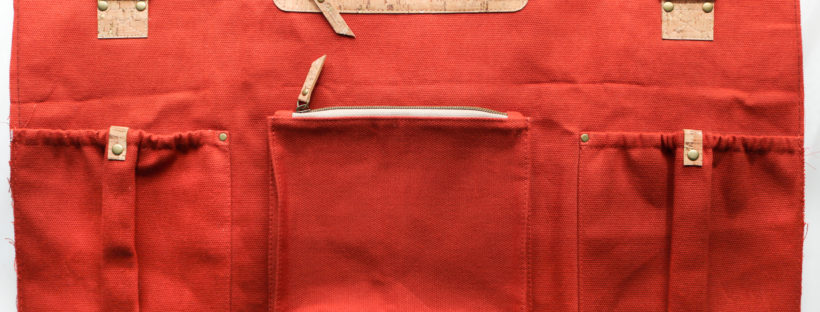
POP-OUT POCKET
If I am in a clothing store, I will always take a look at it’s bag section. I like to see what’s popular and if there are any outstanding features. Well, I saw a 3-D pocket similar to this one that I was determined to figure out on my own because I thought it was a unique way to create one. With a home machine, my design had to be changed, but the essence is there. Now, I get to share with all of you how figured out this pocket construction for my bag-makers!
Please click into the video above to view and note the following:
When finishing the edge of the Zipper (that’s sewn directly to the Front Panel,) can just zig-zag along the zipper tabs. But since I primarily work on a straight stitch machine, it would require me to set up a machine. With the content being so heavy this week, I went with the serger that sits right next to my regular machine.
When attaching the Zipper to the Front Panel, I switched feet on the second seam to get a little closer to the teeth and clear the overlock stitching
During the filming, I lost a few segments when attaching the sides down to the Front Panel. I had to re-film those parts, but the Front Panel was already completed. So you will see that there are no hanging bits of fabric as part if the instructions. You might even see some of the Front Strap Tabs.
FRONT STRAP TABS
These Front Strap Tabs are for the cross-body and shoulder carrying options. So all the weight of the bag will be on these spots. That is why there is so much reinforcement stitching, as well as the added rivets. You don’t want these ripping out later, so take your time on every stitch!
Click into the video above to watch hoe to attach the Front Strap Tabs and note the following:
I work with both my Teflon and Zipper Feet. I don’t call out the changes, but you can see them in the video
For a clean finish, I always like to leave long thread tails and pull them to the back. With several knots and a dab of glue, those seams will hold just as well as several back-stitches.
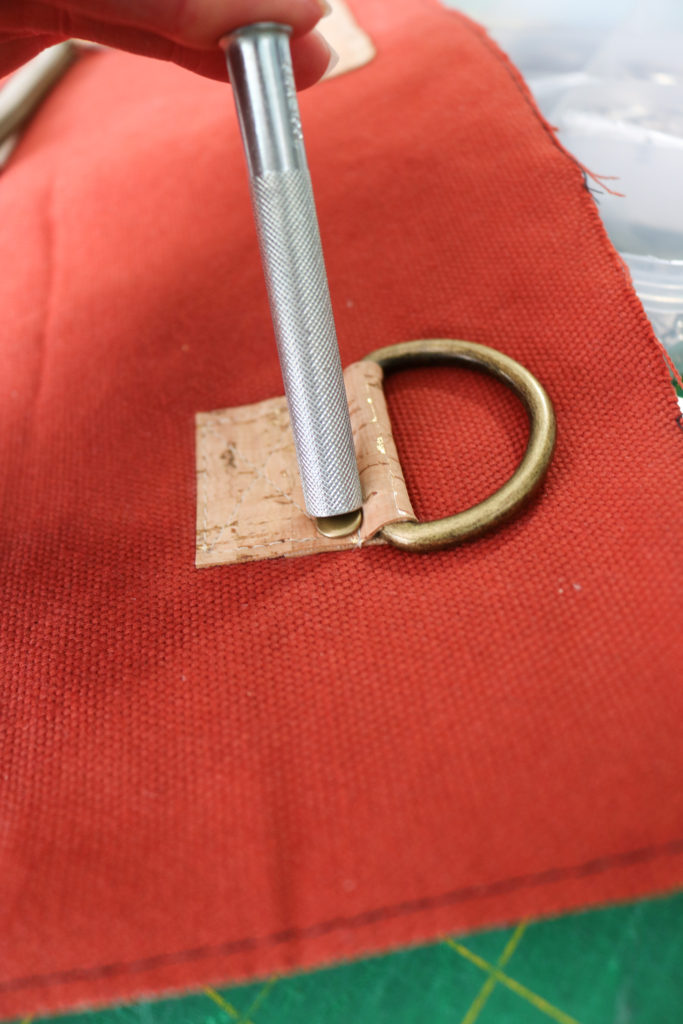
Although a hardware press is a great tool, this is one case when a manual setting tool is better than a press. The dies require at least an 1/8″ clearance around the rivet caps whereas you hardly need any clearance with the tool seen above. There are some projects where there isn’t enough throat space with a press to install as well. So don’t ever get rid of those setting tools!
CONGRATULATIONS on finishing this Part 4 beast! You are more than half-way done now and doing great! Check back next week for Part 5: Making the Lining.
Happy Sewing!
Cristy
Please note, this post contains affiliate links. Please refer to my Disclosures for additional information.
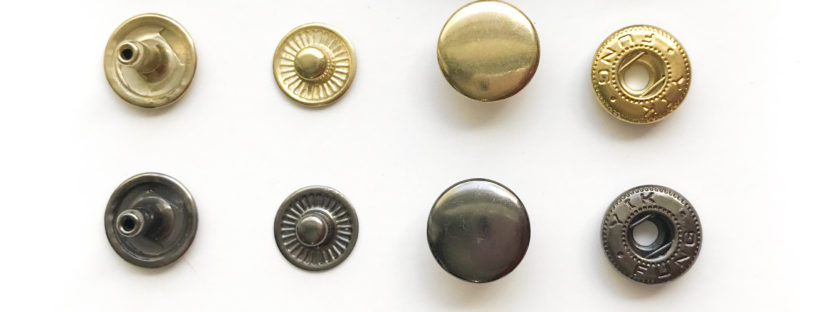
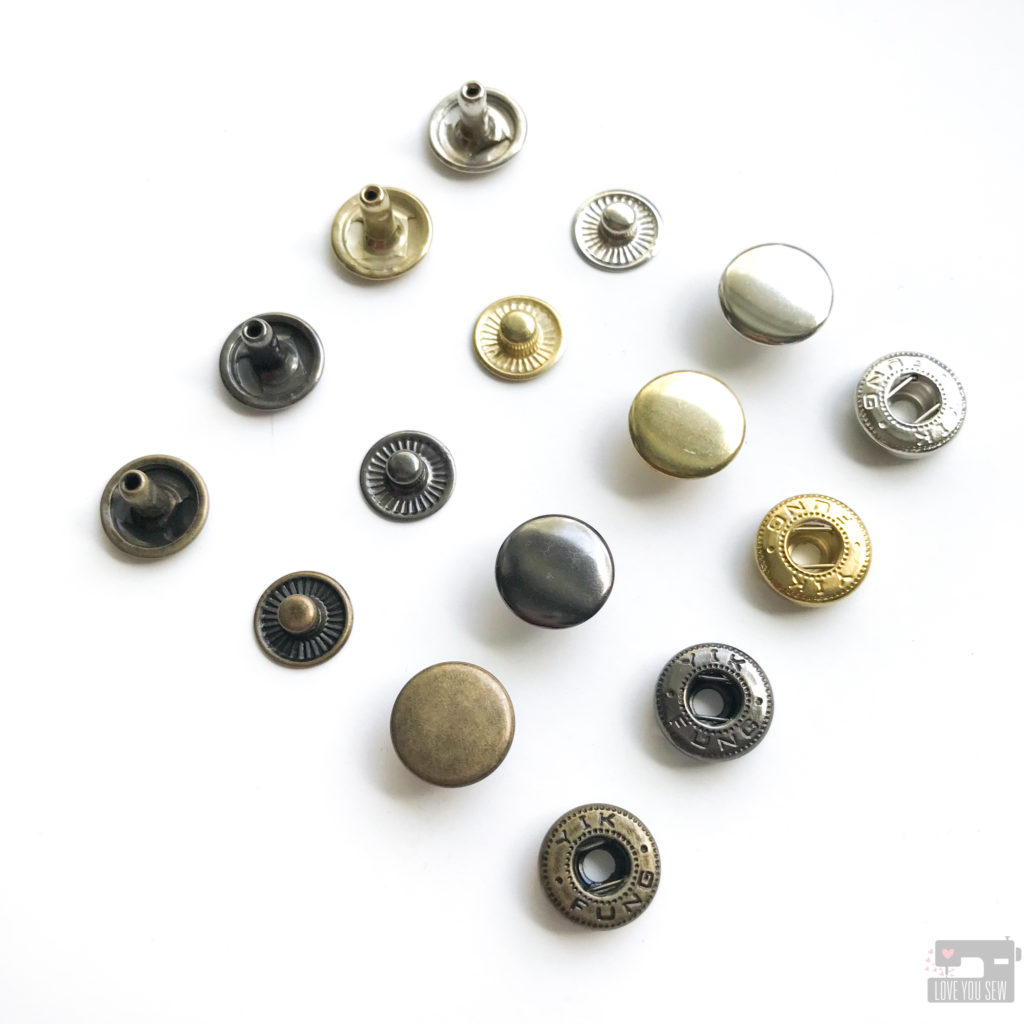
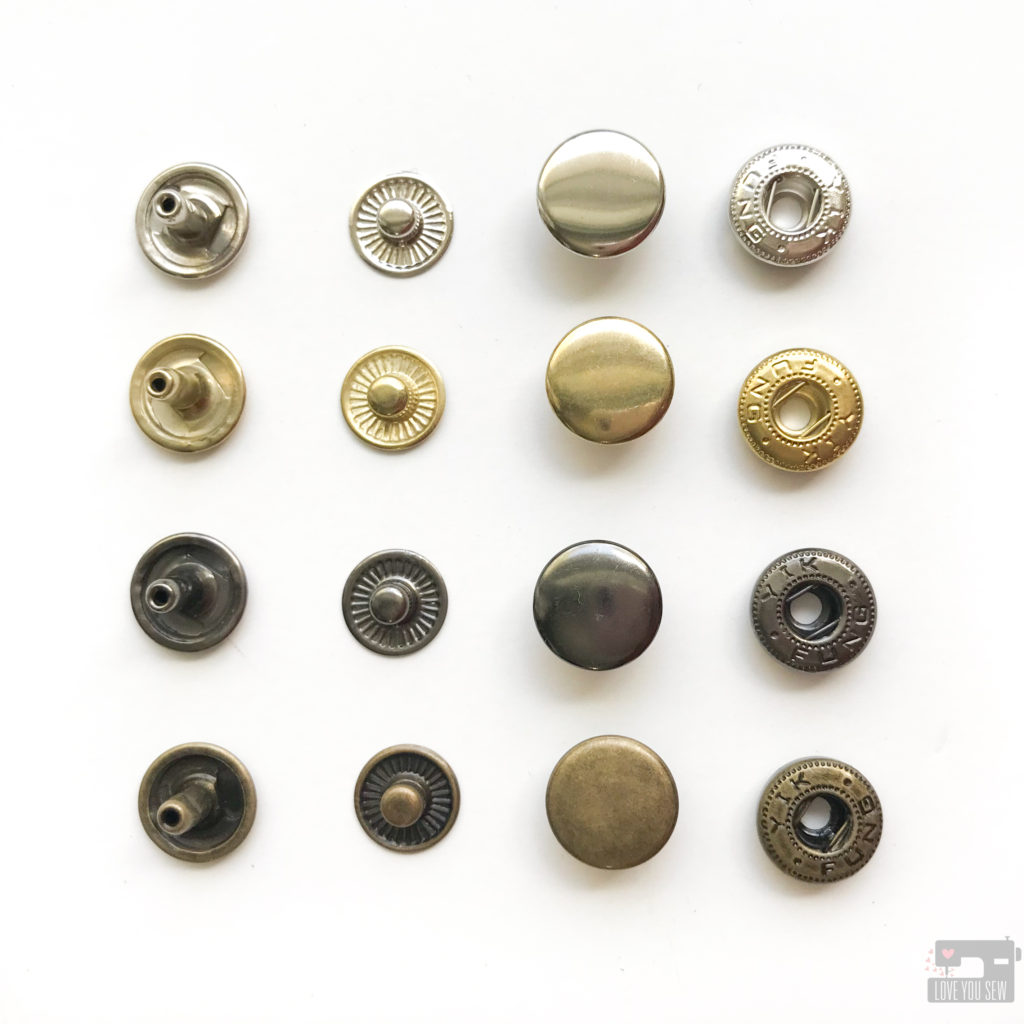
Installing snaps by hand isn’t as hard as it looks! The Double-Cap Spring style snaps are my personal favorite for bag-making and for garments. I’ve tried many different kinds of snaps over the years, including plastic KAM style ones for baby accessories and then Ring Style ones for bags. Out of all the ones I’ve tried, I think these Doubled-Cap Spring snaps are the most forgiving with manual setting tools and produce the BEST results with minimum investment. Check out my video tutorial below to see how easy it really is!!!
Double-Cap snaps – 12.5 mm/20 : These are my preferred size to handle most of my needs and I personally like the Double-Cap for extra strength even though they are slightly more expensive than the single cap style.
Punch Pliers – These are my preferred style with the ability to change hole sizes and punch to either a rubber or metal bed.
Jeweler’s Bench – This tool maybe underrated, but this is actually key in getting a nice firm hardware install
Hammer – Everyone has one at home and with all my bag and garment making, I had to get one specifically for the sewing room so my husband wouldn’t have to keep looking for the one from our toolbox!
Tutorial:
Click into the video above to watch the entire snap installation process. As with anything new you learn, make sure to practice before moving onto your actual process. You’ll get a feel for the swing of the hammer and how much pressure is needed for the posts to attach to either the stud of the socket.
Even though I do own a hardware press along with the right dies for these snaps. many times, I’ll still go the manual route. Sometimes, it’s just a little bit quicker when I just need one or two snaps installed. The application is more forgiving, and that’s what I appreciate versus other snaps which have to be SO perfect to work….ugh….
These snaps are paired correctly going from left to right [Stud Post + Stud] [Socket Cap + socket]
After watching the video, take note of these TIPS as well to help:
With Double-Cap Spring Snaps, the caps can be confusing to figure out. But you will see that only one post can fit through the socket. Make sure you pair those together. The remaining cap will then be paired to the socket
Use a solid work surface like a thick sturdy table
Work at natural waist height – when a project is on the ground, the swing of the hammer is thrown off and can lead to angled application
Again, practice, practice, practice!!!
I hope this helps to alleviate your anxieties around hardware snaps. Once you assemble a few, you’ll be an expert in no time! In just a few weeks, I’ll also share my hardware press details 😉
Enjoy hammering away!
Cristy
This post may contain affiliate links which help keep this website running . For my full affiliate Disclosure, click here.
We use cookies on our website to give you the most relevant experience on our website. By clicking “Accept,” you consent to the use of those cookies.
This website uses cookies to improve your experience while you navigate through the website. Out of these cookies, the cookies that are categorized as necessary are stored on your browser as they are essential for the working of basic functionalities of the website. We also use third-party cookies that help us analyze and understand how you use this website. These cookies will be stored in your browser only with your consent. You also have the option to opt-out of these cookies. But opting out of some of these cookies may have an effect on your browsing experience.
Necessary cookies are absolutely essential for the website to function properly. This category only includes cookies that ensures basic functionalities and security features of the website. These cookies do not store any personal information.
Any cookies that may not be particularly necessary for the website to function and is used specifically to collect user personal data via analytics, ads, other embedded contents are termed as non-necessary cookies. It is mandatory to procure user consent prior to running these cookies on your website.